
You step out of the shower, spot a puddle beside the screen and reach for the silicone. That may be the right fix, but water on the floor doesn't prove the glass or seal is the cause. A leaking shower screen is part of a wet-area system: the door and frame, the threshold, the floor falls, the waterstop and the concealed waterproofing all affect where water goes.
Start by locating the first place water escapes. A worn door sweep is usually a manageable repair. Water spreading beyond the shower, returning after resealing or showing up on a ceiling below calls for a broader investigation. The distinction matters: a cosmetic patch can stop a visible drip while moisture continues behind tiles or into an adjoining room.
Table of Contents
- Match Your Leak to Its Most Likely Cause
- Tell Whether the Screen or the Wet Area Is at Fault
- How to Run a Controlled Spray Test
- How to Re-seal, Adjust or Replace the Screen Seals
- What Each Repair Costs and How Long It Takes
- When to Call a Registered Builder or Escalate a Rental Repair
- Confirm the Repair Scope Before You Book
Match Your Leak to Its Most Likely Cause
A drip at the bottom door sweep is a common first clue. The seal may be worn or missing, or the door may sit out of alignment so the sweep no longer meets the threshold evenly. The location helps narrow the first check, but it doesn't prove the underlying cause.
| Where water appears | Likely cause | First action |
|---|---|---|
| Bottom door sweep or bottom rail | Worn or missing bottom seal, or door out of alignment | Replace the sweep and check door alignment |
| Vertical join where glass meets wall | Failed silicone at the glass-to-wall junction | Clean, dry and re-seal the compatible joint |
| Floor outside the screen | Incorrect threshold, missing waterstop or poor falls | Stop DIY repairs and arrange a waterproofing check |
| Ceiling or wall of the room below | Concealed membrane or penetration failure | Stop DIY repairs and book a licensed inspection |
| Only when the shower runs hard | Shower head angled into the screen | Re-angle the head and check the drainage slots |
| Screen rocks or fixings are loose | Loose frame fixings or movement | Tighten fixings, then re-test before sealing |
Use the table as a starting point, not a diagnosis. Water can run along a frame or tile before it reaches the floor, so the puddle's position may not match the actual escape point. For a broader overview of how household leaks can start and travel through a property, see this guide to understanding sources of household water leaks.
Limit damage while you investigate
If the leak is small and contained, wipe up water after each shower, dry the floor and place an absorbent mat at the threshold. Keep the door closed so spray stays inside the enclosure, and avoid using the shower if water is reaching adjoining rooms or the level below.
A loose screen needs attention before you apply sealant. Movement can reopen a fresh joint, and a wobbly frame can put stress on the glass. Tighten only accessible fixings that can be secured safely. If the frame still moves, or the glass is cracked, leave the adjustment to a glazier or installer.
Tell Whether the Screen or the Wet Area Is at Fault
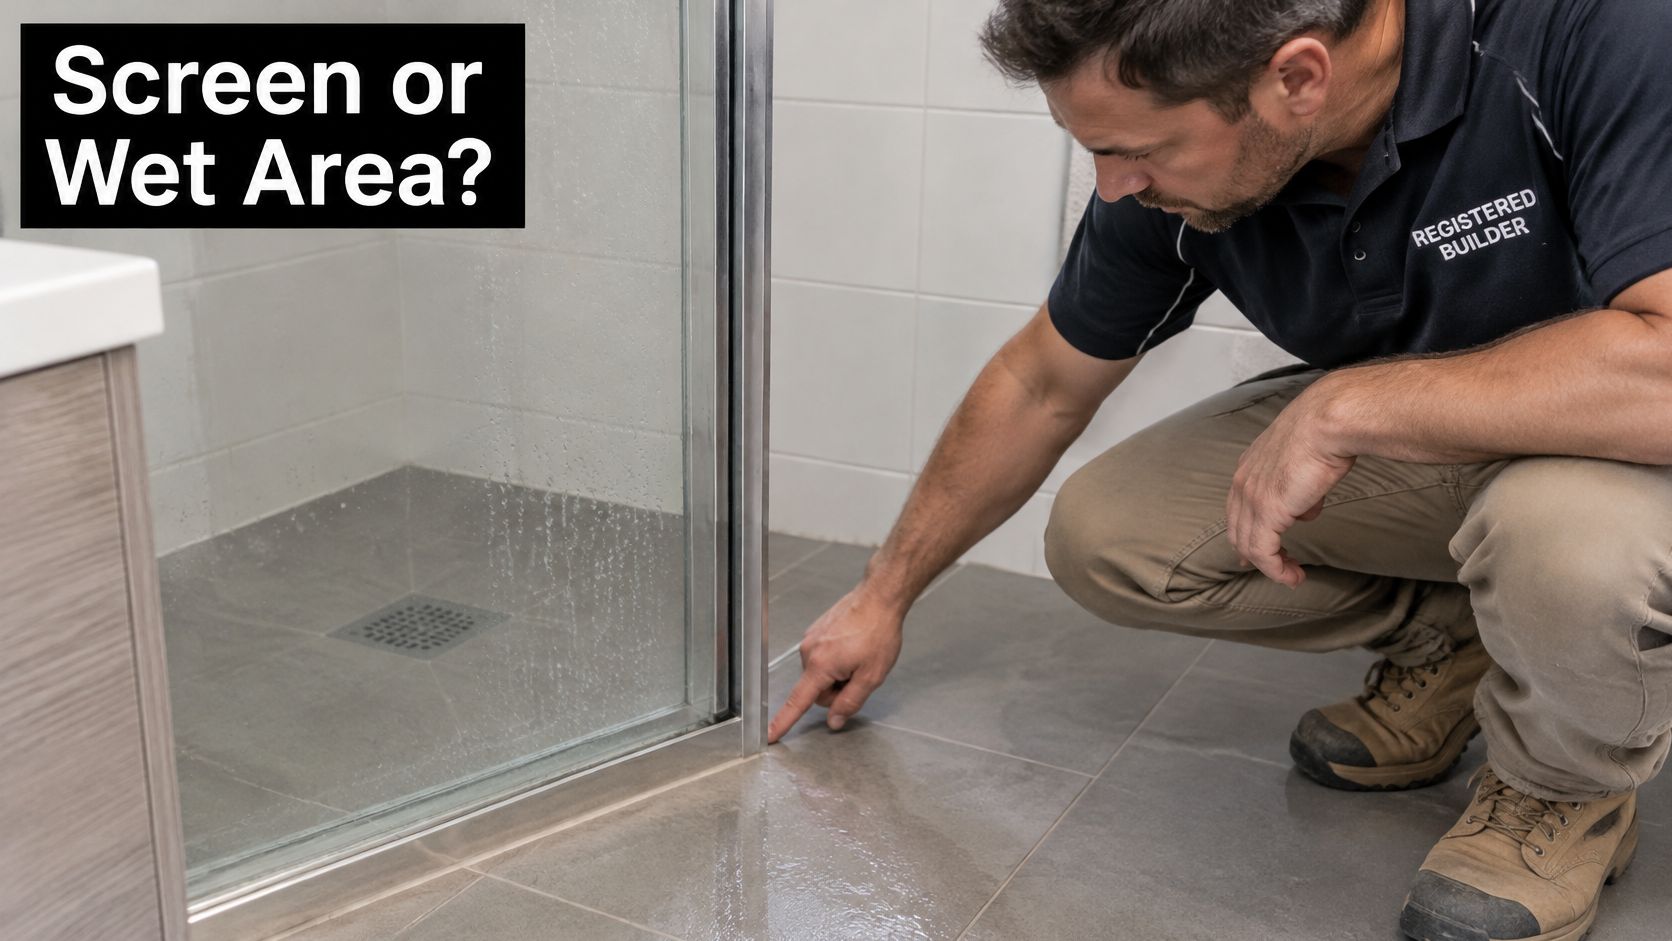
The deciding question is whether water escapes only at the screen, or whether it continues into the surrounding wet area. If it appears just beyond a door edge, the sweep, alignment or a compatible screen joint may be at fault. If it spreads under the bathroom floor, passes the shower perimeter or shows up in the room below, the threshold, waterstop or waterproofing needs investigation.
The NCC 2025 wet-area waterproofing provisions require shower walls to be waterproof to at least 1,800 mm above the floor substrate, with waterproofing at wall junctions, wall–floor junctions and penetrations. For a hobless shower, the provisions also require a perimeter waterstop and a screen that incorporates or sits on an inverted channel positioned over it. Those details matter because water can pass behind tiles even when the visible screen edge looks intact.
Use the repeat leak as a warning
Say a screen has been re-sealed twice, but the leak returns and a stain appears on the kitchen ceiling below the bathroom. The next step isn't a third bead of silicone. Water may be travelling through a failed junction, penetration or membrane before it becomes visible in the kitchen, so the leak needs a waterproofing investigation. A guide to detect hidden bathroom water leaks can help you recognise why the visible wet spot may be some distance from the source.
A surface leak that stops after a properly prepared, dry reseal is consistent with a maintenance issue. A leak that persists, moves beyond the screen or appears below the bathroom is a reason to investigate the wet area, including the shower waterproofing membrane.
Keep this rule: A visible gap isn't always the cause. Repeated caulking can hide a leak that keeps moving.
How to Run a Controlled Spray Test
A controlled spray test helps separate a screen leak from water escaping elsewhere in the shower. The essential technique is to test one zone at a time. If water from the shower rose reaches the floor or waste during the first test, you won't know whether the screen itself leaked.
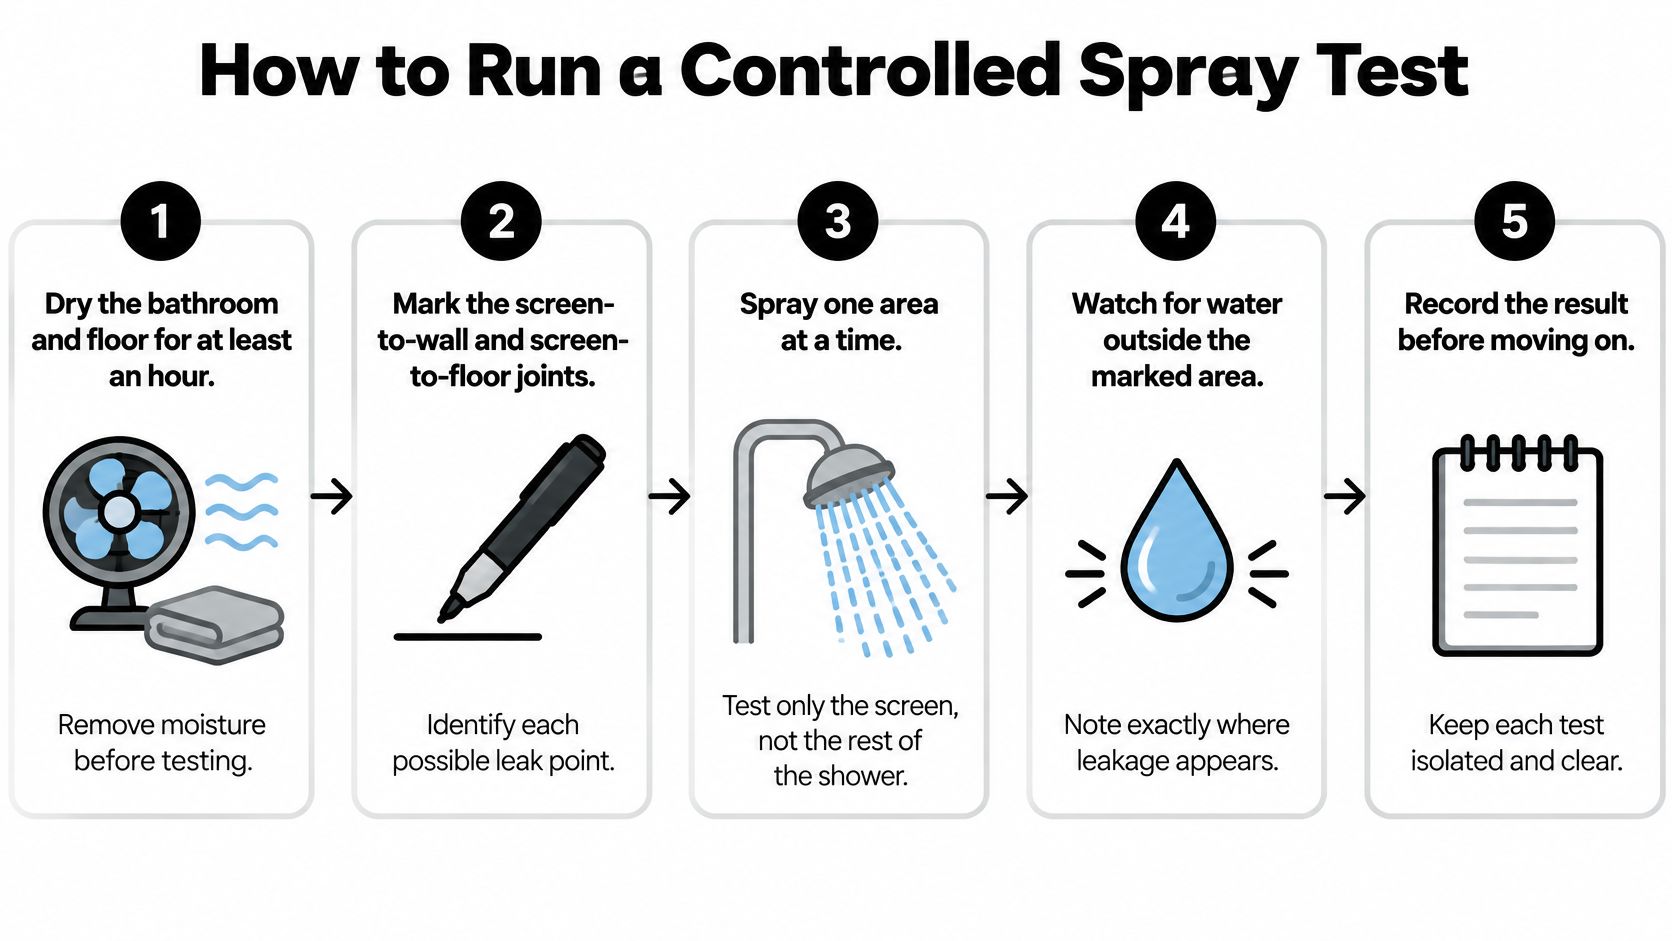
Dry the bathroom and floor for at least an hour. Use towels and ventilation to remove existing moisture, or an old wet patch may look like fresh leakage.
Mark the screen-to-wall, screen-to-floor and door-jamb junctions with painter's tape. These reference lines make it easier to see where water crosses the enclosure.
Spray only the glass and frame for five minutes. Keep the shower rose and floor waste dry so water from the main shower area doesn't confuse the result.
Test the door sweep, bottom rail and wall junction separately. Direct water at one zone at a time, then check the marked lines and photograph the first visible escape point.
Inspect adjoining surfaces after the test. Check the skirting, the room below and the ceiling after twenty minutes, and record where you see fresh moisture.
Read the result, not just the puddle
If water escapes while you're spraying the glass or frame and the rest of the shower is isolated, the screen or its junctions are the likely source. If leakage continues after the screen test, investigate floor falls, the waste, penetrations, wall–floor junctions and waterproofing. For an unenclosed shower, Victorian guidance measures the shower area using a 1,500 mm horizontal radius from the shower-rose connection, so the area that needs assessment may extend farther than expected. The Australian Building Codes Board's waterproofing guidance explains why the screen, waterstop and membrane need to be considered as separate parts of the system.
The slip that ruins this test is spraying every surface at once. You'll wet the whole shower but learn very little about the escape point. If the result points to concealed plumbing rather than the screen, guidance on how professionals find hidden plumbing leaks can help explain the next stage of investigation.
A clean result is straightforward: no water crosses the marked lines, and adjoining surfaces stay dry.
How to Re-seal, Adjust or Replace the Screen Seals
Once a controlled test points to the screen, work from the simplest screen fault to the more involved adjustment. Don't remove a panel unless you need the access, and don't start sealing until you've checked whether the frame moves or the drainage path is blocked.
Remove the door or panel only if access requires it. Label each fixing as you remove it so it goes back in the same position.
Inspect the frame fixings, packers, drainage slots, glass clearance and door alignment. Check the bottom seal for lifting, cracking or a poor fit. If the glass has cracked or shifted, stop and call a glazier rather than trying to adjust it yourself.
Check that no fixing has breached the waterproof layer. A screw through the hob or floor can create a leak path. Don't drill into either without a documented waterproofing detail; if you suspect a fixing has pierced the membrane, get a licensed trade to assess it.
Remove failed silicone and prepare the joint. Cut out the old material rather than covering its surface. The substrate must be smooth, clean, dry and free of dust, residue and loose material before new sealant goes on.
Fit the correct seal or reseal a compatible joint. Replace a worn bottom or vertical seal with a profile that fits the screen. Use sealant only on a dry, clean joint. Grout or silicone can finish a joint, but neither replaces a membrane where waterproofing continuity is needed.
Refit the panel without blocking drainage. Keep manufacturer drainage slots clear. Sealing the outside edge of a frame can trap water inside, so don't close off a drainage path to make the outside look neater.
Document the repair and check it again. Record pass or fail for each test zone, take photographs, note moisture readings and write down the exact repair scope.
Australian guidance on shower-screen rectification and waterproofing details sets out why the screen must align with the hob, waterstop or inverted channel, and why blocking drainage or relying on surface sealant can leave the underlying fault in place. A hobless shower needs the screen to use or sit over an inverted channel positioned over the waterstop; on a hob shower, the screen should be flush with or overhang towards the shower side.
If a substrate feels soft or looks swollen, stop work and call a licensed trade. It may need to be exposed and tested rather than covered with fresh silicone. Where the screen itself needs replacement or refitting, semi-frameless shower screen installation is a different scope from a seal change, particularly if fixings or the surrounding wet area need attention.
What Each Repair Costs and How Long It Takes
A leaking shower screen can need a simple seal change, but the visible gap may not be the source. Costs rise when the frame needs adjusting, glass needs replacing or the wet area needs investigation. These are indicative Melbourne planning ranges in AUD. Get a written quote that defines the work before it starts.
| Repair | Usually done by | Indicative cost | Typical timeframe |
|---|---|---|---|
| Replace bottom door sweep or seal | Homeowner or handyman | Seal cost depends on the replacement profile | About 1 hour |
| Re-seal silicone joints, DIY | Homeowner | $15–$40 for sealant | 1–2 hours, then 24 hours curing |
| Professional re-seal of screen joints | Licensed tiler or plumber | Written quote after inspection | Half a day |
| Adjust or re-pack frame and hinges | Glazier or installer | $100–$300 | 1–2 hours |
| Replace a glass panel | Glazier | $400–$1,200 | 1–3 days, including measure and fit |
| Waterproofing investigation and rectification | Registered waterproofer or builder | Inspection first, then a fixed scope | Several days, depending on scope |
DIY silicone work takes one to two hours, followed by 24 hours to cure before using the shower. A professional reseal usually takes half a day. Glass replacement takes longer than fitting alone because the panel needs measuring and ordering. Waterproofing work has no reliable price until the leak source and repair scope are established.
A low-cost screen repair will not solve a leak coming from behind the glass. If water has reached cabinetry or plasterboard, repairs to those surfaces can add to the total. For a clearer breakdown of likely charges, see this guide to shower leak repair costs.
Compare quotes by what they include, not just the total. Check whether inspection, removal, replacement materials and making good affected surfaces are covered, and whether the proposed repair addresses the suspected source rather than only the visible gap.
When to Call a Registered Builder or Escalate a Rental Repair
DIY stops being sensible when water has moved beyond an accessible screen joint. Arrange a professional inspection if:
- the leak returns after one dry reseal;
- water appears in an adjoining wall, below the bathroom or beneath the floor;
- the substrate is soft or swollen;
- the glass or frame moves; or
- the repair involves waterproofing behind tiles.
For bathroom renovations or more extensive leak rectification, check who is responsible for each part of the work. In Victoria, domestic building work with a contract worth more than $10,000 requires registration with the Building and Plumbing Commission, according to Consumer Affairs Victoria's guidance on registered building practitioners. Check the practitioner's registration and ask which trades will carry out the plumbing and waterproofing work.
Renters and property managers
A tenant should notify the agent or rental provider in writing as soon as the leak is identified. Send dated photos or video, record when the leak happens and ask them to investigate the cause, not just re-silicone the screen. That record helps distinguish ordinary deterioration or defective installation from damage caused by a renter.
Consumer Affairs Victoria says rental providers must arrange urgent repairs immediately and non-urgent repairs within 14 days of receiving a written request. If an urgent repair isn't addressed, a renter may organise and pay for it up to $2,500 and seek reimbursement, subject to the applicable conditions. The Victorian rental repairs guidance sets out the process and conditions. Don't authorise invasive work without following the relevant process, especially when responsibility for the leak hasn't been established.
Apartment owners and property managers should check whether the owners corporation needs to be involved before work begins. A leak that affects a neighbouring unit or shared building element may need coordinated access and repair records.
Confirm the Repair Scope Before You Book
Before signing off on work, make sure the quote answers these questions:
- Which leak zone did the spray test confirm?
- Which joints, seals or wet-area components will the repair address?
- Does the scope include making good damaged tiles, plasterboard or cabinetry?
- What warranty applies to any waterproofing work?
- Can the work be quoted in stages, with an inspection followed by a fixed repair scope?
A screen repair and a bathroom renovation aren't the same job. When work extends behind the tiles, coordination between carpentry, plumbing, waterproofing and tiling helps keep responsibility clear. Melbourne Tiling Services P/L delivers bathroom renovations with in-house carpenters, plumbers, waterproofers and tilers, and its waterproofing work comes with extended warranties. Phone 1300 661 658 with your photos, the zones you tested, the date the leak started and any previous repair invoices to discuss the scope.
Your next step is to book an inspection before ordering new glass or silicone.
Melbourne Tiling Services P/L offers shower leak rectification, waterproofing and coordinated bathroom renovations, so the repair can address the wet-area system as well as the visible screen. Share your spray-test results and photos, then visit Melbourne Tiling Services P/L to arrange a scope conversation.
Recent Comments