

You're standing in a Melbourne tile showroom with a sample of Calacatta marble in one hand and a renovation quote in the other. The surface looks like the obvious choice for a new bathroom, until someone asks where the shower waste will sit, how flat the floor is, whether the existing timber doorway can accept the new build-up, and who is responsible for waterproofing certification. That's the point where large marble tile stops being a style decision and becomes a construction decision.
Real marble can produce a depth and veining pattern that printed porcelain still struggles to copy. It can also expose poor preparation, complicate movement, increase maintenance, and create avoidable risk in a wet area. In Melbourne bathroom renovations, the right material is the one that suits the substrate, waterproofing system, use of the room, and capability of the builder and tiler.
Table of Contents
- Why Large Marble Tile Changes a Bathroom Renovation
- What Counts as Large Marble Tile in Australia
- Honest Pros and Cons of Large Marble Tile
- Substrate, Adhesive and Movement Joint Requirements
- Waterproofing Rules Before the First Tile Is Laid
- Real Marble vs Marble-Look Porcelain at Large Formats
- When You Need a Registered Builder in Victoria
Why Large Marble Tile Changes a Bathroom Renovation
A Brunswick heritage terrace can make 600 x 600 mm Calacatta marble look simple on paper. On site, the timber floor may flex, the walls may be out of square, and the doorway may meet old boards that cannot be covered without raising the finished floor. Shower falls, waterproofing levels and waste locations then become part of the tile decision.
Large marble tile is therefore a risk-managed construction choice, not only a finish. Real marble rewards careful preparation with depth and natural veining, but it also shows uneven backgrounds, increases handling demands and needs more maintenance in a wet room. Porcelain can reduce some of those risks, although it does not reproduce every stone pattern or surface variation.
Australian trade guidance commonly treats large-format tile as starting at an edge length of 400 mm. Premium bathroom interiors also use 600 x 1200 mm and larger panels. The older 15 mm allowable lipping figure often repeated in the trade is not validated by a current Australian tiling standard. Polished marble makes edge variation easy to see because reflected light travels across the surface.
Start with the room build-up
Set out the complete assembly before ordering stone:
- Screed height: Confirm the levelling and falls-to-waste work required on the floor.
- Waste position: Check that the selected format can meet the grate without narrow, awkward cuts.
- Doorway transition: Allow for waterproofing, screed, adhesive and marble thickness beside existing timber.
- Shower channels: Fix linear waste and screen-channel positions before finished levels are established.
- Wall returns: Measure reveals, niches, corners and window trims so the layout avoids thin slivers.
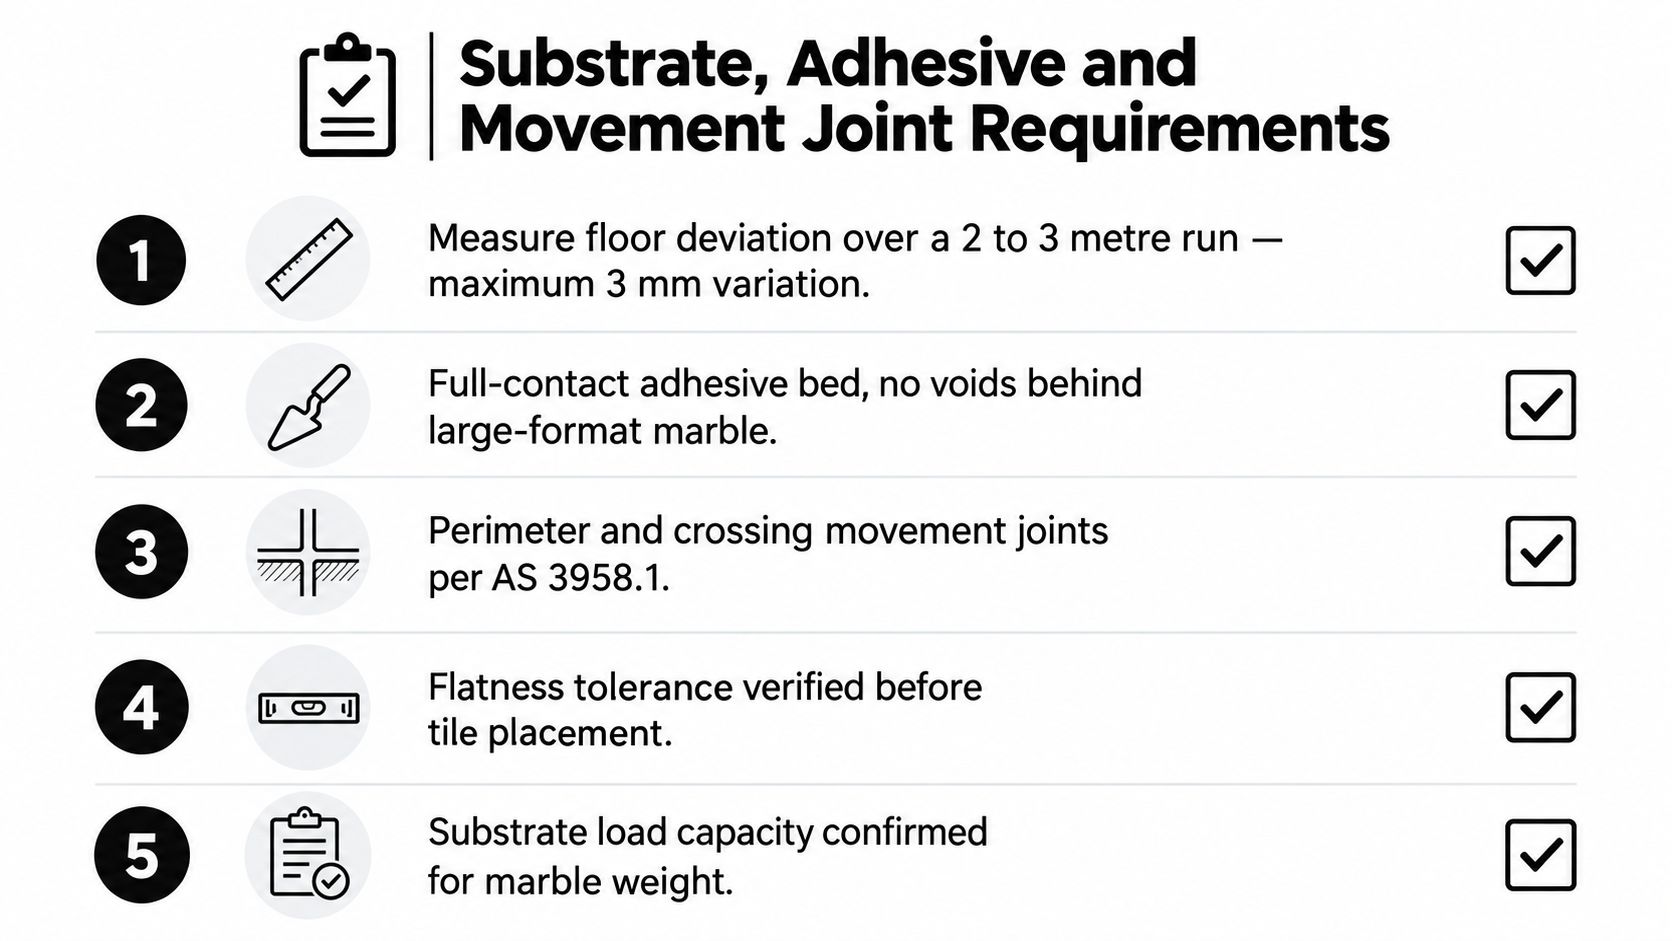
The substrate must be flat enough for thinset large-format installation. Australian technical guidance describes no more than 5 mm out over 3 m, with tighter guidance moving towards 3 mm over 3 m and 1.5 mm over 500 mm, measured from the high spot. Check the actual background rather than assuming a new screed or plasterboard is ready.
Waterproofing certification, substrate preparation and trade coordination also need clear responsibility. In Victoria, most full bathroom scopes of this size legally require a registered builder. The work commonly combines demolition, plumbing, waterproofing, carpentry, electrical work, screeding and tiling, so sequencing errors can affect both compliance and the finished marble.
For early planning, this large-format tile installation guide outlines practical handling and installation constraints. Measure the room, confirm the build-up and resolve waterproofing details before committing to a stone order.
What Counts as Large Marble Tile in Australia
A 600 x 1200 mm panel may look manageable in a showroom, then become difficult once it meets a narrow doorway, uneven wall or crowded shower. In practice, large marble tile is defined by more than its printed dimensions. The longest edge, weight, access route, cutting method and substrate preparation all affect whether the format is suitable.
Australian suppliers commonly move from 300 x 600 mm tiles into formats such as 600 x 1000 mm, 600 x 1200 mm and larger premium panels. A practical site classification is:
| Format Band | Edge Length | Common Bathroom Use | Handling Notes |
|---|---|---|---|
| Standard | Up to 300 mm | Small floors, mosaics, detailed areas | Easier to follow falls and accommodate irregular rooms |
| Large | 300 to 600 mm | Main walls, floors and vanity areas | Requires accurate setting-out and flatter backgrounds |
| Extra-large | 600 to 1000 mm | Feature walls, open floors and shower walls | Needs controlled handling, full adhesive coverage and careful levelling |
| Slab-format | 1000 mm+ | Book-matched walls, full-height features and premium panels | Often requires specialist transport, lifting and cutting equipment |
Tile, panel and slab are different products
A rectified marble tile is an individual manufactured piece with accurately finished edges and planned grout joints. A gauged panel or stone slab is a much larger sheet, usually chosen for continuous veining or book-matched layouts. It may require different transport, storage, reinforcement, cutting and fixing arrangements.
Calacatta, Carrara and Statuario appearances are available in formats including 600 x 1200 mm and 800 x 1600 mm. CNC cutting can make service openings and repeated production more practical, but it does not remove access or installation constraints. Doorways, stairs, window reveals, shower returns and numerous penetrations can make 600 mm a more workable limit on many bathroom walls.
Large formats also expose dimensional variation. Australian stone guidance allows marble panel face tolerances of around ±2.0 mm for flatness or twist on panels over 0.6 m². (Australian tile and stone covering guidance) On site, panels over that area need two-person lifting, dry checking and careful setting out before adhesive is spread. Nominal carton dimensions are not enough.
Before pricing, confirm whether the quote covers tile, gauged panel or slab fabrication. Edge treatment, reinforcement, lifting equipment, cutting time and installation labour can differ substantially. The correct choice is the format that suits the room's access, substrate and waterproofed build-up, rather than only the largest sheet available.
Honest Pros and Cons of Large Marble Tile
A large marble wall can look exceptional at handover, then expose every shortcut once daylight hits it. Real stone gives a bathroom character that printed patterns cannot match, but it also turns substrate preparation, waterproofing details and maintenance into risk decisions rather than purely aesthetic choices.
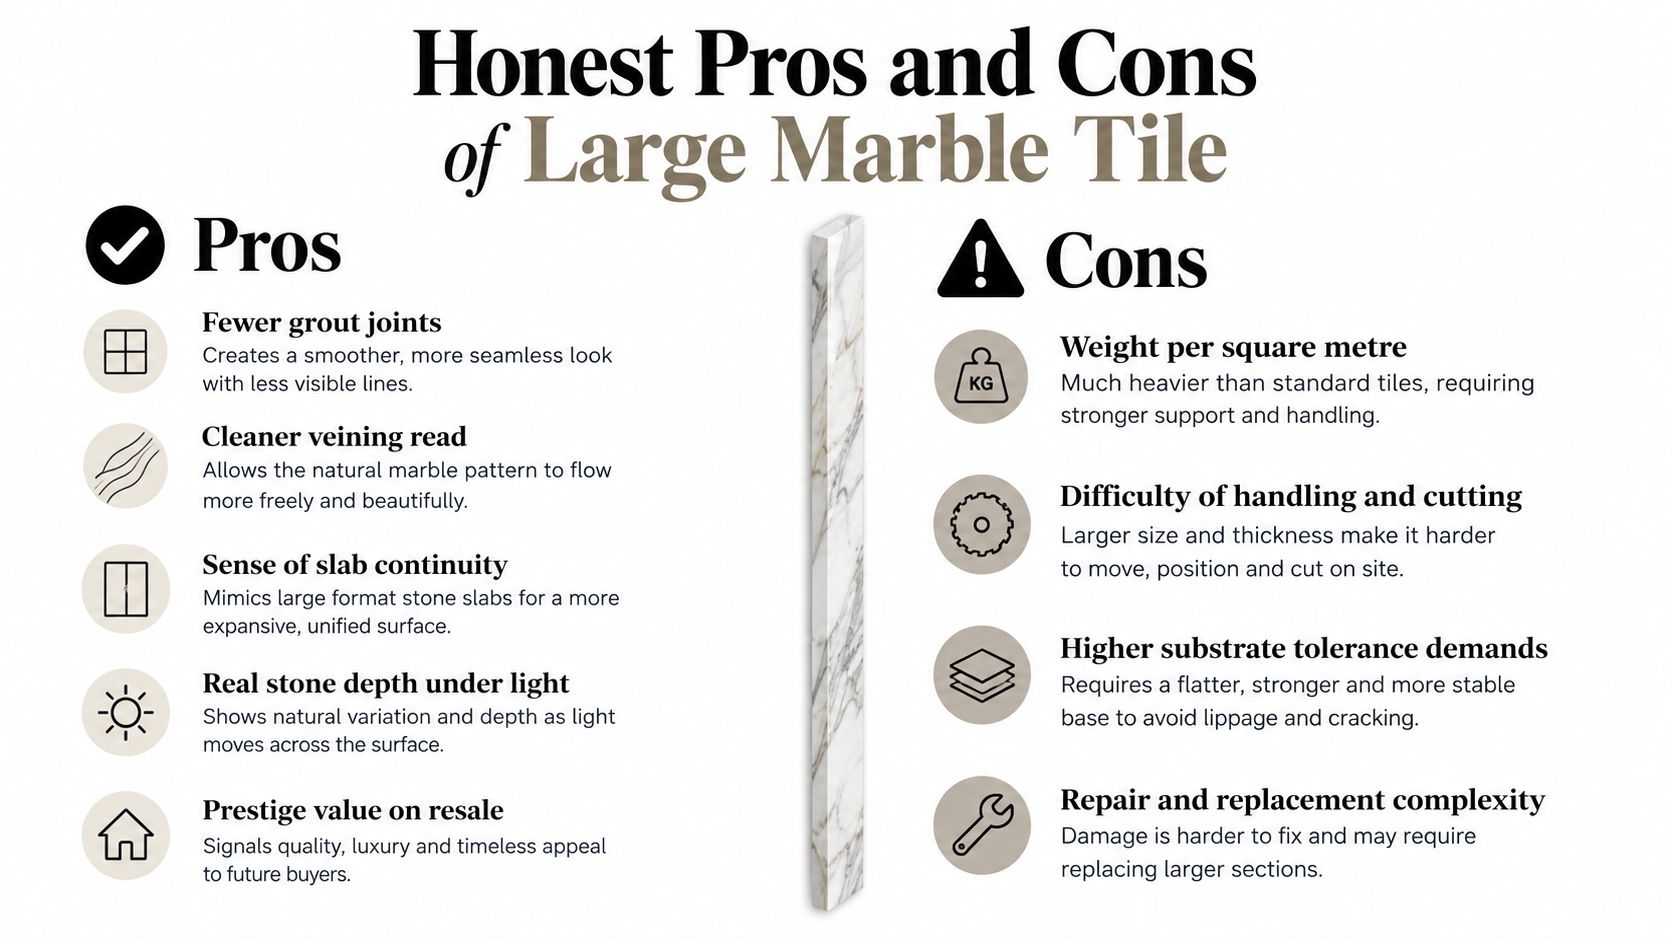
Natural veining varies from piece to piece, and changing light reveals genuine colour movement and depth. Fewer joints create a quieter field on a full-height shower wall or vanity feature, with fewer grout lines to scrub.
What real marble does well
- Fewer grout joints: A wall or floor can read as a more continuous surface, and there are fewer grout lines to clean.
- Clearer veining: Bigger pieces let the pattern run across the wall instead of breaking into small fragments.
- Natural depth: Stone responds to daylight with variation that gives the room a tactile finish.
- Feature value: A selected floor, shower wall or vanity wall can become the bathroom's architectural focus.
Where the risks appear
Weight needs checking before delivery. A 20 mm marble panel can weigh 24 to 30 kg/m², affecting wall fixings, lifting, storage and, in some buildings, the supporting structure. Verify that figure against the selected product because thicknesses vary. A stone panel needs different handling from lightweight ceramic tile.
Flatness matters just as much. A 2 mm edge difference on polished marble is visible from a doorway because reflected light runs across the field. Poor adhesive coverage, a rocking panel or a badly positioned waste can remain obvious after the room is finished. Set out the panels dry, check junctions and confirm openings before fixing.
Polished marble may become slippery when wet. Natural stone can also etch from acids, some cleaners and personal-care products. Australian installation guidance treats marble in wet areas as porous natural stone, so it requires a penetrating sealer at installation and ongoing resealing. (Australian marble installation guidance)
Sealing reduces absorption, not every risk. It does not make marble stain-proof or stop acid from dulling a polished face. Replacement can be difficult when the original batch, vein direction or finish is unavailable. For grout care and stone-surface maintenance, homeowners can find tile grout experts, while selecting pH-neutral, stone-safe products for marble.
Substrate, Adhesive and Movement Joint Requirements
A large marble tile exposes errors in the base quickly. If the substrate is uneven, the panel can rock, show lippage, leave hollow areas or carry stress into the stone. Treat preparation as risk control, not a cosmetic step.
Use a straightedge across the proposed floor, then make closer checks around wastes, doorways, walls and changes in material. Australian large-format guidance sets the tolerances used for this assessment, including the tighter control needed where a large polished surface will reveal irregularities. (Australian substrate flatness guidance)
Prepare the base before opening adhesive
Concrete may require grinding, patching or a compatible levelling system. Timber floors often need structural sheeting and a plan for controlling movement. A proposal such as 15 mm compressed fibre cement over joists at 450 mm centres must be checked against the actual floor construction, manufacturer instructions and structural requirements. It is not a universal fix.
Choose adhesive for both the substrate and the stone. A premium polymer-modified cement-based adhesive, commonly specified at C2S1 or better, is suitable only when its documentation confirms compatibility with the selected marble and site conditions. White adhesive is generally used with pale natural stone to reduce the chance of visible darkening or interaction through the tile. This tile adhesive guide explains how adhesive choice affects coverage and curing.
Back-buttering is required for natural stone, tiles over 400 x 400 mm, and tiles in wet or external areas under the Australian guidance referenced here. Comb adhesive onto the substrate, skim the back of the marble, then press the tile into a continuous bed. Voids can create hollow spots, concentrated stress and cracking under service loads. The installation principle also matters when you install porcelain tiles correctly, although porcelain and marble still require product-specific adhesive advice.
Movement joints belong at perimeters, internal corners and across larger fields. Follow the project design for their locations. Where joints are specified at roughly 4.5 metre centres, use a suitable flexible sealant such as silicone rather than rigid grout. Coordinate these joints with the waterproofing and tile layout before fixing begins, because cutting them in later can compromise both appearance and movement control.
Waterproofing Rules Before the First Tile Is Laid
A large marble floor can look finished while water is already finding a weakness beneath it. In a Melbourne bathroom, the membrane, junction details, falls, penetrations and documentation must be resolved before the first marble piece is placed. Tiles and grout form the wearing surface, not the waterproofing system.
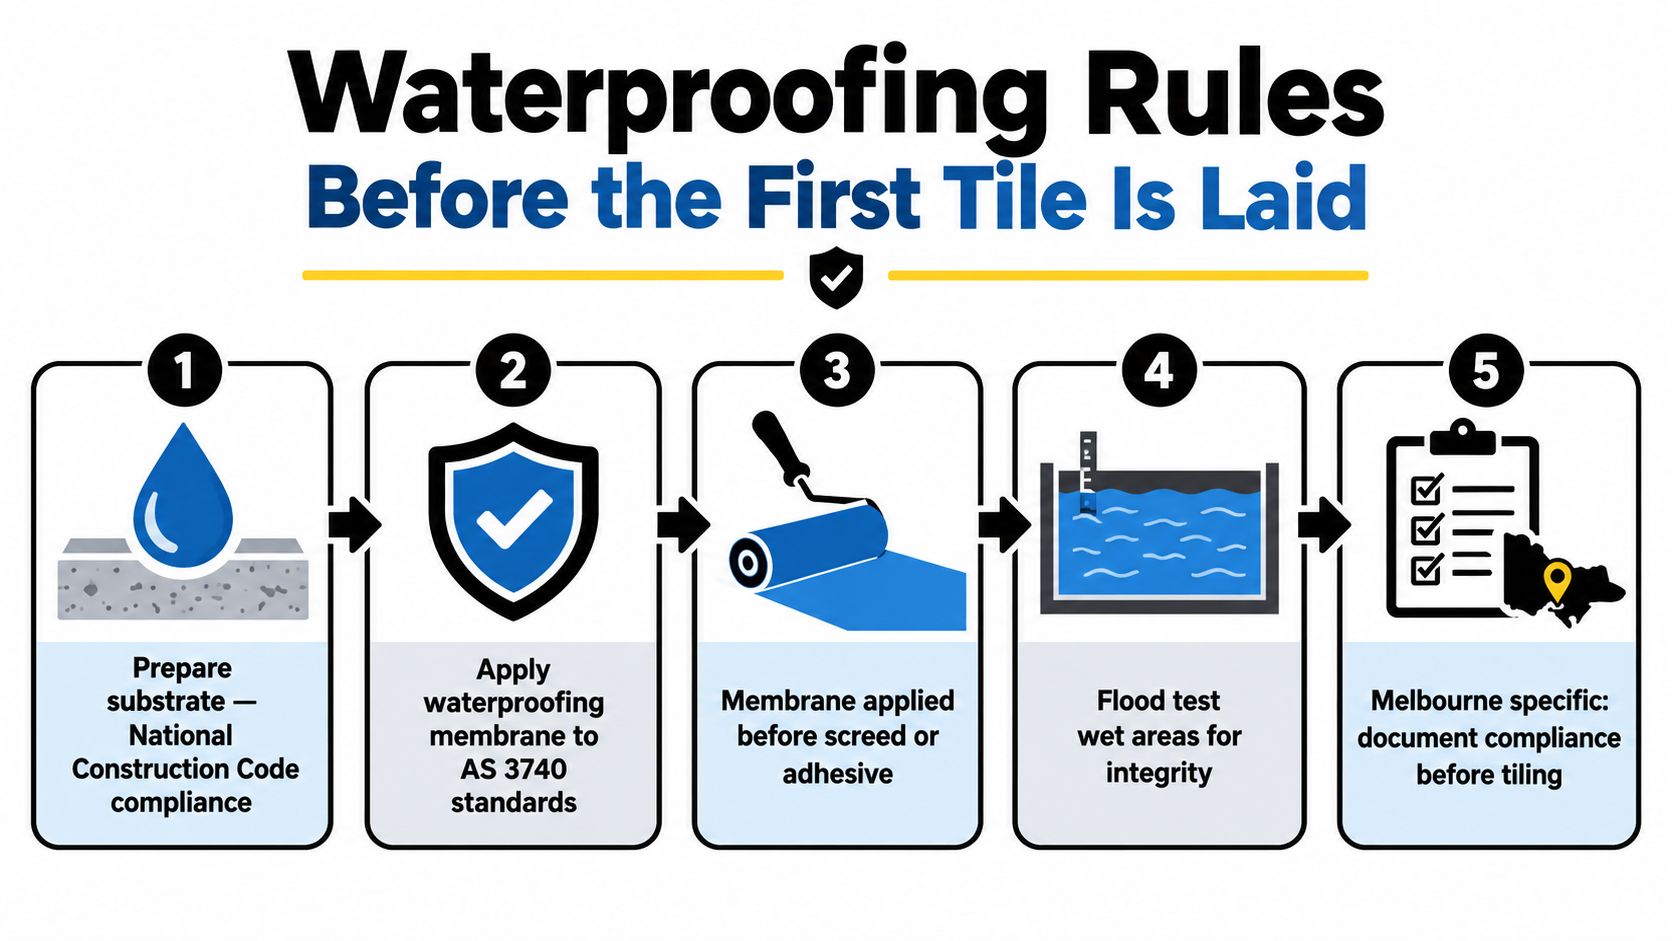
The NCC requires shower floors to be waterproof, shower walls waterproofed to at least 1800 mm above the floor substrate, and shower junctions, wall-to-floor junctions and penetrations waterproofed. It also requires shower-area wall junctions and joints to be waterproof to at least 40 mm either side of the junction. (NCC wet-area waterproofing provisions)
Sequence the work in the right order
The usual control points are:
- Prepare the substrate: Remove contamination, repair defects and form the required falls.
- Detail junctions: Install compatible corner reinforcement, bond-breaker treatments and penetration details.
- Apply the membrane: Install the specified system to the manufacturer's instructions and AS 3740 requirements.
- Inspect and document: Arrange inspection before screed or tile layers conceal the waterproofing.
- Screed and tile: Protect the membrane while forming levels, then install marble over the approved assembly.
On Melbourne projects, inspection should occur before tiling, while junctions, puddle flanges and penetrations remain visible. Photograph the completed membrane and retain the product details, inspection record and certificate with the renovation documentation. Fixing a missed detail after large-format marble is installed usually means removing expensive, difficult-to-match material.
Australian guidance tied to NCC 2022 and AS 3740 notes that a wet area with a timber-based floor requires the entire wet-area floor to be fully waterproofed. Victorian practice described in the same guidance includes independent inspection before tiling and a formal Installation Certificate from a licensed waterproofer. (Victorian bathroom waterproofing documentation)
Falls must direct water to the waste rather than leave ponding beneath stone. The fall design depends on the waste, room layout and applicable requirements, so set it out and check it before the screed is installed. Large pieces expose changes in plane quickly, making a flat, correctly formed base and a documented waterproofing sequence part of the material decision, not paperwork added at the end.
Real Marble vs Marble-Look Porcelain at Large Formats
At 600 x 1200 mm and larger, real marble and marble-look porcelain may appear nearly identical in a showroom. On a Melbourne bathroom site, they create different risks. The practical choice depends on exposure to water, substrate accuracy, waterproofing compliance and the maintenance the owner will actually accept.
Real marble provides genuine veining, translucency and variation. Those qualities give a bathroom character manufactured surfaces cannot fully reproduce, but they demand planning. Dry-lay the pieces before fixing them, then sequence the layout so veins work through niches, returns, wastes and corners. A damaged or incorrectly cut piece may be difficult to replace with a close match.
Marble-look porcelain gives more control over appearance and performance. It generally has low porosity, consistent manufacture and finishes available with slip ratings. It also avoids much of the sealing and acid-etching risk associated with porous natural stone. Check the product data carefully for wet floors, because a polished porcelain panel is not automatically suitable underfoot.
| Attribute | Real Marble | Marble-Look Porcelain |
|---|---|---|
| Appearance | Natural variation, depth and unique veining | Printed or manufactured stone appearance with more consistent repetition |
| Porosity | Porous natural stone requiring penetrating sealing and resealing | Lower-maintenance surface, subject to product specification |
| Cleaning | pH-neutral products and prompt removal of acidic or staining substances | Usually simpler routine care, with grout still requiring maintenance |
| Wet-floor suitability | Polished finishes can be slippery when wet | Choose the manufacturer's wet-area and slip-rated finish |
| Installation | Needs a flatter substrate, controlled coverage and careful handling | Still demands accurate preparation, especially in panel formats |
| Repairs | Matching a damaged piece can be difficult | Replacement is often easier when the product remains available |
| Design role | Feature floors, vanity walls and areas where natural character matters | Shower walls, splashbacks and busy family bathrooms where practicality leads |
Decide by exposure, not showroom emotion
Australian guidance identifies polished marble as potentially slippery when wet, recommends pH-neutral cleaning and indicates resealing every 1 to 2 years. (Australian bathroom tile selection guidance) That routine suits an owner who wants genuine stone and will maintain it carefully. It can frustrate a household expecting a bathroom surface to perform like ordinary ceramic.
Porcelain often suits shower walls, splashbacks and heavily used family bathrooms. Its lower porosity reduces the sealing burden, while a suitable textured finish can provide more predictable wet-area performance. Real marble remains appropriate for a feature floor, vanity surround or controlled ensuite where its natural character justifies the extra care.
Neither material compensates for poor preparation. Large marble and porcelain pieces both show substrate irregularities, and a failed waterproofing system can damage the renovation regardless of the tile selected. Treat the material decision as risk management: confirm the substrate is flat, select an adhesive and finish suited to the installation, and ensure the wet area is completed by the required practitioners.
The consequences of a failed membrane can include demolition, drying, replacement and disruption to adjoining finishes. Remedial work is therefore a project risk, not a reason to claim that porcelain prevents waterproofing failure. Porcelain may reduce staining, etching and replacement-matching problems, but it cannot correct non-compliant construction.
For a closer comparison of the alternative, review this guide to marble-look porcelain tiles before confirming the specification.
When You Need a Registered Builder in Victoria
A bathroom renovation can become regulated building work as soon as the scope extends beyond replacing finishes. In Victoria, domestic building work worth more than $10,000 must generally be carried out by a registered builder or building company. A narrow, single-trade job may fall outside that requirement, so confirm the scope and practitioner status through the Victorian practitioner search.
Large marble tile work rarely stands alone. A typical renovation may include demolition, framing, plumbing, electrical work, waterproofing, screeding, tiling, cabinetry and shower-screen installation. Once the project changes a wet area or coordinates several trades, someone must manage sequencing, responsibility and compliance, not only the tile placement.
Victoria recognises Domestic Builder limited to bathroom, kitchen and laundry renovation registration, DBL-L. A DBL-L practitioner may undertake the renovation work covered by that category, such as removing and rebuilding a bathroom, replacing its waterproofed floor and walls, or coordinating associated fixtures and finishes. A practitioner with Domestic Builder Unlimited, DBU, has broader domestic building authority. The referenced Victorian guidance states that bathroom renovation work must be completed by a practitioner holding either DBU or DBL registration. (Victoria bathroom renovation registration pathway)
Check the practitioner before signing
Ask for evidence and verify it independently:
- Search the VBA register: Confirm the practitioner appears in the official search.
- Check current status: Make sure the registration is current and not suspended.
- Confirm the category: Verify that it covers the proposed bathroom work.
- Read the contract: Check the registered category and number, defined scope, timeline and payment terms.
- Confirm wet-area responsibility: Identify the licensed waterproofer, inspection process and Installation Certificate.
- Record the standards: Ensure the documentation addresses AS 3740 and applicable NCC wet-area provisions.
A straightforward re-tiling job may involve less coordination. Replacing a substrate, altering a shower, moving a waste or repairing a leaking wet area changes the risk profile. Waterproofing sign-off must come from the appropriate licensed waterproofer, while structural changes may require further professional assessment.
Problems often appear after the bathroom looks finished. A cracked marble panel can indicate movement below. Staining, loose tiles or damp adjoining timber can point to preparation or waterproofing failure. If an unregistered person coordinated the work, the owner may later face uncertainty about insurance, contractual responsibility and defect rectification.
Registered builders provide a clearer chain of responsibility. Melbourne Tiling Services P/L operates as a registered unlimited builder and coordinates licensed carpenters, plumbers, electricians, tilers and waterproofers for bathroom and ensuite renovations involving waterproofing, screeding, marble, porcelain and ceramic tiling. That coordinated scope suits large-format stone where substrate, waterproofing and finished levels must work together.
For a Melbourne bathroom renovation, Melbourne Tiling Services P/L can assess the substrate, waterproofing sequence, screed levels and large-format marble or porcelain layout before materials are ordered. Visit Melbourne Tiling Services P/L to arrange a quote and discuss a compliant, properly coordinated renovation.
Write a Comment