

Many assume the shower screen is at fault when water escapes, but the issue often originates earlier with the walls, the base, or the preparation of the opening. A semi frameless shower screen installation only performs as well as the substrate it lands on, and on Melbourne renovation sites that's where the work is won or lost.
In bathroom renovations, the glass is the visible part, not the whole system. If the wall is out of plumb, the hob is soft, the tile face is uneven, or the waterproofing detail is weak, the screen can be perfect and still disappoint. Registered builders know that order matters here, first the structure and waterproofing, then the screen.
Table of Contents
- Why Most Shower Screen Problems Start Before the Glass Arrives
- Tools, Materials and Site Preparation Checklist
- Measuring, Fitting and Fixing the Screen
- Waterproofing, Sealing and Leak Prevention
- Time, Cost and Budget Planning for Melbourne Renovators
- Safety, Compliance and When to Hire Registered Builders
Why Most Shower Screen Problems Start Before the Glass Arrives
A leaking screen often gets blamed because it's easy to see, but the cause is usually hidden in the wall line, the floor fall, or the shower base. Australian installation guidance treats shower screens as a finishing component, not a waterproofing system, so a screen can't rescue a bad substrate or poor membrane work. If the base is wrong, the glass just reveals it.
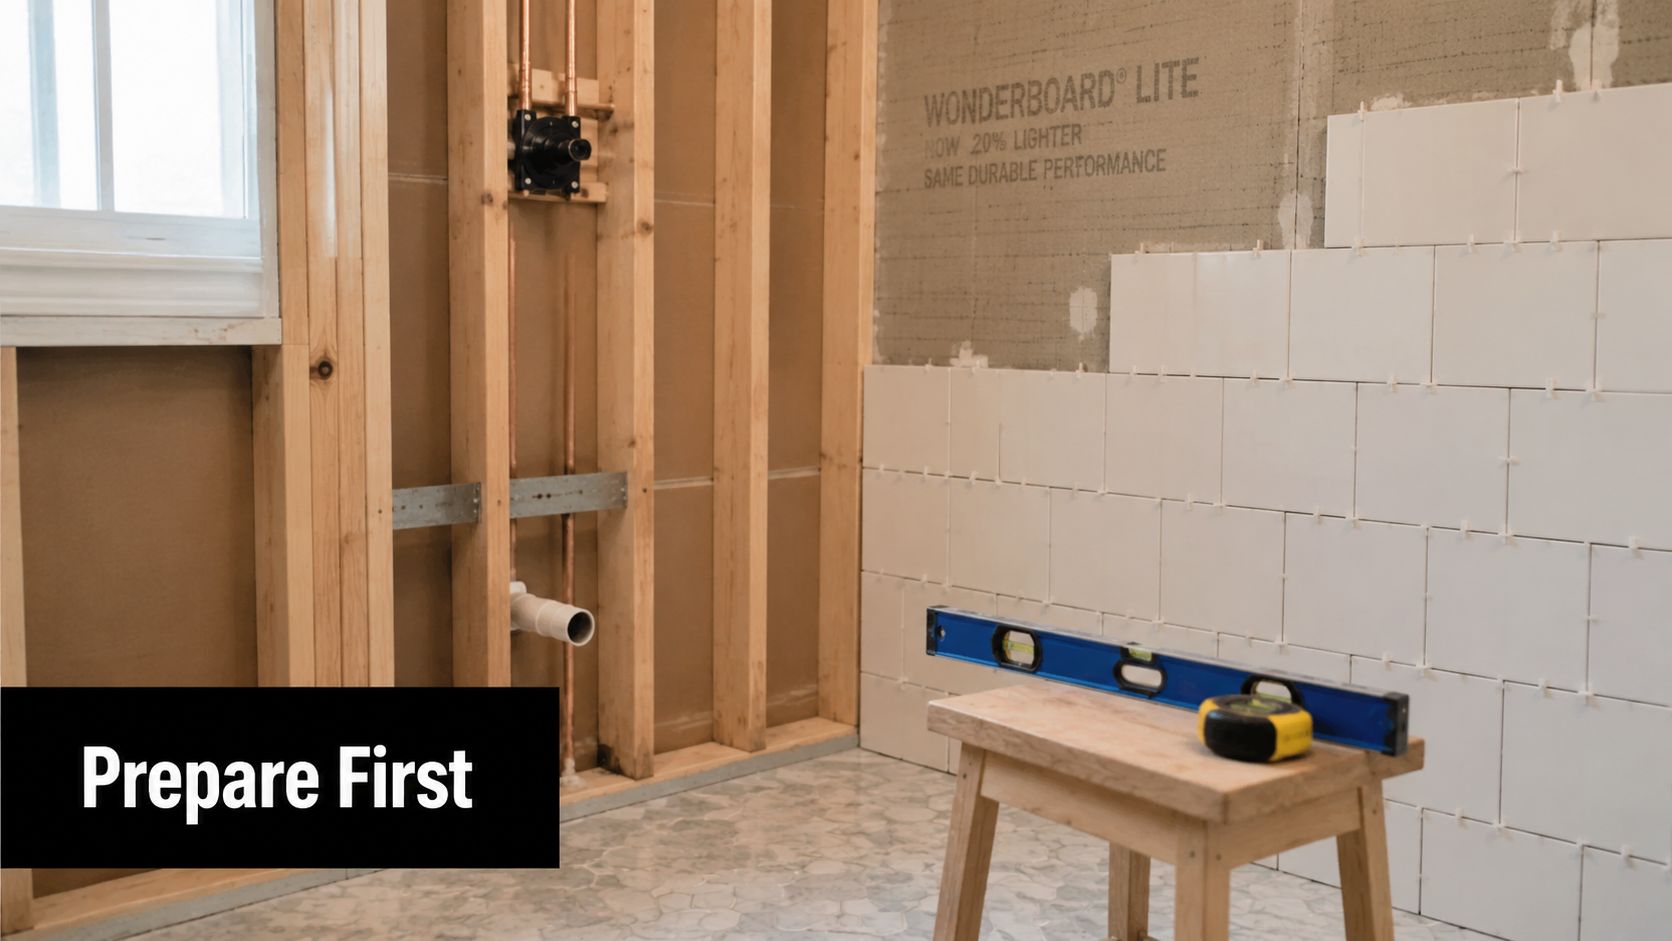
The bathroom tells you more than the brochure does
Existing tiled bathrooms in Melbourne are where the trouble shows up fastest. Walls are often a touch out of plumb, corners aren't square, and hobless entries can look level until a long spirit level or laser tells a different story. That mismatch changes door swing, seal contact, and where water ends up after every shower.
Practical rule: if the substrate isn't right, fitting a better screen won't fix the leak.
Semi frameless screens do give some tolerance for real-world conditions, which is one reason they're common in bathroom renovations. But that tolerance has limits. Once the opening is badly skewed, the installer isn't “adjusting the screen”, they're managing a site problem that may need remedial work before the glass even gets measured.
What a ready site actually looks like
A site is ready when the structure is sound, the tiled surfaces are stable, and the opening geometry matches the screen you plan to install. That means no loose tiles, no hollow patches that shift under load, and no hidden slope that forces the door to bind or drift open. In older bathrooms, a small deviation can cascade into a poor seal and a callback.
The safest way to think about it is simple. First diagnose the wall geometry, then decide whether the opening can take a standard semi frameless unit or needs a custom approach. In Melbourne, that decision often sits with the builder, tiler, or installer who's willing to measure carefully instead of selling the same screen to every room.
Tools, Materials and Site Preparation Checklist
Good measuring starts long before the first fixing goes into the wall. On a real site, the right kit saves time, but the bigger win is catching problems while there's still a chance to correct them. For semi frameless shower screen installation, that means checking geometry, substrate condition, and waterproofing readiness before the glass is ordered.
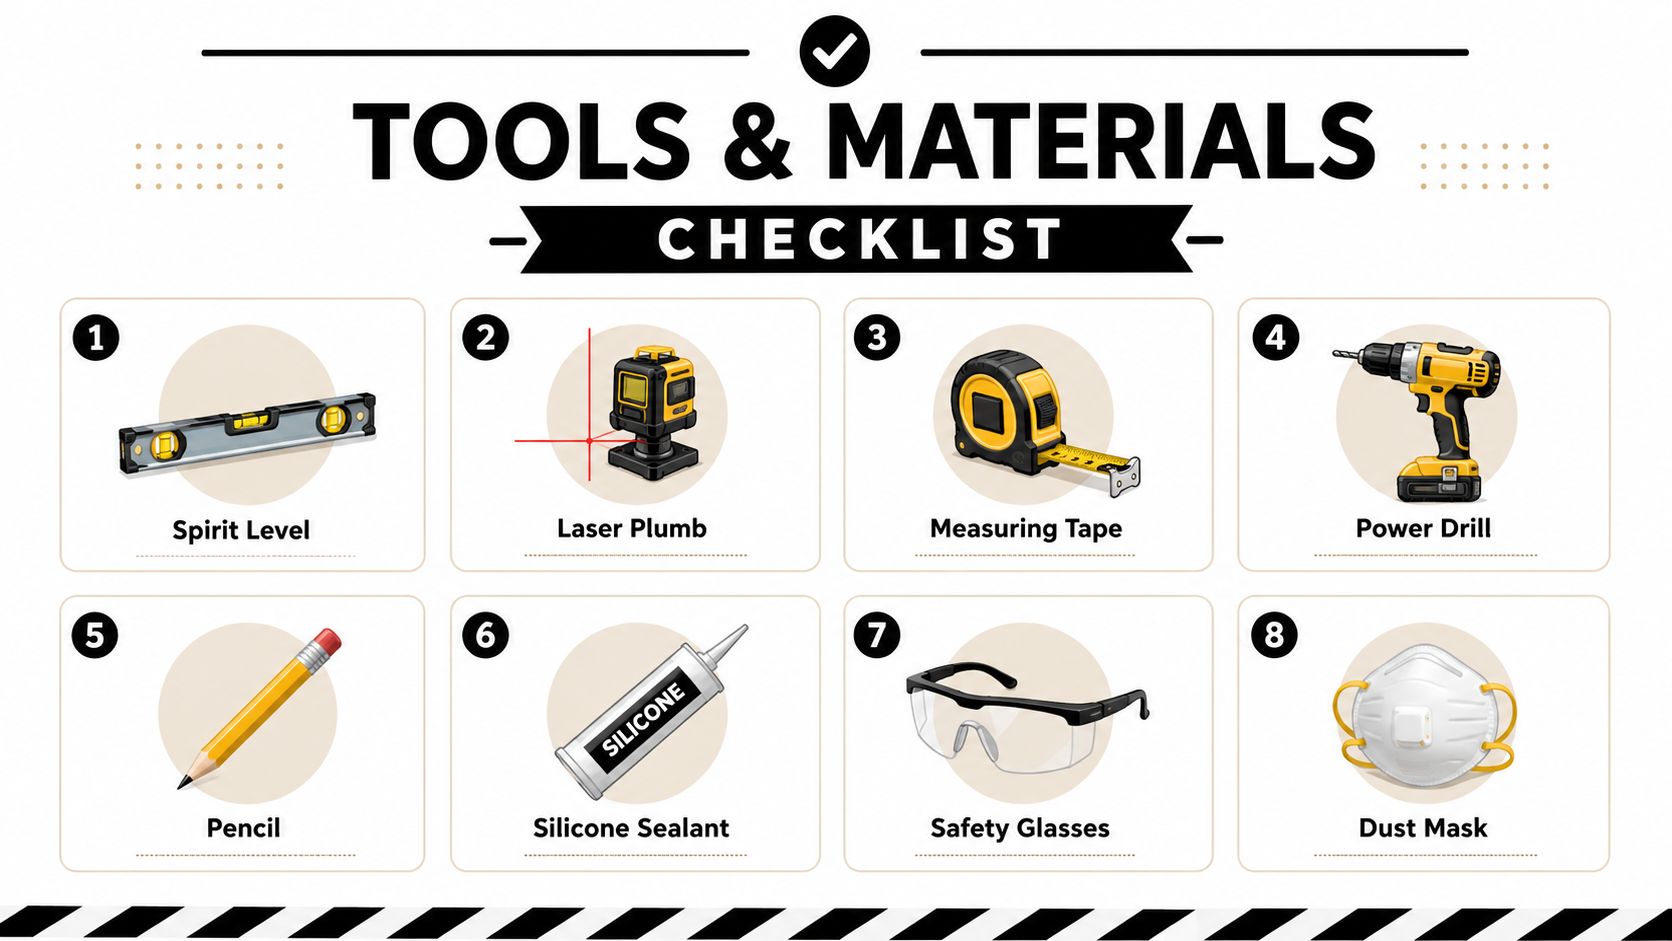
The tools that matter on site
The essentials are straightforward: a spirit level, a laser plumb tool, a measuring tape, a pencil, a power drill, the correct drill bits for the wall type, bathroom-grade silicone, safety glasses, and a dust mask. For awkward openings, angle finders and paper templates earn their keep fast, especially on neo-angle showers or rooms with non-standard corners. A template is often the difference between a clean fit and a glass order that's wrong on day one.
Tile type matters just as much as the tool. Porcelain and large-format surfaces usually need careful drilling and a slow, controlled approach, while hollow-sounding tiles can crack if fixings bite into a weak bond. If the tile face sounds detached, the installer should stop and work out why before any bracket goes up.
Site check: the wall should be plumb enough for the chosen screen, not just “close enough” to look fine in photos.
The checks that prevent callbacks
Waterproofing cure and substrate stability matter before any screen is installed. If the membrane hasn't cured properly, or the screed fall is wrong, the screen can only hide the issue for a while. The same goes for a bath lip or shower hob that isn't structurally sound, because fixings need something firm behind them.
For Melbourne owners briefing a builder or tiler, a clean preparation list helps. Confirm the opening dimensions at multiple points. Check for movement in the tiled surface. Make sure the fixing zones are ready for screws. Then verify that the bathroom has reached the stage where measuring makes sense, not just the stage where the tiles look finished.
Melbourne Tiling Services P/L also fits into this workflow as a renovation contractor that handles bathroom projects, tiling, waterproofing and screen installation coordination, which is useful when the site needs more than a hardware supplier can manage. For practical background on the screening process, the company's shower screen information is linked to tiling completion and measured after the tiling stage, which is the right order for accuracy.
Measuring, Fitting and Fixing the Screen
A semi frameless unit only behaves properly when the measuring is honest. The best installers don't measure once and hope, they check the opening at multiple heights to pick up wall bow, taper and any twist between the top and bottom of the shower. That matters because even a neat-looking wall can drift enough to change the way a door closes.
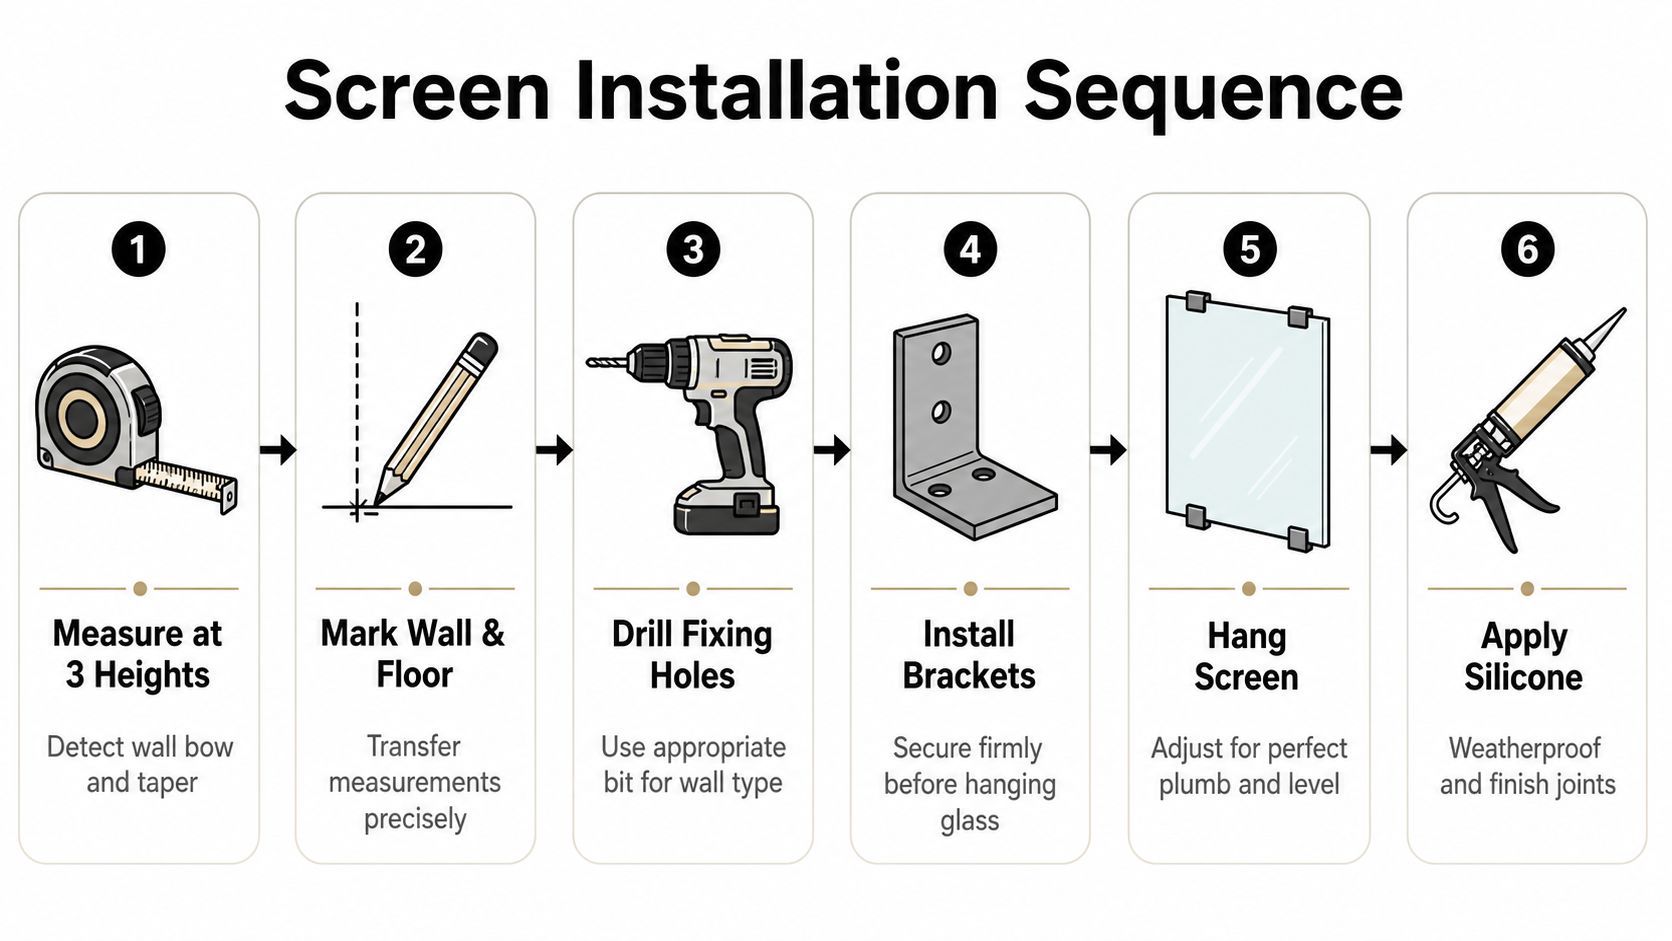
Reading the opening before you drill it
The first decision is whether the opening can take standard panels or needs custom fabrication. If the measurements vary too much from top to bottom, forcing a standard piece into the space just creates stress at the hinges and a weak seal line. That's when packers, shims, or a different panel configuration become part of the solution, not an optional extra.
Australian trade guidance notes that installers may need to measure at several points and, for irregular openings, use angle tools or templates to map the space before fabrication. That matters in renovated bathrooms because old tiles rarely give you a perfect factory opening. The critical question isn't whether the screen is semi frameless, it's whether the wall geometry will let the system sit true.
Fixing points and glass specification
For bath or shower edge fixing, the wall profile should sit 5 to 10 mm in from the edge of the bath or inside the bath lip, then be fixed tightly with screws suited to the substrate. That detail sounds small, but it governs how the screen lands, how the seal line behaves, and whether water runs back into the shower or escapes sideways. The wrong offset often shows up later as a gap that never quite seals.
Semi frameless systems sit in the middle ground for a reason. They use 6 to 8 mm glass rather than the 4 to 5 mm commonly seen in framed screens, while avoiding the heavier 10 to 12 mm glass typical of many frameless setups. That middle specification affects hinge selection, channel depth and how much forgiveness the screen has on a real bathroom wall.
The cost example in the verified data shows why the middle ground matters. One comparison put semi frameless glass at AUD 320 versus AUD 600 for frameless glass, with semi frameless hinges at AUD 180 versus AUD 400 for frameless hinges, and total installed cost at AUD 850 versus AUD 2,100, a AUD 1,250 difference, or about 59.5% less in that scenario (source).
The good install is rarely the one with the fanciest hardware, it's the one that matches the wall.
Waterproofing, Sealing and Leak Prevention
The hard question is whether the leak is coming from the screen or from the bathroom behind it. Most of the time, the screen is only showing you a problem that already existed in the membrane, the fall, or the grout line. A semi frameless screen can control splash, but it can't correct a failed waterproofing system.
The line between screen performance and waterproofing failure matters for Melbourne property managers and homeowners alike. A replacement screen won't cure a membrane defect, just like a new hinge won't fix a cracked base. The right diagnosis starts with the substrate, then moves outward to the seal and fixing details.
Australian installation guidance is very specific about sealing. Apply a fine bead of bathroom-purpose silicone vertically and horizontally only on the outside perimeter of the screen, not inside the fixed area, and leave the shower unused for 24 hours so the silicone can cure properly (installation guide). That outside-only seal matters because trapping moisture inside the fixed zone is a fast route to mould and hidden deterioration.
A careful leak check should happen after the silicone has cured and before the bathroom goes back into service. The point is to see where water tracks, not to drown the room and hope for the best. If water still escapes after a proper seal, the answer is usually not “more silicone”, it's checking the floor fall, wall junctions, bath lip, or a waterproofing problem that needs attention from a tiler or registered builder.
For background on membrane work and shower waterproofing principles, this Melbourne shower waterproofing guide is worth reading alongside the screen spec. The screen is the final piece, not the waterproofing strategy.
Time, Cost and Budget Planning for Melbourne Renovators
Semi frameless screens sit in a practical part of the Melbourne market, but the price on the quote only tells part of the story. Melbourne-focused pricing guides place installed semi frameless screens in the middle band, below frameless and above framed options, which is why they are often chosen by homeowners who want a cleaner finish without paying for the heavier hardware and custom fabrication that frameless work usually brings (Melbourne pricing guide). That middle ground suits plenty of bathrooms, but only if the walls, base and waterproofing are already behaving.
Cost comparison by type
| Screen Type | Glass Thickness | Installed Cost Range (AUD) | Typical Use Case |
|---|---|---|---|
| Framed | 4 to 5 mm | 350 to 800 | Budget bathroom updates |
| Semi frameless | 6 to 8 mm | 600 to 1,400 | Bathroom renovations seeking a premium look without full frameless cost |
| Frameless | 10 to 12 mm | 900 to 2,500+ | Higher-end custom bathrooms |
Those ranges make sense once you look at what changes the job on site. The Melbourne pricing guide also points to labour sitting around AUD 45 to 65 per hour, while the Melbourne shower screen installation cost guide shows semi frameless supply-and-install packages that vary with size, access, and how much correction the walls need. A neat opening, square corners and sound tile fixing keep the number down. Out-of-plumb walls, tight reveals and awkward plumbing cutouts push it up quickly.
Time follows the bathroom, not the brochure. A standard install moves cleanly when the substrate is ready and the opening is square, but uneven walls, bowed tiles or a base that is slightly out can turn a simple fit into a second visit, extra packing and custom trimming. In a full renovation, the screen should be the later trade after tiling and waterproofing are finished, because installing early only makes the sealing and alignment problems harder to fix.
Budget for the screen as part of the room, not as a separate purchase. If you are comparing quotes, ask what the installer is allowing for wall correction, sealing, and any return trip needed after silicone cure time. A cheaper figure can become the dearer job if the installer is glossing over the substrate or hoping the glass will hide geometry that should have been corrected first.
Safety, Compliance and When to Hire Registered Builders
Australian compliance isn't paperwork for the sake of it, it's what keeps a shower screen safe under real use. Technical guidance says shower screen installation should comply with AS 3740, and in commercial or higher-risk residential settings frameless screens may need glass gussets, braces or head supports for stability and safe performance (technical appendix). That's a reminder that the glass is part of a load-bearing and safety-critical assembly, not just a decorative panel.
The fixing method matters too. Fixed panels may be attached to the wall and floor with a securely fixed channel, and the glass should be anchored firmly with glazing wedges or structural-grade silicone (technical appendix). Once you're dealing with larger panels, heavy hardware or an awkward opening, the margin for error gets very small.
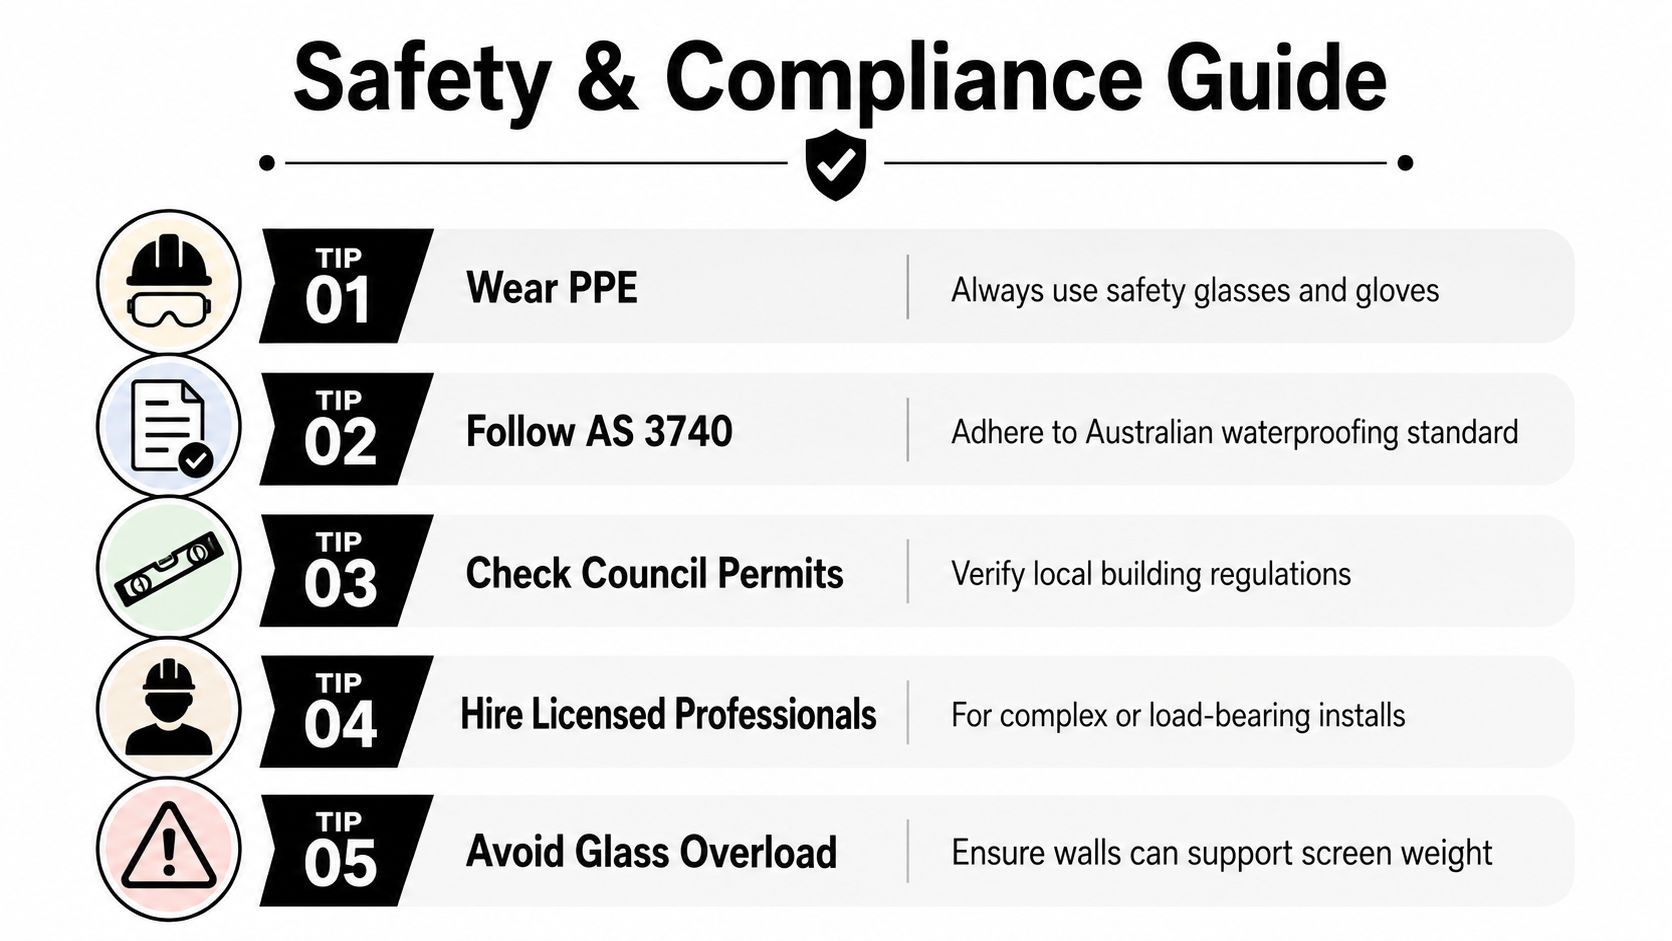
When the job belongs with registered builders
Hire registered builders when the shower sits inside a full bathroom renovation, when waterproofing remediation is needed, when tiles are large-format or hard to drill cleanly, or when the opening geometry is already compromised. Those jobs benefit from coordinated trades, because the tiler, plumber, waterproofing contractor and screen installer all affect the outcome. Melbourne Tiling Services P/L works in that coordinated model as a Registered Unlimited Builder, which suits installations where the screen is one piece of a larger build.
The safest handling habits
Heavy glass isn't forgiving. Keep it upright, move it with two people, protect tile edges, and never assume a 6 to 8 mm toughened panel is “light” just because it's thinner than frameless glass. The panel is still a large, fragile surface, and a slip on a wet bathroom floor can turn a straightforward install into a dangerous one.
For regulatory background on shower screen compliance, the frameless shower screen regulations guide is a useful reference point. If the site feels even slightly uncertain, the right move is to slow down and get the substrate, compliance and fixing method checked before the glass goes anywhere near the wall.
If you're planning a bathroom renovation in Melbourne and want the screen fitted after the waterproofing, tiling and wall geometry are properly sorted, Melbourne Tiling Services P/L handles that coordination as part of its bathroom renovation work. Visit Melbourne Tiling Services P/L to organise a quote, ask about shower screen installation, and get the job measured after the tiling is complete.
Write a Comment