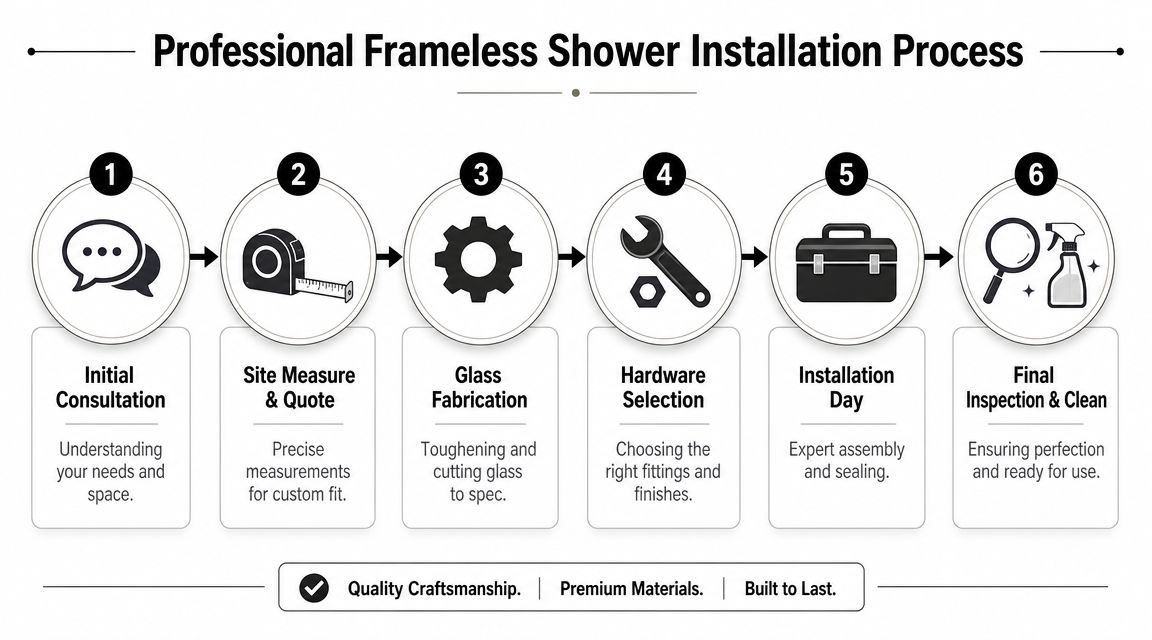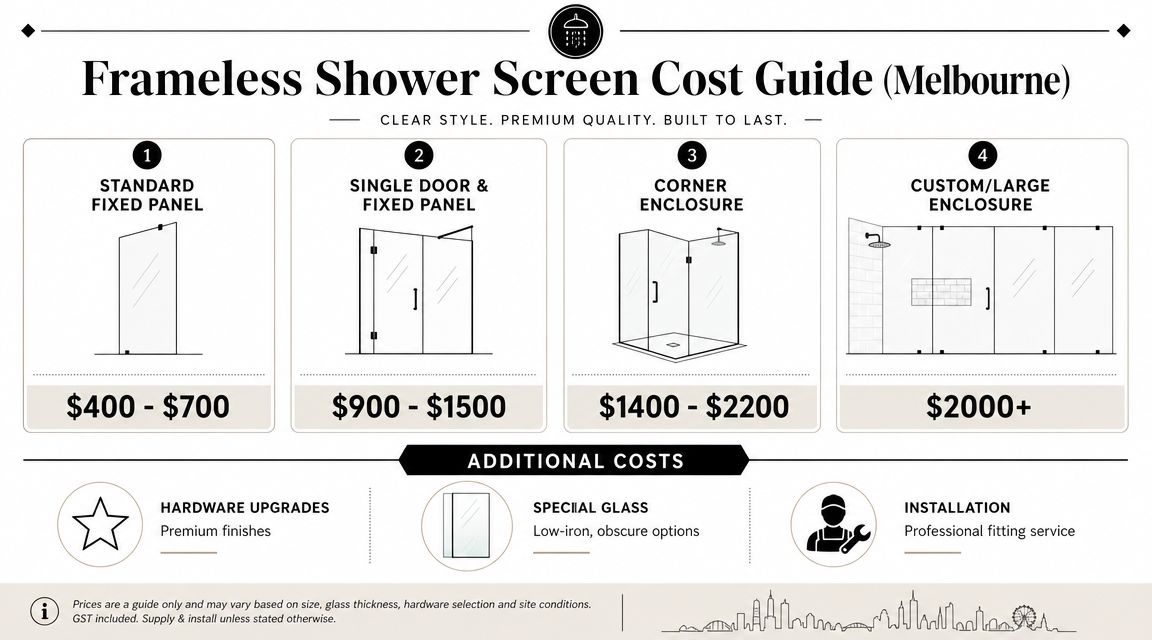
How to Install Frameless Shower Screen in Melbourne

You've reached the stage of a Melbourne bathroom renovation where the tiles are finished, the fittings are on site, and the frameless shower screen looks like the last straightforward job. It isn't. A glass panel can be perfectly manufactured and still leak, bind, or put stress on the fixings if the waterproofing, waterstop, finished floor, and wall set-out aren't right first.

This is the practical answer to how to install frameless shower screen in a Victorian bathroom. The glass is the visible part, but it's only the final component of a wet-area system. The steps below cover preparation, tools, compliance, measuring, fixing, sealing, fault diagnosis, and the point where a registered builder needs to take responsibility.

Table of Contents

What You're Really Fitting Before the Glass Goes In

An ensuite is usually close to lockup when the shower screen installer arrives. The wall tiles have cured, the shower base or hob is installed, the floor falls toward the waste, and the waterproofing membrane should already have been inspected and tested. If those layers aren't settled, fitting glass is premature.

Under the Victorian Building Authority waterproofing guidance, an enclosed shower is a wet area that must be designed to prevent water spreading. The VBA also states that a fully frameless shower area is acceptable only when the relevant building surveyor is satisfied that it will prevent water escaping from the category 1 area.

The surfaces behind the finished bathroom

Before drilling or lifting glass, check the records and the physical set-out:

  • Waterproofing record: The wet-area work should comply with AS 3740, with a valid flood test record available before the finished surfaces conceal the membrane.
  • Wall and floor geometry: The floor must be level across the screen span, and the finished wall should be plumb. A builder's long level or laser exposes problems that a short spirit level can miss.
  • Waterstop position: The screen must align with the waterstop or hob. It isn't a free-standing line chosen for appearance after tiling.
  • Tile layout: Square, consistent joints make the screen easier to set out, but the screen still follows the wet-area boundary rather than blindly following a tile joint.

Drilling into a waterproofed wall without knowing where the membrane and structure sit can damage the system and create a path for moisture behind the tiles. The screen installation is the moment the assembly becomes loadable, so the wall, substrate, anchors, hinges, and panel all need to work together.
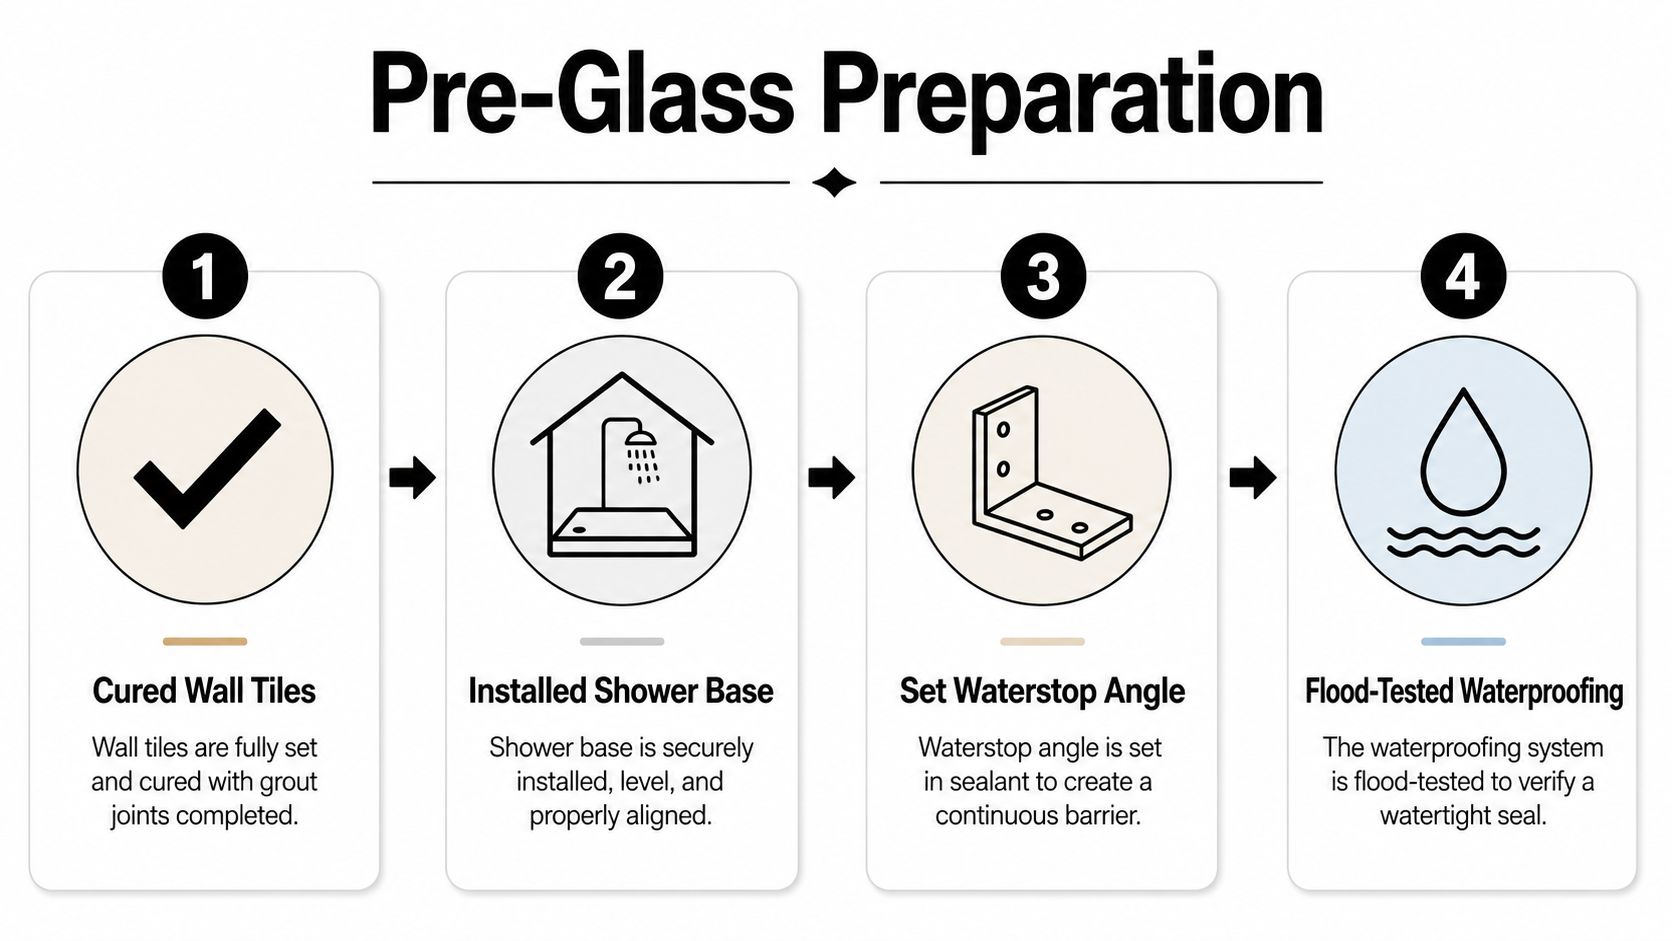
A four-step guide illustrating essential pre-glass preparation steps for installing a frameless shower screen.

Site rule: Don't book the final glass measure until the finished floor, tiles, waterstop, and shower fittings are fixed in their final positions.

For Melbourne bathroom renovations, a useful reference is the frameless shower screen installation service information, particularly where screen measurement follows completion of tiling. That sequence prevents a common mistake, ordering glass against dimensions that change during screeding, tiling, or floor-level adjustment.

Tools, Glass and Compliance Items to Have on Site

A frameless screen shouldn't be installed with a mixed collection of household tools. Glass is unforgiving, polished edges can chip on hard surfaces, and a badly placed hole can compromise both the tile and the substrate. Put every tool and document on the floor before marking the first hole.

The practical tool kit

You'll need a quality cordless drill with hammer function, suitable 6 mm and 8 mm diamond or masonry bits, a spirit level of at least 600 mm, and a 1.5 m laser or long level. Add a silicone gun, neutral-cure silicone, masking tape, pencil, 1 mm and 3 mm packers, and non-marking suction lifters rated above the panel weight.

A second pair of hands isn't optional for a large panel or hinged door. One person controls the glass while the other checks plumb, supports the panel, and manages fixings. Keep the glass on padded supports, never directly on tile, concrete, or metal.

Item Spec / Size
Drill bits 6 mm and 8 mm diamond or masonry bits matched to the tile
Levels 600 mm minimum spirit level, plus a 1.5 m laser or long level
Packers 1 mm and 3 mm packers for controlled adjustment
Suction lifters Non-marking, rated above the panel weight
Sealant Neutral-cure silicone
Glass 6 mm to 10 mm toughened safety glass
Fixings Stainless steel or zinc-plated screws suited to the substrate
Support A second person and temporary bracing

Glass and paperwork

Australian technical requirements centre on AS/NZS 2208 for safety glazing materials and AS 1288 for glass selection and installation, as outlined in this Australian frameless shower screen regulations guide. Frameless screens generally use toughened safety glass from 6 mm to 10 mm, with polished edges and the manufacturer's compliance stamp visible in a corner.

A wider frameless panel needs more careful hardware selection and structural support. Many Melbourne installers specify 8 mm as the minimum for a frameless panel wider than 700 mm, but the manufacturer's design and hardware rating still govern the final choice. The panel mass, hinge type, wall structure, brace requirements, and fixing pattern must be assessed together.

Keep the NCC Volume Two waterproofing records, any required plumbing sign-off, and the panel's compliance certificate with the renovation file. Silicone isn't a substitute for mechanical fixings, and a channel that's only bonded to a weak surface won't reliably carry a moving door.

Measuring and Setting Out Against the Waterproofing

The screen should be square to the wet zone, not automatically square to the nearest wall or tile joint. Melbourne walls and tiled screeds often vary enough that measuring one point gives a false sense of accuracy.

Start by measuring the finished wall-to-wall opening at the floor, midpoint, and top. Record each reading. That tells you whether the walls converge, whether the panel needs a controlled clearance, and whether a standard door configuration will work without binding.

Mark the wet-area line

Mark the screen centre line on the floor with a pencil or fine tape. Transfer it to the wall at screen height using the laser. Place the channel or base profile in position and dry-fit the panel before drilling.

The critical check is the relationship between the glass and the waterstop. The VBA guidance says a shower screen should lap 3–5 mm over the waterproofing membrane on either side. The shower waterproofing membrane guidance is useful background, but on site the installer must locate the actual membrane termination and waterstop rather than assume it from the tile pattern.
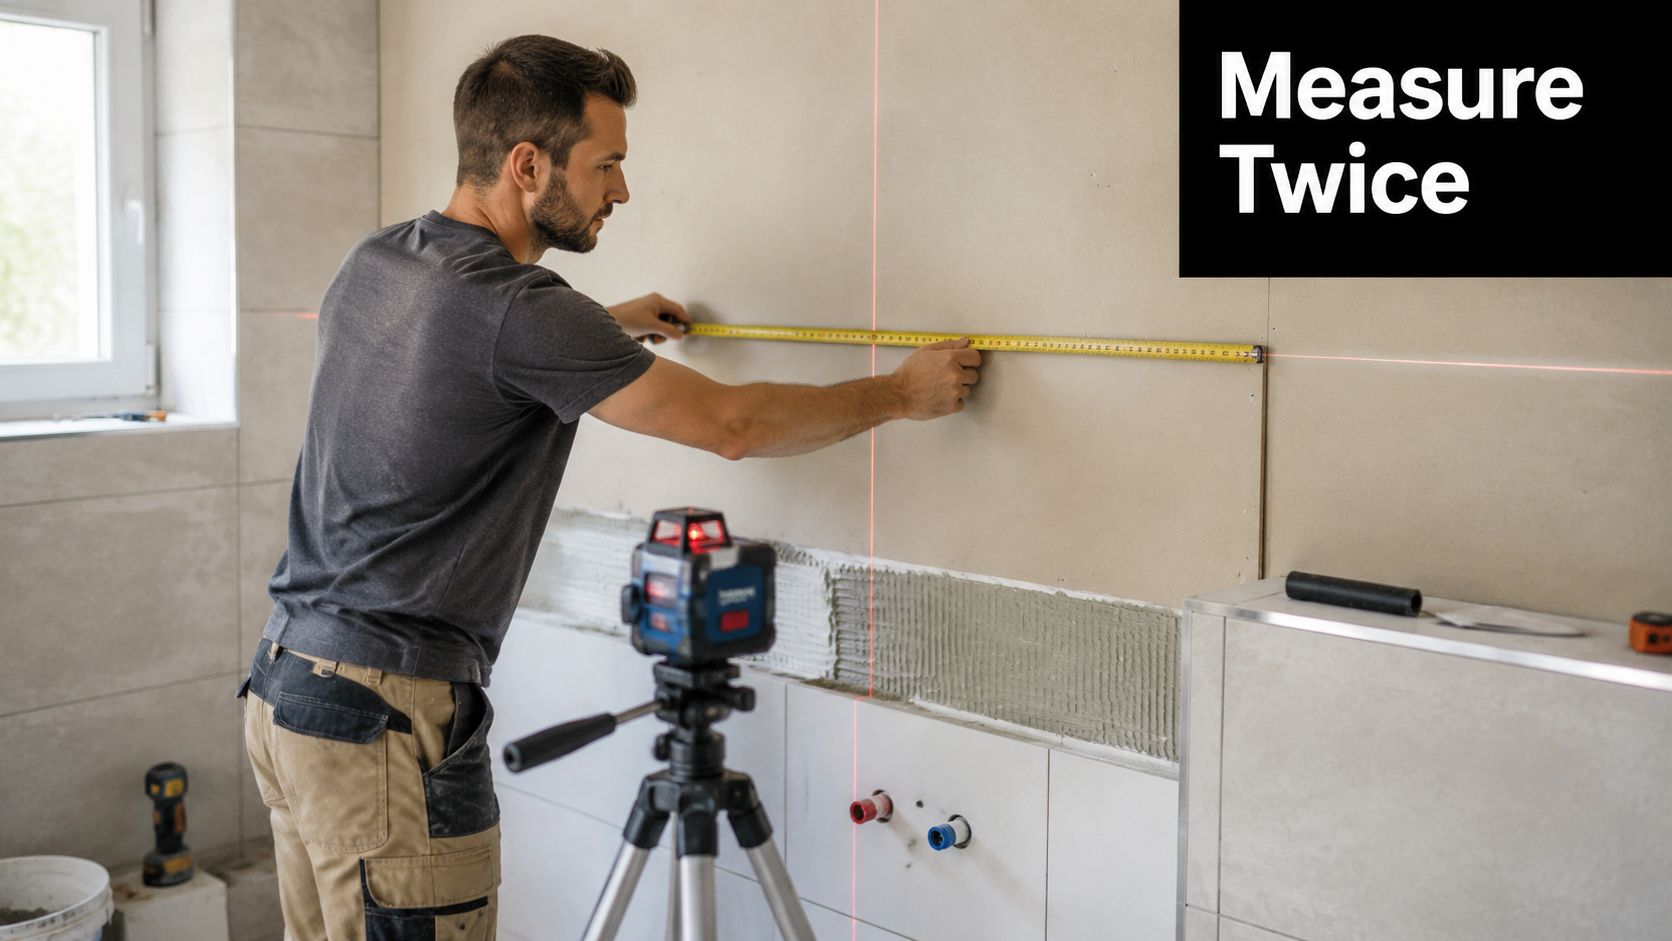
A professional construction worker uses a laser level and measuring tape to accurately mark a wall.

Dry-fit before making holes

With the panel supported, check the following:

  • Waterstop lap: Keep the glass within the 3–5 mm lap zone, never beyond the membrane termination.
  • Base level: Pack under the channel where necessary so it remains level along its full length. Don't shim more than 5 mm.
  • Fitting clearance: Confirm the panel remains clear of the shower rose swing by at least 1500 mm.
  • Door operation: Use the manufacturer's template to mark hinge or pivot points, then check the intended swing against the vanity, toilet, and entry.
  • Record condition: Photograph the dry-fit, waterstop relationship, and packers before installing any fixings.

The screen must sit over or inside the waterstop boundary. In a hobless shower, that floor interface is a compliance detail, not a cosmetic choice. If the finished floor build-up has moved the boundary, stop and resolve it before drilling.

Fixing the Channel, Hinges and Glass Panel

Fix the wall channel or jamb before lifting the main panel into its final position. The channel needs a sound substrate, accurate plumb, and fixings that suit the wall construction. A screw driven into tile adhesive alone won't provide the same support as a fixing into masonry or properly located framing.

Use the specified 6 mm masonry bit for the channel holes, while taking care not to drill blindly through the waterproofing. Keep the fixings vertical and target stud or masonry where the wall construction allows. Clean the holes, install the appropriate anchors or screws, and avoid overtightening against the tile.

Build the support before loading the glass

Drop the wall jamb or channel into position and pack the base until it's plumb. Check it in both directions with the long level. The panel must sit evenly, with no hard point where glass bears directly against tile, metal, or a screw head.
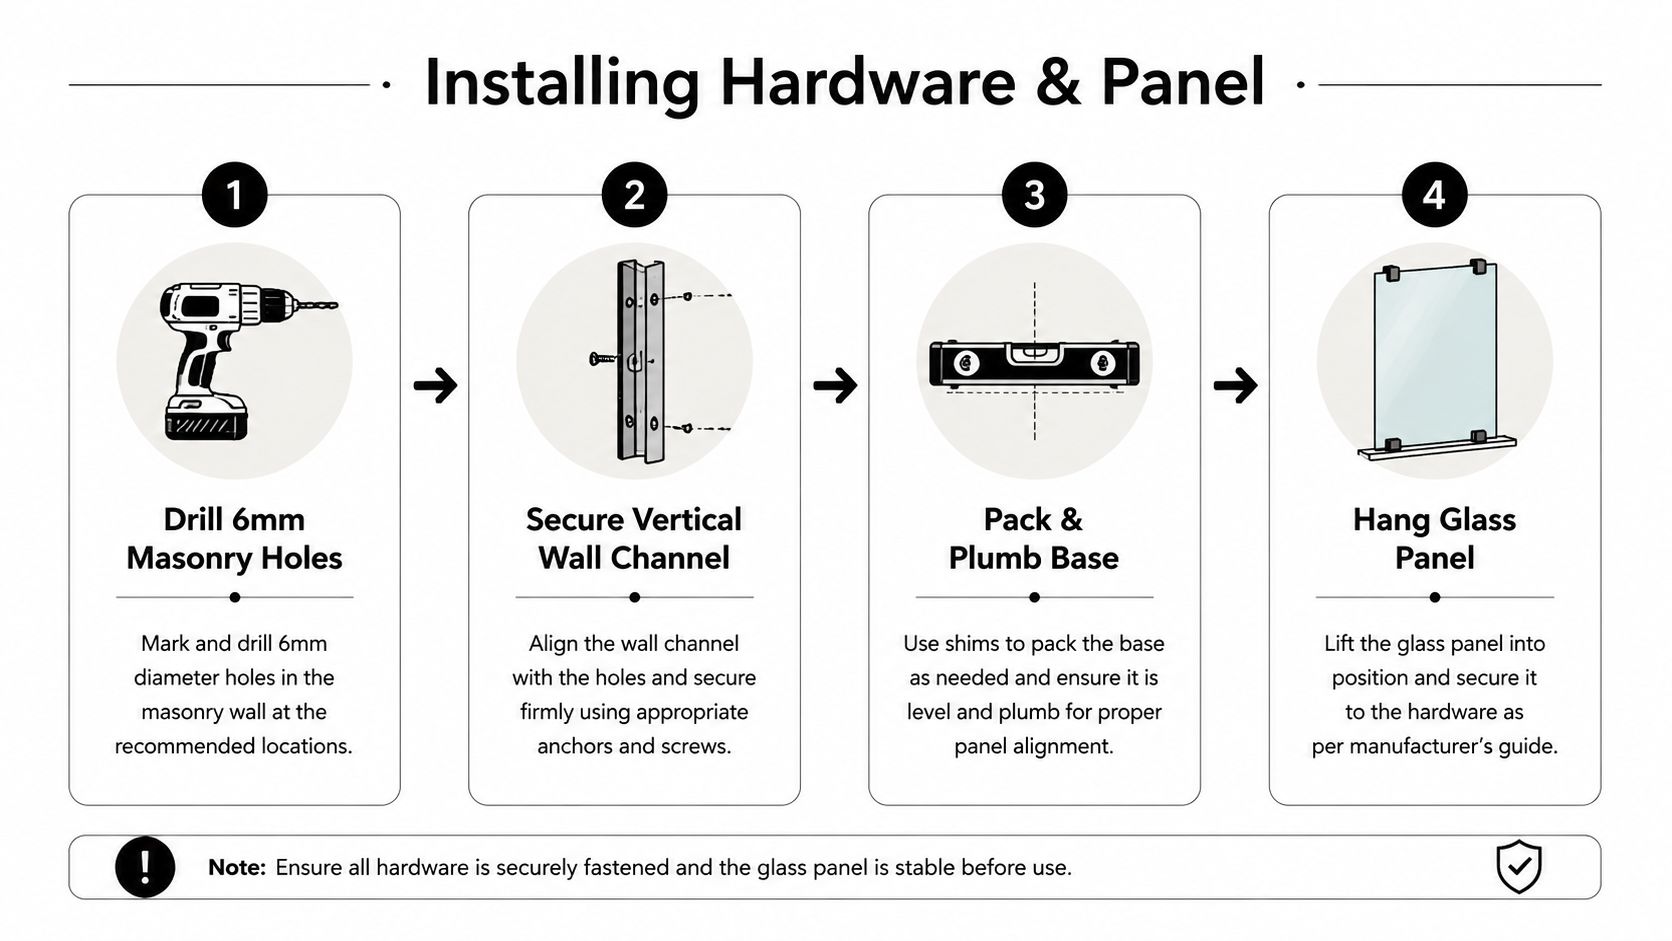
An instructional infographic detailing the four-step installation process for a glass shower screen wall panel.

For a hinged panel, use the manufacturer's template for hinge centres. A typical set-out may place the hinge centre 25 mm from each glass edge and 200 mm from the top, but the supplied hardware specification takes priority. Don't transfer a measurement from another screen because hinge mortices, glass preparation, and load ratings vary between systems.

Lift and secure in a controlled sequence

Have two people lift the panel with suction cups. Rest it on temporary timber bracing and packers while the hinges or channel are brought into alignment. Keep fingers away from the edge and don't let a polished corner touch the floor.

Tighten the hinge hardware to the manufacturer's torque setting. Some systems specify 15–20 Nm, so check the installation sheet rather than guessing. Fit the door panel with the same care, support its weight while aligning the hinges, and swing-test it before applying silicone.

Glass handling matters: If the panel rocks, binds, or contacts metal, don't solve the problem by tightening harder. Correct the support, clearance, or alignment first.

The technical guidance for Australian frameless glass compliance reinforces the need for safety glazing, suitable hardware, and mechanical fixing or bracing. Silicone seals joints. It doesn't replace engineered support.

Sealing, Door Gap and Final Alignment

Sealant should be the last adjustment, not a way to hide a crooked channel or a misplaced waterstop. Clean the tile, metal, and glass surfaces, allow them to dry, and mask both sides of each joint before applying silicone.

Run a 5 mm bead of neutral-cure silicone along the inside edge of the wall channel and along the waterstop where the glass meets the hob. Tool the bead flush so it forms a neat joint of approximately 3–4 mm between the masking lines. Remove the tape before the silicone skins over.

Set the moving parts before the seal cures

Use clear packers to set the door clearance. A practical arrangement is an 8 mm hinge-side gap and a 6 mm latch-side gap, then adjust the pivot blocks until the door self-centres. The exact hardware system can change those clearances, so use the manufacturer's sheet as the controlling document.

Check the bottom edge for contact throughout the swing. The drip rail belongs inside the shower line, directing water back toward the wet area rather than projecting over the bathroom floor. If there's a floor channel, make sure the drain path remains open and silicone hasn't bridged it.

  • Open and close the door repeatedly: Look for binding at the latch, jamb, floor, and adjacent panel.
  • Check the seal line: It should be continuous at the channel and waterstop, without gaps or pinholes.
  • Inspect the fixing points: Glass must remain isolated from metal by the supplied washers, bushes, or sleeves.
  • Protect the cure: Keep water off the installation for 24 hours so the silicone can cure properly.

A door that closes neatly but pushes water outside the screen still needs correction. Watch the first controlled shower and inspect the floor line, because a small failure at the waterstop interface can move moisture into the broader bathroom.

When a Registered Builder Should Take Over

The common assumption is that a shower screen is always a minor DIY fitting. That assumption fails when the screen forms part of regulated bathroom renovations. In Victoria, domestic building work valued at more than A$10,000 must be carried out by a person registered with the Building and Plumbing Commission, with registration approved before work starts, as outlined in the Victorian practitioner registration information.

The threshold applies to the broader residential renovation scope, not just the price of the glass. If the screen is one component of a bathroom renovation involving waterproofing, tiling, plumbing, carpentry, and finishing work, assess the total contract rather than treating the panel as an isolated purchase.

The paperwork changes with the project

Victoria also requires a major domestic building contract for work worth more than A$10,000, while domestic building insurance applies to work worth more than A$16,000. A projection published for work from 1 July 2026 states that Home Warranty insurance will be required above A$20,000, according to this Victorian bathroom renovation coverage guide.

DIY owner-builders can still undertake work on their own home, but the owner carries the insurance and coordination risk. The decision becomes less comfortable when waterproofing is being altered, structural framing is being changed, or the door is unusually wide and heavy. A pivot door exceeding 900 mm deserves a properly assessed wall structure and hardware system rather than a casual fixing decision.

Scenario Can You DIY? Why
Replacing a small, non-hinged panel on an established wet area Potentially, if competent The waterproofing boundary and structure still need to remain intact
Installing a hinged frameless screen during a bathroom renovation above A$10,000 Not as an unregistered contractor The broader domestic building work crosses the Victorian registration threshold
Drilling where the membrane location is unknown No Damage can compromise the waterproofing system
Altering framing, hob, set-down, or waterstop geometry No The work affects structure or wet-area compliance
Installing a heavy pivot door over 900 mm Use a registered builder and qualified installer Hinge loads and wall reinforcement need proper assessment

A registered builder also coordinates licensed plumbers, waterproofers, tilers, and screen installers when the work crosses trades. That coordination matters because the screen can't be corrected in isolation if the floor falls, membrane line, or waterstop was set incorrectly.

Common Installation Problems and How to Fix Them

Three faults appear repeatedly after frameless screens are installed: water tracking onto the bathroom floor, doors that bind, and cracks radiating from fixings. Each symptom points to a set-out or installation problem. Filling a visible gap with more silicone rarely fixes the cause.

Quick diagnosis on site

Symptom Likely cause Realistic fix
Water tracks across the floor Misaligned waterstop, missing channel seal, or excessive door gap Check the wet-area boundary, remove and reseal the affected channel, then reset the door
Door binds or won't close Hinge set-out error or out-of-plumb wall beyond the hardware tolerance Adjust packers and hinges, or relocate the fixing point where the system permits
Crack radiates from a hole Incorrect fastener, excessive torque, or glass touching metal Remove the panel, replace damaged glass if required, and correct the fixing assembly

Floor leakage often begins at the interface rather than in the middle of the glass. If the screen sits outside the waterstop, or if the channel base has an unsealed break, water can move under the finished surface even when the visible silicone bead looks tidy. Resetting the waterstop or screen position may be necessary, not just adding another surface bead.

Binding usually reflects geometry. Check the wall with a long level, inspect the hinge centres against the manufacturer's template, and look for a packer that has compressed or shifted. Forcing the door closed increases stress on the hinges and fixings.

A crack at a drill hole is a stop-work fault. Wrong screws, overtightened hardware, missing nylon bushes, or direct glass-to-metal contact can all concentrate stress. Remove the panel for proper inspection instead of filling the chip and putting the door back into service.

Melbourne Tiling Services P/L coordinates bathroom renovations, waterproofing, tiling, screeding, and frameless shower screen installation through registered builders and relevant trades. For a renovation where the membrane, waterstop, finished floor, and glass need to be treated as one system, visit Melbourne Tiling Services P/L to arrange a site discussion and quote.

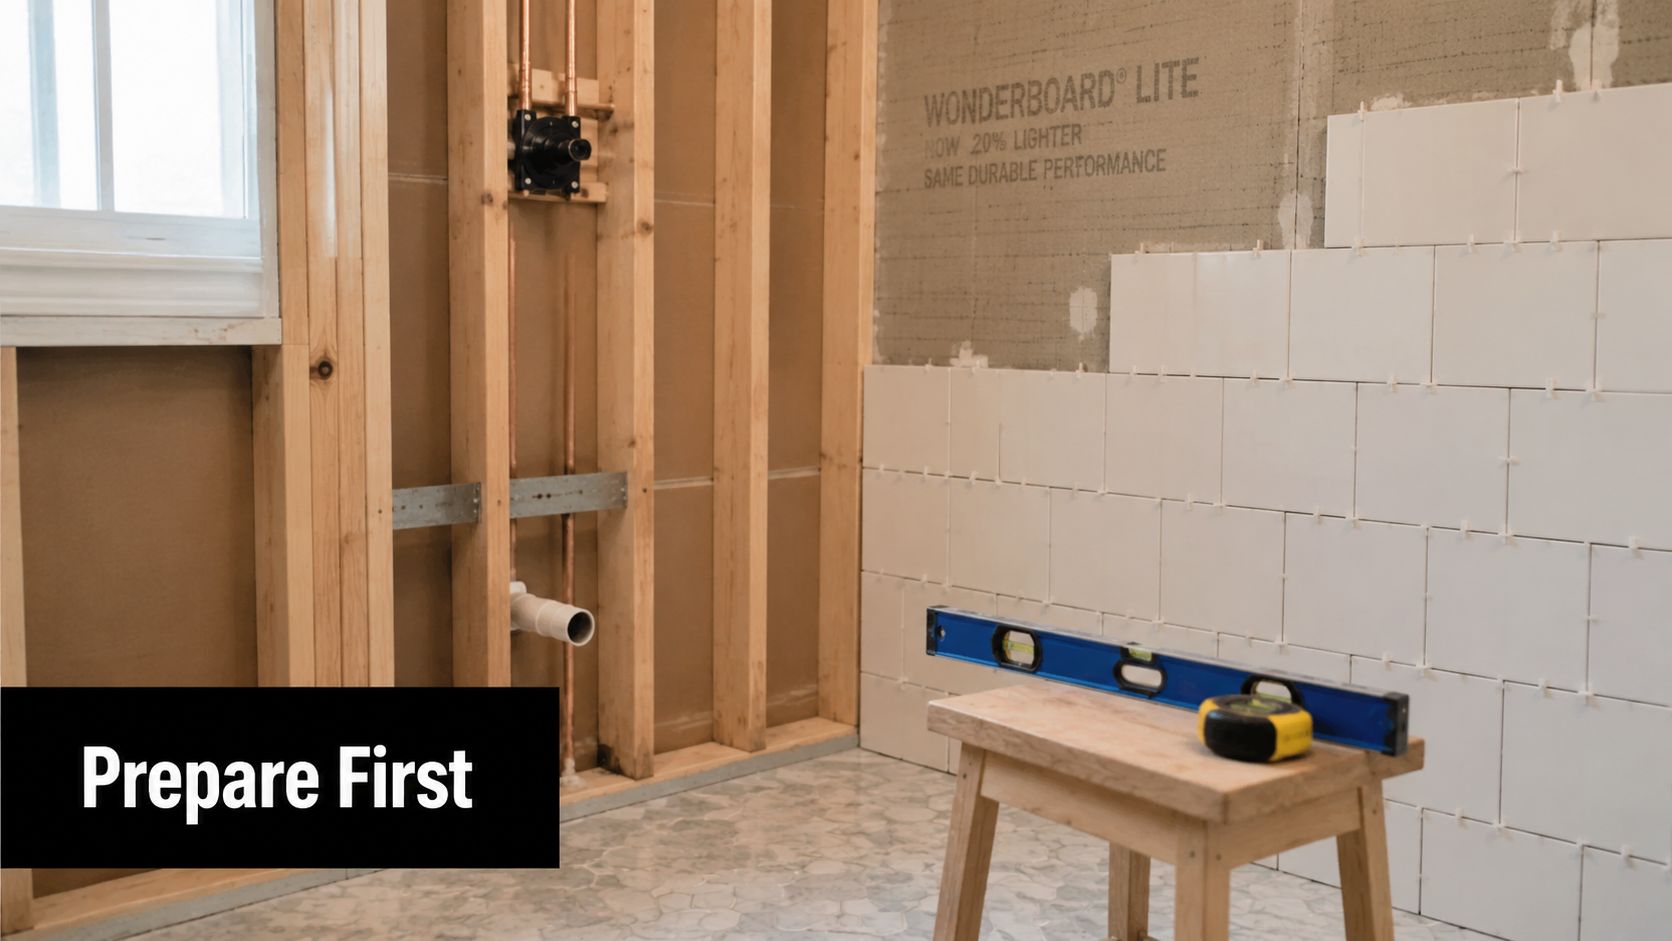
Semi Frameless Shower Screen Installation Guide

Many assume the shower screen is at fault when water escapes, but the issue often originates earlier with the walls, the base, or the preparation of the opening. A semi frameless shower screen installation only performs as well as the substrate it lands on, and on Melbourne renovation sites that's where the work is won or lost.

In bathroom renovations, the glass is the visible part, not the whole system. If the wall is out of plumb, the hob is soft, the tile face is uneven, or the waterproofing detail is weak, the screen can be perfect and still disappoint. Registered builders know that order matters here, first the structure and waterproofing, then the screen.

Table of Contents

Why Most Shower Screen Problems Start Before the Glass Arrives

A leaking screen often gets blamed because it's easy to see, but the cause is usually hidden in the wall line, the floor fall, or the shower base. Australian installation guidance treats shower screens as a finishing component, not a waterproofing system, so a screen can't rescue a bad substrate or poor membrane work. If the base is wrong, the glass just reveals it.

A bathroom renovation in progress featuring wall studs, plumbing pipes, and partially installed white wall tiles.

The bathroom tells you more than the brochure does

Existing tiled bathrooms in Melbourne are where the trouble shows up fastest. Walls are often a touch out of plumb, corners aren't square, and hobless entries can look level until a long spirit level or laser tells a different story. That mismatch changes door swing, seal contact, and where water ends up after every shower.

Practical rule: if the substrate isn't right, fitting a better screen won't fix the leak.

Semi frameless screens do give some tolerance for real-world conditions, which is one reason they're common in bathroom renovations. But that tolerance has limits. Once the opening is badly skewed, the installer isn't “adjusting the screen”, they're managing a site problem that may need remedial work before the glass even gets measured.

What a ready site actually looks like

A site is ready when the structure is sound, the tiled surfaces are stable, and the opening geometry matches the screen you plan to install. That means no loose tiles, no hollow patches that shift under load, and no hidden slope that forces the door to bind or drift open. In older bathrooms, a small deviation can cascade into a poor seal and a callback.

The safest way to think about it is simple. First diagnose the wall geometry, then decide whether the opening can take a standard semi frameless unit or needs a custom approach. In Melbourne, that decision often sits with the builder, tiler, or installer who's willing to measure carefully instead of selling the same screen to every room.

Tools, Materials and Site Preparation Checklist

Good measuring starts long before the first fixing goes into the wall. On a real site, the right kit saves time, but the bigger win is catching problems while there's still a chance to correct them. For semi frameless shower screen installation, that means checking geometry, substrate condition, and waterproofing readiness before the glass is ordered.

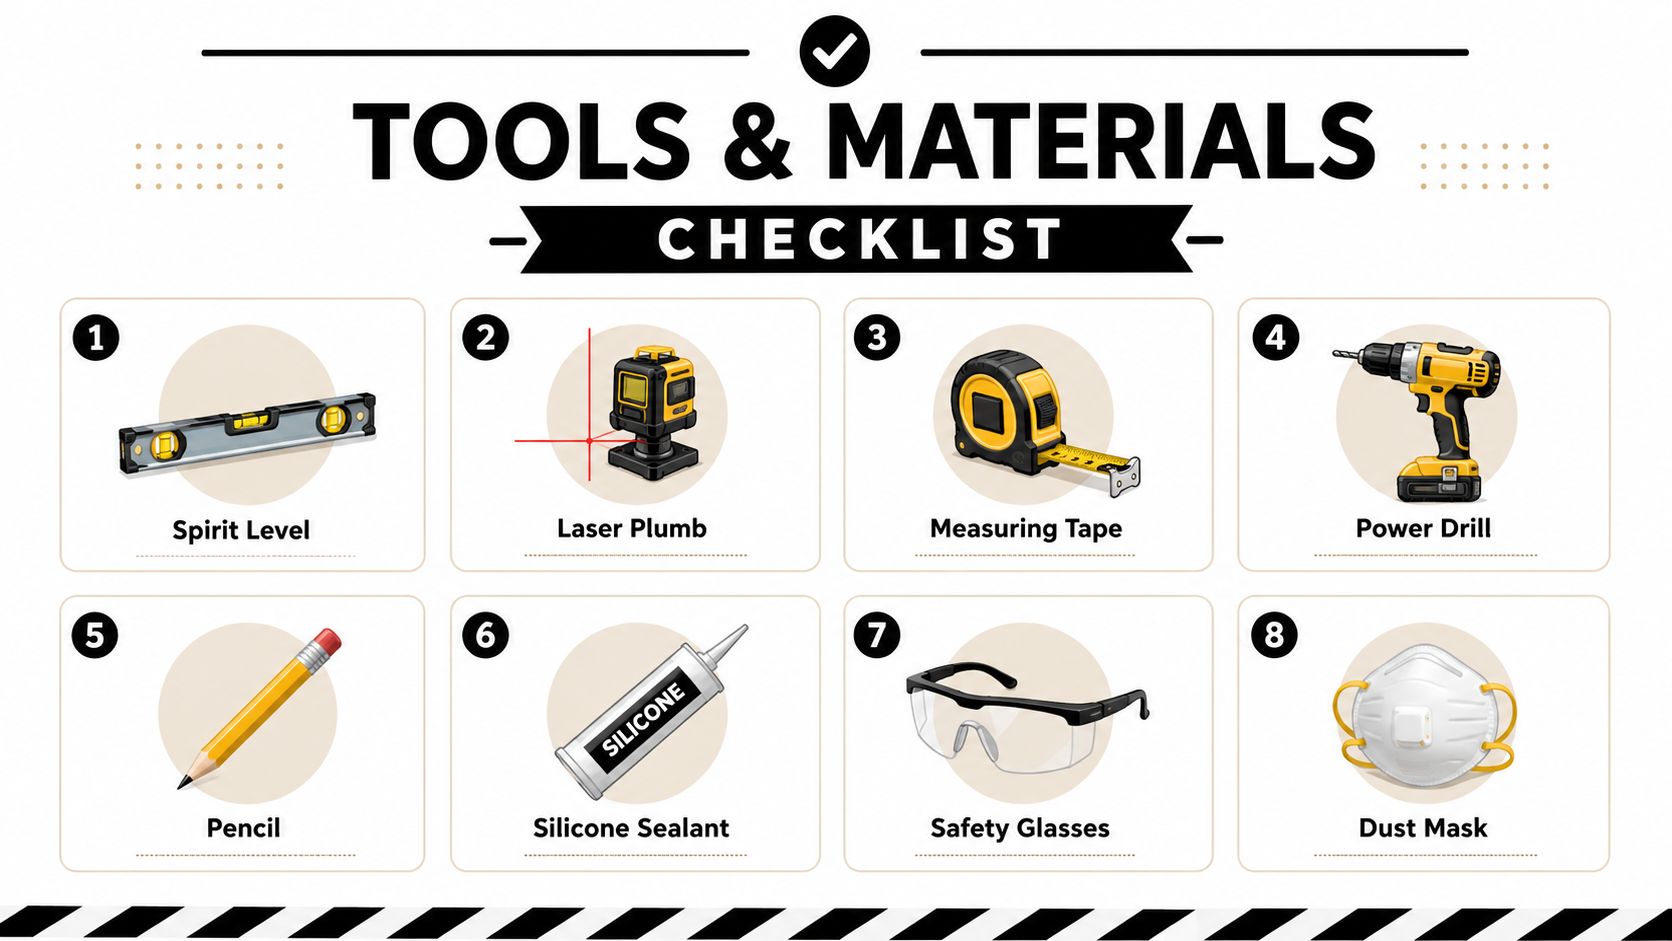
A numbered checklist showing essential tools and safety equipment for a home improvement or installation project.

The tools that matter on site

The essentials are straightforward: a spirit level, a laser plumb tool, a measuring tape, a pencil, a power drill, the correct drill bits for the wall type, bathroom-grade silicone, safety glasses, and a dust mask. For awkward openings, angle finders and paper templates earn their keep fast, especially on neo-angle showers or rooms with non-standard corners. A template is often the difference between a clean fit and a glass order that's wrong on day one.

Tile type matters just as much as the tool. Porcelain and large-format surfaces usually need careful drilling and a slow, controlled approach, while hollow-sounding tiles can crack if fixings bite into a weak bond. If the tile face sounds detached, the installer should stop and work out why before any bracket goes up.

Site check: the wall should be plumb enough for the chosen screen, not just “close enough” to look fine in photos.

The checks that prevent callbacks

Waterproofing cure and substrate stability matter before any screen is installed. If the membrane hasn't cured properly, or the screed fall is wrong, the screen can only hide the issue for a while. The same goes for a bath lip or shower hob that isn't structurally sound, because fixings need something firm behind them.

For Melbourne owners briefing a builder or tiler, a clean preparation list helps. Confirm the opening dimensions at multiple points. Check for movement in the tiled surface. Make sure the fixing zones are ready for screws. Then verify that the bathroom has reached the stage where measuring makes sense, not just the stage where the tiles look finished.

Melbourne Tiling Services P/L also fits into this workflow as a renovation contractor that handles bathroom projects, tiling, waterproofing and screen installation coordination, which is useful when the site needs more than a hardware supplier can manage. For practical background on the screening process, the company's shower screen information is linked to tiling completion and measured after the tiling stage, which is the right order for accuracy.

Measuring, Fitting and Fixing the Screen

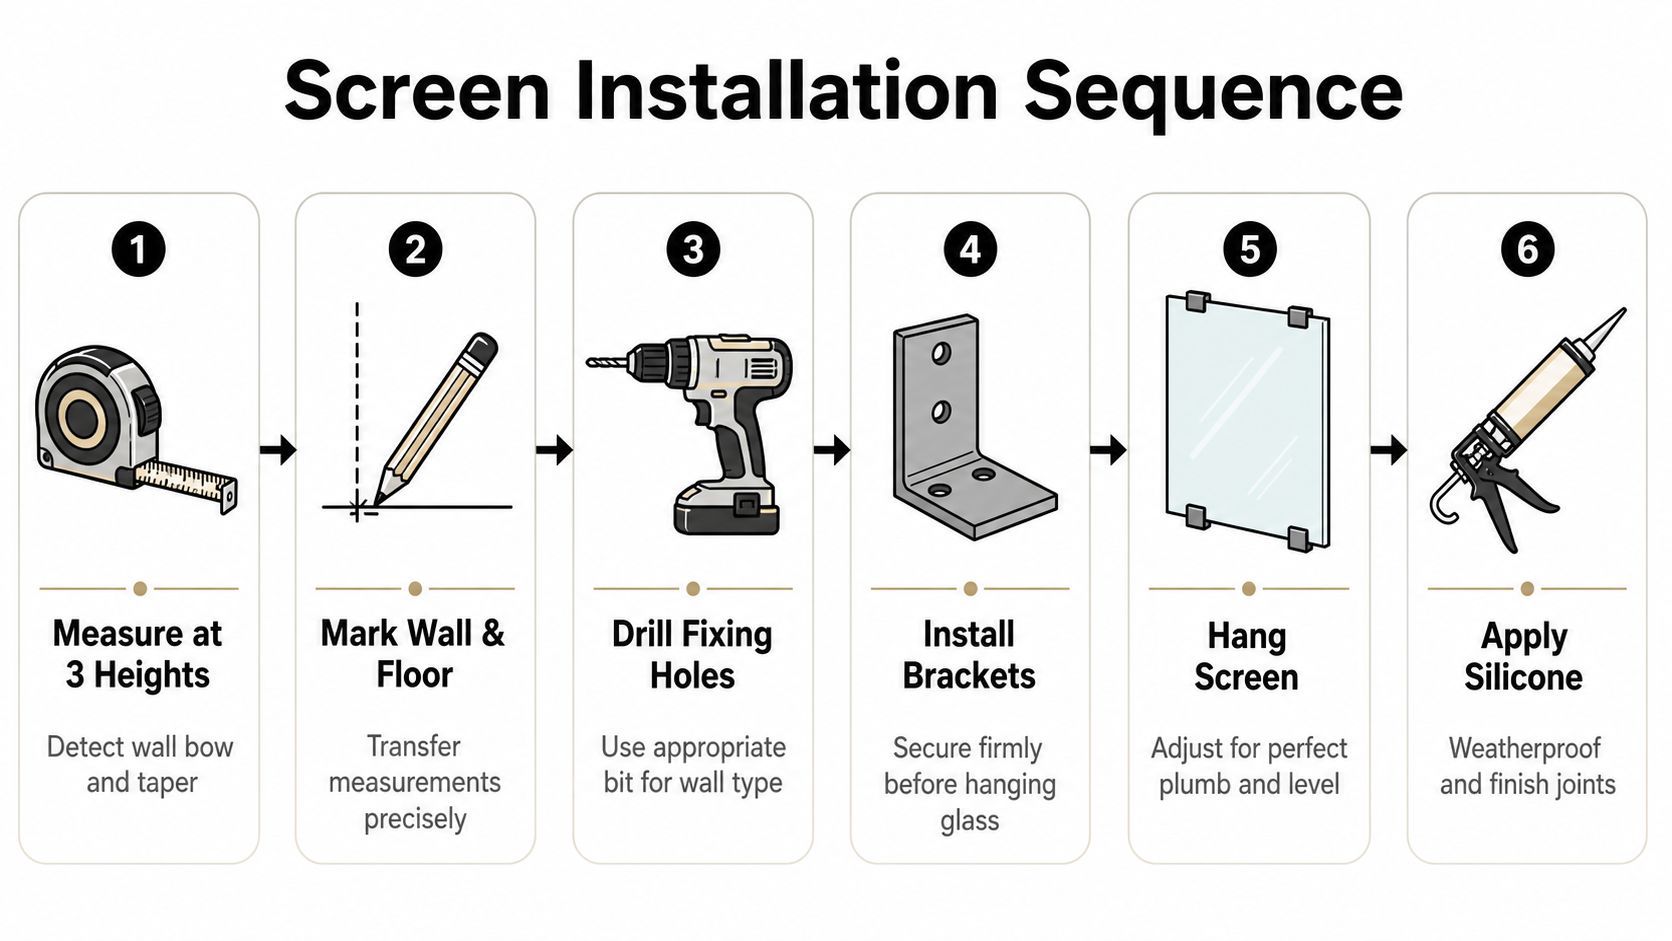
A semi frameless unit only behaves properly when the measuring is honest. The best installers don't measure once and hope, they check the opening at multiple heights to pick up wall bow, taper and any twist between the top and bottom of the shower. That matters because even a neat-looking wall can drift enough to change the way a door closes.

A six-step infographic illustrating the professional installation sequence for a semi frameless shower screen.

Reading the opening before you drill it

The first decision is whether the opening can take standard panels or needs custom fabrication. If the measurements vary too much from top to bottom, forcing a standard piece into the space just creates stress at the hinges and a weak seal line. That's when packers, shims, or a different panel configuration become part of the solution, not an optional extra.

Australian trade guidance notes that installers may need to measure at several points and, for irregular openings, use angle tools or templates to map the space before fabrication. That matters in renovated bathrooms because old tiles rarely give you a perfect factory opening. The critical question isn't whether the screen is semi frameless, it's whether the wall geometry will let the system sit true.

Fixing points and glass specification

For bath or shower edge fixing, the wall profile should sit 5 to 10 mm in from the edge of the bath or inside the bath lip, then be fixed tightly with screws suited to the substrate. That detail sounds small, but it governs how the screen lands, how the seal line behaves, and whether water runs back into the shower or escapes sideways. The wrong offset often shows up later as a gap that never quite seals.

Semi frameless systems sit in the middle ground for a reason. They use 6 to 8 mm glass rather than the 4 to 5 mm commonly seen in framed screens, while avoiding the heavier 10 to 12 mm glass typical of many frameless setups. That middle specification affects hinge selection, channel depth and how much forgiveness the screen has on a real bathroom wall.

The cost example in the verified data shows why the middle ground matters. One comparison put semi frameless glass at AUD 320 versus AUD 600 for frameless glass, with semi frameless hinges at AUD 180 versus AUD 400 for frameless hinges, and total installed cost at AUD 850 versus AUD 2,100, a AUD 1,250 difference, or about 59.5% less in that scenario (source).

The good install is rarely the one with the fanciest hardware, it's the one that matches the wall.

Waterproofing, Sealing and Leak Prevention

The hard question is whether the leak is coming from the screen or from the bathroom behind it. Most of the time, the screen is only showing you a problem that already existed in the membrane, the fall, or the grout line. A semi frameless screen can control splash, but it can't correct a failed waterproofing system.

The line between screen performance and waterproofing failure matters for Melbourne property managers and homeowners alike. A replacement screen won't cure a membrane defect, just like a new hinge won't fix a cracked base. The right diagnosis starts with the substrate, then moves outward to the seal and fixing details.

Australian installation guidance is very specific about sealing. Apply a fine bead of bathroom-purpose silicone vertically and horizontally only on the outside perimeter of the screen, not inside the fixed area, and leave the shower unused for 24 hours so the silicone can cure properly (installation guide). That outside-only seal matters because trapping moisture inside the fixed zone is a fast route to mould and hidden deterioration.

A careful leak check should happen after the silicone has cured and before the bathroom goes back into service. The point is to see where water tracks, not to drown the room and hope for the best. If water still escapes after a proper seal, the answer is usually not “more silicone”, it's checking the floor fall, wall junctions, bath lip, or a waterproofing problem that needs attention from a tiler or registered builder.

For background on membrane work and shower waterproofing principles, this Melbourne shower waterproofing guide is worth reading alongside the screen spec. The screen is the final piece, not the waterproofing strategy.

Time, Cost and Budget Planning for Melbourne Renovators

Semi frameless screens sit in a practical part of the Melbourne market, but the price on the quote only tells part of the story. Melbourne-focused pricing guides place installed semi frameless screens in the middle band, below frameless and above framed options, which is why they are often chosen by homeowners who want a cleaner finish without paying for the heavier hardware and custom fabrication that frameless work usually brings (Melbourne pricing guide). That middle ground suits plenty of bathrooms, but only if the walls, base and waterproofing are already behaving.

Cost comparison by type

Screen Type Glass Thickness Installed Cost Range (AUD) Typical Use Case
Framed 4 to 5 mm 350 to 800 Budget bathroom updates
Semi frameless 6 to 8 mm 600 to 1,400 Bathroom renovations seeking a premium look without full frameless cost
Frameless 10 to 12 mm 900 to 2,500+ Higher-end custom bathrooms

Those ranges make sense once you look at what changes the job on site. The Melbourne pricing guide also points to labour sitting around AUD 45 to 65 per hour, while the Melbourne shower screen installation cost guide shows semi frameless supply-and-install packages that vary with size, access, and how much correction the walls need. A neat opening, square corners and sound tile fixing keep the number down. Out-of-plumb walls, tight reveals and awkward plumbing cutouts push it up quickly.

Time follows the bathroom, not the brochure. A standard install moves cleanly when the substrate is ready and the opening is square, but uneven walls, bowed tiles or a base that is slightly out can turn a simple fit into a second visit, extra packing and custom trimming. In a full renovation, the screen should be the later trade after tiling and waterproofing are finished, because installing early only makes the sealing and alignment problems harder to fix.

Budget for the screen as part of the room, not as a separate purchase. If you are comparing quotes, ask what the installer is allowing for wall correction, sealing, and any return trip needed after silicone cure time. A cheaper figure can become the dearer job if the installer is glossing over the substrate or hoping the glass will hide geometry that should have been corrected first.

Safety, Compliance and When to Hire Registered Builders

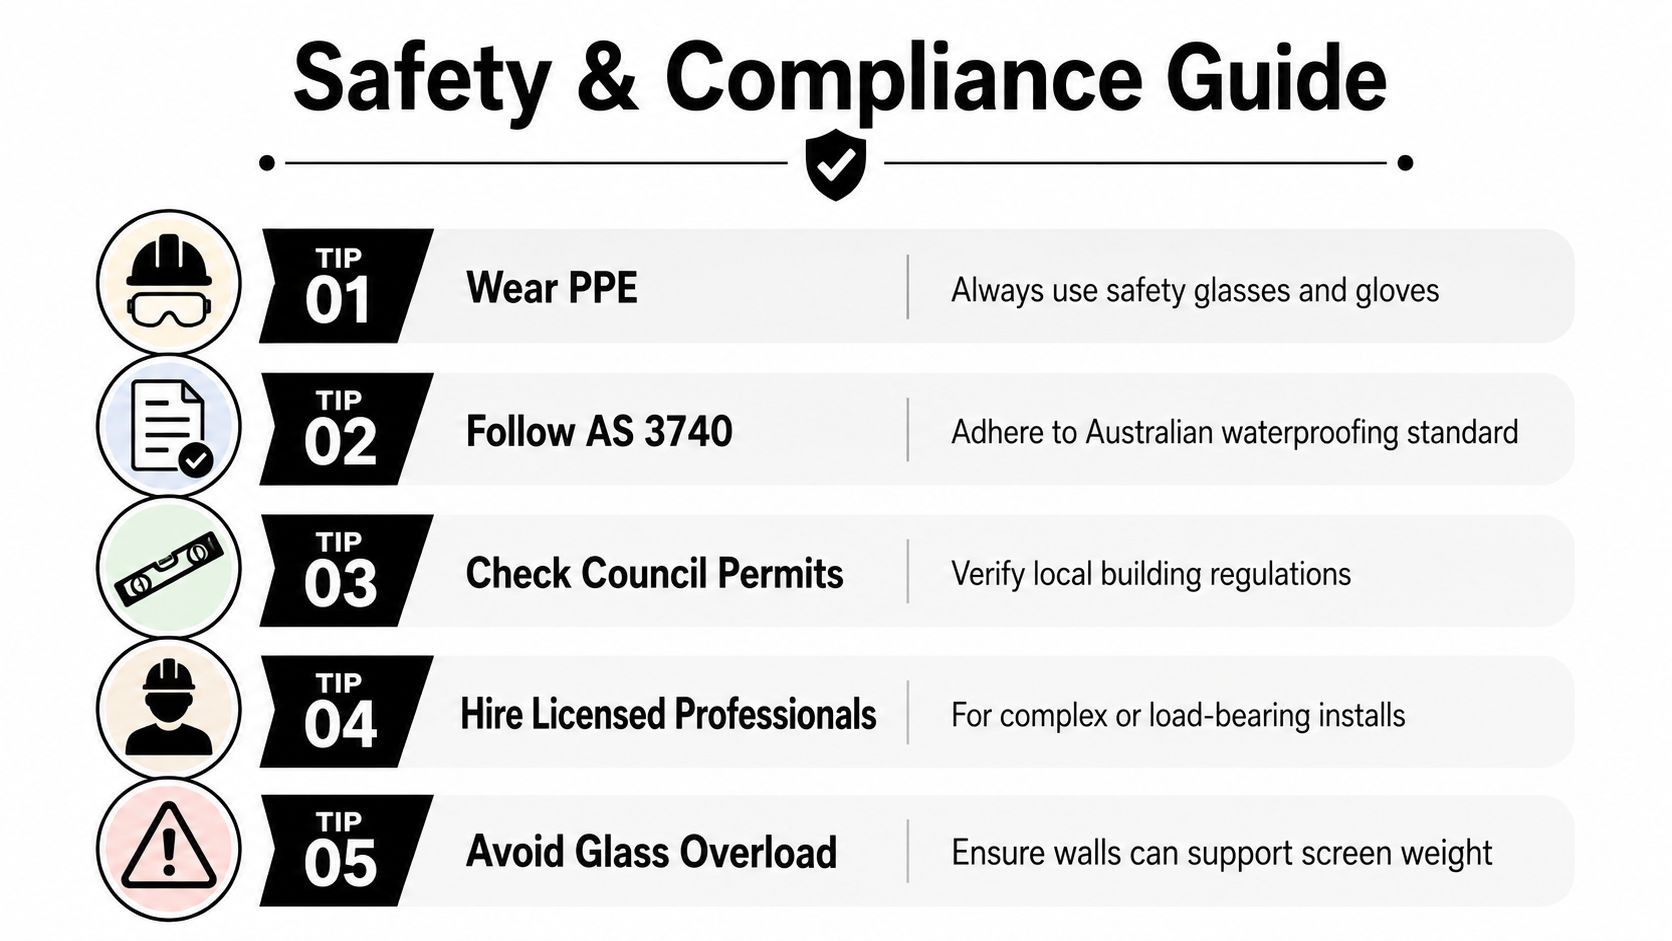
Australian compliance isn't paperwork for the sake of it, it's what keeps a shower screen safe under real use. Technical guidance says shower screen installation should comply with AS 3740, and in commercial or higher-risk residential settings frameless screens may need glass gussets, braces or head supports for stability and safe performance (technical appendix). That's a reminder that the glass is part of a load-bearing and safety-critical assembly, not just a decorative panel.

The fixing method matters too. Fixed panels may be attached to the wall and floor with a securely fixed channel, and the glass should be anchored firmly with glazing wedges or structural-grade silicone (technical appendix). Once you're dealing with larger panels, heavy hardware or an awkward opening, the margin for error gets very small.

A safety and compliance guide infographic listing five essential tips for installing shower screens safely.

When the job belongs with registered builders

Hire registered builders when the shower sits inside a full bathroom renovation, when waterproofing remediation is needed, when tiles are large-format or hard to drill cleanly, or when the opening geometry is already compromised. Those jobs benefit from coordinated trades, because the tiler, plumber, waterproofing contractor and screen installer all affect the outcome. Melbourne Tiling Services P/L works in that coordinated model as a Registered Unlimited Builder, which suits installations where the screen is one piece of a larger build.

The safest handling habits

Heavy glass isn't forgiving. Keep it upright, move it with two people, protect tile edges, and never assume a 6 to 8 mm toughened panel is “light” just because it's thinner than frameless glass. The panel is still a large, fragile surface, and a slip on a wet bathroom floor can turn a straightforward install into a dangerous one.

For regulatory background on shower screen compliance, the frameless shower screen regulations guide is a useful reference point. If the site feels even slightly uncertain, the right move is to slow down and get the substrate, compliance and fixing method checked before the glass goes anywhere near the wall.


If you're planning a bathroom renovation in Melbourne and want the screen fitted after the waterproofing, tiling and wall geometry are properly sorted, Melbourne Tiling Services P/L handles that coordination as part of its bathroom renovation work. Visit Melbourne Tiling Services P/L to organise a quote, ask about shower screen installation, and get the job measured after the tiling is complete.

Frameless Shower Screen Melbourne: Your 2026 Guide

You're usually looking at the shower screen near the end of the job.

The tiles are selected. The vanity is in. Tapware finishes are locked in. The waterproofing, falls, screed, set-out, and trim details have already done the heavy lifting. Then one decision changes how the whole room reads. Open and architectural, or boxed in and busy.

That's why a frameless shower screen in Melbourne shouldn't be treated as a simple glass add-on. In a proper bathroom renovation, it's part of a larger system. The screen has to suit the layout, respect the waterproofing, work with the tile joints, and perform well in daily use. If the renovation is being run by registered builders, that coordination is much easier to get right because one party is looking at the room as a whole, not just one trade item.

Table of Contents

The Final Touch to Your Melbourne Bathroom Renovation

A lot of homeowners get to the same point. The renovation has been disruptive, expensive, and full of decisions. Then the bathroom finally starts to look like a room again. You can see the tile pattern, the vanity proportions, and the way the light moves across the walls. The shower screen becomes the final call that either keeps that space feeling open or cuts it up visually.

In Melbourne renovations, that choice matters even more because many bathrooms are compact, older, or shaped by earlier building methods. A bulky enclosure can make a neat room feel tight. A well-planned frameless screen can do the opposite. It keeps sightlines cleaner and lets the tilework carry more of the design.

That's the appeal. Frameless glass feels quiet. It doesn't compete with stone, porcelain, feature tiling, or brushed metal finishes. It also tends to suit the direction many homeowners want from a modern bathroom renovation, which is less visual clutter and better use of light.

A frameless screen only looks effortless when the renovation behind it has been organised properly.

From a builder's point of view, the screen isn't the hero by itself. It's the finishing element that reveals whether the preceding work was done with care. If the walls are out, the falls are poor, the niche projects too far, or the waterproofing has been handled badly, frameless glass won't hide any of it. It will expose it.

That's why registered builders often push the discussion earlier than homeowners expect. The right time to decide on a frameless shower screen in Melbourne is during layout and waterproofing planning, not after the tiler has packed up.

What Exactly Is a Frameless Shower Screen

It's not just glass without a frame

A frameless shower screen is a shower enclosure made without the perimeter metal frame you see in older or more budget-driven systems. The structure comes from the glass itself, along with hinges, brackets, clamps, channels, or other discreet fixings.

In Australia, frameless shower screens are generally built with 10 mm toughened safety glass and must comply with AS 2208, with industry guidance also noting a common finished height of about 2100 mm for local supply and installation norms, including Melbourne bathroom renovations, as outlined in this guidance on frameless shower screen safety. That's a practical point, not just a specification. The glass has to do the work that a frame would otherwise help with.

This is why homeowners often notice frameless systems feel heavier, cleaner, and more premium at the same time. The edges are polished, the hardware is more deliberate, and every alignment line matters because there's nowhere to hide mistakes.

Shower Screen Types Compared

Feature Frameless Semi-Frameless Framed
Appearance Minimal, open, premium Lighter than fully framed, but still defined by metal lines Most visually enclosed
Structure Thick toughened safety glass with discreet fixings Mixed support from glass and partial framing Frame carries much of the structure
Water containment Good when well designed, but more sensitive to layout and sealing details Often easier to manage in tighter or splash-prone layouts Usually the most forgiving for sealing
Cleaning Fewer frame edges to collect grime Moderate cleaning effort More frame lines and corners to maintain
Cost position Usually the premium option Mid-range Usually the most budget-oriented
Best fit Design-led renovations with solid wet-area planning Good balance of looks and practicality Utility-first bathrooms and tighter budgets

Where frameless works well and where it doesn't

Frameless works well when the bathroom layout supports it. That usually means sensible shower orientation, enough room for door swing if hinged, good falls to the waste, and clean set-out around tiles, hob lines, or recesses.

It's also a strong option when the renovation is aiming for visual simplicity. If you've invested in rectified porcelain, stone-look slabs, or a custom vanity, a framed screen can interrupt the result. Frameless lets those finishes read properly.

There are trade-offs though.

  • Water control matters more: Frameless systems rely on layout, seals, clearances, and installation accuracy. They aren't as forgiving as framed units in difficult splash zones.
  • Tolerance is tighter: If walls are out of square or the floor isn't true, those issues have to be managed before fabrication.
  • Upfront cost is higher: You're paying for thicker glass, premium hardware, custom measurement, and more exact installation.
  • Not every room suits a hinged door: In narrow recesses, conflict points with vanities, toilets, or towel rails can make the design awkward fast.

A good renovation team doesn't push frameless glass into every bathroom. They use it where it improves the room and where the rest of the build can support it.

Design and Customisation for Your Bathroom

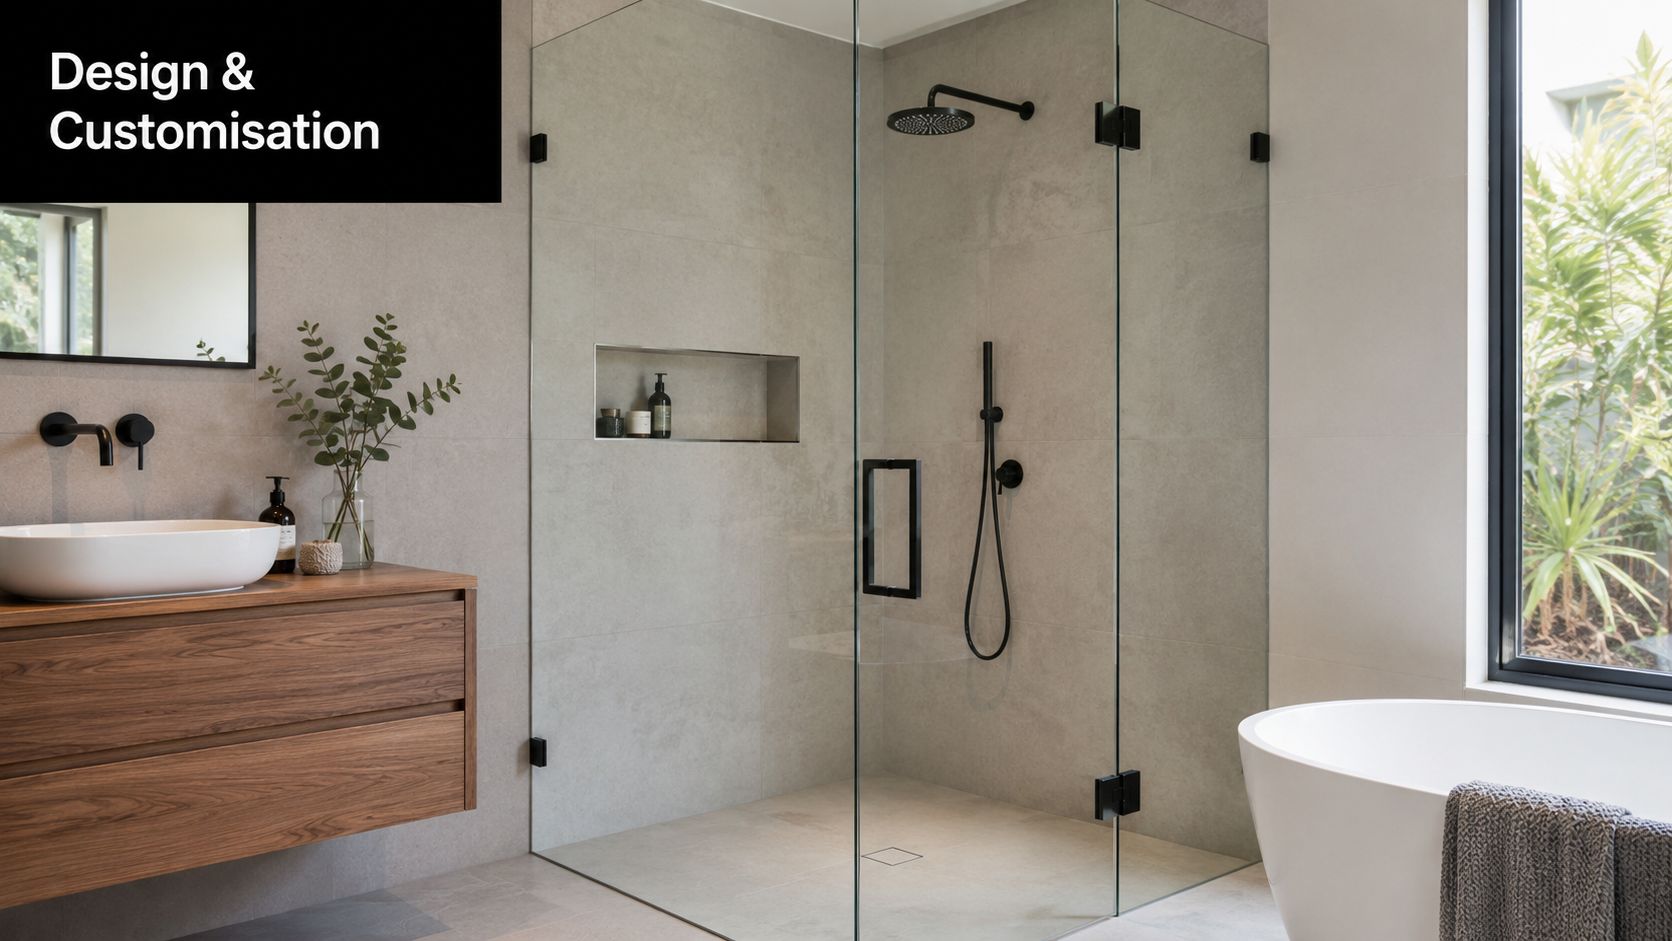
A modern bathroom featuring a frameless glass shower screen, wooden vanity, and a freestanding white bathtub.

The visual decisions homeowners notice first

Once the layout works, design choices start to matter, allowing a frameless shower screen in Melbourne to be tuned to the rest of the renovation rather than dropped in as a standard item.

The main variables usually come down to glass appearance, hardware finish, and door operation. Clear glass keeps the room feeling larger. Frosted or obscure treatments can add privacy. Tinted glass can work well in darker, moodier bathrooms, but it needs to be balanced carefully with the tile colour and available light.

Hardware changes the character quickly. Chrome stays neutral. Matte black creates stronger outlines. Brushed brass or warm metallics can tie the screen into tapware, cabinet handles, and mirror trims if the rest of the palette has been resolved properly.

A few common configurations include:

  • Fixed panel only: Good for open walk-in layouts where splash can be controlled by room planning.
  • Hinged door and panel: Often chosen when full enclosure and easier heat retention matter.
  • Sliding arrangement: Useful where swing space is limited.
  • Return panel setup: Helps when the shower needs more controlled containment from two sides.

Practical rule: Choose the door style after the room has been measured, not before.

The structural decisions that sit behind the look

Not every design idea is buildable in the exact way it's sketched. Technical guidance from the Australian Glass and Window Association notes that the maximum safe width of a fixed frameless shower panel depends on glass thickness, which means sizing is a structural decision affecting door swing stability, hinge loading, and deflection control, not just an aesthetic one, as explained in AGWA's technical note on shower screens.

That's why a good builder or screen specialist will sometimes reshape the design slightly. They may reduce a door width, add a return panel, alter hinge placement, or recommend a different opening method. Those decisions protect long-term alignment and reduce stress on the hardware.

In practice, the best-looking result is usually the one that respects those constraints early. Trying to force a wide dramatic panel into a room that doesn't support it often creates a screen that looks elegant on day one and troublesome later.

Why Professional Installation Is Non-Negotiable

A shower screen sits on top of critical wet-area work

Homeowners often think of shower screen installation as the last easy step. In reality, it lands on top of the most failure-sensitive part of the bathroom. By the time the glass arrives, the waterproofing, falls, tile build-up, wall straightness, and fixing locations have already determined whether the result will perform well.

That's why professional installation matters. The screen has to be fitted in a way that works with the wet-area system, not against it. Poor drilling locations, bad sealant practice, incorrect clearances, and sloppy set-out can all create problems that don't show up on handover day.

Australian guidance on shower screens points to an important issue that sales-led content often misses. Waterproofing, leak risk, and compliance trade-offs should drive the product choice in many bathrooms, especially in high-use rentals or showers with existing defects, where substrate quality and installation method can matter more than aesthetics, as discussed in this shower screen and wet-area guidance.

If you're trying to understand the wet-area side before choosing glass, it helps to review how bathroom waterproofing in Melbourne fits into the renovation sequence.

What a proper installation process looks like

A professional process should be calm, methodical, and measured twice before anything is fabricated or fixed.

A diagram outlining the professional five-step installation process for a high-quality frameless shower screen.

Key steps usually include:

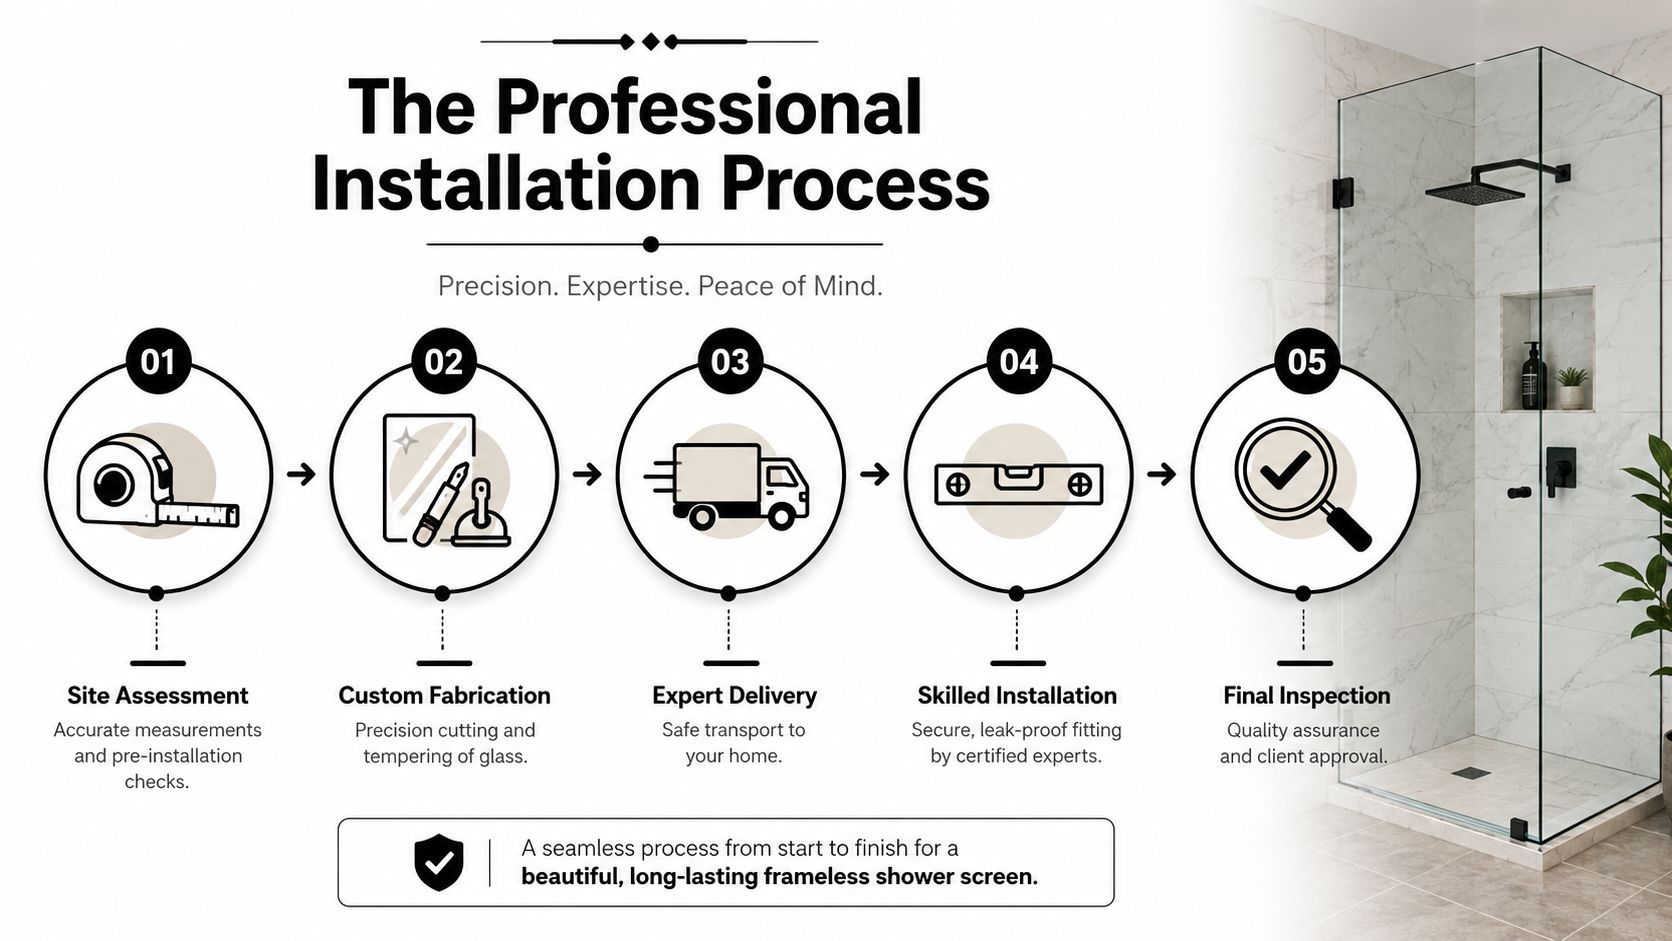
  1. Final measure after finishes are complete: Frameless glass should be measured from actual finished surfaces, not drawings alone.
  2. Assessment of tile lines and substrate condition: The installer needs to know where fixings can go and what sits behind the tile.
  3. Fabrication to the measured opening: Out-of-square conditions and required tolerances are built into the glass and hardware plan.
  4. Controlled installation on site: Packing, levelling, hinge adjustment, alignment, and sealing all need patience.
  5. Operational check: The door should swing correctly, gaps should be consistent, and the water path should make sense.

Where a registered builder is managing the bathroom renovation, that coordination is easier because the screeder, waterproofer, tiler, and screen installer aren't working in isolation. Melbourne Tiling Services P/L is one example of a company that handles bathroom renovations, waterproofing, tiling, and frameless shower screen installation under the one project scope.

Cheap installs usually fail in familiar ways

The same defects keep appearing.

  • Misaligned doors: Usually caused by bad measure-up, rushed hinge positioning, or movement in weak fixing zones.
  • Persistent leaks: Often linked to poor falls, wrong panel layout, or unrealistic expectations about what an open frameless design can contain.
  • Cracked tiles around fixings: A sign the installer treated the job like general hardware fitting instead of wet-area work.
  • Premature hardware issues: Loose hinges, dragging doors, and seal failures often come back to the original install quality.

If the installer never asks about waterproofing, substrate, or wall straightness, they're only looking at the glass, not the bathroom.

That's the difference between a product install and a renovation-standard install. In a proper bathroom renovation, the frameless screen is fitted as part of a system.

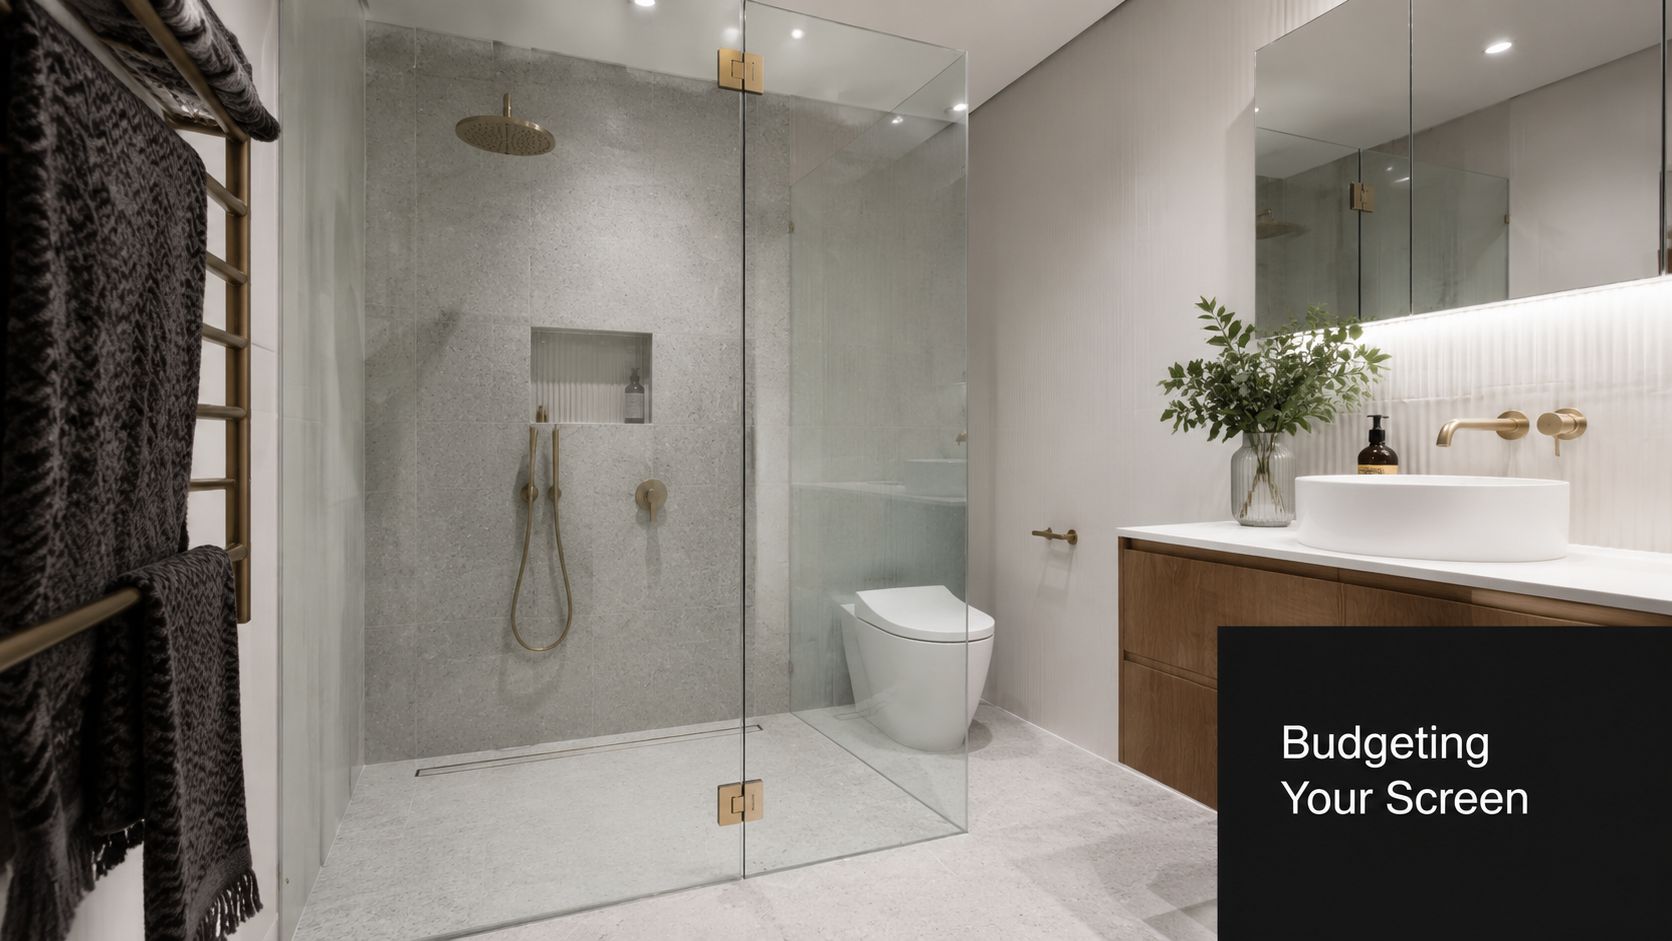
Budgeting for Your Frameless Shower Screen in Melbourne

A modern bathroom featuring a frameless glass shower screen with brushed brass fixtures and wood vanity.

What you're actually paying for

A frameless shower screen quote usually has three moving parts. The glass, the hardware, and the labour. Homeowners often compare only the bottom-line number, but that misses where quality differences sit.

For the labour side alone, Melbourne's market is active. Airtasker lists 90 local shower screen installation services in Melbourne, and its service page shows an average installer cost of $150–$350, while also noting common screen dimensions of 900 mm to 1500 mm wide, which gives a useful benchmark for installation only, not a full premium frameless package, as shown on Airtasker's Melbourne shower screen installation page.

The rest of the quote depends on what's being supplied and how custom the job is. If you want a clearer breakdown of labour and scope, this guide to shower screen installation cost is a practical place to start.

What pushes the quote up

Not all frameless screens are equal to fabricate or install. Some bathrooms are straightforward. Others need custom work because the room itself is difficult.

Common quote drivers include:

  • Custom sizing: Non-standard openings, returns, and recesses usually need exact fabrication.
  • Complex glass processing: Cut-outs around fixtures, nib walls, or unusual details add work.
  • Premium hardware selections: Hinge finish, handle style, and mounting method all affect cost position.
  • Access and handling: Carrying heavy glass through tight internal spaces is slower and riskier than a clear run.
  • Layout complications: Older bathrooms often introduce tolerance issues that require more planning and fitting time.

A cheap quote can still be the expensive option if it leaves out site complexity, proper adjustment, or coordination with the bathroom renovation team. Good quotes are usually specific. They tell you what's included, what assumptions have been made, and what could change if site conditions differ from the original measure.

How to Choose a Trusted Melbourne Installer or Builder

A step-by-step guide on how to choose a professional frameless shower screen installer in Melbourne.

Questions worth asking before you sign

The product matters, but the person fitting it matters just as much. If the shower screen is part of a larger bathroom renovation, a registered builder usually gives you better accountability because one party is responsible for how the tiling, waterproofing, carpentry, and glazing decisions meet on site.

Ask direct questions. Good operators won't dodge them.

  • Who is responsible for the final measure-up: If no one owns this clearly, errors get blamed across trades.
  • How do you handle out-of-square walls: The answer should involve actual tolerance planning, not “we'll make it work”.
  • What is included in the install scope: You want clarity on hardware, seals, drilling, adjustment, and final fit.
  • How is waterproofing protected during installation: This is one of the most important questions in the room.
  • Who coordinates defects if there's a problem later: Multiple subcontractors can create a blame loop if nobody is leading the renovation.

The safest choice is usually the contractor who talks most clearly about risk, not the one who talks most about style.

Older Melbourne homes need better planning

The value of experience is clear. Guidance aimed at Melbourne homeowners points to a real gap in most consumer content. Fit, tolerance, and awkward-layout planning are major issues in older bathrooms, especially where custom-made frameless screens may be necessary and hardware adjustment has limits, as discussed in this Melbourne frameless shower screen planning article.

In practical terms, watch for these red flags:

  • Walls that aren't straight: Frameless glass doesn't hide taper or bowing.
  • Tight recesses: A hinged door may clash with a vanity, toilet pan, or heated towel rail.
  • Protruding services: Pipes, ledges, and trims can complicate both measurement and door path.
  • Sloping ceilings or heritage irregularities: These often push the job into custom territory.

If the installer treats every bathroom like a standard square opening, move on. Melbourne housing stock includes plenty of rooms that need custom thinking. A builder who manages bathroom renovations regularly will usually spot the risks before the glass is ordered.

Frequently Asked Questions

Do frameless shower screens leak more

They can if the layout is wrong or the installation is rushed. A frameless design depends heavily on falls, panel placement, door swing, seals, and how the shower is used. In a well-planned bathroom renovation, they perform well. In a poorly planned one, they expose mistakes quickly.

Why is there a small gap around the door

Because the door has to move freely and the hardware needs operating clearance. Frameless systems aren't built like framed boxes. A small gap is normal. The important question is whether the overall design controls water in the right direction.

Can frameless glass work in an older bathroom with uneven walls

Sometimes yes, but not always in the exact style you first imagined. Older homes often need custom measurement, hardware adjustments, or a different door configuration. In some rooms, a fixed panel or semi-frameless option is more practical than a hinged frameless recess door.

What's the best way to keep the glass clean

Use a squeegee regularly and don't let soap residue sit on the glass for long periods. Keep the hardware dry where possible and avoid harsh abrasive cleaners. If hard water marks are already established, don't attack the glass aggressively. Start with the mildest suitable method and protect the surrounding finishes.

Should the shower screen be chosen before waterproofing

Yes, or at least the type and likely layout should be. The screen affects opening size, fixing logic, and water containment strategy. If you're planning the wet area from scratch, it helps to understand how to waterproof a shower properly before the glass is measured.


If you're planning a frameless shower screen as part of a bathroom renovation, Melbourne Tiling Services P/L can help coordinate the full job from waterproofing and tiling through to final screen installation, with registered builders overseeing compliance, finish quality, and long-term performance.

Melbourne Frameless Shower Screens: Design & Cost Guide 2026

You're probably looking at a bathroom that still works, but doesn't feel good to use. The shower may be boxed in by heavy framing, the room feels tighter than it is, and every edge seems to collect soap scum. In many Melbourne homes, that's the point where people start thinking about a frameless screen.

A frameless shower screen can absolutely change the feel of a bathroom. It opens sightlines, lets tilework do the visual heavy lifting, and gives the room a cleaner, more modern finish. But in a real renovation, the screen isn't a standalone upgrade. It sits at the end of a chain of decisions about layout, waterproofing, falls, wall straightness, hardware, and compliance.

That's where many projects go wrong. Clients often compare screens by appearance alone, then find out too late that the chosen layout doesn't contain water well, the door swing clashes with the vanity, or the glass can't be safely detailed the way they imagined. A good result comes from treating the shower screen as part of the full bathroom build, not as an afterthought.

Table of Contents

Elevating Your Bathroom with a Frameless Shower Screen

A dated bathroom usually has the same problems. The screen chops the room into smaller visual zones, aluminium edges catch grime, and the shower feels like a separate box rather than part of the room. Even when the floor area is reasonable, the bathroom can still feel cramped.

A frameless screen changes that because it removes visual bulk. You see tile, light, stone, and fittings first. The glass becomes part of the architecture rather than the feature itself. In an ensuite, that often makes the room feel calmer. In a family bathroom, it can make the whole space read as newer even when the footprint hasn't changed.

What matters is using the right frameless solution for the room you have. A wide, open panel can look excellent in a large bathroom with generous circulation space. In a tight room, the best result may be a smaller fixed panel, a door with inline glass, or a more contained corner layout.

A good shower screen should make the bathroom easier to live with, not just nicer in a photo.

In full bathroom renovations, the most successful frameless shower screens are the ones designed around how the room will be used day after day. That means thinking about cleaning, splash control, who uses the bathroom, where towels sit, where the showerhead points, and how the waterproofing and tile set-out support the final glass.

Frameless vs Framed Screens Understanding Your Options

The first decision isn't hardware finish or handle style. It's which screen type suits the renovation brief. Most bathrooms come down to three categories: framed, semi-frameless, and frameless.

What changes visually and practically

A framed screen uses metal framing around the glass. It's usually the most forgiving option when budget is tight or the room needs stronger water containment. It does, however, create more edges, more visual interruption, and more places for residue to build up.

A semi-frameless screen sits in the middle. You still get some visible framing, but less than a fully framed system. For many households, it's a practical compromise. It can deliver a cleaner look than a traditional framed screen while keeping more structure around the enclosure.

A frameless screen strips the enclosure back to glass and hardware. That's what gives it its premium and sought-after aesthetic. The room feels more open, and the tilework stays visible. The trade-off is that detailing has to be much sharper. Measurements, wall condition, hardware selection, and shower layout all matter more.

Quick comparison for renovation planning

Feature Framed Semi-Frameless Frameless
Visual style More traditional and defined Cleaner than framed, still has visible structure Minimal, open, contemporary
Cleaning More edges and channels to clean Moderate cleaning around partial frame Easier to wipe down due to fewer interruptions
Water containment Generally stronger containment Often a good balance of style and sealing Can be less forgiving if the layout is too open
Flexibility in design Practical for standard layouts Good for many common bathroom plans Best when custom measured and designed carefully
Renovation feel Functional Updated Premium
Budget position Usually lowest Mid-range Usually highest

If your priority is keeping costs down and controlling splash in a busy household bathroom, framed or semi-frameless can make sense. If your priority is a clean architectural finish and uninterrupted sightlines, frameless usually wins.

There's also a maintenance question. Clients often assume frameless means no compromises. In reality, each system has a place.

  • Choose framed when the room is heavily used, the budget is tighter, or containment matters more than appearance.
  • Choose semi-frameless when you want a more current look without going fully into premium detailing.
  • Choose frameless when the bathroom design, tile finish, and overall renovation quality justify a more exacting system.

Practical rule: Pick the screen type after the layout is resolved, not before. The wrong enclosure in the wrong room creates more problems than the right enclosure ever solves.

Choosing the Right Glass and Hardware

The look of a frameless shower screen is simple. The build behind it isn't. Glass thickness, panel width, hardware type, wall support, and finish selection all need to work together.

Glass thickness and panel limits

In Australian practice, frameless shower screens should use safety glass compliant with AS/NZS 2208 and be installed in accordance with AS 1288, with common guidance pointing to 10 mm toughened glass as the standard frameless option and 8 mm generally kept for smaller panels or situations with extra bracing, as outlined in guidance on shower screen glass thickness and installation.

For fixed unframed panels, width matters more than height when you're thinking about deflection. Guidance for Australia and New Zealand recommends a maximum width of 750 mm for 8 mm toughened glass and 1,500 mm for both 10 mm and 12 mm toughened glass, which effectively sets 1,500 mm as a practical upper limit for unframed shower panels according to the Window & Glass Association technical bulletin.

Choosing the Right Glass and Hardware

That's why asking for “thicker glass” isn't enough. Once the panel gets too wide, layout and bracing become more important than adding weight. If a client wants a broad, open walk-in look, the design may need a stabiliser bar, a header, or a different panel arrangement to keep movement under control.

Glass style and hardware finishes

After thickness and sizing are sorted, the visual choices become easier.

  • Clear glass suits most bathrooms because it keeps the room open and shows off feature tiles.
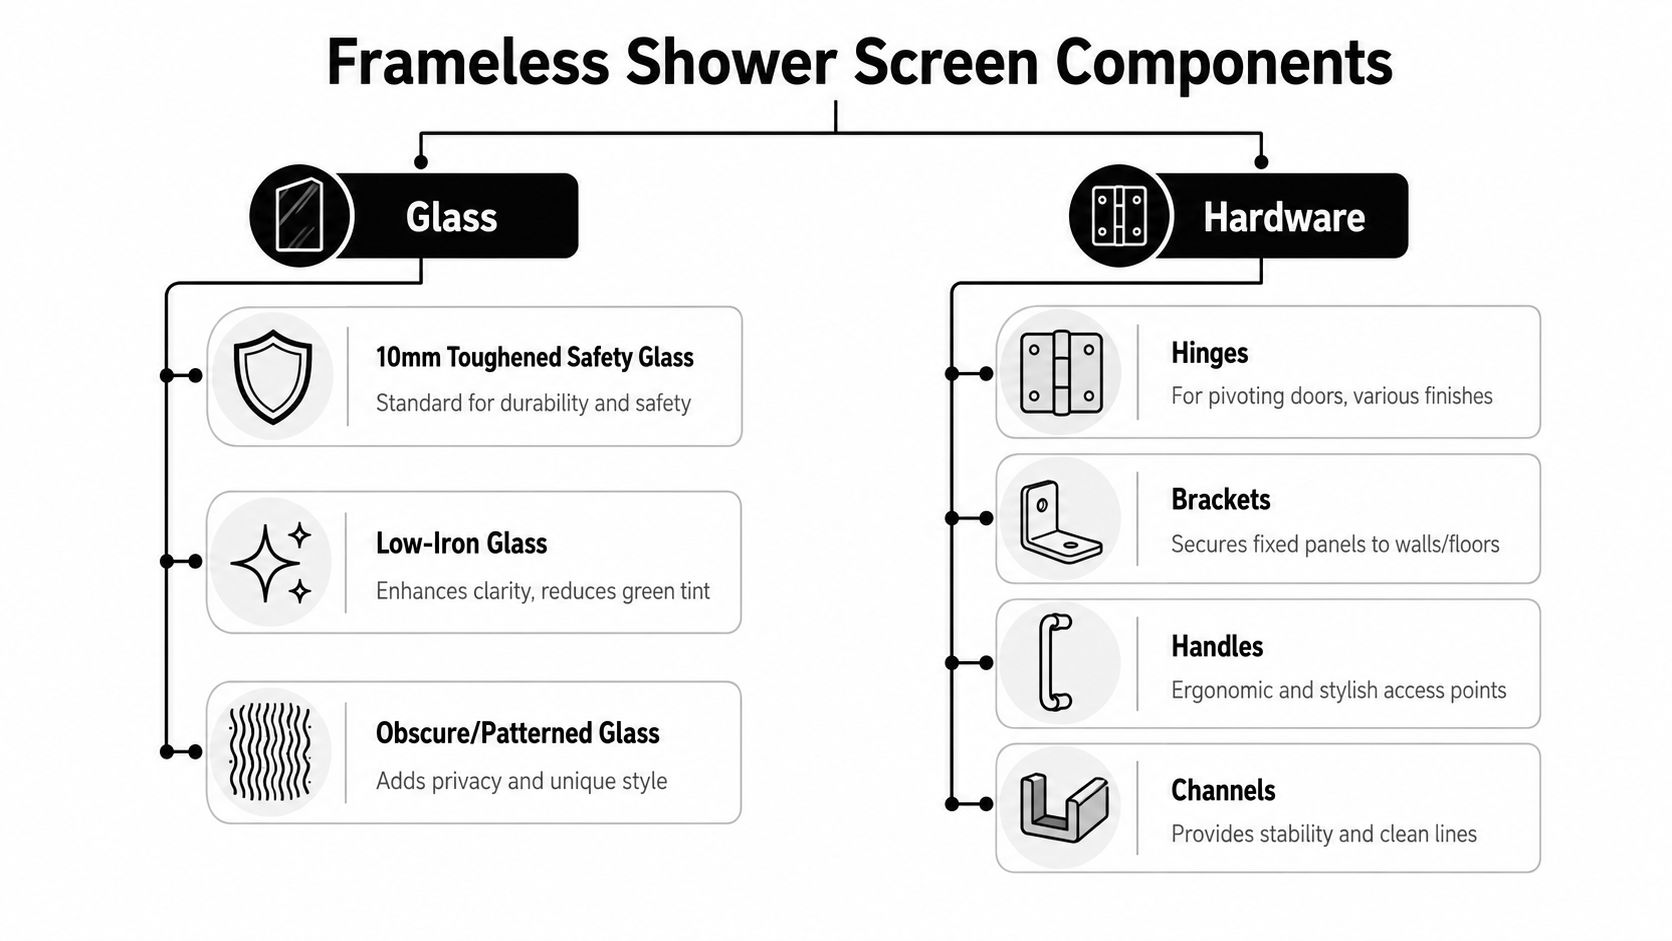
  • Low-iron glass reduces the green tint you see on some glass edges. It's often worth considering when the palette is light, especially with white or pale stone finishes.
  • Obscure or patterned glass gives more privacy and can soften the visual impact of water spots.

Hardware deserves more attention than it usually gets. Hinges, brackets, handles, channels, and stabiliser bars carry the visual style, but they also carry load. The finish has to suit the bathroom, and the hardware has to suit the actual glass weight and configuration.

In practice, these are the decisions that hold up best:

  • Stainless steel fittings are a reliable choice for a clean, modern bathroom.
  • Solid brass hardware is often selected where a heavier, more decorative finish is wanted.
  • Chrome stays popular because it pairs easily with many tapware ranges.
  • Matte black, brushed nickel, and brushed brass can look sharp, but the full room needs to be coordinated so the finish feels intentional.

A well-built frameless screen should feel quiet in use. No obvious flex, no awkward handle placement, and no hardware that looks undersized for the panel.

Designing the Perfect Shower Screen Layout

Most problems with shower screens start at layout stage, not installation day. A screen can be beautifully made and still be wrong for the room. The right layout depends on space, movement, and how water behaves once the shower is running.

Designing the Perfect Shower Screen Layout

Layouts that work in real bathrooms

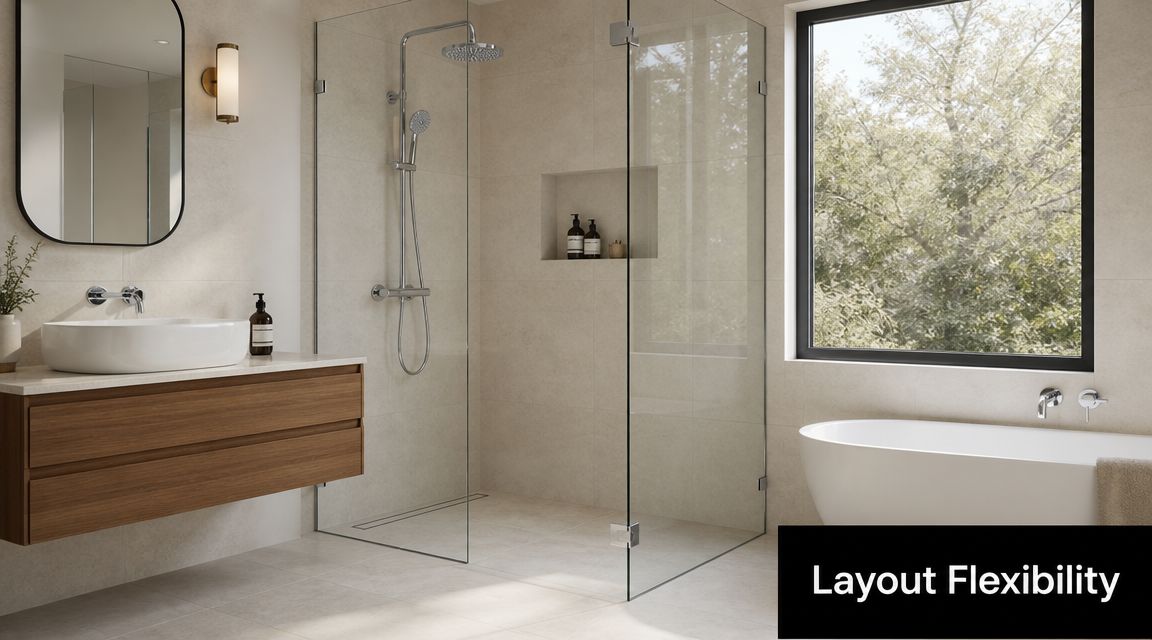
In a small ensuite, a single fixed panel can be the cleanest answer. It keeps the room visually open and avoids the clutter of a swinging door. This works best when the showerhead is positioned to throw water away from the opening and the floor falls are set correctly.

In a standard alcove shower, a door with an inline fixed panel often gives a more controlled result. You still get the frameless look, but entry is more defined and the enclosure usually contains water better than a very open walk-in arrangement.

A corner unit can solve awkward planning in family bathrooms, especially where the vanity, toilet, and doorway are all competing for space. The glass can be arranged to preserve circulation without making the shower recess feel cramped.

For tight rooms where door swing becomes a problem, a sliding configuration can be the practical choice. It won't suit every design style, but it can prevent the door from clashing with a vanity, towel rail, or toilet pan.

The details that decide whether it works

The layout only works if the surrounding details support it. These are the checks that matter most on site:

  • Showerhead placement decides where splash goes. A beautiful open panel can still flood the bathroom if the outlet is aimed toward the opening.
  • Door swing clearance has to be tested against actual room use, not just the plan drawing.
  • Screen height and return positioning affect privacy, cleaning access, and water control.
  • Nib walls, benches, and recessed shelves can either improve the enclosure or make the glass detailing harder if they're not planned early.

In small bathrooms, the smartest frameless design is often the one that looks slightly more contained on paper and performs far better in daily use.

The best layout is rarely the most extreme one. It's the one that respects the room, the users, and the renovation as a whole.

The Installation and Renovation Workflow

A frameless shower screen should be one of the final fitted elements in the bathroom. If it's measured or installed at the wrong time, everything downstream gets harder. This part of the job only runs well when the renovation sequence is controlled properly.

Here's the overall process in visual form.

The Installation and Renovation Workflow

How the sequence should run

The job starts with site assessment. The room is checked for dimensions, wall condition, floor levels, plumbing locations, and the practical constraints that affect the final screen layout. A registered builder earns their keep during this process, because the screen decision can't be separated from the rest of the bathroom renovation.

Then the wet area build has to be completed in the right order.

  1. Structural and set-out work first
    If walls need straightening, carpentry adjustment, plumbing relocation, or substrate correction, that happens before finishes. Frameless glass is unforgiving. Crooked walls and poor set-out don't disappear under minimal hardware.

  2. Waterproofing before tiling
    The membrane is what protects the structure. Penetrations, junctions, and floor-to-wall transitions need to be resolved before tile goes down. The shower screen sits on top of a waterproofed, finished system. It doesn't fix a weak one.

  3. Tiling and final finished surfaces
    Only after the tiles are laid, cured, and finished should the final measure be taken. A few millimetres matter. If you measure too early, the fabricated glass may not suit the actual finished opening.

A practical demonstration helps clients understand how accurate the process needs to be.

Why timing matters

Custom glass isn't a flexible product once it's made. Holes for hinges, handle positions, notch details, and edge sizes are all locked in. That's why the final site measure should happen after the room is fully ready, not when it is “close enough”.

A coordinated bathroom renovation also means the glass installer isn't working in isolation. Plumbers, waterproofers, tilers, and the screen supplier all affect the final result. On larger or more detailed jobs, Melbourne Tiling Services P/L handles that sequence as part of the bathroom renovation scope, including the integration of tiling, waterproofing, and shower screen installation.

Measure from finished reality, not from intentions. That one habit prevents a lot of expensive rework.

The cleanest installs usually come from disciplined timing. The screen becomes the final precision element in a bathroom that has already been built properly.

Budgeting for Frameless Screens in Melbourne

Frameless shower screens sit in the premium end of the bathroom market. That doesn't mean they're automatically overpriced. It means the cost is tied to heavier toughened glass, custom fabrication, more exact measuring, and a more careful fitting process.

What drives the final quote

Australian cost benchmarks show why frameless sits above simpler options. A standard shower door installation is commonly priced around AU$530 to AU$1,380, while frameless options sit at the higher end of that range. Angi also notes that glass shower door installation and materials typically cost about US$500 to US$1,500, with custom frameless doors reaching about US$3,300, and that with proper maintenance a frameless door can last 20 to 30 years, according to this shower door cost and lifespan guide.

Budgeting for Frameless Screens in Melbourne

On actual renovation jobs, the final price usually moves for practical reasons rather than marketing reasons:

  • Bigger panels cost more because the glass is heavier and harder to handle.
  • More complex layouts need more fabrication detail, more hardware, or both.
  • Special finishes on hinges, handles, and brackets can push the figure up.
  • Custom conditions on site such as angles, nib walls, benches, and uneven existing structures often increase labour.

If you want a more project-specific breakdown, this shower screen installation cost guide for Melbourne is a useful starting point.

Thinking beyond the ticket price

A cheaper screen can still become the more expensive choice if it ages badly, contains water poorly, or needs early replacement. The better way to budget is to ask what you're paying for:

Cost driver Why it matters
Glass specification Heavier toughened glass affects both material and installation complexity
Hardware quality Better fittings usually give smoother operation and longer service life
Site conditions Straight walls, good tile set-out, and prepared openings reduce headaches
Design complexity Simpler layouts are usually easier to fabricate and fit

For most homeowners, the right question isn't “What's the cheapest frameless screen?” It's “What screen suits the room, performs well, and still feels worth the spend years from now?”

Waterproofing, Compliance, and Long-Term Care

The best-looking shower screen in the world won't save a bathroom that leaks. In a proper renovation, compliance and waterproofing come ahead of appearance every time.

Compliance isn't optional

In Australia, all glass shower screens are a safety glazing application and must comply with AS/NZS 2208, which means they use toughened safety glass and certified hardware as part of a compliant installation, as explained in this overview of frameless shower door safety requirements in Australia.

That matters because a shower screen lives in one of the highest-risk interior glass locations in the home. It's in a wet area, it's used constantly, and it needs the right clearances, fixings, and edge protection. Compliant products should also carry the required safety glazing identification or marking.

The other half of compliance is the substrate beneath it. Waterproofing isn't a box to tick. It's the layer that stops water migrating into walls, framing, and surrounding finishes. If the membrane, junctions, and penetrations are wrong, leaks often show up long after the bathroom looks “finished”.

For Victorian projects, homeowners should also understand the paperwork side. Where waterproofing forms part of the work, clear records and certification matter. This guide to a waterproofing compliance certificate in Victoria gives a useful overview of what to expect.

Care and leak prevention

Frameless screens need sensible maintenance, but not fussy maintenance. The simplest routine is usually the best.

  • Squeegee after use to reduce water spotting and soap residue.
  • Clean hardware gently so finishes aren't damaged by harsh products.
  • Check silicone and seals as part of normal bathroom upkeep.
  • Act early on movement or leakage instead of waiting for minor issues to become substrate damage.

Most shower leaks blamed on the screen are really layout, waterproofing, or detailing problems.

Long-term performance comes from the whole assembly. Glass, fixings, tile falls, shower position, and membrane work together. When that system is built correctly, frameless shower screens can be both refined and dependable.

Why a Registered Builder Is Essential for Your Project

A frameless shower screen looks simple because the visible parts are simple. The renovation work behind it is not. You're combining design, plumbing, substrate preparation, waterproofing, tiling, glazing, and final fit-off in a wet area where errors are expensive.

One system, one scope of responsibility

This is why a registered builder matters. Instead of treating the screen as a separate purchase bolted onto the end of the job, a builder looks at the bathroom as one connected system. The shower area is planned around use, not just appearance. Door swing, set-out, floor falls, waterproofing terminations, recesses, and glazing details are coordinated together.

That approach is especially important with frameless designs because they can have more limited water containment than framed options. In smaller Australian bathrooms, splash control becomes a real planning issue. The answer isn't to talk clients out of frameless. It's to design the enclosure geometry, showerhead placement, and waterproofing detail properly, as highlighted in this discussion of frameless shower screen trade-offs and splash control.

Where builder oversight changes the outcome

A registered builder reduces common renovation risks in a few very practical ways:

  • One point of accountability means the tiler, waterproofer, plumber, and screen installer aren't passing problems around.
  • Sequencing is controlled so final measurements happen when the bathroom is ready.
  • Compliance is built in rather than checked after the fact.
  • Layout decisions are tested against real use including family traffic, cleaning access, and leak risk.

For homeowners planning a broader upgrade, it helps to look at the shower screen inside the full renovation brief. This bathroom renovations project overview in Altona shows the kind of integrated planning that produces better wet area outcomes.

The end result is usually less stress and fewer surprises. You're not buying a piece of glass. You're building a shower that has to perform every day, in a room where water management, compliance, and workmanship all matter just as much as the final look.


If you're planning a bathroom upgrade and want clear advice on frameless shower screens, waterproofing, layout, and renovation sequencing, Melbourne Tiling Services P/L can help you assess the full scope before any glass is ordered.