

You've spent an evening comparing warm white, charcoal, terrazzo-look and stone-effect tiles, then discovered that the tile you prefer may not be suitable for the shower floor. That's a common point of confusion during Melbourne bathroom renovations. A tile can look excellent under showroom lighting and still create problems with slip resistance, waterproofing details, substrate movement, cleaning or future repairs.
The practical answer to how to choose bathroom tiles starts with the room's performance requirements. Work out where water will go, confirm the required slip rating, check the substrate and installation system, then make decisions about colour, format and pattern. A registered builder or experienced tiler can help you keep those decisions aligned instead of treating the tile as a decorative product in isolation.
Table of Contents
- Why Tile Selection Goes Beyond Colour and Style
- Comparing Tile Materials for Wet Areas
- Understanding Slip Ratings and Waterproofing Requirements
- Choosing Sizes, Finishes, Colours and Patterns
- Ordering Samples, Estimating Costs and Planning Timelines
- Working with Registered Builders and Asking the Right Questions
- Your Tile Selection Action Plan
Why Tile Selection Goes Beyond Colour and Style
Most homeowners begin with appearance because colour is easy to compare. A display wall makes a large polished porcelain tile look calm and spacious, while a textured mosaic can make a shower feel detailed and luxurious. The problem starts when that showroom preference gets carried directly into a wet area without checking the tile's technical suitability.
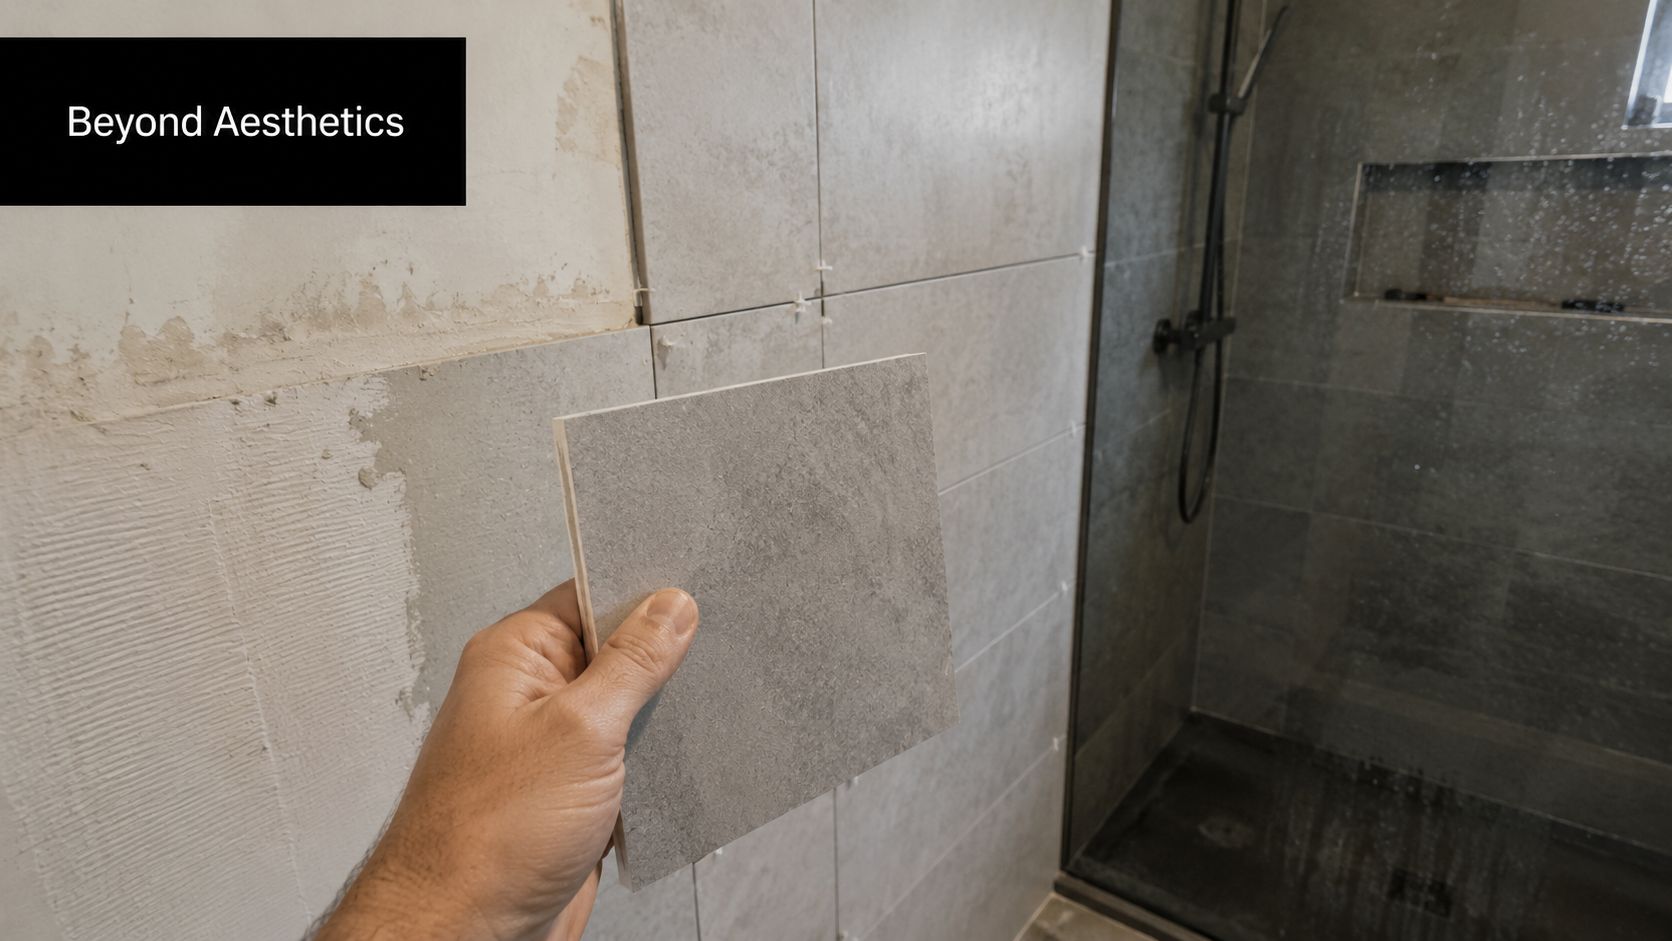
In Melbourne homes, the underlying structure can be just as important as the tile itself. Older bathrooms may have uneven floors, timber movement or previous repair work beneath the finished surface. A rigid large-format tile installed over a substrate that hasn't been properly assessed can develop lippage, cracked grout or debonding. Water ingress usually points to a failure in the complete wet-area system, not to an unattractive or low-quality tile.
Start with exposure, not the showroom wall
Separate the room into zones. A shower floor receives direct water and soap residue, a main bathroom floor experiences regular foot traffic, and a vanity wall has a different risk profile from either. Those locations may need different formats and finishes, even when you want one coordinated colour palette.
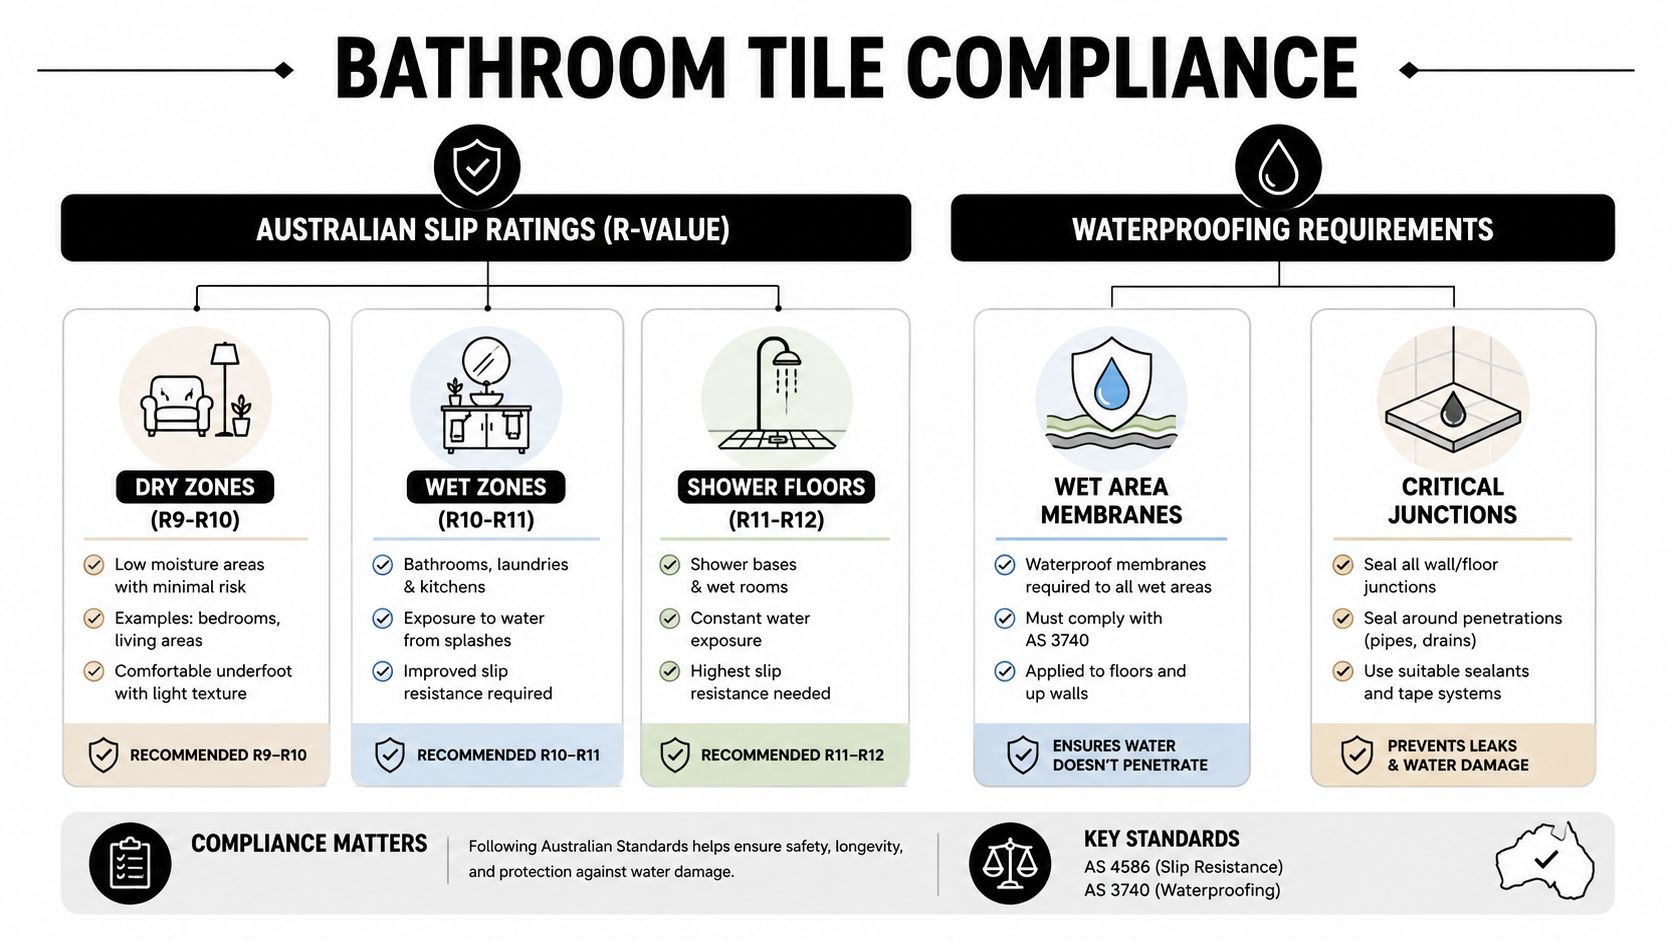
Australian tile selection is shaped by national safety and waterproofing requirements as well as appearance. AS 4586 guidance for Australian tile selection classifies new pedestrian surfaces by slip resistance, with P-ratings from P0 to P5 and R-ratings from R9 to R13. A common guide for bathroom floors is P3 or R10, while shower floors may need greater traction, such as P4/P5 or R11, depending on exposure.
That means a matte label isn't enough. A product should have technical documentation confirming its intended floor or wall use and its relevant slip rating. Porcelain's low water absorption is useful, but porcelain isn't automatically safe for every wet area, and it doesn't replace a compliant waterproofing system.
Practical rule: Choose the performance category first. Use colour and pattern to narrow the options that remain.
The tile is only one part of the result
A sound installation depends on substrate preparation, adhesive selection, movement joints, grout and continuous waterproofing. Australian bathroom flooring installation guidance stresses the importance of checking flatness, tile thickness, absorption and the intended installation environment before committing to a product.
This approach prevents an expensive mismatch. A tile may be technically suitable, but the floor may need levelling before it can receive the chosen format. A stone product may look perfect, but its maintenance requirements may not suit a busy family bathroom. The right tile is the one that fits the zone, the structure, the installation method and the people using the room.
Comparing Tile Materials for Wet Areas
Material selection affects durability, maintenance, cutting, adhesive requirements and the amount of installation risk. There isn't one universal winner. Porcelain often suits demanding wet areas, ceramic can be practical for walls, natural stone brings variation and upkeep, and large-format Kerlite panels can reduce grout lines while increasing handling and preparation demands.
| Material | Water Absorption | Slip Rating Range | Maintenance Level | Installation Complexity | Best Suited For |
|---|---|---|---|---|---|
| Porcelain | Low absorption, but verify the product data | Varies by product and finish | Low to moderate | Moderate to high | Floors, shower walls and floors when correctly rated |
| Ceramic | More variable, verify wet-area suitability | Varies by product and finish | Low to moderate | Low to moderate | Walls, splashbacks and suitable floors |
| Natural stone | Porousness varies by stone | Varies by surface treatment | Moderate to high | High | Feature walls, floors and premium details with proper care |
| Large-format Kerlite panels | Low absorption, subject to product specification | Varies by product and finish | Low to moderate | High | Large walls and streamlined surfaces with capable installers |
Porcelain balances performance with installation discipline
Porcelain is dense, hard and resistant to moisture, which makes it a strong candidate for shower walls and bathroom floors. It's available in stone, concrete and marble effects, so you can achieve a refined appearance without accepting the maintenance profile of every natural material.
The trade-off is installation. Hard porcelain demands suitable cutting equipment, compatible adhesive and a flat substrate. Large pieces expose unevenness quickly, and an installer can't compensate for a poor floor by pressing harder on the tile. For a more detailed material comparison, review this guide to porcelain versus ceramic tiles.
Ceramic remains useful, especially on walls
Ceramic tiles are often easier to cut and handle than dense porcelain. They offer a broad range of colours, glazes and decorative shapes, which makes them useful for shower walls, vanity splashbacks and feature areas. Some products are also suitable for floors, but the technical sheet must confirm that application and the required slip performance.
Ceramic isn't a shortcut around preparation. Adhesive coverage, wall flatness and waterproofing still matter, particularly around niches, corners and plumbing penetrations. A less expensive tile can produce a sound result when it's matched to the correct location and installed properly.
Natural stone rewards care
Marble, limestone, travertine and slate offer natural variation that manufactured surfaces can't reproduce exactly. That visual character comes with responsibility. Stone may need sealing, can react to unsuitable cleaners and can show etching or staining more readily than a glazed manufactured tile.
Use stone where the household can follow the maintenance requirements. If the bathroom needs a simple cleaning routine, a porcelain interpretation of stone may be the more practical choice. If slip safety is a priority, compare the finished surface rather than assuming the raw material tells you enough. Readers planning an accessible bathroom can also consult this practical resource on non slip bathroom flooring for seniors.
Kerlite panels reduce joints but increase precision
Large-format Kerlite panels, including very large wall panels, create a clean surface with fewer grout lines. That can simplify the visual field and reduce the number of joints that need regular cleaning. It doesn't remove the need for careful layout, waterproofing or movement accommodation.
Large-format tiles are less forgiving of lippage and substrate deviation. Before purchase, assess floor tolerance and confirm that the tile thickness, absorption rate and intended installation environment match the adhesive and underlayment. Handling, transport, cutting and future replacement also require planning. A panel that looks perfectly matched today can be difficult to source and match later, so retain suitable offcuts whenever possible.
Understanding Slip Ratings and Waterproofing Requirements
A tile can look suitably matt and still be a poor choice for a wet floor. Slip resistance depends on the zone, water exposure, surface texture, drainage and the completed grout layout. Assess the main bathroom floor, ensuite and shower separately rather than applying one rating to every surface.
Read the rating instead of relying on “matt”
Under AS 4586, new pedestrian surfaces use P and R classifications. A bathroom floor commonly starts around P3 or R10, while a shower floor may require higher traction, such as P4/P5 or R11, depending on water and soap exposure. Treat those figures as a starting point. Check the manufacturer's technical data and the conditions of the installation. The Australian slip and tile guidance explains the classification framework.
A matt finish can reduce glare and feel more secure underfoot, but the word “matt” does not establish compliance. Fine texture can improve grip, while deep texture may collect soap residue and demand more scrubbing. Tile format also changes the result. Smaller pieces provide more grout joints and can offer additional texture underfoot, whereas large pieces leave fewer joints and demand more accurate falls and cutting.
Use the rating with the whole floor design
- Main bathroom floor: Review the likely splash zone, doorway exposure and cleaning routine. A rating suitable on paper still needs a surface that remains comfortable and practical across the room.
- Ensuite floor: Allow for water spreading beyond the shower, particularly where the shower has limited separation from the vanity or toilet. Confirm that the selected finish is suitable for the floor, not only for a dry display sample.
- Shower floor: Check that the tile format can follow the required falls with consistent joints. A very large tile may meet a traction specification yet create awkward cuts, poor drainage or uncomfortable changes in plane.
- Grout layout: Joint width, joint direction and the quality of the finished falls affect how water moves across the surface. The effective grip of a tile is experienced as an installed system, not as an isolated sample.
For further practical guidance on non-slip bathroom flooring, compare the finished surface, drainage and maintenance requirements together.
Waterproofing sits behind the finish
Tiles and grout are not the waterproof barrier. The membrane beneath them must remain continuous at corners, junctions, penetrations and changes in plane. Under AS 3740:2021, shower walls must be waterproofed to at least 1,800 mm above finished floor level or 50 mm above the shower rose, whichever is higher. The shower floor must be fully waterproofed. On timber or particleboard subfloors, the entire bathroom floor must also be waterproofed. These requirements are summarised in Australian waterproofing and tiling guidance.
Tile selection affects how these details are installed. Large pieces reduce joints, but still require precise cuts around outlets, niches and penetrations. In Victoria, independent inspection before tiling and a formal installation certificate from a licensed waterproofer support sound compliance practice, as outlined in Australian waterproofing guidance for wet areas.
Do not allow tiling to begin until the waterproofing has been inspected and documented. Once adhesive and tiles cover the membrane, many defects are difficult to identify without removing finished work.
Choosing Sizes, Finishes, Colours and Patterns
Tile selection should follow the room's geometry, substrate and maintenance demands. Format changes joint frequency and the amount of flatness an installer needs. Finish affects reflected light, cleaning and underfoot confidence. Colour and grout determine whether water marks, soap residue and everyday wear remain discreet or become the room's main feature.
Match format to the room and substrate
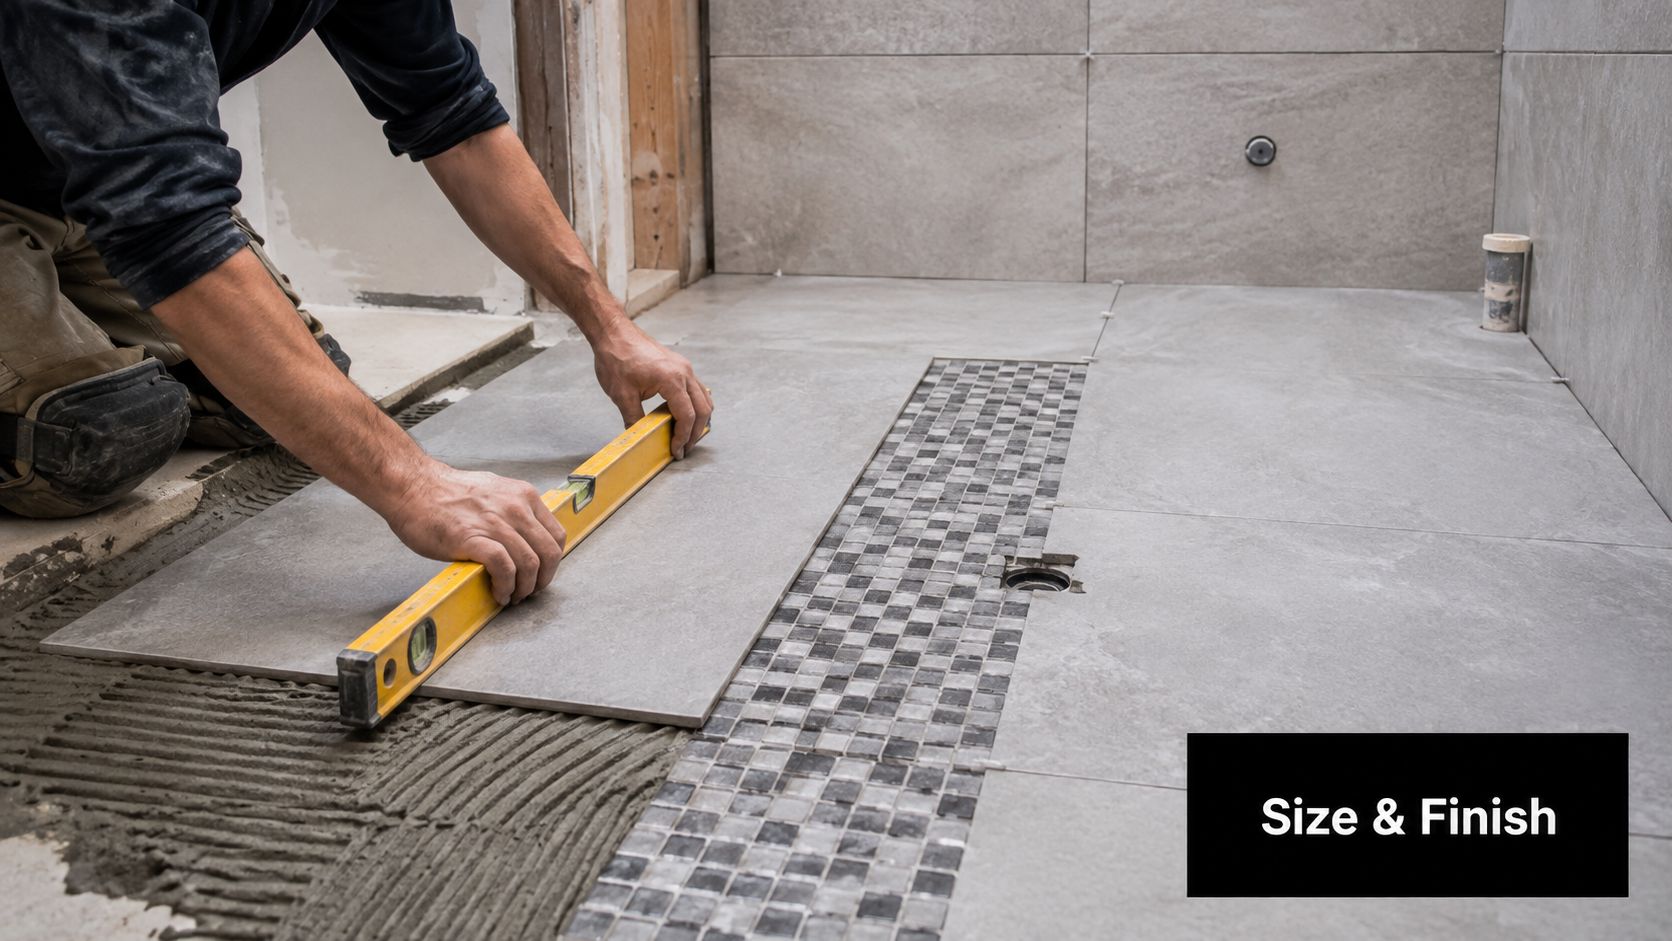
Large-format tiles create fewer grout lines, which can make a compact ensuite feel calmer and give a larger bathroom a restrained appearance. They also demand a suitably flat substrate. Walls that bow, floors with uneven falls and poorly prepared cement sheet can make lippage, inconsistent joints and hollow spots more likely. Large pieces do not hide preparation defects.
Small mosaics and modest-format tiles suit shower floors where the surface must follow falls towards the waste. More joints allow the tile surface to change direction gradually, although they also create more grout lines to clean. The layout should serve drainage and room geometry, rather than follow a style trend.
Treat finish as a practical specification
Polished tiles reflect light and give walls a crisp appearance. On floors, that appearance says nothing about wet slip performance, so check the product's technical documentation before approving it. Honed, matte and textured finishes often suit floors better, provided their rating matches the location and intended use.
Texture also changes cleaning effort. Deep relief can hold soap residue, while an extremely smooth surface may show water marks clearly. A moderate texture and a grout colour that does not highlight every mark can be easier to maintain in a busy family bathroom.
Build a palette that can be repaired
Neutral colours coordinate more easily with tapware, cabinetry and later paint changes. They can still have character. Use a stronger pattern in a contained area, such as a niche or vanity wall, while keeping shower walls and other high-exposure surfaces visually simpler.
Check shade and batch information before installation. Tiles from separate production runs may vary, making a later top-up noticeable. Keep labelled spare tiles and clean offcuts for future repairs, particularly in rental properties or high-use family bathrooms. A pattern may also require extra careful placement around niches, outlets and other cuts, so the chosen format should allow the installer to maintain its rhythm.
Ordering Samples, Estimating Costs and Planning Timelines
A physical sample should be approved before the order is placed. Hold it beside the vanity, tapware and cabinetry, then check it under the bathroom's actual lighting. A tile that looks warm in a showroom may read cooler against white sanitaryware. Textured surfaces can also show more soap residue than expected.
Wet the sample to observe how its appearance changes, but treat that as a visual check only. Request the manufacturer's technical sheet, confirm whether the product is suitable for floors or walls, and verify the stated finish and absorption class. Keep the approved sample and documentation with the project records so the delivered tiles can be checked against the specified product.
Order quantity with the layout in mind
Measure every tiled surface separately. Account for the proposed layout, cuts around niches and plumbing penetrations, and the placement required for natural or printed patterns. A simple lineal-metre check can expose an under-order: a wall measuring 2.4 metres wide and 1.8 metres high has 4.32 square metres before openings, cuts or the installation allowance are considered. The final order must reflect the tile format and layout, not just the room's rough dimensions.
Confirm stock, batch details and lead times before demolition. A missing tile can hold up substrate preparation, waterproofing, screeding and following trades once the bathroom is stripped. For several tile types, record each product, finish, batch and intended zone separately rather than relying on one supplier invoice.
Allow for the complete installation system
The tile price covers only part of the work. Include adhesive, grout, trims, substrate repairs, levelling, screeding, waterproofing, delivery, cutting and labour. A cheaper tile may need more surface preparation or produce more difficult cuts. Large panels can reduce grout joints, but they require careful handling, accurate access planning and a well-prepared substrate.
For plumbing-related scope and trade estimating, Exayard plumbing estimating software can help organise plumbing allowances alongside tile and waterproofing work. It does not replace a site inspection. A structured estimate does, however, make it easier to identify interfaces that might otherwise become variations.
Plan the sequence, not just the finish date
A bathroom renovation generally runs through demolition, rough-in work, substrate preparation, waterproofing, inspection, tiling, grouting and final fit-off. Waterproofing requires suitable preparation and curing before tiles cover the membrane. Tile size and weight also affect cutting, handling and installation time.
Keep the tiler's booking conditional on the substrate and waterproofing responsibilities being clear. Confirm who supplies each material, who checks the surface, who records the waterproofing work and who stores spare tiles. For rental properties, retain the samples, batch details, specifications and clean offcuts with the maintenance records. Future repairs are more straightforward when replacement information is available.
Working with Registered Builders and Asking the Right Questions
A registered building practitioner provides more than a name on a contract. In a bathroom, several trades meet at the waterproofing layer, the floor structure, plumbing penetrations, shower niches and wall junctions. Poor coordination can leave a tiler working over an unsuitable surface or a waterproofer dealing with penetrations that weren't planned properly.
In Victoria, bathroom renovation building work valued at $10,000 or more must be carried out by a registered building practitioner. The relevant registration is typically Domestic Builder: Unlimited, DB-U, or Domestic Builder: Limited, DB-L, as outlined in Victorian bathroom renovation regulation guidance.
Verify registration and responsibility
If the renovation requires a building permit, the work must be completed by, or under the supervision of, a registered building practitioner. The Victorian Building Authority provides a public register that homeowners can use to verify registration before hiring anyone. Guidance on Victorian bathroom permits and practitioner checks explains why that verification should happen before the contract is signed.
Ask direct questions:
- Registration: What is your registration category, and can I verify it through the Victorian Building Authority register?
- Waterproofing: Who holds the waterproofing licence, and who issues the installation certificate?
- Inspection: Will the waterproofing be independently inspected before tiling begins?
- Substrate: How will you assess floor flatness before ordering large-format tiles?
- Scope: Are demolition, substrate repairs, screeding, levelling, trims, grout and sealants included?
- Defects: What documentation and warranty cover tile adhesion, grout defects and membrane integrity?
Look for coordinated trade control
Registered builders coordinate licensed carpenters, plumbers, electricians, waterproofers and tilers so each trade leaves the next one a workable surface. That matters around shower roses, floor wastes, niches, balcony junctions and other penetrations where small planning errors can compromise the finished system.
A tiling contractor should be able to explain the adhesive, coverage, joint layout and movement provisions, not just quote a square-metre rate. Homeowners can compare qualified tiling contractors near Melbourne while checking who is responsible for preparation and compliance.
The lowest tile installation price often excludes the work that protects the tile. A properly documented scope may cost more at the start, but it gives you a clearer basis for comparing builders and a better chance of identifying defects before the room is sealed behind finished surfaces.
Your Tile Selection Action Plan
Start by mapping each bathroom zone and its water exposure. Confirm the appropriate slip rating, then compare porcelain, ceramic, stone or Kerlite against maintenance and installation demands. Check substrate flatness before ordering large formats, select the finish and layout, order the required quantity from one batch, and retain offcuts. Before tiling, request waterproofing records, independent inspection evidence and the waterproofer's certificate. Give your registered builder and tiler the product data sheets, approved layout and grout specification, then keep cleaning and maintenance instructions with the renovation documents.
Melbourne Tiling Services P/L provides bathroom renovations, waterproofing, screeding, substrate preparation and porcelain, ceramic, stone and large-format Kerlite tiling across Melbourne and greater Victoria. For a site-specific tile selection, compliance review and coordinated renovation quote, visit Melbourne Tiling Services P/L.
Write a Comment