
You can be halfway through a bathroom renovation and still not be at the hard part yet. The hard part is staring at a marble floor that looks too good to destroy, knowing the next trades need the substrate clear, and realising one wrong swing could turn reusable stone into landfill. In Australian bathroom renovations, that's where patience matters more than speed, especially when the floor sits inside a larger sequence of waterproofing, levelling, and finish work that registered builders have to coordinate carefully.
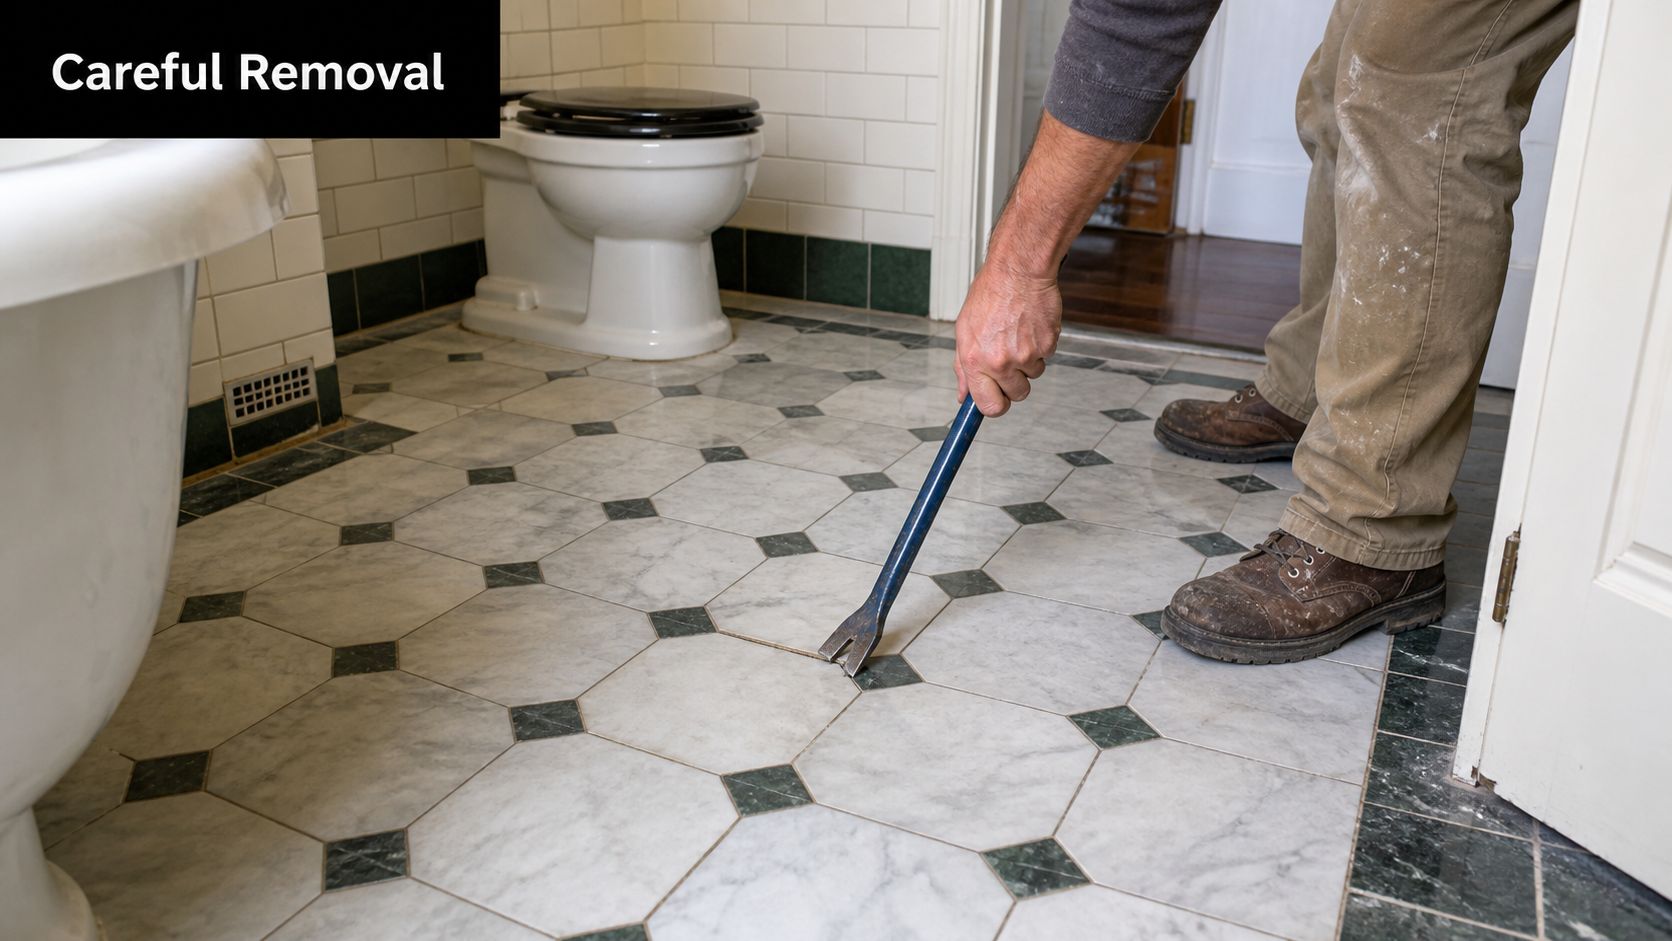
Table of Contents
- Introduction to Marble Tile Removal
- Gathering the Right Tools and Safety Gear
- The Step-by-Step Removal Process
- Adapting Techniques for Different Adhesives and Substrates
- Preserving Tiles and Troubleshooting Common Issues
- Knowing When to Hire a Professional
Introduction to Marble Tile Removal
A typical Melbourne renovation starts with optimism, then the floor reminds you who's in charge. The marble looks immaculate, the veining still carries the room, and the idea of reusing it feels sensible until you test the first tile and hear that brittle little click that tells you the stone and the bond are fighting back. Marble is beautiful, but it's also unforgiving when you rush it.
Australian housing patterns help explain why this job comes up so often in serious renovation work. The Australian Bureau of Statistics reported around 10.8 million households in the 2021 Census, and owner-occupied dwellings with a mortgage made up 36.1% of all households in that same census, which sits behind a lot of bathroom upgrade activity and value-adding repair work in homes across the country, as recorded by the ABS in the 2021 Census. In that setting, careful tile salvage isn't a niche skill, it's part of practical renovation planning, especially where homeowners want to keep a premium finish or match existing stone later in the job. See the ABS household figures in the 2021 Census household snapshot.
Practical rule: if the tile is worth reusing, treat removal like precision work, not demolition.
The challenge with marble floor tile removal is that it is never just about lifting one piece. It's about preserving the adjacent tiles, protecting the substrate, and stopping the bond from tearing the stone before the perimeter is fully released. In Australian stone and tiling guidance, the recommended pattern is consistent: grout first, edge access second, then controlled lifting, because marble's value drops fast once it fractures. If you're working inside an ensuite or main bathroom, that approach also keeps the broader renovation sequence intact for the next trade.
The cleanest jobs start with restraint. The fastest jobs usually cost more later.
Gathering the Right Tools and Safety Gear
The first mistake people make is treating marble like ceramic. Marble punishes that assumption fast, so the tool kit has to suit stone removal, not generic demo work. An oscillating multi-tool with grout blades, a narrow putty knife, a masonry chisel, a rubber mallet, and a sturdy pry bar are the core tools that let you work at the edge of the tile instead of through the middle of it.
Build the toolkit around control
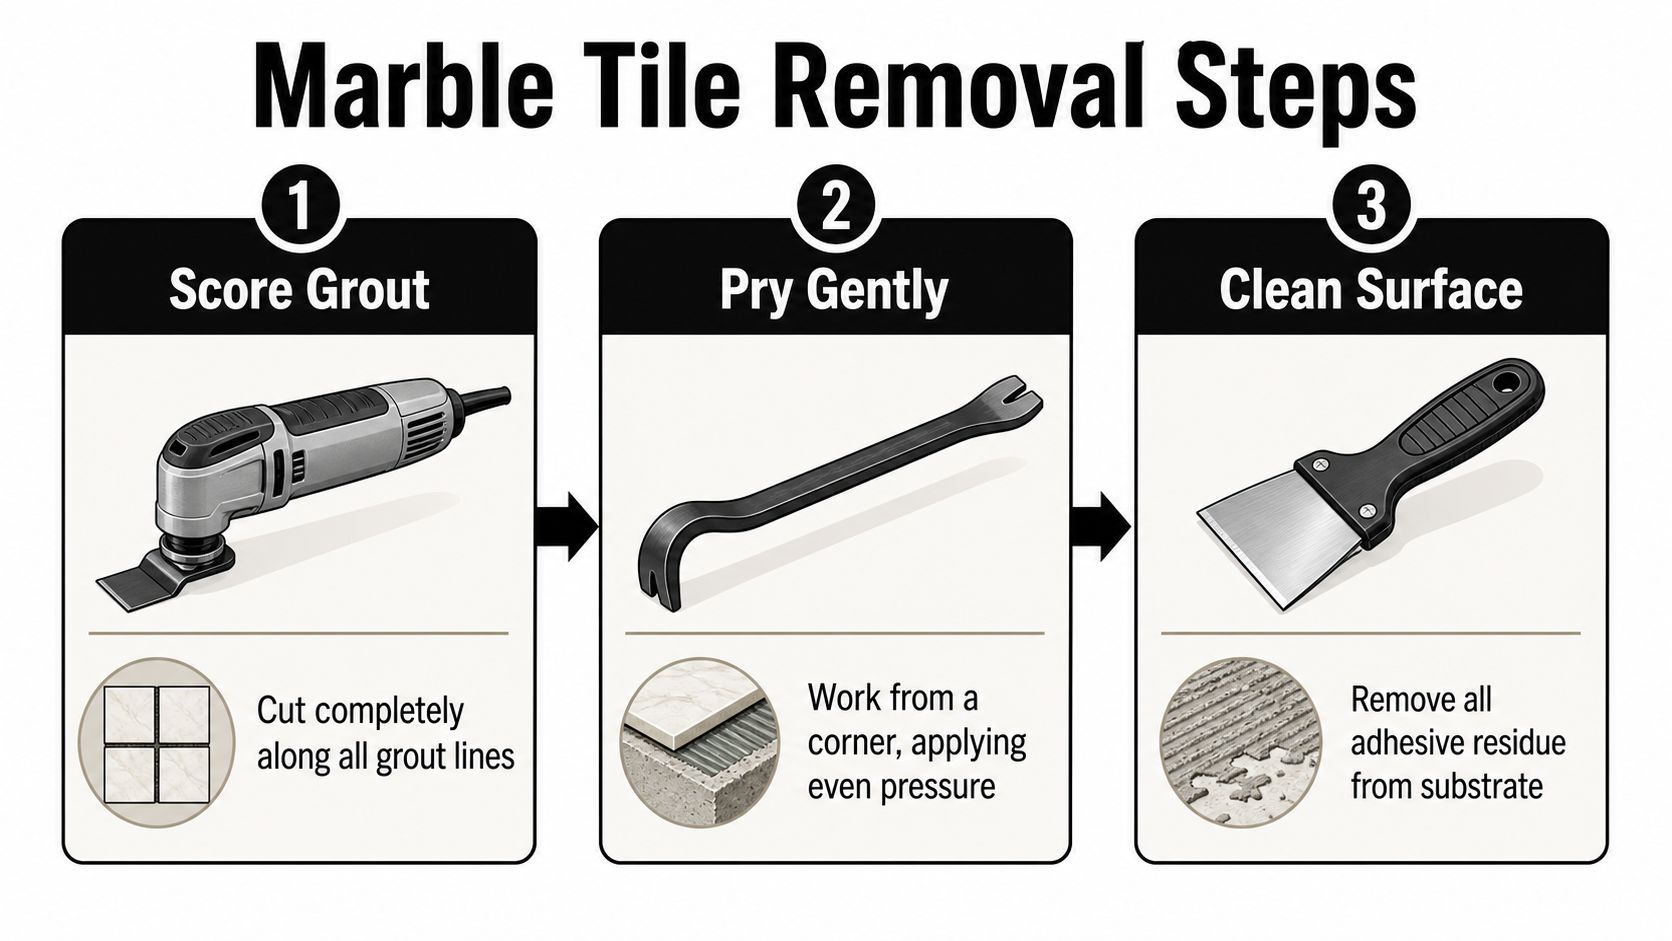
Start with the grout removal stage, because that's what isolates the tile. An oscillating multi-tool gives you the cleanest way to cut grout all the way to the substrate, and a grout saw can do the same job where the joint is shallow or awkward. A putty knife or thin chisel then gives you a shallow entry point, while the rubber mallet supplies light tapping instead of brute force. The pry bar is the last tool in the chain, not the first.
Use this article on practical tiling tools for renovation work as a reference point if you're comparing gear before you start.
Treat silica control as part of the job
Australian work health and safety regulators have tightened controls since the model WHS laws were introduced from 2011 onward, and Safe Work Australia lists respirable crystalline silica as hazardous dust generated when cutting, grinding, drilling, or removing stone and concrete materials. That matters here because marble removal can create dust from both the tile and the adhesive bed. A P2 respirator, safety goggles, and heavy-duty gloves aren't optional extras, they're the basic setup that keeps the work moving without unnecessary exposure. You can read the hazard listing in Safe Work Australia's silica guidance.
Protect the room before you touch the tile.
Dust control protects the finish you're trying to save. Drop cloths, tape, and clean edges around the work zone make the whole job easier to manage.
Use drop cloths over nearby fixtures, tape off doorways, and seal any obvious dust escape paths. That keeps debris from scratching finished surfaces and makes cleanup manageable once you start lifting. It also helps if you're working in a bathroom where access is tight and every bit of dust seems to settle on the one surface you didn't mean to touch.
The Step-by-Step Removal Process
The safest way to remove marble floor tile without breaking it is to work from the perimeter inward and let the bond fail in stages. The first tile is usually the hardest because it's bonded on all sides, so don't judge the whole floor by that first fight. Once you get a clean entry, the rest of the room follows the same pattern.
Start by isolating the tile completely
Cut the grout lines all the way to the substrate with an oscillating multi-tool or grout saw. That gives the tile its own boundary and reduces the sideways stress that cracks neighbouring pieces. Australian removal guides consistently point to this as the step that decides whether a tile comes up intact or shatters as soon as force starts.
After the joints are open, work from an edge or weak point. Slide a putty knife or masonry chisel in at about a 30° angle, then tap lightly to create a small gap before you apply any real lifting force. That angle matters because it spreads the load across the tile instead of driving a wedge straight through it. For a marble floor, the aim is to break the adhesive bond, not to force the stone upwards.
Increase leverage only after the bond loosens
Once the tile starts to move, keep the pressure incremental. A pry bar can help, but only after the perimeter has lifted enough that the bar is supporting movement rather than causing it. If the tile resists, go back to the edge, widen the gap a little more, and continue from the weak point rather than trying to win in one motion.
Practical rule: if the tile hasn't opened at the edge, the pry bar is too early.
Work the tile up gradually, then rotate it as it loosens so the remaining adhesive breaks cleanly instead of peeling the underside. That's especially important when you're hoping to salvage the stone for later use. Once a marble tile fractures, you still have to clean adhesive from the back by hand, and the time saved by rushing disappears fast.
Keep the sequence consistent
The same pattern applies tile by tile. Grout first, edge access second, controlled lifting last. If you keep the process disciplined, you protect the surrounding floor and reduce the chance that one cracked tile sets off a chain reaction. In a bathroom, that means less risk to waterproofing edges and less chance of damaging the finish you're trying to preserve for the next stage of the renovation.
Adapting Techniques for Different Adhesives and Substrates
Not every marble floor was installed the same way, and that's where a lot of DIY jobs go wrong. A clean lift on one floor can become a repair job on another because the adhesive bed, mesh backing, or substrate changed under the stone. If you want the tile to survive, you have to read the floor before you start prying.
Compare what's under the marble
| Adhesive and Substrate Comparison for Marble Tile Removal | |||
|---|---|---|---|
| Adhesive/Substrate Type | Removal Method | Difficulty | Key Consideration |
| Direct-bond marble tile | Grout removal first, then shallow edge lifting with chisel or putty knife | Lower | Best chance of intact salvage if the bond breaks cleanly |
| Mortar-bed system | More invasive edge work, often with partial breakage | Higher | The tile may come up with mortar attached, which risks the substrate |
| Mesh-backed marble | Controlled prying, slower release, careful underside cleaning | Higher | Mesh or bonded backing makes salvage harder |
| Waterproofed bathroom floor | Minimal force, precise removal to protect membrane and screed | High | Substrate integrity matters as much as tile recovery |
The difference is simple. Direct-bond tiles usually lift more cleanly because the adhesive bond is easier to separate. Mortar-bed and mesh-backed systems often resist salvage because the tile comes up with extra material attached, which can force more invasive removal and subfloor repair. Australian installers warn that these systems are far less forgiving, especially in bathrooms where the layer beneath the tile may be more valuable than the tile itself.
Match your method to the substrate
If the floor sits on a sound slab or screed, you still need to work gently, but you have more room to isolate and lift. If there's waterproofing below the tile, the goal becomes substrate preservation, not speed. That's why experienced tilers stop treating marble removal as a demolition task and start treating it as a controlled separation job.
Use this guide to tile adhesive types if you're trying to identify what you're dealing with before you start. The right read on the adhesive saves more tiles than any single tool.
Preserving Tiles and Troubleshooting Common Issues
Even careful removal runs into stubborn adhesive, slight fractures, and tiles that seem to have welded themselves to the floor. The difference between a salvageable tile and a wasted one often comes down to how you handle those interruptions. Patience keeps the tile usable. Panic turns a manageable problem into a pile of fragments.
Work the bond, not the stone
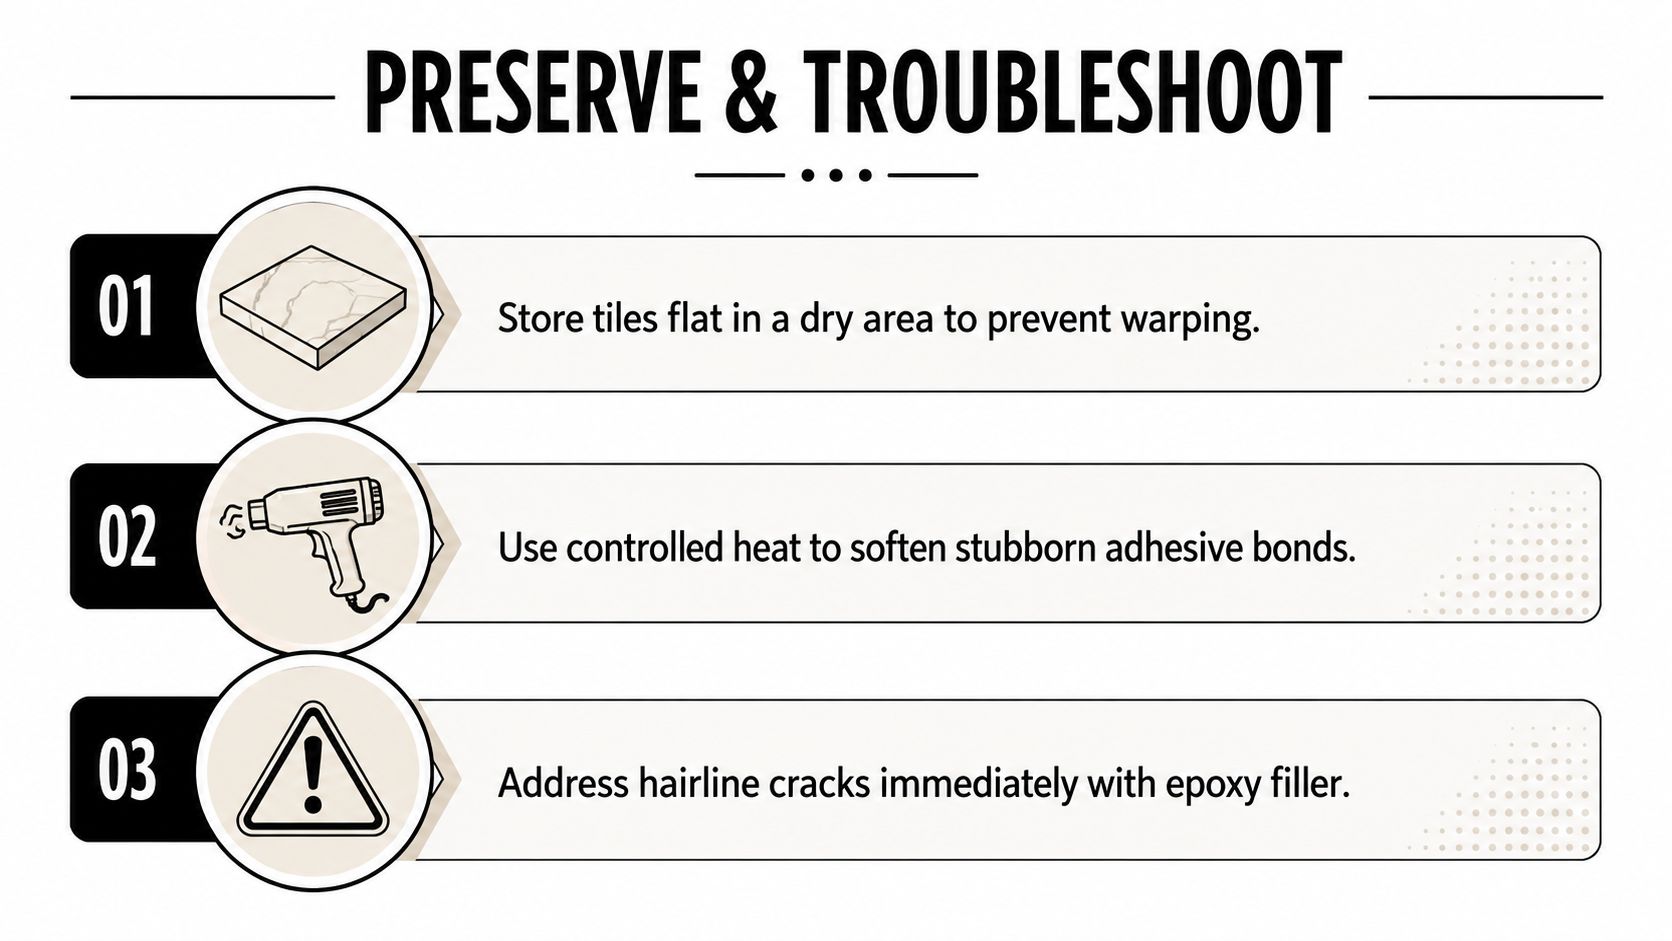
If a tile won't budge, don't hit harder. Try to soften the bond locally with controlled heat or a suitable solvent, but only after testing a small area first so you don't mark the marble surface. Once the adhesive gives a little, go back to the edge and repeat the shallow-angle lift rather than forcing a wider pry.
The workflow from removal guides pays off. Light tapping creates a gap, the gap grows slowly, and the tile comes away because the bond has been weakened in stages. That approach is far more reliable than trying to lever the tile up in one movement. It also keeps the underside cleaner, which matters if you're planning to reinstall the stone later.
Handle the back of the tile with care
Once a marble tile is off the floor, adhesive usually stays on the underside. Clean that residue manually so the tile can be reused, but don't scrape aggressively enough to scratch the back or bruise the edges. A cracked tile can still have value in some situations, but once it fractures badly, the reuse options drop quickly and the labour on the next stage increases.
Store the removed tiles flat in a dry area so they don't warp or chip while the rest of the renovation continues. That's especially useful in a bathroom project where tiles might sit around while waterproofing, screeding, or fixture work is still underway.
Practical rule: salvage ends where uncontrolled force begins.
Use this stone sealing guide if you're preparing the tiles for future reuse or want to think ahead about how their finish will be protected once they're reinstalled.
Keep the troubleshooting simple
- If the tile refuses to lift: return to the grout line and edge, because the bond is still holding too much of the perimeter.
- If the underside is clogged with adhesive: clear it by hand in stages, not with hard scraping that can nick the stone.
- If a hairline crack appears: set the tile aside and assess whether it still suits a low-visibility reuse point.
- If the substrate starts to crumble: stop and reassess, because the next finish may depend on keeping that layer intact.
This is the part that gets underestimated. Preserving marble isn't about winning every tile. It's about keeping enough of the good ones intact to make reuse worthwhile.
Knowing When to Hire a Professional
DIY marble removal reaches its limit faster than you might expect. Once you're dealing with widespread cracking, unknown substrate conditions, or a bathroom where the next trade depends on a perfect base, the risk shifts from manageable to expensive. That's the point where a registered builder becomes the safer choice, not the fancy one.
Watch for the signs that the job has outgrown DIY
If the floor is part of a larger bathroom renovation and you can't see how the waterproofing, screed, and tile removal all fit together, pause before you keep prying. If the marble is installed over a mortar bed or mesh backing, the chance of clean salvage drops sharply. If the home is older and there's any concern about hazardous materials in adjacent building layers, a professional assessment is the sensible move before more demolition starts.
A registered builder also makes sense when the floor removal affects the whole sequence of works. Once tiles come up, the room may need substrate repair, waterproofing, and re-laying in a strict order. That's not just a tiling problem, it's a coordination problem, and bathroom renovation delays usually happen when those layers aren't managed together.
Compare the real trade-offs
DIY looks cheaper at the start because you're paying in time and tools instead of labour. The hidden cost is the cracked tile, the damaged screed, or the membrane that gets nicked because the prying was too aggressive. Professional removal costs more upfront, but it can save the floor, shorten the rework, and keep the renovation moving cleanly.
If you're comparing contractors, ask whether they're a registered builder, whether they handle the tile removal and the bathroom rebuild together, and whether they can manage waterproofing, levelling, and new stone installation as one scope. That matters more than a polished pitch.
A good contractor protects the substrate first, because a perfect tile install means nothing on a damaged base.
If you're planning a marble floor removal as part of a bathroom upgrade, Melbourne Tiling Services P/L can handle the tile work, waterproofing, and full renovation sequence with a registered builder on the job. They offer start-to-finish bathroom renovations, free quotes, and 3D drawings, so you can see how the new space comes together before the old floor comes out. Visit Melbourne Tiling Services P/L to discuss your marble removal and bathroom renovation with a team that works across Melbourne and greater Victoria.
Write a Comment