

You've chosen the tiles. They're large, calm and almost grout free, exactly the look you wanted for a walk in shower and ensuite floor. Then your tiler starts asking about falls, substrate flatness, membrane cure times and movement joints, and the purchase suddenly feels less like a finish and more like a construction system. That's the right instinct. With large format tile installation, the visible panel is the last decision, not the first.
Table of Contents
- Why Large Format Tile Installation Demands a Different Mindset
- Substrate Preparation and Flatness Tolerances
- Waterproofing, Falls and Movement Joint Planning
- Adhesives, Trowels and Bedding for High Coverage
- Handling, Cutting and Levelling System Setup
- Grouting, Movement Joints and Handover Documentation
- Troubleshooting Lippage, Hollow Spots and Shower Ponding
Why Large Format Tile Installation Demands a Different Mindset
A Melbourne homeowner I worked with had set her heart on slab style porcelain for a walk in shower. The sample looked flawless under showroom light. On site, the existing floor fell in two directions, the waste sat off centre, and the wall sheeting bowed between studs. None of that would've been hidden by a bigger tile. It would've been broadcast across the surface.
That's the shift in mindset. A small tile can absorb minor variation from piece to piece. A large panel behaves more like cladding. It spans irregularities instead of following them, bridges hollows instead of bedding into them, and turns a small slope error into visible lippage at the next joint.
Fewer Joints Means Fewer Places to Hide Error
Fewer grout lines are the appeal, and they're also the constraint. Set out, cuts, waste position and joint placement have to be resolved on paper and in a dry lay before adhesive is mixed. Once a panel is bedded, you don't nudge the layout back into line over the next three rows. You've committed.
Material consistency matters for the same reason. In the 2018–2019 financial year, Australia imported 42,177,154 square metres of ceramic tiles worth A$455,488,586, with China supplying 70.9% of the volume, as detailed in Australian ceramic tile import figures for 2018 to 2019. Melbourne installers are therefore working predominantly with imported porcelain. Calibration, thickness and technical documentation should be verified batch by batch, not assumed from a display board.
One System, Several Trades
Successful bathroom renovations with large format work rely on coordination between registered builders, waterproofers, plumbers and tilers before tiling starts. Who owns the falls. Who signs off the membrane. Who confirms the substrate is plane enough to receive a rigid panel.
Treat the tile, adhesive, membrane and substrate as one assembly. If one layer is improvised, the panel won't rescue it.
That coordination is what separates a premium finish from an expensive rectification. The tile choice is easy. Designing everything underneath it is the job.
Substrate Preparation and Flatness Tolerances
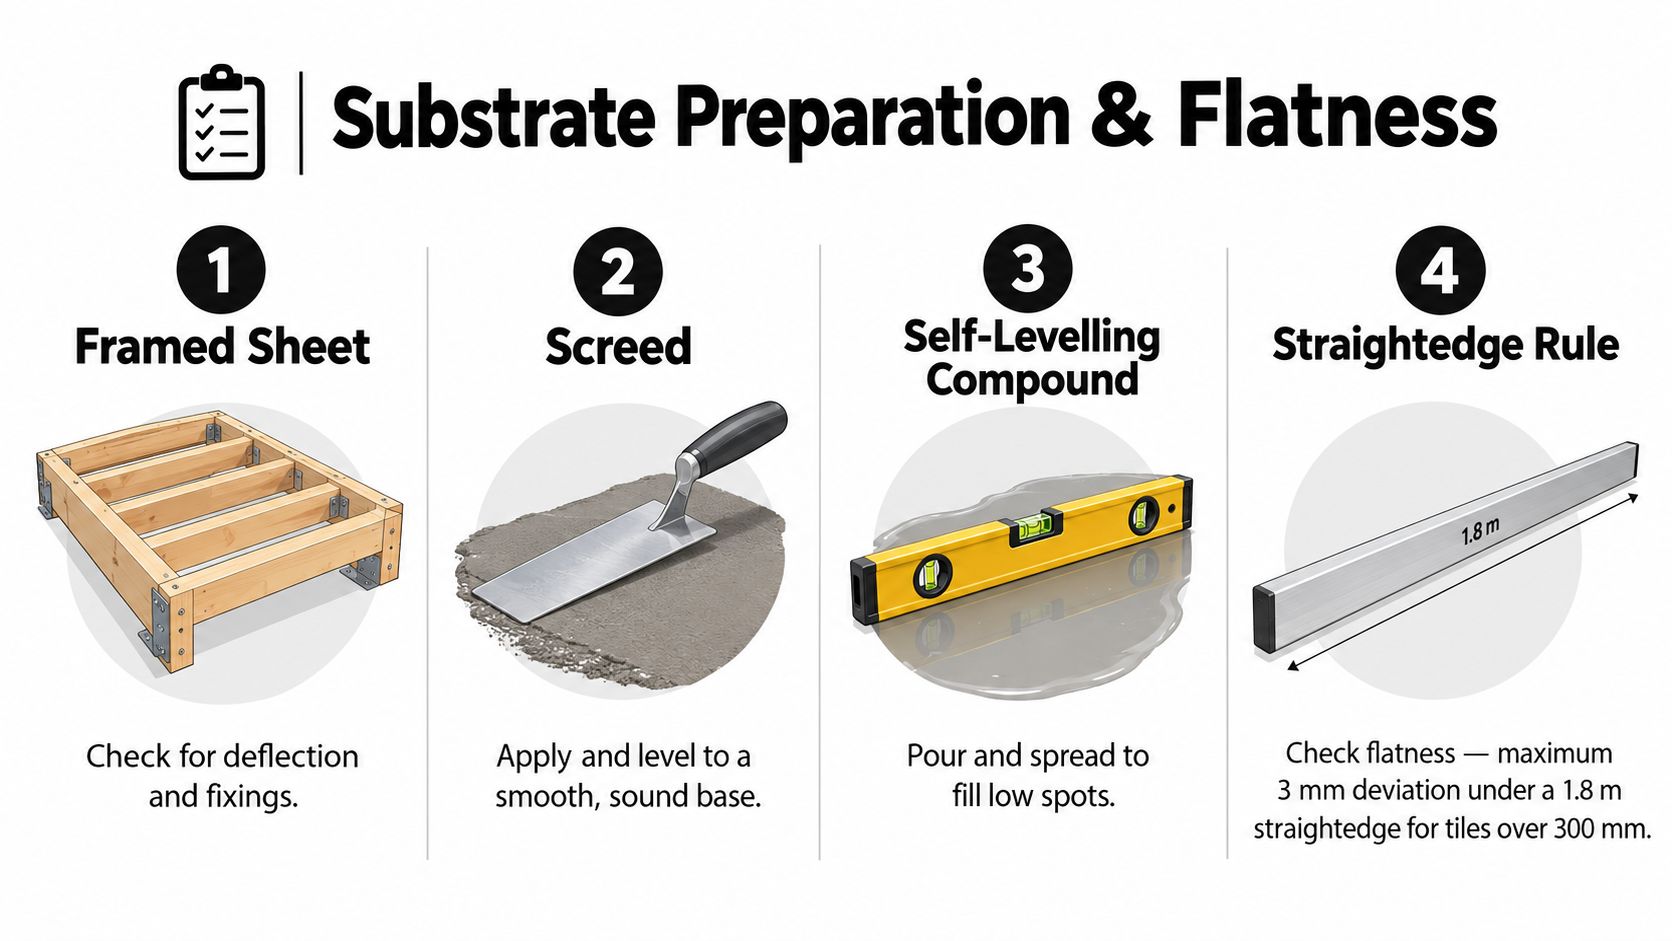
Flatness isn't a preference with large format. It's a measurable entry condition. Australian guidance treats tiles with an edge of at least 400 mm as large format and requires a substrate tolerance of no more than 3 mm under a 1.8 m straightedge when the smallest dimension exceeds 300 mm, according to Dunlop guidance on fixing large format heavy tiles. Check in multiple directions, not just along the longest wall.
Start with the structure underneath the finish. Loose sheeting, excessive deflection or a patched floor won't become sound because a stiff panel sits over it. You can read more about what substrate preparation involves before tiling begins if you want the underlying sequence in detail.
Choosing the Correction Method
Different defects need different fixes:
- Framed and sheeted walls: Check stud alignment, sheet fixings and deflection first. Pack, plane or resheet where the surface waves, because adhesive won't straighten a bowed wall over a long panel edge.
- Screed: Use a sand and cement screed where you need to build falls or correct a substantial level change. It's labour intensive, but it lets you shape drainage deliberately.
- Self levelling compound: Use it to fill shallow hollows on a sound, primed base. It's efficient for broad, gentle undulation, but it's not a substitute for creating fall where fall doesn't exist.
- Concrete: Grind high spots and fill low spots rather than averaging them out. Large panels rock on crowns and bridge dips.
The Check That Actually Matters
Run the straightedge, mark high and low zones in pencil, correct them, then check again. Don't rely on a spirit level alone. A floor can be level in one spot and still undulate enough to leave voids under a rigid panel.
Practical rule: If the straightedge rocks or daylight shows underneath it, stop. Correct the substrate now, while correction is cheap.
Trying to compensate with a thicker adhesive bed creates uneven support. The panel may look right on the day, but load concentrates where contact is solid and leaves corners and edges vulnerable where it isn't.
Waterproofing, Falls and Movement Joint Planning
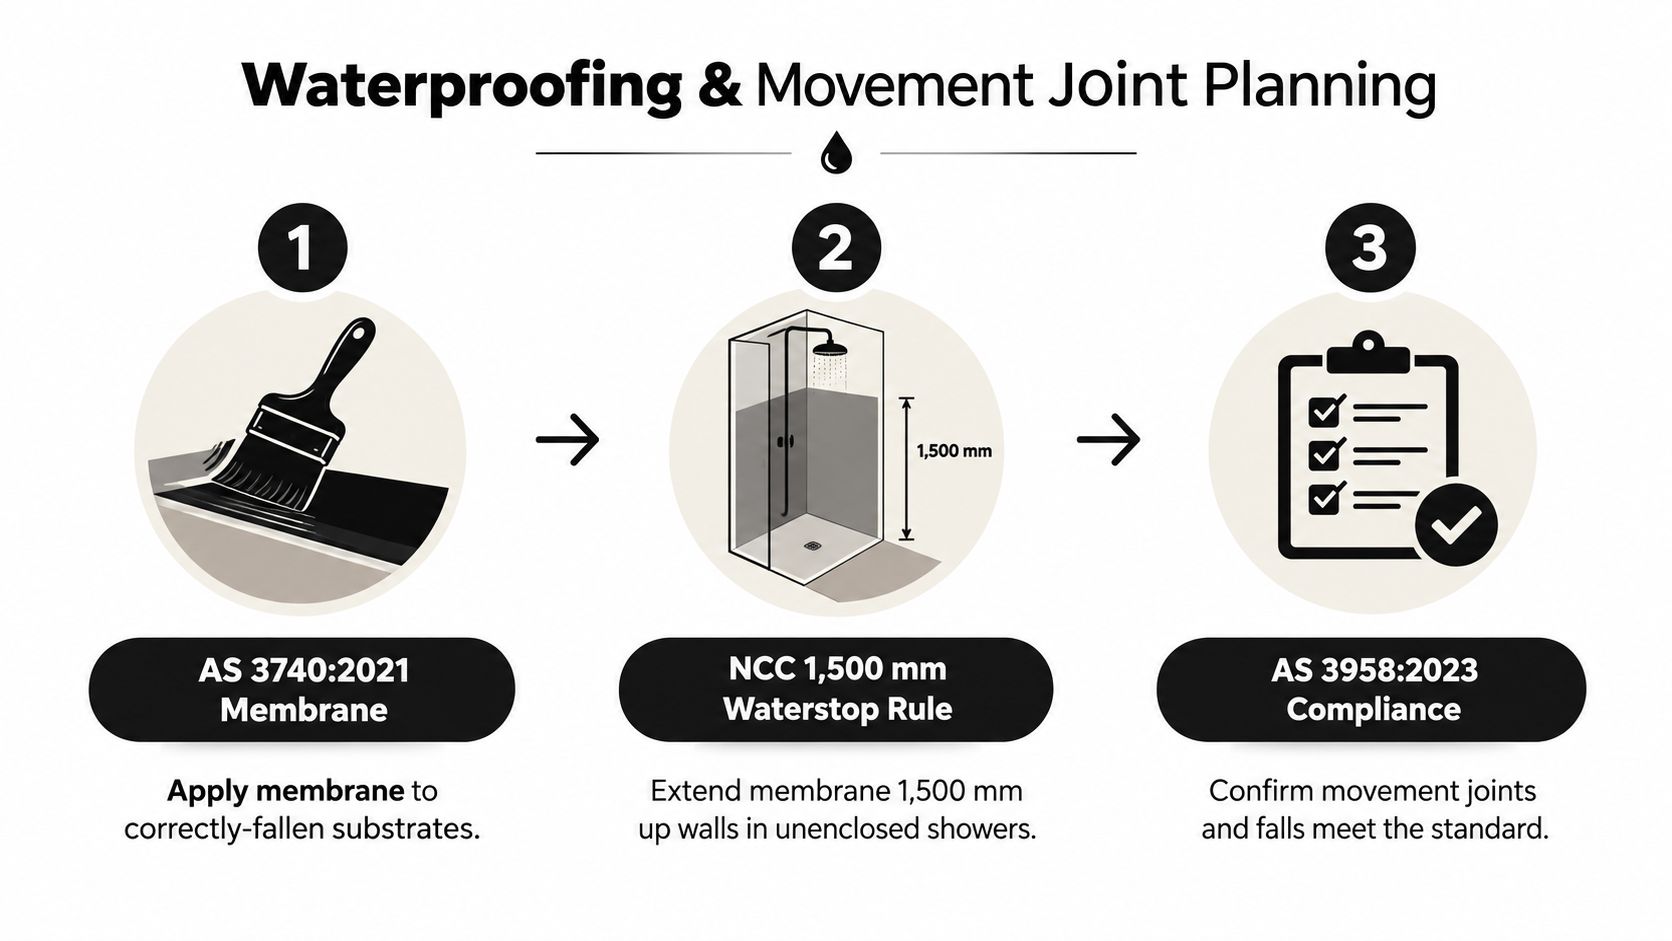
Waterproofing is a compliance stage, not a coating you squeeze in between other trades. For wet areas, the membrane needs to comply with AS 3740:2021, be applied to a substrate that already falls correctly, and be allowed to cure in line with its product data sheet before tiling conceals it.
Sequence matters because large format tile installation removes your second chances. Once panels cover junctions, penetrations and wastes, inspection becomes destructive.
Lock In Falls Before the Membrane
Under NCC guidance, a waterstop must sit at least 1,500 mm horizontally from the shower rose, measured from the rose itself, and the wet area floor must fall to waste at no less than 1:80 and no greater than 1:50, as set out in NCC waterproofing guidance for houses. That measurement catches people out in unenclosed showers. It's not taken from the wall.
For shower areas more broadly, the NCC requires the floor to be waterproof and shower walls to be waterproof to at least 1,800 mm above the floor substrate, with junctions and penetrations also waterproof, under NCC wet area waterproofing provisions for housing. Establish those zones on the set out, not from memory on tiling day.
A Pre Tile Inspection Routine
- Inspect the framed and sheeted substrate: Confirm it's sound and sufficiently plane.
- Verify falls: Flood or level check toward the waste before membrane work starts.
- Inspect the membrane: Look closely at corners, penetrations, drain transitions and wall to floor junctions.
- Mark movement joints: Plan perimeter joints and joints over transitions so the tile layout preserves them. Guidance on where movement joints belong in a tiled installation helps if you're mapping these for the first time.
- Photograph everything: Record membrane layers, junction detailing and waste positions before they're covered.
Large rigid tiles and complex shower gradients are an awkward pairing. A panel can't bend to follow compound falls to a central waste without cuts that often look clumsy and drain poorly. Linear wastes, pre formed falls or smaller format tiles inside the shower recess paired with large wall panels are usually more honest solutions.
Adhesives, Trowels and Bedding for High Coverage
Coverage is where large format work succeeds or fails. Industry standards require at least 80% adhesive contact in dry interiors and at least 90% in interior wet areas or exteriors, so a 600 × 1200 mm tile covering 0.72 m² needs adhesive contact across roughly 0.648 m² of its back, based on LATICRETE technical guidance for large format tile and stone. Visual alignment tells you nothing about that hidden contact.
Adhesive class, trowel choice and bedding technique work as a set. Changing one without the others rarely fixes a coverage problem. If you're unsure how adhesive types differ, an overview of what tile adhesive does and how it's classified is a useful starting point.
Adhesive and trowel pairing for large format porcelain
| Adhesive class | Trowel notch | Back-butter | Min coverage |
|---|---|---|---|
| C2TE | Large square notch, combed in one direction | Recommended for panels with a profiled back | 80% dry interior |
| C2TE S1 | Large square or U notch suited to panel size | Yes, keyed flat coat plus combed bed | 90% wet area or exterior |
| C2TE S2 | Large notch matched to substrate and tile weight | Yes, essential on large or warped panels | 90% wet area or exterior |
The table is a pairing guide, not a brand endorsement. Always confirm the specific product is rated for the tile material, size, substrate and service conditions.
Why Ridge Collapse Matters More Than Brand
Comb adhesive in straight, parallel lines in one direction on the substrate, and apply a flat keyed coat to the back of the tile. Straight ridges let air escape as the panel is moved. Swirled ridges trap air pockets that become voids.
- Direction: Comb along the short direction of the tile where practical, so air has a shorter path out.
- Open time: Don't spread more adhesive than you can cover before it skins over. A skinned bed looks workable and bonds poorly.
- Verification: Lift a freshly placed tile early in the run and inspect the transfer. Adjust notch size, mix consistency or bedding pressure before you repeat the same error across a room.
Hollow corners are the classic failure point. Continuous support at edges and corners isn't optional detailing, it's where point loads and impacts do their damage.
Handling, Cutting and Levelling System Setup
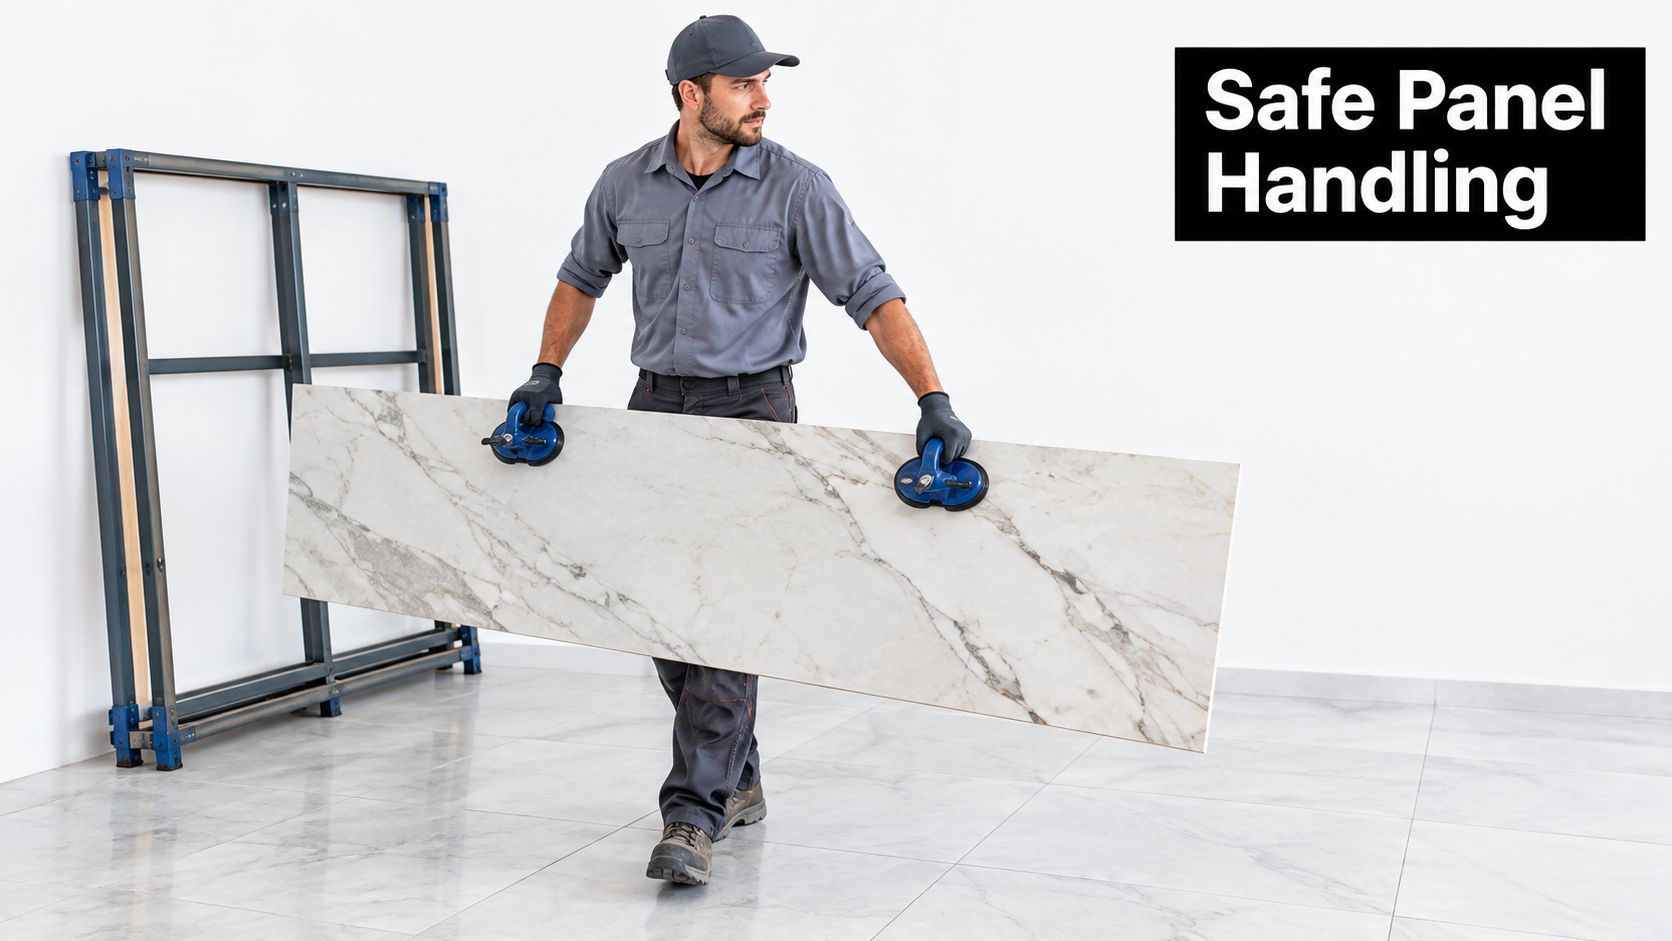
A large panel is awkward before it's heavy. Two people carrying a sheet by its edges invite flex, chipped corners and a cracked panel before it reaches the wall. Use suction lifters on clean, suitable surfaces and a rigid handling frame for thin porcelain and Kerlite style panels, and store panels upright and supported, never flat over an uneven stack.
The image below shows the two handed suction handling that keeps a slab controlled instead of wrestled.
Cutting and Dry Layout
Score and snap systems suit many straight cuts in porcelain and thin panels, provided the rail, scoring wheel and support table are up to the length. Wet saws give cleaner results on dense material, mitres and cut outs around wastes and tapware, but they demand space, water management and patience. Rushed cuts on large panels waste expensive material quickly.
Dry lay first. Centre the layout on the most visible wall or floor axis, then check what lands at doorways, vanity ends and shower entries. Narrow sliver cuts in corners look poor and are fragile. Shifting the starting point by half a tile often fixes both sides at once.
AS 3958:2023 guidance requires adhesive to be spread across the tile rather than applied only in isolated dabs, and large panels should be slid, tapped or twisted into the ridges so they fully collapse during placement, as explained in HIA guidance on updates to AS 3958:2023. Spot fixing has no place here.
Clip and wedge levelling systems help control lippage between adjacent panels, but they don't flatten a bad substrate. Choose clip height for the tile thickness, place them consistently, and apply even tension. Overtightening can lift a corner out of the bed and create the void you were trying to avoid. Teams such as Melbourne Tiling Services P/L, which installs large format Kerlite, porcelain and stone, use suction handling frames and long format cutters for this work, and that tooling is now standard for serious panel installation.
Watch the placement sequence in the video below, particularly how the panel is moved into the bed rather than pressed down.
Grouting, Movement Joints and Handover Documentation
Grouting is where people relax, and it's where movement joints get accidentally erased. Australian installation guidance requires movement joints at about 4.5 m intervals on large internal floors, and these joints must continue through the tile and adhesive bed rather than being rigidly grouted over, as described in Australian floor tiling and movement joint guidance. Perimeter joints and joints over structural transitions need the same respect.
Fill movement joints with a suitable flexible sealant over a backing arrangement that lets the joint move. Rigid grout in a movement joint doesn't make it stronger. It transfers stress into the tile edge, where it shows up later as cracking or debonding.
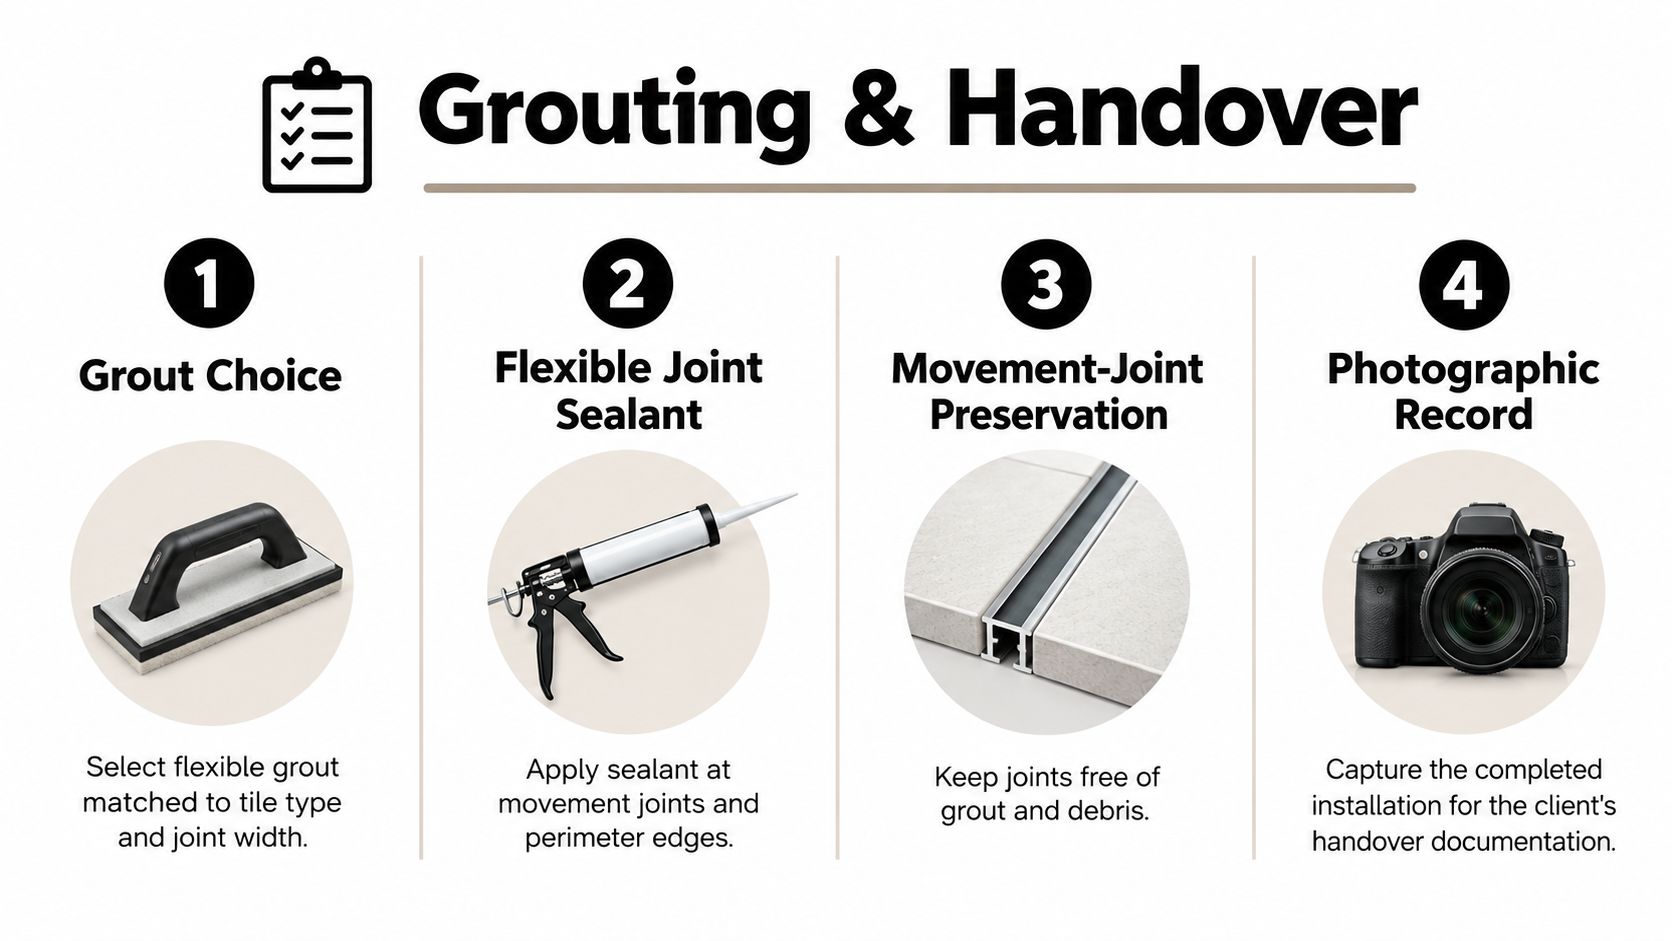
Choose grout for joint width, tile type and service area, then clean it properly. Cement based grout left to dry on a textured porcelain face becomes a haze problem that's tedious to reverse. If that happens, a cement and epoxy haze guide from Eco Clean Solutions explains removal approaches for cured residue, though prevention through timely washing is far easier.
The Handover Folder Clients Should Actually Receive
A slab tiled bathroom conceals almost everything that matters. Fewer grout joints also mean fewer visible clues when a leak investigation starts years later, and removing one large panel can damage neighbours or the membrane beneath.
- Substrate and membrane photos: Dated images of preparation, junction detailing and penetrations.
- Inspection and approval records: Whatever sign off applied to the waterproofing stage.
- Product information: Adhesive, membrane and tile batch details for future matching.
- Marked up plan: Concealed wastes, penetrations and movement joint locations.
Attractive, low grout surfaces don't prove the concealed wet area system is sound. The record does.
For landlords, property managers and apartment owners, that folder turns a future dispute about who did what into a straightforward diagnostic exercise.
Troubleshooting Lippage, Hollow Spots and Shower Ponding
Most large format failures I get called to inspect weren't caused by the tile. They were caused by a shortcut taken two stages earlier, then covered up.
Lippage usually traces back to substrate undulation, inconsistent adhesive bed thickness or a panel with inherent bow laid in a running bond pattern that stacks high centres against low edges. Levelling clips mask minor differences. They can't reconcile a wavy floor, and forcing them can pull panels out of full contact.
Hollow spots and drumming mean voids. Tap testing finds them, but injecting grout or flooding a joint with resin as a first response treats the sound, not the cause. If corners are unsupported, the honest fix is lifting and rebedding the affected panel while adhesive is still workable, or planned replacement later. Extra grout over the top does nothing for a void underneath.
Shortcuts That Make Things Worse
- Thicker adhesive to fix flatness: It shrinks unevenly, supports unevenly and hides the actual defect. Correct the substrate instead.
- Silicone over a missing movement joint: Sealant smeared over a grouted, rigid joint doesn't restore movement capacity. The joint needs to exist through the bed.
- Grouting over substrate cracks: Movement in the base will telegraph through a rigid panel. Address the crack and its cause first.
Cracked corners point to point loading over a void, impact on an unsupported edge, or movement that had nowhere to go. Debonding suggests skinned adhesive, incompatible products, contamination on the tile back or tiling over a membrane that hadn't cured as its data sheet required.
Shower ponding is a design failure, not a grout failure. If falls weren't built into the substrate, or a rigid panel was forced over compound gradients, water will sit where the geometry tells it to sit. Regrouting won't change that geometry. A Registered Builder assessing ponding will check falls, waste type and tile set out together, and the fix may involve reworking the shower floor format rather than replacing like with like.
Diagnose the layer that failed before you choose the repair. Surface cosmetics applied to a structural or drainage problem only delay a larger rectification.
If you're planning large format tile installation for a bathroom, ensuite, balcony or façade, Melbourne Tiling Services P/L offers start to finish bathroom renovations, waterproofing, screeding and large format Kerlite, porcelain and stone installation across Melbourne and greater Victoria, coordinated by Registered Unlimited Builders. Visit the site to request a free quote, discuss your substrate, falls and tile selection before work begins, and get a documented installation plan for your project.
Recent Comments