
Tile installation in Australia costs about $40 to $91 per m² for a basic ceramic budgeting allowance, or $65 to $200 or more per m² for porcelain-floor budgeting, putting a 20 m² floor at about $800 to $1,820 or $1,300 to $4,000 or more respectively. These are preliminary supply-and-installation allowances, not complete bathroom renovation prices.
The important qualification is that the published benchmarks cover general installed tiling and floor tiling, rather than fixed ceramic-only or porcelain-only tariffs. Your tile selection and the condition underneath it determine whether either allowance is realistic.
The cheapest per-square-metre quote often isn't the cheapest project. If the installer has excluded preparation, levelling and waterproofing, you'll still need to pay for them, potentially after demolition has already started.
Table of Contents
- Tile Installation Cost per m² and per Job
- What a Tiling Quote Includes and Leaves Out
- Substrate Prep, Screeding and Self-Levelling Costs
- Waterproofing Costs Most Quotes Leave Out
- Complexity Factors That Change the Price
- Worked Sample Quotes for Three Bathroom Jobs
- Registered Builders and Contract Rules for Bathroom Renovations
- Choose a Quote That Lasts and Stays on Budget
Tile Installation Cost per m² and per Job
What's the Damage's Australian renovation-cost report places tile supply and installation at approximately $40–$91 per m², equivalent to about $1,200–$2,730 for a 30 m² tiled area, before separate preparation and other charges. Treat that as a national budgeting allowance. Melbourne access, apartment handling, substrate condition and wet-area scope can move the final figure.
Use the lower band for a straightforward ceramic layout on a prepared surface. Stone, detailed shower walls and oversized porcelain panels need their own pricing logic.
The cheapest per-square-metre quote can still produce the dearest job. If preparation, levelling and waterproofing sit outside the headline rate, they usually return as variations after the old surface is gone.
Installed tile rates and indicative job totals
The table uses the national installed benchmark for basic ceramic budgeting and the Australian floor-tiling benchmark for porcelain budgeting. Neither published range guarantees a material-specific quote.
| Tile type | Installed rate per m² | Indicative 20 m² job | Main cost driver |
|---|---|---|---|
| Ceramic, straight-lay wall or floor | $40–$91 preliminary allowance | $800–$1,820, calculated from the allowance | Low cutting, flat substrate |
| Porcelain floor | $65–$200+ preliminary allowance | $1,300–$4,000+ | Heavier tile, more cutting, tighter flatness tolerance |
| Marble or natural stone | Individually quoted by the installer | Priced from the measured area once the stone rate is agreed | Sealing, cutting and lippage risk |
| Large-format Kerlite panels | Individually quoted, based on panel size and site conditions | Panel supply, handling, cutting and preparation quoted together | Large-format labour premium, specialised handling |
Installed does not automatically include everything needed to finish. Demolition, substrate repairs, waterproofing, screeding, disposal and unusual materials can sit outside the advertised rate. Adhesive, grout, trims and cutting also need a written inclusion, not an assumption.
Read the inclusions before you compare totals. Two quotes can carry the same per-m² figure and still price different jobs once waste, trims, movement joints and edge finishing are counted.
Measure the surface you're actually tiling
Start with separate measurements for floors and walls. A bathroom footprint does not equal tiled area when the design includes full-height walls, a shower recess or tiled returns.
- Separate surfaces: Record floor, shower-wall and remaining wall areas individually.
- Identify details: Mark niches, window reveals, exposed edges and floor wastes on the drawing.
- Confirm quantities: Ask the installer to calculate cutting waste against the chosen tile and layout.
- Apply the rate: Multiply each surface area by the relevant quoted rate, then add separately priced work.
Keep the floor sum in its place. A bathroom can also need plumbing, electrical work, ventilation, fixtures and finishing, and none of that is captured by a line that only says tiling.
What a Tiling Quote Includes and Leaves Out
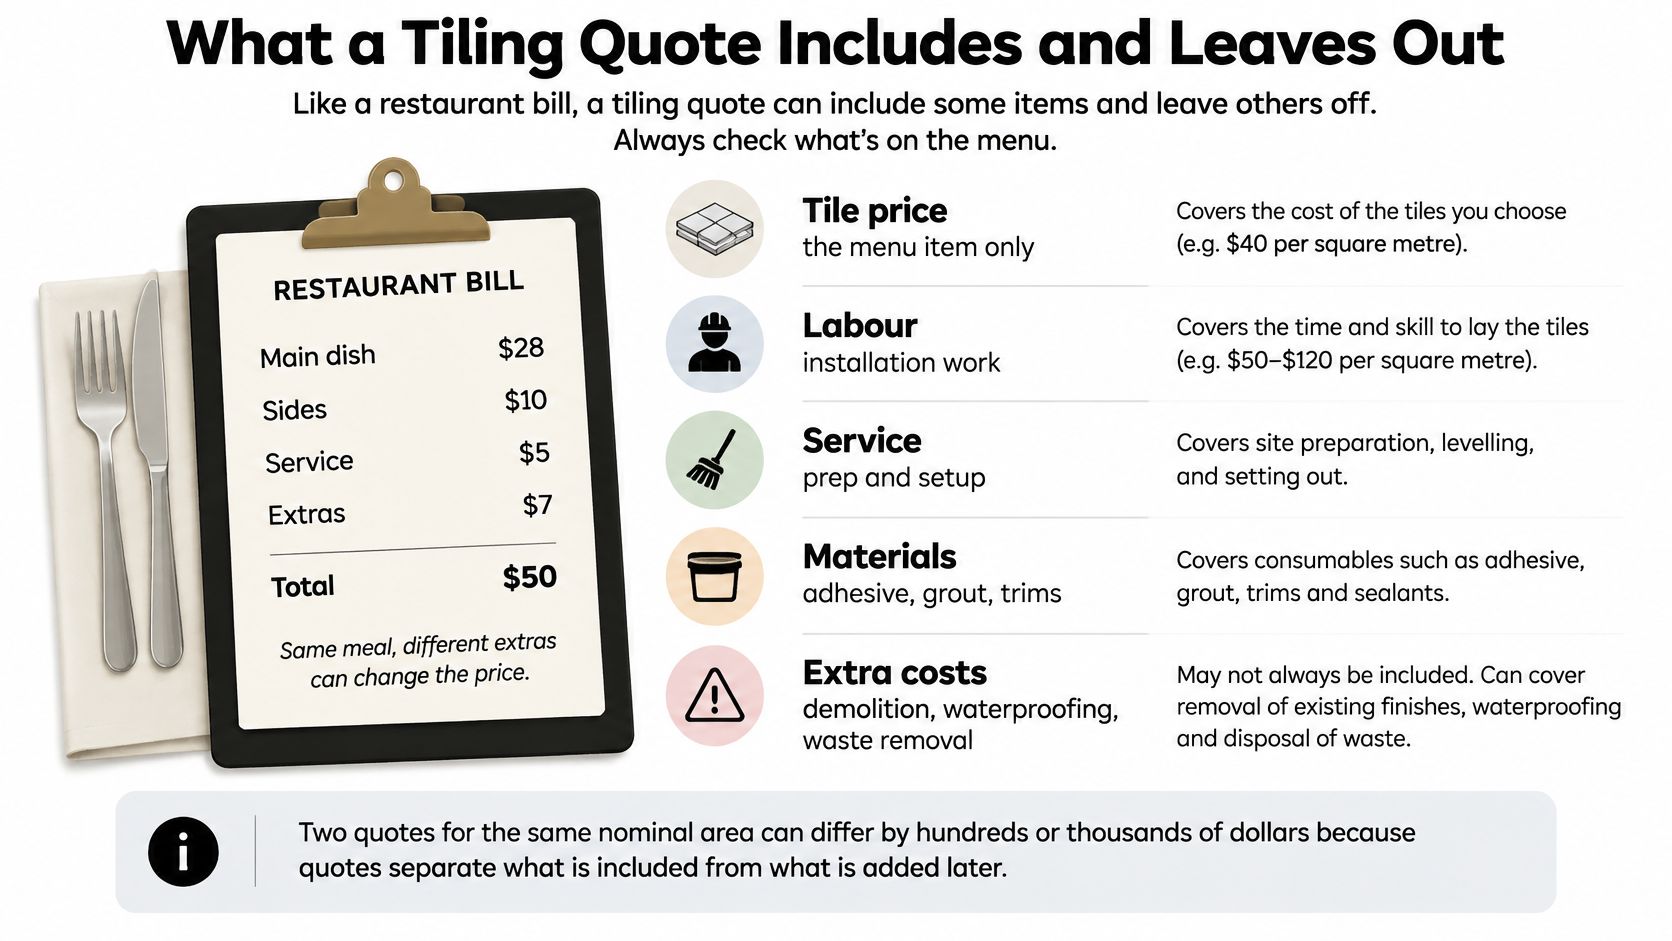
A tiling quote can resemble a restaurant bill: the tile price is the menu item, while preparation, installation and extras determine the final cost. The analogy stops being useful once you're signing, because every inclusion needs to be written down.
Property Blueprint's Australian floor-tiling guide reports installed floor tiling at roughly $65 to more than $200 per m², with materials at about $20–$160 per m² and laying labour at about $45–$150 per m². These are broad market bands, not components you can combine indiscriminately, but they show why labour can equal or exceed the tile purchase price.
This visual separates the advertised item from the work needed around it.
What a comparable quote should show
Ask each contractor to identify the same scope, even if they organise their pricing differently.
- Tile supply: Product, size, finish, quantity, delivery and cutting allowance.
- Installation materials: Adhesive, primer, grout, trims, silicone and movement-joint materials.
- Laying work: Setting out, ordinary cuts, detailed cuts and edge finishing.
- Preparation: Removal, adhesive grinding, substrate repairs, screeding and levelling.
- Wet-area work: Waterproofing system, coverage and documentation.
- Completion: Waste disposal, any required stone sealing and the final clean.
The cheaper contractor may have assumed a clean, flat substrate and an uncomplicated layout. The higher quote may include grinding, heavier porcelain, additional cutting and more demanding alignment. Neither price tells you which assumption is correct.
Questions to settle before accepting
Ask whether materials and waste are included, whether levelling has been allowed for, and who supplies the adhesive and membrane. Have the contractor identify provisional sums, meaning allowances for work whose actual scope or cost hasn't yet been settled.
For concealed damage, agree on how the contractor will document the finding, price the repair and obtain approval. Don't leave the approval process until the bathroom is unusable.
Comparison rule: Compare the inclusions and exclusions line by line. An unexplained all-in square-metre rate isn't enough information to approve the work.
Substrate Prep, Screeding and Self-Levelling Costs
Preparation is the part of tile installation cost you won't see once the room is finished. It's also where a cheap-looking job can become expensive: the installer may discover loose bedding, damaged sheeting or an unsuitable floor height after removing the old finish.
A sound tile needs a sound base. Using more adhesive to disguise a poor substrate isn't a substitute for properly repairing and preparing it.
Prepare in the right order
- Assess the existing surface. Check bond, movement, cracks, moisture damage and transitions to adjoining rooms.
- Remove unsuitable finishes. Lift tiles where necessary and remove incompatible or loose adhesive.
- Inspect the exposed substrate. Check timber support, sheeting, slab cracks and areas around the waste.
- Establish drainage falls. Set the finished waste and doorway relationships before building the bed.
- Correct flatness. Grind high spots or apply a compatible levelling system where appropriate.
Use a straightedge to identify high and low areas, and a laser level to check heights. These checks need to happen before someone orders a panel that can't accommodate the existing surface.
Substrate preparation items and typical ranges
These indicative Victorian preparation allowances are for budgeting, not a substitute for inspecting the exposed floor.
| Preparation item | Typical range | What it covers |
|---|---|---|
| Tile and adhesive removal | $30–$70 per m² tile-removal benchmark | Existing tile demolition; confirm adhesive grinding and disposal separately |
| Screeding to establish drainage falls | $50–$95 per m² | Sloped sand-cement bed directing water towards the waste |
| Self-levelling compound | Price by measured area, depth and product system | Correcting suitable minor depressions to create a flat plane |
| Substrate repair | Inspection-based quotation | Timber subfloor, cracked slab, damaged sheeting or rot |
Screeding and self-levelling solve different problems. A shower floor needs a deliberate slope towards its waste. A self-levelling product generally seeks a level surface, so pouring it across a floor that needs falls can create the wrong geometry.
For example, applying the screeding allowance to a hypothetical 6 m² floor gives $300–$570 for screeding alone. Removal is additional, not included in that calculation.
For a clearer explanation of the drainage bed, see screeding for tiles. Ask your contractor to state whether removal, adhesive grinding, screeding and levelling are included, fixed allowances or potential variations.
A floor can be flat without being level. In a shower, it needs to be flat enough for the tile while still falling towards the waste.
Waterproofing Costs Most Quotes Leave Out
Waterproofing is a separate technical installation, not a feature of the tile. A low laying rate tells you nothing about the membrane beneath the finish.
The Quote Yard's Victorian tiling-cost guide benchmarks membrane supply and application at approximately $40–$80 per m², with a typical bathroom at about $600–$1,500 and complex full-coverage rooms reaching $2,200 or more. Its guidance identifies shower floors and walls, bathroom floors, wall–floor junctions and plumbing penetrations as areas requiring waterproofing detailing under AS 3740.
Junctions and penetrations deserve particular attention during application.
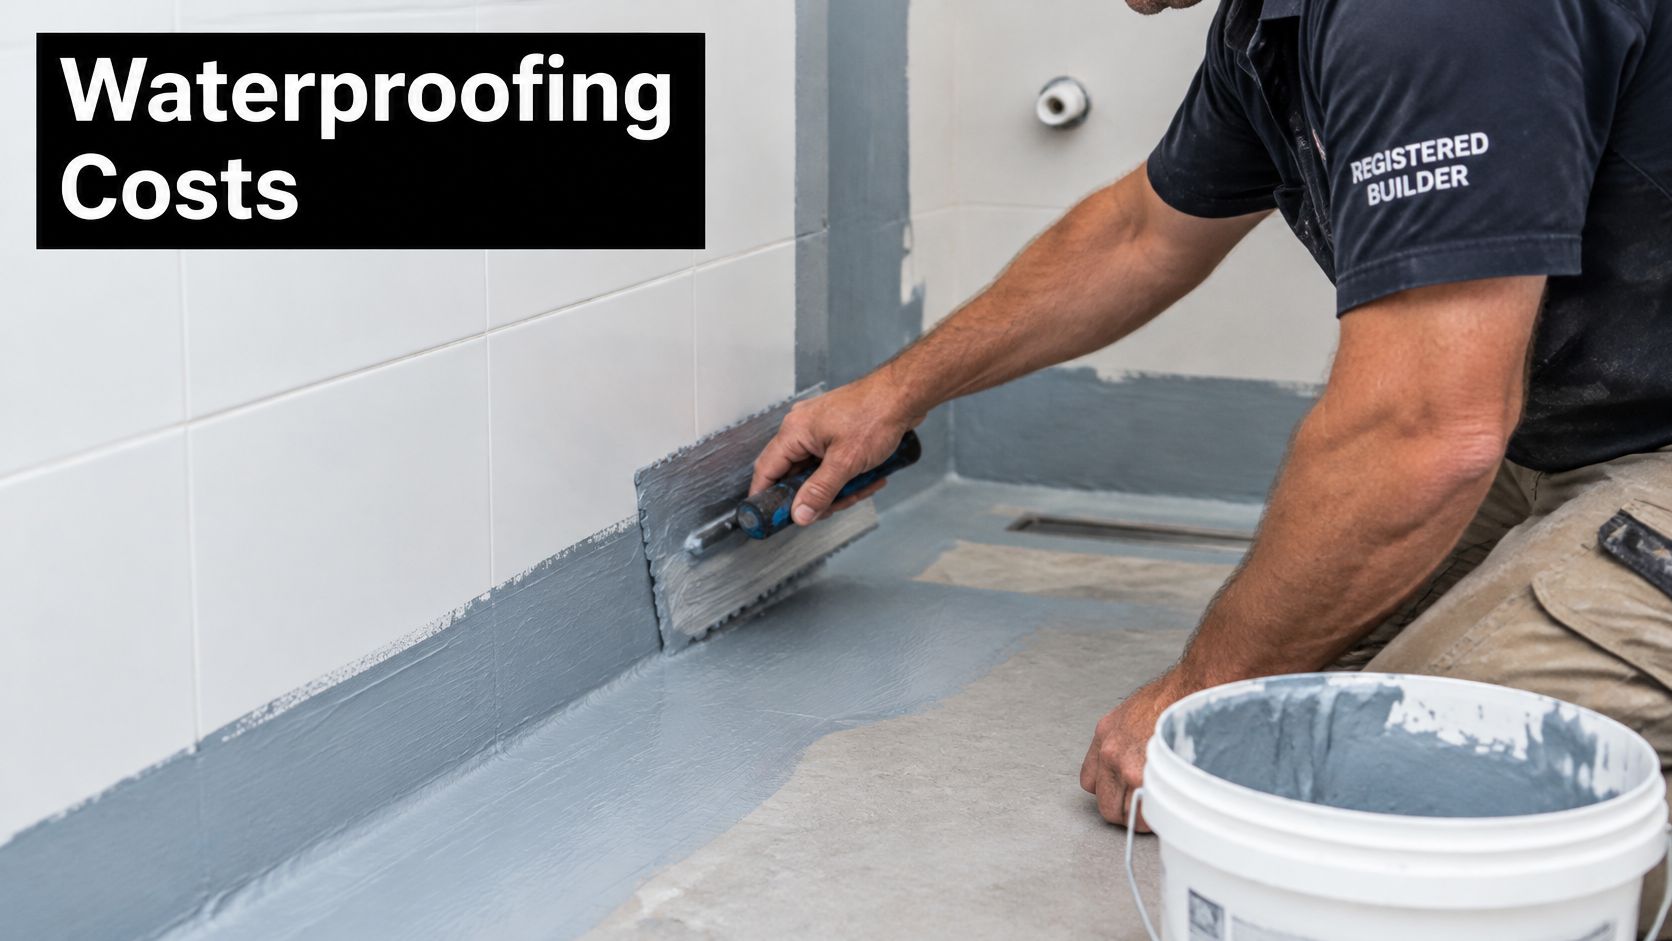
The contractor needs a prepared substrate, compatible primers and membranes, correctly detailed junctions and sufficient curing before tiling. Covering a suspect membrane doesn't resolve the defect, it makes access harder.
Repair, retile or rebuild
A leak needs a diagnosis before it needs a tile selection. Plumbing leaks, failed sealant, damaged membranes and poor drainage can produce similar symptoms.
- Localised surface repair: Appropriate only where inspection supports a grout or sealant defect without evidence of concealed failure.
- Investigative tile removal: Useful when the membrane or substrate condition can't otherwise be established.
- Wet-area strip-out: Appropriate when the system has failed and a reliable local repair isn't feasible.
- Drainage and substrate remediation: Necessary where movement, damaged materials or incorrect falls caused or contributed to the failure.
Don't assume fresh grout will repair a leaking waterproofing system. Equally, don't approve a complete rebuild solely because a silicone joint looks tired.
The following video provides additional wet-area context.
Retile-only work is poor value if the new finish covers damaged substrate or leaves water pooling away from the waste. Property managers should request the diagnosis and supporting photographs before approving a cosmetic scope.
Use this bathroom waterproofing cost guide to frame the discussion. The quote should name the membrane system, coverage area, inspection responsibility and documentation, with waterproofing priced separately from laying.
Complexity Factors That Change the Price
The same tiled area can involve very different amounts of work. An open floor lets the installer establish a grid and repeat it; a shower with a niche, channel grate and window requires repeated decisions about cuts, edges and alignment.
The Quote Yard's Victorian bathroom-tiling guide reports herringbone or mosaic additions of about $30–$80 per m², large-format premiums of approximately 20–40%, tile removal around $30–$70 per m², and screeding around $50–$95 per m². The preparation figures support the budgeting calculations above; pattern and format premiums explain a different part of the quote.
Cost factors and their uplift bands
| Cost factor | Uplift | Why it applies |
|---|---|---|
| Herringbone or mosaic layout | +$30–$80 per m² | Extra cuts, alignment and slower setting |
| Large-format tiles | About +20–40% labour allowance | Setting-out accuracy, handling risk and flatness demands |
| Cuts around niches, wastes and thresholds | Quote by detail and cutting method | Extra time per penetration and exposed edge |
| External versus internal work | Site-specific allowance | Exposure, movement joints, weather timing and access |
| Upper-floor access or occupied home | Agreed handling and protection allowance | Carrying, protecting finishes and working around occupants |
Pattern comes first. Herringbone needs careful setting out so the pattern doesn't finish with awkward slivers. Mosaic sheets still need adjustment, especially around a waste where sheet joints can become conspicuous.
Format changes handling. Large panels may require suction lifting equipment, additional installers and specialist cutting. A small hump that falls between smaller tiles can become an obvious raised edge, or lippage, under a large panel.
This visual groups the main sources of additional installation work.
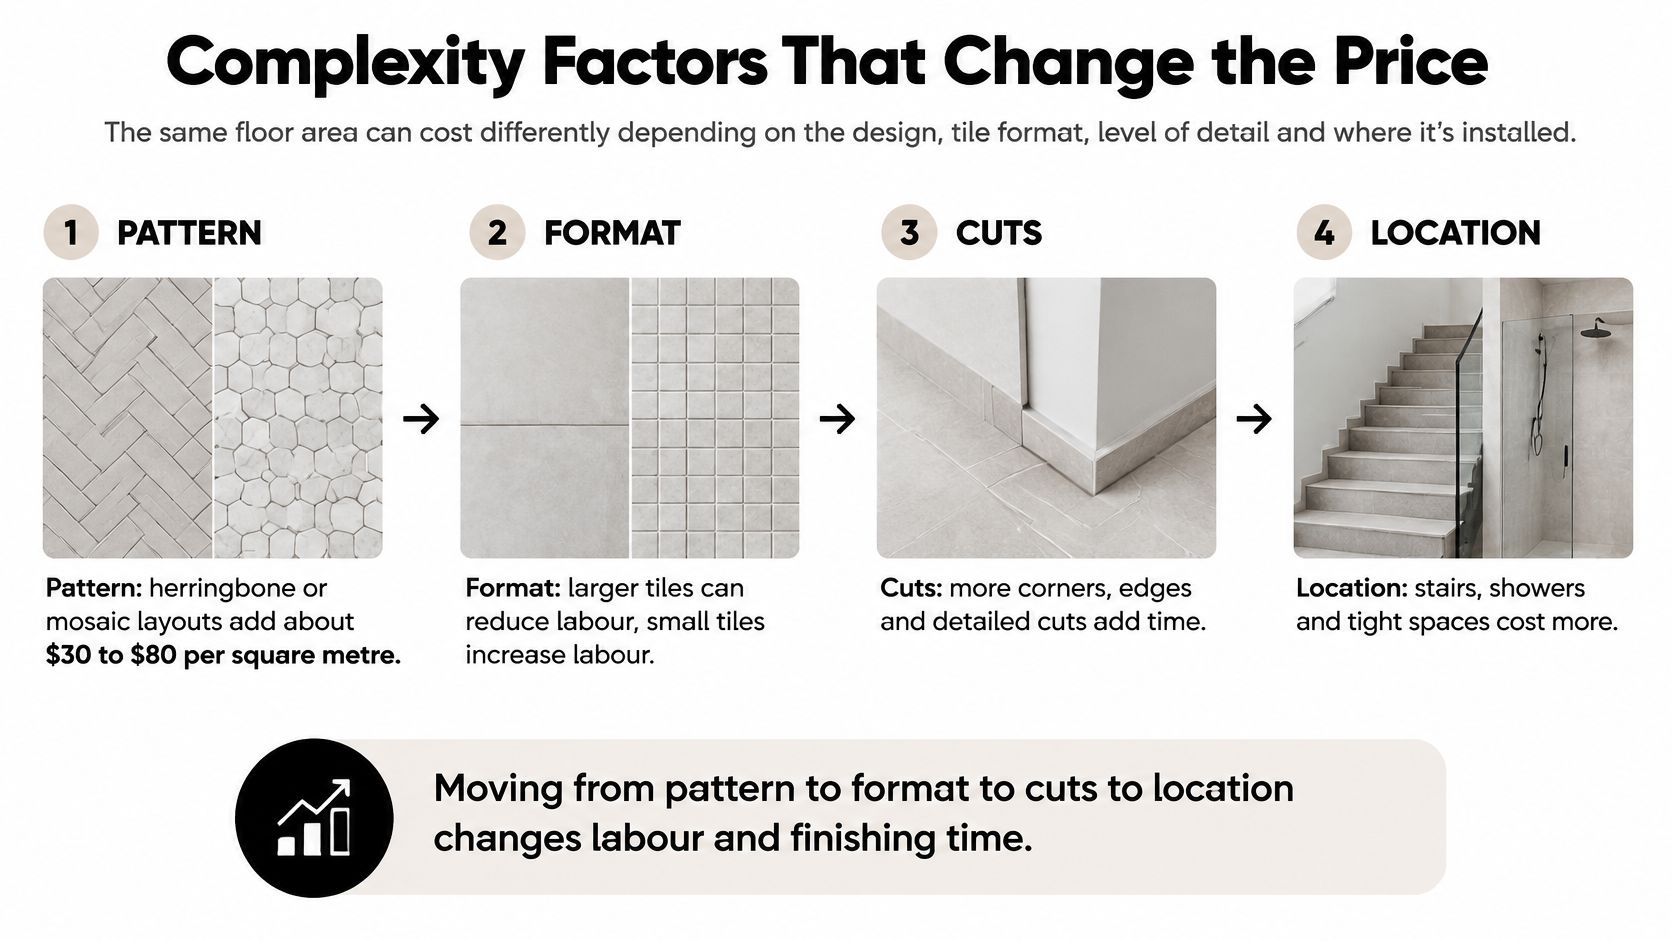
Larger tiles can cover an uncomplicated area with fewer pieces, but that doesn't establish a labour saving for oversized panels. Preparation, handling and adhesive coverage can outweigh the reduction in joints.
Details and access need their own allowance
A niche requires coordinated cuts, suitable edge treatment and alignment with surrounding grout joints. A floor waste also needs cuts that preserve drainage without leaving fragile tile points.
External installations introduce exposure and movement considerations. Apartment work adds lift access, carrying routes, protection and working arrangements with occupants or building management.
Ask the installer to price the actual drawing and access conditions. A showroom tile sample doesn't reveal how much work its installation will involve.
Worked Sample Quotes for Three Bathroom Jobs
A useful sample quote shows what the installer has assumed, not just a plausible total. The following scenarios apply the earlier budgeting allowances to different scopes; they aren't offers or complete bathroom-renovation prices.
For perspective, Canstar's bathroom renovation guide gives a broad Australian renovation range of approximately $8,000–$35,000, depending on scope and materials. That broader project includes work a surface-tiling allowance doesn't cover.
Line items for three sample tiling quotes
| Line item | Cosmetic retile, hypothetical 12 m² ceramic floor | Full wet-area rebuild, hypothetical 6 m² floor | Large-format stone feature |
|---|---|---|---|
| Tile and labour | $480–$1,092, calculated using the basic national allowance | Included in the contractor's separately stated rebuild rate | Product-specific supply and installation quote |
| Tile removal | Not required only where an inspected overlay is suitable | $30–$70 per m² allowance | Quote removal and adhesive grinding if replacing an existing finish |
| Screeding for falls | Not required where the existing geometry is suitable | $300–$570, calculated for the floor area | Flatness preparation quoted separately; falls if required |
| Waterproofing | Confirm existing membrane condition and suitability for the proposed work | About $600–$1,500 whole-room allowance | Required scope assessed if located in a wet area |
| Stone or large-format premium | None assumed | None assumed | About 20–40% large-format labour allowance; no verified stone-specific range |
What each scenario really assumes
The cosmetic job is the narrowest scope. Its calculation assumes a sound, suitably flat surface and an installation method that doesn't require demolition or disturb the waterproofing. An overlay also needs checks for bonding, finished height, doorway clearance and waste detailing.
A sound substrate alone doesn't mean tile removal is unnecessary. If the old tiles must come out, price that work and assess what happens to the membrane beneath them.
The rebuild needs an exposed-substrate decision point. The floor allowance doesn't automatically include wall tiling, replacing damaged framing, moving plumbing or installing fixtures. Ask the contractor to distinguish measured work from concealed-condition allowances.
The feature installation needs a product-specific quote. Marble and Kerlite aren't interchangeable materials. Slab dimensions, edge treatment, cutting, handling and preparation determine the scope, and there isn't a verified product-specific installed range here.
Budget check: A total is meaningful only when you can identify everything the contractor has left out.
Before comparing these jobs, add their excluded items. A cosmetic allowance and a wet-area rebuild price answer different questions, even when both appear under tile installation cost.
Registered Builders and Contract Rules for Bathroom Renovations
Victorian bathroom renovations can move beyond a standalone tiling job into coordinated domestic building work. Check the contract arrangements against the whole scope, not just the trade that finishes last.
Consumer Affairs Victoria's renovation checklist states that renovations costing more than $10,000 generally require a written major domestic building contract, and projects exceeding $16,000 require the builder to provide current domestic building insurance before taking a deposit and starting work.
Check the paperwork before demolition
- Contract: Identify the work, price, payment schedule and responsibility for permits.
- Permits: Ensure required planning and building permits are obtained, and receive any building permit before work begins.
- Insurance: Obtain the project-specific certificate where required, rather than accepting a general statement that the contractor is insured.
- Authorised scope: Confirm who is contracting for and coordinating the complete renovation.
The homeowner remains responsible for ensuring required permits are obtained. Don't assume a tiler's attendance means someone else has resolved that obligation.
Registration depends on the work
Standalone wall and floor tiling is treated differently from a contractor combining building skills or undertaking permit-related work. A bathroom contractor coordinating carpentry, plumbing, electrical work, waterproofing and tiling may need registered-builder status even when an isolated tiling contractor wouldn't.
The Victorian wet-area waterproofing fact sheet explains that, where a building permit applies, the relevant building surveyor signs off once satisfied the work complies with the applicable building legislation. Ask how required inspections will be arranged before the waterproofing is concealed.
Keep the contract, permit documents, inspection records and product information together. Those records matter if you later need to investigate a leak or establish what work was completed.
Choose a Quote That Lasts and Stays on Budget
Accept the quote that defines the necessary work clearly, not the one that makes the most optimistic assumptions. I would simplify the finish before reducing the preparation or waterproofing scope.
Don't save money by omitting a required membrane, substituting an unsuitable adhesive or deleting movement joints. Those decisions change performance, not just appearance.
Reduce complexity without reducing durability
- Choose manageable formats: Standard-size porcelain can avoid the handling demands of oversized panels.
- Simplify secondary areas: Use straight-lay tiling where a decorative pattern won't add much to the room.
- Retain proven sound materials: Reuse a substrate only when inspection supports it and the proposed system is suitable.
- Agree on supply: Have the installer approve tile quantities, adhesive compatibility and delivery arrangements before ordering.
- Resolve decisions early: Finalise wastes, niches, trims and fixtures before they trigger changes to installed work.
Confirm the contractor's authority as carefully as the material list. Consumer Affairs Victoria's building-practitioner guidance distinguishes standalone tiling from broader work and explains registration requirements for domestic-building contracts over $10,000, combined building skills and work requiring a building permit.
Make the next quote comparable
Request a free, itemised bathroom renovation quote with measured surfaces, named materials, preparation allowances and explicit exclusions. Provide photographs, your preferred tile, the proposed layout and any evidence of leaking so the contractor can assess the right scope.
Before signing, resolve provisional items and confirm who coordinates the licensed trades. A clear scope won't eliminate every concealed problem, but it gives you a practical basis for approving or rejecting additional work.
Melbourne Tiling Services P/L offers free quotes for tiling and bathroom renovations, with registered unlimited builders coordinating licensed trades, waterproofing and preparation. Visit Melbourne Tiling Services P/L to request an itemised quote for your project, then check its inclusions, allowances and exclusions before signing.
Write a Comment