

The average Australian home now has more bathrooms than it did a few years ago. The Housing Industry Association reported that the average number of bathrooms rose from 2.2 in 2019 to 2.6 in 2022. Interest in wet rooms and ensuites has grown over the same stretch, and households are renovating bathrooms on a shorter cycle than they did before the pandemic.
That pace is why large format tiles for bathroom work keep showing up on Melbourne quotes. Bigger panels cut the grout grid and let a compact wet area read as one surface. They also punish a poor fall, a rocking substrate and a one-person lift.
A large panel is not automatically the better bathroom choice. Start with the floor waste, the slip evidence and the people who have to carry the panel. Then pick the format those limits will accept.
Table of Contents
- Large Format Tile Sizes at a Glance
- Which Bathroom Zones Suit Large Format Tiles
- Waterproofing, Falls and Substrate Before Tiling
- Slip Resistance and Choosing a Safe Surface
- How to Handle, Cut and Set Large Format Tiles
- Registered Builders and the Quote Checklist
Large Format Tile Sizes at a Glance
A size chart is a menu of formats, not a promise that every row belongs on your floor. Handling weight, cut length and how cleanly a panel can meet a waste decide the row that is honest for the room.
| Size (mm) | Typical bathroom use | Main constraint |
|---|---|---|
| 600 x 600 | Reference size for floors and lower walls | Lightest handling load of the large formats |
| 600 x 1200 | Family bathroom walls and open floors | Longer edge, still a two-person set on a flat wall |
| 900 x 1800 | Feature walls and larger floor areas | Heavier panels; cuts around a floor waste are harder |
| 1200 x 2400 | Full-height ensuite walls | Two-person handling and a flat substrate are essential |
| 1500 x 3000 | Wall panels in premium projects | Specialist handling and tooling; rarely suited to shower floors |
600 x 600 mm is the size I treat as the reference. It is large enough to quiet a busy grout grid, and it is the lightest panel in this range to score, carry and bed. Most tilers can set it without specialist lifters, which keeps breakage and lippage risk lower on a first renovation.
600 x 1200 mm suits family bathroom walls and open floor zones where the fall is a single plane. The long edge still needs a straight substrate. On a wall it reads as a calm stack. On a floor it only works if the waste sits where a full panel, or one planned cut, can meet it.
900 x 1800 mm is a feature-wall and larger-floor format. The panel is heavy, and a cut around a round floor waste is awkward because you are notching a long, rigid piece rather than swapping in a small tile. Plan that cut on paper before the pallet arrives.
1200 x 2400 mm can cover a full-height ensuite wall in one or two courses. Two people, suction lifters and a flat substrate are not optional. A bow in the wall shows as a shadow line the full height of the room.
1500 x 3000 mm belongs on wall panels in premium projects, with specialist handling and tooling. I would not put this format on a shower floor. It cannot fold into a multi-way fall, and a broken panel is a large waste allowance.
Practical rule: Measure the longest wall and the shower footprint before you order. Those two dimensions set the largest panel that lands with few cuts.
Which Bathroom Zones Suit Large Format Tiles
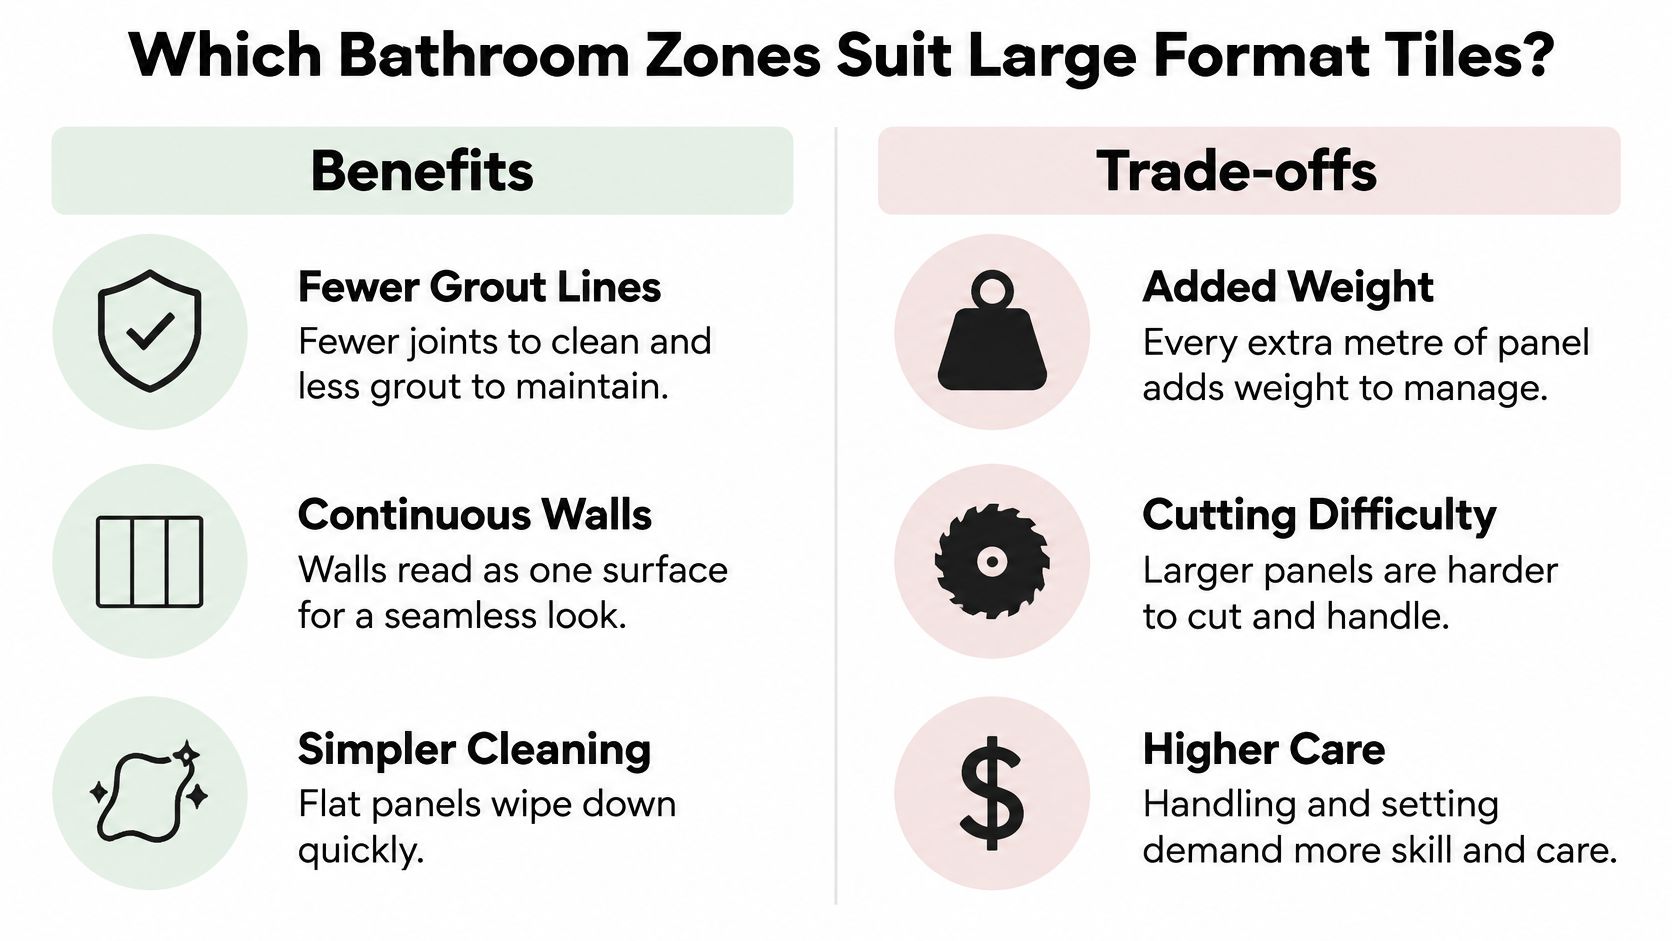
Large format is not automatically the best choice for every bathroom. Panels reduce grout lines, make walls look continuous and simplify cleaning. Every extra metre of length also adds weight, makes cutting harder, raises lippage risk, and reduces how well the tile can follow a fall.
| Bathroom zone | Large format suitability | Main reason |
|---|---|---|
| Feature or full-height walls | Well suited | Fewer grout lines; panels bond well to a flat wall |
| Open bathroom floor | Suited if flat or falling to a waste | Cuts and lippage increase with panel length |
| Shower floor | Poorly suited | Rigid panels must follow the fall toward the waste |
| Shower niche and threshold | Usually unsuited | Needs smaller tiles or mosaics for shape and drainage |
| Vanity surround | Medium format often better | Easier to cut around pipes and fittings |
Walls, open floors, then the wet bits
Feature and full-height walls are where large panels earn their keep. A flat wall gives full adhesive contact, and the eye reads one surface instead of a grid. That is the zone I would keep large even when the floor changes format.
Open bathroom floors can take large tiles when the floor is level, or when it falls in one clean direction to a waste. Panel length is the limit. A longer tile bridges more variation, so lippage and extra cuts show up faster.
Shower floors are poorly suited. A rigid panel has to follow the fall toward the waste. Force it across two directions and you get rocking, ponding, or a proud edge at the screen.
Niches and thresholds usually want smaller tiles or mosaics. The shape is short, the corners are tight, and water has to leave the ledge. A slab offcut looks clumsy and drains poorly.
Vanity surrounds are kinder to a medium format. Pipes, tap bodies and a shaving cabinet create short cuts. A 600 mm module turns those cuts into tidy pieces instead of a cracked corner on a 2.4 m panel.
Say the room is 2.2 m by 1.6 m with the floor waste off centre. 1200 x 2400 mm panels will be mostly cuts, and those cuts will fight the fall. A 600 x 1200 mm or 900 x 900 mm floor will usually give fewer lippage and drainage problems, while the walls stay large.
Fewer joints also mean less grout to scrub. Once the room is in use, a clear routine for cleaning grout and acrylic tubs keeps the remaining joints from staining, which matters more on a floor that still needs small tiles in the shower.
Find each zone in the table and note the format it can accept before you order. Mixing formats is normal, not a compromise.
Waterproofing, Falls and Substrate Before Tiling
The shower floor has to direct water continuously to the waste. For an unenclosed shower, Victoria's NCC 2022 wet-area rules define the shower area as the floor within a 1,500 mm horizontal radius of the shower rose connection. The Building and Plumbing Commission's wet-area waterproofing guidance says the entire shower area must be waterproofed and have a floor waste. A waterstop is also required at least 1,500 mm from the shower rose, with the membrane running from the waterstop back to the waste. Compliance can follow Part 10.2 of the ABCB Housing Provisions or AS 3740.
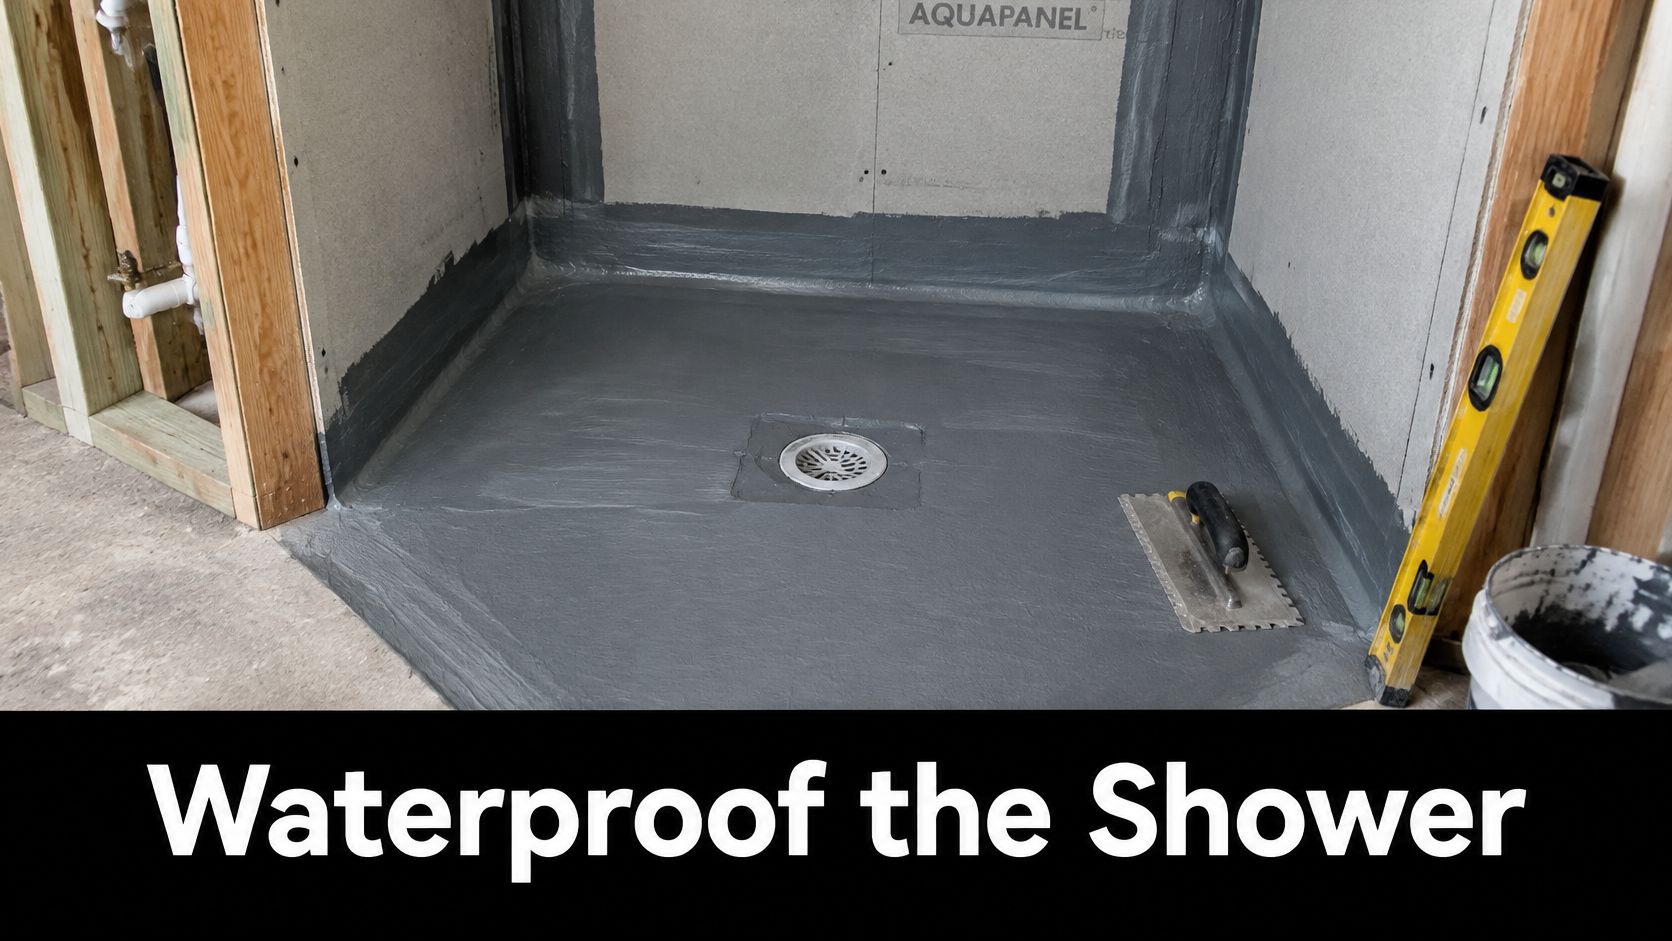
The required fall must suit the applicable standard and be formed in the substrate, not corrected with grout. Check the shower floor fall requirements for drainage before the screed is set. Open showers and shower-over-bath layouts without screens need particular care because water can travel beyond the immediate shower area.
Tiles are the finish, not the waterproofing. The substrate must be structurally sound, clean, dry and flat within the tile manufacturer's tolerance. Where the membrane system calls for levelling or screeding, complete that work before applying the membrane.
Why a long edge is less forgiving
A long tile can bridge a high spot instead of sitting flat against the substrate. That can leave a rocking corner, a hollow bond or stress in the adhesive as it cures. On a shower floor, a rigid panel also has to follow the fall to the waste without creating a low spot where water collects.
Check the base before setting out:
- Check the fall with a level. Confirm that the surface falls continuously towards the waste, with no backfall behind the screen line.
- Match the waste to the layout. If a large panel cannot follow the required fall, consider a linear waste or use smaller tiles in the shower and large format tiles outside it.
- Check the membrane documentation. Confirm that the system and its details, including junctions, penetrations and the waterstop, meet the chosen compliance pathway.
A linear waste can help keep large panels on a single plane because the floor falls in one direction. A centre waste may require the floor to slope from several directions, which is harder for a large rigid tile to follow.
Standing water can encourage mould in corners. Cleaning and drying can help manage mildew after handover, but it cannot correct a flat shower base. Use a routine to scrub and dry shower mildew.
Slip Resistance and Choosing a Safe Surface
A polished large-format porcelain floor can look continuous and still become much more hazardous under a wet foot. Matt, natural and honed describe the face of the tile. They do not describe how it behaves when that face is wet.
Australian guidance tied to AS 4586 uses slip-resistance classifications such as P ratings. Wet pendulum testing produces ratings from P0 to P5, and the rating belongs to the tested surface, not a marketing label. The NCC does not impose one P rating for every residential bathroom floor. The right class depends on the zone, exposure, footwear, contamination and the project risk assessment. I would not accept a finish name in place of the pendulum result for that exact batch.
The My Homeware buying guide is clear that the slip class should be set for each distinct zone. Separately, confirm the format can be installed while the fall stays true. Forcing a rigid panel across a sloping floor can produce rocking, poor drainage, or an unsafe step at the threshold. Grip on the box does not rescue a panel that will not sit to the fall.
Main floor. Ask the supplier for the wet pendulum result on that batch. A bedroom-soft polish is a poor match for a floor that stays wet beside the shower.
Shower floor. This is the highest contamination in the room. Specify the floor tile's own rating, and do not assume the wall tile's sheet applies. A large panel with a low wet result is the wrong shower floor, even when it matches the walls on a sample board.
Externally exposed threshold. A door to a balcony or side path brings rain and outdoor shoes onto the same surface. Treat it as its own zone. A tile that tests well but cannot be laid to the fall that threshold needs is still not a valid choice there.
Wheelchair-accessible areas have to keep compliant falls as well. Grip without drainage, or drainage without grip, both fail the person using the room.
A tile that cannot be set to the fall is not made safe by a higher P rating on the box.
Notes on non slip bathroom flooring walk through how to read a test sheet against the zone. Finish that check before the order is placed. Finding the mismatch on site means the wrong tiles are already in the hallway.
How to Handle, Cut and Set Large Format Tiles
Large panels fail in a repeatable order. The substrate was checked too late, the cuts were made after the adhesive was mixed, or a hollow spot was left under the middle. The sequence below is the one I would follow on a Melbourne ensuite, whether the panel is 600 mm or a full-height slab.
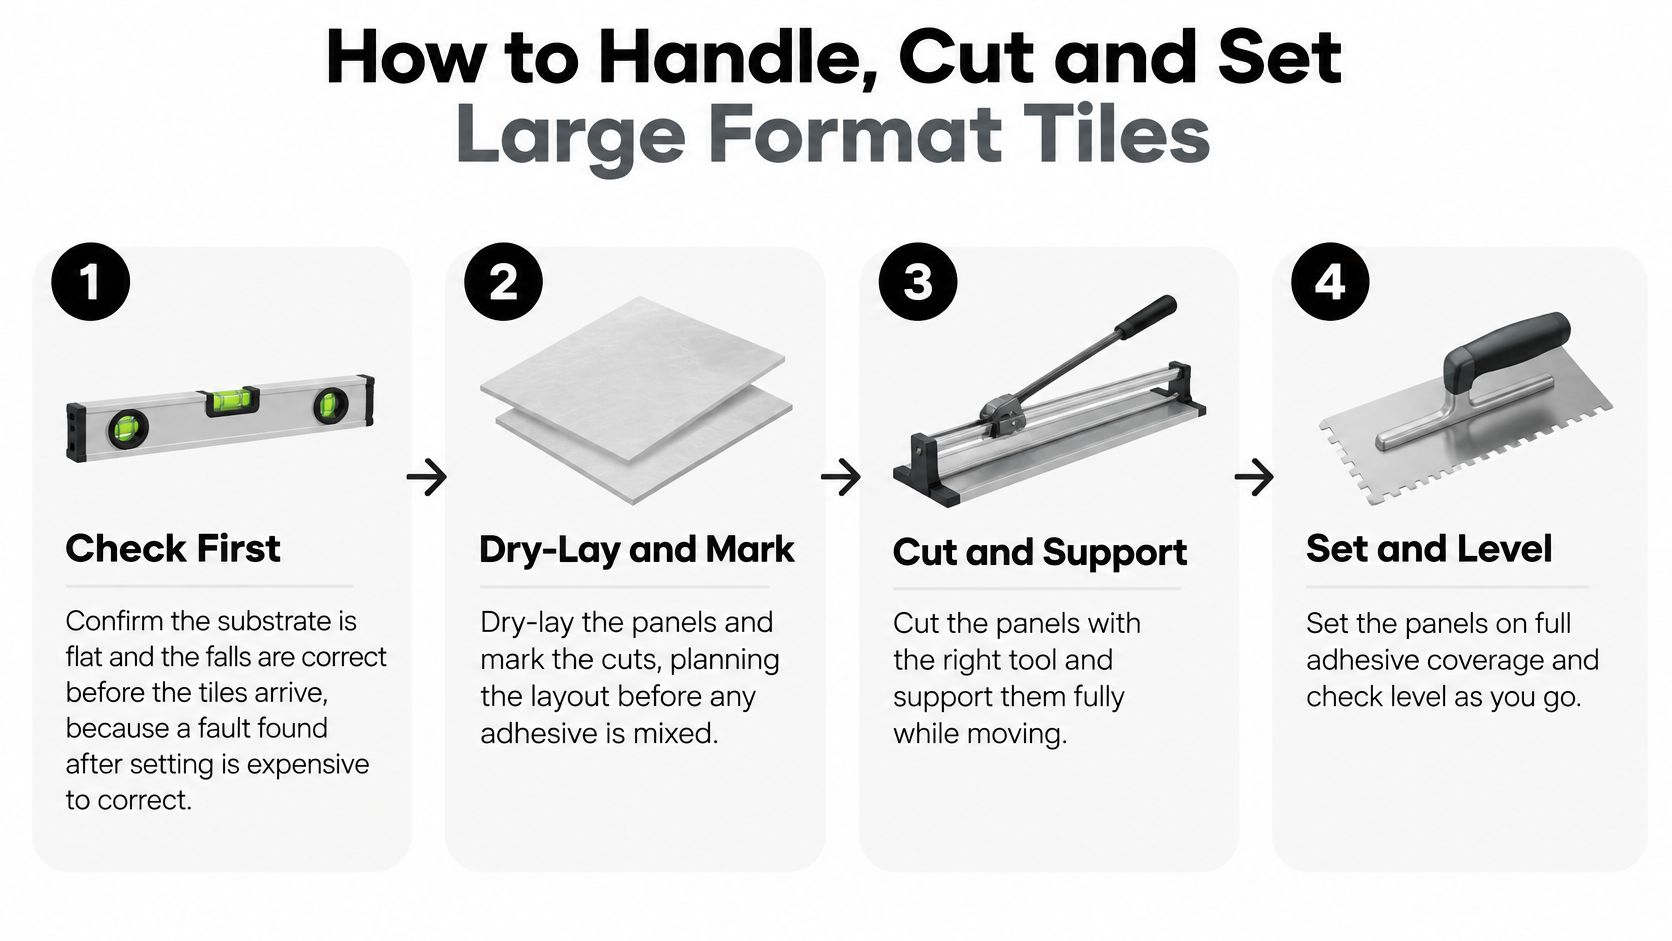
Confirm flatness and falls before delivery. Run a straightedge over walls and floors and record the fall to the waste. A fault found after the tiles are stuck means lifting bonded panels, and that is the expensive version of a five-minute check. The common slip is trusting a screed that looks smooth under raking light but rocks a straightedge.
Dry-lay and mark every cut. Set the panels out dry, mark penetrations, and keep cuts away from the waste by more than a short offcut. A sliver beside the grate snaps, and it leaves a lip you cannot hide with grout. Mix no adhesive until the layout is agreed.
Cut with a wet saw or a specialist cutter, then stop. Do this after the dry lay and before any tile is bedded. A late cut chips the edge and bumps the neighbour that has already grabbed. Support the offcut. A 20 mm porcelain edge will snap if it cantilevers off the bench.
Move panels with two people and suction lifters. Carry them on edge and protect the corners. Chipped corners are the usual loss between the truck and the wall, not a failure in the kiln. One person twisting a 1200 mm panel is how it cracks in the middle.
Trowel to suit the panel and back-butter every tile. Comb the wall or floor, then skim the back so the ridges collapse into full contact. Hollow spots crack under a heel or a shower screen fixing. Standard thinset that suits a 300 mm tile often lacks the bed depth these panels need.
Set, then check lippage while the adhesive is open. A straightedge across the joint tells you immediately. Twist the panel down now. Once the mortar skins, the lip is permanent and the fix is removal.
Leave movement joints. Keep them at internal corners, wall-to-floor junctions and where the substrate changes, for example from sheet to screed. A long panel moves more across its length than a mosaic does. Hard grout in those joints is a crack waiting for the first hot shower.
Agree grout and sealer before the room is used. Match the joint colour, use a flexible sanitary grout in the wet zones, and seal corners with a proper joint sealant rather than grout. Write that scope into the quote so it is not a variation on the last day.
Skip the dry lay and you will spend the afternoon recutting a panel that no longer matches its neighbour.
If a panel rocks after step 6, lift it. Do not pack one corner with a thicker blob and hope the straightedge was wrong.
Registered Builders and the Quote Checklist
A 1500 mm panel does not excuse a weak quote. In Victoria the registration has to match the wet-area work, and the quote has to say who owns the fall, the membrane and the panel before anyone signs.
The Building and Plumbing Commission sets out what counts as domestic building work. Registration then splits by class. A Domestic Builder class limited to bathroom, kitchen and laundry renovations can build, renovate or repair those wet areas, but the work stays inside the existing external walls, floor and ceiling. A separate waterproofing class covers application, installation and repair of membranes and systems in homes and associated Class 10 structures, including interior, exterior, below-ground and remedial work. For major domestic building work, a building surveyor has to be satisfied the builder is registered in the right class and covered by the required insurance before a building permit is issued.
Consumer Affairs Victoria states that domestic building work generally requires registration when the contract or the work exceeds $10,000, and also whenever a building permit is required, whatever the value. A bathroom often combines structure, waterproofing, carpentry, plumbing and electrical work. Standalone tiling can sit outside that general registration rule. Once those trades are one renovation, check the registration. Do not assume it.
What to take to the quote meeting
Get each answer in writing before you sign.
- Registration and class: Search the practitioner on the BPC public register and confirm the class matches wet-area renovation, not an unrelated category.
- Insurance: Confirm domestic building insurance is current for the contract value, which the surveyor will want before a permit.
- Who holds the contract and the permit: One party should own coordination. Split quotes with nobody holding the permit leave the membrane and the tile arguing with each other.
- Who signs off falls and waterproofing: Name the person who checks the fall to the waste and the membrane documents before tiling starts. A long panel will not hide a flat spot.
- Tile size against the shower footprint: Attach the zone plan, the drainage path and the slip evidence for the main floor, the shower floor and any external threshold. Note how the panel will be carried in and cut. If the shower cannot take the format, keep a smaller tile there.
A clear quote also names who patches plaster, who reconnects the waste, and who waterproofs. Bathroom renovations run cleanly when carpenters, plumbers, waterproofers and tilers are in-house and working off one layout. Kerlite panels between 900 x 900 mm and 1500 x 3000 mm need that coordination, because delivery, cutting and the membrane booking have to land in the same week. Free quotes and 3D drawings are the right moment to lock the format to the measured room, not after the pallet is in the garage. I would not accept a size until the shower fall and the slip rating for that zone are on the same drawing.
When the panels are finally down, fine dust from cuts settles in tracks and on adjacent floors. An Orlando post-construction cleaning guide is a useful checklist for that last clean, so slurry is not left in the waste the new fall is meant to serve. If you want the line items a Melbourne quote should already contain, start with how to quote a bathroom renovation and take that list to the meeting.
Melbourne Tiling Services P/L plans and installs large format bathroom tiles across Melbourne and greater Victoria, including falls, waterproofing and the panel sizes the room can carry. The wet-area trades are coordinated so the substrate, membrane and tile layout are agreed before the first slab is cut. Visit Melbourne Tiling Services P/L to book a measure and see which format belongs on your walls, and which zones should stay smaller.
Write a Comment