
You're standing in a Melbourne bathroom with the old tiles removed, a concrete slab exposed and a new 600 x 600 porcelain tile already chosen. The entry has only a modest step-down from the adjoining room, the waste sits away from the door, and every millimetre of finished floor height matters. The obvious question is, “What bathroom floor screed thickness do I need?” The practical answer depends on the screed system, the required fall, the waterproofing position, the substrate and the tile build-up.
A screed is more than a flat layer poured to a standard depth. It forms the drainage geometry, supports the finished floor and has to fit between the existing slab and the final threshold. In a Melbourne renovation, the right specification is the one that delivers a stable, tile-ready surface without creating a trip at the doorway or leaving the waste too high.
Table of Contents
- Why Bathroom Floor Screed Thickness Matters in a Renovation
- Bonded Versus Unbonded Screeds and Why the Numbers Differ
- How Fall to Waste Shapes Screed Thickness Across the Room
- Matching Screed Thickness to Tile Type and Stone Choice
- Waterproofing Compatibility and Where the Screed Sits in the Build-up
- Curing Times and How They Affect Renovation Scheduling
- Melbourne Renovation Rules Including the Registered Builder Threshold
- Quick Reference Table for Common Bathroom Screed Scenarios
- Decision Rules and a Pre-Build Checklist for Homeowners
- Frequently Asked Questions About Bathroom Floor Screed Thickness
Why Bathroom Floor Screed Thickness Matters in a Renovation
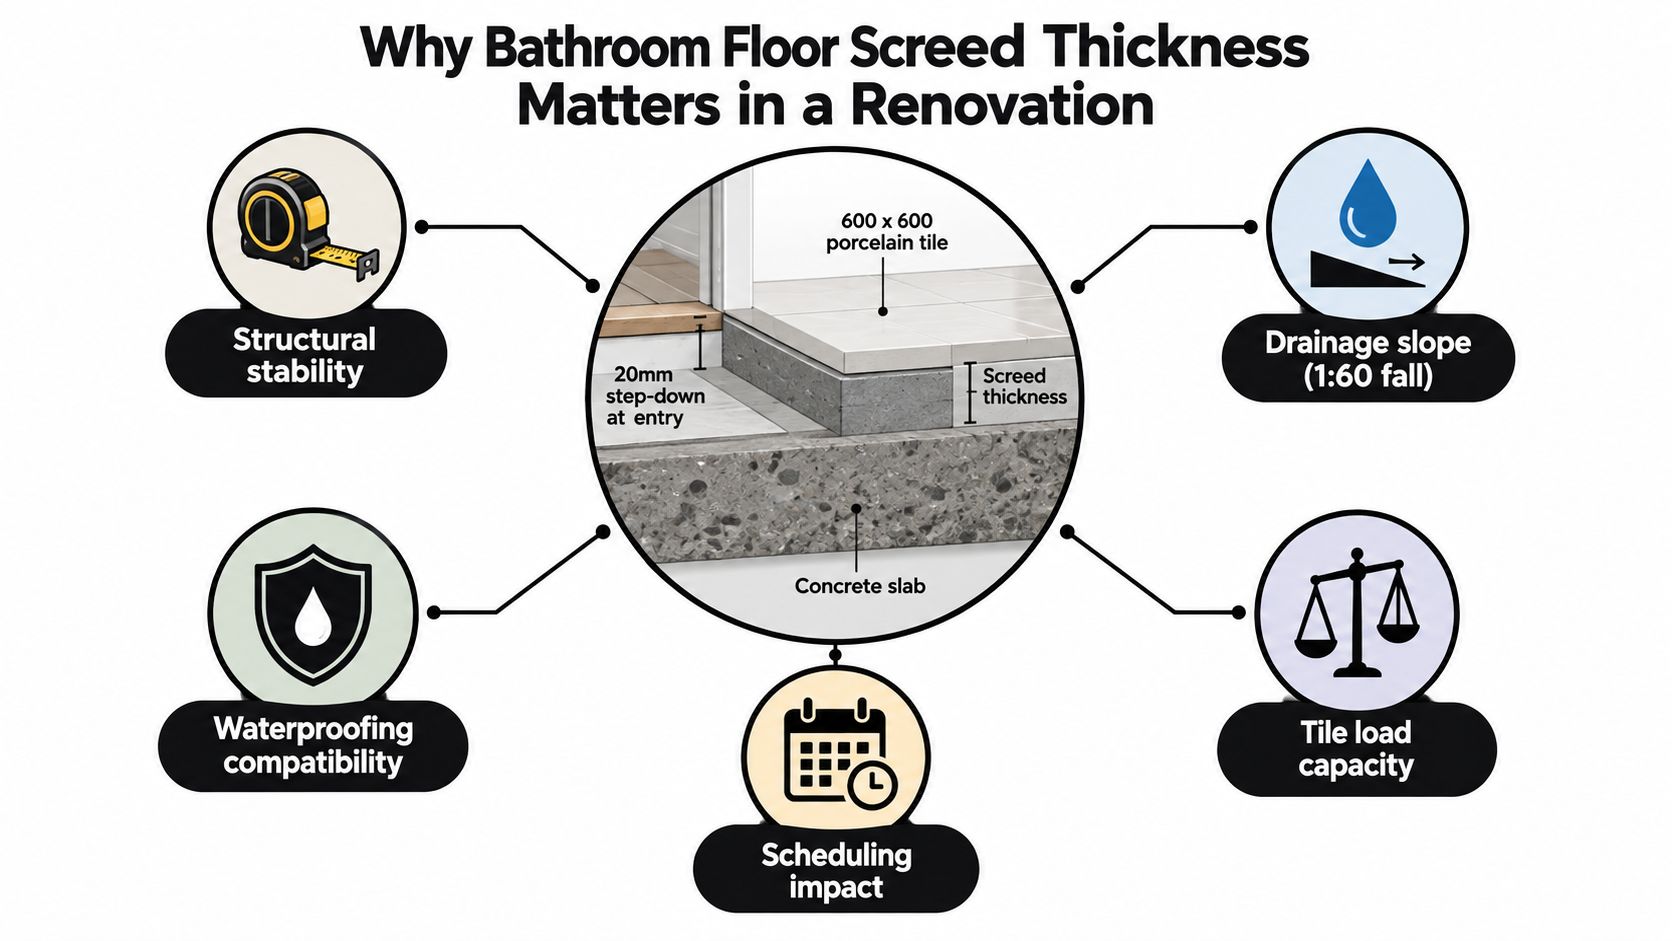
Consider a 1990s bathroom with a concrete slab, a 20 mm step-down at the entry and a 600 x 600 porcelain tile specification. The available height has to accommodate the substrate, primer, screed, waterproofing membrane, tile adhesive and tile. If the screed starts at 15 mm in one corner but needs to rise to 45 mm at the perimeter to form the drainage fall, the total build-up can quickly consume the available threshold clearance.
That's why bathroom floor screed thickness is a system design decision, not a universal number. A bonded screed may work at a relatively shallow point where the slab is sound and the system permits it. An unbonded screed over a separating layer needs substantially more depth because it can't rely on a direct bond to the concrete for support. The tile format also matters. Large porcelain and stone show changes in flatness that small mosaics can visually absorb.
Read the floor as a complete build-up
Before ordering materials, mark the proposed finished tile level at the doorway and compare it with the adjoining room. Then work backwards through the build-up:
- Confirm the existing slab or substrate level.
- Identify whether the screed will bond to the substrate or sit over a membrane or separating layer.
- Draw the fall from the perimeter and shower area to the waste.
- Allow for waterproofing, adhesive and the selected tile.
- Check the finished level against the door, skirting, shower screen and adjacent floor.
A 15 mm screed at one point can become 45 mm elsewhere when the fall geometry demands it. That difference isn't a defect. It's often the result of directing water properly while maintaining the minimum depth required by the screed system.
A useful starting point is to understand what screed is in tiling, then apply that definition to the actual bathroom cross-section rather than relying on a single number from a generic renovation quote.
Bonded Versus Unbonded Screeds and Why the Numbers Differ
The first specification question is simple: what is the screed sitting on?
A bonded screed is installed directly onto a mechanically prepared and primed substrate. The cementitious layer is intended to work with the base as a combined system. Australian practice commonly treats bonded cementitious screed as starting at 10 mm, while bonded proprietary levellers can be applied from around 3 mm, depending on the product and substrate requirements.
That shallow approach only works when the base is suitable and the product data allows it. A bonded screed that loses adhesion can crack, sound hollow or move under the finished tiles. It doesn't have the same tolerance for debonding as an unbonded layer.
An unbonded screed sits over a separating layer or damp-proof membrane and moves independently from the substrate. Australian guidance commonly specifies 50 mm minimum for cement and sand and 35 mm for fibre-reinforced mixes, because the screed has to resist curling, point loads and movement without relying on a direct bond to the slab. A floating screed over insulation is generally treated as a heavier build-up, with a 65 mm minimum commonly used in the cited guidance. These figures are discussed in Australian trade guidance on floor screeding practice.
| Screed Type | Substrate Condition | Minimum Thickness | Typical Use |
|---|---|---|---|
| Bonded cementitious screed | Prepared and primed concrete | 10 mm | Repairs, falls and levelling where the substrate can provide support |
| Bonded proprietary leveller | Compatible prepared substrate | 3 mm | Localised correction and low-build-up levelling |
| Unbonded cement and sand screed | Separating layer or DPM | 50 mm | Wet areas where the screed is isolated from the slab |
| Unbonded fibre-reinforced screed | Separating layer or DPM | 35 mm | Systems designed to improve resistance to movement |
| Floating screed | Insulation layer | 65 mm | Floors requiring a floating construction over insulation |
The practical Australian bathroom renovation figures homeowners often hear, 40 mm minimum and 50 mm preferred in some wet-area applications, relate to the particular unbonded bathroom system rather than replacing every bonded screed rule. The correct number must come from the specified system, substrate and fall design, not from choosing the thinnest option that fits the doorway.
How Fall to Waste Shapes Screed Thickness Across the Room
Fall geometry determines where the thin point sits and how much build-up the perimeter requires. Screed thickness therefore changes across the room unless the slab already contains the required slope. The edge generally needs more material, while the surface tapers towards the waste.
Australian wet-area guidance commonly uses a 1:60 fall for shower areas and 1:80 for general bathroom floors. A 1:60 gradient drops 1 mm for every 60 mm of horizontal run. At 1:80, it drops 1 mm for every 80 mm. The run to the waste, rather than the room's overall size alone, sets the height required.
For example, a 1500 mm shower run to a centre waste needs 25 mm of fall at 1:60. A 2400 mm general bathroom run needs 30 mm at 1:80. The screed must retain its specified minimum thickness at the thin point, then gain enough depth at the perimeter to create the gradient. Use this Australian bathroom floor slope guidance when checking whether the proposed floor build-up has sufficient room for drainage.
Practical rule: Measure the fall from the highest finished edge to the waste, not merely from one side of the room to the other.
That measurement should be checked against the renovation's height budget. A pre-fall in the concrete slab can reduce the screed depth. A flat or uneven slab increases it, especially where the waste is low and the doorway or adjoining floor level cannot move. A fall below 1:100 is treated in the supplied Australian guidance as non-compliant for the relevant wet-area application and can leave water ponding behind the tiles.
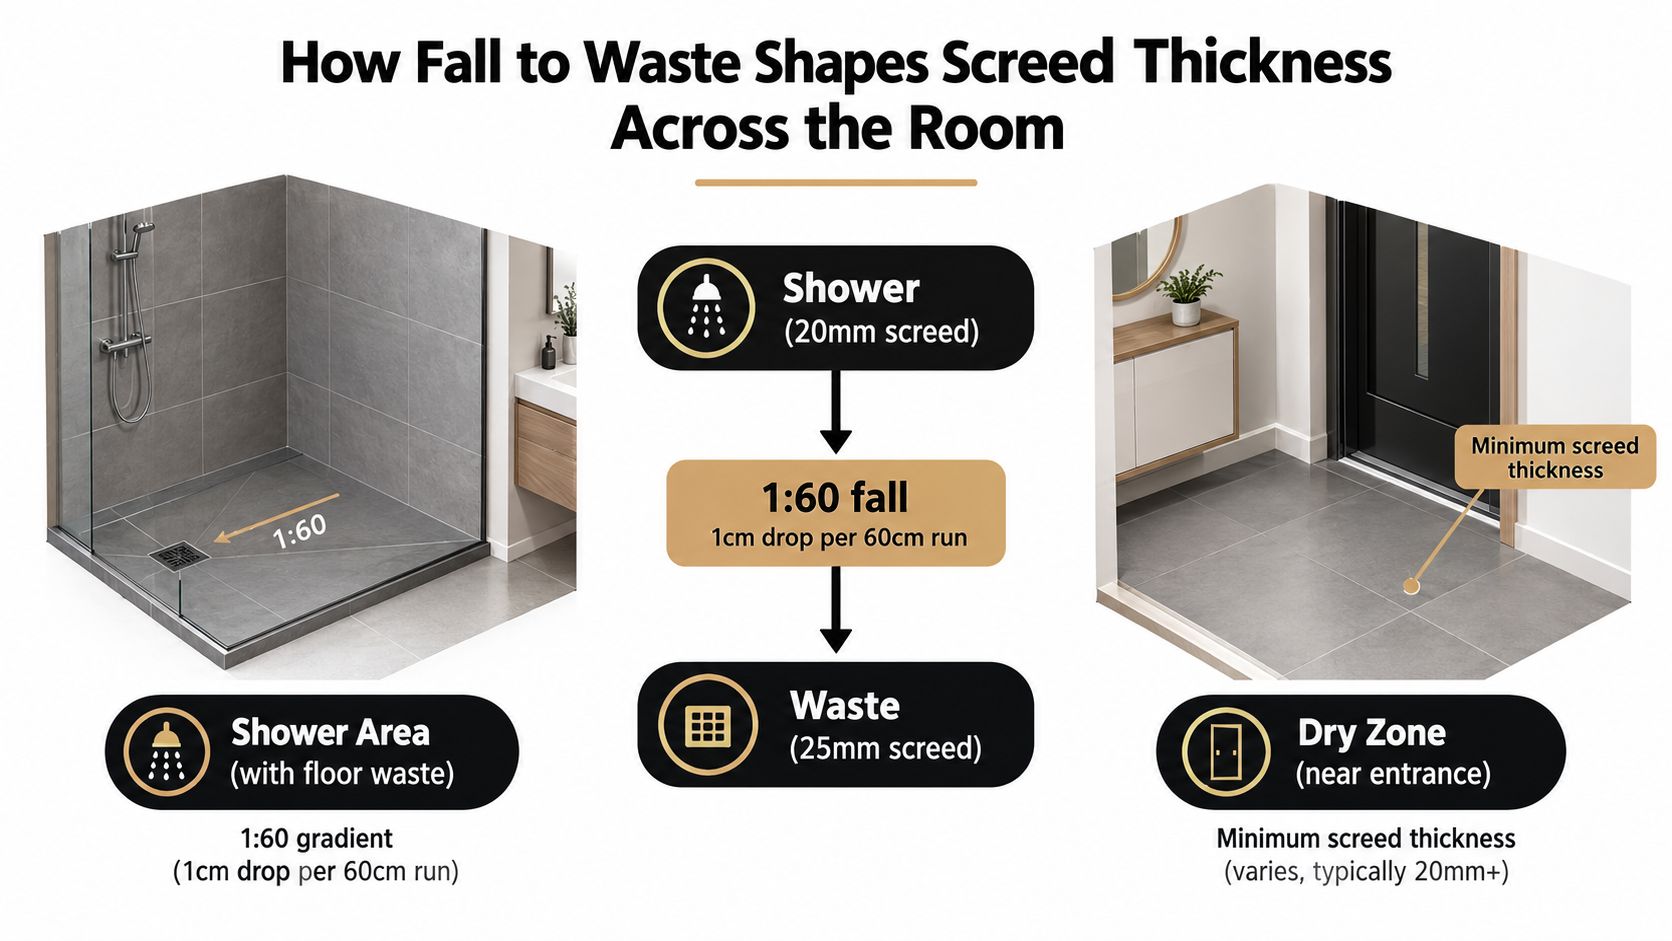
Waste position changes the profile too. A centre waste creates falls from several directions, while a linear drain supports a more controlled single-plane or two-plane arrangement. Draw the screed profile before placement, marking the thin point, high point and finished tile level. That drawing exposes clashes with thresholds and large-format tile requirements before the screed is installed.
Matching Screed Thickness to Tile Type and Stone Choice
The tile choice often arrives before the screed specification, but it still changes the preparation required. Small ceramic mosaics can follow modest variations in the substrate because their individual pieces and grout joints break up the visual effect. Large-format porcelain and natural stone are less forgiving.
For a bonded system on a sound substrate, installers commonly work around 15 to 20 mm where the product and site conditions permit. A 600 x 600 porcelain floor may need around 25 to 30 mm in the relevant build-up, especially where the installer has to establish a controlled fall and maintain a flat setting plane. Larger slabs and stone commonly push an unbonded bathroom floor towards 40 to 50 mm, subject to the system design and membrane location.
Large rectified tiles expose high spots, low spots and changes in plane. The supplied trade guidance refers to a flatness target of about 3 mm under a 2 m straightedge for large-format work. If the slab misses that benchmark, correction can add around 5 to 10 mm across parts of the floor, although the exact amount depends on where the defects are and whether a leveller can be used.
| Tile Type | Format Size | Bonded Screed Min | Unbonded Screed Min |
|---|---|---|---|
| Ceramic mosaic | Small pieces | 15 to 20 mm where permitted | 40 mm or more in common bathroom systems |
| Standard porcelain | Around 300 x 300 mm | 15 to 20 mm where permitted | 40 mm or more |
| Large-format porcelain | 600 x 600 mm | 25 to 30 mm commonly allowed for in the build-up | 40 to 50 mm commonly allowed for in the system |
| Large porcelain slab | 900 mm or more | System-specific | 40 to 50 mm commonly allowed for in the system |
| Natural stone | Format-dependent | System-specific, with careful substrate control | 40 to 50 mm commonly allowed for in the system |
AS 3958.1 tile-fixing practice and Australian Tile Council guidance on format size should inform the installation, particularly where rectified edges, stone sensitivity and lippage risk are involved. A tile can be correctly selected yet still fail visually if the base isn't flat enough for the format.
Waterproofing Compatibility and Where the Screed Sits in the Build-up
Two floor build-ups appear regularly in Australian wet areas. In the first, the installer forms the screed, allows it to cure and applies the waterproofing membrane over the screed. In the second, the membrane is applied first and the screed is placed over it.
Screed first, membrane second
The screed-then-membrane sequence gives the installer a cementitious surface to shape and cure before waterproofing. It's commonly preferred in Melbourne renovations because the membrane protects the prepared wet-area surface and the tiler can work from a defined, stable plane.
The screed still needs the correct primer and surface preparation before the membrane is applied. Polyurethane, acrylic and sheet membranes have different preparation requirements, and the selected system must be compatible with the screed and associated puddle flange detail. Guidance connected with bathroom floor waterproofing should be read alongside the product data sheet, not used as a substitute for it.
Membrane first, screed second
A membrane-then-screed build-up is used where the waterproofing layer and waste detail require the screed to sit above the membrane. A bonded screed over the membrane can add around 15 to 25 mm, depending on the system and the required fall. That extra layer can be the difference between a clean entry and a threshold that needs redesigning.
The membrane itself may add around 1 to 2 mm to the overall build-up. Shower recesses, puddle flanges and linear drains also change the local depth because the membrane must connect continuously to the drainage detail.
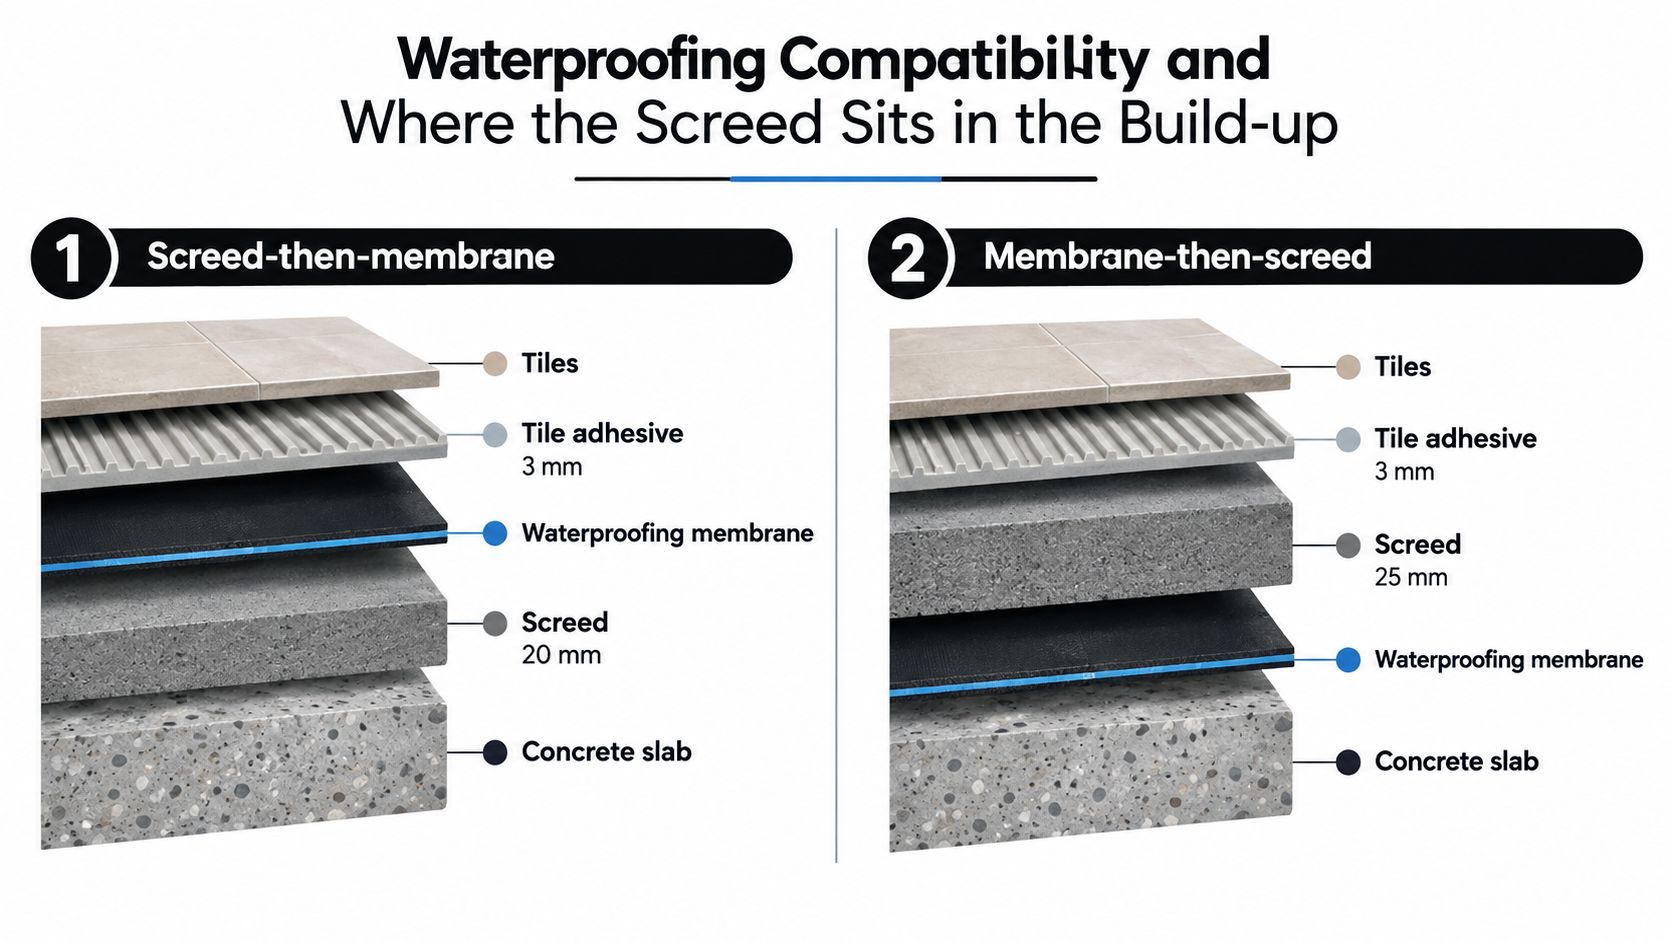
Don't choose the sequence after the screed has been poured. Put the membrane line, waste flange, screed profile, adhesive bed and tile into one cross-section first. The waterproofing standard and system instructions then control the final details.
Curing Times and How They Affect Renovation Scheduling
A screed has two separate scheduling milestones. It must first gain enough strength to be walked on and worked over, then it must dry sufficiently for waterproofing or tiling. Those are not the same test.
A standard cement-based screed may take 24 to 48 hours before light foot traffic and around 7 days before waterproofing or tile work begins, according to the supplied renovation guidance. Beyond 40 mm, a commonly used planning allowance is about one day per millimetre for full drying, although site conditions and the product specification govern the actual result.
Product choice changes the programme
Rapid-set or modified screeds may accept tiles after 4 to 6 hours, but they usually cost more and give the installer less working time. Calcium sulphate, or anhydrite, screeds require mechanical scabbling before tiling and moisture testing below 75% relative humidity in the supplied guidance.
Melbourne conditions influence the outcome. Cold winter air, poor ventilation and low substrate absorption can slow drying, while warm, ventilated conditions may improve it. Forced drying without following the product instructions can create surface cracking or leave moisture trapped beneath the membrane.
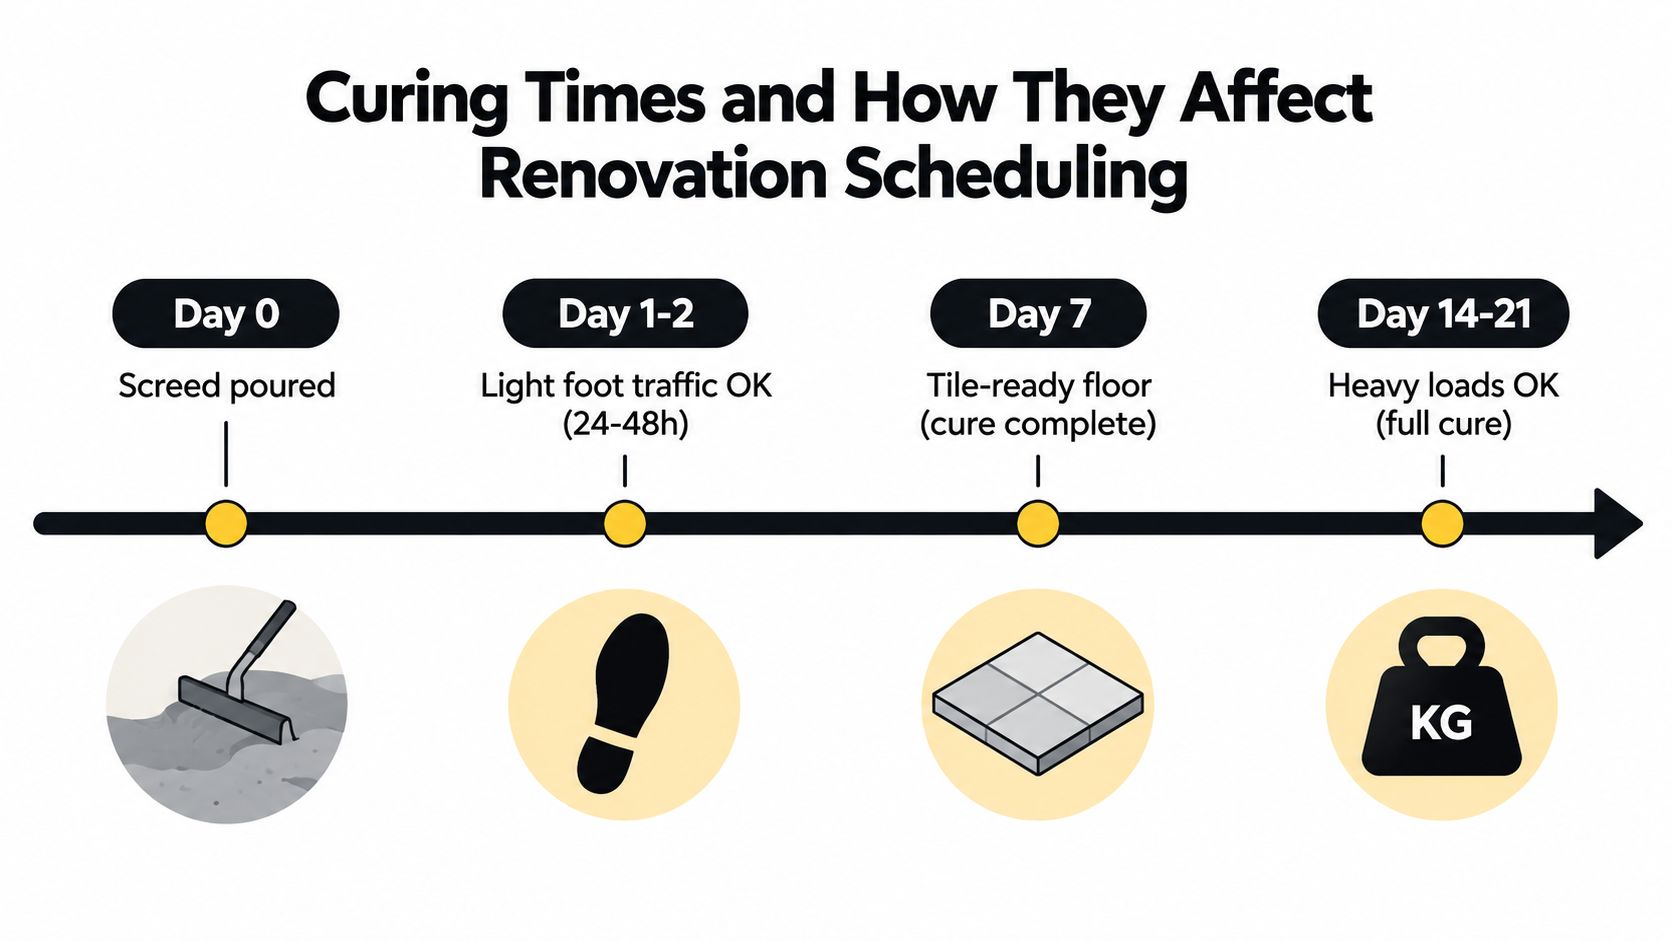
A 40 mm unbonded screed can add roughly 7 to 10 days to a bathroom renovation programme in the supplied trade guidance. That delay matters when the bathroom is the only one in the house. The quote and construction schedule should identify the screed cure, moisture checks, waterproofing and tile installation as separate steps.
Melbourne Renovation Rules Including the Registered Builder Threshold
In Victoria, domestic building work costing more than A$10,000 must be carried out by a registered builder, and work over A$16,000 requires domestic building insurance under the supplied Victorian guidance from Butler Build. A bathroom renovation can cross those thresholds even when the screeding itself is only one part of the contract.
The wet-area membrane also needs proper trade responsibility. A tiler may install tiles and screed, but waterproofing certification and regulated plumbing or building work can involve separately licensed or registered practitioners. Ask who is responsible for the membrane, which practitioner signs the relevant work and how the completed wet area will be documented.
Protect the height budget before work starts
Melbourne terrace homes and apartments often have fixed door clearances, adjoining floor finishes and stair landings. A large unbonded screed can perform well structurally yet be the wrong solution if it raises the bathroom above the hall or prevents the door from opening.
Set a finished floor datum before choosing the screed type. Include the tile, adhesive and membrane, then compare the proposed level with the entry and adjacent rooms. Check the builder's registration through the Victorian Building Authority and confirm insurance requirements before ordering materials or accepting a renovation scope.
Quick Reference Table for Common Bathroom Screed Scenarios
The table below is a starting point for site discussions, not a substitute for a drawn floor section or product data sheet. The minimum band must still preserve the required fall, waterproofing detail and finish-floor level.
| Screed Type | Substrate | Tile or Stone Finish | Minimum Thickness |
|---|---|---|---|
| Bonded cementitious screed | Prepared concrete slab | Ceramic tile | 15 to 20 mm in common bathroom practice where the system permits |
| Bonded screed | Prepared concrete slab with fall requirements | 600 x 600 porcelain | Around 25 to 30 mm commonly allowed for in the build-up |
| Unbonded cement and sand screed | Concrete over a separating layer or membrane | Porcelain tile | 40 mm commonly specified, with 50 mm preferred in some applications |
| Unbonded fibre-reinforced screed | Separating layer or DPM | Large-format porcelain | Around 40 mm or more, subject to the product system |
| Screed over waterproofed slab | Membrane-protected substrate | Natural stone | Commonly 40 to 50 mm in an unbonded system |
| Fall-only screed | Prepared bathroom slab or shower base | Hobless shower tile finish | Thickness varies from the waste to the perimeter, with the minimum system depth maintained at the thin point |
A self-leveller may replace a traditional sand and cement screed for local correction when the product is approved for the substrate, wet-area exposure and intended tile finish. It isn't automatically suitable for forming a bathroom fall or for use over a membrane.
Balcony work needs its own exterior waterproofing and drainage specification. Don't use an interior bathroom row as a balcony design, even where the finished tile is similar.
Decision Rules and a Pre-Build Checklist for Homeowners
A screed quote is easier to assess when it answers five questions in order.
- Identify the substrate. Is it a sound concrete slab, an existing membrane, timber or insulation? The answer determines whether a bonded, unbonded or floating system is appropriate.
- Confirm the finish. Record the tile format, thickness and material before setting the finished floor level. Large porcelain and stone need a flatter, more controlled base.
- Calculate the fall. Mark the waste, measure the run and confirm the required ratio. The thin point must not fall below the specified system minimum.
- Locate the membrane. Show whether waterproofing sits over the screed or beneath it, including the puddle flange, shower recess and drain connection.
- Check the height budget. Compare the finished bathroom floor with the hallway, door leaf, skirting and shower screen track.
Pause the job if the quote contains any of these warning signs:
- An unexplained thin bonded screed: A specification below 20 mm needs a clear product and substrate justification, particularly where falls or large tiles are involved.
- No membrane in the section: The quote should show where waterproofing sits and how it connects to the waste.
- No documented fall: A contractor should state the fall ratio and show the high and low points.
- No curing allowance: The programme should identify when the screed becomes suitable for waterproofing and tiling.
Before work begins, ask for the screed product data sheet, the proposed mix, any fibre or mesh inclusion, the required primer and the standard or system the mix is designed to meet. Also ask who will verify moisture readiness before the membrane or tiles are installed.
Frequently Asked Questions About Bathroom Floor Screed Thickness
Balcony screed follows a different design rule from an interior bathroom. It must accommodate exterior drainage, waterproofing, exposure and the specified 1:100 fall, while still meeting the system's minimum thickness at the low point. Substrate condition, membrane type, waste locations and the finished surface determine the final depth.
How much cover does a heated floor need?
Hydronic pipes and electric cables need sufficient compatible screed cover to protect them and spread heat evenly. Allow around 30 to 40 mm over heating pipes for planning, then follow the heating manufacturer's installation instructions for the final cover, mix and curing requirements.
What happens if the screed is too thin?
A layer that is too thin or poorly supported can debond, crack or flex under load. The results may include hollow-sounding tiles, cracked grout around the waste and lippage at thresholds. The thin point must meet the specified system minimum after the fall is formed.
What happens if it is too thick?
Extra depth uses the renovation's floor-height budget. It can affect doors, adjoining floors and shower-screen details, while also extending curing and drying. Allow for those programme and level impacts before approving additional material.
Can late foot traffic cause waterproofing problems?
Yes. Foot traffic before the screed or membrane is ready can damage the surface, create pinholes or alter the fall. Keep other trades out until the installer confirms that the screed, membrane and adhesive are ready for the next stage.
Melbourne Tiling Services P/L provides bathroom screeding, shower-base preparation, waterproofing and tiling, with floor levels and falls assessed before installation. For a site-specific bathroom floor screed thickness review and renovation quote, contact the company.
Write a Comment