
You're probably looking at a bathroom that still works, but doesn't look the part anymore. The tiles are dated, the grout is tired, and the thought of full demolition means dust through the house, trades in and out for longer, and a bathroom that's offline when you still need to live in the property.
That's why tiling over existing tiles comes up so often in Melbourne bathroom renovations. On the right job, it can be a practical renovation method. On the wrong job, it just buries defects, adds risk, and creates a more expensive failure later. From a registered builder's perspective, the key question isn't whether it can be done. It's whether the existing bathroom gives you a sound, dry, stable base that won't compromise the new work or the value of the home.
Table of Contents
- Is Tiling Over Tiles a Shortcut or a Smart Solution
- The Critical Inspection Your Go or No Go Checklist
- Preparation is Everything Your Step-by-Step Substrate Plan
- Choosing the Right Materials for a Lasting Bond
- Installation Guide for Tiling Over Tiles
- Risks Costs and Hiring a Registered Builder in Melbourne
Is Tiling Over Tiles a Shortcut or a Smart Solution
You see this decision at the start of a lot of bathroom jobs in Melbourne. The tiles look dated, the family still needs the room in use, and no one wants demolition dust through the house if it can be avoided. In the right bathroom, tiling over existing tiles can cut mess, shorten downtime, and keep the job simpler.
The problem is that people often treat it as a cosmetic decision when it is really a risk decision.
From a registered builder's perspective, tile-over-tile work only makes sense when the existing installation is already doing its job properly. The old tiles, the substrate under them, and the room itself all need to be stable. If they are, overlaying can be a sensible way to renovate. If they are not, the new finish just inherits the old failure.
That distinction matters most in bathrooms. A leaking shower, failed waterproofing, loose wall sheeting, or movement in the floor does not improve because a new tile goes on top. It gets covered. Then the repair usually costs more because there are now two layers to remove instead of one.
Builder's rule: Tiling over tiles is a suitable finish upgrade on a sound base. It is not a fix for moisture damage, movement, or a bathroom that is already breaking down.
A good candidate is usually a room where the issue is age or appearance, not performance. The tiles are firmly bonded, the layout can handle the added height, and there are no signs that water has been escaping into surrounding materials. In that situation, keeping the existing layer can be a practical call.
A poor candidate shows warning signs before any adhesive is opened. Hollow or loose tiles, cracked joints that keep reopening, swollen trims, stained junctions, soft skirtings, persistent mould patterns, and uneven surfaces all point to a deeper problem. In those bathrooms, a full strip-out is the smarter option because it gives access to the substrate, the waterproofing, and any hidden damage.
There is also a value question. Covering over a defective bathroom can make the room look newer for a while, but it does nothing to protect the structure or the resale value of the home. If I suspect the room has moisture issues or movement, I would rather stop the shortcut and fix the cause properly. That is the call that holds up better over time.
The Critical Inspection Your Go or No Go Checklist
A tile-over-tile job is approved or rejected at inspection. That decision should happen before anyone orders finishes, because the existing tiled surface becomes the substrate for everything that follows.
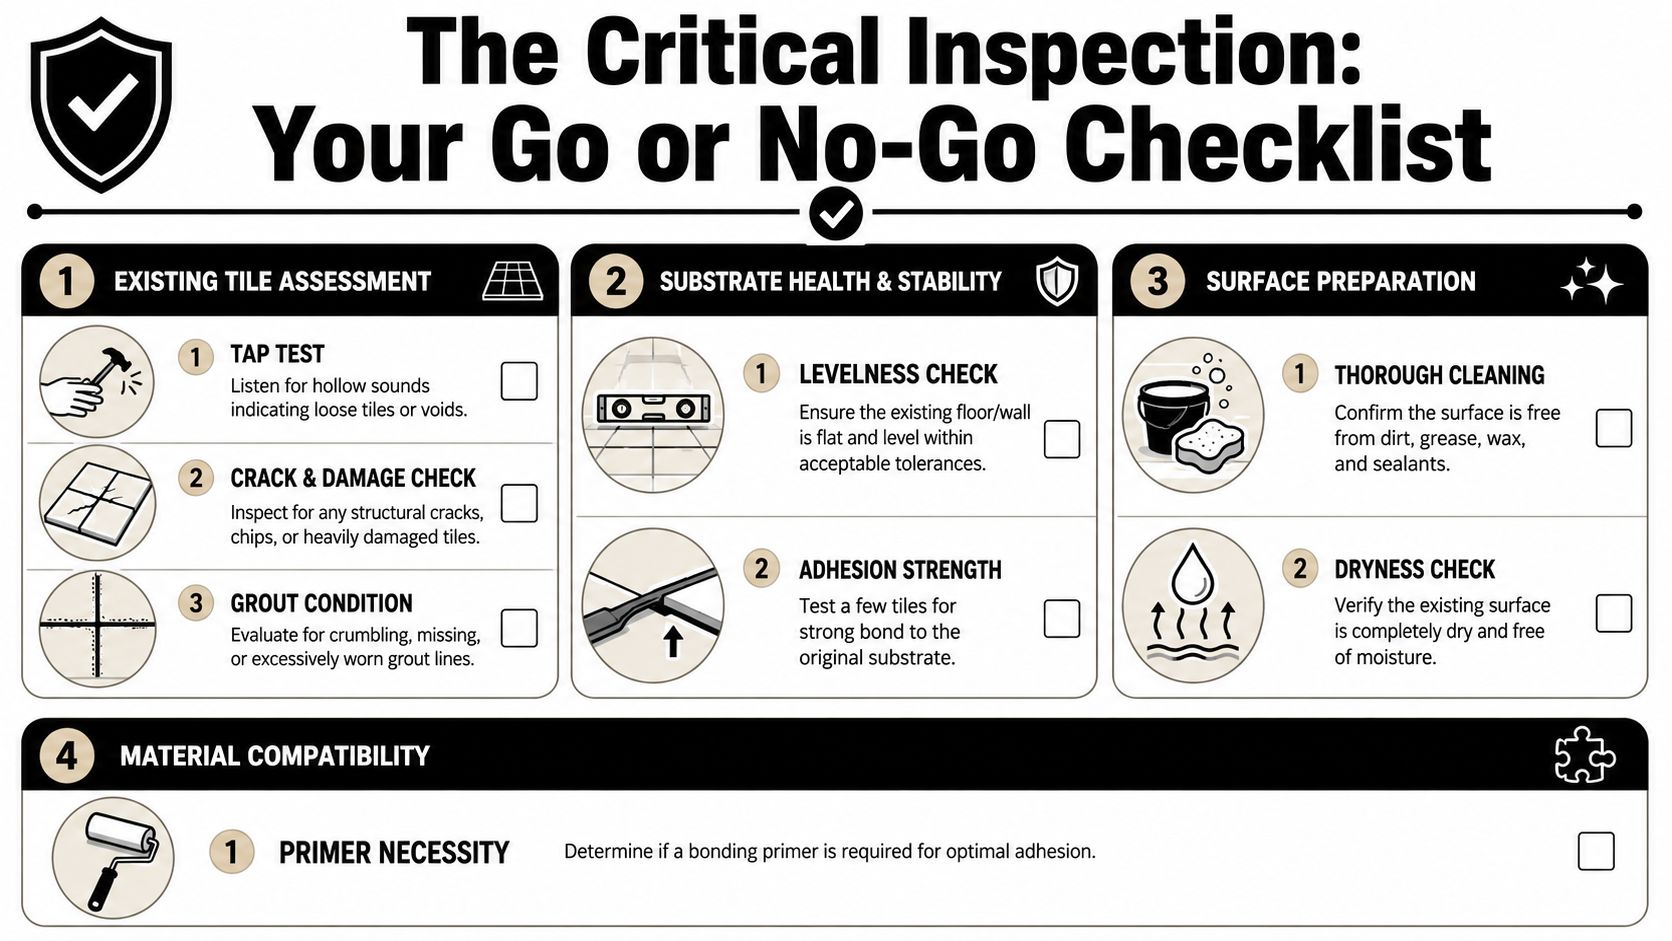
What makes an existing tiled surface acceptable
Start with bond. I tap every area methodically, not just the obvious problem spots, and I listen for hollow or drummy sections. One loose tile is enough to turn a cosmetic upgrade into a failure risk, because the new layer is only as reliable as the old one underneath.
Then check flatness with a long straightedge across multiple directions. Large-format tiles punish small substrate errors, and even standard tiles will show lippage if the old surface has humps, dips, or patched areas. If the floor is out, you may need corrective work before tiling, and in some cases that means looking at proper floor screeding for tiles rather than forcing adhesive to do a levelling job it was never meant to do.
Visible defects matter, but the pattern matters more than the defect itself. A single chipped tile can be isolated damage. Repeating cracks through grout joints, broken corners in several locations, or failed grout at stress points usually point to movement, poor adhesion, or moisture getting where it should not.
Pay close attention around floor wastes, shower perimeters, wall-floor junctions, penetrations, and doorway transitions. Those are the places that expose the truth first.
Fresh tiles can hide a problem for a while. They do not remove it.
The builder's risk checks
A registered builder has to assess more than appearance. The central question is whether covering the old surface protects the building or increases the risk of a more expensive failure later.
In Melbourne bathrooms, moisture evidence outside the tiled area often decides the job. Swollen skirtings, stained architraves, peeling paint beside the shower, soft plaster, musty smells, or movement in trims tell you to stop and investigate further. If I see those signs, I do not treat the room as a tile replacement job. I treat it as a building defect question first.
Weight and build-up also need checking. A second tile layer adds dead load to walls and floors, changes finished heights, and can create problems at doors, shower screens, wastes, and adjoining rooms. In wet areas, added height can also affect falls and drainage. If the existing bathroom already has marginal falls or awkward thresholds, overlaying tiles often makes the room less compliant and harder to use.
That is why bathrooms deserve a harder yes or no test than a laundry splashback or an entry floor. A failed bathroom affects framing, sheeting, waterproofing, and resale value. A full strip-out costs more upfront, but it is often the only sensible choice when there is any doubt about what is happening behind the tile face.
Use this checklist before approving a tile-over-tile job:
- Tap every section for hollow spots and debonding. Include corners, shower areas, and around wastes.
- Check flatness with a long straightedge. Do not assess it by eye or with a short level.
- Look for repeating cracks, loose grout, and broken edges. Repetition usually signals a deeper issue.
- Inspect adjacent materials for moisture damage. The warning signs often sit outside the tiled area.
- Measure height changes at doors, drains, fixtures, and screens. Build-up can create practical and waterproofing problems.
- Confirm the substrate can carry another finished layer. The tile face is only part of the system.
If those checks are clean, tiling over tiles can be a practical option. If they raise doubts, stop there. From a builder's point of view, uncertainty is not a green light.
Preparation is Everything Your Step-by-Step Substrate Plan
A successful tile-over-tile job is won before the first new tile goes down. The installer has to treat the old tiled surface as a substrate that needs rebuilding for bond, not as a finished surface that can be covered directly.
Phase one clean like bond strength depends on it
It does.
Bathrooms carry soap film, body oils, cleaning residue, waxes, and sometimes silicone contamination around edges and fittings. Any of that left behind can compromise adhesion. The first stage is a serious clean, not a quick wipe-down.
Focus on residues that builders see all the time in used bathrooms:
- Soap scum and shampoo build-up in shower walls
- Waxes and polishes from previous cleaning products
- Grease and airborne residue near vanities and exhaust paths
- Old sealants at corners and fixtures
Mechanical prep applied over contamination is wasted effort. You'll roughen the dirt, not the tile.
Phase two abrade the glaze
Glazed ceramic is low porosity. Tile specialist guidance says the surface should be washed clean and then mechanically roughened with a carborundum disk or sander because the bond relies on mechanical keying, and primer alone is not a substitute, as described in Tile Doctor's guide to tiling over existing tile.
That's the part many failed DIY jobs skip. People assume a bonding primer can solve everything. It can't. On a glossy, contaminated or insufficiently abraded tile, the system starts with a weak link.
A proper prep routine usually includes:
- Mechanical abrasion across the full field: Not just a few scratches here and there.
- Attention to corners and edges: These areas often get missed.
- Dust removal after grinding: Fine dust left on the surface interferes with primer and adhesive.
- Spot repairs where damaged tiles were removed: Low areas need correcting before installation.
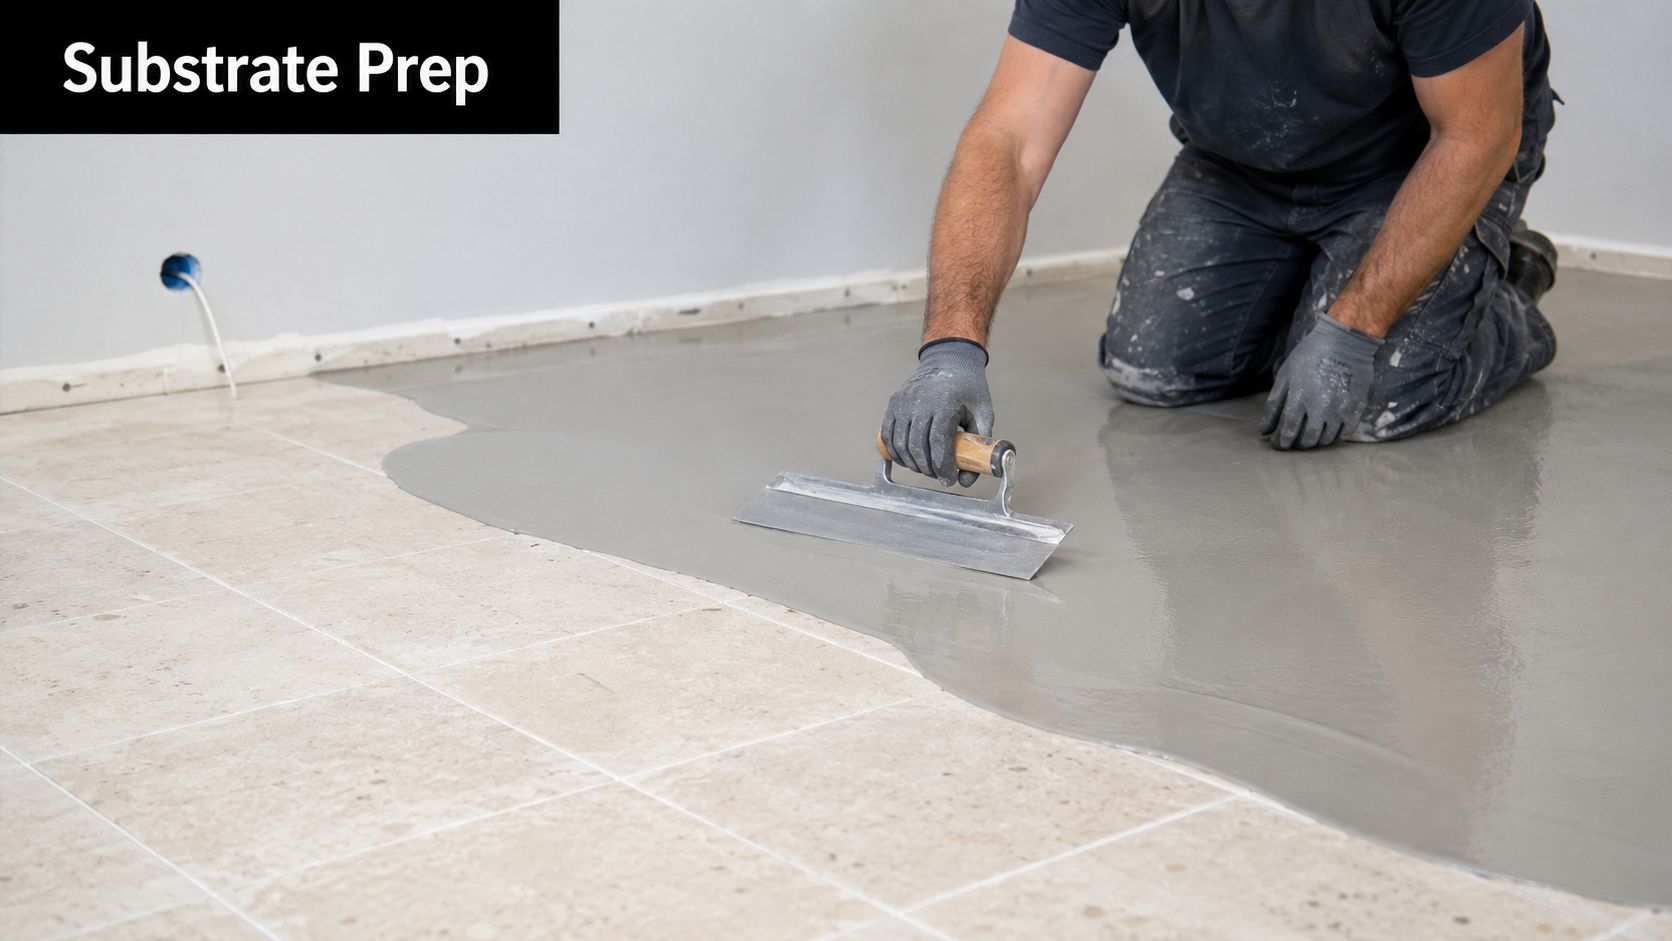
If the surface needs flattening after repairs or abrasion, that correction matters just as much as cleaning and priming. On floors, screeding for tiles may be part of getting the substrate ready for a clean, even install.
Primer helps a prepared surface. It does not rescue an unprepared one.
Phase three prime the surface properly
Once the surface is clean, abraded and dust-free, use a primer designed for non-porous tile-on-tile applications. This isn't the same thinking as priming a porous cement sheet or raw screed. The old tile face needs a primer that suits a dense, previously finished surface.
Application matters. Patchy primer, puddling, contamination between coats, or rushing the drying stage can undermine the rest of the system. Good prep work is methodical and boring. That's exactly why it lasts.
The pattern is simple. Clean first. Abrade properly. Prime the right surface with the right product. Reverse that order or cut one out, and you're building failure into the job.
Choosing the Right Materials for a Lasting Bond
Good prep can still be undone by the wrong product stack. I see that regularly in bathroom renovation work. The old tiles are solid, the surface has been ground and primed, then someone reaches for a basic adhesive because it is cheaper or already on site. That is where the risk shifts from preparation to bond failure.

Why standard adhesive is the wrong gamble
Tile-over-tile work puts extra demand on the adhesive because it is bonding to a dense, previously finished surface rather than a fresh porous base. In practice, that means using a flexible adhesive rated for this type of installation, not a general-purpose product picked for price.
The same logic applies to the whole system. Primer, adhesive, grout, and sealant need to suit each other and the room they are going into. Mixing brands and product types can work if the specifications align, but it also creates more room for error, and that is a poor trade in a bathroom.
A sound material stack usually includes:
| Material | What it needs to do |
|---|---|
| Non-porous primer | Bond to the prepared tile face and support the adhesive system |
| Flexible tile adhesive | Hold on a dense substrate and cope with minor movement |
| Appropriate grout | Suit the tile type, joint width, and cleaning demands |
| Sealants at movement joints and junctions | Allow controlled movement where rigid grout should not be used |
For anyone comparing products, these tiling materials used in renovation work need to be chosen as a compatible system, not as isolated items pulled from different shelves.
What matters in a bathroom renovation
Bathrooms need a stricter standard because the tile finish sits over a wet-area assembly. Tiles and grout are not the waterproofing. If there is moisture trapped below, a failed membrane, swelling in surrounding linings, or movement through the floor, no premium adhesive fixes the underlying problem.
That is the builder's view of material selection. The question is not only what sticks best. The question is whether this bathroom is a sensible candidate for overlay at all. In a dry, stable bathroom with a sound build-up, the right material system can perform well. In a shower with suspected leaks, drummy wall sheets, loose fittings, or movement at the floor, a full strip-out is usually the only smart option if you want to protect the property and avoid paying twice.
Cheap adhesive does not make the job cheaper. It lowers the cost of causing a failure.
As registered builders, we at Melbourne Tiling Services P/L approach this as a system, coordinating the tiling with the broader wet-area scope when required. That matters in Melbourne bathrooms, where the right call is sometimes to proceed with an overlay, and sometimes to stop, open the area up, and rebuild it properly before any new tile goes down.
Installation Guide for Tiling Over Tiles
A tile overlay can still fail after a good inspection and careful prep if the install is rushed. Most failures I see at this stage come from poor set-out, weak coverage, ignored movement, or bad decisions around edges and penetrations. The surface may look straight on handover and still let you down later.
Start with the finished height, not the first tile
Before adhesive goes down, check the full build-up against the room as a whole. An overlay lifts the finished level enough to affect door swings, thresholds, shower screens, wastes, toilet pan set-out, vanity legs, skirtings, and transitions into hallways or adjoining bedrooms.
Bathrooms are less forgiving than dry areas. A few millimetres in the wrong place can leave a door rubbing, a screen sitting awkwardly, or a floor finish dying into the next room with no clean transition. On builder-led work, this is the point where I decide whether the overlay still makes sense or whether the extra height starts creating more defects than it solves.
Mark control lines first. Dry-lay key rows. Check where cuts fall at the doorway, around the floor waste, and at the most visible wall. Clean symmetry matters, but so does serviceability.
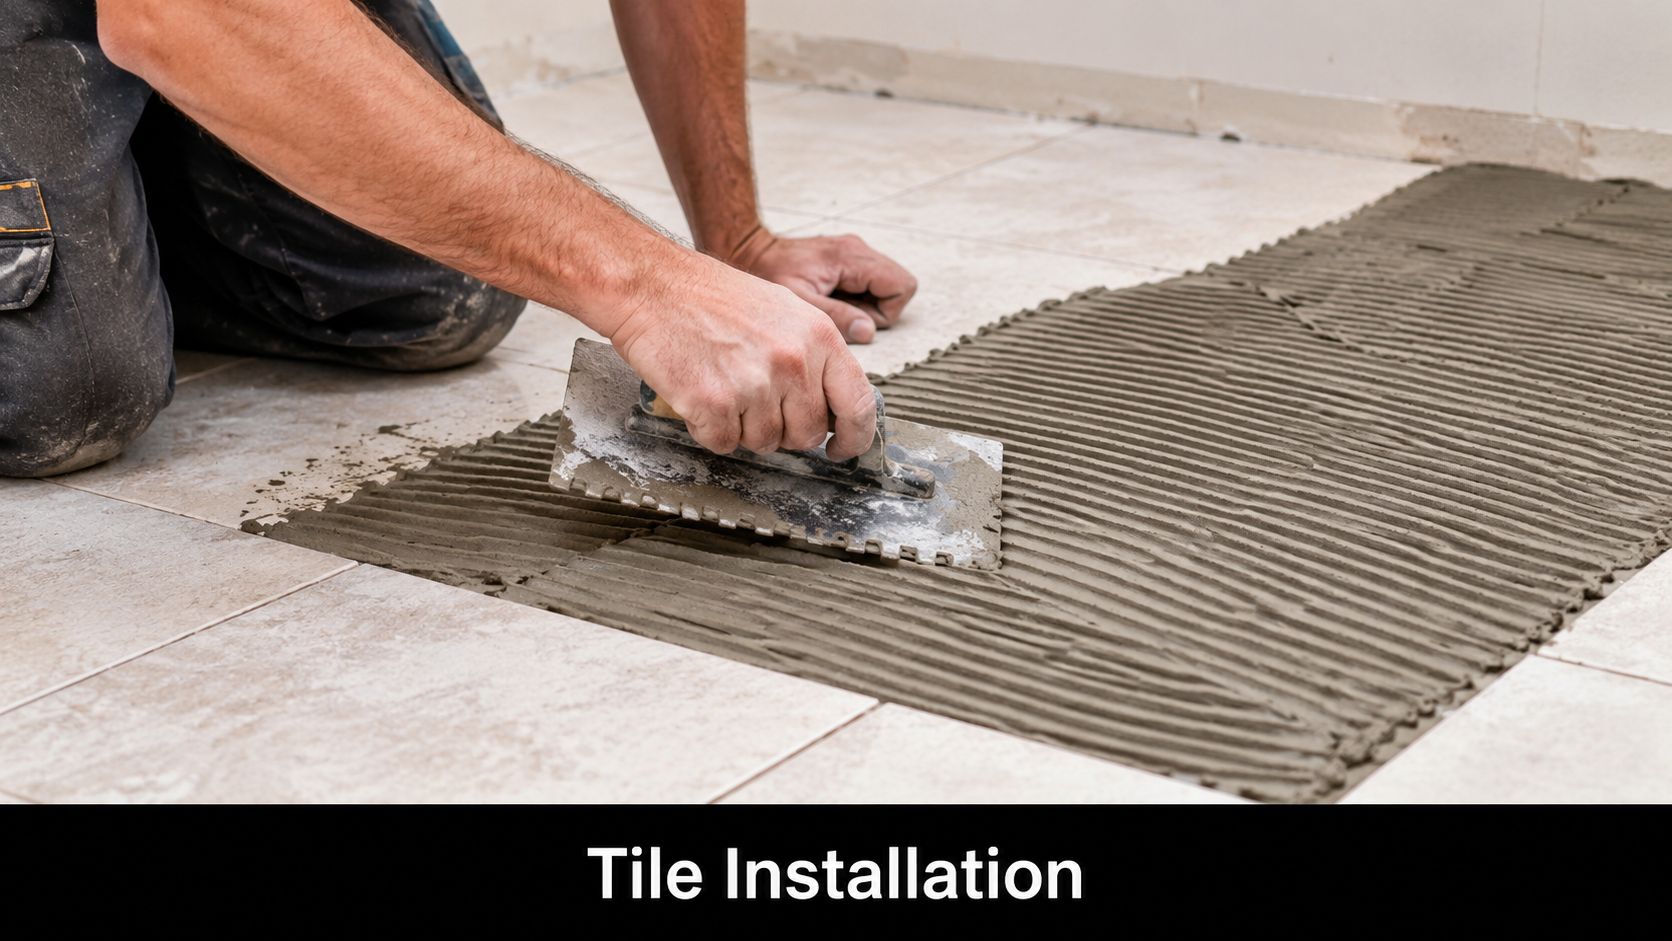
Spread adhesive for full support
Overlay work needs consistent bedding. Voids under the tile create weak spots, drummy sound, and a higher chance of cracked grout or broken corners once the room is back in use.
A sound install sequence is simple:
- Spread adhesive with the trowel size suited to the tile and substrate
- Back-butter tiles where needed to improve contact
- Bed each tile firmly and move it across the ridges to collapse them
- Lift tiles regularly to confirm coverage instead of guessing
- Keep checking joint width, level, and surface plane as the work progresses
Corners, edges, and traffic paths deserve extra attention. These are the areas that show failure first.
This video gives a useful visual reference for installation technique and site handling:
Control lippage before it travels across the room
Lippage rarely starts as a whole-floor problem. It starts with one tile sitting slightly high, then the next one is adjusted to suit it, and the error keeps going. On an overlay, small irregularities in the old surface can telegraph straight through if the installer is not checking constantly.
Use straight edges. Check multiple directions. Reset a tile early if it is wrong. Waiting until the adhesive starts to firm up usually turns a small correction into a bigger repair.
Rectified porcelain gives very little visual forgiveness. That crisp look is exactly why clients choose it, but it demands tighter control from the installer.
Large-format tiles raise the standard
Large-format tiles are popular in Melbourne bathroom renovations because they reduce grout lines and give a cleaner finish. They also expose every dip, hump, and bedding inconsistency. A floor that was acceptable for a smaller ceramic tile may be unsuitable for a large rectified porcelain overlay without additional correction.
In practice, larger tiles usually require:
- A flatter surface than small-format tiles
- More back-buttering and more frequent coverage checks
- Closer control of adhesive skinning time
- Levelling clips or similar systems where appropriate
- More care at corners, niches, and fixture penetrations
Bigger tiles give a sharper finish only when the substrate and installation standard are good enough to support them.
Treat wet-area details as a building issue, not a tiling detail
This matters most in bathrooms. Tile and grout are the wearing surface. They are not the waterproofing system. If the job includes a shower area, floor waste detail, or any doubt about the wet-area assembly, the right question is whether the existing waterproofing remains compliant and defensible. For Victorian projects, that often means checking what records exist and whether a waterproofing compliance certificate in Victoria should form part of the decision-making before the room is closed up again.
From a registered builder's perspective, that is the risk check that protects the property. A neat overlay means very little if moisture gets trapped, detailing is compromised, or the bathroom cannot be properly accounted for later.
Finish cleanly or the shortcuts will show
Good overlay work is won at the margins. Silicone joints need to be placed where movement is expected. Trims and transition profiles need to suit the new height. Fittings should be refitted neatly, not forced to suit a build-up that was never properly planned.
The last part of the install is also where rushed jobs advertise themselves. Uneven cuts at the doorway, chipped drill holes, thin adhesive at edges, and badly resolved floor wastes all point to the same problem. The installer focused on sticking tiles down, not on delivering a bathroom that works as a complete assembly.
Risks Costs and Hiring a Registered Builder in Melbourne
A bathroom overlay can look like a tidy saving on day one, then turn into a much more expensive correction once the room is back in use. From a builder's perspective, the main issue is not whether new tiles will stick. The main issue is whether the existing bathroom can still perform properly after another layer is added on top.
Overlaying tiles changes levels, affects door clearances, alters transitions, and can make wastes, screens, and fittings harder to resolve cleanly. Those are manageable on the right job. They are expensive on the wrong one.
When strip-out is the only sensible choice
Some bathrooms are poor candidates from the start. In those cases, keeping the old tile work in place hides defects that should be opened up and assessed properly.
Signs the safer decision is full demolition
- Widespread hollow or loose tiles
- Cracking that points to movement in the base, not just surface damage
- Evidence of water entry around corners, junctions, shower screens, or adjoining rooms
- An old substrate that may not handle more build-up with confidence
- Floor heights that will create awkward thresholds, trip points, or poor waste falls
- Any uncertainty about the wet-area build-up in a shower or bathroom floor
I give very direct advice on this. If there is doubt about the waterproofing, especially in a Melbourne bathroom, strip-out is usually the smarter call. Tile and grout do not make a bathroom waterproof. If the assembly underneath cannot be verified, covering it up adds risk, not value.
The cost problem is also misunderstood. A failed overlay rarely means replacing a few tiles. It often means removing two bonded layers, repairing the substrate, redoing waterproofing, and paying for trades to revisit work that should have been dealt with the first time.
Why builder oversight matters
A registered builder assesses the room as a building assembly, not just a tiling surface. That means checking substrate condition, moisture risk, penetrations, movement, set-downs, plumbing interfaces, screen fixing points, and whether the finished result will still be serviceable and defensible later.
That distinction matters most in bathrooms.
A neat overlay can still be the wrong decision if it traps an existing problem, complicates compliance, or leaves the owner with no clear record of what sits beneath the finish. If waterproofing forms part of the scope or the history of the wet area is unclear, it helps to review what a waterproofing compliance certificate in Victoria covers before the room is closed up again.
Good builder oversight also protects resale and future maintenance. Buyers, building inspectors, and later trades all benefit when the decision to overlay was made for sound reasons and documented properly. In my experience, the best tile-over-tile jobs are the ones that could survive scrutiny before the first tile is laid.
If you're planning a bathroom renovation and want a straight answer on whether tiling over existing tiles is a sound option, Melbourne Tiling Services P/L can inspect the bathroom, assess the risks, and advise whether an overlay or full strip-out makes more sense for your project.
Recent Comments