

Bathrooms outnumbered kitchens in Australian renovation work in 2024–2025: approximately 244,000 jobs against 163,000 kitchen renovations, based on Housing Industry Association estimates reported by news.com.au. A mid-range refresh that keeps the existing layout, replacing the tiles, shower screen, vanity and fixtures, usually lands between AUD 15,000 and AUD 30,000 and runs for 2 to 4 weeks.
The finished surface tells you almost nothing.
Money and lost days sit underneath it, in demolition, substrate repair, falls, membrane and the cure time each layer demands. A fall that misses the waste or a membrane that skipped a flood test stays invisible until the leak appears. I would verify both before a single tile goes on, and judge any quote on how the contractor proves that hidden work rather than on the tile range being proposed.
Table of Contents
- What a Bathroom Renovation Costs and How Long It Takes
- Choosing Between Ceramic, Porcelain, Marble and Kerlite
- Waterproofing and Falls Before Any Tile Goes On
- How Trades Run From Demolition to Grout
- Spotting Leaks Before Tiles Hide Them
- Hiring a Registered Builder and Signing the Contract
- Confirm Your Scope Before You Book
What a Bathroom Renovation Costs and How Long It Takes
A bathroom quote is mostly a wager on what sits behind the old tiles. Two rooms with the same floor area can land weeks and thousands apart once demolition exposes swollen sheeting, a floor out of level, a waste in the wrong place, or a shower base that never had enough fall. Costs vary widely by scope because the visible finish is only the last layer; demolition, substrate, falls and membrane decide whether the job stays simple.
| Scope | Indicative cost (AUD) | Typical duration |
|---|---|---|
| Wall and floor re-tile on existing layout | 4,000 to 9,000 | 5 to 8 working days |
| Mid-range refresh with new tiles, screen and fixtures on existing layout | 15,000 to 30,000 | 2 to 4 weeks |
| Full redesign with relocated waste, niche or hobless shower | 30,000 to 50,000 and above | 4 to 8 weeks |
| Shower leak repair with re-membrane and re-tile | 2,000 to 6,000 | 3 to 7 days |
Treat these bands as typical ranges by scope rather than fixed quotes. A re-tile on the existing layout stays shorter because plumbing points do not move. A redesign that relocates the waste, cuts a niche or builds a hobless shower pays for carpentry, new falls and a wider membrane, which is why it stretches toward 4 to 8 weeks.
What pushes the price inside a band
Tile price and format. A standard ceramic wall tile carries a different material cost, and a different cutting day, from large porcelain or stone. More cuts mean more labour even when the square metres match.
Hidden substrate and waterproofing. Stripping sheeting, rebuilding a shower base and laying a new membrane often cost more than the vanity you can see. An out-of-level floor adds screed before a single tile is set, and every extra layer needs time before the next one covers it.
Services and walls that move. Shifting a waste, a tap or a power point brings a plumber or electrician back while the walls are open. Leaving those positions where they are is the fastest way to stay in the lower half of a band.
How to read the quote
Each trade should be its own line: demolition, substrate, waterproofing, tiling, fixtures, electrical and make-good. Exclusions belong in writing, not in a verbal “we'll see on site”. A lump sum with no breakdown is how a cheap quote grows once the wall comes off. Before tiles hide the work, ask for photos of the substrate, the membrane and the shower base fall, and have the fall checked with a level rather than judged by eye. You can test a scope against a bathroom renovation calculator before you compare two written prices.
Practical rule: If the waterproofing line is smaller than the tile-supply line, ask which membrane, how many coats, and whether waterstops are included.
Choosing Between Ceramic, Porcelain, Marble and Kerlite
Water absorption decides whether a tile belongs in a shower. Ceramic is like a biscuit with a glazed coat: the body can still drink water if that coat chips. Porcelain is fired so dense it barely drinks, which is why it suits showers and floors that take constant wet feet.

| Material | Best use | Water absorption | Care needs | Relative cost |
|---|---|---|---|---|
| Ceramic | Walls and light-traffic floors | Higher, often 3% or more | Glaze can chip; wipe clean | Low |
| Porcelain | Showers, floors and walls | Very low, under 0.5% | Low maintenance; harder to cut | Low to mid |
| Marble | Feature walls, niches and vanity tops | Porous, needs sealing | Seal regularly; etches with acidic cleaners | High |
| Kerlite (brand of thin sintered porcelain) | Large-format walls and floors, inside and out | Low; thin sintered porcelain | Few grout lines; needs flat substrate and specialist cutting | High |
Where each material earns its place
Ceramic is still a sound wall tile where weight and cost matter. I wouldn't put a higher-absorption ceramic on a shower floor that stays wet for hours. It wipes clean on a dry wall and fails the brief once the glaze is breached at the floor.
Porcelain is the default for shower floors and most wet walls. It cuts harder, so blade wear and a slower set-out belong in the tiling days, not only in the box price. Low maintenance is real. Easy cutting is not.
Marble brings natural veining that suits a feature wall, a niche or a vanity top. It is porous, so it needs sealing on a schedule, and lemon-based or other acidic cleaners etch the face. Treat it as a finish you maintain, not a set-and-forget surface. A remnant sill in a niche can look deliberate. An unsealed shower floor in the same stone will mark.
Kerlite is a brand of thin sintered porcelain, so compare it as a large-format porcelain option rather than a separate mineral. The thin slabs give few grout lines and a smooth look inside or out. They demand a flatter substrate, a compatible large-format adhesive and specialist cutting. Fewer joints don't replace falls or a membrane.
Slip, light and the order
Ask for an AS 4586 slip rating. R10 or higher is commonly specified for wet floors. A polished tile that looks right under showroom spots can be the wrong surface once it's soapy.
View samples under the bathroom's own lighting, write down the batch number, and confirm the format fits the walls without a run of skinny cuts. A 600 mm tile on a short return leaves awkward pieces. Change the format on paper, not after the pallet arrives. Large-format work also fails on lippage when the wall waves more than the adhesive can fill. Check flatness with a straightedge, and match the trowel notch to the tile, before you lock the order.
Waterproofing and Falls Before Any Tile Goes On
A shower screen limits splash. It does not seal the floor or the wall. Water still tracks under tiles, through movement joints and around pipes if the membrane stops too low. Adhesive and grout are finishes. They are not the waterproofing system.
In Victoria, the NCC 2022 Housing Provisions require a bathroom shower floor to be waterproof, and shower-area walls waterproofed to at least 1,800 mm above the floor substrate, as set out by the Australian Building Codes Board. For a hobless shower the membrane continues across the floor and up the vertical wall substrate to that height, rather than stopping at the screen line. AS 3740 is the domestic wet-area pathway the Board identifies, with the NCC as the compliance framework. Substrate prep, a compatible primer, bond breakers at internal corners, sealed penetrations and photos of coverage all sit before any tile.
| Requirement | Rule | Why it matters |
|---|---|---|
| Shower wall waterproofing height | At least 1,800 mm above floor substrate | Covers the splash zone above the screen line |
| Floor fall to waste | Between 1:80 and 1:50 | Drains water without ponding, around 18.75 to 30 mm over 1.5 m |
| Unenclosed shower radius | 1,500 mm from the shower rose | Sets a wider exposed zone for membrane and waterstops |
| Doorway waterstop | Fitted at floor-level openings | Stops water crossing the threshold into the room |
| Membrane coats and coverage | As the product data sheet and AS 3740 require | Confirms the membrane is continuous and thick enough |
| Penetrations | Sealed at pipes, valves and waste | Common entry points for leaks behind tiles |
Corners, pipes and the waste
Internal corners need bond breakers or reinforcing so the membrane can flex when the framing moves. A coat painted tight into a sharp corner cracks along the junction. The leak then shows up in the next room, not on the tile face.
Pipe penetrations, mixer bodies and the waste flange are the usual entry points. Each one should be sealed with a collar or sealant the membrane maker accepts, then lapped into the field coat. Primer has to suit the sheet or screed. A second coat only counts if the first has skinned as the data sheet says. The screed that sets the fall has to be in place before that membrane goes down, so drainage doesn't depend on a thick, compressible bed of adhesive.
What to hold before tiles go on
Ask for three records while the membrane is still visible.
- Product and batch: the membrane name, the batch number and the primer used.
- Dated photographs: the full floor, the wall height, every penetration and each doorway waterstop.
- A written check: a flood test, or the equivalent inspection your waterproofer records, before tiling starts.
Those photos are the only proof once the tiles cover the work. The practical sequence is set out in these bathroom waterproofing standards.
A neat tile layout cannot repair a membrane that stopped at the glass.
How Trades Run From Demolition to Grout
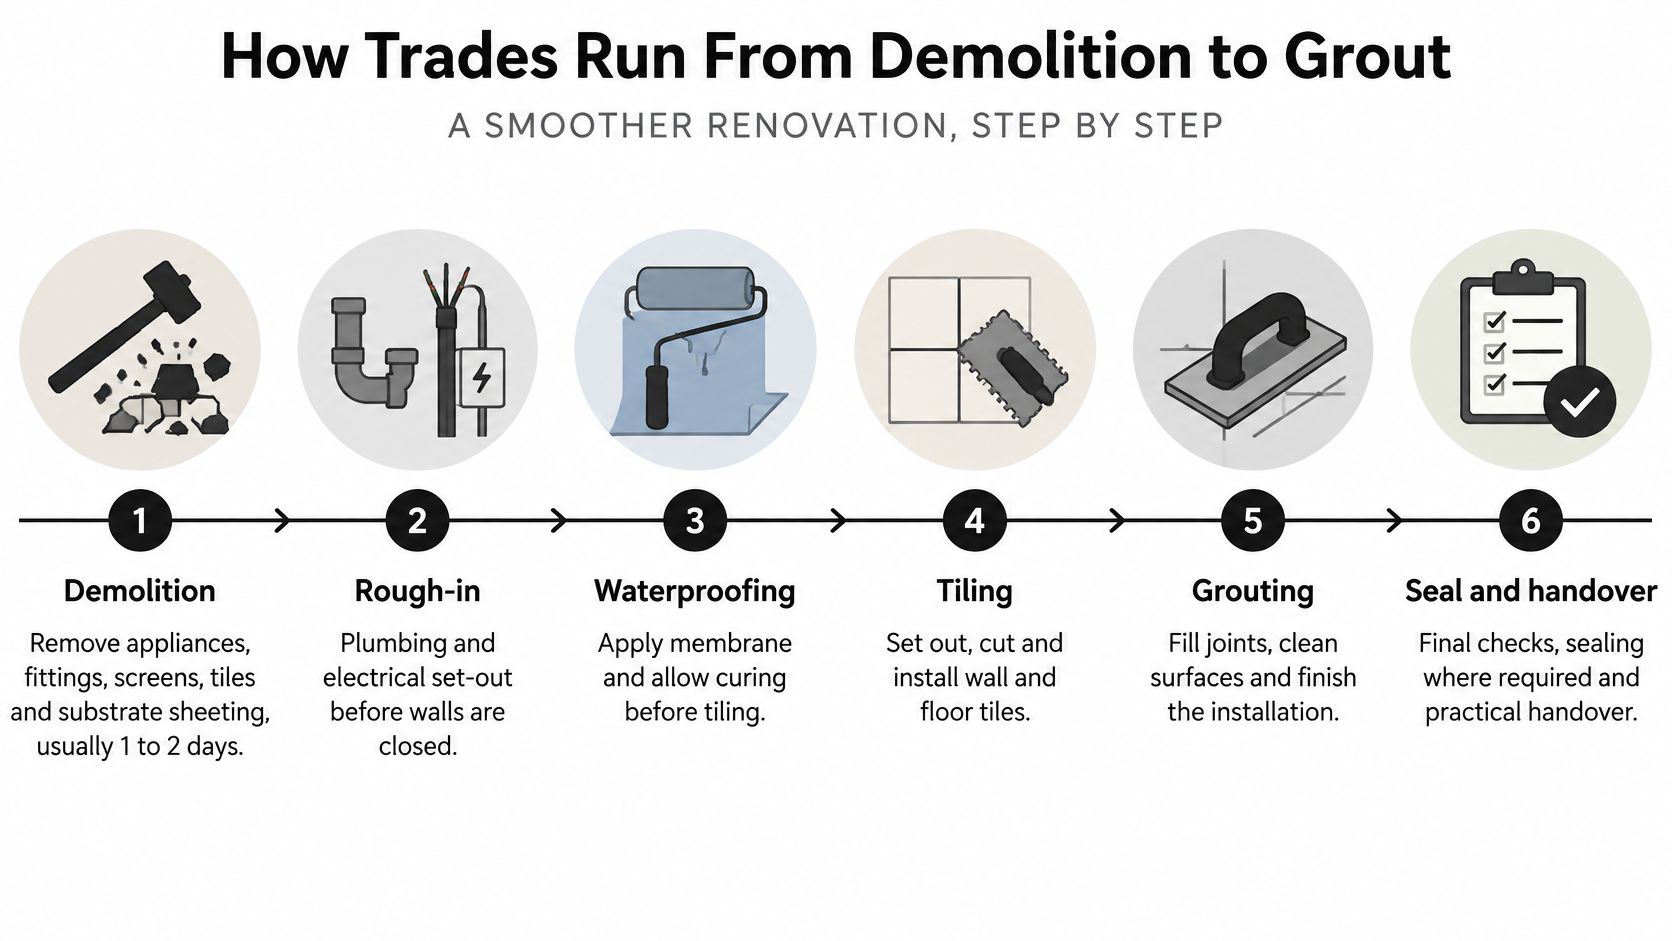
A renovation programme is a chain of handovers. The costly mistakes are usually buried by the next trade: an unstable substrate, uninspected rough-in, incorrect fall or membrane covered before it has cured. Check each layer before it disappears.
Demolition, usually 1 to 2 days. Appliances, fittings, shower screens, tiles and substrate sheeting come out. Soft sheet and old adhesive beds get binned rather than tiled over. This is the first chance to assess what the new work will sit on.
Rough-in plumbing and electrical, usually 1 to 3 days. Drains, supply lines, outlet positions and rewiring are completed while the walls remain open, then inspected before anything is closed. Book the return visit before the carpentry slot. A contractor who can handle plumbing calls while on jobs is less likely to leave a required adjustment sitting in voicemail.
Carpentry and substrate, usually 1 to 3 days. Stud walls, a dropped shower base, niches, and new wall and subfloor sheeting are completed. Walls are commonly plaster or fibre-cement sheet. Subfloors may be timber, particle board, compressed sheet or fibre-cement. Swollen or loose sheeting has to be replaced before tiling.
Screeding, then cure. Victorian guidance from the Building and Plumbing Commission sets a minimum fall of 1:80 and a maximum of 1:50 toward a floor waste (about 18.75 mm to 30 mm over a 1.5 m run), and waterproofing across a 1,500 mm horizontal radius from the shower rose connection for an unenclosed shower. Too little fall leaves ponded water, slower drying, mould risk and efflorescence. Too much makes large-format porcelain uncomfortable underfoot and prone to lippage.
Waterproofing, usually 2 to 4 days. Prime the substrate, apply the membrane to the data sheet and AS 3740, fit waterstops, seal penetrations and leave the system to cure. The membrane has to cover the full regulated zone rather than stopping at the screen line.
Tiling walls and floors, usually 3 to 7 days. Floor tiles are cut to suit the shower base fall. Walls are set from a ledger so cut tiles land away from eye level. Check the layout and tile quantities before adhesive is mixed.
Grouting and sealing, usually 1 to 2 days. Colour-matched grout goes across walls and floors, corner joints are sealed, then a penetrating sealer is applied over tiles and grout where the product requires it.
Fixtures and screens, usually 1 to 2 days. The vanity, tapware, bath, cabinets, shower screen and mirror go on after the grout has set. Confirm the finished dimensions before the screen is made.
Final inspection and clean. Run water across the floor, check the waste, silicone lines and fittings, then file the pre-tile photographs and waterproofing records with the handover.
Where the calendar slips
Cure times cannot be shortened with a heater and a hope. A late tile delivery stalls the tiler even when the membrane is ready, and glass measured too early can arrive for a niche or wall line that moved during tiling. Confirm material availability before demolition, keep the hold points in place and move the later bookings when an earlier trade slips.
Spotting Leaks Before Tiles Hide Them
Mould, a brown stain or a loose tile is a late symptom. Waiting for those signs is a poor test of the membrane. By the time the ceiling below blotches, water has already travelled through a cavity.
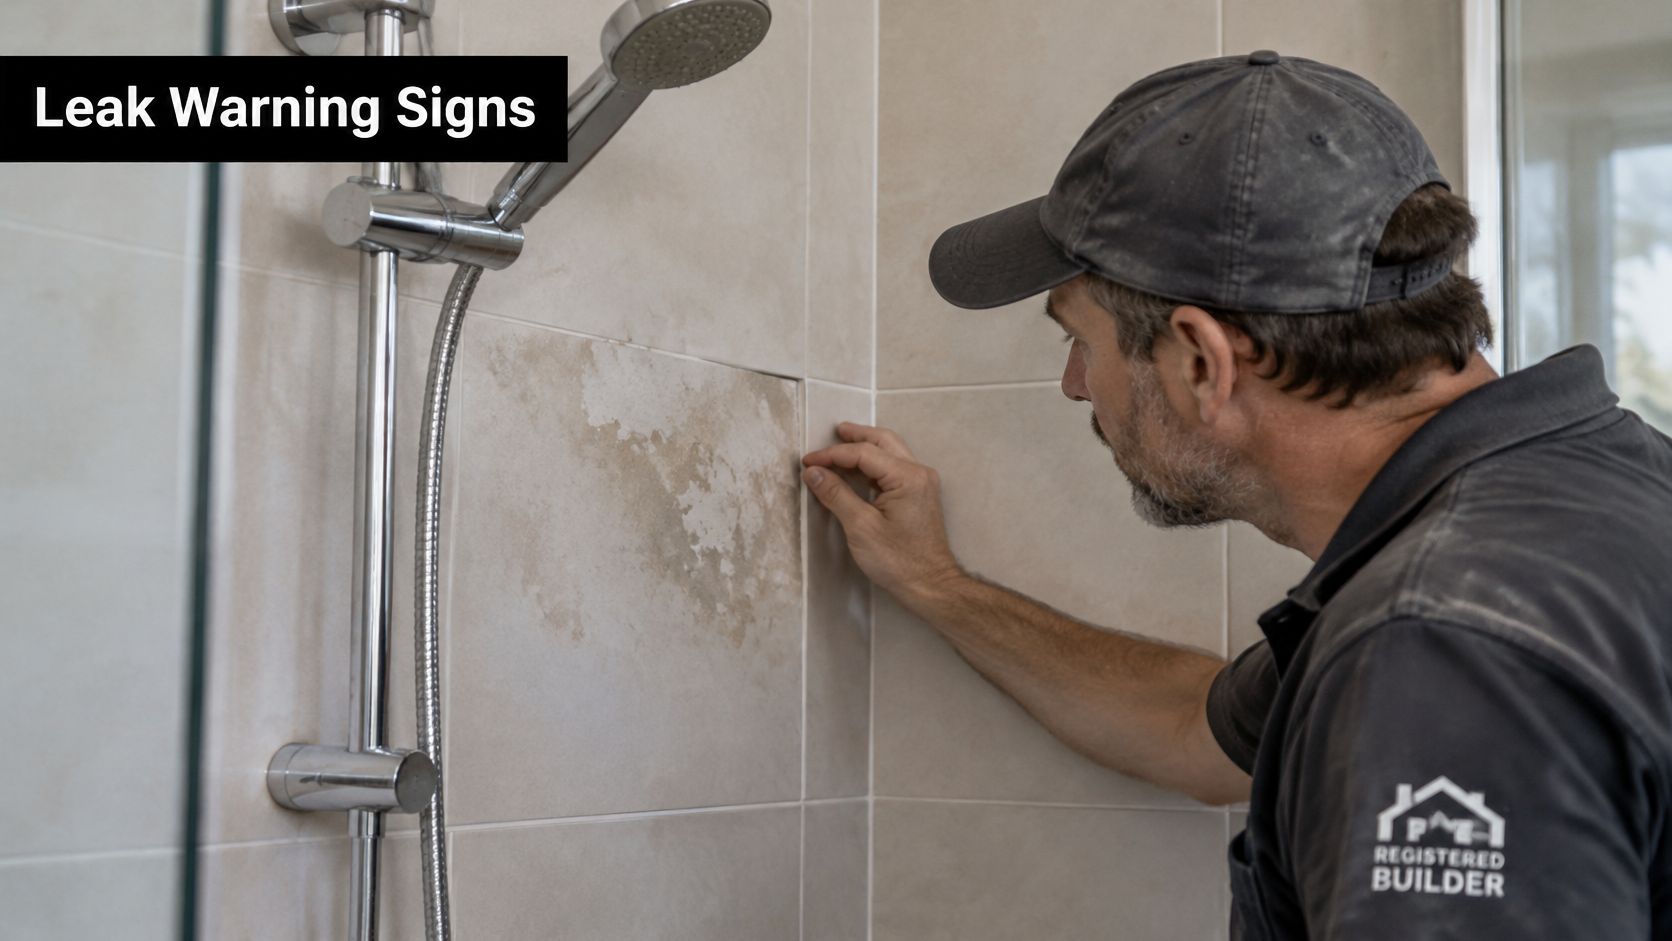
Look for earlier signs that don't need a saw.
- Musty air in the room beside the bathroom, even when the bathroom itself looks clean.
- Soft or swollen skirting and door frames on the wet-area side.
- Ceiling stains underneath, often offset from the shower rather than directly below the waste.
- A hollow tap on floor tiles near the junction, which can mean the bed has let go after repeated wetting.
- Dark or cracked grout along the floor-to-wall junction.
- Water sitting on the shower floor after the waste has had time to drain.
A Western Australian inspection of 86 shower areas, covering 1,360 points, found only 60% satisfactory. The WA industry bulletin tied 111 of 539 unsatisfactory findings, about 21%, to waterstops that were missing or installed incorrectly. That defect sits under the tile. Grout colour won't show it.
Membrane, grout or silicone
If the leak shows only at a joint, test the sealant and grout first. Failed silicone in a screen channel is a different repair from a failed membrane. If water tracks through the wall cavity, or appears away from joints, suspect the membrane, a missing waterstop or a badly sealed penetration.
Settle that argument with the handover set: dated photos, the membrane batch and the flood-test note. Re-grouting before that check covers the evidence you need.
For a landlord or property manager, write down the symptom, notify the party named in the contract or tenancy, and book a licensed inspection before anyone skins the wall. In Melbourne, leak detection should chase the path of the water, not just the stain on the paint.
The clip below shows what a wet area looks like once it is opened. That is the stage worth photographing, not guessing after the tiles are back on.
Hiring a Registered Builder and Signing the Contract
In Victoria, a written major domestic building contract is required when bathroom renovations and other home improvements are worth more than AUD 10,000, including alterations and repairs. Consumer Affairs Victoria applies that threshold to the total project value even when the work is split into several smaller contracts. Separate invoices for demolition, waterproofing and tiling don't reset it.
The contract should describe the work in detail, name both parties, state the price, deposits and progress payments, attach plans and specifications, and explain the five-day cooling-off period. That pack is what you argue from if a variation appears in week three.
Registration covers the whole bathroom
A full bathroom combines carpentry, plumbing and tiling, so registered builders matter more than a tiler working alone. Consumer Affairs Victoria states that registration is generally required above that value, while single-trade work such as tiling alone is among the listed exceptions. Someone using a mix of skills, or doing work that needs a building permit, must be registered with the Building and Plumbing Commission. Check the job as a whole, not as "just tiling".
Outside Victoria, state and territory rules set different thresholds and registration tests. Use the equivalent test where the property sits.
Before any deposit
- Registration: confirm the builder on the Commission's register, and check the licence class covers the plumbing.
- Insurance: ask for a current certificate of currency for public liability.
- Waterproofing warranty: get, in writing, who carries it and for how long.
- Scope: lock every line before money moves.
A low quote with a vague scope usually costs more through variations. If "make good paint" or "relocate the waste" isn't listed, it isn't included.
Pay the deposit against a signed scope, not against a text that says the job will be around that figure.
Confirm Your Scope Before You Book
A quote can look tidy and still leave the expensive parts vague: what happens under the tiles, which walls move, and who makes good after the last fixture is set. Lock the scope first, or the first variation arrives with the skip.
Write the job down. List rooms, tile format and the budget band that matches the work, then mark every change to plumbing, wall position, shower base fall or substrate. A hobless shower is a different job from a re-tile on the same waste.
Put the concealed work on paper. The scope should name demolition down to appliances, fittings, screens, tiles and substrate sheeting; the wall and floor build-up; waterproofing extent; outlet changes; and the checks due before tiling covers them. Ask for the fall to the waste and the inspection point to be stated before dates are booked.
Demand separate lines. Split demolition, carpentry and alterations, plumbing, electrical, waterproofing, tiling, fixtures, caulking and make-good, with exclusions written beside them. Compare that page with the drawings, sketches and agreed modifications, not the mood board.
Match the paperwork before you pay. Melbourne Tiling Services P/L has specialised in bathroom renovations since 2003, runs them with in-house carpenters, plumbers, waterproofers and tilers, and offers free quotes and 3D drawings, so a site visit can price the full scope.
Book the visit, compare the written scope with those checks, and confirm the signed contract covers every item before the first deposit is paid.
Melbourne Tiling Services P/L plans and builds bathroom installation and tiling from demolition through waterproofing and falls to the finished surface. If you're ready to price a Melbourne or Victorian bathroom against a written scope, visit Melbourne Tiling Services P/L and ask for a site visit, a free quote and 3D drawings before you commit a deposit.
Write a Comment