Movement Joints in Tiling for Melbourne Homes

You've just finished a Melbourne bathroom renovation, balcony upgrade or open-plan flooring project. The tiles are clean, the grout lines are straight and the handover photographs look perfect. Then, months later, a grout line splits near the doorway, a balcony tile sounds hollow, or a large porcelain floor begins lifting at the edges. The finish looked complete, but the installation may not have had enough room to move.

Movement joints in tiling provide that controlled room. They separate a rigid tiled surface into panels, allowing tile, adhesive, screed, concrete, timber and waterproofing systems to respond to movement without forcing stress into the tile field. For Melbourne homes, that planning matters across large-format interior floors, sun-exposed balconies, alfresco areas and wet-area bathroom work.

Table of Contents

Why Tiled Surfaces Need Room to Move

A large-format porcelain floor can fail even when the tiler has produced an impressive visual finish. Melbourne homes experience daily temperature changes, seasonal humidity shifts and structural deflection. Those forces push, pull and shear the different layers beneath the tiles.

Tile, adhesive, screed, concrete, timber and waterproofing membranes don't expand and contract in exactly the same way. If the whole assembly is bonded tightly against walls, columns, cabinets or adjoining surfaces, movement has nowhere to dissipate. The stress then concentrates at weak points, such as corners, doorways, grout lines and areas where the substrate changes.

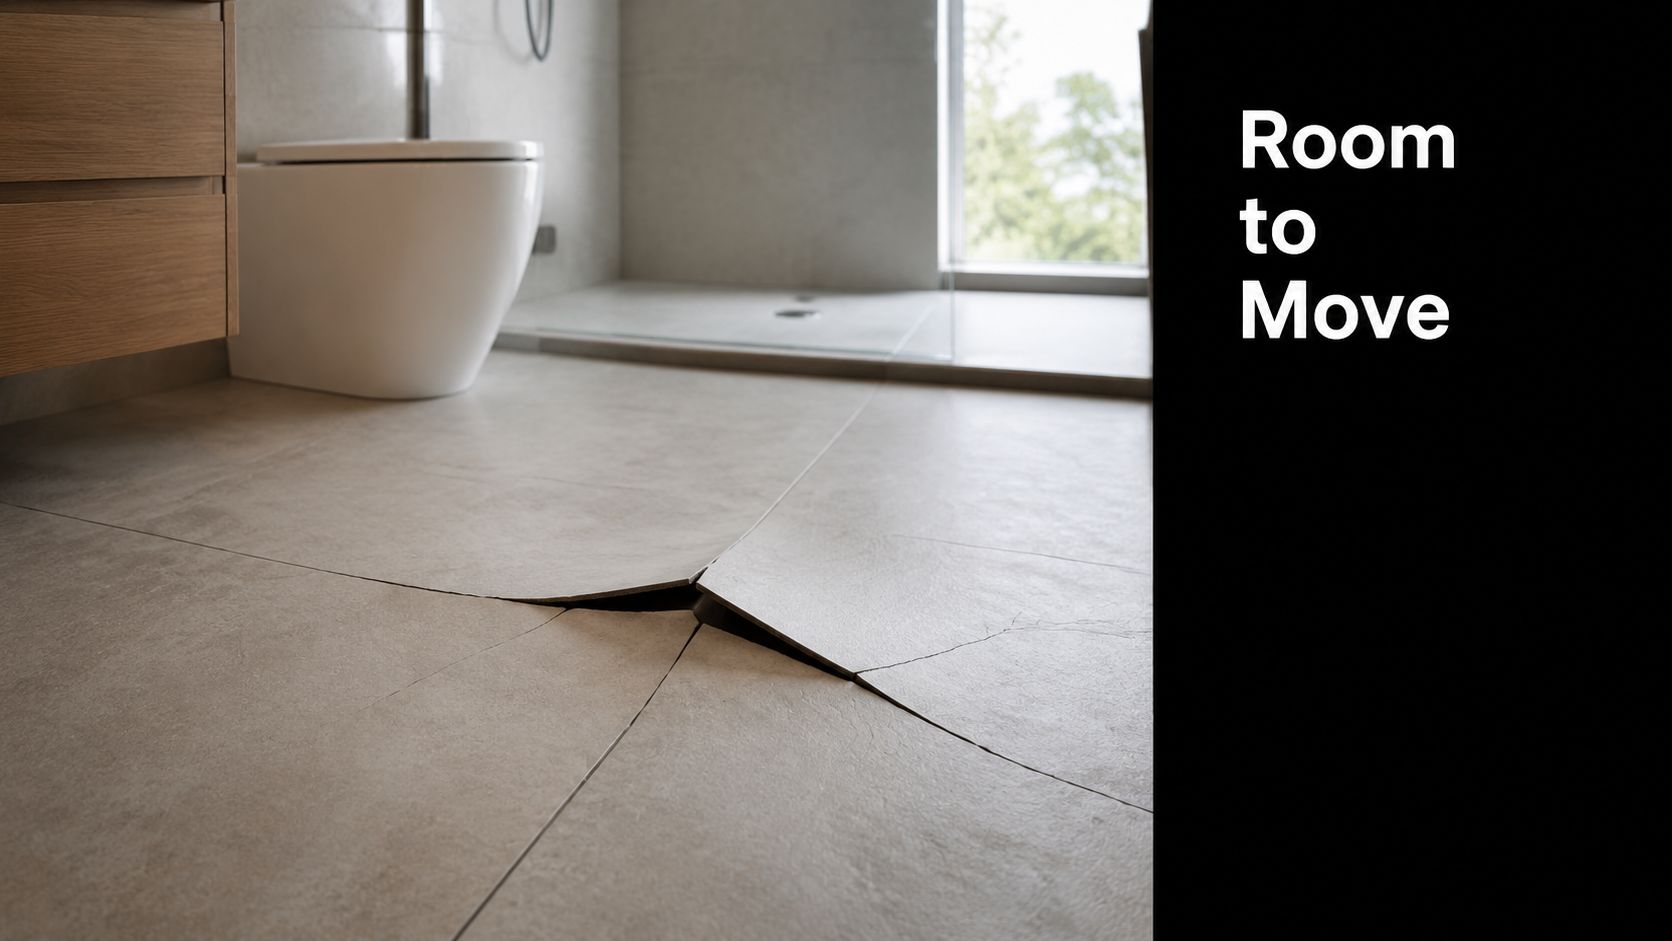
A bathroom floor showing tiles lifting and buckling due to lack of proper movement joints in tiling.

What homeowners usually see

The first signs often look minor. A grout line opens beside a skirting board, a corner tile debonds, or sanitary ware junctions develop cracks. On an exposed balcony, tiles may sound hollow when tapped, while a living-area screed can develop a drummy or loose-sounding section.

Those symptoms don't always identify the original cause. A cracked grout line may reflect movement below, not poor grouting alone. A tented tile may have been pushed against a wall as the tiled panel expanded. A hollow balcony tile may also point to incomplete support, water entry or movement that the installation couldn't accommodate.

Practical rule: A neat grout finish can conceal a poorly planned movement system. Inspect the joints beneath the finish, not just the visible surface.

Movement joints are part of the design

A movement joint isn't an aesthetic flaw or an admission that the tiling is unfinished. It's an engineered separation that manages predictable movement before the tile field cracks or lifts.

Large interior floors need a different approach from exposed balconies. A bathroom floor must also work with waterproofing, shower transitions, floor-to-wall junctions and changes in plane. Treating every tiled surface as one uninterrupted sheet is the mistake. Treating each area according to its substrate, exposure and restraints produces a more durable result.

Understanding Movement Joints in Tiling

A movement joint is a deliberately formed, full-depth gap that divides a tiled surface into smaller panels. Each panel can respond more independently to thermal and structural movement instead of transferring every force through the tiles and grout.

The simplest comparison is a concrete driveway. Separate sections are divided by joints so the concrete can move without pushing the entire drive against a fixed edge. Timber decking uses a similar principle through planned gaps between boards. In tiling, the separation is usually narrower, more carefully positioned and finished with a flexible sealant or a purpose-made movement profile.

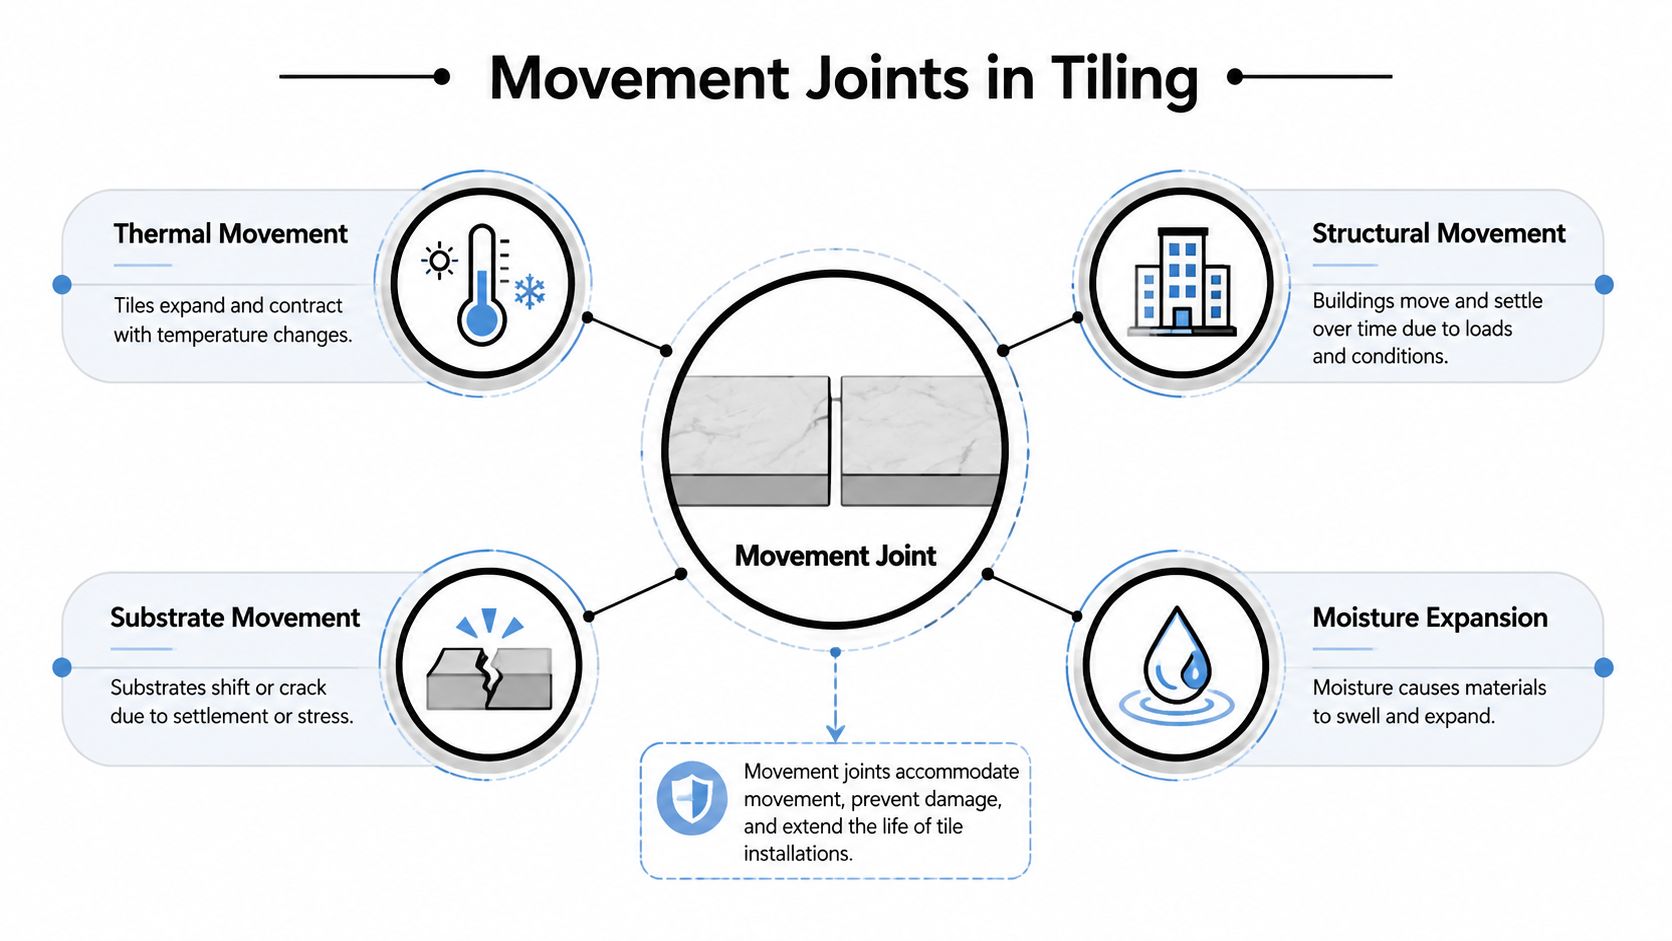
An infographic showing the various causes for installing movement joints in tile floor installations.

The joint has several layers

A functional joint isn't a line scraped into grout. It needs to continue through the tile, adhesive and underlying bedding material so the complete assembly can move at the planned location.

A typical sealant joint may include:

  • A clean joint face: Tile edges must be free from grout, adhesive, dust and curing residue.
  • Compressible backing rod: In a deep joint, backing rod controls sealant depth and helps create the correct sealant geometry.
  • Primer where required: The sealant manufacturer may require primer on particular tile, screed or substrate surfaces.
  • Flexible sealant: The elastomeric sealant should bond to the joint faces, not to the backing rod below.
  • Bond-breaker treatment: At some wall junctions, bond-breaker tape helps prevent the sealant from adhering to the back of the joint.

ARDEX Australia's technical guidance requires movement joints to run through the full tile and adhesive build-up, remain free from grout and adhesive, and use compressible backing rod in deep joints where needed. Its guidance also identifies perimeters, internal corners, changes in substrate plane and doorways as locations requiring careful movement detailing. ARDEX Australia's technical bulletin on differential movement in tiles.pdf) explains why the detail matters, concentrated shear transfer can otherwise pass into the tile field.

Structural joints and tiling joints differ

A structural joint belongs to the building or substrate and may be formed by the engineer or builder. If a concrete slab has a structural or control separation, the tiled finish must honour it at the same location.

A tiling movement joint is planned within the tile layout to manage movement across the tiled surface. The two systems aren't interchangeable. A tiler can add field, perimeter or isolation joints, but shouldn't cover or relocate a structural joint without appropriate design coordination.

Australian Spacing and Width Guidance

Australian guidance gives Melbourne designers and installers measurable starting points, but spacing still needs to reflect exposure, substrate and construction details. The current Housing Industry Association summary of AS 3958:2023 states that internal floors larger than 9 m in any dimension need movement joints at spacings no greater than 4.5 m, while external floors require 4.5 m spacing in any dimension. The same guidance states that wall movement joints should be at least 6 mm wide and extend through both the tiles and bedding material. The HIA guidance on joints in floor and wall tiles also places horizontal wall movement joints at storey heights and about 3 m to 4.5 m apart vertically.

These figures are particularly relevant to Melbourne homes with broad interior layouts, balconies and alfresco areas. Sun exposure can create stronger thermal movement than a shaded internal room, so a balcony layout shouldn't copy the spacing used in a hallway.

Current guidance and older summaries

Older Australian industry material summarising AS 3958.1-2007 states that perimeter movement joints are required in installations over 10 m², and that joints should be used wherever movement is likely, not only at standard spacings. That source also reports a minimum floor joint size of 3 mm for dust-pressed floor tiles under clause 5.4.6(c). The Australian tiling industry summary is useful historical context, but a summary table shouldn't replace reviewing the current standard and project-specific requirements.

A practical reference looks like this:

Location Typical maximum spacing Minimum joint width Notes
Internal floors larger than 9 m in any dimension 4.5 m Project-specific, with wall joints at least 6 mm Follow current HIA guidance and coordinate with substrate joints
External floors 4.5 m in any dimension Project-specific, with wall joints at least 6 mm Exposed balconies and alfresco areas need careful thermal and water detailing
Wall tiling About 3 m to 4.5 m vertically At least 6 mm for wall movement joints Place at storey heights and coordinate with corners and substrate changes

For large interior layouts, review the tile format and proposed layout alongside large-format tile installation considerations. A straight joint may need to move to align with a control joint, doorway or change in construction. The numbers are not permission to ignore site conditions. They're a measurable framework for a design that still needs professional judgement.

Choosing the Right Joint Locations

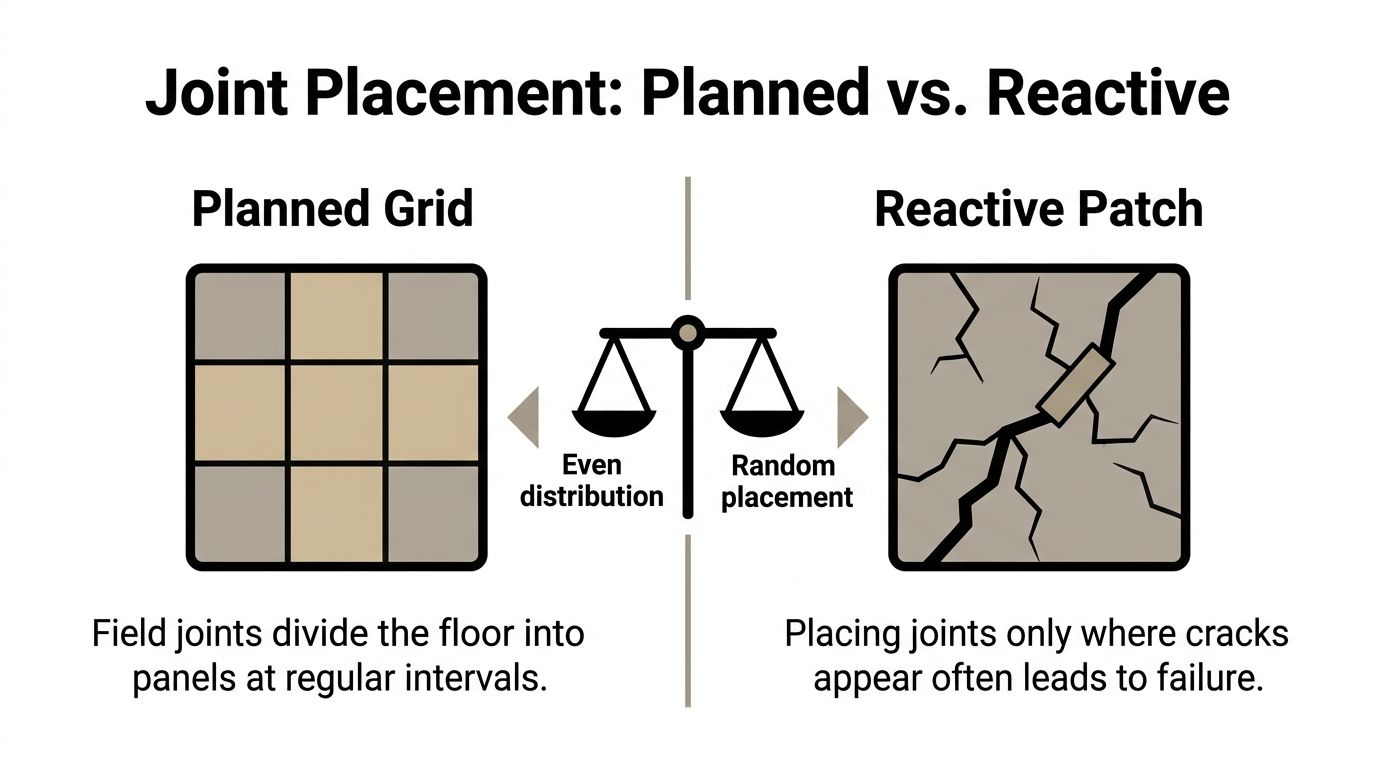
Joint placement works best as a planned grid, not as a repair strategy after cracking appears. Field joints divide the interior of a tiled area into panels. Perimeter joints separate the tile field from walls, columns, fixed cabinets and other boundaries that can restrain expansion.

Compare the main joint types

Joint type Where it belongs Why it matters
Field joint Across the interior tile field Divides a large surface into manageable panels
Perimeter joint Against walls, columns, cabinets and fixed fixtures Stops the tile field pressing against fixed boundaries
Structural joint Directly above a joint in the substrate Carries the building separation through the tile assembly
Isolation joint Between different materials, construction methods or movement zones Separates areas that may move differently
Change-of-plane joint At floor-to-wall junctions, shower corners and similar transitions Allows movement where surfaces meet at an angle

A diagram comparing organized planned floor joint grids to reactive, random crack patching in tiling.

Plan around the room, not just the grout lines

Doorways often make useful panel boundaries, particularly where rooms have different substrates, tile directions or construction methods. A doorway can also separate a bathroom floor from an adjoining hallway, but the joint still needs to work with the threshold, waterproofing detail and finished floor levels.

Internal corners deserve special attention. A flexible joint at a floor-to-wall junction may isolate the two planes, but it doesn't replace field-joint spacing across a large floor. Likewise, a perimeter joint beside a column doesn't remove the need for a planned field grid.

Good layout practice: Mark joints on the drawing before tile selection, screeding and waterproofing. A joint that's designed late may collide with a shower waste, cabinet, step or high-traffic route.

Large-format tiles change the visual problem

Large-format tiles can make a room look calm because they reduce visible grout lines. They don't reduce the movement of the substrate beneath them. In fact, a wide tile can make a poorly located joint harder to integrate into the layout, especially where the joint falls near a corner or cuts across a prominent visual axis.

Check thresholds, shower transitions, steps, columns and changes in bay size before adhesive reaches the floor. If a joint must cross a visible area, the designer and installer can coordinate it with tile edges, a doorway or a suitable movement profile. The aim isn't to hide every joint. The aim is to place each one where it can perform and still look intentional.

Installing Movement Joints Correctly

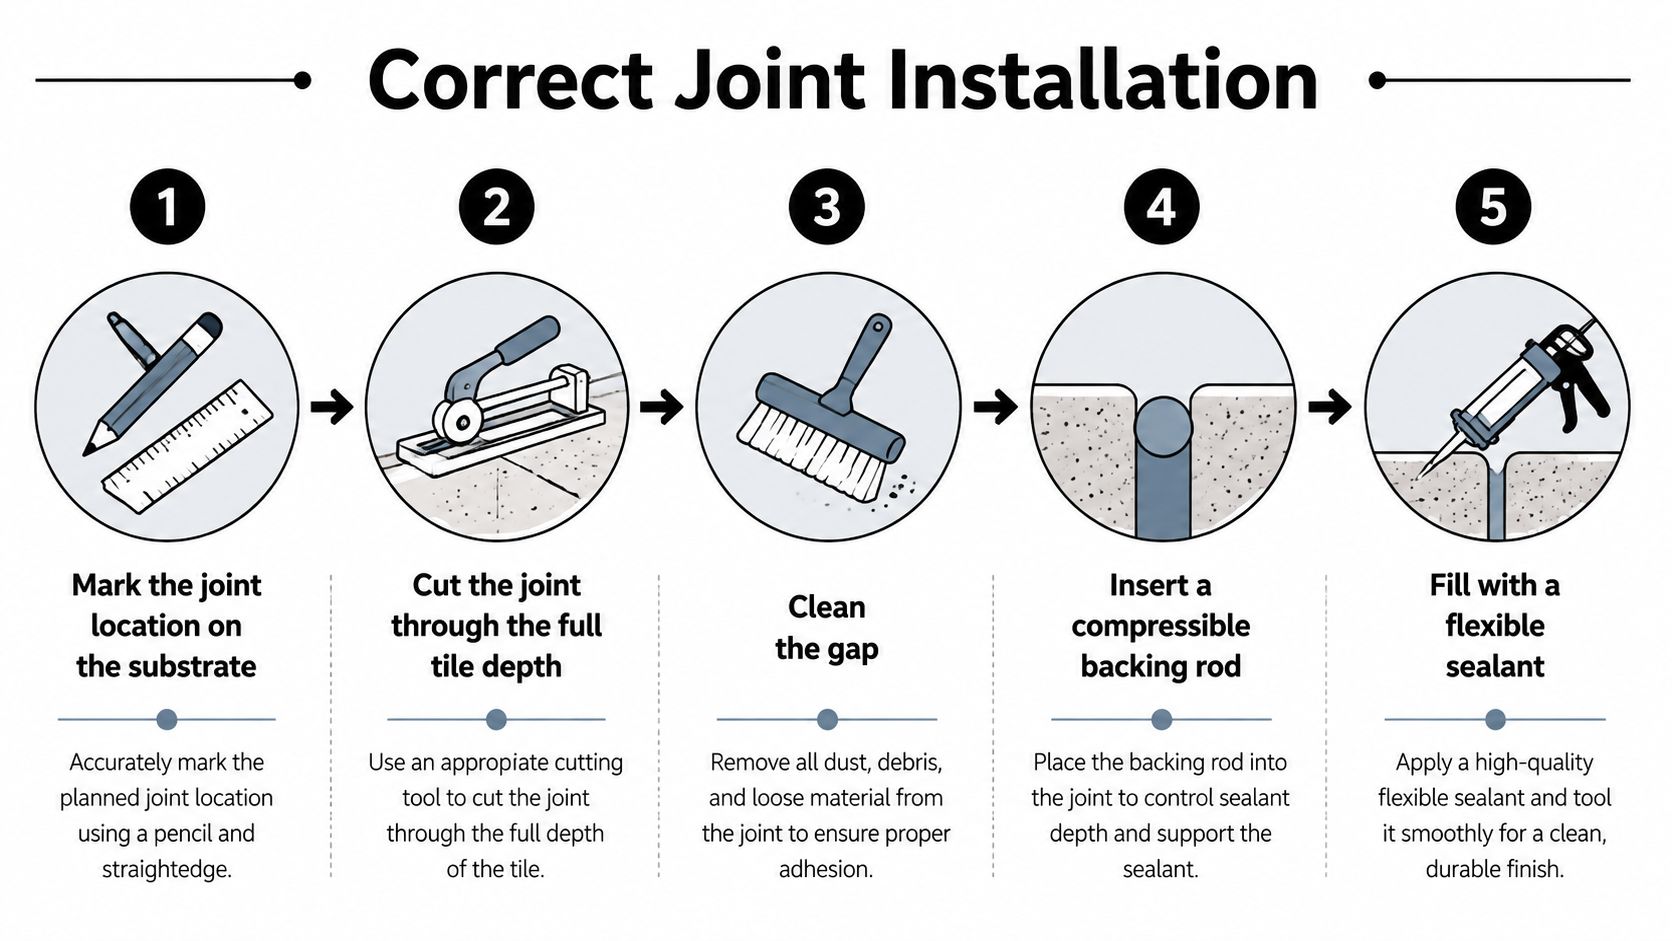
A movement joint only works when the installer builds it through the complete tiled assembly and fills it with a material designed to absorb movement. Cutting a line into the finished grout won't create the required separation.

Prepare the joint from the substrate up

Start by marking the joint location on the substrate. Carry that line consistently through any levelling compound, screed, adhesive bed and tile installation. If the substrate already contains a structural or control joint, the tile joint must align with it rather than bridging across the separation.

The finished gap needs straight, clean faces. Remove dust, adhesive, grout, loose particles and curing residues before applying sealant. Any rigid material left in the gap can restrict movement or stop the sealant bonding correctly.

A five-step instructional diagram illustrating the professional installation process for movement joints in tiling projects.

Control the sealant geometry

Where the joint is deep, insert a compressible backing rod at the specified depth. The rod controls how much sealant is used and prevents the sealant from bonding to the bottom of the joint. That allows the sealant to stretch and compress between the joint faces instead of tearing under movement.

Primer isn't universal. Follow the sealant manufacturer's requirements for tile, screed, concrete, waterproofing interfaces and other surfaces. The same instructions should establish the required width-to-depth relationship, product compatibility and curing conditions.

  • Clean the faces: Brush and vacuum the gap before masking and sealing.
  • Use compatible materials: Confirm that the sealant suits the tile, waterproofing system and exposure.
  • Keep rigid products out: Grout and adhesive must not bridge the movement gap.
  • Finish below traffic: On external floors, detail the sealant so it remains protected from impact while still shedding water and debris.
  • Protect the joint: Keep fixtures, floor finishes and excess sealant from obstructing the designed separation.

A rigid grout plug defeats the joint. Leaving adhesive across the gap creates the same problem by transferring stress into the tile edges. On balconies, debris and water can also shorten the life of an otherwise suitable sealant if the joint isn't properly formed and protected.

Adapting Joints to Substrates and Tiles

The joint layout must respond to what supports the tiles, what covers them and what the room experiences. A concrete slab, suspended timber floor, bathroom screed and exposed balcony aren't interchangeable bases.

Timber floors and suspended construction may deflect differently from concrete. Before selecting a tile grid, confirm that the framing, sheeting and fixings provide a suitable foundation. Concrete and cementitious screeds may shrink or crack while curing, so existing cracks, construction joints and curing conditions need assessment before the tiled finish is installed.

Waterproofing adds another layer of coordination. Bathroom floor-to-wall transitions, shower corners, thresholds and balcony perimeters need movement detailing that works with the membrane rather than cutting or puncturing it. A sealant joint that looks correct at the tile face can still fail if the underlying waterproofing detail is discontinuous.

For guidance on the supporting layer, review what screed does in a tiling system. The screed's condition, thickness, curing and relationship with the substrate all affect the decision.

Substrate or tile Planning consideration Typical action
Timber floor Deflection and sheeting movement can differ from concrete Confirm structural support and fixing before layout
Concrete slab Existing control and structural joints may govern the tile grid Reflect substrate joints through the tile finish
Cementitious screed Shrinkage and curing can affect the finished surface Assess curing, cracks and movement before tiling
Waterproofing system Joints must preserve membrane continuity Coordinate floor, wall, shower and balcony details
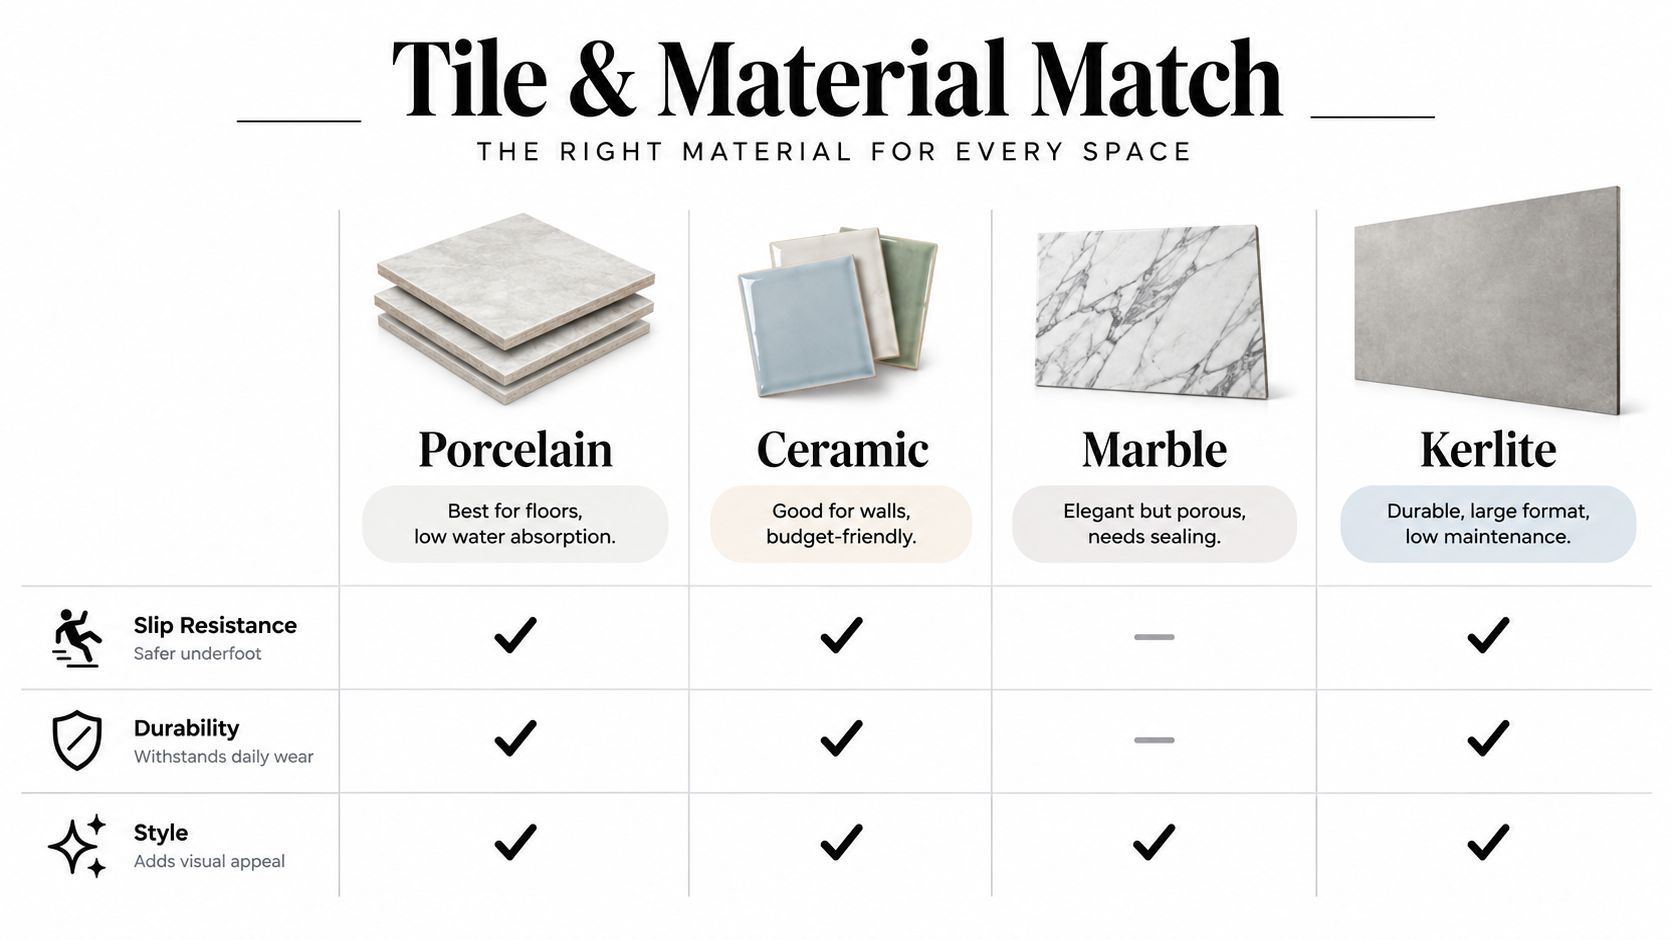
Ceramic tile Format and substrate still determine movement needs Use the planned joint system, not grout alone
Porcelain tile Dense, rigid tiles still follow substrate movement Provide full support and planned movement accommodation
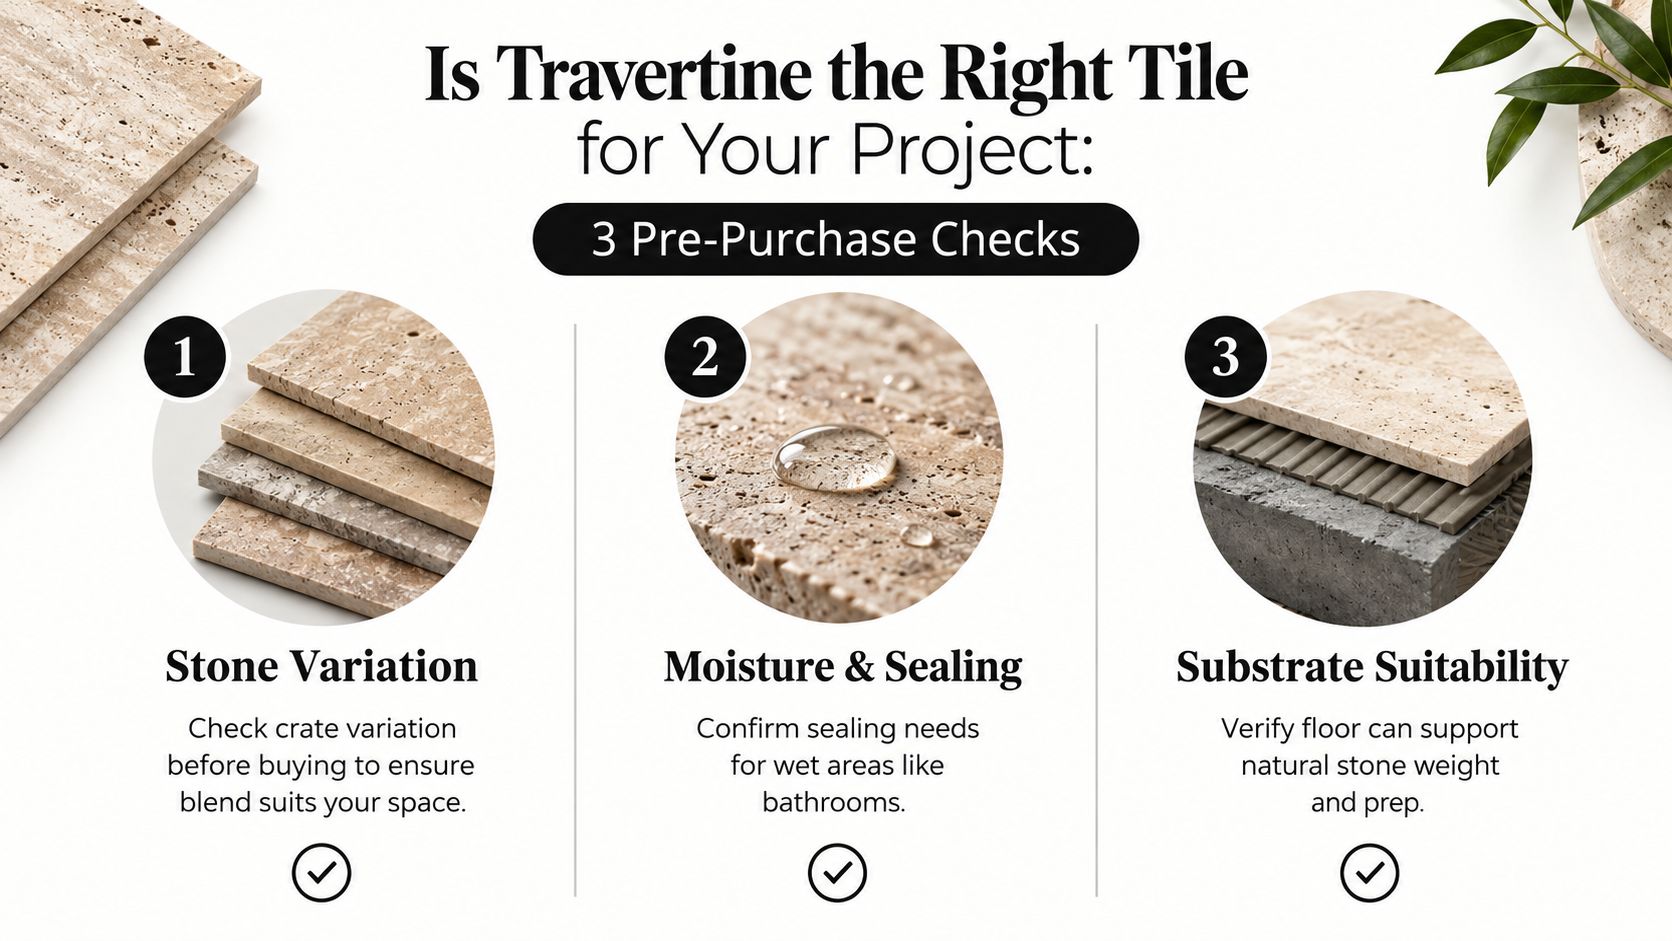
Stone Natural variation and sealant compatibility require checking Confirm product suitability and movement detailing
Large-format Kerlite Broad sheets demand careful alignment and support Use product-specific technical data and a coordinated grid

Large-format porcelain, stone and thin porcelain formats such as Kerlite don't justify fewer or narrower joints. Rectified edges improve visual consistency, but they can't stop substrate movement. Interior floors, heated floors, balconies and sun-exposed areas should be treated as distinct design situations, with the tile dimensions, adhesive, membrane, joint width and sealant recorded before work begins.

Bathroom Renovations and Registered Builders

Grout isn't a movement joint. Cement-based grout cures into a rigid filler, so it can crack where two planes meet, around perimeters or wherever a tile assembly moves. Flexible silicone or another compatible elastomeric sealant belongs at movement points, internal corners and junctions where rigid grout is likely to transfer stress.

That technical distinction matters in a Melbourne bathroom renovation because a failed junction can affect more than appearance. A cracked sealant line may expose the waterproofing detail, while a grout-filled corner can concentrate movement at the tile edges. The tiler, waterproofer, plumber and builder need to agree on floor levels, screed curing, fixture locations, membrane transitions and movement joints before the finish is installed.

Victorian registration boundaries

In Victoria, domestic building work worth more than $10,000 must be carried out by a person registered with the Building and Plumbing Commission. Registration also applies regardless of value where the work requires a building permit, and Consumer Affairs Victoria states that registration must be approved before work starts. Consumer Affairs Victoria's guidance on builders and tradespeople sets out that boundary.

Victoria also recognises a limited domestic builder class for bathroom, kitchen and laundry renovations that remain within the home's existing external walls, floor and ceiling. The prescribed pathway includes a cabinet-making certificate, additional competency units and at least 2 years of practical experience, while the VBA application requires documentary evidence including qualifications, project work, a technical referee report, a criminal history check, photo identification, declarations and payment authorisation. The prescribed Victorian qualification schedule shows why registration represents documented competence and formal vetting, not a business description.

Renovation task Typically tiler scope Requires registered builder
Replacing tiles on a sound existing surface Often Not necessarily
Installing compatible sealant at tile junctions Often Not necessarily
Altering waterproofing as part of broader renovation Coordinated trade work Often, depending on scope and permit requirements
Moving fixtures and changing services Trade coordination May require registered-builder oversight
Altering load-bearing walls or structural elements No Yes
Multi-trade bathroom renovation Participates as tiler Confirm registered-builder requirement before work starts

For wet-area scope and membrane coordination, review bathroom tiling and waterproofing services. Written scope, product records, photographs and sign-offs help clarify responsibility if a warranty dispute later involves the tile, membrane, screed or structure.

A Practical Movement Joint Planning Checklist

Before any tile is laid, record the installation rather than relying on memory or a last-minute site conversation.

Substrate and movement

  • Identify the base: Note whether it's concrete, screed, timber, suspended construction or another system.
  • Record existing joints: Mark structural, control, construction and isolation joints.
  • List movement sources: Include sun exposure, balconies, alfresco areas, heated floors, moisture and substrate changes.
  • Check the surface: Document cracks, deflection, curing condition, levels and support.

Layout and materials

  • Sketch the joint grid: Show field, perimeter, structural, isolation and change-of-plane joints.
  • Confirm spacing and width: Compare the plan with AS 3958 and current HIA guidance, then adjust for site conditions.
  • Specify the joint system: Record sealant type, backing rod, primer requirements and movement profile details.
  • Note the tile: Include format, thickness, ceramic, porcelain, stone or Kerlite classification.
  • Coordinate wet areas: Align joints with waterproofing, screed, shower transitions, thresholds and fixtures.

Documentation and responsibility

Keep the standards referenced, technical data sheets, product batch information, drawings and trade responsibilities together. This checklist supports qualified trades, but it isn't a substitute for competent design or installation. Where structural, permit-related or broader wet-area changes are involved, confirm the scope with a registered builder before work begins.


Melbourne Tiling Services P/L coordinates bathroom renovations, waterproofing, screeding and large-format porcelain, stone and Kerlite installations with movement details in mind. Visit Melbourne Tiling Services P/L to discuss your Melbourne project, request a free quote and plan the joint layout before tiles are ordered.

Bathroom Tiling and Waterproofing Guide for Melbourne Homes

You've stripped out the old bathroom in a Melbourne home, the plumber has finished the rough-in, and the room is finally starting to resemble the design you approved. Then the tiler asks a question that can't be postponed: what exactly is being waterproofed, and what evidence will be provided before the first tile is fixed? That decision matters more than whether you choose porcelain, marble or a patterned feature tile.

A bathroom can look perfectly finished while hiding a failed membrane, a poorly detailed puddle flange or falls that leave water sitting at the shower entrance. Bathroom tiling and waterproofing are one compliance system, and the tile finish is only the visible part. In Melbourne renovations, the durable result starts with the substrate, drainage, membrane, documentation and trade sequence.

Table of Contents

Planning a Bathroom Tiling and Waterproofing Project

Lock in the scope before ordering materials

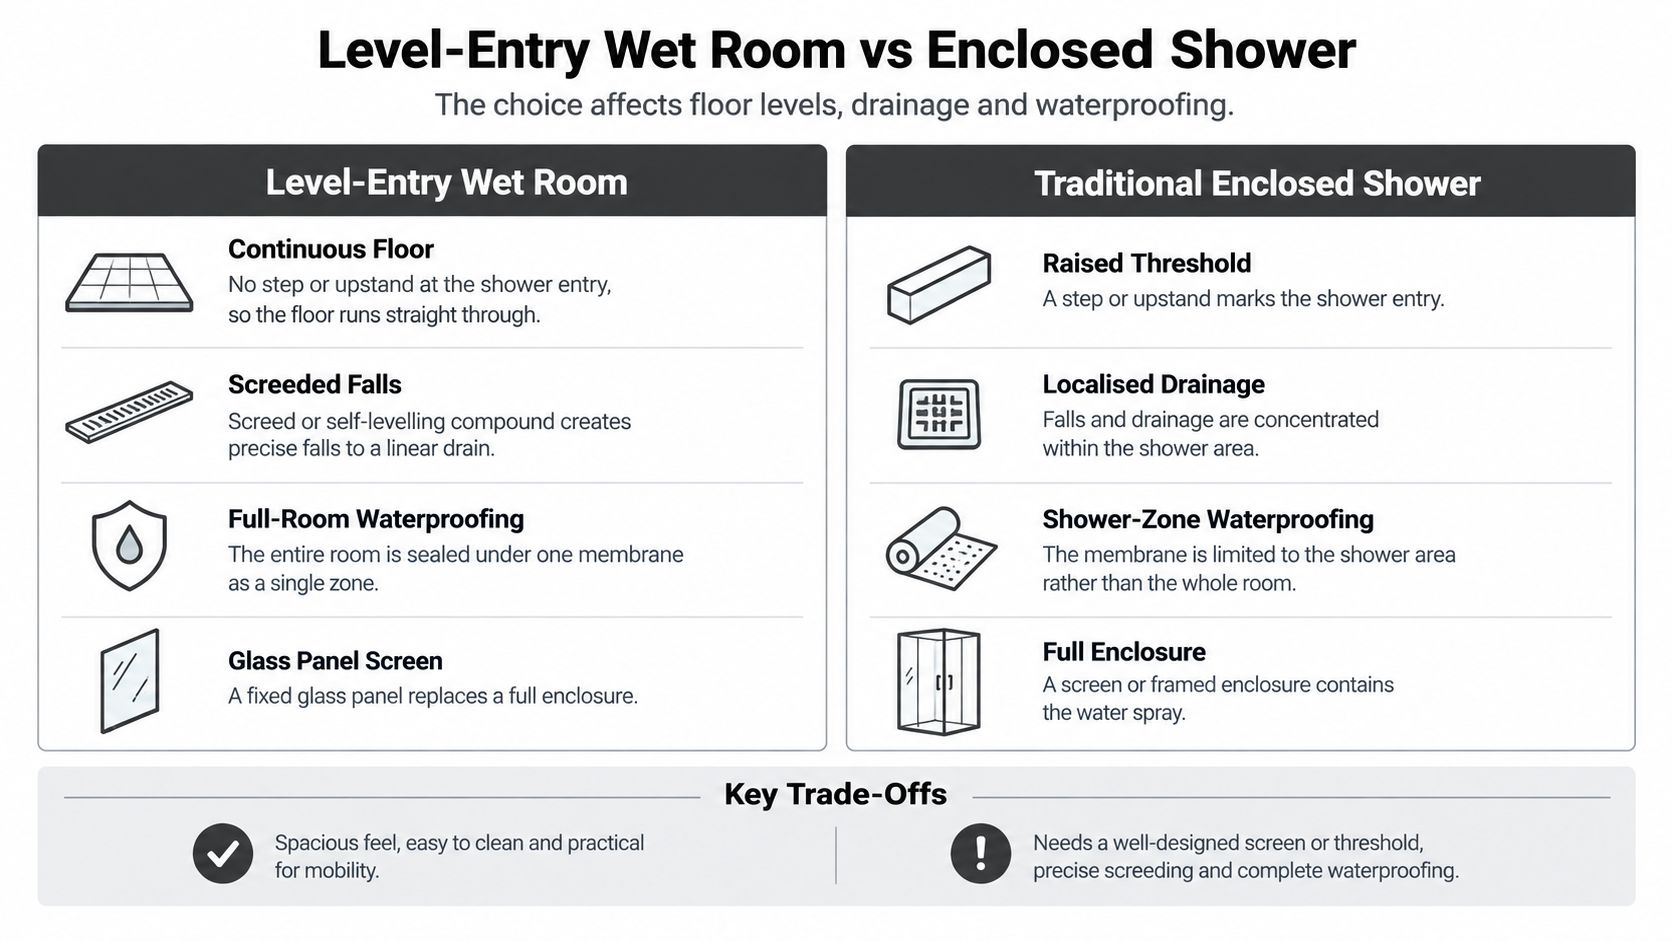
Start by defining the wet area. Is the membrane limited to the shower, or will the entire bathroom floor and additional wall zones be treated? A hob, a frameless shower, a recessed niche, a linear drain and a set-down all change the preparation and detailing. The waterproofing scope drives labour, materials, curing time and tile quantities, so choosing tiles first often produces an inaccurate renovation price.

Demolition also needs a proper decision. Confirm what will be removed, who will dispose of it and whether the building may contain asbestos, particularly in older homes. Pre-1990s construction deserves careful checking before fibro sheeting, old floor coverings or wall linings are disturbed. Don't let a tiler arrive to find that the substrate is unstable, contaminated or still covered in demolition waste.

Identify the existing substrate before specifying primers and membranes. Fibro, plasterboard, brick, concrete, Scyon and existing tile surfaces behave differently. The plumber should also confirm fixture locations, pipe penetrations, the floor waste and the finished floor height before waterproofing begins. A change to the vanity, toilet, shower rose or waste after membrane work can create a new penetration and compromise the system.

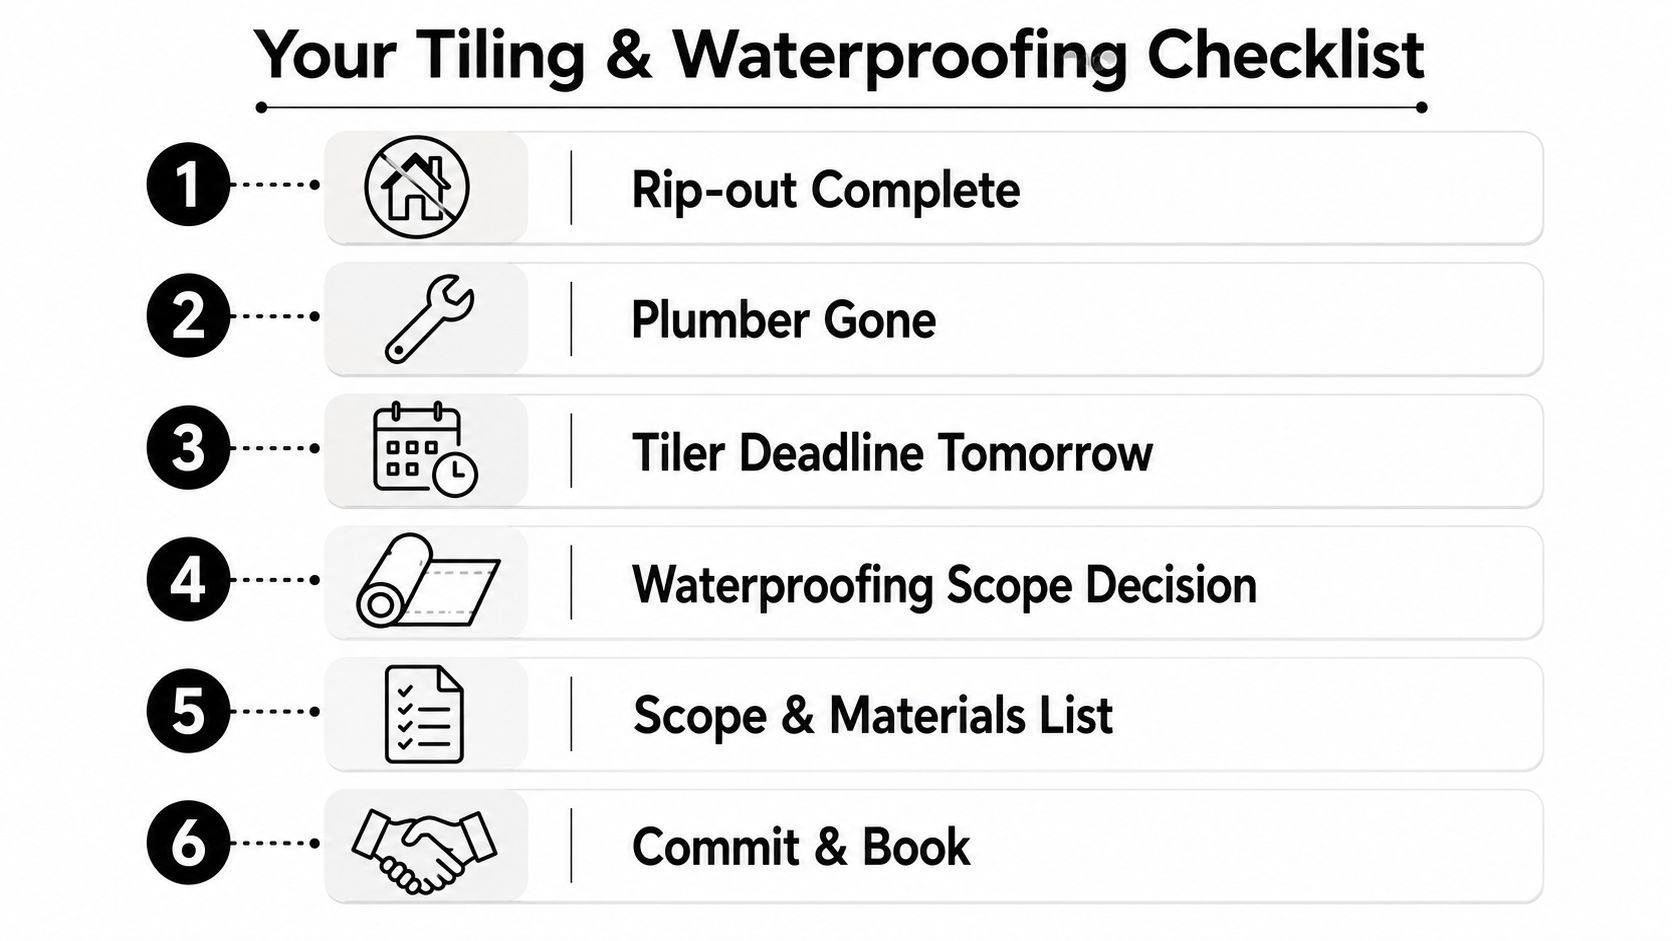
A checklist for bathroom renovation showing six steps including rip-out, plumbing, and booking a tiler.

Sequence the trades, then keep the records

A reliable sequence generally has the carpenter preparing framing and linings, the plumber completing rough-in work, the waterproofer preparing and coating the wet area, the tiler installing the finish, the electrician completing fit-off, and the glazier measuring and installing the shower screen. The exact order can vary, but the membrane must be protected from avoidable damage after certification.

Keep a project file containing:

  • Approvals and permits: Retain the building permit and any relevant project approvals.
  • Waterproofing evidence: Keep the waterproofing compliance certificate, product information, photographs and test records.
  • Builder documentation: For work over $16,000, retain the relevant VBA documentation and builder records. The threshold and Victorian practitioner pathway should be confirmed for the specific contract and scope.
  • Product details: Record membrane, primer, sealant and adhesive batch information where available.
  • Variation history: Put changes to drains, niches, shower screens and tile layouts in writing.

Practical rule: Don't approve tiling because the room “looks ready”. Approve it when the substrate, membrane, curing and inspection evidence are ready.

Before waterproofing, check that the demolition is complete, the substrate is clean and stable, plumbing penetrations are fixed, the waste is correctly installed, falls are formed, corners are detailed and the final fixture layout is signed off. That checklist prevents the expensive return visit caused by a late plumbing change or a membrane punctured by another trade.

Waterproofing Standards and Membrane Choices

What the Australian standard controls

Australia's current bathroom waterproofing baseline is AS 3740:2021, published on 23 July 2021 and superseding AS 3740:2010. It defines minimum requirements for waterproofing materials, design and installation in domestic wet areas, including wet areas in Class 1, 2 and 4 buildings under the NCC, with wider application to relevant Class 3 to 9 wet areas as described in the standard. The standard was adopted by NCC 2022 on 1 May 2023, which is why the compliance framework matters directly to current Melbourne bathroom renovations. See the AS 3740:2021 standard reference and the Standards Australia product listing.

The shower floor must be waterproof. Shower walls need waterproofing to at least 1,800 mm above finished floor level, or 50 mm above the shower rose, whichever is higher. Relevant wet-area wall conditions also include a minimum of 150 mm above finished floor level outside the shower zone. These dimensions protect the substrate behind the tiles. They aren't a substitute for correct corners, penetrations, junctions or drain detailing.

A membrane system also has to suit the substrate and the intended wet-area application. Acrylic roll-on systems are common because they're practical for many residential layouts and can be applied around irregular corners. They depend heavily on correct primer selection, film thickness, reinforcement and curing between coats. A rushed single coat is not a waterproofing strategy.

Two-part polyurethane systems can provide a continuous coating, but they demand accurate mixing, careful application and controlled curing. Sheet systems, including products such as Schluter Kerdi, can offer consistent factory-controlled thickness and dependable overlaps when installed correctly. They're less forgiving of poor joint preparation, awkward penetrations and detailing that hasn't been planned before the sheet is cut.

Comparing practical membrane systems

Membrane Type Cost per m2 (AUD) Cure Time Best Application
Acrylic roll-on Varies by product and scope Product-dependent, between coats and before tiling Standard residential bathrooms with prepared substrates
Two-part polyurethane Varies by product and scope Product-dependent, with controlled mixing and curing Demanding wet-area detailing and compatible substrates
Sheet membrane Varies by product and scope Adhesive and joint system dependent Planned shower systems requiring controlled sheet overlaps

The figures above are deliberately qualitative because membrane pricing depends on access, preparation, penetrations, floor shape and product specification. A contractor should provide the selected system, primer, compatible sealants, required dry film thickness and curing instructions rather than quoting a membrane as an unnamed bucket of product. The shower waterproofing membrane guide can help homeowners understand the system choices before approving a scope.

The details that cause trouble are usually small. Shower tap penetrations, niche corners, internal wall-floor junctions and the puddle flange at the floor waste all need deliberate treatment. The membrane must bond to compatible surfaces and remain continuous around each penetration. Where a tiler also performs the waterproofing, ask who is responsible for inspection and certification. The concern isn't that one person can never do both tasks. It's that the person paid to continue into tiling may have a commercial reason to declare the membrane ready before every detail has been properly checked.

Screeding, Self-Levelling and Getting the Falls Right

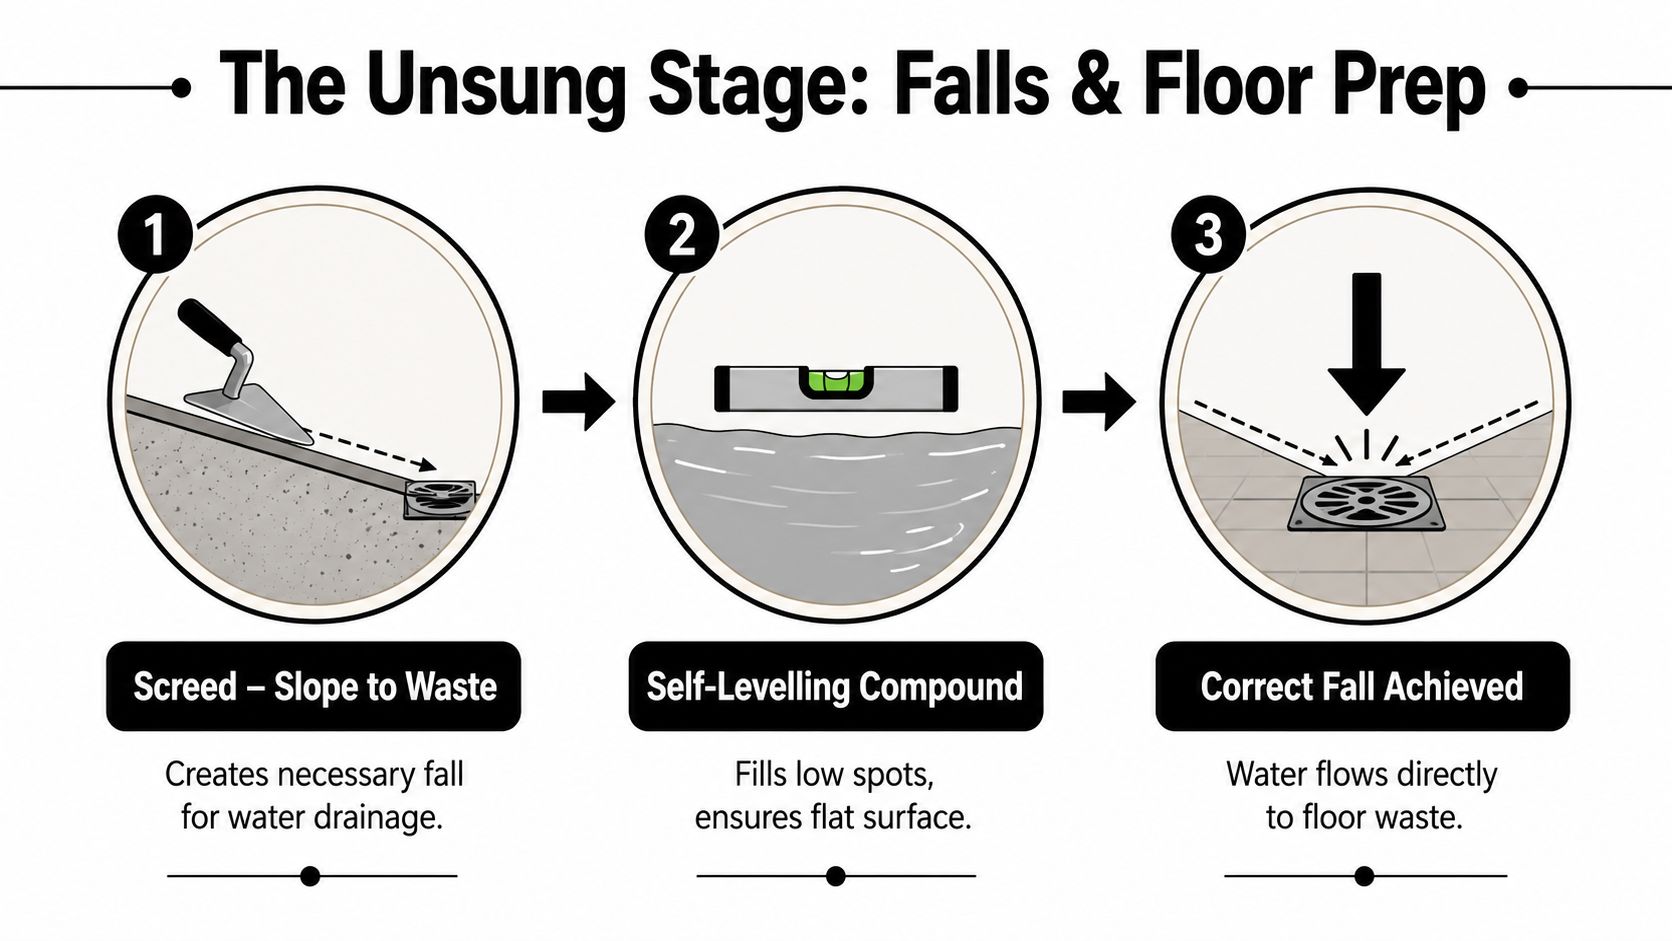
A membrane can't correct a floor that sends water away from the waste. Screeding shapes the drainage plane, while self-levelling compound corrects suitable low spots and creates a flatter surface where a true fall isn't required. A pre-formed shower tray provides a manufactured fall and drain arrangement, but it still needs compatible waterproofing and accurate connections to the surrounding floor.

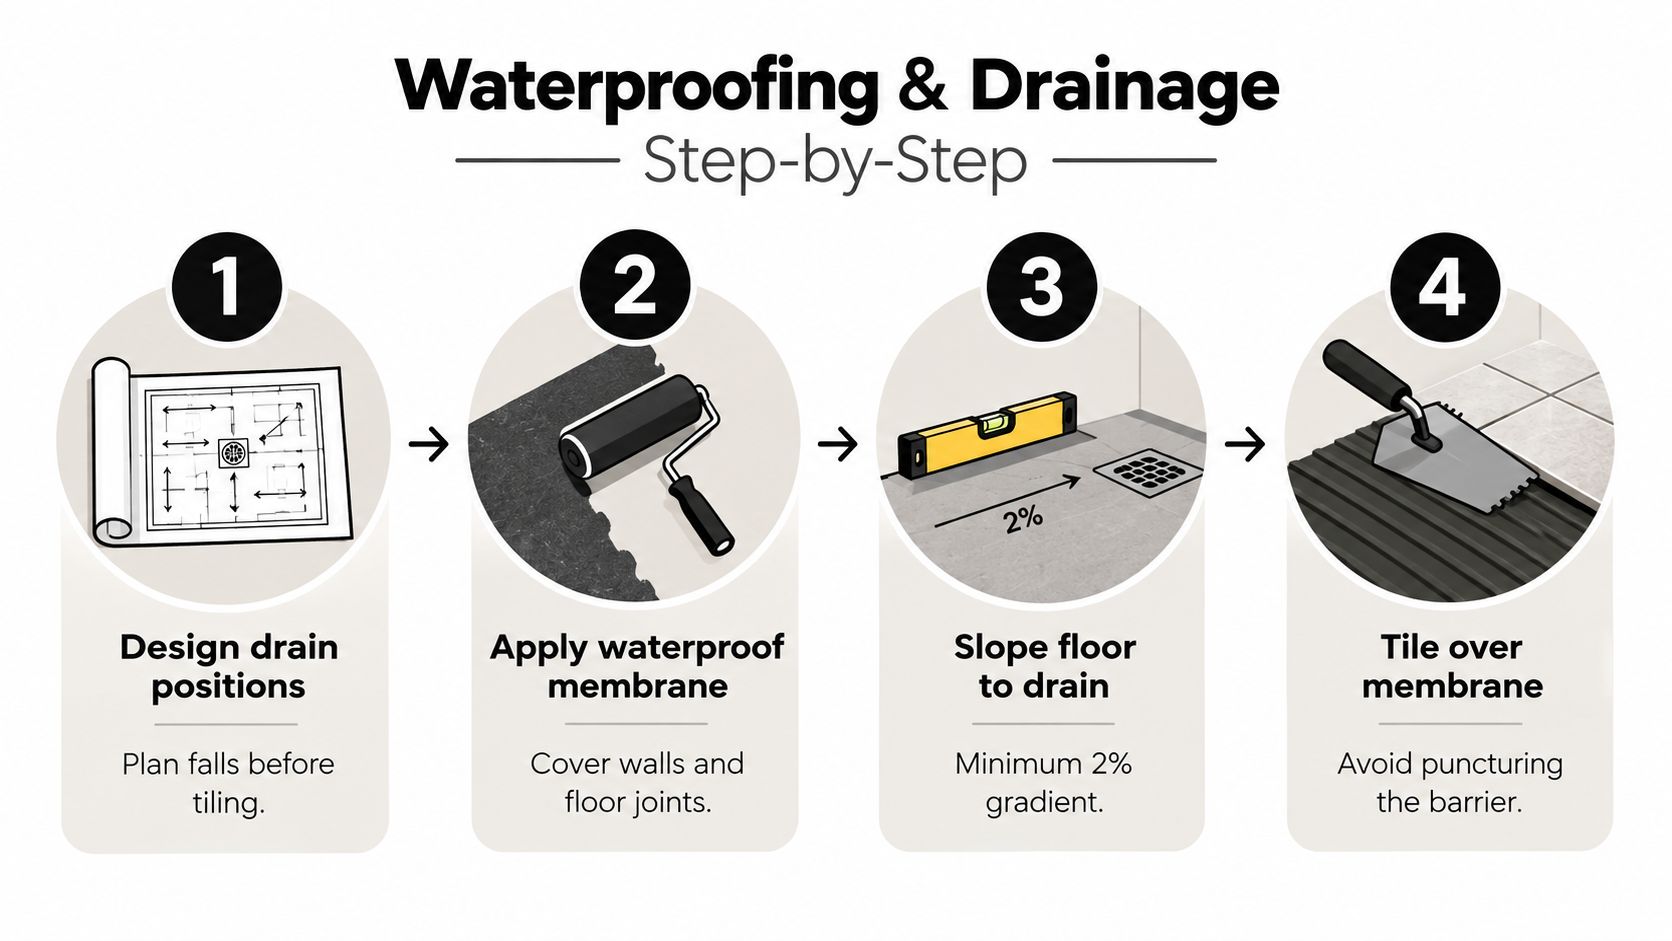
Australian guidance identifies a general wet-area floor fall of at least 1:100, or 10 mm per metre, to move water towards drainage and reduce ponding risk. The NCC wet-area provisions also describe fall requirements that can include a continuous fall between 1:80 and 1:50, depending on the application. Check the applicable detail for the exact bathroom design rather than assuming a steeper slope is automatically safer. Excessive fall can create its own compliance and usability problems.

Shape the floor for the actual drain

A centred waste normally needs a four-way fall. Each plane rises towards the walls, and the tile layout has to accommodate the resulting changes in angle. A linear drain allows a two-way fall and can suit larger tiles, but only if the drain is installed level and the surrounding screed reaches it without hollows.

For example, a brick shower base may need a bonded screed that forms the fall from the perimeter to a puddle flange. Outside the shower screen, the screed may need to feather into the tile underlay while preserving the required drainage direction. A frameless screen can also require a meaningful height relationship between the shower area and the rest of the bathroom, so the finished tile build-up must be designed before screeding.

Self-leveller won't hide a dropped slab, a hollow section or a structurally moving substrate. It also won't solve an incorrectly positioned waste. Those defects need correction first, otherwise a smooth-looking compound only creates a smooth-looking version of the same drainage problem.

A diagram illustrating the three steps of bathroom floor preparation including screeding, leveling, and drainage.

The timing matters just as much as the mix. Tiling over a screed before it has reached the product's required cure condition risks weak adhesion, trapped moisture and movement beneath the tile. Ask the installer to identify the product, application date and cure requirement in the site records before tiles are laid.

The video below illustrates the relationship between floor preparation and tile installation.

For a closer explanation of substrate shaping and preparation, review this guide to screeding for bathroom tiles.

Tiling Sequence, Adhesives, Grout and Sealants

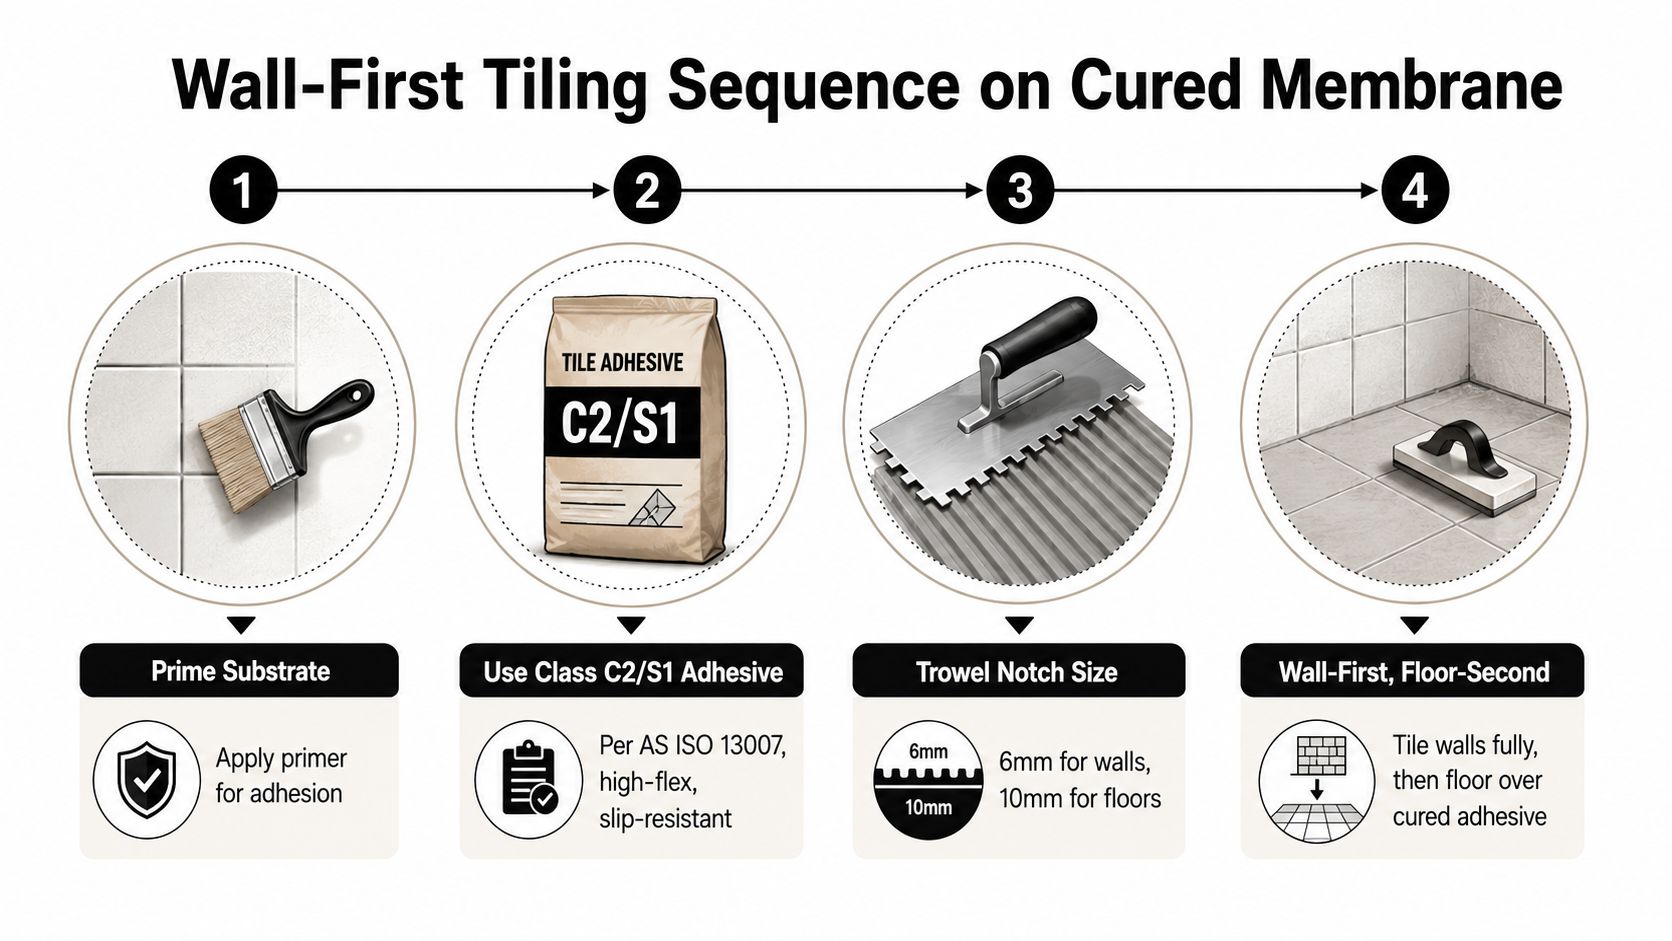
The tiling crew should start only after the membrane has fully cured and passed the agreed inspection process. Wall layout is set from a datum line, not from the first visible corner. That line determines where cuts land around the vanity, shower screen and doorway, and it prevents a room from looking skewed because the installer followed an out-of-square wall.

Walls are generally tiled before the floor so the floor finish can run neatly into the wall junction and avoid unnecessary damage during wall work. If a ledger board is needed to support heavy or large-format tiles, every fixing point must be repaired and waterproofed in accordance with the membrane system before the area is closed.

An infographic illustrating the four-step wall-first tiling sequence on a cured waterproof membrane for bathroom installation.

Match the adhesive to the tile and substrate

Adhesive selection should account for tile size, tile absorption, substrate movement and the wet-area system. A basic C1 adhesive may suit limited stable applications, while C2 adhesives and deformable classes such as S1 or S2 are commonly considered where stronger adhesion and flexibility are required. The classification should be checked against AS ISO 13007, the tile manufacturer's instructions and the membrane manufacturer's compatibility requirements.

The trowel notch isn't a decorative preference. The installer selects it to achieve adequate coverage, then collapses the ridges by laying tiles in a consistent direction. Large-format and rectified tiles expose poor coverage quickly, especially around shower floors, niches and edges. The substrate needs to be flat enough for the tile, and the adhesive bed needs to support the tile without voids that can transmit movement or allow water to collect.

Use movement joints at internal corners and perimeter changes rather than filling every junction with rigid grout. Cementitious grout is practical and repairable, but it needs correct mixing, cleaning and maintenance. Epoxy grout resists staining and water absorption more effectively in suitable applications, though it costs more and requires disciplined installation.

Corners, wall-floor transitions and changes of plane should normally receive sanitary silicone compatible with the tile and membrane system. Grout in a moving corner is a common shortcut, not a movement joint. The sealant also needs adequate cure time before the shower is exposed to water.

A neat grout line can't compensate for the wrong adhesive, poor coverage or a joint that should have been flexible.

The final fit-off should protect the finished work. Avoid drilling through tiled waterproofed zones without a planned sealing method. Shower screens, accessories and shelves need fixings that don't create unsealed paths into the substrate.

Common Failure Points and How to Verify the Work

Good-looking tiles prove very little about waterproofing. The defects I'm most concerned about are usually hidden beneath a clean finish, where the puddle flange wasn't clamped correctly, the membrane stopped short at a junction or a later fixing punctured the system.

Small omissions create large repairs

A membrane applied below the specified dry film thickness may look complete while failing to provide the intended protection. The second coat matters where the approved system requires it, and the applicator should follow the product's coverage and thickness instructions rather than judging the finish by colour alone.

Corners and changes of plane need reinforcement or bond-breaker detailing where required by the system. If the wall-floor junction is grouted instead of sealed, movement can open a path behind the tile. A screed flatter than the applicable drainage requirement leaves water at the shower base, while tiling over a failed screed conceals the defect.

Common warning signs include:

  • Loose or drummy tiles: Hollow sounds can indicate poor adhesive coverage, substrate movement or a bond problem.
  • Efflorescence: White crystalline deposits may indicate moisture movement through the substrate or joints.
  • Persistent mould: Mould that repeatedly returns at the shower base can point to retained moisture, failed sealant or inadequate drainage.
  • Cracked junctions: Cracking at corners and wall-floor transitions often indicates that rigid grout has been used where movement accommodation was needed.
  • Recurring dampness: Damp adjoining walls, ceilings or skirtings require investigation rather than another bead of silicone.

Ask for evidence at every hold point

Photographs should show the prepared substrate, penetrations, corners, puddle flange, membrane coats and any reinforcement before the tiles cover them. Keep the membrane product name, batch details, applicator information and the completed waterproofing certificate in the project file.

A flood test should be recorded before tiling where the system and site conditions permit it. The evidence should show the test area filled to the agreed level, the start time, the inspection period and the result. Guidance for Australian bathroom waterproofing commonly identifies a 24-hour flood-test period, and the test should be completed before tile installation, not after a leak appears. See the Australian waterproofing defect guidance for the wider defect context.

The certificate needs to be appropriate to the work and the Victorian compliance pathway. Ask for the practitioner's details and the relevant VBA documentation instead of accepting a text message that says “waterproofed”. Product data sheets should also confirm that the membrane is suitable for the intended application, including compatibility with the substrate, adhesive and sealants.

Inspection evidence is part of the bathroom, even though it disappears behind the tiles.

If a contractor refuses to photograph concealed work or can't explain the test process, pause before approving the next stage. A tile finish can be repaired. A concealed membrane failure may require removal of tiles, screed, fixtures and adjoining linings.

Timelines, Costs and When to Hire a Registered Builder

A complete Melbourne bathroom renovation commonly takes three to five weeks, depending on the scope, access, structural work, product availability and the number of trades involved. Strip-out, plumbing rough-in, substrate correction, screed curing, membrane coats, flood testing, tiling, grouting and fit-off each create dependencies. A delay in one stage can leave several trades unable to proceed.

A straightforward cosmetic re-tile is a different engagement from a full renovation. If the existing membrane and substrate are sound, the work may be limited to tile removal, preparation, adhesive, new tiles and joints. If the shower leaks, the floor waste is defective or the substrate has moved, the job becomes a waterproofing and rectification project before new tiles are even considered.

Understand what changes the price

There are no reliable universal Melbourne rates for bathroom tiling and waterproofing because preparation often costs more than the visible installation. A small bathroom with difficult access, multiple niches, a frameless screen, large-format tiles or a herringbone layout can require more labour than a larger room with simple geometry.

Scope Element Cost Range (AUD) Notes
Waterproofing Project-dependent Changes with wet-area coverage, penetrations, corners, substrate preparation and membrane system
Screeding and floor preparation Project-dependent Depends on falls, waste position, slab condition, levelling and finished floor height
Tile supply Project-dependent Influenced by tile material, size, finish, wastage and pattern
Tile labour Project-dependent Large-format, rectified, stone, mosaics and complex layouts require additional control
Leak rectification Project-dependent Can expand when failed screeds, membranes, linings or adjoining areas need removal

A transparent quote should separate demolition, disposal, carpentry, plumbing, electrical work, waterproofing, screeding, tile supply, tiling, grout, sealants, shower screen and fit-off. The cost of bathroom renovation in Melbourne varies with precisely these scope decisions, so a single allowance for “bathroom tiles” doesn't provide a useful comparison.

Choose the right practitioner

In Victoria, bathroom, kitchen and laundry renovations commonly fall within the registered Domestic Builder pathway. A limited registration needs to be the DBL-L category for bathroom, kitchen and laundry renovations, while a Domestic Builder Unlimited registration covers a broader range of domestic building work. Confirm the registration, contract requirements and permit position for the actual project rather than relying on a trade label. The Australian state bathroom renovation regulation overview provides background on the Victorian pathway.

Work over $16,000 needs particular attention to Victorian builder documentation and the registered builder requirements. Structural waterproofing, altered layouts, new plumbing, wall removal, floor changes and significant rectification aren't suitable for an informal tiler-only arrangement. A tiler-only engagement makes sense for a cosmetic re-tile only when the underlying membrane, falls and substrate have already been properly assessed and remain sound.

Your contract should identify who prepares the substrate, who applies and certifies the membrane, who performs the flood test, what products are approved, how variations are authorised and what warranty documentation is supplied. It should also state who is responsible if another trade damages the waterproofing after certification.

For homeowners who want one coordinated scope, Melbourne Tiling Services P/L provides bathroom and ensuite renovations, waterproofing, screeding, self-levelling, tile installation and frameless shower-screen installation, with registered builder coordination across the relevant trades. The practical advantage of a coordinated engagement is clearer responsibility for the sequence, not a promise that documentation can be skipped.


If your Melbourne bathroom needs more than a tile refresh, ask Melbourne Tiling Services P/L to assess the substrate, drainage, waterproofing scope and trade sequence before work starts. Visit Melbourne Tiling Services P/L to discuss a documented bathroom renovation, waterproofing or leak-rectification plan and request a quote.

Marble Floor Tiles Matt Guide for Melbourne Bathrooms

You might be standing in a half-finished Melbourne bathroom right now, trying to decide whether the floor should gleam like a showroom or feel calmer, safer, and easier to live with. That choice gets more complicated when the tiles are marble, because the finish changes how the room looks, how it feels under wet feet, and how the work needs to be handled by your builder.

Marble floor tiles matt sit in that sweet spot between luxury and practicality. In Australia, the domestic consumption of marble and travertine reached 810,000 tons in 2024, valued at $195 million AUD, with matte finishes increasingly favoured for their slip resistance in wet areas like bathrooms and ensuites (IndexBox market overview). For Melbourne homeowners, that means the finish isn't just a style choice, it's part of the safety and renovation conversation.

Table of Contents

Introduction to Matte Marble Floor Tiles

Sarah and Tom had just finished their ensuite, and the first thing they noticed wasn't the vanity or the tapware. It was the floor. Their builder had suggested a softer marble finish instead of a glossy one, and once the bathroom filled with daylight, the difference was obvious, less glare, calmer tone, and a more grounded feel underfoot.

That reaction is common. People often fall in love with marble for its natural movement, then realise the finish changes the whole room. Matt marble tiles don't shout for attention, they allow the stone's natural character to emerge, which is why they suit bathrooms where comfort, safety, and restraint matter just as much as appearance.

The market data backs up the wider shift in demand for marble materials, including floor tiles across residential and commercial spaces in Victoria and nationwide. When you're planning a bathroom renovation, that matters because your tile choice affects not only the visual outcome but also the materials your registered builder needs to specify, install, seal, and sign off correctly.

If you're weighing up finishes, start with the basics, then let the bathroom do the talking. A wet-zone floor needs to look good on day one and still make sense after daily use, cleaning, and winter mornings.

Understanding What Matt Marble Floor Tiles Are

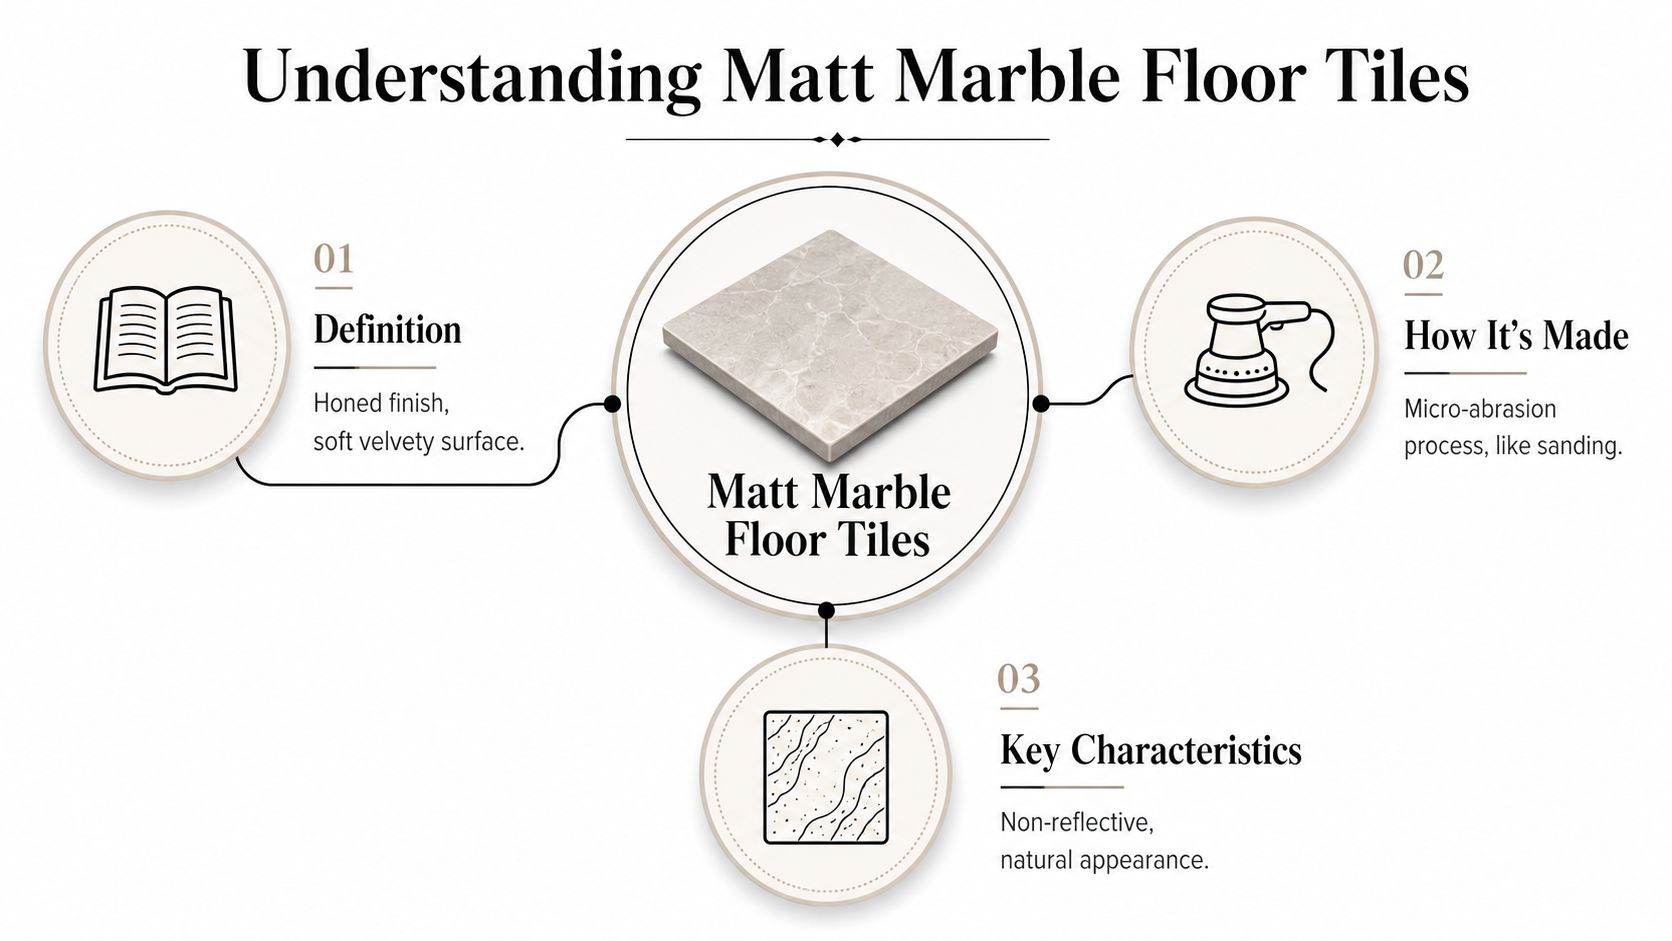
Matt and honed are often used for the same kind of finish, and in practical conversation they usually point to a surface that has lost the mirror-like shine of polished stone. Much like sanding raw timber, the wood doesn't become fake; it just becomes softer to the eye and easier to live with.

An infographic explaining the definition, manufacturing process, and key characteristics of matt marble floor tiles.

The finish comes from micro-abrasion, where the stone's surface is gently worked so it scatters light rather than reflecting it sharply. That creates the velvety look many Melbourne homeowners want in bathrooms, because it reads as natural rather than glossy, and it tends to hide the busy visual noise that polished stone can throw back at you under bright downlights.

How the surface changes the room

The main effect is visual comfort. A matt surface reduces glare from windows, mirrors, and ceiling lights, so the floor feels more settled. That's especially useful in en suites and compact bathrooms where every shiny surface can add to the sense of crowding.

The term also covers how the room feels emotionally. A polished floor can feel formal and dramatic, while a matt floor usually feels softer and more grounded. That's one reason people compare it to honed timber, it still has character, but it doesn't try to dominate the room.

What to ask before you buy

If you're shopping in Melbourne, ask whether the tile is a matt marble finish or a marble-look porcelain product. Both can work well, but they behave differently in installation and maintenance.

Practical rule: ask for the tile's finish description, its cleaning requirements, and whether it's meant for floor use in a wet area before you commit.

For local examples and product categories, this Melbourne marble tile resource can help you see how the finish sits within a broader bathroom design context. The key is to judge the tile by how it will function in your room, not just by how it looks under showroom lighting.

Comparing Matt and Polished Finishes

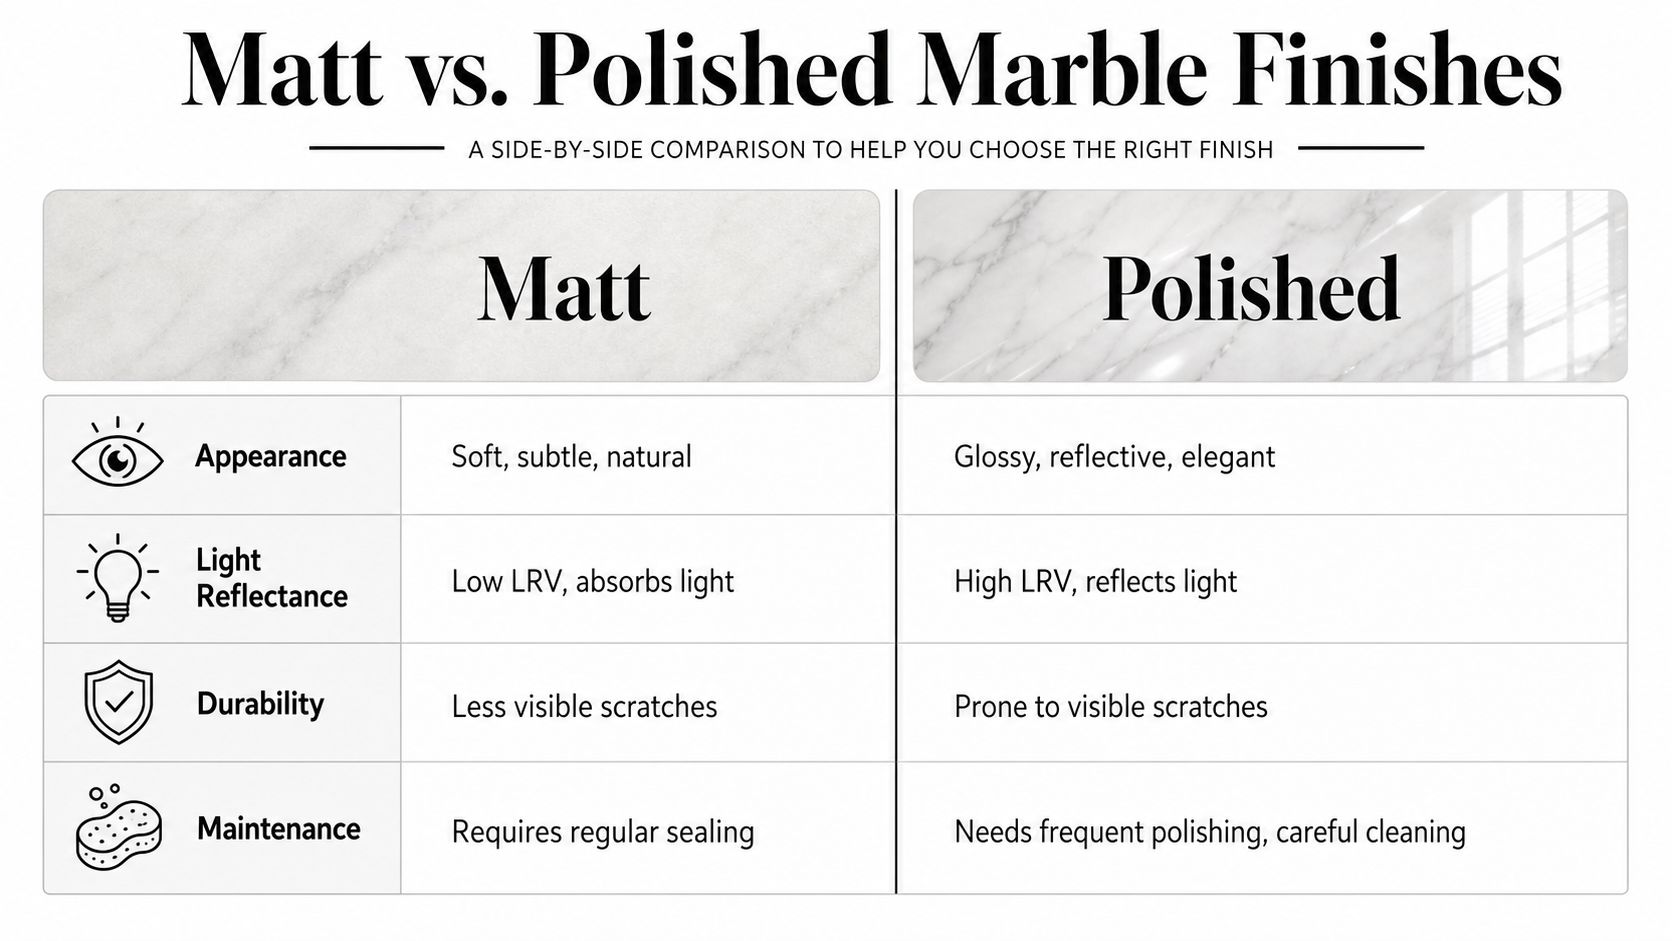
A glossy marble floor makes a strong first impression. It reflects light, highlights veining, and can make a bathroom feel formal or high-end. A matt floor does something different, it calms the room, softens contrast, and keeps attention on the texture of the stone rather than the shine.

A comparison chart outlining the differences between matt and polished marble finishes regarding appearance, light, and maintenance.

The biggest technical divide is reflectance. True matt-finish marble floor tiles in Australia typically exhibit an LRV between 5% and 15%, while polished marble can exceed 30% LRV, which means the polished surface bounces much more light back into the room (WD Tiles). That difference sounds abstract, but in a bathroom it changes how every towel, tap, and shadow reads against the floor.

Appearance and mood

Matt marble gives you a quieter palette. It suits bathrooms where you want the floor to frame the vanity, bath, or shower screen without competing for attention. Polished marble is more theatrical, and that can work beautifully in the right space, but it tends to announce itself first.

Wear, cleaning, and daily life

Matt surfaces usually hide small scuffs and incidental marks more easily because they don't catch every reflection. Polished stone can look spectacular when freshly cleaned, but once water spots, streaks, or surface wear appear, you notice them faster.

A recent Melbourne ensuite project I reviewed in design terms, not as a published case study, used matt marble on the floor and a brighter wall finish above. The result felt balanced, because the floor anchored the room while the walls kept it lively. That's the kind of split many architects prefer when the client wants softness underfoot without losing visual energy.

Choosing by user needs

If the bathroom is used by children, older adults, or anyone who values a more forgiving floor surface, matt usually makes more sense. If the space is a display bathroom with minimal wet traffic and a strong preference for gloss, polished may still fit.

A good tile choice should suit the person using the room every day, not just the photo you'll take after installation.

For a closer look at bathroom tile categories and layout ideas, the porcelain bathroom tile guide is a useful comparison point when you're deciding whether a marble-look or natural marble route is better for your budget and maintenance tolerance.

Safety and Slip Resistance in Wet Zones

Bathroom floors expose weak tile choices quickly. A tile that looks calm and elegant in a showroom can feel very different once water, soap, and steam are part of everyday use. That is why matt marble floor tiles are discussed as much for safety as for appearance.

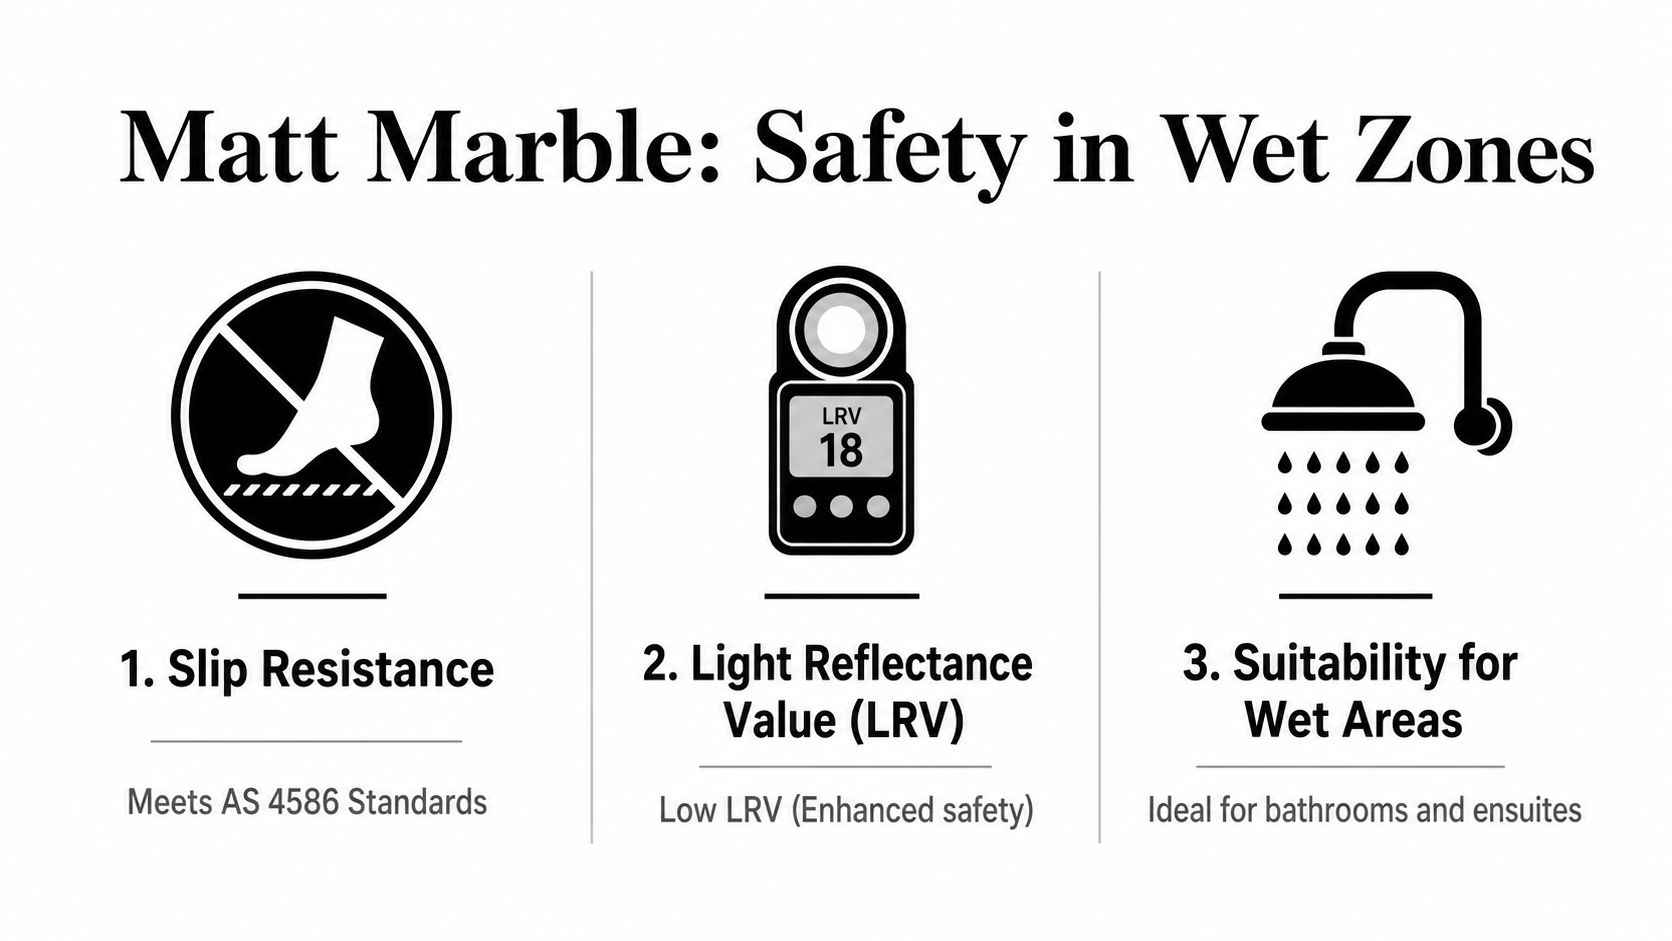
A graphic explaining the safety features of matt marble, highlighting slip resistance, light reflectance, and wet area suitability.

A matt surface reduces glare, so the floor reads as calmer and less shiny under bathroom lighting. That lower reflectance can help a wet room feel less visually slippery, which is one reason matt finishes are often preferred in practical wet zones. The point is not that the tile alone makes a bathroom safe. It is that the finish supports the overall safety of the room.

Why texture matters

A matt finish uses a fine surface texture that scatters light and gives the foot a little more purchase than a highly reflective surface. That matters when the floor is damp, your hands are full, or steam has softened visibility in the room. In Melbourne bathrooms, where family members often want a floor that feels forgiving without looking rough, that added surface control can make daily use easier.

The finish also needs to be considered alongside Australian slip-resistance expectations under AS 4586 and the wet-area requirements in the NCC waterproofing provisions. In a shower zone, or anywhere the floor is regularly exposed to water, the tile choice cannot be judged on appearance alone. It has to be checked as part of the full system, including substrate preparation, waterproofing, and drainage fall.

For a broader look at tile categories and bathroom layout ideas, the porcelain bathroom tile guide is useful when you are comparing a marble-look option with natural marble for maintenance and budgeting.

What to verify before you order

  • Ask for the slip data: The tile should come with technical information showing it suits wet-area use.
  • Read the surface description carefully: Matt, honed, textured, and anti-slip do not always mean the same thing, so check the specification sheet rather than relying on the brochure.
  • Confirm the installation plan: Even a better-performing tile still depends on proper substrate preparation, waterproofing, and drainage fall.

A secure-feeling surface is only one part of the decision. The installer still has to match the tile to the room conditions, and that is where careful planning matters just as much as the material itself.

Sealing Maintenance and Longevity

Marble asks for a bit more discipline than some other floor coverings, and matt marble asks for it in a slightly different way. The texture that gives it character also means dirt, soap residue, and cleaning products can sit differently on the surface, so maintenance needs to be intentional, not casual.

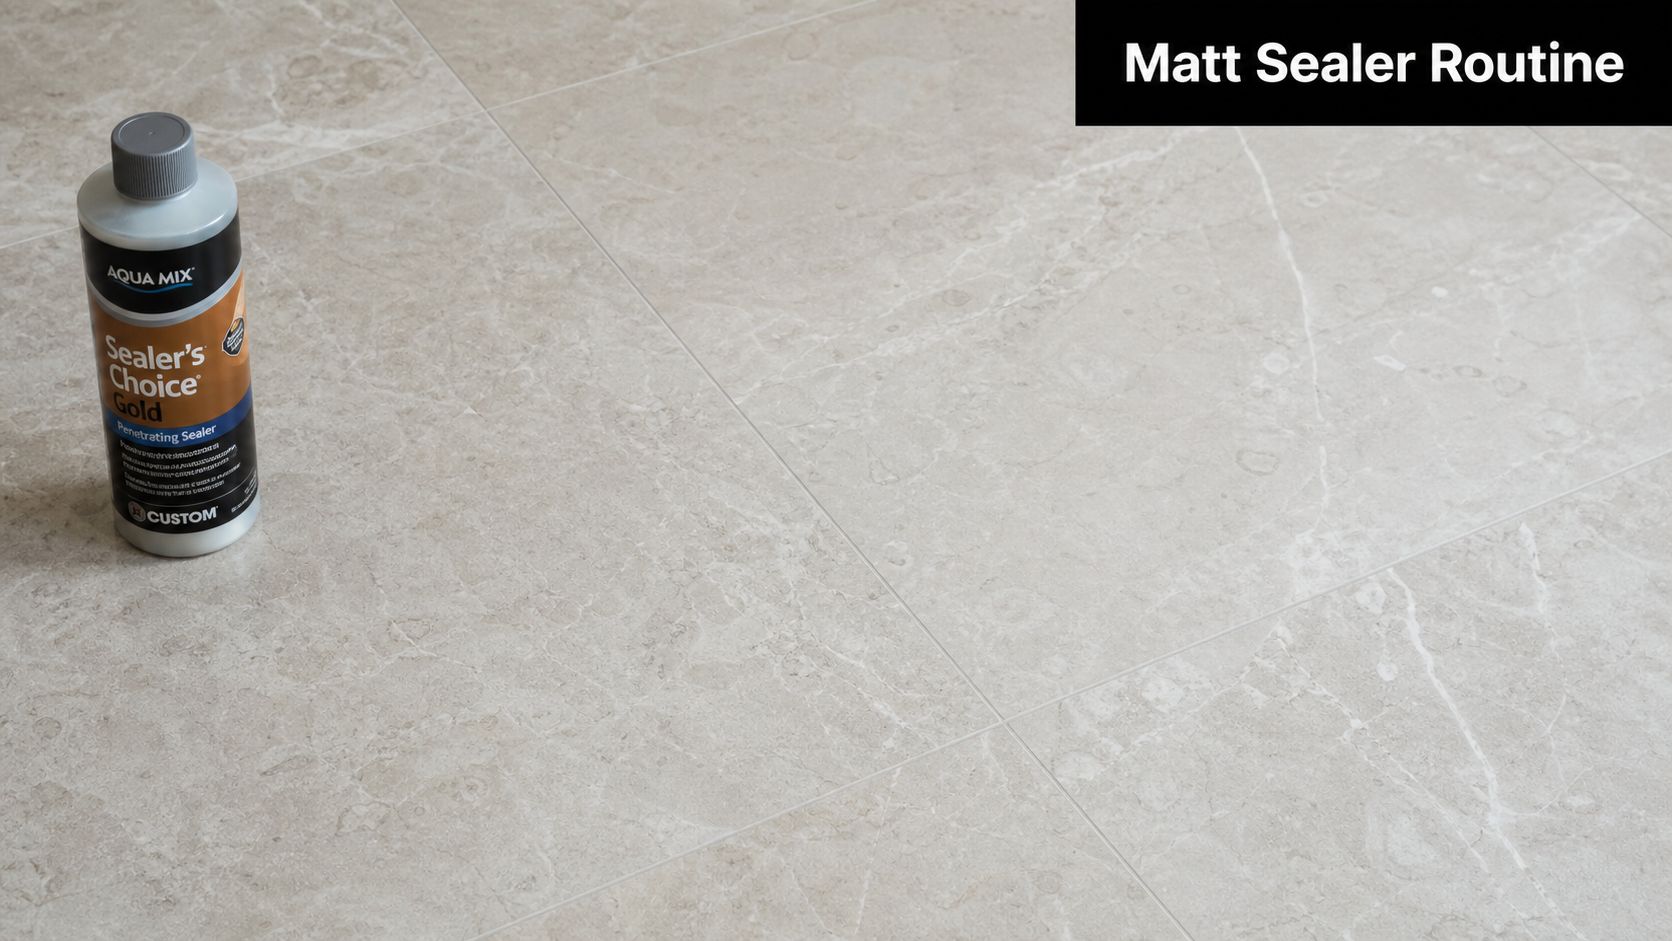
A bottle of Aqua Mix Sealer's Choice Gold sealer standing on light beige marble floor tiles.

For Melbourne homeowners, the main goal is to preserve the look without flattening the stone. A penetrating sealer is usually preferred over a topical coating because it works inside the surface rather than sitting as a film on top. That matters on a matt finish, where you want to protect the stone without creating a plastic sheen.

A simple maintenance rhythm

Start with the first clean after installation, then wait for the sealer and grout advice from your tiler or stone supplier. From there, use a gentle, pH-neutral cleaner and avoid anything acidic, because acids can attack marble and make the surface dull or patchy.

Practical rule: if a cleaner is strong enough to strip soap scum in seconds, it's probably too aggressive for marble.

The day-to-day routine should be boring, and that's a good thing. Wipe down standing water, use soft mops, and keep harsh scrub pads away from the stone. A matt surface can look beautifully understated for years, but only if the cleaning process respects the finish.

What Melbourne homeowners often get wrong

People sometimes assume matt means maintenance-free. It doesn't. It can be forgiving in appearance, but it still needs sealing and sensible cleaning. That said, many homeowners prefer the way matt marble ages because small marks don't jump out the way they do on polished stone.

There's also a comfort question that comes up often in Melbourne's cooler months. Insufficient coverage exists on the specific acoustic and thermal comfort advantages of matt-finish marble versus polished marble in Melbourne's cooler climate, despite anecdotal reports of a softer underfoot feel in winter months (Stonemasons installation guide). So if comfort is part of your buying decision, treat it as a lived experience point rather than a fully quantified claim.

If your renovation includes both tiling and waterproofing, the tiling and waterproofing overview is a useful reminder that the floor finish, membrane, falls, and cleaning plan all belong in the same conversation.

Choosing Tile Sizes Grout and Cost Framework

Tile size changes the room more than many homeowners expect. A large-format tile can make a bathroom feel calmer because there are fewer grout lines. A smaller tile can add texture and flexibility, but it also introduces more joints, which means more visual interruption and potentially more maintenance.

Matte marble tiles in Australia are often manufactured as rectified porcelain in 600×1200 mm format with ±0.5 mm edge precision, allowing 2 mm grout joints that reduce water ingress (TileMob). That precision matters in bathrooms because narrow, even joints support cleaner lines and a more disciplined finish.

Tile sizes and grout recommendations

Tile Size Grout Width Use Case
Large-format rectified 600×1200 mm 2 mm High-end en suites, minimal grout look, contemporary bathrooms
Traditional marble format Wider joints Older homes, more irregular rooms, classic layouts
Smaller modular sizes Wider joints Feature floors, tighter rooms, detailed patterns

The narrower joint on rectified tile also helps reduce the chance of water finding its way into vulnerable edges, provided the waterproofing and substrate are done properly. That's why many Melbourne builders favour rectified products in premium bathrooms, especially when the visual goal is a visually continuous floor.

Budget thinking without guesswork

Price can vary widely depending on the stone type, fabrication, rectification, sealing, and labour, so it's better to price the whole bathroom rather than the tile alone. If you're comparing quotes, make sure each one includes the same assumptions about substrate preparation, waterproofing, trim details, grout, and sealing.

Ask for a quote that separates supply, install, waterproofing, and finishing work. If those items are bundled vaguely, it becomes hard to compare one builder against another.

A practical buying mindset helps here. If you want a restrained, upscale look and easy-to-read grout lines, large-format rectified tile is often the cleanest option. If your room has awkward angles or heritage details, a different format may be easier to fit neatly without forcing cuts into visible areas.

Design Inspiration and Local Sourcing Tips

A good marble bathroom does not need much decoration. In Melbourne homes, the strongest examples usually rely on proportion, restraint, and one clear material choice. A matt floor can carry much of that visual weight on its own, like a calm backdrop that lets the rest of the room speak clearly.

A Fitzroy renovation might use matt marble floor tiles with simple wall tile and compact brass fittings, so the old-house character stays intact. In Southbank, the same finish might sit under slimline fixtures and a frameless screen, which makes the room feel cleaner and more architectural. In a suburban family bathroom, the floor may become the quietest part of the room, while storage and easy cleaning take priority.

What local sourcing should look like

Good sourcing starts with touch and light. Ask to see the tile in natural light and under artificial light, then check how the veining and surface finish read from standing height. A matt finish can look richer in one showroom and flatter in another, depending on the lighting and the size of the room.

Trade compliance matters at the same time. In Victoria, any domestic building work valued over $10,000 in labour and materials requires the contractor to hold appropriate VBA registration, so homeowners need a registered builder for many bathroom renovations (CertifyMe VBA guide). If the total contract value exceeds $16,000, domestic building insurance becomes legally required for the registered builder, which gives the homeowner protection for structural defects and non-completion (builders warranty discussion).

A builder checklist worth keeping

  • Confirm registration early: Do not wait until the quote is accepted.
  • Ask about project scope: Cosmetic retiling is one thing, but structural changes, plumbing moves, electrical updates, or major waterproofing can change permit requirements.
  • Check experience level: Domestic Builder (Unlimited) Registration in Victoria requires at least three years of practical experience within the seven years before application, while Domestic Builder (Limited) Registration requires two years (HIA Victoria licence guide).

A building permit in Melbourne is required when the renovation includes structural modifications, plumbing system changes, electrical updates, or major waterproofing work needed to meet Australian standards. Purely cosmetic updates like retiling or replacing taps in the same location generally do not require a permit (Melbourne permit guide). That distinction matters because the finish you choose can affect the scope of the job, which in turn affects who can legally do the work.

Conclusion and Next Steps

Matt marble works best when you want a bathroom that feels calm, safe, and timeless rather than bright and glossy. It suits wet areas because the finish lowers glare, supports better slip resistance, and gives the room a more grounded look, but the installation still has to be handled by the right registered builder.

If you're planning bathroom renovations in Melbourne, compare finish, grout, sealing, and builder credentials together, not separately. Then ask for a clear quote, confirm the registration details, and choose the tile that fits the way your household lives.


A CTA for Melbourne Tiling Services P/L.

Modern Bathroom Renovation: Your 2026 Melbourne Guide

You're probably here because the bathroom you use every day no longer works the way it should. The tiles might be dated, the shower screen could be awkward, the vanity may not hold enough, or worse, you've started noticing loose grout, musty smells, swelling skirtings, or signs that water is getting where it shouldn't.

That's the point where a modern bathroom renovation stops being a style exercise and becomes a building project. In Melbourne, that distinction matters. A bathroom has to look sharp, but it also has to survive daily moisture, meet wet-area requirements, and be built in the right sequence by the right licensed trades. Homeowners usually start with a moodboard. They finish with decisions about layout, waterproofing, ventilation, drainage, tile selection, and who's going to coordinate the entire job without mistakes.

Good bathroom renovations balance all of it. Clean lines, better storage, easier cleaning, stronger lighting, compliant waterproofing, and finishes that still look right years later. The most successful projects aren't the flashiest. They're the ones that make the room feel calm, practical, and durable from the day of handover onwards.

Table of Contents

Introduction Your Guide to a Flawless Modern Bathroom Renovation

A dated bathroom usually gives you plenty of warning before you decide to renovate. Storage stops working. Cleaning gets harder. The shower feels cramped. Old grout darkens, silicone peels away, and every small defect makes the room feel more tired than it really is.

In Melbourne homes, that often leads to the same question. Do you patch what's there, or do you rebuild it properly and turn it into a bathroom that suits how you live now? For many owners, the answer becomes obvious once layout problems and moisture risks start showing up together. Cosmetic fixes don't solve poor falls, failing substrates, or a room that was never detailed well to begin with.

A modern bathroom renovation should give you more than a cleaner look. It should improve movement through the room, simplify maintenance, and hold up to heavy daily use. That means thinking past the visible finishes and making decisions about ventilation, waterproofing, fixture placement, tile format, and how the trades will be coordinated.

A bathroom can look brand new and still be poorly built. The hidden work is what determines whether it stays sound.

That's also why homeowners increasingly look at bathroom work through a value lens rather than a trend lens. Australian renovation decisions sit inside a broader household spending reality, where housing costs and maintenance compete with other major expenses, so owners tend to prioritise durability, utility, accessibility, and cost control rather than short-term decoration, as noted in this Australian bathroom renovation spending context.

The smartest approach is to treat the project as one integrated build. Design matters. So do materials. But the lasting result comes from getting the technical work, sequencing, and supervision right from day one.

Defining Your Modern Design Vision and Materials

Modern bathrooms often get reduced to a look. White walls, black tapware, floating vanity, frameless shower. That's part of it, but in practice, a modern bathroom has to do more. It needs to feel open, clean, and easy to use without becoming fragile or hard to maintain.

What modern usually means in a real Melbourne bathroom

The most reliable modern layouts tend to share a few traits:

  • Cleaner lines: Wall-hung vanities, recessed niches, and frameless screens remove visual clutter.
  • Better movement: Hobless or low-profile shower entries can make the room feel larger and easier to access.
  • Controlled palette: Porcelain, stone-look surfaces, timber tones, brushed metal finishes, and matte or satin textures usually age better than highly decorative combinations.
  • Smarter storage: Drawer vanities, mirrored shaving cabinets, and in-wall recesses help reduce bench mess.

Minimalism works when the room is properly planned. It doesn't work when “minimal” becomes “there's nowhere to put anything” or when a flush shower is drawn beautifully but not resolved properly at the floor and waste.

A lot of online advice skips one of the biggest practical issues. Moisture resilience in low-maintenance finishes. Australian guidance makes clear that bathrooms are wet areas requiring compliant waterproofing and ventilation, yet many style-led articles don't explain how those requirements interact with large-format tiles, flush showers, and minimal grout lines. That gap matters in Melbourne bathrooms, where moisture control and durability need to sit alongside the aesthetic brief, as highlighted in this Australian discussion on wet-area detailing and ventilation.

Materials that look clean and work hard

Large-format porcelain is one of the strongest choices for a modern bathroom. It gives you fewer grout joints, a more continuous finish, and a less busy wall or floor. It also suits contemporary layouts with frameless glazing and long vanity runs. The trade-off is that substrate preparation has to be excellent. Large tiles don't hide uneven walls or floors.

Marble still has a place, especially where the aim is warmth and texture rather than a stark finish. It can look exceptional on feature walls, vanity tops, or selected floor areas. But natural stone needs a client who understands upkeep. If the brief is low maintenance first, porcelain that mimics stone is usually the safer option.

Kerlite and other thin porcelain sheet systems can be a strong solution where weight, finish continuity, or oversized panels matter. Installation is specialised. Handling, cutting, substrate flatness, adhesive choice, and edge detailing all need attention. It's not a product to hand to an inexperienced installer.

For homeowners comparing options, this practical guide to modern bathroom tiling in Melbourne is useful for understanding how tile style and installation method intersect.

A good material selection process usually comes down to this table:

Priority What usually works What often causes problems
Low maintenance Porcelain, fewer grout lines, satin finishes Heavily textured surfaces that trap residue
Visual calm Large-format walls, restrained palette, concealed storage Too many feature tiles and mixed finishes
Longevity Quality tile, solid waterproof-ready substrate, practical tapware Trend-led fixtures with poor serviceability
Easy cleaning Wall-hung vanity, framed or frameless glass with accessible edges Tight joins, awkward corners, excess ledges

Practical rule: Choose materials as a system, not as isolated samples. A tile that looks perfect on a showroom board may be the wrong choice if the substrate, drainage plan, or maintenance expectation doesn't suit it.

The best modern bathrooms don't rely on novelty. They rely on calm finishes, good detailing, and materials that still make sense after years of steam, cleaning, and daily use.

The Unseen Hero Waterproofing and Building Compliance

A bathroom can look finished on handover day and still be heading for failure. I have seen clean new tiling, frameless glass, and neat silicone lines hide poor falls, broken membrane continuity, and untreated penetrations that later sent water into adjoining rooms and subfloors.

Waterproofing sits behind the finishes, but it controls whether the renovation holds up. In a modern bathroom, that matters even more. Flush shower entries, large-format tiles, recessed niches, linear drains, and wall-hung fixtures leave less room for error. They can work well, but only if the builder resolves the technical side before the tiler starts.

Why waterproofing decides whether the renovation lasts

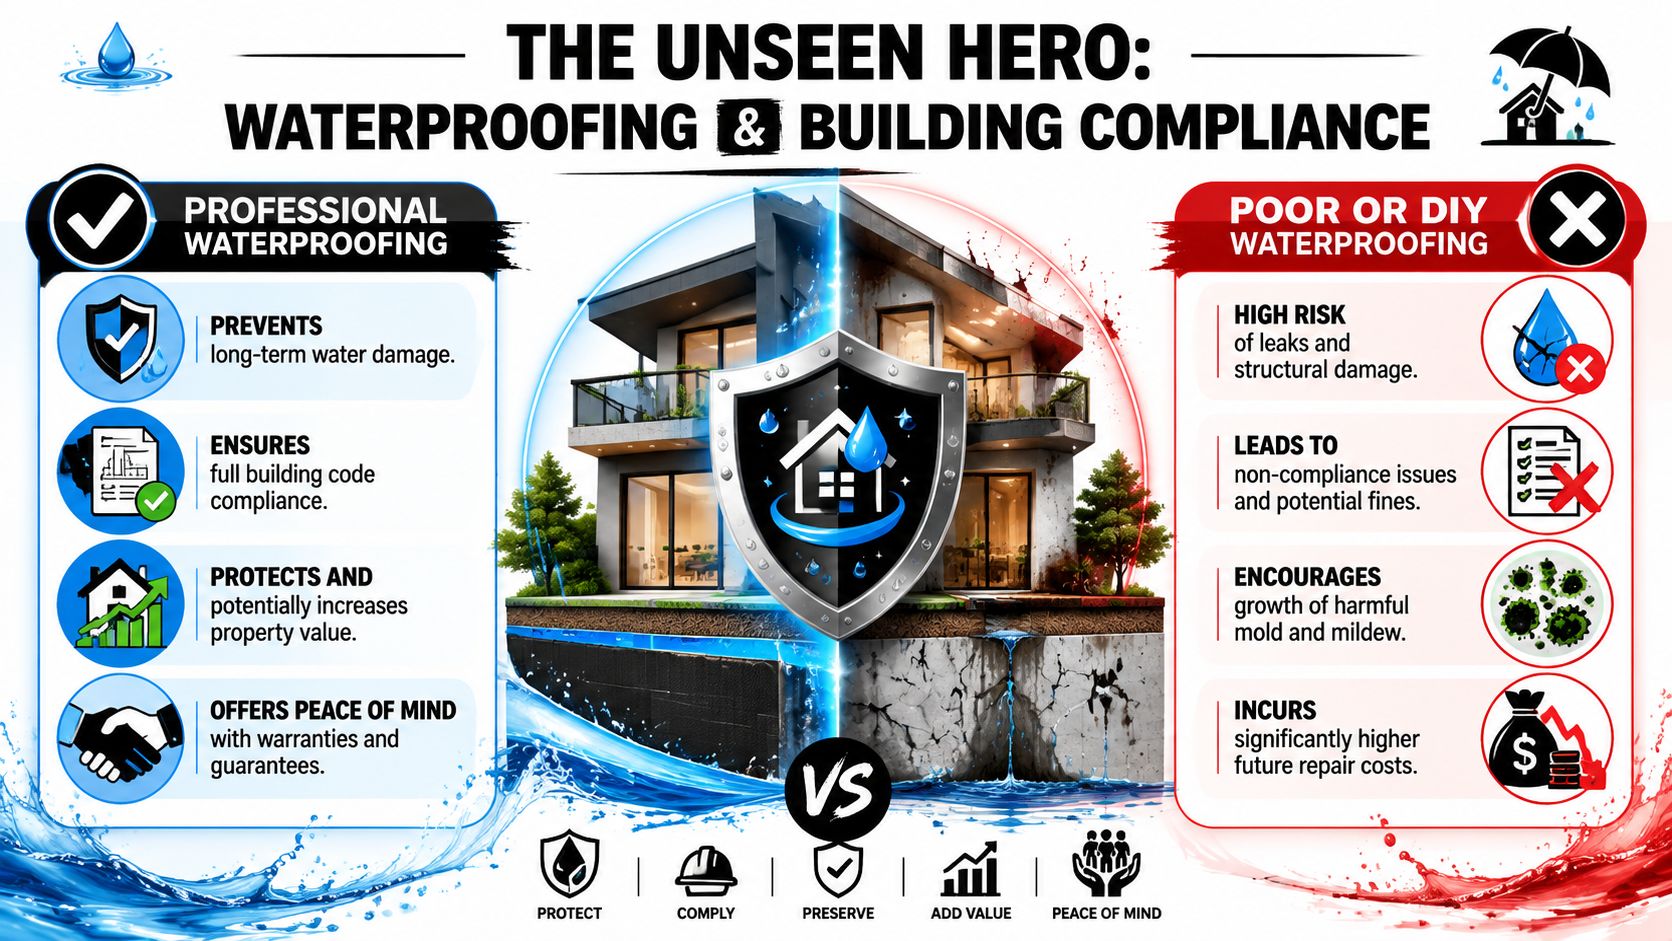
Tiles are the wear surface. They are not the waterproofing layer. Grout is porous. Silicone is a junction sealant that needs maintenance. The actual protection comes from the substrate preparation, the membrane system, and the way every junction is detailed from wall to floor to waste.

Continuity is the point that gets missed. If the membrane is interrupted at a hob, a shower waste, a pipe penetration, or the base of a niche, water gets a path. Once that happens, the repair is rarely local. The usual outcome is strip-out, drying time, retesting, and redoing finished work.

A split-view infographic comparing professional waterproofing benefits versus the risks of poor or DIY waterproofing methods.

What compliant wet-area work actually involves

In Victoria, bathroom waterproofing is tied to standards, trade sequencing, and clear responsibility. AS 3740 sets the baseline for wet area waterproofing, but the standard alone does not deliver a good result. The room still needs correct set-out, suitable substrates, drainage falls that suit the tile format, and trades who do not damage completed work as the project moves forward.

This is one reason a single registered builder adds value. One party can control demolition, rectification of framing or sheeting, plumbing rough-in, screeding, waterproofing timing, protection of finished membranes, and final quality checks. When several contractors work independently, the common problem is not effort. It is gaps between scopes, and bathrooms fail in those gaps.

In practical terms, compliant wet-area work usually includes:

  • Substrate preparation: Wall and floor surfaces need to be stable, dry, clean, and appropriate for the nominated membrane system.
  • Correct falls to waste: The floor must shed water properly. If the shower holds water, the room is defective no matter how good the tile looks.
  • Membrane continuity at every junction: Corners, wall-floor junctions, hobs, niches, penetrations, and floor wastes all need proper treatment.
  • Curing and protection: Waterproofing needs its full cure time, and other trades must not walk over it or puncture it before tiling.
  • Compliance records: Owners should be able to identify the system used, the installer, and the paperwork that supports the work.

If you want to understand the documentation side, this guide to a waterproofing compliance certificate in Victoria explains what should be recorded and why it matters at handover or during a future sale.

The trade-off is straightforward:

Decision Short-term appeal Long-term outcome
DIY or loosely coordinated waterproofing Lower upfront cost and faster booking Higher risk of concealed leaks, rework, insurance disputes, and damaged finishes
Properly sequenced wet-area work under one builder More planning and tighter site control Better durability, clearer accountability, and a bathroom that complies and performs

The expensive part of waterproofing failure is not the membrane. It is the demolition required to reach it.

That is why experienced builders treat waterproofing as a construction stage with hold points, not as a quick task between trades. A modern bathroom should look sharp, but the long-term value comes from what is underneath, who is responsible for it, and whether the work meets the standards Victoria expects.

Your Step-by-Step Renovation Roadmap and Timeline

Bathroom work feels chaotic if you only see the room being ripped apart. It makes much more sense when you follow the order properly. The sequence isn't just about convenience. It protects quality.

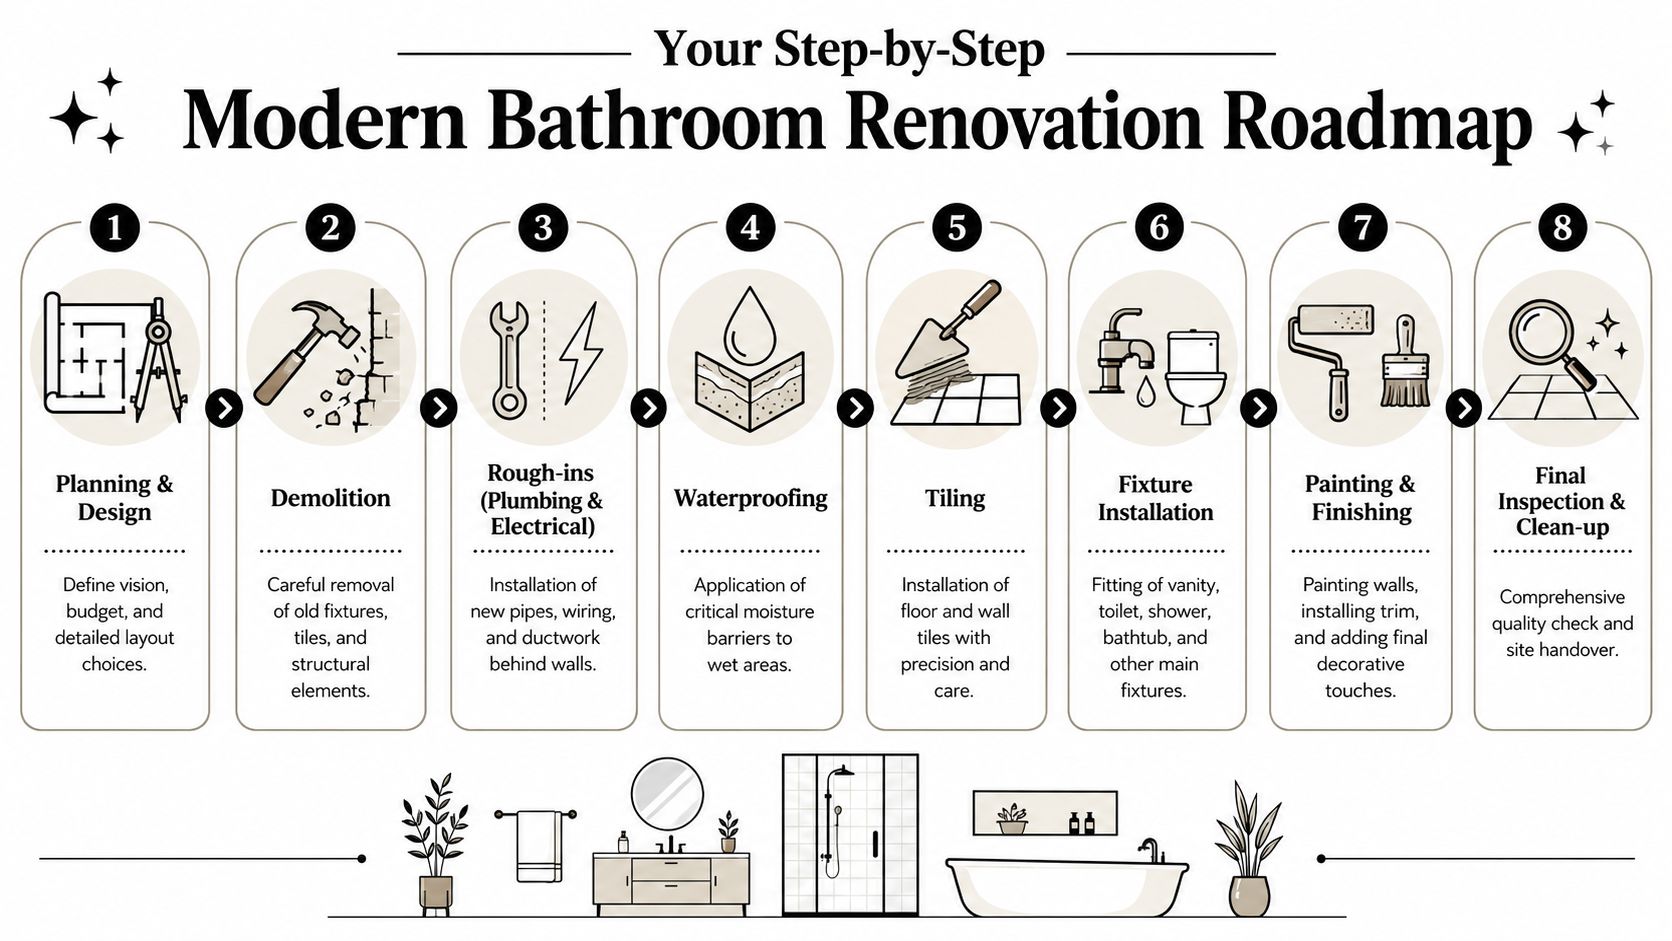
Near the start of the process, this roadmap helps homeowners understand how each trade depends on the one before it.

An infographic detailing the eight essential steps of a modern bathroom renovation, from planning to final inspection.

The order matters more than most people expect

A well-run renovation generally follows this path:

  1. Planning and selections
    Layout, fixture locations, tile format, drainage intent, electrical needs, and material selections should be resolved early. Last-minute changes are one of the fastest ways to create delay and rework.

  2. Demolition and strip-out
    Existing fixtures, wall linings, floor finishes, and damaged materials are removed. Good demolition is controlled, not reckless. The room is opened up so the condition of framing, substrate, and services can be assessed.

  3. Rough-in plumbing and electrical
    New pipework, wastes, cables, switches, lighting provisions, heated towel rail points, exhaust fan ducting, and any niche or mirror lighting requirements are set in place before surfaces are closed.

  4. Floor preparation and substrate correction
    This stage often includes screeding, levelling, patching, or rebuilding parts of the floor and wall surfaces so the room is ready for the membrane and tile system.

  5. Waterproofing and curing
    Wet areas are treated in line with the specified system. Then the room has to be left alone long enough for the membrane to do its job.

  6. Tiling
    Wall tiling and floor tiling are set out carefully. The precision of tiling determines whether modern bathrooms look refined or slightly off. Centre lines, cuts, niche alignment, waste positioning, and edge profiles all show up here.

Later in the build, the visual progress speeds up.

  1. Fit-off and installation
    Vanity, basin, toilet, tapware, shower screen, mirror, accessories, and lighting are installed once the surfaces are ready.

  2. Painting, sealing, clean, and final check
    Final sealing, touch-ups, site cleaning, defect review, and handover complete the job.

Where delays usually happen

The biggest timeline issues usually come from coordination problems, not from the visible work itself.

  • Selections made too late: If tapware, vanity depth, or screen dimensions change late, the rough-in may no longer suit.
  • Uneven existing structure: Older homes often reveal walls and floors that need more correction than expected.
  • Curing and drying constraints: Some stages can't be compressed without affecting the result.
  • Trade overlap: Tilers, plumbers, electricians, waterproofers, glaziers, and cabinet suppliers all need the site at different times.

The fastest renovation isn't the one with the most people in the room. It's the one where each trade arrives to a site that's ready for them.

A bathroom is a compact space, but it's a dense project. The smaller the room, the more every millimetre and every handover between trades matters.

Budgeting Realistically for Your Renovation

Bathroom budgets go wrong when owners treat every line item as equal. They aren't. Some items protect the room. Some items shape everyday use. Others are mainly cosmetic and can be adjusted without damaging the outcome.

Where the money should go first

In Australia, bathroom renovation decisions are increasingly driven by value engineering. Homeowners still spend on improvement works, but the stronger preference is for durable finishes and choices that reduce long-term maintenance rather than paying only for a fashionable look. In Melbourne, that usually means asking which features are worth paying for and which ones are mostly visual upgrades, as reflected in this Australian view of modern bathroom value decisions.

That mindset is the right one.

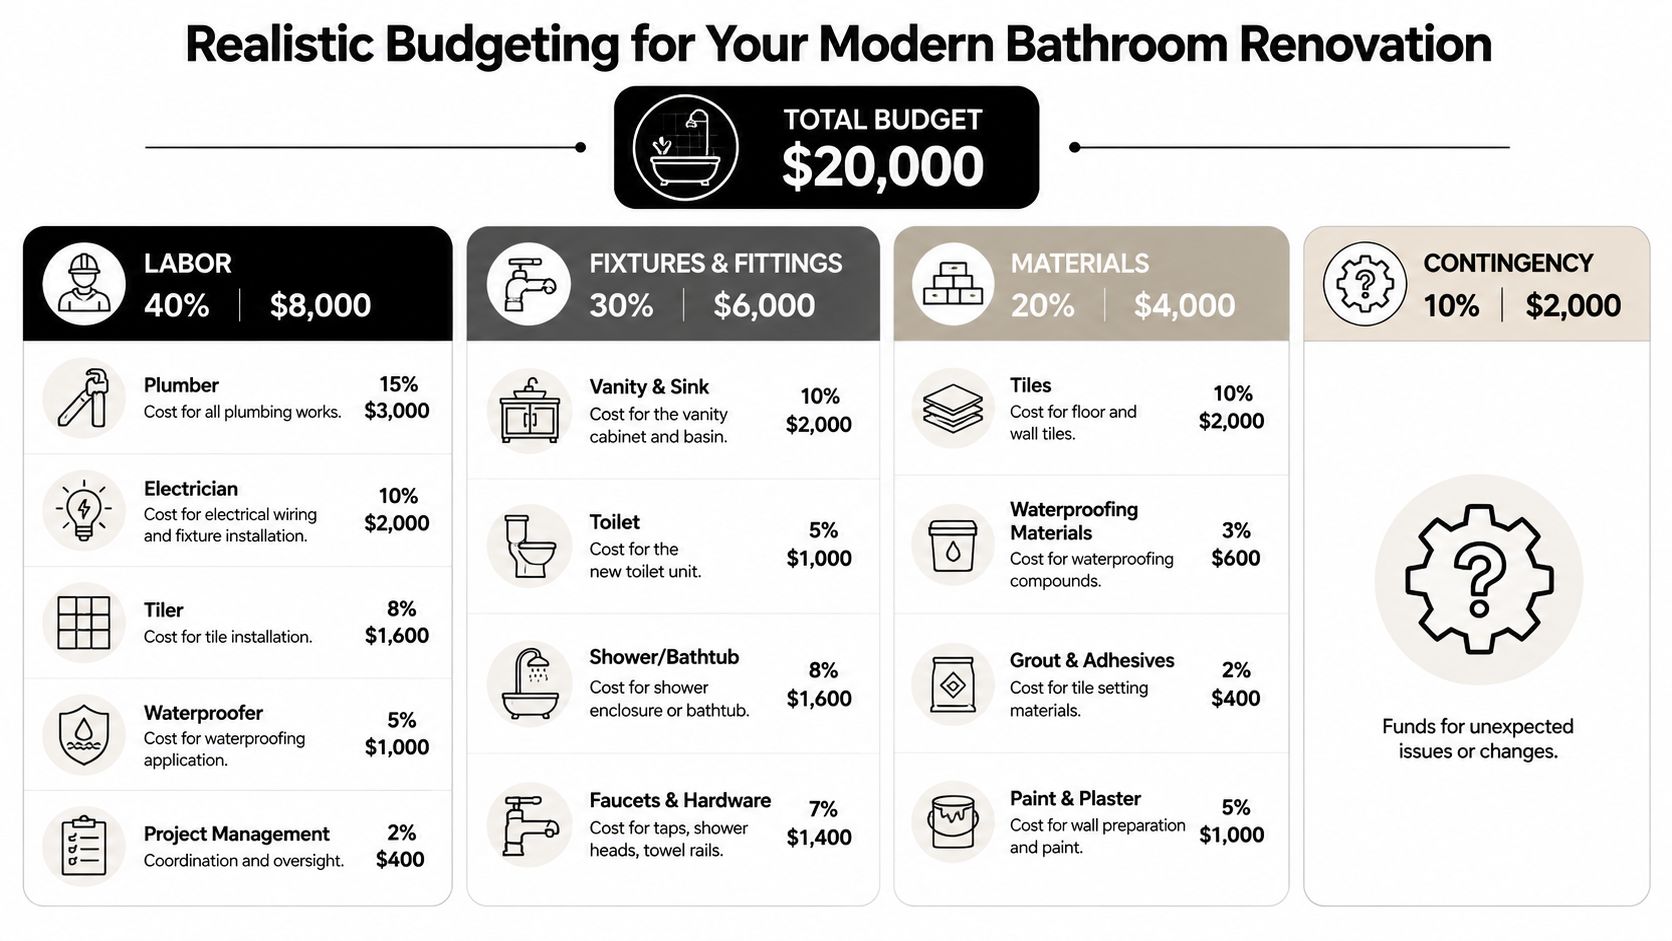
For many projects, a realistic starting point is to separate the budget into four buckets:

Budget area What it covers Why it matters
Core construction Demolition, preparation, waterproofing, screeding, tiling labour Protects the room and determines finish quality
Services Plumbing and electrical rough-in plus fit-off Locks in how the room functions
Fixtures and fittings Vanity, toilet, tapware, shower fittings, mirrors, accessories Changes usability and daily experience
Contingency Hidden issues and necessary adjustments Prevents the project stalling when surprises appear

A lot of owners want a number immediately. That's fair. Melbourne Tiling Services P/L states that clients can plan scope and budget with a transparent calculator, with projects typically around a median $10,000, according to the company background provided for this article. That should be treated as a starting point for discussion, not a universal bathroom price, because layout change, tile selection, structural condition, and fixture quality all shift the actual cost.

A detailed infographic showing a realistic $20,000 budget breakdown for a modern bathroom renovation project.

For a more local pricing reference, this guide to the cost of bathroom renovation in Melbourne helps frame how scope affects spend.

What to save on and what not to cheapen

There are sensible places to save. There are also false economies.

Usually worth prioritising

  • Waterproofing and preparation: Fail here and you can end up reopening the room.
  • Tiling workmanship: Large-format tile and tight modern detailing show every error.
  • Tapware and mixers with serviceable parts: Maintenance matters once the bathroom is in use.
  • Ventilation and lighting: These affect comfort every day, not just appearance.

Usually safer to moderate

  • Feature walls: One restrained feature can do the job of a much more expensive full-room treatment.
  • Custom cabinetry: Useful in some spaces, but off-the-shelf dimensions can work well if the layout suits.
  • Highly specialised finishes: They can be beautiful, but not every project benefits from them.

Spend where replacement would be disruptive. Save where replacement would be easy.

A well-budgeted bathroom doesn't feel cheap or extravagant. It feels deliberate. The money goes into the parts that keep the room dry, functional, and easy to live with, then the visual upgrades are layered on top.

Coordinating Contractors and Navigating Permits

The trouble usually starts after demolition.

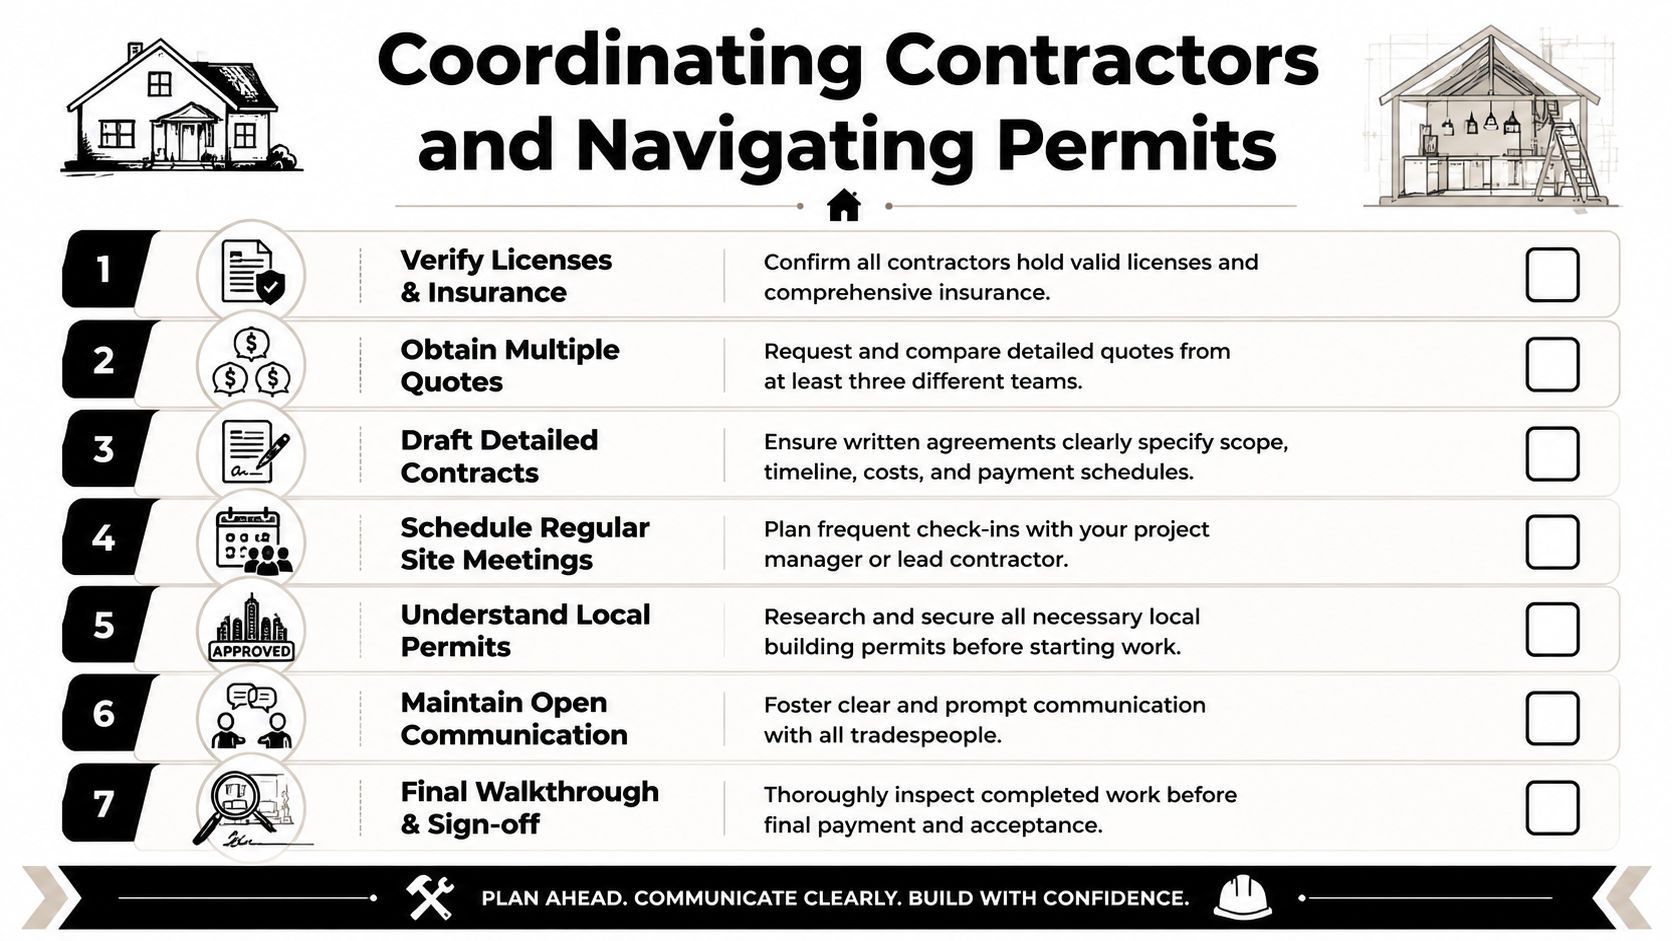
A homeowner has booked a plumber, an electrician, a waterproofer, and a tiler separately. The wall-hung vanity arrives late. The mixer set-out does not match the selected basin. The shower screen is measured before final tile build-up is confirmed. Nobody owns the whole sequence, so every small miss rolls into the next trade. In a modern bathroom, where tolerances are tight and finishes are clean-lined, that is how a straightforward renovation turns into delay, rework, and arguments about responsibility.

Why a registered builder changes the job

A registered builder gives the renovation one accountable point of control from strip-out to handover. That matters because bathroom work is connected at every stage. Plumbing rough-in affects cabinetry and fixture placement. Floor preparation affects falls, grate position, and screen clearances. Waterproofing depends on the substrate being ready, dry, and correctly detailed before any membrane goes on.

The risk sits at the interfaces between trades. Corners, hob transitions, wall-floor junctions, and service penetrations are common failure points in wet areas if the work before and after waterproofing is not coordinated properly. The Victorian Building Authority guidance on bathrooms and waterproofing responsibilities is a useful reference for understanding how regulated work and trade responsibilities fit together.

A builder managing the full job helps by:

  • Sequencing trades in the right order: Demolition, rough-in, substrate preparation, waterproofing, tiling, fit-off, and glazing need proper spacing and inspection points.
  • Checking set-outs before work is locked in: Waste locations, mixer heights, niche positions, vanity clearances, and tile layouts need to be confirmed against the actual fixtures.
  • Protecting finished work: A small room gets damaged quickly when trades overlap or arrive before the previous stage has cured or been signed off.
  • Keeping responsibility clear: If the shower base ponds or the vanity does not fit, there is one party responsible for sorting it out.

A checklist infographic titled Coordinating Contractors and Navigating Permits, outlining seven essential steps for managing home renovation projects.

Permit and coordination issues that catch owners out

Not every bathroom renovation needs the same approval path, but existing rooms are not exempt from building rules. Scope decides the process. If the project includes structural work, changes to windows, major layout changes, or other regulated building work, permit requirements can change. Plumbing and electrical work also need to be carried out by properly licensed trades, with the right certificates where applicable.

The problems I see most often are practical, not theoretical.

Issue What goes wrong
Independent trade booking One delay shifts every following booking, and some trades are then pushed weeks out
Selections made after rough-in Taps, wastes, vanities, or shower fittings do not suit the installed set-outs
No recorded scope changes Variations are agreed on site, then disputed later on cost, timing, or responsibility
Missing compliance records Owners cannot confirm who completed regulated work or what system was installed
Assuming a like-for-like update is low risk Wet-area detailing, ventilation, and substrate condition still need proper checks

A bathroom usually goes wrong at the handover between trades, not in the visible finish.

That is why quote comparison needs to go beyond tile rates and fixture allowances. Ask who is programming the work, who signs off each stage before the next trade starts, who manages permits or advises when they are needed, and who carries responsibility if one trade's work affects another. In Melbourne, that clarity often adds more long-term value than an extra feature tile or a more expensive tap set.

Conclusion Creating Your Lasting Bathroom Sanctuary

A successful modern bathroom renovation isn't the result of one good product or one clever design idea. It comes from joining the visible and invisible parts of the job properly. The layout has to suit the room. The materials have to suit moisture, maintenance, and daily use. The waterproofing and compliance work has to be right before the finishes go on. The trades have to be coordinated in the right order.

That's why the best bathroom renovations feel simple once they're finished. The shower drains properly. The storage works. The tile lines are clean. The room is easier to clean, easier to use, and less likely to create expensive surprises later. None of that happens by accident.

For Melbourne homeowners, the long-term value usually sits in the same places every time. Durable finishes. Sound wet-area construction. Practical fixture choices. Clear budgeting. And one accountable, registered builder managing the process from demolition through to handover.

If your current bathroom is dated, leaking, hard to maintain, or doesn't suit the way you live, it's worth treating the renovation as a full building project rather than a cosmetic refresh. That approach costs less stress and usually delivers a much better result.


If you want a clear scope, practical advice, and end-to-end coordination under a registered builder, contact Melbourne Tiling Services P/L for a free, no-obligation quote and a complimentary 3D drawing to explore your bathroom renovation ideas.