

You've found the right tiles, chosen the vanity and probably saved a few inspiration photos. Then the builder mentions membrane thickness, floor falls, a flood test and a waterproofing certificate, and the bathroom suddenly feels less like a design project and more like a technical job. That reaction is normal. In Melbourne bathroom renovations, the tiles are the visible finish, but the waterproofing, drainage and substrate underneath decide whether the room performs.
Good Melbourne waterproofing and tiling treats the bathroom as one connected system. The membrane, screed, waste, wall linings, tile adhesive, grout, silicone and shower screen all need to work together. A neat-looking bathroom can still be poorly built if the falls are wrong, penetrations are unsealed or tiling starts before the membrane is ready.
Table of Contents
- What Melbourne Waterproofing and Tiling Actually Covers
- The Building Code for Your Bathroom
- How a Bathroom Renovation Actually Unfolds on Site
- What a Melbourne Bathroom Renovation Really Costs in 2026
- Choosing a Registered Builder Versus a Tiler-Only Quote
- Leaks, Balconies and Rectification Work
- Planning Your Next Steps with Confidence
What Melbourne Waterproofing and Tiling Actually Covers
A bathroom renovation doesn't begin with a tile trowel. It begins with demolition, access planning and a close look at what sits behind the existing finishes. Once old tiles and fixtures are removed, the team can inspect framing, the structural floor, existing damage and the position of plumbing services. That information determines whether the project needs a straightforward refresh or a deeper rebuild.
A full scope commonly involves:
- Strip-out and disposal: Remove tiles, fixtures, wall linings and failed waterproofing, then organise safe disposal and site protection.
- Carpentry and substrate work: Repair framing, prepare cement sheet or other approved linings, and correct surfaces that aren't flat or stable.
- Plumbing and electrical coordination: Complete rough-ins before waterproofing and tiling conceal access points behind the finished room.
- Screeding and self-levelling: Form the drainage falls and create a suitable base for the membrane and tiles.
- Waterproofing: Prime the substrate, treat corners and penetrations, and apply the membrane according to the system requirements.
- Tiling and finishing: Set out wall and floor tiles, grout the joints, apply flexible silicone at movement points, and coordinate frameless shower screens.
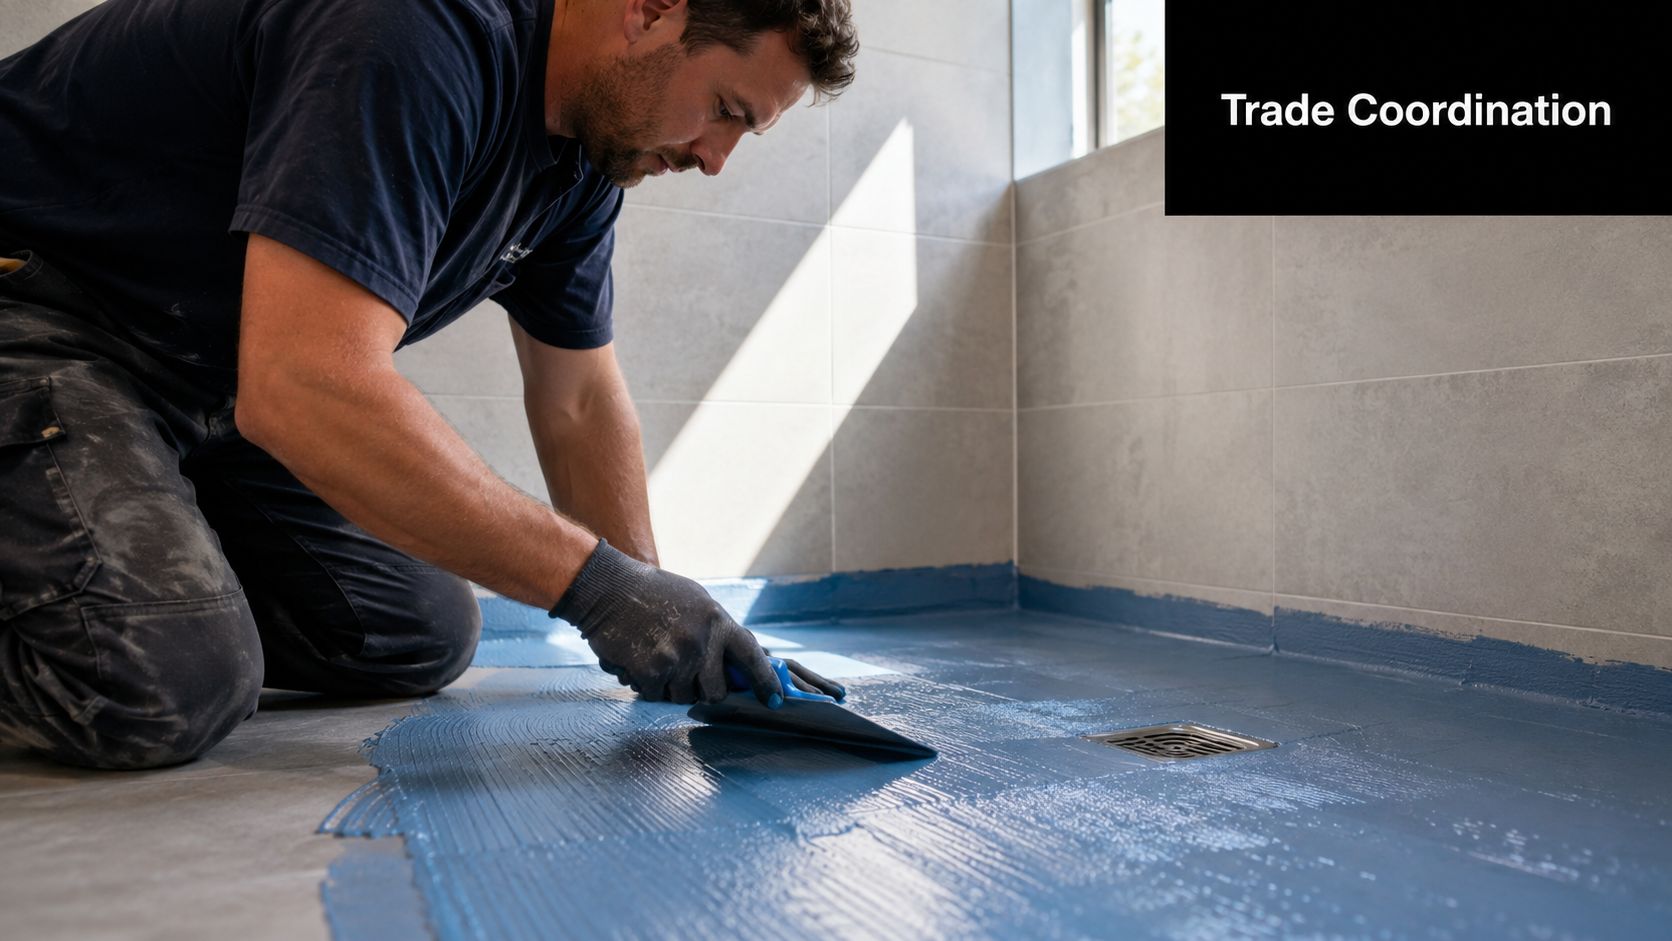
Why one person needs to own the sequence
Waterproofing and tiling are separate skills, but they shouldn't be separate accountability lines. A tiler who brings in an unknown waterproofing subcontractor may still produce a good result, but the homeowner needs to know who prepared the substrate, which membrane system was used, who inspected it and who will return if water appears later.
An integrated team can coordinate the practical handovers. Plumbing penetrations need to be finished before the membrane. Screed needs to be stable and ready before waterproofing. The membrane needs to pass its inspection or test before tiles cover it. The shower screen measure must account for the finished tile plane, not an early drawing.
Practical rule: Ask for the renovation sequence in writing. If a quote only lists “waterproof and tile bathroom” without identifying preparation, testing, curing and finishing, it doesn't describe the full risk.
A start-to-finish specialist may coordinate licensed carpenters, plumbers and electricians while keeping waterproofing, screeding, tiling, grouting and screen installation aligned. That matters for warranty discussions because a leak rarely respects trade boundaries. The person responsible for the finished bathroom should be able to explain the work from the first site visit through to handover, including what happens if the substrate isn't suitable.
The Building Code for Your Bathroom
A compliant Melbourne bathroom starts with two documents: AS 3740:2021, the Australian Standard for waterproofing domestic wet areas, and NCC 2022, which adopted it on 1 May 2023. The Housing Industry Association's explanation of AS 3740 outlines minimum requirements for waterproofing materials, design and installation. On site, those requirements become measurable details rather than a checkbox.
The NCC 2022 wet-area provisions require shower floors to be fully waterproofed. Shower walls need protection to at least 1,800 mm above the finished floor level, while walls around baths or laundry tubs require protection to at least 150 mm above the fixture. The NCC also recognises membranes complying with AS/NZS 4858 as acceptable waterproofing materials.
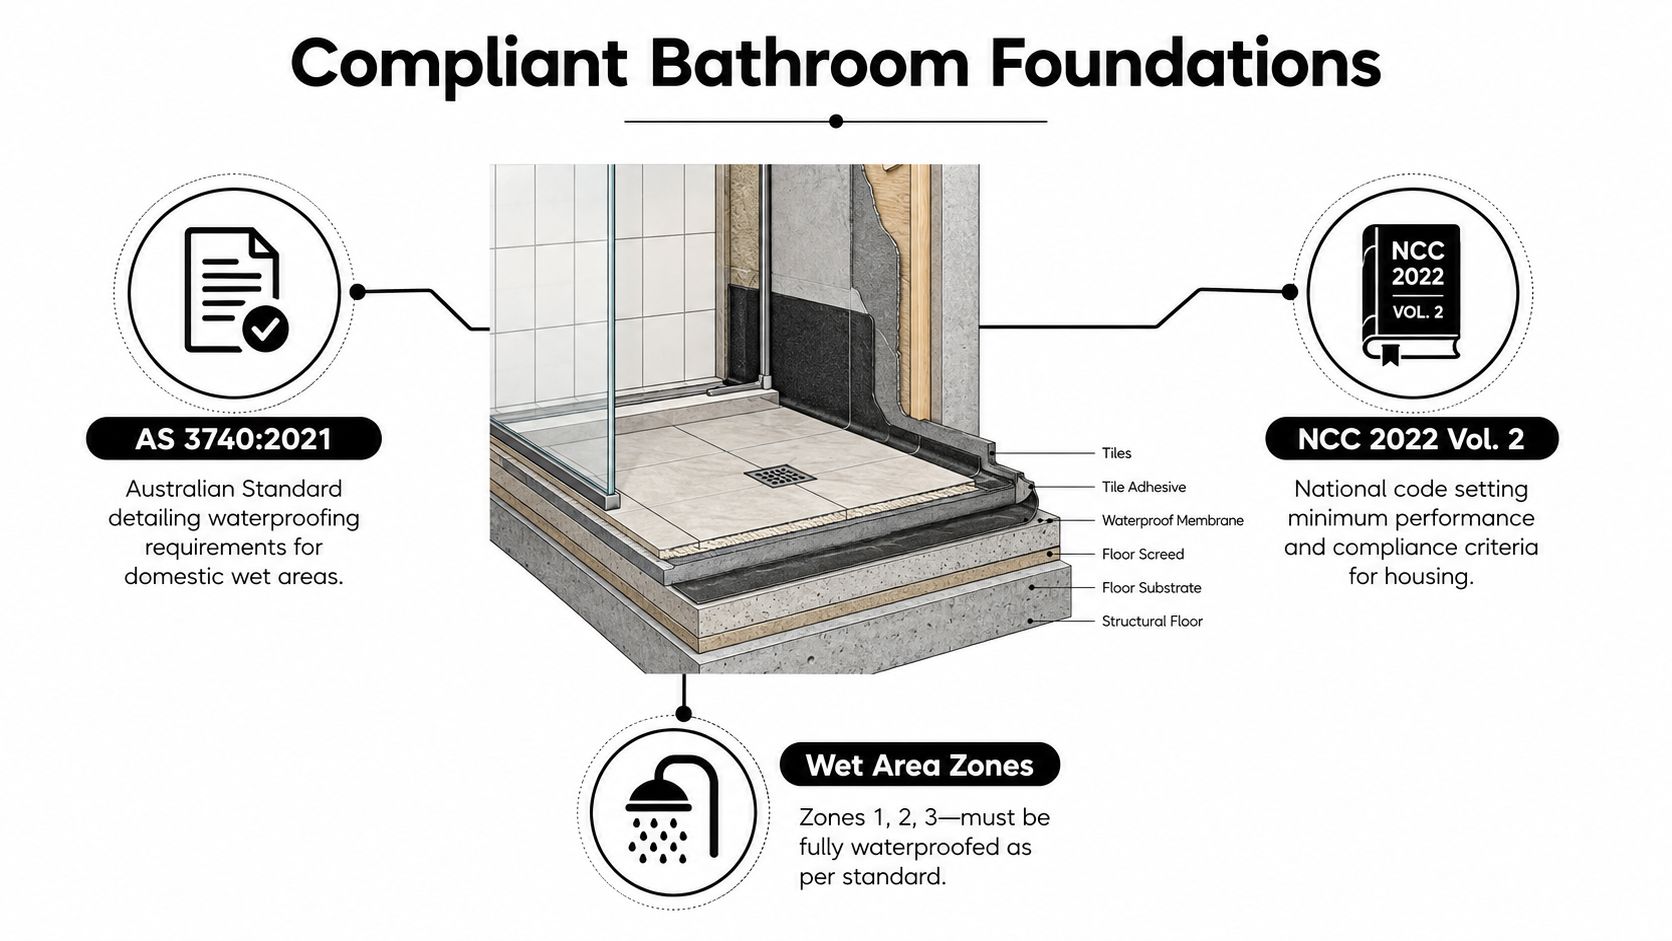
The measurements affect the build
In an unenclosed shower, Victorian guidance identifies waterproofing extending 1.5 metres from the shower rose connection, with a waterstop at a minimum horizontal distance of 1,500 mm from the shower rose. Where a floor waste is installed, the floor plane must fall continuously to the waste at a minimum of 1:80, as the Victorian Building Authority explains in its waterproofing guidance.
These measurements control the work. The shower radius determines how far the membrane and waterstop extend. The required fall affects screed depth, waste placement, tile set-out and the risk of ponding beside a large-format tile. Expensive tiles cannot correct a substrate that sends water away from the waste.
Before tiling, ask the contractor:
- Which parts of the room are classified as wet areas?
- Which membrane system is being used, and does it meet the applicable requirements?
- How will the floor fall be formed and checked?
- How will penetrations, corners, niches and wastes be detailed?
- What inspection or testing occurs before the membrane is covered?
Independent guidance on AS 3740 commonly describes a flood test that holds water within the membrane area for at least 24 hours without a drop in level. Treat that test as quality control before tile installation, not paperwork completed after the surface is hidden. A clear explanation of Melbourne waterproofing requirements should match the site method, drawings and product documentation.
How a Bathroom Renovation Actually Unfolds on Site
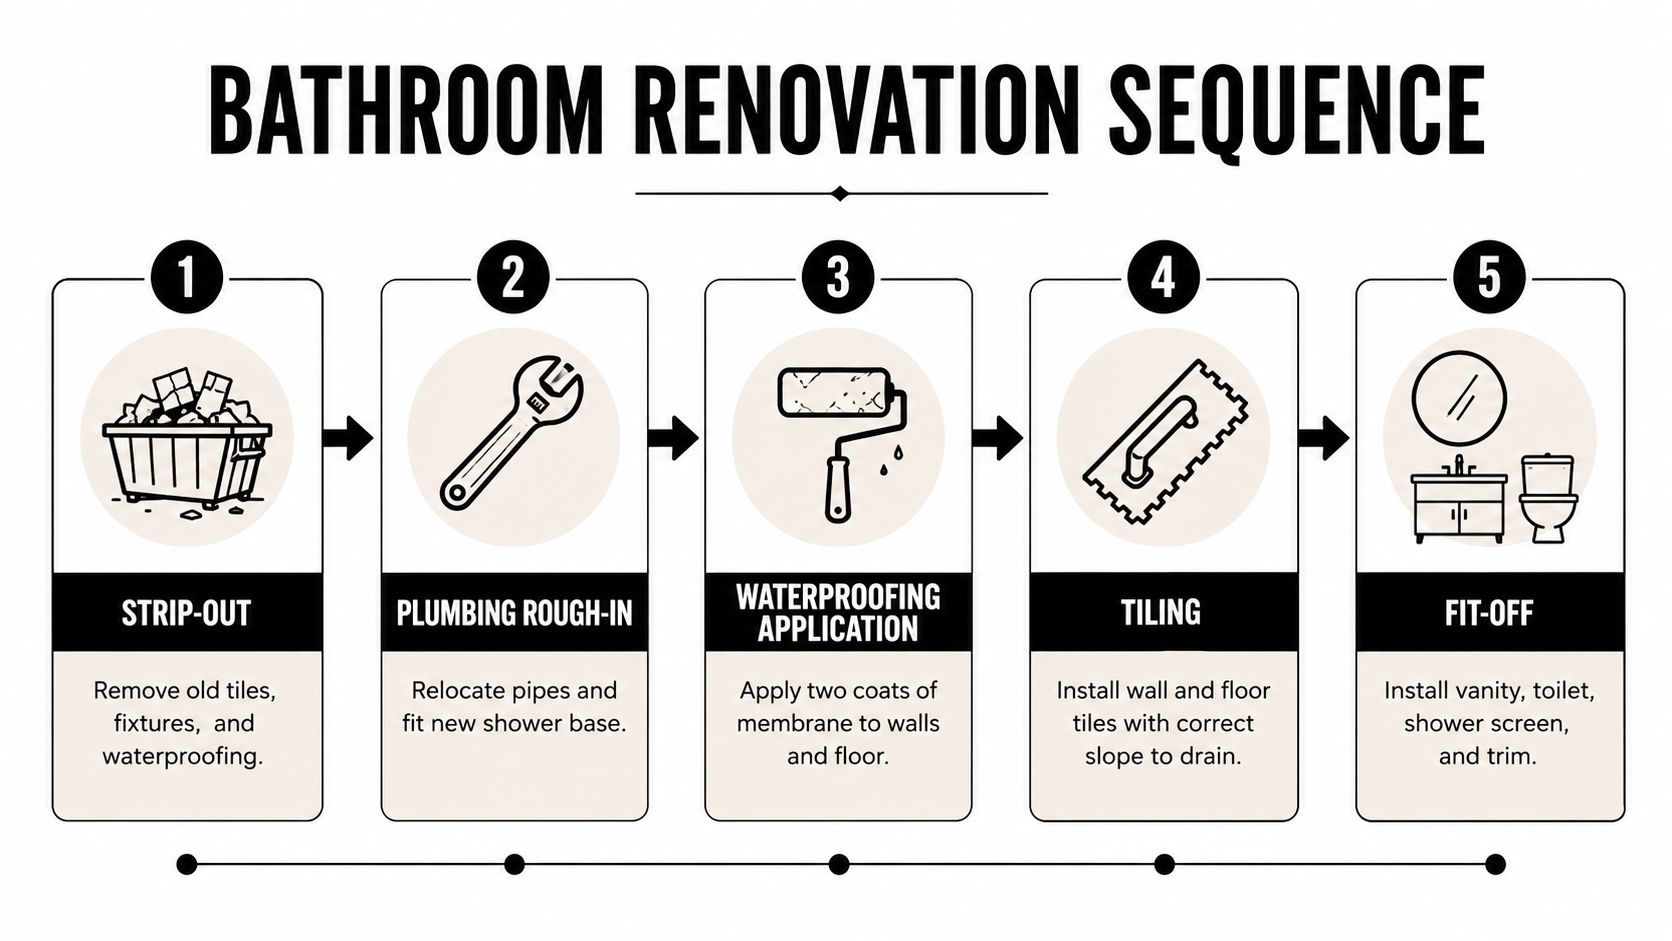
The order of work controls the result. Start tiling before the substrate, membrane or services are ready, and the project accumulates shortcuts that are difficult to see once the room is finished.
The work before waterproofing
The first stage is strip-out. The team removes the existing tiles, fittings and wall linings, then checks for movement, water damage, damaged studs and unsuitable surfaces. A bathroom that's being altered around a new shower position may need more carpentry than a like-for-like replacement.
Plumbing rough-in follows. New wastes, mixers and outlets are positioned, then the plumber completes the relevant checks before the walls and floor are closed. Electrical first-fix work also needs to happen before waterproofing covers the substrate. The aim is simple, no one should cut into a finished membrane to install a service that was missed.
The screed then creates the drainage plane. It must direct water to the waste while leaving a stable, sufficiently prepared surface for the membrane. Self-levelling compounds can help in suitable areas, but they don't replace correct falls. The substrate needs time to cure and dry according to the materials used.
Membrane, inspection and tile set-out
Once preparation is complete, the applicator primes the surface, reinforces corners and changes of plane, seals penetrations and applies the membrane system in its required coats. The product data sheet matters here. A membrane isn't ready because it feels dry at the surface, and tiles shouldn't be used to hide incomplete detailing.
A second inspection or flood test provides a hold point before the finish goes over the work. If the level drops or water escapes, the cause needs to be addressed while the membrane remains accessible.
Large-format porcelain and Kerlite raise the preparation standard. Thin tiles reveal humps, hollows and inconsistent adhesive coverage, so the substrate and set-out need more control than a small-format tile can sometimes disguise.
Site reality: Most delays aren't caused by laying the tile. They happen when demolition reveals movement, services need relocation, screed or membrane needs curing time, or a failed inspection sends the work back a stage.
After approval, the tiler establishes reference lines, checks the drain relationship and fixes the tiles with the correct adhesive and coverage. Grouting comes after the adhesive has set. Flexible silicone belongs at movement joints, internal corners and junctions where rigid grout is likely to crack. The frameless shower screen is measured against the completed tile surfaces, then fitted after the finished levels are known.
What a Melbourne Bathroom Renovation Really Costs in 2026
A single renovation price hides the decisions that control the quote. A shower reseal and limited re-tiling are different from stripping a room to the stud frame, relocating plumbing, rebuilding the floor and installing new fixtures.
Melbourne Tiling Services P/L references a typical median spend around $10,000 for bathroom renovation planning, but that figure should be read as a scope reference rather than a promise. The final price depends on access, demolition, substrate condition, fixture selection, tile format, plumbing changes, electrical work, screen design and the amount of rectification discovered after strip-out.
| Cost Driver | Impact on Quote | Typical Trade-Off |
|---|---|---|
| Existing substrate | A sound base keeps preparation controlled. Damaged framing or slab work adds labour and materials. | Save on demolition only when inspection confirms the base is suitable. |
| Plumbing layout | Keeping fixtures near existing positions usually limits service relocation. | Moving a waste or shower can improve the design but increases coordination and floor work. |
| Tile format | Large-format Kerlite and porcelain demand flatter substrates, careful handling and accurate set-out. | Fewer grout lines can create a cleaner finish, but preparation becomes less forgiving. |
| Waterproofing scope | Niches, penetrations, unenclosed showers and complex junctions require more detailing. | Simplifying the layout can reduce risk without compromising the room's function. |
| Shower screen | Frameless glass, hardware and final measurement add to the finishing package. | A simpler screen may reduce cost, while frameless glazing keeps the visual field open. |
| Design changes | Late fixture or tile changes affect ordering, labour and sequencing. | Confirming finishes early protects the programme and reduces rework. |
A useful quote should identify demolition and skip hire, substrate preparation, screeding, waterproofing, testing, tiling, grouting, silicone, fixtures and screen installation. It should also state exclusions. “Waterproofing included” isn't enough if the quote doesn't say who prepares the substrate or provides the certificate.
Free quotes, 3D drawings and a renovation calculator can help test the scope before signing. Compare line items, not just totals. The cheapest tender often leaves out preparation, testing or coordination, and those omissions tend to reappear as variations once the floor is open.
Choosing a Registered Builder Versus a Tiler-Only Quote
A tiler-only quote can suit a limited job where the substrate is already sound, plumbing and electrical work are complete, and the scope stops at preparation, waterproofing and tiles. It becomes a poor fit when the project involves structural changes, multiple licensed trades, new services, major demolition or a contract for the whole renovation.
The Victorian Building Authority states that only a registered domestic builder can enter into a major domestic building contract with an owner-builder, and that a builder must be registered where the work exceeds the prescribed cost threshold. The VBA owner-builder information guide sets out that registration requirement.
What registration does and doesn't prove
Registration doesn't guarantee perfect workmanship. It does provide a formal regulatory status for the type of work being contracted and gives the homeowner a clearer party to hold responsible for coordination. A registered builder can manage the relationship between the plumber, electrician, carpenter, waterproofing applicator, tiler and screen installer rather than leaving the owner to resolve gaps.
A tiler-only arrangement may cost less on paper because it excludes project management and other trades. That can work when the boundaries are real and documented. It becomes risky when the tiler informally organises plumbing or electrical work without a clear contract, licence checks or defined responsibility for defects.
Use a repeatable vetting process:
- Check registration: Search the VBA register and confirm the registration matches the work being proposed.
- Read the contract: The written scope should identify the registered builder, inclusions, exclusions, allowances and variation process.
- Verify waterproofing records: Ask who applies the membrane, what system is specified and what inspection or certificate is supplied.
- Confirm insurance: Request evidence of current public liability insurance and clarify any relevant domestic building insurance obligations.
- Inspect comparable work: Look at finished bathrooms and ask how the contractor handled leaks, failed substrates or changes in scope.
Bathroom renovation specialists should be assessed on evidence, not polished images alone. Ask who owns the job after handover. If every trade points to somebody else when a leak appears, the low initial price wasn't a complete measure of risk.
Leaks, Balconies and Rectification Work
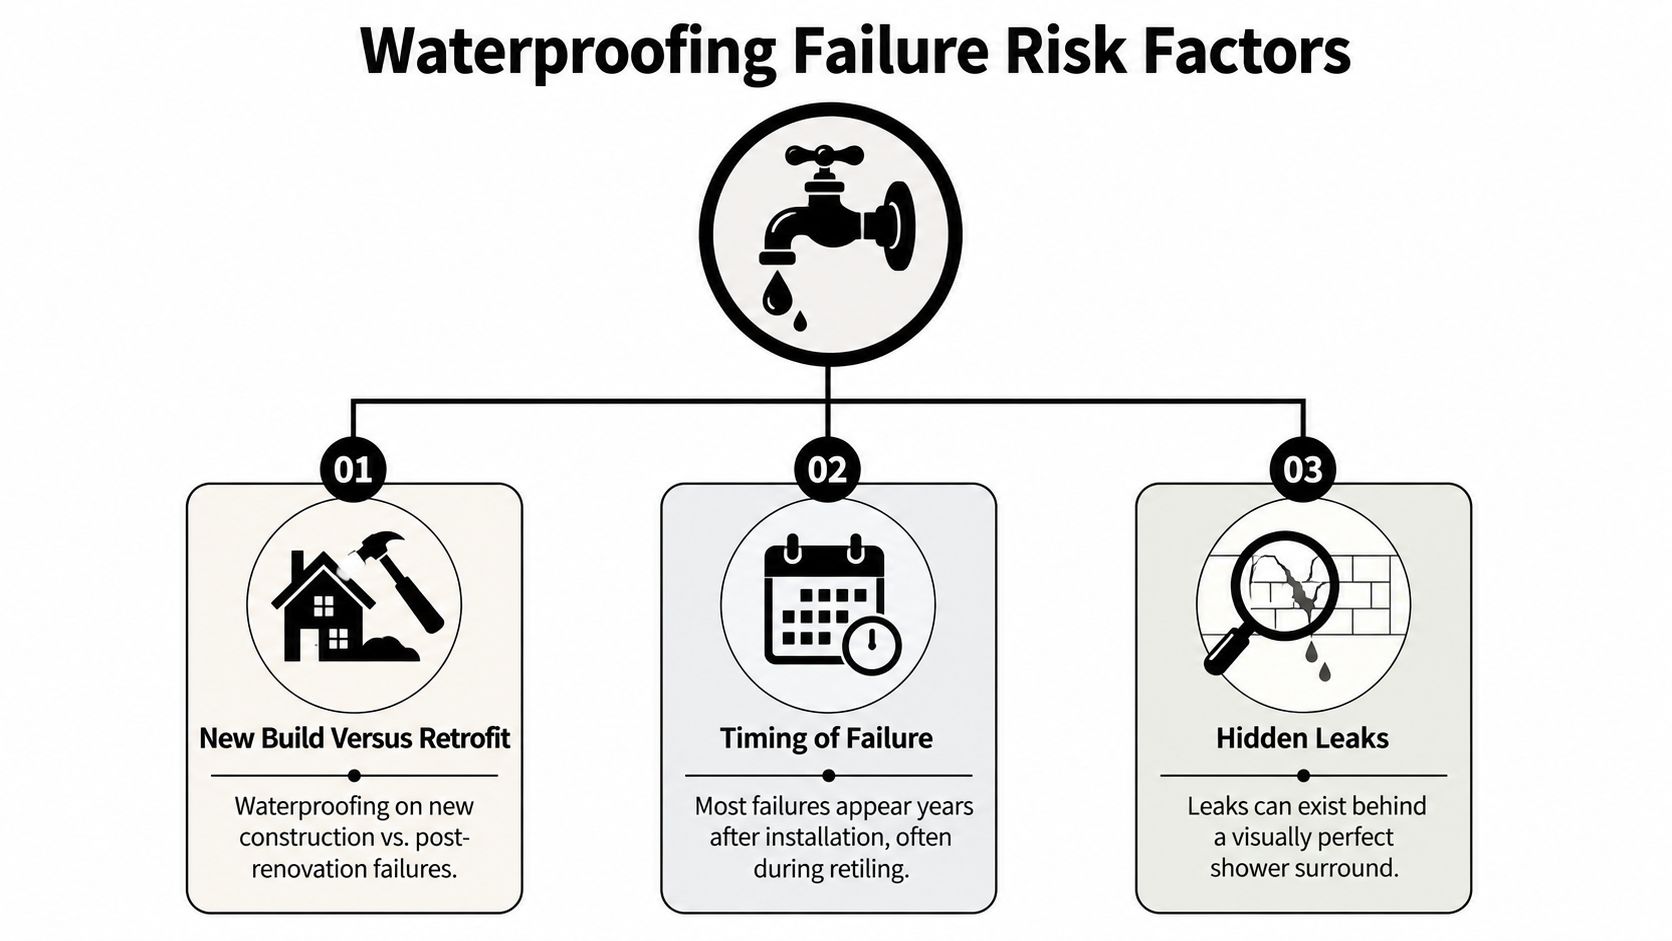
A shower can look clean while water is moving behind it. On a balcony, the first visible sign may appear on the ceiling below, around a balustrade fixing or at a door threshold rather than at the actual membrane breach.
Australian defect research used in NCC discussions reports that waterproofing accounts for 63% of incidences of waterproofing defects in Class 2 and Class 7 buildings, as documented in the ABCB waterproofing cost-benefit analysis. Separate NSW strata defect data identifies waterproofing as a material defect category at 22% of registered buildings in 2022–2024, also discussed in that source. The figures don't diagnose a particular Melbourne property, but they explain why leak rectification needs investigation rather than cosmetic patching.
Surface repair or full remediation
Re-grouting or replacing silicone may be appropriate where the membrane is sound and the problem is limited to a failed joint. It won't repair a breached membrane, inadequate drainage fall, movement in the substrate or a badly detailed waste. Painting a coating over existing tiles can also trap water rather than solve the path that lets it in.
A proper assessment may include:
- Visual inspection of the shower, balcony, thresholds, corners and penetrations.
- Moisture readings and inspection of the room or ceiling below.
- Drainage and ponding checks.
- Localised tile removal where the membrane condition can't be established from the surface.
- Substrate and framing inspection after strip-out.
- A written scope that identifies the cause, not only the visible damage.
Full rectification commonly means removing tiles and failed layers, checking the substrate, repairing movement or damage, replacing the membrane and screed where necessary, then testing before re-tiling. The correct scope depends on evidence. A balcony with one isolated defective detail shouldn't automatically receive the same treatment as a slab with widespread moisture, but a growing stain shouldn't be covered with fresh paint.
Property managers should record the location, timing and progression of staining, mould, loose tiles or odours, then arrange an assessment. Apartment owners should notify the owners corporation or strata manager before starting work because responsibility can depend on the building structure, plan of subdivision and location of the defect.
Balcony waterproofing services in Melbourne should begin with diagnosis. The useful question isn't “Can you reseal this?” It's “What evidence shows where the water is entering, and what layer needs to be repaired?”
Planning Your Next Steps with Confidence
Start by collecting the information a contractor needs. Measure the room, photograph every wall and floor, note the age of the existing bathroom, record any previous leaks and list the fixtures you want to keep or move. For a balcony, include photos of drainage points, balustrade bases, door thresholds and the ceiling or wall below.
Request a written quote that separates:
- Demolition and preparation: Strip-out, disposal, framing and substrate repairs.
- Services: Plumbing and electrical rough-in, testing and fit-off.
- Waterproofing: Membrane system, wet-area extent, detailing and inspection records.
- Finishes: Tile supply or installation, grout, silicone, trims and screen work.
- Design support: 3D drawings, fixture selections and any renovation calculator assumptions.
- Handover: Certificates, warranties, maintenance notes and the process for reporting defects.
Use 3D drawings to settle tile direction, niche positions, vanity dimensions and screen layout before materials arrive. Ask how long each stage needs to cure, what could trigger a variation and who approves changes. Maintenance still matters after handover. Keep drains clear, inspect grout and silicone, avoid harsh chemical cleaners, and respond quickly to damp patches, mould, bubbling paint or loose tiles.
A practical timeline should account for demolition, trade coordination, substrate preparation, curing, waterproofing, testing, tiling, grout, silicone and screen installation. The exact duration depends on the room and discoveries behind the old finishes, so a contractor who gives a confident completion date without discussing these hold points hasn't allowed for the work.
Melbourne Tiling Services P/L coordinates bathroom renovations, waterproofing, screeding, self-levelling, premium tiling, Kerlite installation, frameless shower screens and shower or balcony leak rectification across Melbourne and greater Victoria. For a measured scope, 3D design support and a quote that separates compliance work from finishes, visit Melbourne Tiling Services P/L and arrange the next site discussion.
Write a Comment