How to Tile a Bathroom Wall: A Melbourne Guide 2026

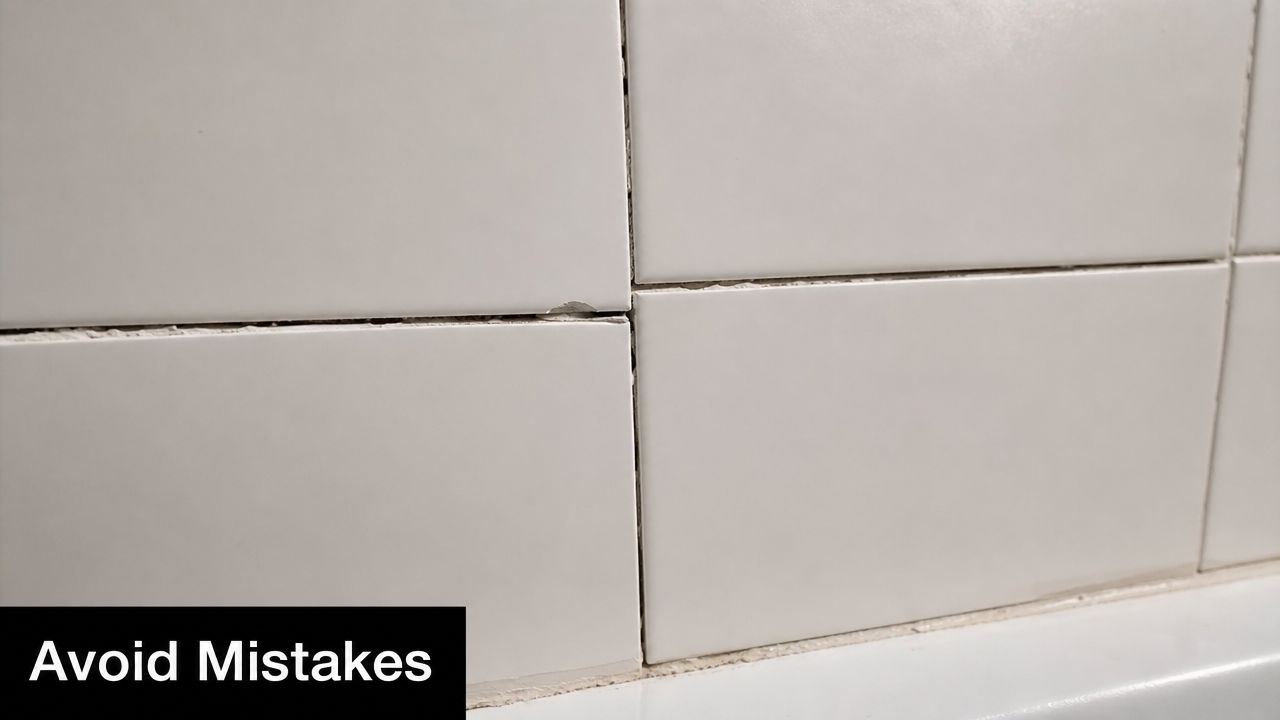
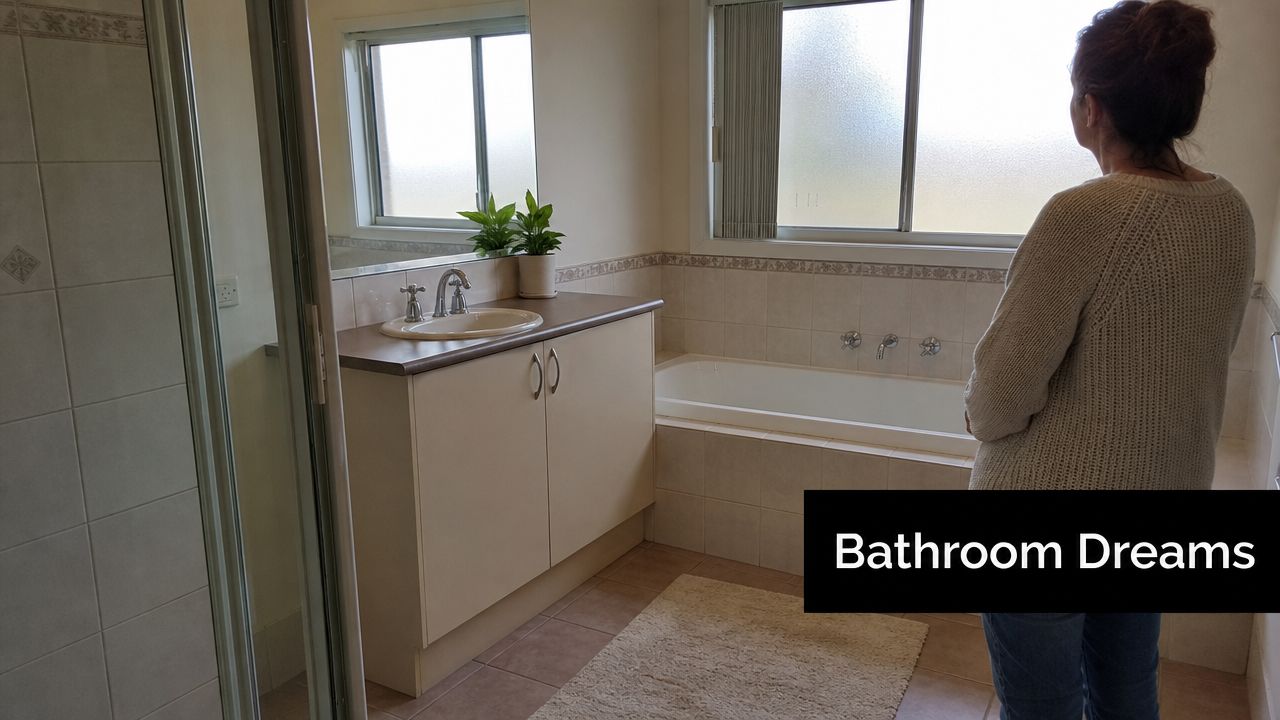
Individuals often start in the same place. They stand in an outdated bathroom, look at the stained grout, the tired wall tiles, the crooked lines around the shower mixer, and think tiling a new wall can't be that hard. Buy the tiles, grab some adhesive, watch a few videos, and get stuck in.

That's the part where bathroom renovations usually split into two paths. One becomes a clean, durable finish that still looks right years later. The other looks fine for a few weeks, then the corners crack, a row drifts out, or moisture finds its way behind the wall because the prep was wrong from the start.

In Melbourne, the second path is common in older homes. Solid-looking bathrooms often hide walls that are out of plumb, patched substrates, old movement cracks, and framing that was never set up for large-format wall tile. That's why knowing how to tile a bathroom wall properly means understanding more than tile adhesive and a spirit level. It means knowing where tiling ends and compliant wet-area construction begins.

Table of Contents

The Reality of a Flawless Tiled Wall

A flawless tiled wall is built long before the first tile goes up. The visible part is the finish. The real work sits behind it in the set-out, substrate correction, waterproofing, and movement detailing.

In older Melbourne homes, I regularly see bathrooms where the wall looks serviceable until a long straight edge goes on it. Then the problems show up fast. One side bellies out, the corner isn't square, the nib wall leans, or an old repair has left a hump exactly where a large porcelain tile needs to sit flat. None of that gets fixed by pushing on more adhesive.

There's also a big difference between a cosmetic re-tile and a proper bathroom renovation. If you're replacing a splashback outside a wet zone, a capable DIYer can sometimes manage it. If you're working inside a shower area, around penetrations, niches, wall-to-floor junctions, and waterproofed surfaces, the stakes go up sharply. A pretty finish won't save a wall system that isn't compliant.

Practical rule: If water will regularly hit the wall, treat the job as wet-area construction first and tiling second.

A lot of online guides miss that distinction because they assume flat walls, generic room layouts, and standards that don't apply in Australia. Melbourne bathrooms don't always play nicely. Period homes, post-war homes, and fast-renovated investment properties all throw up their own versions of the same issue. The wall behind the tile often needs more work than the tile itself.

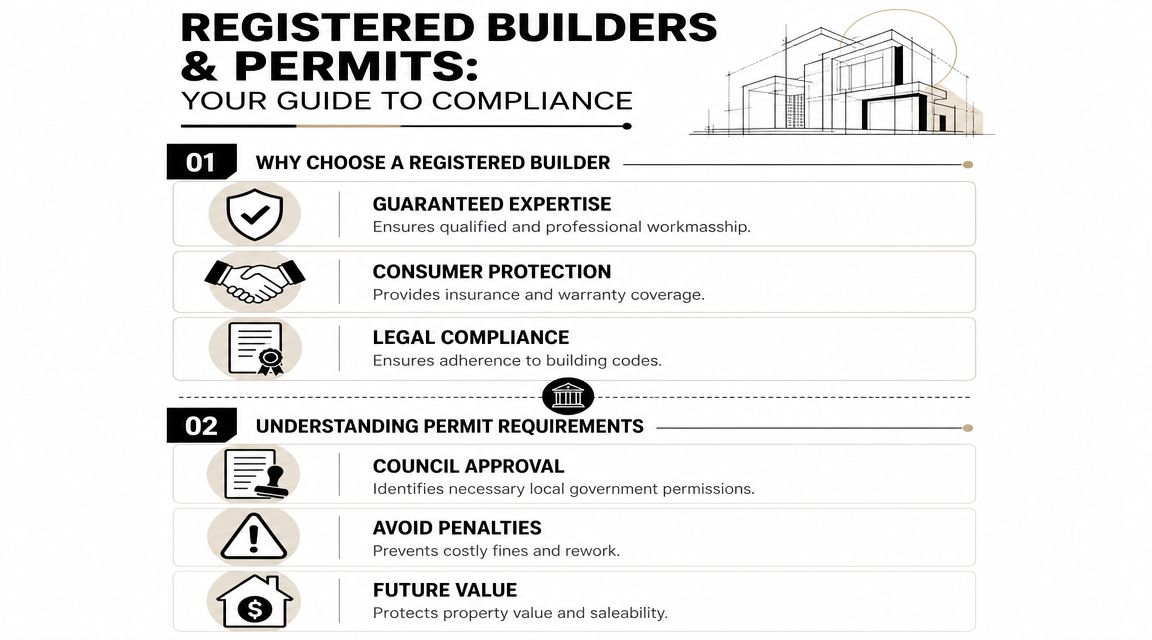
That's also why registered builders matter in bathroom renovations. A proper builder doesn't just look at tile colour and grout width. They coordinate substrate repair, waterproofing, plumbing penetrations, and sequencing so the wall system works as one assembly.

A good tiled bathroom wall should do three things at once:

  • Look balanced: full tiles or larger cuts land where the eye goes first.
  • Stay bonded: no hollow spots, sagging, lippage, or weak bedding.
  • Manage movement and moisture: corners, junctions, and wet zones are detailed correctly.

If one of those is missing, the job usually tells on itself.

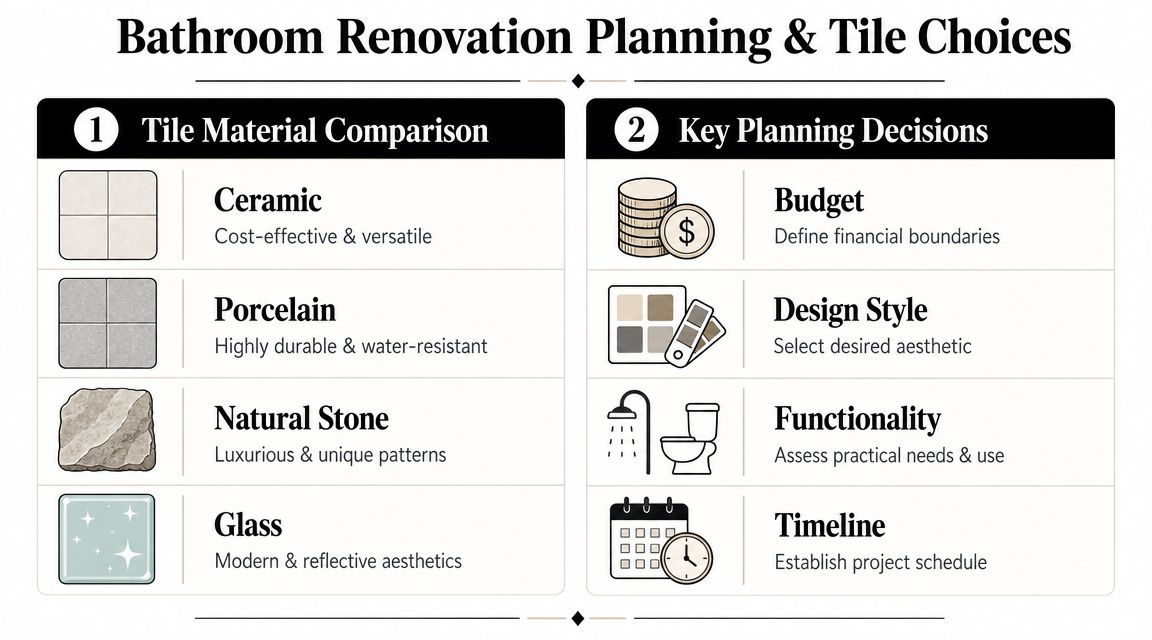
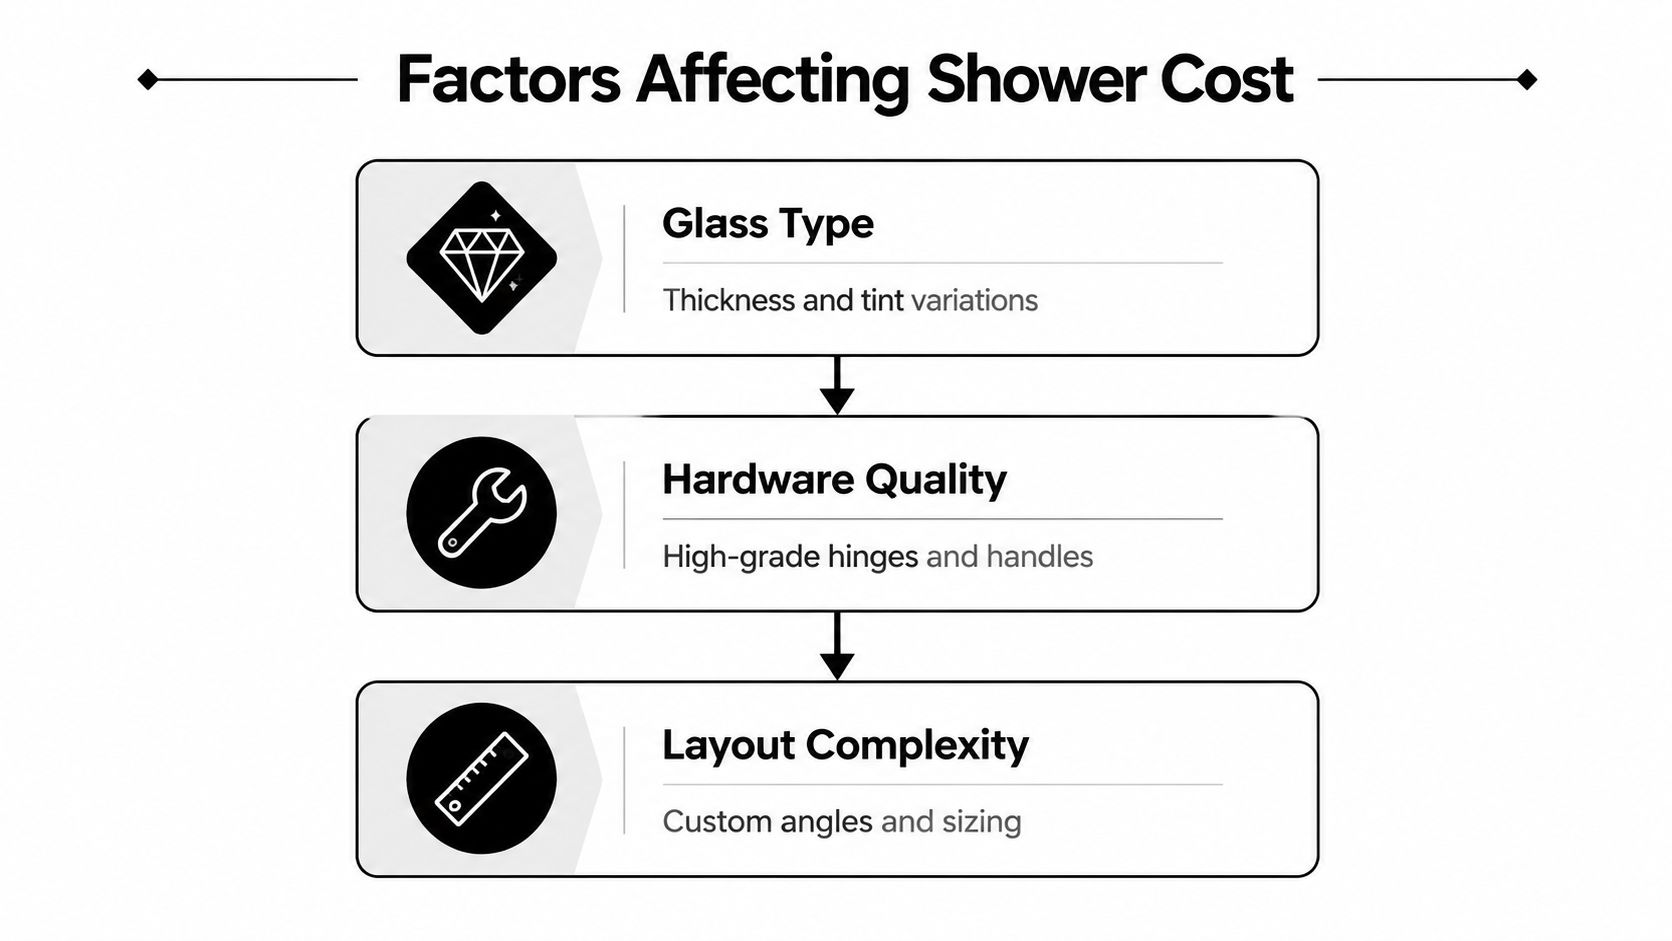
Planning Your Layout and Materials

The cleanest bathroom wall jobs are usually won before any adhesive is opened. Planning decides how the wall will look, how much material you'll need, and whether the install can be built without ugly compromises.

Start with the wet area rules

In Australia, bathroom wall tiling sits within the framework of the National Construction Code and AS 3740, and shower wall linings are commonly detailed to extend to at least 1800 mm above the finished floor. For estimating, a standard allowance is at least 10% extra tile, with 20% or more often needed for complex layouts, patterned tile, or difficult cuts, as outlined in this bathroom tile measurement guide.

That matters at the planning stage because your tile height, waterproofing extent, substrate, trim selection, and fixture set-out all need to line up. If they don't, the wall can end up looking improvised even when the workmanship is neat.

A checklist infographic titled Bathroom Tiling Planning Checklist with five numbered steps for successful wall tile installation.

For homeowners choosing finishes, a practical place to compare options is this guide to tiling materials for bathroom renovations.

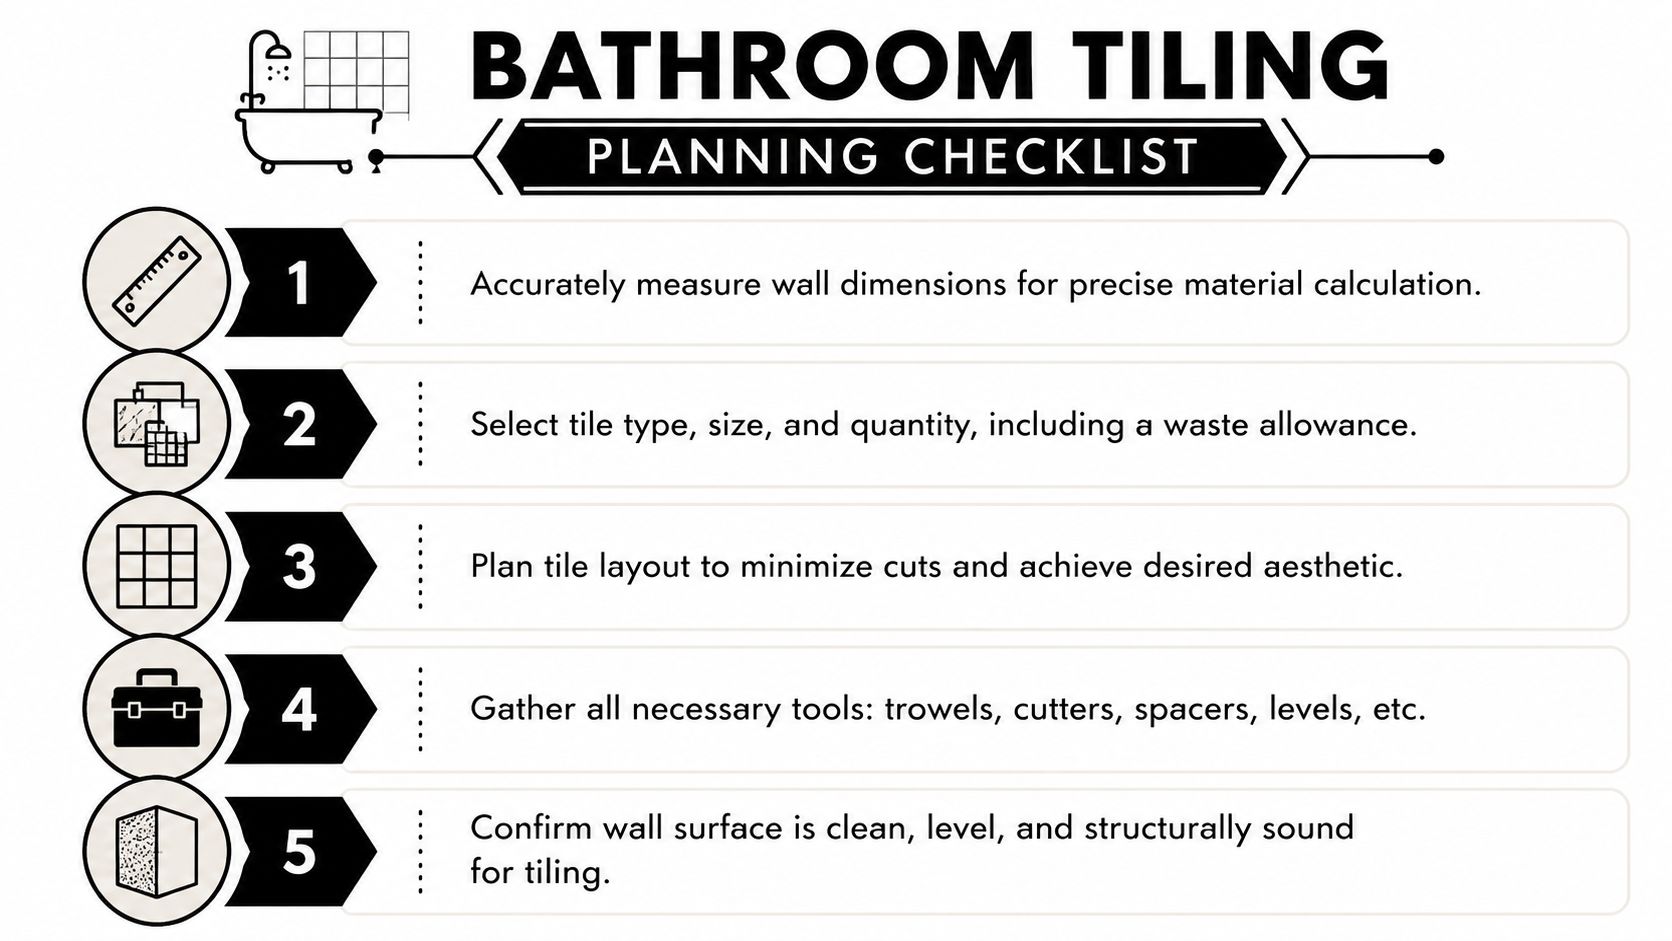
Measure the wall like a tiler, not a shopper

Don't just measure width by height and order off that. Measure each wall separately, then note every interruption.

Use a tape, laser, and a notepad. Record:

  • Openings and penetrations: windows, doors, niches, mixer bodies, shower outlets, and power points.
  • Termination points: where tile stops at architraves, ceilings, benchtops, screens, or trims.
  • Out-of-square conditions: check the width at the top, middle, and bottom, not only once.

Then lay out the tile grid on paper or with a story pole. Dry planning tells you where your cuts will land. The goal is simple. Keep cut tiles larger and place them in lower-visibility areas instead of creating thin slivers in the first thing people see.

Narrow cuts at eye level are rarely a tile problem. They're usually a planning problem.

Choose tile size with the wall in mind

Ceramic wall tile is forgiving. Porcelain is tougher and often cleaner looking, but it's less forgiving to cut and heavier on the wall. Large-format panels and Kerlite can look excellent in a modern ensuite, but they demand a flatter substrate and tighter control over set-out.

A quick trade-off table helps:

Tile type What works well What catches people out
Ceramic Easier cutting, good for standard walls Can look busy with many grout joints
Porcelain Dense finish, sharp modern look Harder cuts, heavier handling
Large-format or Kerlite Fewer joints, premium appearance Exposes uneven walls fast

If the wall is patchy, bowed, or out of plumb, a smaller format often gives you more forgiveness. If the design calls for large-format tile, sort the wall first. Don't expect adhesive to rescue the finish.

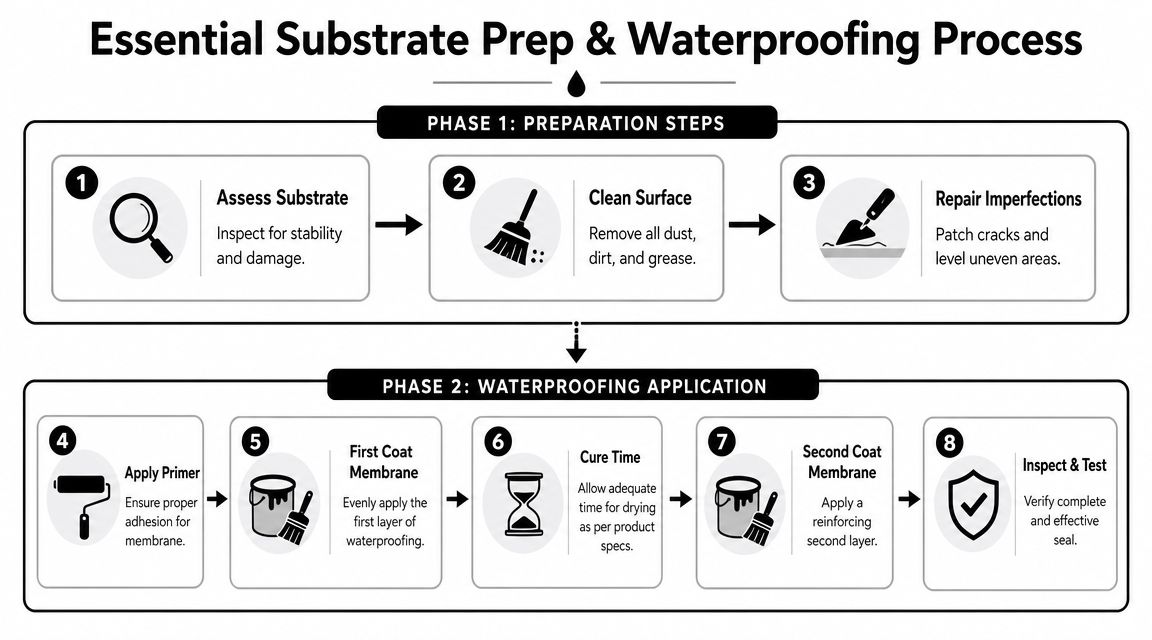
Wall Preparation and Waterproofing

The best-looking tile in the showroom won't compensate for a bad wall. If the substrate moves, is damp, is powdery, or is out of plane, the tiled finish is already in trouble.

A tiled wall only performs as well as the substrate

Start with a hard inspection. Tap the wall. Check for drummy patches, loose sheeting, old swelling from moisture, soft plaster, or cracked cement render. Then check flatness and plumb with a straight edge and level.

If the wall is visibly uneven, fix the wall. Don't try to hide it with thick blobs of adhesive. That approach creates inconsistent bedding, poor bond, and a much higher chance of lippage on the face.

A professional construction worker applies waterproof membrane sealant onto bathroom wall boards using a paint roller.

In older Melbourne bathrooms, this stage often decides whether the project stays DIY-friendly. Minor patching is one thing. Re-sheeting walls, correcting bad framing, and rebuilding shower substrates is another.

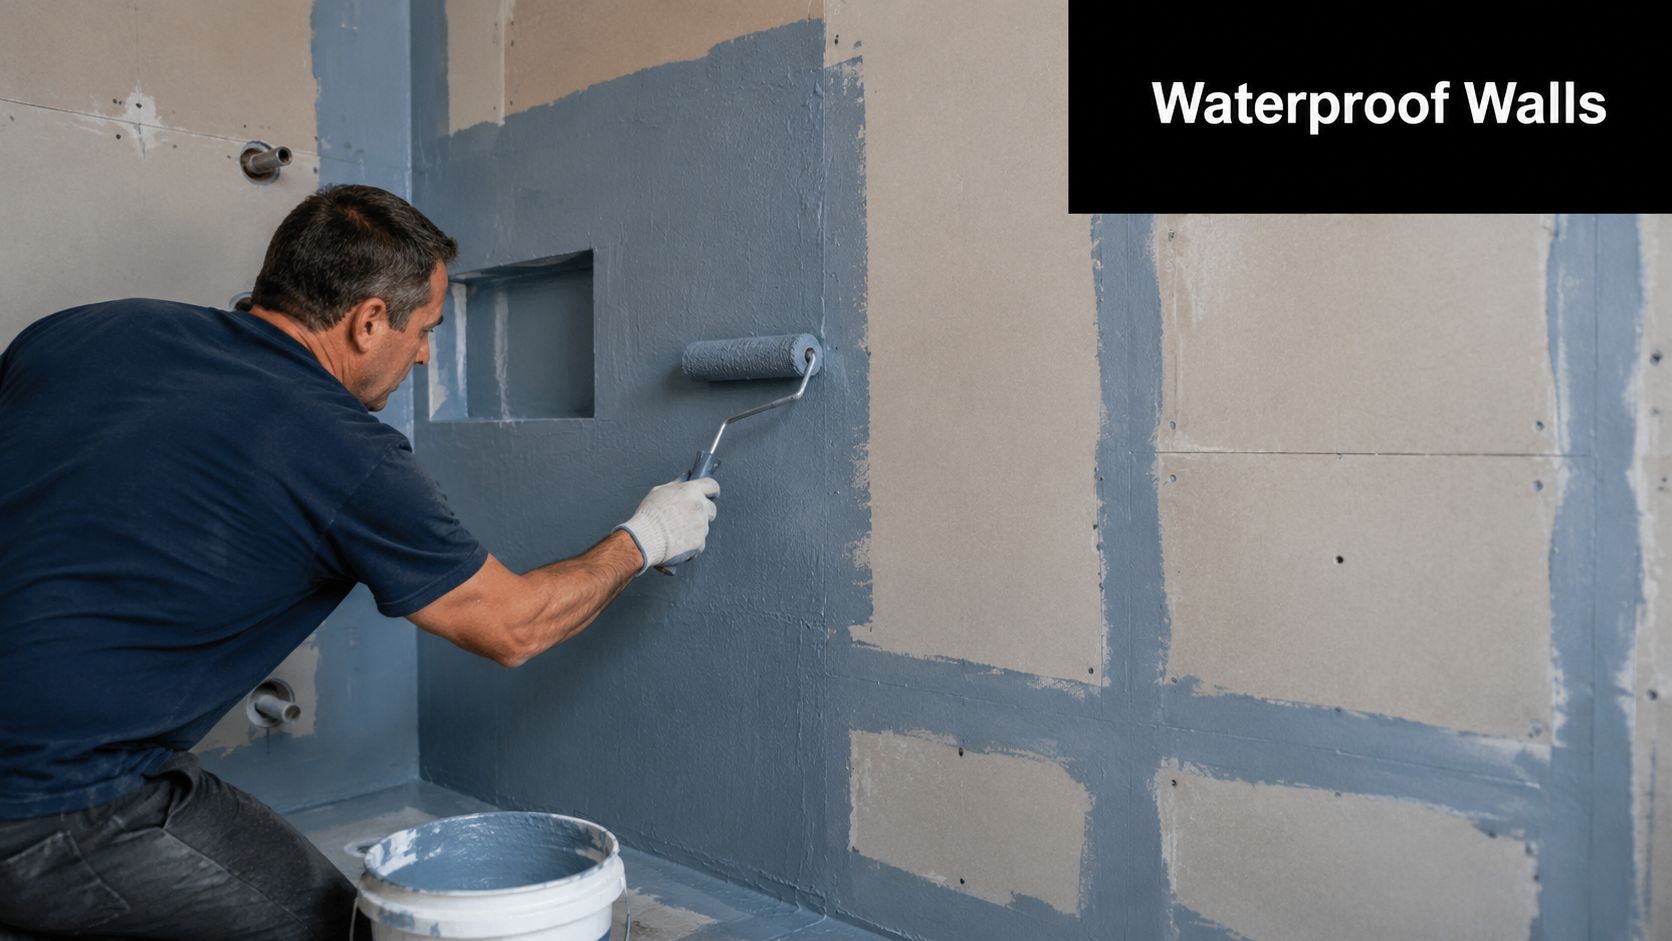
Waterproofing isn't a decorative extra

In wet areas, waterproofing is part of the system. It isn't something you squeeze in because the tiles are nearly ready to go. Corners, wall-to-floor junctions, and changes of plane all need to be treated as movement points, and expert guidance is clear that these areas should use flexible sealant, not grout. The same guidance also recommends back-buttering tiles when coverage is uncertain so you don't leave voids on vertical surfaces, which can lead to bond failure, as explained in this bathroom wall tile installation guide.

If you're working on a full renovation, at this stage many homeowners should stop and bring in the right trade team. Waterproofing compliance is not the place to guess. If there's any doubt about membrane selection, penetration treatment, or wet-area detailing, get a qualified waterproofer involved and have the work coordinated properly. For system-level context, this page on bathroom waterproofing systems is a useful reference point.

What DIYers usually get wrong

The common failures are nearly always behind the tile, not on it.

  • They tile over a poor base: dusty sheeting, weak old plaster, or walls that aren't flat enough.
  • They grout movement joints: internal corners and fixture junctions crack later because the assembly can't move.
  • They ignore penetrations: mixer points, outlets, and niche corners need careful detailing before the finish goes on.

If the wall needs waterproofing, sealant strategy should be decided before tile layout, not after grouting.

Another trap is sequencing. Plumbing rough-in, sheeting, waterproofing, set-out, tile installation, grouting, and silicone all need to happen in the right order. Registered builders are useful here because they don't treat the tiler in isolation. They coordinate the whole bathroom renovation so one trade doesn't undo the next.

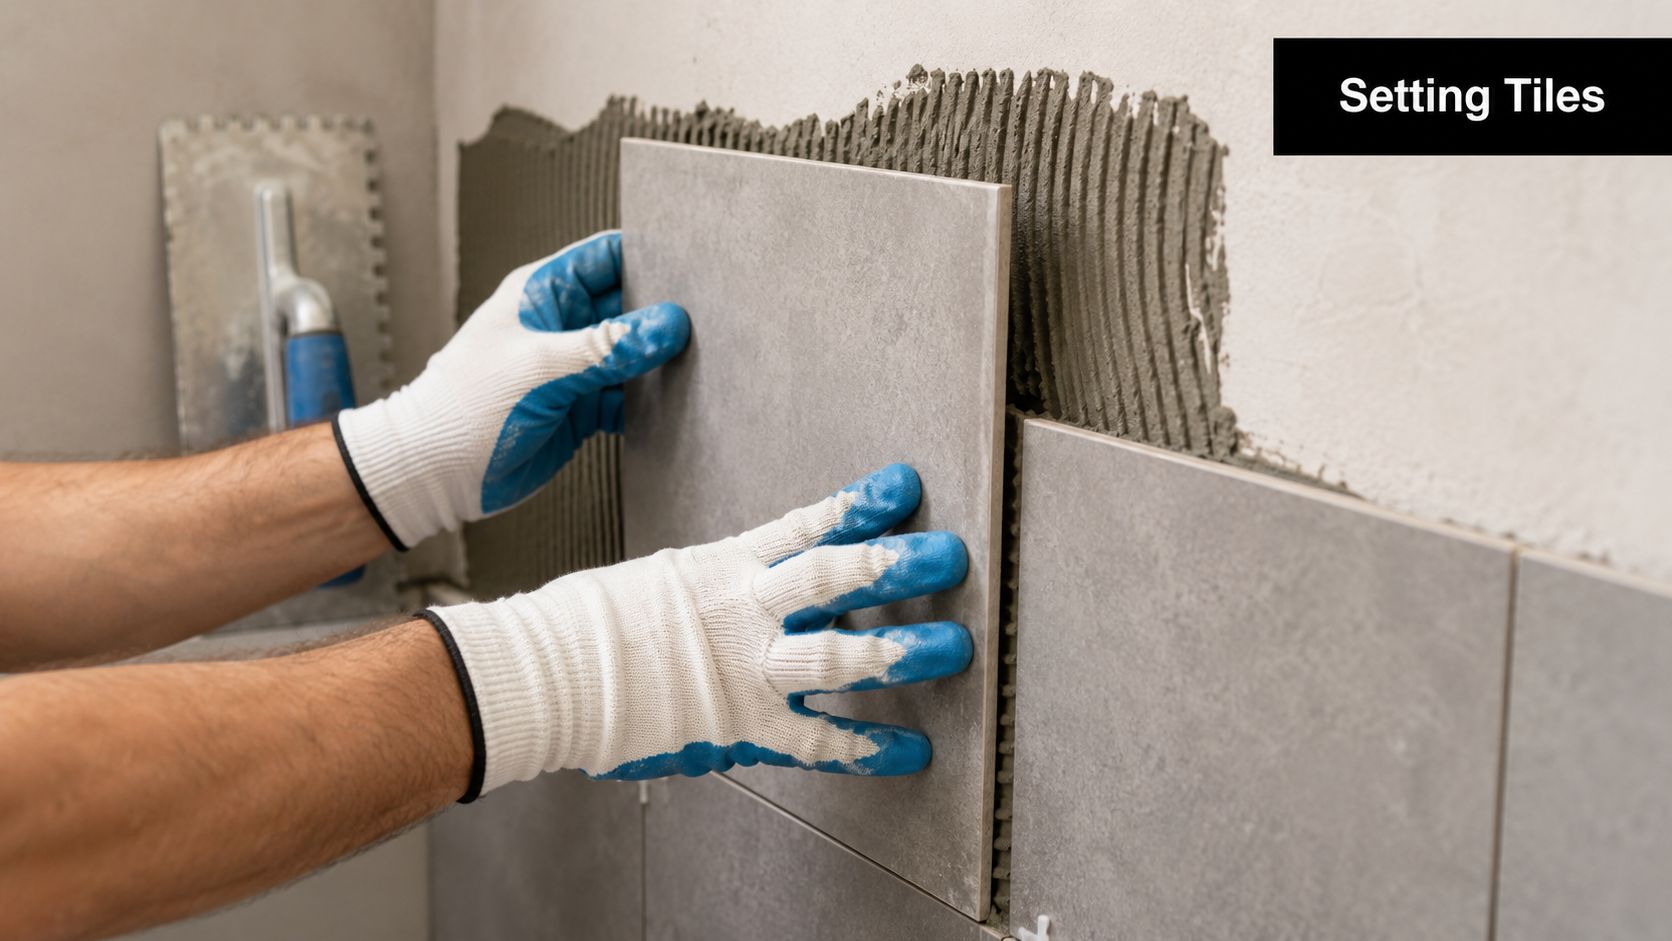
Setting Tiles From Adhesive to Final Cut

This is the stage commonly thought of when considering how to tile a bathroom wall. It's also the stage where rushed work becomes visible immediately.

Set out first, then mix adhesive

A reliable wall-tiling method starts with set-out, not adhesive. Dry-lay the field tiles, establish a reference line from the most visible area, and push smaller cuts into less noticeable corners. On bathroom walls, pros also recommend using a notched trowel at about 45° and pressing each tile with a slight twist to collapse the ridges properly. For ordering, a practical benchmark is about 15% extra tile to cover cuts, breakage, and pattern matching, especially where penetrations and niches increase waste, as noted in this tile-setting guide.

A tiler carefully installs a grey marble-look wall tile onto mortar during a bathroom renovation.

Mark your verticals and horizontals clearly. If the floor isn't perfectly level, don't trust it as your starting point. Use a straight batten or laser line and build the wall from a known level reference.

For the actual setup, I'd keep the process disciplined:

  1. Dry-check the layout so you know where your cuts, trims, and fixture openings will fall.
  2. Mix adhesive in small batches so it doesn't skin over while you're still adjusting tiles.
  3. Spread only what you can tile in a short run on a vertical wall.
  4. Comb in one direction and keep the notch lines consistent.
  5. Use spacers and keep checking level rather than assuming the first row will carry the rest.

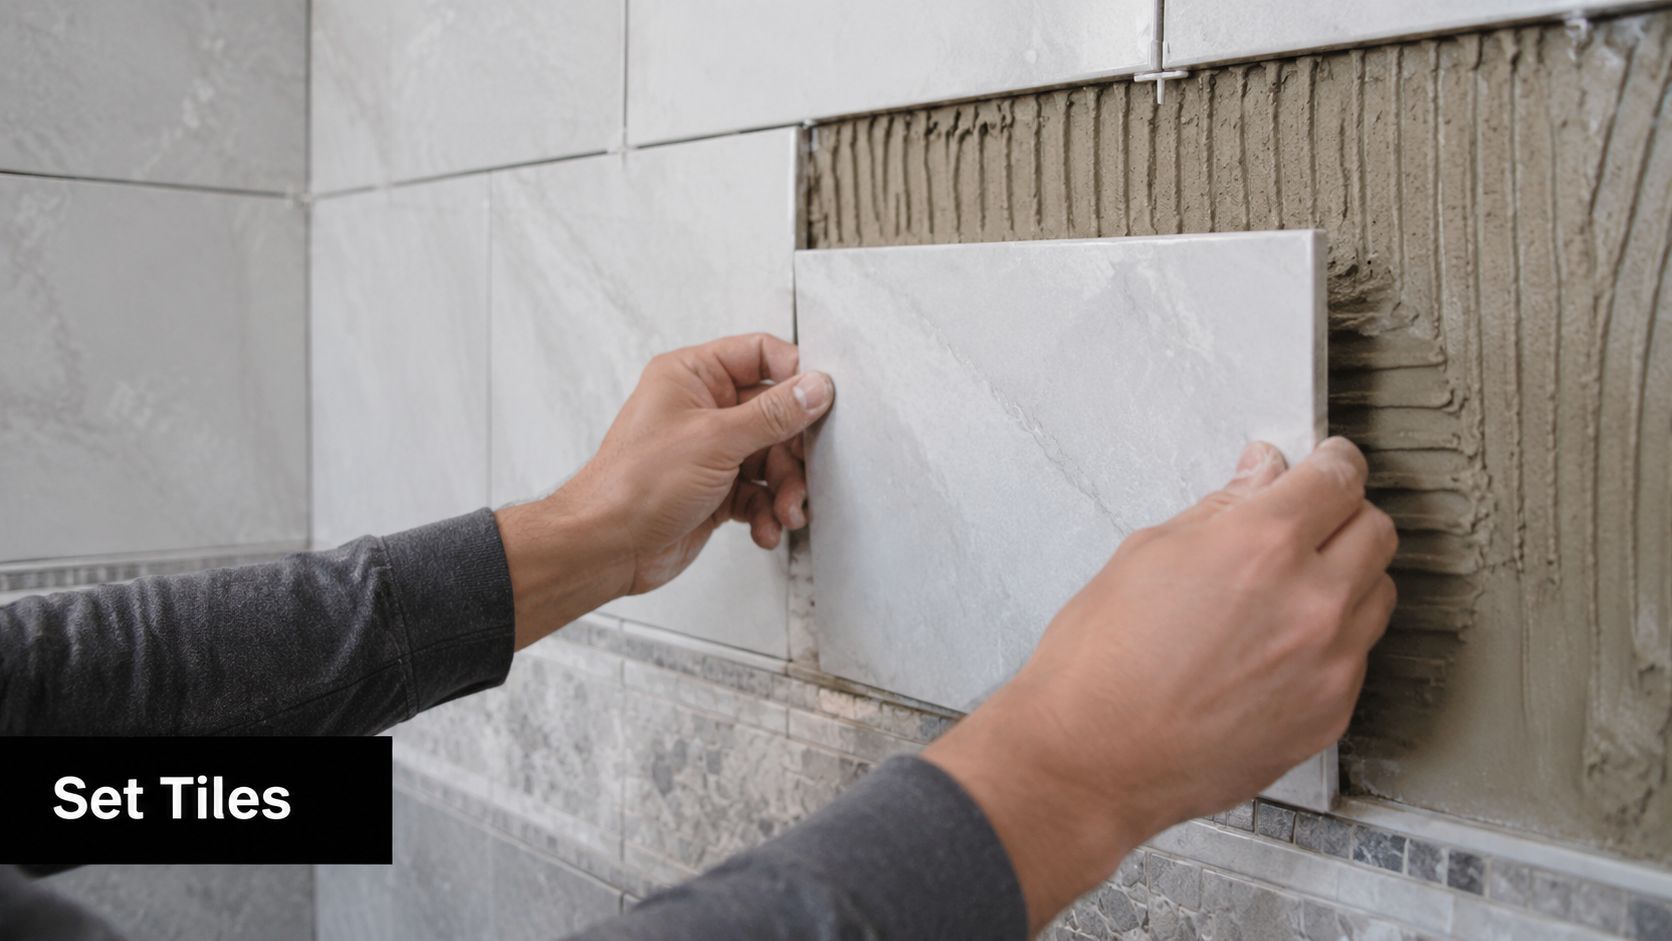
How to place each tile so it actually bonds

The tile has to be bedded properly, not just stuck on. Press it in, give it a slight twist, and check the first few pieces by lifting one back off if needed. You're looking for proper adhesive transfer, especially on porcelain and large-format tile.

Back-buttering helps when the tile back pattern or wall condition makes full contact less certain. It's a simple habit that prevents hollow spots and weak corners.

The biggest practical mistakes happen fast:

  • Over-spreading adhesive: the surface skins and the bond suffers.
  • Letting joints wander: one bad line multiplies across the wall.
  • Forcing a tile to correct a crooked wall: the face may look close, but the bedding will be inconsistent.

This video shows the kind of careful handwork wall tiling needs, especially around alignment and tile placement.

Large-format tiles on Melbourne walls

Large-format tile is where many bathroom wall jobs stop being forgiving. On a straight, well-prepared wall, it can look sharp and modern. On an older Melbourne wall with a belly, twist, or patched substrate, it exposes every flaw.

That's why set-out and substrate correction matter more with bigger tiles. A small ceramic can ride over slight inconsistency. A large porcelain tile won't. It will telegraph the defect, bridge a low area, or leave a void if the installer tries to cheat the wall with adhesive thickness.

For cuts around taps, outlets, windows, and niches, measure twice and cut with the finished edge in mind. Good wall jobs aren't judged only by the full tiles. They're judged by the cuts around the details.

Good tilers don't just install the field neatly. They make the awkward cuts look intentional.

If the room has sloping ceilings, angled walls, difficult niches, or premium large-format panels, that's often the point where a professional install makes more sense than learning on the wet wall of your own bathroom.

Applying Grout and Sealing for a Perfect Finish

A tiled wall can be set well and still be spoiled in the final stage. Grouting and sealing need patience, clean timing, and a clear understanding of where grout belongs and where it doesn't.

Grouting without ruining the joints

Wait until the tiles are properly set before you start. Then mix the grout to a smooth, workable consistency and apply it with a rubber float on an angle, forcing it firmly into the joints from more than one direction.

The cleanup matters as much as the application. Wipe too early and you drag grout back out of the lines. Wipe too aggressively and you wash out the face of the joint so it dries shallow and patchy.

A tidy routine works best:

  • Pack the joints fully: don't skim over them and hope the sponge fixes it.
  • Strike off diagonally: this helps avoid pulling grout from the gaps.
  • Use a well-wrung sponge: too much water weakens the finish and makes a mess of the joints.

If haze forms later, deal with it carefully. Don't panic and flood the wall. Most grout cleanup problems come from using too much water, too early.

Where grout must stop

Many DIY bathroom walls fail early at internal corners, wall-to-floor junctions, and the edges around fixtures. These are movement points. They should be sealed with a quality flexible silicone sealant, not filled with grout.

As noted earlier, grout in those areas will crack because the wall system moves. Once that line opens up, moisture has a path.

A simple division keeps the finish durable:

Area Use
Tile joints in the field Grout
Internal corners Flexible sealant
Around fixtures and changes of plane Flexible sealant

The neatest bathroom wall finish usually comes from restraint. Clean joints, clean silicone lines, and no attempt to grout every gap in sight.

Colour matching also matters. If the silicone clashes with the grout, the finish looks patched even when the detailing is correct. Professional tilers spend time here because this is the point the client stares at from close range.

Troubleshooting and When to Call a Registered Builder

Some bathroom wall problems are cosmetic. Others are warning signs that the system behind the tile isn't right.

Problems you can sometimes fix

Minor grout haze can often be cleaned up. A small low spot in a grout line can usually be repaired. A chipped edge at a trim may be improved if it's isolated and accessible.

Other issues are more serious:

  • Lippage: one tile sits proud of the next. This usually points to poor substrate prep or poor bedding.
  • Hollow-sounding tiles: often a sign of inadequate adhesive coverage or voids behind the tile.
  • Cracked corner joints: commonly caused by grout being used where flexible sealant should have been used.

Screenshot from https://melbournetilingservices.com.au

If a shower has angled planes or tricky drainage geometry, caution matters even more. Recent VBA data shows that 22% of bathroom leak complaints in 2024–2025 stemmed from improper tile-to-drain alignment in angled showers, which is exactly the kind of issue generic tutorials usually ignore.

Red flags that need a professional

If any of these apply, I'd stop treating the project as a casual DIY wall-tiling job:

  • The walls aren't straight or plumb: common in older Melbourne homes and hard to correct without proper prep work.
  • The shower area needs full wet-area compliance: membrane detailing, penetrations, and junctions can't be guessed.
  • You're using large-format tile or Kerlite: these materials demand better substrate control and handling.
  • The layout includes niches, windows, sloping ceilings, or awkward returns: the cutting and sequencing get technical quickly.

A registered builder earns their keep when the bathroom renovation needs coordination across trades, not just tile setting. That includes sheeting, waterproofing, plumbing points, screeding, electrical clearances, and final finish alignment. One practical option for homeowners dealing with failed sections or localised defects is to start with a tile repair assessment in Melbourne.

For full bathroom renovations, Melbourne Tiling Services P/L is one example of a registered builder-led contractor that handles tiling as part of the broader wet-area build sequence rather than as a standalone cosmetic trade.

If you're confident, organised, and working on a straightforward wall outside the highest-risk wet areas, some parts of the job are achievable. If the bathroom has movement, moisture risk, uneven walls, or premium finishes, professional help isn't overkill. It's good judgement.


If your bathroom wall project has moved beyond a simple DIY refresh and into full wet-area work, Melbourne Tiling Services P/L can help with bathroom renovations, waterproofing, substrate preparation, tile installation, and repair work across Melbourne. As registered builders, they coordinate the full process so the finished wall looks right and performs properly.

Bath Tile Installation: Melbourne’s Expert Guide 2026

You're probably at the stage where the bathroom still looks simple on paper. Pick a tile, book a tiler, get it done. In practice, bath tile installation in Melbourne is rarely just about the tile. The finish you see on day one only lasts if the work underneath it was handled properly.

As a Melbourne-based Registered Builder and master tiler, I can tell you the same thing I tell homeowners at quoting stage. The expensive mistakes in bathroom renovations usually happen before the first tile is laid. Poor substrate prep, rushed waterproofing, bad falls, and sloppy junction detailing create the leaks and failures that cost the most to fix later.

Table of Contents

Planning Your Bathroom Renovation and Tile Selection

The best bathroom renovations start with decisions that most homeowners can't see. Before you compare colours, you need to know whether you're doing a cosmetic re-tile, a full wet-area rebuild, or a broader renovation involving plumbing, waterproofing, fixtures and layout changes. That scope determines cost, sequencing, who needs to be involved, and whether a Registered Builder should manage the job.

Start with scope, not samples

If the room has movement, an old screed, patched surfaces, or a history of leaks, tile selection is not the first conversation. The first conversation is whether the existing base is suitable to tile over at all. In many Melbourne bathrooms, it isn't.

Use these early planning checks:

  • Confirm the wet-area condition: Look for cracked grout lines, drummy tiles, swollen skirtings, stained ceilings below, or movement around shower bases and corners.
  • Define the renovation level: A simple surface refresh is very different from a strip-out that includes screeding, waterproofing, plumbing adjustments and fixture replacement.
  • Decide who coordinates trades: Bathroom renovations often need a builder to sequence tilers, plumbers, electricians, carpenters and waterproofers properly.

Practical rule: If you're changing waterproofed areas, drainage, wall linings, or the bathroom layout, treat it as construction work first and decorating second.

Choose tile by performance first

Homeowners often choose on appearance, then try to force the room to suit the tile. That's backwards. Tile size, material and edge profile all affect labour, substrate tolerance and installation difficulty.

Here's a practical comparison.

Tile Type Durability Water Resistance Average Cost (Supply) Best For
Ceramic Good Good Lower entry point Budget-conscious wall and floor updates
Porcelain High High Mid to higher range Family bathrooms, floors, showers
Natural Stone Varies by stone Varies, often needs sealing Higher Premium bathrooms and feature areas
Glass Good in the right application High Varies Feature strips, splashbacks, decorative walls

For style ideas, many homeowners start by browsing modern bathroom tiling options and then narrow choices based on cleaning, slip resistance, edge detail and how much movement the room is likely to see.

Large-format tiles can look sharp, but they're less forgiving. If the walls are out, the floor has poor falls, or the corners aren't true, a large porcelain tile will expose every flaw. Natural stone gives a premium look, but it asks more from the installer and from the owner after handover.

An infographic titled Bathroom Renovation Planning and Tile Choices listing material types and key planning decisions.

Budget for the hidden work

A realistic budget needs to separate visible finishes from technical preparation. Australian renovation guides commonly report bathroom tiling costs of about A$50 to A$150+ per m² for standard ceramic or porcelain, with higher-end stone, mosaics or complex layouts rising above that range, according to Angi's tile installation cost guide.

That spread tells you something important. Labour intensity changes dramatically when the room needs levelling, screeding, tighter set-out, shower detailing, niche work, or difficult cuts around fixtures.

DIY can work for a dry, simple, low-risk area. A bathroom is different. Wet-area work has compliance implications, and once waterproofing, falls and penetrations are involved, cutting corners stops being a styling issue and becomes a defect issue.

The Critical Foundation Substrate Prep and Waterproofing

The success or failure of bath tile installation depends heavily on the preparation. A bathroom can look perfect at handover and still be heading for failure if the base under the tiles wasn't sound. Tiles don't waterproof a bathroom. They protect and finish the surface. The actual defence sits below them.

Why the substrate decides the outcome

Australian wet-area work is governed by AS 3740:2021, and in domestic bathrooms the membrane must be installed before tiles are laid. That's part of why compliant bathroom work in Victoria is primarily about waterproofing and substrate preparation, not just appearance, as outlined in this explanation of AS 3740:2021 and bathroom tile installation.

Before any membrane goes down, the substrate has to be checked for stability, flatness, cleanliness and movement risk. On renovation projects I regularly see old bathrooms with patched screeds, mixed materials, previous repair work and surfaces that were never flat to begin with. If you tile over that without correcting it, the room may still leak, pond, crack or produce lippage.

The common weak points are predictable:

  • Wall and floor junctions
  • Pipe penetrations
  • Shower recess transitions
  • Drain detailing
  • Changes between old and new substrates

An infographic detailing the eight steps of the essential substrate preparation and waterproofing process for construction.

What compliant waterproofing actually involves

A proper system starts with substrate prep, then primer where required by the product system, then membrane application, reinforcement and detailing at critical junctions, followed by curing and project-specific verification before tile setting starts. If you're comparing contractors, ask them to explain the sequence in plain language. If they skip straight to tile choice, that's a warning sign.

For homeowners reviewing system options, one useful reference point is this page on bathroom waterproofing systems, because it reflects the fact that membranes, primers, detailing and tile adhesives need to work as a coordinated assembly rather than as isolated products.

Waterproofing failures rarely begin in the middle of the wall. They begin at edges, joins, penetrations and places where one trade assumed another trade had handled it.

What goes wrong when this stage is rushed

The hardest defects to fix are the ones hidden behind finished surfaces. If a tiler lays over a substrate that still moves, you can get cracking, drummy tiles and broken grout lines. If falls are wrong, water sits where it shouldn't. If the membrane is poorly detailed, moisture finds the path.

Consumer advice often reduces prep to “make sure the surface is clean.” In real bathroom renovations, that's nowhere near enough. The room needs a base that is true, stable and ready for a membrane that remains continuous through corners, edges and penetrations.

A premium tile doesn't rescue poor prep. In fact, high-end porcelain, stone and large-format panels tend to punish bad prep more severely because they reveal unevenness and demand better coverage and tighter movement control.

Tile Layout Adhesives and Setting Your Tiles

Once the room is properly prepared, the visible craft begins. This is the stage most homeowners think of when they hear bath tile installation, but the method matters more than speed. A neat finish comes from planning cuts, controlling lines and maintaining coverage, not from pushing tiles onto adhesive as fast as possible.

A tiler wearing blue and white gloves carefully setting a grey ceramic tile onto a mortar-covered wall.

A clean layout prevents a messy finish

Professional workflow starts with a dry layout. That means working out where full tiles land, where cuts fall, how the room centres visually, and whether niche edges, corners and floor wastes will look balanced. Industry installation guidance commonly recommends laying full tiles first and leaving perimeter cuts until last, with movement gaps maintained at walls. Mortars typically need about 24 hours before grouting, and ordering about 15% extra tile is a sensible allowance for cuts, breakage and future spares, based on Daltile's floor tile installation guidance.

The room should dictate the set-out, not the packet size. In a small ensuite, for example, a centred wall can still produce ugly slivers at an external edge if nobody thought through the sightlines from the doorway.

Adhesive choice and coverage matter

The right adhesive depends on the tile, the substrate and where the tile is going. Porcelain, natural stone, vertical applications and large-format pieces all ask more from the adhesive system than a basic ceramic wall tile in a low-stress area.

A few things matter on every job:

  • Coverage: Hollow spots come from poor transfer and bad technique.
  • Trowel selection: Notch size needs to suit tile size and substrate condition.
  • Working time: Spread only what can be tiled while the adhesive remains workable.
  • Movement allowance: Hard-setting every edge tight against walls invites later stress.

If you're comparing products for porcelain, stone or large-format work, this overview of tiling materials for bathroom and renovation projects is a practical starting point.

Here's a short visual demonstration of controlled tile setting technique in action:

Set in control zones, not in a rush

Good installers don't try to cover the whole room in one go. They work in smaller zones, check plane continuously, and keep adjusting as they go. On walls, that helps maintain clean lines around niches and tapware. On floors, it keeps falls readable and prevents drifting joints.

If the set-out is right, the room feels calm. If the set-out is off, even expensive tiles look second-rate.

Large-format work often benefits from levelling clips and wedges, but those are aids, not solutions. They don't replace a flat substrate, proper adhesive coverage or a well-planned layout.

Grouting Sealing and Installing Fixtures

A lot of bathrooms are spoiled at the finish line. The tiles are straight, the cuts are clean, then the grout is inconsistent, the haze isn't removed properly, or fixtures are installed with too much pressure on fresh tilework. Finishing trades need restraint.

Grout is part of the system

Grout choice should suit the location and maintenance expectations. Cement-based grout remains common and works well when correctly mixed, packed and cleaned. Epoxy grout can be a sensible option in areas where stain resistance and lower absorption matter more, but it needs more skill to install neatly.

What matters most is technique:

  • Pack the joints fully: Shallow joints don't protect edges well and often look patchy.
  • Clean in stages: Overwashing weakens colour consistency and can drag material from the joint.
  • Watch the timing: Cleaning too early smears grout. Too late, and haze becomes much harder to remove.

In showers and splash-prone areas, movement joints and junctions should be handled appropriately rather than being treated like ordinary field joints. That's one of the details that separates durable work from work that only photographs well.

Seal where the material calls for it

Not every tile needs sealing. Porcelain often doesn't. Many natural stones and other porous finishes do. The key is matching the sealer to the material and applying it at the correct stage.

Homeowners often assume sealing makes a bathroom waterproof. It doesn't. Sealing helps protect porous tile or grout from staining and moisture absorption at the surface. It does not replace the waterproofing system beneath.

Fixtures must be installed without compromising the tilework

The final stage includes shower screens, tapware trim-outs, wastes, mirrors, accessories and silicone finishing. This is where coordinated bathroom renovations matter. The tiler, plumber, glazier and builder all affect the final outcome.

A few details deserve close attention:

  • Frameless shower screens: Fixings need to respect waterproofed zones and finished tile lines.
  • Tap penetrations: Escutcheons should sit cleanly without forcing uneven cuts or leaving messy gaps.
  • Floor wastes: The grate position should align with the tile layout and still allow proper drainage.
  • Silicone joints: Neat flexible joints at changes of plane matter for movement and appearance.

Melbourne Tiling Services P/L is one example of a contractor that handles bathroom renovations with coordinated tiling, waterproofing and fixture integration under Registered Builder oversight, which is often the cleanest path when several trades need to work in sequence.

Common Tiling Mistakes and Melbourne Regulations

The most expensive assumption in bathroom work is that tiling is just a finish trade. It isn't. In a wet area, tiling sits on top of construction decisions that affect durability, leak risk and compliance.

The mistakes I see most often

The failures are rarely mysterious. Most can be traced back to basic shortcuts.

A close-up view of white bathroom wall tiles showing a cracked corner and poor grouting work.

Common examples include:

  • Tiling over uncured waterproofing: That traps risk into the room before the finish is even complete.
  • Ignoring substrate movement: Cracks, hollow spots and lippage often start here.
  • Bad junction detailing: Corners, penetrations and waste areas are frequent failure points.
  • Chasing appearance over drainage: Nice tile lines don't help if water doesn't fall correctly to waste.
  • Using premium tiles to hide poor prep: Expensive material usually makes defects more obvious, not less.

A recognised failure mode is tiling over uncured or discontinuous waterproofing, especially at junctions and penetrations. Guidance tied to Australian wet-area practice notes that AS 3740 requires these areas to be systematically sealed and cured before tiling starts, as explained in this article on how bathroom tile is laid over waterproofed areas.

A bathroom can survive a dated colour scheme. It won't survive failed waterproofing for long.

Why builder oversight matters in bathroom renovations

Melbourne homeowners sometimes split a bathroom job between separate trades without anyone taking full responsibility for sequencing. That's where defects get born. The plumber assumes the substrate issue has been fixed. The waterproofer assumes the carpentry is final. The tiler assumes penetrations are complete. Nobody owns the junction between trades.

That's why many bathroom renovations benefit from Registered Builder oversight. A builder doesn't just hire people. A competent builder coordinates the order of work, checks whether the room is ready for each trade, and prevents one shortcut from being buried by the next layer.

The homeowner benefit is practical. You get one scope, one sequence and one accountable party managing the room as a wet-area build, not as a patchwork of individual tasks.

Bringing It All Together Your Bathroom Renovation Checklist

A lasting bathroom isn't built by starting with the prettiest tile. It's built by getting the hidden work right and then finishing it with care. This is the difference between a bathroom that still performs years later and one that starts showing defects far too early.

Use this checklist before you commit:

  • Scope the job properly: Re-tile, rebuild, or full renovation.
  • Match the tile to the room: Don't choose large-format or stone without checking substrate suitability.
  • Verify the base: Flatness, movement, falls and junction condition all matter.
  • Treat waterproofing as essential: The membrane system has to be complete before tiling.
  • Plan the layout: Good set-out prevents poor cuts and awkward visual balance.
  • Use the right adhesive and curing sequence: Don't rush grouting or traffic.
  • Finish carefully: Grout, seal where required, and install fixtures without compromising the tilework.
  • Use qualified trades: Bathroom renovations work best when a Registered Builder coordinates the room as one system.

If you're spending money anywhere, spend it on the work you won't see once the room is complete. That's what protects everything you will see every day.


If you're planning a bathroom renovation and want practical guidance on tile selection, waterproofing, layout, or full project coordination, Melbourne Tiling Services P/L handles bathroom tiling and renovation work across Melbourne with Registered Builder oversight.

Bathroom Renovations Caroline Springs

You're probably standing in a bathroom that still works, but only just. The shower leaks around the screen, the vanity never had enough storage, the tiles look tired, and every quote you've seen online feels either too vague or too good to be true. That's a common starting point for homeowners in Caroline Springs, especially when the bathroom has reached the point where patch repairs no longer make sense.

The good news is that a successful renovation isn't mysterious. It comes down to clear scope, realistic budgeting, proper sequencing, and using registered builders and licensed trades who understand Victorian compliance. In a suburb like Caroline Springs, where many homes are owner-occupied and upgrades are often driven by family needs, maintenance issues, and value-adding improvements, those practical decisions matter more than flashy finishes.

Table of Contents

Your Guide to Bathroom Renovations in Caroline Springs

Caroline Springs isn't a fringe pocket with a handful of homes. It's a substantial outer-western Melbourne growth suburb, with a population of 20,365 recorded in the 2021 Census, and bathroom upgrades here are usually shaped by practical household decisions rather than luxury-for-luxury's-sake. A useful local planning benchmark is around $10,000 for a mid-range project, which reflects the fact that many suburban renovations focus on better function, better storage, and solving wet-area issues without completely overcomplicating the layout, according to Melbourne-based renovation planning for Caroline Springs.

A woman stands in a bright, tiled bathroom considering potential renovation ideas for the space.

A bathroom renovation in Caroline Springs usually starts with one of three triggers. The room no longer suits the family. Water is getting where it shouldn't. Or the bathroom is dragging down the rest of an otherwise well-kept home. Each trigger points to a different scope, and getting that scope right early is what keeps the project efficient.

Start with function, not mood boards

The first job is to decide what the room must do better. That might mean a larger shower, more drawer storage, better lighting at the vanity, a wall-hung toilet to free up floor space, or a layout that gives you cleaner movement through the room.

If you start with tiles and tapware, you can end up dressing up a bad plan. If you start with movement, storage, and water containment, the design decisions become easier and more coherent.

  • Fix the daily frustration: Identify what annoys you now. Poor storage, hard-to-clean corners, weak ventilation, or a cramped shower all point to where money should go first.
  • Separate cosmetic from structural work: Replacing fittings is one thing. Moving plumbing points, changing walls, or rectifying leaks is a different job altogether.
  • Treat waterproofing as core scope: In bathrooms, hidden work matters more than decorative work.

Practical rule: If the bathroom has leak history, drummy tiles, mouldy corners, or movement around the shower base, plan for investigation before you commit to finishes.

What works in Caroline Springs homes

Many homes in Caroline Springs were built for family living, which means the best bathroom renovations often improve usability rather than chase trends. Keeping the plumbing layout broadly similar can control costs. Upgrading to better storage, larger mirrors, modern lighting, and a properly built shower often delivers more day-to-day value than a dramatic redesign.

For homeowners searching for bathroom renovations Caroline Springs, the right mindset is simple. Build for durability, compliance, and clean detailing first. The visual result follows from that.

Planning Your Budget What a Renovation Really Costs

Bathroom budgets go wrong when homeowners compare unlike jobs. A cosmetic refresh and a full strip-out aren't the same project, even if both end with new tiles and fixtures. The labour, risk, and hidden conditions are very different.

The broad context matters. For 2026 projections, a mainstream bathroom remodel is commonly priced between $8,000 and $45,000, with a national average around $16,500. The same source says most homeowners spend $29,000 to $50,000 on a primary bathroom renovation, and estimates a 4% to 6% year-on-year increase from 2025, based on 2026 bathroom remodelling cost projections. Those figures are broad, but they're useful because they show how quickly costs can shift once a project moves past simple replacement work.

What the broad market numbers actually mean

For a Caroline Springs project, budget pressure usually comes from five areas:

  1. Extent of demolition
  2. Plumbing changes
  3. Tile selection and tile size
  4. Waterproofing and substrate repairs
  5. Joinery and glazing choices

A room that keeps its existing layout will usually be simpler to price and manage. Once you move the shower, relocate the toilet, or discover damaged wall linings or flooring, the budget naturally expands because more trades and more compliance steps get involved.

Cheap quotes often leave out the parts of the job that only appear after demolition. That's where owners get caught. A realistic quote allows for the invisible work, not just the visible finish.

Sample budget breakdown for a mid-range project

The table below is a planning tool, not a fixed quote. It shows how costs are typically distributed across the main trades and work packages in a mid-range bathroom renovation.

Item / Trade Estimated Cost Range (AUD) % of Total Budget
Demolition and strip-out Qualitative, varies by scope Qualitative
Waste removal Qualitative, varies by site access and volume Qualitative
Plumbing rough-in and fit-off Qualitative, depends on fixture changes Qualitative
Electrical rough-in and fit-off Qualitative, depends on lighting and power changes Qualitative
Carpentry and substrate preparation Qualitative, depends on wall and floor condition Qualitative
Waterproofing Qualitative, core compliance cost Qualitative
Screeding and floor preparation Qualitative, depends on falls and levels Qualitative
Wall and floor tiling Qualitative, driven by tile type, size, and layout Qualitative
Shower screen and glazing Qualitative, framed vs frameless affects spend Qualitative
Vanity, basin, toilet, tapware and accessories Qualitative, product selection drives variation Qualitative
Painting, sealants and finishing Qualitative, final presentation cost Qualitative
Project management and coordination Qualitative, reflects scope and trade scheduling Qualitative

If you want a faster early-stage estimate before collecting full quotes, a bathroom renovation calculator for Melbourne projects can help you test different scopes.

Where to spend and where to save

Some line items deserve protection. Waterproofing, substrate preparation, good plumbing fit-off, and capable tiling are not where you trim the budget. If those fail, you pay twice.

Good saving opportunities usually sit in specification choices instead:

  • Vanities: Off-the-shelf can work well if dimensions suit the room.
  • Tapware: Choose a solid, serviceable range rather than chasing unusual finishes that can be harder to match later.
  • Tiles: A clean porcelain tile often gives better long-term value than chasing a high-maintenance feature finish.
  • Layout: Keeping waste points close to their current location can reduce unnecessary disruption.

The smartest budget is the one that protects the wet-area build-up first and styles the room second.

The 7 Stages of a Bathroom Renovation Project

A bathroom renovation feels chaotic when you only see individual trades coming and going. It feels manageable when you understand the sequence. Order matters because one stage sets up the next, and mistakes early on are expensive to correct once walls are closed and tiles are laid.

A simple visual summary helps before the detail.

An infographic illustrating the seven essential stages of a professional bathroom renovation project from planning to finishing.

What happens at each stage

1. Design and planning

Layout, fixtures, materials, and scope are locked in. Good planning also confirms what's staying, what's moving, and what level of investigation the room needs before demolition starts.

2. Demolition

The old bathroom is stripped carefully. Fixtures, tiles, sheet linings, shower screens, and damaged materials come out. This stage often reveals the actual condition of the room, including moisture damage, poor past repairs, or uneven substrates.

3. Structural work and rough-in

Carpenters, plumbers, and electricians do their hidden work here. Wall framing may be adjusted, plumbing points are moved or renewed, and electrical rough-ins are completed before walls are closed.

4. Sheeting and waterproofing

The room is lined and prepared for wet-area treatment. This stage is one of the most important in the whole project because it determines whether the finished bathroom can manage repeated moisture exposure without damaging the structure.

5. Screeding and tiling

The floor is set up with proper falls, then tiles are installed to the agreed layout. At this stage, quality trades make the room look precise. Tile set-out, cuts, grout joints, and fall lines all become visible.

A short walkthrough of the process can help if you haven't been through a renovation before.

6. Fit-off

The room starts looking like a bathroom again. Vanity, toilet, tapware, shower fittings, mirror, lighting, and accessories are installed, and trades return to complete final connections.

7. Final touches and handover

Sealants are finished, surfaces are cleaned, defects are checked, and the room is reviewed for completeness. This stage should never be rushed. Small finishing details are what separate a job that merely looks new from one that feels properly built.

Why waterproofing is the stage you can't afford to rush

In Australian wet areas, the technical requirement is clear. Bathroom renovations in Caroline Springs must comply with AS 3740, which requires waterproofing in shower recesses, across bathroom floors, and at wall and floor junctions in defined wet-area zones through a continuous membrane system, as outlined in the AS 3740 wet-area waterproofing reference.

That matters because bathrooms fail from behind the tile, not on the tile face. When membranes are missing, broken, badly sequenced, or poorly detailed around penetrations and junctions, moisture gets into substrates, framing, and screeds. The visible signs often show up much later as loose tiles, swollen skirtings, stained adjacent rooms, or mould smells.

  • Correct sequencing matters: The membrane must go onto a properly prepared substrate.
  • Penetrations matter: Mixers, outlets, wastes, and shower fittings all need proper detailing.
  • Falls matter: Waterproofing doesn't compensate for a floor that doesn't drain properly.

A bathroom can look flawless on handover day and still fail early if the waterproofing and falls weren't built correctly.

For bathroom renovations Caroline Springs homeowners often focus on layout and tile choice first. From a project management perspective, the safer order is waterproofing method, drainage detail, substrate condition, then finishes.

Why You Need Registered Builders and What Permits to Expect

The most overlooked part of a bathroom renovation in Victoria isn't style. It's compliance. That's where many online guides fall short. They treat the job like a shopping exercise when, in practice, a full renovation can involve regulated building work, waterproofing obligations, trade licensing, inspections, and documentation that affect future resale and defect risk.

Industry guidance points to a key gap in online advice. For bathroom renovations in Caroline Springs, a significant risk often sits in non-compliance, and Victorian regulations often require a registered builder for work beyond cosmetic updates where waterproofing, structural changes, and inspections become part of the job, as noted in this guidance on bathroom renovation compliance and expert FAQs.

An infographic titled Registered Builders and Permits guiding homeowners on construction compliance and building requirements.

Why registered builders matter in Victoria

A registered builder isn't just someone who can organise trades. They're responsible for managing work that must be carried out to the required standard, in the correct sequence, with the right subcontractors and documentation.

That matters in bathrooms because the room brings multiple trades together in a small footprint. Plumbing, electrical, carpentry, sheeting, waterproofing, tiling, glazing, and finishing all overlap. If one trade gets the sequencing wrong, the next trade inherits the problem.

A registered builder helps reduce that risk by managing:

  • Trade coordination: Plumbing rough-in can't clash with framing, and waterproofing can't be applied over poor preparation.
  • Compliance oversight: Wet-area work must align with applicable standards and approved methods.
  • Defect prevention: The builder sees the whole build-up, not just one trade's piece of it.

If you're comparing renovation teams, ask who takes responsibility for the full wet-area assembly. If nobody clearly owns that answer, that's a warning sign.

When permits and approvals can become part of the job

Not every bathroom renovation needs the same approvals. A straightforward replacement of fixtures and finishes is very different from a project that changes structure, alters walls, changes openings, or intersects with broader building work.

In practice, permit questions tend to appear when the project includes:

  • Structural changes: Altering walls, openings, or framing beyond simple replacement.
  • Major reconfiguration: Work that shifts the bathroom beyond like-for-like renovation.
  • Inspection-sensitive work: Jobs where waterproofing, building scope, or associated works need formal oversight.

A practical way to think about it is this. If the project is more than cosmetic, treat permit and builder registration questions as part of the planning stage, not as something to check after demolition.

For homeowners wanting more background on wet-area risk, waterproofing in Melbourne bathrooms and wet areas is worth reviewing before you finalise scope.

Compliance isn't a paperwork add-on. It shapes who should do the work, how the room is built, and what problems you avoid later.

One factual example of a provider in this space is Melbourne Tiling Services P/L, which operates as a Registered Unlimited Builder and coordinates bathroom renovations, waterproofing, tiling, shower screens, and related trades across Melbourne. That kind of builder-led model is useful on bathroom projects where sequencing and wet-area compliance are central.

Choosing Durable Materials and Finishes

A bathroom can look current on completion day and still age badly if the material choices were driven only by trend. The better approach is to choose finishes that suit repeated moisture, daily cleaning, and the way the room is used.

Where durability starts

Tiles do more than set the style. They affect cleaning, slip resistance, visual scale, and long-term maintenance. In many bathrooms, a good porcelain tile is the most balanced option because it's consistent, practical, and available in finishes that don't date quickly.

Large-format tiles can work especially well in contemporary bathrooms because they reduce grout lines and create a cleaner visual field. That doesn't automatically make them the right choice for every room. Small bathrooms with awkward corners, nib walls, or multiple penetrations sometimes need more careful set-out to avoid messy cuts.

If you're comparing tile options, this guide to porcelain bathroom tiles and their practical uses is a useful starting point.

  • Porcelain tiles: Strong all-round choice for floors and walls.
  • Large-format panels or tiles: Cleaner look, fewer grout joints, more demanding installation.
  • Feature tiles: Best used sparingly so the room doesn't date too quickly.

Finishes that still work years later

The longest-lasting bathrooms usually rely on a restrained material palette. One floor tile, one main wall tile, simple joinery, and a small number of accents often produce a sharper result than mixing too many statements.

Frameless shower screens are a good example of form and function working together. They open up the room visually and remove the heavier framing that tends to collect grime. That said, they need accurate walls, careful set-out, and good hardware. If the room or budget doesn't support that, a simpler screen can still perform well.

Vanities should be selected with cleaning and storage in mind, not just appearance. Drawers generally outperform cupboards for daily access. Wall-hung vanities make the floor easier to clean and can make smaller rooms feel less crowded.

Good material selection is less about luxury and more about reducing the number of surfaces that trap moisture, soap residue, and clutter.

A few practical selection rules help:

  • Choose timeless tapware colours: Standard finishes are usually easier to service and coordinate later.
  • Use lighting in layers: Task lighting at the mirror, general ceiling lighting, and shower lighting all play different roles.
  • Keep grout practical: Very light grout can look sharp at handover but may require more maintenance in heavy-use bathrooms.
  • Think about edge details: Niches, trims, hob lines, and transitions need to be easy to clean and easy to waterproof.

The best finish schedule is the one that still feels sensible after years of steam, cleaning, and family traffic.

Avoiding Common Renovation Pitfalls and Costly Mistakes

Most bathroom problems don't come from one dramatic error. They come from a series of small decisions that seemed harmless at the time. A vague quote. A rushed waterproofing stage. A layout that looked fine on paper but doesn't work with a real person using the room every day.

Three mistakes that keep showing up

The first is waterproofing failure. A homeowner chooses a lower quote, demolition happens quickly, tiling goes in, and everything looks finished. Months later, moisture shows up in the adjoining room, tiles begin to sound hollow, or the shower never quite smells dry. The problem wasn't the tiles. It was the hidden build-up.

The second is budget blowout through unclear scope. An owner thinks they've approved a renovation, but the quote didn't clearly separate product supply, demolition surprises, substrate repair, or fixture upgrades. Every site discovery becomes a variation because the project was never properly defined.

The third is poor layout judgment. A room can be expensive and still awkward. The vanity drawer hits the toilet. The shower opening is too tight. The mirror lighting throws shadows onto the face. None of these are catastrophic, but together they make the room feel wrong every day.

A simple prevention checklist helps:

  • Before signing anything: Confirm exactly what is included in demolition, preparation, waterproofing, tiling, fit-off, and waste removal.
  • Before ordering finishes: Check final set-out against actual room dimensions, not showroom assumptions.
  • Before waterproofing starts: Make sure all substrate repairs, penetrations, and falls are resolved.
  • Before handover: Inspect sealant lines, fixture alignment, drainage behaviour, and tile finish in natural and artificial light.

If the quote is light on detail, expect heavy conversations later.

Bathroom renovations Caroline Springs homeowners are happiest with usually have one thing in common. The team solved problems on paper before trying to solve them on site.

Start Your Caroline Springs Bathroom Renovation Today

A good bathroom renovation isn't just about replacing old tiles with new ones. It's about making the room work better, building it to the right standard, and avoiding the kind of shortcuts that create leaks, rework, and stress later. If you get the scope right, protect the wet-area work, and engage registered builders and the right licensed trades, the project becomes much more predictable.

That's the key advantage of approaching bathroom renovations Caroline Springs the way a project manager would. Budget first. Scope clearly. Confirm compliance early. Then choose finishes that suit how the room will be used.

Screenshot from https://melbournetilingservices.com.au

If you're still deciding between a cosmetic update and a full renovation, start by listing what must change and what can stay. That one exercise usually tells you whether the budget should go into layout improvement, leak rectification, new fixtures, or a complete rebuild of the wet area.

The next step should be practical. Get your likely scope priced properly, compare inclusions carefully, and ask direct questions about waterproofing, sequencing, and who is responsible for the whole job. That's how you avoid expensive surprises and end up with a bathroom that looks right because it was built right.


If you're ready to explore options for your home, Melbourne Tiling Services P/L offers bathroom renovation support including quotes, design input, waterproofing, tiling, and project coordination for Melbourne homeowners.

Shower Screen Installation Cost: 2026 Melbourne Guide

In Melbourne, a standard frameless shower screen installation usually sits between AUD 1,200 and AUD 3,500, and the final figure changes with glass thickness, hardware, labour, waterproofing, and how complex the bathroom is. If you're planning a renovation, that shower screen price only makes sense when you look at it as part of the full bathroom build, not as a stand-alone product.

That's where many homeowners get caught. They start by pricing a nice piece of glass, then later discover the real job includes site measure, tile tolerances, waterproofing interfaces, hardware choice, compliance, and the sequencing of trades. By the time the screen goes in, the room should already be built correctly for it.

A shower screen is one of the last visible items in a bathroom renovation, but it depends on almost everything that came before it. If the walls are out, the tiles aren't plumb, or the waterproofing hasn't been handled properly, the glazier inherits a problem and you inherit a bigger invoice.

Table of Contents

Planning Your Bathroom Renovation Budget

Homeowners typically begin in the same place. They're standing in an older bathroom, looking at dated aluminium frames, tired silicone, and tiles that have seen better years. They search for shower screen installation cost and get pages of pricing that don't match what local trades are quoting.

That confusion isn't your fault. A lot of online content still leans on US pricing, and that's a poor guide for a Melbourne renovation. As noted by This Old House's shower glass door cost guide, much of the content in circulation cites US averages of $530 to $1,390, while Victorian homeowners face different labour rates, Australian standards, and the added cost of bundling shower screens with tiling and waterproofing. The same source notes that homeowners here can underestimate total costs by 50%+ when they treat the screen as an isolated purchase.

A person in a green hoodie stands in a modern bathroom looking at a glass shower enclosure.

The practical way to budget is to start with the whole bathroom, then place the shower screen inside that scope. If you're comparing options early, a bathroom renovation calculator for Melbourne projects is a better starting point than a generic product page because it forces you to consider waterproofing, tiling, labour coordination, and finish level together.

Why isolated pricing causes trouble

A shower screen doesn't sit on its own. It touches wall straightness, floor level, tile layout, hob detail, drainage, and the condition of the substrate behind the tiles.

If one of those elements is off, the screen may still be installable, but the job becomes slower and more delicate. That extra labour often surprises owners who thought they were just buying glass and hinges.

Practical rule: Budget for the screen after you've decided the renovation scope, not before. In bathrooms, sequence drives cost.

What a realistic budget mindset looks like

A homeowner planning a basic refresh may still choose a simpler screen to control cost. A homeowner doing a full ensuite renovation usually gets better value by coordinating the screen with the tiling and waterproofing package from the start.

That's the key trade-off. The cheaper decision at the product stage can become the expensive decision once rework, delays, and compliance are added to the project.

Typical Shower Screen Installation Costs in Melbourne

If you want a clean starting point, use local ranges rather than overseas examples. In Melbourne, a premium frameless shower screen installation typically ranges from AUD 1,200 to AUD 3,500, with cost influenced by 10 to 12 mm tempered safety glass required by AS/NZS 1288 and certified glazier labour at AUD 80 to 120 per hour, according to HomeAdvisor's shower door installation cost reference.

What most homeowners actually pay for

There isn't one universal number because “shower screen” covers very different products. A compact replacement with standard hardware is a different job from a custom frameless panel with premium fittings and exact tile alignment.

The table below is the most practical way to compare options.

Screen Type Typical Cost Range (AUD) Pros Cons
Framed 800 to 1,500 Lowest upfront cost, more forgiving on uneven walls, easier to source Bulkier look, more frame lines to clean, less suited to high-end bathroom renovations
Semi-frameless Around 2,100 median for common installs Good balance of cost and appearance, lighter visual feel, suits many standard bathrooms Still has visible framing, less seamless than full frameless
Frameless 1,200 to 3,500 Premium finish, open look, strong resale appeal, works well in modern bathrooms Highest cost, relies on accurate walls and tiles, hardware quality matters more

Choosing between framed, semi-frameless, and frameless

A lot of homeowners start out wanting frameless, then pull back when they see the top end of the range. That's reasonable. Frameless looks excellent, but it only performs properly when the bathroom has been prepared to suit it.

Semi-frameless is often the middle ground that makes sense. It gives a cleaner result than framed, but it usually places less pressure on the room being perfectly true.

You can also compare local style and product options through Melbourne shower screen installation services, especially if you're still deciding which format suits your renovation scope.

Frameless is usually the right choice when the rest of the bathroom is being rebuilt properly. It's often the wrong place to spend if the room around it is still compromised.

For budget-focused projects, framed screens still have a place. They can be practical in rental properties, basic updates, or where the goal is to replace a failing enclosure without rebuilding the room.

For a full bathroom renovation, though, most owners want the cleaner line and lighter feel of semi-frameless or frameless. The screen becomes part of the design, not just a barrier to keep water in.

Deconstructing Your Quote Materials vs Labour

A proper quote should tell you more than the total. It should show where the money is going and why. That's how you compare one proposal against another without getting fooled by a low headline number.

A refreshing green drink with ice cubes and lemon slices beside a technical drawing diagram.

In Melbourne, frameless shower screen labour can range from $100 to $276 per task, and bundling installation with waterproofing membranes and self-levelling screeds through a registered builder can reduce total outlay by 10 to 15% by coordinating trades and avoiding rework, according to Airtasker's shower screen installation cost guide.

What you are paying for in materials

The glass itself is only the starting point. In a frameless setup, thicker toughened safety glass, cut-outs, polished edges, and exact sizing all push the materials cost upward.

Then there's hardware. Hinges, brackets, channels, handles, and finish colour all matter. Cheaper hardware can look fine on day one and start showing play, corrosion, or poor door movement later.

A better quote usually spells out items such as:

  • Glass specification. Thickness, safety compliance, edge finish, and whether the panels are standard or custom.
  • Hardware finish. Chrome, matte black, or another finish that matches tapware and bathroom fittings.
  • Sealing components. Channels, silicone, and any junction detail needed where the screen meets tile, hob, or wall.

What labour should include

Labour is where experience shows. Good installers don't just arrive and mount the panel. They check dimensions, wall condition, tile plumb, fixing points, and clearances before they start drilling.

For integrated bathroom renovations, labour may also include site protection, coordination with the tiler or waterproofer, and making sure the screen sits correctly against finished surfaces. That's why bundled jobs often cost less overall than separately managed trades.

Cheap labour usually means one of two things. The scope is missing important steps, or someone else will be asked to fix the result later.

A decent quote should account for measuring, handling heavy glass, installation, sealant work, and cleanup. If those items are vague, ask for them in writing.

Later in the process, homeowners often find it useful to watch a clear installation overview before signing off on the scope:

Key Factors That Influence Your Final Cost

Two shower screens can look similar in photos and land at very different prices on a quote. The difference usually comes down to hidden complexity, not sales padding.

A flowchart infographic titled Factors Affecting Shower Cost, listing glass type, hardware quality, and layout complexity.

The biggest cost drivers

The first driver is glass specification. Frameless designs rely on thicker glass and tighter tolerances. If the opening is non-standard, the panel often needs custom fabrication rather than a stock size.

The second driver is hardware quality. Better hinges and brackets cost more, but they also handle heavy glass better and hold alignment longer. In a bathroom, that matters.

The third is layout complexity. A straight screen on square walls is one thing. A screen that has to work around an awkward nib wall, a sloping ceiling, a recessed channel, or a tight door swing becomes a more exact installation.

Here's the hierarchy most homeowners should keep in mind:

  1. Custom sizing and shape
    Custom panels, unusual returns, and non-standard openings generally move the quote faster than any cosmetic choice.

  2. Bathroom condition before the screen arrives
    Out-of-plumb walls, bowed substrates, poor tile cuts, and inconsistent floor level all make the glazier's work harder.

  3. Finish selections
    Premium hardware finishes and higher-spec components lift cost, but they're often easier to justify in a quality renovation because they stay visible every day.

What works and what usually doesn't

What works is designing the shower screen with the bathroom, not after it. If the tiler knows the screen detail in advance, grout lines, falls, hob size, and wall build-up can all support a clean fit.

What usually doesn't work is trying to “make frameless fit” into a room that wasn't set up for frameless. That's when installers start compensating for poor surfaces, and the final result can still look compromised.

A shower screen exposes errors. Frames can hide some of them. Frameless rarely does.

Another practical point is restraint. Not every bathroom needs multiple panels, expensive coatings, or boutique fittings. In many homes, a standard layout with solid hardware gives the best result for the money.

Sample Quote Scenarios for Melbourne Homes

The easiest way to understand shower screen installation cost is to look at real-world renovation patterns. Not exact invoices. The shape of the job.

Scenario one simple replacement

A small apartment bathroom in Kew has an old framed screen that's leaking at the corners and looks tired. The owner isn't rebuilding the whole room. They want a neat replacement that improves appearance without opening up the walls.

A framed or semi-frameless option usually makes sense in this context. The lower-cost path is framed, commonly sitting around AUD 800 to AUD 1,500 based on the verified Melbourne and Victorian ranges already noted earlier in this article. It suits a like-for-like replacement because it's more forgiving if the bathroom isn't perfectly square.

Typical quote shape:

  • Supply of standard screen with basic hardware
  • Removal of old enclosure
  • Installation and resealing
  • Minor making-good where practical

The mistake here is forcing a premium frameless screen into an older bathroom with existing tiles and limited rectification scope. The product can be good and still be the wrong fit for the room.

Scenario two full ensuite renovation

A family home in Highett is doing a complete ensuite renovation. The walls are being rebuilt, waterproofing is redone, large-format porcelain is going in, and the owners want a custom frameless screen in a dark hardware finish.

This is exactly the type of project where a frameless screen earns its keep. The room is being prepared correctly, so the screen isn't trying to solve existing defects. Because the bathroom renovation is integrated, the builder can coordinate the waterproofing, screeding, tiling, and final glass measure in the right order.

The total bathroom spend matters more than the isolated screen number here. Homeowners who focus only on the cost of glass usually miss the value in sequencing and avoiding rework.

Scenario three architectural feature

A Brighton new build has a larger shower zone, more open space, and a strong design brief. The screen is no longer just a practical divider. It's a visible architectural element in the bathroom.

This kind of job often pushes toward the upper end of the local frameless range because the design asks more of the materials and the installation. The panel spans are larger, the visual lines matter more, and the tolerance for imperfect alignment is lower.

A premium result here usually depends on three things:

  • Early detailing with the bathroom design
  • High-grade hardware that suits heavier glass
  • An installer working from true surfaces, not patched ones

The common thread across all three scenarios is simple. The right screen is the one that matches the condition of the bathroom and the scope of the renovation, not the one with the best showroom photo.

Compliance Timelines and The Role of a Registered Builder

A shower screen is fitted late in the job, but compliance starts much earlier. If the waterproofing, substrate prep, plumbing positions, and tiling sequence aren't managed properly, the shower screen stage becomes slower, riskier, and more expensive.

In Victoria, shower screen installation costs rose 18% annually from 2022 to 2025, driven by standards including AS 3740 for waterproofing, and those compliance requirements add 10 to 15% to labour fees because certified installers are needed, according to Wellfor's 2025 shower door installation cost breakdown.

A construction worker uses a green level to ensure a glass shower screen is perfectly vertical.

Why timing matters

The screen installer should be arriving to a bathroom that is ready, dry, tiled, and dimensionally reliable. If waterproofing certificates are unclear, tile set-out hasn't considered fixing points, or wall lines are inconsistent, everyone starts improvising.

That's when jobs drift. The glazier delays. The owner waits. Another trade gets called back. Small sequencing mistakes create expensive friction.

For homeowners dealing with renovation paperwork, waterproofing records and certification matter as much as the visible finish. If you're unsure what should be documented in Victoria, it helps to review a waterproofing compliance certificate guide for Victorian bathroom works.

Why registered builder coordination saves money

A registered builder brings order to the sequence. The builder doesn't just appoint trades. They manage handover points between waterproofing, screeding, tiling, plumbing, and final screen installation.

That matters because shower screens rely on all of those earlier stages. A registered builder can catch issues before the glass is measured, not after.

Good bathroom renovations are coordinated backwards from the finish. If the final screen needs straight lines and clean fixing points, the builder has to protect that outcome from day one.

Trying to run separate trades yourself can work on a very simple job. On anything more substantial, it often creates overlap, uncertainty, and avoidable cost.

How to Hire the Right Installer and Save Money

The cheapest quote isn't always the cheapest job. If the installer doesn't understand how the screen interacts with waterproofing, tile tolerances, and compliance, you can save at the front and pay later.

Australia's BCA and NCC-related waterproofing obligations are often missed in basic online pricing. As noted in Horow's 2025 installation cost guide, compliance items tied to strict mandates can add 20 to 35% or $400 to $1,200 to base costs for certificates and leak-testing. That's why cutting corners on who manages the work can be expensive.

A shortlist that protects your budget

When you speak to installers or builders, ask for the basics in writing:

  • Registration and insurance. If bathroom renovations are involved, confirm they're appropriately registered and insured for the scope.
  • A detailed written quote. You want materials, labour, inclusions, and exclusions clearly listed.
  • Recent Melbourne bathroom work. Not generic gallery photos. Recent work in homes similar to yours.
  • Trade coordination plan. Ask who handles waterproofing, tiling, measurements, and final installation timing.

Where to save and where not to

There are sensible ways to reduce shower screen installation cost without lowering the standard of the bathroom.

  • Keep the layout standard if you can. Straight runs and standard panel sizes are usually easier to price and install.
  • Spend on preparation. Plumb walls and good tile work make every later trade more efficient.
  • Avoid bargain hardware in wet areas. It's touched daily and carries the stress of heavy glass.
  • Bundle works under one manager when the bathroom is being fully renovated. That usually prevents call-backs and mismatch between trades.

A good installer protects the bathroom. A good registered builder protects the whole sequence.


If you're planning a bathroom renovation and want a realistic view of shower screen installation cost in Melbourne, Melbourne Tiling Services P/L can help you price the full project properly. Their team handles bathroom renovations, waterproofing, tiling, screeding, and frameless shower screens as an integrated build, which is the safest way to avoid leaks, delays, and expensive rework.