
You've bought a shower waterproofing kit, cleared the bathroom, and watched enough installation videos to feel ready. Then the practical questions start: Is the floor falling towards the waste correctly? How high must the membrane travel up the wall? What happens around the mixer, niche, hob and floor waste? A neat coat of membrane can still fail inspection if those details don't form a continuous, compliant system.
In Melbourne bathroom renovations, waterproofing problems rarely announce themselves immediately. Water can sit behind tiles, move through an unsealed junction or escape around a penetration before staining appears in the ceiling below. The right kit helps, but product selection is only one part of the work. Substrate preparation, drainage, movement detailing, curing, testing and qualified installation determine whether the finished shower performs as intended.
Table of Contents
- Understanding Shower Waterproofing Kit Options
- Surface Preparation Requirements
- Applying Your Waterproofing Membrane
- Flood Testing and Curing Verification
- When a Kit Is Not Enough
- Making the Right Choice for Your Renovation
Understanding Shower Waterproofing Kit Options
A homeowner in an older Melbourne home may have a timber floor, uneven masonry walls, a new linear waste and a shower niche added during the renovation. A liquid membrane kit may suit some of those surfaces, while a sheet system or preformed base may provide a more controlled solution elsewhere. The mistake is choosing the product before understanding the construction beneath it.
The National Construction Code requires the shower floor to be waterproof, the shower walls to be waterproof to at least 1800 mm above the floor substrate, and shower-area junctions and penetrations to be waterproof. The NCC housing provisions also recognise four compliant construction options for enclosed showers, a stepdown, hob, level threshold or preformed shower base. These requirements mean a kit must support the complete shower geometry, not merely cover a flat rectangle. You can review the current NCC wet-area waterproofing provisions when checking a renovation detail.
Three common system families
Liquid-applied membrane kits use a roller, brush or trowel to form a continuous coating over the substrate. They're useful around irregular corners, recessed shelves, pipe penetrations and awkward wall shapes because the installer can form the waterproofing around the geometry. Their weakness is application control. The membrane must be applied at the manufacturer's specified coverage and thickness, with no pinholes, thin areas, puddles or unsealed transitions.
Sheet membrane kits provide a manufactured layer with consistent material thickness. They work well on sound, flat substrates and can make coverage easier to inspect visually. The installer still has to seal every overlap, corner, drain connection and penetration correctly. A sheet laid over a hump, trapped air pocket or poorly treated joint can create a failure even though the membrane itself is sound.
Cementitious systems bond strongly to suitable masonry and mineral substrates. They can be practical in some concrete or blockwork showers, but they're less forgiving where the structure moves or where junctions need flexible treatment. The product's compatibility with the substrate and tile adhesive must be confirmed before installation.
| Kit Type | Best For | Key Limitation |
|---|---|---|
| Liquid-applied membrane | Irregular layouts, niches and detailed retrofits | Requires disciplined coverage and drying |
| Sheet membrane | Flat, stable substrates and controlled system installations | Seams, corners and penetrations need precise sealing |
| Cementitious waterproofing | Suitable masonry and mineral substrates | Less tolerant of movement and flexible junctions |
The finished floor matters too. A waterproof membrane won't correct a badly designed or poorly formed shower base. If you're comparing tile finishes, guidance on slip-resistant bathroom stone can help you consider surface safety alongside waterproofing and drainage.
For Melbourne renovations, the useful question isn't “Which kit is easiest?” It's “Which complete system matches this substrate, shower configuration and compliance pathway?” The shower waterproofing membrane installation guidance is useful for seeing how membrane selection connects with junctions, wastes and the final tiled assembly.
Surface Preparation Requirements
Most waterproofing failures begin before the membrane is opened. Dust, laitance, loose paint, damp plasterboard, movement cracks and an incorrect floor fall can undermine a good product. Membrane application only works when the substrate is stable, clean, dry or suitably conditioned for the product, and ready to receive a continuous waterproof layer.
Start by checking the shower floor and waste position. Australian guidance describes a continuous fall to the waste of at least 1:80 and no steeper than 1:50, which equals 12.5 mm to 20 mm fall per metre. Those limits are stated in industry guidance on wet-area waterproofing and AS 3740. A membrane can follow the existing surface, but it won't turn a flat floor into a draining floor or rescue a depression where water remains around the waste.
Assessing the substrate
A liquid membrane can accommodate complex shapes, but it still needs a firm and properly prepared base. Repair holes, voids and cracks with compatible materials, remove powdery surfaces, and abrade or strip contaminants that could prevent adhesion. Primers aren't interchangeable. Porous cement sheet, fibre-cement board, concrete, plasterboard and repaired surfaces may each require a different preparation method, so follow the selected system's technical data rather than applying a universal primer.
A sheet membrane demands even more attention to flatness. Ridges can prevent full contact, while hollows may leave unsupported areas beneath the membrane or create difficulty at overlaps. Cementitious products generally suit mineral substrates more naturally, but they still need clean, sound surfaces and correctly treated joints.
A detailed guide to substrate preparation before waterproofing proves more useful than a generic “clean the wall” instruction. Preparation includes checking board fixing, confirming that the waste flange or bonding surface is compatible, and ensuring the finished shower profile matches the chosen drain and threshold arrangement.
Junctions need a planned detail
The shower wall height must be measured from the floor substrate, not from the eventual tile surface. The NCC requires shower walls to be waterproofed to at least 1800 mm above the floor substrate, and wall junctions within the shower area need waterproof treatment extending at least 40 mm on either side of the junction under the relevant housing provisions. The NCC 2022 waterproofing provisions set out the extent that the installed system needs to achieve.
Movement joints require particular care. Bonded membrane systems use bond breakers at relevant wall-to-wall and wall-to-floor movement joints so the waterproof layer can accommodate movement without being forced to bridge a joint rigidly. Sealant, reinforcing tape, fabric and preformed corners must be compatible with the selected membrane. Mixing components from unrelated systems can create adhesion and warranty problems.
Before membrane work begins, check every penetration. Mixer bodies, shower outlets, taps, niches, benches, screens and wastes all interrupt the substrate. If the installer can't identify how each opening will be sealed, the preparation isn't complete.
Applying Your Waterproofing Membrane
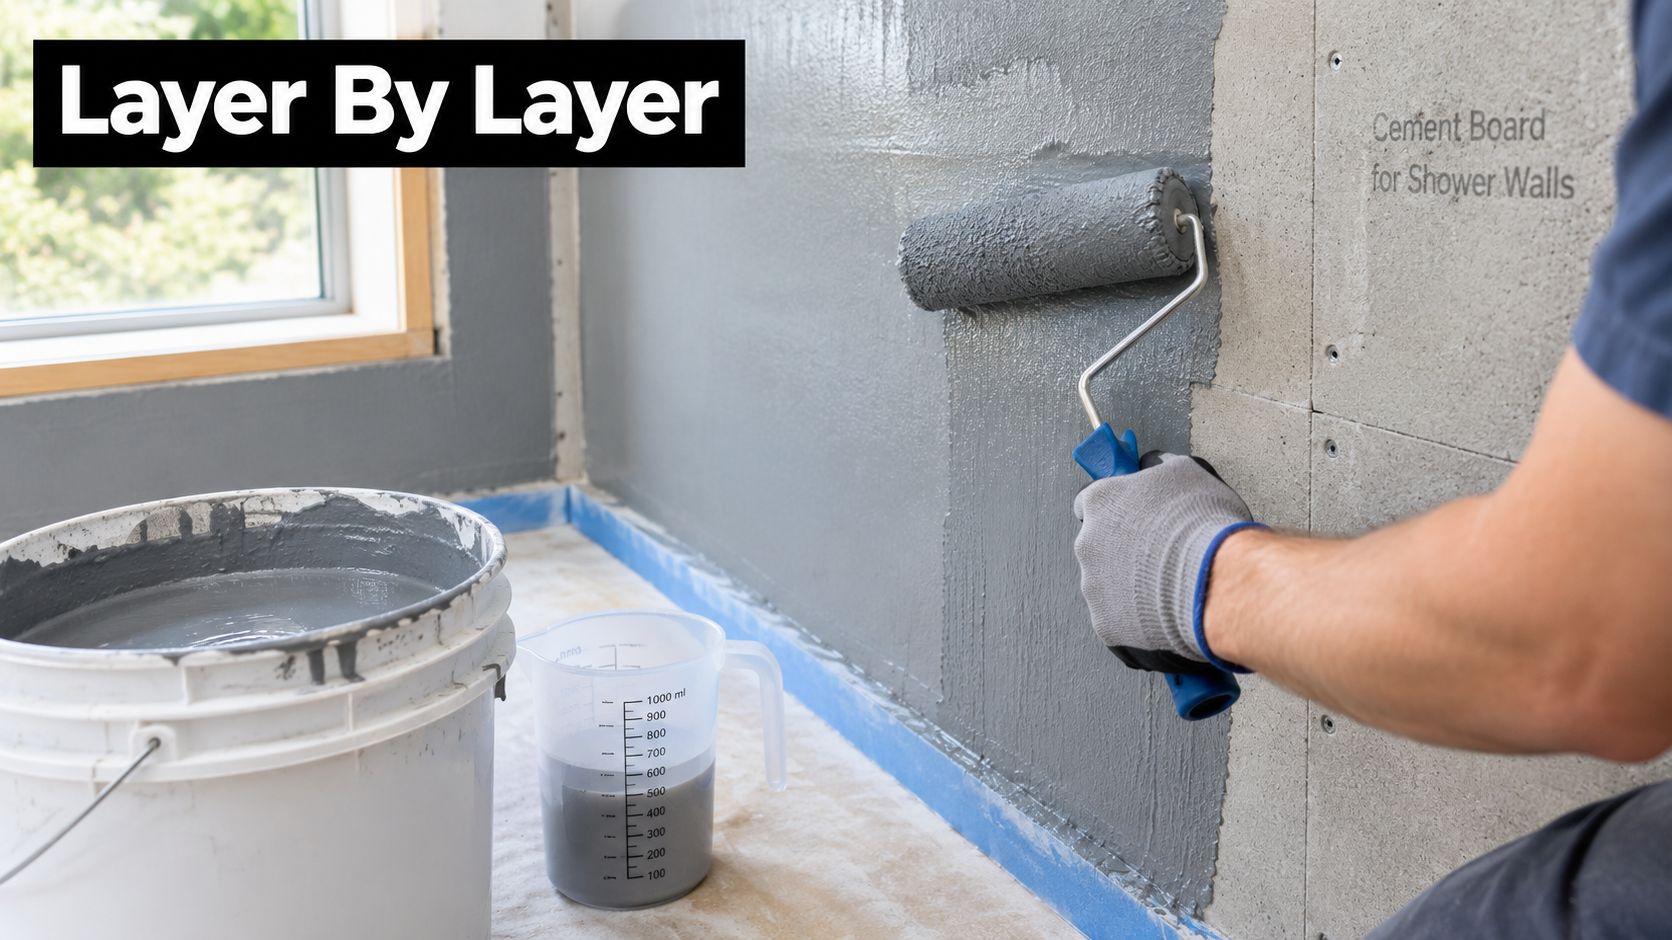
Liquid-applied systems are common in bathroom renovations because they can follow corners, hobs, niches and irregular wall profiles. They're also easy to apply badly. The reliable method is controlled and methodical, not a quick coat rolled across the visible wall.
Begin with the product documentation. Confirm the approved substrate, primer, mixing requirements, recoat conditions, coverage rate, drying time and tile adhesive compatibility. Don't alter the mixing ratio to make a thick product easier to spread, and don't thin it unless the manufacturer expressly allows it. A membrane that feels easier to roll may finish below the required dry film performance.
Work from details to broad surfaces
A practical sequence is:
- Prime the prepared substrate. Allow the primer to dry as specified. Keep dust, foot traffic and water away from the surface during this stage.
- Treat corners and junctions first. Apply the compatible reinforcing fabric, bond breaker or preformed corner detail at wall-to-wall and wall-to-floor transitions. Press it firmly into the wet membrane or approved bedding compound without leaving wrinkles or air pockets.
- Seal penetrations. Use the system's collars, reinforcing pieces or approved sealant around wastes, pipes and mixer penetrations. A brush coat around a pipe is not automatically a compliant penetration detail.
- Coat the floor and walls. Apply even coats across manageable sections, maintaining the specified coverage. Avoid working a partially dried membrane until it rolls or brushes smoothly again.
- Build the required height. Continue the shower-wall waterproofing to at least 1800 mm above the floor substrate, as required by the NCC. Marking the height before starting prevents an attractive but underspecified finish.
- Inspect between coats. Look for pinholes, fish eyes, roller holidays, uncovered corners and areas where the membrane has pooled or pulled away from the substrate.
Practical rule: Treat every change in plane, opening and material transition as a separate waterproofing detail, not as an area that will be fixed by the next broad coat.
Fabric reinforcement is valuable where the manufacturer specifies it, particularly at movement-prone transitions and awkward corners. It must be fully embedded and compatible with the membrane. Wrinkled fabric can create voids, while a dry strip placed over an already cured surface may not bond as intended.
Maintain clean working conditions. Keep the roller loaded enough to spread the product evenly, but don't chase a disappearing edge until the film becomes too thin. Work in sections that can be completed while the membrane remains workable, and protect the coated surface from dust and trades moving through the room.
Let the system cure before tiling
Curing depends on the membrane, ambient temperature, humidity, ventilation, substrate absorbency and applied thickness. Melbourne winter conditions can slow the process, especially in an enclosed bathroom with limited airflow. A surface that feels dry to the touch may not have cured through its full film.
Before tiling, confirm that the membrane has reached the manufacturer's required cure state and has a surface suitable for the specified cement-based adhesive. Some membranes provide a keyed finish specifically to support tile adhesion. If the surface is glossy, contaminated, soft or incompatible with the adhesive, the tile can delaminate even when the waterproof layer itself has no visible hole.
Do not allow another trade to cut, screw or chase through the membrane after inspection. Protect the completed surface, record the product and batch details, and photograph junctions and penetrations before the tile conceals them.
Flood Testing and Curing Verification
Tiling can hide a waterproofing defect for a long time, so testing belongs before the first tile is fixed. Australian leak-detection guidance describes a 24-hour flood test as the definitive confirmation of membrane failure or integrity. It doesn't replace correct installation, but it gives the renovator or property manager a valuable opportunity to find a defect while the membrane remains accessible.
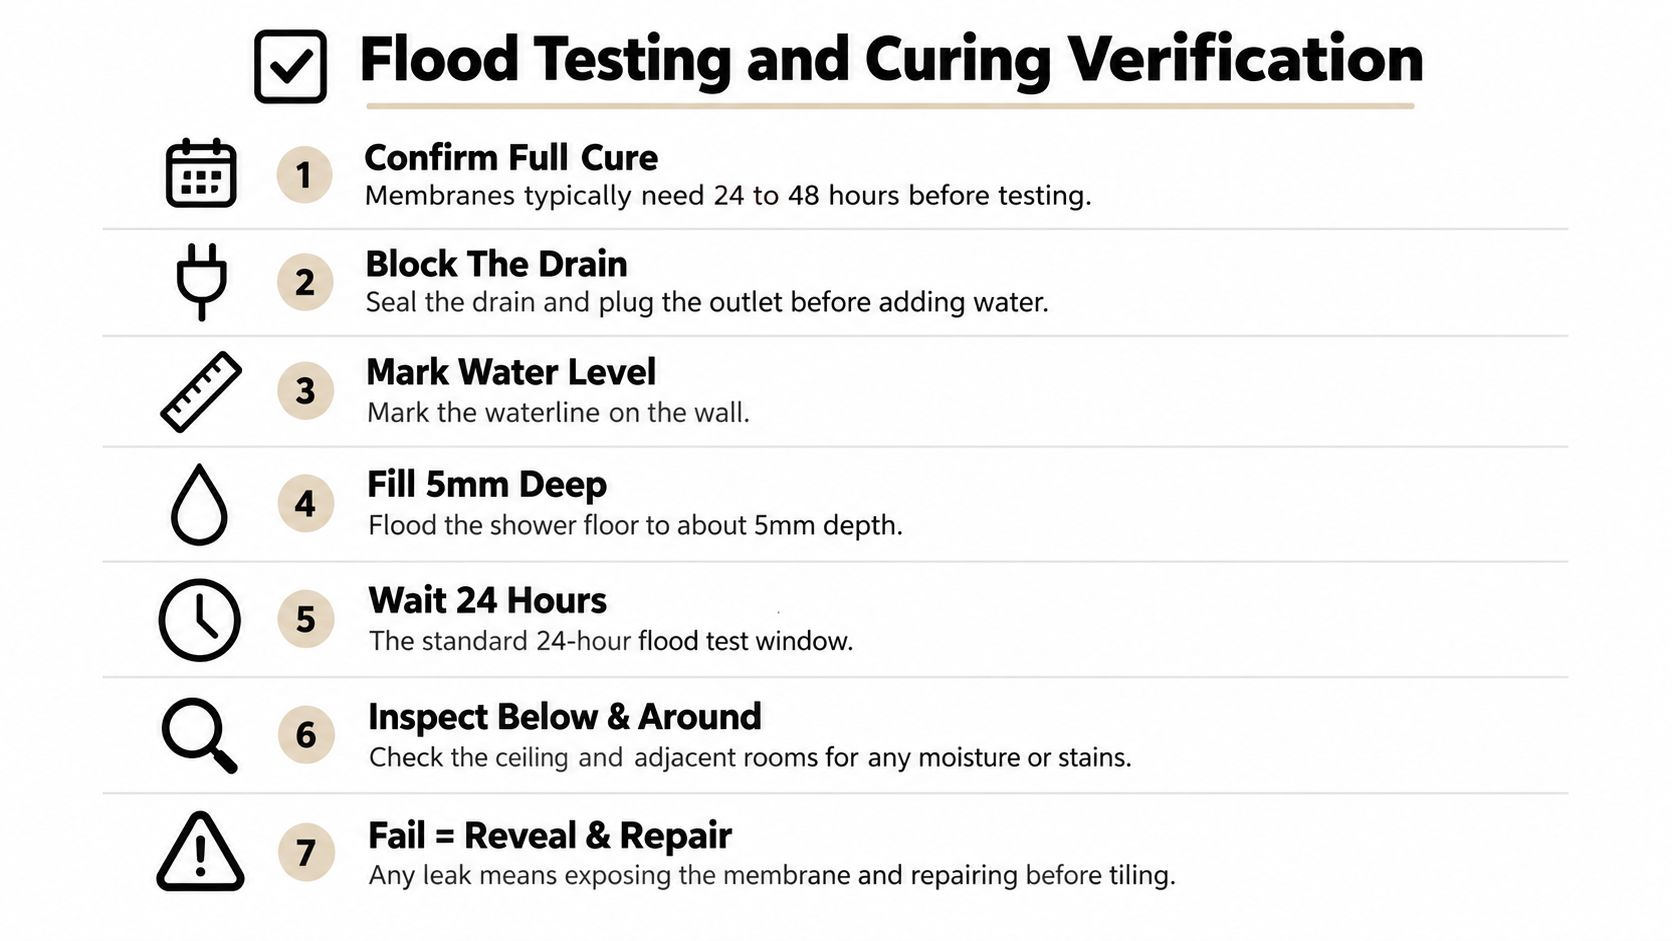
Complete the test in a controlled sequence
First, confirm that the membrane has fully cured according to its product documentation. Seal the drain with a suitable test plug that prevents water escaping through the waste. A loose rag or temporary cover isn't a dependable test seal.
Add water carefully and mark the starting level on the wall or a stable reference point. Keep the test area controlled, particularly where the shower is on an upper floor or near sensitive finishes. Australian guidance supports holding the water for the full 24-hour test period, rather than checking it shortly after filling.
Inspect the ceiling below, adjoining rooms, skirtings and nearby wall faces. Look for staining, dampness, swelling, soft plasterboard or a measurable change in the water level after accounting for evaporation and accidental disturbance. A failed test means the shower shouldn't be tiled. Find the defect, expose enough of the membrane to repair it properly, allow the repair to cure and repeat the test.
The Australian bathroom waterproofing standards guidance provides useful context for connecting waterproofing work with the broader wet-area compliance process.
Verify adhesive compatibility
Curing isn't only about waiting. The membrane needs a clean, stable and bondable surface. Check that the selected cement-based tile adhesive is approved for the membrane and that the membrane has the required keyed finish. Applying adhesive to a soft, dusty or incompatible coating can lead to tile movement or delamination, which may later be mistaken for a membrane leak.
Document the test with the date, room, water level, drain plug method, observations and any corrective work. Keep product labels, technical sheets and photographs with the renovation records. For property managers and landlords, that information can be important when future rectification or maintenance questions arise.
A flood test can reveal a leak path, but it can't confirm that the membrane reaches the required wall height or that every junction has been treated. Those checks belong in the pre-tiling inspection, alongside substrate photographs and a review of the selected system.
When a Kit Is Not Enough
A box labelled “complete shower waterproofing kit” can still leave major design and compliance questions unanswered. Kits are useful components of a waterproofing system, but they don't assess structural movement, redesign a floor, coordinate plumbing penetrations or determine whether the proposed threshold works with the building.
Apartment and multi-unit bathrooms deserve particular caution. A review of Australian waterproofing failures cites ACIL Allen research indicating that 20% to 40% of modern multi-unit residential buildings have some form of waterproofing defect, while another federal reference noted about 30% of buildings had external leaks including shower-floor pathways. These figures are reported in an Australian review of waterproofing failures. They point to a systemic risk, not a purely cosmetic tiling issue.
Recognise the difficult conditions
A kit may be insufficient without professional design or installation where:
- The building moves: Structural movement joints, cracking masonry, deflection and transitions between different substrates require a coordinated detail. A rigid coating across a moving joint isn't a durable solution.
- Penetrations are numerous: Niches, benches, mixers, wastes, screen channels and concealed plumbing create several opportunities for discontinuity. Each requires an approved treatment that remains compatible with the surrounding membrane.
- The threshold is complex: A stepdown, hob, level threshold or preformed shower base changes how the floor, walls, waste and entry are waterproofed. The four compliant construction options recognised in the NCC must work as an integrated arrangement.
- The existing bathroom has hidden damage: Swollen boards, rotten framing, damp insulation or movement beneath the tiles must be repaired before waterproofing. Coating over damaged material preserves the problem.
- The renovation affects other apartments: In a strata building, a leak can damage ceilings, common property or neighbouring lots. The lowest-cost kit is not automatically the lowest-risk decision.
A shower kit can provide materials. It can't take responsibility for a poor substrate, an incompatible drain or an uncoordinated renovation sequence.
Know when Victorian registration applies
In Victoria, consumer guidance states that building work worth more than $10,000 must be carried out by a person registered with the Building and Plumbing Commission, subject to limited exceptions. The relevant Victorian consumer guidance on builders and building practitioners should be checked before work begins because project scope and contract arrangements affect the obligation.
Bathroom renovations often combine demolition, carpentry, plumbing, electrical work, waterproofing and tiling. A registered builder can coordinate those trades and manage the construction sequence rather than treating waterproofing as an isolated roller application. Victorian registration material for limited bathroom, kitchen and laundry renovation work also requires applicants to demonstrate competency in selecting suitable waterproofing systems and installing them to manufacturer specifications, as shown in the VBA registration application guidance.
For a simple, isolated repair on a sound substrate, a capable installer may be able to use a manufacturer-approved kit correctly. For a full bathroom renovation, an apartment, a threshold change or a project above the Victorian registration threshold, involve the appropriate registered builder and licensed trades before selecting products.
Making the Right Choice for Your Renovation
Use the building, not the packaging, to choose the waterproofing approach. A liquid system may suit a sound but irregular retrofit. A sheet system may be preferable where the substrate is flat and the installer can control overlaps. A preformed base can simplify a defined shower layout, while a cementitious system may suit an appropriate masonry substrate.
Before tiling, verify that:
- The construction option is clear: Confirm whether the shower uses a stepdown, hob, level threshold or preformed base.
- The substrate is ready: Check repairs, cleanliness, primer, falls, waste connection and movement joints.
- The membrane reaches the required extent: Confirm the shower floor, junctions, penetrations and wall height.
- The products work together: Match membrane, reinforcement, sealants, primer and tile adhesive within one approved system where possible.
- Testing is recorded: Keep the flood-test method, water level, inspection notes, photographs and repair records.
- The installer is appropriate: For relevant Victorian work, verify registered builder involvement and coordinate licensed plumbing and electrical trades.
A DIY shower waterproofing kit can work when the project is small, the substrate is sound, the details are straightforward and the installer follows the complete system instructions. It's not a substitute for design coordination on complex bathroom renovations, multi-unit properties or regulated building work.
Melbourne Tiling Services P/L provides bathroom and ensuite renovations, compliant shower waterproofing, substrate preparation, screeding, tiling and leak rectification across Melbourne and greater Victoria. For a project where the kit, floor falls, junctions and registered builders need to be coordinated, visit Melbourne Tiling Services P/L to discuss the scope and request a quote.
Write a Comment