Bathroom Tiling and Waterproofing Guide for Melbourne Homes

You've stripped out the old bathroom in a Melbourne home, the plumber has finished the rough-in, and the room is finally starting to resemble the design you approved. Then the tiler asks a question that can't be postponed: what exactly is being waterproofed, and what evidence will be provided before the first tile is fixed? That decision matters more than whether you choose porcelain, marble or a patterned feature tile.

A bathroom can look perfectly finished while hiding a failed membrane, a poorly detailed puddle flange or falls that leave water sitting at the shower entrance. Bathroom tiling and waterproofing are one compliance system, and the tile finish is only the visible part. In Melbourne renovations, the durable result starts with the substrate, drainage, membrane, documentation and trade sequence.

Table of Contents

Planning a Bathroom Tiling and Waterproofing Project

Lock in the scope before ordering materials

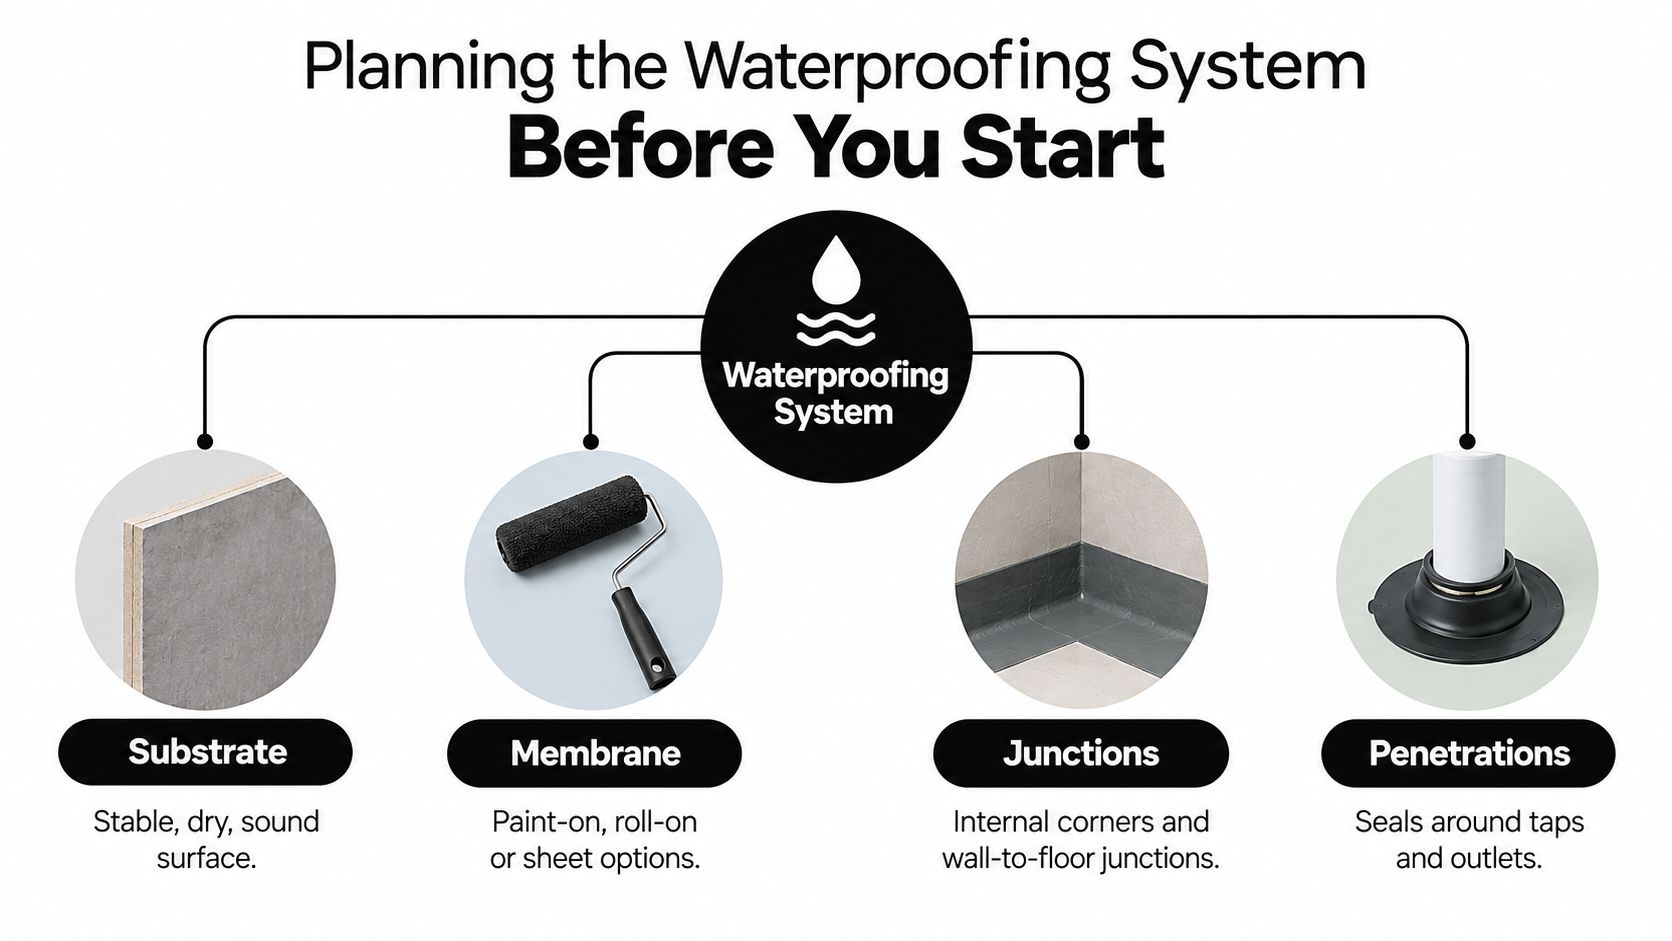
Start by defining the wet area. Is the membrane limited to the shower, or will the entire bathroom floor and additional wall zones be treated? A hob, a frameless shower, a recessed niche, a linear drain and a set-down all change the preparation and detailing. The waterproofing scope drives labour, materials, curing time and tile quantities, so choosing tiles first often produces an inaccurate renovation price.

Demolition also needs a proper decision. Confirm what will be removed, who will dispose of it and whether the building may contain asbestos, particularly in older homes. Pre-1990s construction deserves careful checking before fibro sheeting, old floor coverings or wall linings are disturbed. Don't let a tiler arrive to find that the substrate is unstable, contaminated or still covered in demolition waste.

Identify the existing substrate before specifying primers and membranes. Fibro, plasterboard, brick, concrete, Scyon and existing tile surfaces behave differently. The plumber should also confirm fixture locations, pipe penetrations, the floor waste and the finished floor height before waterproofing begins. A change to the vanity, toilet, shower rose or waste after membrane work can create a new penetration and compromise the system.

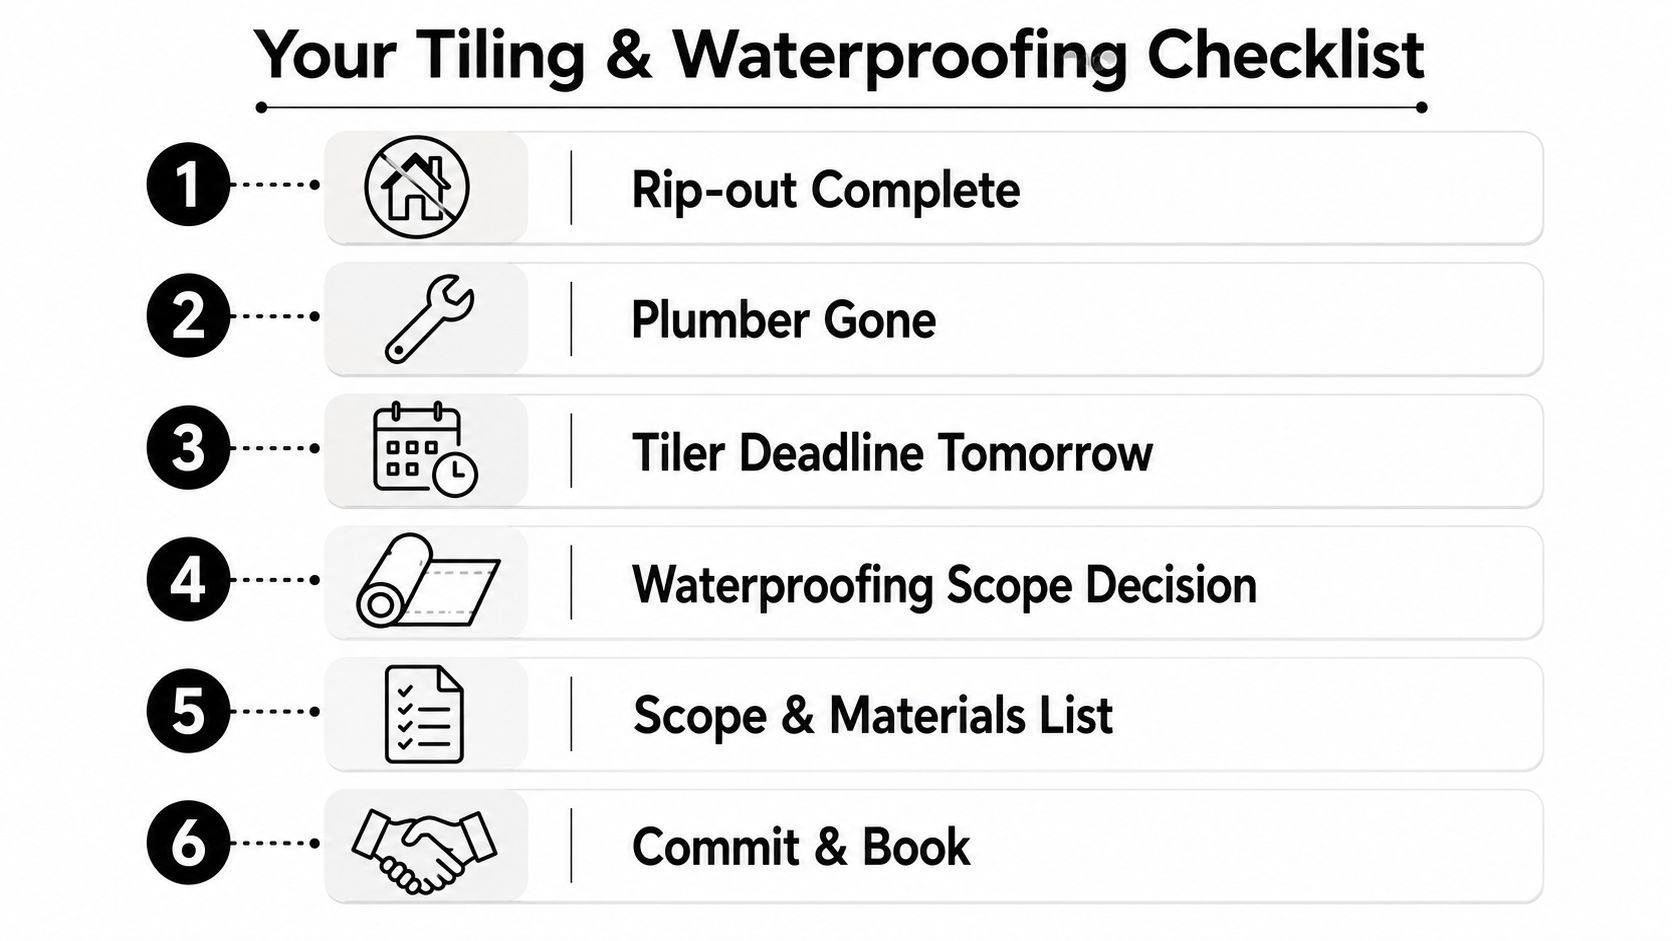
A checklist for bathroom renovation showing six steps including rip-out, plumbing, and booking a tiler.

Sequence the trades, then keep the records

A reliable sequence generally has the carpenter preparing framing and linings, the plumber completing rough-in work, the waterproofer preparing and coating the wet area, the tiler installing the finish, the electrician completing fit-off, and the glazier measuring and installing the shower screen. The exact order can vary, but the membrane must be protected from avoidable damage after certification.

Keep a project file containing:

  • Approvals and permits: Retain the building permit and any relevant project approvals.
  • Waterproofing evidence: Keep the waterproofing compliance certificate, product information, photographs and test records.
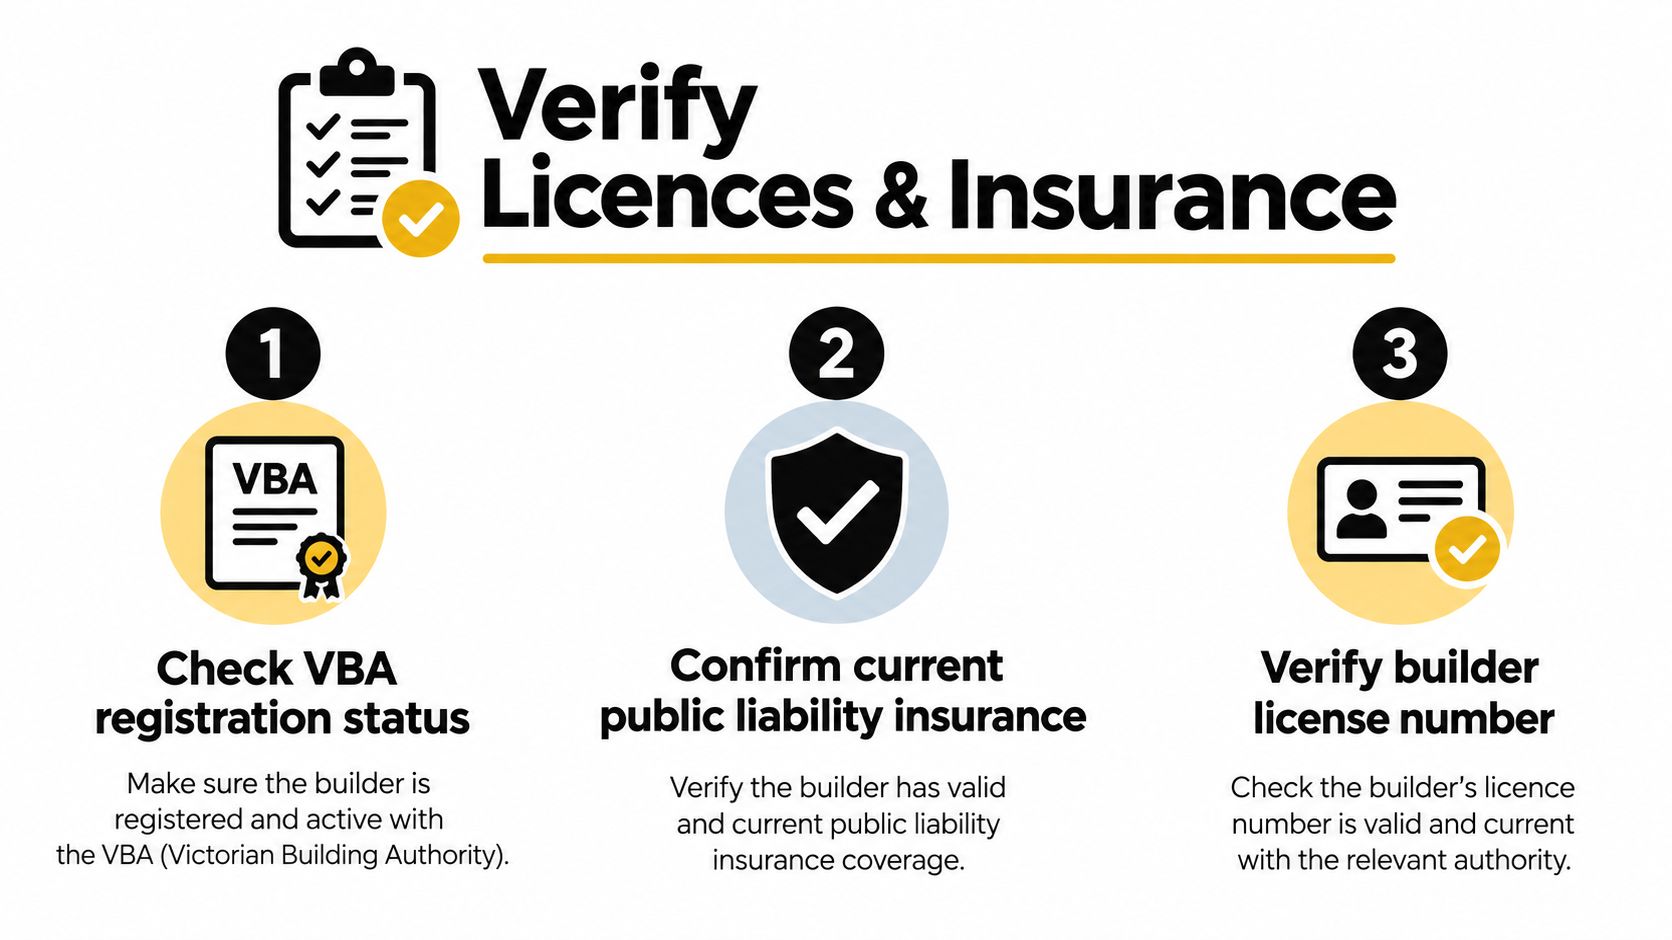
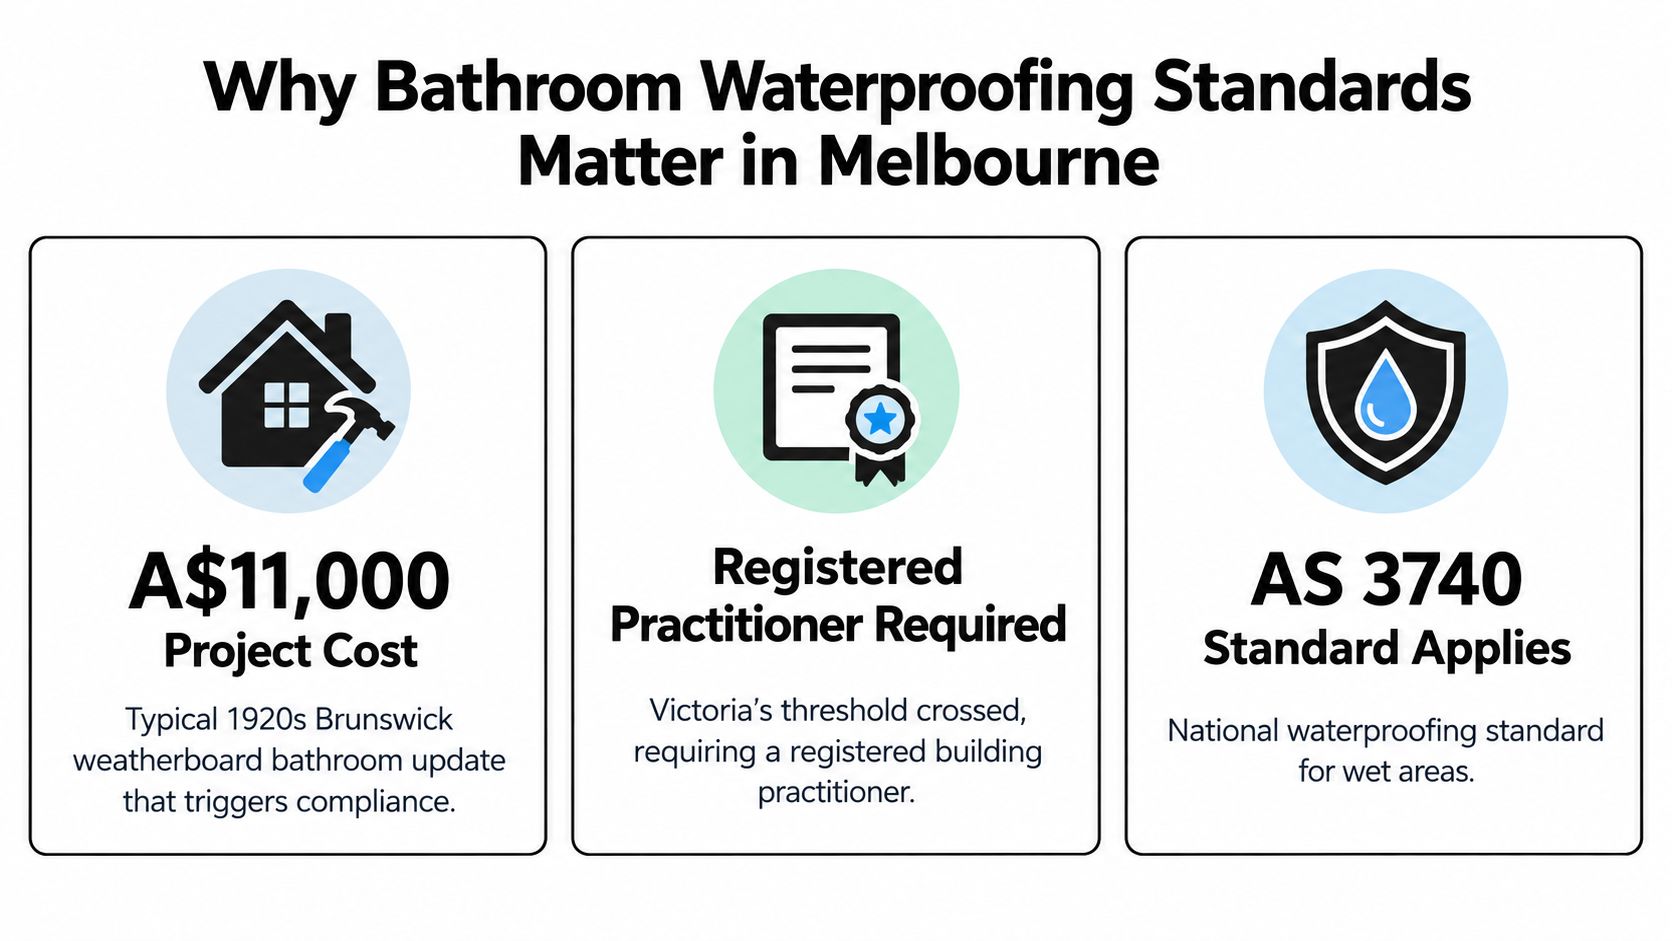
  • Builder documentation: For work over $16,000, retain the relevant VBA documentation and builder records. The threshold and Victorian practitioner pathway should be confirmed for the specific contract and scope.
  • Product details: Record membrane, primer, sealant and adhesive batch information where available.
  • Variation history: Put changes to drains, niches, shower screens and tile layouts in writing.

Practical rule: Don't approve tiling because the room “looks ready”. Approve it when the substrate, membrane, curing and inspection evidence are ready.

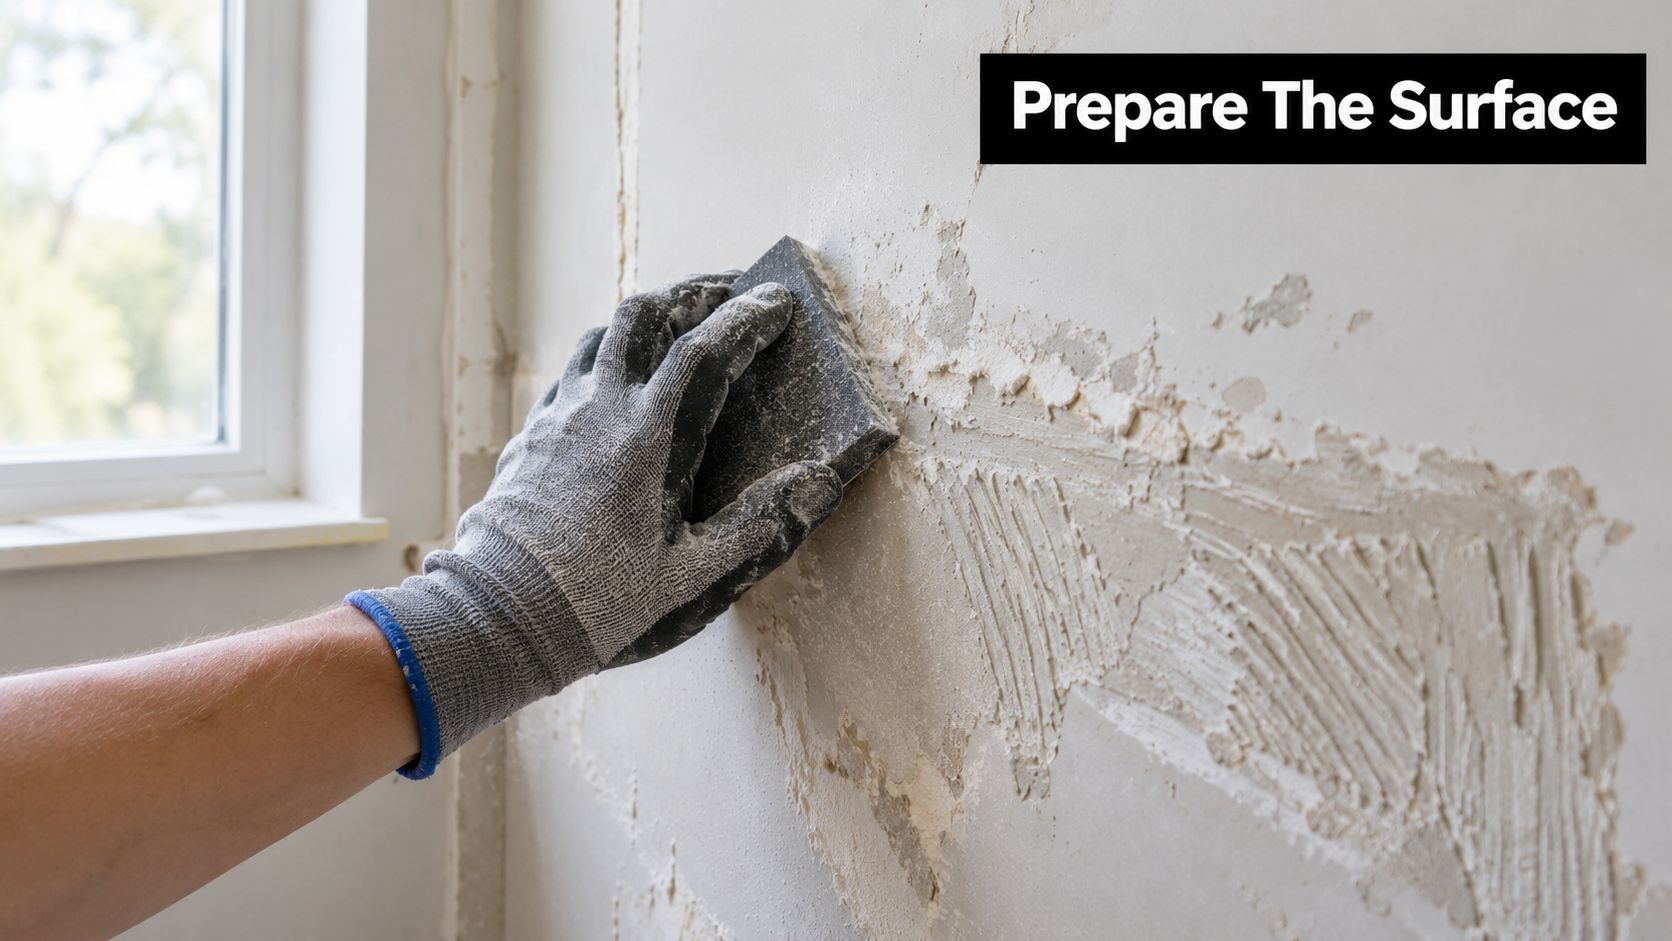
Before waterproofing, check that the demolition is complete, the substrate is clean and stable, plumbing penetrations are fixed, the waste is correctly installed, falls are formed, corners are detailed and the final fixture layout is signed off. That checklist prevents the expensive return visit caused by a late plumbing change or a membrane punctured by another trade.

Waterproofing Standards and Membrane Choices

What the Australian standard controls

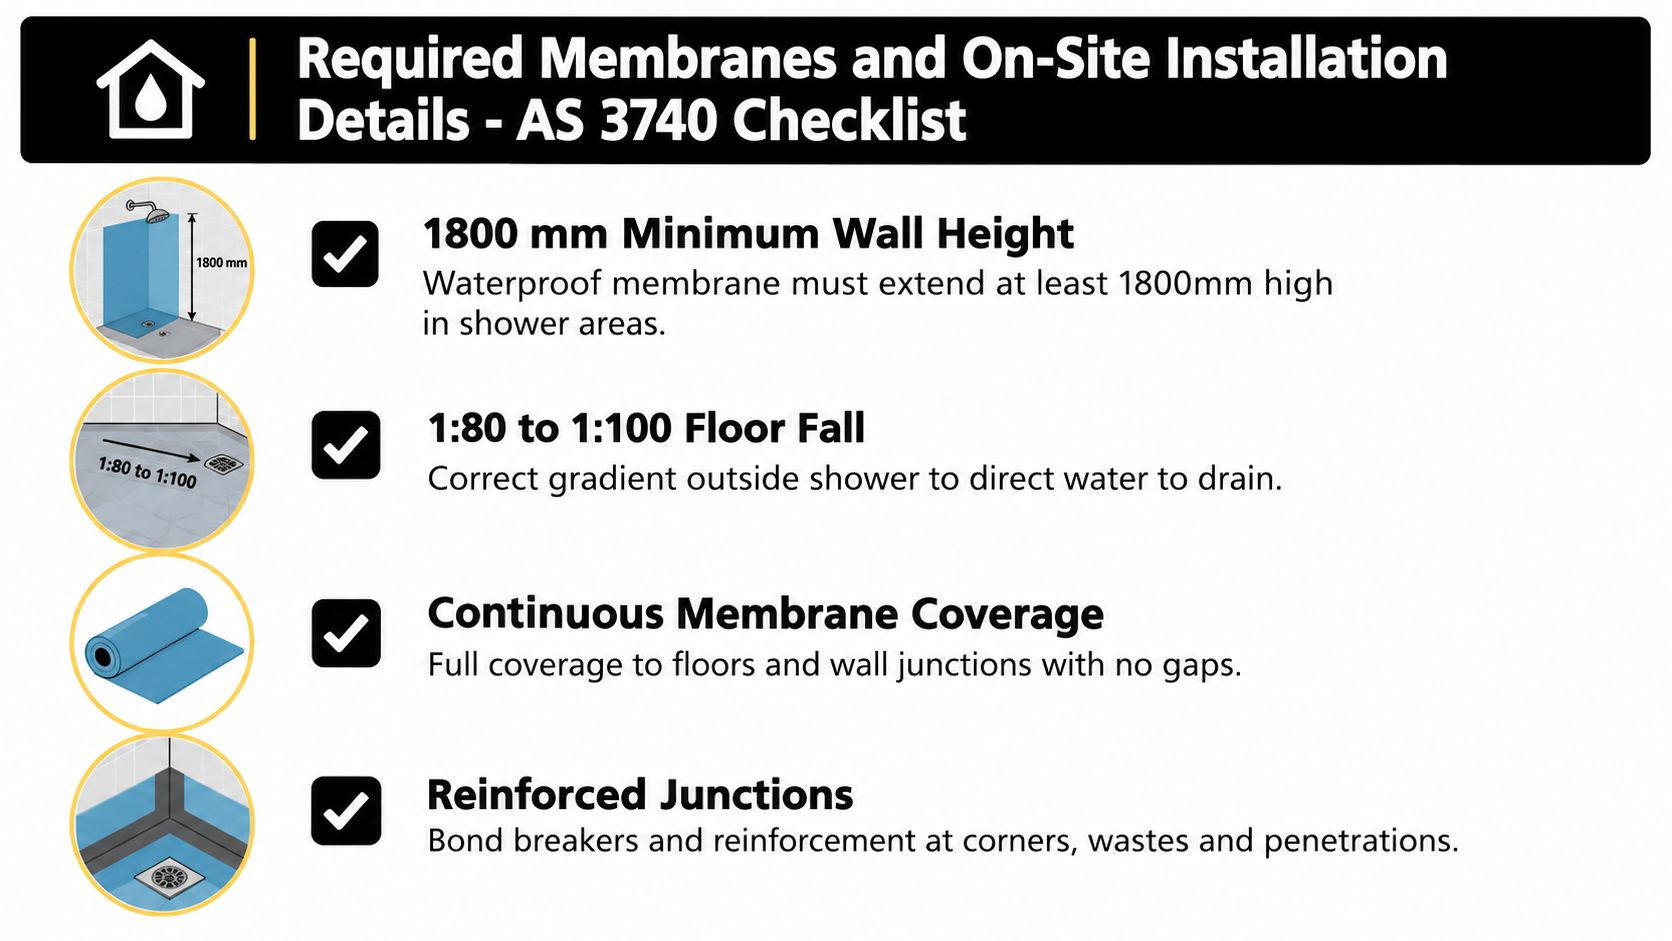
Australia's current bathroom waterproofing baseline is AS 3740:2021, published on 23 July 2021 and superseding AS 3740:2010. It defines minimum requirements for waterproofing materials, design and installation in domestic wet areas, including wet areas in Class 1, 2 and 4 buildings under the NCC, with wider application to relevant Class 3 to 9 wet areas as described in the standard. The standard was adopted by NCC 2022 on 1 May 2023, which is why the compliance framework matters directly to current Melbourne bathroom renovations. See the AS 3740:2021 standard reference and the Standards Australia product listing.

The shower floor must be waterproof. Shower walls need waterproofing to at least 1,800 mm above finished floor level, or 50 mm above the shower rose, whichever is higher. Relevant wet-area wall conditions also include a minimum of 150 mm above finished floor level outside the shower zone. These dimensions protect the substrate behind the tiles. They aren't a substitute for correct corners, penetrations, junctions or drain detailing.

A membrane system also has to suit the substrate and the intended wet-area application. Acrylic roll-on systems are common because they're practical for many residential layouts and can be applied around irregular corners. They depend heavily on correct primer selection, film thickness, reinforcement and curing between coats. A rushed single coat is not a waterproofing strategy.

Two-part polyurethane systems can provide a continuous coating, but they demand accurate mixing, careful application and controlled curing. Sheet systems, including products such as Schluter Kerdi, can offer consistent factory-controlled thickness and dependable overlaps when installed correctly. They're less forgiving of poor joint preparation, awkward penetrations and detailing that hasn't been planned before the sheet is cut.

Comparing practical membrane systems

Membrane Type Cost per m2 (AUD) Cure Time Best Application
Acrylic roll-on Varies by product and scope Product-dependent, between coats and before tiling Standard residential bathrooms with prepared substrates
Two-part polyurethane Varies by product and scope Product-dependent, with controlled mixing and curing Demanding wet-area detailing and compatible substrates
Sheet membrane Varies by product and scope Adhesive and joint system dependent Planned shower systems requiring controlled sheet overlaps

The figures above are deliberately qualitative because membrane pricing depends on access, preparation, penetrations, floor shape and product specification. A contractor should provide the selected system, primer, compatible sealants, required dry film thickness and curing instructions rather than quoting a membrane as an unnamed bucket of product. The shower waterproofing membrane guide can help homeowners understand the system choices before approving a scope.

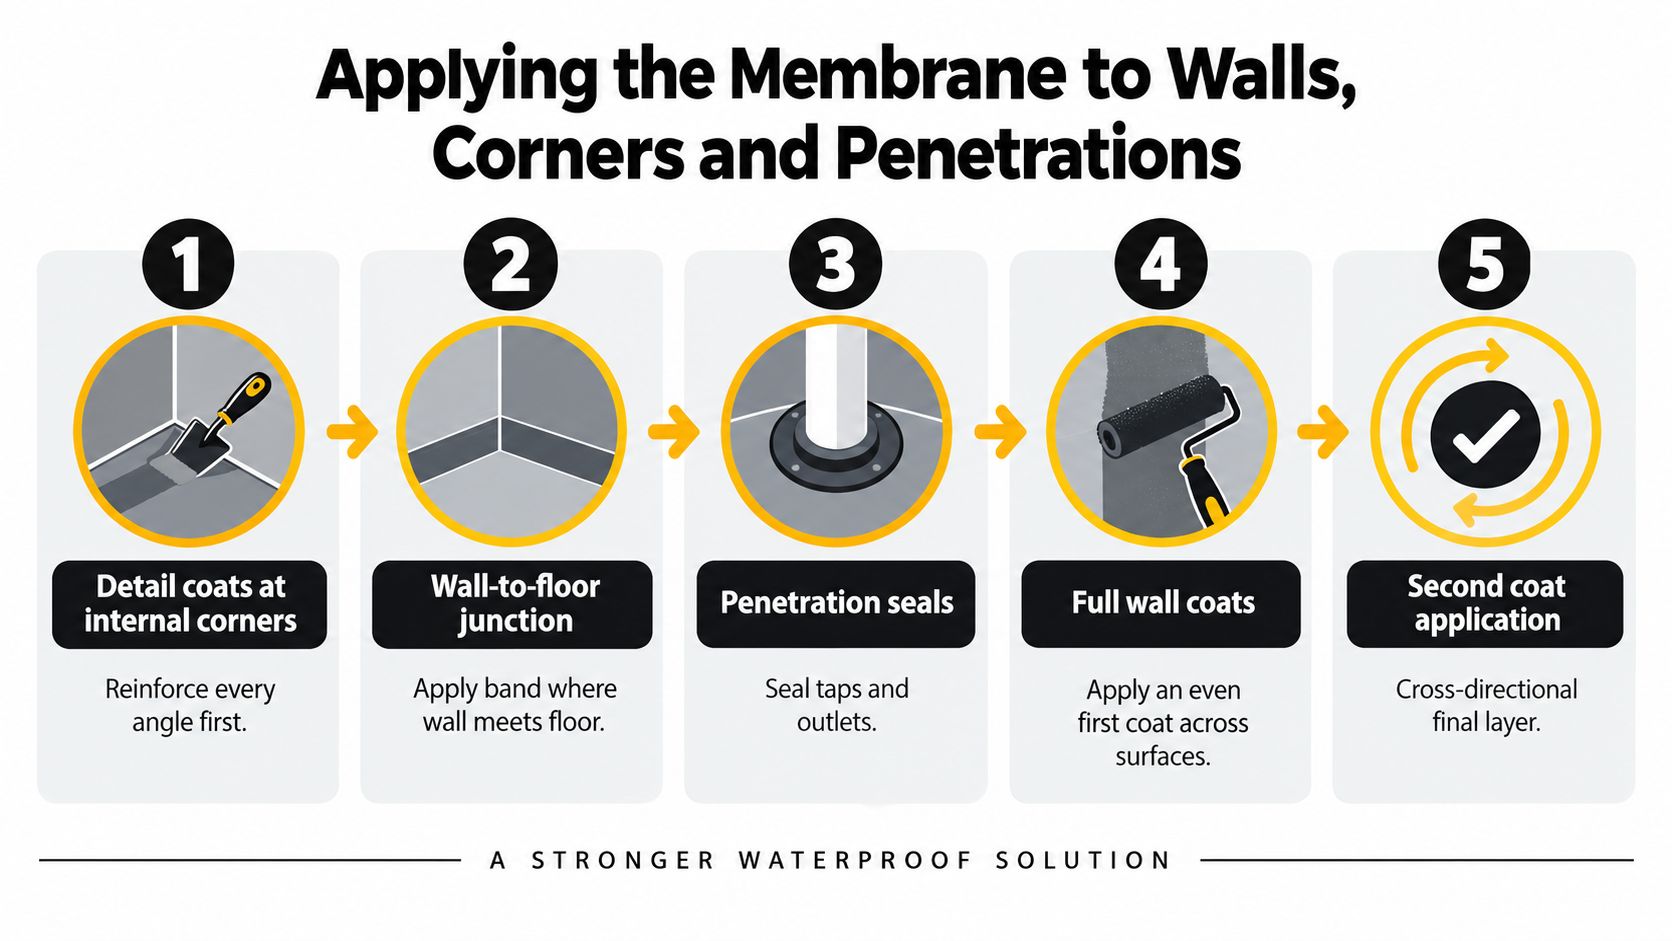
The details that cause trouble are usually small. Shower tap penetrations, niche corners, internal wall-floor junctions and the puddle flange at the floor waste all need deliberate treatment. The membrane must bond to compatible surfaces and remain continuous around each penetration. Where a tiler also performs the waterproofing, ask who is responsible for inspection and certification. The concern isn't that one person can never do both tasks. It's that the person paid to continue into tiling may have a commercial reason to declare the membrane ready before every detail has been properly checked.

Screeding, Self-Levelling and Getting the Falls Right

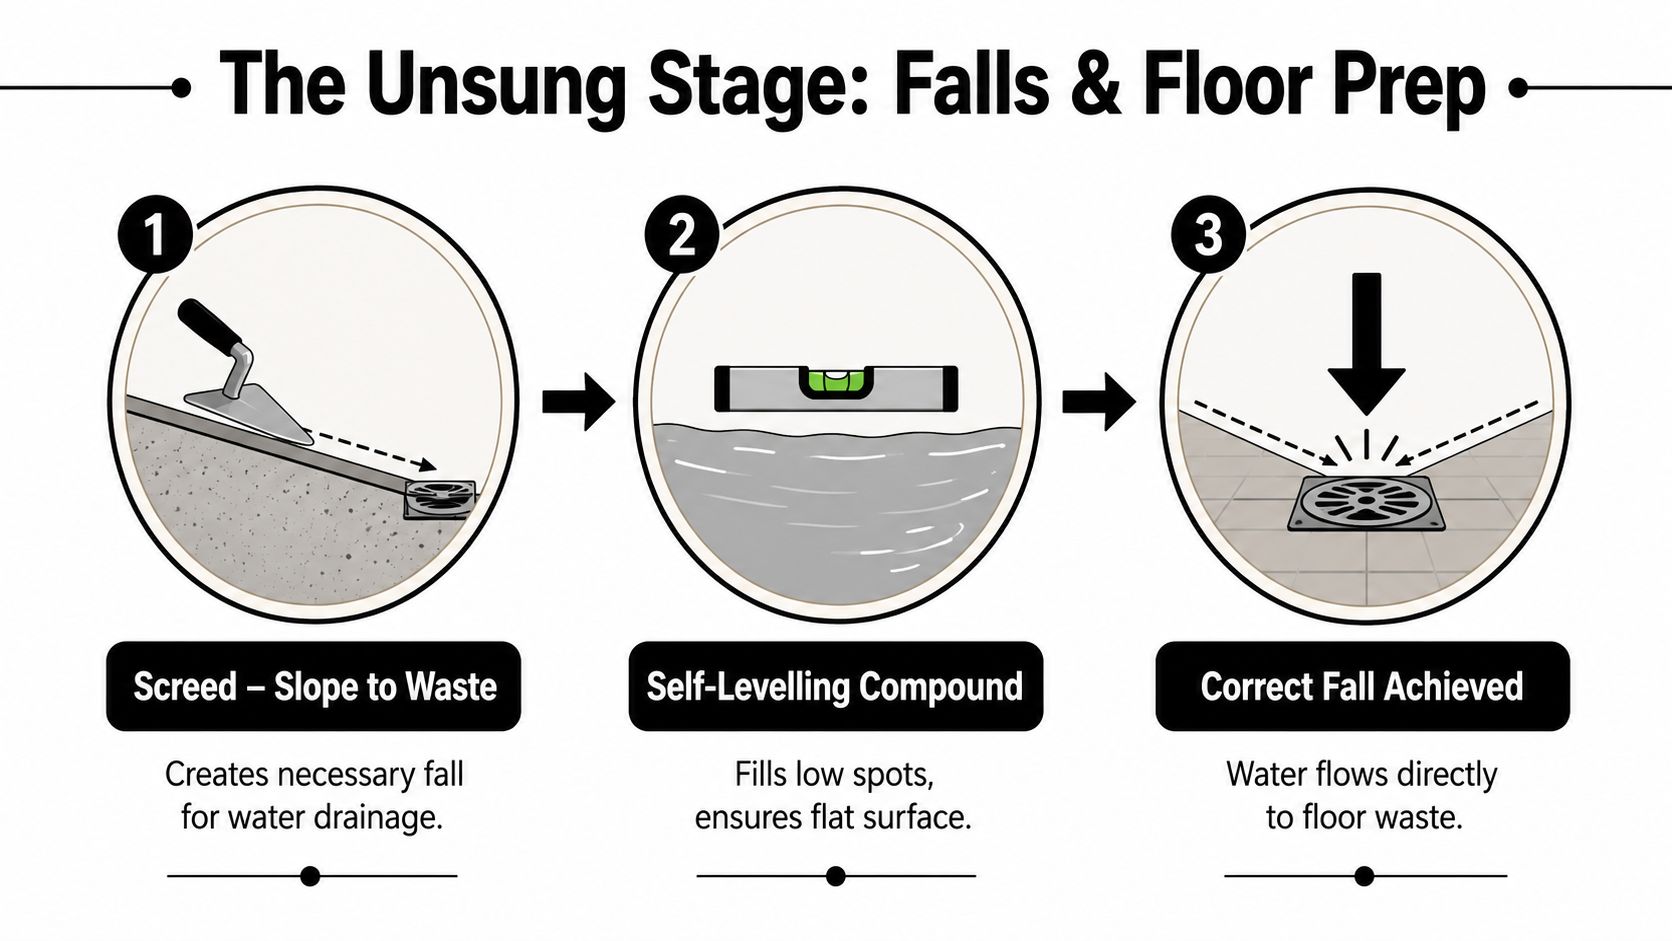
A membrane can't correct a floor that sends water away from the waste. Screeding shapes the drainage plane, while self-levelling compound corrects suitable low spots and creates a flatter surface where a true fall isn't required. A pre-formed shower tray provides a manufactured fall and drain arrangement, but it still needs compatible waterproofing and accurate connections to the surrounding floor.

Australian guidance identifies a general wet-area floor fall of at least 1:100, or 10 mm per metre, to move water towards drainage and reduce ponding risk. The NCC wet-area provisions also describe fall requirements that can include a continuous fall between 1:80 and 1:50, depending on the application. Check the applicable detail for the exact bathroom design rather than assuming a steeper slope is automatically safer. Excessive fall can create its own compliance and usability problems.

Shape the floor for the actual drain

A centred waste normally needs a four-way fall. Each plane rises towards the walls, and the tile layout has to accommodate the resulting changes in angle. A linear drain allows a two-way fall and can suit larger tiles, but only if the drain is installed level and the surrounding screed reaches it without hollows.

For example, a brick shower base may need a bonded screed that forms the fall from the perimeter to a puddle flange. Outside the shower screen, the screed may need to feather into the tile underlay while preserving the required drainage direction. A frameless screen can also require a meaningful height relationship between the shower area and the rest of the bathroom, so the finished tile build-up must be designed before screeding.

Self-leveller won't hide a dropped slab, a hollow section or a structurally moving substrate. It also won't solve an incorrectly positioned waste. Those defects need correction first, otherwise a smooth-looking compound only creates a smooth-looking version of the same drainage problem.

A diagram illustrating the three steps of bathroom floor preparation including screeding, leveling, and drainage.

The timing matters just as much as the mix. Tiling over a screed before it has reached the product's required cure condition risks weak adhesion, trapped moisture and movement beneath the tile. Ask the installer to identify the product, application date and cure requirement in the site records before tiles are laid.

The video below illustrates the relationship between floor preparation and tile installation.

For a closer explanation of substrate shaping and preparation, review this guide to screeding for bathroom tiles.

Tiling Sequence, Adhesives, Grout and Sealants

The tiling crew should start only after the membrane has fully cured and passed the agreed inspection process. Wall layout is set from a datum line, not from the first visible corner. That line determines where cuts land around the vanity, shower screen and doorway, and it prevents a room from looking skewed because the installer followed an out-of-square wall.

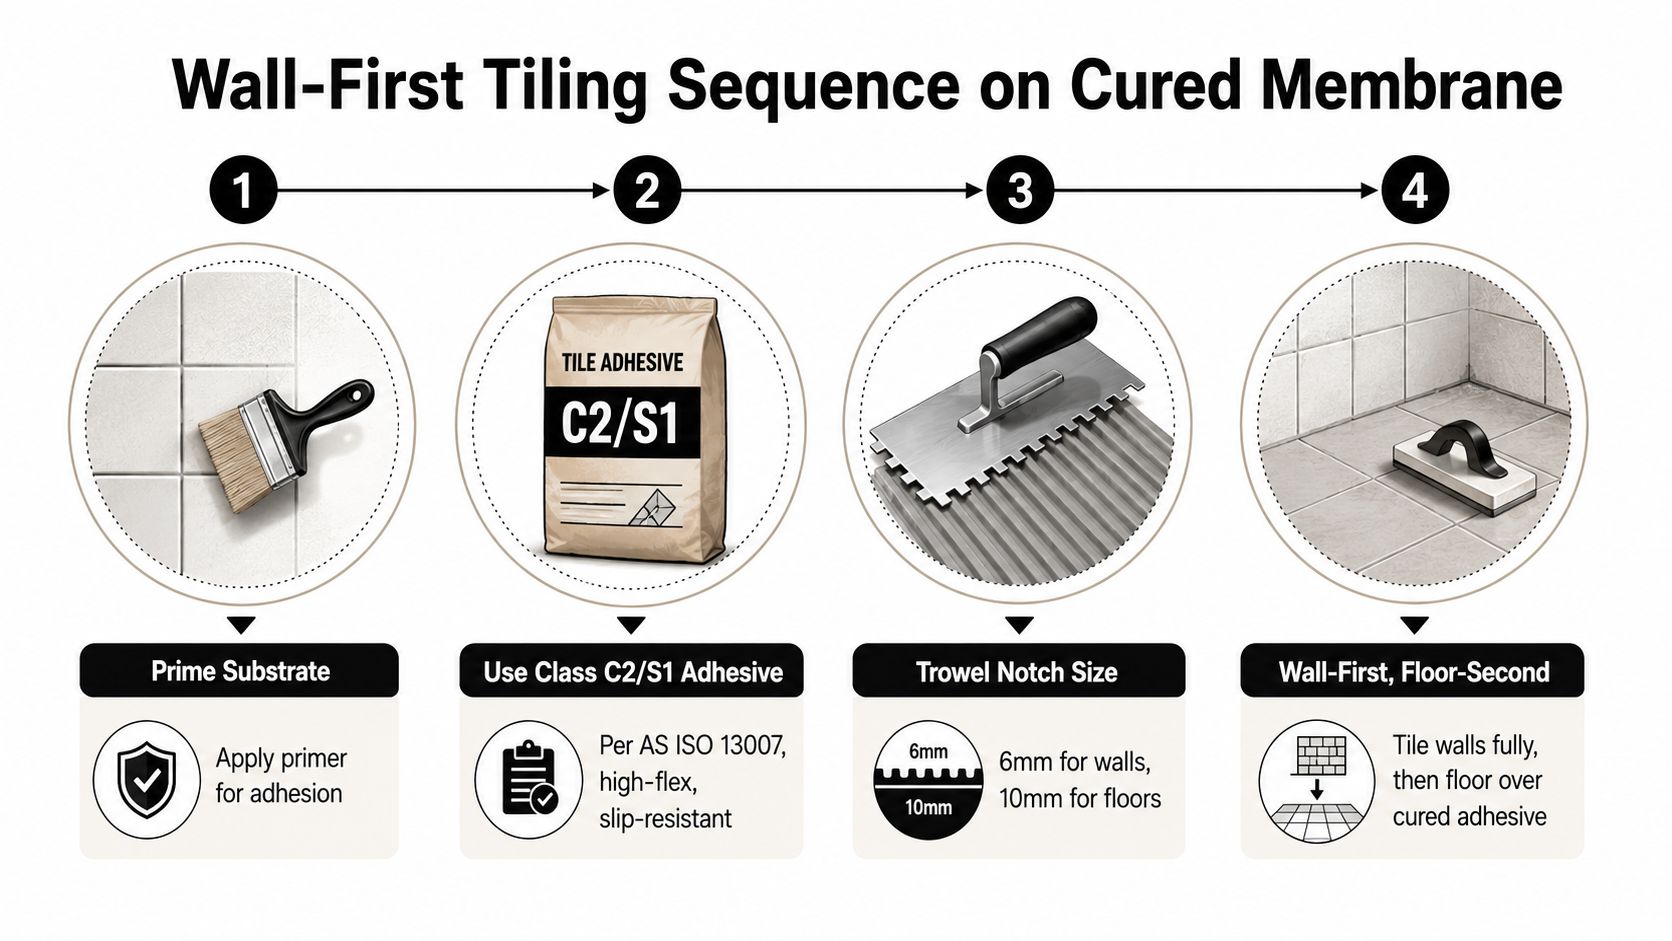
Walls are generally tiled before the floor so the floor finish can run neatly into the wall junction and avoid unnecessary damage during wall work. If a ledger board is needed to support heavy or large-format tiles, every fixing point must be repaired and waterproofed in accordance with the membrane system before the area is closed.

An infographic illustrating the four-step wall-first tiling sequence on a cured waterproof membrane for bathroom installation.

Match the adhesive to the tile and substrate

Adhesive selection should account for tile size, tile absorption, substrate movement and the wet-area system. A basic C1 adhesive may suit limited stable applications, while C2 adhesives and deformable classes such as S1 or S2 are commonly considered where stronger adhesion and flexibility are required. The classification should be checked against AS ISO 13007, the tile manufacturer's instructions and the membrane manufacturer's compatibility requirements.

The trowel notch isn't a decorative preference. The installer selects it to achieve adequate coverage, then collapses the ridges by laying tiles in a consistent direction. Large-format and rectified tiles expose poor coverage quickly, especially around shower floors, niches and edges. The substrate needs to be flat enough for the tile, and the adhesive bed needs to support the tile without voids that can transmit movement or allow water to collect.

Use movement joints at internal corners and perimeter changes rather than filling every junction with rigid grout. Cementitious grout is practical and repairable, but it needs correct mixing, cleaning and maintenance. Epoxy grout resists staining and water absorption more effectively in suitable applications, though it costs more and requires disciplined installation.

Corners, wall-floor transitions and changes of plane should normally receive sanitary silicone compatible with the tile and membrane system. Grout in a moving corner is a common shortcut, not a movement joint. The sealant also needs adequate cure time before the shower is exposed to water.

A neat grout line can't compensate for the wrong adhesive, poor coverage or a joint that should have been flexible.

The final fit-off should protect the finished work. Avoid drilling through tiled waterproofed zones without a planned sealing method. Shower screens, accessories and shelves need fixings that don't create unsealed paths into the substrate.

Common Failure Points and How to Verify the Work

Good-looking tiles prove very little about waterproofing. The defects I'm most concerned about are usually hidden beneath a clean finish, where the puddle flange wasn't clamped correctly, the membrane stopped short at a junction or a later fixing punctured the system.

Small omissions create large repairs

A membrane applied below the specified dry film thickness may look complete while failing to provide the intended protection. The second coat matters where the approved system requires it, and the applicator should follow the product's coverage and thickness instructions rather than judging the finish by colour alone.

Corners and changes of plane need reinforcement or bond-breaker detailing where required by the system. If the wall-floor junction is grouted instead of sealed, movement can open a path behind the tile. A screed flatter than the applicable drainage requirement leaves water at the shower base, while tiling over a failed screed conceals the defect.

Common warning signs include:

  • Loose or drummy tiles: Hollow sounds can indicate poor adhesive coverage, substrate movement or a bond problem.
  • Efflorescence: White crystalline deposits may indicate moisture movement through the substrate or joints.
  • Persistent mould: Mould that repeatedly returns at the shower base can point to retained moisture, failed sealant or inadequate drainage.
  • Cracked junctions: Cracking at corners and wall-floor transitions often indicates that rigid grout has been used where movement accommodation was needed.
  • Recurring dampness: Damp adjoining walls, ceilings or skirtings require investigation rather than another bead of silicone.

Ask for evidence at every hold point

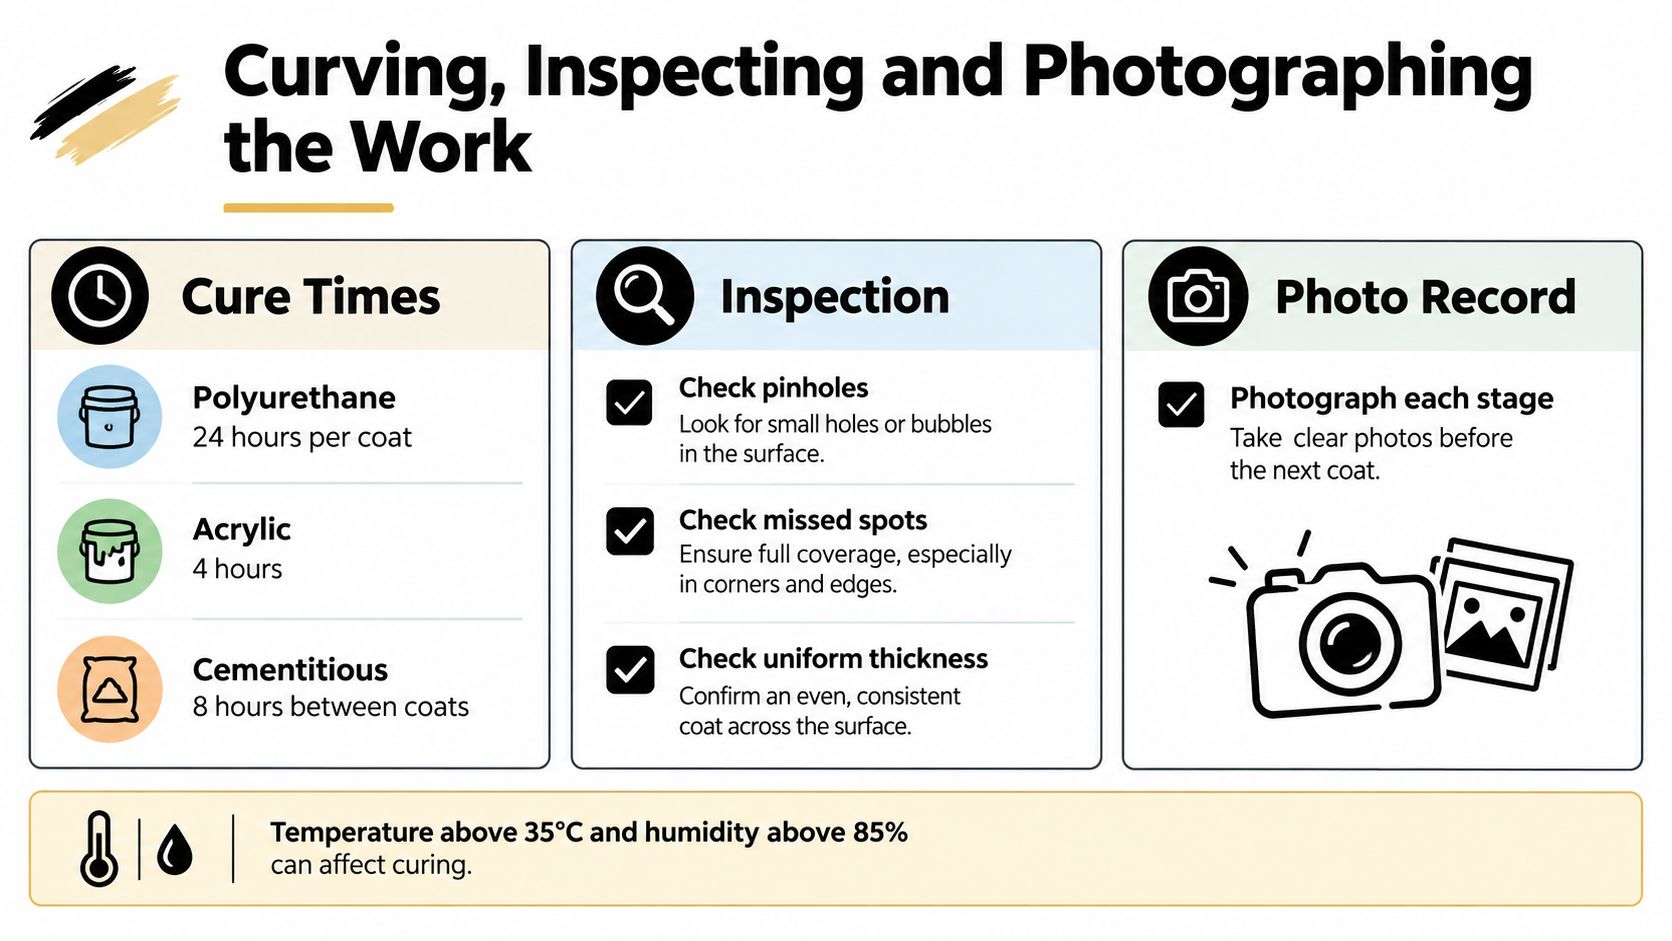
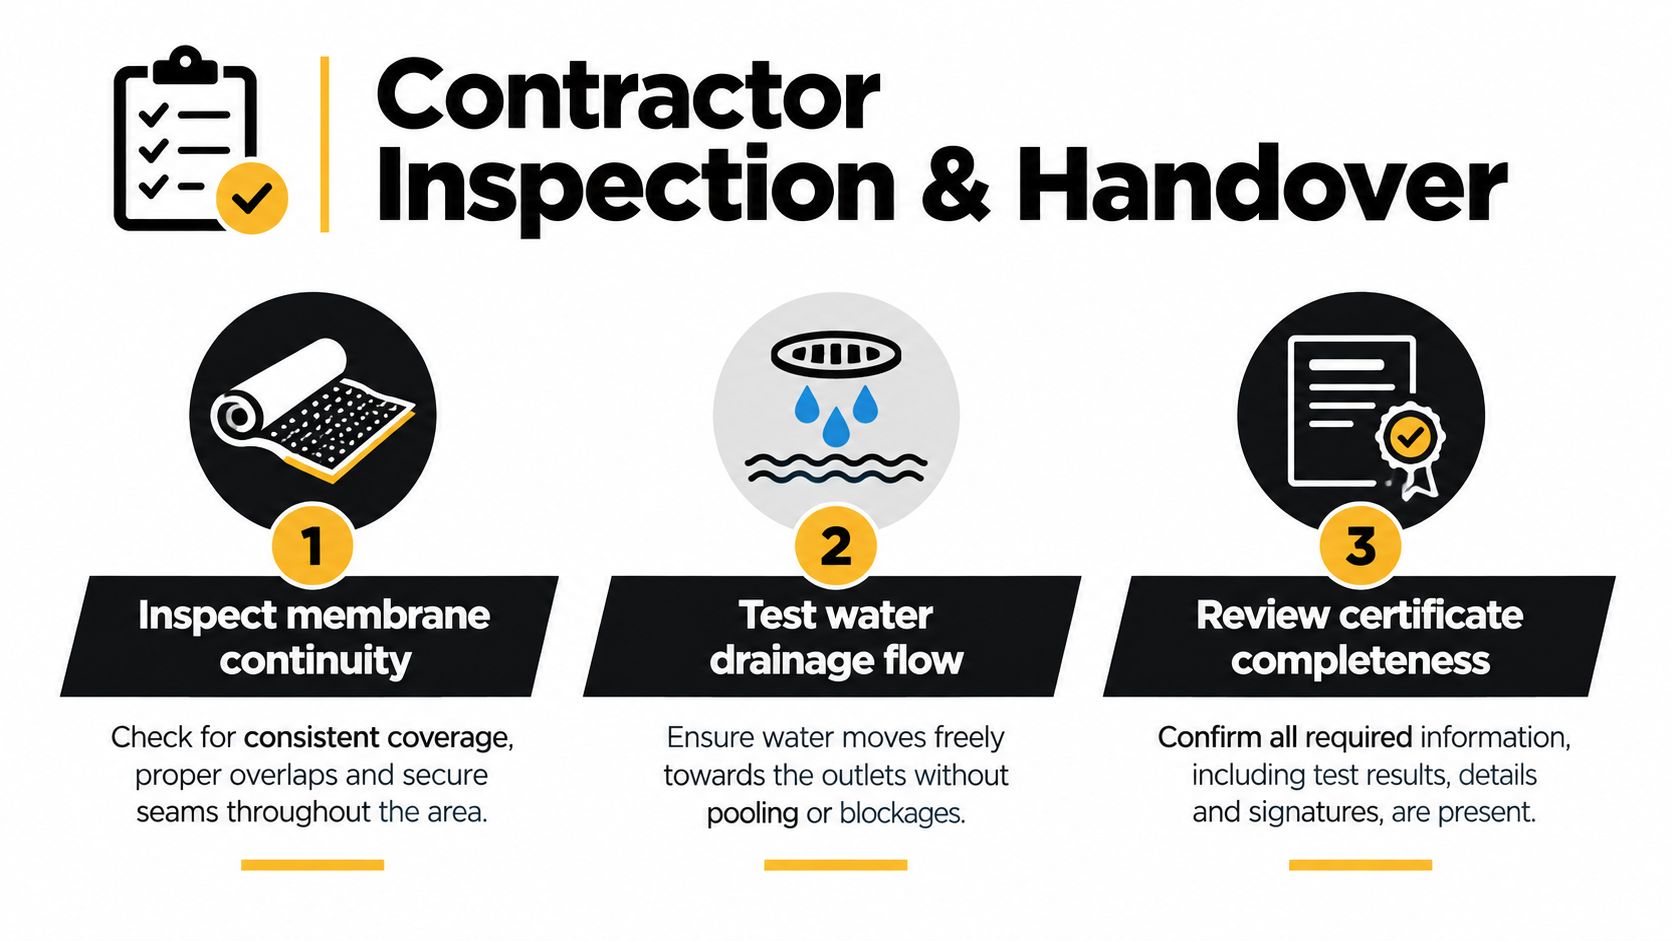
Photographs should show the prepared substrate, penetrations, corners, puddle flange, membrane coats and any reinforcement before the tiles cover them. Keep the membrane product name, batch details, applicator information and the completed waterproofing certificate in the project file.

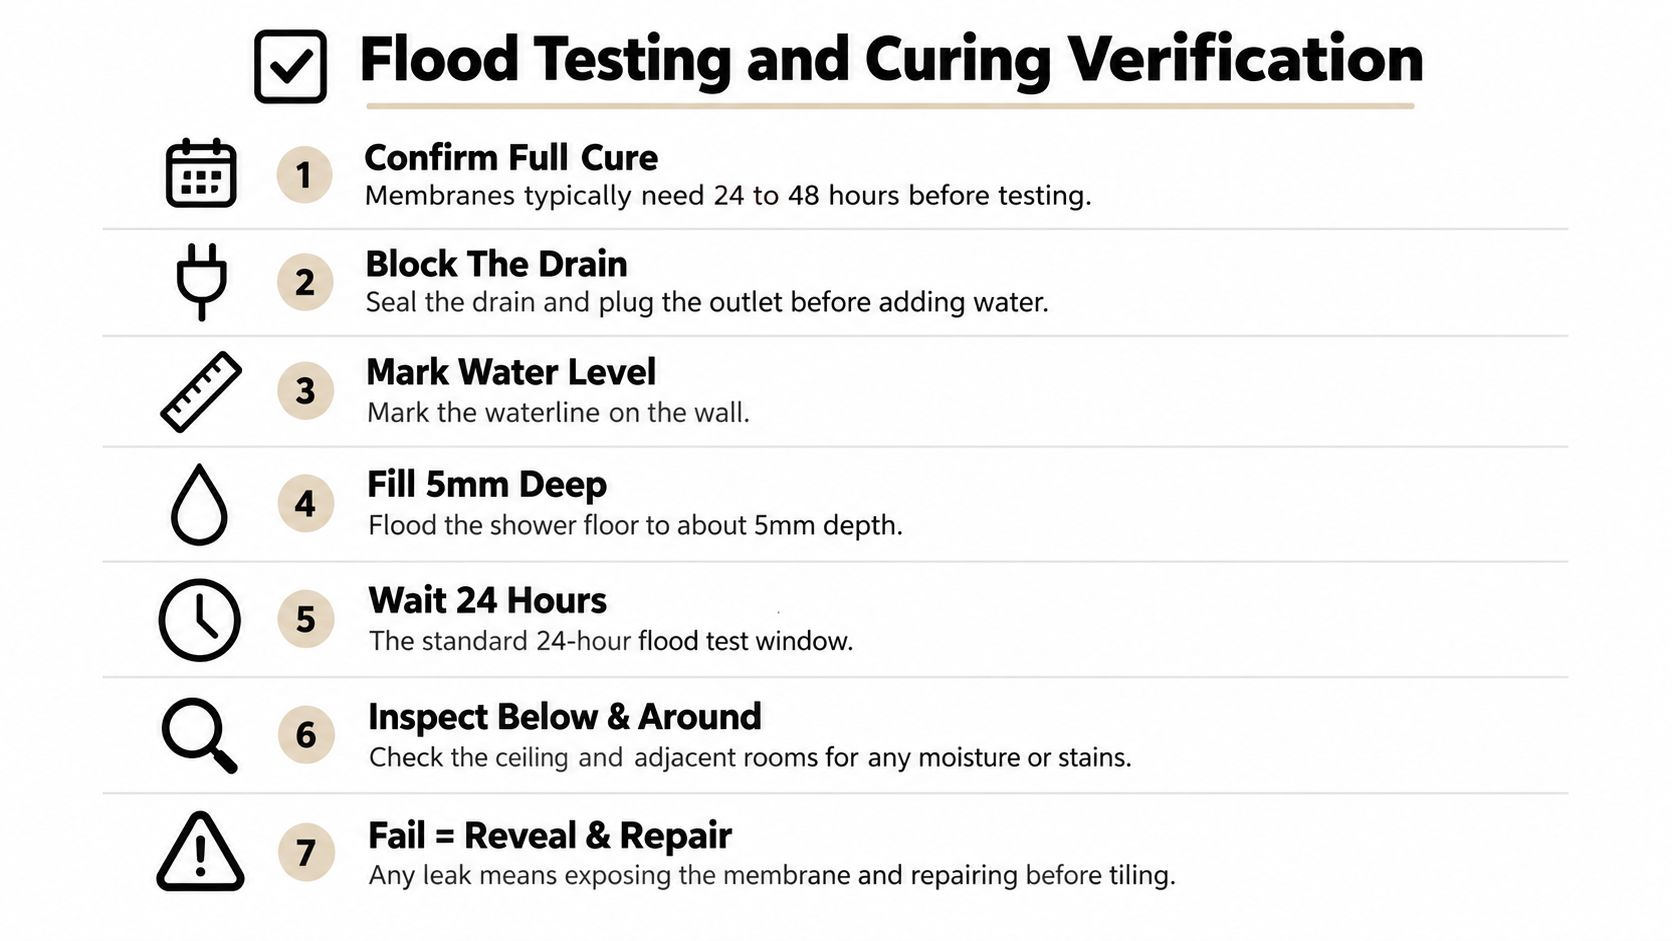
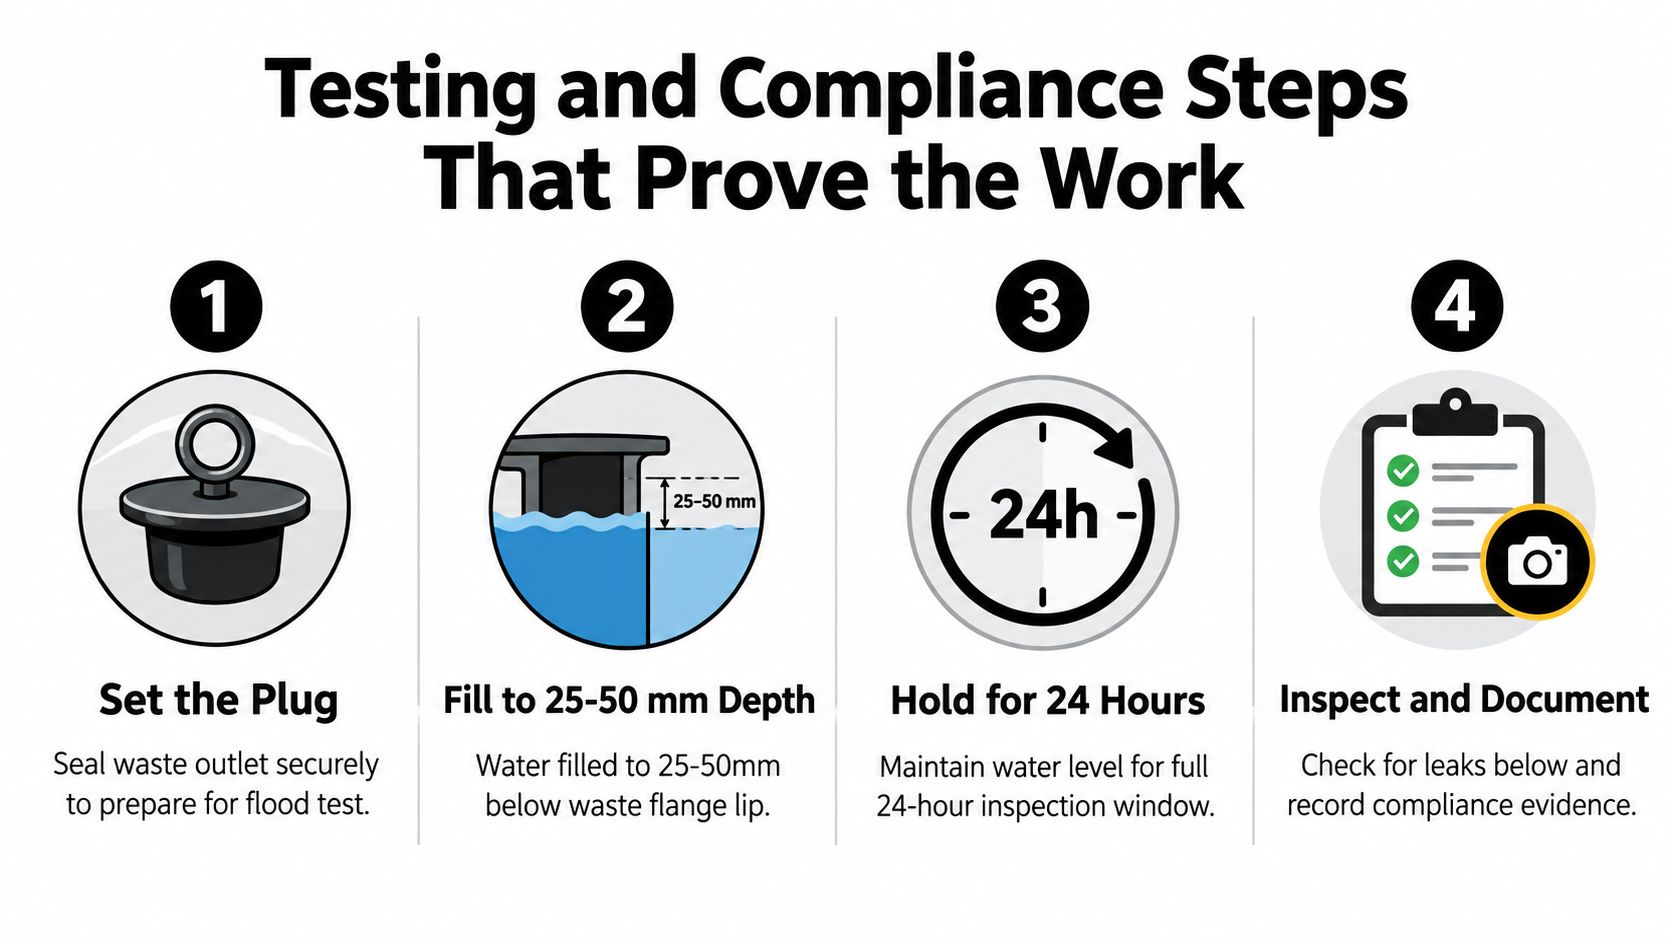
A flood test should be recorded before tiling where the system and site conditions permit it. The evidence should show the test area filled to the agreed level, the start time, the inspection period and the result. Guidance for Australian bathroom waterproofing commonly identifies a 24-hour flood-test period, and the test should be completed before tile installation, not after a leak appears. See the Australian waterproofing defect guidance for the wider defect context.

The certificate needs to be appropriate to the work and the Victorian compliance pathway. Ask for the practitioner's details and the relevant VBA documentation instead of accepting a text message that says “waterproofed”. Product data sheets should also confirm that the membrane is suitable for the intended application, including compatibility with the substrate, adhesive and sealants.

Inspection evidence is part of the bathroom, even though it disappears behind the tiles.

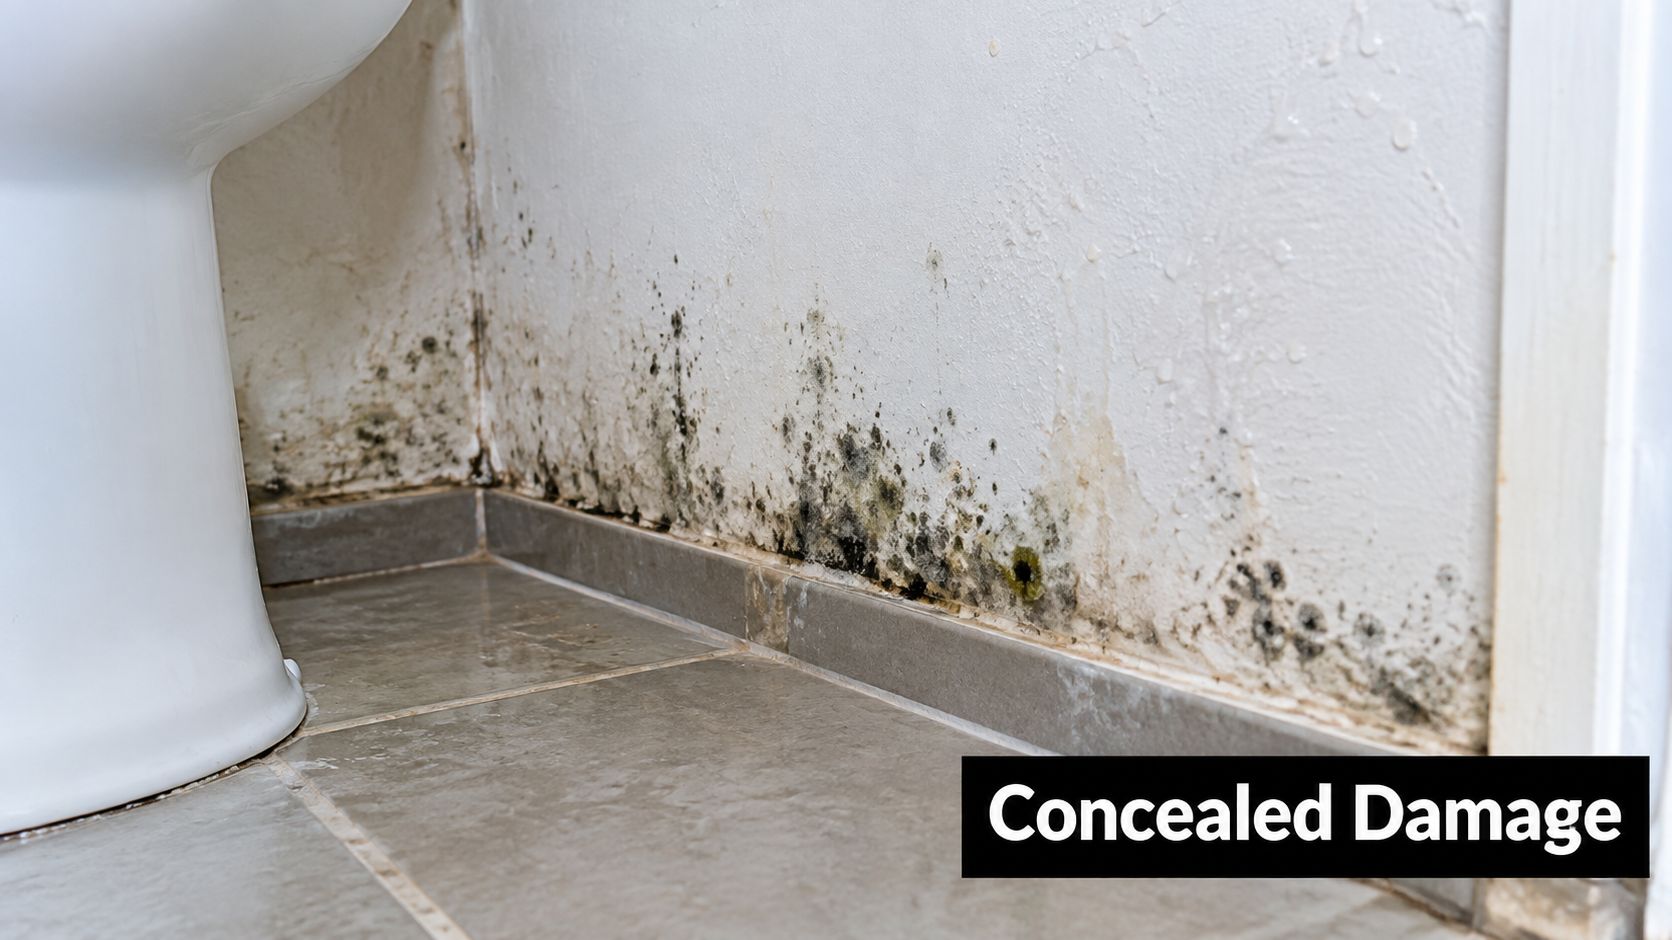
If a contractor refuses to photograph concealed work or can't explain the test process, pause before approving the next stage. A tile finish can be repaired. A concealed membrane failure may require removal of tiles, screed, fixtures and adjoining linings.

Timelines, Costs and When to Hire a Registered Builder

A complete Melbourne bathroom renovation commonly takes three to five weeks, depending on the scope, access, structural work, product availability and the number of trades involved. Strip-out, plumbing rough-in, substrate correction, screed curing, membrane coats, flood testing, tiling, grouting and fit-off each create dependencies. A delay in one stage can leave several trades unable to proceed.

A straightforward cosmetic re-tile is a different engagement from a full renovation. If the existing membrane and substrate are sound, the work may be limited to tile removal, preparation, adhesive, new tiles and joints. If the shower leaks, the floor waste is defective or the substrate has moved, the job becomes a waterproofing and rectification project before new tiles are even considered.

Understand what changes the price

There are no reliable universal Melbourne rates for bathroom tiling and waterproofing because preparation often costs more than the visible installation. A small bathroom with difficult access, multiple niches, a frameless screen, large-format tiles or a herringbone layout can require more labour than a larger room with simple geometry.

Scope Element Cost Range (AUD) Notes
Waterproofing Project-dependent Changes with wet-area coverage, penetrations, corners, substrate preparation and membrane system
Screeding and floor preparation Project-dependent Depends on falls, waste position, slab condition, levelling and finished floor height
Tile supply Project-dependent Influenced by tile material, size, finish, wastage and pattern
Tile labour Project-dependent Large-format, rectified, stone, mosaics and complex layouts require additional control
Leak rectification Project-dependent Can expand when failed screeds, membranes, linings or adjoining areas need removal

A transparent quote should separate demolition, disposal, carpentry, plumbing, electrical work, waterproofing, screeding, tile supply, tiling, grout, sealants, shower screen and fit-off. The cost of bathroom renovation in Melbourne varies with precisely these scope decisions, so a single allowance for “bathroom tiles” doesn't provide a useful comparison.

Choose the right practitioner

In Victoria, bathroom, kitchen and laundry renovations commonly fall within the registered Domestic Builder pathway. A limited registration needs to be the DBL-L category for bathroom, kitchen and laundry renovations, while a Domestic Builder Unlimited registration covers a broader range of domestic building work. Confirm the registration, contract requirements and permit position for the actual project rather than relying on a trade label. The Australian state bathroom renovation regulation overview provides background on the Victorian pathway.

Work over $16,000 needs particular attention to Victorian builder documentation and the registered builder requirements. Structural waterproofing, altered layouts, new plumbing, wall removal, floor changes and significant rectification aren't suitable for an informal tiler-only arrangement. A tiler-only engagement makes sense for a cosmetic re-tile only when the underlying membrane, falls and substrate have already been properly assessed and remain sound.

Your contract should identify who prepares the substrate, who applies and certifies the membrane, who performs the flood test, what products are approved, how variations are authorised and what warranty documentation is supplied. It should also state who is responsible if another trade damages the waterproofing after certification.

For homeowners who want one coordinated scope, Melbourne Tiling Services P/L provides bathroom and ensuite renovations, waterproofing, screeding, self-levelling, tile installation and frameless shower-screen installation, with registered builder coordination across the relevant trades. The practical advantage of a coordinated engagement is clearer responsibility for the sequence, not a promise that documentation can be skipped.


If your Melbourne bathroom needs more than a tile refresh, ask Melbourne Tiling Services P/L to assess the substrate, drainage, waterproofing scope and trade sequence before work starts. Visit Melbourne Tiling Services P/L to discuss a documented bathroom renovation, waterproofing or leak-rectification plan and request a quote.

Shower Niche Waterproofing: A Complete Guide

You've finished a Melbourne bathroom renovation, the tiles look flawless, and the shower niche has become the room's neatest feature. Then, months later, a faint watermark appears on the adjoining wall. The grout still looks sound, so the cause isn't obvious. Often, the trouble began behind the niche, where a missed junction, flat shelf, unsealed penetration, or poorly integrated membrane allowed water into the wall assembly.

Shower niche waterproofing isn't a decorative upgrade. It's part of a regulated wet-area system governed by the National Construction Code and AS 3740:2021. The substrate, framing, membrane, bond breakers, falls, penetrations, tiles, and shower-screen detailing all have to work together. This guide follows the practical sequence used on Melbourne bathroom renovations, including the registration obligations that apply to builders and waterproofers and the frameless-screen details many generic guides leave out.

Table of Contents

Why a Shower Niche Is the First Place a Bathroom Leaks

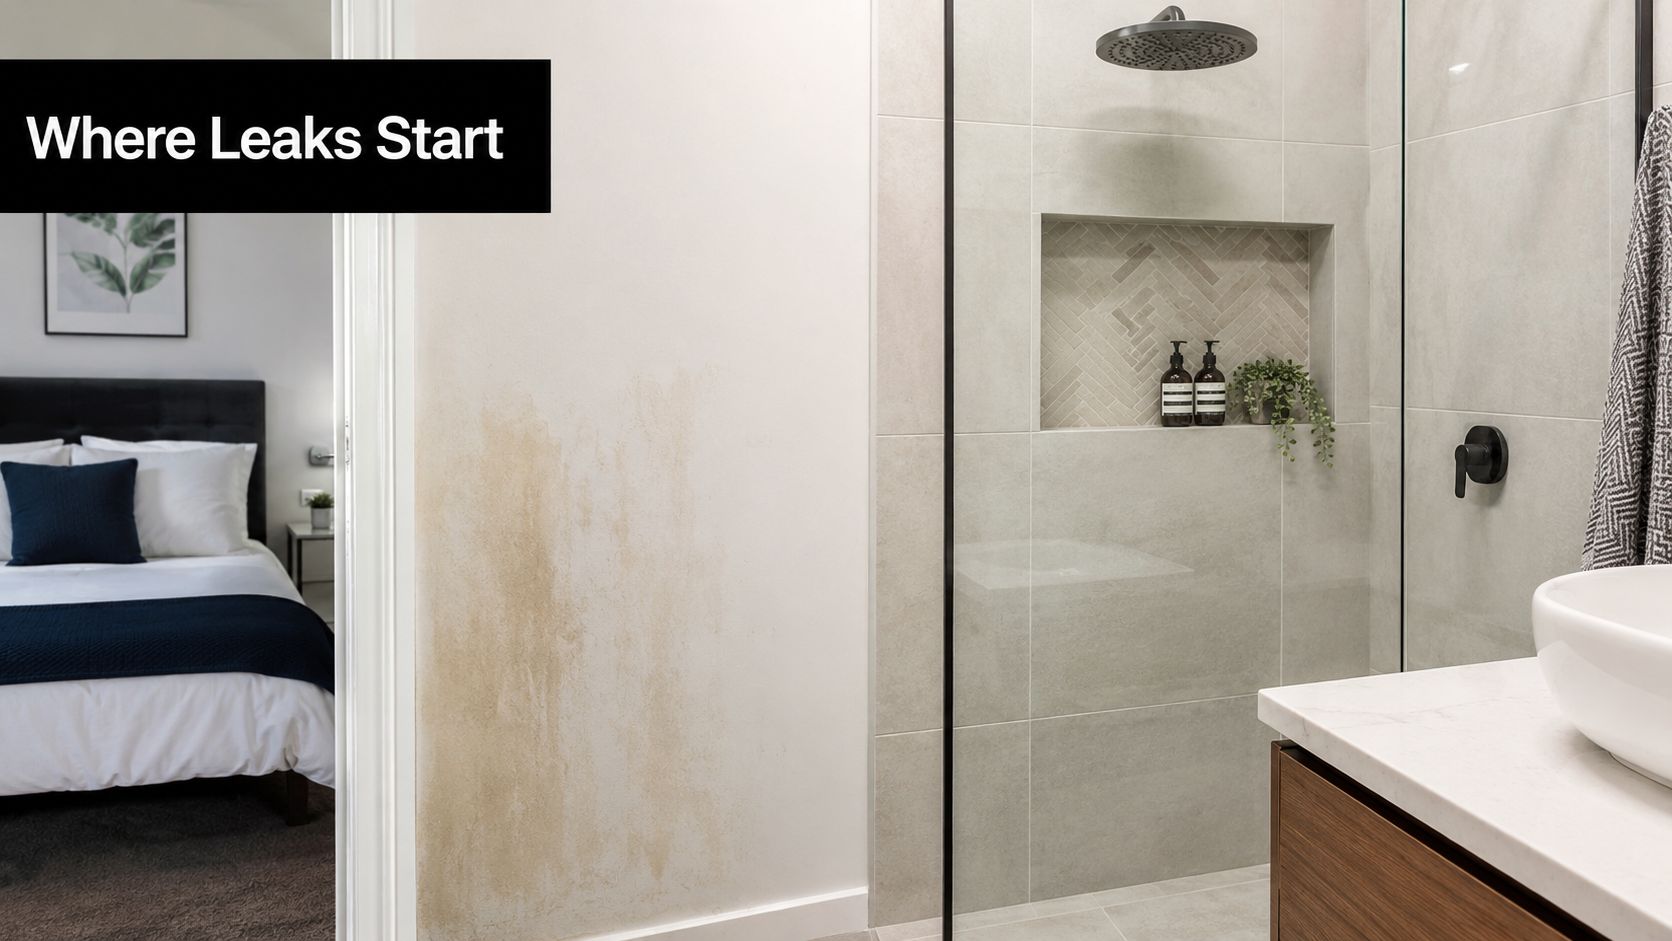
A common rectification call starts with a renovation that appears complete. The homeowner has used the shower for months without noticing anything unusual. Then a discoloured patch appears on the wall beside the bathroom, paint begins to blister, or the ceiling below shows a damp mark. By the time the symptom is visible, the niche may have been receiving water every day.

A recessed niche interrupts the otherwise continuous wall plane. That creates more internal corners, more substrate joins, more membrane transitions, and often a penetration for lighting or plumbing. The base also becomes a small horizontal surface where water can sit if the fall is missing or directed the wrong way.

Stained wall next to a shower showing signs of water damage, highlighting potential shower niche waterproofing issues.

Where the water gets in

The membrane itself is rarely the only issue. In failed niches, the vulnerable points are usually:

  • Internal corners: The back, side, and base junctions need compatible fillets or bond-breaker detailing so movement doesn't open a direct path behind the membrane.
  • Shelf bases: A level shelf can hold water against the rear corner rather than directing it towards the shower.
  • Penetrations: Mixer outlets, pipework, niche lighting, and screen fixings all need compatible sealing.
  • Wall transitions: The niche lining must connect with the surrounding wet-area substrate without leaving an unprotected break in the waterproofing plane.

Australian guidance places the shower floor and shower walls within a defined waterproofing zone. Under the NCC 2022 wet-area waterproofing provisions, shower walls must be waterproofed to at least 1800 mm above the floor substrate, and wall junctions and joints within the shower area require waterproofing for at least 40 mm either side of the junction. A niche sits inside that regulated zone, so it must be treated as part of the assembly, not patched as an afterthought.

Practical rule: If the tiler can't show how the niche membrane joins the surrounding wall membrane, the tiles are hiding a risk rather than finishing a compliant detail.

Rectification is disruptive because the visible repair is only the beginning. Tiles may need removal, the niche substrate may need to be opened, the membrane may need to be reinstated, and the wet area may require another test before retiling. Spending time on framing, substrate preparation, membrane continuity, falls, and inspection before tiling is far cheaper than diagnosing a stained adjoining room later.

The Code and Registration Baseline Every Melbourne Project Should Meet

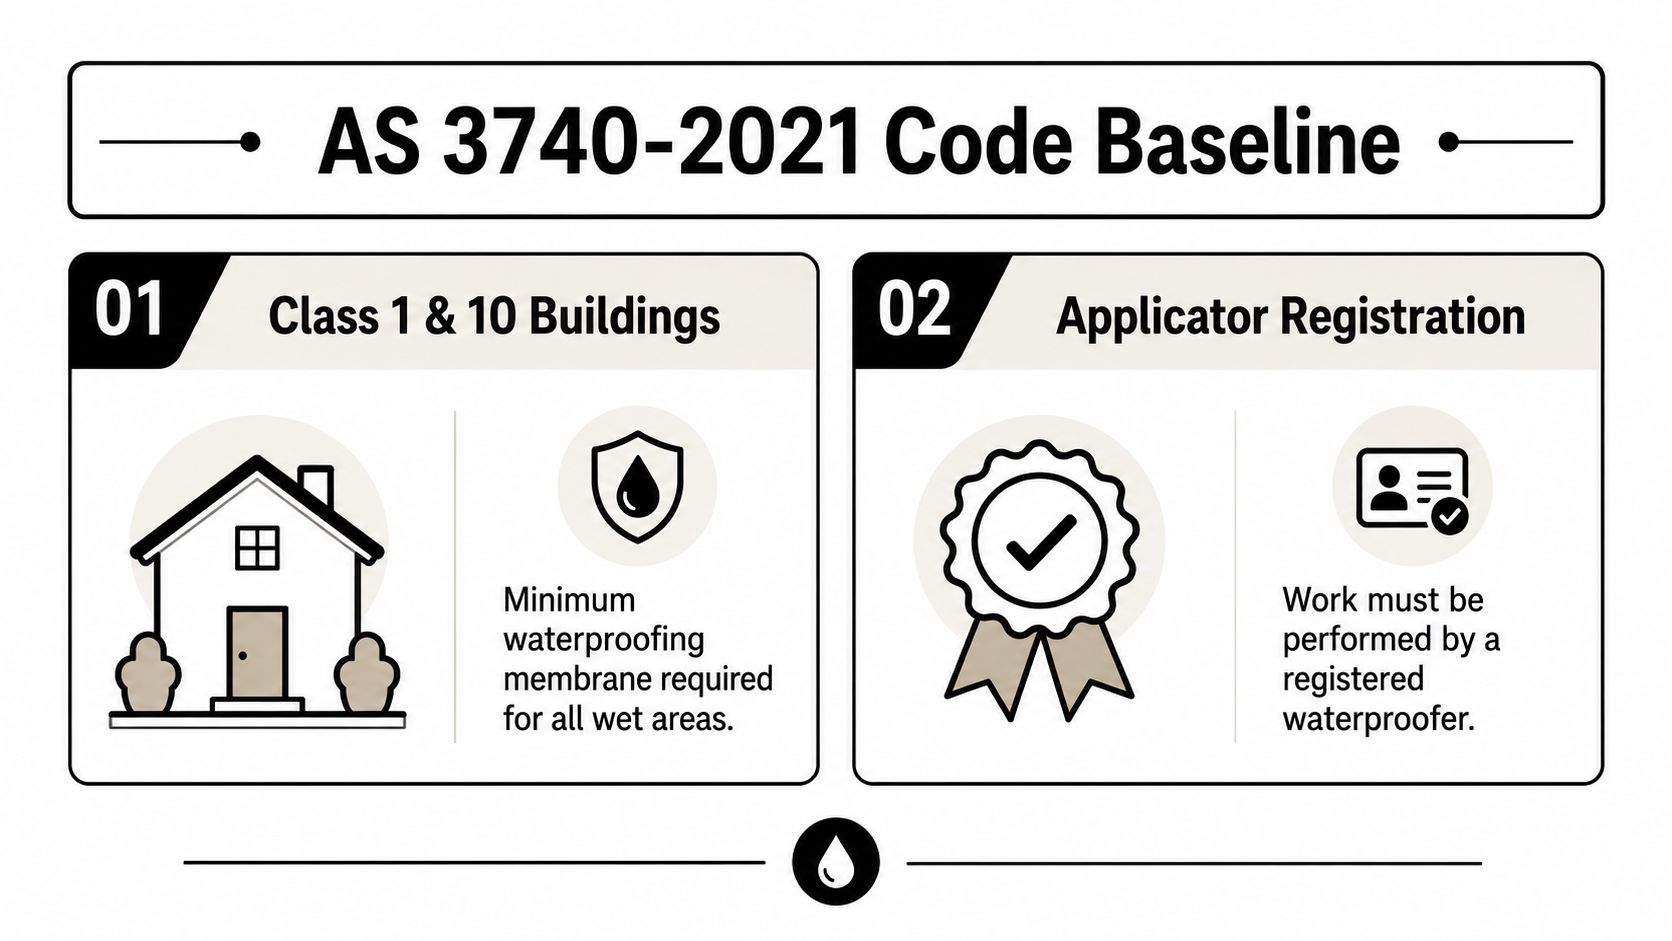
The starting point is AS 3740:2021, which sets minimum waterproofing requirements for domestic wet areas in Class 1, 2, and 4 buildings. It also applies to wet areas in Class 3 to 9 buildings as if they were Class 2 or 4 parts of a building, making it relevant beyond detached homes and standard apartment bathrooms. The Standards Australia description of AS 3740:2021 identifies it as the core standard for materials, design, and installation of waterproofing in these wet areas.

The NCC 2022 provisions translate that framework into practical coverage. The shower floor, including a hob or step-down, must be waterproof. Shower walls need waterproofing to at least 1800 mm above the floor substrate, while shower-area wall junctions and joints require coverage for at least 40 mm on either side. Penetrations also need sealing, which matters around mixers, shower outlets, shelves, and any niche lighting.

Falls and shower risk categories

The finished shower floor must fall towards the waste between 1:80 and 1:50. The Australian Building Industry Services information on waterproofing explains that this range corresponds to 12.5 mm to 20 mm per metre. The Victorian Building Authority treats both enclosed and unclosed showers as Category 1 high-risk areas, with a minimum 1:80 fall in shower areas. The VBA material also identifies 1:100 where vertical separation applies and no fall requirement for a Category 3 area where an enclosed shower retains water, conditions that shouldn't be casually applied to an open or frameless design. These distinctions are set out in the VBA wet-area waterproofing practitioner material.

A summary of AS 3740-2021 code baseline requirements for residential waterproofing and installer registration.

Registration questions to ask

Victoria separates bathroom renovation work from waterproofing work through different domestic builder categories. The Victorian regulations include a class limited to bathroom, kitchen and laundry renovation, and another class limited to waterproofing, so a renovation builder and a waterproofing practitioner aren't automatically the same registration scope. The relevant categories appear in Schedule 12 of the Victorian Building Regulations.

Victoria also requires registration to perform domestic building work over $10,000 in labour and materials, or to carry out building work requiring a permit regardless of cost, as explained by Consumer Affairs Victoria's registered practitioner guidance. Before signing a quote, ask:

  • Who holds the registration: Confirm the builder's registration class and the waterproofer's relevant scope.
  • What the quote includes: Check that framing, substrate, falls, membrane, penetrations, testing, and documentation aren't excluded.
  • Which system is specified: The membrane needs to be compatible with the substrate, adhesive, corners, collars, and tile finish.
  • What evidence you'll receive: Ask for photographs, product details, and test records before tiling covers the work.

For a renovation, a waterproofing compliance certificate in Victoria should form part of a properly documented handover where applicable.

Preparing the Framing, Substrate, and Falls Before Any Membrane

A niche can't be waterproofed properly if the opening moves, the lining is unsuitable, or the shelf starts flat. Preparation decides whether the membrane has a stable, continuous surface to protect.

Build a rigid opening

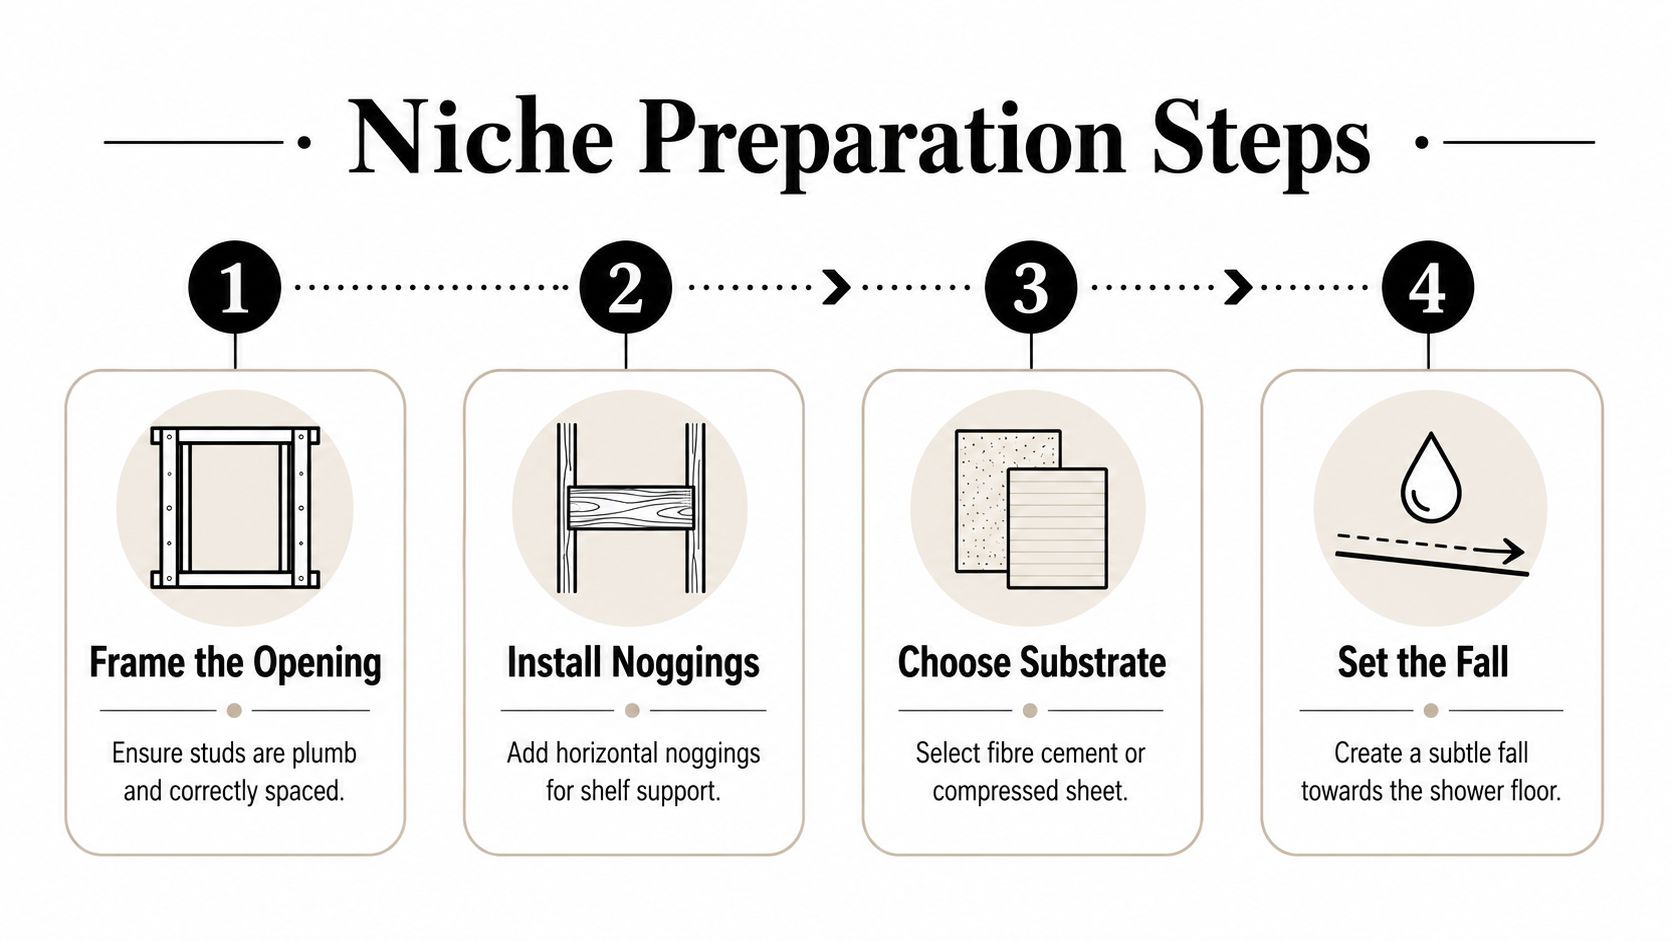
The niche opening should be framed with plumb studs and solid noggings. The upper and lower members need to support the lining and shelf without flexing, while the opening must avoid clashes with plumbing, electrical services, insulation, and structural elements. A wide horizontal niche deserves particular caution because removing too much existing framing can reduce wall stiffness. If the wall is structural or external, the builder needs to resolve that issue before the niche is cut.

The lining choice depends on the system and site conditions. Fibre cement sheet, compressed sheet, and proprietary foam tile backer can all be suitable when used according to their product instructions and integrated with a compatible membrane. The important point is continuity. A waterproof niche box installed against a poorly prepared opening still leaves a weak perimeter.

A prefabricated niche saves time only when its flange, substrate, membrane, and surrounding wall have been designed as one detail.

The niche lining must cover the back, sides, top, and base. AS 3740:2021 material quoted in this technical reference on niche waterproofing requires all niche surfaces to use a water-resistant substrate, with the niche separated from the lining on the opposite side of the wall. That separation matters where the recess would otherwise press directly against or share a vulnerable lining on the other face.

Establish the falls before coating

The niche base needs a minimum 1:100 fall towards the shower. That requirement is separate from the main shower-floor fall. A tiler can create the niche slope by packing, screeding, or forming the substrate before the membrane is applied, but the method must leave a sound, even surface.

The base should fall out of the recess, not towards the back wall. The back and side corners need to remain clean and continuous so water can travel across the shelf and out rather than collect in the rear junction. A registered waterproofer should check the substrate for dust, contamination, loose material, and excessive moisture, then use the specified primer before applying the membrane.

A four-step infographic illustrating the preparation process for building a shower niche, featuring construction diagrams.

The practical order is straightforward:

  1. Frame the opening: Make the structure square, plumb, and adequately supported.
  2. Install noggings: Provide firm support for the shelf and each lining edge.
  3. Install the substrate: Line every niche face and keep it separated from the opposite wall lining where required.
  4. Set the fall: Form the base slope before membrane application and confirm that it drains towards the shower.

A short site video can help illustrate the construction sequence, but it doesn't replace the membrane manufacturer's instructions or the registered waterproofer's inspection.

Sheet Membrane Versus Liquid Membrane for a Shower Niche

Both sheet and liquid membranes can produce a reliable shower niche when the products are compatible and the installer follows the system requirements. Neither option fixes poor framing, a flat shelf, contamination, or an unsealed penetration.

Criterion Sheet Membrane Liquid Membrane
Internal corners Preformed corners and proprietary tapes can make geometry consistent. The material conforms to complex shapes but needs careful reinforcement at corners.
Application control Coverage is visible, with overlaps and bonding carrying the main risk. Coat thickness, drying, and recoating windows carry the main risk.
Speed Fast on prepared, regular surfaces. Flexible for custom shapes, but requires curing between stages.
Common failure Poorly bonded overlaps, wrinkles, or incomplete corner adhesion. Thin spots, pinholes, or coating applied before the previous layer is ready.
Best fit A clean, stable niche with a compatible proprietary detailing system. A complex recess where an experienced applicator can control coverage and curing.

What works on site

Sheet systems are useful where the niche has crisp, predictable geometry. The membrane is cut to suit the back, sides, top, and base, then joined with compatible tapes or corner pieces. Overlaps must be fully bonded, pressed free of wrinkles, and integrated with the surrounding wall membrane. A sheet that appears to cover the area but isn't properly bonded at an edge is not a finished waterproofing detail.

Liquid polyurethane and acrylic systems are more forgiving around irregular geometry because the coating follows the substrate. That flexibility comes with discipline. The waterproofer needs to apply the specified coats at the specified coverage, allow the correct drying period, and avoid trapping moisture between layers. Cold and humid Melbourne conditions can make rushed recoating particularly risky.

The membrane system should also suit the tile adhesive and substrate. Product instructions govern primers, reinforcement, curing, and compatibility, so choosing a brand from a catalogue without checking the complete system is poor practice. A useful shower waterproofing membrane service overview can help homeowners understand what should be discussed, but the installer still needs to nominate the actual compatible system for the project.

Treat corners and penetrations as separate details

At wall-to-floor and wall-to-niche junctions, the applicator uses compatible fillets, bond-breaker tape, or the proprietary equivalent. These details accommodate movement and help the membrane remain continuous through a change in plane. Mixer outlets, shower penetrations, and niche lights need collars or reinforced detailing, not a casual smear of membrane around the pipe.

The choice between sheet and liquid should follow the geometry, substrate, enclosure, and applicator's demonstrated skill. Brand loyalty is a poor substitute for a complete, documented system.

Flashing, Taping, and the Niche Base That Drains

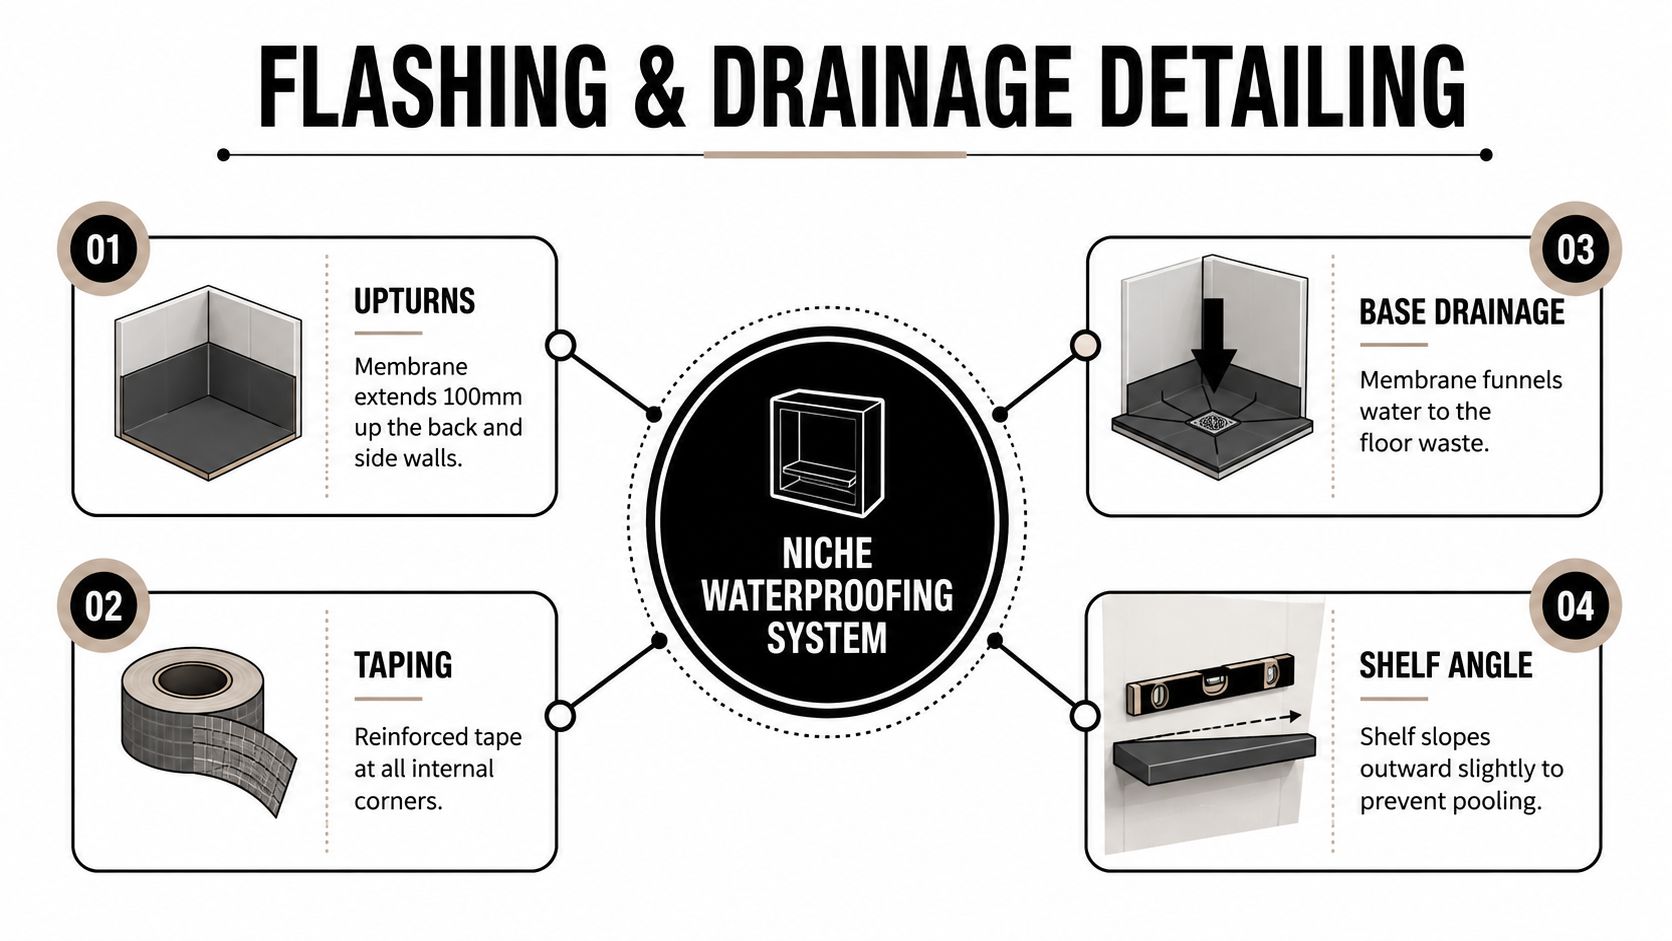
A niche must drain into the shower, not function as a small tiled shelf that holds water. The membrane covers the back, sides, top, and base, then turns into each junction with compatible fillets or bond breakers. All niche surfaces require waterproofing, with a minimum 1:100 fall towards the shower under the applicable wet-area requirements, as noted earlier.

Form the internal corners

Sharp changes of plane can thin a membrane, leave gaps beneath reinforcement, or crack when the framing moves. The applicator prepares each junction, installs the specified fillet or bond-breaker tape, and dresses the membrane continuously over the detail. Back and side upturns must remain continuous, with no pinholes or open lower corners.

The niche base should slope outward into the shower. A single sloping shelf is easier to clean and inspect than a concealed step or complicated channel. A drained shelf can work, but it adds an outlet, another junction, and another component requiring compatible products and ongoing cleaning. A full-width niche also needs stronger framing and more accurate tile setting than a compact recess.

An infographic detailing shower niche waterproofing steps, including upturns, taping, base drainage, and shelf angle techniques.

Connect the niche to the floor system

The wall membrane must join the floor membrane, which then dresses into a compatible floor-waste flange or puddle-flange arrangement. Waterproofing is incomplete if it stops short of the waste, finishes behind an unsealed penetration, or leaves the shower-screen line outside the planned wet-area detail.

The main shower floor fall remains between 1:80 and 1:50, or 12.5 mm to 20 mm per metre, under VBA guidance and the AS 3740 framework. A shower drainage installation service should coordinate the waste, screed, membrane, tile thickness, and finished levels. The grate is not a trim item to position after everything else.

Frameless screens change the exposure

Frameless and walk-in screens let more spray reach the wall and niche opening. The screen rail, channel, and fixing line must be planned before membrane application, especially where a waterstop sits beneath the rail. Drilling through a completed tiled wall can breach the waterproofing when the fixing detail was not allowed for during construction.

An enclosed shower contains spray more effectively, but it does not correct poor niche detailing. An open shower exposes more wall area, so the designer, builder, waterproofer, and screen installer need agreed falls and water-containment details before tiling begins. This coordination is where many otherwise neat niches fail.

Leak Testing, Sign-Off, and Documentation Before Tiling

Waterproofing should be inspected before tile adhesive hides it. A visual check looks for missed corners, pinholes, uncoated substrate, damaged membrane, incomplete collars, and poor transitions around the niche. It should also confirm that the shelf still has its intended fall after all reinforcement and coating have been applied.

Run a controlled flood test

Where the construction and project requirements call for it, the shower area can be temporarily flooded and held for the standard 24-hour period. The NCC wet-area waterproofing provisions provide the broader regulatory context for wet-area waterproofing, while the site team must follow the applicable testing method and membrane instructions.

Before filling, the tester marks the water level and protects openings and test drains appropriately. During the hold period, the adjoining room, skirtings, ceiling below, penetrations, and accessible edges should be checked for moisture or movement in the level. A niche may not be the lowest point, so the inspection must cover the whole wet zone rather than focusing only on the recess.

If the test fails, the team shouldn't just dry the area and tile over it. The membrane system needs diagnosis. A localised defect may allow a controlled repair followed by another test, but widespread separation, missing coverage, or a poor floor-to-wall connection can justify removing and rebuilding the wet-zone membrane.

Record the work

A useful handover file includes:

  • Photographs: Capture the substrate, niche corners, membrane coverage, penetrations, waste connection, and screen-zone detail before tiling.
  • Product records: Keep membrane and primer names, batch numbers, and manufacturer instructions.
  • Application notes: Record coat sequence and applied thickness where the system requires it.
  • Site checks: Include substrate moisture readings, preparation notes, and inspection dates.
  • Test evidence: Note the test method, water level, duration, observations, and any repairs.

Once tiling begins, later diagnosis becomes slower and more destructive. Documentation gives the owner and builder a clear record of what was installed, and it provides useful evidence if a warranty or rectification question arises.

Common Shower Niche Defects, Fixes, and Long-Term Maintenance

A neat tile finish can conceal a badly performing niche. The recurring defects in Melbourne rectification work are usually simple geometry or detailing mistakes, not mysterious product failures.

The failures that keep returning

Ponding on the shelf usually means the base was left level or falls towards the rear. The repair involves removing enough tile to expose the substrate, correcting the fall, reinstating the compatible membrane detail, and repeating the required test before retiling.

Delamination at the back wall can follow inadequate substrate preparation, movement, or a niche lining installed flush against the opposite wall lining where separation was required. The affected lining and membrane may need removal rather than a surface patch.

Perimeter silicone failure allows water behind the finished edge, especially where the joint is contaminated, too thin, or applied to a moving connection without proper preparation. Silicone is a maintenance joint, not a replacement for membrane coverage.

Capillary tracking at mixer penetrations often starts where the pipe collar or seal was omitted. Water follows the small gap around the penetration and travels behind the tile. The correct remedy depends on the extent of damage, but it can require opening the wall around the fitting and reinstating the penetration detail.

Repair or rebuild

Local tile and membrane removal makes sense when the defect is isolated and the surrounding system is documented and sound. A full wet-zone rebuild is often the safer decision where multiple junctions are missing, the floor membrane doesn't connect to the waste, or the substrate has moved. Any repair should include a new inspection and, where required, a repeat flood test.

Maintenance still matters after handover:

  • Inspect while cleaning: Look for cracked grout, open silicone, staining, and persistent moisture.
  • Maintain flexible joints: Replace failed silicone before water reaches the substrate.
  • Avoid excessive shelf loading: Heavy rigid objects can stress a small shelf and its tile edges.
  • Keep the recess clear: Remove residue so water can run out rather than sit in corners.
  • Report changes early: A stain outside the shower is a reason to investigate, not a mark to paint over.

Melbourne Tiling Services P/L provides bathroom renovations, shower niche waterproofing, screeding, drainage detailing, tiling, frameless shower screens, and leak rectification across Melbourne and greater Victoria, coordinating registered builders and relevant trades for the wet-area scope. For a niche renovation or an existing leak, visit Melbourne Tiling Services P/L to arrange a project discussion and request a quote before the tiles conceal the detail.

Shower Waterproofing Membrane: The Ultimate 2026 Guide

You notice it in small ways first. A faint musty smell after a shower. Grout that never seems to dry properly. A paint bubble on the ceiling below. By the time water shows itself, it has usually been travelling for a while.

That's what catches people out in bathroom renovations. The tiles still look good. The tapware still shines. The room feels finished. But the part that decides whether the bathroom lasts is buried underneath all of that. It's the shower waterproofing membrane.

In Melbourne, that hidden layer matters even more than is commonly understood. Bathrooms deal with daily water exposure, cleaning chemicals, movement in the building, and stop-start drying conditions. Add variable humidity and cold spells, and rushed work gets exposed fast. A shower can look perfect on handover day and still be heading towards failure if the membrane was applied badly, cured poorly, or installed without proper falls to the drain.

If you're planning a bathroom renovation, fixing a leak, or comparing registered builders, this is the part worth understanding before a single tile goes on the wall.

Table of Contents

The Hidden Threat in Your Bathroom

A leaking shower rarely starts with a dramatic flood. More often, it starts with a pinhole weakness somewhere no one can see. Water gets past a junction, sits under tile, works into a wall cavity, and keeps going. Months later, the owner is staring at swollen skirting, lifting paint, or a dark patch in the room next door.

That's why I tell clients the shower membrane is the essential bathroom, and the tiles are just the finish. The membrane is the layer doing the hard work every day. If it fails, the rest of the bathroom becomes decoration over a defect.

Where the trouble usually starts

Most failures come from one of a few places:

  • Wall to floor junctions: Movement and water pressure converge.
  • Around the drain: If the system doesn't direct water properly, moisture hangs around where it shouldn't.
  • Penetrations: Shower roses, mixers, spouts, and pipes interrupt the surface and need proper sealing.
  • Hobs, niches, and corners: These details look simple on a plan, yet poor workmanship often becomes evident.

A bathroom can survive a chipped tile. It won't survive a failed waterproofing system.

A shower leak is rarely about one bad tile. It's usually about one broken chain in a waterproofing system.

Why cosmetic finishes fool people

Tiles, grout, silicone, and water-resistant linings all have a job, but none of them replaces membrane work. Grout absorbs moisture. Silicone ages. Tile assemblies move. If the waterproofing behind them isn't continuous, water finds the break.

That's what makes this part of bathroom renovations so often botched. Owners can compare tile colours and tapware brands easily. They can't see dry film thickness, curing discipline, or whether the membrane was detailed correctly around a puddle flange.

The result is simple. The most important layer in the room is also the easiest one for a rushed contractor to hide.

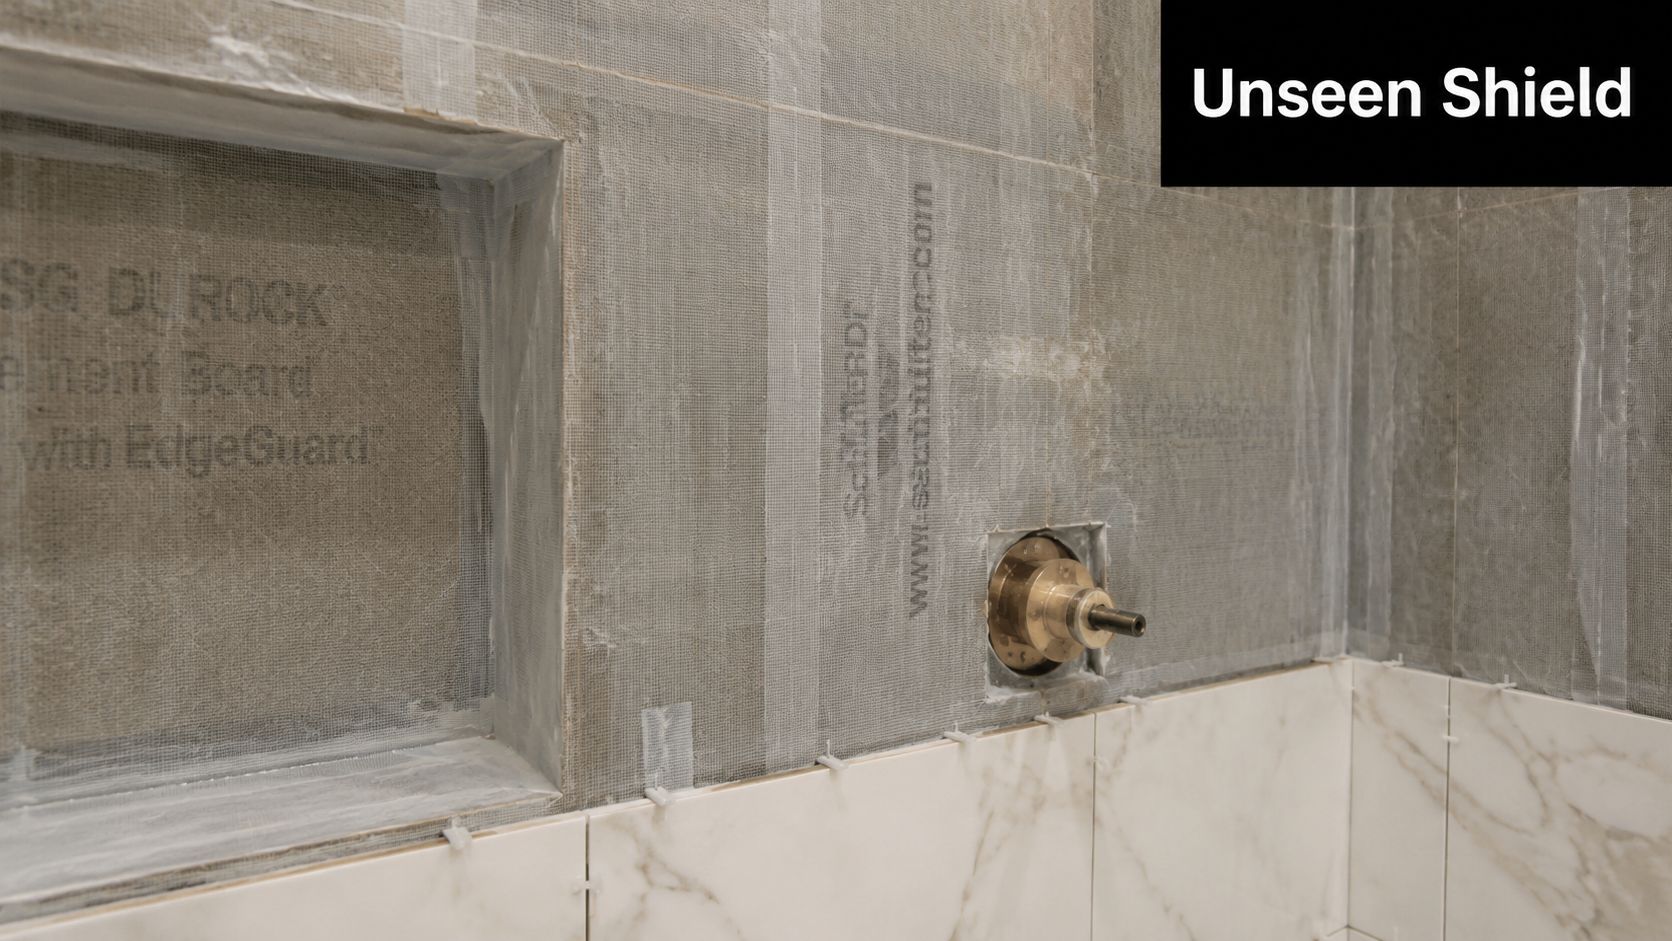
The Unseen Shield What Is a Waterproofing Membrane

A shower waterproofing membrane is the sealed barrier between everyday shower water and the structure of the building. The easiest way to think about it is a raincoat under the tiles. The tiles are the outer clothing. They look finished and tidy, but they are not the thing keeping the frame dry.

A shower wall under construction featuring cement backer board, waterproofing tape at seams, and partially installed marble tiles.

What the membrane actually does

Its job is blunt and uncompromising. It must stop water from passing through the tiled surface and reaching substrate, framing, and adjoining materials. That means it has to work across flat areas, corners, pipe penetrations, drains, and transitions.

If that barrier is broken anywhere, the shower stops being a controlled wet area and starts feeding moisture into places never meant to stay wet.

In Australia, faulty waterproofing is one of the top three building defects, with up to 90% of all bathroom complaints relating to waterproofing and leakages in shower areas, as noted in Siniat's summary of bathroom waterproofing requirements. That figure tells you something important. This isn't a minor trade detail. It's one of the biggest defect points in the whole renovation process.

Why tiles and grout aren't enough

A lot of people still assume tiled equals waterproof. It doesn't.

  • Tiles resist wear: They give you a cleanable finish.
  • Grout fills joints: It helps lock the surface together, but it is not a guaranteed water barrier.
  • Water-resistant boards help manage exposure: They are not a substitute for a compliant membrane.
  • Silicone handles movement at changes of plane: It can't carry the waterproofing system on its own.

That's the mistake. People trust the visible layer because it looks solid. In practice, the visible layer sheds some water and slows the rest. The membrane is what stops it.

Why continuity matters more than product marketing

The membrane only works when it forms one uninterrupted system. It can't stop at the easy parts and leave the critical details weak. Corners, drains, hobs, and penetrations are where good installs separate from bad ones.

If you want a practical walkthrough of the sequence, this guide on how to waterproof a shower properly shows the process in the order it needs to happen.

Practical rule: If someone tells you the tiles, grout, and silicone will “keep most of the water out”, they've already missed the point.

Choosing Your Armour Sheet vs Liquid-Applied Membranes

Not all membranes are installed the same way, and not all showers suit the same system. In practice, most bathroom renovations come down to sheet membranes or liquid-applied membranes. Both can work. Both can fail. The difference is usually in the detailing, substrate, and the person installing them.

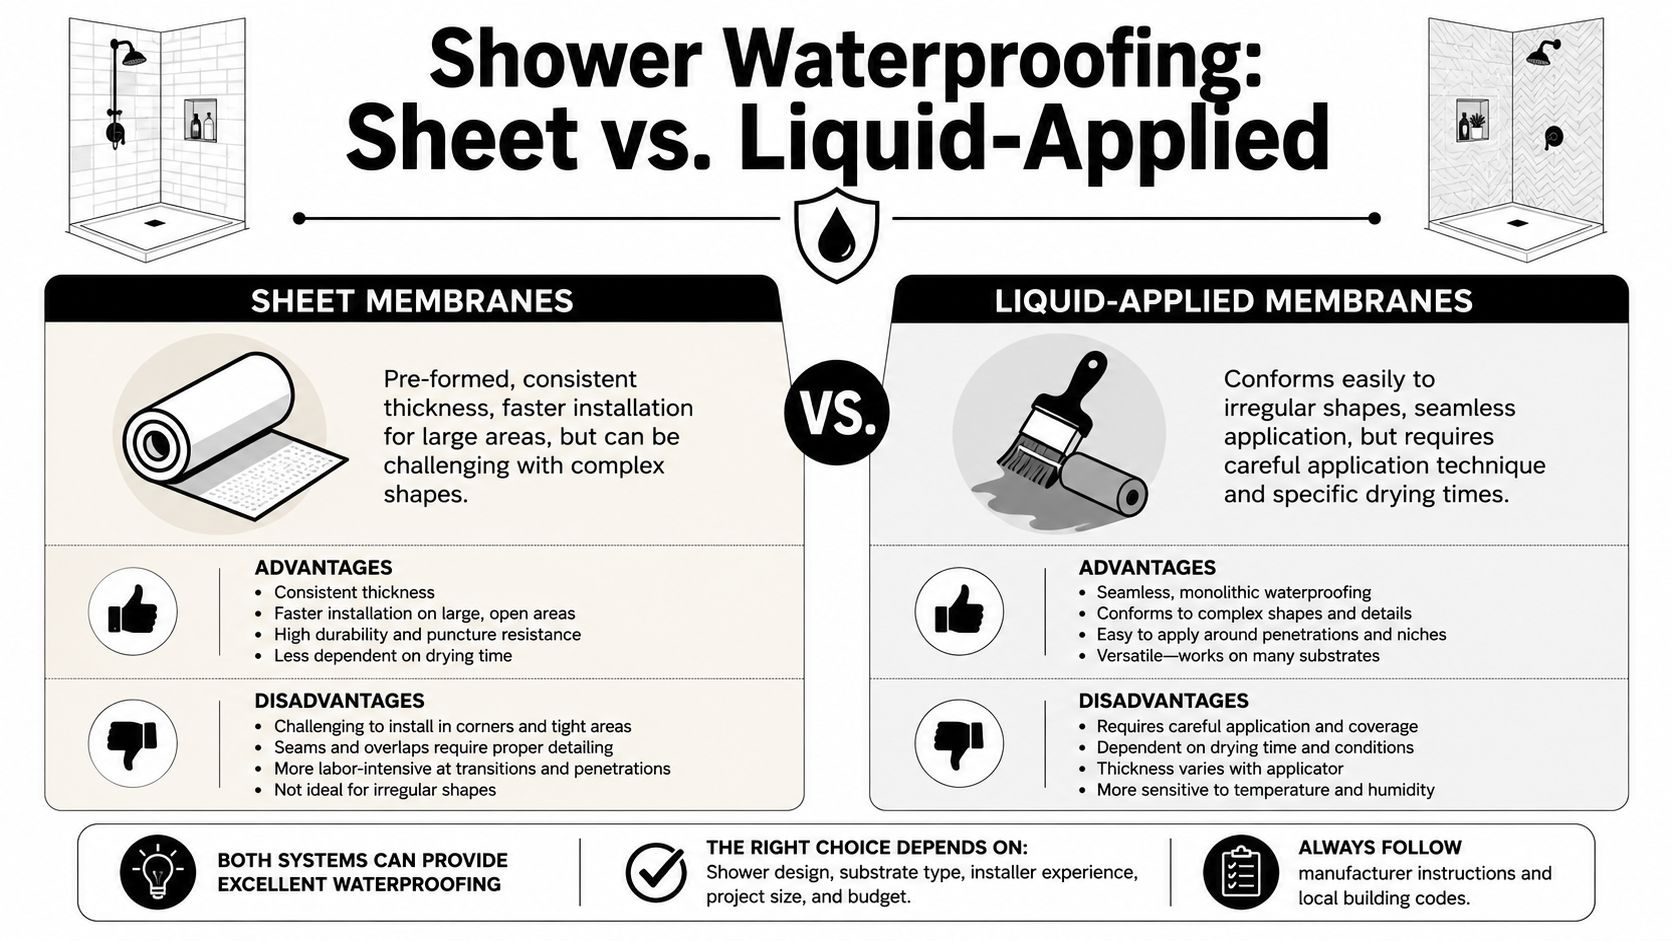
A comparison infographic between sheet and liquid-applied shower waterproofing membranes, explaining their pros, cons, and use cases.

The core difference

A sheet membrane is a manufactured layer that gets cut, bonded, lapped, and sealed into place. A liquid membrane starts wet and is rolled, brushed, or trowelled on, then dries into a continuous barrier.

That sounds straightforward, but the trade-offs are real.

  • Sheet systems give you factory-made consistency in the membrane body itself.
  • Liquid systems adapt better to odd shapes, fiddly details, and irregular geometry.

The catch is that each system has its own failure points. Sheet systems rely heavily on seam treatment. Liquid systems rely heavily on application control.

Sheet vs Liquid-Applied Waterproofing Membranes

Feature Sheet Membrane (e.g., Fabric-Reinforced) Liquid-Applied Membrane (e.g., Polyurethane)
Thickness control Factory-made membrane thickness is consistent Installer must achieve correct thickness across the whole area
Corners and junctions Needs careful folding, bandaging, or preformed corner details Conforms easily to corners and complex shapes
Seams Seams are the critical weak point if badly lapped or bonded Fewer sheet joins, but continuity still depends on careful detailing
Speed on open areas Often efficient on simple, larger surfaces Can be slower because multiple coats and drying stages are needed
Complex penetrations Can be more fiddly around pipes and niches Usually easier to dress around penetrations
Substrate variation Good on flat, well-prepared surfaces More forgiving on shapes, less forgiving on poor prep
Quality risk Usually in overlaps, corners, and drain integration Usually in thin spots, pinholes, or rushed recoating
Best fit New builds or straight-forward layouts with clean geometry Renovations with awkward details, mixed surfaces, or custom shapes

What works well with sheet membranes

On clean, square substrates, sheet membranes can be an excellent choice. If the shower base, walls, and corners are well built, the installer can create a very controlled system. The membrane thickness isn't being guessed at on site because the material arrives as a manufactured sheet.

That's the upside. The downside is precision. One sloppy overlap, trapped air pocket, badly dressed corner, or poor drain connection can compromise the system. Sheet work rewards methodical installers.

What works well with liquid-applied membranes

Liquid membranes suit renovation work because bathrooms are rarely perfect once stripped out. Walls can be out slightly. Penetrations can be awkward. Niches, hobs, and transitions can be easier to detail with a brush and roller than with cut sheets.

The trade-off is consistency. The installer has to build the membrane to the required thickness everywhere, not just where it's easy. The verified Australian guidance around shower membrane application is very clear on the importance of thickness and cure. The ARDEX guide to liquid-applied waterproofing membranes states a minimum total dry film thickness of 1.0 mm for floor applications, notes full curing after 3 days at 23°C or 5 days at 10°C for an example system, and requires the membrane over the hob to extend at least 150 mm beyond the outside edge.

That's why liquid systems don't forgive rushed work. If someone lays it on too thin, skips reinforcement where required, or tiles before cure, the barrier looks finished before it is finished.

How I'd decide between them on a real job

I'd look at the job in this order:

  1. Substrate condition: Flat and simple can suit sheet. Irregular renovation work often suits liquid.
  2. Detail complexity: More penetrations, nib walls, niches, and custom geometry usually push the decision towards liquid.
  3. Installer skillset: A membrane is only as good as the team applying it. Product choice doesn't rescue poor workmanship.
  4. Programme pressure: If the timeline is compressed, that's a warning sign. The right answer isn't the “fastest” membrane. It's the system the team can install properly without forcing the next trade in too early.

Good waterproofing isn't about choosing the fanciest product. It's about choosing the system the site conditions and installer can support without shortcuts.

The Rulebook Meeting AS 3740 and Builder Compliance

Most owners hear “AS 3740” and switch off because it sounds like paperwork. That's a mistake. The standard matters because it tells you how a wet area must be built so water goes where it should, and nowhere else.

In plain terms, AS 3740 is not there to make bathroom renovations harder. It's there because bathrooms fail in predictable ways, and the standard is written around preventing those failures.

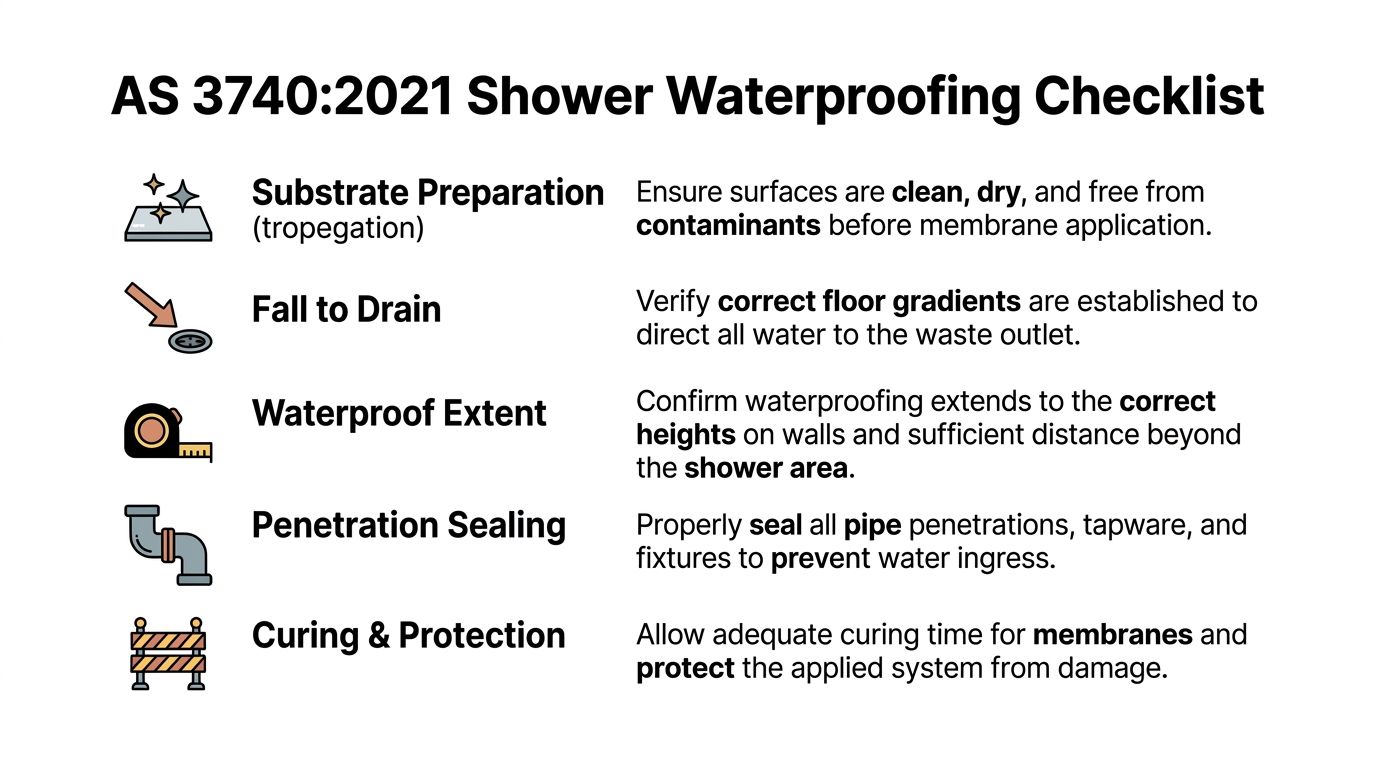
A checklist infographic outlining AS 3740:2021 standards for proper shower waterproofing preparation and installation steps.

The wall height requirement is about splash and saturation

One of the most important changes people need to understand is shower wall coverage. In Victoria, all bathroom renovations, including complete stripping back to substrate, must comply with AS 3740:2021, which mandates shower walls be waterproofed to a minimum height of 1800mm above the finished floor level, or 50mm above the shower rose if the rose is higher, according to this explanation of AS 3740 requirements for Victorian wet areas.

That requirement isn't arbitrary. Showers don't just wet the bottom of walls. They create repeated splash, misting, and runoff well above the old minimal treatment zones. Waterproofing only at the junction is like wearing gumboots in a storm and expecting your shirt to stay dry.

Falls and drainage are part of waterproofing

People often separate waterproofing from drainage. On site, they're tied together. A membrane can be intact and the shower can still fail if water sits where it should be moving.

The updated AS 3740:2021 guidance in Australia requires shower walls to be waterproofed to 1800 mm above the finished floor level or 50 mm above the shower rose, whichever is higher, and in commercial wet areas the membrane must be graded to the drain waste puddle flange, with no opting out, as outlined by ABCG's overview of the new waterproofing standard.

That grading requirement matters because standing water increases stress on every junction, every penetration, and every weakness in workmanship. If the shower floor doesn't fall properly, the membrane and the tile assembly stay wetter for longer.

Why registered builders matter

Compliance isn't just a membrane brand and a ticked box. It's coordination.

A registered builder looks at the whole chain:

  • Substrate preparation: Framing, sheeting, and set-out have to support the waterproofing system.
  • Drain location and puddle flange detailing: These are not accessories. They are part of the system.
  • Trade timing: Waterproofing can't be rushed because the tiler is due tomorrow.
  • Inspection and documentation: The work has to stand up later, not just look neat on the day.

If you're engaging a builder or waterproofer, ask how they handle compliance records and whether they issue the right documentation. This guide to a waterproofing compliance certificate in Victoria is useful because it shows what proper accountability looks like.

Rules only work when someone enforces them on site

Standards don't build bathrooms. People do.

The reason registered builders matter is simple. Someone has to control sequencing, reject bad substrate, hold back tiling until waterproofing is ready, and make sure each trade leaves the next one a compliant surface to work from. Without that oversight, the standard becomes a set of good intentions buried under tile adhesive.

Why Waterproofing Fails and How to Prevent It

Waterproofing failures usually aren't mysterious. They come from predictable mistakes, repeated on jobs where someone is rushing, guessing, or relying on cosmetic finishes to cover technical defects.

The pattern is familiar. The bathroom looks complete. The leak shows up later.

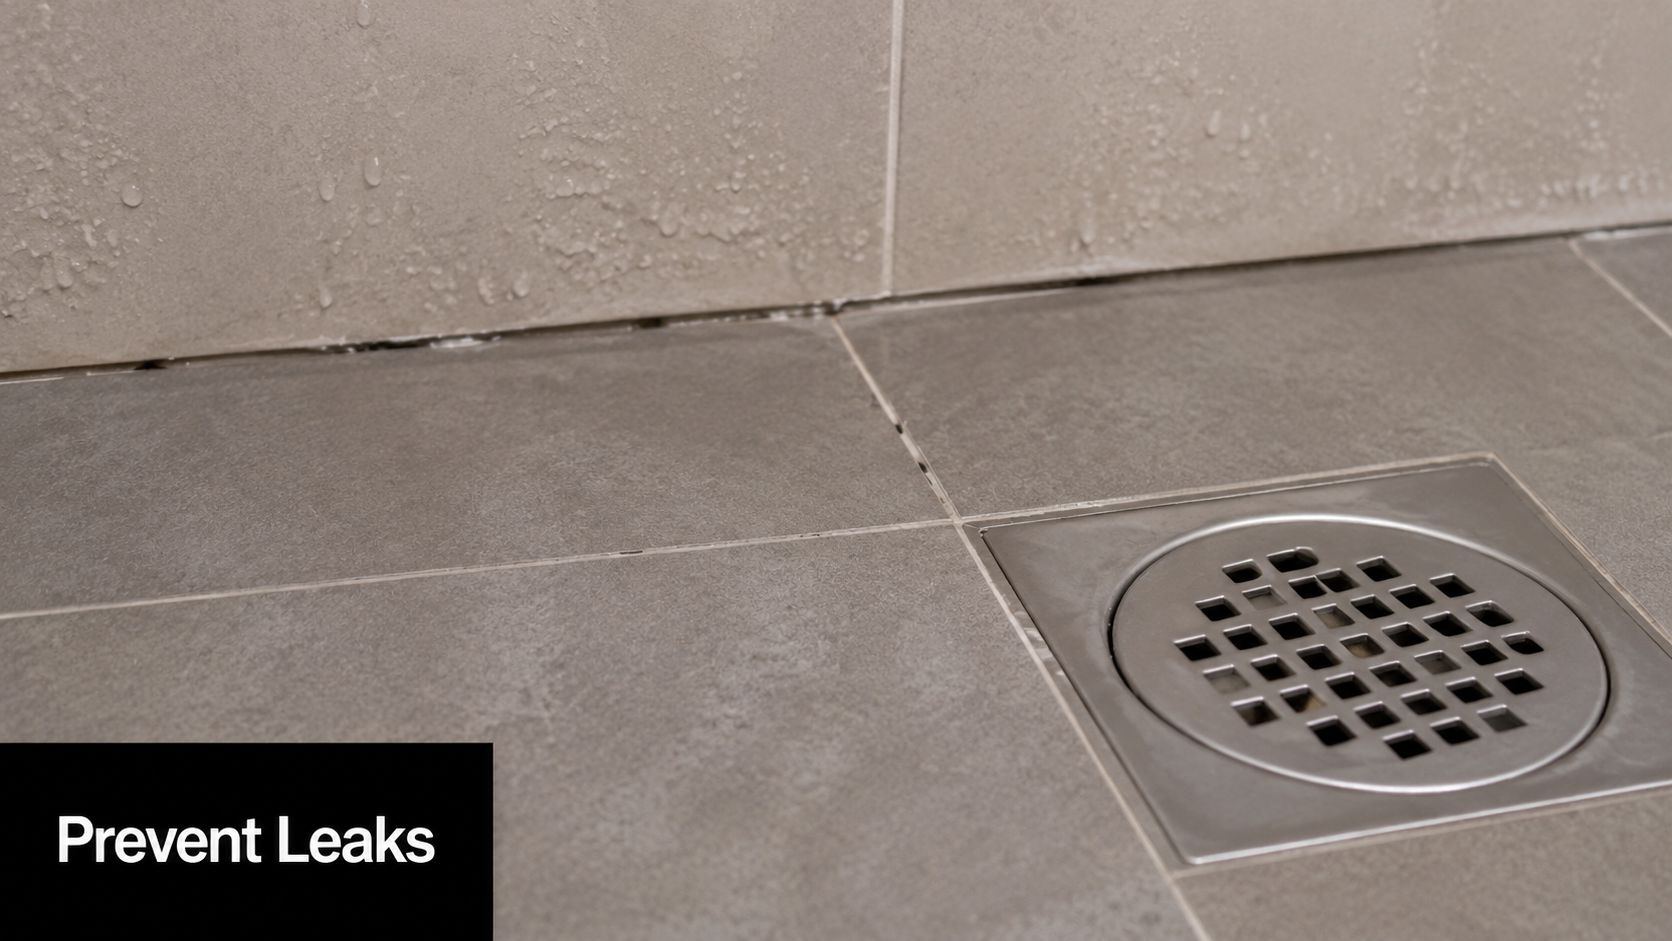
A close up view of shower floor tiles with a drain showing potential gaps needing waterproofing.

Failure starts before the membrane goes on

A membrane can't fix a dirty, damp, unstable, or badly formed surface. If the substrate is dusty, contaminated, or moving, adhesion suffers. If falls are wrong before waterproofing, the membrane follows bad geometry.

These are the common red flags:

  • Poor prep: Dust, residue, loose sheeting, or moisture left in the substrate.
  • Bad geometry: No proper fall to waste, uneven transitions, or awkward build-ups around the drain.
  • Untreated penetrations: Pipes and fittings interrupt the membrane plane and need proper detailing.
  • Damage between trades: A membrane can be compromised after application if later work isn't controlled.

Thin application means weak protection

This is one of the biggest issues with liquid systems. People see coverage and assume performance. They're not the same thing.

If the membrane goes on too thin, the cured layer may look continuous but still allow moisture transmission. Weak spots often show up at corners, around floor wastes, over hobs, and at changes of plane where the brush or roller work gets inconsistent.

If the waterproofing is only heavy where the installer can see it easily, it probably isn't right where it matters most.

Melbourne's climate punishes rushed curing

Local conditions really matter. Recent 2025–2026 data from Australian Waterproofing Company shows 25% of shower membrane failures in Melbourne are due to tiling before the membrane fully cured, and that Melbourne's variable climate can extend drying times beyond manufacturer claims, according to Dunlop Trade's discussion of shower waterproofing membrane selection and curing.

That aligns with what experienced site teams already know. A membrane doesn't cure by the calendar on the box if the room is cold, closed up, or carrying high humidity. In Melbourne, one day can be dry and mild, the next cool and damp. If a contractor treats every bathroom like a laboratory-controlled environment, they're taking a gamble with your walls and floor.

The mistake owners rarely see

Tiling too early is dangerous because it hides the problem immediately. Once adhesive and tile go over a membrane that hasn't fully cured, the system gets sealed in before it has reached proper performance. You can't inspect that later without demolition.

A useful visual explanation sits below. It helps homeowners understand where leaks often begin and why drain zones and transitions deserve extra attention.

How to prevent failure on a live renovation

Prevention isn't glamorous. It's disciplined.

  1. Start with the substrate: Clean, dry, stable, and formed correctly to falls.
  2. Use the membrane system as specified: Don't mix random components because they're “close enough”.
  3. Control thickness and detailing: Corners, penetrations, hobs, and drains need deliberate work, not quick touch-ups.
  4. Respect cure times: Programme pressure is not a technical justification.
  5. Protect the membrane before tiling: Damage from later trades is still membrane failure.

Most shower leaks are expensive because they stay hidden while the damage spreads. The fix isn't heroic workmanship later. It's patient workmanship at the exact moment people are tempted to rush.

The Full Picture Cost Compatibility and Maintenance

Owners often ask the wrong cost question. They ask what waterproofing adds to the renovation instead of what failure removes from it. Waterproofing is one of the least visible parts of the job and one of the most important to get right.

A proper membrane system has to work with the substrate, the adhesive, the tile format, the falls, and the sequencing of the trades. If one part is mismatched, the room might still finish neatly, but long-term performance starts to slip.

Cost is tied to complexity, not just area

A simple shower on straight walls is one thing. A shower with a niche, a hob, awkward penetrations, mixed substrates, and detailed stone work is another. The membrane itself is only part of the cost. The primary value is in proper preparation, detailing, cure management, and accountability if something goes wrong.

That's why cheap quotes can be misleading. The number on paper may exclude the patience required to do the work properly.

Compatibility matters more than people think

Large-format porcelain, mosaics, natural stone, sheet systems, liquid systems, adhesives, and substrates all interact differently. A good installer doesn't just ask what tile you like. They ask what the tile requires underneath.

  • Large-format tiles: These demand flatter surfaces and place a premium on accurate substrate preparation.
  • Mosaics on shower floors: They follow falls well but increase the number of grout joints and need careful drainage detailing.
  • Natural stone: This may need specific adhesive and sealing considerations depending on the stone and substrate.
  • Membrane-to-adhesive compatibility: The waterproofing product and tile adhesive have to be used as a system, not guessed at from separate brands and assumptions.

If that compatibility conversation never happens, that's a warning sign.

Maintenance protects the system you already paid for

Even the best shower waterproofing membrane doesn't mean the bathroom can be neglected. Surface maintenance won't replace the membrane, but it does reduce avoidable stress on the assembly.

A simple maintenance routine helps:

  • Check silicone joints: If movement joints are splitting or shrinking, deal with them early.
  • Watch drainage: If water lingers after a shower, don't ignore it.
  • Keep ventilation working: Bathrooms need moisture removed, not trapped.
  • Treat cracked grout as a signal: It may be minor movement, or it may be showing a bigger issue underneath.
  • Don't assume new means permanent: Wet areas age through use, cleaning, and movement.

According to Precision Business Insights' overview of the Australian waterproofing membranes market, high-quality waterproofing membranes typically last between 7 to 10 years under normal conditions, with industry guidelines recommending a refresh every 10 to 15 years to prevent water penetration.

That doesn't mean every bathroom suddenly fails at a set age. It means membranes are part of a working wet-area system, not a forever product you install once and stop thinking about.

Your Renovation Checklist Hiring the Right Professional

If you want a leak-free bathroom, don't start by asking what membrane brand someone uses. Start by asking how they run the whole job. Waterproofing succeeds when the builder, waterproofer, and tiler work in sequence and someone takes responsibility for the final outcome.

That's why bathroom renovations go better under registered builders who control the process instead of leaving each trade to protect itself.

Questions worth asking before work starts

Use this as a practical shortlist when you're interviewing contractors.

  • Are you a registered builder, or who is taking overall responsibility for the renovation? If no one owns the whole chain, defects get bounced between trades later.
  • How do you make sure the shower meets AS 3740 requirements on site? The answer should mention substrate, falls, wall extent, penetrations, and drainage details, not just “we waterproof everything”.
  • What membrane system are you using, and why does it suit this bathroom? A real answer connects the product to the substrate and layout.
  • How do you deal with niches, hobs, corners, and pipe penetrations? These are the places that reveal whether someone has a process or just confidence.
  • What is your curing process before tiling starts? If the answer sounds vague or too fast, keep digging.
  • How do you protect the membrane between application and tiling? Damage after waterproofing still counts as failed waterproofing.
  • What documentation do I receive at the end? This matters for compliance, future sale, and dispute protection.

What a good answer sounds like

A capable professional usually speaks in sequence. They talk about demolition, substrate condition, rectification if needed, falls, membrane application, cure management, inspection, then tiling. They don't jump straight to tile finish, grout colour, or how quickly they can start.

They also won't promise that waterproofing is easy. Good operators know wet areas are detail-heavy and don't like pretending otherwise.

The best contractor isn't the one who sounds the fastest. It's the one who can explain where showers fail and what they do to stop that happening.

One team is often safer than multiple disconnected trades

There's a reason many difficult bathrooms go wrong when owners split the job across separate people. One person strips the room, another sheets it, another waterproofs it, another tiles it. If a leak appears later, everyone says the defect started before they arrived.

A single accountable team reduces that problem. It doesn't eliminate the need for skill, but it does reduce the handover gaps where defects get buried.

If you're comparing local options, this list of tiling contractors near you in Melbourne is a useful place to begin your shortlist.

The final filter

Before you sign anything, ask yourself one plain question. Does this contractor talk about waterproofing like a hidden technical system, or like a quick prep step before the main work starts?

That answer tells you almost everything.


If you want a bathroom renovation team that understands shower waterproofing membrane systems from demolition through to final tiling, Melbourne Tiling Services P/L offers registered builder oversight, coordinated licensed trades, and practical wet-area experience across Melbourne and greater Victoria. For homeowners who want the job done once and done properly, they're worth speaking to early.

Waterproofing Compliance Certificate Victoria: 2026 Guide

You've probably started with the exciting parts of the renovation. Tiles, tapware, vanity, layout, lighting. Then someone mentions a waterproofing compliance certificate and the whole bathroom project suddenly feels more technical than expected.

That reaction is normal. Most Melbourne homeowners don't think about the membrane hidden under the tiles until a builder, surveyor, buyer, or insurer asks for paperwork. By then, the wrong answer can turn a straightforward bathroom renovation into a dispute about leaks, liability, and whether the work was even signed off properly.

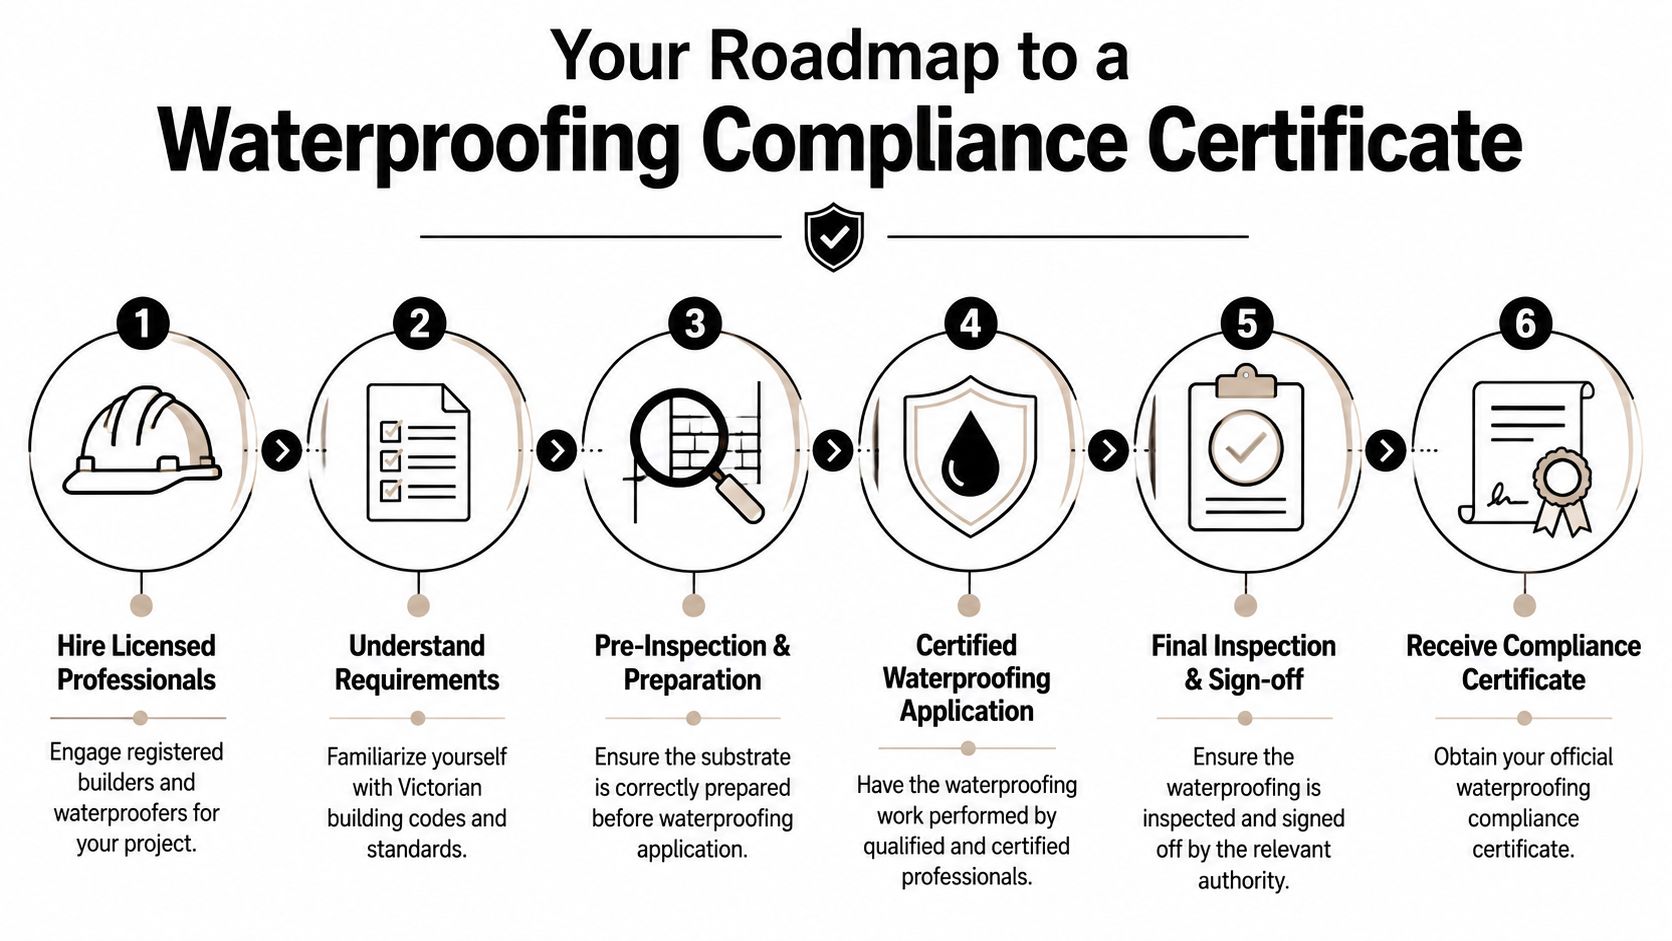
A waterproofing compliance certificate victoria issue usually isn't about paperwork for paperwork's sake. It's about proving that the wet area was built to the required standard, by the right practitioner, with traceable accountability if something goes wrong later. In practical terms, that certificate can matter when the bathroom is being built, when the home is sold, and when water damage shows up where it shouldn't.

The biggest trap in Victoria is the gap between smaller jobs and larger renovations. Some works sit in a grey area where homeowners assume they're covered because the bathroom looks finished and the invoice has been paid. That assumption can be expensive.

Table of Contents

Your Bathroom Renovation and the Certificate You Can't Ignore

A bathroom renovation looks simple from the outside. Demolition starts. Plumbing gets roughed in. The room takes shape. Then the part that matters most gets covered up. That's why the certificate matters. It records that the unseen waterproofing work wasn't guessed, rushed, or left to an unqualified trade.

For homeowners, this document protects more than the shower recess. It helps protect adjoining walls, floors, skirtings, ceilings below, and the long-term value of the home. If water gets past the membrane, the damage often stays hidden until mould, swelling, staining, or movement appears somewhere else.

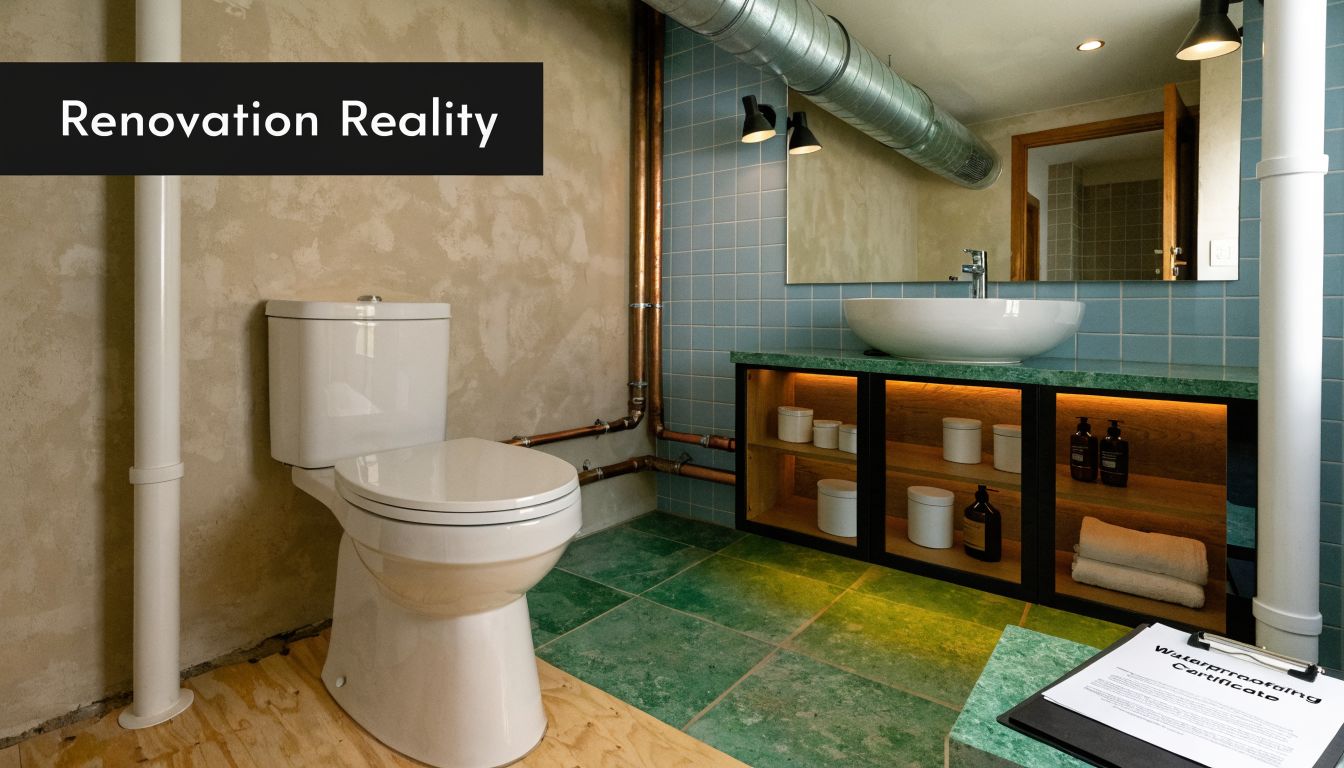
A modern bathroom renovation with green floor tiles, open shelving, exposed pipes, and a waterproofing compliance certificate.

If your project involves a full bathroom renovation in Melbourne, the waterproofing stage is one of the few moments where compliance has to be taken seriously before finishes go on. Once tiles, grout, screens, and joinery are installed, inspecting the membrane becomes much harder and any repair usually means demolition.

Practical rule: If a contractor treats waterproofing like a minor step between screeding and tiling, that's a warning sign. In a wet area, it's one of the core structural protection tasks in the whole job.

The certificate also changes the conversation from trust to proof. A homeowner shouldn't have to rely on “we always do it this way” or “it'll be fine.” You want a traceable record that the work met the required standard and that somebody with the right registration stands behind it.

What Is a Waterproofing Compliance Certificate?

A homeowner usually sees the problem too late. The bathroom looks finished, the silicone is neat, the tiles are straight, and six months later paint starts lifting on the wall outside the shower or a ceiling stain appears below. By that point, the membrane is buried under the finished work and proving what was done becomes much harder.

A waterproofing compliance certificate is the document that ties that hidden work to a clear standard and a legally accountable party. In practical terms, it records that the wet area waterproofing was carried out in accordance with the relevant building requirements and by someone permitted to stand behind that work.

In Victoria, that means the waterproofing behind a bathroom renovation must meet the requirements of AS 3740 and the NCC Volume 2. The certificate matters because waterproofing is one of the few parts of a bathroom you cannot properly judge once tiling is complete. If the membrane is missing, poorly bonded, interrupted at a corner, or badly detailed around a waste or tap penetration, the room can still look first-class at handover.

What the certificate is actually confirming

A proper certificate is evidence that the waterproofing system was installed over a suitable substrate, with the right preparation, set-out, bond breakers where required, and continuity through the areas most likely to fail.

That includes details such as:

  • Internal corners and wall-to-floor junctions that move slightly over time
  • Shower areas and adjacent splash zones where water exposure is repeated
  • Pipe penetrations and tap bodies where small gaps become leak paths
  • Doorways, hobs, and floor transitions where water can escape the wet area
  • Falls and drainage points that affect how long water sits on the surface

Those are the details that separate a bathroom that lasts from one that starts causing damage behind the scenes.

For homeowners, the core issue is not paperwork for its own sake. It is proof. On a smaller job under the common minor works threshold, people often assume the compliance risk is low because the renovation scope feels modest. In reality, the waterproofing risk is the same whether you are rebuilding the whole bathroom or just replacing the shower area. Water does not care what the contract value was.

Why this matters more than many owners expect

The gap between minor works and larger renovations catches a lot of people out in Victoria. A homeowner may hire someone for a bathroom refresh, assume the waterproofing side is routine, and only later find there is no clear certification trail and no registered builder taking responsibility for the full wet area package.

That is where the trade-off sits. A lower upfront price can also mean weaker documentation, blurred responsibility between trades, and a much harder path if defects show up later.

A certificate helps establish who carried out the work, what standard it was expected to meet, and who is exposed if it fails. That can become important if:

  • A leak appears after handover and responsibility is disputed
  • An insurer asks for renovation records
  • A future buyer or conveyancer wants evidence of compliant work
  • Parts of the bathroom need to be opened up and the original workmanship is questioned

From a builder's point of view, this is why registered oversight matters. Waterproofing sits between carpentry, plumbing, screeding, and tiling. If those stages are not coordinated properly, the membrane is often where the failure shows up first, even when the underlying cause started earlier. A registered builder closes that gap by taking responsibility for the sequence, the substrate, the detailing, and the documentation, not just the final tile finish.

A finished bathroom can hide a lot. A compliance certificate gives the homeowner something far more useful than a verbal assurance. It gives them a document that connects the hidden waterproofing work to a recognised standard and a party who can be held to it.

When a Waterproofing Certificate Is Legally Required in Victoria

Many bathroom renovations become complicated at this stage. Homeowners learn that waterproofing must adhere to the standard, but they also find that not every minor project is certified through the same process. Both concepts can be accurate, and the space between them is where people often encounter issues.

Victoria's regulatory framework changed significantly in 2018. The key thresholds often discussed in practice are these: work by unregistered tradespersons can be carried out up to $10,000 without requiring a compliance certificate, while projects valued over $16,000 require VBA registration and formal certification, according to the Victorian waterproofing regulatory changes summary.

The practical threshold problem

Most homeowners don't think in regulatory bands. They think in renovation scope. Replace the shower. Retile the room. Move the vanity. Rebuild the ensuite. The trouble is that the legal and compliance consequences can change depending on who is doing the work, the value of the work, and how the contract is structured.

That creates a real trade-off.

A smaller bathroom job may appear cheaper or simpler if someone says it can be done without the same formal sign-off. But the lower the paperwork, the more important it becomes to check who is responsible if moisture damage appears later. Once a bathroom is stripped, re-sheeted, waterproofed, tiled, and fitted off, it behaves like major building work even if the owner originally saw it as a cosmetic upgrade.

Victorian Waterproofing Certificate Requirements 2026

Project Value Practitioner Certificate Required?
Up to $10,000 Unregistered tradesperson Not required under the threshold described in the 2018 Victorian framework
Between $10,000 and $16,000 This is where homeowners often face uncertainty The framework highlights a practical compliance gap, so verification matters
Over $16,000 VBA-registered practitioner Formal certification required

That middle band is the problem area in real bathroom renovations. It's where homeowners can assume the project is “too big to be casual” but still not receive the clear compliance pathway they expected.

What works and what doesn't

What works is treating wet area waterproofing as regulated building work from the start, regardless of whether the quote lands just under a threshold. That means checking registration early, clarifying who is responsible for sign-off, and making the certificate part of the contract discussion before demolition begins.

What doesn't work is trying to split a larger bathroom renovation into smaller parts to make it feel like a minor job. On site, the water doesn't care how the invoices were separated. If the room fails, the entire assembly gets judged by the outcome.

A practical homeowner question is simple: who is taking legal responsibility for the waterproofing and what document proves it? If nobody can answer that clearly, stop there.

Who Can Legally Issue a Waterproofing Certificate

This is one of the most confusing parts of waterproofing compliance in Victoria, and homeowners aren't imagining the confusion. Different websites, trades, and even industry conversations often give different answers.

According to this overview of common waterproofing issues in Victoria, there is significant homeowner confusion because sources conflict on whether the certificate comes from a VBA-registered waterproofing contractor, a licensed plumber, or a builder, with thresholds discussed from $5,000 to $16,000. The practical takeaway is clear. Verify the practitioner's VBA registration before work starts.

Why homeowners get mixed answers

Part of the confusion comes from the fact that bathroom renovations involve several trades whose responsibilities overlap physically but not legally.

A plumber handles plumbing work. A waterproofer applies the membrane system. A tiler installs the finish. A builder may manage the whole renovation, coordinate sequencing, and carry the broader responsibility for compliant delivery. On site, those roles interact closely. On paper, they aren't interchangeable.

That's why the answer to “can my tiler issue the certificate?” is usually the wrong question. The better question is: what registration does that person hold, and are they authorised to certify this exact work?

Here's the practical split homeowners should keep in mind:

  • Tilers: A tiler can be excellent at finishes and still not be the person who can lawfully issue a waterproofing compliance certificate.
  • Plumbers: A plumber can certify plumbing work within their own scope, but that doesn't automatically resolve waterproofing certification.
  • Waterproofing contractors: They may perform the membrane application, but homeowners still need to confirm the registration status and whether the issued documentation is valid for the project.
  • Registered builders: On full bathroom renovations, a registered builder often provides the clearest line of accountability because the wet area work sits within the broader building scope.

The safest way to approach sign-off

From a homeowner's point of view, the least risky setup is the one with a single accountable party overseeing the renovation and using correctly licensed specialists where needed. That avoids the common site problem where each trade says the next one is responsible.

If three different trades are pointing at each other when you ask about certification, you don't have compliance. You have a future argument.

In practice, registered builders are often the most reliable option on bathroom renovations because they can coordinate the sequence properly. Waterproofing only works when the substrate, plumbing penetrations, falls, sheet linings, membrane system, and tiling are all aligned. That's difficult to manage when the owner hires separate trades and assumes certification will sort itself out at the end.

What doesn't work is relying on verbal assurances. Ask for registration details. Check them. Ask who issues the final compliance document. Get that answer before any membrane is applied.

Your Roadmap to Obtaining a Compliance Certificate

A common Melbourne bathroom scenario goes like this. The room is half-demolished, the plumber has finished rough-in, the tiler is booked, and only then does the owner ask who will handle the waterproofing certificate. By that point, the risk is already on site.

The better approach is to set up certification before work starts, especially in the grey area between minor works under $10,000 and larger bathroom renovations. Smaller jobs often get treated casually, even though the same leak can still damage framing, swell skirtings, stain ceilings below, and trigger an insurance dispute. A registered builder closes that gap by taking responsibility for the whole sequence, not just one trade task.

A six-step infographic showing the roadmap to obtaining a waterproofing compliance certificate for building projects.

Homeowners should also discuss the actual membrane build-up early. The certificate only has value if the underlying work is suitable for the room, the substrate, and the fixtures being installed. Our guide to waterproofing systems used in bathroom renovations helps explain what should be decided before the first coat goes down.

Before work starts

Start by locking in responsibility. Ask three direct questions. Who is carrying out the waterproofing work, who is supervising it, and who will issue the compliance paperwork at the end?

If those answers are vague during quoting, they usually stay vague during construction.

This matters most on projects that sit between a simple refresh and a full structural renovation. Homeowners often split these jobs across separate trades to save money. Sometimes that works. Often it creates a gap where no one owns the compliance side properly. A registered builder usually gives a clearer path because the waterproofing, substrate preparation, plumbing penetrations, sheet lining, falls, and tiling all need to line up.

Before signing off on the job, confirm:

  1. Who is responsible for certification
    Get the name of the practitioner or builder who will stand behind the wet area work.

  2. What the bathroom scope includes Confirm whether the room is being stripped to framing, back to substrate, or partly retained. The certificate process depends on what is being altered.

  3. Which wet areas are included
    The quote should identify shower areas, bathroom floors, wall returns, niches, hobs, and any other sections being waterproofed.

  4. Which products will be used
    Ask for the membrane system, primer, bond breaker, sealant, and accessories. Mixed systems cause problems if components are not compatible.

During the waterproofing stage

Good certification starts with disciplined site work. By the time waterproofing begins, the surfaces should be stable, clean, and ready for the membrane system being used. If the substrate is dusty, moving, cracked, or still too wet, the final paperwork will not save a failed installation.

On site, I look for a few things straight away. Floor to wall junctions need proper treatment. Penetrations at wastes, taps, and mixers need to be sealed with components that suit the system. Corners, hobs, niches, and transitions need careful detailing because those are the places that usually fail first.

Photo records matter here. Once tiling starts, the evidence disappears.

A practical site checklist includes:

  • Substrate readiness with no loose material, contamination, or movement
  • Correct junction treatment at wall and floor changes
  • Compatible detailing around wastes, flanges, tap bodies, and penetrations
  • Clear photos taken after membrane application and before tiling
  • Sequencing control so no trade damages the waterproofing before covering works proceed

Homeowners do not need to become waterproofing inspectors, but they should ask to see the membrane before it is covered. That single step solves a lot of disputes later.

What you should receive at handover

At handover, the paperwork should match the work on site. If the bathroom has been rebuilt properly, there should be a clear record of who did the waterproofing, what system was used, and what evidence supports the sign-off.

For owners, the practical handover pack should include:

  • The compliance certificate
  • The responsible practitioner or business details
  • The waterproofing product details
  • Photos of the membrane before tiling
  • Any written warranty documents that apply to the job

Do not leave this until weeks after completion. If final payment is made and everyone has moved on to the next project, missing documents become much harder to chase.

That is the fundamental difference between a patched-together bathroom job and one run properly. On a larger renovation, responsibility is usually clearer. On smaller or mid-range jobs, it often is not. Hiring a registered builder helps close that liability gap before it turns into a leak claim, a resale issue, or an argument about who was supposed to certify what.

Common Pitfalls and the True Cost of Non-Compliance

Most failed bathrooms don't start with a dramatic event. They start with a shortcut that seemed harmless at the time. A rushed membrane. No photo record. A trade working outside their actual registration. A homeowner being told that a certificate isn't necessary because the room is “only a small reno”.

A person standing in a damaged room next to the text Costly Mistakes written on a black background.

The broad compliance culture in Victoria is not casual. Between July 2024 and June 2025, Victorian water corporations commenced 3,670 investigations into alleged breaches of the Water Act 1989, according to Victoria's water compliance report for 2024 to 2025. That report relates to water regulation, not bathroom certificates directly, but it shows the wider regulatory environment takes water compliance seriously.

Where bathroom renovations go wrong

The first pitfall is assuming waterproofing is just part of tiling. It isn't. Tiling is the surface finish. Waterproofing is the protective system underneath. Good tilers understand this distinction. Cheap operators often blur it.

The second pitfall is trying to save money by treating a substantial bathroom renovation like a minor patch-up. Homeowners sometimes break work into smaller pieces or use separate cash jobs across demolition, waterproofing, and tiling. That can leave nobody clearly accountable for the finished wet area.

The third pitfall is failing to inspect the hidden stage. Once the membrane is covered, your influence drops. If there are no photos, no checklist, and no proper certificate, proving what happened later becomes much harder.

Common warning signs include:

  • Vague answers about certification
  • No registration details provided upfront
  • Pressure to move quickly through curing and tiling
  • No mention of pre-tiling photos
  • A contractor saying the certificate “isn't really needed”

Why shortcuts fail later

The actual cost of non-compliance usually appears after the bathroom looks finished. Water tracks into framing, adjoining rooms, or the ceiling below. Mould develops where you can't clean it. Timber swells. Paint bubbles. Tiles debond. Then the owner learns that fixing the membrane means removing the new bathroom to get back to the failed layer.

This video gives a useful visual sense of how hidden defects can turn into expensive rectification work.

A bathroom leak rarely stays in the bathroom. It spreads into the parts of the home that cost the most to open up and repair.

What works is slower, more disciplined, and less glamorous. Proper preparation. The right practitioner. Clear sign-off. A documented chain from substrate to finished tile. Homeowners remember the stone and the fittings. The house remembers whether the waterproofing was done properly.

How Melbourne Tiling Services Ensures Your Peace of Mind

For homeowners, the biggest relief is having one accountable team manage the bathroom renovation properly from start to finish. That matters because waterproofing compliance only works when the builder, waterproofer, plumber, and tiler are all working in sequence, with the same scope and the same standard in mind.

Melbourne Tiling Services P/L operates as Registered Unlimited Builders, which is exactly the kind of structure that helps close the risk gap between minor works assumptions and major renovation realities. Instead of leaving the owner to coordinate separate trades and chase paperwork afterwards, the process can be managed as one compliant building scope with proper trade supervision and documentation.

That's especially valuable on bathroom renovations where the waterproofing layer disappears behind finishes very quickly. A registered builder-led process means the critical checks happen before the room is closed up. It also means the homeowner has a clear point of accountability rather than a chain of subcontractors passing responsibility around.

If you need a team that handles wet area compliance as part of the build, not as an afterthought, see Melbourne waterproofing services for the practical side of how that work is delivered on site.


If you're planning a bathroom renovation and want the waterproofing compliance handled properly from the start, Melbourne Tiling Services P/L can help you build it once, document it properly, and avoid the grey areas that catch so many homeowners later.