
The advice you'll hear most often about large format tile adhesive is to buy as much flexibility as you can afford. Pick the highest classification on the shelf, usually a C2S2, and the panel will stay down. That advice gets the priority backwards.
A premium adhesive is a fine material. It's also a thin, load-transferring layer that can only perform across the surface it's given. Put the best bag in the country under a 1500 x 3000 mm porcelain panel on a floor that flexes, or over a bed with 60 percent contact, and it fails the way a budget adhesive fails. You've just paid more for the failure.
What decides whether a large panel stays bonded sits underneath the bag. Is the substrate flat and stiff enough for the tile size. Is the contact behind the tile continuous, and can the installer prove it. Is the wet area built as a waterproofed system rather than a tiled surface with sealant run around the edges. Adhesive selection is real and the classification codes matter, but those three questions come first, and they're the ones a quote rarely spells out.
Table of Contents
- Why Large Format Tiles Need a Different Adhesive
- Adhesive Coverage and Class Requirements by Location
- Reading the AS ISO 13007 Classification Codes
- Substrate Preparation and Deflection Limits That Protect the Bond
- How to Apply Large Format Adhesive Step by Step
- Wet Area Waterproofing and Registered Builder Checks
- Diagnosing Hollow, Lifting or Cracked Large Tiles
- Confirm the Adhesive Specification Before Work Starts
Why Large Format Tiles Need a Different Adhesive
The size jump carries the argument on its own. Kerlite large format tiles are available in sizes between 900×900 mm and 1500×3000 mm, and a single one of those panels covers more area than a whole box of the squares most Melbourne bathrooms were built with. Fewer joints means less relief for movement, more weight across each square metre, and far more tile surface relying on the adhesive beneath it.
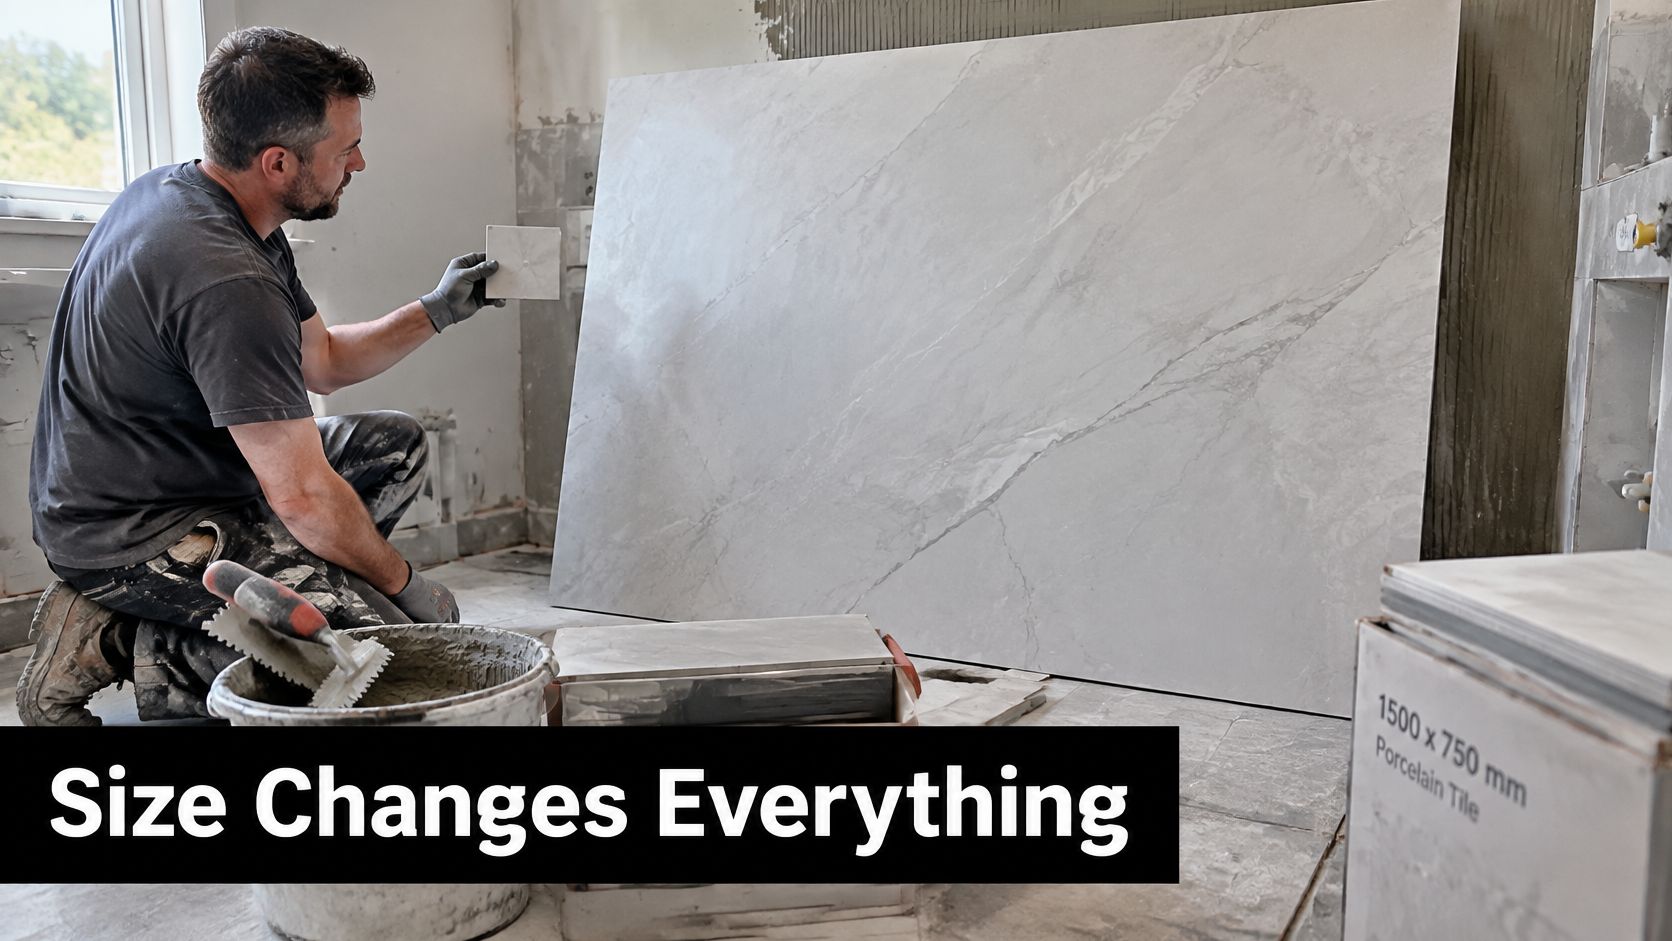
Three jobs land on the adhesive at once. It carries the weight of the panel, it absorbs the movement the substrate passes up into the tile, and it has to hold continuous contact across the entire back of the panel. Skip the third job and the first two stop mattering.
The sheet of glass on a bed of pebbles
Think about a sheet of glass laid on loose pebbles. Press it and it cracks at the high points, because every bit of load concentrates where it touches and the gaps contribute nothing. Lay the same sheet on a firm, fully supporting surface and it takes a surprising amount of punishment. A large porcelain panel behaves the same way. It's stiff, so it cannot drape into a hollow, and every void behind it becomes a spot where stress builds and moisture can sit.
That's why a patch of missing adhesive matters so little on a 300 mm tile and so much on a 1200 mm panel. The small tile spans a narrow strip of the bed. The big one spans all of it.
Practical rule: you aren't buying adhesion, you're buying contact. A panel with full coverage from a mid-range C2 adhesive outlasts a panel with 70 percent coverage from the best bag in the catalogue.
The Melbourne settings that punish a weak bond hardest are the ones with movement on both sides of the tile: bathroom floors over timber framing, shower walls, balconies, and exterior walls taking summer heat and driving rain. Layout decisions feed into that too, and this large format advice from Western Bathroom Renovations is a practical walk through the design side before you get to the adhesive.
The adhesive is a load and movement layer, not glue. Everything that follows is about matching that layer to the job in front of you.
Adhesive Coverage and Class Requirements by Location
Start with where the tile is going, not with the bag. Location sets the coverage floor, the coverage floor sets how the adhesive has to be applied, and the class tells you what the cured adhesive must be able to do.
| Location | Minimum adhesive coverage | Suggested class | Back-buttering |
|---|---|---|---|
| Internal residential walls | 65% | C2, with S1 where movement is expected | Required for tiles 400 mm and larger |
| Residential floors | 80% | C2S1 or C2S2 | Required for tiles 400 mm and larger |
| Wet areas (showers, bathroom floors) | 90% | C2S1 or C2S2, compatible with the waterproofing system | Required for tiles 400 mm and larger |
| Balconies and exterior work | Set by the manufacturer's data sheet for the specified system | C2S2 with movement joints | Required for tiles 400 mm and larger |
Reading a row from left to right
Take a 600 x 600 mm porcelain tile going onto a bathroom floor. The location is a wet area, so the target is 90 percent bonded coverage. The suggested class is an improved cementitious adhesive with S1 or S2 deformability, and it has to be one the waterproofing membrane manufacturer approves over their product. The back-buttering column says yes, because the tile is over 400 mm.
Now move the same tile to an internal bedroom wall and the floor drops to 65 percent. Same tile, same adhesive family, very different application standard, because a wall isn't carrying foot traffic or sitting under a shower rose.
Why coverage is a floor, not a target
Those figures are minimums an installer checks on site with a lift test, not a number you infer from how many bags left the van. More adhesive spread badly is worse than less adhesive spread properly, because a thick uneven bed traps air and holds the tile off the substrate at the edges.
Site check: lift one tile early in the day, photograph the back, and compare it against the figure for that location. If the pattern is patchy, the trowel notch, the combing direction or the open time is wrong, and you fix that before laying another twenty panels.
Back-buttering is the one item on the table that installers skip when they're behind schedule. It's also the cheapest insurance in the whole job, because it fills the shallow variations on the tile underside that a notched bed alone won't reach.
Where the table runs out
Balconies, terraces and exterior walls carry no fixed public coverage figure, and that's deliberate. Wind exposure, fall to drainage, membrane type, tile size and Melbourne's temperature swings all change the answer, so the number belongs in the manufacturer's data sheet for the exact system being installed, and in the written scope your installer signs.
Ask for that figure in writing before the first panel is mixed for. Put the table into a written scope and the quotes you receive finally compare like for like.
Reading the AS ISO 13007 Classification Codes
In Australia, large format tile adhesive performance is defined through AS ISO 13007, the classification system that distinguishes cementitious adhesives by bond strength, deformability, open time and slip resistance. Bostik's Evoflex specification lays out the codes that matter for panels: C2 for improved cementitious adhesive, S1 for deformability greater than 2.5 mm, and S2 for high deformability greater than 5 mm, with its S2 product reporting more than 30 minutes of open time and more than 5 mm of flexibility.
Read the string left to right and each element answers a different question.
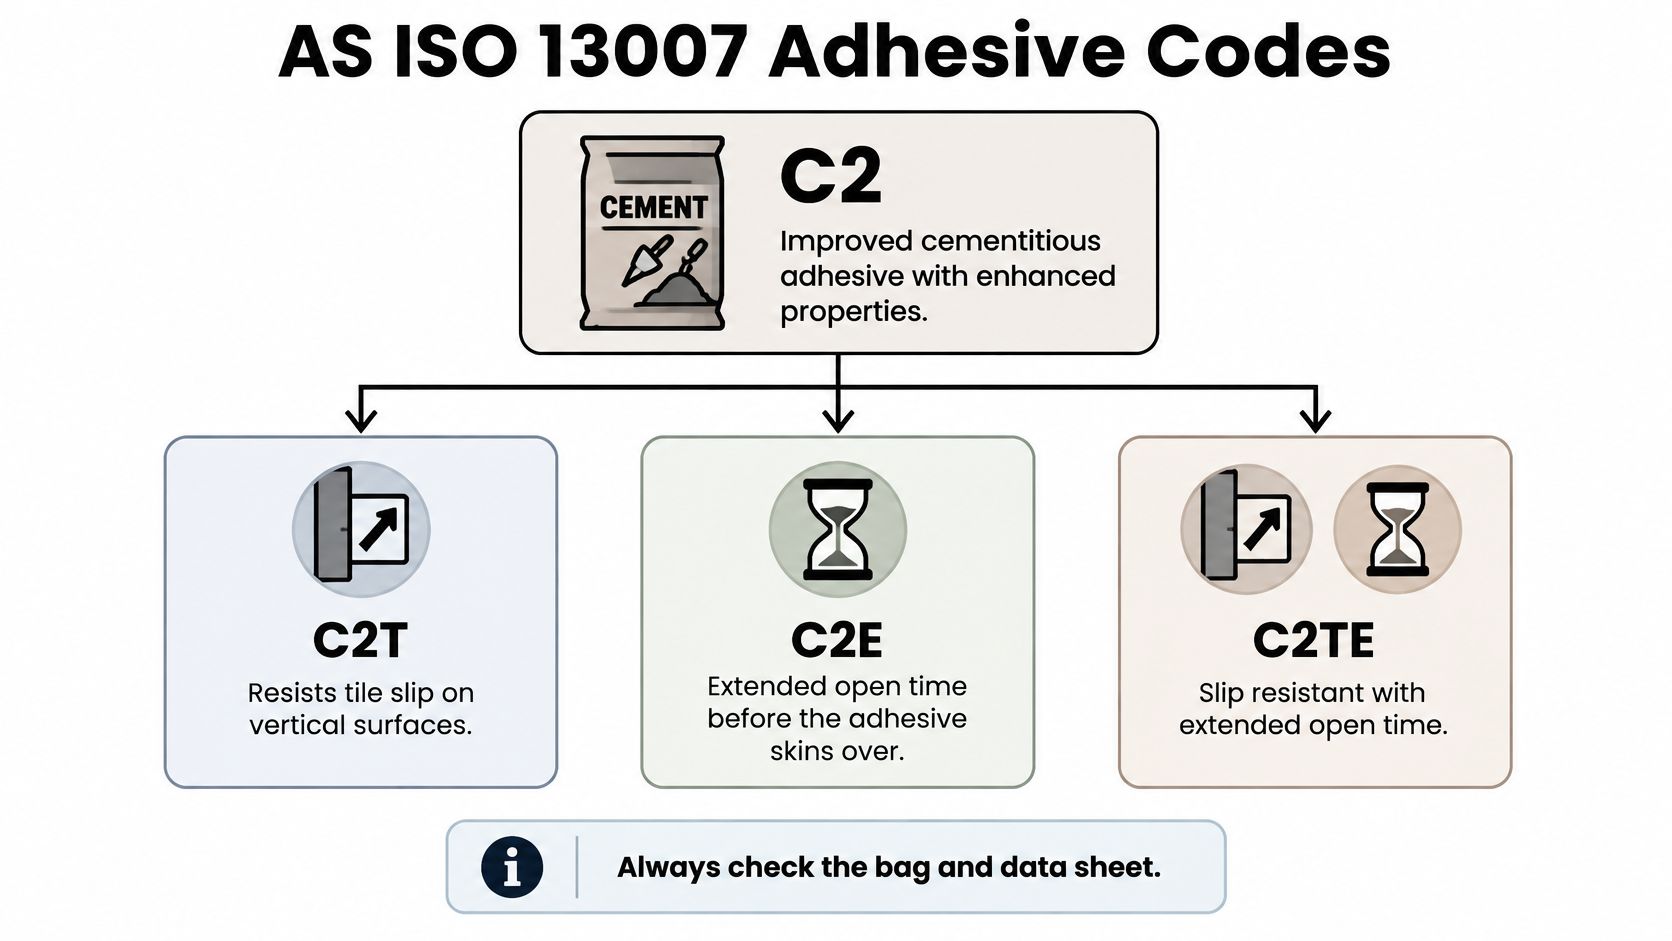
C2 is the floor, not the whole code
The C says cementitious. The 2 says improved performance, tested for tensile adhesion after water immersion, heat ageing and freeze-thaw cycling. One Australian product specification reports tensile strength above 1.0 MPa after all three of those exposures, and that's the benchmark worth holding a product to rather than a marketing word like "premium".
C2 on its own tells you nothing about movement. A stiff C2 adhesive can be strong enough to pass every adhesion test and still crack the grout off a timber-framed bathroom floor.
S1 and S2 measure movement, not strength
The S suffixes describe how far the cured adhesive can deform before it fails. S1 covers deformability greater than 2.5 mm. S2 covers high deformability greater than 5 mm. Neither number is a permission slip for the floor to move 5 mm in service. They describe how the adhesive manages stress that the tile and substrate hand it.
For a large panel over a timber subfloor, a heated slab or a balcony, S2 is the classification I'd specify, and I'd want the product's own data sheet to approve the tile size and the substrate before I trusted the letter on the bag.
T and E change how the bag behaves in your hand
T means reduced slip, which is what stops a heavy wall panel sliding down the wall while the adhesive sets. E means extended open time. On a vertical wet-area wall with a 1500 x 3000 mm panel, that pair is the difference between a controlled install and a wrestling match.
Open time is the window before the adhesive skins over. Once it's gone, it's gone. Adding water or remixing adhesive that has already skinned cannot restore bond, no matter how workable it looks.
Some large format work, particularly glass-mesh-backed panels and certain stone, uses reaction-resin adhesives. AS ISO 13007 treats those products differently from cementitious adhesives, so read the manufacturer's method statement for that class rather than assuming the C2 rules carry across.
Substrate Preparation and Deflection Limits That Protect the Bond
Most large tile failures I'm asked to diagnose started below the adhesive, not inside it. The bag gets blamed because it's the thing with a label on it, but a panel that sounds hollow over a floor that bounces was never going to hold, whatever went under it.
Before a trowel comes out, four checks matter. The substrate has to be flat enough for the tile size, level on horizontal work, falling correctly to the drain in wet areas, and sound, with moisture content and curing time confirmed. In Melbourne bathrooms, walls are typically laid over plaster or A/C sheeting, and floors over timber flooring, particle board, compressed sheeting or A/C sheeting, each of which behaves differently under load.
Australian guidance now consolidates ceramic, porcelain, stone tiles and panels under AS 3958:2023, the tiling standard, with specific attention to background flatness, levels, falls and plumbness. That's the document the work should be measured against, and it's the one that replaced the older part-by-part structure the trade grew up with.
Deflection is where large tiles part company with small ones
A floor that feels solid underfoot still flexes. What changes with tile size is how much flex is allowed.
| Tile size | Substrate deflection limit | Applies to |
|---|---|---|
| Tiles up to 350 mm square | 1/360 of joist spacing | Standard ceramic and smaller porcelain tiles |
| Tiles larger than 350 mm square | 1/500 to 1/700 of joist spacing | Large-format porcelain panels |
| Stone tiles | L/720 | Example from a product technical sheet |
Those ranges come from Dunlop's technical bulletin on laying large porcelain tiles, which sets limits in the range of 1/500th to 1/700th of floor-joist spacing for tiles larger than 350 mm square, against 1/360th for smaller tiles.
Run the numbers on a timber floor with joists at 450 mm centres. At 1/360 the floor can move 1.25 mm across that span and still pass. At 1/500 it's 0.9 mm. At 1/700 it's 0.64 mm. A floor that has carried 300 mm ceramics without complaint for twenty years can sit outside the limit for a 1200 mm panel, and nobody finds out until the grout line cracks a metre from the wall.
Movement joints are part of the specification
Adhesive cannot level a hollow floor or stop a bouncing one from bouncing. It also cannot replace a movement joint. Panels and substrates expand, contract and settle at different rates, and the joints built into the layout, at perimeters, at changes of plane and where the substrate itself has a joint, are what let that movement happen without tearing the tile apart.
The same bulletin notes the shift from the superseded AS 3958.1:2007 to the consolidated AS 3958:2023, which gives more explicit treatment to adhesive types, low-modulus adhesives and reaction-resin products. Ask which version the specification was written to.
Where underfloor heating is fitted, the substrate moves more with every heating cycle and pushes that movement into the adhesive layer. Confirm with the installer that the adhesive is approved for heated floors, that the heating has been commissioned and is off during tiling, and that the floor isn't brought up to temperature until the adhesive has cured.
Before work starts, ask for three things: a straightedge check recorded on the substrate, a deflection calculation for the floor you're tiling over, and written confirmation of where the movement joints go. For a closer look at what preparation involves, this explanation of substrate preparation covers the stages in order, and the Elite Bathroom Renovations tiling guide shows how the tiling stage sits inside a full bathroom renovation.
How to Apply Large Format Adhesive Step by Step
The sequence below is the one that produces a full, even contact pattern rather than a tile that merely looks flat. Each step exists because skipping it shows up later as a hollow patch.
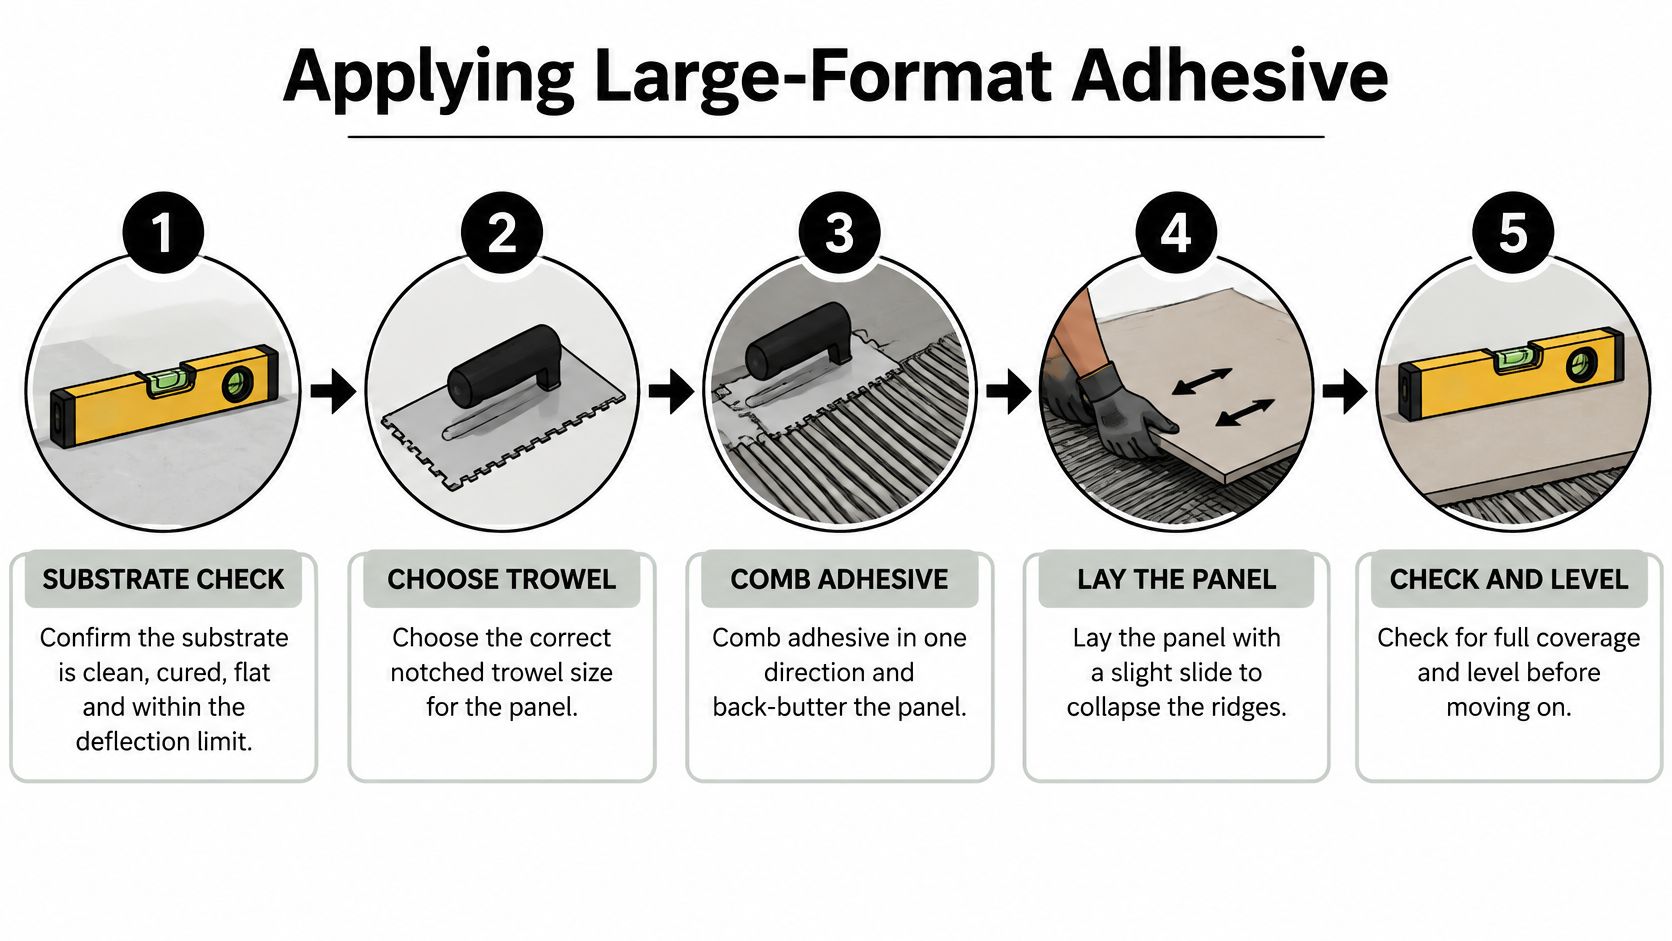
1. Confirm the substrate before anything is mixed. Clean, cured, flat and inside the deflection limit. Mixing onto a dusty, sealed or still-curing base weakens the bond from the first minute and you cannot recover it later.
2. Choose a notched trowel sized for the panel. The notch has to leave enough adhesive to fill the tile's underside profile once the ridges collapse. A trowel that's too small gives you a thin bed with voids at the corners. Too large and the bed slumps.
3. Mix to the manufacturer's ratio and respect the slaking time. An adhesive that's been mixed wet to make it easier to spread loses strength and open time. Mix the stated water quantity, let it slake, then remix briefly as the data sheet says.
4. Back-butter every tile 400 mm and larger. Comb ridges onto the substrate, then spread a thin, even coat across the tile's underside with the flat edge of the trowel. This fills the shallow depressions that a notched bed alone won't reach.
5. Comb the adhesive in one direction. Parallel ridges in a single direction give trapped air somewhere to escape when the tile goes down. A random swirl of adhesive traps air pockets under a large panel.
6. Bed the tile and slide it across the ridges. Press it home and work it perpendicular to the ridge direction so the ridges collapse and the air is pushed out toward the edges. On a wall, seat it and check for slip before you let go.
7. Lift a test tile and check coverage. The wet-area target is at least 90 percent contact, with full contact at the corners and edges, and the figure falls to 80 percent on residential floors and 65 percent on internal walls. The Bostik Conflex technical data sheet sets out those coverage minima and the back-buttering requirement for tiles 400 mm and larger. Lift early in the day, before the bed skins over, and photograph the back as a quality record.
8. Respect the open time and the maximum bed thickness. Once the adhesive has skinned, adding water or remixing will not restore bond performance. Scrape it off and start again. The same discipline applies to bed depth, because a bed deeper than the data sheet allows will slump and lose contact.
Here's the sequence in motion, from combing to bedding.
What a good result looks like
A successful lift check shows an even, near-complete print of adhesive across the tile back, with no bare patches at the corners. Tap the tile once it has set and it sounds dead and solid, not hollow at one end.
Kerlite large format tiles can be installed in any area, interior or exterior, but "any area" still means the same preparation and the same lift checks apply whether the panel is going on a bathroom wall or an exterior facade.
Wet Area Waterproofing and Registered Builder Checks
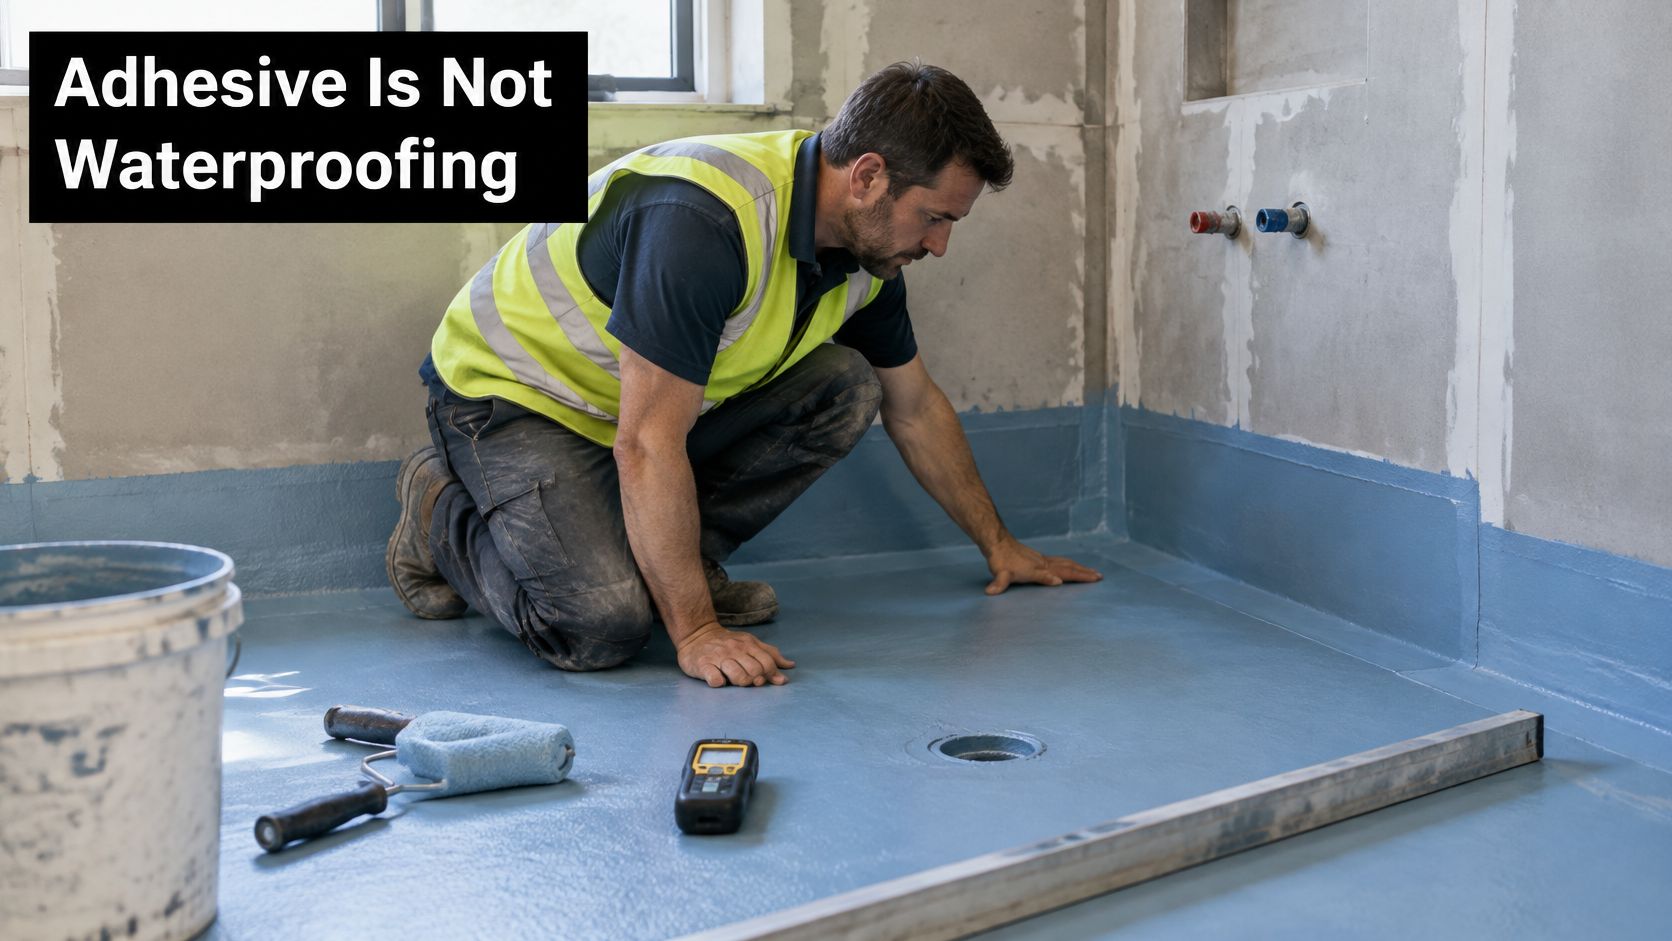
Large format tile adhesive is not waterproofing. It never has been, and no classification letter changes that. The adhesive bonds a tile to a substrate. The membrane behind it stops water reaching the structure, and the two are separate products with separate installation standards that have to be compatible with each other.
What Victorian rules actually require
The Victorian Building and Plumbing Commission identifies bathroom, kitchen and laundry renovations within existing external walls, floors or ceilings as domestic building work. Waterproofing work covers shower areas, spaces outside showers, areas adjacent to baths and spas, laundries, WCs, and walls adjoining sinks, basins and laundry tubs.
For showers specifically, Victorian Building Authority guidance requires the entire floor of the shower area to be waterproofed, with shower walls waterproofed to at least 1,800 mm above the floor substrate in the specified shower conditions. It names AS 3740, the NCC Housing Provisions and performance requirement H4P1 as the compliance pathways.
The drainage geometry underneath your tile layout is prescribed too. Under NCC 2022 Housing Provisions, an unenclosed shower's waterproofed area extends to a 1,500 mm horizontal radius from the shower-rose connection, with a floor waste in the shower area, a continuous fall of no less than 1:80 and no more than 1:50 toward the waste, and a waterstop at least 1,500 mm from the rose, as set out in the commission's wet area waterproofing guidance.
That geometry constrains the tile layout. A 1500 x 3000 mm panel doesn't bend to a fall, so the screed and the membrane have to deliver the fall before the panel arrives, and the adhesive bed has to sit within the thickness the manufacturer allows.
The trade chain, in order
Bathroom waterproofing here uses class 4 systems on walls and cementitious compatible systems on floors, and every worker on our sites is a qualified and certified waterproofer or tiler. The order that keeps those systems intact is a waterproofer applying and testing the membrane, a tiler fixing panels with the adhesive the membrane manufacturer approves, and a registered builder coordinating the licensed carpenters, plumbers and electricians whose work penetrates or abuts that membrane.
The two questions to ask any builder before a bathroom renovation starts: which waterproofing system is specified for each wet area, and which adhesive is compatible with that system. If the answer is vague on either, the interface is where your leak will start.
The Cabinet Coach guide to bathroom tile is useful for comparing tile types and grout options at the design stage, because the tile you choose decides the membrane and adhesive it can be fixed over. For the wet area system itself, this outline of wet area waterproofing explains how the membrane, falls and tile bedding work together.
Diagnosing Hollow, Lifting or Cracked Large Tiles
The first symptom is almost always sound. Tap a large panel along its length and one end rings hollow while the rest sounds dull and solid. That hollow note means low coverage or trapped air, and it shows up long before the tile lifts or the grout cracks.
| Symptom | Likely cause | Fix |
|---|---|---|
| Hollow or drummy tiles | Low coverage or trapped air | Lift the tile, re-bed with back-buttering and confirm coverage |
| Tiles lifting at the edges | Poor perimeter contact or wrong adhesive class | Re-fix the edges with a suitable class and check perimeter contact |
| Cracked grout lines | Substrate deflection or missing movement joints | Stiffen the substrate and add movement joints before regrouting |
| Debonding in wet areas | Incomplete waterproofing or uncured substrate | Investigate the waterproofing system and cure the substrate before re-tiling |
| Lippage between tiles | Uneven substrate or inconsistent bed | Level the substrate; adhesive cannot correct major irregularities |
Working the table row by row
Hollow and drummy panels are a coverage story. Either the trowel notch was too small, the adhesive was combed in a swirl that trapped air, or a tile was laid after the adhesive had skinned. The fix is a targeted one, lifting the panel, cleaning it back, re-bedding with back-buttering and confirming the contact print before moving on.
Lifting at the edges is the perimeter version of the same failure, usually with a helping hand from the wrong adhesive class. Edges lose contact first because that's where the bed is thinnest and where air escapes last.
Cracked grout lines are rarely a grout problem. They follow deflection and missing movement joints, running in straight lines across a floor or outlining a panel where the substrate moves. Regrouting without addressing the cause buys you a year.
Debonding in a wet area takes you back to the membrane and the curing time before it's an adhesive question. A substrate that was still curing, or a membrane that wasn't compatible with the adhesive, will debond a correctly classified product every time.
Lippage, where one edge stands proud of its neighbour, comes from an uneven substrate or an inconsistent bed. A levelling clip system helps control it during the install, but it doesn't pull an under-bedded tile into full contact. Adhesive cannot correct major irregularities; it can only follow them.
Where a repair stops and a rebuild starts
Re-bedding an individual panel is a targeted repair. It still needs the bed checked and the coverage confirmed, and the replacement adhesive should be specified by classification rather than by the word "flexible", which is a marketing term unless a code sits behind it. As Chalkline's tile adhesive glossary sets out, a practical specification is an improved cementitious adhesive in the C2 class with S1 or S2 deformability where movement or tile size increases stress, and the substrate cured, sound, clean and flat before fixing.
Stiffening a floor, adding movement joints or levelling a slab is different work. That needs a builder or structural assessment before any tile goes back down, because it changes the building, not just the finish. The same applies to movement joint positions, which are decided by the layout and the substrate rather than by where it's convenient to stop tiling, and this guide to movement joints in tiling explains how those positions are set out.
The rule I'd hold to: don't regrout and don't re-tile over a hollow panel until the bed has been checked and the cause named. Covering it up simply moves the failure under a new surface.
Confirm the Adhesive Specification Before Work Starts
A written specification lets you compare three quotes on the same basis instead of comparing three prices for three different jobs. Copy these items into your quote request and ask each installer to answer them in writing.
- Tile size and location. Panel dimensions, wall or floor, internal or exterior, wet area or dry.
- Adhesive class. C2S1 or C2S2 for movement-sensitive work, named as a classification rather than a brand promise.
- Coverage target. 90 percent for wet areas and 80 percent for residential floors, with the balcony or exterior figure taken from the manufacturer's data sheet for that system.
- Back-buttering commitment. Written confirmation that every tile 400 mm and larger gets the underside coated, not just the substrate.
- Substrate evidence. Straightedge readings and a deflection calculation checked against 1/360 for tiles up to 350 mm, or 1/500 to 1/700 for larger panels.
- Waterproofing system and compatible adhesive. The named membrane for each wet area, and the adhesive approved to go over it.
- Movement joint positions. Marked on the layout, not improvised on the day.
Two of those items, the waterproofing system and the movement joints, are the ones most often left out of a quote because they're hard to price. They're also the two that decide whether the job lasts.
For a bathroom renovation, an ensuite, a large format panel installation or a balcony, request a written quote that includes every item on that list. Melbourne Tiling Services P/L is a bathroom renovation and tiling business that provides quotes and coordinates licensed trades, and you can phone 1300 661 658 or email sales@melbournetiles.com.au to start that conversation.
Melbourne Tiling Services P/L handles bathroom renovations, waterproofing and large format Kerlite installation across Melbourne and greater Victoria, with registered builder coordination across the licensed trades so the membrane, the falls and the adhesive are specified as one system. If you want the coverage target, the adhesive class and the waterproofing system written into your quote before a single panel comes out of the crate, send your plans through for a written scope. Visit Melbourne Tiling Services P/L to book a quote and talk through the specification for your project.
Recent Comments