

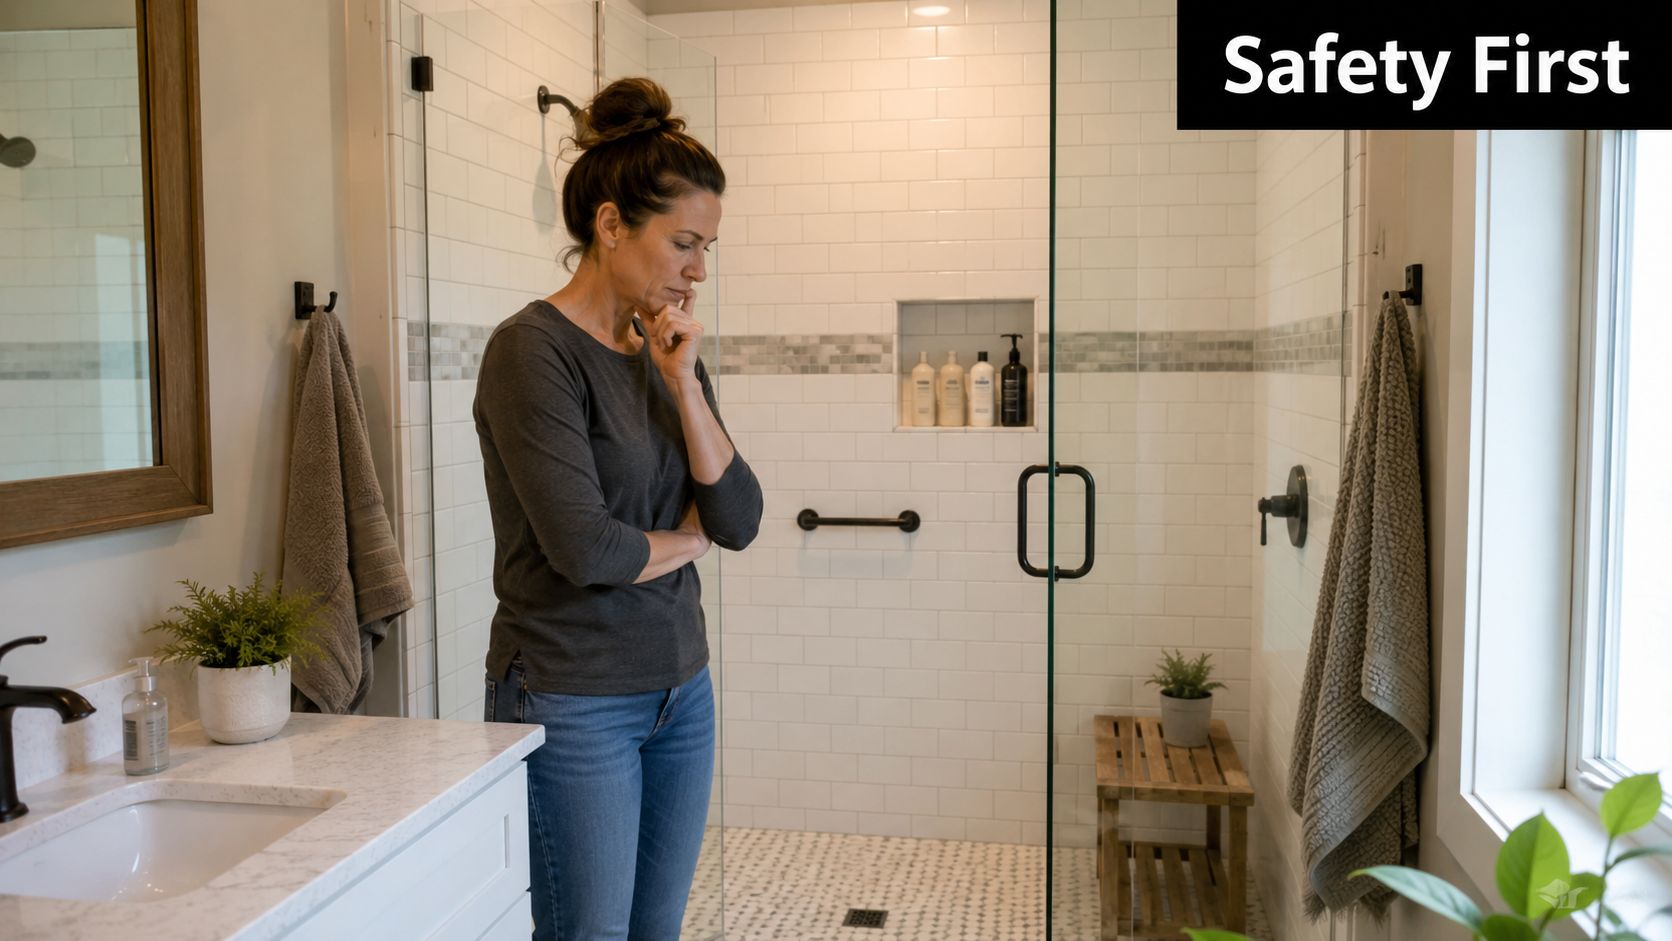
You've got a bathroom that looks finished on the surface, but the key question is still sitting behind the tiles. A parent is coming to stay, someone's already had a wobble in the shower, or an occupational therapist has said a grab rail would make sense, and now you're staring at a fully tiled wall wondering what's behind it.
That's the part many people in Melbourne get stuck on. Grab rail installation isn't mainly about choosing a neat rail or guessing a comfortable height, it's about whether the wall can safely take the load without cracking tile, damaging waterproofing, or missing the framing altogether. In a renovated bathroom, that hidden structure matters more than the hardware on the front.
Table of Contents
- Why Grab Rail Installation Is More Than a Quick Handyman Job
- Planning the Rail Before You Drill Anything
- The Installation Sequence From Stud to Tightened Flange
- What Is Really Behind Your Tiles and Why It Matters
- When a Grab Rail Becomes a Building Permit Question
- Why a Registered Builder Changes the Answer
- Testing the Install and Planning for the Long Term
Why Grab Rail Installation Is More Than a Quick Handyman Job
A typical call starts with a simple request. The bathroom is already tiled, the shower is finished, and someone says, “Can we just add a rail here?” Then the conversation shifts once the wall is tapped and the stud lines don't line up with the place the user needs support. That's where the job stops being a surface fix and becomes a wall-structure problem.
The key issue is not whether the rail looks right once it's up. It's whether the load transfers into studs, nogging, or other solid framing behind the tile, and whether that wall was built or reinforced with the rail in mind. Australian guidance on grab rail installation ties the need to safe, supported fixing points to the broader reality of ageing-in-place, with the Australian Bureau of Statistics projecting that people aged 65 and over will make up 22% of the population by 2066, up from about 16% in 2021 (ABS projection via ILCT guide).
The hidden structure decides the outcome
A rail can only work if the wall behind it does. Tile is a finish, waterproofing is a membrane, and neither one is structural. In a Melbourne renovation, that distinction matters because a beautiful bathroom can still be the wrong wall for a rail if there's no suitable backing where the user needs support. The practical question is always the same, where are the fixing points, and can they take load without disturbing the membrane?
Practical rule: if the wall can't accept the load safely, the right answer is not “use a stronger plug”, it's “change the fixing strategy”.
That's why experienced tradespeople start with structure, not hardware. A well-placed rail only helps if the wall beneath it is sound, and that's why a proper retrofit often sits inside a broader renovation conversation. For homeowners thinking about a safer, better-planned bathroom layout, this universal design bathroom guide fits naturally with the same decision-making.
Planning the Rail Before You Drill Anything
A good plan starts with the person who'll use the rail. A rail for steadying while standing up is not the same as a rail for side support during a shower transfer, and a horizontal bar is not the same as an angled or vertical one. The position has to match the movement, not just the empty patch of tile.
Match the rail to the task
The first question is simple, what does the user need the rail to do? If the rail is there for balance near the shower entrance, the final spot will differ from a rail used for standing or transferring. Melbourne bathrooms often have tight layouts, glass screens, tiled niches, and fixed mixers, so the rail needs to work around the room rather than just fit a wall.
Australian positioning guidance is clearest on the horizontal benchmark. Thornthwaite's installation manual cites AS 1428.1 at 800 to 810 mm from floor to top of rail for the horizontal section, and it also stresses a flat, contaminant-free wall surface plus correct flange guide-lug orientation and careful marking before tightening the lock nut and fitting the flange cover (Thornthwaite manual).
A rail that suits the user but misses the framing is the wrong rail in the wrong place.
Check the wall before the first hole
Before anyone drills, the planned rail position needs to be compared with the wall structure. That means knowing whether the fixing line lands on studs or solid framing, whether the wall is fully tiled, and whether the bathroom layout leaves enough room for the hand to reach the rail naturally. A rail that lines up with the user but not with the structure usually turns into an expensive compromise.
A quick planning checklist keeps the conversation grounded:
- User movement: sit-to-stand, balance, side support, or transfer.
- Rail type: horizontal, vertical, or angled.
- Wall location: wet zone, dry zone, edge of shower, or beside the toilet.
- Fixing line: confirm where the studs or solid backing sit.
That planning step is what stops a small job becoming a patch-up later. It also gives a tiler or builder something concrete to check before the drill comes out.

The Installation Sequence From Stud to Tightened Flange
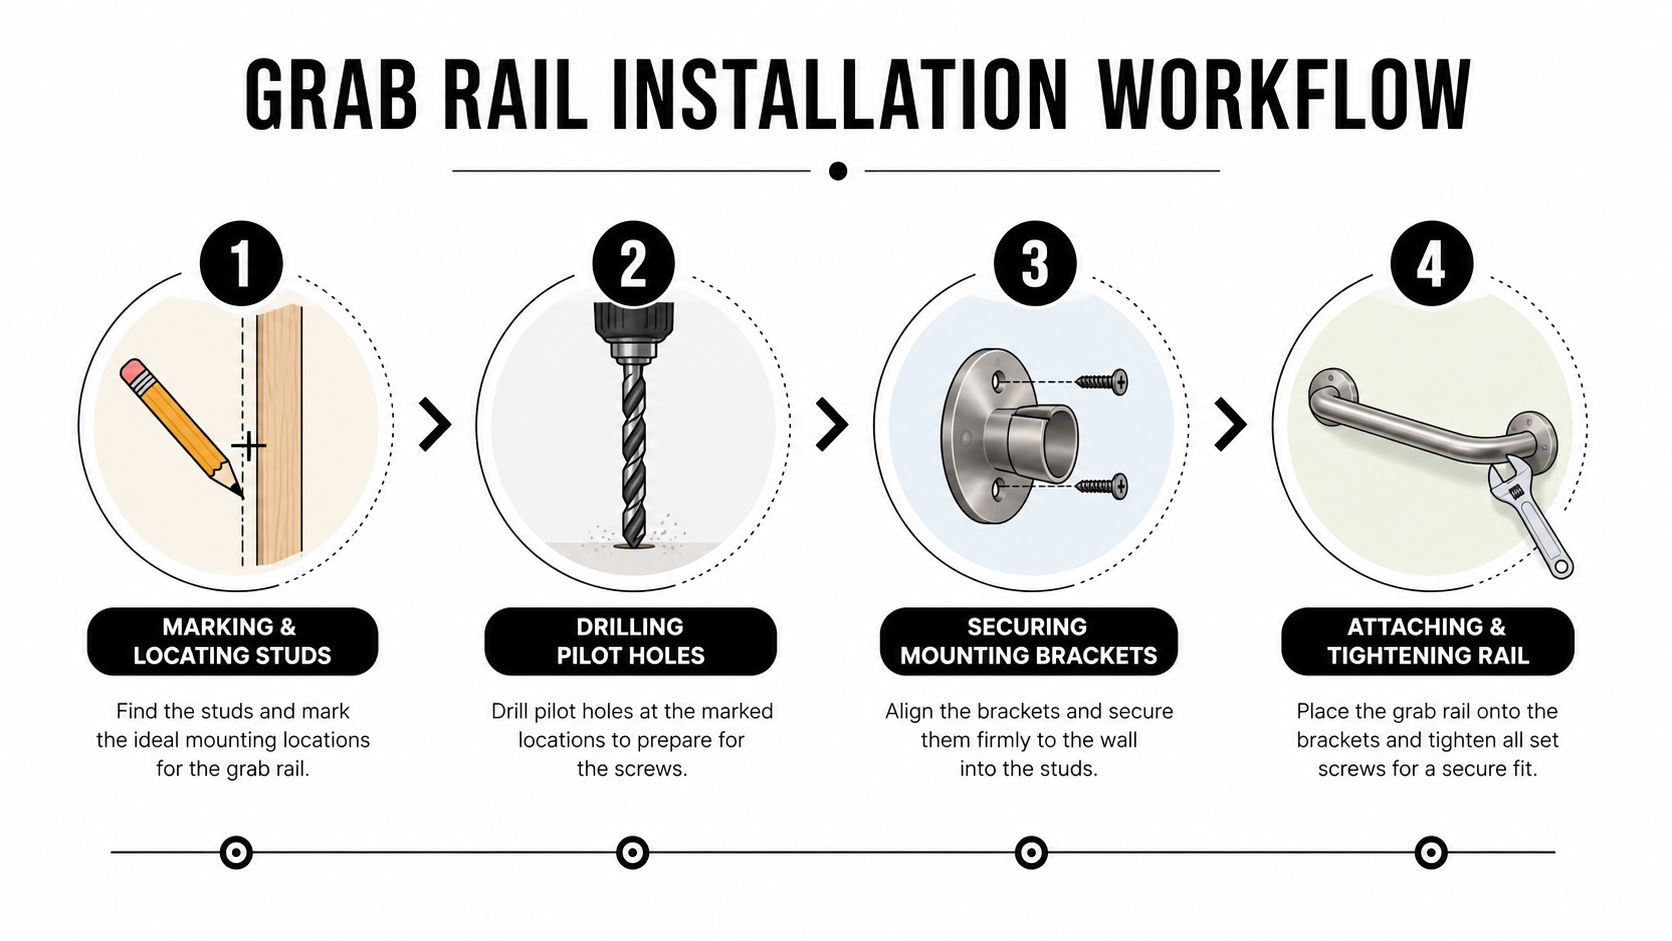
A solid install usually starts with finding the fixing line properly, not guessing it from the tile pattern. I'll tap the wall, confirm with a stud finder where possible, and look for clues from the room layout, then I mark the flange position so the rail lands where the hand needs it. Canterbury Concepts' Australian guidance says to locate studs or solid framing, mark fixing positions, drill pilot holes to the specified depth, lightly fix the flange, trial-fit the rail, then fully tighten and recheck for movement, with 45 to 50 mm drill depth and a minimum of two fixing points per flange (Canterbury Concepts installation guidance).
Drill for the wall you actually have
Tiled surfaces need respect. I use a proper masonry bit on tile, keep the drill steady, and clear dust before plugs or screws go in. Bunnings' Australian guidance also notes that the rail should be reassembled only after bracket alignment is right, which sounds obvious until you've seen a bracket forced home against a slightly wrong mark and then loosen later (Bunnings guide).
The sequence matters because each stage checks the previous one. A lightly fixed flange lets you confirm alignment without committing too early, and the trial fit shows whether the rail sits true against the tile. If the rail moves at that point, something is wrong with the locating, the fixing, or the wall itself.
Tighten only after the trial fit
Once the rail sits correctly, the fixings get fully tightened and then checked again. That final movement check is the difference between a rail that feels firm on day one and one that works loose after repeated use. If the flange rocks, the screws are biting badly or the backing is wrong, and that needs to be corrected before the job is signed off.
The best installations look boring because nothing shifts. The rail doesn't twist, the tile doesn't crack, and the flange sits flat because the fixing was planned for the wall rather than forced into it.
What Is Really Behind Your Tiles and Why It Matters
A renovated Melbourne bathroom wall is rarely just tile over plaster. Behind the finish there may be plasterboard or fibre cement sheeting, a waterproof membrane, adhesive, and then the tile itself, with the stud or nogging sitting behind all of that. The problem with retrofit grab rail installation is simple: the visible surface tells you very little about what the wall can hold.
The membrane is the part you can't casually ignore
Once a bathroom is tiled and waterproofed, the membrane becomes part of the risk calculation. Keep drilling in the wrong place and you can chip the tile, damage the waterproofing, and still end up with a wall that looks fine until movement shows up later. That is why the hardest part of the job is often not the rail, it is finding solid backing without destroying the finish or the waterproof layer.
If you need a refresher on how bathroom waterproofing in Melbourne sits behind the tile finish, that detail matters before any fixing goes in. The wall needs to accept the load, and the waterproofing has to stay intact while you get there.
Australian installation guidance keeps coming back to one point, the rail must be fixed into a stud or solid framing structure, not just tile or plasterboard. The health-facility guidance also says rails should be fully supported at all fixing points, and where the wall structure does not provide that, reinforcement must be added before installation (health facility guidance).
Signs the wall needs more investigation
Some walls give themselves away. Hollow-sounding areas, a tiled shower wall with no record of the framing, or a planned rail line that lands between known studs are all warning signs. In those cases, the choice is usually between relocating the rail, adding reinforcement, or bringing in a builder who can open the wall properly.
On an already waterproofed and tiled bathroom, the trade-off is straightforward. A quick fix may save time, but a properly supported rail is what keeps the wall safe over the long term. That matters even more in high-value Melbourne bathrooms with porcelain, marble, or large-format surfaces, where the finish is too expensive to treat casually.
A good installer reads the wall before touching the drill. A bad one trusts the tile and hopes the backing is where it should be.
When a Grab Rail Becomes a Building Permit Question
Not every rail needs formal paperwork, but bathroom renovation work can tip the job into regulated territory quickly. The Victorian Building Authority says a building permit may be required when bathroom renovation works alter structural elements, waterproofing, or other regulated building work, and that work above the minor-repair threshold can trigger formal compliance steps (Victorian Building Authority position via the briefed reference).
The line between simple repair and renovation work
A like-for-like replacement is one thing. If the work only swaps hardware without changing the wall structure, waterproofing, or the scope of the bathroom, it's much closer to maintenance. Once reinforcement is added, wall framing is altered, or the rail becomes part of a wider bathroom renovation, the job starts looking like regulated building work rather than a small handyman call-out.
| Scenario | Permit Typically Required | Reason |
|---|---|---|
| Replacing an existing rail in the same position without altering the wall | Usually no | It's closer to maintenance than structural work |
| Adding new backing or reinforcement behind a tiled wall | Often yes | The wall structure is being altered |
| Installing a rail as part of a wider bathroom renovation | Often yes | The work may affect waterproofing or regulated building elements |
| Moving a rail position and opening the wall to do it | Often yes | The scope goes beyond a simple fix |
The permit question is about scope, not hardware
The trap is thinking the rail itself decides the paperwork. It doesn't. The surrounding bathroom work does. A rail in a fully tiled wall with no structural changes is very different from a rail tied into new framing, fresh waterproofing, or a full renovation scope where the wall is already being rebuilt.
If the wall is getting opened, waterproofed, or reframed, treat the rail as part of the renovation, not as a separate little task.
That's where homeowners often need someone who can look at the whole bathroom, not just the accessory. Once you're in renovation territory, the next decision is who is allowed to take responsibility for the work.
Why a Registered Builder Changes the Answer
Victoria's building rules matter here because once the job goes beyond exempt or minor work, certain building work has to be done by, or under the responsibility of, a registered building practitioner. The VBA also explains that domestic building work over a prescribed value must be carried out under a major domestic building contract, and a builder who isn't appropriately registered can't lawfully take responsibility for regulated domestic building work (briefed VBA reference).
A handyman can't replace coordination on a renovation wall
A single rail in isolation is one thing. A rail inside a bathroom renovation that involves waterproofing, framing, tiling, and maybe plumbing coordination is another. The contractor status matters because someone has to take responsibility for how those trades fit together, and a handyman generally isn't set up to supervise regulated building work.
That's why a coordinated renovation scope is safer when the wall is being changed. A builder or registered renovation specialist can sequence the work so the carpenter, waterproofer, tiler, and plumber aren't working against each other. That matters more than people expect, because a rail needs the structure, the membrane, and the finish to line up properly.
A practical Melbourne example
A homeowner renovating a bathroom with a new grab rail gets a much cleaner result when the scope is managed as one job rather than three disconnected trades guessing at each other's handover. In that setup, the wall is opened, reinforcement is planned, waterproofing is done to suit the final fixing points, and the tile layout doesn't leave the rail awkwardly stranded between studs. For a broader renovation context, this bathroom renovation specialists page shows why the wall, the membrane, and the finish should be treated as one system.
The safest rail is the one installed into a bathroom that was planned for it, not patched around it later.
That's the key advantage of a registered builder in renovation work. You're not just paying for installation, you're paying for responsibility across the wall system.
Testing the Install and Planning for the Long Term
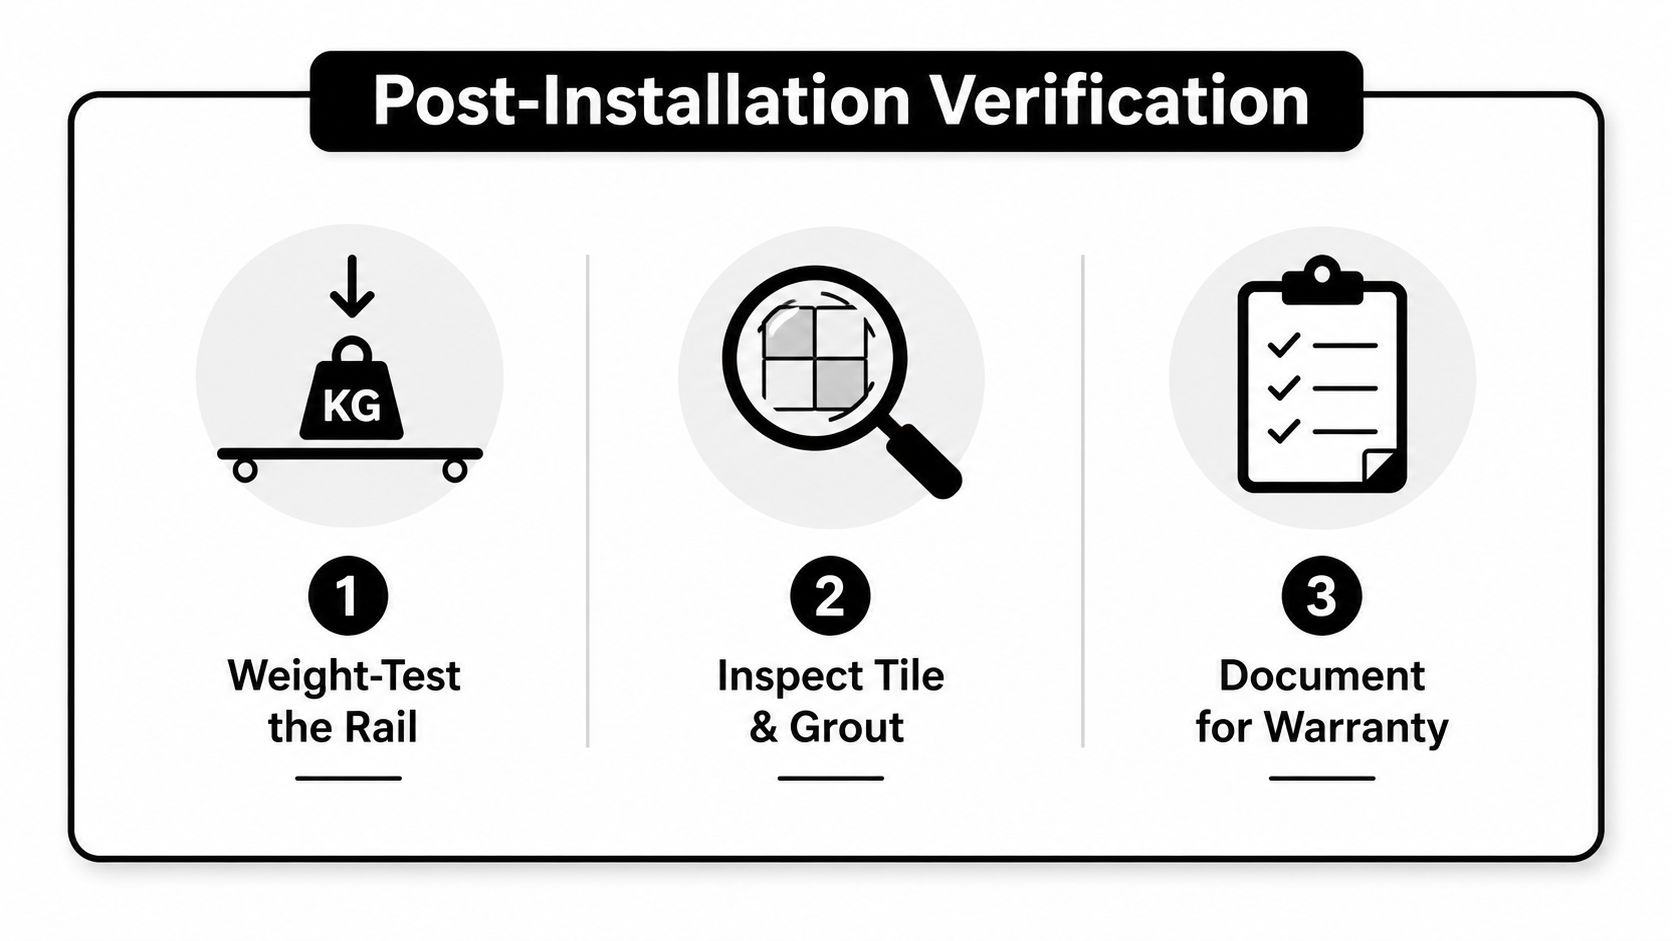
A rail isn't finished when the screws go in. I always test it by hand in more than one direction, then check the flange edge for any sign of tile cracking or micro-movement. If the manufacturer calls for sealing where the flange meets the tile, that gets done neatly, because wet zones punish sloppy finishing.
The post-install checks that actually matter
The rail should feel dead firm, not just “pretty solid”. If it shifts even slightly under hand pressure, something needs to be revisited before the bathroom is handed back. It's also worth documenting the fixing positions and hardware used, because that makes future maintenance and warranty conversations much easier.
- Weight-test the rail: Pull it firmly in the directions it will be used.
- Inspect tile and grout: Look closely for hairline cracking or grout movement around the flange.
- Document the fixing: Keep a note of the position, wall type, and fixings for later reference.
Maintenance matters too. Screws can be re-checked over time, silicone seals in wet zones should be watched, and grout movement can signal a hidden membrane issue behind the tile. If the bathroom starts showing movement later, the rail often isn't the primary problem, the wall behind it is.
A single retrofit rail in an existing tiled bathroom can be a modest handyman visit or can run into several hundred dollars if a tiler is doing the work, while including the rail inside a wider renovation usually adds only a small marginal cost because the wall is already open. The time commitment follows the same logic, a straightforward install is quick, while a structural or tiled-wall retrofit takes longer because the fixing has to be verified properly.
A well-installed grab rail should disappear into the bathroom until it's needed. If you're planning a retrofit in Melbourne, especially in a fully tiled shower or a wider bathroom renovation, Melbourne Tiling Services P/L can coordinate the wall structure, waterproofing, tiling, and finishing so the rail is fixed properly the first time. Visit Melbourne Tiling Services P/L to talk through your bathroom, confirm the fixing strategy, and get a proper renovation plan around the wall that's already there.
Recent Comments