

You've chosen the vanity, saved a dozen tile images and started imagining warm lighting over a frameless shower. Then a builder asks where the floor waste goes, a tiler asks about the substrate, and the budget starts moving before the first tile is ordered. That moment is common in Melbourne bathroom renovations because the room's appearance depends on decisions hidden beneath the finishes.
Good bathroom renovation design isn't only about colour, tapware or a beautiful stone look. The layout controls how people move, the substrate controls how water drains, the membrane protects the structure, and the tile choice affects cleaning and installation. A design can look calm and expensive while still creating avoidable problems if those parts aren't planned together.
Table of Contents
- Introduction to Bathroom Renovation Design That Lasts
- How Bathroom Layout Shapes Daily Comfort and Flow
- Choosing Tiles and Materials for Style and Durability
- Planning Wet Areas Waterproofing and Drainage the Right Way
- Lighting Ventilation and Universal Design for Everyday Ease
- From Mood Board to 3D Drawings and Builder Collaboration
- Bringing Your Bathroom Renovation Design Together
Introduction to Bathroom Renovation Design That Lasts
A bathroom may be small, but its surfaces and services work hard every day. Water, steam, cleaning products, plumbing connections and constant movement all test the room, especially in an older Melbourne home where floors, walls and pipework may not be perfectly predictable. A durable renovation treats the bathroom as a comfortable living space supported by a coordinated building system.
The budget and programme depend on that coordination. A 2026 Australian renovation market report estimated that Australians spent more than A$50 billion on home renovations, with bathroom and kitchen projects accounting for over 60% of that spend. It placed a full bathroom renovation at roughly A$10,221 to A$20,443 nationwide, while a typical project took 2 to 3 weeks. Owners who remain at home during construction may add 30% to 50% to the schedule. These are estimates only. Your property, scope and trade availability will determine the final result. See the Australian renovation market estimates.
Design principle: Choose the visual finish only after you understand the surface, drainage and installation conditions supporting it.
Begin with the room's geometry. Check the door, window, plumbing routes, shower, bath, toilet, vanity and storage before choosing finishes. Then confirm how the floor falls towards the waste, how the waterproofing membrane protects the wet areas, and how lighting and ventilation will support daily use. These decisions determine whether attractive tiles perform well, rather than look good in a sample.
Melbourne homeowners also need to clarify responsibility before work starts. A renovation involving plumbing, waterproofing or structural alterations may require proper building oversight, rather than being treated as a cosmetic update. The Victorian bathroom renovation permit guidance explains why permit requirements should be checked before demolition.
A tile is only the visible surface. Its long-term result depends on the substrate beneath it, the membrane below that, and the drainage plan that moves water away. Get those layers right and the finished room can stay easy to clean, comfortable to use and visually settled for years.
How Bathroom Layout Shapes Daily Comfort and Flow
Layout is the first design decision because every finish has to fit inside it. A bathroom with expensive tiles can still feel awkward if the door collides with the vanity, the toilet dominates the entry view or there's nowhere to place a towel after a shower.
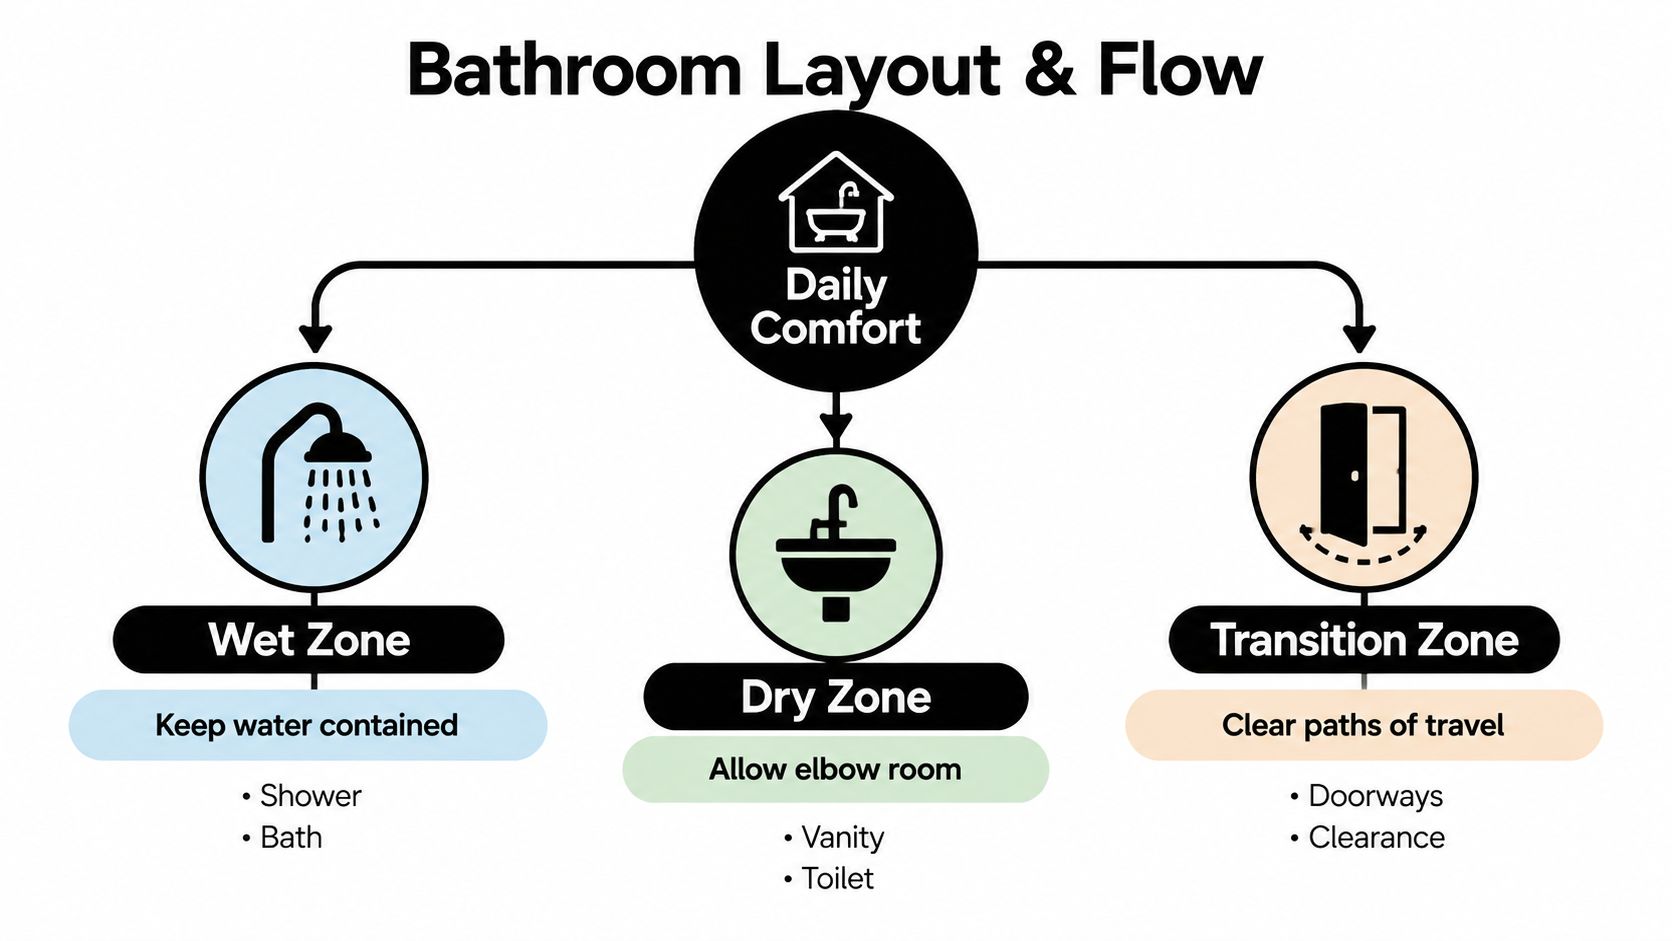
Think of the room as three connected areas rather than a collection of fixtures.
- Wet zone: The shower and bath should contain water where possible. This makes cleaning simpler and reduces the amount of floor exposed to regular spray.
- Dry zone: The vanity and toilet need enough room for dressing, washing hands and opening cupboards without blocking the rest of the room.
- Transition zone: The doorway, circulation path and clearances act like traffic lanes. If they're crowded, the bathroom feels smaller than its measurements suggest.
Start by drawing the room as an empty rectangle. Mark the door swing, windows, existing soil pipe and likely plumbing routes. Then place the shower, toilet and vanity as simple blocks. Don't draw tapware or decorative details yet. You're testing movement, not styling.
Test the plan like a daily routine
Walk through the sequence in your head. Enter the room, turn on the light, hang a towel, use the vanity, open the shower screen and clean the floor. If another person needs to pass behind you, mark that path. A layout that works only when one person stands still won't feel comfortable in a family bathroom.
Storage needs the same practical test. Deep vanity drawers can hold more than a narrow cupboard, but they need clearance to open. Recessed shelving keeps bottles off the floor, yet its location must be decided before wall linings, waterproofing and tile set-out. A mirrored cabinet can provide useful storage without consuming floor area, provided it works with lighting and electrical planning.
A good plan behaves like a well-organised kitchen. You shouldn't have to cross the room repeatedly to complete one ordinary task.
Privacy also belongs in the layout discussion. If possible, avoid placing the toilet directly in the first sightline from the hallway. A partial nib wall, vanity position or shower screen can create visual separation without making a compact room feel closed in.
Finally, consider future flexibility. A shower that can accommodate a seat later, wall construction that can support grab rails and a vanity with usable knee space can serve changing needs without looking institutional. Layout decisions are difficult to correct once plumbing and waterproofing are complete, so test them with cardboard templates or a scaled plan before approving the final drawings.
Choosing Tiles and Materials for Style and Durability
Tiles create the visible character of a bathroom, but they also change the installation workload. The right material depends on where it will be used, how much maintenance you accept and how accurately the substrate can be prepared.
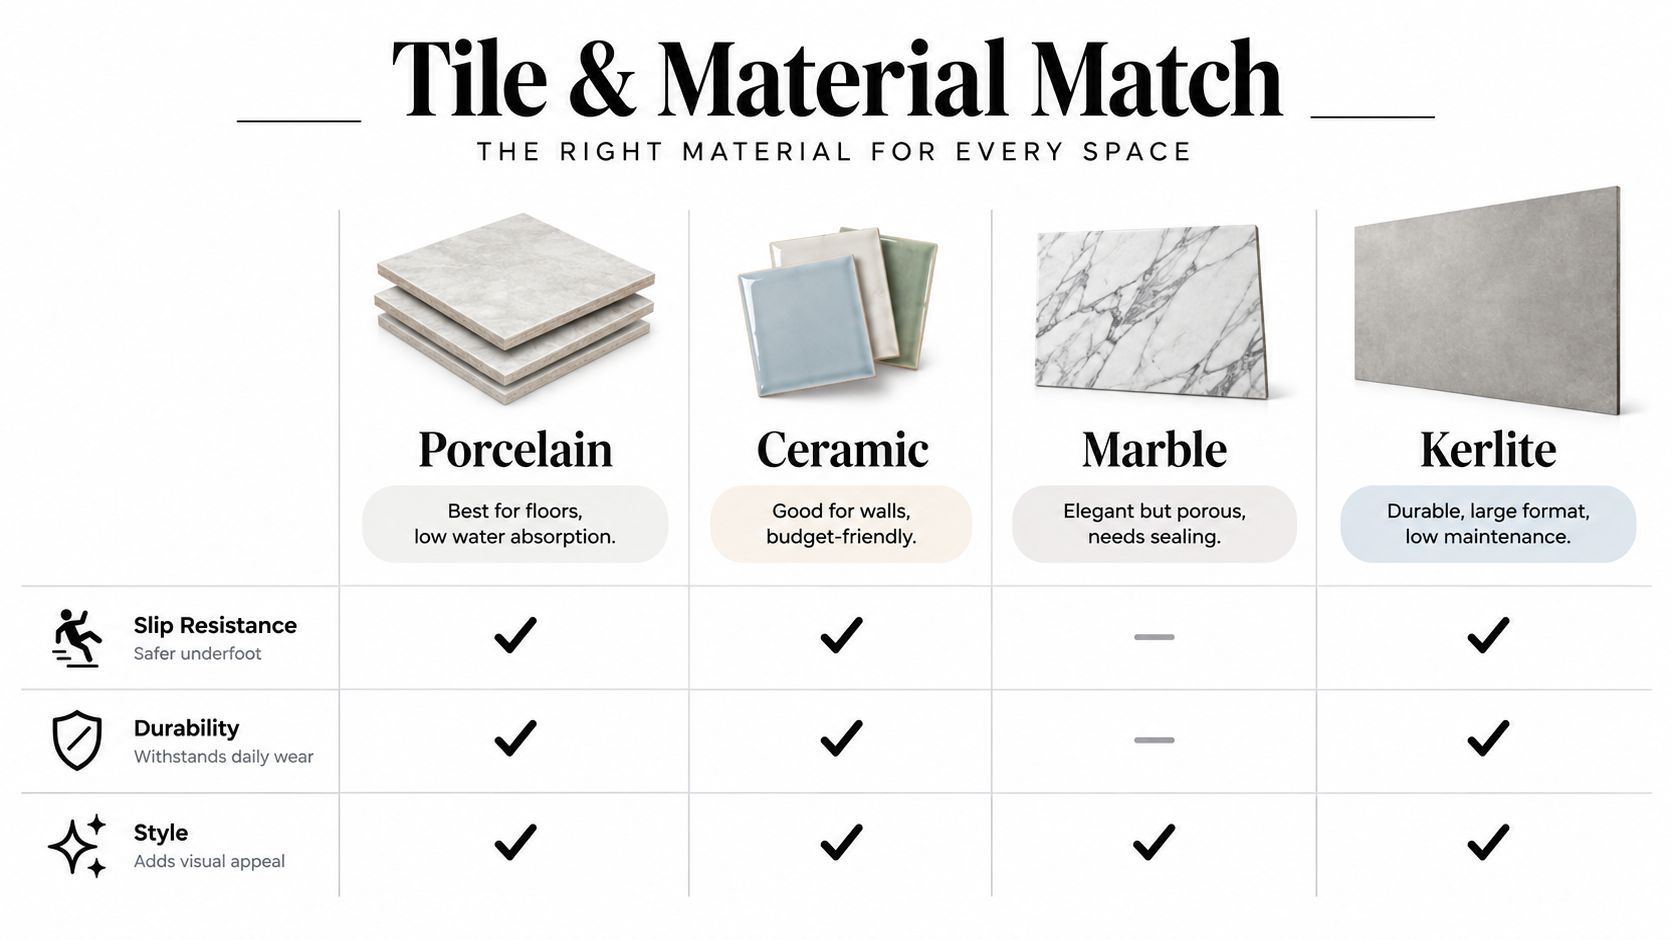
Porcelain is a strong general option for floors and wet areas. It offers a dense surface and can reproduce concrete, limestone or marble appearances with less ongoing care than many natural stones. The exact product still matters, particularly its slip characteristics and suitability for the intended floor.
Ceramic works particularly well on walls, where it can provide colour, texture and pattern without receiving the same foot traffic as a floor. It's often easier to cut than dense porcelain, which can help with detailed wall layouts, borders and niches.
Marble brings genuine variation and a refined appearance, but it's porous and needs appropriate sealing and maintenance. Its veining also creates a set-out decision. You'll need to decide whether the pattern should continue across corners, align around niches or be treated as a more relaxed natural composition.
Kerlite, a large-format porcelain slab, creates fewer visible joints and a clean architectural effect. It can reduce grout maintenance, but its size makes handling, substrate flatness, cutting and installation accuracy especially important. Large formats don't hide an uneven wall. They reveal it.
Match the material to the surface
For floors, prioritise grip, drainage and cleanability before visual drama. Small tiles can follow falls more easily because their edges accommodate changes in plane, while large tiles require a carefully formed substrate and deliberate cuts around wastes. On walls, larger formats can make a compact room feel calmer by reducing grout lines, but they demand precise setting out around doors, windows and fittings.
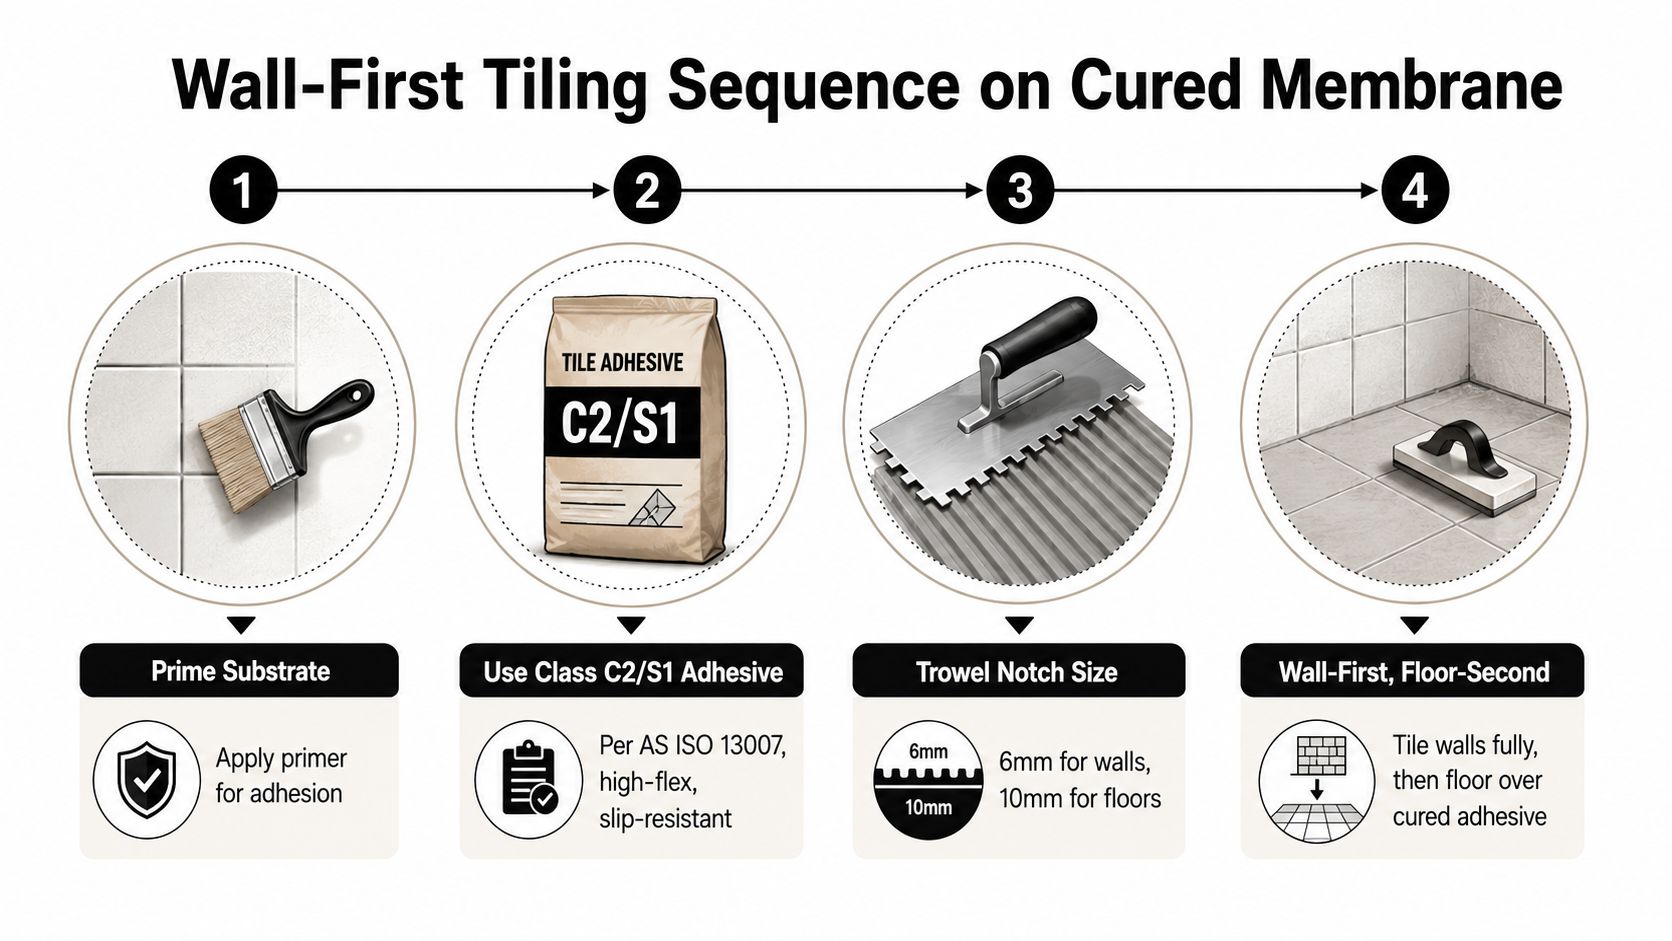
Grout deserves more attention than it usually receives. A contrasting grout highlights the pattern and makes every alignment visible. A closely matched grout creates a quieter surface and can make cleaning marks less visually prominent. Neither choice fixes poor installation, so the tile, adhesive, joint width and substrate must be considered as one system.
Use samples in the actual room. Melbourne daylight, warm lamps and cool LEDs can change how a cream tile or stone-look surface reads. Place the floor sample beside the vanity finish, tapware, wall colour and grout sample before ordering. For practical selection guidance, this bathroom tile selection guide can help you compare appearance with installation and maintenance requirements.
A tile can look timeless without being expensive. Often, the durable choice is the one that gives you a convincing natural finish, manageable grout lines and enough tolerance for the room's drainage geometry.
This video provides a visual introduction to tile selection and bathroom finishes:
Planning Wet Areas Waterproofing and Drainage the Right Way
Waterproofing should be resolved before tile set-out, not treated as a coating applied just before the tiler arrives. Tiles and grout form the visible surface, but the membrane and substrate beneath them provide the protective envelope that keeps water away from framing and adjoining rooms.
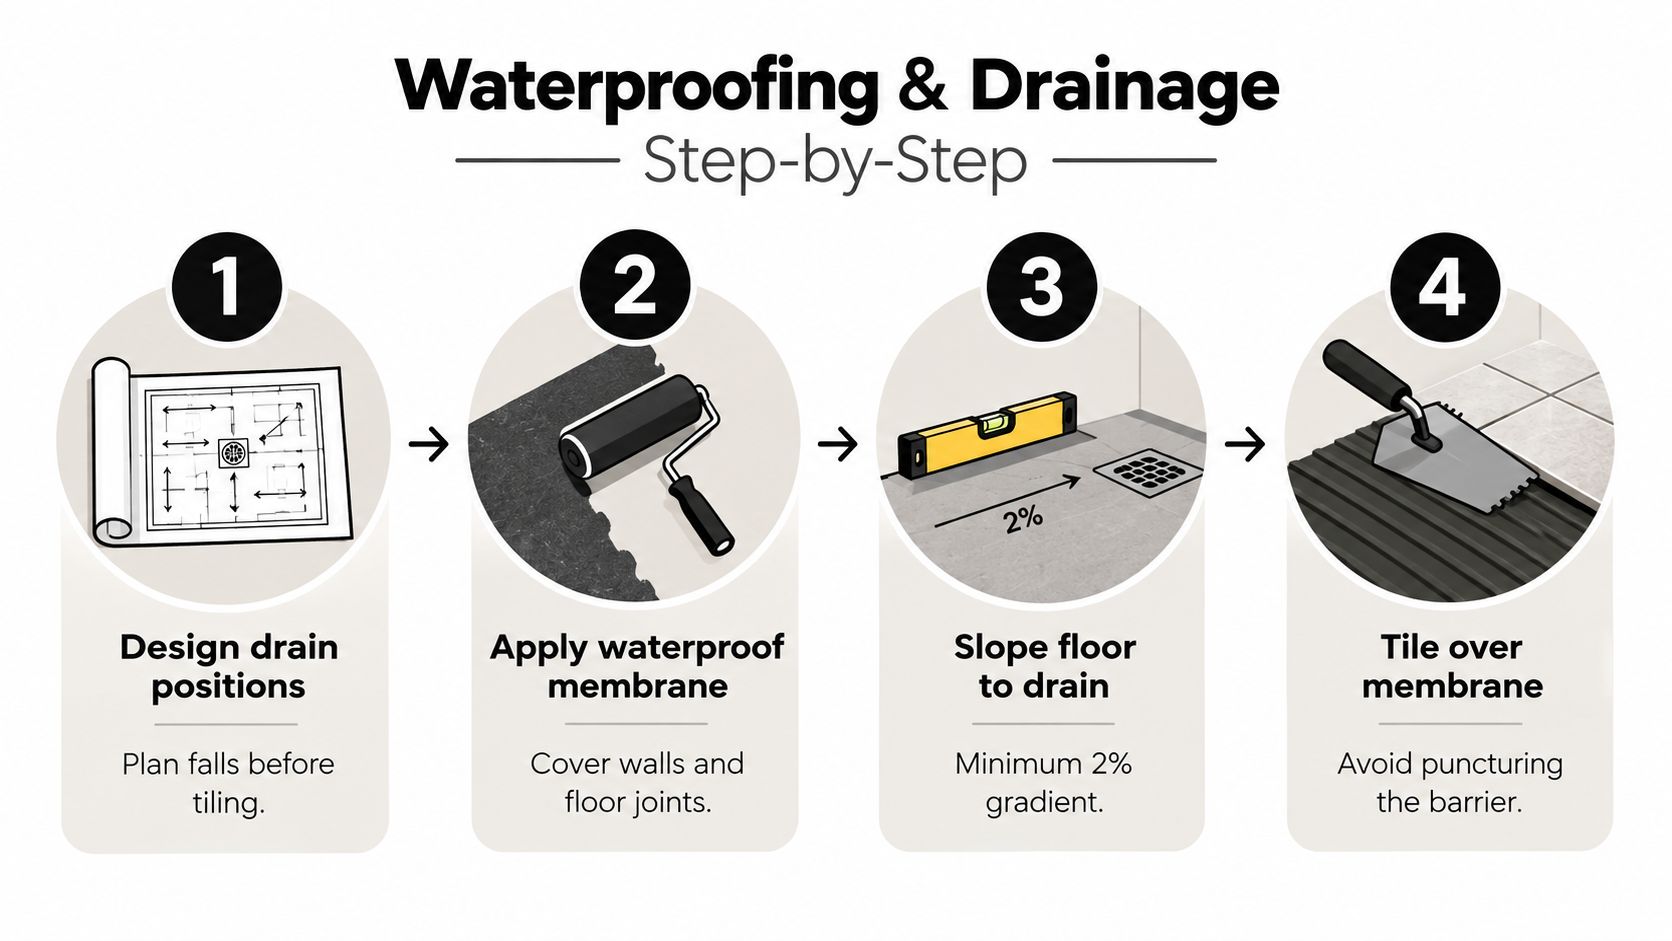
Australian requirements specify that the shower floor, including any hob or step-down, must be waterproof. Shower walls must also be waterproofed to at least 1,800 mm above the finished floor level, or to 50 mm above the shower rose, whichever is higher. The NCC 2022 wet-area waterproofing provisions set out the relevant requirements.
That height affects design details. A recessed niche, mixer penetration, shower screen channel or wall junction must be positioned so the waterproofing remains continuous. If the designer selects the niche after the wall lining is installed, the tiler and waterproofer may be forced into awkward alterations, increasing the possibility of membrane damage or rework.
Build the drainage plane first
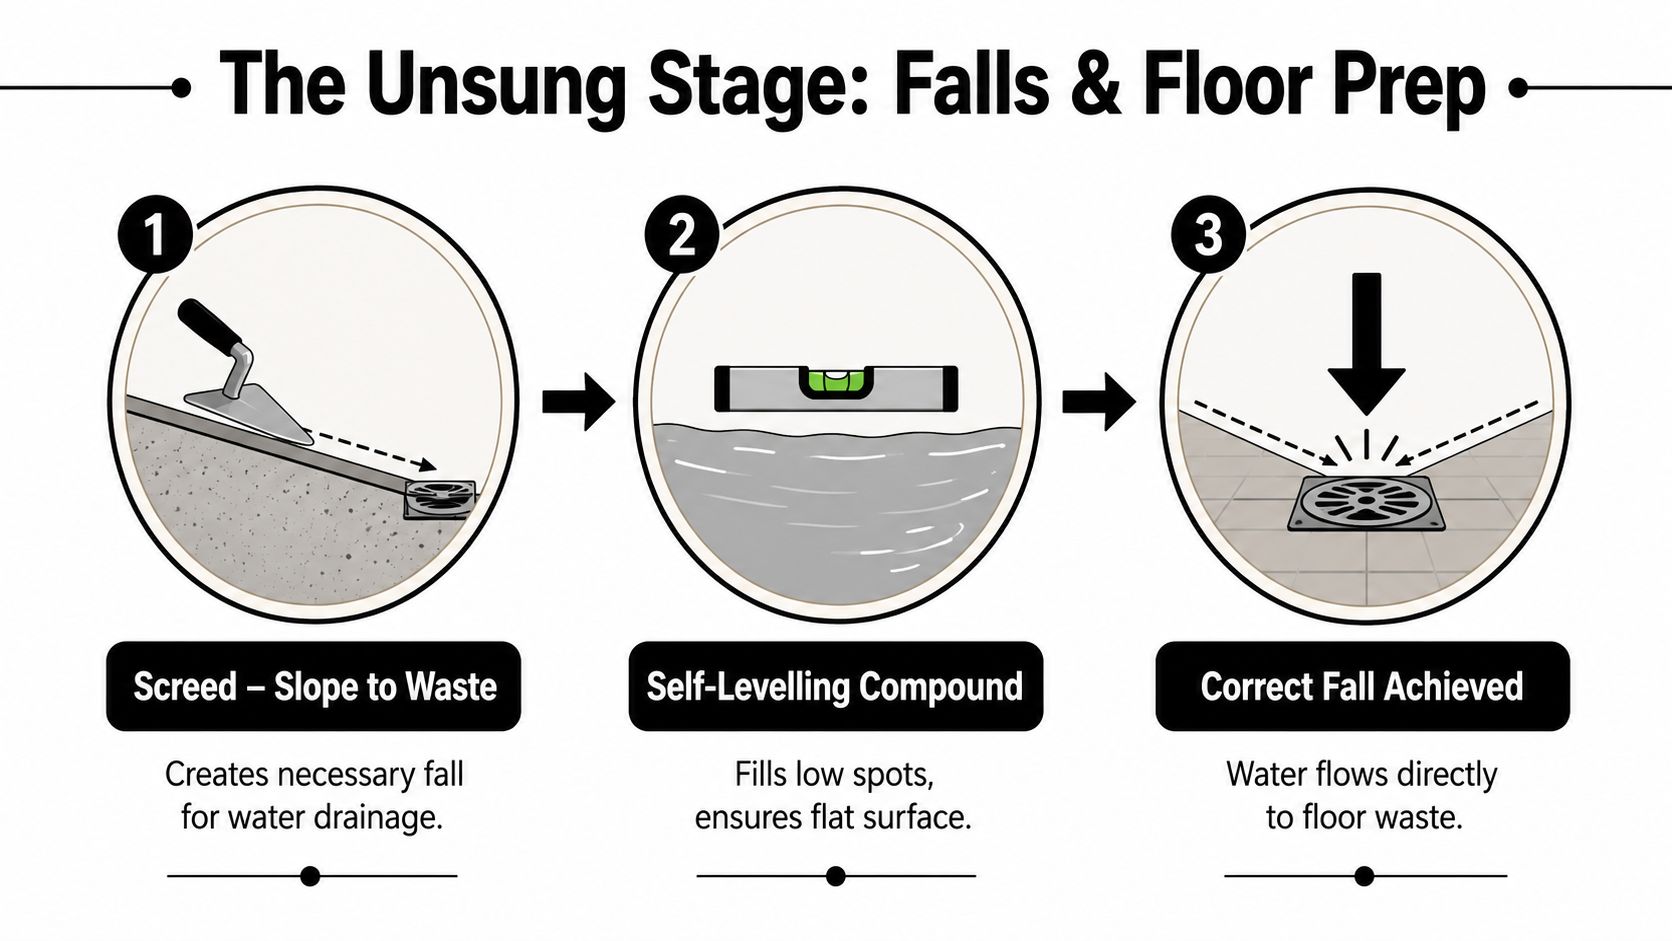
Where a floor waste is installed, the floor must fall continuously towards it. The required fall is a minimum grade of 1:80, and shower areas must not exceed 1:50 under the relevant drainage geometry. Stormtech's wet-area drainage whitepaper explains the practical relationship between falls, drainage and tile installation.
The simple analogy is a shallow funnel. If the funnel is too flat, water sits. If it's too steep, the surface becomes uncomfortable and difficult to tile neatly. Screeding or self-levelling creates the intended plane before the membrane and tiles are installed, so the substrate must be checked rather than assumed to be flat enough.
Large-format tiles make this stage more demanding. A floor with multiple planes, a linear drain and large porcelain pieces needs careful cuts and consistent support. Excessive variation can create lippage, where adjacent tile edges sit at different heights. Insufficient fall can leave ponding at the junction between the shower and the rest of the bathroom.
Ask for evidence, not reassurance
Before work starts, ask who is responsible for waterproofing, what system is being used, how penetrations will be treated and how the floor falls will be checked. You should also confirm how the shower screen, hob, niche and floor waste connect to the waterproofing detail. The wet-area waterproofing service information provides useful context for the sequence and trades involved.
Australian bathroom waterproofing is connected to standards including AS 3740:2021, AS 3958.1, AS 4654.2, AS/NZS 4858 and NCC Volume Two Part 10.2. This Australian waterproofing and tiling overview summarises how those requirements relate to shower floors, walls and drainage.
A membrane isn't a substitute for good detailing. It's the barrier that works when the layout, substrate, falls and penetrations have been designed to support it.
Lighting Ventilation and Universal Design for Everyday Ease
A bathroom should be easy to use early in the morning, relaxing at night and safe when the floor is damp. That calls for layers rather than one bright ceiling fitting.
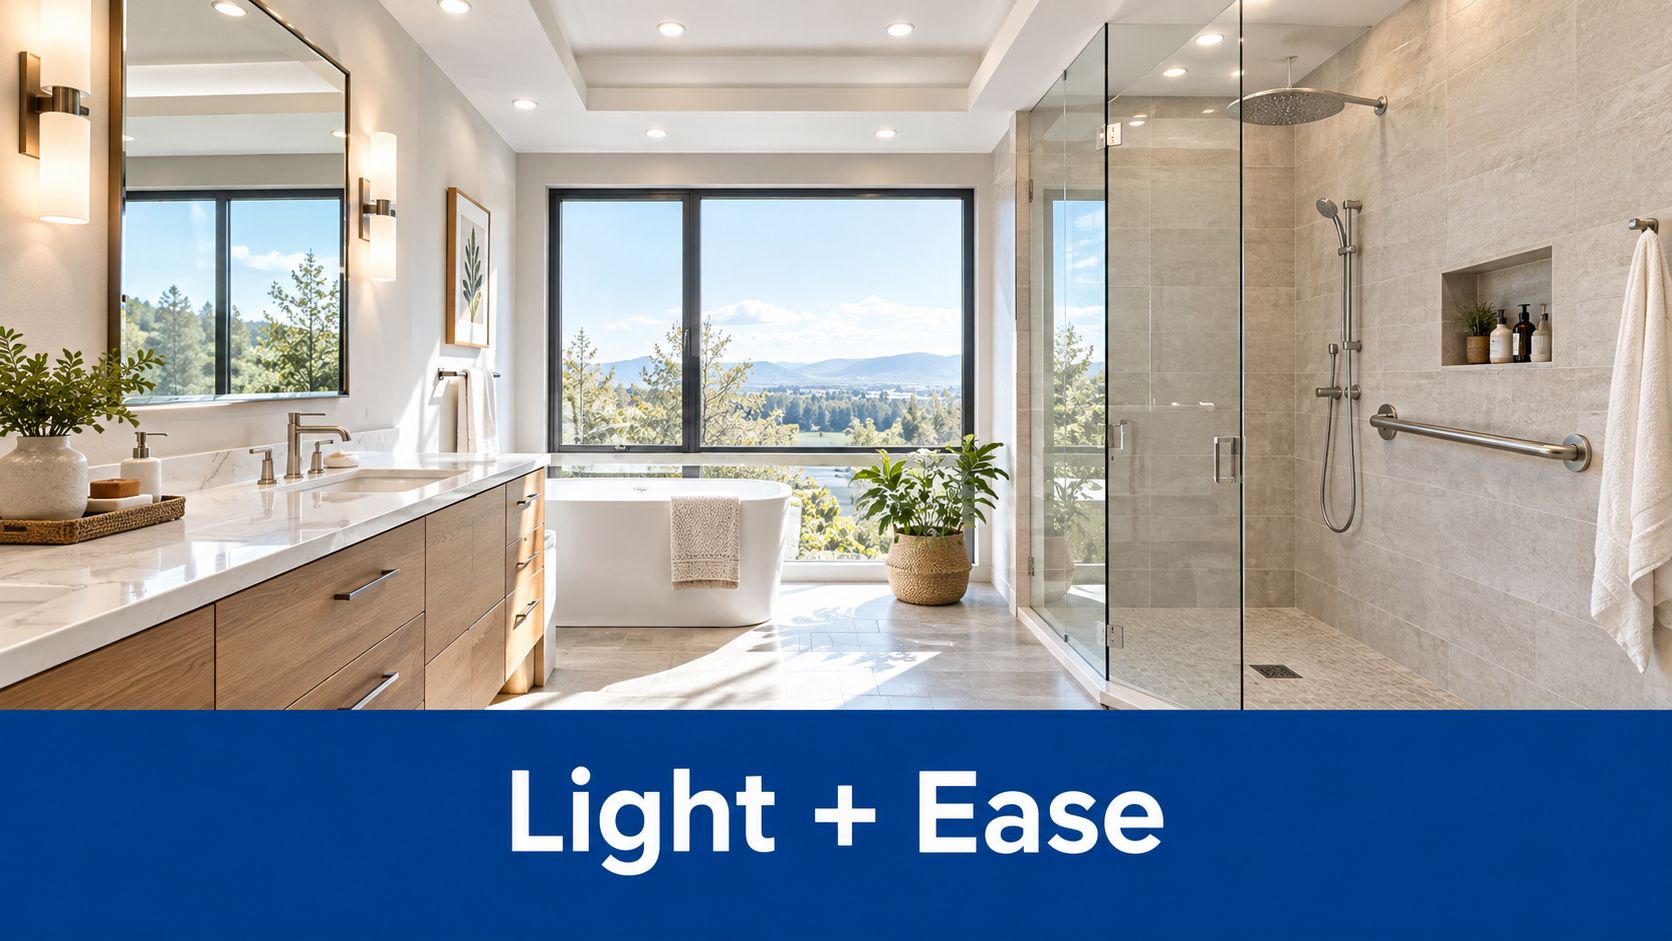
Begin with ambient lighting, such as a ceiling fitting or evenly distributed downlights. Add task lighting beside or around the mirror so your face isn't lit from above, which can create unhelpful shadows. Accent lighting can highlight a textured wall, niche or joinery detail, but it should support the room rather than compete with the mirror.
Place the mirror and vanity lighting together on the drawing. A round mirror can soften a room dominated by straight tile lines, while a mirrored cabinet can provide storage. In either case, the electrician needs the final dimensions before rough-in so switches, lights and power points land where they belong.
For more ideas about combining function, ambience and electrical planning, DLG Electrical's lighting guide for Brisbane homeowners offers a useful lighting reference, even though the advice isn't specific to Melbourne conditions.
Control steam before it becomes a maintenance problem
Ventilation removes humid air and helps limit condensation on mirrors, ceilings and joinery. Choose the fan location with the shower and window in mind, and make sure the system vents appropriately rather than moving moisture into a roof cavity. A quiet fan is more likely to be used consistently, particularly in a shared home.
Natural light can improve the room, but privacy and heat control still matter. Obscure glazing, a high window or a considered blind can bring daylight without exposing the bathroom to neighbours.
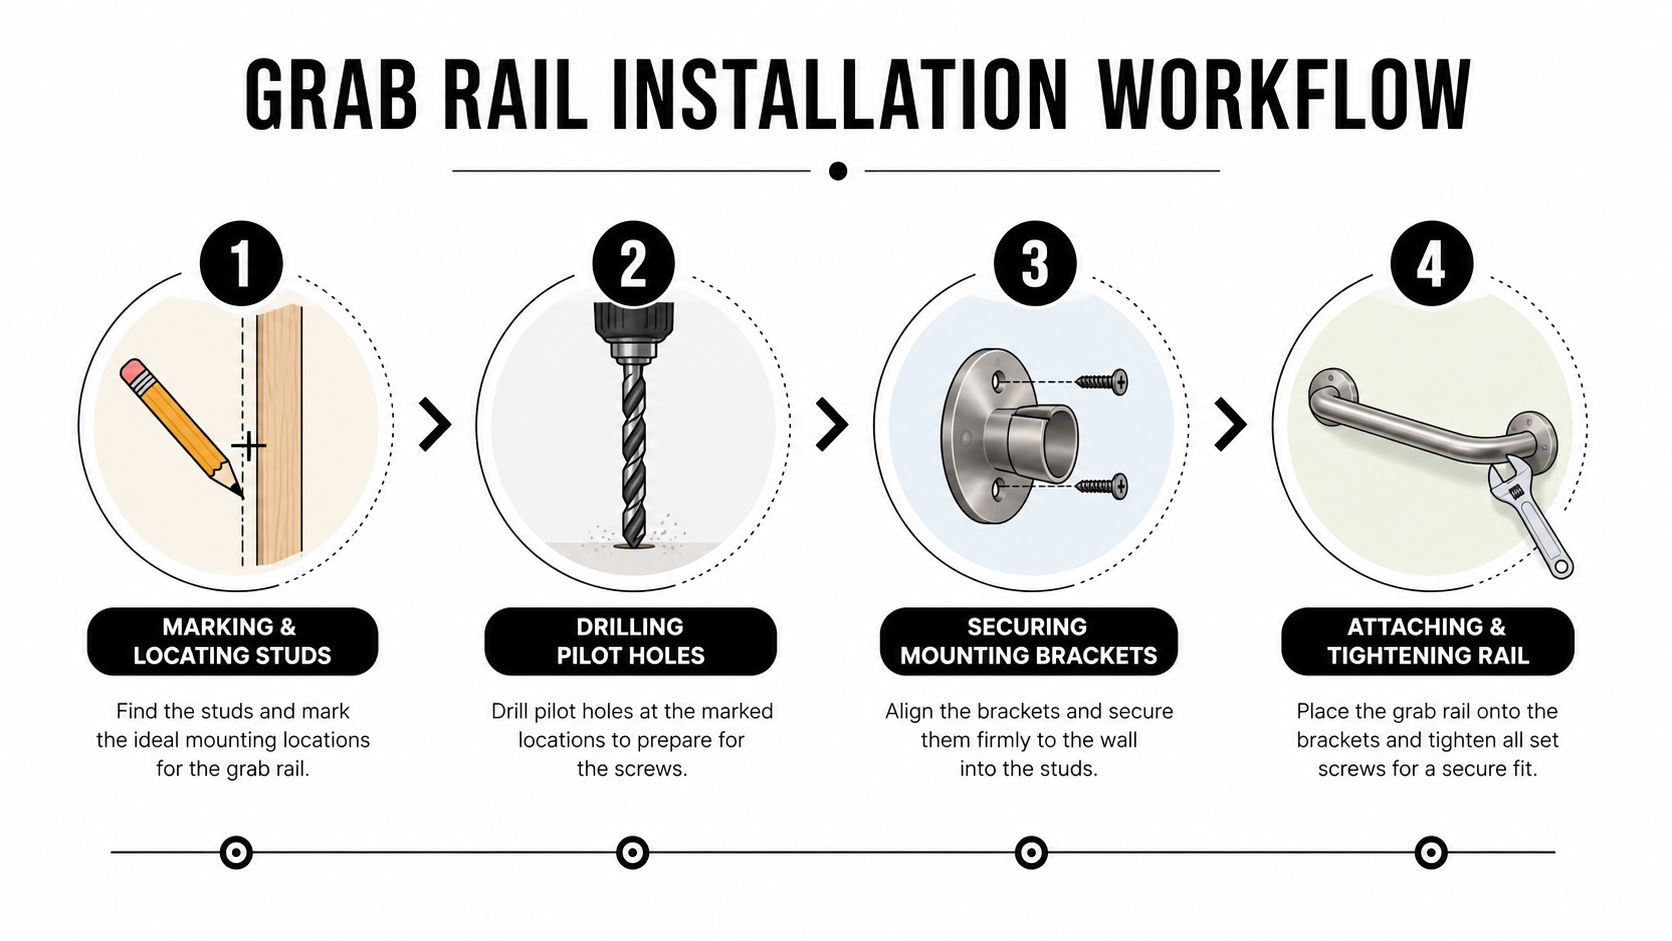
Universal design doesn't require an institutional appearance. A level-entry shower, carefully selected floor surface, reachable storage and reinforced wall areas for future grab rails can look completely contemporary. Wall blocking is easiest to provide while the room is open, even if rails aren't needed immediately.
Comfort-height fixtures, a hand shower and a clear route through the room can help children, older residents and anyone recovering from an injury. The universal bathroom design guide explains how these choices can be integrated into a refined renovation rather than added as an afterthought.
From Mood Board to 3D Drawings and Builder Collaboration
A mood board is useful only when it becomes a buildable brief. Start with a small group of reference images, then identify what you like in each one. It might be the warm timber tone, the quiet grout, the curved mirror or the way the shower is separated from the vanity. This prevents you from copying a look without understanding its ingredients.
Collect physical samples where possible. Hold tiles beside the proposed joinery, basin, paint and tapware in the bathroom's actual light. A screen image can't show the texture of a handmade-look ceramic tile or the variation within marble. It also won't reveal whether two warm neutrals clash beside one another.
Use drawings to expose expensive surprises
A 3D drawing can test more than appearance. It can show whether the vanity feels too deep, whether the shower screen blocks the mirror, whether a niche aligns with the tile grid and whether the pendant or wall light sits at the right visual height. It can also help you decide between a freestanding bath and additional storage before the plumber sets pipework.
Your drawing package should identify the fixture positions, tile direction, joint alignment, niche dimensions, screen location, floor waste and lighting points. Make changes on paper, where they're inexpensive, rather than after waterproofing or tile installation.
A useful quote-stage checklist includes:
- Scope: Confirm demolition, carpentry, plumbing, electrical work, waterproofing, screeding, tiling, grouting, sealing and screen installation.
- Responsibilities: Ask which registered practitioners and specialist trades are involved, and who coordinates them.
- Materials: Confirm product names, sizes, quantities, wastage allowances and whether natural stone requires sealing.
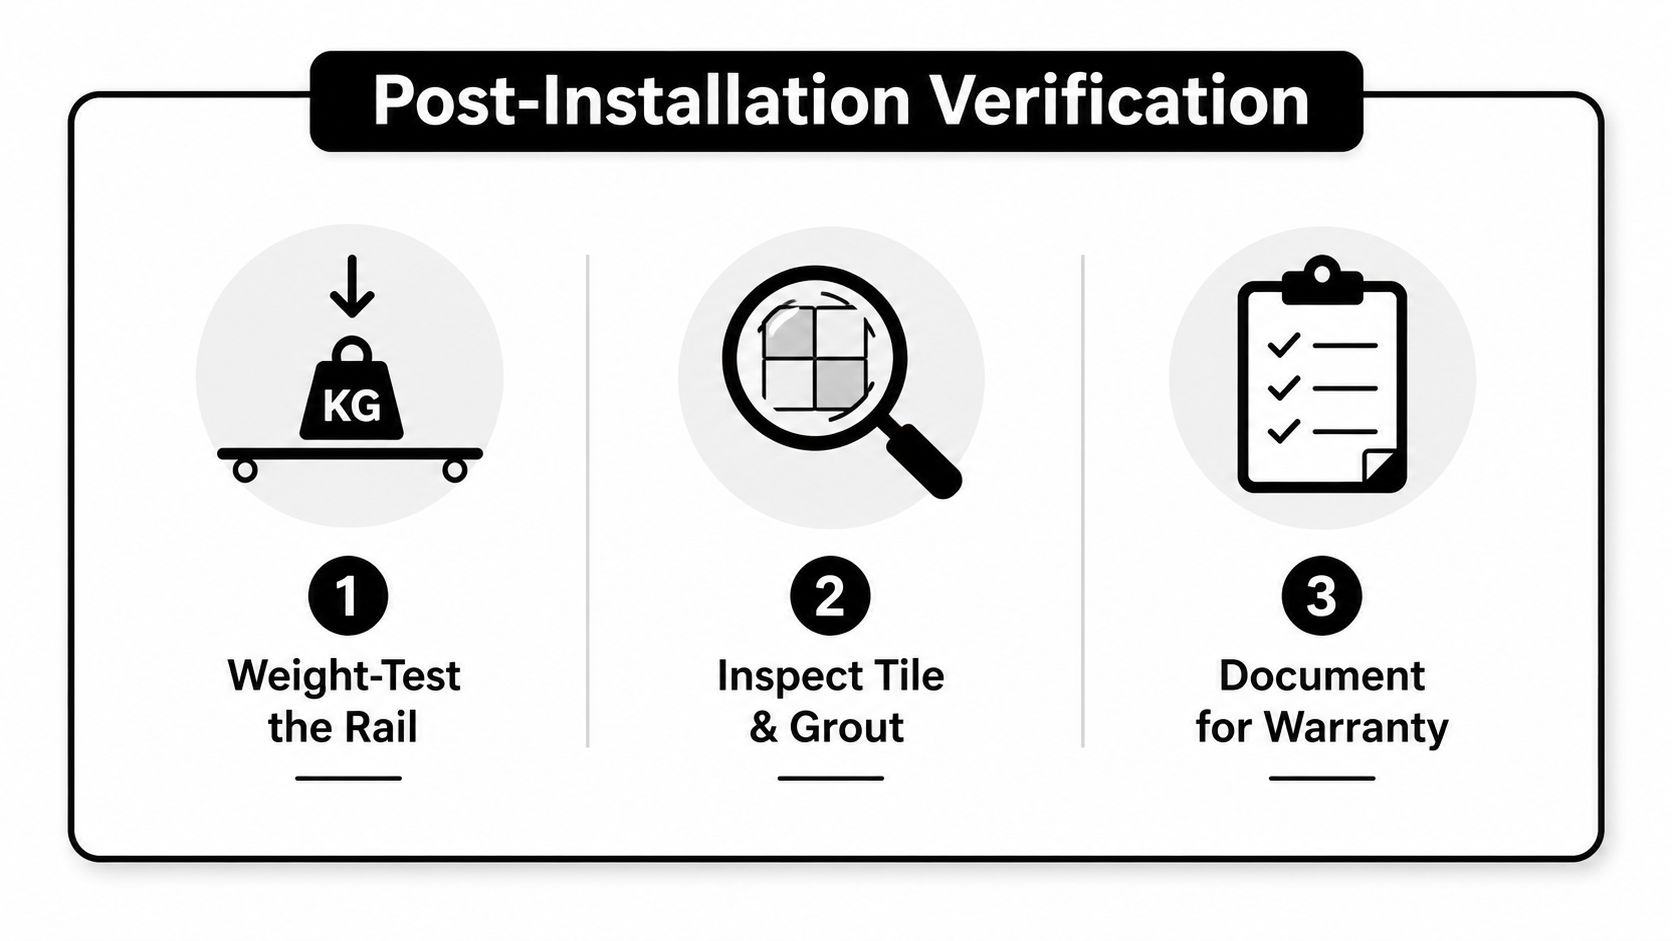
- Quality checks: Ask how substrate flatness, floor falls, membrane continuity and tile alignment will be reviewed.
- Variations: Require changes to be recorded with their effect on cost and timing before the work proceeds.
Victoria treats registration as a meaningful part of bathroom renovation work. Bathroom renovations valued at A$5,000 or more must be carried out by a registered building practitioner under the guidance summarised by the Victorian bathroom renovation regulations overview. A Domestic Builder: Limited, or DBL-L, registration specifically covers bathroom, kitchen and laundry renovations.
The VBA application for limited registration requires evidence such as industry qualifications, project work evidence, a technical referee report, a criminal history check, photo identification and declarations. The VBA registration application document shows why registration is different from registering a business name.
For a coordinated project, Melbourne Tiling Services P/L provides bathroom renovation, waterproofing, screeding, self-levelling, tiling and shower-screen installation while coordinating the relevant trades. Treat that as one option to investigate, then compare the proposed scope, registration details, drawings and quality controls with other registered builders.
Bringing Your Bathroom Renovation Design Together
A bathroom can look polished on paper yet fail in daily use if the design ignores maintenance, water movement or construction details. Treat the design like a chain. The tiles, falls, membrane, drainage and workmanship must support one another, or a weak link can lead to cracked finishes, pooling water or leaks.
Before approving the work, confirm the decisions that still affect the build:
- The finish schedule is complete: Tile names, sizes, quantities, grout, trims and sealants are listed, with spare tiles allowed for future repairs.
- Supply responsibilities are clear: Confirm who orders, receives and stores the tiles on site. Record what happens if a selected batch is delayed or discontinued mid-project.
- Product compatibility is checked: Ensure adhesives, grout, sealers, fixtures and waterproofing products suit the selected surfaces and manufacturer requirements.
- The handover plan is agreed: Ask who protects finished surfaces, removes packaging, tests fixtures and provides care instructions.
- Changes have a paper trail: Any substitution or variation should show its cost, timing and effect on the finished design before approval.
Set the budget before the mood board becomes fixed. A full renovation may cost more when Melbourne access, structural changes, material choices or rectification work add complexity, so request a detailed quote rather than relying on an early allowance.
Use a renovation calculator, review samples in the actual room and request 3D visuals before ordering products. The strongest result is a bathroom where attractive choices also make cleaning, drainage and future maintenance easier.
Melbourne Tiling Services P/L can coordinate 3D drawings, waterproofing, screeding, self-levelling, wall and floor tiling, and shower-screen installation. Visit Melbourne Tiling Services P/L to discuss your Melbourne or Victorian project and request a clear quote.


Recent Comments