
A perfect-looking porcelain floor can still be a leaking bathroom. Porcelain's dense, low-absorption body stops water soaking through the tile itself, but it doesn't waterproof the joints, penetrations, waste connection or wall junctions underneath. That's the counterintuitive starting point for learning how to install porcelain tile in a Melbourne wet area. The finish you see is only the last layer, and every earlier layer has to be signed off before you cover it.
Table of Contents
- The Porcelain Tile Installation Sequence at a Glance
- Large-Format Porcelain Flatness, Warpage and Handling
- Pre-Tiling Waterproofing Sign-Off
- Movement Joints and Waterproofing Details to Get Right
- How to Lay Porcelain Tile Step by Step
- Grouting, Sealing and Fixing Common Faults
- Confirm Your Builder and Permits Before You Start
The Porcelain Tile Installation Sequence at a Glance
Get the order wrong and the only remedy is demolition. The sequence is substrate, waterproofing, falls, adhesive, laying, movement joints, grout, then sealer, and every stage gates the next. Few installers skip a step deliberately. They work around one they cannot prove, which is why every row below carries its own check.
| Stage | Must be true before moving on | How to check |
|---|---|---|
| 1. Substrate prepared | Flat within about 3 mm under a 2 m straightedge, dry and sound | Straightedge and moisture test |
| 2. Waterproofing applied | Membrane, collars, bond breakers and reinforcing complete and cured | Photograph concealed work and record curing time |
| 3. Falls checked | Consistent fall to the floor waste as the waterproofing system specifies | Spirit level and water test before tiling |
| 4. Adhesive selected | Suited to porcelain's low water absorption and the substrate | Adhesive data sheet against the tile specification |
| 5. Tiles bedded | Near-continuous adhesive support across the tile back, no voids | Lift test on sample tiles |
| 6. Movement joints set | Joints continue through tile and bedding, with flexible sealant planned | Layout drawing marked before adhesive goes down |
| 7. Grout and sealer applied | Grout cured, matching colour, corner joints sealed | Manufacturer cure times and sealer data sheet |
In Australia, porcelain work follows the Australian Standard for ceramic and stone tile installation, while wet-area waterproofing must also comply with the National Construction Code and AS 3740. The NCC Housing Provisions for wet area waterproofing require the membrane in a hobless shower, or a shower with a hob or stepdown, to extend over the floor and up the vertical wall substrate to at least 1,800 millimetres above the finished tile level, and they permit that membrane above or below the tile bed or screed provided the complete system meets the performance requirements.
Why the sequence matters
Tile height doesn't replace that membrane. A wall tiled to the ceiling over a membrane that stops short, misses a collar or bridges a corner will still leak, and the failure stays hidden until moisture appears in the next room.
Porcelain is a finish, not a waterproofing system. Treat the membrane as structure and the tile as the wear surface over it.
The step DIYers skip is the pause between waterproofing and tiling. The membrane looks painted on, so the adhesive goes down the same afternoon. I'd stop there and treat the sign-off as its own milestone. Confirm falls, penetrations, corners and junctions, photograph the concealed work with a tape measure in frame, record primer and membrane curing times, and note collar and puddle flange checks on a dated sheet. Adhesive over an unproven membrane is a gamble with the dearest part of the job, the strip-out.
Tick each row before you open the next bag of adhesive. Once porcelain covers the floor, your photos and records are the only evidence of what sits underneath.
Large-Format Porcelain Flatness, Warpage and Handling
A careful installer can still produce an uneven large-format floor. That isn't always poor workmanship, and understanding why saves arguments later.
Check flatness physically before you judge any finished surface, as this checking work shows.
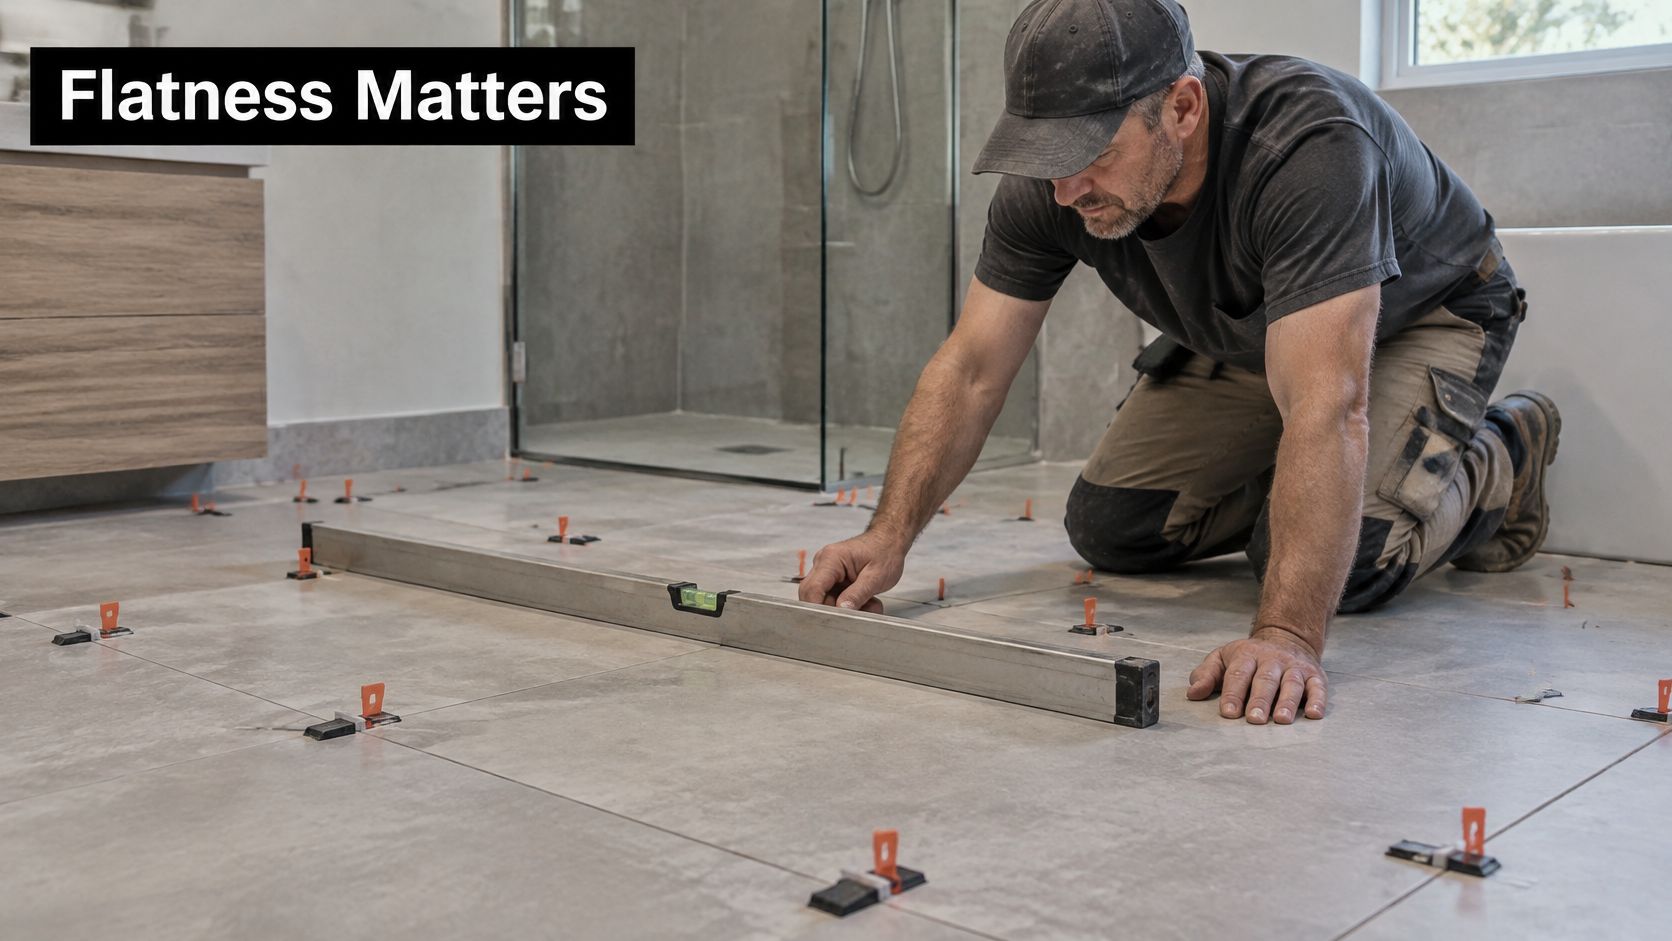
Long tile edges bridge substrate dips instead of following them. A small hollow that a mosaic would absorb becomes a raised corner, a shadow line under downlights, and a toe-catching lip on a 600 mm-plus tile. Lippage is that height difference between adjacent edges.
Clips don't flatten floors
A levelling-clip system pulls neighbouring edges closer together. It doesn't correct a bowed screed, remove deflection in a sheet floor, or straighten a warped tile. Tightening clips over a dip can even lift a tile off its bed and create a void. Australian Laticrete technical guidance for large porcelain panels identifies strict substrate flatness requirements, a stable substrate with limited deflection, and high mortar coverage for large porcelain panels, particularly in wet and exterior areas.
Decide before you buy, not on laying day:
- Measure first: Run a straightedge in several directions and mark highs and lows on the floor.
- Budget for correction: Allow for grinding, patching, screeding or self-levelling compound if the base needs it.
- Confirm the system: Match adhesive, primer and trowel size to the tile back and substrate.
- Plan the handling: Work out entry paths, cutting space, suction lifters and a second pair of hands.
Tile-over-anything methods stop looking cheap at this stage. A 600 mm-plus format requires more preparation, slower placement, heavier adhesive use, and a higher breakage allowance. Our large-format tile installation approach reflects that extra preparation, because the tile price is only part of the installed cost.
Watch the bedding and alignment sequence before you attempt a large panel on your own.
Telling warpage from installation error
Carry large tiles on edge, use two people for long pieces, and inspect every carton for chips and bow before adhesive is mixed. To check warpage, lay a tile face up on a known flat surface and look for rocking or a raised centre, then place two tiles face to face. If both bow the same way, that's inherent warpage. If flat tiles sit unevenly only in one part of the room, suspect the substrate or bedding.
Agree in writing, before the first tile is set, how you'll assess inherent bow and acceptable lippage, including offset patterns that place a tile centre beside another tile's edge. A 50 per cent brick offset is the worst layout for a bowed tile. A one-third offset usually reduces the visible peak.
Pre-Tiling Waterproofing Sign-Off
Don't let waterproofing become a preliminary step you rush to get past. Sign it off as its own milestone, with a named person, a date and photos, before any tile is set.
- Match the system to the specification: Confirm the membrane, primer, reinforcing and bond breakers installed are the products in the approved specification, and check them against the product data sheet for your bathroom plan.
- Check membrane extent: Verify coverage over the floor and up the shower walls to the required height for hobless showers and showers with a hob or stepdown, measured from finished tile level, not from the raw screed.
- Inspect the waste: Confirm floor waste collars and puddle flanges are clean, the membrane laps the flange correctly, and there's no trapped air, bridging or lifted edge.
- Check penetrations and junctions: Every pipe, valve and fixing penetration needs a sealed collar. Bond breakers should sit at wall-to-wall, wall-to-floor and hob-to-wall junctions so movement doesn't tear the membrane.
- Water test the falls: Flood or hose the shower floor lightly and watch the water. It should move consistently to the waste with no ponding away from the drain.
- Confirm curing: Record when primer and each membrane coat were applied and confirm the required curing time has elapsed before tiling or flood testing.
- Photograph everything: Take dated photos with a scale reference of corners, penetrations, the flange, membrane terminations and the full floor before tile covers them.
Practical rule: If you can't prove a junction was detailed correctly from your photos, assume you'll have to argue about it later.
File the completed checklist with the product data sheets and warranty documents. For a Victorian project, keep the paperwork described in our guide to a waterproofing compliance certificate in Victoria with those records, rather than relying on a verbal assurance that the room was done properly.
Compatibility matters too. Confirm the tile adhesive is approved over that membrane and substrate. A membrane can pass its own inspection and still fail as a system if the adhesive, primer or screed layer isn't compatible with it.
Movement Joints and Waterproofing Details to Get Right
Rigid grout in a corner looks neat for about one season. Then the building moves, the grout cracks, and the owner blames the tile.
| Location | Spacing rule | Joint width |
|---|---|---|
| Internal floor where any dimension exceeds 9 m | Joints needed, spacing no greater than 4.5 m | At least 6 mm |
| Internal floor in direct sunlight with a dimension over 6 m | Spacing 4.5 m | At least 6 mm |
| External tiled floor in any dimension | Spacing 4.5 m | At least 6 mm |
| Internal shower corners | Joint required at each corner | At least 6 mm (generally) |
| Changes between materials and floor perimeters | Joint required | At least 6 mm (generally) |
Housing industry guidance interpreting AS 3958:2023 on tile layout states internal floors require movement joints when any dimension exceeds 9 metres with spacing no greater than 4.5 metres, internal floors affected by direct sunlight need 4.5-metre spacing where a dimension exceeds 6 metres, and external tiled floors require joints at 4.5-metre spacing in any dimension. Those joints are generally at least 6 millimetres wide, continue through tile and bedding, and shouldn't be filled with rigid cement grout.
Why porcelain needs room to move
Substrates and buildings expand, contract and deflect with temperature, moisture and structural load. Porcelain and cementitious bedding don't accommodate that movement at the same rate. Without a soft joint to absorb strain, stress concentrates at the weakest point, which is usually a grout line, a tile edge or the adhesive bond.
That reasoning tells you where joints belong even in an odd-shaped room:
- Over structural joints: Never bridge them. Bring the joint straight through the tile layer.
- At material changes: Timber to concrete, sheet to screed, and old slab to new extension all move differently.
- Around fixed elements: Columns, door frames, island benches and bath hobs restrain the field.
- At perimeters and corners: Walls restrain floors, and internal shower corners combine movement with water exposure.
Form the gap through the tile and bedding, insert suitable backing material where the system requires it, and finish with flexible sealant. Backing material controls sealant depth and stops three-sided adhesion, which would stop the sealant flexing properly.
Bond breakers under the tile
Bond breakers sit at wall-to-wall, wall-to-floor and hob-to-wall junctions, and at movement joints where a bonded membrane meets the substrate. They let the membrane system accommodate local movement at the junction instead of being locked rigidly across it. Missing bond breakers are hidden once tiled, which is why your sign-off photos matter.
Before adhesive goes down, draw every joint on the layout plan and run your finger along each planned line. Mark any uninterrupted run longer than 4.5 m and resolve it on paper. Confirm those planning figures against the specific standard, substrate, sunlight exposure and manufacturer system for your job, because a sunny balcony, a heated bathroom floor and a shaded ensuite don't impose identical strain.
How to Lay Porcelain Tile Step by Step
Work slowly enough to check your bedding while it's still wet. Speed is useless if the tile you placed an hour ago is sitting on ridges and air.
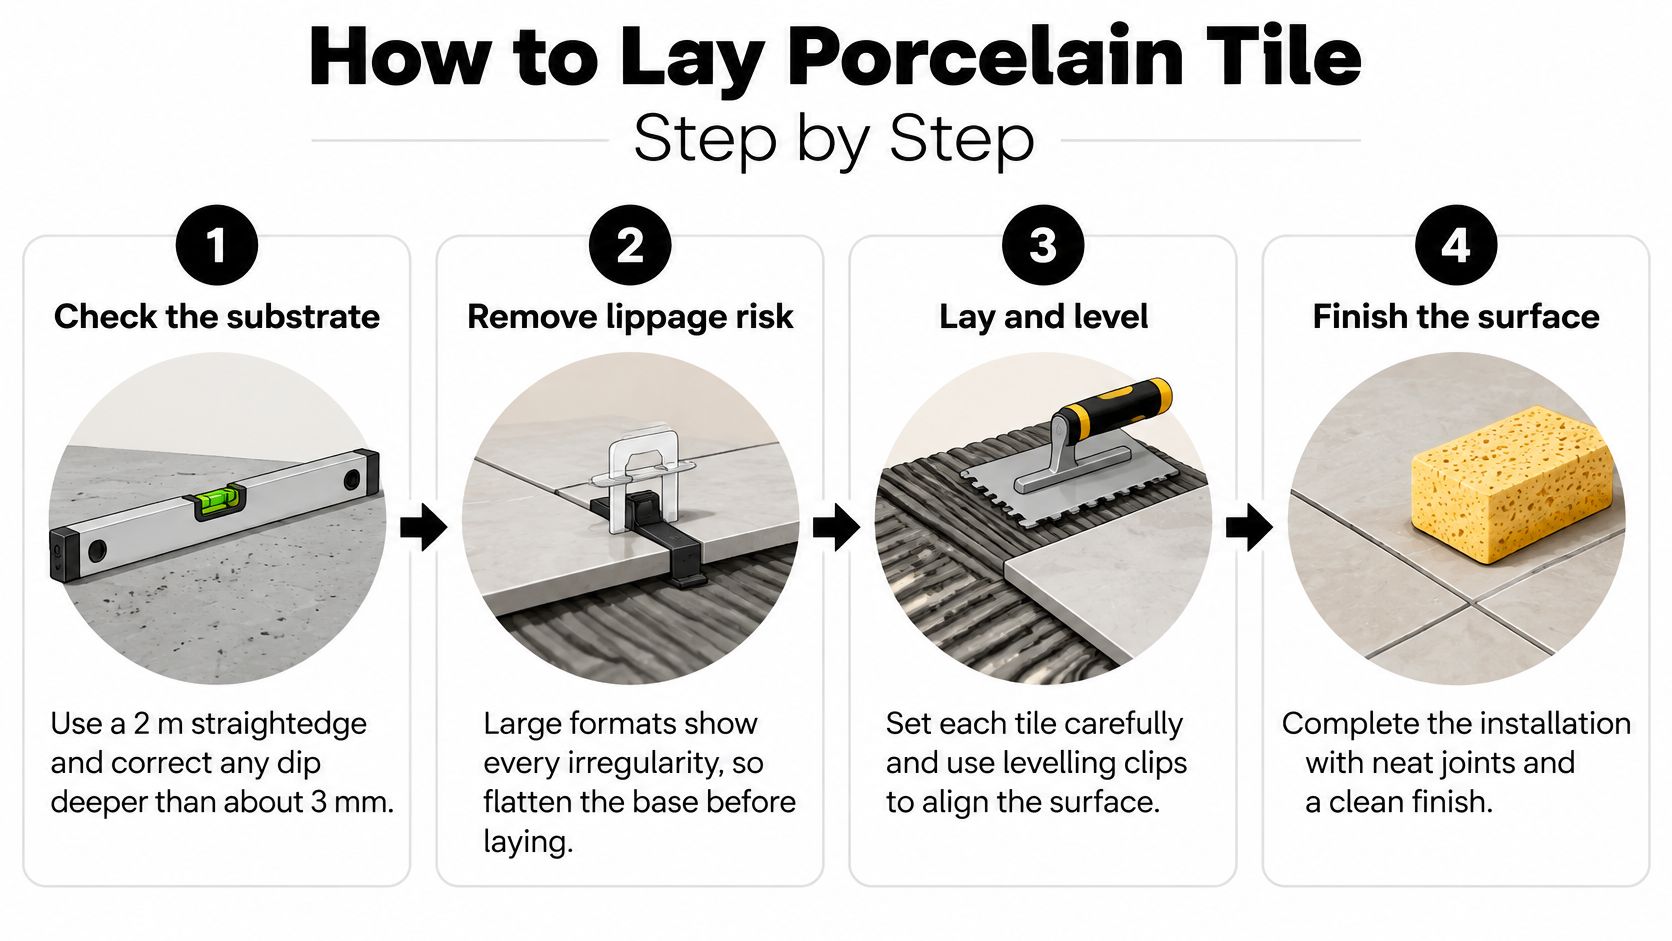
Check the substrate. Run a 2 m straightedge across the slab, screed or sheet in several directions. Published Australian guidance on tile floor coverings says to correct deviations exceeding approximately 3 mm under that straightedge. Grind high spots and fill or level low spots with a compatible compound. The common slip is trying to pack out a dip with extra tile adhesive, which slumps, shrinks unevenly and leaves a hollow edge.
Clean back to a sound surface. Mechanically remove dust, laitance, paint, curing compounds and weak material. Vacuum, don't just sweep, because fine dust breaks the bond. Confirm the surface is structurally sound, dry, stable and compatible with the specified primer and adhesive. Primer isn't a cure for a crumbling screed.
Dry lay and set out. Mark centre lines, check perimeter cuts, and confirm movement joint locations before mixing. In a shower, plan cuts so floor tiles follow the fall to the waste without tiny slivers at the drain. I would dry lay the first rows with spacers in place, because a layout error is free to fix at this point and expensive an hour later.
Key in, then comb. Spread a thin coat with the flat side of the trowel, pressing adhesive into the substrate or membrane. Then comb the bed with a notched trowel sized to the tile, holding consistent ridges in one direction. One-direction ridges let air escape when you slide the tile. Swirled adhesive traps it.
Back-butter large-format tiles. Flat-trowel a thin, continuous coat onto the tile back, filling any mesh, texture or shallow profile. Place the tile and slide it perpendicular to the comb lines so ridges collapse into each other. Skipping back-buttering is the fastest route to edge voids on a big tile, even when the floor bed looks generous.
Set, space and check level. Press the tile firmly, fit spacers, and run the straightedge across neighbouring tiles, not just a small spirit level on one tile. Clean adhesive from joints as you go. Work in small areas you can cover before the adhesive skins over, and scrape up and discard adhesive that has skinned. Pressing a tile into skinned adhesive gives contact without proper transfer.
Lift and verify coverage. Every few rows, and whenever you change mix, trowel or substrate area, lift a freshly placed tile. Wet-area floors and shower zones should show near-continuous support at 95 to 100 per cent coverage with no edge voids. Squeeze-out around the perimeter doesn't prove the centre is supported. If you see clean stripes on the tile back, increase transfer by back-buttering more thoroughly, using fresh adhesive, checking trowel size and improving your sliding action.
Cut accurately and safely. Use a quality manual cutter for suitable straight cuts and a wet saw with a diamond blade for dense porcelain, dense edge work and shower floor cuts. Support the tile fully, mark clearly, feed slowly and wear eye and hearing protection. Cut shower floor pieces to match the fall, checking each piece against the waste height instead of forcing one large tile to bend across competing planes.
Leave the bed alone to cure. Keep foot traffic off fresh work and follow the adhesive manufacturer's cure time before grouting. Walking on tiles early can break the developing bond without visibly moving the tile.
A sound lifted tile shows full adhesive transfer across the back, corners included. A sound finished tile gives a solid note when tapped, not a hollow drum.
Porcelain's density makes it unforgiving of shortcuts. You need a polymer-modified adhesive specified for porcelain and your substrate, clean mixing water, the right open time for the day's conditions, and enough adhesive to support the whole tile. If a lifted tile keeps showing voids after you correct technique and trowel size, stop and reassess the flatness of the base rather than pressing harder.
Grouting, Sealing and Fixing Common Faults
Grout last, seal after cure, and keep rigid material out of joints designed to move. That order sounds obvious, yet most cosmetic repairs I would investigate start with someone treating grout and sealant as interchangeable.
Grout and sealer order
Wait until the adhesive has cured, remove spacers and loose adhesive, then pack joints fully with grout matched in colour across walls and floors. Work diagonally across joints with a rubber float, tool the surface, and clean with a damp sponge without flooding fresh joints. Too much wash water weakens and lightens cement grout.
Once grout has cured to the manufacturer's timing, seal corner and movement joints with flexible sealant and apply penetrating sealer over tiles and grout where the specified system requires it. Our bathroom work uses matching colour grout on walls and floors, sealed corner joints, and penetrative sealer over tiles and grout. If you're weighing joint materials, compare epoxy grout versus cement grout on curing, cleaning and movement limits before you buy, not after the bags are open.
The NCC waterproofing frequently asked questions for houses confirm the National Construction Code permits AS 3740 as a deemed-to-satisfy pathway for residential wet areas when applicable Housing Provisions are also met, with AS 3740:2021 covering materials, junctions, penetrations and shower detailing. That matters during repairs because replacing surface grout doesn't restore a failed junction underneath.
| Symptom | Likely cause | Fix |
|---|---|---|
| Hollow or drummy tile when tapped | Low adhesive coverage or no back-buttering | Lift, re-bed with full coverage and back-butter large tiles |
| Lippage between adjacent tiles | Substrate dips beyond about 3 mm | Level the substrate before re-setting |
| Cracked grout at a corner or junction | Rigid grout across a movement joint | Cut out the grout and install flexible sealant in the joint |
| Tiles lifting or debonding | Adhesive skinned over or unlevel substrate | Remove, clean the back, re-bed with fresh adhesive |
| Damp patch at a wall-floor junction | Incomplete membrane, bond breaker or drain detail | Stop and have the waterproofing checked before any repair |
Diagnose bedding before grout. Tap systematically, mark hollow tiles with tape, and check whether cracks follow one tile, one joint line or a structural line through several tiles. A single drummy tile usually points to local coverage. A repeating crack points to movement.
If the fault sits at a wet-area junction, floor waste or wall-to-floor corner, stop before cosmetic repair. Correct-looking tiles over incomplete waterproofing, blocked falls, unsealed penetrations or rigidly grouted corners are a recognised failure pathway, and fresh sealant over the top can trap moisture while hiding the evidence.
Confirm Your Builder and Permits Before You Start
Calling a full bathroom rebuild “tiling” doesn't change what it legally is. Separate single-trade tile replacement from coordinated bathroom renovations before demolition, purchasing or signing anything.
Registration checks in order
- Search the register: Use the Building and Plumbing Commission practitioner search to check the builder's name, registration class, permitted work and any conditions or limits. Do this before appointment, not after a deposit.
- Define the full scope: Demolition, carpentry, waterproofing, plastering, plumbing coordination and tiling together amount to a wider renovation, even if porcelain is the visible finish.
- Apply the contract threshold: Consumer Affairs Victoria guidance on becoming a registered building practitioner states a person does not generally need domestic-builder registration for work involving only wall or floor tiling, but registration is required for domestic building work where the contract exceeds $10,000, subject to stated exemptions. A major domestic building contract must be used for work worth more than $10,000, and the builder must be registered with the Building and Plumbing Commission.
- Check permits separately: Like-for-like replacement of internal wall cladding without structural alteration may not need a building permit. Moving walls, changing structural elements or altering services can change that position, so ask your local council or a registered building surveyor before work starts.
For bathroom renovations, use registered builders whose registration covers coordinating the actual scope, and confirm which licensed practitioners will handle plumbing, electrical and waterproofing components. Registration for the coordinating builder doesn't automatically answer every specialist licence question.
Ask for a written scope naming demolition, substrate preparation, waterproofing, screeding, tiling, grouting, sealing and shower screen work as applicable. Request membrane product data, waterproofing records, curing documentation, progress photos and warranty terms in the contract documents.
Melbourne Tiling Services P/L has been an established tiling business since 2003, and all of the business's workers are qualified and certified waterproofers or tilers. Check our registration on the same practitioner search before appointment, just as you would any other builder. You can also phone Melbourne Tiling Services on 1300 661 658 to discuss who coordinates each trade on a bathroom renovation.
For a Melbourne bathroom that needs the full sequence handled in order, from substrate preparation and waterproofing sign-off through porcelain laying, movement joints and sealing, talk to Melbourne Tiling Services P/L about your scope before demolition begins. Visit Melbourne Tiling Services P/L to arrange advice on your renovation, check the work your project involves, and plan the installation before the first tile covers the details underneath.
Recent Comments