
You've probably seen the warning signs already. A Melbourne balcony feels uneven underfoot, water sits near the doorway after a sudden downpour, and the tiles have started to sound hollow or crack at the edges. The tempting fix is to buy a bag of smooth-flowing compound, pour it across the slab and create a clean surface for new tiles. That shortcut is responsible for many failed balconies, because self levelling compound for outdoor use isn't interchangeable with an indoor floor product, and it must be installed in the right relationship with waterproofing.
Exterior work has to cope with sunlight, rain, temperature changes and wet foot traffic. It also has to preserve drainage, respect the substrate and deliver a surface that's safe when Melbourne weather turns quickly. The sections below focus on the details that decide whether an outdoor restoration lasts or becomes another expensive repair.
Table of Contents
- What Outdoor Self Levelling Compound Actually Does
- Cementitious vs Polymer-Modified Formulations
- Critical Substrate Prep and Waterproofing Rules
- AS 4586 Slip Ratings and Melbourne Weather
- Thickness Limits and Bathroom Renovation Standards
- Cost Guidance and When to Hire Professionals
What Outdoor Self Levelling Compound Actually Does
A sloping balcony isn't always defective. Some fall is necessary so water can move towards the drainage point instead of collecting against a wall or door. The problem starts when the slab has local depressions, ridges or damaged patches that interrupt that drainage path. A tile may bridge a hollow, flex under load and eventually crack, while trapped moisture works its way into joints and adjacent building materials.
Self levelling compound for outdoor use corrects those surface irregularities by flowing across a prepared mineral substrate and forming a more consistent plane. It doesn't replace structural repairs, rebuild a failed balcony or magically create a compliant drainage design. It provides the stable, even base that a tile adhesive and exterior finish need.
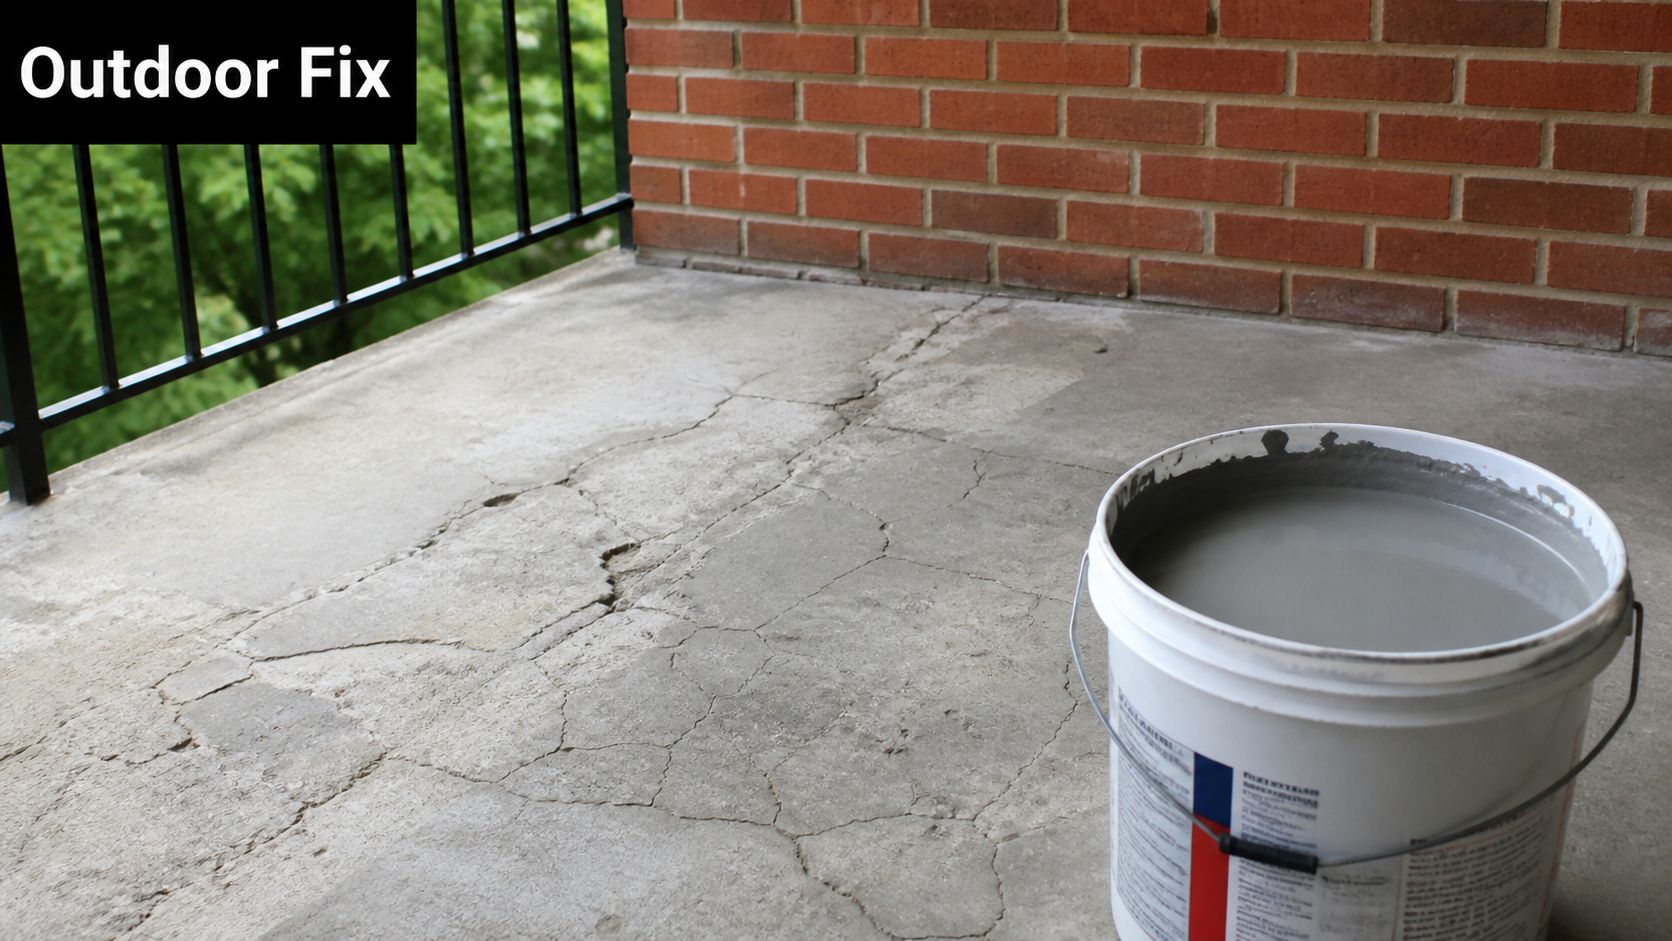
Where the product earns its place
On a terrace restoration, the compound can smooth a rough concrete surface before the waterproofing and tiling stages. It can also help create a controlled transition where an old surface meets a repaired section, provided the underlying slab is sound and the system has been designed around the existing fall.
The Australian technical information for ARDEX K 301 exterior levelling compound describes it as suitable for internal and external applications. It's designed to resist sun, rain, heat, cold and freeze-thaw conditions, making its rated exposure scope distinctly different from an indoor-only leveller.
That distinction matters in Victoria. A balcony may be dry when the compound is mixed, then face harsh sun, wind-driven rain and cold conditions during its service life. An indoor product can look perfect on installation day and still be the wrong material for that exposure.
Practical rule: A smooth finish doesn't prove exterior suitability. The technical sheet must specifically rate the product for external use.
The same ARDEX Australian information gives useful planning milestones. K 301 is walkable after 2–3 hours and ready for tile, carpet and floating floors after 24 hours, subject to the product instructions and site conditions. Those timings help organise access to a balcony or patio, but they don't remove the need to check moisture, substrate stability and the complete waterproofing system.
For related floor preparation terminology, the guide to what screed means in tiling is useful. Levelling compound and screed can both alter a floor build-up, but they aren't automatically the same product or suitable for the same application.
Cementitious vs Polymer-Modified Formulations
The word “cement” on a bag tells you very little about whether the product belongs outside. The important questions are where the compound is rated for use, how it bonds, how it handles movement and what system the manufacturer specifies around it.
A conventional cementitious leveller can be durable on a stable, correctly prepared substrate. It still depends heavily on accurate water measurement, proper mixing, suitable curing conditions and protection from contamination. If the slab moves, the layer is too thick for the product or the installer adds water to make it flow more easily, the finished result can lose strength or adhesion.
Polymer-modified compounds add polymer technology to the cementitious binder. Depending on the formulation, those polymers can improve adhesion, workability and tolerance of minor movement compared with a basic mix. They don't make a cracked or structurally unstable balcony safe, and they don't turn a leveller into a waterproofing membrane.
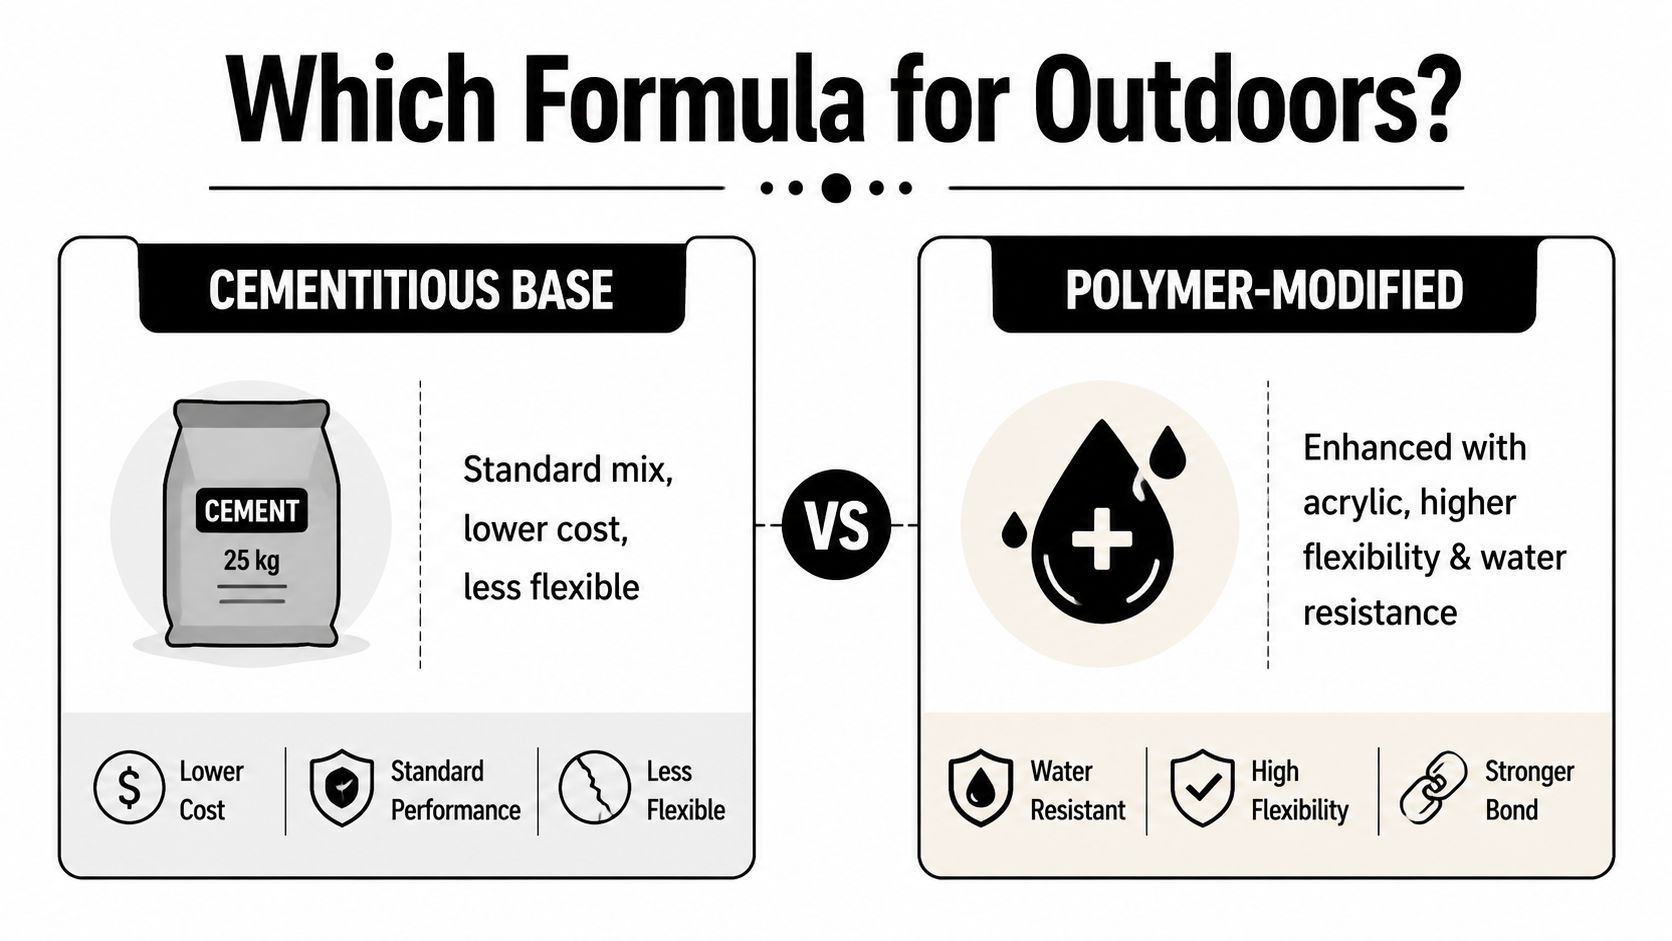
A practical product comparison
| Consideration | Standard cementitious formulation | Exterior-rated polymer-modified formulation |
|---|---|---|
| Exposure | May suit stable internal work, depending on its technical sheet | Designed for specified external conditions when the manufacturer confirms that use |
| Movement tolerance | More dependent on a rigid, stable substrate and careful curing | Polymer modification can improve adhesion and flexibility, but it isn't a substitute for structural repair |
| Water exposure | Not automatically suitable for rain or repeated wetting | May be suitable where the product is explicitly rated for external exposure |
| Selection risk | The label can be mistaken for universal suitability | The technical data makes the intended application clearer |
ARDEX provides a useful Australian example. K 301 is identified for internal and external applications and exposure to sun, rain, heat, cold and freeze-thaw conditions in its Australian product information. By contrast, the Australian balcony guidance from Remedial Building Australia's external self-levelling reference identifies internal-only products such as K 15 as unsuitable for exposed outdoor use.
That's the trade-off in plain terms. A cheaper indoor compound may be perfectly reasonable for the correct interior substrate, but using it on a Melbourne balcony because it pours smoothly is false economy. An exterior-rated product costs less than removing failed tiles, repairing water damage and repeating the waterproofing.
Before choosing, check the entire system rather than only the bag front:
- Rated location: Confirm internal, external or submerged suitability in the technical documentation.
- Substrate: Make sure the slab is sound, clean and free from loose material, coatings, oil and contaminants.
- Movement: Identify cracks, joints and structural movement before levelling.
- Finish: Confirm compatibility with the membrane, adhesive, tile and final surface treatment.
Critical Substrate Prep and Waterproofing Rules
On a Melbourne balcony, the membrane may look like a suitable base for a flowing compound. It is not. Never pour self-levelling compound over a waterproofing membrane. The leveller belongs on prepared concrete first, then the cured layer receives the external membrane. The two products perform different jobs, and reversing the order can cause delamination or compromise waterproofing.
The correct sequence
Inspect the concrete. Remove loose, flaky or poorly bonded material. A leveller cannot stabilise a slab that is already failing underneath.
Clean thoroughly. Dust, oil, grease, old adhesive and paint can stop primer and compound bonding. Embedded contamination may require mechanical preparation.
Repair defects first. Treat cracks, open joints and damaged edges with a compatible repair system. A flowing compound will not accommodate movement or correct structural damage.
Prime the substrate. Porous concrete generally requires the primer specified for the selected compound. It controls absorption and supports consistent adhesion. Follow the manufacturer's dilution, drying and application instructions.
Check drainage and falls. A balcony must not be levelled into a flat ponding area. Retain or form the required fall towards the drain, threshold or discharge point, and check finished heights at doors and edges.
Apply the external leveller to prepared concrete. Use the specified water quantity, then spread the mix with the suitable gauge rake or flooring trowel. A smoother or spike roller may be used where the system permits. Keep movement and perimeter joints correctly detailed.
Allow the layer to harden. Protect it from rain, contamination and early traffic. A product being walkable does not mean the waterproofing and tiling system is ready.
Install the external membrane over the cured leveller. Select a membrane rated for external above-ground exposure. Complete corners, penetrations, junctions and outlets in line with the system requirements.
Tile with compatible materials. Choose an exterior adhesive and surface finish suited to the exposure, movement and slip requirements.
The levelling layer sits below the waterproofing membrane. Reversing that order risks delamination and can compromise the waterproofing system.
The Melbourne waterproofing service guide reflects the practical sequence. Waterproofing is not a decorative coating added after the visible work. It is a system that depends on a prepared substrate, sound detailing and protection from the layers installed above it.
Membrane selection also matters. Australian guidance distinguishes membranes for external above-ground applications under AS 4654.2 from domestic internal wet-area products governed by AS 3740:2021, as outlined in this Australian waterproofing and tiling reference. A bathroom membrane and an exposed balcony membrane are not interchangeable because both may be liquid-applied or sheet-based.
AS 4586 Slip Ratings and Melbourne Weather
A level surface can still be dangerous. Outdoor floors collect rainwater, condensation, dirt and leaf residue, and a glossy finish can become hazardous when wet. The final result must be judged as a complete pedestrian surface, not just by how flat the levelling compound looks before the tiles or sealer are installed.
AS 4586 is the Australian Standard used to classify new pedestrian surface materials, including external walkways, balconies and pool-adjacent areas. The relevant classification affects material choice, surface texture and the finish applied over the prepared base. AS 4586 guidance for pedestrian slip classification.pdf) is the reference point for checking how the completed surface is assessed.
Why the P-rating belongs in the design
Published Australian guidance maps higher-risk external locations such as balconies, driveways and external walkways to ratings such as P4 or P5. That doesn't mean every outdoor surface receives the same classification without assessment. Location, exposure, slope, contamination and the selected finish all influence the safe specification.
| Area | Design concern |
|---|---|
| Exposed balcony | Rain, wind-driven moisture and limited shelter can make a smooth finish unsafe |
| External walkway | Frequent pedestrian traffic requires reliable wet slip resistance |
| Pool-adjacent surface | Bare feet and persistent water demand careful texture and material selection |
| Driveway or access zone | Vehicle and pedestrian use create different performance considerations |
Melbourne's weather makes this more than a paperwork exercise. A terrace can dry quickly in bright sun, then become slippery during a sudden shower. The sealer should complement the tile or exposed finish, not create a glossy film that undermines the texture. If the leveller will remain visible, confirm that the product and topcoat are designed for that use and can achieve the required friction category.
The same thinking applies to covered outdoor areas. A roof overhead reduces direct rain but doesn't eliminate condensation, tracked water or wet footwear. For interior wet areas, the discussion shifts to products and detailing suited to bathrooms, such as the considerations in this guide to non-slip bathroom flooring. The principle remains consistent, choose the finished surface for its real wet conditions.
Before approving a finish, ask for the specified slip classification and the test or product evidence supporting it. Don't accept “rough enough” as a substitute for an appropriate AS 4586-based selection.
Thickness Limits and Bathroom Renovation Standards
A few extra millimetres can affect door clearances, drain levels, tile transitions and the space available for waterproofing and finishes. For external resurfacing, the specified system may allow 2–20 mm in a single layer, increasing to 30 mm only with aggregate. Those limits are a design constraint, not a suggestion. An internal-only compound is unsuitable for exposed outdoor work.
Measure before mixing
Start by mapping the existing levels. A shallow hollow may suit the product's normal range, while a deep depression, damaged edge or abrupt height change may need repair mortar, a screed system, aggregate extension or wider substrate repairs. Adding extra compound beyond the manufacturer's stated thickness can leave a weak, poorly cured build-up.
Check these points on site:
- Lowest and highest levels: Use a straightedge or laser level to establish the existing plane and calculate the actual build-up.
- Drain and threshold heights: Confirm the new layer will not obstruct an outlet, reduce the fall or create a trip at a doorway.
- Perimeter movement: Keep specified joints and edge details clear so the surface can move without cracking.
- Layer compatibility: Check that the primer, leveller, waterproofing membrane, adhesive and tile are approved for use together.
The finished height also affects the waterproofing sequence. On an outdoor balcony, the leveller is applied to the prepared substrate, then the compatible membrane and finish are installed as specified. Pouring self-levelling compound over a membrane can bury movement details, trap moisture and leave the membrane working on an unsuitable base. Plan the drain and threshold before mixing, because correcting levels after waterproofing is far more disruptive.
Product limits still require site judgment. ARDEX K 301 documentation lists a 2–20 mm single-layer thickness, with aggregate allowing a greater build-up under the specified system. That information helps calculate material and set levels, but temperature, humidity, substrate moisture and the membrane or adhesive requirements still control the installation sequence.
Bathroom renovations need their own compliance path
A balcony build-up cannot be copied into a bathroom. Australian bathroom waterproofing follows AS 3740:2021 and the NCC wet-area provisions, including renovation work. Shower walls must be waterproofed to at least 1800 mm above the floor substrate, or to 50 mm above the shower rose when the rose is higher, as summarised in Australian bathroom renovation waterproofing guidance.
Junctions and floor construction change the detailing. Guidance summarising AS 3740:2021 states that wall-and-floor junction protection extends at least 40 mm on either side of the joint, while timber-based wet-area floors must be fully waterproofed, as explained in Australian waterproofing standards guidance. These requirements affect the compound, sheet substrate, screed and finished floor height selected for the renovation.
Cost Guidance and When to Hire Professionals
There isn't a responsible single price for an exterior levelling job without inspecting the site. The cost depends on the area, substrate condition, preparation required, thickness variation, drainage adjustments, access, membrane system and finished surface. A small, clean concrete area with minor correction is a different job from a cracked balcony with failed waterproofing and a difficult threshold.
DIY may be reasonable when the substrate is stable, the drainage layout is already correct, access is straightforward and the product instructions are fully understood. It becomes a poor risk calculation when the work involves a balcony membrane, active leaks, structural cracking, complex falls, multiple transitions or a finish that must satisfy a slip classification.
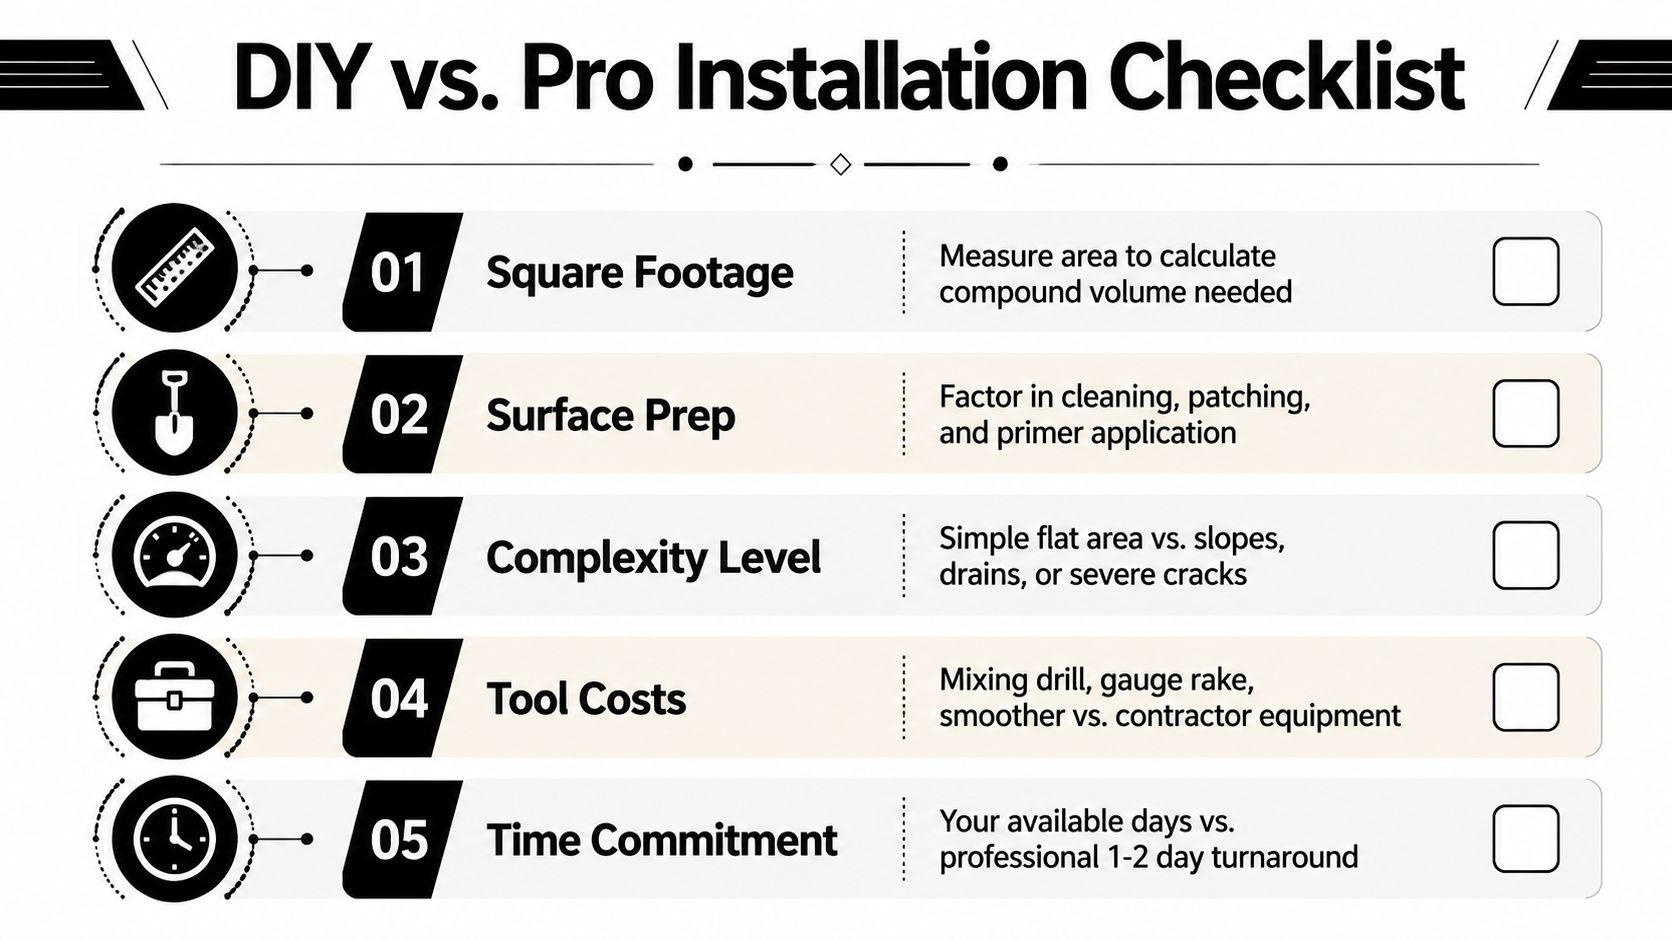
Use this decision checklist
- Inspect the base: If the concrete is unstable, contaminated or cracked through movement, arrange a professional assessment before buying compound.
- Check the system order: The leveller goes onto prepared concrete, then the cured layer receives the correctly rated waterproofing membrane.
- Confirm the thickness: Keep the application within the product's stated range, including any aggregate requirement for deeper correction.
- Plan drainage: Check falls, outlets, door thresholds and edge levels before the pour.
- Specify slip performance: Choose the completed outdoor surface with AS 4586 classification in mind, especially for balconies, walkways and pool-adjacent areas.
- Coordinate bathroom work: Waterproofing, plumbing, electrical work, substrate preparation and tiling need to be organised as one compliant renovation.
Victoria also has a legal threshold that homeowners shouldn't overlook. A person must be registered with the Building and Plumbing Commission for domestic building work where the contract value exceeds $10,000, and the requirement applies regardless of cost to re-blocking, re-stumping, demolishing or removing a home, according to the Victorian registered building practitioner requirements. A full bathroom or ensuite renovation can exceed that threshold once labour and materials are combined, so confirm the builder's registration and scope before work starts.
Melbourne Tiling Services P/L offers bathroom and ensuite renovations, waterproofing, screeding, self-levelling and balcony remediation, with coordination across the relevant trades. For a project involving exterior levelling or a bathroom renovation, request a site assessment, confirm the membrane and slip-resistance specification, and have the proposed build-up documented before materials are ordered.
Melbourne Tiling Services P/L can assess your balcony, terrace, bathroom or ensuite substrate, then coordinate self-levelling, waterproofing and tiling as a complete system. Visit Melbourne Tiling Services P/L to arrange a quote and discuss the correct product sequence for your Melbourne property.
Recent Comments