

You've chosen the tiles, ordered the frameless screen and perhaps even removed the old vanity. Then the shower is used for the first time, and water sits along the wall instead of travelling cleanly to the waste. The finish may look expensive, but the floor slope for drainage was decided too late.
That problem is common in Melbourne bathroom renovations, especially where an older timber floor, shallow setdown or poorly positioned waste leaves little room for a compliant screed. A drainage fall isn't a cosmetic detail. It affects waterproofing, tile installation, thresholds, accessibility and the protection of the building below. The correct fall must be planned before demolition and coordinated between the builder, plumber, waterproofing contractor and tiler.
Table of Contents
- Why Floor Slope for Drainage Matters in Australian Bathrooms
- Understanding Fall Ratios and Percentage Calculations
- Australian Code Requirements for Different Wet Areas
- Construction Methods to Achieve Correct Falls
- When Steeper Falls Create More Problems Than They Solve
- Why Registered Builders Matter for Bathroom Renovations
- Planning Your Drainage Strategy from Start to Finish
Why Floor Slope for Drainage Matters in Australian Bathrooms
Ponding water is the visible warning. The less obvious risk is where that water goes afterwards. If a bathroom floor doesn't drain properly, repeated wetting can place pressure on junctions, penetrations and waterproofing details. In timber homes, a poorly resolved wet area can also expose the subfloor and adjoining structure to ongoing moisture.
Australian site drainage has long followed the same basic principle. External surfaces around a slab must grade away from the building, with a minimum fall of 25 mm over the first metre in low-rainfall areas for reasonably impermeable surfaces, or 50 mm over the first metre in other cases, as set out in the NCC Housing Provisions drainage requirements. Those gradients equal 2.5% and 5%, respectively. Internal wet areas apply their own requirements, but the principle is identical: water needs a deliberate path to a waste or away from the building.
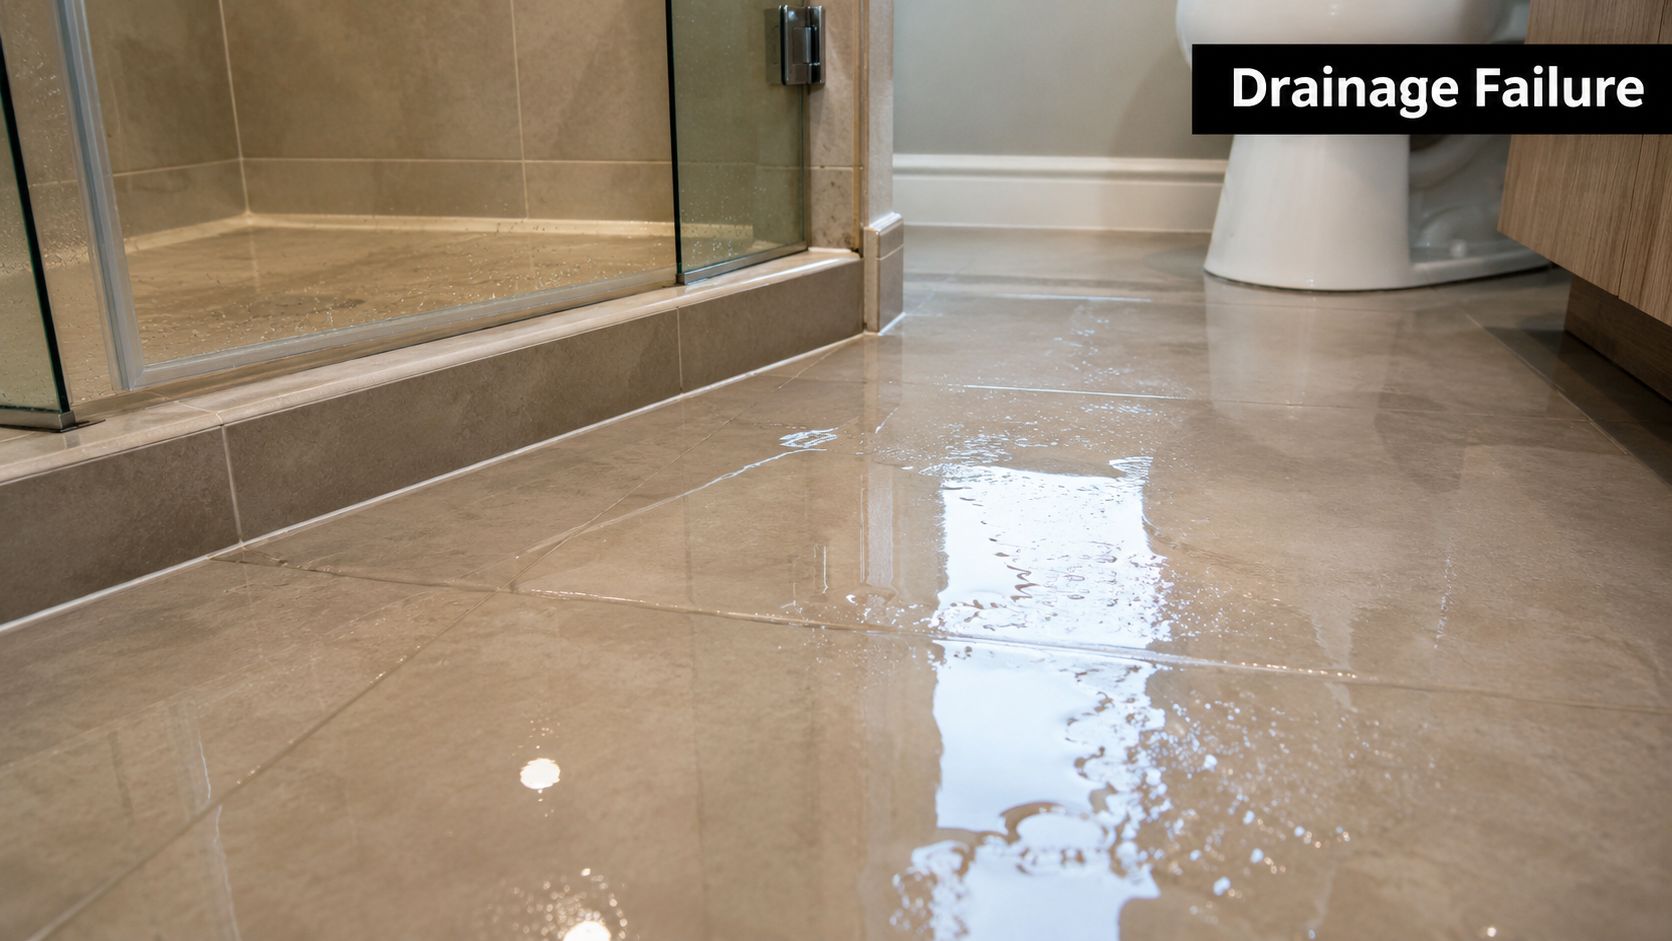
Why Melbourne retrofits are difficult
New construction gives the plumber and builder more control over the waste location, slab recess and finished floor level. A retrofit often gives you an existing slab or timber structure, a fixed bathroom doorway and a waste that sits too far from the shower's lowest point. Raising the floor can create a step into the hallway. Lowering the structure may involve carpentry, structural assessment and changes to plumbing connections.
A standard rule such as “use 1:80” doesn't solve those constraints on its own. The team must calculate the distance from the furthest wet point to the waste, establish the finished tile level, allow for adhesive and tiles, then check that the membrane and substrate can be formed without creating a thin or unstable edge.
Practical rule: Set the waste position and finished floor levels before the screed is ordered. A tile can hide a minor visual irregularity, but it can't correct a missing drainage path.
The same coordination matters in balconies and leak remediation. A balcony may appear reasonably level while still directing water towards a door or wall junction. A bathroom renovation should therefore begin with levels, not tile selection. Take measurements, locate the waste, inspect the substrate and decide whether the proposed shower is enclosed, hobless or accessible before any surface is removed.
Understanding Fall Ratios and Percentage Calculations
A fall ratio describes the drop over a horizontal distance. A 1:80 fall drops one unit for every 80 units travelled, so a 1,200 mm shower run requires a 15 mm drop, while a 900 mm run requires 11.25 mm. The same 1:80 gradient equals 12.5 mm per metre, or 1.25%, according to the Australian wet-area guidance discussed by Wyatt Tiling in its explanation of getting levels right.
The common conversions are straightforward:
- 1:100 equals 10 mm per metre, or a 1% fall.
- 1:80 equals 12.5 mm per metre, or a 1.25% fall.
- 1:60 equals approximately 16.7 mm per metre.
- 1:50 equals 20 mm per metre, or a 2% fall.
Worked shower examples
For a 900 mm by 900 mm shower, measure from the furthest corner to the waste, not just across one tile. If the waste is positioned centrally, each corner may need a compound fall. A 1:80 calculation over 900 mm gives an 11.25 mm difference. At 1:60, the difference is 15 mm, and at 1:50 it is 18 mm.
A 1,500 mm-wide walk-in shower needs more depth because the water travels further. At 1:80, the required drop is 18.75 mm. At 1:60, it's 25 mm. At 1:50, it's 30 mm. Those figures affect the screed edge, drain channel height, waterproofing details and the transition into the rest of the bathroom.
| Shower Dimension | 1:80 Fall (mm) | 1:60 Fall (mm) | 1:50 Fall (mm) | Percentage Equivalent |
|---|---|---|---|---|
| 900 mm | 11.25 | 15 | 18 | 1.25% to 2% |
| 1,200 mm | 15 | 20 | 24 | 1.25% to 2% |
| 1,500 mm | 18.75 | 25 | 30 | 1.25% to 2% |
The table shows why a longer shower run can change the construction method. If the waste is 25 mm below the finished tile height, the available screed depth must account for the calculated drop as well as the tile and adhesive build-up. A laser level is useful before demolition because it identifies the existing high and low points, while a straight edge helps expose local depressions that an average reading can miss. Practical tile screeding guidance is valuable here, particularly when the shower requires several planes directing water towards one drain.
A balcony or large bathroom floor must be assessed in the same way. Measure the longest drainage route and check the proposed gradient at every edge. A single flat plane may work towards a linear drain, but a central waste usually needs a compound fall. A 1:100 fall can be acceptable in some general wet-area situations, yet it leaves less tolerance for surface irregularities, tile lippage and construction debris than a faster fall.
Australian Code Requirements for Different Wet Areas
Wet-area drainage isn't governed by one universal number. The correct gradient depends on the shower arrangement, the presence of a floor waste, the finished surface and whether the design must accommodate accessibility. The NCC 2022 Housing Provisions require wet areas with a floor waste to be graded so water can drain, while Australian waterproofing guidance aligned with AS 3740:2021 distinguishes between substrate falls and finished surface falls.
For a substrate beneath a membrane, the minimum fall towards a waste is 1:100 where a waste is provided. Finished shower floors generally need a steeper fall. The technical distinction matters because a membrane substrate that ponds can hold moisture beneath the finished layer, while a finished tile surface that drains slowly can affect hygiene, slip resistance and adjacent building elements. The Stormtech technical whitepaper on wet-area drainage explains this relationship between substrate and finished falls.
Three common Australian arrangements
An enclosed shower recess with a hob can retain water within the shower zone, giving the installer a clear boundary and a shorter path to the waste. A hobless shower removes that physical barrier, so the fall, drain position and waterproofing detailing must work together. A linear drain at the shower edge changes the geometry because the floor can fall in one primary direction instead of forming multiple planes towards a central grate.
Accessible and zero-threshold showers require more careful coordination. Victorian guidance notes a continuous fall between 1:80 and 1:50 where a floor waste is installed, while accessible configurations may use 1:60 to 1:80 inside the shower and 1:80 to 1:100 elsewhere. That range reflects a trade-off. The surface must drain, but the surrounding floor also needs to remain suitable for movement and entry.
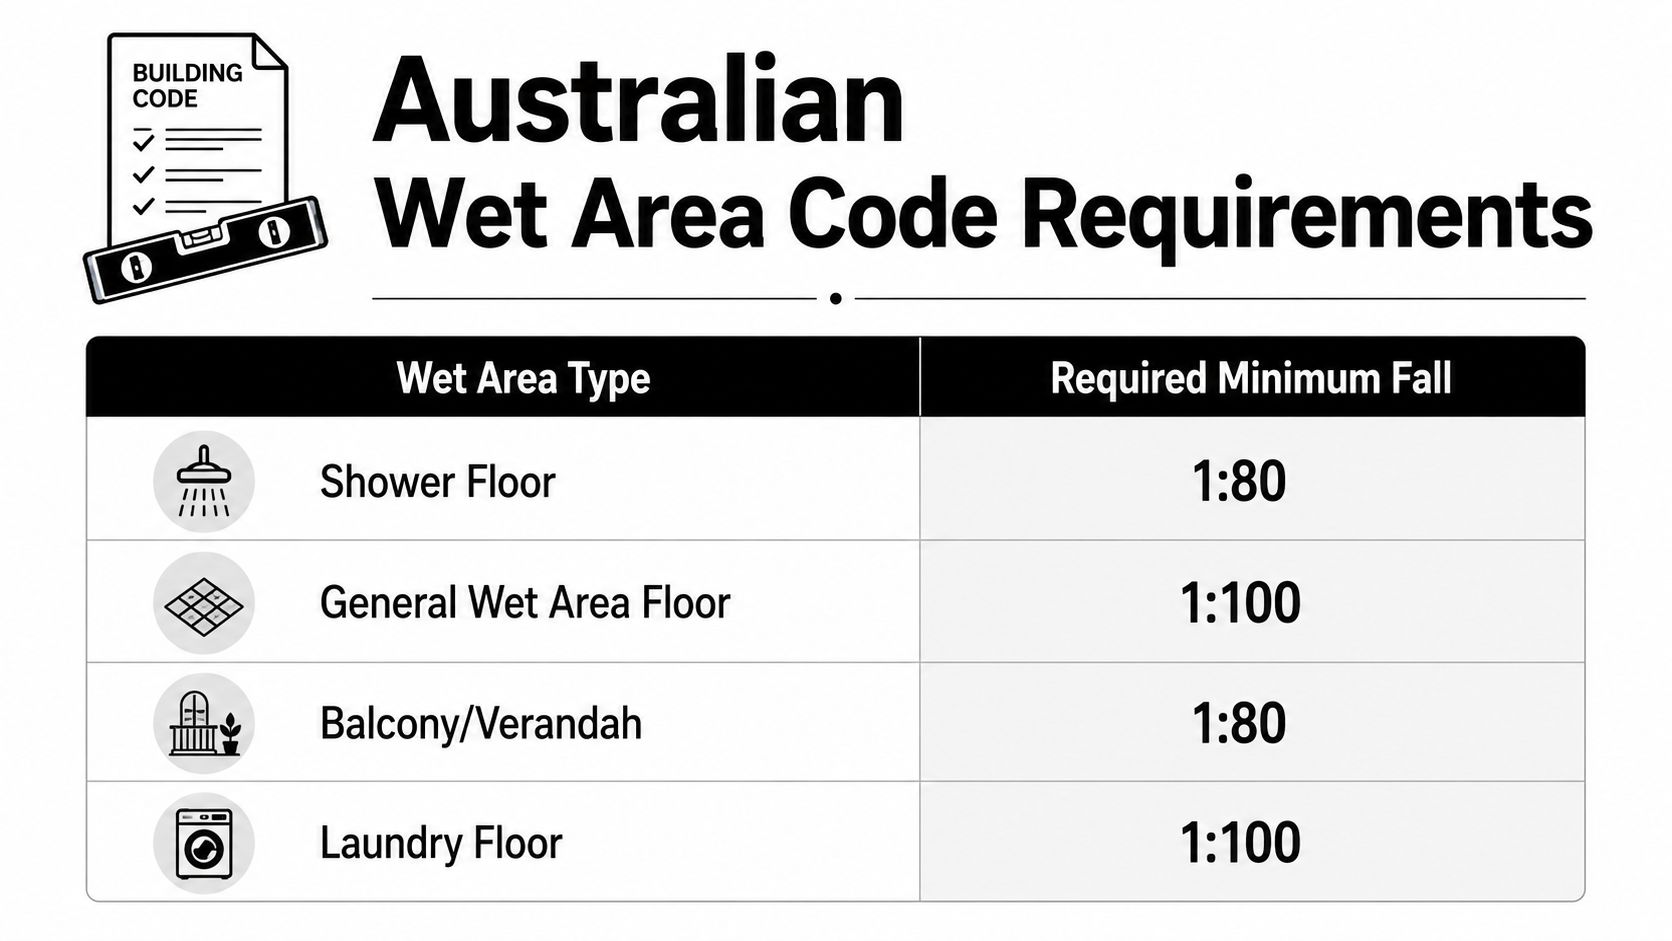
An external balcony or verandah needs a drainage strategy that protects the building envelope, not just the visible finish. The relevant waterproofing design must account for falls, membrane detailing, door thresholds, overflow paths and junctions. A laundry may need a less aggressive general floor fall than a shower, but the waste position still needs to support practical drainage.
Grate size doesn't replace a correctly formed fall. A larger waste may receive water more easily, but it won't correct a low spot several hundred millimetres away. In a Melbourne renovation, the builder and tiler should also confirm whether the work requires a building permit or triggers other upgrade obligations. Don't assume that a generic diagram or a tile manufacturer's installation note settles the compliance question. The wet-area classification, drain arrangement and accessibility brief must be resolved as one design.
For detailed membrane sequencing and junction treatment, the wet-area waterproofing service guidance can help homeowners understand what should be coordinated before tiling begins.
Construction Methods to Achieve Correct Falls
The construction method determines how much control the installer has over the fall. Traditional sand-cement screeding remains flexible, especially when an existing Melbourne bathroom has an unusual shape or an off-centre waste. Preformed bases offer repeatable geometry. Self-levelling compounds are useful for correction, but the name is misleading when the objective is a directional slope.
Traditional screeding
A skilled tiler can shape a sand-cement screed from the perimeter towards a grate or channel, forming the compound planes needed around a central waste. The method suits custom shower footprints and allows the installer to adjust the build-up around existing levels. Its weakness is workmanship. A screed can appear smooth under a straight edge yet retain a shallow depression that collects water after the tiles are installed.
Preformed shower bases
Preformed systems from manufacturers such as Wedi or Tile Redi provide a manufactured fall and can simplify waterproofing integration. They're useful where the drain position matches the base and the finished height can be coordinated early. The limitations are equally clear. The base dimensions may restrict the layout, the waste must align accurately, and large-format tile layouts may need careful cutting around the formed geometry.
Self-levelling compounds
Self-levelling products can correct minor variations over a sound substrate, but they naturally seek a level surface. They aren't a substitute for a formed screed where water must travel consistently to a waste. Product compatibility, primer selection and waterproofing requirements must be checked before application, particularly where underfloor heating is present.
| Method | Typical Fall Achieved | Setup Time | Best For | Key Limitation |
|---|---|---|---|---|
| Sand-cement screed | Custom falls from 1:100 to steeper shower gradients | Depends on site preparation and curing | Irregular layouts and retrofit bathrooms | Relies heavily on installer skill |
| Preformed shower base | Factory-formed directional fall | Faster once levels and waste are ready | Standardised shower footprints | Limited by base geometry and drain alignment |
| Self-levelling compound | Minor substrate correction | Relatively quick preparation | Localised surface irregularities | Doesn't reliably create a drainage fall by itself |
Screed depth also controls the doorway. If the bathroom floor rises too far, the threshold can become a trip point. If the screed is forced too thin near an edge, cracking or debonding can follow. The plumber, builder and tiler should agree on waste height, setdown and finished tile level before the screed is mixed.
The same principle applies to external slabs and shed surrounds. A practical drainage guide by Firm Foundations is useful background when considering how a hard surface should shed water away from a structure. It reinforces a point that applies indoors too: drainage has to be built into the supporting surface, not painted onto the finish.
When Steeper Falls Create More Problems Than They Solve
A steeper fall can clear water faster, but more slope isn't automatically better. Australian wet-area guidance uses a range from 1:80 to 1:50 for relevant shower floors with a waste, while a substrate fall of 1:100 may apply beneath a membrane in the circumstances described by AS 3740:2021-aligned waterproofing guidance. The installer still has to keep the surface usable, tileable and compatible with the room's access requirements.
Large-format tiles expose poor geometry quickly. When a broad tile crosses several changing planes, the edges can sit at visibly different heights. That can create lippage, uneven adhesive coverage and awkward cuts around a central waste. Small-format mosaics often follow compound falls more easily, while a large porcelain panel needs a much more deliberate layout.
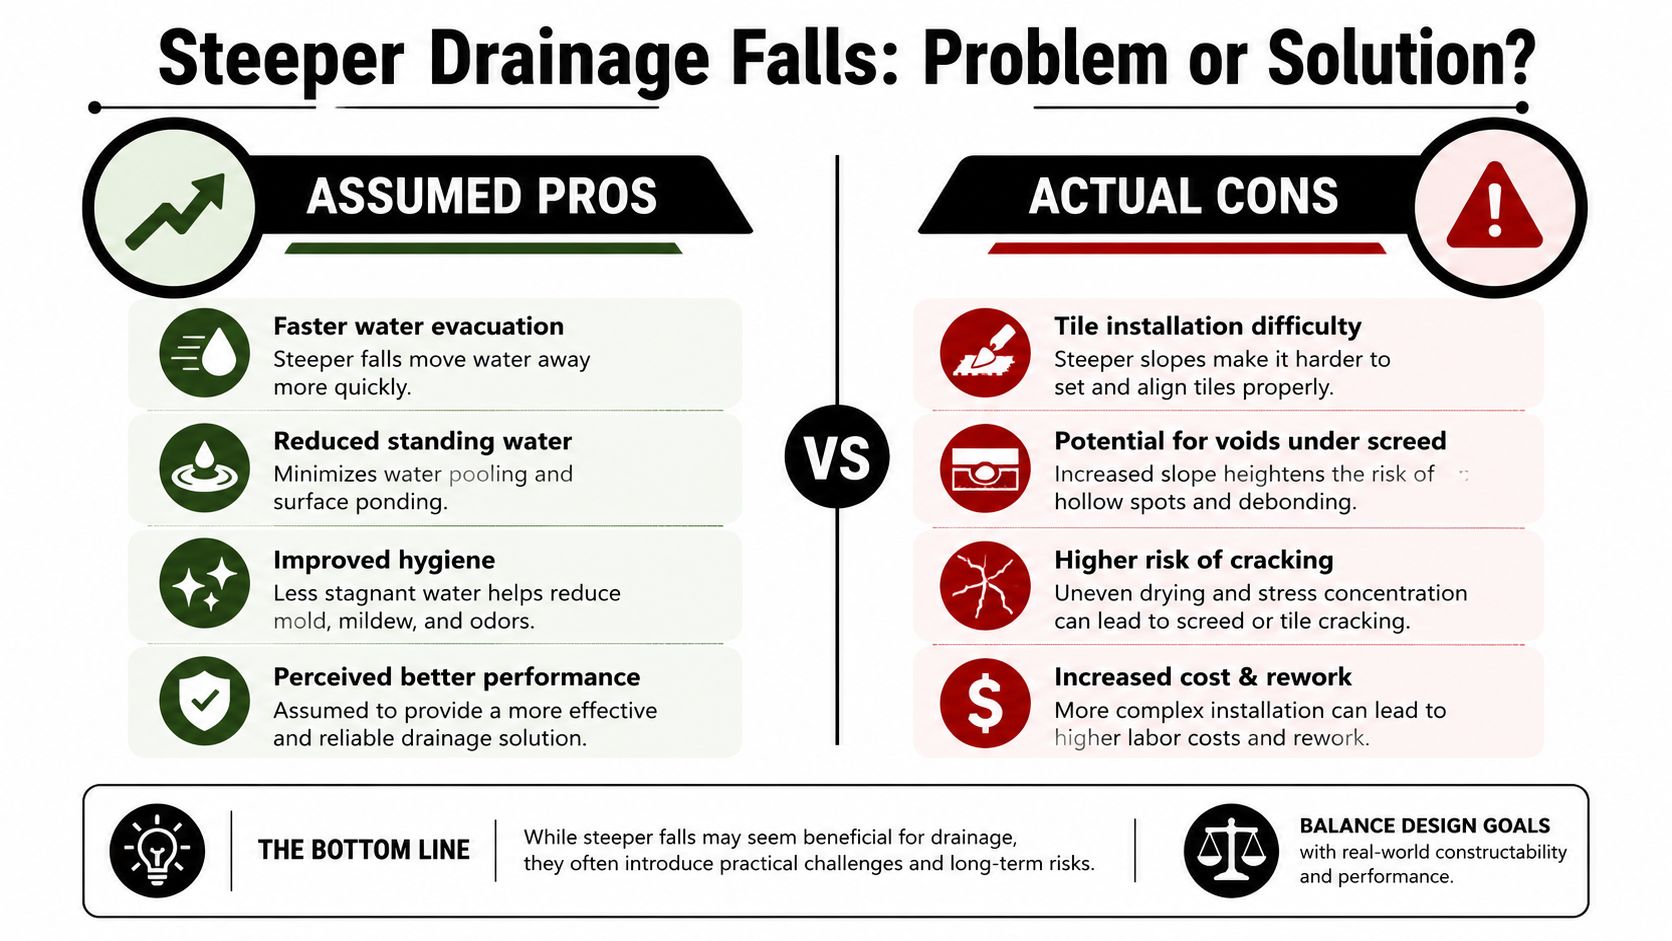
The accessibility trade-off
A zero-threshold shower has no raised hob to contain water, so the floor must transition smoothly into the surrounding bathroom. An aggressive fall can create a noticeable slope outside the shower, especially when the existing floor envelope is shallow. That may conflict with accessible movement requirements and make the entry uncomfortable or unsafe for someone using mobility equipment.
Water can also bypass a waste if the installer creates the wrong high point. A floor that looks steep overall may still direct water towards a wall, door or screen rather than the grate. This is why the drain position matters as much as the ratio. A laser level, straight edge and test pour before the membrane and tile installation can identify the problem while correction remains practical.
A useful fall is the one that takes water to the waste without making the room difficult to enter, tile or maintain.
Steeper isn't a cure for a misplaced waste, a blocked grate or a poorly detailed membrane. In many retrofits, a carefully designed 1:80 shower fall with a suitable linear drain performs better than a dramatic gradient forced into the wrong layout.
Why Registered Builders Matter for Bathroom Renovations
Floor slope for drainage sits inside a larger construction system. The builder must coordinate structural work, plumbing penetrations, waterproofing, falls, thresholds and finishes. Treating the task as a tiling-only decision is how retrofit problems become expensive.
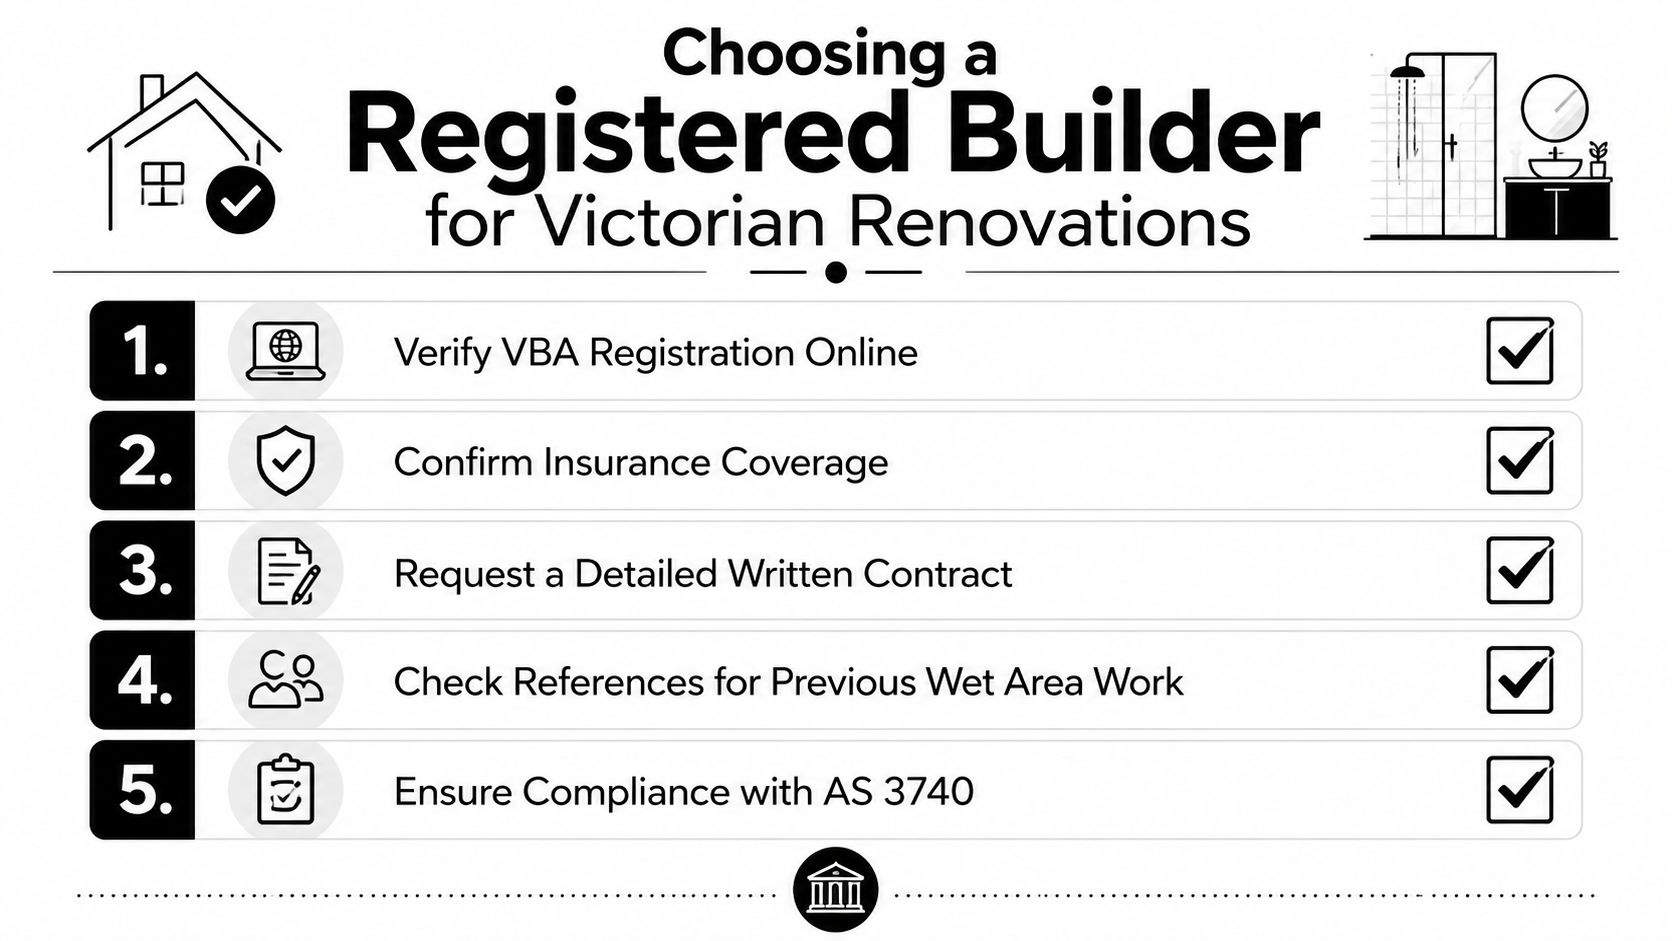
In Victoria, a person must be registered with the Building and Plumbing Commission before performing domestic building work valued above $10,000, and registration applies to the individual rather than the company, as explained in the Victorian registration guidance. Bathroom projects that combine demolition, carpentry, plumbing, waterproofing, electrical work and tiling can require registration even where an individual trade might otherwise fall within a single-trade exception.
Victoria also has a specific Domestic Builder, limited to bathroom, kitchen and laundry renovation registration category. Applicants for that category must provide qualifications, evidence of project work, a technical referee report, a criminal history check, photo identification and declarations, according to the BPC registration application.
What to check before signing
Start with the individual's registration details, not just the trading name on a van or website. The Victorian consumer guidance on builders and tradespeople explains that single-trade exceptions can include tiling, plumbing, painting, glazing and electrical work, but a combined renovation or work requiring a building permit changes the position.
Ask for a written scope that identifies who is responsible for:
- Level verification: Existing slab, timber floor and threshold measurements.
- Drainage design: Waste location, fall direction and overflow considerations.
- Waterproofing: Membrane system, substrate preparation and inspection points.
- Trade coordination: Plumbing, carpentry, electrical, screeding and tiling sequence.
- Documentation: Registration, insurance and relevant compliance certificates.
A registered practitioner isn't automatically a skilled wet-area installer, so check previous bathroom and leak-remediation work as well. Melbourne Tiling Services P/L coordinates bathroom renovations, waterproofing, screeding, self-levelling and tiling with other licensed trades, which is one model for managing the interfaces that determine whether a drainage fall works in practice.
Planning Your Drainage Strategy from Start to Finish
A reliable drainage plan follows the construction sequence, not the tile catalogue.
- Classify the wet area. Decide whether the project includes an enclosed shower, hobless shower, accessible bathroom, balcony, laundry or another wet-area arrangement.
- Map the levels. Locate the waste, measure the longest drainage path and record the existing floor, doorway and adjoining room levels.
- Choose the build-up. Compare a formed screed, preformed base or corrective compound against the available depth and chosen tile format.
- Coordinate the trades. Confirm plumbing heights before screeding, then schedule waterproofing and inspection hold points before adhesive and tiles conceal the substrate.
- Check the paperwork. Verify the builder's registration, contract scope, waterproofing system and any permit or certificate requirements.
For a new build, the plumber can position the waste while the slab and setdown are still adjustable. For a retrofit, the solution may involve a recessed substrate, a linear drain, a smaller shower footprint or a carefully designed threshold. If the property has an active leak or uncertain external drainage, a resource such as emergency drainage help from EZ Plumbing can help frame the broader drainage investigation.
Before tiles arrive, confirm the membrane manufacturer's compatibility with the selected substrate and screed method. A documented drainage system installation sequence also gives the homeowner a clearer record of what was formed, tested and covered.
Melbourne Tiling Services P/L can assess existing levels, design practical shower falls, complete waterproofing and screeding, and coordinate the tiling sequence for bathroom renovations across Melbourne. Visit Melbourne Tiling Services P/L to arrange a quote and discuss whether your project needs a standard shower fall, a zero-threshold solution or leak remediation.
Recent Comments