
You've saved the marble references, found tapware you like and started wondering whether your tired ensuite could feel like a hotel bathroom. Then the practical questions arrive: can the shower become level-entry, what's underneath the existing tiles, and how do you know the work will last once everything's covered?
A high end bathroom remodel should answer those questions before anyone orders stone. For Melbourne homeowners, the strongest result combines carefully chosen finishes with documented construction, sensible maintenance and a layout that won't become inconvenient as your needs change.
Table of Contents
- What Makes a Bathroom High End in Melbourne
- Budgeting for a High End Bathroom Remodel
- Premium Materials and Finishes Worth Specifying
- Waterproofing and Tiling Checks Before Finishes Hide the Work
- Planning the Timeline and Trades Coordination
- Choosing a Registered Builder and Tiling Contractor
- Maintaining Your Bathroom and Taking the Next Step
What Makes a Bathroom High End in Melbourne
A homeowner can choose beautiful finishes and only discover their real priorities when the room is in use. The marble looks right, but water gathers beside the shower, the vanity interrupts circulation and nobody can explain what was checked before tiling. That's a useful test of luxury: does the bathroom work as well as it photographs?
A premium ensuite isn't just a cosmetic refresh with more expensive fittings. It needs coordinated plumbing, appropriate substrates, dependable waterproofing and a considered ventilation strategy. The visible surfaces are the final layer, not the whole renovation.
Start with the building you have
Older Melbourne properties deserve particular attention before the layout is settled. Historical Australian Bureau of Statistics renovation data found that 61% of dwellings aged 20 years or more had been renovated during the decade preceding 1999, compared with 49% of dwellings less than 10 years old. These are historical figures, not a current Melbourne market estimate.
For an established home, the practical starting point is an investigation of existing conditions. Ask what can remain, what needs opening up and which design decisions depend on the floor or wall structure. A heritage-sensitive appearance can sit comfortably alongside modern performance, but retaining character shouldn't mean retaining unsuitable concealed work.
Practical rule: Spend on the parts you can't easily replace before upgrading the parts you can.
Make luxury adaptable
A long-life bathroom should accommodate changing mobility without looking institutional. Plan the geometry and concealed preparation while the room is open.
- Level-entry access: Resolve floor construction, drainage and waterproofing together rather than removing a shower hob as an isolated change.
- Future support: Provide suitable wall reinforcement for possible grab rails, and retain a record of its location.
- Comfortable movement: Leave useful circulation space around the vanity, toilet and shower entrance.
- Everyday usability: Choose reachable controls, appropriate slip-resistant surfaces and drainage details that remain accessible for cleaning.
These decisions don't require a clinical aesthetic. Coordinated finishes and discreet preparation can preserve a refined appearance while making the room more forgiving to use. The premium is in the planning, not in how many statement features fit inside.
Budgeting for a High End Bathroom Remodel
A compact ensuite with relocated plumbing, custom cabinetry and stonework can cost more to coordinate than a larger bathroom with an unchanged layout. Price the work by scope, not floor area alone.
Set the construction scope first, then choose finishes that fit the available budget. A shopping list built before the site work is understood can leave waterproofing, preparation and other concealed work competing with visible upgrades.
Bathroom renovation pricing benchmarks
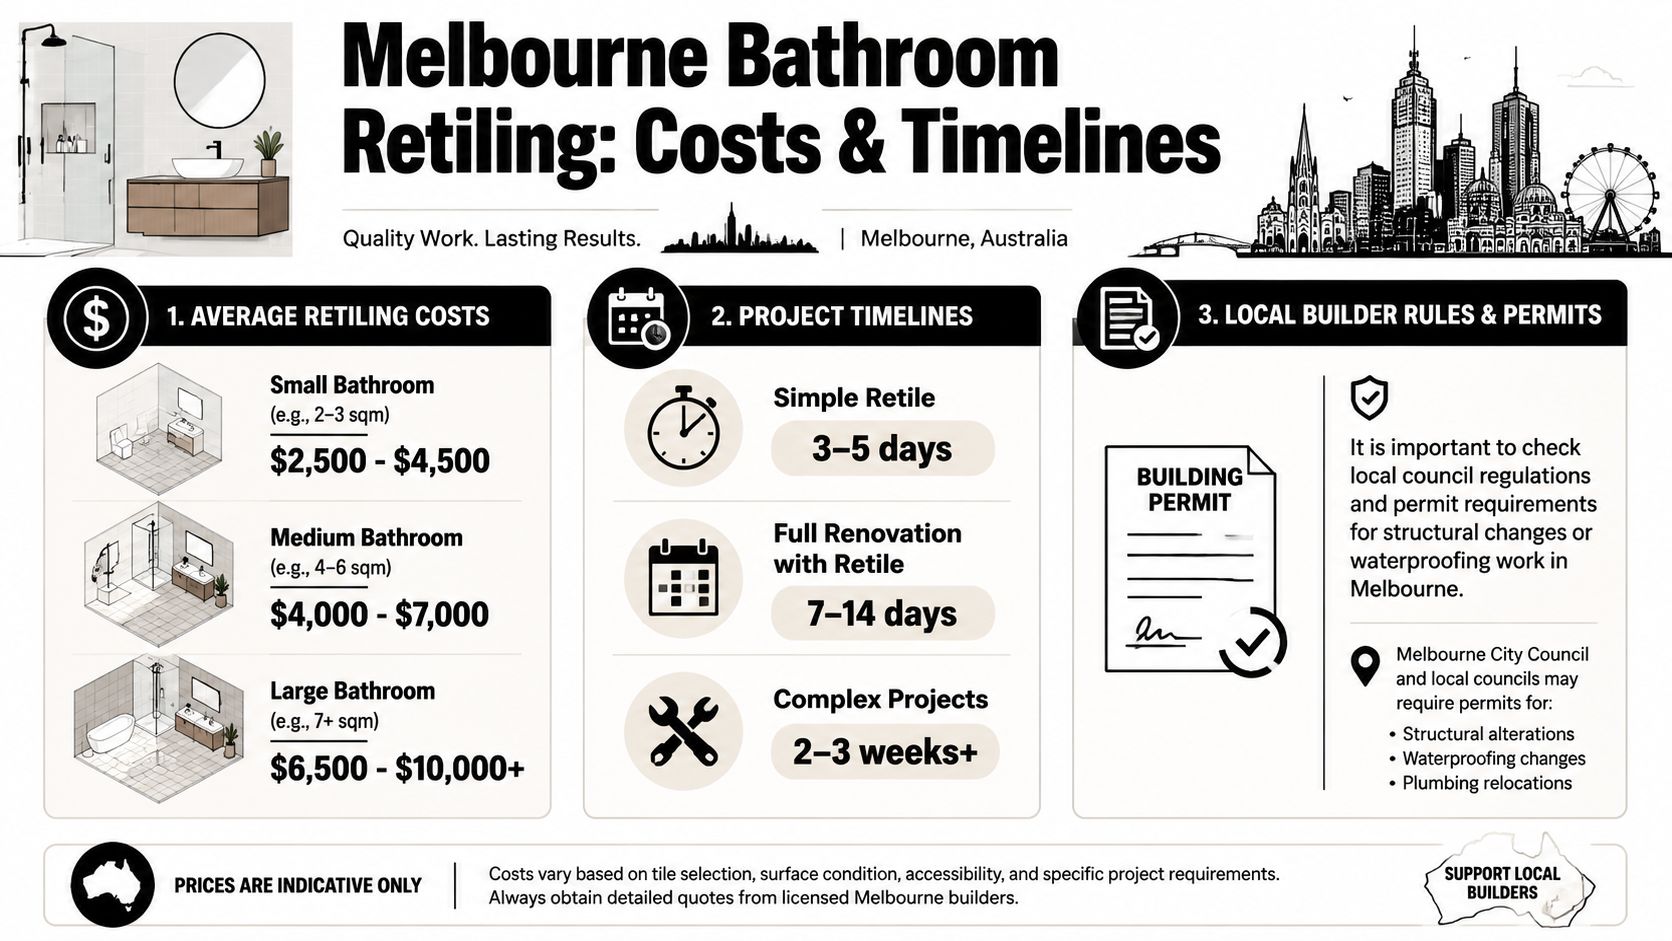
Historical national figures in Buildmat's Australian renovation cost overview put a 6-square-metre bathroom at approximately $9,000–$12,000 in 2012 and $15,000–$30,000 in 2022. These figures are historical benchmarks, not current Melbourne luxury prices.
| Period | Typical price range for a 6 sqm bathroom | Main driver of the upper range |
|---|---|---|
| 2012 | Approximately $9,000–$12,000 | Specification and scope need checking against the historical benchmark |
| 2022 | Approximately $15,000–$30,000 | Larger scopes and higher-grade fittings |
Ask for a quote that separates demolition and waste removal, carpentry, plumbing, electrical work, waterproofing and floor preparation. Tiling, cabinetry, tapware and glazing should also be described clearly, so you can compare alternatives and see what is included.
Separate necessities from preferences
Keep required construction work distinct from optional upgrades. If costs need to come down, simplify a feature wall before cutting substrate preparation or other work that supports the finished bathroom.
- Construction scope: Record repairs, service relocations, waterproofing and preparation.
- Material scope: Specify the actual tile, stone, tapware and cabinetry, not broad product descriptions.
- Allowances and exclusions: Identify provisional items and agree how work uncovered after demolition will be priced.
For household cash-flow planning, the Peaceful Mindful Pocket budgeting guide can help organise a spending limit. Use it for personal budgeting, not as a replacement for a construction assessment.
A free quote, 3D drawing and renovation calculator each serve a different purpose. A drawing tests the layout, a calculator helps explore possible scope, and a quote records the contractor's proposed work. The published planning context from Melbourne Tiling Services includes a typical median around $10,000, which is not a promised price for premium work. Use the Melbourne bathroom renovation cost guide to prepare for a site-specific pricing discussion.
Before signing, check that the priced scope matches the design you intend to build.
Premium Materials and Finishes Worth Specifying
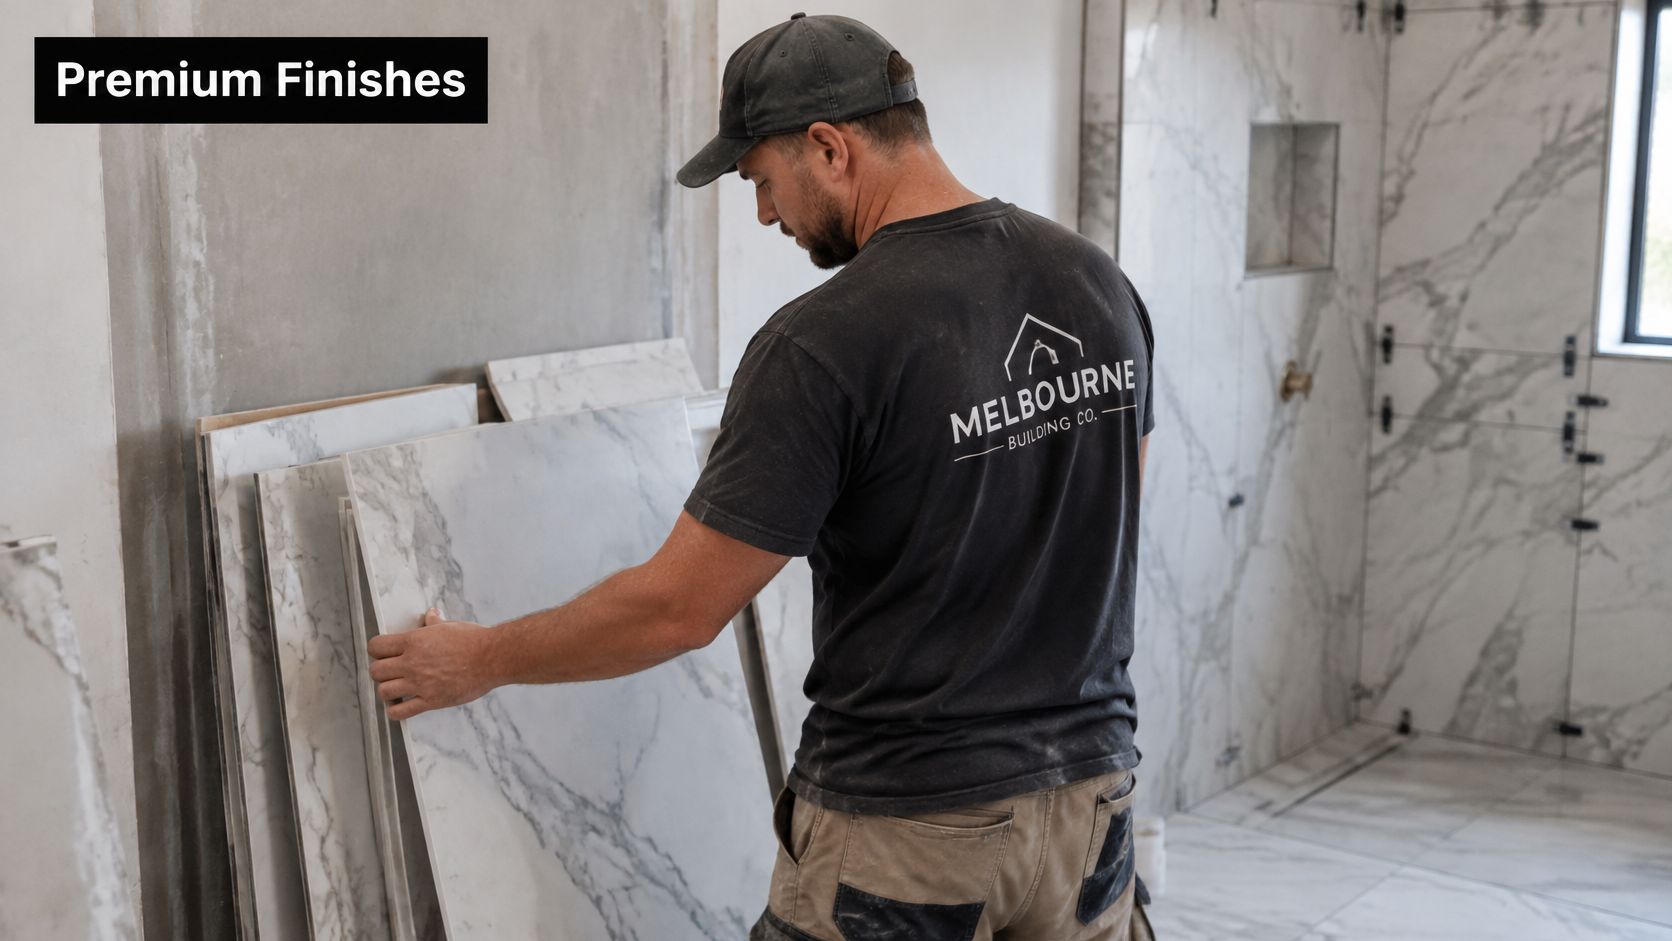
A compact ensuite can include marble, a generous shower and useful storage without covering every surface in stone. Selective use of marble leaves more room for careful installation and cabinetry designed for the space. The material choice should follow the layout and how the room will be used.
Match the material to the job
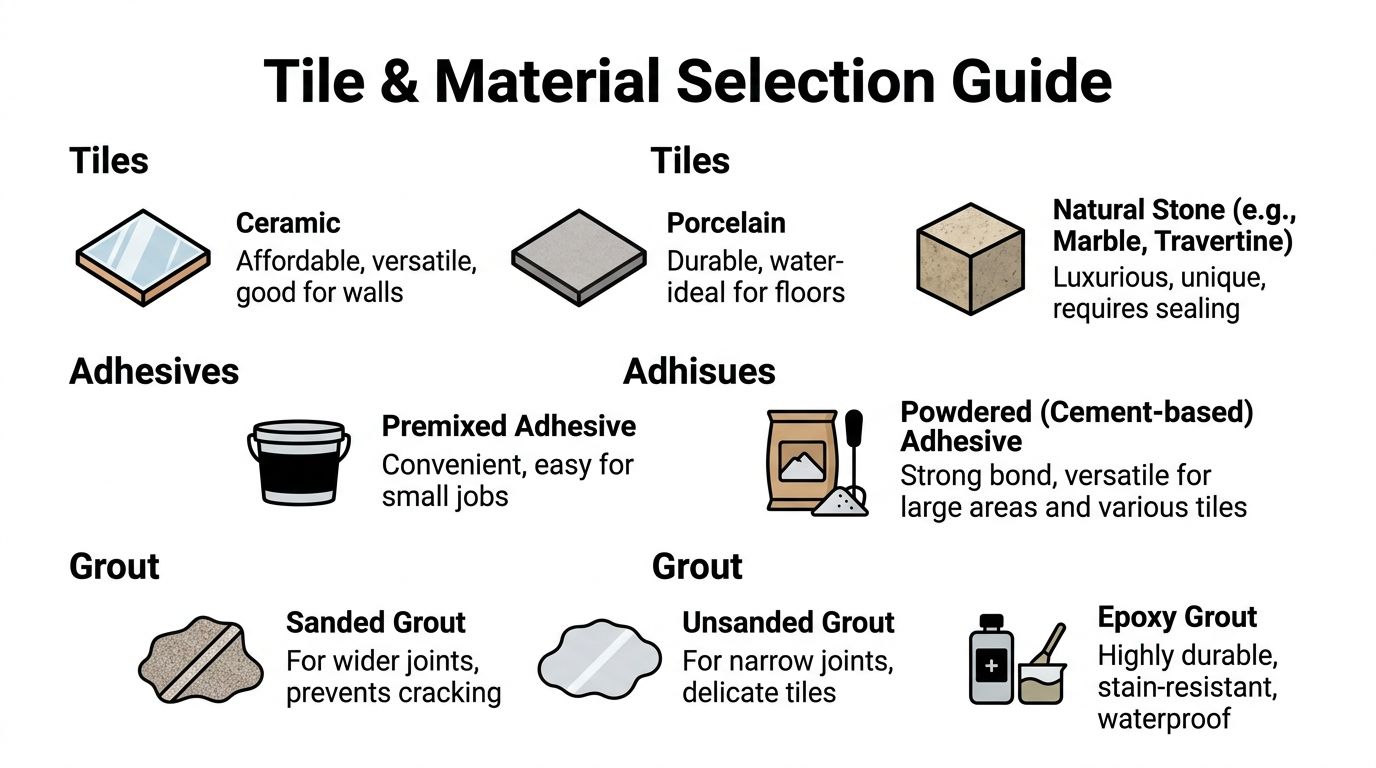
A marble vanity or statement wall can anchor the design. Before specifying a particular stone, ask the supplier for written cleaning, sealing and maintenance requirements. Marble selections can differ in the care they need, so confirm the details for the exact product.
Large-format Kerlite can create a broad, visually continuous surface with fewer grout lines. It needs more than standard tile handling. Before approval, ask the installer to explain substrate preparation, panel handling, adhesive compatibility, cutting and edge detailing. These choices affect both the finished appearance and the work required to install it.
Porcelain or ceramic may suit other areas. Assess the specific product for its intended location rather than relying on the material category alone.
- Shower floors: Check that the surface suits the room and that the tile layout can follow the designed falls.
- Feature walls: Review veining, joint positions and cut edges on the elevation, not only on a sample board.
- Vanity surrounds: Consider splash exposure, cleaning needs and the junction between the surface and cabinetry.
For a family bathroom, restrained wall tiling, a suitable floor finish and practical storage may serve daily routines better than a dramatic surface that requires more care than the household wants to provide.
Coordinate the whole palette
Plan frameless shower screens alongside the tile format. Confirm the glass position, hardware and fixings before tiling, and compare tapware finishes directly with stone and cabinetry samples. Photographs can make colours and finishes difficult to judge together.
Storage deserves as much attention as a feature wall. The high-end bathroom cabinet planning guide covers decisions about proportions, access and how cabinetry relates to the room. Prepare for future accessibility at the design stage too: practical clearances and accessible storage can be incorporated without making the bathroom feel clinical.
Use the accompanying video as a visual reference when discussing finishes.
Choose suppliers and installers familiar with the selected surface. A beautiful sample isn't a complete installation specification. Verify the stone's care requirements and installation details before committing to the finish.
Waterproofing and Tiling Checks Before Finishes Hide the Work
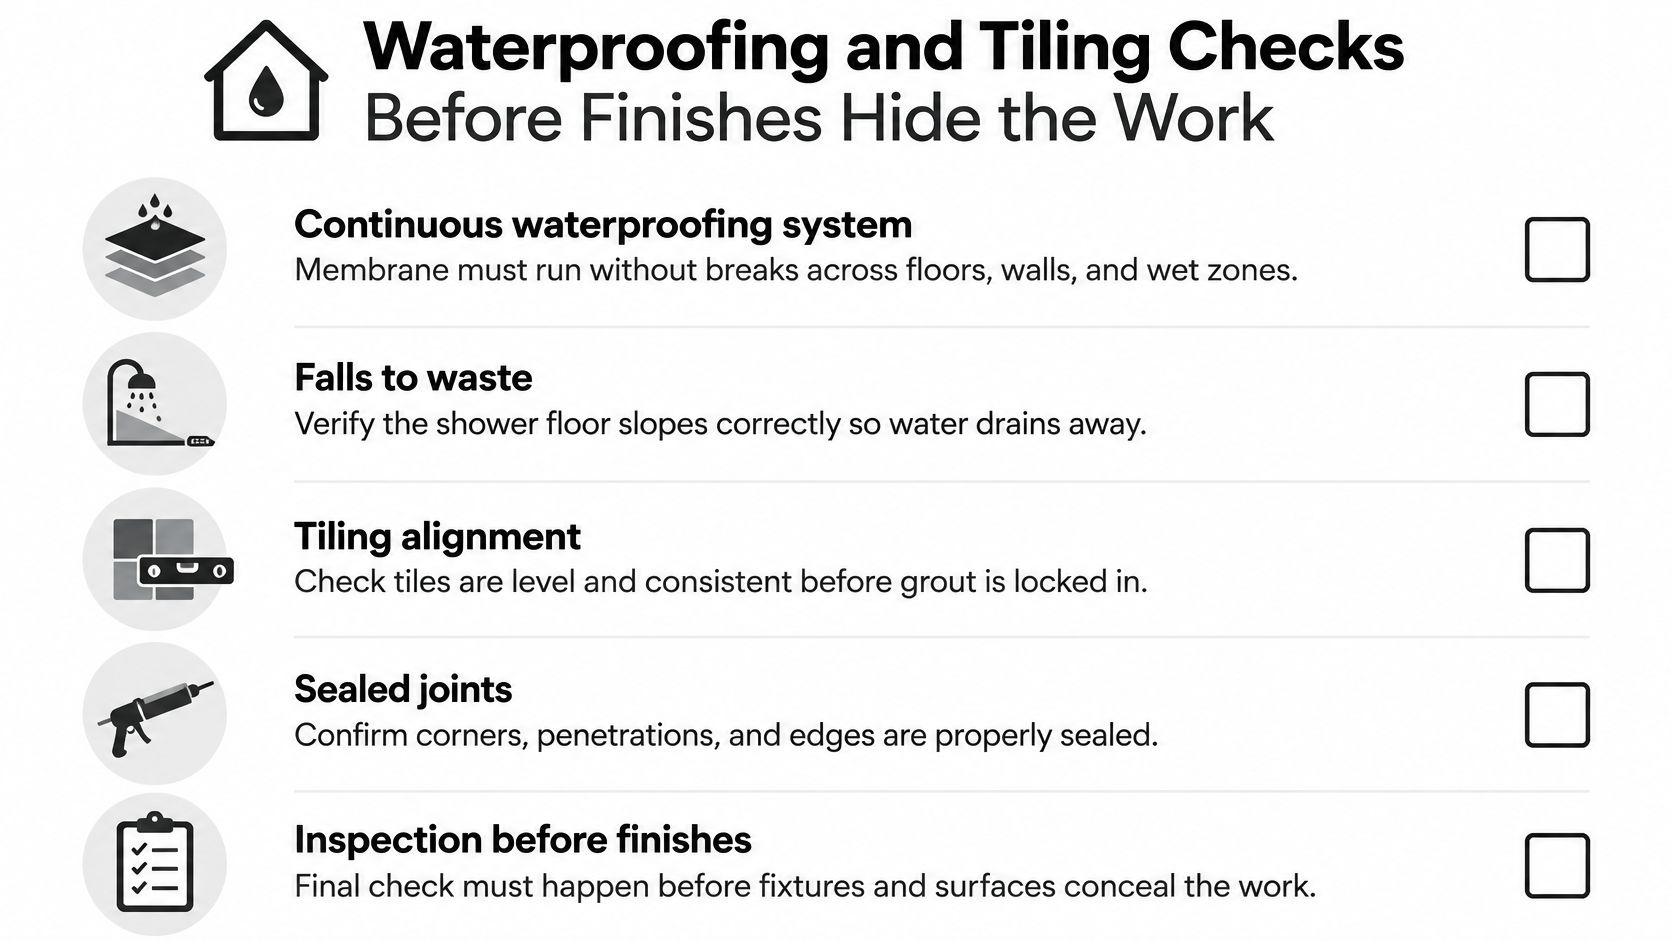
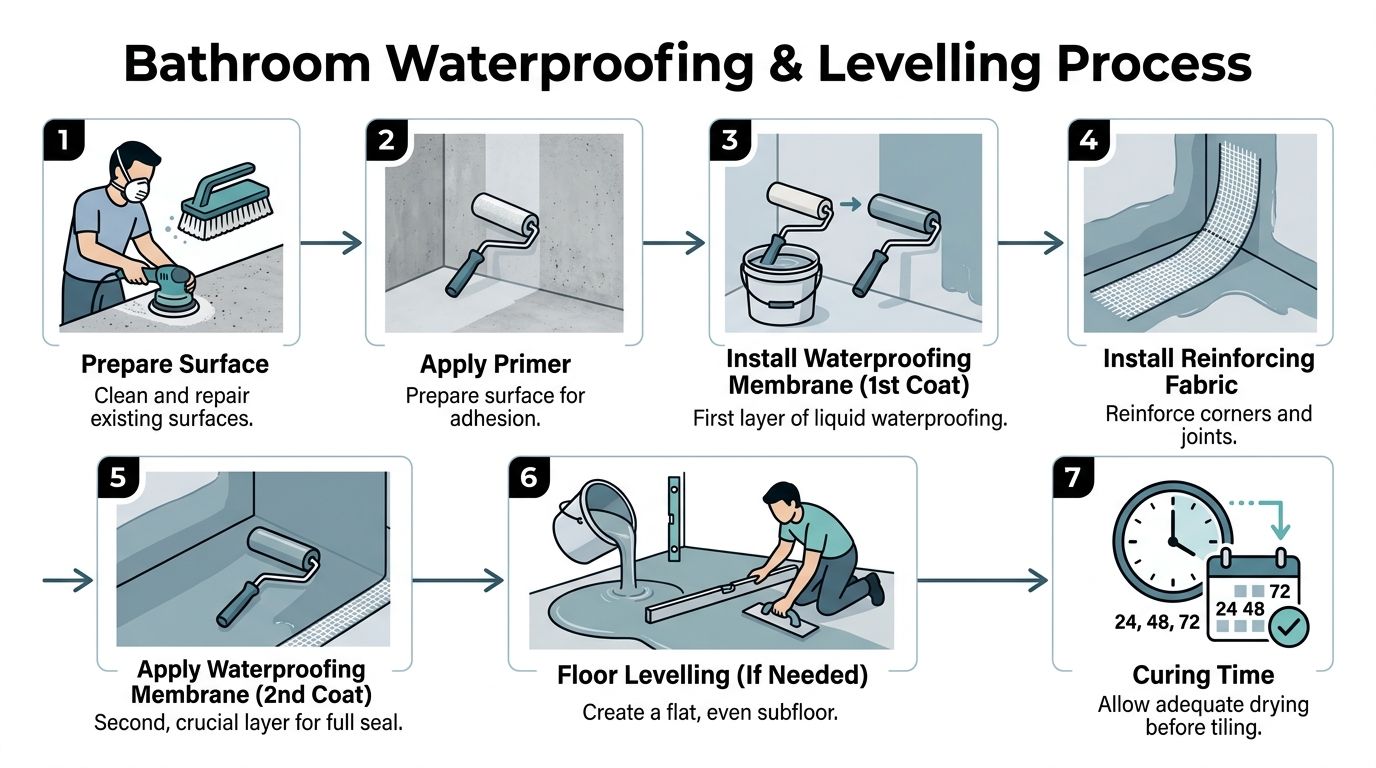
A large-format tile or stone slab can cover defects in the substrate and waterproofing for years. Before finishes go on, arrange a clear inspection point and collect evidence of the work, not just a promise that it was completed properly.
The NCC 2022 Housing Provisions for wet-area waterproofing sets out requirements for wet areas. The shower floor, including any hob or step-down, must be waterproof. Shower walls must be waterproof to at least 1,800 mm above the floor substrate, and shower-zone wall junctions and joints must be waterproofed at least 40 mm on each side. Penetrations and interfaces need attention too. Coverage across the broad surfaces alone does not show that the system is continuous.
Agree on the evidence before work begins
Put a pre-tiling hold point in the programme. Confirm who inspects the work, what they check, and which records you will receive before the membrane is concealed.
- Confirm responsibility: Identify the practitioner responsible for the waterproofing and who accepts the completed stage.
- Record substrate preparation: Request photographs and notes of prepared surfaces, junctions and defect repairs.
- Check continuity: Review membrane coverage and detailing around mixers, shower outlets, corners and transitions.
- Keep product records: Retain system details, compatibility information and relevant batch records.
- Review drainage preparation: Check the falls and look for potential puddling while adjustments are still practical.
- Collect documentation: Obtain relevant compliance records and the inspection outcome before approving tiling.
Use the bathroom waterproofing standards guide to frame questions with your contractor. The checklist below can help keep the inspection focused.
Know what sign-off does and doesn't mean
Where a building permit is required, the relevant building surveyor signs off completed work after being satisfied it complies with applicable legislation, as outlined in the Victorian wet-area waterproofing fact sheet. Agree separately on any inspection needed before tiling. Final approval does not necessarily provide a photographic record of concealed work.
For a bathroom with previous leaks, uncertain substrates or complex junctions, consider an independent inspection. Confirm what the inspection covers and what evidence the inspector needs before booking it.
A flawless tiled surface shows appearance, not the condition of the waterproofing beneath it.
Tiling checks should cover set-out, alignment, edges and the relationship between the finished surface and drainage. The shower floor needs its designed fall, so “level” is not the objective everywhere. Expensive stone cannot correct a failed waterproofing system.
Planning the Timeline and Trades Coordination
A construction programme should show dependencies and inspection points, not just a completion date. The tiler needs an accepted substrate, the waterproofer needs suitable preparation, and the screen installer needs reliable finished dimensions.
The exact sequence depends on the specified floor and waterproofing system. Don't insist on a generic order that conflicts with the approved installation requirements.
Organise work around handovers
| Work stage | What should be resolved before the next handover |
|---|---|
| Demolition and investigation | Existing conditions recorded and unexpected damage assessed |
| Structural work and service rough-in | Approved layout, framing and concealed service positions checked |
| Floor and substrate preparation | Required geometry, stability and preparation accepted |
| Waterproofing | System installation, curing requirements and inspection completed |
| Tiling | Set-out, cuts, junctions and drainage relationships checked |
| Screens and fit-off | Finished dimensions confirmed and installation details coordinated |
| Final inspection | Operation, drainage, finishes and outstanding defects reviewed |
Screeding or self-levelling must sit in the sequence required by the chosen assembly. The contractor should explain where these products belong relative to the membrane and finish, rather than treating them as interchangeable preparation steps.
A named coordinator should manage the carpenters, licensed plumbers and electricians, tilers and waterproofers. Homeowners shouldn't have to resolve conflicting instructions between trades while the room is open.
Plan for living around the work
Before demolition, settle how the household will function without that bathroom. Temporary access matters particularly when the renovation affects the only practical shower or toilet.
- Daily access: Agree which rooms and routes remain available, including arrangements for children or residents with mobility needs.
- Dust and noise: Establish protection, working areas, waste removal and notification of disruptive tasks.
- Decisions on site: Nominate who can approve a variation and require the price and programme implications in writing.
- Material readiness: Confirm selections and availability before scheduling work that depends on them.
The contract programme is the starting agreement. The site sequence must still respond to what demolition exposes, product requirements and inspection outcomes.
Scheduling advice: If a stage isn't ready, moving the next trade forward doesn't solve the problem. It usually moves the unresolved work out of sight.
Ask how delays will be communicated and how the contractor will protect completed work between visits. A credible schedule leaves room for required preparation and curing rather than relying on every trade arriving without interruption.
Choosing a Registered Builder and Tiling Contractor
A low quote and a well-documented quote may cover different work. Compare responsibilities, exclusions and inspection arrangements before weighing the totals. For a bathroom with several trades, registered builders and specialist tiling contractors have different roles. Confirm who holds the overall contract, coordinates the trades and takes responsibility if a concealed defect affects the finished room.
Compare evidence rather than promises
Consumer Affairs Victoria's practitioner guidance states that domestic building work costing more than $10,000, including labour and materials, generally requires a practitioner registered with the Building and Plumbing Commission. Renovation work above that threshold also requires a written major domestic building contract. Structural work requires an appropriately registered practitioner regardless of price.
| A documented proposal provides | An unclear proposal leaves unresolved |
|---|---|
| Practitioner identity and relevant registration | Who is legally responsible for the scope |
| Written inclusions and exclusions | Whether preparation and repairs are included |
| Named trade coordination | Who resolves clashes between trades |
| Inspection and handover arrangements | Who checks concealed stages |
| A variation process | How changes affect price and timing |
Use the official practitioner-search pathway identified by Consumer Affairs Victoria to check registration. A logo, business name or gallery of completed bathrooms does not establish a practitioner's credentials.
Check permit requirements before construction. The Victorian renovation checklist explains that the owner remains responsible for ensuring required permits are obtained, even when a builder or agent handles applications. Ask the relevant building surveyor to assess structural alterations.
Assess capability and communication
Melbourne Tiling Services P/L, based in Highett, has operated since 2003, according to its company and service information. The business describes itself as a Registered Unlimited Builder that coordinates licensed trades and undertakes waterproofing, screeding and marble, porcelain, ceramic and Kerlite installations. It also lists free quotes, 3D drawings and a renovation calculator.
Assess the offer as you would any contractor's. Request a written scope, check relevant registration details and ask how the proposed floor and wall assemblies will be inspected. For a high-end bathroom, confirm how waterproofing evidence will be recorded before stone or large-format tiles conceal the membrane and substrate. If accessibility may matter later, discuss provisions such as wall reinforcement for future grab rails while the framing remains accessible. These can be planned without changing the visible finish.
Communication systems are useful, but they do not prove construction capability. The homeowner needs a named, authorised person who can answer technical questions, approve variations and resolve site issues. Confirm who that person is, and how decisions will be documented, before work begins.
Maintaining Your Bathroom and Taking the Next Step
A bathroom can look finished while small problems remain hidden in ventilation, drainage or joints. At handover, collect product details, care instructions, inspection records and photographs of concealed work. These records help guide future repairs and adaptations.
Ventilation is part of the performance specification. Shower vapour raises humidity. Without adequate extraction, condensation can encourage mould and damage paint, sealants, cabinetry and plasterboard.
Commission the room for everyday use
The NCC ventilation provisions describe natural and mechanical ventilation requirements. Natural ventilation generally requires an opening equivalent to at least 5% of the room's floor area. Confirm the provisions that apply to the Victorian project, and check the effective openable area rather than the size of the glass.
For mechanical extraction, ask the contractor to confirm where the air discharges, whether ducting is unobstructed, where the pickup is located and how the system was commissioned. A fan switching on does not confirm that the complete system performs as intended.
- Extraction: Follow the operating guidance given at handover and report persistent condensation.
- Surfaces: Use cleaners suited to the installed stone, tile, grout and fittings.
- Joints: Monitor sealant, grout and adjoining finishes for changes. Don't conceal a developing problem with a cosmetic patch.
- Drainage: Keep wastes clear and accessible. Investigate any change in how water leaves the shower.
- Records: Keep details of concealed reinforcement and services for future repairs or adaptations.
Protect the original planning decisions
Care should preserve the bathroom's waterproofing and accessibility. Before fixing anything through a wet-area surface, check how the fixing will be sealed. Keep storage clear of circulation routes included in the layout.
If moisture appears, note where and when it happens, and whether drainage or ventilation has changed. Specific observations help a contractor identify the cause more effectively than a general report that the room feels damp.
A long-life bathroom still needs maintenance. Suitable materials, construction records and accessible service details make routine care and future repairs more manageable.
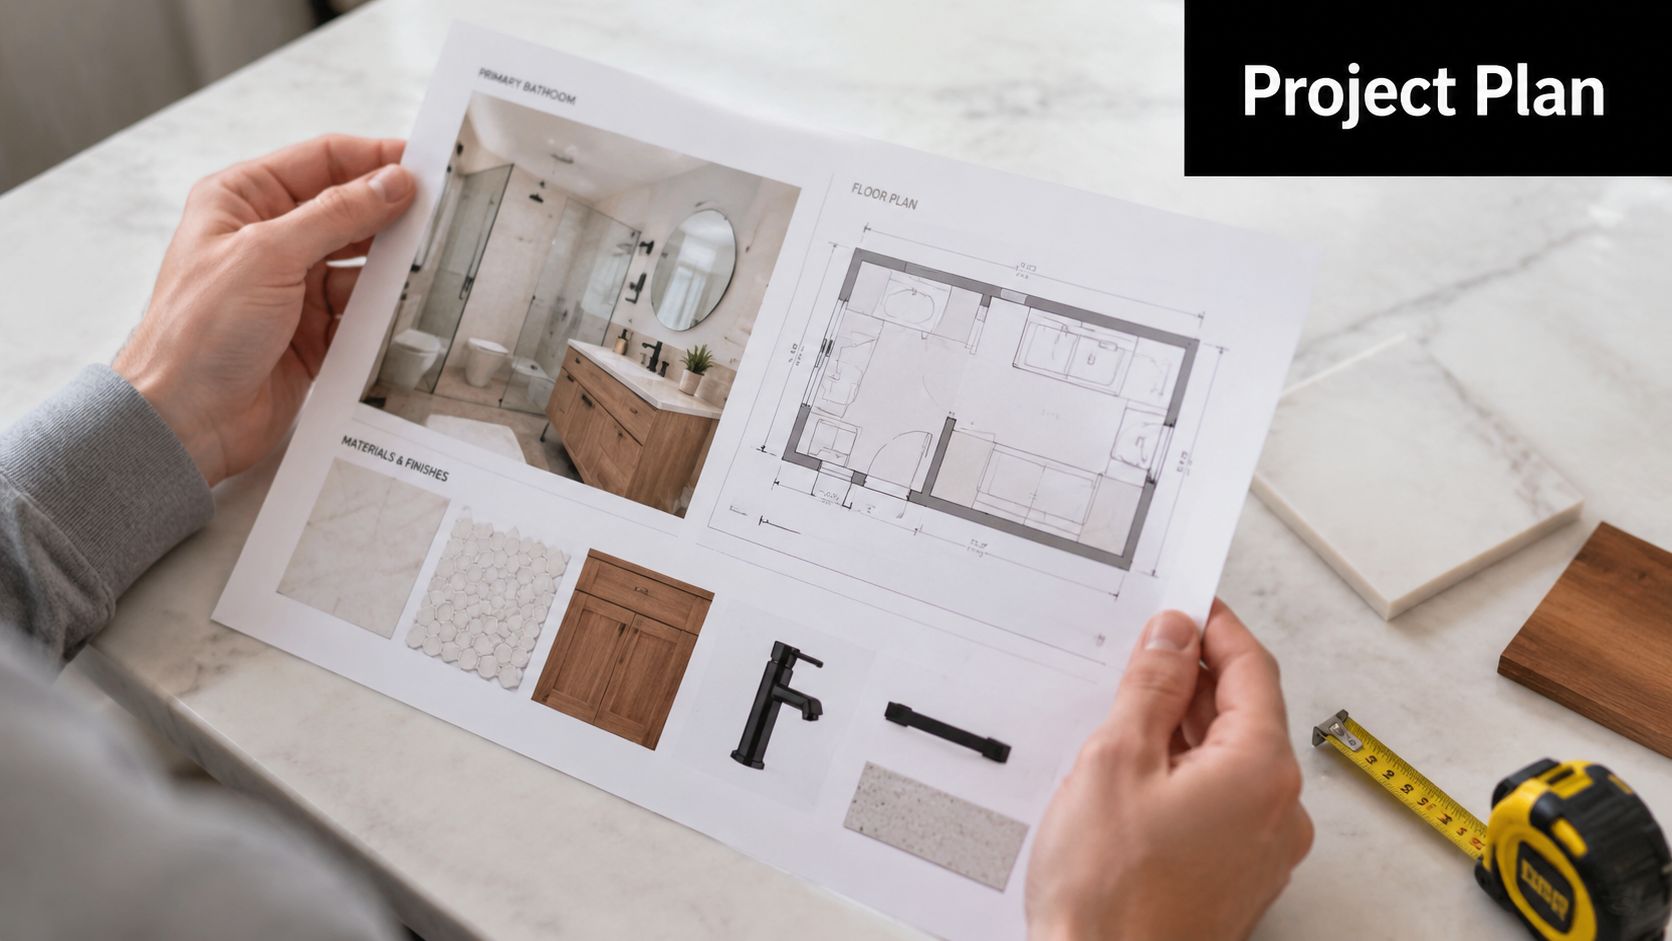
Before requesting a proposal, gather room photographs, a simple plan, preferred finishes and a list of problems with the existing bathroom. Separate required improvements from optional features, check the practitioner's registration and request a written quote. If drawings are offered, use them to review the scope and budget before work starts.

Recent Comments