
You're standing in a bathroom renovation, the tiles look perfect on the showroom board, and the quote has a cheap adhesive line that seems harmless enough. The problem is that wet areas don't forgive shortcuts, and the adhesive is only one part of a system that has to deal with moisture, heat, movement and daily use in Melbourne homes. In bathrooms and showers, the right choice is less about grabbing a bag off the shelf and more about matching the adhesive to the membrane, the substrate and the tile itself.
Table of Contents
- Why Wet Areas Demand a Different Tile Adhesive
- The Four Adhesive Families That Work in Wet Areas
- Decoding Australian Standards and Adhesive Classifications
- Matching Adhesive to Substrate, Tile and Waterproofing Membrane
- Common Failure Modes and How to Prevent Them
- A Practical Selection Checklist for Melbourne Renovations
- Working with Registered Builders on Wet-Area Tiling
Why Wet Areas Demand a Different Tile Adhesive
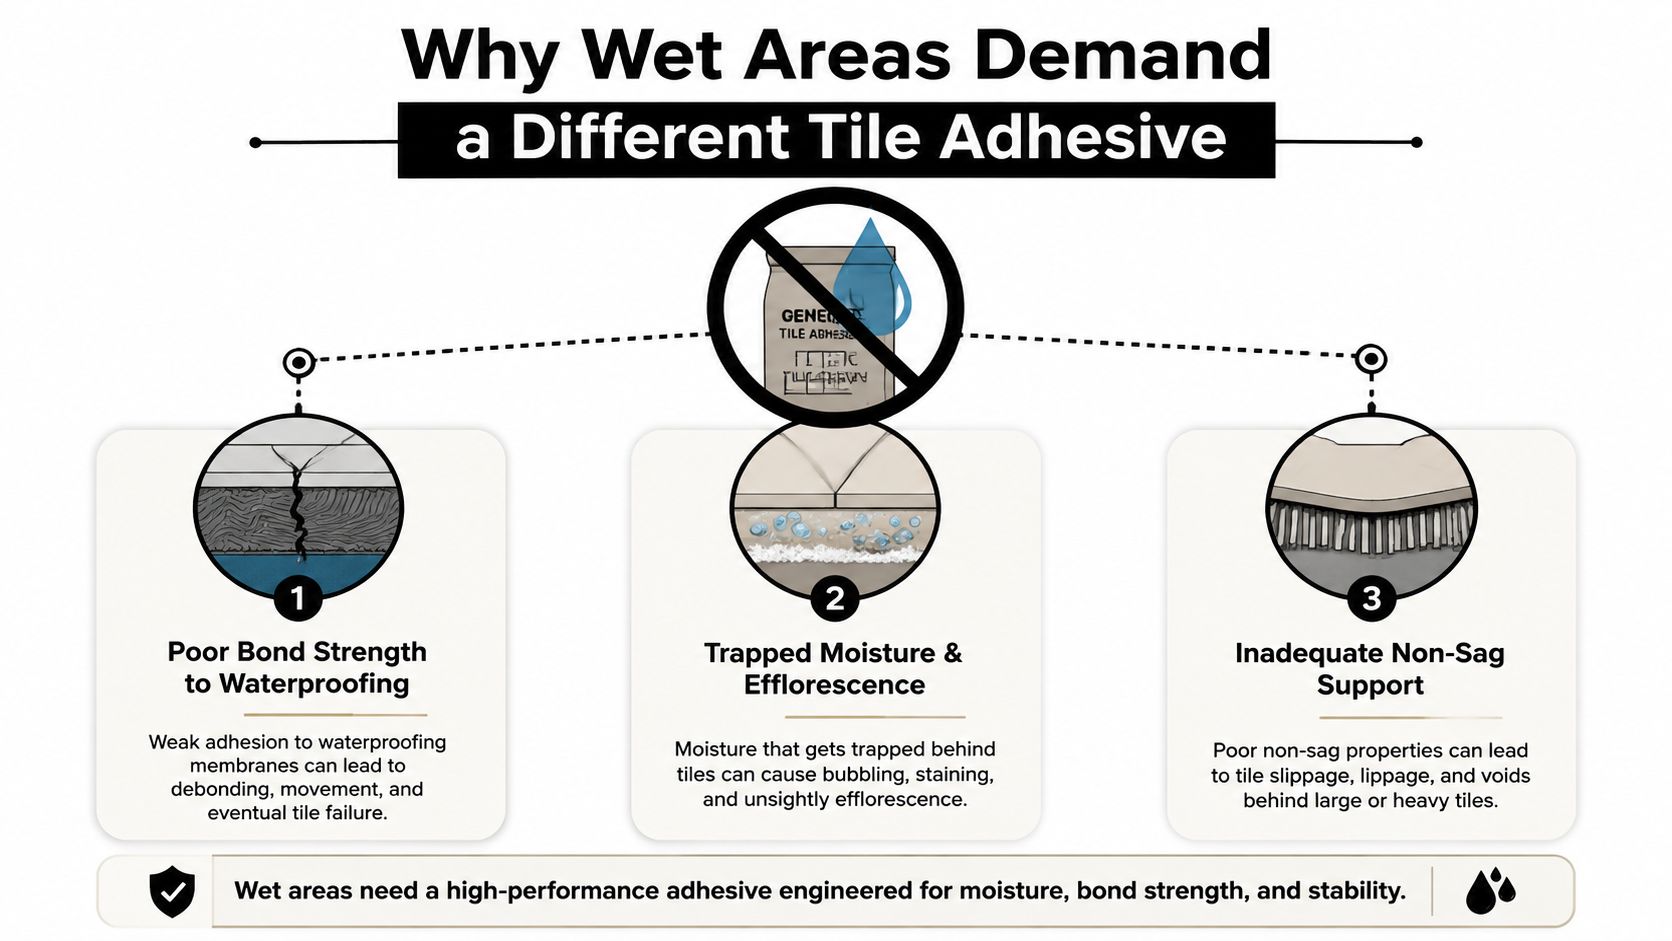
A bathroom can look finished on day one and still be on the way to failure. Melbourne wet areas deal with shower steam, temperature swings, cleaning chemicals, and movement in the structure, so tile adhesive for wet areas has to do more than hold a tile in place. It needs to work with the membrane, keep its grip on dense porcelain, and stay stable through repeated wetting without turning soft or brittle.
What attacks the bond
Wet areas are not just splash zones. They are humid spaces where vapour pressure pushes moisture into joints and edges, while the substrate flexes under people, fixtures, and thermal change. Cleaning products and soap residue can also work on the bond surface over time, especially if the adhesive was never meant for regular wetting.
Practical rule: if the adhesive cannot stay sound under a membrane, it does not belong in a shower.
That is why the old idea of “it sticks, so it is fine” causes trouble. Dense, low-absorption tiles now make up a large share of the market, and Wacker's technical paper notes that many tiles used worldwide have water absorption at 0.5% or lower under ASTM C373, which is the kind of dense tile often specified for wet areas in Australia (Wacker technical paper). When the tile does not absorb much, the adhesive has to do more of the work.
The wet-area system: substrate, membrane, adhesive, tile
A wet-area job lasts when the whole assembly works together, substrate, membrane, adhesive, and tile. A Registered Unlimited Builder does not treat adhesive as a moisture barrier, because it is only one layer in the system. The substrate needs to be sound, the membrane needs to control water at the right plane, the adhesive needs to suit the tile and the waterproofing chemistry, and the tile itself needs to match the movement and exposure the room will see.
Australian guidance treats adhesives in bathrooms and showers as water-resistant, not waterproof (wet-area adhesive guidance). That distinction matters on site. If moisture gets past the tile and into the grout lines, the interfaces between tile and adhesive, adhesive and membrane, and membrane and substrate are where the bond gets tested first.
I also point clients to tile adhesive basics explained when they want the plain version of how the product sits inside the full wet-area build-up.
The main point is simple. If the adhesive does not suit the tile, the membrane, and the substrate together, the shower can look finished and still fail early. Melbourne's seasonal movement makes that risk worse, not better.
The Four Adhesive Families That Work in Wet Areas
Tile adhesive basics explained
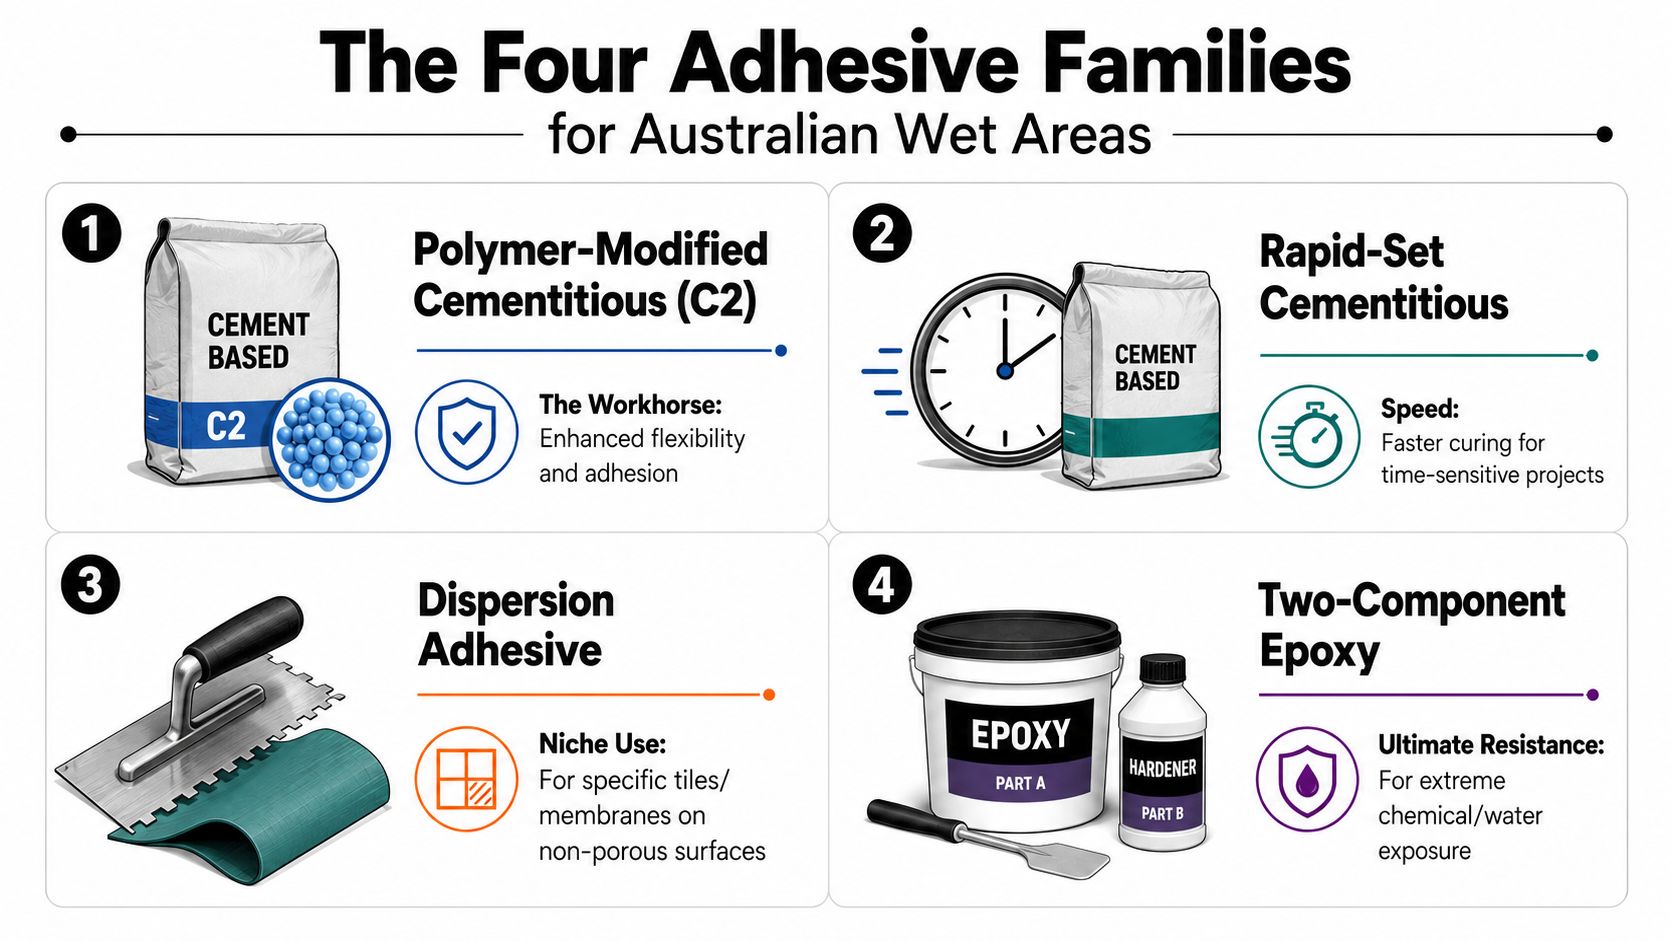
A shower might look finished the day the last tile is set, but the bond only lasts when the adhesive suits the other three parts of the wet-area system, the substrate, the membrane, and the tile. That is the way I assess a bathroom on site in Melbourne. If the backing board is moving, the membrane has the wrong cure or chemistry, or the tile is too dense for the adhesive to grab properly, the install starts working against itself. A Registered Unlimited Builder coordinates those parts so the product choice fits the room, the waterproofing method, and the movement the house will see through summer heat, winter cold, and daily shower use.
Polymer-modified cementitious adhesive
This is the workhorse. In wet-area work, polymer-modified cementitious adhesive is the product most Melbourne tilers reach for because it gives a better blend of grab, flexibility and wet performance than basic mortar. The polymer modification helps the adhesive stay bonded to dense tile backs and common wall or floor substrates, which matters when the tile is large, heavy or low-porosity.
It suits most bathroom floors, shower walls and general wet-zone renovations where the substrate has been prepared properly and the membrane system is compatible. In practice, that usually means a C2-grade cementitious adhesive, and C2 + S1 is the safer call where movement, tile size or substrate behaviour raises the risk. Tile adhesive basics explained covers the plain-language version of how that product sits inside the build-up.
Rapid-set cementitious adhesive
Rapid-set products are the time-sensitive specialist. They are useful when a room needs to return to service quickly, or when a builder is managing a tight sequence around waterproofing, tiling and grouting. The trade-off is less working time, so the tiler has to move fast and stay organised.
That speed can help on small repairs or shutdowns, but it does not forgive poor prep. If the substrate is uneven or the membrane is not cured, a fast adhesive will not fix the job. It just locks in the mistake sooner.
Ready-mixed acrylic adhesive
This one gets oversold in retail aisles. Ready-mixed acrylic products can suit lighter-duty interior wall applications, but they are not the first choice over a waterproofing membrane in a bathroom shower. In wet-area practice, products that cure chemically are generally the safer match once the membrane is part of the assembly.
That matters because a product can feel simple to use and still be wrong for the system. The short-term convenience often turns into a repair bill later, and the owner ends up paying for the mismatch between the adhesive, the membrane, and the exposure the room sees.
Two-component epoxy adhesive
Epoxy sits at the premium end. It is the most resistant option for harsh chemical exposure, demanding commercial conditions and some submerged or near-submerged applications. The upside is strong resistance, but the downsides are cost, mixing discipline and installation difficulty.
A lot of bathroom renovators do not need epoxy everywhere. A Registered Unlimited Builder usually reserves it for specific conditions, not as the default answer. That is the right call, because the adhesive has to suit the room, the membrane, and the substrate, not the other way around.
Decoding Australian Standards and Adhesive Classifications
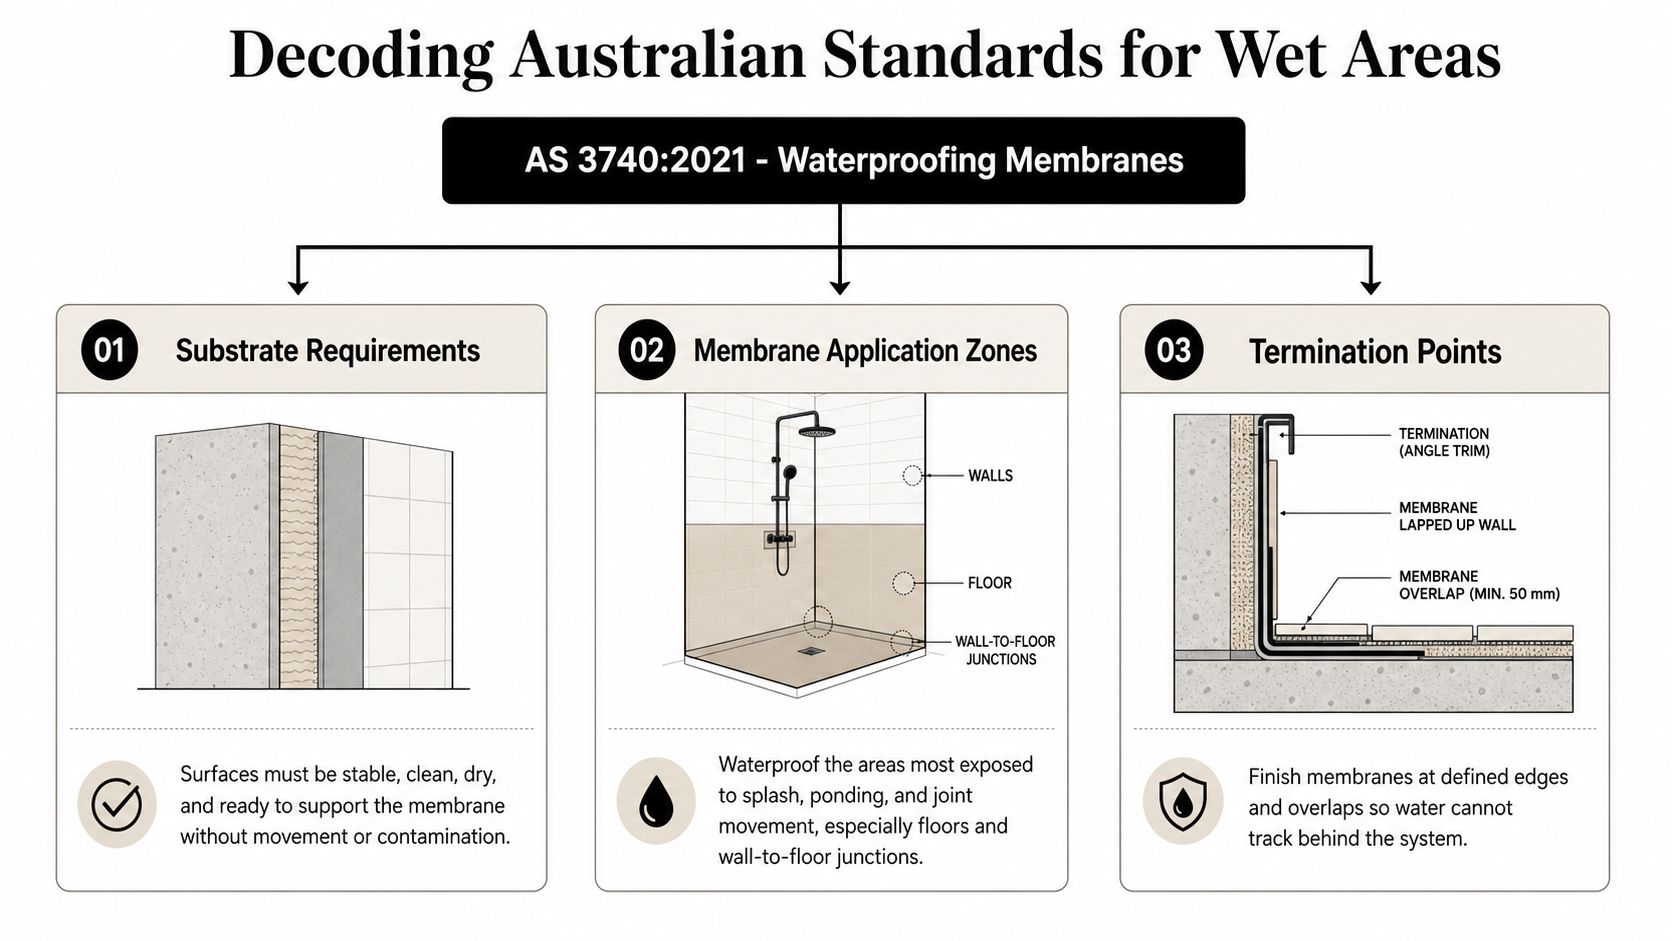
A shower can look finished and still be wrong. The failure usually starts below the tile, where the substrate, membrane, adhesive and tile have to work as one system. In Australian wet-area work, that system sits under AS 3740:2021 for domestic waterproofing and AS 3958.1 for tiling installation, and a builder has to coordinate the trade sequence so each layer does its part. For Melbourne jobs, that usually means checking the waterproofing detail first, as set out in waterproofing in Melbourne, then choosing an adhesive that matches the membrane and the tile load.
Reading the product codes without the jargon
Most datasheets follow EN 12004-style classifications. C1 and C2 identify cementitious adhesive strength, with C2 the higher-performance class that is usually selected for wet areas. S1 and S2 refer to flexibility, which matters when a substrate moves or the tile format gets larger. T means reduced slip, and E means extended open time, which gives the tiler more time before the adhesive skins over.
ARDEX breaks that into a practical wet-area split. Its guidance classifies Type 1 as dry-area only and Type 2 as the minimum for wet areas (ARDEX internal wet-area guidance). That is the sort of wording that helps on a quote, because it turns a standards discussion into a clear buying decision.
What the wet-area numbers mean on site
Wet-area adhesive data commonly asks for minimum tensile adhesion of 1 N/mm² in wet condition, and bathroom and shower guidance often points to C2 products, with C2 + S1 used where the room needs more flexibility. Tensile adhesion is the figure that tells you whether the bond survives repeated moisture and movement, not just a neat-looking test on a bench.
Mapei's Australian large-format tile adhesive datasheet gives a useful example of that kind of specification. It lists a bond strength after water immersion of 1.2 N/mm², along with an open time of more than 30 minutes and adjustability of about 45 minutes (Mapei AU datasheet).
If the product sheet does not state wet-area suitability, bond strength and membrane compatibility, keep looking.
That is where trade judgment matters. A product can carry the right code and still be a poor fit if the membrane finish, the substrate movement or the tile size pushes it outside its comfort zone. The right adhesive is the one that matches the standard, the membrane and the layout the room demands.
Matching Adhesive to Substrate, Tile and Waterproofing Membrane
The adhesive isn't chosen in isolation. It has to suit what it's sticking to, what it's holding up, and what sits underneath it. A concrete slab, fibre-cement wall, plasterboard lining, old tile surface or flexible timber floor all ask something different from the adhesive, and so do dense porcelain, natural stone and large-format panels.
Common pairings and the adhesive grade that usually fits
| Substrate | Tile Type | Recommended Adhesive | Why |
|---|---|---|---|
| Concrete slab | Dense porcelain floor tile | C2 or C2S1 cementitious | Handles dense tile backs and everyday movement in wet zones |
| Fibre-cement wall | Large-format porcelain or Kerlite | C2S1, often with non-slip and extended open time | Better wall support and working time for big tiles |
| Plasterboard in a bathroom | Ceramic wall tile | C2 cementitious, system-compatible with membrane | Keeps the bond stronger than a basic wall adhesive |
| Existing tile surface | Smaller-format ceramic or porcelain | High-bond cementitious or epoxy, depending on prep | Needs strong adhesion to a non-porous surface |
| Flexible timber floor | Wet-area floor tile | C2S1 or higher-flexibility system | Movement control is critical |
Why membrane compatibility matters
Membranes are not all the same. Acrylic, polyurethane and epoxy-based systems each create a different surface for the adhesive to grab onto, so the product has to be checked against the membrane manufacturer's guidance. A bathroom can be perfectly waterproofed and still fail if the tiler uses an adhesive that doesn't cure properly over that membrane.
That's why I like to see a written system on wet-area jobs. A waterproofing membrane guide from Melbourne Tiling Services P/L can be found in their shower waterproofing resources, and the useful point isn't marketing, it's that the membrane, adhesive and substrate should be treated as one specification rather than three loose purchases (shower waterproofing membrane reference).
Two real-world combinations
A 600 x 600 porcelain tile on a concrete slab in a main bathroom usually points toward a C2S1 cementitious adhesive. The tile is dense, the format is large, and the installer needs enough open time to maintain coverage without skimming the surface.
A Kerlite panel on a fibre-cement wall in a walk-in shower needs even more discipline. Large-format panels reward a flatter substrate, careful trowel selection and strict membrane compatibility. In that job, the wrong adhesive can make the panel look fine at install and then fail at the edges later.
Common Failure Modes and How to Prevent Them
A wet-area tile failure usually shows itself in stages. A shower may start with a faint hollow sound, then grout staining, then tile movement, and only later a leak behind the wall. By the time the damage is visible, the adhesive problem has usually become part of a bigger system failure.
Four failures I see most often
| Failure | What it looks like | How to prevent it |
|---|---|---|
| Debonding over membrane | Tiles lift or sound dead behind the surface | Use an adhesive that is compatible with the cured membrane and suits the substrate beneath it |
| Hollow tiles or poor coverage | Tapping the tile sounds empty in patches | Use the right trowel notch, spread the adhesive properly, and back-butter where the tile format calls for it |
| Grout cracking or movement | Hairline cracks, especially on walls or corners | Use the right adhesive for the substrate and tile, then allow movement joints to do their job |
| Efflorescence or staining | White residue, patchy grout colour, damp looking joints | Keep the membrane, adhesive and grout system aligned, and avoid trapping moisture in voids |
The pre-mixed adhesive trap
The mistake I keep seeing is a pre-mixed product being used where a chemically curing adhesive belongs. In wet areas, that shortcut can leave you with slow cure, weaker bond development and a tile layer that never really settles into the membrane system the way it should. A shower can look finished on day one and still be setting up a failure behind the surface.
Practical rule: if the room has a membrane, treat the adhesive as part of that membrane system, not as a shortcut around it.
Coverage matters too. ARDEX's wet-area tiling guidance says the adhesive layer should be at least 2.5 mm thick under the tile, with at least 90% contact coverage for internal wet-area floors and walls, and back-buttering for tiles larger than 400 x 400 mm to help achieve that target (ARDEX wet-area tiling guidance). In practice, poor coverage is one of the fastest routes to failure because the voids hold moisture and movement. Once the load, water and seasonal movement start working on those gaps, the bond begins to break down.
A Practical Selection Checklist for Melbourne Renovations
When I review a bathroom quote, I look for the adhesive spec before I look at the tile picture. If the line item just says “tile adhesive”, that's not enough detail for a wet area. A proper renovation file should name the substrate, membrane, adhesive class, coverage target and curing sequence.
A checklist you can use on the day you approve the job
- Confirm the substrate: concrete, fibre cement, plasterboard, existing tile or timber all change the adhesive choice.
- Confirm the tile format: large-format porcelain, Kerlite, ceramic or stone all need different levels of support.
- Confirm the membrane system: the adhesive has to suit the waterproofing layer under it.
- Ask for the adhesive class: look for C2 at minimum, and C2S1 where flexibility matters.
- Check the wet-condition rating: 1 N/mm² is a common minimum benchmark in wet use guidance.
- Ask how coverage will be achieved: 90% to 95% contact, with back-buttering on larger tiles.
- Confirm the curing sequence: membrane cure first, then adhesive, then grout.
- Ask for the flood test timing: it should happen before the room is put into service.
One Melbourne bathroom I saw failed because a decent porcelain tile was bonded over a membrane with the wrong pre-mixed product. The tiles stayed put for a while, then the shower floor started sounding hollow and the grout joints stained because moisture was getting into the voids. The repair was not cheap in labour, and the homeowner ended up paying twice for demolition and reinstallation.
Another job held up well because the builder and tiler matched a C2S1 adhesive to the membrane, flattened the substrate and back-buttered the large tiles. The room didn't look exotic, just well managed, and that's usually what a good wet-area job looks like after two years, then five, then ten.
A premium polymer-modified adhesive can add a modest cost to a bathroom renovation, but the budget shock comes from tearing out a failed shower and rebuilding the waterproofing, lining and tilework. That's why the adhesive choice belongs in the quote, not as a last-minute substitution.
Working with Registered Builders on Wet-Area Tiling
Wet-area tiling is a coordination job as much as a tiling job. The screeder has to deliver a flat base, the waterproofer has to build a continuous membrane, the tiler has to use the right adhesive and coverage, and the plumber or electrician may need to finish their rough-ins before the room is closed up. A Registered Unlimited Builder in Melbourne sits at the centre of that sequence and makes sure no trade jumps ahead of the one before it.
A proper quote should name the products, the standards, the cure times and the waterproofing method statement. It should also make clear who is responsible for membrane inspection, substrate readiness and the final handover. That level of paperwork isn't bureaucracy, it's how you protect the homeowner when the room is under warranty or inspected later.
Melbourne Tiling Services P/L is one example of a builder-tiler team that coordinates bathroom renovations, waterproofing, screeding and tile installation under one roof, which is useful because the adhesive only performs if the earlier steps are already right. The point isn't the brand name, it's the structure of the job. If the membrane isn't cured or the substrate isn't stable, even a good adhesive won't save the shower.
If you're planning bathroom renovations in Melbourne and want the wet-area system checked from substrate to tile, speak with Melbourne Tiling Services P/L about the adhesive, membrane and sequencing before you lock in the quote. They can assess whether your renovation needs standard polymer-modified adhesive, a higher-flexibility system or a full wet-area rebuild, and they'll do it in the context of a properly managed renovation.
Write a Comment