
You've just had a tiled Melbourne balcony finished, and after the first proper rain you notice a shallow puddle near the door. A week later, there's a damp mark on the ceiling below, or the grout at the wall edge has started darkening. The tiles may look perfect, but the waterproofing layer beneath them is already telling you something.
A balcony waterproofing membrane isn't just a liquid product rolled across concrete. It's part of a coordinated system involving the substrate, falls, drains, movement joints, wall terminations, door thresholds, penetrations and the tile finish. This guide explains how that system works, why membranes fail at details more often than through the membrane material itself, how Australian compliance requirements apply, and when a homeowner, property manager or renovator should bring in a registered professional. The same principles matter in bathroom renovations, where waterproofing errors can also remain hidden until finishes are complete.
Table of Contents
- Why Tiled Balconies Leak Without the Right Membrane
- What a Balcony Waterproofing Membrane Actually Does
- Types of Balcony Waterproofing Membranes Compared
- How Substrate Preparation and Installation Work
- Compliance Testing and Australian Standards Explained
- Common Failure Modes Troubleshooting and Maintenance
- Costs Longevity and When to Hire Licensed Professionals
Why Tiled Balconies Leak Without the Right Membrane
The first sign is often easy to dismiss. A few tiles stay wet after the rest of the balcony dries. Water gathers beside the sliding door. A downstairs ceiling develops a faint brown mark. By the time a leak becomes visible indoors, water may already have travelled through several concealed junctions.
Tiles and grout aren't the waterproofing system. They form the exposed walking surface, while the membrane underneath provides the continuous barrier that protects the structure below. If the installer leaves a gap around a drain, fails to seal a balustrade penetration, or carries the membrane to the wrong height at an adjacent wall, rain can move beneath the tiles even when the chosen product is technically suitable.
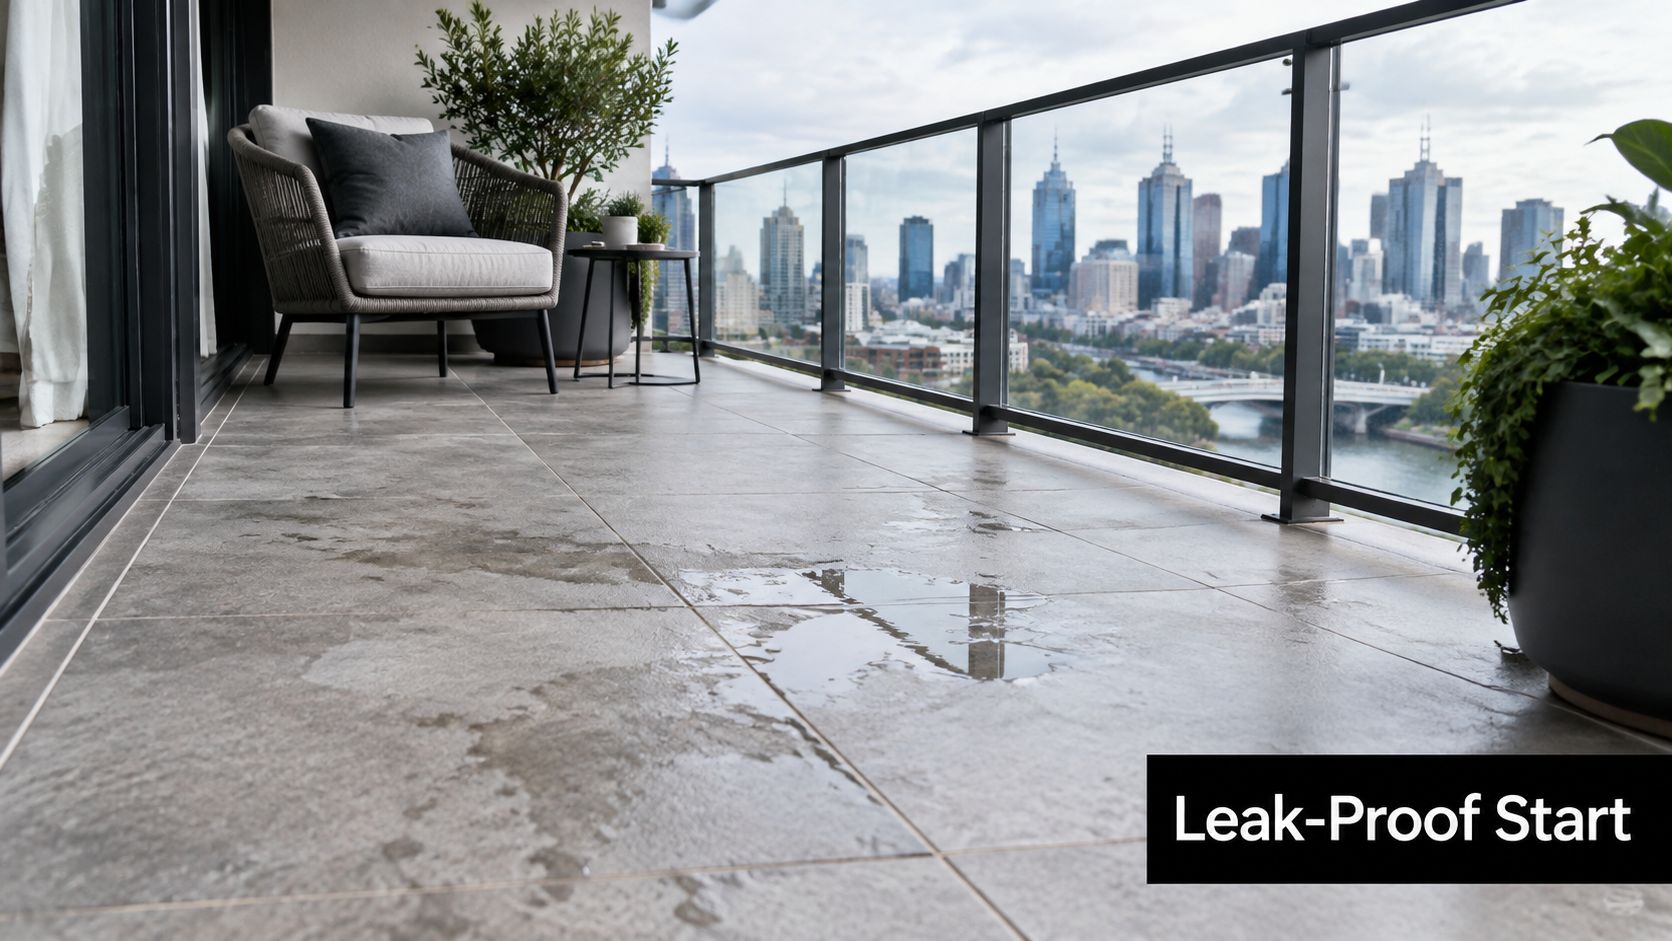
The visible symptom is rarely the entry point
Suppose water appears on the ceiling below the outer corner of a balcony. That doesn't prove the membrane failed at that corner. Water may have entered around a door threshold, travelled along the slab, and emerged somewhere else. Concrete, screeds and tile bedding can conceal the path.
Common warning signs include:
- Persistent ponding: Water remains around low points because the finished surface doesn't drain correctly.
- Efflorescence: White mineral deposits appear where moisture carries salts through grout or masonry.
- Drummy tiles: Tiles sound hollow or lose adhesion after moisture reaches the bedding layer.
- Damp interiors: Paint, plaster or ceiling surfaces below the balcony show staining, mould or a musty smell.
- Edge deterioration: Sealants split at wall junctions, corners, drains or door openings.
A Melbourne balcony also faces movement, wind-driven rain, temperature changes and strong exposure. Those forces concentrate at transitions, not in the middle of an uninterrupted membrane field. A product comparison that ignores those transitions gives homeowners false confidence.
Practical rule: Treat the balcony as a waterproofing system, not as a tile job with a waterproof coating added at the end.
That approach helps prevent expensive strip-outs. It also gives property managers and renovators a better question to ask: not just “Which membrane are you using?” but “How will the membrane connect to the drain, walls, threshold, joints and balustrade?”
What a Balcony Waterproofing Membrane Actually Does
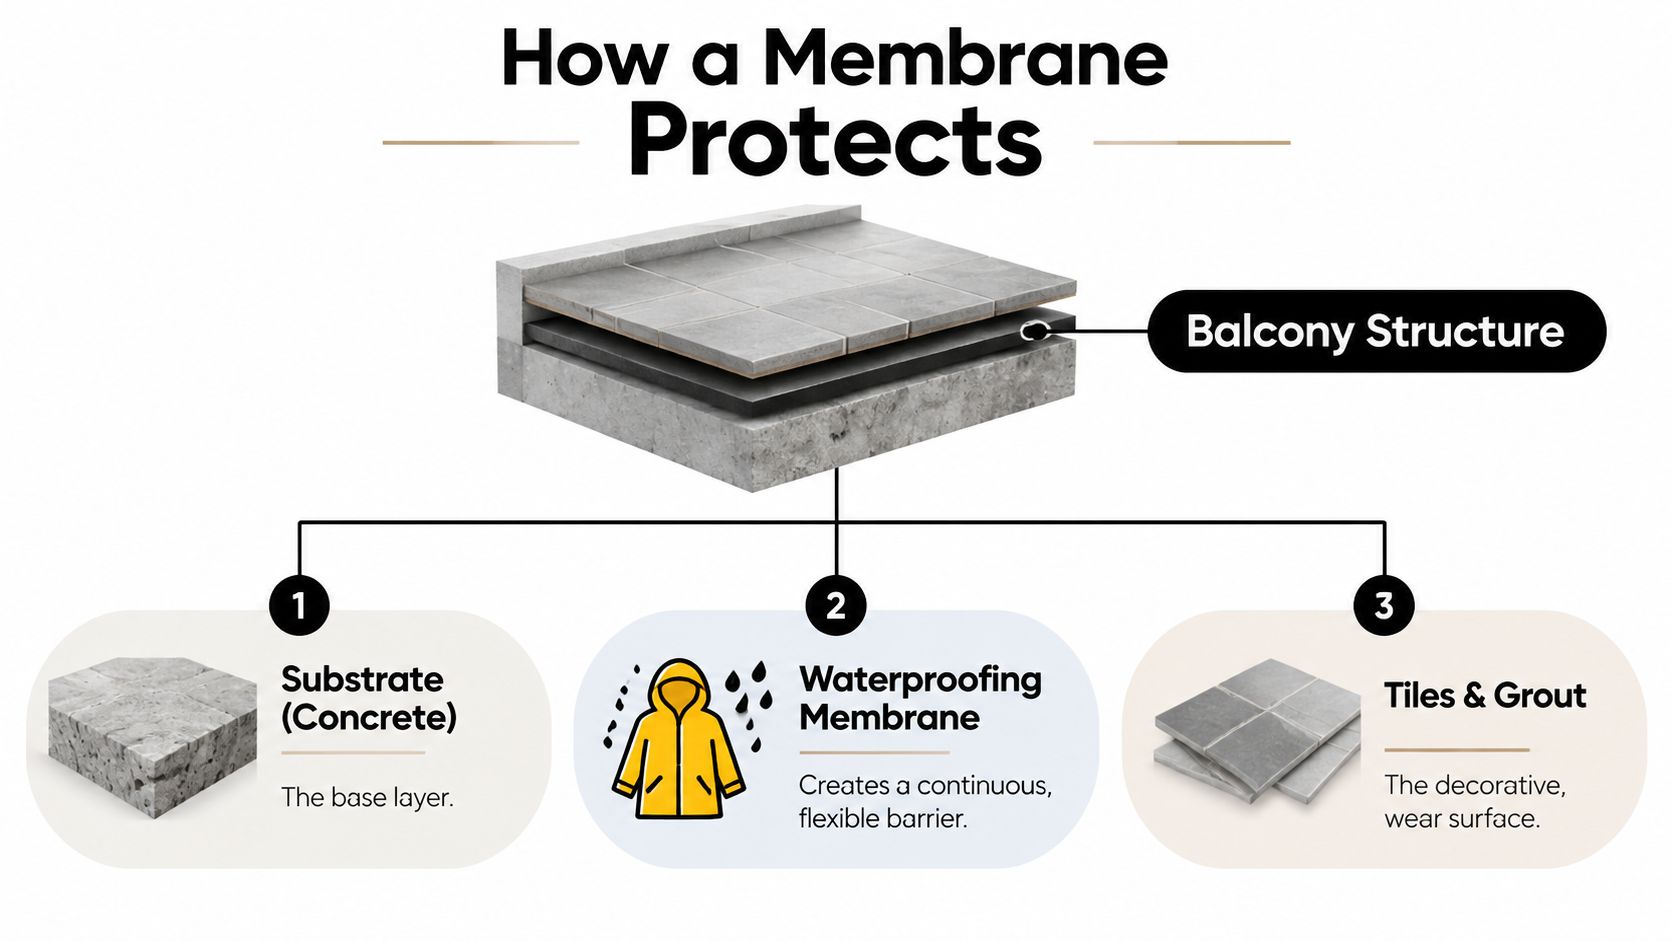
Think of the membrane as a raincoat beneath the tiles. The fabric keeps water out, but the coat only works if its seams, cuffs and zip are sealed. A balcony membrane follows the same principle. The broad surface matters, but the junctions decide whether the protective layer remains continuous.
The basic assembly contains three functional layers:
- Substrate: Usually the concrete or prepared base that supports the system.
- Waterproofing membrane: The flexible or bonded barrier that limits water movement into the structure.
- Tiles and grout: The decorative, wear-resistant surface that people walk on and that directs surface water towards drainage.
Material versus complete system
A membrane material may be waterproof on its own, but a balcony needs more than a waterproof sheet or cured coating. The system includes primers, reinforcing components, bond breakers, sealants, compatible adhesives, drain connections and termination details. Each part must work with the next part.
External balconies are also different from internal wet areas. AS 4654.2-2012 is Australia's key technical benchmark for above-ground external waterproofing membranes used in buildings and structures, including balconies and roofs. The standard addresses above-ground use, rather than below-ground or pool and spa applications, so a product suitable for one environment isn't automatically suitable for another. Australian balcony membrane guidance referencing AS 4654.2-2012 explains this distinction and the importance of design and installation.
How membrane assemblies differ
You may encounter several descriptions in specifications:
- Fully bonded: The membrane adheres across the prepared substrate, limiting movement beneath it.
- Partially bonded: Selected areas bond while other areas accommodate movement or help manage stresses.
- Mechanically fixed: Fasteners secure the membrane, with penetrations and laps requiring careful sealing.
- Ballasted: A covering layer holds the membrane in position rather than relying entirely on adhesive.
- Inverted roof membrane assembly: The waterproofing sits beneath insulation or other protective layers in a roof-style build-up.
Those categories don't identify a universal “best” option. They describe how the membrane interacts with the structure and the layers above it. A tiled balcony needs a system compatible with the substrate, tile adhesive, screed and expected exposure.
Balustrades deserve particular care because posts, brackets and edge fixings can interrupt the waterproofing plane. Before selecting a railing arrangement, it can help to review a specialist resource on balcony railing safety and materials, then coordinate the railing design with the waterproofing detail rather than treating it as a separate trade decision.
Types of Balcony Waterproofing Membranes Compared
A tiled balcony can still leak after a high-quality membrane is installed. The usual weak points are the junctions, drainage details and compatibility between layers. Liquid-applied systems can follow irregular shapes and reduce laps, while sheet systems offer a controlled, factory-made thickness. Bituminous products may suit particular build-ups, and polyurethane, polyurea, PVC or other systems may offer different combinations of flexibility, UV resistance and traffic tolerance.
The right choice depends on the existing substrate, required falls, tile overlay, exposure, movement, access and the manufacturer's compatibility requirements. A roof product may not accept the same adhesive or tile bedding arrangement as a pedestrian balcony. Commercial work can place greater demands on the assembly where people use the area frequently or the membrane sits over occupied space. Guidance on durable waterproofing for commercial roofs shows why exposure, traffic and the complete build-up need to be considered together.
| Membrane Type | Application Method | Pros for Tiled Balconies | Limitations to Consider |
|---|---|---|---|
| Liquid-applied polyurethane or acrylic | Rolled, brushed or squeegeed in coats | Forms a continuous layer around corners, drains and irregular penetrations, making it practical for some remediation work | Requires accurate coverage, curing and reinforcement; incompatible products or thin application can create weak areas |
| Sheet membrane | Laid in sheets with bonded or welded laps | Provides consistent manufactured thickness and can suit larger, regular areas when laps, upturns and thresholds are detailed correctly | Laps, corners, drains and penetrations need precise detailing; the tile overlay must be compatible |
| Bituminous membrane | Bonded, heat-applied or incorporated into a designed assembly | Can provide heavy-duty protection in suitable roof and deck constructions, including assemblies with planned drainage and edge upturns | May need protection from traffic and UV; heat application and tile compatibility require specialist assessment |
| Polyurea or other rapid-curing liquid system | Sprayed or applied with specialist equipment | Can create a joint-free finish around complex balcony details and may suit demanding commercial programmes | Requires experienced installers, controlled conditions and documented compatibility with the finishing system |
| PVC or synthetic sheet | Installed with bonded or welded seams | Flexible sheet construction can suit selected external assemblies where drains, thresholds and edge seams are properly coordinated | UV exposure, seam method, edge detailing and compatibility with tile finishes must be verified |
Match the system to the balcony
A new balcony with a sound, accessible substrate allows the installer to design the build-up from the falls through to the tile adhesive. Retrofit work is less predictable. Existing tiles may need removal, old coatings may be poorly bonded, drains may be undersized or blocked, and movement joints may not align with the proposed tile layout.
The membrane is only one part of the water-control system. Falls must direct water to the drain, wall upturns must connect with the waterproofing plane, and thresholds must prevent water from reaching the interior. A product can perform well in testing yet fail when one of these details is interrupted during construction.
Traffic and UV exposure also affect the decision. A membrane that remains exposed needs a finish designed for exposure, while one beneath tiles needs protection from construction damage and compatibility with the tile assembly. The product data sheet should state the intended use, preparation requirements, curing conditions and compatible overlay products.
Ask for a written recommendation tied to the actual balcony rather than a generic promise. The shortlist should come from the substrate condition, junction details, drainage arrangement and planned finish, not brand popularity.
How Substrate Preparation and Installation Work
A reliable installation starts before anyone opens a membrane drum or rolls out a sheet. The installer first examines the substrate for cracks, contamination, loose material, moisture, unevenness and previous coatings. A balcony can't drain properly if the base contains depressions, and a membrane can't bond reliably to dust, laitance, grease or unstable material.
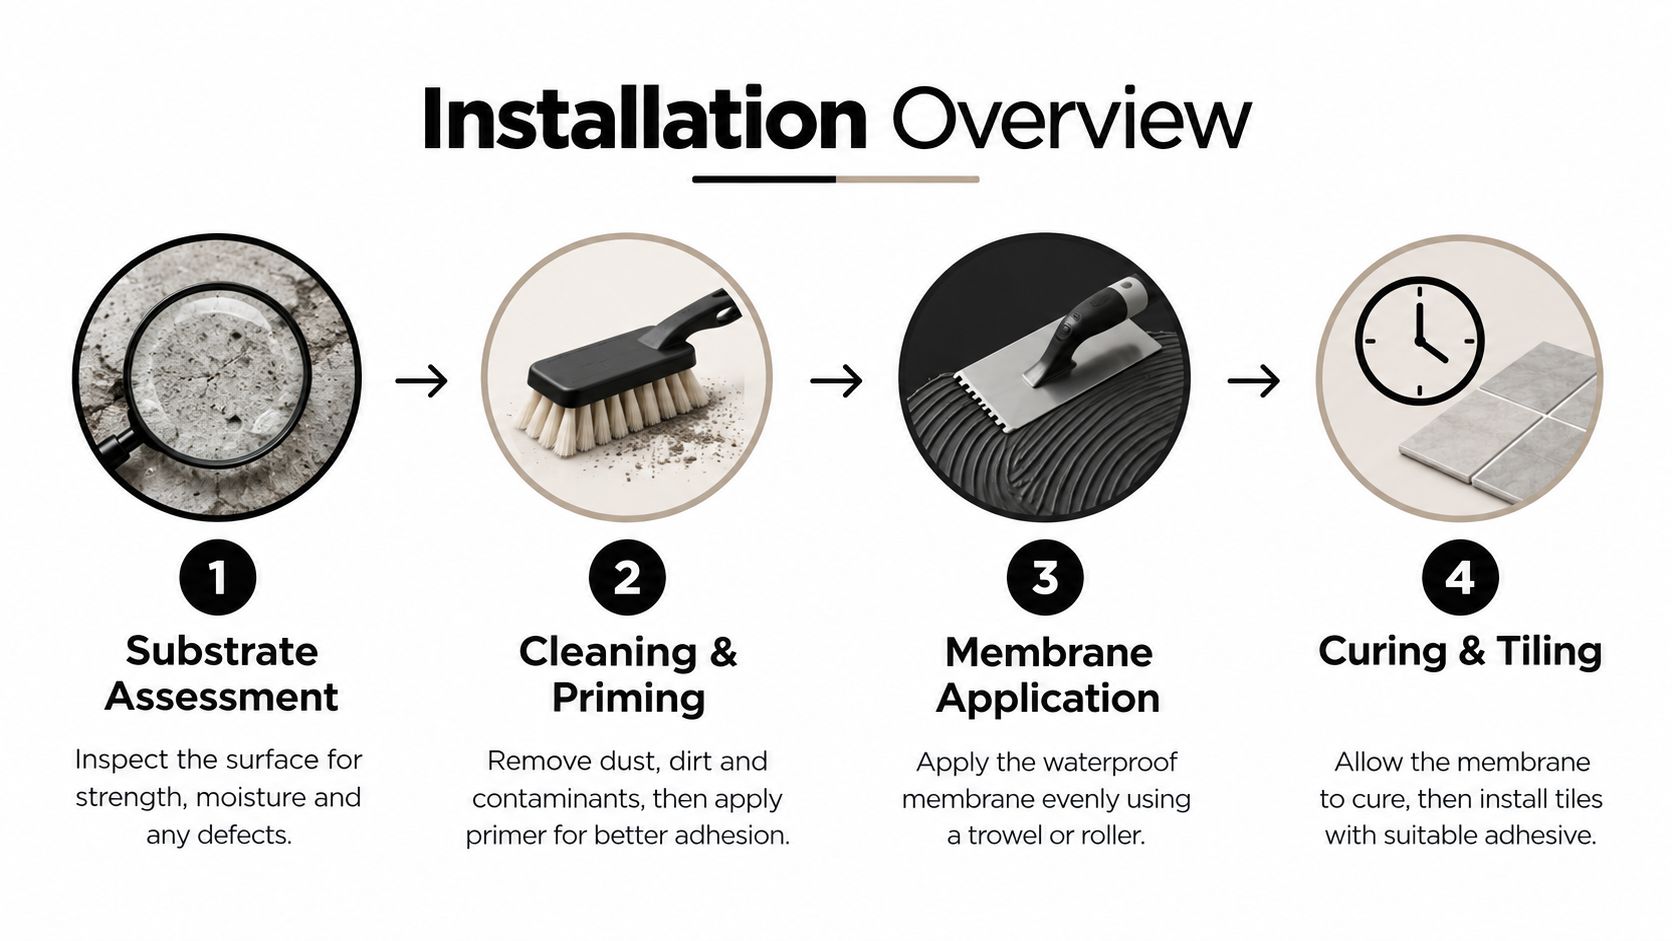
The sequence usually follows a clear logic:
- Assess the substrate. Identify structural cracks, hollow areas, weak screed, existing membrane remnants and locations of drains, joints and penetrations.
- Clean and prime. Remove contaminants and use the primer specified for the substrate and membrane. Primer choice isn't interchangeable across concrete, masonry, timber-based materials or old coatings.
- Correct levels and falls. Use a suitable screed or self-levelling approach where required, while preserving movement joints and ensuring the surface directs water to drainage.
- Detail the junctions. Treat corners, wall upturns, door thresholds, drains, balustrades, penetrations and movement joints before covering the broad field.
- Apply and protect the membrane. Install the specified coats, sheets, reinforcing or laps, allow the system to cure, then protect it from trades before tiling begins.
For a plain-language explanation of the first stage, see this guide to substrate preparation before tiling. Preparation determines whether later layers sit on a stable, clean and correctly shaped base.
Falls and terminations are measurable
Australian balcony guidance built around AS 4654.2 identifies a continuous minimum finished surface fall of 1 in 80, equivalent to a 1.25% gradient towards drainage points. The same guidance identifies membrane termination heights of 100 mm to 150 mm above finished tile level on adjacent walls, depending on wind region and door-threshold design. AS 4654.2 guidance and construction requirements also highlights the need to treat penetrations, movement joints, drains and upturns correctly.
Those figures aren't decorative details. If the finished surface doesn't maintain the required fall, water can pond. If the termination is too low or interrupted at a threshold, wind-driven rain can reach the wall or internal floor edge.
A good installer photographs the substrate, details, membrane coats and completed work before tiles conceal the system. The project file should include product information, batch details where relevant, installation records and the waterproofing certificate. A short inspection before tiling can prevent a long investigation after the first leak.
For a visual explanation of how the process is carried out, watch the following installation overview:
Compliance Testing and Australian Standards Explained
Victorian homeowners don't need to memorise an entire standard, but they should understand what compliance evidence looks like. AS 4654.1 and AS 4654.2 work together. Material performance and design-and-installation requirements are related, but they aren't the same document or the same responsibility.
The National Construction Code references the AS 4654 requirements as deemed-to-satisfy provisions for external above-ground waterproofing. Those provisions apply to elements including balconies, decks, roofs, external door openings, planter boxes and penetrations, and the NCC began referencing AS 4654 Parts 1 and 2 in its deemed-to-satisfy provisions from 1 May 2013. Australian guidance on waterproofing external above-ground building elements summarises that relationship.
What the paperwork should demonstrate
A membrane product needs evidence of material compliance, including relevant testing or certification to AS 4654.1. The design and installation must then align with AS 4654.2, the part that addresses how the system is configured and installed on the building.
The Victorian Building Authority identifies AS 4654.2 as the source of compliant balcony design details. Its guidance also addresses balcony and external wall junctions, including waterproofing incorporating balustrades under Clause 2.8.4. The VBA fact sheet on water ingress in balconies, roofs and drainage is especially useful because it focuses attention on the places where components meet.
Ask the installer for:
- System identification: The exact membrane, primer, reinforcement and compatible tile or screed products.
- Compliance evidence: Test reports or certification showing the membrane material meets the relevant requirements.
- Installation records: Photos and notes showing preparation, details, coats and protection before tiling.
- Drainage confirmation: Evidence that balcony drainage connects correctly to the stormwater system.
- Completion documentation: A waterproofing certificate and any required inspection or handover records.
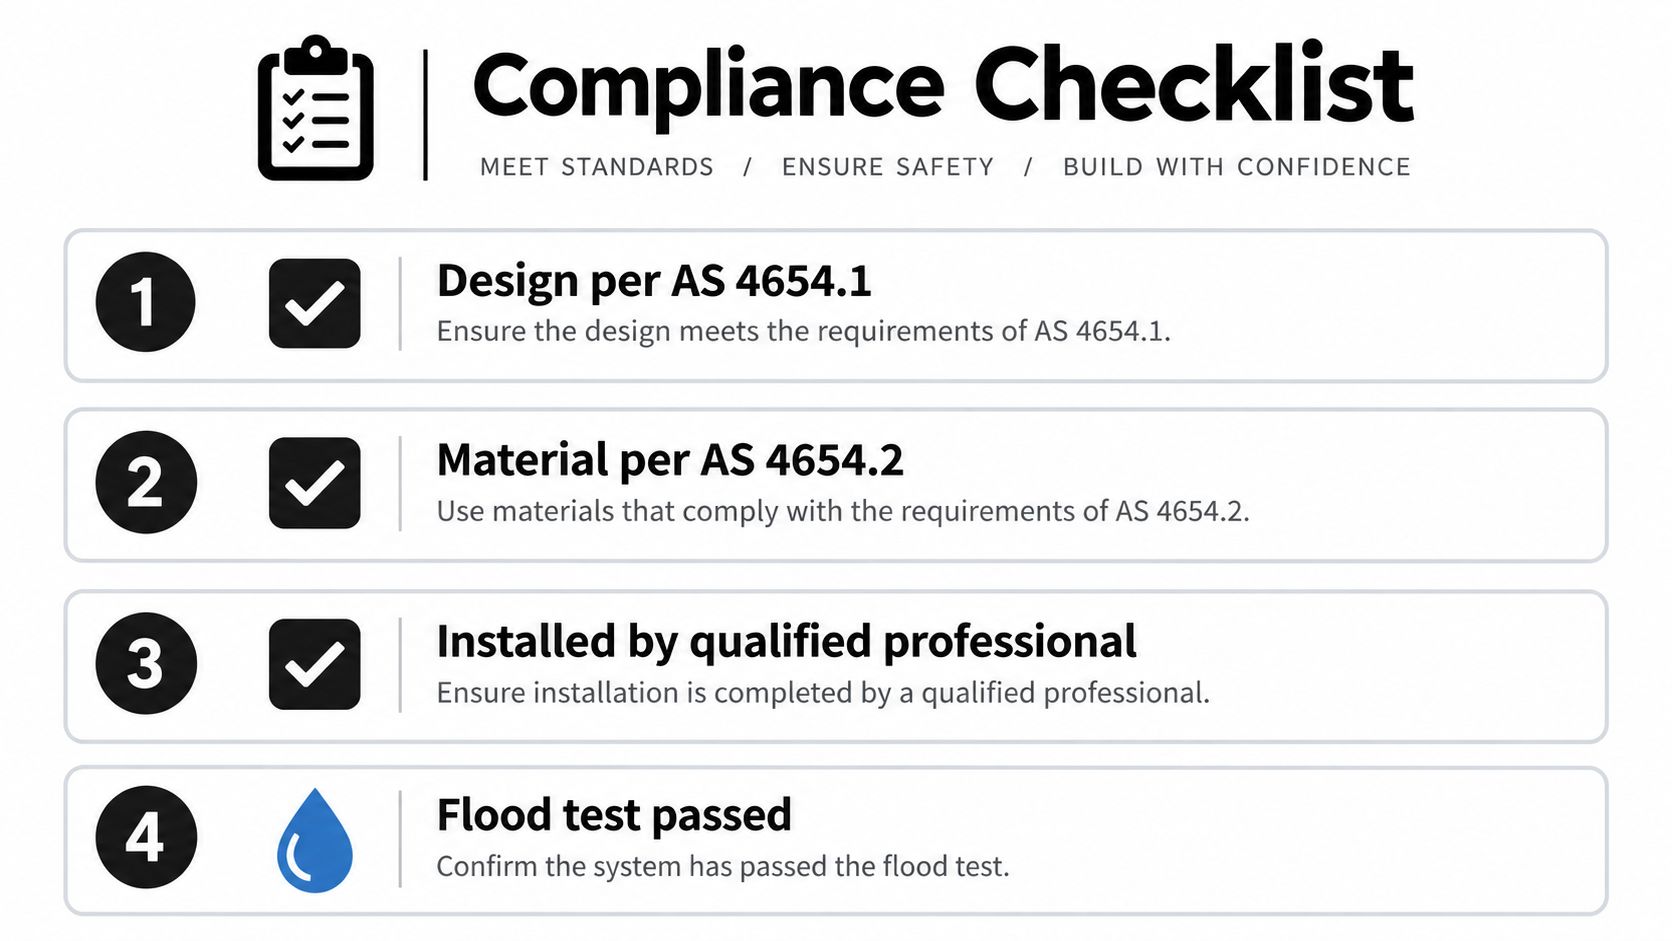
The central question is whether the documented system matches the constructed balcony. A premium product installed without the correct falls, termination or drain interface doesn't solve the compliance problem. Victoria waterproofing compliance certificate information can help homeowners understand the handover evidence they should expect.
Common Failure Modes Troubleshooting and Maintenance
A technically compliant membrane can still leak in service. Compliance confirms that a system has been designed and installed against the applicable requirements, but the balcony remains dependent on drainage, movement accommodation, protection and ongoing maintenance. A later railing installation, blocked overflow or damaged tile can create a new weak point.
Victorian water-ingress guidance places substantial emphasis on drainage and junction details. That supports a practical diagnosis: look at the interfaces before blaming the membrane field.
Where to look first
Start with the pattern rather than the product label:
- Ponding near a door or wall: Check finished falls, tile build-up, threshold detailing and nearby drainage.
- White deposits in grout: Investigate recurring moisture movement, cracked joints and water trapped beneath the tile finish.
- Hollow or drummy tiles: Look for poor bedding, movement, substrate instability or moisture affecting the adhesive layer.
- Dampness below the balcony: Inspect the full drainage path, wall junctions, penetrations and membrane edge, not just the stained ceiling location.
- Leaks after railing work: Check whether posts, brackets or fixings pierced the waterproofing without a coordinated detail.
- Water around an overflow: Confirm that the overflow is open and properly connected, rather than relying on a sealant bead alone.
The repair method depends on the cause. A failed surface sealant may need local replacement, while recurring ponding or concealed membrane damage may require tile removal and a broader investigation. Covering a stain with paint or applying another coating over unstable tiles usually hides the symptom without correcting the water path.
The membrane may be waterproof, but an unsealed penetration is still an opening in the waterproof envelope.
Protect the evidence and the finished work
Keep dated photographs of each membrane coat, corner treatment, drain connection and termination before tiling conceals them. This record helps future trades locate the system and gives the owner useful evidence if a defect appears later.
Maintenance should remain simple and regular:
- Clear drainage points: Remove leaves, dirt and debris before they obstruct drains or overflows.
- Inspect exposed sealants: Look for splitting at thresholds, wall junctions and balustrade interfaces.
- Watch tile movement: Repair loose, cracked or drummy tiles before water reaches the bedding layer.
- Record changes: Photograph new stains, ponding or efflorescence so a contractor can compare conditions over time.
- Avoid unplanned penetrations: Coordinate shade structures, screens, railings and fixings with the waterproofing detail.
A professional investigation should trace the water path and inspect the concealed assembly where necessary. Don't accept a product swap as a diagnosis.
Costs Longevity and When to Hire Licensed Professionals
Balcony waterproofing costs depend on the work hidden beneath the visible finish. A new build with a sound substrate, planned falls and accessible edges is generally simpler to price than remediation involving tile removal, damaged screed, blocked drainage, failed terminations or water damage below. The membrane itself is only one line in the scope.
A useful budget separates the work into stages:
- Investigation and access: Locate the entry point and protect adjoining areas.
- Removal: Lift tiles, bedding or failed coatings where inspection requires it.
- Substrate repair: Correct cracking, weak screed, uneven levels or damaged concrete.
- Waterproofing: Install the selected system, including primers, reinforcement and junction details.
- Finishing: Replace tiles, grout, movement joints and sealants, then complete the handover records.
Longevity depends on exposure, drainage, movement, installation quality and maintenance. A membrane that stays dry beneath a compatible tile assembly faces different conditions from an exposed system subject to traffic and ultraviolet light. The cheapest initial coating isn't automatically the lowest-cost decision if the balcony needs repeated disruption.
For a project-specific budgeting framework, review the cost factors involved in waterproofing a balcony. The same budgeting discipline helps with bathroom renovations, where waterproofing, screeding, tiling, plumbing and electrical coordination need to be priced as one connected scope.
In Victoria, domestic building work valued at $10,000 or more including labour and materials must be carried out by a registered building practitioner. Victorian guidance on DIY and professional waterproofing identifies registered domestic builder categories including Domestic Builder Unlimited and Domestic Builder Limited for relevant renovation work. Registration and trade licensing aren't a substitute for good detailing, but they help establish responsibility and coordination.
Contact a registered professional when the balcony sits above living space, the leak has returned, tiles need removal, the substrate is damaged, drainage is inadequate, or the work involves structural edges and balustrade fixings. Melbourne Tiling Services P/L in Highett coordinates balcony waterproofing, screeding, tiling and leak rectification, and also delivers bathroom and ensuite renovations with registered builder coordination, free quotes and 3D drawings.
If your Melbourne balcony is ponding, staining the room below or due for a tile replacement, ask Melbourne Tiling Services P/L to assess the substrate, drainage and membrane details before finishes are installed. Visit Melbourne Tiling Services P/L to discuss a quote for waterproofing, rectification, screeding and tiling.
Write a Comment