
You wake up after a long shower and notice a brown stain spreading across the ceiling below. The bathroom renovation looked finished, but the leak has turned a completed project into demolition, drying and repair. By the time water becomes visible, it may already have travelled through tile joints, screeds, wall junctions or a pipe penetration.
That's why a bathroom waterproofing system shouldn't be judged by the brand on the drum or by a photo of a freshly painted membrane. It's a connected arrangement of substrate preparation, falls, wastes, penetrations, junction treatments, compatible products and installation records. In Melbourne bathroom renovations, the membrane is only one part of the work.
Table of Contents
- Why a Bathroom Waterproofing System Matters
- The Three Main Membrane Types and How Each Behaves
- Shower Tray, Full-Floor and Level-Access System Choices
- What AS 3740 and the NCC Actually Require on Site
- How Leaks Actually Start and What Rectification Looks Like
- Choosing a Registered Builder for Bathroom Renovations
- Your Pre-Tile Inspection Checklist and What to Keep on File
Why a Bathroom Waterproofing System Matters
A paint-on membrane can be perfectly suitable and still fail as part of a poorly designed wet area. If the substrate moves, the fall holds water, the waste connection is blocked or a mixer penetration remains open, the membrane is being asked to solve problems it wasn't designed to solve.
Think of the system as a controlled path for water. The finished surface sheds most water, the membrane manages moisture behind the tiles, the screed directs water towards the waste, and carefully treated corners and penetrations stop water entering the structure. Each layer supports the next one.
That matters particularly in Melbourne homes with older timber subfloors, upstairs bathrooms over living areas, balconies that can act as overflow paths, and level-access or frameless showers. A traditional hob may help contain water. A flush entry has less tolerance for poor falls or an incorrectly positioned waste, while a frameless screen can allow more splash beyond the immediate shower footprint.
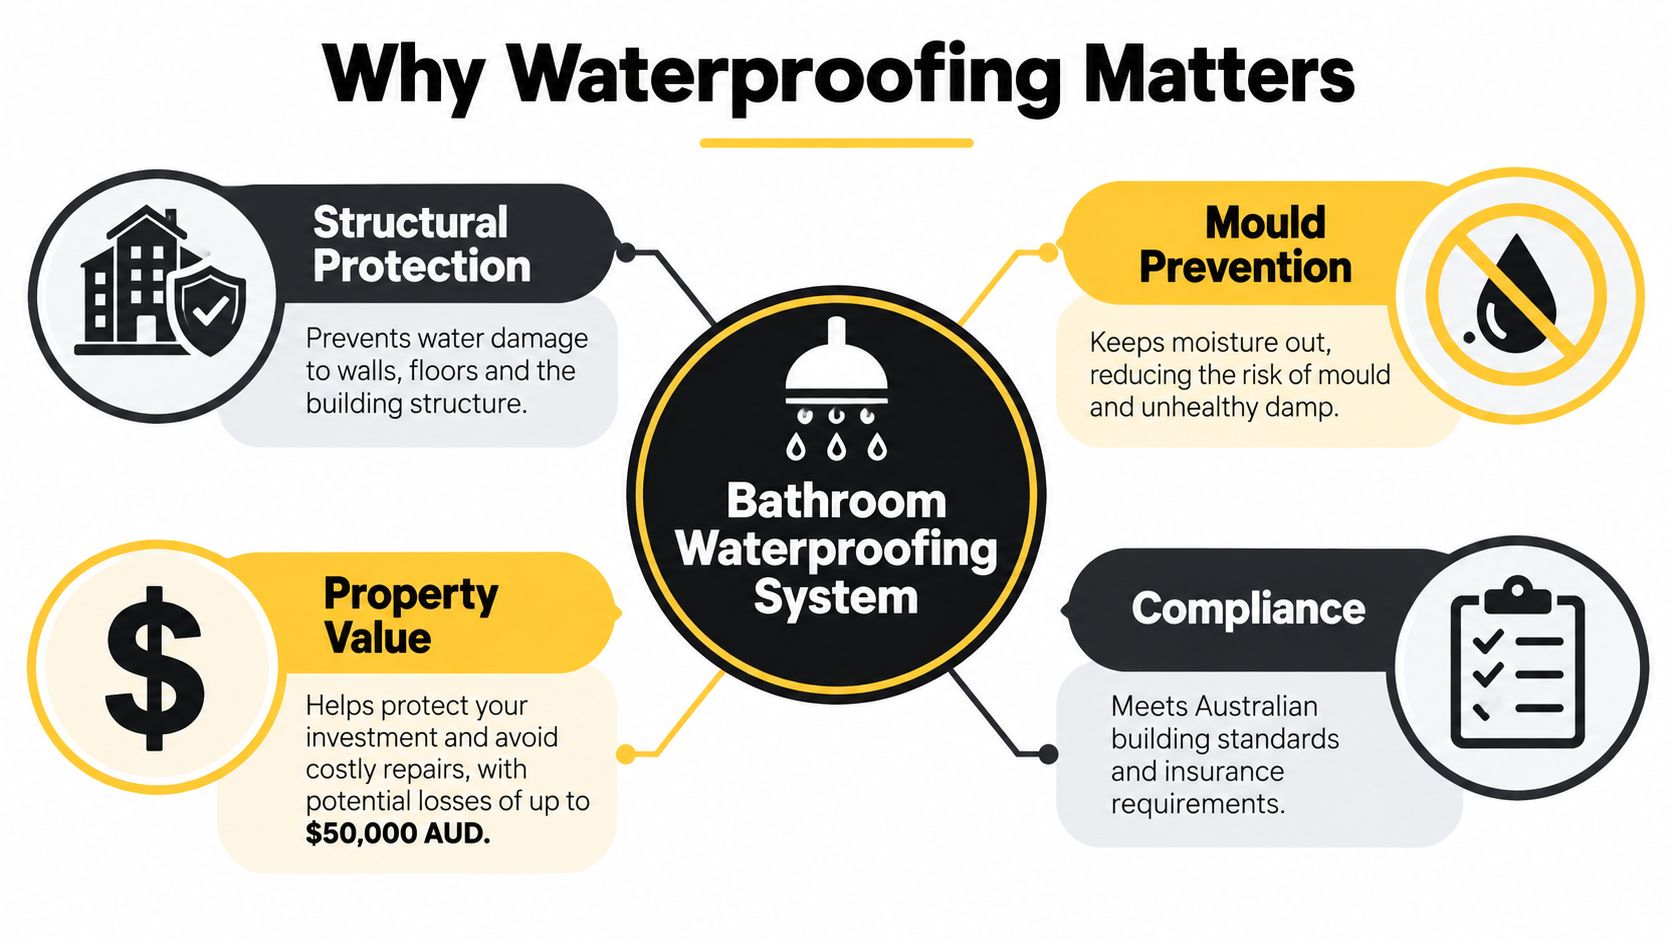
The system sits behind the visible finish
Tiles, grout and silicone help manage surface water, but they aren't the primary waterproof barrier. Water can move through grout joints, around fixtures and into changes of plane. The hidden construction has to control that moisture before it reaches timber, plasterboard, framing or the room below.
Australia's framework treats waterproofing as a building-compliance function, not just a finishing task. The ABCB overview of waterproofing houses explains how the NCC and AS 3740 work together across bathrooms, showers, laundries and sanitary compartments.
Practical rule: Evaluate the complete wet-area system, not just the membrane product. A product brochure can't show whether the waste, falls, junctions and penetrations were prepared correctly.
Before tiles conceal the work, you should be able to identify what the substrate is, where water is meant to go, how the membrane connects at corners and junctions, and which products are approved to sit together. That information is more useful than choosing between two similar-looking membrane colours.
The Three Main Membrane Types and How Each Behaves
Australian bathroom work generally uses three membrane families: liquid-applied membranes, sheet membranes and cementitious waterproofing. The right choice depends on the substrate, geometry, movement, drainage design and the manufacturer's compatible system, not on a simple ranking of products.
A liquid-applied membrane behaves like a thick, flexible paint film, although it must be installed as a tested waterproofing product rather than ordinary paint. The installer applies it to the prepared surface, builds the required coverage and reinforces vulnerable locations such as corners, junctions and penetrations. It suits irregular shower walls, niches and detailed layouts because it can follow the shape of the room.
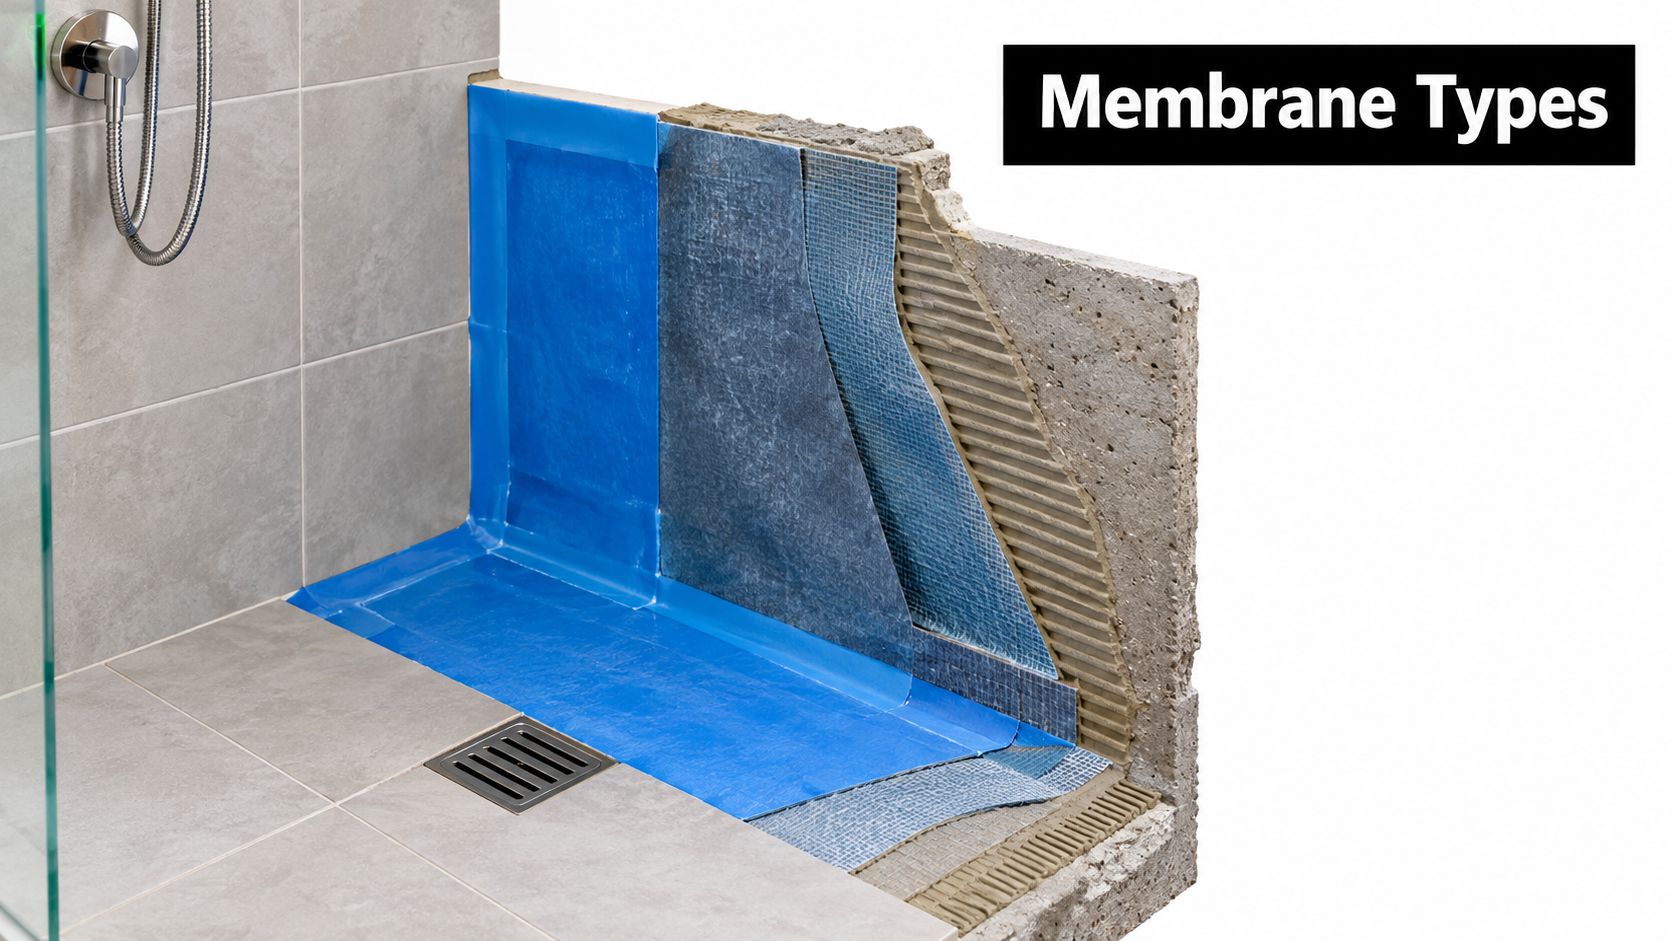
A sheet membrane is a pre-made waterproof skin. The installer bonds or fixes it according to the system instructions, then seals overlaps, corners, changes of plane and penetrations. Because the sheet arrives with a consistent manufactured body, it can be useful across broad floor areas, provided the substrate is suitable and the joints are detailed correctly.
Cementitious waterproofing is a cement-based slurry or coating that bonds closely to masonry and cement-based surfaces. It's commonly considered where a concrete slab, cement screed or masonry background provides a stable base. It isn't automatically suitable for every substrate, so the proposed system still needs to address movement, priming, curing and tile adhesion.
The supporting products are part of the membrane
A primer prepares the surface for the next layer. A bond breaker or reinforcing band helps manage movement at wall-to-floor junctions and internal corners. Pipe seals and compatible collars close around mixers, outlets and wastes. Tile adhesive then has to bond to the cured membrane without softening it or pulling it away from the substrate.
That's why a quote that says only “waterproof bathroom” leaves important questions unanswered. Ask which membrane family is proposed, where it will be applied, how many coats or layers are required, what curing period applies, and which adhesive and screed products are compatible. A shower waterproofing membrane system should be specified as a coordinated assembly rather than a collection of unrelated materials.
The installation sequence matters too. The base must be clean, stable and prepared. Falls and wastes need to be established before the membrane is covered. The installer should treat penetrations and junctions, allow the system to cure as required, and record the work before tiling begins.
A good installer can explain why the selected membrane suits your substrate and how the tile adhesive will interact with it. If the only answer is that the product is commonly used, ask for the technical data and the installation method.
Shower Tray, Full-Floor and Level-Access System Choices
Membrane selection is only half the design decision. The room layout determines how water is contained, where it travels and how much of the floor needs protection.
A localised shower-tray approach concentrates waterproofing on the shower footprint. It can suit a compact ensuite with a clear hob, controlled shower area and effective screen. The shower tray or formed base must still direct water to the waste, and the junction between the shower area and the rest of the room must be properly resolved.
A full-floor wet-area system extends protection across the bathroom floor and connects it with the wall treatment. This approach gives the room a broader moisture-management zone. It can be particularly sensible where splash travels beyond the shower, where the bathroom sits above living space, or where a frameless screen offers less physical containment.
A level-access system removes or reduces the threshold at the shower entry. That improves accessibility and creates a clean visual line, but it also turns the floor into a carefully controlled drainage plane. The fall, waste capacity, screen position, doorway detail and floor build-up must work together.
| Bathroom configuration | Typical system approach | Key design pressures | Main risk to manage |
|---|---|---|---|
| Small ensuite | Localised shower area or full-floor treatment | Limited space and close fixture spacing | Splash reaching an unprotected transition |
| Family bathroom | Full-floor wet-area system | Multiple users, bath or shower overlap and cleaning water | Water moving beyond the shower zone |
| Upstairs bathroom over living space | Full-floor system with careful waste and junction detailing | Protection of the ceiling and structure below | Concealed damage after a small leak |
| Aged-care or accessible bathroom | Level-access system | Continuous falls, threshold and screen design | Water escaping through the entry or ponding |
The substrate changes the calculation. Timber-based floors move differently from concrete slabs. A screed may create the required fall, but it also adds another layer whose bond, curing and junctions need attention. A waste that sits too high can force a poor fall, while a waste that sits too low can create a weak or uneven connection.
The Victorian Building Authority also expects an enclosed shower to have a screen designed and installed to prevent water spreading beyond the shower area, as explained in the NCC guidance on waterproofing houses. A screen isn't a substitute for waterproofing, and waterproofing isn't a substitute for sensible screen design.
What AS 3740 and the NCC Actually Require on Site
The practical starting point is the NCC 2022 Housing Provisions and AS 3740:2021. The NCC allows two Deemed-to-Satisfy pathways, AS 3740 or the Housing Provisions in Part 10.2. They aren't options to mix selectively. If a project uses AS 3740, it still needs to satisfy the relevant NCC Housing Provisions clauses, including requirements for wet-area protection and floor wastes.
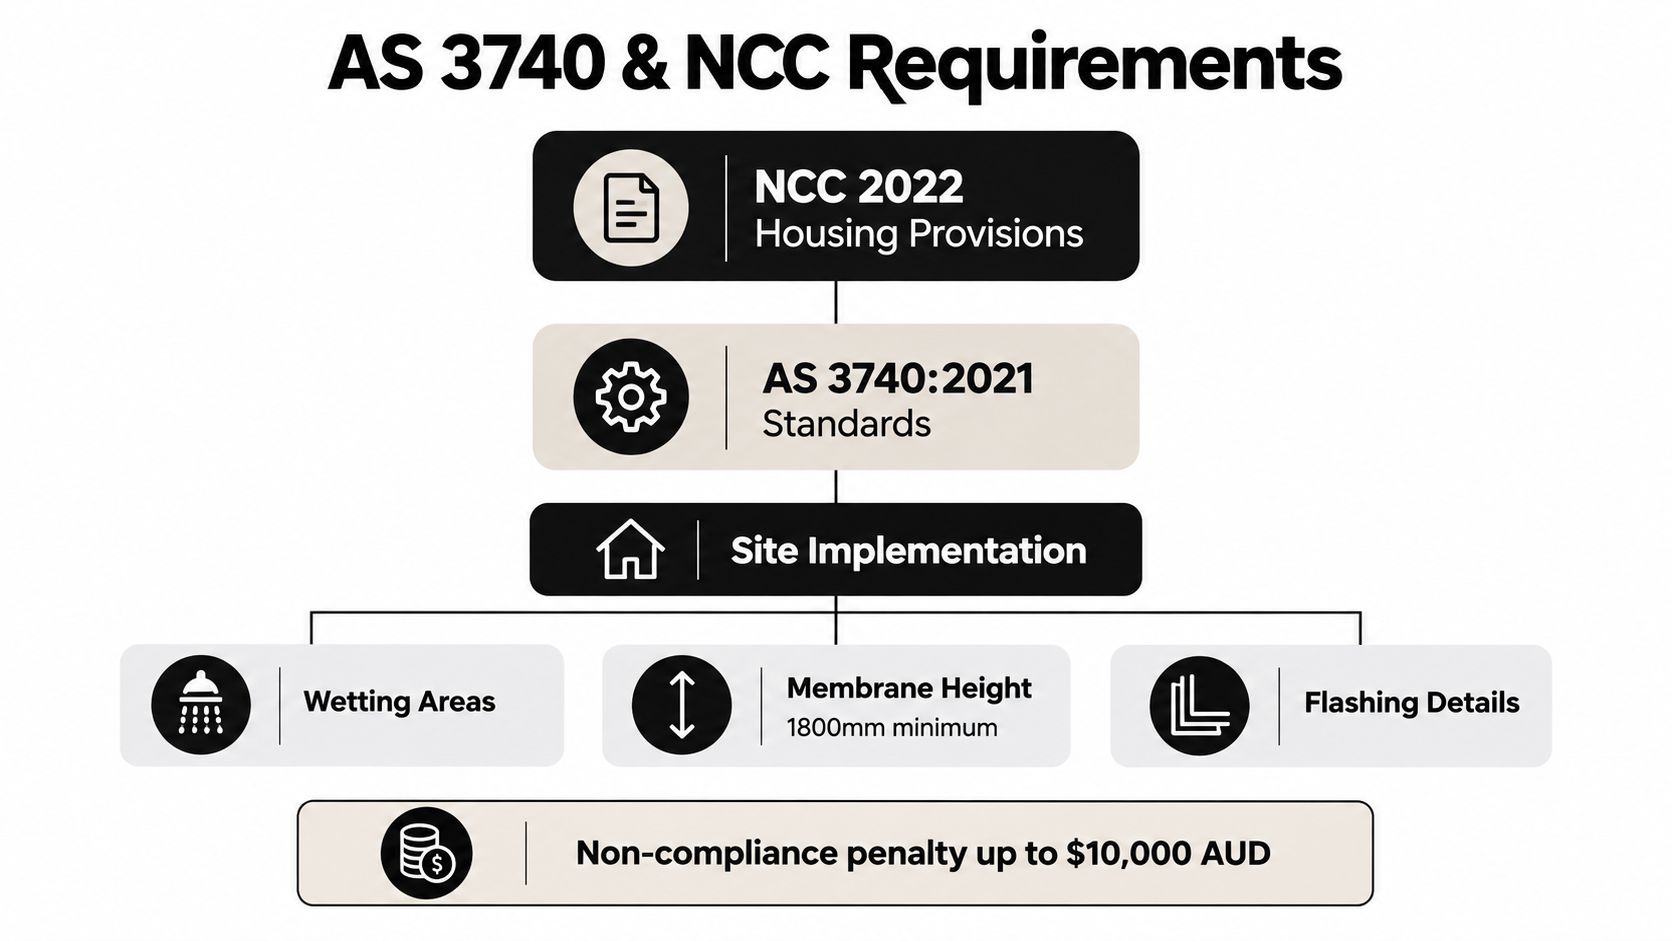
For a residential shower, the shower floor must be waterproof, including a hob or step-down. Shower walls must be waterproof to at least 1,800 millimetres above the floor substrate, and wall junctions and joints within the shower area must be waterproof for at least 40 millimetres on either side of the junction, according to the NCC 2022 wet-area waterproofing provisions.
These dimensions explain why a few painted patches around the waste don't represent a complete system. The waterproofing needs to continue up the shower walls and through vulnerable junctions. Service penetrations, wall-to-floor junctions and changes in level also need deliberate treatment.
Waterproof and water-resistant aren't interchangeable
The substrate determines the level of protection required outside the shower. Concrete, compressed fibre-cement and fibre-cement sheet flooring may generally be water resistant outside the shower, while timber-based floors such as particleboard and plywood must be waterproof. The NCC requirements for wet-area building elements sets out this distinction.
Water-resistant construction tolerates limited moisture exposure without acting as a complete barrier. Waterproof construction is intended to stop water passing into the building element. A homeowner should therefore ask what the floor is made from and why the proposed coverage matches that substrate and bathroom layout.
Falls should direct water to the waste rather than leave a shallow puddle beside a wall, hob or screen. Look for a continuous path to the waste, a stable waste connection and sealed details around floor drains. On walls, check mixer penetrations, shower outlets, niches and any pipework. These small openings are routine failure points because they interrupt the otherwise continuous membrane.
A pre-tile inspection should confirm that the membrane is continuous, the corners are reinforced where specified, the penetrations are sealed and the system has cured before adhesive is applied. The Australian waterproofing standards guide can help homeowners frame those questions before the finished tile layer conceals the work.
How Leaks Actually Start and What Rectification Looks Like
A Melbourne apartment bathroom can look sound for months before the unit below reports a stain. In one typical rectification scenario, the visible symptom appeared in the downstairs ceiling, but the cause was a combination of inadequate fall, a blocked puddle flange, incompatible tile adhesive and an unsealed pipe penetration.
That combination matters because the leak wasn't explained by a single dramatic tear in the membrane. Water remained where it shouldn't, drainage was restricted, the adhesive affected the bond, and an opening around the pipe gave moisture a route into the surrounding construction. The same ceiling stain could have been caused by any one of those details, which is why diagnosis must come before demolition.
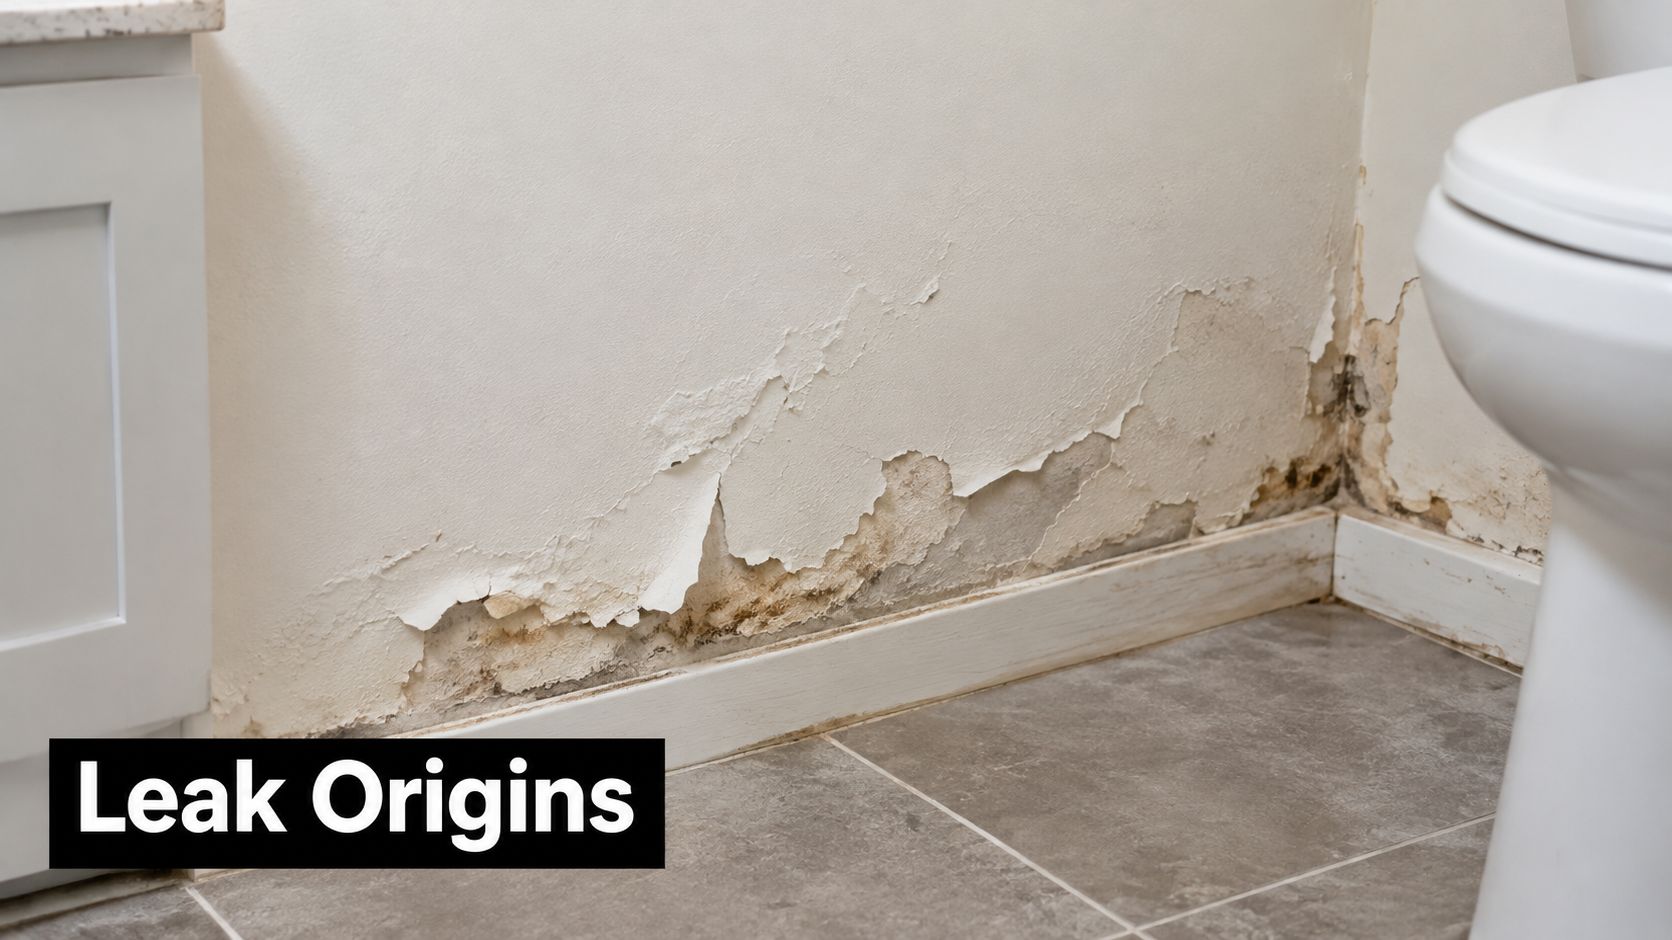
Four failure patterns deserve attention
Undrained water can sit against a wall or junction when the fall is too shallow, interrupted or directed away from the waste. A blocked waste or puddle flange makes the drainage problem worse. If water is slow to clear, practical maintenance matters, and a resource on fixing a clogged shower drain may help distinguish a routine blockage from a deeper waterproofing issue.
Movement cracks often develop where different materials meet, especially at wall-to-floor junctions or around a change in substrate. A rigid finish can hide movement until the joint, grout or membrane detail begins to fail.
Poorly sealed penetrations include mixers, shower outlets, wastes and other services passing through the waterproofed surface. The pipe itself may be sound, but the gap around it can let water bypass the membrane.
Incompatible layers can undermine the bond between membrane, screed, adhesive and tile. The installer needs to follow the selected system's technical instructions rather than assume that any primer or tile adhesive will work.
Rectification should be treated as a sequence: diagnose the source, open up enough of the area to see the construction, repair the substrate, correct the fall, reapply the compatible waterproofing system, and retile after the required curing stages. A surface patch may hide the symptom without repairing the drainage or junction detail.
Waterproofing repairs in showers and balconies often reveal that the visible damage is downstream from the original fault. The durable solution is therefore a system repair, not a bead of sealant placed over the first crack someone notices.
Choosing a Registered Builder for Bathroom Renovations
Your builder choice affects more than scheduling. It determines who coordinates demolition, structural changes, plumbing, waterproofing, tiling, screens and the documentation that ties those tasks together.
Consumer Affairs Victoria states that building work worth more than $10,000 generally requires a registered builder, as set out in its guidance on builders, tradespeople and building practitioners. Some individual categories are exempt when performed alone, including wall and floor tiling, electrical work, glazing, plumbing, gas-fitting and draining, painting, plastering, insulation and floor-covering installation.
That exemption doesn't mean a complete bathroom renovation is automatically outside the registration framework. A project that combines demolition, structural work, waterproofing, plumbing and tiling has a broader scope than tiling alone. Ask who holds responsibility for the whole contract, not only who will spread the adhesive.
Registration should answer practical questions
The Victorian Building and Plumbing Commission's domestic-builder application material requires qualifications, evidence of project work, a technical referee report, criminal-history information, identification and declarations. It also addresses selecting an appropriate waterproofing system and installing it to the manufacturer's specifications.
That makes registration a competency and suitability signal, not merely a business-name listing. You can verify the practitioner through the Victorian regulator's search service, then check that the registered builder is authorised for the work described in the contract.
Use this hiring checklist:
- Registered entity: Ask for the registered builder's name, registration details and relevant class.
- Project responsibility: Confirm who coordinates demolition, structural work, plumbing, waterproofing and tiling.
- System specification: Request the membrane family, substrate preparation method, junction treatment and compatible adhesive.
- Wet-area competency: Ask who will install the membrane and what relevant waterproofing experience supports that appointment.
- Evidence at completion: Confirm that photographs, product data and compliance documentation will be supplied before handover.
A contractor who can't explain the proposed system, the substrate or the pre-tile inspection process leaves you carrying unnecessary risk. Information should be clear before the first sheet is removed, not reconstructed after a leak.
For a renovation that needs coordinated waterproofing and tiling, licensed waterproofing contractors can be included in the comparison process alongside other qualified practitioners.
Your Pre-Tile Inspection Checklist and What to Keep on File
The most valuable inspection happens while the membrane is visible. Before tiles cover it, walk through the work with the builder or waterproofing installer and record the answers.
- Substrate: Confirm the base is sound, clean and suitable, with moisture condition checked where required.
- Falls and waste: Verify that the floor drains without ponding and that the waste, puddle flange and surrounding build-up are correctly connected.
- Primer and junctions: Check that primer, bond breakers, reinforcing bands and corner treatments are installed where the system requires them.
- Penetrations: Photograph sealed mixers, shower outlets, wastes, drains, niches and other services before covering.
- Membrane coverage: Confirm the membrane reaches the specified shower wall height and covers the required floor and junction areas.
- Build-up and curing: Ask what coats or layers were applied, when they were completed and whether the required cure time has passed.
- Adhesive compatibility: Keep written confirmation that the tile adhesive and screed are compatible with the membrane system.
Keep the registered builder's details and registration class with the product data sheets for the primer, membrane and adhesive. File any installation certificate, pre-tile photographs and maintenance notes covering the shower screen, wastes and sealants.
This paperwork is unglamorous, but it gives you a record of what sits behind the tiles. A compliant membrane can still be defeated by poor falls, movement or penetrations, so the useful question isn't “Which membrane did you use?” It's “How does the complete system manage water, and what evidence shows that it was installed correctly?”
Melbourne Tiling Services P/L coordinates bathroom renovations, waterproofing, screeding, tiling and frameless shower-screen installation across Melbourne and greater Victoria. For a system-focused renovation or leak rectification plan, visit Melbourne Tiling Services P/L to discuss the substrate, wet-area layout and pre-tile documentation you need.
Recent Comments