Bathroom Waterproofing System Guide for Melbourne Homes

You wake up after a long shower and notice a brown stain spreading across the ceiling below. The bathroom renovation looked finished, but the leak has turned a completed project into demolition, drying and repair. By the time water becomes visible, it may already have travelled through tile joints, screeds, wall junctions or a pipe penetration.

That's why a bathroom waterproofing system shouldn't be judged by the brand on the drum or by a photo of a freshly painted membrane. It's a connected arrangement of substrate preparation, falls, wastes, penetrations, junction treatments, compatible products and installation records. In Melbourne bathroom renovations, the membrane is only one part of the work.

Table of Contents

Why a Bathroom Waterproofing System Matters

A paint-on membrane can be perfectly suitable and still fail as part of a poorly designed wet area. If the substrate moves, the fall holds water, the waste connection is blocked or a mixer penetration remains open, the membrane is being asked to solve problems it wasn't designed to solve.

Think of the system as a controlled path for water. The finished surface sheds most water, the membrane manages moisture behind the tiles, the screed directs water towards the waste, and carefully treated corners and penetrations stop water entering the structure. Each layer supports the next one.

That matters particularly in Melbourne homes with older timber subfloors, upstairs bathrooms over living areas, balconies that can act as overflow paths, and level-access or frameless showers. A traditional hob may help contain water. A flush entry has less tolerance for poor falls or an incorrectly positioned waste, while a frameless screen can allow more splash beyond the immediate shower footprint.
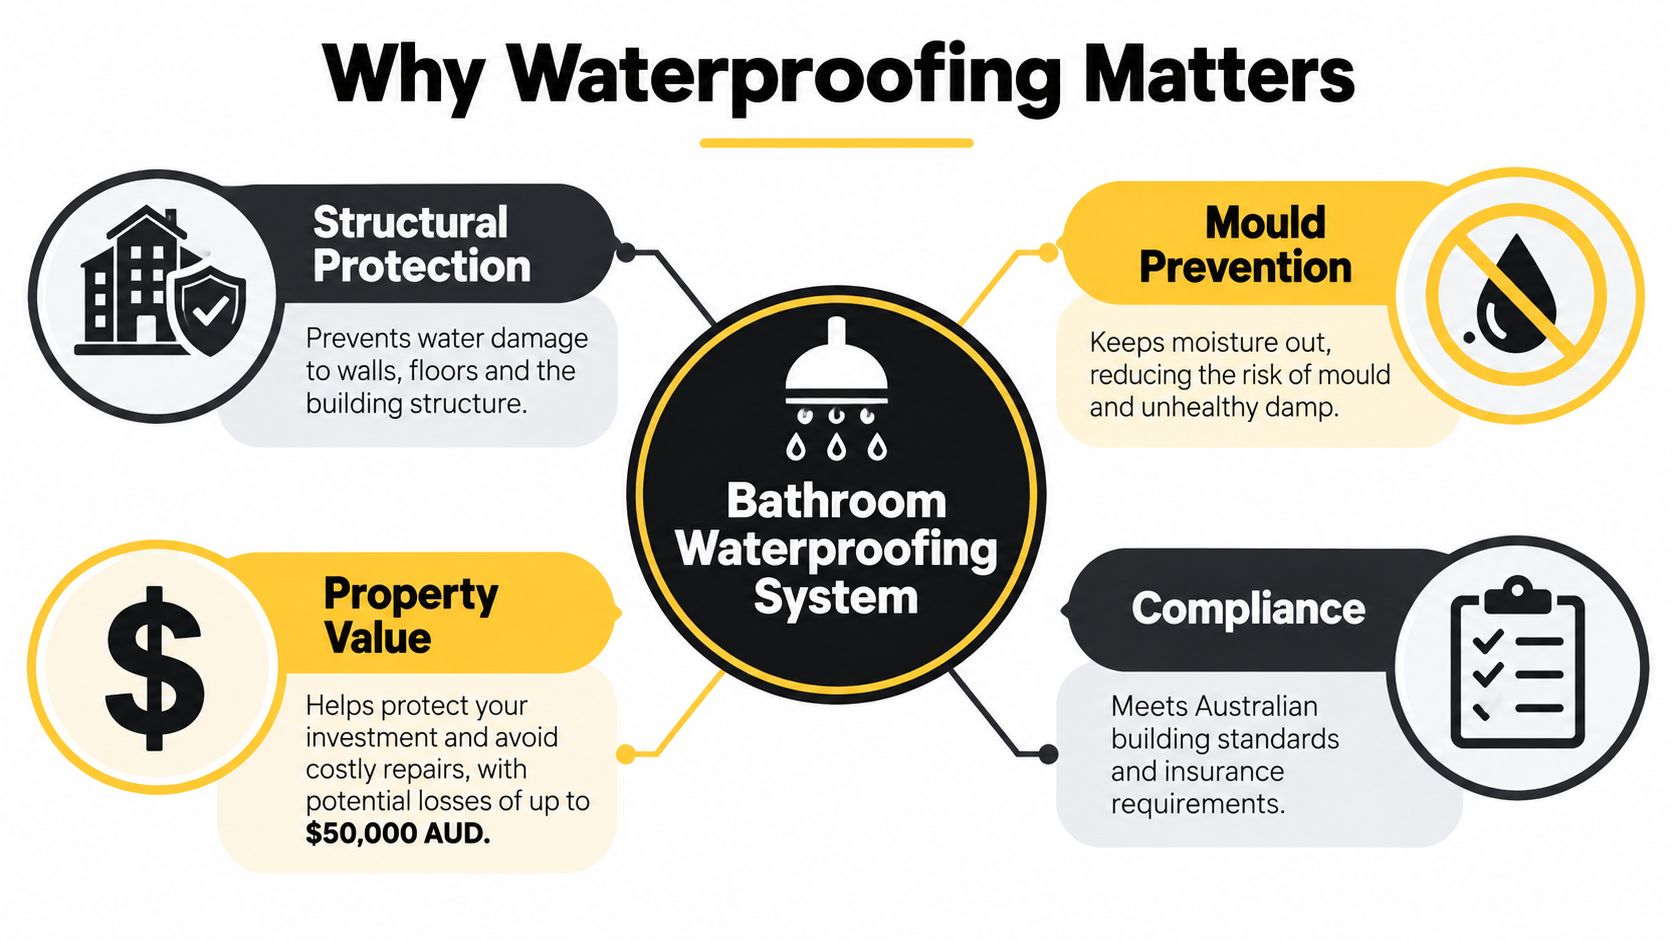
An infographic titled Why Waterproofing Matters, detailing benefits like structural protection, mould prevention, property value, and compliance.

The system sits behind the visible finish

Tiles, grout and silicone help manage surface water, but they aren't the primary waterproof barrier. Water can move through grout joints, around fixtures and into changes of plane. The hidden construction has to control that moisture before it reaches timber, plasterboard, framing or the room below.

Australia's framework treats waterproofing as a building-compliance function, not just a finishing task. The ABCB overview of waterproofing houses explains how the NCC and AS 3740 work together across bathrooms, showers, laundries and sanitary compartments.

Practical rule: Evaluate the complete wet-area system, not just the membrane product. A product brochure can't show whether the waste, falls, junctions and penetrations were prepared correctly.

Before tiles conceal the work, you should be able to identify what the substrate is, where water is meant to go, how the membrane connects at corners and junctions, and which products are approved to sit together. That information is more useful than choosing between two similar-looking membrane colours.

The Three Main Membrane Types and How Each Behaves

Australian bathroom work generally uses three membrane families: liquid-applied membranes, sheet membranes and cementitious waterproofing. The right choice depends on the substrate, geometry, movement, drainage design and the manufacturer's compatible system, not on a simple ranking of products.

A liquid-applied membrane behaves like a thick, flexible paint film, although it must be installed as a tested waterproofing product rather than ordinary paint. The installer applies it to the prepared surface, builds the required coverage and reinforces vulnerable locations such as corners, junctions and penetrations. It suits irregular shower walls, niches and detailed layouts because it can follow the shape of the room.
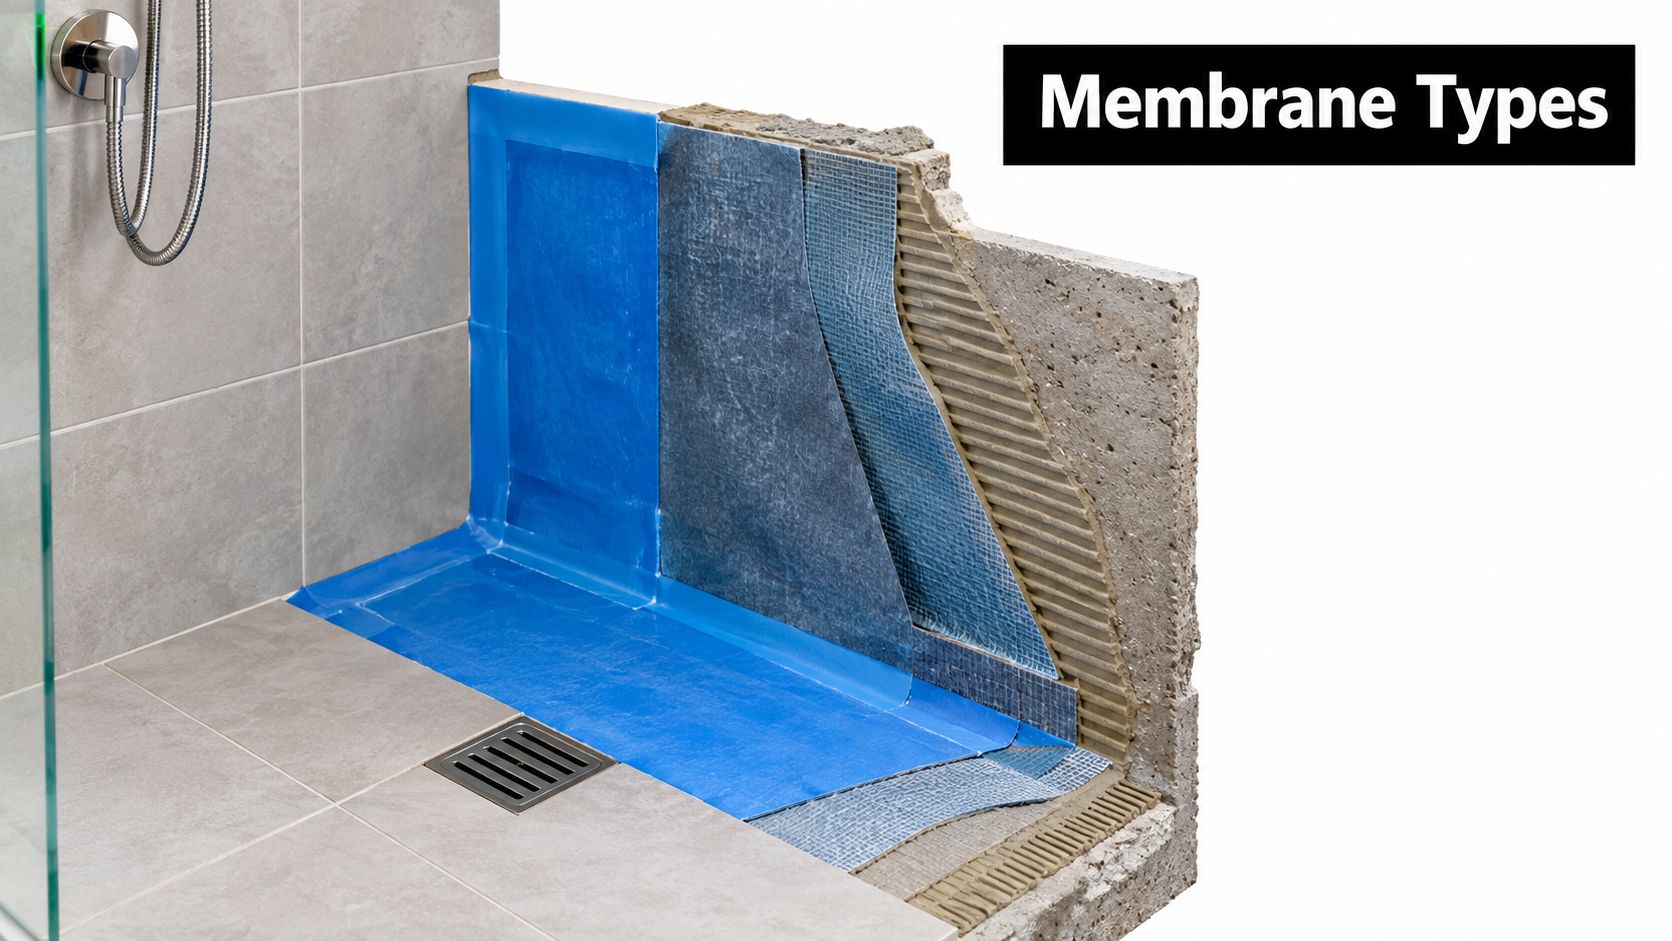
A cutaway view showing the layers of a professional bathroom waterproofing system installed in a shower area.

A sheet membrane is a pre-made waterproof skin. The installer bonds or fixes it according to the system instructions, then seals overlaps, corners, changes of plane and penetrations. Because the sheet arrives with a consistent manufactured body, it can be useful across broad floor areas, provided the substrate is suitable and the joints are detailed correctly.

Cementitious waterproofing is a cement-based slurry or coating that bonds closely to masonry and cement-based surfaces. It's commonly considered where a concrete slab, cement screed or masonry background provides a stable base. It isn't automatically suitable for every substrate, so the proposed system still needs to address movement, priming, curing and tile adhesion.

The supporting products are part of the membrane

A primer prepares the surface for the next layer. A bond breaker or reinforcing band helps manage movement at wall-to-floor junctions and internal corners. Pipe seals and compatible collars close around mixers, outlets and wastes. Tile adhesive then has to bond to the cured membrane without softening it or pulling it away from the substrate.

That's why a quote that says only “waterproof bathroom” leaves important questions unanswered. Ask which membrane family is proposed, where it will be applied, how many coats or layers are required, what curing period applies, and which adhesive and screed products are compatible. A shower waterproofing membrane system should be specified as a coordinated assembly rather than a collection of unrelated materials.

The installation sequence matters too. The base must be clean, stable and prepared. Falls and wastes need to be established before the membrane is covered. The installer should treat penetrations and junctions, allow the system to cure as required, and record the work before tiling begins.

A good installer can explain why the selected membrane suits your substrate and how the tile adhesive will interact with it. If the only answer is that the product is commonly used, ask for the technical data and the installation method.

Shower Tray, Full-Floor and Level-Access System Choices

Membrane selection is only half the design decision. The room layout determines how water is contained, where it travels and how much of the floor needs protection.

A localised shower-tray approach concentrates waterproofing on the shower footprint. It can suit a compact ensuite with a clear hob, controlled shower area and effective screen. The shower tray or formed base must still direct water to the waste, and the junction between the shower area and the rest of the room must be properly resolved.

A full-floor wet-area system extends protection across the bathroom floor and connects it with the wall treatment. This approach gives the room a broader moisture-management zone. It can be particularly sensible where splash travels beyond the shower, where the bathroom sits above living space, or where a frameless screen offers less physical containment.

A level-access system removes or reduces the threshold at the shower entry. That improves accessibility and creates a clean visual line, but it also turns the floor into a carefully controlled drainage plane. The fall, waste capacity, screen position, doorway detail and floor build-up must work together.

Bathroom configuration Typical system approach Key design pressures Main risk to manage
Small ensuite Localised shower area or full-floor treatment Limited space and close fixture spacing Splash reaching an unprotected transition
Family bathroom Full-floor wet-area system Multiple users, bath or shower overlap and cleaning water Water moving beyond the shower zone
Upstairs bathroom over living space Full-floor system with careful waste and junction detailing Protection of the ceiling and structure below Concealed damage after a small leak
Aged-care or accessible bathroom Level-access system Continuous falls, threshold and screen design Water escaping through the entry or ponding

The substrate changes the calculation. Timber-based floors move differently from concrete slabs. A screed may create the required fall, but it also adds another layer whose bond, curing and junctions need attention. A waste that sits too high can force a poor fall, while a waste that sits too low can create a weak or uneven connection.

The Victorian Building Authority also expects an enclosed shower to have a screen designed and installed to prevent water spreading beyond the shower area, as explained in the NCC guidance on waterproofing houses. A screen isn't a substitute for waterproofing, and waterproofing isn't a substitute for sensible screen design.

What AS 3740 and the NCC Actually Require on Site

The practical starting point is the NCC 2022 Housing Provisions and AS 3740:2021. The NCC allows two Deemed-to-Satisfy pathways, AS 3740 or the Housing Provisions in Part 10.2. They aren't options to mix selectively. If a project uses AS 3740, it still needs to satisfy the relevant NCC Housing Provisions clauses, including requirements for wet-area protection and floor wastes.
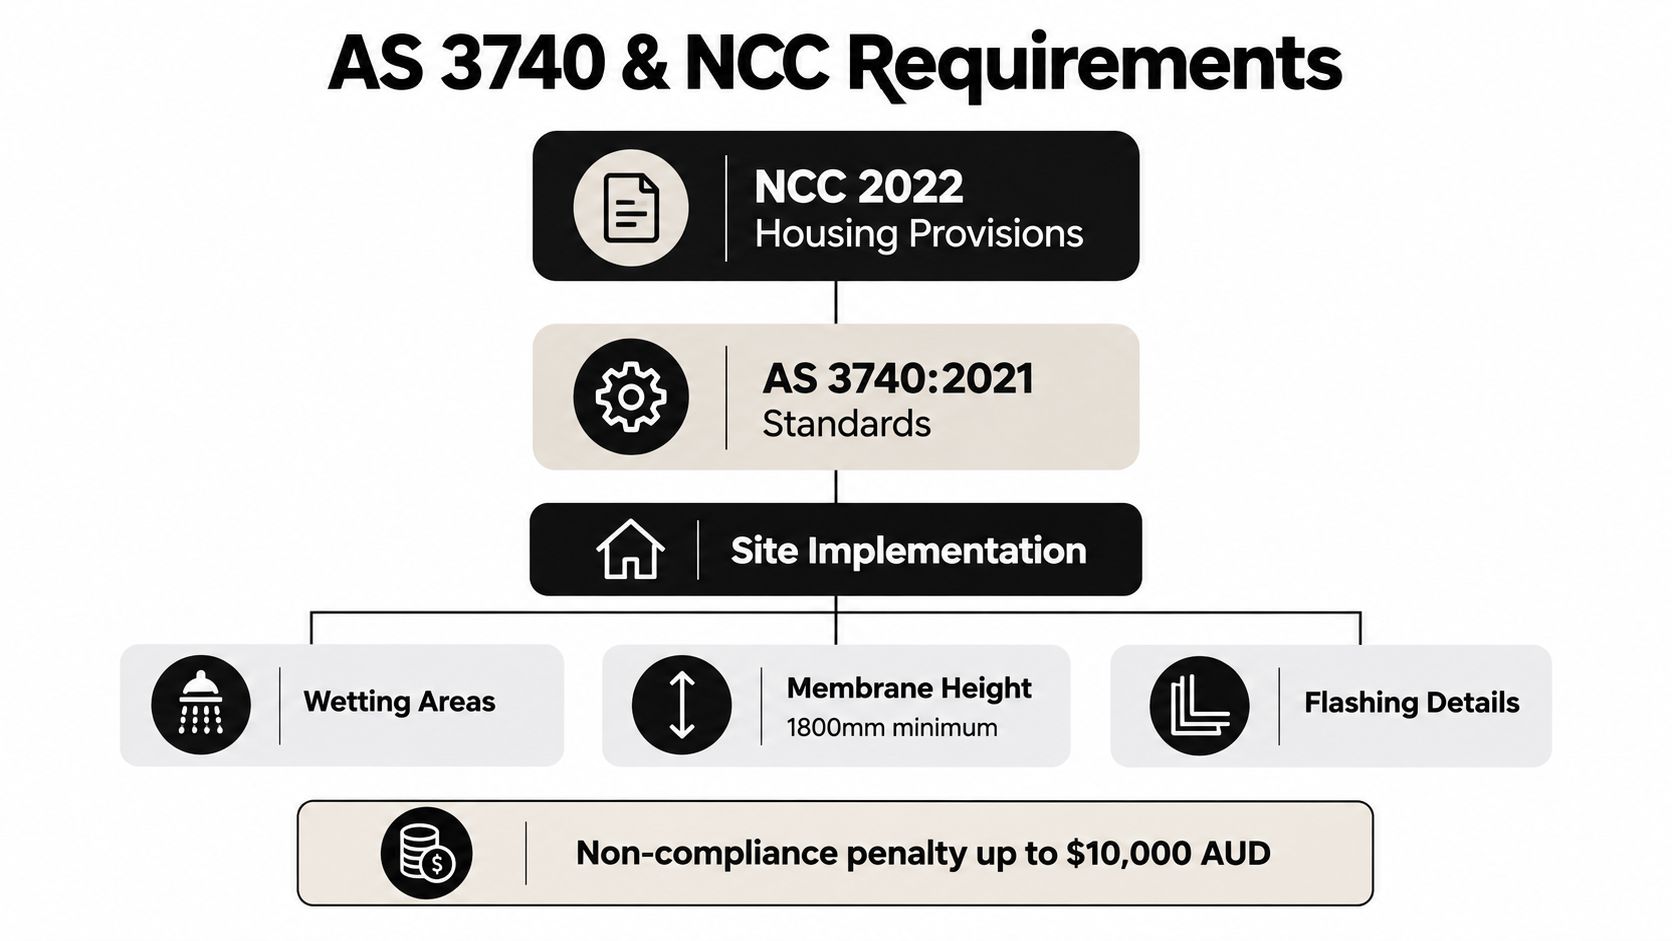
A diagram outlining AS 3740 and NCC 2022 standards for bathroom waterproofing requirements and site implementation.

For a residential shower, the shower floor must be waterproof, including a hob or step-down. Shower walls must be waterproof to at least 1,800 millimetres above the floor substrate, and wall junctions and joints within the shower area must be waterproof for at least 40 millimetres on either side of the junction, according to the NCC 2022 wet-area waterproofing provisions.

These dimensions explain why a few painted patches around the waste don't represent a complete system. The waterproofing needs to continue up the shower walls and through vulnerable junctions. Service penetrations, wall-to-floor junctions and changes in level also need deliberate treatment.

Waterproof and water-resistant aren't interchangeable

The substrate determines the level of protection required outside the shower. Concrete, compressed fibre-cement and fibre-cement sheet flooring may generally be water resistant outside the shower, while timber-based floors such as particleboard and plywood must be waterproof. The NCC requirements for wet-area building elements sets out this distinction.

Water-resistant construction tolerates limited moisture exposure without acting as a complete barrier. Waterproof construction is intended to stop water passing into the building element. A homeowner should therefore ask what the floor is made from and why the proposed coverage matches that substrate and bathroom layout.

Falls should direct water to the waste rather than leave a shallow puddle beside a wall, hob or screen. Look for a continuous path to the waste, a stable waste connection and sealed details around floor drains. On walls, check mixer penetrations, shower outlets, niches and any pipework. These small openings are routine failure points because they interrupt the otherwise continuous membrane.

A pre-tile inspection should confirm that the membrane is continuous, the corners are reinforced where specified, the penetrations are sealed and the system has cured before adhesive is applied. The Australian waterproofing standards guide can help homeowners frame those questions before the finished tile layer conceals the work.

How Leaks Actually Start and What Rectification Looks Like

A Melbourne apartment bathroom can look sound for months before the unit below reports a stain. In one typical rectification scenario, the visible symptom appeared in the downstairs ceiling, but the cause was a combination of inadequate fall, a blocked puddle flange, incompatible tile adhesive and an unsealed pipe penetration.

That combination matters because the leak wasn't explained by a single dramatic tear in the membrane. Water remained where it shouldn't, drainage was restricted, the adhesive affected the bond, and an opening around the pipe gave moisture a route into the surrounding construction. The same ceiling stain could have been caused by any one of those details, which is why diagnosis must come before demolition.
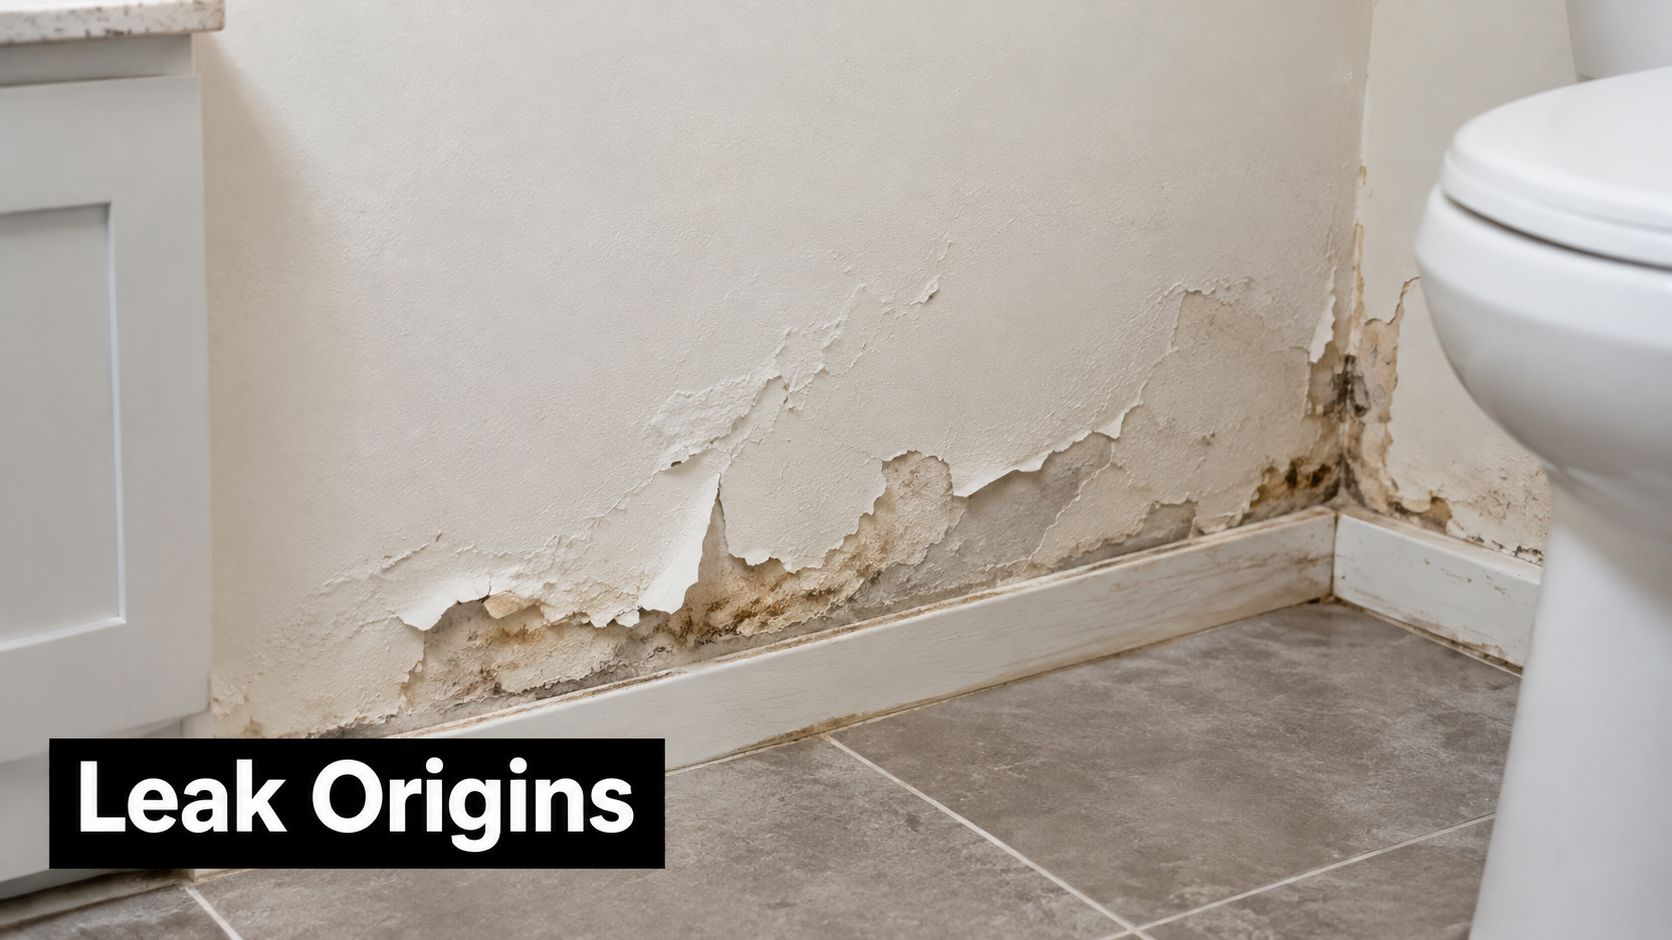
Severe water damage showing peeling paint and mold on a bathroom wall near a toilet base.

Four failure patterns deserve attention

Undrained water can sit against a wall or junction when the fall is too shallow, interrupted or directed away from the waste. A blocked waste or puddle flange makes the drainage problem worse. If water is slow to clear, practical maintenance matters, and a resource on fixing a clogged shower drain may help distinguish a routine blockage from a deeper waterproofing issue.

Movement cracks often develop where different materials meet, especially at wall-to-floor junctions or around a change in substrate. A rigid finish can hide movement until the joint, grout or membrane detail begins to fail.

Poorly sealed penetrations include mixers, shower outlets, wastes and other services passing through the waterproofed surface. The pipe itself may be sound, but the gap around it can let water bypass the membrane.

Incompatible layers can undermine the bond between membrane, screed, adhesive and tile. The installer needs to follow the selected system's technical instructions rather than assume that any primer or tile adhesive will work.

Rectification should be treated as a sequence: diagnose the source, open up enough of the area to see the construction, repair the substrate, correct the fall, reapply the compatible waterproofing system, and retile after the required curing stages. A surface patch may hide the symptom without repairing the drainage or junction detail.

Waterproofing repairs in showers and balconies often reveal that the visible damage is downstream from the original fault. The durable solution is therefore a system repair, not a bead of sealant placed over the first crack someone notices.

Choosing a Registered Builder for Bathroom Renovations

Your builder choice affects more than scheduling. It determines who coordinates demolition, structural changes, plumbing, waterproofing, tiling, screens and the documentation that ties those tasks together.

Consumer Affairs Victoria states that building work worth more than $10,000 generally requires a registered builder, as set out in its guidance on builders, tradespeople and building practitioners. Some individual categories are exempt when performed alone, including wall and floor tiling, electrical work, glazing, plumbing, gas-fitting and draining, painting, plastering, insulation and floor-covering installation.

That exemption doesn't mean a complete bathroom renovation is automatically outside the registration framework. A project that combines demolition, structural work, waterproofing, plumbing and tiling has a broader scope than tiling alone. Ask who holds responsibility for the whole contract, not only who will spread the adhesive.

Registration should answer practical questions

The Victorian Building and Plumbing Commission's domestic-builder application material requires qualifications, evidence of project work, a technical referee report, criminal-history information, identification and declarations. It also addresses selecting an appropriate waterproofing system and installing it to the manufacturer's specifications.

That makes registration a competency and suitability signal, not merely a business-name listing. You can verify the practitioner through the Victorian regulator's search service, then check that the registered builder is authorised for the work described in the contract.

Use this hiring checklist:

  • Registered entity: Ask for the registered builder's name, registration details and relevant class.
  • Project responsibility: Confirm who coordinates demolition, structural work, plumbing, waterproofing and tiling.
  • System specification: Request the membrane family, substrate preparation method, junction treatment and compatible adhesive.
  • Wet-area competency: Ask who will install the membrane and what relevant waterproofing experience supports that appointment.
  • Evidence at completion: Confirm that photographs, product data and compliance documentation will be supplied before handover.

A contractor who can't explain the proposed system, the substrate or the pre-tile inspection process leaves you carrying unnecessary risk. Information should be clear before the first sheet is removed, not reconstructed after a leak.

For a renovation that needs coordinated waterproofing and tiling, licensed waterproofing contractors can be included in the comparison process alongside other qualified practitioners.

Your Pre-Tile Inspection Checklist and What to Keep on File

The most valuable inspection happens while the membrane is visible. Before tiles cover it, walk through the work with the builder or waterproofing installer and record the answers.

  • Substrate: Confirm the base is sound, clean and suitable, with moisture condition checked where required.
  • Falls and waste: Verify that the floor drains without ponding and that the waste, puddle flange and surrounding build-up are correctly connected.
  • Primer and junctions: Check that primer, bond breakers, reinforcing bands and corner treatments are installed where the system requires them.
  • Penetrations: Photograph sealed mixers, shower outlets, wastes, drains, niches and other services before covering.
  • Membrane coverage: Confirm the membrane reaches the specified shower wall height and covers the required floor and junction areas.
  • Build-up and curing: Ask what coats or layers were applied, when they were completed and whether the required cure time has passed.
  • Adhesive compatibility: Keep written confirmation that the tile adhesive and screed are compatible with the membrane system.

Keep the registered builder's details and registration class with the product data sheets for the primer, membrane and adhesive. File any installation certificate, pre-tile photographs and maintenance notes covering the shower screen, wastes and sealants.

This paperwork is unglamorous, but it gives you a record of what sits behind the tiles. A compliant membrane can still be defeated by poor falls, movement or penetrations, so the useful question isn't “Which membrane did you use?” It's “How does the complete system manage water, and what evidence shows that it was installed correctly?”


Melbourne Tiling Services P/L coordinates bathroom renovations, waterproofing, screeding, tiling and frameless shower-screen installation across Melbourne and greater Victoria. For a system-focused renovation or leak rectification plan, visit Melbourne Tiling Services P/L to discuss the substrate, wet-area layout and pre-tile documentation you need.
Licensed Waterproofing Contractors: A 2026 Guide

Between July 2021 and December 2022, 17 per cent of inspected Victorian properties had at least one waterproofing compliance risk, with missing water stops or flashing accounting for 41 per cent of identified issues. Hiring properly licensed contractors who document every inspection hold-point is the practical way to reduce the chance that a small concealed omission becomes major building damage.

You may be choosing tiles, comparing tapware and looking at bathroom layouts right now. The waterproofing sits underneath all of that work, out of sight, and it's usually only noticed after swelling skirtings, loose tiles, staining or mould reveal that water has travelled somewhere it shouldn't.

A licence matters, but it isn't a complete quality guarantee. The safer choice is a waterproofing contractor who can prove the right credentials, coordinate with registered builders and other trades, follow the relevant NCC and AS 3740 pathway, and provide photographs and records before the membrane disappears beneath screed, adhesive and tiles.

Table of Contents

Why Licensed Waterproofing Contractors Matter in Melbourne

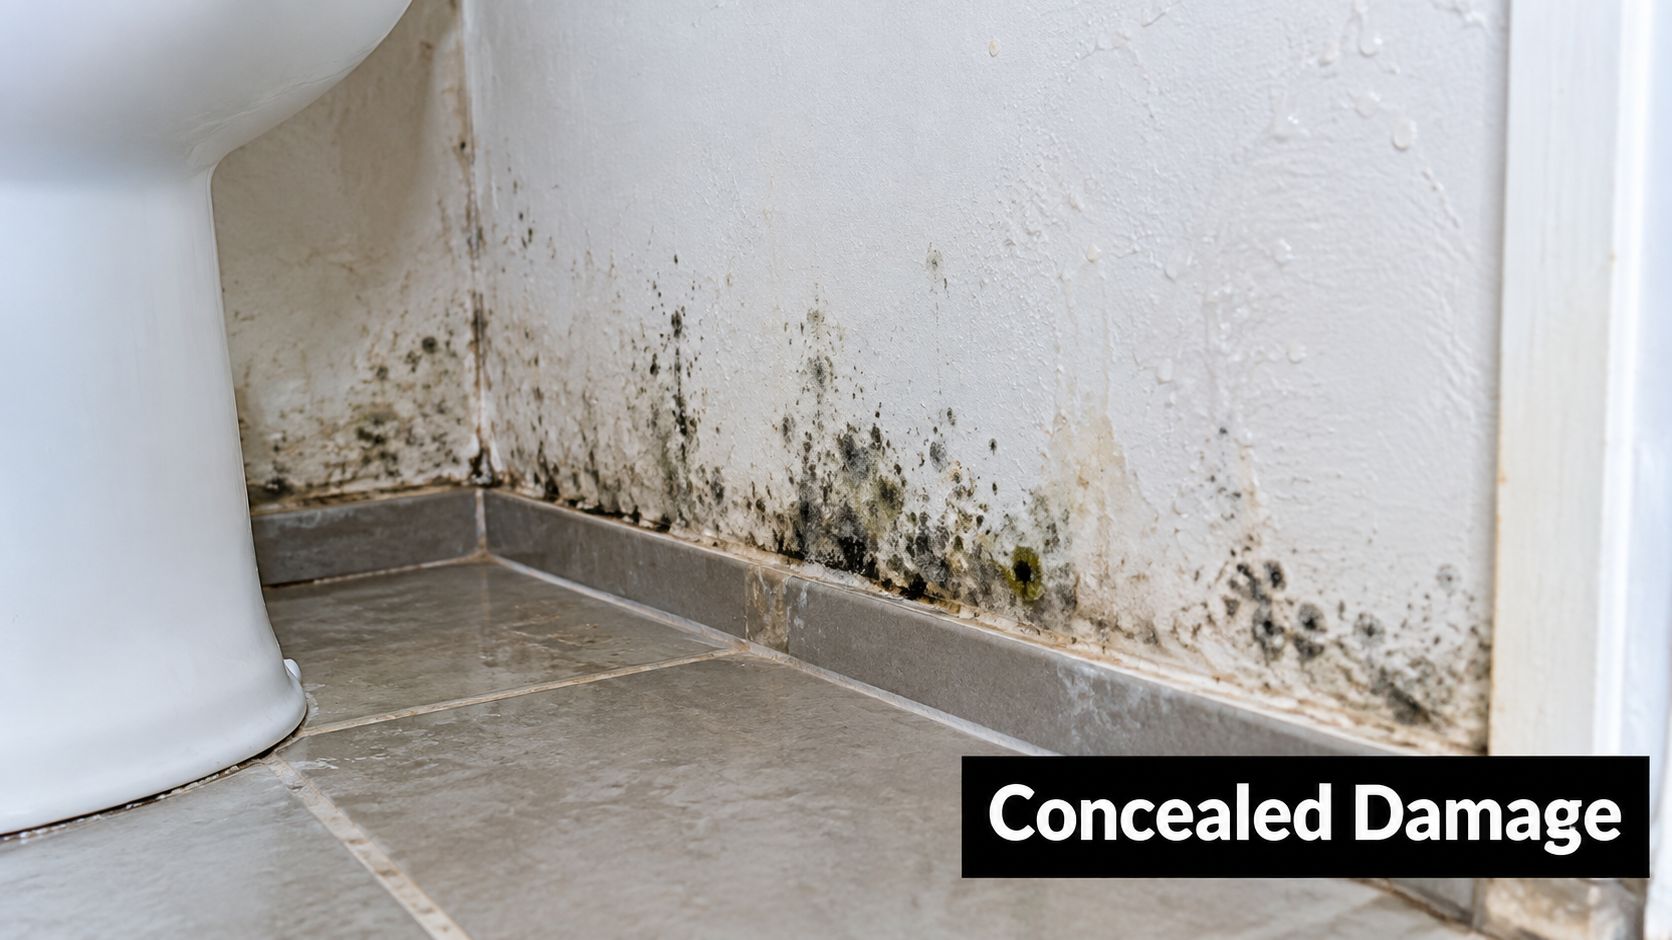
A bathroom can look complete while a small waterproofing omission is already sending moisture into the wall. By the time swollen skirtings, loose tiles, staining or mould appear, the membrane is buried beneath finishes and the repair may involve the substrate, cabinetry and adjoining rooms.

The Victorian Building Authority inspected 2,592 properties under construction between July 2021 and December 2022. At least one compliance risk connected with preventing water damage appeared in 467 inspections, or 17 per cent of properties assessed. Missing water stops or flashing made up 41 per cent of identified issues, while incomplete membranes over water stops and perimeter flashing made up a further 19 per cent. These defects occurred around bath hobs, beneath bath flanges, in shower enclosures and at door-to-floor junctions. (Victorian Building Authority defect research)

A bathroom wall with severe black mold growth caused by moisture and potential water damage behind drywall.

A missing flashing detail may look minor during the installation. Once the wall is lined and tiled, water can travel behind the finish, wet the substrate and stay concealed. Grout replacement will not solve a failure that began at a junction or penetration.

What a licensed contractor actually delivers

A licence confirms a legal qualification, not the quality of every detail. A competent contractor treats waterproofing as a connected system: substrate preparation, falls, wastes, bond breakers, puddle flanges, penetrations, movement joints, membrane thickness, curing and the handover between trades all need to work together.

Bathroom renovations add practical constraints. An existing slab, timber floor, old plumbing layout or uneven wall can affect the preparation and detailing. Those conditions should be identified before product is applied, with unsuitable surfaces corrected rather than hidden beneath the membrane.

Practical rule: Ask where water will drain, how every penetration will be sealed and what photographs you will receive before tiling. If the contractor cannot answer clearly, the licence number alone is not enough.

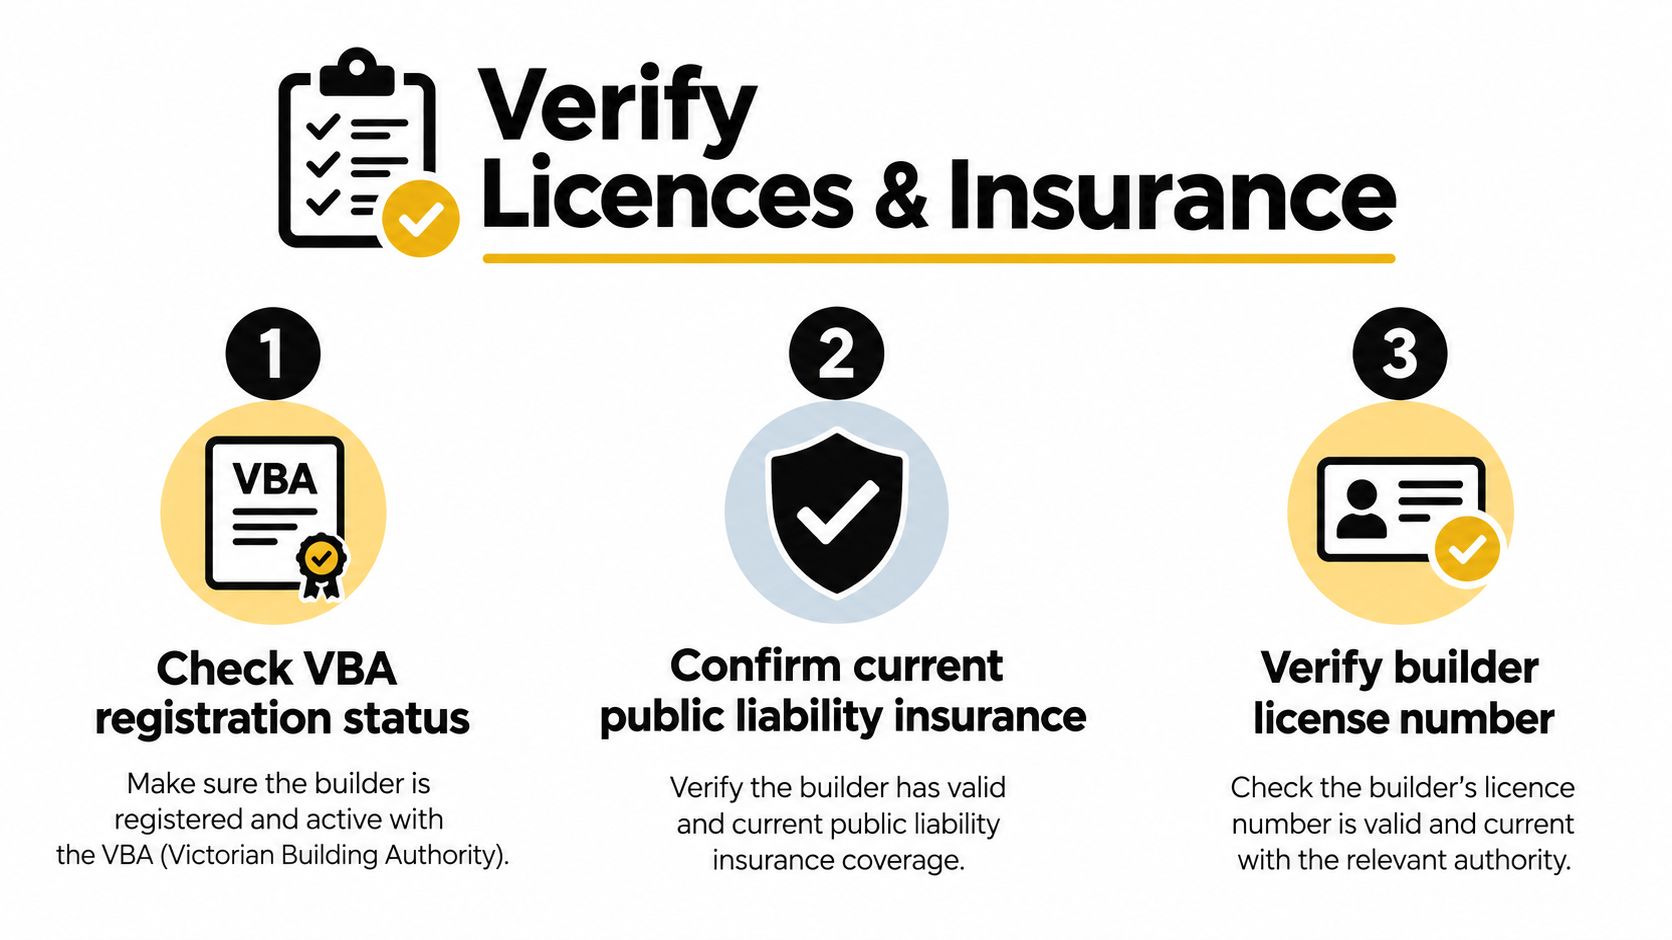
The hiring decision should test three areas: legal credentials, technical method and documented proof. Request photographs at inspection hold-points before screed, adhesive or tiles cover the membrane. That evidence gives the homeowner, property manager and registered builder something concrete to check, instead of treating a certificate or attractive tiled finish as proof that the wet area is compliant.

How to Verify Licences, Insurance and Builder Registration

A licence number can be genuine while the person signing your quote remains unclear. Before work starts, identify the trading name, legal business entity, individual licence or registration number, and the registered builder responsible for the broader renovation. Put those details beside the contract, quote and permit paperwork so responsibility does not disappear between the waterproofing subcontractor and the builder.

For waterproofing work in Victoria, check the contractor's current status through the relevant Victorian plumbing and trade registration records. Confirm that the registration category covers the proposed work, then search the official Victorian Building Authority records for the builder. This matters particularly where the renovation involves structural changes, substantial substrate work or a building permit. A logo, business card or old certificate is not verification.

Separate the trade role from the builder role

The waterproofing specialist may install the membrane, while the undertaking builder coordinates the renovation and carries wider project responsibilities. Ask whether that builder is registered as an Unlimited Builder or Restricted Builder, what the registration covers, and whose name will appear on the contract and permit documentation.

Ask for current certificates of public liability and indemnity insurance. Check the insured legal entity, policy dates, exclusions, project type and applicable coverage limits. Contact the insurer or intermediary using details printed on the certificate, not a phone number supplied informally. An expired policy, a different business name or an exclusion for the proposed work can leave a defect dispute without the protection you expected.

Use these checks before signing:

  • Record the licence number and screenshot the register result: Include the date, licence holder, business name and status, then cross-check those details against the ABN on the quote and insurance certificate.
  • Confirm the builder appointment: Obtain the registered builder's name in writing and identify who controls the waterproofing scope, inspections and rectification if a defect appears.
  • Test the insurance evidence: Ask the broker or insurer to confirm that the named entity, renovation type and waterproofing work fall within the policy.
  • Match every contract party: The quote, contract, licence record, insurance certificate and payment details should point to the same legal business, or clearly identify each separate role.
  • Ask about permits and hold-points: Establish who appoints the relevant building surveyor and require written approval before screed, adhesive or tiles cover the membrane.
  • Require dated photographs: Request images of substrate preparation, junctions, penetrations, wastes, membrane coverage and cured details. Keep them with the contract and inspection records.

A checklist for verifying builder registration, public liability insurance, and license numbers for construction projects.

A builder's statutory warranty generally covers waterproofing defects for up to 10 years after completion, according to the Victorian Building Authority. That period does not close the responsibility gap if the contractor, builder and insurer cannot be matched to the work. The VBA's guidance also explains that a trade licence or certificate does not establish compliance across the whole bathroom, balcony or drainage system. (VBA guidance on water ingress and responsibility)

For background on the qualification behind this work, see the Certificate III in Construction Waterproofing. Verify the people, businesses, insurance and photographic record before materials arrive.

Understanding AS 3740 and NCC Waterproofing Standards

The National Construction Code treats a bathroom as a wet area requiring protection against water damage. Under the NCC Housing Provisions, the shower floor must be waterproof, including a hob or step-down, while shower walls must be waterproof to at least 1,800 millimetres above the floor substrate. Wall junctions and joints inside the shower area must also be waterproof, extending at least 40 millimetres on either side of the junction. (NCC Housing Provisions for wet-area waterproofing)

Tiles don't replace the waterproofing system. They form the finished surface, while the membrane and associated detailing are what prevent water from reaching vulnerable construction beneath. The treatment outside a shower also depends on the substrate. Concrete, compressed fibre-cement and fibre-cement sheet flooring generally require water-resistant treatment outside the shower area, whereas timber floors, including particleboard and plywood, must be waterproof.

Read the detail, not just the product label

AS 3740 gives contractors a recognised pathway for wet-area detailing, but a product name doesn't tell you whether the installation will work. Ask how the contractor will prepare the substrate, manage movement, seal penetrations and connect the floor membrane to wastes, thresholds and wall junctions.

A practical comparison looks like this:

Area Requirement Common failure
Shower floor Waterproof the floor, including any hob or step-down Membrane stops short of the waste or is damaged during later work
Shower walls Waterproof to at least 1,800 millimetres above the floor substrate Wall coverage is reduced because the contractor measures from the finished tile level
Shower junctions Waterproof joints and junctions at least 40 millimetres on either side Corners, wall-to-floor junctions or movement joints lack compatible reinforcement
Timber floor outside the shower Waterproof treatment is required A system suited only to water-resistant concrete floors is used on a timber substrate
Concrete or fibre-cement floor outside the shower Water-resistant treatment generally applies The contractor ignores falls, perimeter detailing or penetrations because the area is outside the shower

Why small omissions matter

The VBA has recorded missing water stops, incomplete membrane coverage and unsuitable wall lining among wet-area compliance risks. Australian inspection evidence has also identified floor waterproofing that failed to extend at least 25 millimetres up the wall in more than 40 per cent of wet areas inspected in a Western Australian government inspection. That example demonstrates why a visual tile inspection cannot confirm concealed compliance.

Use this bathroom waterproofing standards guide as a prompt for questions, then ask your contractor to relate the proposed system to your actual substrate, layout and drainage design. A capable installer won't object to that conversation.

Waterproofing Membrane Systems Compared for Melbourne Renovations

The membrane choice should follow the building conditions, not a contractor's habit. A ground-floor ensuite on a concrete slab presents a different problem from a first-floor bathroom over timber, and a balcony remediation project adds exposed weather, drainage and movement to the decision.

The Australian Building Codes Board evidence review estimates that design-related causes account for 52 per cent of waterproofing defects in Class 2 buildings and 49 per cent in Class 3 to 9 buildings. That finding is a useful warning for Melbourne projects. A technically sound product can still fail when falls, thresholds, wastes, door tracks and substrate movement weren't coordinated before installation. (ABCB waterproofing evidence review)

Membrane type Best for Lifespan expectation Key consideration
Liquid-applied membrane Complex bathroom shapes, detailed junctions and areas where continuous coating is practical Depends on correct preparation, specified thickness, curing and protection from later trades Coating thickness can vary if the installer rushes or applies too little product
Sheet membrane Projects requiring a controlled factory-made sheet and clear overlaps Depends on sound bonding, sealed laps and protection during subsequent work Corners, penetrations and sheet joins need careful detailing
Cementitious coating Suitable mineral substrates and systems designed for compatible wet-area applications Depends on the specified system, substrate stability and correct application It must be compatible with movement, tile adhesive, screed and the manufacturer's installation method

Where each option can go wrong

Liquid membranes suit awkward corners and penetrations, but the installer must apply the specified number of coats at the required thickness and allow proper curing. A sheet system can provide consistent coverage, yet poorly bonded laps or an unsealed pipe penetration can defeat that advantage. Cementitious systems can work well on compatible substrates, but they aren't a universal answer for timber movement or every balcony condition.

Ask for the manufacturer's technical data sheet, the proposed primer, application thickness, number of coats, curing requirements and compatibility information for the planned screed and tile adhesive. Also ask who will protect the membrane after installation. A perfect membrane can be punctured by a later trade dragging materials across it.

For contractors, estimators and project managers coordinating complex scopes, a resource such as Exayard roofing estimating software can help organise material and labour allowances. It doesn't replace a site inspection or technical specification, but clear estimating makes it easier to compare like-for-like proposals.

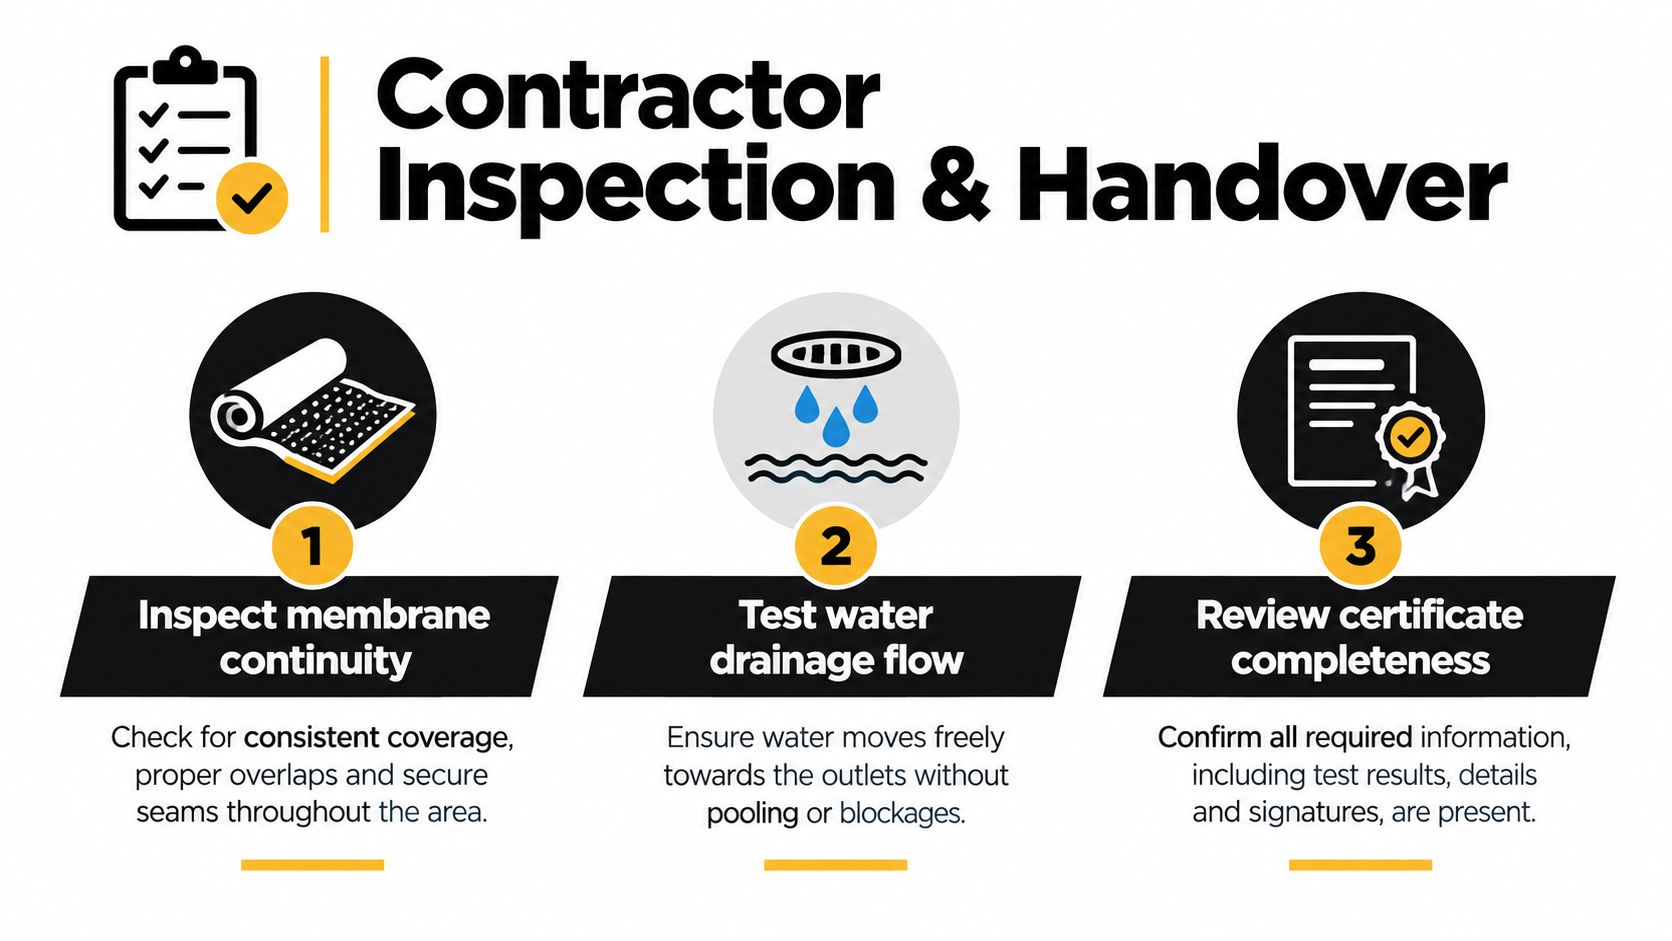
The Contractor Inspection and Handover Checklist

Treat each concealed stage as a hold-point. The contractor shouldn't just arrive, roll on a membrane and return after tiling. The work needs to be checked while it can still be corrected.

The Victorian Building Authority's guidance supports a documented sequence covering substrate verification, junction detailing, membrane application to manufacturer specifications, curing, photographs and building surveyor sign-off where a permit applies. Australian literature generally places waterproofing-defect prevalence in Class 2 buildings at approximately 20 to 40 per cent, which reinforces the value of inspecting the work before it disappears. (VBA waterproofing of wet areas guidance)

A three-step infographic showing the contractor inspection and handover process for waterproofing projects.

Before the membrane

The first hold-point is the substrate. Record the condition of the floor and walls, confirm that surfaces are clean and suitable, and measure the falls towards floor wastes before application. The contractor should identify movement joints, thresholds, puddle flanges and every pipe or fixture penetration.

Request marked-up plans or a simple site sketch showing waste locations, shower boundaries, door junctions and areas receiving membrane. Photograph the substrate and the fall measurements, not just the finished room.

During application

At the detailing stage, check that compatible primers, bond breakers and reinforcing are used at junctions, penetrations, floor wastes and movement joints. The membrane should be applied to the manufacturer's specified thickness and number of coats, with enough time allowed between coats and before covering.

Ask for photographs that show corners, wall-to-floor junctions, penetrations, wastes, hob details and the full shower area. Product technical data, batch information, application conditions and installer details should sit with those photographs. If a later trade damages the membrane, the record helps identify what was installed and where repair is required.

Before tiles conceal the work

Do not allow screed, adhesive, plasterboard or tiles to cover the system until the curing period has passed and the inspection has been completed. Check that drainage works as intended, that water doesn't pond at thresholds and that the membrane remains continuous around fixtures and junctions.

Where a building permit applies, the relevant building surveyor must be satisfied that the work complies with the Building Act 1993 and Building Regulations 2018. That sign-off is part of the project control process, but it doesn't remove the need for your own records.

Handover file: Keep the approved details, marked-up plans, falls measurements, photographs, product data, batch details, installer information, inspection notes, certificates and written defect-resolution process together.

The registered builder remains responsible for coordinating the broader renovation, so send the file to the builder and keep a copy yourself. A complete record is far more useful than a single undated photograph of a grey floor.

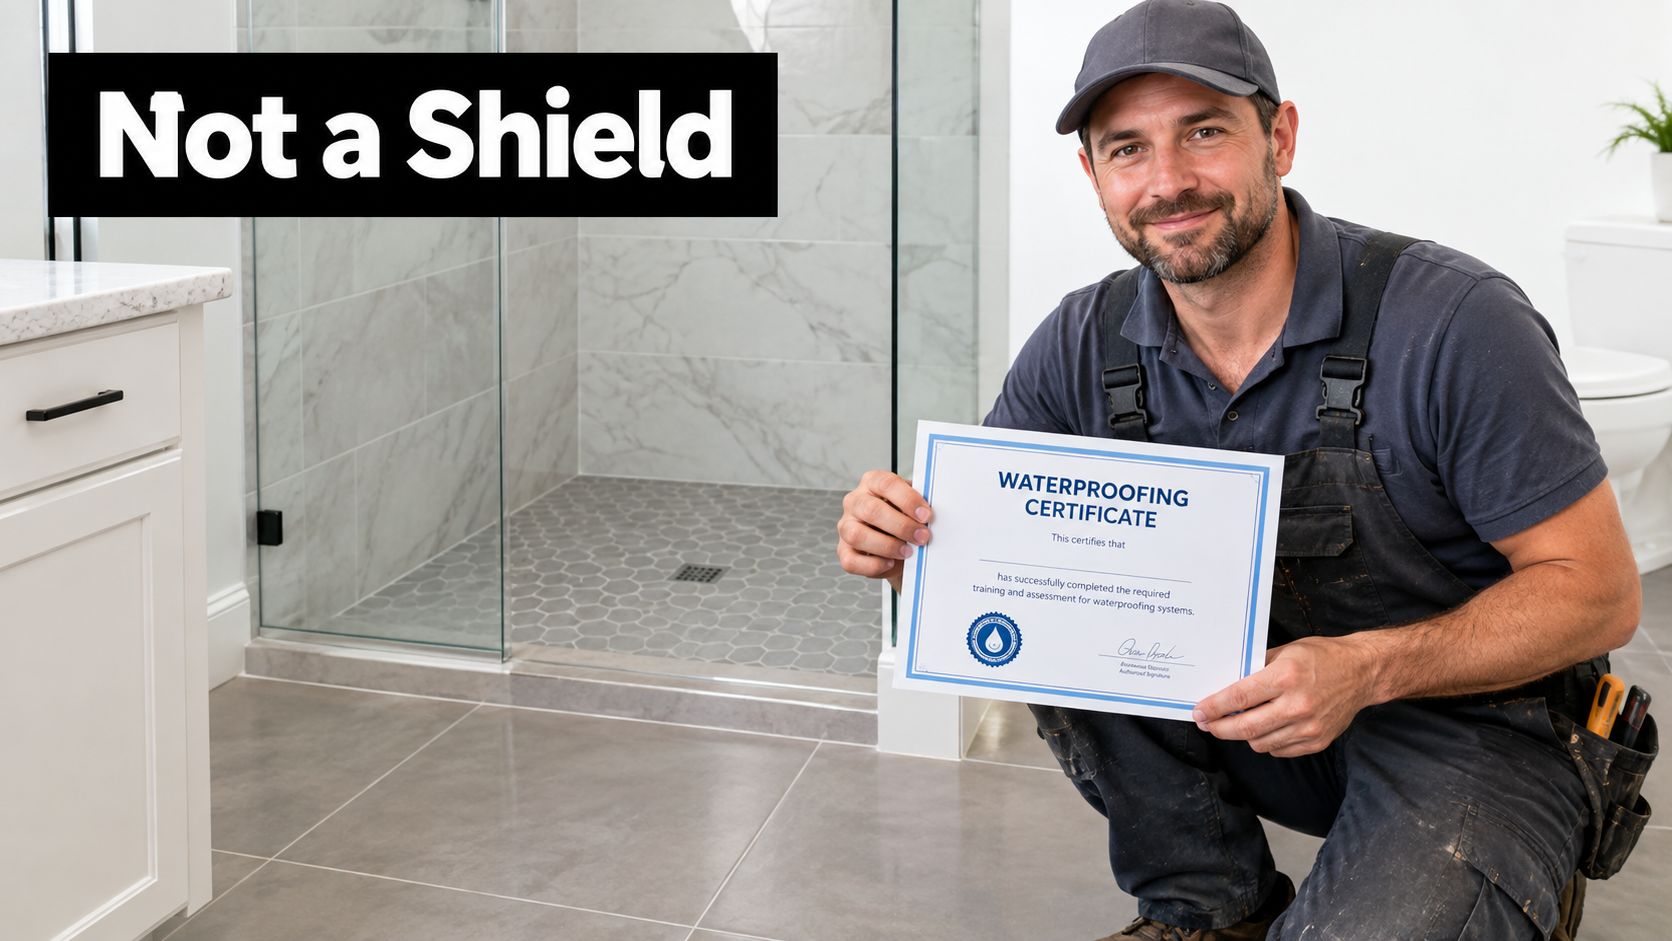
What a Waterproofing Certificate Does Not Protect You From

A certificate documents that a membrane was installed to a stated detail on a stated date. It does not certify falls, substrate preparation, drainage performance or that the whole wet area complies. It records one part of the job, not the concealed conditions that can later create a leak.

A certificate never proves that the substrate was clean, stable and suitable before application. It does not show whether corners, penetrations, wastes, hob junctions and wall-to-floor transitions were prepared correctly. It does not confirm the membrane was applied at the required thickness, cured for the required period or protected from damage by following trades.

A professional male contractor in work overalls proudly holding a waterproofing certificate in a renovated bathroom.

What the handover file must still prove

The file should connect the certificate to evidence from the actual bathroom. Ask for dated photographs before concealment, including corners, wall-to-floor junctions, penetrations, wastes, hob details and the complete shower area. Photographs should show enough surrounding detail to identify the room and the location of each junction, rather than a single close-up of an unmarked membrane.

Retain the approved details, marked-up plans, falls measurements, drainage checks and inspection notes. Product technical data, batch information, application conditions and installer details should accompany the photographs. The record should also show when the membrane was ready for covering and who inspected it before screed, adhesive, plasterboard or tiles concealed the work.

The Victorian Building Authority has identified water-ingress risks associated with small detailing and drainage omissions. Its research insights on water ingress reinforce why a signed certificate cannot replace project-specific evidence.

The registered builder's broader obligations under the Building Act, Building Regulations and National Construction Code still apply, but this section of the file should answer a narrower question: what was installed, where, with which product and what was checked before it disappeared?

A Victorian waterproofing compliance certificate guide can help you check whether the certificate is supported by usable records. If a contractor cannot provide that evidence before tiling, the responsibility gap remains open.

Cost Pointers, Warranties and Red Flags to Watch For

Waterproofing cost should be assessed from the scope, not from a bare square-metre allowance. A straightforward room with an accessible substrate may require less preparation than a renovation involving uneven floors, structural movement, a balcony threshold, multiple penetrations or leak rectification. Ask the contractor to separate preparation, detailing, membrane installation, curing, inspection, protection and any remedial work in the quote.

Avoid accepting a cheap figure that leaves out substrate preparation or the time needed for curing. The lowest price can become expensive when another trade has to remove tiles, screed and wall linings to locate a concealed failure.

What a sound proposal should show

A useful quote identifies the membrane system, manufacturer, primer, reinforcing, number of coats, application thickness, curing requirements and areas to be treated. It also names the installer, describes who coordinates the registered builder and states when inspections and photographs will occur.

The contract should explain how defects are reported, who responds, what evidence is retained and how rectification is handled. A warranty is only useful when the responsible business can be identified and the scope is clear.

Red flags that deserve a pause

  • Vague product language: “Premium waterproofing” without a product, system or technical data sheet gives you nothing to compare.
  • No concealed-work photographs: A contractor who refuses to photograph junctions, wastes and penetrations is removing your ability to check the installation.
  • Pressure to skip preparation: Uneven or contaminated substrates don't become suitable because the project is behind schedule.
  • No curing allowance: Screed and tiles shouldn't cover a system before the manufacturer's required curing period.
  • Unclear responsibility: If nobody can identify the registered builder, permit pathway or defect process, stop before signing.
  • Unverifiable insurance: A certificate with the wrong entity, missing policy dates or unclear work coverage needs explanation before work begins.

Class 2 apartments represent less than one-quarter of dwellings constructed but account for more than two-thirds of residential defect costs, with estimated defect costs of approximately $453 million annually statewide. That financial context is one reason property managers and builders should treat waterproofing records as part of asset protection, not administrative clutter. (Victorian Building Amendment regulatory impact statement)

Before work starts, verify the contractor and registered builder. During installation, attend the hold-points or receive dated photographs and measurements. After handover, keep the complete file, including the certificate and written defect process. That approach works better than relying on tile appearance, a verbal promise or a licence number printed on a quote.


Melbourne Tiling Services P/L provides bathroom and ensuite renovations, waterproofing, screeding, leak rectification and tiling, with licensed trades coordinated through its registered building operation. If you're planning work in Melbourne or greater Victoria, visit Melbourne Tiling Services P/L to request a free quote and discuss the evidence and inspection process before your membrane is covered.

Bathroom Waterproofing Cost in Melbourne: 2026 Guide

A straightforward Melbourne bathroom usually costs about A$500 to A$750 to waterproof, while a more involved project can reach A$1,500 to A$4,000 once size, compliance, second-storey access, or substrate repairs are included. The quote isn't just for membrane, it covers preparation, detailing, labour, drying time, and the documentation needed before tiling.

You may be looking at three bathroom renovation quotes right now, each with a different waterproofing figure and no obvious explanation for the gap. A small ground-floor room on a concrete slab can be relatively predictable. An upstairs bathroom with timber flooring, a shower niche, awkward pipe penetrations, or an old failed membrane is a different trade package entirely.

Melbourne homeowners should treat waterproofing as a structural protection and compliance stage, not a cosmetic add-on. The Australian bathroom waterproofing cost guide places common jobs within a broad range, including an average around A$500 to A$750, while more complex work can rise to A$4,000. The price makes more sense once you separate the quote into labour, materials, substrate preparation, junction detailing, and certification.

Table of Contents

What Bathroom Waterproofing Costs in Melbourne

A 1990s Caulfield brick veneer home can show why quotes differ. The owners may have stripped the old bathroom and asked several tilers to price waterproofing. If the room is compact, sits on a sound concrete slab, has easy access, and needs a standard shower floor and wall system, A$500 to A$750 is a realistic starting band for the waterproofing component. The installer still needs to inspect the substrate before confirming that figure.

A mid-range bathroom commonly falls around A$800 to A$1,500, while a complex job can reach A$1,500 to A$4,000. Australian cost guidance reports a national average of A$800, with a minimum of A$500 and a maximum of A$4,000 in one 2023 guide. The range is outlined in the Australian waterproofing price guide.

Job Type Typical Melbourne Price What's Included
Straightforward ground-floor bathroom A$500 to A$750 Basic preparation, membrane application, standard shower and floor detailing
Mid-range bathroom A$800 to A$1,500 More wall area, additional junctions, repairs, or broader compliant coverage
Complex or second-storey bathroom A$1,500 to A$4,000 Second-storey access, timber substrate, extensive preparation, difficult falls, or replacement work

The line items matter more than the headline price. Labour covers site setup, preparation, membrane application, detailing, and the waiting time between coats. Membrane and reinforcement materials are usually a smaller part of the quote, while damaged substrate, difficult junctions, and removal of failed waterproofing can change the scope quickly.

For budget planning, waterproofing is a small but material part of the renovation allowance. Against a A$10,000 renovation benchmark, it can represent roughly 5% to 10%, depending on the work required. Demolition, plumbing, electrical work, screeding, tiling, fittings, and shower-screen installation sit outside that waterproofing figure. Virtual Tour Easy knows renovation planning checklists can help place this stage within the wider renovation sequence.

The main cost drivers are practical decisions:

  • Second-storey work: Decide whether the access, timber framing, and extra preparation justify the higher labour allowance.
  • Substrate condition: Particleboard, movement, rot, or uneven screed must be addressed before membrane application.
  • Room design: Niches, benches, curbless transitions, baths, and extra penetrations require more detailing.
  • Legacy waterproofing: Ask whether a failed or non-compliant membrane will be removed rather than covered.

Before accepting a quote, confirm whether it covers a basic membrane application or a complete compliant wet-area system, including preparation and documentation. That distinction often explains a cheaper figure.

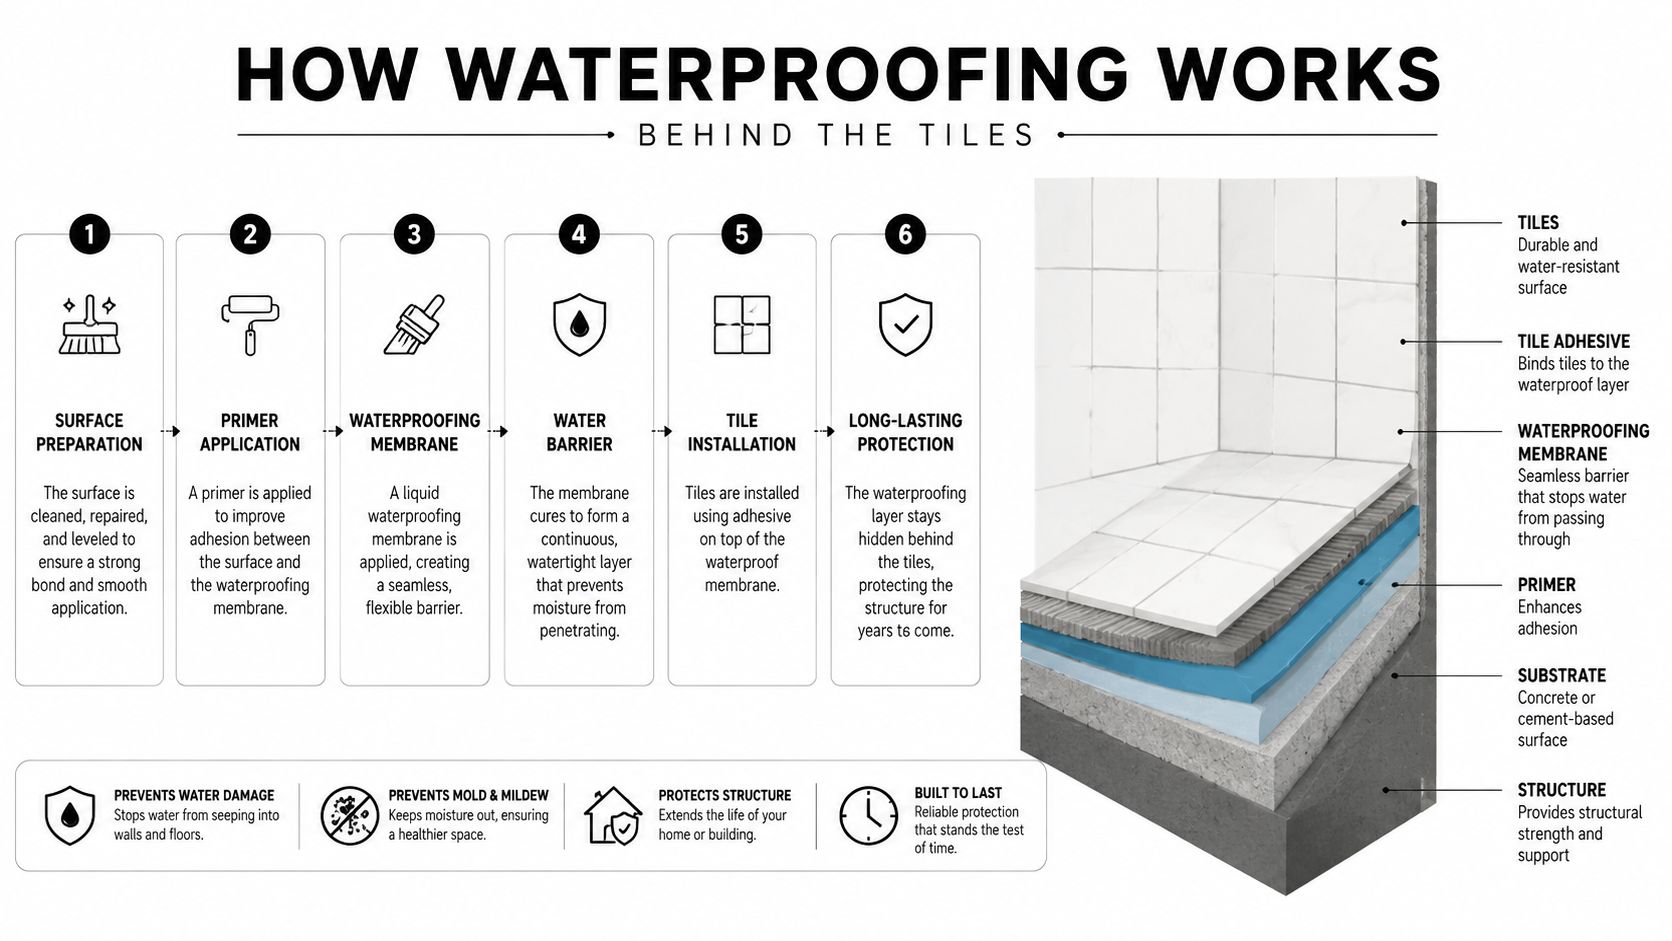
How Waterproofing Works Behind the Tiles

A tiled shower can look finished while water is already reaching the substrate. Tiles and grout are the visible cladding, not the waterproof barrier. The membrane is the tank, so corners, penetrations, junctions, and waste connections must join into one continuous sealed system.

The installation sequence is practical:

  1. Clean, repair, and prime the substrate.
  2. Apply the first membrane coat to the specified areas.
  3. Reinforce wall-to-floor junctions and internal corners with bond-breaker tape or compatible bandage.
  4. Seal pipe penetrations, wastes, niches, and other openings.
  5. Apply the second coat over the reinforced areas, reaching the product's required thickness.
  6. Allow the membrane to cure before tiling, adding another coat if the system or site conditions call for it.

Drying time forms part of the work, not an optional delay. Applying another coat too soon can disturb the layer underneath, while tiling before the membrane has cured can weaken the bond or trap moisture. The installer should follow the selected product's technical data sheet rather than judge readiness by surface appearance.

A step-by-step infographic illustrating the six-stage professional process for installing waterproofing behind bathroom shower tiles.

Falls and wall coverage

A shower recess needs a pre-formed shower tray or a correctly formed, flood-tested membrane fall that directs water to the waste. If the floor is flat, water can remain where the membrane and tile system face the most exposure.

Shower walls must also be waterproofed to the required height. Under the NCC wet-area provisions, shower floors require waterproofing, shower walls must reach at least 1,800 mm, and houses use that same 1,800 mm shower-area height requirement. The NCC wet-area waterproofing provisions provide the regulatory basis.

Australian guidance also covers waterproofing at least 150 mm above shower floors, 25 mm above finished floors, and fully waterproofing timber floors before tiling. The Australian waterproofing standards overview explains how preparation, layer thickness, and curing affect the finished system. Those steps are part of the quoted work, not just the visible paint-like membrane.

What Drives the Price on a Melbourne Quote

A useful quote should let you trace the price from the bare substrate to the signed compliance paperwork. If it only says “waterproof bathroom” with one lump sum, you can't tell whether the installer has allowed for corners, penetrations, drying days, or damaged flooring.

Preparation comes before membrane

Preparation may include removing old tiles, cleaning adhesive, repairing cracks, correcting screed levels, priming porous surfaces, or replacing unsuitable boards. This is often where a cheap quote becomes unstable. Membrane won't compensate for a loose, contaminated, moving, or poorly graded substrate.

The decision is practical. If the floor is sound and level, you may only need cleaning and primer. If the installer finds rotten particleboard or an uneven shower base, the right response is to repair it before waterproofing, not bury it under another coat.

Materials and junction details

The membrane price depends on the selected system, coverage area, and number of coats. The quote should identify whether it uses a liquid acrylic, polyurethane, cementitious-compatible system, or sheet membrane, along with compatible primers, sealants, tapes, corner pieces, and penetration seals.

Edges and junctions consume time because they carry concentrated movement and water exposure. Ask whether the price includes:

  • Wall-floor junctions: Bond-breaker tape or reinforcing fleece.
  • Internal corners: Reinforcement and compatible sealant.
  • Pipe penetrations: Proper collars or seals rather than a brush of excess membrane.
  • Waste connection: A compatible puddle flange detail.
  • Shower recess: A tray or formed fall, where applicable.

Labour and compliance

Labour is commonly the largest part of a waterproofing quote because the installer must prepare the area, detail weak points, apply coats, return after curing, and check the finished coverage. In Victoria, work valued over A$5,000 requires a Construction Waterproofing Licence from the Victorian Building Authority, which can affect labour pricing, scheduling, and documentation. The Victorian waterproofing licensing and compliance guidance provides the relevant cost and licensing context.

Compliance may include a VBA-recognised certificate, photographic records, and a flood test where appropriate. Victorian wet-area work is governed by AS 3740, and compliance paperwork is expected before tiling proceeds, as outlined in this Victoria waterproofing compliance guide.

Quote Line Item Approx. Share of Cost Homeowner Decision Involved
Substrate preparation Variable Pay for proper repair, or risk sealing an unstable surface
Membrane materials Variable Choose the specified system and required coat coverage
Edges and junctions Variable Confirm corners, penetrations, waste, and niches are included
Labour Usually the largest component Allow for return visits and cure time between coats
Compliance documentation Variable Confirm certificate, photographs, and testing requirements

Don't assume a waterproofing-only quote includes a shower-screen refit, tiling, demolition, plumbing alterations, or rotten-subfloor rectification. Those exclusions can change the final bill substantially. If someone offers to skip a second coat to save A$150, or proposes one coat over particleboard, the saving is attached to the part of the system that protects everything above it.

Comparing Waterproofing Methods and Materials

Melbourne quotes usually refer to a few broad system types. The right choice depends less on the product label than on the substrate, room layout, movement, junction count, and installer competence.

Liquid acrylic and polyurethane membranes are the familiar default for many standard bathrooms. The installer rolls or brushes the product over a prepared substrate, reinforces corners and junctions, then builds the system to the manufacturer's required thickness. They suit many concrete-slab bathrooms and compressed fibre-cement surfaces, but application quality matters. A thin or incomplete coat isn't equivalent to a correctly applied system.

Sheet membranes use PVC, CPE, or another bonded sheet with treated seams, corners, and penetrations. They can offer consistent coverage and make sense where the layout contains difficult junctions or where the installer is experienced with that particular system. The material cost may be higher, but a predictable sheet can reduce some application variability.

Pre-formed polyurethane shower trays provide the fall and waterproofing geometry in one component. They're useful where the waste position and shower layout suit the tray, but they don't remove the need to detail wall junctions and penetrations. A tray can simplify the shower base while adding product and fitting considerations elsewhere.

Method Typical $ per m² Best suited to Expected lifespan Key trade-off
Liquid acrylic membrane Not fixed Standard prepared bathrooms on sound substrates Depends heavily on preparation and application Accessible pricing, but thickness and curing must be controlled
Liquid polyurethane membrane Not fixed Areas needing a flexible liquid-applied system Depends on system specification and installation Flexible coverage, with careful substrate and cure requirements
Sheet PVC or CPE membrane Not fixed Complex junctions or installers trained in sheet systems Depends on seams, corners, and penetrations Consistent sheet coverage, but higher detailing and material requirements
Pre-formed polyurethane tray Not fixed Showers where tray dimensions and waste position suit Depends on compatible installation and surrounding detailing Provides a formed fall, but limits layout flexibility

There isn't a verified universal lifespan or Melbourne dollar-per-square-metre figure that applies to every system, so be wary of quotes promising a fixed service life without naming the product and installation conditions. The shower waterproofing membrane service information is useful when comparing membrane approaches, but your installer should still provide the exact product specification.

For a straightforward concrete-slab bathroom, liquid membrane is often the sensible choice when correctly applied. On an upstairs timber floor or a heavily articulated wet room, a sheet system or tray may justify its higher price because the layout demands more controlled detailing. Premium doesn't automatically mean better. Compatibility and installation quality decide whether the system performs.

Real Melbourne Bathroom Examples and Case Studies

Two bathrooms can have similar floor areas and completely different waterproofing quotes. The difference usually appears under the tiles, at the waste, and around the room's junctions.

Ground-floor ensuite in Glen Waverley

The first example is an anonymised ground-floor ensuite in a 1990s Glen Waverley brick veneer home. The room had a straightforward concrete slab, one shower, reasonable access, and no visible substrate surprise after the old finishes were removed.

The scope was easy to define. Preparation involved cleaning and priming the sound surface, the shower walls received the required coverage, and the installer detailed the floor, corners, penetrations, and waste before applying the membrane system. Because the substrate didn't need major correction, the quote stayed within the straightforward bathroom band.

The homeowner's key decision was whether to keep the existing layout. Keeping the waste and shower position avoided additional falls, complicated junctions, and broader screed work. The clear quote separated preparation, membrane application, detailing, and compliance rather than presenting a bare “waterproofing” allowance.

Second-storey bathroom in Brunswick

The second example is a second-storey bathroom in a 1920s Brunswick terrace. The room sat over timber joists, required levelling, needed an increased fall to the floor waste, and demanded careful treatment as a raised wet area under AS 3740.

The headline price per square metre would have been a poor guide. The waterproofer had to inspect the timber substrate, coordinate repairs and levelling, establish the fall, detail more movement-prone junctions, and document the compliant installation. Access also affected how materials and equipment reached the room.

Site inspection changes the quote: A phone estimate can price surface area, but it can't see rotten boards, movement, waste position, or the quality of the old screed.

These examples show why a free quote based only on room dimensions is unreliable. Send substrate photographs before the inspection, identify whether the room is upstairs, and explain whether the existing tiles are being removed. A site visit should also confirm shower-screen locations, niches, baths, floor wastes, and penetrations.

The difference isn't necessarily profiteering. It reflects scope. A slab-based ensuite can need a controlled membrane installation. A terrace bathroom over timber may need a coordinated substrate and compliance package before the waterproofing can even begin.

Ask the contractor to state which assumptions support the price. If the quote depends on “sound substrate” or “no levelling required”, those conditions should be written down so you know what happens if demolition reveals something else.

Repair or Replace How to Decide

A visible leak doesn't always tell you where the waterproofing failed. Water can travel beneath tiles and emerge away from the original gap, which makes a small surface patch an uncertain fix. Replacing grout or applying sealant may improve the finish, but it won't rebuild a continuous membrane behind the wall.

Use three checks before choosing a repair:

  1. Age: Older membranes deserve closer scrutiny, especially if the installation history and product are unknown.
  2. Leak location: A localised issue at a known penetration may be different from moisture appearing across several walls.
  3. Renovation timing: If tiles and wall linings are already being removed, rebuilding the system is usually more efficient than preserving questionable layers.

A spot repair can make sense when the installer can identify a discrete failure and the surrounding system is sound. Partial re-waterproofing may suit a confined shower zone where the rest of the wet area remains intact. Full replacement is more appropriate when the membrane is damaged broadly, the substrate has moved, or the room is being stripped back for a renovation.

The figures need to be read as scope bands, not promises. Simple work may sit in the common A$500 to A$750 range, while broader re-waterproofing can reach A$1,500 to A$4,000 when access, substrate, and compliance requirements expand. The cost of a failed system can also include tile removal, drying, damaged plasterboard, timber repairs, repainting, and work in the room below. Research cited in the Australian waterproofing defect cost discussion identifies waterproofing as a serious defect category and estimates annual economic costs from defects in new residential apartments at A$121 million to A$314 million, with the wider building estimate reaching as much as A$1.2 billion.

A man looks thoughtfully at a broken washing machine while comparing repair versus replacement options on paper.

Replacement usually wins when: More than one wall shows moisture signs, the membrane is over 15 years old, or tiles are already coming off.

Photograph bubbling paint, swollen skirting, mould, cracked grout, damp ceilings below, loose tiles, and any staining around the shower. Keep those images with the renovation records. They give the waterproofer a starting point and help distinguish a surface maintenance issue from a concealed wet-area failure.

Estimates Guarantees and Smart Budgeting in Melbourne

A useful Melbourne quote should read like a scope of work, not a product receipt. Whether you compare a specialist waterproofer, a tiler, or a bathroom renovation contractor, the estimate should state what happens before the membrane is opened and what evidence you'll receive before tiles cover it.

Read the quote line by line

Look for these items in writing:

  • Substrate preparation: Hours or tasks allowed for cleaning, removal, priming, screed correction, and board replacement.
  • Membrane specification: Product type, brand, system compatibility, coverage area, and coat count.
  • Detailing: Treatment of corners, wall-floor junctions, niches, wastes, pipe penetrations, and shower-screen interfaces.
  • Curing stages: Return visits and waiting periods between coats and before tiling.
  • Compliance certificate: The certificate, photographs, and any testing included in the price.
  • Warranty terms: Separate the product warranty from the installer's workmanship guarantee.

A quote that says “two coats membrane” but doesn't identify the product leaves too much unresolved. So does a price that excludes screed work while assuming the floor is already correctly graded. Ask what triggers a variation and require the contractor to show you the affected area before extra work begins.

For broader bathroom renovations, the legal contracting structure matters. Domestic building work above A$16,000 generally must be carried out by a registered builder in Victoria, and a renovation involving demolition, plumbing, waterproofing, tiling, and fittings commonly reaches that level. The Victorian domestic building guidance explains the registration threshold and its relevance to project supervision.

One industry source states that renovation jobs over A$10,000 require a Registered Builder, while plumbing must be performed by a registered or licensed plumber. Because guidance can differ by project category and source, confirm the current requirement with the relevant Victorian authority and make sure the contract identifies the responsible registered builders and licensed trades. You can also review the role of the Victorian waterproofing compliance certificate before signing.

Set the budget before demolition

For planning purposes, a small ground-floor bathroom may sit around A$500 to A$750, a standard main bathroom around A$1,200 to A$2,500, and a complex second-storey or substrate-replacement project around A$2,500 to A$4,000. These are practical planning brackets, not fixed tariffs, and the final amount depends on the inspected scope.

Against a A$10,000 renovation envelope, keep a contingency of 10% to 15% for surprises behind the tiles. That allowance can cover substrate repairs, levelling, waste alterations, or compliance-related rework, but it shouldn't be used to justify vague pricing. Ask for a written variation with the reason, affected trade, and revised total.

A checklist infographic titled Estimates, Guarantees and Smart Budgeting for renovation projects in Melbourne, Australia.

Before you commit, verify the contractor's registration, insurance details, certificate process, warranty wording, exclusions, and responsibility for coordinating plumbers, tilers, and shower-screen installers. A low initial quote only works if it includes the same scope as the quote beside it.


Melbourne Tiling Services P/L provides bathroom waterproofing, screeding, tiling, leak rectification, and complete bathroom renovation coordination, with written estimates and compliance documentation for Victorian projects. To compare your room's substrate, layout, and waterproofing scope against a clear renovation plan, visit Melbourne Tiling Services P/L and request a quote.