

You've chosen the tiles, ordered the vanity and booked the trades. Then the old bathroom comes out, and the true condition of the room appears: uneven substrate, questionable falls, exposed pipe penetrations and junctions that need more attention than the showroom sample suggested. In a Melbourne renovation, the visible surface is only the final layer of a system.
Good tiling and stone work depends on substrate preparation, waterproofing, movement control and trade sequencing. The right material can still fail when it's installed over a moving or poorly prepared base. A modest-looking bathroom can also involve a registered builder, licensed waterproofers, plumbers, electricians and tilers, all working in the correct order.
Table of Contents
- A Renovation That Starts Before the First Tile
- Comparing Ceramic, Porcelain, Marble, Engineered Stone and Kerlite
- Waterproofing Under the Tiles
- Substrate, Screeding and Movement Joints
- Matching Material and Finish to Room and Exposure
- The Handover Checklist Homeowners Should Demand
- When a Registered Builder Is the Right Call
- Care, Maintenance and Long-Term Performance
A Renovation That Starts Before the First Tile
The bathroom is stripped back to the structure. Tiles are stacked outside, the old screed has been removed and the floor waste is exposed. A waterproofing membrane covers the shower floor and lower walls, while a test is being carried out before anyone is allowed to bring in adhesive.
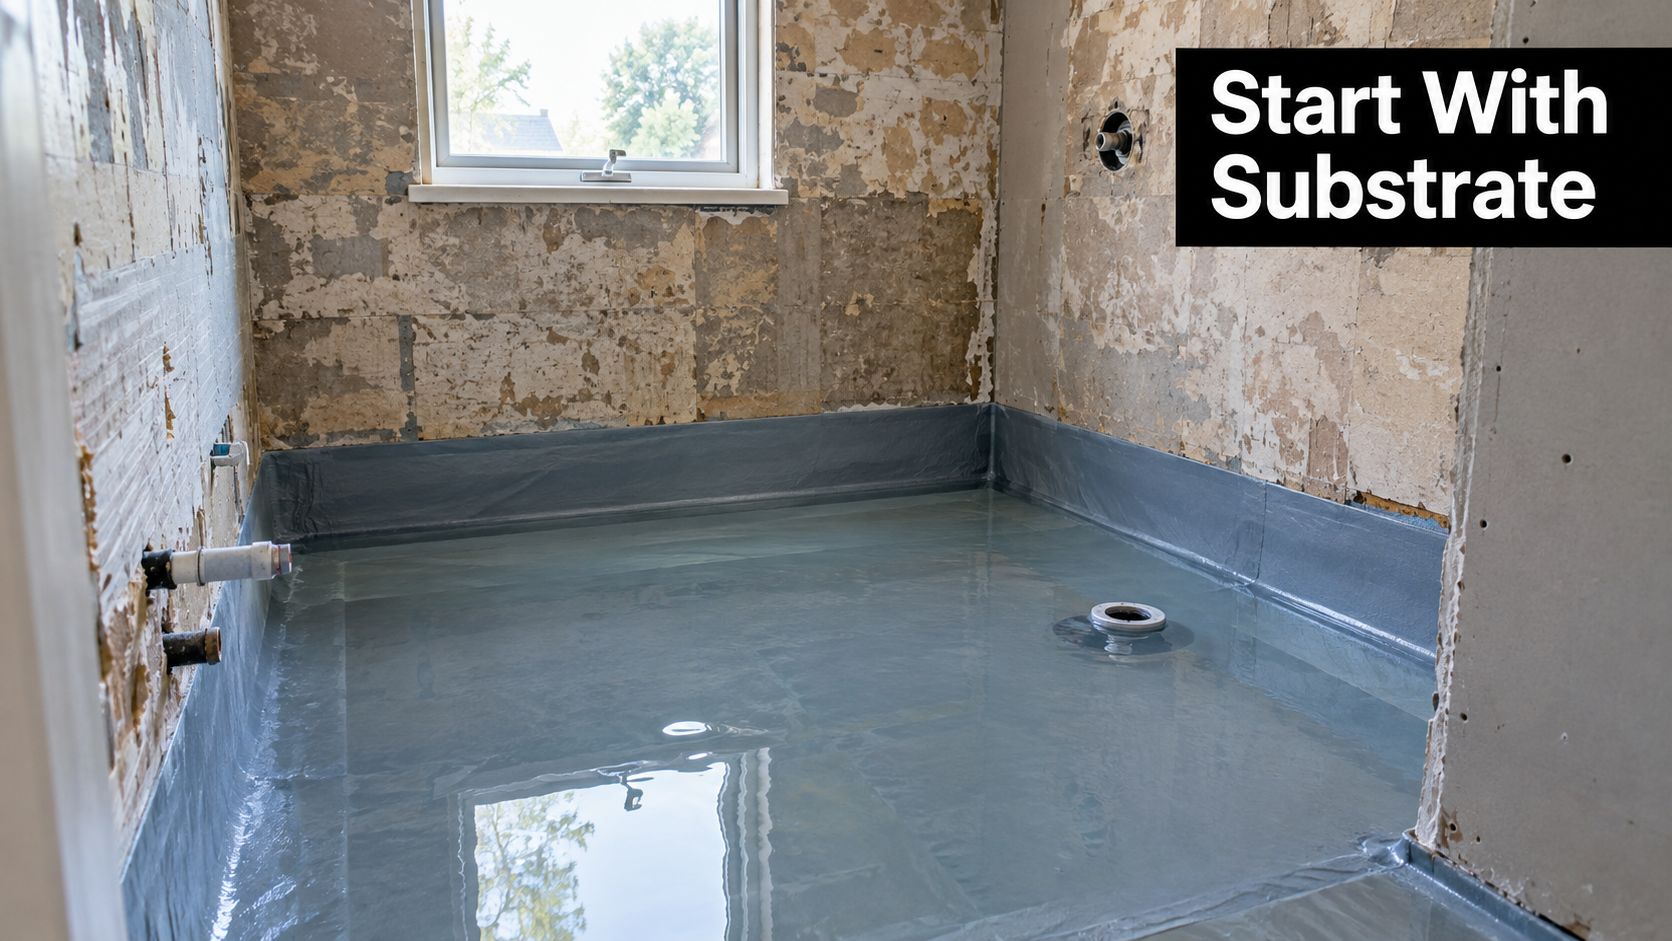
This is the stage many homeowners never see, but it determines whether the finished bathroom performs. The tile colour and stone pattern matter, yet they can't correct a substrate that flexes, a floor that doesn't drain properly or a membrane that stops short at a penetration. A good renovation follows a chain: inspect the existing structure, prepare the substrate, establish falls, waterproof the wet area, inspect the work and only then install the finish.
The order matters because each trade can conceal or restrict the work of the next. Once screed, adhesive, tiles, grout, fixtures and cabinetry are installed, access becomes difficult and evidence disappears. If the waterproofing record is incomplete, a visually perfect bathroom may still leave the owner with uncertainty about what sits beneath it.
What happens before installation
A well-organised site should answer several practical questions before tiling begins:
- Substrate condition: Is the base sound, clean, dry and sufficiently flat for the selected tile or panel?
- Drainage: Do the screed and floor levels direct water to the waste without creating ponding?
- Junctions: Have wall-to-floor transitions, corners, hobs, step-downs and penetrations been detailed as part of the waterproofing system?
- Trade sequence: Have plumbing and electrical rough-ins been completed before the waterproofing and screeding stages?
- Records: Are product information, installation details, photographs and inspection notes being retained?
A registered builder is valuable when several trades must be coordinated and responsibility needs to be clear. A licensed waterproofer and experienced tiler also need to work from the same drawings and specification, rather than treating each task as a separate job.
Renovation logistics affect quality too. Keeping furniture, boxed tiles and personal items away from dust and impact can make the site safer and more workable. For homeowners who need somewhere organised to keep belongings during demolition, temporary storage for home renovations can remove pressure from a crowded Melbourne site.
Practical rule: If the team can't explain what is beneath the tile, who inspected it and what happens at each junction, the material selection is premature.
Comparing Ceramic, Porcelain, Marble, Engineered Stone and Kerlite
Material selection should follow exposure and installation conditions, not just a showroom impression. Ceramic, porcelain, marble, engineered stone and Kerlite can all look excellent, but they don't tolerate the same moisture, traffic, movement or maintenance regime.
| Material | Density and Absorption | Best-Fit Application | Price Band |
|---|---|---|---|
| Ceramic | Generally lighter and more absorbent than porcelain | Interior walls, splashbacks and suitable low-stress floors | Lower to mid-range |
| Porcelain | Dense, hard-wearing and low absorption | Bathrooms, living floors, high-traffic areas and selected exteriors | Mid-range |
| Marble | Natural stone with variable porosity and surface sensitivity | Feature walls, floors and premium wet-area details where maintenance is accepted | Mid to premium |
| Engineered stone | Manufactured stone composite with product-specific performance limits | Benchtops, vanity tops and selected wall applications | Mid to premium |
| Kerlite and sintered panels | Very large, rigid, low-absorption panels with minimal joints | Feature walls, floors and broad interior or exterior surfaces | Premium |
Ceramic remains a sensible choice for many internal walls and splashbacks. It's comparatively easy to cut, widely available and often cost-effective. The limitation is that not every ceramic product is suitable for every floor or exterior application, so the manufacturer's use rating still matters.
Porcelain is denser and less absorbent, which makes it a strong option for bathroom floors, living areas and demanding circulation zones. Its strength doesn't remove installation requirements. A poor substrate, insufficient adhesive contact or badly placed movement joint can still produce a failed installation.
Marble brings natural variation that manufactured products can't fully reproduce. It also needs a homeowner who accepts sealing, careful cleaning and the possibility of etching or staining. A polished marble floor may be a poor fit for a busy family kitchen, while a honed finish can offer a more forgiving appearance and feel.
Engineered stone works well in applications such as vanity tops and benchtops when the specific product is approved for that use. It shouldn't automatically be treated as a universal tile or wet-area surface. Check fabrication, heat, moisture and edge details before specifying it.
Kerlite and other sintered panels reduce grout-joint area and create a continuous look, but they're not an easy substitute for smaller tiles. Handling, transport, cutting, adhesive coverage and substrate flatness all become more demanding. The comparison of porcelain and ceramic tiles can help narrow the shortlist, but the final choice should still follow the room's exposure and the installer's capability.
Waterproofing Under the Tiles
A bathroom can look finished while water is already reaching the framing. Tiles shed water at the surface, but they do not replace the compliant waterproofing system beneath them. The membrane, junction details and inspection record need to be resolved before the first tile is fixed.
For residential work, NCC 2022 permits either the Housing Provisions in full or the specified Housing Provisions clauses used with AS 3740:2021. The Australian Building Codes Board warns against mixing these pathways. The builder or waterproofing contractor should nominate the pathway before work begins and keep product selection, installation and records consistent with it.
The practical sequence
- Define the wet areas. Mark the shower, bath, basin, laundry and other areas requiring waterproof or water-resistant treatment.
- Inspect the substrate. Remove dust and loose material, repair defects and confirm that the base suits the selected membrane system.
- Detail the junctions. Treat corners, wall-to-floor joints, hobs, step-downs, control joints and penetrations with compatible products.
- Apply the membrane. Under the NCC Housing Provisions, the shower floor, including a hob or step-down, must be waterproof. Shower walls must be waterproof to at least 1,800 mm above the floor substrate. Shower junctions and joints must be waterproof at least 40 mm on either side. These requirements appear in the ABCB guidance on waterproofing houses.
- Inspect before concealment. Photograph the work and resolve defects before screed or tiles cover the membrane.
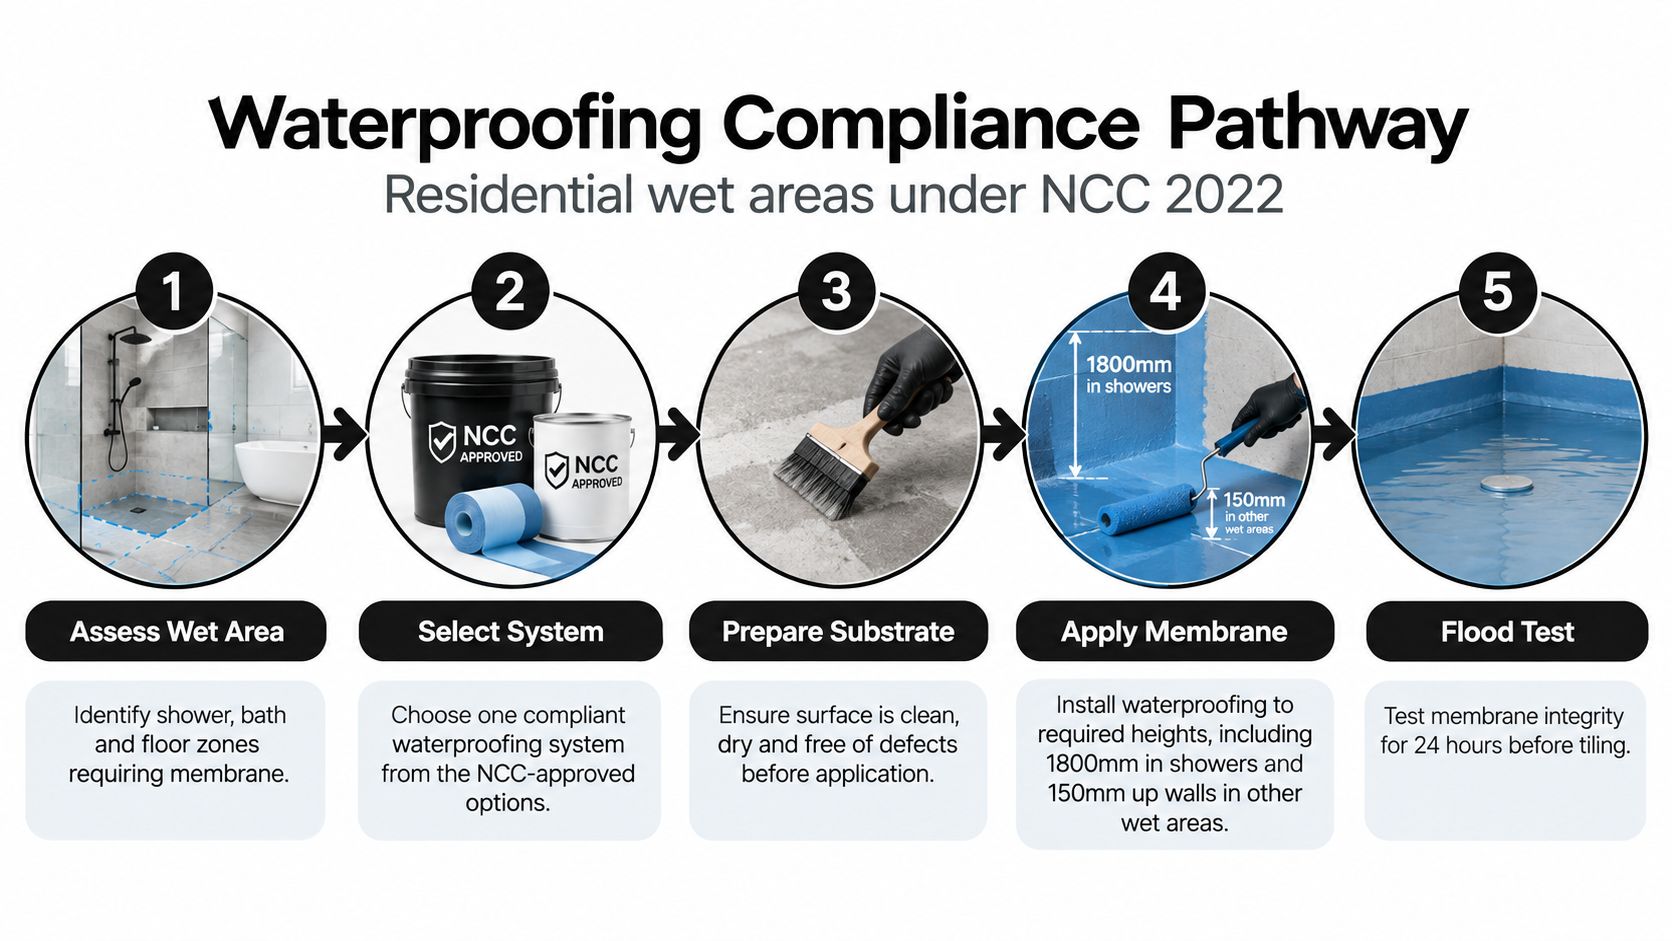
Water exploits gaps around pipe penetrations, corners and floor-to-wall transitions. A broad, neatly coated wall does not prove that changes in direction or connections to other building elements have been detailed correctly.
Before handover, ask who supplied and installed the membrane, which system was used, how penetrations were sealed, when the inspection occurred and which photographs will be provided. A bathroom floor waterproofing guide helps homeowners check the visible stages. Complex renovations should be coordinated by a registered builder with the relevant licensed trades.
Substrate, Screeding and Movement Joints
A tile follows the surface beneath it. If the substrate has hollows, ridges, contamination or movement, the tile and grout inherit those problems.
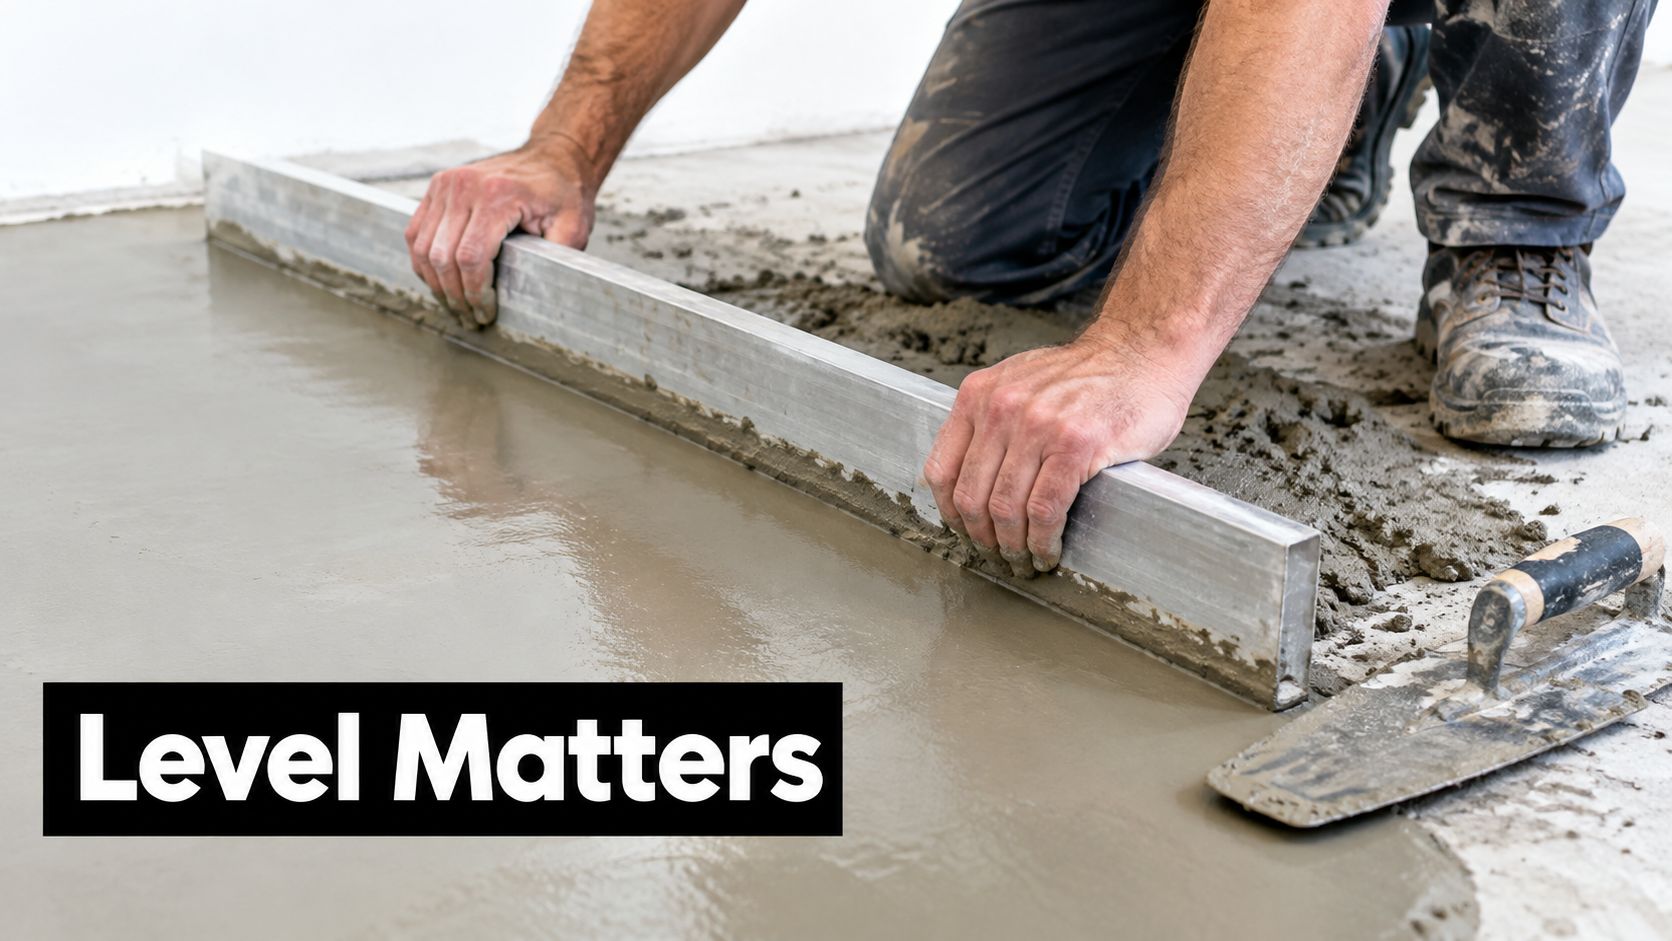
Screeding establishes the plane and the falls. In a bathroom, the fall to the waste is created before the tile is laid, not by hoping the tile adhesive can compensate for an unsuitable floor. A screed that is too wet, poorly bonded or incorrectly shaped can leave low points where water sits.
Self-levelling compounds have a useful role on suitable internal substrates, but they're not a universal cure. The installer still needs to check compatibility, moisture, priming requirements, thickness limits and the condition of the base. Large porcelain tiles and sintered panels are particularly unforgiving of local high spots because a rigid piece can rock over an uneven area.
Check the surface before ordering panels
A straight edge, moisture assessment and visual inspection should form part of the preparation record. The installer needs to identify:
- High spots: These can prevent full support beneath a large tile or panel.
- Low spots: These can create adhesive voids, lippage and drainage problems.
- Weak material: Dusty or friable substrate can compromise primer, membrane or adhesive bond.
- Movement: Deflection, cracks or unstable framing need to be addressed before the finish is selected.
- Existing joints: The tile layout should respect structural, control and perimeter movement provisions.
The principles in the ICRI CSP 4-6 preparation guide are useful background when assessing concrete preparation, even though the final system must follow the selected Australian product and construction requirements.
Movement joints give the building somewhere to move without transferring every stress into the tile surface. Perimeter gaps, changes of plane and relevant control joints need compatible flexible treatment rather than rigid grout. The correct layout depends on the substrate, room geometry, tile format and manufacturer instructions. The guide to movement joints in tiling provides a practical reference for this part of the installation.
The preparation sequence is easier to understand when you can see the tools and finished surface being managed in real time.
Photographing the substrate before covering it protects both the homeowner and the tradesperson. It records what was prepared, where joints were located and whether the surface was accepted before the next layer concealed it.
Matching Material and Finish to Room and Exposure
A tile that performs well on a bathroom wall may be unsuitable for a balcony. A polished stone that looks refined beside a vanity may become difficult to live with on a busy kitchen floor. Room exposure should decide the material before colour and pattern take over.
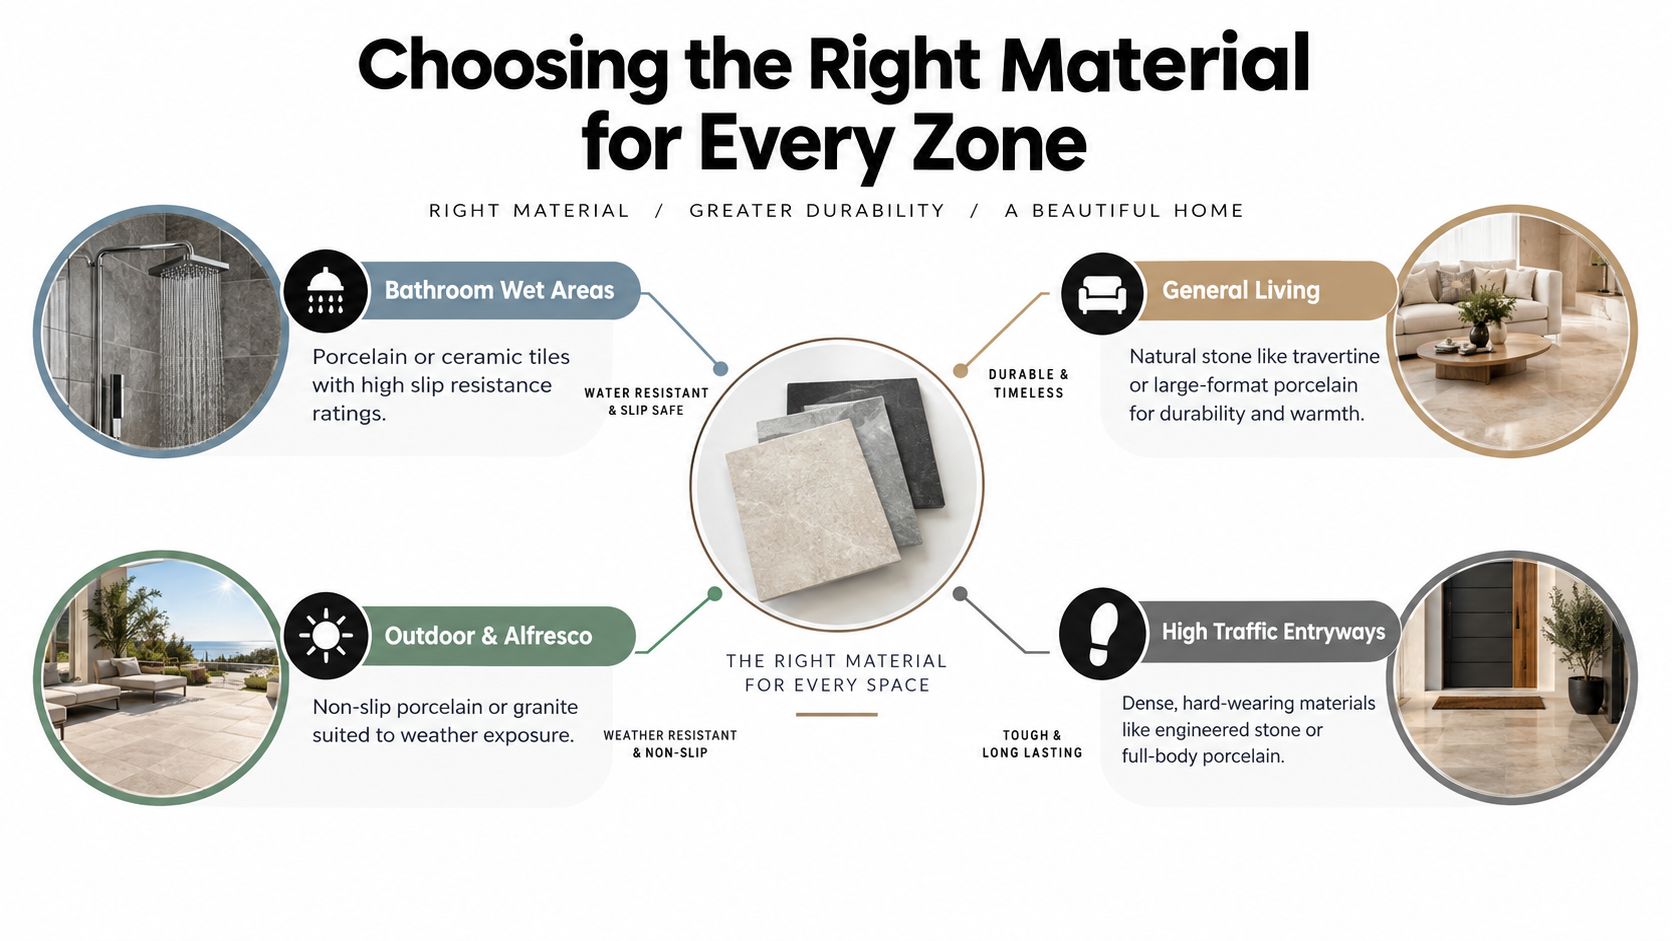
Bathroom wet areas
Bathrooms need a finish that works with the waterproofing system, provides appropriate slip performance and can be cleaned without damaging the surface. Porcelain is often practical for floors because it combines low absorption with a broad range of textures and formats. Ceramic can work well on walls, provided the product is intended for that location.
Natural stone needs a more deliberate maintenance plan. Marble can suit a feature wall or carefully selected floor, but the finish, sealing and cleaning method need to be agreed before installation. Highly polished surfaces can show marks and may provide less forgiving footing when wet.
Living areas and feature walls
Living floors experience foot traffic, furniture loading, grit and cleaning. Large-format porcelain offers a consistent manufactured surface, while travertine and other natural stones bring variation that becomes part of the room's character. The choice should account for grout colour, replacement availability and whether the owner accepts ongoing stone care.
Feature walls and splashbacks offer more flexibility because they don't receive the same direct wear. Here, marble veining, textured ceramic, glass or a thin sintered panel can create impact, but the wall still needs adequate support and correctly detailed penetrations.
Balconies, entries and heritage properties
Exterior work needs more than an outdoor-rated tile. Falls, drainage, adhesive coverage, movement joints, edge details and exposure all influence performance. Non-slip porcelain and suitable stone can work well, but an installer must confirm that the entire assembly is appropriate for weather and structural movement.
Melbourne and regional Victoria also have a substantial built-heritage context. Heritage Victoria reports approximately 23,000 heritage places recorded in heritage overlays, while more than 180,000 properties statewide are included in those overlays, as outlined in the Victorian heritage planning information. These places include buildings, residential precincts, historic town centres, gardens, mining sites and industrial structures.
That context matters when replacing stone paving, masonry or tile finishes. Check whether the property is heritage-listed or within an overlay, document existing materials and confirm whether repair or like-for-like treatment is more appropriate than wholesale replacement. The same source records approximately 7,000 known historical, non-Indigenous archaeological sites in Victoria, while noting that the inventory is incomplete. A small entrance renovation can therefore require more care than its footprint suggests.
The Handover Checklist Homeowners Should Demand
A clean grout line and straight tile layout show workmanship at the surface. They don't prove that the waterproofing is compliant. Handover should separate cosmetic quality from concealed-system evidence.
Waterproofing and substrate records
Request a practical file rather than a verbal assurance:
- Membrane details: Record the product, batch or system information, installer and areas treated.
- Substrate preparation: Keep photographs and notes showing repairs, priming, screeding and surface acceptance.
- Drainage evidence: Confirm falls to the waste and record the treatment of the waste connection, puddle flange or relevant drainage detail.
- Penetration photographs: Keep images of pipe seals, corners, hobs and wall-to-floor junctions before they disappear.
- Inspection timing: Arrange inspection before screed and tiles conceal the membrane. An independent building surveyor or inspector may be appropriate where the scope or risk justifies it.
- Warranty information: Retain contracts, invoices, product instructions, inspection records and written communication.
Victorian consumer guidance states that renovation services are covered by Australian Consumer Law guarantees and recommends keeping contracts, invoices and written communications. It also identifies inadequate bathroom waterproofing as potential non-compliant work. The Victorian guidance on concerns about renovation quality is useful when deciding what evidence to retain.
Tile quality and future repairs
Check that tiles are aligned, cuts are consistent, junctions are finished cleanly and movement gaps haven't been filled with rigid grout. Look across the surface under practical lighting, test doors and fixtures and confirm that water drains as intended.
Sustainability also belongs in the handover conversation. An Australian construction-waste analysis reports that construction produces 39% of the nation's total waste, with average waste of 141 kg per square metre across 142 building projects. Concrete, masonry and tiles were among the largest discarded material streams, according to the CEFC construction-waste analysis.
Ask the installer to record the estimated tile quantity, expected offcuts, unopened boxes and sound remnants suitable for future repairs. Don't confuse landfill diversion with genuine reuse. The same analysis found recovery rates for some diverted materials as low as 14%. A salvage plan, safe storage location and confirmation that replacement stock may remain available are more useful than a broad sustainability label.
When a Registered Builder Is the Right Call
A registered builder is the right choice when a renovation crosses trade boundaries, changes plumbing or framing, involves structural work, or requires one person to control waterproofing and finishes.
Under the NCC, bathrooms, showers, laundries and sanitary compartments are wet areas that require a coordinated waterproofing system. The requirements extend beyond the shower floor to zones around baths, tubs, basins, sinks and similar fixtures. Plumbers, carpenters, electricians, waterproofers and tilers therefore need to work in a controlled sequence, before screed and tiles conceal the substrate and junctions.
A homeowner can coordinate independent trades for a contained splashback. A full bathroom is different. If a leak appears later, responsibility can become unclear, with each contractor arguing that another trade caused the defect.
Builder coordination adds a cost, but that should be weighed against rectification risk. The ABCB estimates that rectifying waterproofing in a 6 m² bathroom five years after completion costs 44% more than fixing it during construction, as explained in its waterproofing cost guidance. This figure will not predict every project cost, but it shows why early inspection, clear records and accountable sequencing matter.
For a full bathroom renovation, balcony remediation or project involving several licensed trades, a registered builder provides a clear point of coordination. That is a practical risk decision, not a luxury.
Care, Maintenance and Long-Term Performance
Treat the finished bathroom as a building system, not a one-day reveal. Use manufacturer-approved cleaners on porcelain and ceramic, keep abrasive products away from sensitive finishes and inspect grout and flexible joints regularly in wet areas.
Natural stone may need resealing according to its product, finish and exposure. Marble deserves prompt attention when staining, etching or dull patches appear. A discoloured grout line, loose tile or hairline crack at a shower hob should be investigated early, especially if water is reaching a junction.
The practical sequence is straightforward: choose the material for its exposure, document the substrate and waterproofing, use a registered builder when trades must be coordinated, then maintain the surface and joints as part of the system.
Melbourne Tiling Services P/L provides bathroom and ensuite renovations, waterproofing, screeding, self-levelling, ceramic, porcelain, marble and Kerlite installation, including coordination across licensed trades as Registered Unlimited Builders. For a renovation that needs the substrate, waterproofing and finish handled as one sequence, visit Melbourne Tiling Services P/L to discuss the project and request a quote.
Recent Comments