
You've probably seen it happen. You step out of the shower, towel off, and notice a small puddle creeping across the bathroom floor. Maybe it's near the screen. Maybe it's showing up on the other side of the wall. Maybe the silicone looks tired, so you wipe it up and tell yourself you'll deal with it later.
That's how a lot of shower leaks begin. Not with a dramatic burst pipe, but with a small, repeat problem that keeps showing up after every shower. The mistake is treating every leak like the same job. Some are straightforward DIY repairs. Others are signs that water has already moved past the tiles and into the structure behind them.
As a Melbourne-based Registered Builder, I use a triage approach. First, find the leak path. Second, decide whether it's a surface repair or something deeper. Third, act at the right level. If you get that sequence right, you avoid wasting time on patchwork that won't last. If you get it wrong, a simple shower leak can turn into a bathroom rectification job or even a full bathroom renovation.
Table of Contents
- That Puddle on the Floor is a Warning Sign
- First Response Diagnosing Your Shower Leak Source
- The DIY Fix Toolkit For Common Shower Leaks
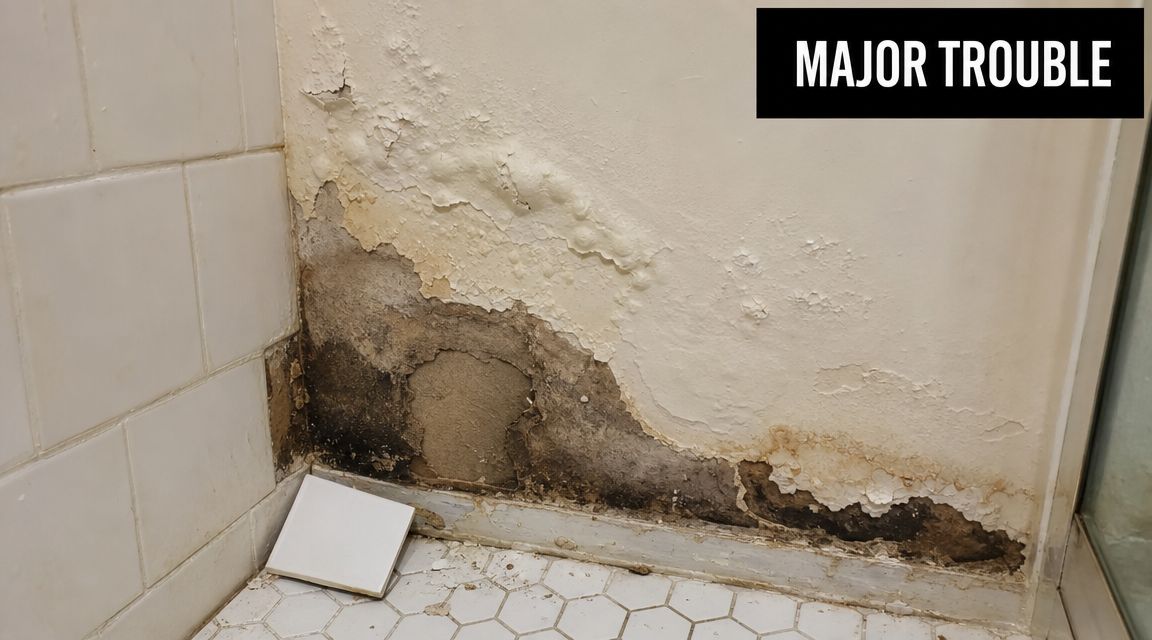
- Red Flags When a Leak Signals Major Trouble
- Calling the Pros Rectification Renovations and Registered Builders
- Protecting Your Home With the Right Shower Repair
That Puddle on the Floor is a Warning Sign
A puddle beside the shower door doesn't tell you much on its own. It could be a failed bead of silicone, water escaping at the frame, a leaking showerhead connection, or a drain problem. It could also be the first visible clue that water has been getting past the tiled surface for some time.
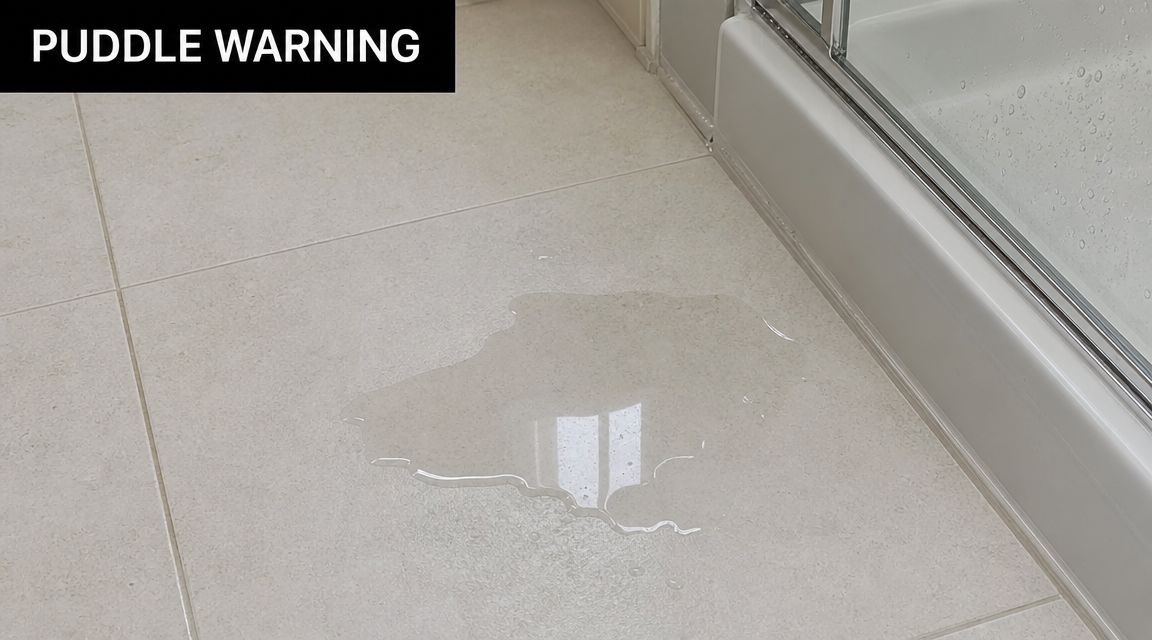
In practice, homeowners usually focus on where the water appears. Builders and plumbers focus on where the water starts and how it travels. Those are not always the same place. Water can move along framing, under tiles, behind skirtings, and through joints before it becomes visible.
A leaking shower also isn't only about property damage. Even a minor fixture leak is worth dealing with early. A showerhead leaking at 10 drips per minute wastes more than 1,900 litres per year, which is why plumbers usually begin with simple checks before assuming a major failure, as noted in this water leak reference.
Practical rule: Don't start with sealant. Start with diagnosis.
The triage approach is simple:
- Find the source. Check whether the leak comes from the showerhead, tapware, screen, grout lines, corners, base, or waste.
- Judge the severity. A localised seal failure is very different from a soft shower floor or staining outside the shower.
- Choose the right response. Some jobs suit a careful DIY repair. Others need licensed trades and a registered builder because the waterproofing system itself may have failed.
If you want to know how to fix leaking showers properly, that sequence matters more than any single product from the hardware store. Silicone has its place. So does regrouting. But neither one is a cure-all.
First Response Diagnosing Your Shower Leak Source
The first job is to stop guessing. Most wasted money on shower leaks comes from fixing the wrong thing first. If you don't isolate the leak path, you can re-caulk the whole shower and still end up with water outside the bathroom.
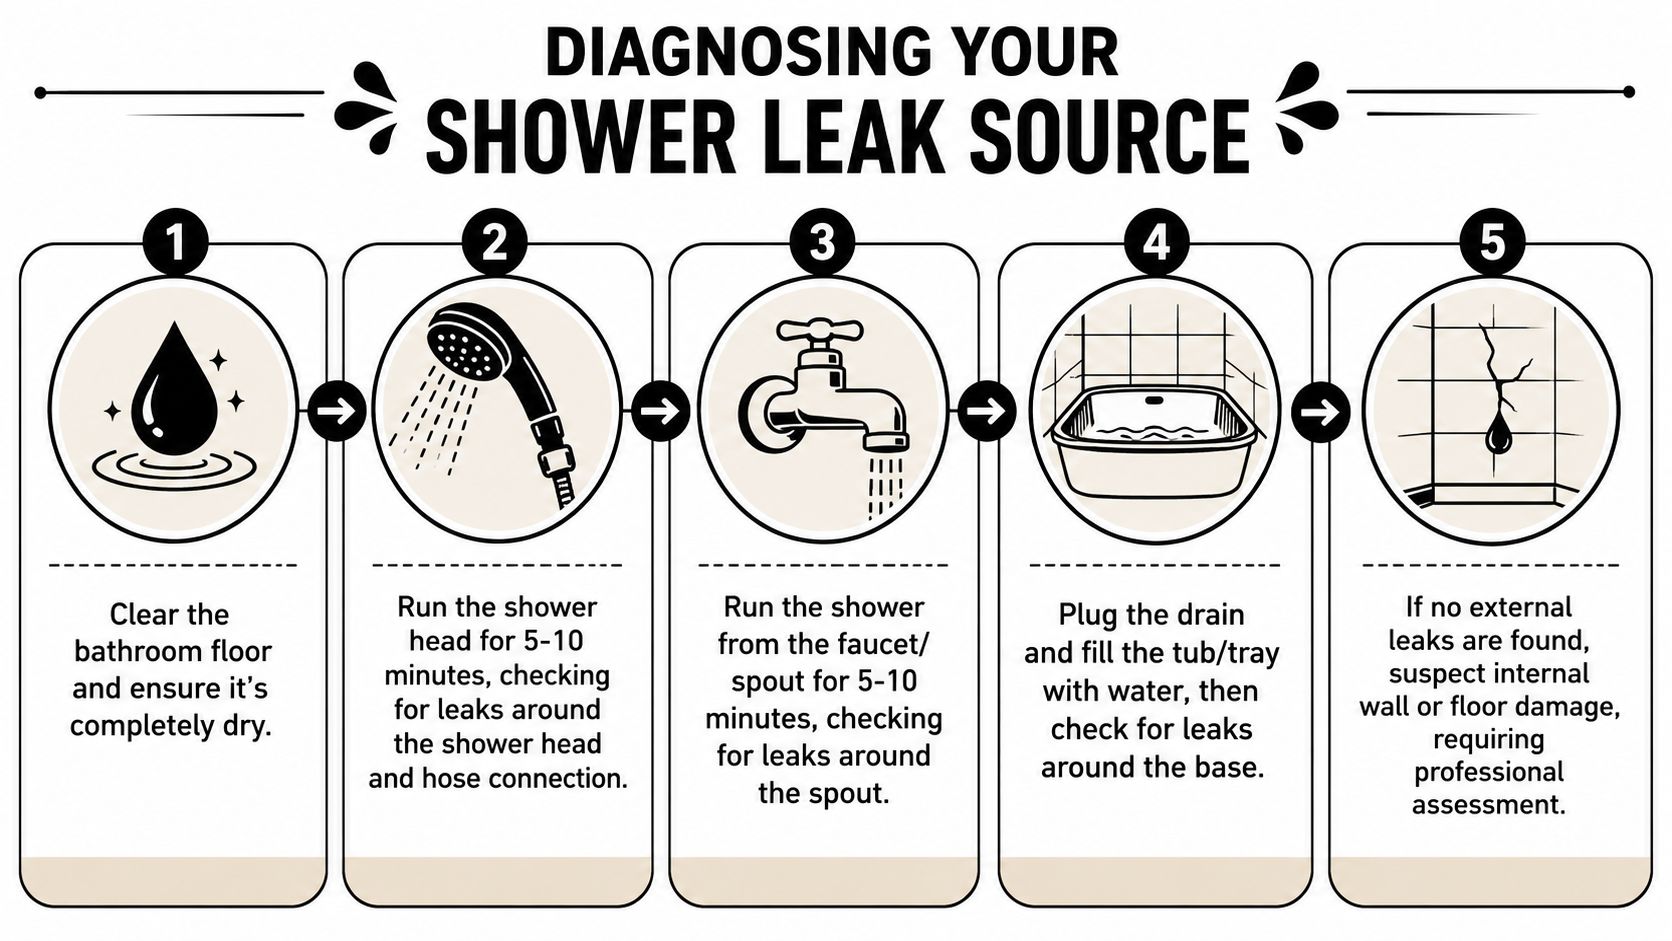
Start with the simplest leak path
Dry the bathroom floor completely. Dry the shower base, the lower frame, the corners, and the wall outside the shower. Put down a few dry paper towels around likely exit points so you can see where water shows up first.
Then check the easy items before touching tiles.
- Showerhead and hose connection: Run the shower and look for drips at the head, hose, and wall outlet.
- Tapware and spout area: Watch around penetrations where fittings enter the wall.
- Screen and door edge: Check whether water escapes only when spray hits the door seal or frame.
- Corners and floor junctions: Look for cracked, missing, mouldy, or detached silicone.
- Waste area: Watch for water appearing around the drain or at the base after water starts pooling.
Use isolation tests, not guesswork
A proper diagnosis uses controlled tests. Change one condition at a time and watch what happens.
Test one. Spray test
Run the showerhead for several minutes and aim the water only at the wall tiles, away from the door and corners. If no leak appears, repeat while directing water at the screen junctions and then the floor junctions. This helps separate a screen leak from a wall or floor leak.
Test two. No-spray base test
Don't use the showerhead. Plug the drain and add a small amount of water to the tray or shower floor. If water appears outside the shower without wall spraying, the issue is more likely around the base, waste, tray, or lower perimeter.
Test three. Door and frame test
Open and close the shower door, then run water directly against the frame-to-tile junction. For shower bases, the system matters. Frame alignment, channel fit, perimeter sealing, and membrane continuity all affect whether the enclosure stays watertight. A common failure point is the junction between the shower frame and the tiles, which often needs resealing with sanitary-grade silicone, not just the floor perimeter, as shown in this shower base installation and leak guidance.
If the leak only shows when water hits one specific area, that area becomes your first repair target. If the leak appears regardless of where the spray lands, suspect something deeper.
What your results usually mean
Here's a practical read on the patterns:
| Test result | Likely issue | Typical next step |
|---|---|---|
| Leak appears at showerhead or fitting connection | Washer, O-ring, thread seal, loose connection | Minor fixture repair |
| Leak appears when water hits screen or frame | Failed seal at frame, door sweep issue, water deflection problem | Reseal frame junctions |
| Leak appears when water hits corners or floor junctions | Failed silicone or cracked grout lines nearby | Cut out and reseal properly |
| Leak appears during base fill test | Waste, tray, perimeter, or floor assembly problem | Stop DIY if base feels compromised |
| Leak appears outside shower with no clear local source | Hidden wall or floor path | Professional assessment |
Homeowners often ask whether grout itself is waterproof. It isn't the right way to think about it. Grout and silicone are part of the surface management of water. The primary defence is the waterproofing system beneath and behind the tiled finish.
The DIY Fix Toolkit For Common Shower Leaks
Once you've isolated a minor leak, a careful DIY repair can work well. The key word is careful. Most failed shower repairs don't fail because the product was wrong. They fail because the preparation was poor.
What belongs in your kit
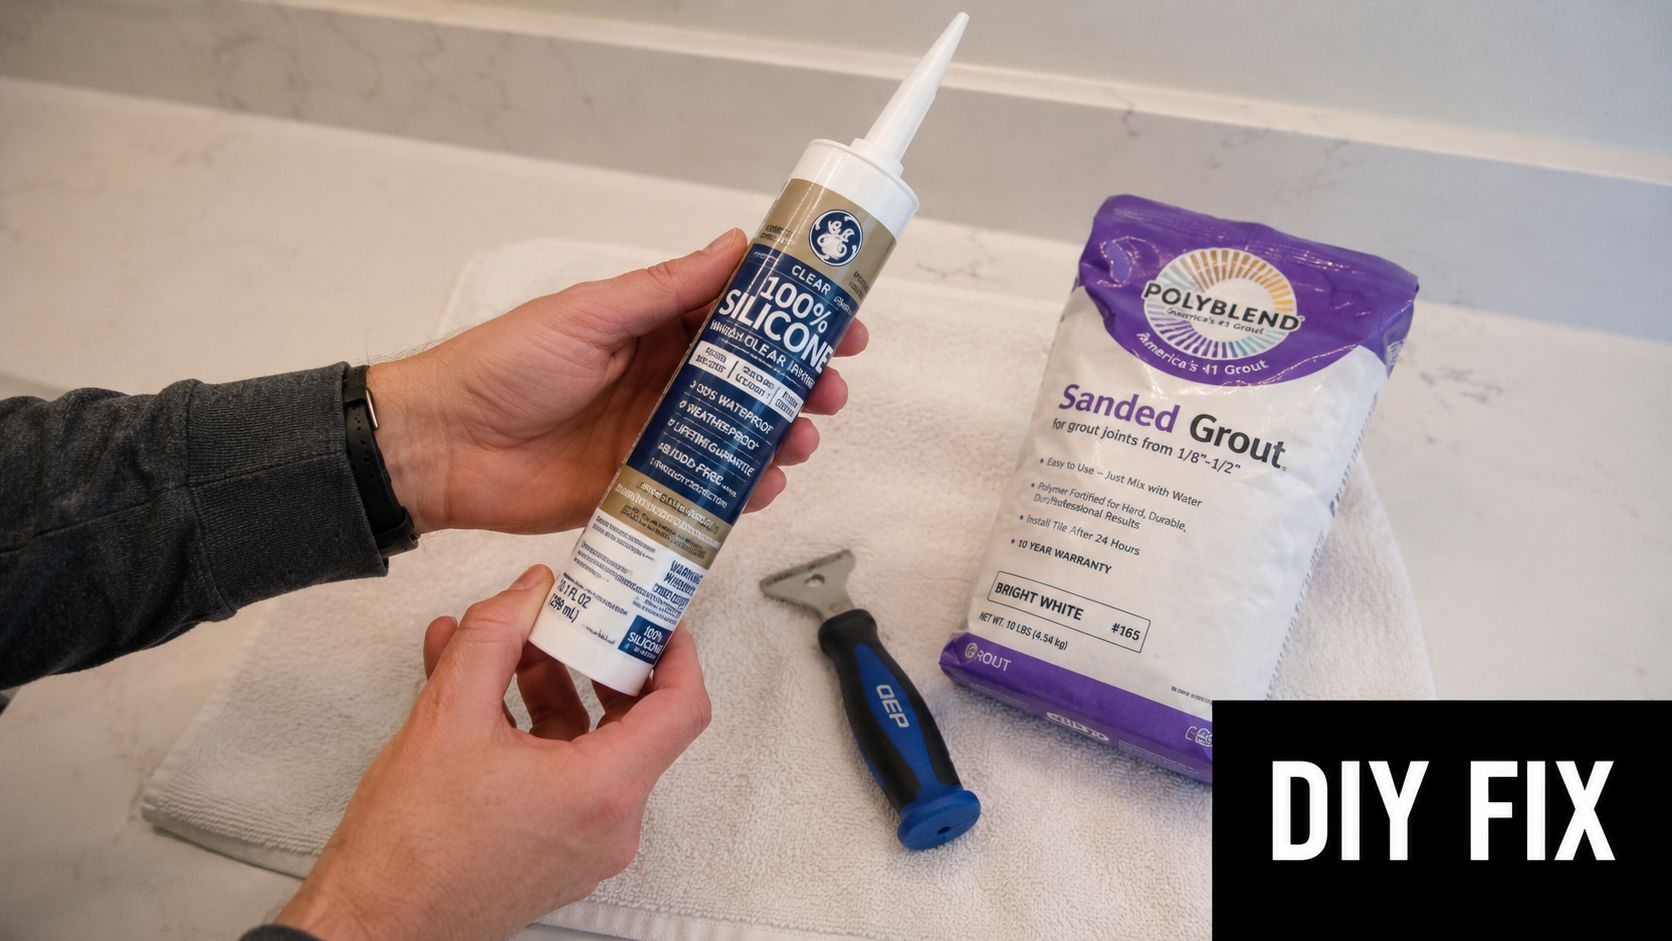
For common shower leak repairs, keep the toolkit simple and specific:
- Silicone removal tool or sharp scraper: For cutting out failed sealant cleanly.
- Methylated spirits and clean cloths: For removing residue before resealing.
- 100% sanitary-grade silicone: For corners, movement joints, and shower screen junctions.
- Caulking gun: For controlled, even application.
- Masking tape: Helps keep beads neat on visible joints.
- Grout rake or oscillating tool attachment: For removing loose or cracked grout in small sections.
- Vacuum and soft brush: To clear debris from joints before repair.
- Gloves and ventilation: Important when using solvents and sealants.
- Adjustable spanner and replacement washers or O-rings: For minor fixture leaks.
If the issue is limited to failed sealant lines, professional caulking and sealing services are one option if you don't want to handle the finish work yourself, but the same principles apply whether you DIY or hire it out.
How to reseal silicone properly
This is the part many people rush, and it's usually why the leak returns.
The most reliable DIY sequence is to remove all old failed silicone, clean off the residue with methylated spirits, make sure the joint is completely dry, then apply 100% sanitary-grade silicone. Sealing over old, dirty, or damp material is the most common reason a new bead fails early, as outlined in this leaking shower repair guide.
Use this sequence:
Cut out the old bead fully
Don't leave thin strips behind. New silicone won't bond properly over patches of old material.Clean the joint thoroughly
Remove soap film, loose particles, mould residue, and silicone smears. The new bead needs a clean bonding surface.Let it dry properly
This matters more than people think. If moisture is trapped in the joint, adhesion suffers.Apply an even bead
Keep pressure steady. A smaller neat bead placed correctly works better than a large messy one sitting on the surface.Tool the bead once
Smooth it in one pass where possible. Reworking it too much drags contaminants back into the joint.Leave it alone to cure
Don't use the shower too soon. A rushed return to service ruins otherwise decent work.
Sanitary silicone works when it bonds to clean, stable edges. It doesn't work as a cosmetic layer over movement, dampness, or breakdown underneath.
A visual walkthrough can help if you haven't done this before:
Small grout and fixture repairs
Cracked grout in a localised area can also be a leak path, especially where movement or wear has opened the joint.
For a small grout repair:
- Remove all loose or deteriorated grout rather than filling over the crack.
- Vacuum the joint so dust doesn't weaken the bond.
- Regrout the area according to product directions.
- Keep water off the repair until it has set and dried properly.
Keep expectations realistic. Regrouting is suitable for a small isolated section where tiles are still firm and the substrate feels solid. If the crack keeps returning, there's usually movement underneath, and the grout is only the symptom.
For a leaking showerhead or tap fitting, the fix is often simpler. Check the connection, inspect the washer or O-ring, and replace worn parts. If the fitting body is cracked or corroded, replacement is usually more sensible than repeated tightening.
DIY works best when the leak is clearly superficial, the area is sound, and the repair target is obvious. Once the floor feels soft, the frame moves, or the leak path isn't clear, stop there.
Red Flags When a Leak Signals Major Trouble
Some shower leaks are repair jobs. Others are warnings that the bathroom assembly has already been compromised. The difference matters because surface repairs won't fix a failed waterproofing system.
Signs the membrane may have failed
Look closely at what the shower is telling you.
- A spongy or bouncy floor underfoot usually means the substrate has taken on water or deteriorated.
- Peeling paint, swollen architraves, or staining outside the shower suggests moisture has moved beyond the enclosure.
- Persistent musty odour points to long-term dampness, not a one-off splash issue.
- Loose tiles or drummy sounding tiles can indicate loss of bond or movement in the base.
- Repeated failure of silicone or grout in the same location often means you're patching a symptom, not solving the cause.
When I inspect older bathrooms in Melbourne, the pattern is often the same. The owner has already tried re-caulking once or twice. The leak improves briefly, then comes back because water is bypassing the tiled surface entirely.
Why patching can make it worse
A major gap in common online advice is that it doesn't clearly separate a surface seal issue from a waterproofing failure. In Australia, that distinction is critical. Waterproofing of domestic wet areas is governed by AS 3740-2021, and in Victoria, rectifying a failed membrane is regulated building work. A DIY patch can hide the underlying problem and lead to much greater remediation later, as discussed in this overview of tracking down shower leaks.
If water has already passed the membrane line, the job is no longer about neat silicone. It's about rectification.
Homeowners often lose time by being optimistic. They see mould in a corner and treat it as a cleaning issue. They see cracked grout and treat it as a cosmetic issue. They smell dampness and blame poor ventilation. Sometimes those things are true. But when they occur together, especially with movement or staining, they usually point to a failed wet-area system.
In Victoria, that's the point where you should stop experimenting and bring in a professional who understands waterproofing compliance, substrate repair, and full bathroom rectification.
Calling the Pros Rectification Renovations and Registered Builders
Once a shower leak moves beyond a simple seal failure, the cheapest option is rarely the lowest quote. The right option is the one that fixes the cause and leaves you with compliant work.
Minor fixes like re-caulking often sit around $150 to $500, according to this shower repair pricing guide. That's a useful benchmark for small maintenance jobs. But when water has bypassed the waterproofing membrane, the work becomes a full remediation project and can cost significantly more because the structure, substrate, and waterproofing system may all need attention.
What professional rectification involves
A proper rectification process usually includes several stages.
First comes investigation. That may involve moisture tracing, opening up adjoining areas, and checking whether the leak is localised or widespread. Good diagnosis prevents unnecessary demolition, but some opening-up is often needed once membrane failure is suspected.
Then comes removal. Tiles, screed, sheeting, shower bases, or damaged substrate may need to come out so the underlying condition is visible. This is one reason surface-only pricing can be misleading. You can't price hidden damage accurately until the affected area is exposed.
After that, the build-back starts:
- Substrate repair: Replace damaged materials and correct movement or instability.
- Falls and drainage review: Make sure water sheds to waste properly.
- Waterproofing installation: Rebuild the wet area as a system, not as a patch.
- Tiling and sealing: Refinish the shower with proper movement joints and detailing.
- Compliance documentation: Important for owners, landlords, and future sale records.
For Victorian owners dealing with membrane failure, waterproofing compliance certificate information in Victoria is worth reviewing because compliance isn't just paperwork. It's part of proving the wet area has been rectified correctly.
Hiring a registered builder for significant shower rectification isn't about adding formality. It's about making sure the repair is coordinated, compliant, and insurable.
DIY Fix vs. Professional Rectification at a Glance
| Aspect | DIY Fix (e.g., Re-caulking) | Professional Rectification (Membrane Failure) |
|---|---|---|
| Best suited to | Local seal failure, minor fixture leak, isolated cracked grout | Ongoing leaks, soft floor, water damage, failed membrane |
| Main goal | Stop water at visible surface joints | Rebuild the wet area system correctly |
| Typical work scope | Remove and replace silicone, minor grout or washer replacement | Demolition, substrate repair, waterproofing, retiling, reassembly |
| Risk if misapplied | Leak returns | Further hidden damage if delayed |
| Compliance issue | Usually maintenance level | Regulated building work in Victoria when waterproofing rectification is involved |
| Outcome | Can be effective for the right minor issue | Required when the waterproofing system has failed |
When rectification becomes a renovation decision
There's also a practical point many owners overlook. Once the shower is being opened up, it can make sense to look at the whole bathroom. If the tiles are dated, the screen is tired, or the layout never worked well, a leak rectification can become the trigger for a broader bathroom renovation.
That doesn't mean every leak should turn into a renovation. It means if major demolition is already necessary, you should at least consider whether partial repair or full upgrade makes better long-term sense. In many Melbourne homes, especially older stock, the shower leak is only the first visible sign that the bathroom has reached the end of its serviceable life.
A registered builder helps weigh that decision properly. Not by pushing a bigger job, but by telling you which parts can be retained, which can't, and where money spent on patchwork won't hold its value.
Protecting Your Home With the Right Shower Repair
The right way to approach how to fix leaking showers is to stop thinking about “the fix” as one thing. It isn't. A leaking shower can be a loose connection, a failed silicone joint, cracked grout, a tray problem, a waste issue, or a failed waterproofing system. The repair only works when it matches the actual defect.
That's why triage matters. Diagnose first. Repair second. Escalate when the signs tell you the problem is beyond surface level. A neat bead of silicone can be the correct solution for one shower and a complete waste of time for the next one.
For homeowners, landlords, and property managers in Melbourne and across Victoria, the smartest move is knowing where your line is. If the issue is minor and clearly isolated, a careful DIY repair can do the job. If there's movement, staining, odour, recurrent leakage, or signs of membrane failure, treat it as a building problem, not a handyman problem.
If you're planning a longer-term solution, it also helps to understand how compliant bathroom waterproofing systems fit into a durable shower build. That's what protects the structure, not just the visible finish.
A small puddle doesn't always mean a major rebuild. But it always means you should pay attention.
If your shower is leaking and you need clear advice on whether it's a simple seal repair or a full rectification issue, Melbourne Tiling Services P/L can assess the problem, carry out bathroom renovation and waterproofing work where required, and help you decide on the right repair path for your property in Melbourne and greater Victoria.
Write a Comment