

You're probably looking at one of two situations right now. Either you're planning a new backyard pool and want the finish to feel as refined as the rest of the home, or you've got an older tiled pool in Melbourne that's starting to show the usual warning signs: loose tiles, stained grout, hollow spots, water loss, or patch repairs that never quite matched.
That's where many homeowners get steered in the wrong direction. They focus on tile colour first, price second, and only much later discover that swimming pool tiling in Melbourne isn't a decorative add-on. It's a wet-area construction job tied to substrate preparation, waterproofing, movement, drainage, trade sequencing, and compliance.
A properly tiled pool has more in common with a high-end bathroom renovation than is often appreciated. In both, the visible finish only performs when the hidden system underneath has been built correctly. The difference is that a pool is exposed to permanent water load, exterior conditions, and structural movement. That raises the stakes.
Table of Contents
- The Foundation of a Flawless Pool: Waterproofing and Screeding
- Choosing Your Pool Tiles: A Melbourne Style and Durability Guide
- The Pool Tiling Installation Process and Professional Timeline
- Budgeting for Swimming Pool Tiling in Melbourne
- Common Pool Tiling Problems and Ensuring Long-Term Durability
- Why Your Pool Tiler Should Be a Registered Builder
- Selecting Your Tiling Professional: Quotes, Designs, and Warranties
The Foundation of a Flawless Pool: Waterproofing and Screeding
A tiled pool only lasts when the shell underneath is prepared as a system. That means the shape has to be true, the falls have to be right, the substrate has to be sound, and the waterproofing has to be applied with discipline. If any one of those steps is handled casually, the finish above it becomes vulnerable.
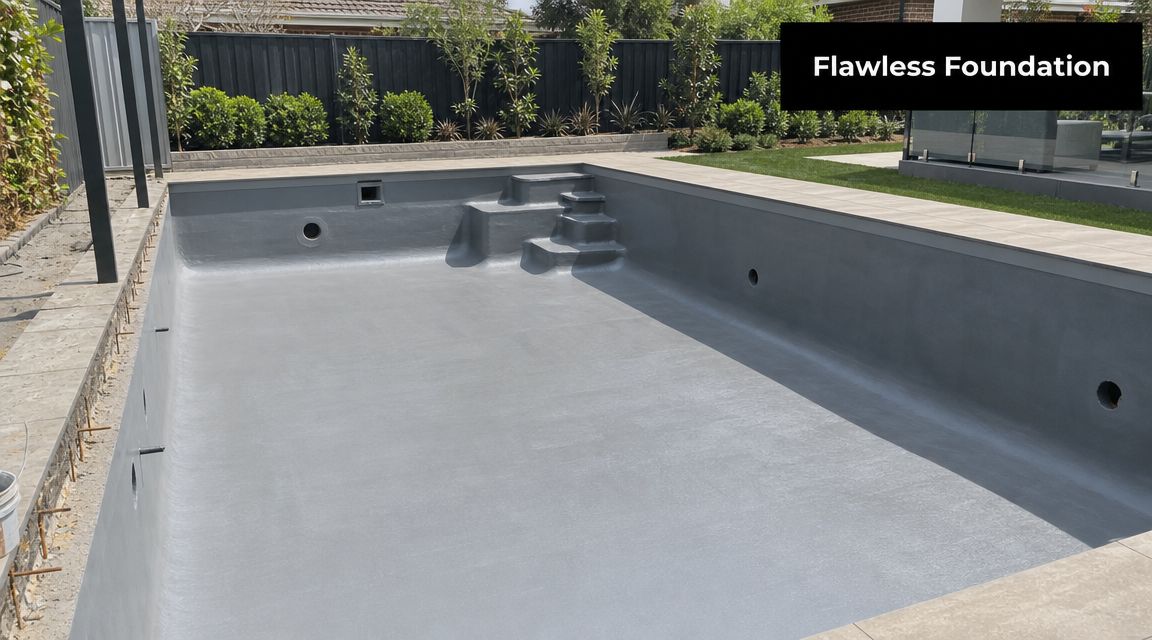
Homeowners often hear the word screeding and assume it just means flattening a surface. In pool work, it's more exact than that. Screeding creates the correct plane for the tile finish, resolves minor irregularities in the shell, helps maintain clean lines through walls and floor transitions, and allows steps, benches, entries and curves to read properly once tiled.
Why the hidden layers matter most
The same lesson comes up repeatedly in complex bathroom renovations. Clients see stone, porcelain, niches and fixtures. Trades see substrate condition, movement, falls, junctions and membrane continuity. Pools work the same way, only with a much harsher service environment.
For a technically sound Melbourne pool, substrates should not vary more than 10 mm in 3 m for thick-bed installations, and the waterproofing build-up should use two coats to achieve at least 1.2 mm dry-film thickness, followed by 24 hours curing before tiling, as outlined in ARDEX's Australian swimming pool tiling recommendation.
That's not paperwork for paperwork's sake. If the substrate is out, the tile bed becomes inconsistent. If the membrane is thin, rushed, or interrupted at changes in plane, water pressure eventually finds the weakness. In pool work, shortcuts don't stay hidden.
For homeowners comparing wet-area methods, it helps to understand how waterproofing systems for Melbourne tiling projects are structured across bathrooms, balconies and pools. The principle is the same. Contain water, protect the structure, and build the finish on a stable base.
What works and what doesn't
What works:
- Accurate substrate correction so the shell presents a true surface for adhesive and tile.
- Full membrane build-up applied in sequence, not patched in isolated spots.
- Respect for curing time before the next trade steps in.
- Set-out planning before tiling starts, especially around steps, returns, skimmer areas and curved walls.
What doesn't:
- Tiling over an uneven shell and expecting adhesive to make up the difference.
- Treating waterproofing as a quick coating job instead of a controlled wet-area process.
- Rushing the handover between trades while surfaces are still green.
- Assuming a nice tile can rescue poor prep.
Practical rule: If the shell, screed and membrane aren't right, the tile finish is already compromised before the first sheet goes on.
Choosing Your Pool Tiles: A Melbourne Style and Durability Guide
A tile can look perfect in the showroom and still be the wrong choice for your pool.
I see that mistake when owners choose on colour first, then try to force the material to suit the shell, the waterline, the steps and the maintenance demands later. Pool tiling is tied to structure, waterproofing and movement. That is one reason a registered builder approaches tile selection differently from a decorator or retail salesperson. The finish has to work with the build system underneath it, not just the design brief.
Melbourne conditions make that even more important. Summer heat, winter temperature swings, UV exposure, pool chemistry and regular cleaning all place pressure on the tile assembly. The right selection balances appearance, slip considerations, cleaning effort, pool geometry and the way the shell has been formed.
How each material behaves in a pool
| Feature | Glass Mosaic Tiles | Porcelain Tiles | Ceramic Tiles |
|---|---|---|---|
| Look | Luminous, reflective, premium finish | Clean, contemporary, versatile | Traditional and varied |
| Best use | Feature interiors, curves, waterline detailing | Broad surfaces, steps, surrounds, modern formats | Simpler layouts where the product is rated for pool use |
| Handling curves | Very good with mosaic format | Depends on tile size and pool shape | Depends on tile size and pool shape |
| Visual effect in water | Strong shimmer and colour depth | More solid, architectural appearance | Softer, classic look |
| Maintenance feel | Needs careful installation and consistent backing | Generally straightforward if selected well | Varies with product quality |
| Budget position | Higher material entry point | Mid to premium depending on range | Lower to mid depending on range |
Material cost matters, but it should not drive the first decision. Industry guidance from SPASA Australia's pool and spa information resources is useful for understanding product suitability, safety and pool construction expectations, especially where different finishes and installation methods are being compared. In practice, renovation work usually costs more than new work because access, demolition, substrate correction and detailing are harder to price than tile supply alone.
A practical way to compare finishes before you commit is to review tiling materials used across wet areas and exterior applications. The same product questions apply in high-end bathrooms and balconies. Water absorption, slip resistance, edge quality, chemical resistance and compatibility with the fixing system all matter. In pools, there is less tolerance for getting any of them wrong.
What usually works best in Melbourne homes
Glass mosaics are often the right answer for curved pools, rounded entries, spa spillovers and feature interiors where water colour and light reflection are part of the design. They suit complex shapes well because the sheet format can follow curves that larger tiles fight against. The trade-off is that every inconsistency shows. If the substrate is uneven, the sheets are poorly aligned, or the adhesive coverage is patchy, the finish will read that way forever.
Porcelain is a strong option for geometric pools, steps, bench seats, surrounds and coping transitions where a sharper architectural line is wanted. Good porcelain is dense, stable and easier to keep visually consistent across large areas. The limitation is format. Large units can look excellent on straight runs, but they are less forgiving on tight curves, internal angles and irregular shells.
Ceramic can still be used successfully, but only when the product is correctly specified for pool conditions. That means checking more than colour and price. Water absorption, frost tolerance where relevant, slip rating on walkable surfaces and manufacturer suitability for submerged use all need to be clear before the tile is ordered.
The pool shape should guide the tile format. A small mosaic may suit a freeform shell. A larger porcelain tile may suit a rectilinear lap pool. A mixed scheme can also work well, with mosaics internally and porcelain to adjacent surrounds, but the junctions need to be resolved properly so the finish looks deliberate rather than pieced together.
This is where builder-level experience matters. Pool tiling sits in the same technical family as complex bathroom renovations. Both rely on sound substrate preparation, disciplined waterproofing and material compatibility. The difference is that a pool stays under constant water load. Selection is not just a style exercise. It is part of the construction method.
The right pool tile is the one that suits the shell, the waterproofed system, the pool's use and the level of maintenance you are prepared to live with for years.
The Pool Tiling Installation Process and Professional Timeline
Good pool tiling follows a sequence. When that sequence is respected, the finish looks calm and intentional. When trades overlap, materials are rushed, or decisions are made on the run, the defects usually show up later, not immediately.
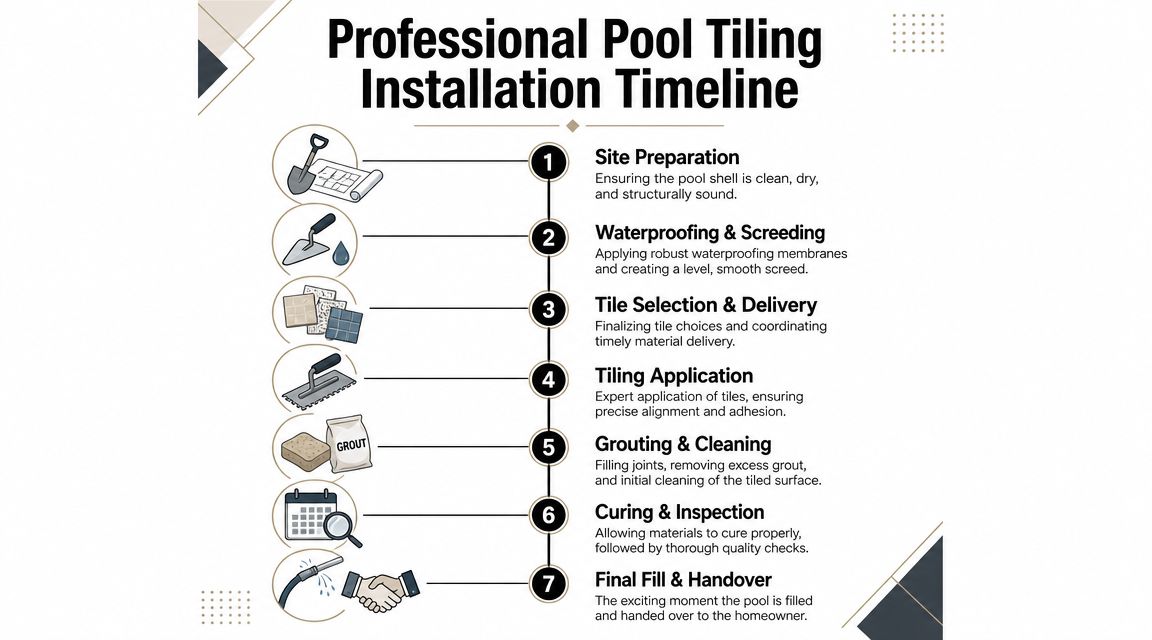
A professional program starts with the shell, not the tile delivery. On renovation work, the pool may need to be drained, stripped, cleaned and assessed before anyone can confirm the final tile method. Old coatings, failed adhesive, substrate contamination and previous repairs can all alter the scope.
What happens before the first tile goes on
A registered builder or properly coordinated lead contractor will usually move through the job in this order:
Pool assessment and preparation
The shell is checked for soundness, contamination, visible cracking, and geometry issues. Existing finishes may need removal. Surfaces are cleaned and prepared so the next layers can bond properly.Repairs, screeding and surface correction
During this stage, steps, floors, walls, curves and edges are brought into line. Clean set-out later depends on disciplined prep here.Waterproofing application
The membrane system is applied as part of the wet-area build-up, then left to cure as required before tiling begins.Tile set-out and laying
Sheet lines, corners, penetrations, returns, skimmer areas and step faces are planned before adhesive is spread. This is one of the biggest differences between trade craftsmanship and reactive installation.
Here's a visual overview of that sequencing in practice:
Why the timeline can't be rushed
Once tiles start going on, the pace still has to stay controlled. Adhesives need proper conditions. Grouting needs timing. Cleaning needs care. Final inspection needs a clear eye, not a race to fill the pool before a weekend event.
The timeline on swimming pool tiling Melbourne projects varies with access, weather, shell condition, detail complexity and whether it's new work or renovation. What matters most is not whether someone promises speed. It's whether they can explain the sequence and justify the waiting periods between stages.
A well-run job also protects finished work from following trades. That's another place where builder-led projects stand out. Someone is responsible for the whole site, not just for laying tile.
- Preparation stage often reveals hidden issues that change the method.
- Curing periods protect the waterproofing and tile bond from premature loading.
- Inspection points catch alignment, lippage, sheet lines and coverage problems before they're locked in.
- Final fill should only happen once the installation system is ready for service.
Budgeting for Swimming Pool Tiling in Melbourne
A budget blowout on a tiled pool usually starts with a cheap-looking quote and a shell that has not been properly assessed. By the time the old finish is removed, hollow areas show up, fittings need correction, falls are out, and the tiling allowance no longer reflects the actual job.
That is why pool tiling should be budgeted as a building and waterproofing project first, and a finish selection second. A registered builder prices the shell condition, substrate preparation, waterproofing continuity, movement detailing, and compliance risk. A tiler pricing off photos or a rough square metre rate often does not.
What actually drives the cost
Square metre rates are only one part of the picture. The final cost usually turns on five things. Shell condition, access, tile selection, detail complexity, and who is taking responsibility for the work as a whole.
New pools are generally more predictable because the substrate and sequencing are controlled from the start. Renovations are different. Removal of old finishes, rectification of cracked or uneven surfaces, resetting falls, and coordinating waterproofing repairs can add a large amount of labour before a single new tile is laid.
Industry guidance from SPASA Australia is useful here because it frames pool construction and renovation as a specialist trade area with compliance, sequencing, and handover obligations, not a simple surface upgrade.
A smaller plunge pool can also cost more per square metre than owners expect. The total area is lower, but the setup, detailing, waterproofing, cutting, and cleanup are still there. Steps, benches, curved walls, spas, wet edges, and feature bands increase labour quickly because they slow set-out and demand tighter finishing.
Where quotes separate
The differences usually sit in the parts of the quote that are easy to miss:
Preparation and repairs
Grinding, render correction, crack treatment, screed work, and substrate rebuilding are often provisional or excluded.Waterproofing scope
Some contractors allow for patching only. Others include a full system with detailing at penetrations, coves, corners, and changes in plane.Tile type and format
Glass mosaics, custom blends, small modules, and patterned layouts take more time to install and clean correctly than a simple standard format tile.Site access and protection
Tight access, manual handling, waste removal, and protection of surrounding finishes all affect labour.Responsibility for the whole job
Builder-led projects usually include coordination of repairs, sequencing of trades, inspections, and accountability if latent issues appear once surfaces are opened up.
The cheapest quote often pushes risk back onto the homeowner. If the shell is worse than expected, if the substrate is out, or if the waterproofing needs more than patch repairs, variations arrive fast.
Ask direct questions. Has the quote allowed for demolition and disposal? How are shell repairs handled? Is waterproofing included, and to what extent? Who is responsible if fittings, corners, or movement joints need correction? If the answer is vague, the budget is not settled.
A good quote does not have to be the lowest figure. It has to define the scope clearly, separate allowances from fixed work, and show who carries responsibility when site conditions change. That clarity is where long-term value sits.
Common Pool Tiling Problems and Ensuring Long-Term Durability
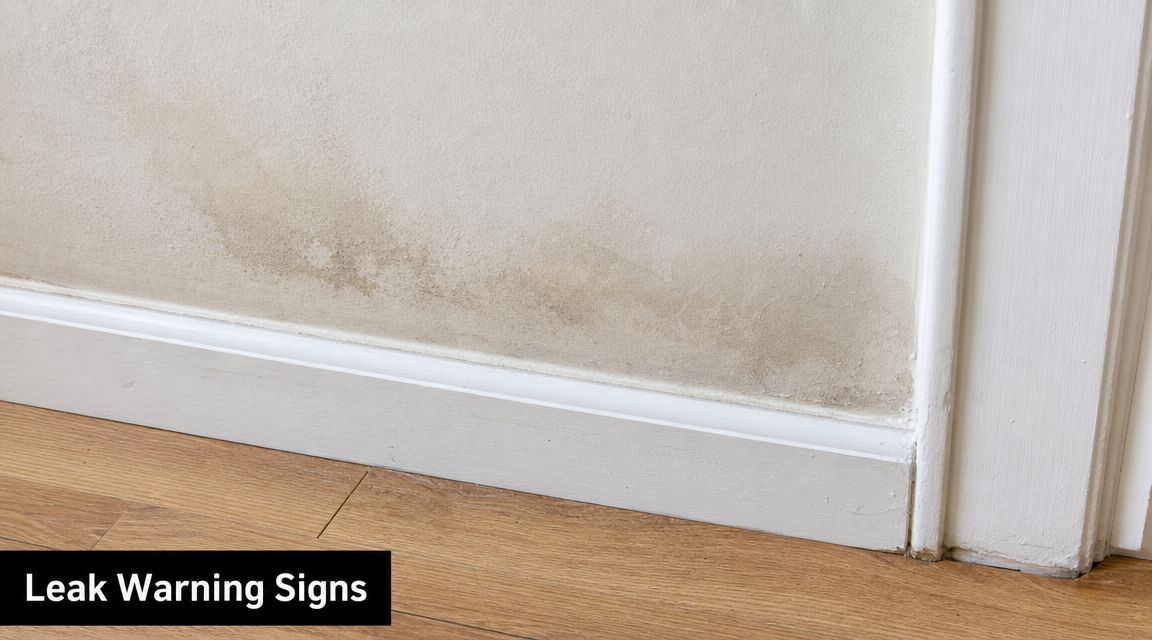
Most tiled pool failures aren't random. They're built in early. The symptoms appear later as hollow tiles, cracked grout, leaking junctions, staining, movement at corners, or tiles that start to release after the pool has been in service for a while.
Homeowners often blame the visible product first. In practice, the root cause is usually deeper. Bond failure, poor substrate preparation, inadequate waterproofing continuity, weak detailing at changes in plane, or no allowance for movement are far more common explanations than “bad tiles”.
Failures that start below the tile
A drummy tile isn't just an annoyance. It's a warning. It can point to incomplete adhesive coverage, contamination on the substrate, movement beneath the tile bed, or a tiling system that was forced onto an unprepared surface.
Grout deterioration can also mislead people. Grout is often treated as if it failed on its own. In reality, grout may be responding to movement, water migration, poor joint design, or stresses transmitted from the shell.
Problems that repeatedly show up in pool rectification work include:
- Hollow-sounding areas where the tile bond has weakened.
- Cracking at corners and transitions where movement concentrated but no proper allowance was made.
- Persistent leaks tied to junctions, penetrations, or membrane failure beneath the finish.
- Patchy repairs that solve the symptom but leave the underlying cause in place.
Movement joints are not optional
Trade discipline is paramount. A pool moves. It moves with temperature, moisture, load and settlement. Tiling doesn't stop that movement. It has to accommodate it.
Australian training guidance for domestic pools and spas recommends movement joints every 2.5–4 m, and notes that a 50 m pool can allow for about 10 mm average expansion after filling, with joint widths around 3–4 times the anticipated movement, or about 30–40 mm, to reduce bond failure from moisture-driven dimensional change, as set out in this Australian pool tiling training standard.
That's the technical version of a simple truth. If the system doesn't have room to move, the stress shows up somewhere else.
Tiles don't fail because they got wet. They fail because the installation didn't account for what water, movement, and pressure do over time.
A long-lasting pool build manages movement early, not after the cracks appear.
Why Your Pool Tiler Should Be a Registered Builder
A tiled pool sits across more than one trade boundary. That's the key point many homeowners miss. It involves structure, waterproofing, set-out, finishing, penetrations, coordination with pool systems, and site responsibility. That's why the person leading the work matters as much as the person laying the tiles.
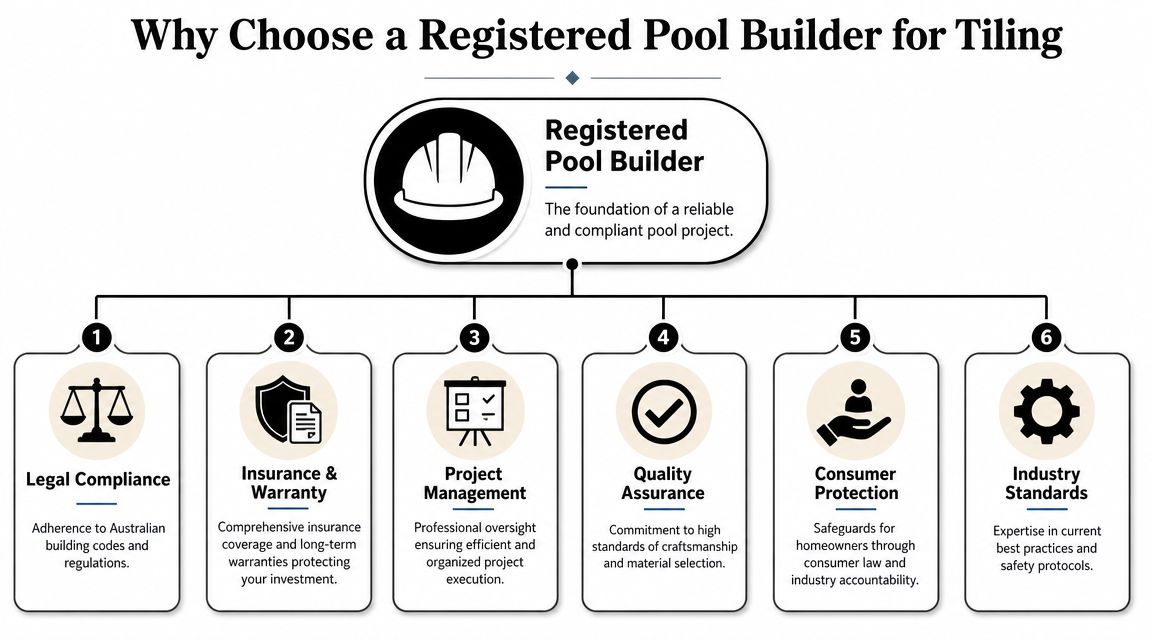
The Australian Bureau of Statistics separates Wall and Floor Tilers from Swimming Pool and Spa Builders, and notes that builders may install pool plumbing, electrical systems, hardscape areas and decorative elements, while registration or licensing may be required, as shown in the ABS occupation classification for pool builders and tilers. That distinction reflects what happens on real projects. A pool isn't one trade working in isolation.
A pool project involves more than tiling
A registered builder approaches a tiled pool as a managed construction package. That includes:
- Trade coordination across tilers, waterproofers, plumbers, electricians and other required specialists.
- Scope responsibility when the shell condition, penetrations, drainage or sequencing affect the tile finish.
- Compliance mindset so the installation is treated as part of the building work, not a cosmetic overlay.
- Risk control through documentation, staging, inspections and site management.
That broader oversight matters on renovation work especially. Once the old finish comes off, someone has to decide what gets repaired, what can remain, which trade returns next, and when the surface is ready for the following stage.
Why bathroom renovation experience matters
The connection to bathroom renovations is stronger than most homeowners expect. In premium bathroom work, the most reliable results come when one registered builder manages waterproofing, screeding, plumbing, electrical, carpentry and finishes under one program. Pool work benefits from the same structure.
A contractor such as Melbourne Tiling Services P/L on its commercial tiling page presents itself as a registered builder coordinating multi-trade tiling and waterproofing work across Melbourne. That model is relevant to pool tiling because it reflects the same need for oversight, trade sequencing and wet-area discipline.
If you hire only for the visible finish, you may still need someone else to carry the structural and compliance side. If you hire a registered builder with tiling expertise, those responsibilities are more likely to sit under one roof.
Selecting Your Tiling Professional: Quotes, Designs, and Warranties
By the time you're comparing contractors, you should be looking for clarity, not sales language. The right professional won't just tell you the pool will look good. They'll show you how the work will be documented, staged and protected.
A quality proposal for swimming pool tiling Melbourne work should read like a project plan, not a one-line rate. If the quote is vague, the disputes usually arrive later.
What a proper quote should include
Look for a quote that breaks out the practical parts of the job:
Preparation scope
Removal, cleaning, grinding, repairs, substrate correction and disposal should be identified.Waterproofing and setting methodology
You want to know what wet-area build-up is being proposed and who is responsible for it.Tile supply and installation detail
The quote should identify what's being supplied by whom, and whether trims, edges, fittings and feature areas are included.Allowances and exclusions
Unknown substrate repair work, specialist access equipment, or owner-supplied materials should be clearly stated.
For design-led projects, visual planning is valuable. Many homeowners benefit from sample boards, layout sketches or 3D drawings before work starts, especially when they're balancing water colour, interior tile choice, coping, and adjacent paving. That's common in quality bathroom renovation work and it translates well to pools.
What to ask before you sign
Ask direct questions.
Who is managing the whole project if additional trades are needed?
Who carries responsibility for waterproofing and substrate readiness?
What happens if hidden defects are found during demolition or surface preparation?
How will variations be approved?
What workmanship warranty is being offered, and how are material warranties handled?
Also ask for evidence of organisation. Clean documentation usually reflects clean site management.
A reliable contractor should be comfortable discussing:
- Builder registration status
- Public liability insurance
- Who supervises the job
- How defects are rectified if they arise
- How the final finish is protected before handover
The best appointments are calm, specific and transparent. No pressure. No evasive answers. Just a clear explanation of how the pool will be built, tiled and signed off.
If you're planning a new pool finish or renovating an existing tiled pool, Melbourne Tiling Services P/L is one Melbourne option to consider for builder-led tiling and waterproofing work. The company operates as a registered builder and bathroom renovation specialist, which is relevant for pool projects that need coordinated wet-area expertise, detailed preparation, and clear quoting before work begins.

Recent Comments