

You've reached the stage of a Melbourne bathroom renovation where the tiles are finished, the fittings are on site, and the frameless shower screen looks like the last straightforward job. It isn't. A glass panel can be perfectly manufactured and still leak, bind, or put stress on the fixings if the waterproofing, waterstop, finished floor, and wall set-out aren't right first.
This is the practical answer to how to install frameless shower screen in a Victorian bathroom. The glass is the visible part, but it's only the final component of a wet-area system. The steps below cover preparation, tools, compliance, measuring, fixing, sealing, fault diagnosis, and the point where a registered builder needs to take responsibility.
Table of Contents
- What You're Really Fitting Before the Glass Goes In
- Tools, Glass and Compliance Items to Have on Site
- Measuring and Setting Out Against the Waterproofing
- Fixing the Channel, Hinges and Glass Panel
- Sealing, Door Gap and Final Alignment
- When a Registered Builder Should Take Over
- Common Installation Problems and How to Fix Them
What You're Really Fitting Before the Glass Goes In
An ensuite is usually close to lockup when the shower screen installer arrives. The wall tiles have cured, the shower base or hob is installed, the floor falls toward the waste, and the waterproofing membrane should already have been inspected and tested. If those layers aren't settled, fitting glass is premature.
Under the Victorian Building Authority waterproofing guidance, an enclosed shower is a wet area that must be designed to prevent water spreading. The VBA also states that a fully frameless shower area is acceptable only when the relevant building surveyor is satisfied that it will prevent water escaping from the category 1 area.
The surfaces behind the finished bathroom
Before drilling or lifting glass, check the records and the physical set-out:
- Waterproofing record: The wet-area work should comply with AS 3740, with a valid flood test record available before the finished surfaces conceal the membrane.
- Wall and floor geometry: The floor must be level across the screen span, and the finished wall should be plumb. A builder's long level or laser exposes problems that a short spirit level can miss.
- Waterstop position: The screen must align with the waterstop or hob. It isn't a free-standing line chosen for appearance after tiling.
- Tile layout: Square, consistent joints make the screen easier to set out, but the screen still follows the wet-area boundary rather than blindly following a tile joint.
Drilling into a waterproofed wall without knowing where the membrane and structure sit can damage the system and create a path for moisture behind the tiles. The screen installation is the moment the assembly becomes loadable, so the wall, substrate, anchors, hinges, and panel all need to work together.
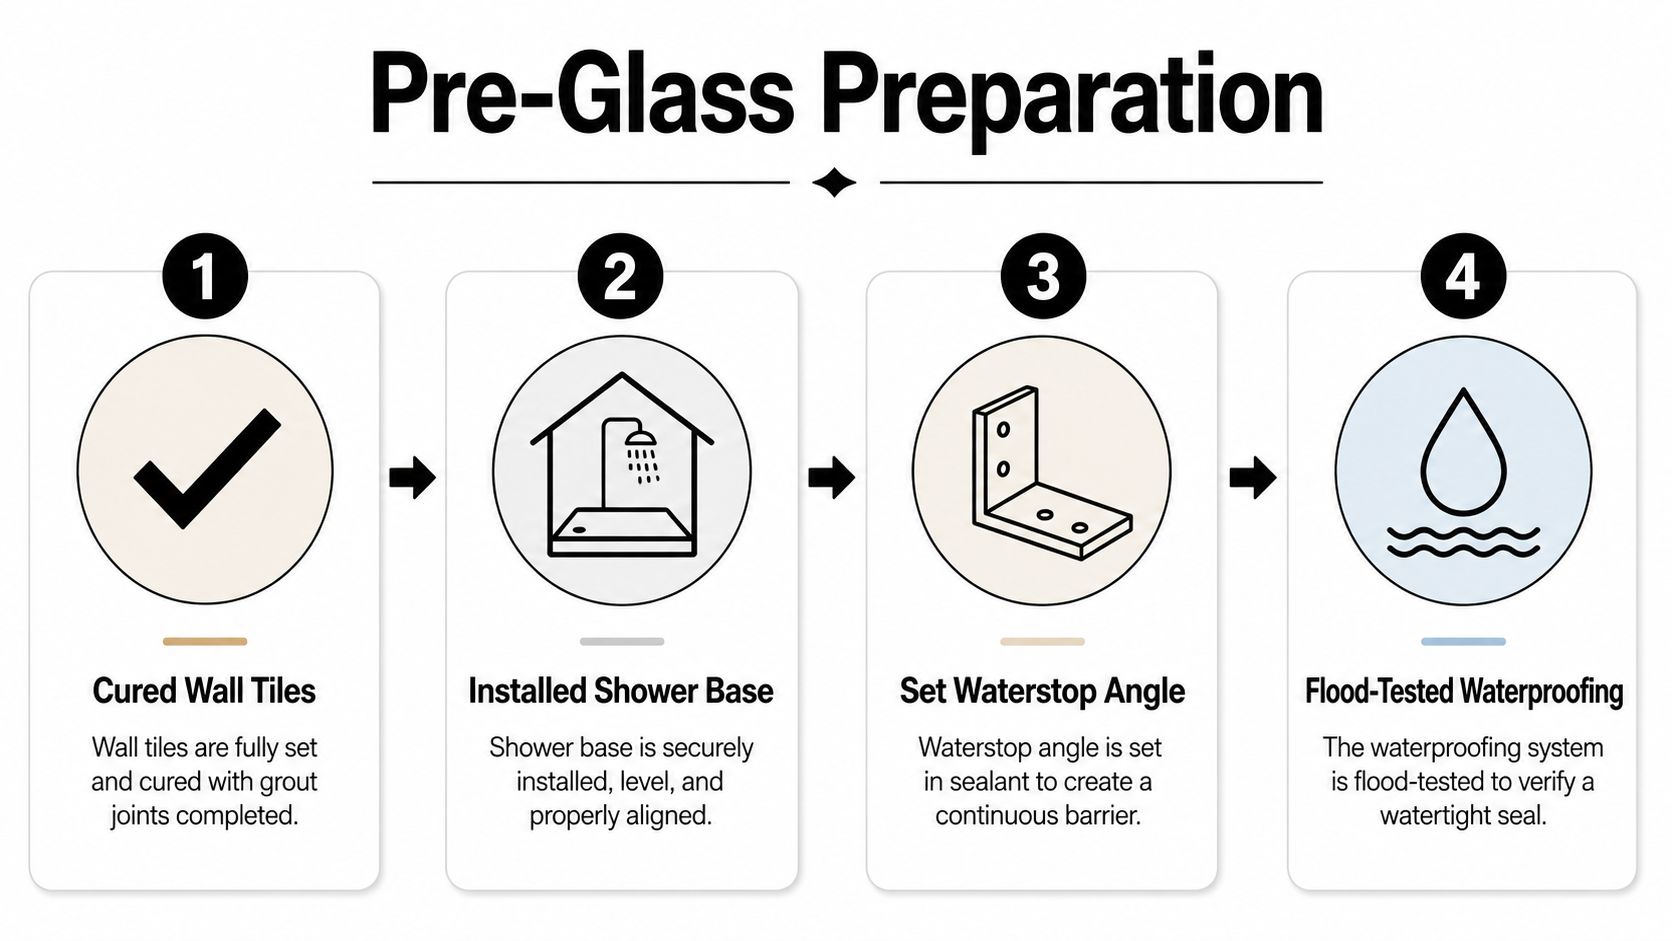
Site rule: Don't book the final glass measure until the finished floor, tiles, waterstop, and shower fittings are fixed in their final positions.
For Melbourne bathroom renovations, a useful reference is the frameless shower screen installation service information, particularly where screen measurement follows completion of tiling. That sequence prevents a common mistake, ordering glass against dimensions that change during screeding, tiling, or floor-level adjustment.
Tools, Glass and Compliance Items to Have on Site
A frameless screen shouldn't be installed with a mixed collection of household tools. Glass is unforgiving, polished edges can chip on hard surfaces, and a badly placed hole can compromise both the tile and the substrate. Put every tool and document on the floor before marking the first hole.
The practical tool kit
You'll need a quality cordless drill with hammer function, suitable 6 mm and 8 mm diamond or masonry bits, a spirit level of at least 600 mm, and a 1.5 m laser or long level. Add a silicone gun, neutral-cure silicone, masking tape, pencil, 1 mm and 3 mm packers, and non-marking suction lifters rated above the panel weight.
A second pair of hands isn't optional for a large panel or hinged door. One person controls the glass while the other checks plumb, supports the panel, and manages fixings. Keep the glass on padded supports, never directly on tile, concrete, or metal.
| Item | Spec / Size |
|---|---|
| Drill bits | 6 mm and 8 mm diamond or masonry bits matched to the tile |
| Levels | 600 mm minimum spirit level, plus a 1.5 m laser or long level |
| Packers | 1 mm and 3 mm packers for controlled adjustment |
| Suction lifters | Non-marking, rated above the panel weight |
| Sealant | Neutral-cure silicone |
| Glass | 6 mm to 10 mm toughened safety glass |
| Fixings | Stainless steel or zinc-plated screws suited to the substrate |
| Support | A second person and temporary bracing |
Glass and paperwork
Australian technical requirements centre on AS/NZS 2208 for safety glazing materials and AS 1288 for glass selection and installation, as outlined in this Australian frameless shower screen regulations guide. Frameless screens generally use toughened safety glass from 6 mm to 10 mm, with polished edges and the manufacturer's compliance stamp visible in a corner.
A wider frameless panel needs more careful hardware selection and structural support. Many Melbourne installers specify 8 mm as the minimum for a frameless panel wider than 700 mm, but the manufacturer's design and hardware rating still govern the final choice. The panel mass, hinge type, wall structure, brace requirements, and fixing pattern must be assessed together.
Keep the NCC Volume Two waterproofing records, any required plumbing sign-off, and the panel's compliance certificate with the renovation file. Silicone isn't a substitute for mechanical fixings, and a channel that's only bonded to a weak surface won't reliably carry a moving door.
Measuring and Setting Out Against the Waterproofing
The screen should be square to the wet zone, not automatically square to the nearest wall or tile joint. Melbourne walls and tiled screeds often vary enough that measuring one point gives a false sense of accuracy.
Start by measuring the finished wall-to-wall opening at the floor, midpoint, and top. Record each reading. That tells you whether the walls converge, whether the panel needs a controlled clearance, and whether a standard door configuration will work without binding.
Mark the wet-area line
Mark the screen centre line on the floor with a pencil or fine tape. Transfer it to the wall at screen height using the laser. Place the channel or base profile in position and dry-fit the panel before drilling.
The critical check is the relationship between the glass and the waterstop. The VBA guidance says a shower screen should lap 3–5 mm over the waterproofing membrane on either side. The shower waterproofing membrane guidance is useful background, but on site the installer must locate the actual membrane termination and waterstop rather than assume it from the tile pattern.
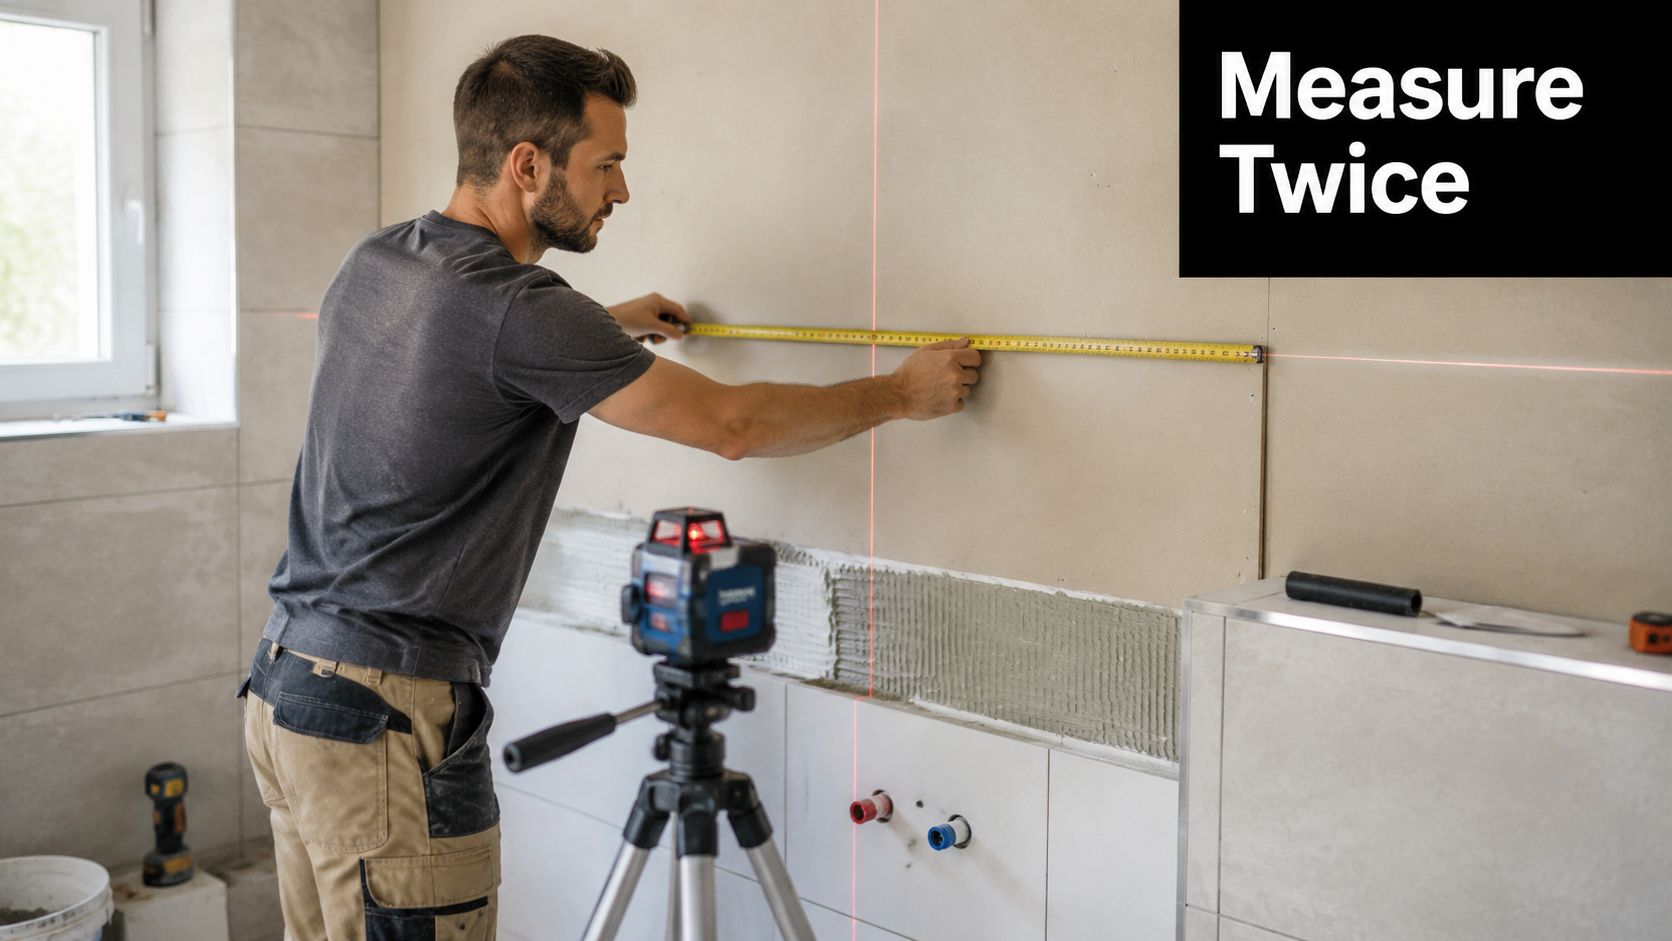
Dry-fit before making holes
With the panel supported, check the following:
- Waterstop lap: Keep the glass within the 3–5 mm lap zone, never beyond the membrane termination.
- Base level: Pack under the channel where necessary so it remains level along its full length. Don't shim more than 5 mm.
- Fitting clearance: Confirm the panel remains clear of the shower rose swing by at least 1500 mm.
- Door operation: Use the manufacturer's template to mark hinge or pivot points, then check the intended swing against the vanity, toilet, and entry.
- Record condition: Photograph the dry-fit, waterstop relationship, and packers before installing any fixings.
The screen must sit over or inside the waterstop boundary. In a hobless shower, that floor interface is a compliance detail, not a cosmetic choice. If the finished floor build-up has moved the boundary, stop and resolve it before drilling.
Fixing the Channel, Hinges and Glass Panel
Fix the wall channel or jamb before lifting the main panel into its final position. The channel needs a sound substrate, accurate plumb, and fixings that suit the wall construction. A screw driven into tile adhesive alone won't provide the same support as a fixing into masonry or properly located framing.
Use the specified 6 mm masonry bit for the channel holes, while taking care not to drill blindly through the waterproofing. Keep the fixings vertical and target stud or masonry where the wall construction allows. Clean the holes, install the appropriate anchors or screws, and avoid overtightening against the tile.
Build the support before loading the glass
Drop the wall jamb or channel into position and pack the base until it's plumb. Check it in both directions with the long level. The panel must sit evenly, with no hard point where glass bears directly against tile, metal, or a screw head.
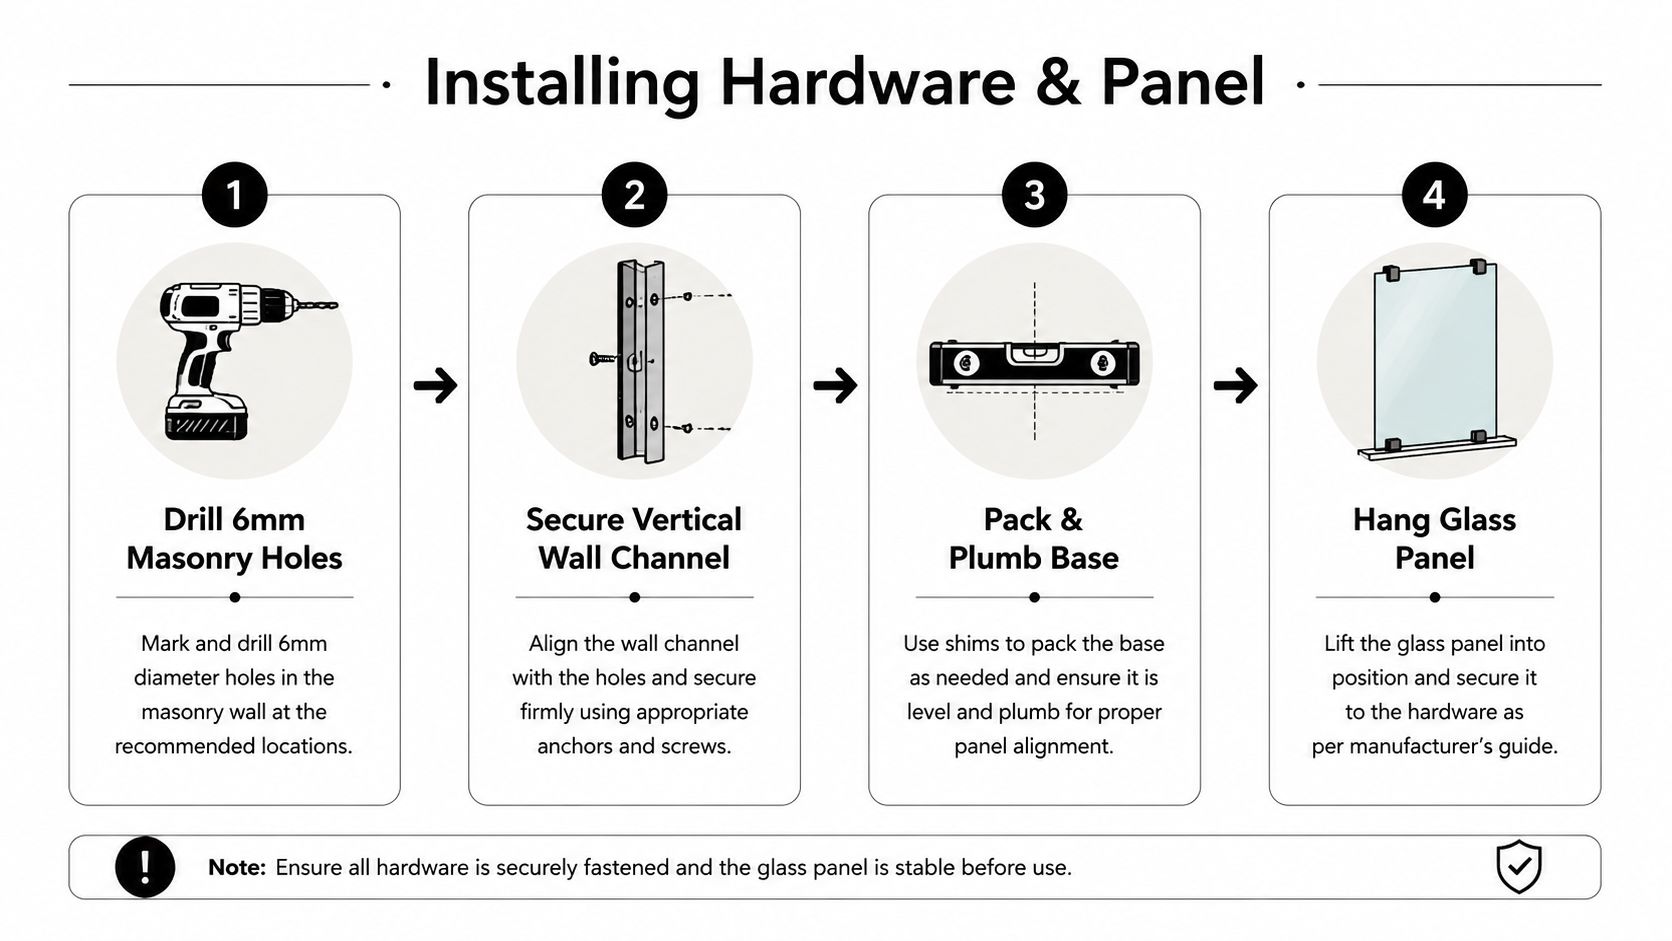
For a hinged panel, use the manufacturer's template for hinge centres. A typical set-out may place the hinge centre 25 mm from each glass edge and 200 mm from the top, but the supplied hardware specification takes priority. Don't transfer a measurement from another screen because hinge mortices, glass preparation, and load ratings vary between systems.
Lift and secure in a controlled sequence
Have two people lift the panel with suction cups. Rest it on temporary timber bracing and packers while the hinges or channel are brought into alignment. Keep fingers away from the edge and don't let a polished corner touch the floor.
Tighten the hinge hardware to the manufacturer's torque setting. Some systems specify 15–20 Nm, so check the installation sheet rather than guessing. Fit the door panel with the same care, support its weight while aligning the hinges, and swing-test it before applying silicone.
Glass handling matters: If the panel rocks, binds, or contacts metal, don't solve the problem by tightening harder. Correct the support, clearance, or alignment first.
The technical guidance for Australian frameless glass compliance reinforces the need for safety glazing, suitable hardware, and mechanical fixing or bracing. Silicone seals joints. It doesn't replace engineered support.
Sealing, Door Gap and Final Alignment
Sealant should be the last adjustment, not a way to hide a crooked channel or a misplaced waterstop. Clean the tile, metal, and glass surfaces, allow them to dry, and mask both sides of each joint before applying silicone.
Run a 5 mm bead of neutral-cure silicone along the inside edge of the wall channel and along the waterstop where the glass meets the hob. Tool the bead flush so it forms a neat joint of approximately 3–4 mm between the masking lines. Remove the tape before the silicone skins over.
Set the moving parts before the seal cures
Use clear packers to set the door clearance. A practical arrangement is an 8 mm hinge-side gap and a 6 mm latch-side gap, then adjust the pivot blocks until the door self-centres. The exact hardware system can change those clearances, so use the manufacturer's sheet as the controlling document.
Check the bottom edge for contact throughout the swing. The drip rail belongs inside the shower line, directing water back toward the wet area rather than projecting over the bathroom floor. If there's a floor channel, make sure the drain path remains open and silicone hasn't bridged it.
- Open and close the door repeatedly: Look for binding at the latch, jamb, floor, and adjacent panel.
- Check the seal line: It should be continuous at the channel and waterstop, without gaps or pinholes.
- Inspect the fixing points: Glass must remain isolated from metal by the supplied washers, bushes, or sleeves.
- Protect the cure: Keep water off the installation for 24 hours so the silicone can cure properly.
A door that closes neatly but pushes water outside the screen still needs correction. Watch the first controlled shower and inspect the floor line, because a small failure at the waterstop interface can move moisture into the broader bathroom.
When a Registered Builder Should Take Over
The common assumption is that a shower screen is always a minor DIY fitting. That assumption fails when the screen forms part of regulated bathroom renovations. In Victoria, domestic building work valued at more than A$10,000 must be carried out by a person registered with the Building and Plumbing Commission, with registration approved before work starts, as outlined in the Victorian practitioner registration information.
The threshold applies to the broader residential renovation scope, not just the price of the glass. If the screen is one component of a bathroom renovation involving waterproofing, tiling, plumbing, carpentry, and finishing work, assess the total contract rather than treating the panel as an isolated purchase.
The paperwork changes with the project
Victoria also requires a major domestic building contract for work worth more than A$10,000, while domestic building insurance applies to work worth more than A$16,000. A projection published for work from 1 July 2026 states that Home Warranty insurance will be required above A$20,000, according to this Victorian bathroom renovation coverage guide.
DIY owner-builders can still undertake work on their own home, but the owner carries the insurance and coordination risk. The decision becomes less comfortable when waterproofing is being altered, structural framing is being changed, or the door is unusually wide and heavy. A pivot door exceeding 900 mm deserves a properly assessed wall structure and hardware system rather than a casual fixing decision.
| Scenario | Can You DIY? | Why |
|---|---|---|
| Replacing a small, non-hinged panel on an established wet area | Potentially, if competent | The waterproofing boundary and structure still need to remain intact |
| Installing a hinged frameless screen during a bathroom renovation above A$10,000 | Not as an unregistered contractor | The broader domestic building work crosses the Victorian registration threshold |
| Drilling where the membrane location is unknown | No | Damage can compromise the waterproofing system |
| Altering framing, hob, set-down, or waterstop geometry | No | The work affects structure or wet-area compliance |
| Installing a heavy pivot door over 900 mm | Use a registered builder and qualified installer | Hinge loads and wall reinforcement need proper assessment |
A registered builder also coordinates licensed plumbers, waterproofers, tilers, and screen installers when the work crosses trades. That coordination matters because the screen can't be corrected in isolation if the floor falls, membrane line, or waterstop was set incorrectly.
Common Installation Problems and How to Fix Them
Three faults appear repeatedly after frameless screens are installed: water tracking onto the bathroom floor, doors that bind, and cracks radiating from fixings. Each symptom points to a set-out or installation problem. Filling a visible gap with more silicone rarely fixes the cause.
Quick diagnosis on site
| Symptom | Likely cause | Realistic fix |
|---|---|---|
| Water tracks across the floor | Misaligned waterstop, missing channel seal, or excessive door gap | Check the wet-area boundary, remove and reseal the affected channel, then reset the door |
| Door binds or won't close | Hinge set-out error or out-of-plumb wall beyond the hardware tolerance | Adjust packers and hinges, or relocate the fixing point where the system permits |
| Crack radiates from a hole | Incorrect fastener, excessive torque, or glass touching metal | Remove the panel, replace damaged glass if required, and correct the fixing assembly |
Floor leakage often begins at the interface rather than in the middle of the glass. If the screen sits outside the waterstop, or if the channel base has an unsealed break, water can move under the finished surface even when the visible silicone bead looks tidy. Resetting the waterstop or screen position may be necessary, not just adding another surface bead.
Binding usually reflects geometry. Check the wall with a long level, inspect the hinge centres against the manufacturer's template, and look for a packer that has compressed or shifted. Forcing the door closed increases stress on the hinges and fixings.
A crack at a drill hole is a stop-work fault. Wrong screws, overtightened hardware, missing nylon bushes, or direct glass-to-metal contact can all concentrate stress. Remove the panel for proper inspection instead of filling the chip and putting the door back into service.
Melbourne Tiling Services P/L coordinates bathroom renovations, waterproofing, tiling, screeding, and frameless shower screen installation through registered builders and relevant trades. For a renovation where the membrane, waterstop, finished floor, and glass need to be treated as one system, visit Melbourne Tiling Services P/L to arrange a site discussion and quote.
Recent Comments