

Frameless shower screens typically require at least 6 mm toughened safety glass, and Melbourne renovation work worth more than $10,000 legally requires a registered builder or building company. The screen still needs accurate measurement, structural fixings, compliant glazing and careful waterproofing coordination, even when the glass installation looks simple.
The usual starting point is an ageing bathroom in a Melbourne home. The tiles have been updated, the old framed enclosure is stained or loose, and a clean frameless panel seems like the obvious finishing touch. Then the installer finds a wall that isn't plumb, a floor that falls unevenly, or hinges with nowhere solid to anchor.
That's why glass shower screen installation is more than fitting a pane into a tiled opening. The glass, brackets, hinges, wall structure, shower hob, waterstop and waterproofing membrane all need to work together. A screen can look level while allowing water to escape, or appear securely sealed while the hinges slowly pull against an inadequately reinforced wall.
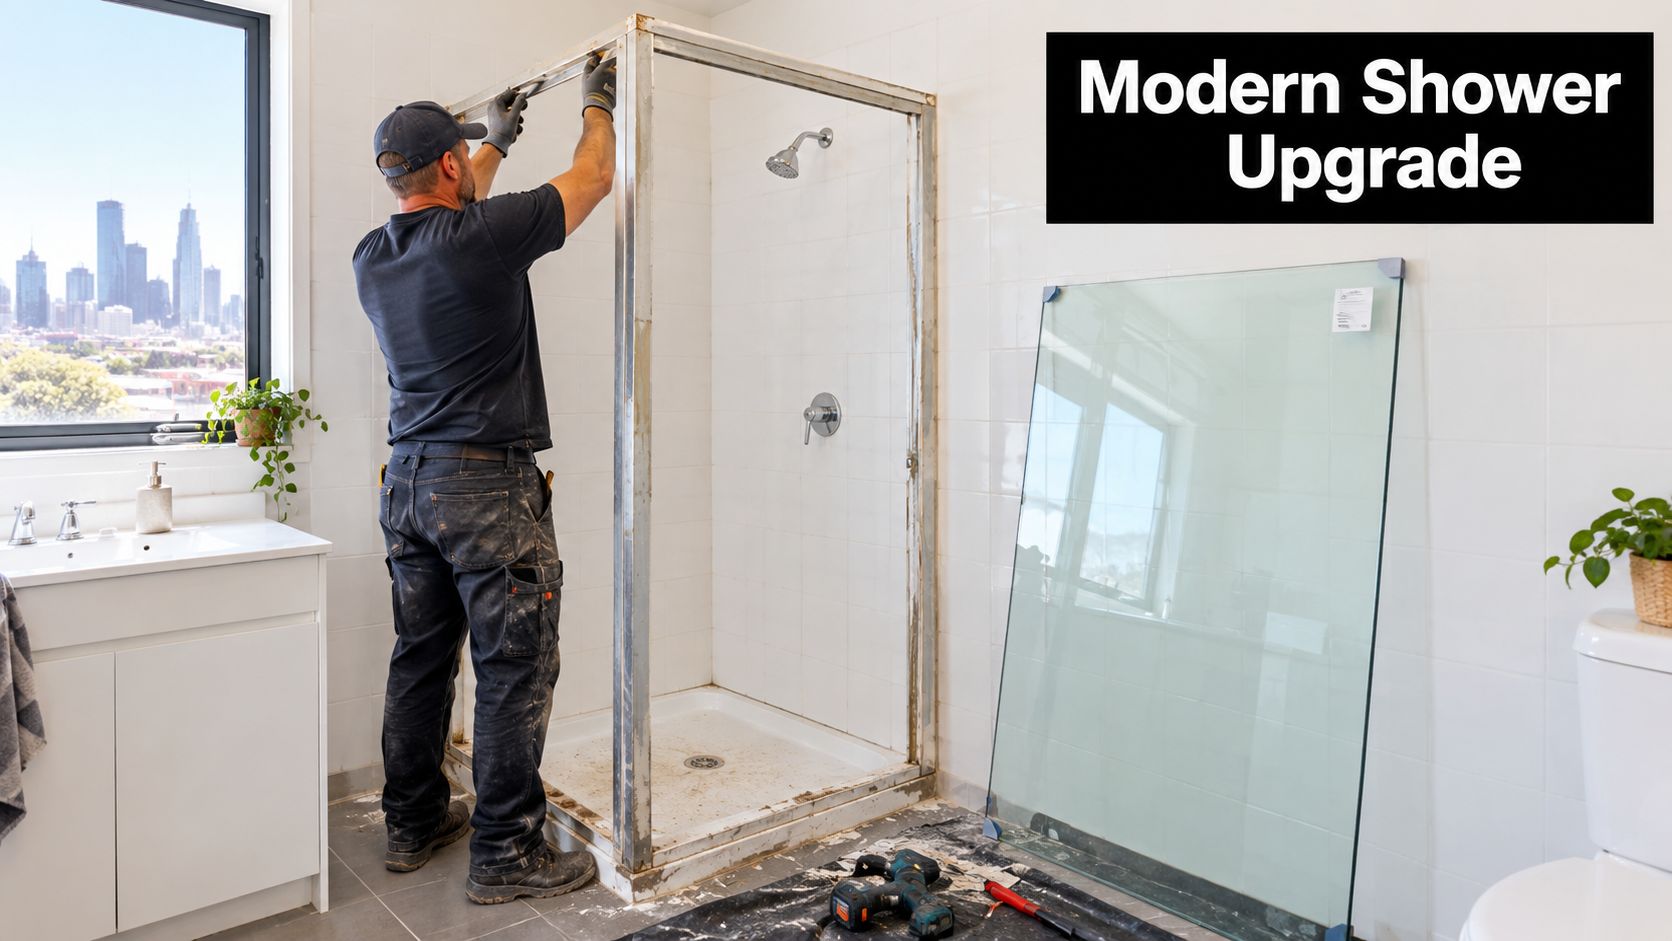
Table of Contents
- Understanding Glass Shower Screen Installation in Melbourne
- Essential Tools and Materials for Installation
- Step-by-Step Installation Process
- Common Mistakes and Installation Pitfalls
- Compliance Requirements and Building Regulations
- Cost Estimates and Time Requirements
- When to Hire a Professional in Melbourne
Understanding Glass Shower Screen Installation in Melbourne
In Australia, shower screens and shower doors in bathrooms, ensuites, spa rooms and similar wet areas fall under the National Construction Code's glazing provisions. If the lowest sight line is less than 2.0 m above the finished floor or shower base, framed panels must use Grade A safety glazing. Panels or doors with an exposed edge must use toughened safety glass with a minimum nominal thickness of 6 mm, as set out in the National Construction Code glazing provisions.
A sight line is the height at which a person can see the glass in normal use. In a bathroom, much of the screen sits below that safety threshold, so decorative or ordinary household glass isn't suitable. The regulation treats the screen as a human-impact safety element, not just as a design feature.
Design must follow the room
A fixed panel can create an open walk-in entry, but it won't contain spray as effectively as a hinged door. If the shower head points towards the opening, water may reach the bathroom floor even when the panel is installed perfectly. A hinged door improves containment, but it needs outward swing clearance and stronger wall support at the hinge side.
Frameless, semi-frameless and framed systems each solve different problems. Frameless glass gives a lighter visual result and fewer tracks to clean. Framed systems can offer more restraint and water control in awkward layouts, while semi-frameless screens sit between those priorities.
Homeowners comparing unusual layouts, returns or enclosure shapes may also find custom shower screen designs useful for seeing how a made-to-measure configuration can respond to the room rather than forcing the room to suit a standard kit.
Where the screen fits in the wet area
The screen doesn't perform the bathroom's waterproofing. It manages water movement and splash after the waterproofed substrate, falls and drainage have done their work. For a screen installed over a hob, the NCC requires the screen to sit flush with the shower-area side of the hob or overhang into the shower area. A stepdown requires the screen to sit flush with the finished vertical surface, while a shower without a hob or stepdown needs an inverted channel positioned over the waterstop.
Those details matter in Melbourne renovations because an installer often arrives after demolition, plumbing and tiling. The glass must be measured against the finished surfaces, not an earlier plan, and the fixing method must suit the wall behind the tiles.
Essential Tools and Materials for Installation
The right materials begin with the glass order. Frameless toughened glass generally needs a minimum thickness of 6 mm, while the NSW Government identifies 4 mm as the minimum for framed toughened shower glass and 6 mm for partly framed and frameless toughened glass. For an unframed screen supported on two adjacent edges, the Australian Glass and Window Association also recommends a minimum 6 mm toughened glass thickness and compliance with AS/NZS 2208. These benchmarks are explained in the NSW Government guidance on toughened glass.
The glass should arrive manufactured to the measured opening, with polished edges and any holes or cut-outs completed before toughening. Toughened glass can't be cut or drilled safely on site. A late change to a hinge position or notch usually means reordering the panel rather than modifying it with a standard drill.
The installation kit
A practical kit normally includes:
- A glass suction lifter: Use properly rated lifters and enough people to control the panel. A large pane is awkward even before it reaches the wall.
- A diamond tile drill bit: Drill slowly through tiles with suitable cooling and avoid hammer action. The anchor must suit the substrate behind the tile, not just the tile surface.
- A spirit level and straight edge: Check both vertical walls and the finished floor. A level panel may still need a controlled gap where the floor falls.
- Brackets, channels and packers: Choose hardware designed for wet areas and the specified glass thickness. Temporary packers protect the glass edge while the panel is positioned.
- Mechanical anchors and screws: Fixings must suit timber studs, masonry or the actual wall construction. Silicone is a sealant, not a structural substitute.
- Neutral-cure bathroom silicone: Apply it only where the system requires sealing. Blocking drainage paths or sealing the wrong side of a channel can trap water.
- A stud finder and inspection tools: Confirm where the hinge loads will transfer before drilling. If the wall has been opened during renovation, reinforce it before the tiles go on.
Check the wall before the glass arrives
Older Melbourne bathrooms often have walls that lean slightly or corners that aren't square. Measure the opening at relevant points, check the wall with a straight edge and record the floor fall at the threshold. A custom panel can accommodate a controlled variation, but it can't correct a wall that has been assumed straight when it isn't.
Door hinges need solid support behind the wall. Standard practice is a double stud or about 90 mm of timber blocking at hinge level, because the door load transfers through the hinge plate into the wall structure. If the only support is plasterboard and tile adhesive, the door may sag, loosen the fixing or stop closing cleanly.
Step-by-Step Installation Process
Good installation follows the finished room in a set order. The tiling, grout and silicone condition come first, then the glass is measured against what is physically present. A drawing can show the intended enclosure, but the site determines the final cut.
-
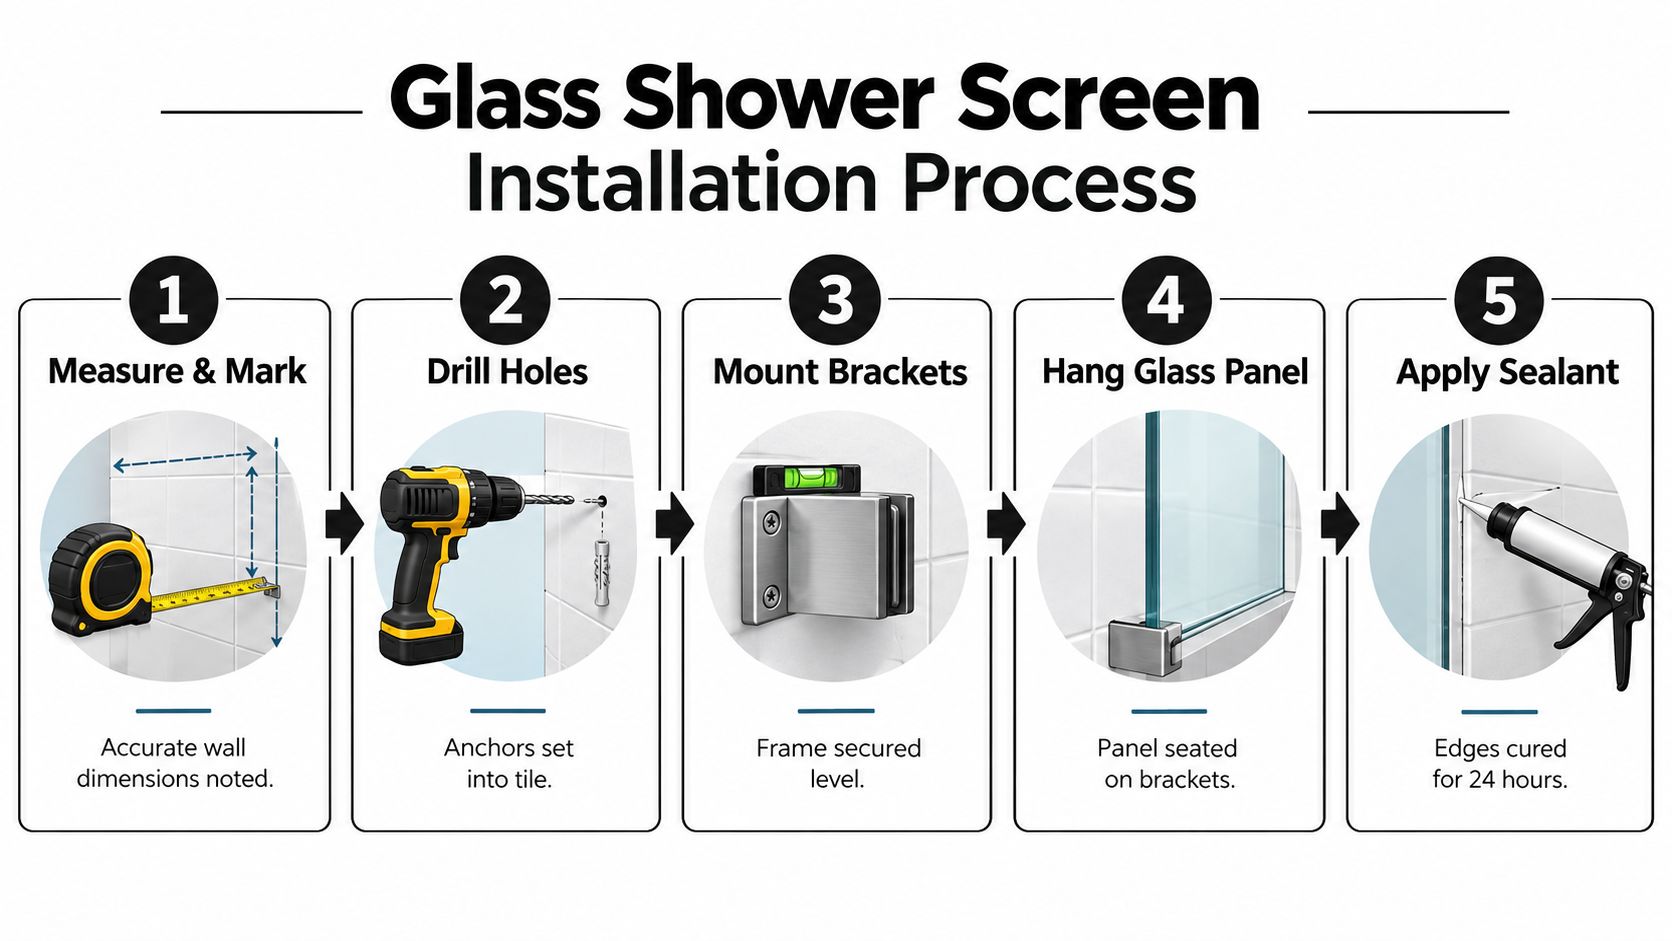
Measure and mark the opening. Check the width at more than one height, the wall plumb, the corner angle and the floor fall. Mark the panel position without placing the edge directly on the tile. For showers with a hob, stepdown or waterstop, confirm that the proposed line follows the relevant water-containment detail.
-
Confirm fixing locations. Locate studs, blocking or masonry before drilling. Fixed panels up to 2100 mm high should have at least 2 mechanical fixings. Taller panels require fixings at minimum 1700 mm spacing, according to practical Australian shower-screen installation guidance from O'Brien Glass. These fixings stop movement that silicone alone can't resist.
-
Drill without damaging the wet area. Mark the holes through the bracket or channel, protect the tile surface and use the correct diamond bit. Keep the drill controlled as it passes through the tile, then use an anchor appropriate to the structure behind it. Don't rely on a hollow-wall plug where a hinge or panel is loading the wall.
-
Mount the fixed panel. Place protective packers under the glass, fit the brackets or channel and check the panel in both directions. Don't tighten one bracket fully while the glass is being forced into position. Work progressively so the panel remains supported and the hardware doesn't point-load the edge.
-
Hang and adjust the door. Hinges should be fixed into the prepared wall support, not merely into the tiled face. Set the door so it runs true, closes against its seal or magnetic strip and maintains the intended floor clearance. Frameless doors commonly need only 3 mm to 10 mm of floor clearance, so a small deviation in the floor can affect the final adjustment.
-
Seal the correct joints. Clean and dry the surfaces, apply a continuous bead where the manufacturer specifies and tool the silicone without leaving voids. Avoid sealing over weep paths or creating a dam that sends water behind the channel. The screen controls water, but the membrane beneath the tiles remains the waterproofing layer.
-
Allow the sealant to cure. Leave the shower unused for at least 24 hours so the silicone can cure and form a watertight seal. This curing recommendation is also reflected in Australian manufacturer installation guidance. A useful supplementary reference for sequencing, levelling and handling glass components is the Binks step-by-step balustrade help, although shower-screen hardware and wet-area details must still follow the relevant shower system.
For a semi-frameless layout, compare the fixing and sequencing requirements with semi-frameless shower screen installation in Melbourne, particularly where a framed channel changes the way the glass meets the wall and threshold.
Common Mistakes and Installation Pitfalls
The most expensive mistakes usually happen before the glass is lifted. A homeowner measures the opening from the old screen, orders a standard panel and only discovers after tiling that the corner has moved or the finished floor falls towards the doorway. Glass can't be trimmed casually after toughening, so a measurement error can turn a quick replacement into a new manufacturing order.
Another common failure is treating silicone as the thing holding the screen up. Silicone seals a joint. It doesn't replace mechanical brackets, channels, anchors or stud reinforcement. When a hinged door is fixed into a weak wall, the hinge side can move first, followed by a door that rubs, a seal that opens and a bead of silicone that tears.
Practical rule: If a panel or door is carrying a load, identify the mechanical fixing and the structure behind it before thinking about sealant.
Water escaping isn't always a glass problem
A screen may leak because the panel is too short, the door gap is poorly aligned or the shower head directs spray towards the opening. It may also leak because the hob, stepdown, floor fall or waterstop has been detailed incorrectly. Adding more silicone to the visible edge won't correct a substrate that sends water in the wrong direction.
Victorian guidance makes the distinction clear. The shower screen is not the waterproofing solution. The membrane under the tiles provides waterproofing, and a shower screen isn't required where the whole bathroom has been practically waterproofed, as explained in the Victorian Building Authority wet-area waterproofing fact sheet.
What poor work looks like later
Weeks after installation, poor work can show up as a door that drops, a bracket that shifts, mould at an unsealed joint or water appearing outside the shower after every use. These symptoms aren't solved equally. A loose bracket needs structural investigation, while mould at a tile junction may point to failed sealant or a wet substrate.
Before accepting the work, open and close the door repeatedly, inspect the hinge side, check that the fixed panel doesn't move and look for gaps in the silicone. Run water in a controlled way only after the curing period, then check the outside of the enclosure and the adjacent skirting or vanity base.
Compliance Requirements and Building Regulations
The practical compliance question is not just, “Can this piece of glass fit?” It is, “What is the scope of the work, who is responsible for it, and does the finished enclosure protect people and contain water as intended?”
The NCC glazing rule uses the height of the lowest sight line to identify areas where human impact is foreseeable. Below the 2.0 m threshold, the specified safety glazing requirements apply. Exposed edges also matter, which is why frameless panels and doors are built around toughened safety glass rather than ordinary annealed glass.
When builder registration applies
In Victoria, domestic building work worth more than $10,000 must be completed by a registered builder or building company. The Victorian consumer guidance on builders and tradespeople also explains that a builder doesn't need to be registered for work involving only one trade, such as glazing.
That creates an important distinction for homeowners. A standalone glazing job may be treated differently from a bathroom renovation that includes demolition, plumbing, waterproofing, carpentry, tiling and screen installation. If the screen is one component of a larger contract over the threshold, the project should be assessed as a whole rather than treated as an isolated glass task.
A builder registration application for bathroom, kitchen and laundry renovation work requires evidence such as industry qualifications, project work evidence, a technical referee report, a criminal history check, photo identification, declarations and payment submission. The Victorian Building Authority's registration application for limited bathroom, kitchen and laundry renovation work expressly includes installed shower screens, mirrors and splashbacks within the renovation scope.
Permits and project boundaries
A bathroom renovation classified as structural work requires a building permit. Changing walls, altering waterproofing substrates or relocating plumbing can move the work beyond a simple replacement, as explained in guidance on bathroom renovations and building permits.
Use this decision check before starting:
- Standalone replacement: Confirm the glass specification, installer's experience and fixing method.
- Wet-area alteration: Establish who is responsible for waterproofing, substrate preparation and certification.
- Full bathroom renovation: Check builder registration, contract scope, permits and trade coordination.
- Structural change: Ask whether the proposed wall, plumbing or substrate work requires approval before demolition.
For a practical reference focused on the glass itself, see the frameless shower screen regulations in Melbourne. The final decision should still account for the complete renovation scope, not just the screen style.
Cost Estimates and Time Requirements
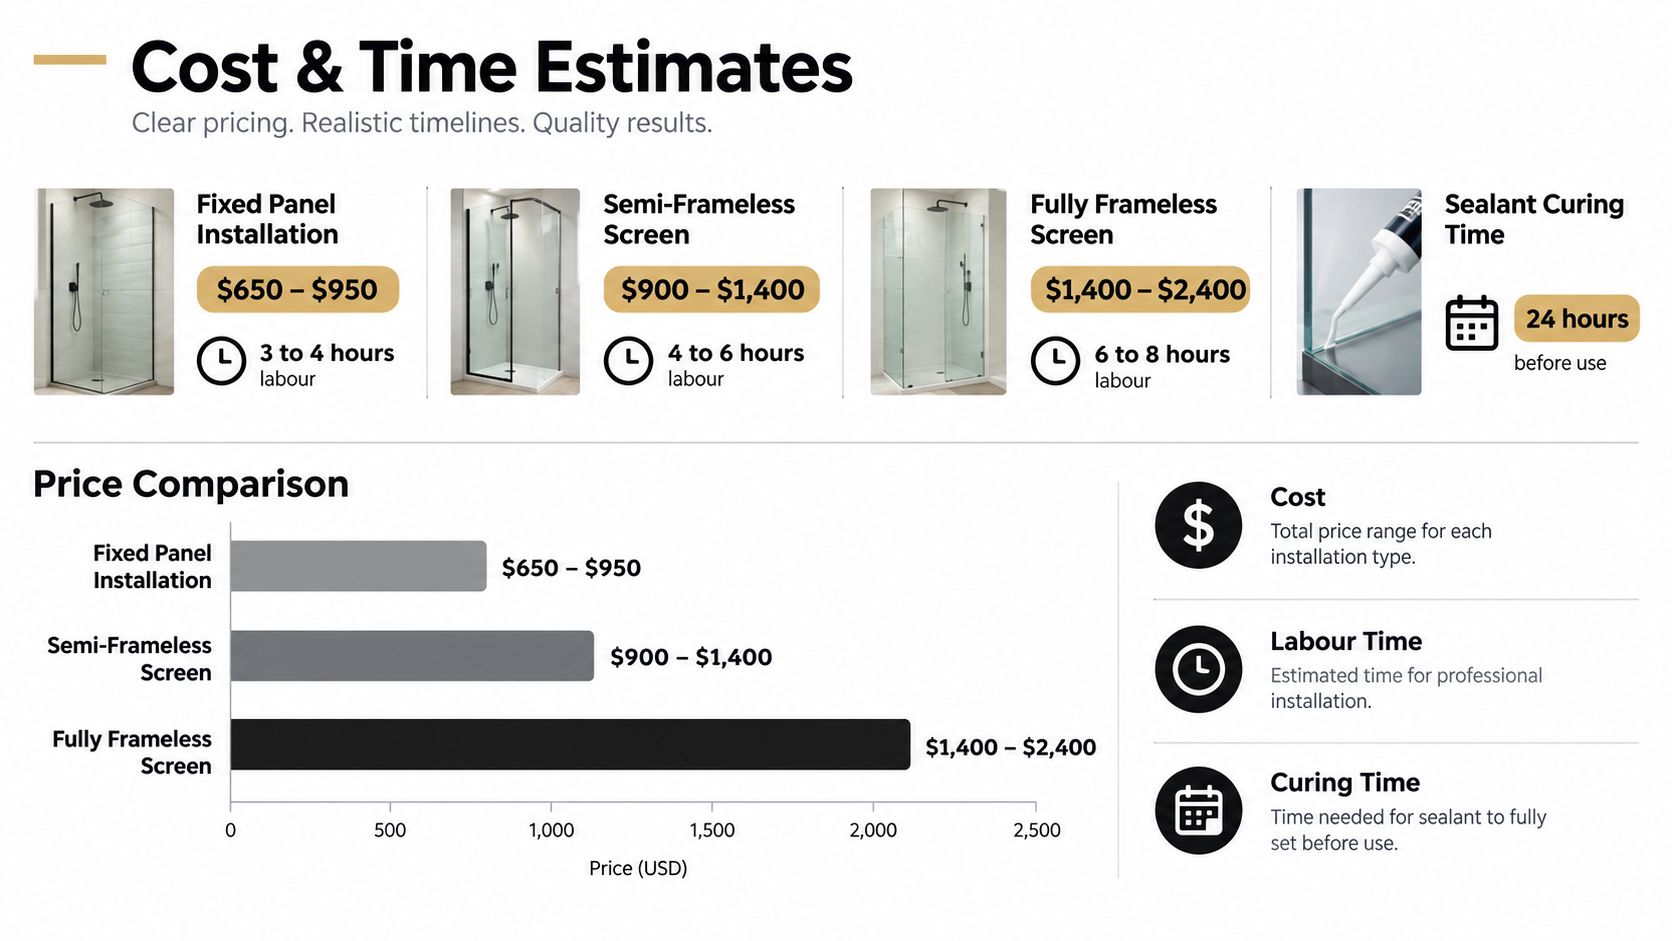
The price of a screen depends on the glass size, configuration, hardware, access, wall condition and whether the bathroom is already tiled. A fixed panel usually has fewer moving parts than a hinged enclosure. A door adds hinges, a handle, alignment work, seals and a swing-clearance check.
Frameless systems also demand more precision. The glass is more visually exposed, the wall and floor variations are less forgiving, and the installer must coordinate brackets, gaps and door movement without hiding errors behind a substantial frame. Semi-frameless systems can provide a practical middle ground where a channel or frame helps manage an imperfect opening.
Compare the real scope
A DIY installation may appear cheaper because the homeowner supplies labour, but the calculation changes if a panel is ordered incorrectly, a tile cracks around a hole or the wall needs opening and reinforcement. Professional pricing generally includes measurement, fabrication coordination, specialist handling, installation and a planned sealant cure period.
A quote should identify:
- Glass specification: State whether the system is framed, semi-frameless or frameless, and confirm the safety-glass specification.
- Hardware: List hinges, brackets, channels, handles, seals and finishes rather than describing them as a single allowance.
- Site preparation: Clarify who fixes out-of-plumb walls, weak substrates, damaged tiles or inadequate hobs.
- Aftercare: Confirm the curing period and what the installer expects the homeowner to check after completion.
Bathroom renovation budgeting also needs to include the surrounding work. Melbourne Tiling Services P/L offers renovation calculators and typically manages projects around a median $10,000 for bathroom renovations, including start-to-finish coordination of licensed tradespeople. That figure is a planning reference, not a universal screen price, because each bathroom has different demolition, waterproofing, tiling and plumbing requirements.
For a more detailed breakdown of factors affecting a project quote, use this guide to shower screen installation cost in Melbourne.
When to Hire a Professional in Melbourne
A homeowner who is replacing a like-for-like framed screen on a sound, finished bathroom may be able to arrange a standalone glazing service. That doesn't make every screen a suitable DIY job. Large glass panels are difficult to control, drilled holes must land accurately, and a hinged door can place considerable force on a wall that looks solid from the room side.

Match the installer to the project
Professional help becomes the sensible choice when the walls aren't plumb, the floor has an unusual fall, the screen includes a hinged door, or the fixing locations aren't obvious. It is also advisable where the bathroom is being stripped back, because waterproofing, tiling and glass measurement need to follow a coordinated sequence.
The registered-builder question depends on scope. A one-trade glazing job may not require a registered builder, while domestic building work over $10,000 must be done by a registered builder or building company. A bathroom renovation that combines several trades should be assessed as a complete project, with the contract, approvals and responsibility for defects made clear.
Ask potential contractors:
- Who measures the final opening? The answer should account for completed tiling, grout, falls and wall variation.
- What supports the hinges? Look for a clear explanation of studs, blocking or masonry anchors.
- Which part provides waterproofing? A competent contractor should distinguish the membrane from the glass screen.
- Who coordinates the trades? Plumbing, waterproofing, screeding, tiling and glazing need an organised sequence.
- What documents are supplied? Confirm the glass specification, scope, registration details where relevant and any approval responsibilities.
A red flag is a quote that promises a watertight result through silicone alone. Another is a contractor who wants to measure before the finished tile surfaces exist, or who can't explain how the panel will be supported. Cheap hardware and vague allowances may also hide later costs.
For homeowners planning a complete renovation, Melbourne Tiling Services P/L coordinates bathroom work with licensed carpenters, plumbers, electricians, tilers and waterproofers, and offers frameless shower screen installation alongside bathroom renovation services. The useful comparison isn't just the labour charge. It is whether the team can manage the wet-area sequence, identify structural issues early and leave the glass installation as the final measured fit.
The following video can help homeowners recognise the broad handling and installation sequence, but it doesn't replace a site assessment or Victorian compliance advice.
Before accepting a quote, provide photographs of the shower, the room layout and any known wall or waterproofing issue. Ask for a written scope that names the glass, hardware, fixings, sealant, measurement stage and responsibility for making good the surrounding bathroom. That preparation gives you a much clearer basis for deciding whether the project is a simple glass replacement or part of a regulated bathroom renovation.
For Melbourne bathroom renovations, Melbourne Tiling Services P/L can coordinate waterproofing, tiling, licensed trades and frameless shower screen installation as one organised project. Visit Melbourne Tiling Services P/L to request a quote and discuss the right screen configuration for your bathroom.
Recent Comments