
You notice it when you step onto the carpet outside the bathroom and the fibres feel sodden under your feet. The shower screen looks intact, the tiles still look presentable, and yet the skirting board is swelling or the room below has a faint brown mark on its ceiling. By the time water becomes visible outside the shower, it may already have travelled through joints, penetrations or the substrate.
Preventing shower leaks isn't about buying a better tube of silicone after the damage appears. It starts with the decisions made during a bathroom renovation, including the substrate, floor fall, membrane coverage, drain, screen and the people responsible for signing off the work. In Victoria, registered builders and waterproofing practitioners must work within the AS 3740 and NCC 2022 framework. The practical question is whether those requirements have been properly translated into the shower being built in your home.
Table of Contents
- Why Shower Leaks Happen in Melbourne Homes
- The Five Most Common Causes of Shower Leaks
- Building a Leak-Free Shower From the Substrate Up
- Choosing Membranes, Tiles, Grout and Shower Screens
- Routine Maintenance That Keeps a Compliant Shower Compliant
- Warning Signs That Point to Leak Rectification, Not Prevention
- Your Melbourne Shower Leak Prevention Checklist
Why Shower Leaks Happen in Melbourne Homes
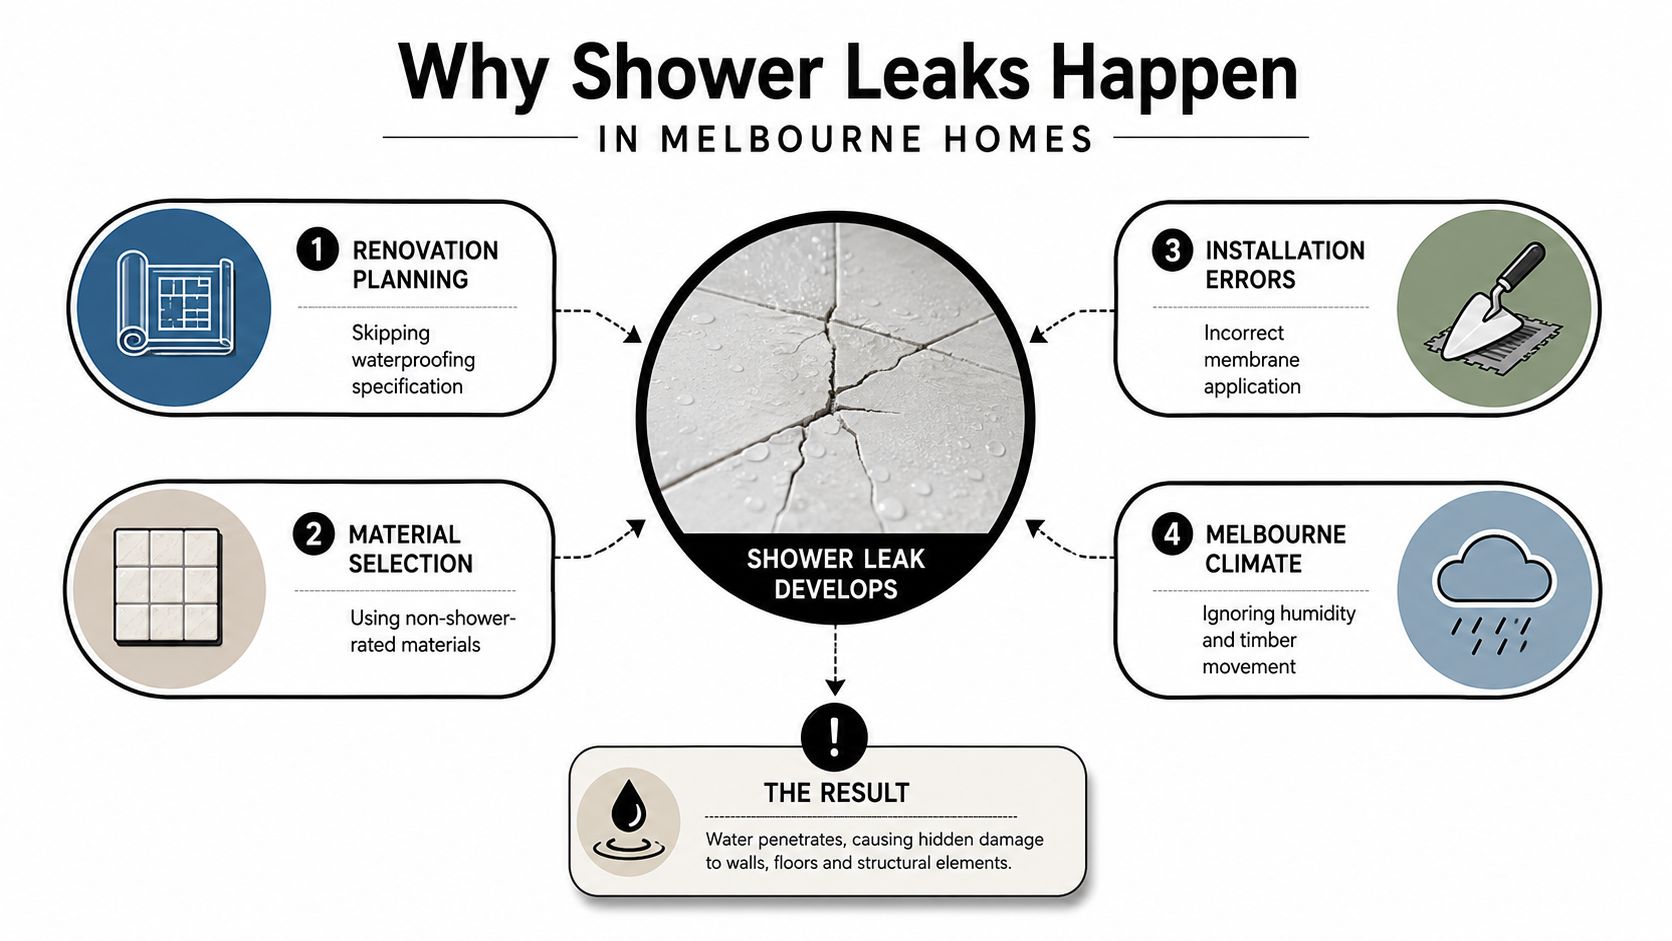
A shower leak is rarely one dramatic failure. More often, it's a chain of small decisions that drift away from the required construction detail. A membrane may be incomplete, the floor may hold water, a penetration may be left unsealed, or a screen may later be fixed through the waterproofing.
Australian building reviews and consultation material indicate that between 20% and 40% of modern multi-unit residential buildings have some form of waterproofing defect, with leaking showers, bathrooms and balconies repeatedly appearing among the common defect types over the past decade. The same review estimates the annual economic cost of residential apartment waterproofing defects at about A$121 million to A$314 million. These figures are discussed in the Australian review of waterproofing failures, and they explain why a shower shouldn't be treated as a cosmetic tiling job.
The house type changes the risk
A Melbourne brick home with timber joists doesn't respond to trapped moisture in the same way as an apartment with a concrete slab. Timber framing can move, swell and decay when moisture remains hidden. Concrete won't rot, but water can still migrate through slab edges, wall cavities and service penetrations, damaging finishes and neighbouring rooms.
Older fibro shower rooms, acrylic-lined bathrooms built over timber, and newer tiled apartments may all require different investigation before retiling. A registered builder should identify the existing substrate, check for deflection or swelling, and establish whether the old waterproofing can be retained. Covering a questionable base with fresh tiles doesn't remove the original failure.
Start with the wet-area chain
Think of the shower as a connected system:
- Substrate: It must be stable, sound and suitable for the membrane and tile system.
- Fall: Water needs a clear path to the waste rather than a place to pond.
- Membrane: The waterproof layer must cover the required surfaces continuously.
- Junctions: Corners, changes of plane, hobs and penetrations need deliberate detailing.
- Screen and drain: Later fixtures mustn't compromise the waterproofing or obstruct drainage.
Practical rule: If the quote only says “waterproof bathroom” without describing coverage, system and testing, ask for the construction detail before work starts.
The Five Most Common Causes of Shower Leaks
The most useful way to assess a leak is to match what you see on site with the construction decision that failed. A stained ceiling might come from a shower waste, a membrane defect or water escaping at the screen. Guessing from the stain alone often leads to patching the visible symptom rather than repairing the source.
Five failure points worth checking
Missing or incomplete membrane is the first major concern. Renovations sometimes proceed with a tiler applying adhesive and tiles over a surface that was never waterproofed by a properly engaged practitioner. Tiles and grout aren't the waterproofing system. In the shower area, the floor, required wall surfaces, junctions and penetrations all need compliant treatment under the applicable requirements.
Insufficient fall to the waste leaves water sitting against tile edges, seals and junctions. Victorian Building Authority guidance points to a minimum 1:80 fall in shower areas, as outlined in its wet-area waterproofing guidance. A flatter surface may look acceptable once tiled, but it gives water more opportunity to track beneath a screen or remain around the drain.
Failed grout and silicone often appears at the wall-floor corner or at a change of plane. Grout isn't a flexible sealant, so movement can open a joint even when the tiles remain firmly attached. Those junctions need suitable mould-resistant silicone or another specified flexible seal, rather than a hard acrylic product used because it was cheaper or easier to apply.
Unsealed penetrations include mixer bodies, tap spindles, shower rose brackets, niches and screen-related fixings. Each hole through a wet-area surface is a potential route behind the finish. The problem may not show until water has travelled through the lining or framing.
Substrate movement is common where timber joists flex, sheets are compressed, joints aren't properly treated, or the surface wasn't primed for the membrane system. A crack along a grout line can be a finish issue, but repeated cracking, soft lining or movement underfoot points to a base that needs investigation.
| Cause | What You See On Site | Standard Reference |
|---|---|---|
| Missing or incomplete membrane | Damp lining, loose tiles or moisture outside the shower | AS 3740 and NCC wet-area waterproofing provisions |
| Poor fall to waste | Ponding, slow drainage or water sitting at the screen edge | AS 3740 guidance, including the 1:80 minimum shower fall |
| Failed grout or silicone | Open wall-floor joints, cracked corners or mould at changes of plane | Wet-area junction and movement-joint detailing |
| Unsealed penetrations | Damp around mixers, brackets, niches or fixings | Waterproof treatment to shower-area penetrations |
| Moving substrate | Cracked grout, flexing sheets, swollen edges or loose tiles | Suitable substrate preparation and membrane-system installation |
Building a Leak-Free Shower From the Substrate Up
The finished tile tells you very little about the quality of the waterproofing underneath. A reliable shower is built in sequence, and each stage makes the next stage possible.
Begin with a base that won't move
Remove loose materials and inspect the structural surface. Plywood or compressed fibre-cement sheets should be firmly fixed, joints should be treated as required by the system, and the base shouldn't deflect, swell or carry old water damage. If the substrate is compromised, a new membrane won't turn it into a sound floor.
For a practical explanation of the first stage, see substrate preparation for tiling. The preparation may look slow compared with rolling on a product, but it prevents the membrane and tile finish from being asked to bridge movement they weren't designed to absorb.
Form drainage before waterproofing
The shower floor must fall towards a suitable waste. AS 3740 guidance identifies 1:80 as the minimum fall in shower areas, and the fall needs to be formed before the membrane and tiles are installed. A centrally positioned waste and a linear drain can both work, provided the screed, grate and membrane details suit the assembly.
Don't rely on tile adhesive to correct a poorly formed floor. It creates inconsistent bedding, can leave unsupported tile edges and may produce a surface that still holds water. The drain also needs to be set at the correct height for the tile, adhesive and membrane system.
Apply the specified membrane system
Once the surface is clean and suitably primed, the waterproofer applies the selected system to the required coverage. Liquid acrylic and polyurethane systems are common options, but the product data sheet controls primer choice, coat application, curing and detailing. Corners, hobs, wall-floor junctions, pipe penetrations and drain connections deserve more attention than broad open areas because that's where continuity is most often lost.
The shower walls must be waterproofed to at least 1,800 mm above the floor substrate, and the exact floor and wall coverage depends on the shower configuration. A shower within 200 mm of a wet-area exit requires a vertical water stop, according to guidance on AS 3740 wet-area waterproofing.
The membrane must cure before testing. Don't let tiling start just because the surface feels dry to the touch.
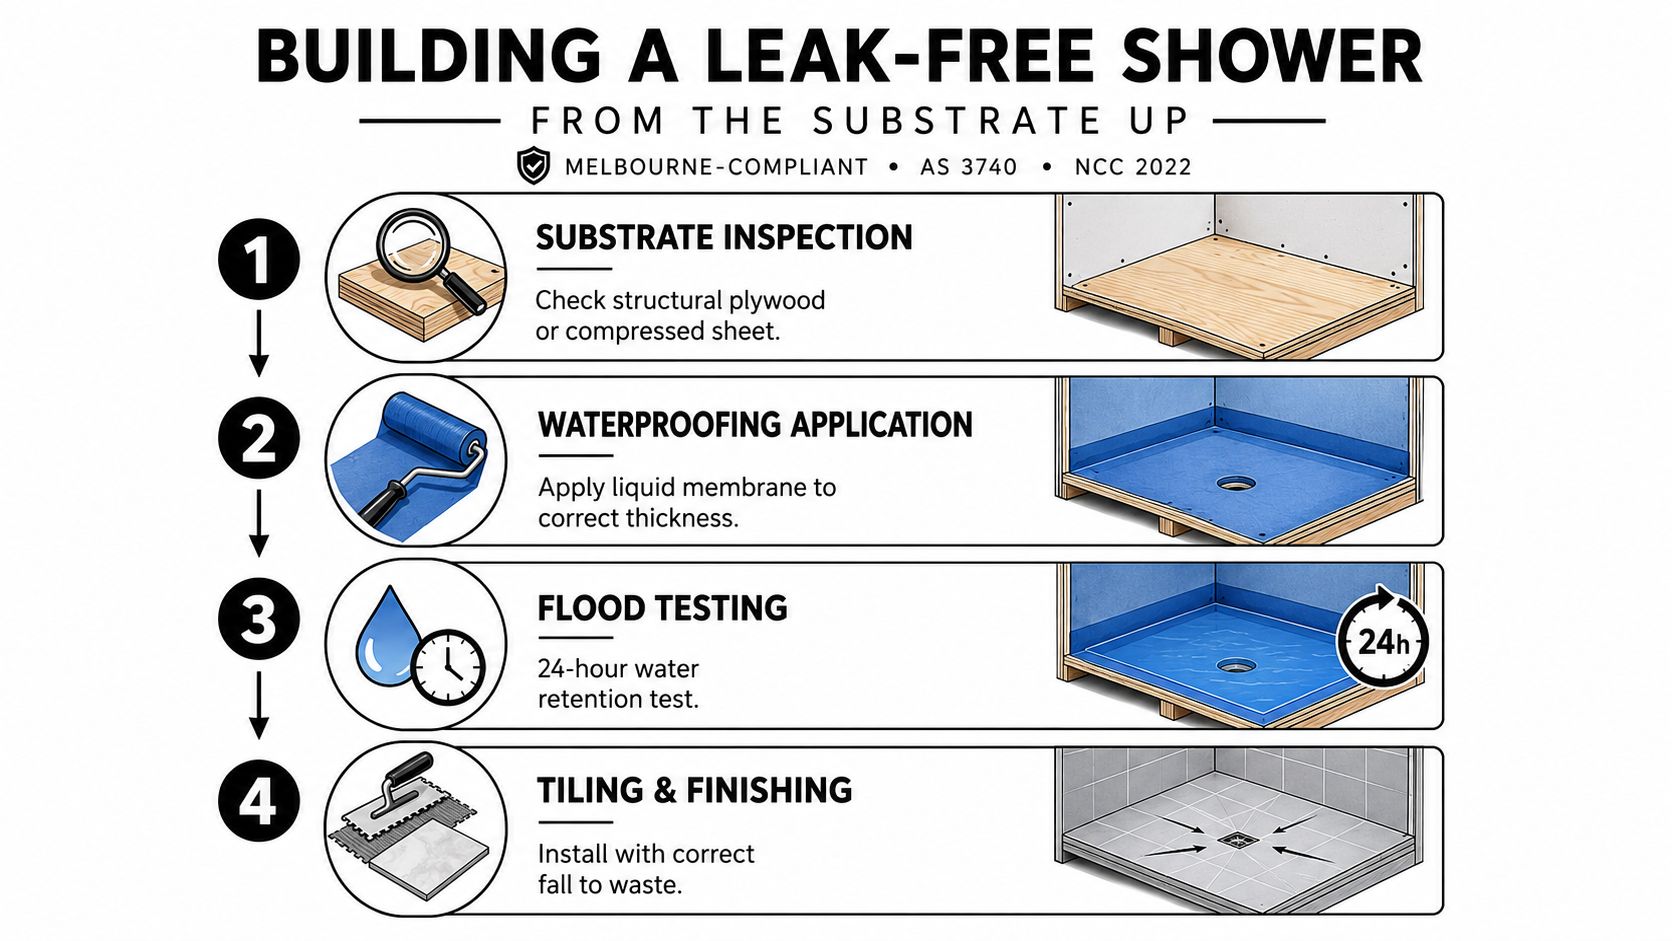
A flood test belongs between waterproofing and tiling. Block the waste with a proper test plug, fill only to the prescribed level for the shower assembly, mark the water level and inspect surrounding areas. Australian guidance describes a shallow perimeter test of no more than 5 mm, while standards material refers to filling to the waterstop angle and holding for a minimum of 24 hours. Follow the approved system and test method rather than improvising a deeper fill.
Here is a useful visual reference for the sequence:
Only after a successful test should the tiler install tiles with a compatible flexible adhesive. Finish changes of plane with the specified flexible sealant, then install the screen without piercing the waterproofing where the system doesn't allow it.
Choosing Membranes, Tiles, Grout and Shower Screens
The product written on a quote matters, but compatibility matters more. A membrane, adhesive, tile and screen can each be reputable products and still form a poor assembly if the substrate, primer, cure time or fixing method doesn't match.
Compare the options before signing
Sheet membranes offer consistent factory thickness and can be useful where the installer is experienced with the particular system. They still require careful treatment at seams, corners, drains and penetrations. Liquid membranes suit irregular surfaces and detailed repairs, but the installer must achieve the specified coverage and dry-film thickness across the whole area.
For a clearer look at the membrane stage, review shower waterproofing membrane systems. The cheaper option isn't automatically the weaker option, but a low quote that removes preparation, detailing or testing is a reliability problem.
| System | Typical Use | Pros | Watch For |
|---|---|---|---|
| Sheet membrane | Planned shower assemblies and compatible proprietary systems | Controlled thickness and clear components | Seams, corners, drains and penetrations |
| Liquid acrylic membrane | General wet-area construction and suitable repairs | Adaptable around details and irregular surfaces | Primer, coat thickness and cure |
| Polyurethane membrane | Areas requiring a flexible liquid system | Useful movement tolerance when correctly specified | Product compatibility and application conditions |
| Porcelain tile | Floors, walls and higher-wear finishes | Dense body and broad design range | Correct adhesive, cutting and movement detailing |
| Ceramic tile | Wall finishes and suitable bathroom applications | Light, workable and available in many formats | Body suitability, edge protection and wet-area use |
| Cement or polymer-modified grout | Standard tile joints | Familiar application and repairability | Porosity, cracking and cleaning |
| Epoxy grout | Joints needing greater stain and water resistance | Dense finish and strong chemical resistance | Installation skill and difficult cleanup |
| Framed screen | Bathrooms needing a more forgiving enclosure | More support and defined sealing lines | Tracks, corners and regular cleaning |
| Frameless or semi-frameless screen | Open, contemporary layouts | Clean sightlines and less framing | Precise floor fall, silicone and fixing details |
Tile choice also affects safety and durability. Check the product's wet-area suitability, edge profile and slip characteristics rather than selecting only by colour or showroom appearance. A large format tile can look excellent, but it demands a flat substrate and careful falls, especially around a linear drain.
The screen should direct water back into the shower, not create a new route into the wall or floor. Silicone-to-tile and silicone-to-subsill joints need clean surfaces, correct profiles and a compatible sealant. If a screen installer drills through a membrane without a planned detail, the waterproofing can be compromised after the tiling work has passed inspection.
Routine Maintenance That Keeps a Compliant Shower Compliant
A compliant shower still needs maintenance. Silicone shrinks, surface joints collect soap residue, grout becomes harder to inspect, and drain hair can slow the flow enough to keep water around the enclosure.
Start with a visual inspection every six months. Look at the screen base, hob, wall-floor junction, tap penetrations and corners under a bright torch. You're looking for lifting, splitting, pinholes, discolouration or a seal that has separated from the tile.
Use a simple inspection rhythm
- Silicone joints: Check the screen, hob and changes of plane for gaps or lifting.
- Grout lines: Inspect annually with a pointed tool, without gouging the joint.
- Drain: Remove the grate and clear hair and soap buildup without damaging the waste or seal.
- Cleaning products: Use products suitable for the tile, grout and sealant. Vinegar and harsh acids can shorten the service life of some finishes and seals.
- Water behaviour: Notice whether water drains promptly or remains around the screen and corners.
Silicone resealing is commonly planned around every 2 to 3 years, but condition matters more than a calendar alone. A clean, intact joint is normal wear management. Mould that returns quickly, a joint that has opened behind the tile, or moisture outside the shower calls for investigation.
A broader plumbing inspection checklist can help you prevent water damage with a home check, particularly if you manage a rental or have wet areas on more than one level. Use it as a general household check, not as a substitute for a Victorian wet-area assessment.
If a repair reaches the substrate, remove tiles, changes a penetration or disturbs the membrane, treat the work as a new waterproofing event. Let the repaired area dry, reinstate the system correctly and flood test it again before closing the surface.
Warning Signs That Point to Leak Rectification, Not Prevention
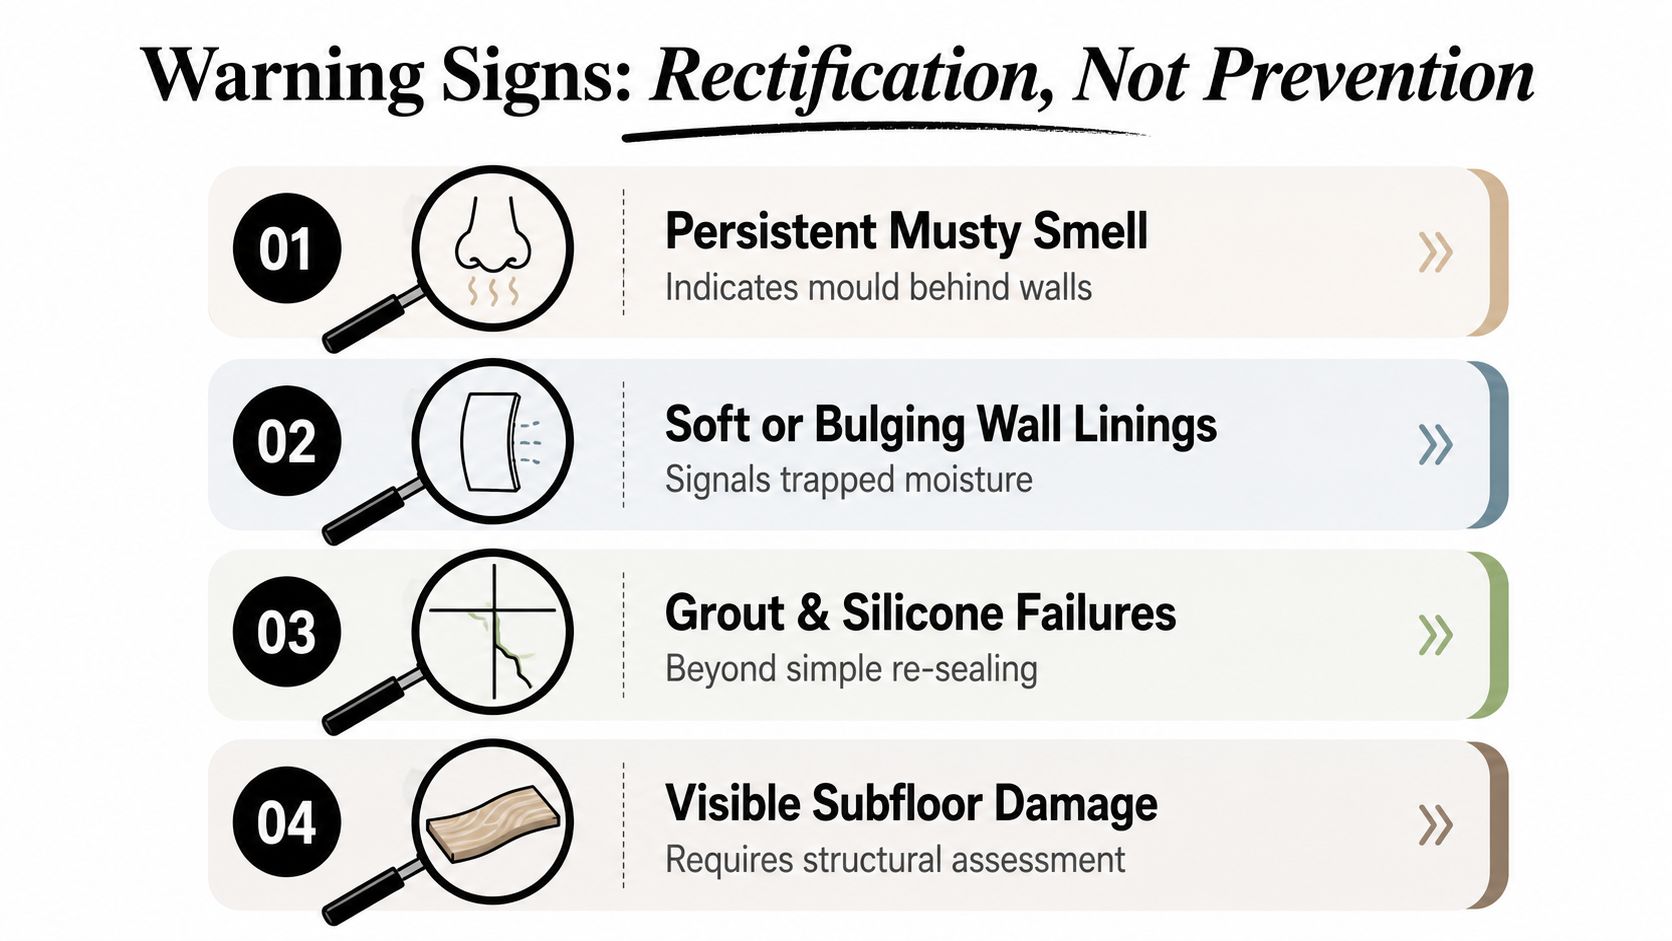
Routine cleaning and resealing are appropriate only when the waterproofing assembly remains sound. Once moisture has entered the substrate or adjoining structure, adding another bead of silicone may hide the evidence while the damage continues.
Watch for a combination of visible and sensory clues:
- Persistent efflorescence: White crystalline deposits can indicate moisture moving through masonry or cement-based materials.
- Swollen skirting or wall lining: Expansion, soft spots or bulging suggest water has travelled beyond the finished surface.
- Returning mould: If mould reappears shortly after cleaning, the moisture source hasn't been removed.
- Musty air: A damp smell in the bathroom, hallway or adjacent room can point to concealed moisture.
- Ceiling marks below: Brown staining, bubbling paint or damp patches under the shower deserve prompt investigation.
A plumber or builder may isolate the waste, carry out a shower-base flood test, inspect the screen and use moisture or thermal imaging equipment to trace the affected area. A pressure test can help separate a plumbing fault from a wet-area waterproofing failure. The aim is to identify the route before demolition, not to guess from the location of the stain.
For a plumbing-focused first assessment, property owners can use detect water leaks in Melbourne as a starting resource. For shower-specific investigation, shower leak detection in Melbourne can help define whether the problem sits with the waste, screen, penetrations or membrane.
Know when the work becomes regulated rectification
In Victoria, waterproofing work must be carried out or supervised by a registered building practitioner, and only registered practitioners can authorise compliance with the applicable standard, as outlined in Victoria-focused AS 3740 waterproofing guidance. Work that penetrates or reinstates the waterproofing should be documented appropriately, including the relevant waterproofing compliance documentation.
Rectification may involve removing tiles, inspecting the lining and framing, replacing damaged substrate, rebuilding falls, reinstating the membrane, testing, then retiling and resealing. The cost depends on how far water has travelled, what must be removed and whether plumbing or structural work is involved. A realistic Melbourne assessment should be based on an inspection and defined scope, not a fixed promise made from a photograph.
Your Melbourne Shower Leak Prevention Checklist
Use this checklist before a bathroom renovation starts, while the shower is open, and after handover. It turns waterproofing from an item buried in a quote into a sequence you can verify.
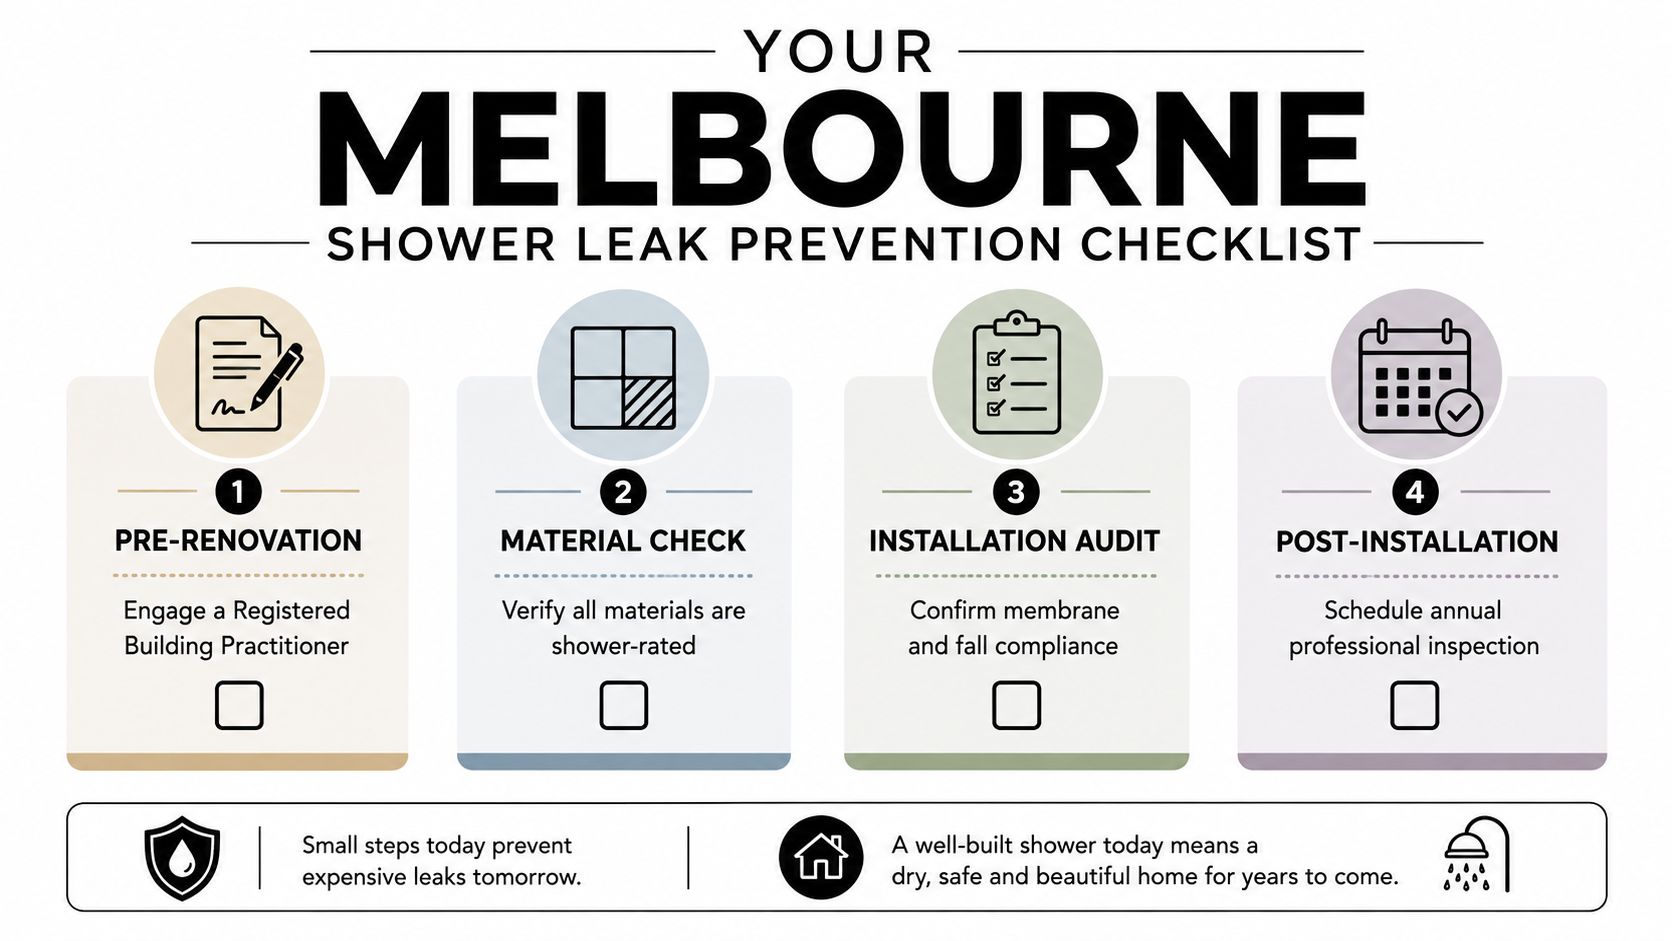
Before the renovation
- Engage the right practitioner: Confirm who will perform or supervise the waterproofing and check the relevant Victorian registration.
- Write the standard into the scope: Require the work to address AS 3740 and NCC 2022 wet-area requirements, not just a generic “waterproofing allowance”.
- Record the system: Ask for the membrane product, primer, coverage, curing requirements and treatment of corners, drains and penetrations.
- Inspect the existing base: Look for swelling, soft lining, deflection, mould, damaged joists and evidence that water has already travelled beyond the shower.
- Plan the screen early: Confirm where fixings will go and how the screen will be sealed without compromising the waterproofing.
During construction
- Check the substrate: Sheets should be stable, clean and suitable for the nominated membrane and tile system.
- Check the fall: The shower floor needs the required fall to the waste before membrane application. Victorian guidance identifies 1:80 as the minimum shower fall.
- Check the membrane coverage: Confirm shower walls reach the required height, and that junctions and penetrations have been detailed.
- Wait for cure: Don't accept tiling just because the membrane looks dry.
- Witness the flood test: The test should use a proper plug, the correct fill level and a minimum 24-hour hold, with the surrounding areas inspected.
- Confirm compatible finishes: Adhesive, grout, tile and sealant should suit the substrate, membrane and wet-area conditions.
- Review screen fixing: The installer should avoid unplanned penetrations through the waterproofing.
After handover
- Inspect silicone twice yearly: Look at the screen base, hob, corners and penetrations.
- Inspect grout annually: Use a torch and look for cracks, hollow tiles, open joints or repeated mould.
- Keep the waste clear: Remove hair and residue before drainage slows.
- Treat alterations seriously: Any plumbing change, tile removal or membrane repair should trigger drying, reinstatement and another flood test.
- Keep the paperwork: Retain product records, photos, compliance documentation and the renovation scope.
A failed flood test means the shower isn't ready to close up. Multiple substrate symptoms, such as soft lining combined with mould or swelling, mean maintenance has ended and rectification should begin. Call a registered Victorian builder before the damage spreads into framing, flooring or the room below.
For bathroom renovations, Melbourne Tiling Services P/L provides coordinated waterproofing, screeding, tiling, shower screen installation and shower or balcony leak rectification across Melbourne and greater Victoria. Visit Melbourne Tiling Services P/L to discuss your shower, request a quote and establish a compliant prevention or rectification scope before tiles go down.
Recent Comments