
You've chosen the tiles, booked the tiler and stripped the old bathroom back, only to discover that the shower wall has an unsealed pipe penetration and a suspicious gap where the sheets meet. The wall may look ready for a roller, but waterproofing over dust, movement or poor junctions can hide a failure until water reaches the framing.
Learning how to waterproof bathroom walls properly means treating the work as a continuous system. The substrate, membrane, corners, penetrations, floor junctions, drainage and inspection all need to work together under the National Construction Code (NCC) and AS 3740. Tiles make the room look finished, but the membrane behind them is what provides the primary barrier.
Table of Contents
- Planning the Waterproofing System Before You Start
- Preparing the Substrate for a Lasting Bond
- Choosing Between Sheet and Liquid Membrane Systems
- Applying the Membrane to Walls, Corners and Penetrations
- Curing, Inspecting and Photographing the Work
- Knowing When to Call in a Licensed Waterproofer or Registered Builder
- Caring for the Membrane After the Tiles Go On
Planning the Waterproofing System Before You Start
A bathroom job can be off track before anyone opens a membrane pail. I've walked into plenty of renovations where the tile selection was done, the screen was ordered and the wall linings were already up, but nobody had set out the waterproofing heights, the floor falls or the pipe penetrations. By the time that gets picked up, you are not planning anymore. You are pulling work apart and paying twice.
Treat substrate, membrane, junctions and penetrations as one system from day one. Check what the walls are built from, whether that is fibre-cement sheet, masonry, render or another lining the membrane manufacturer accepts. Then mark the shower area, screen position, niche, mixer body, shower outlet, bath edge, spout and every penetration that will break the waterproofed surface. If a detail is not marked now, it usually turns into a weak point later.
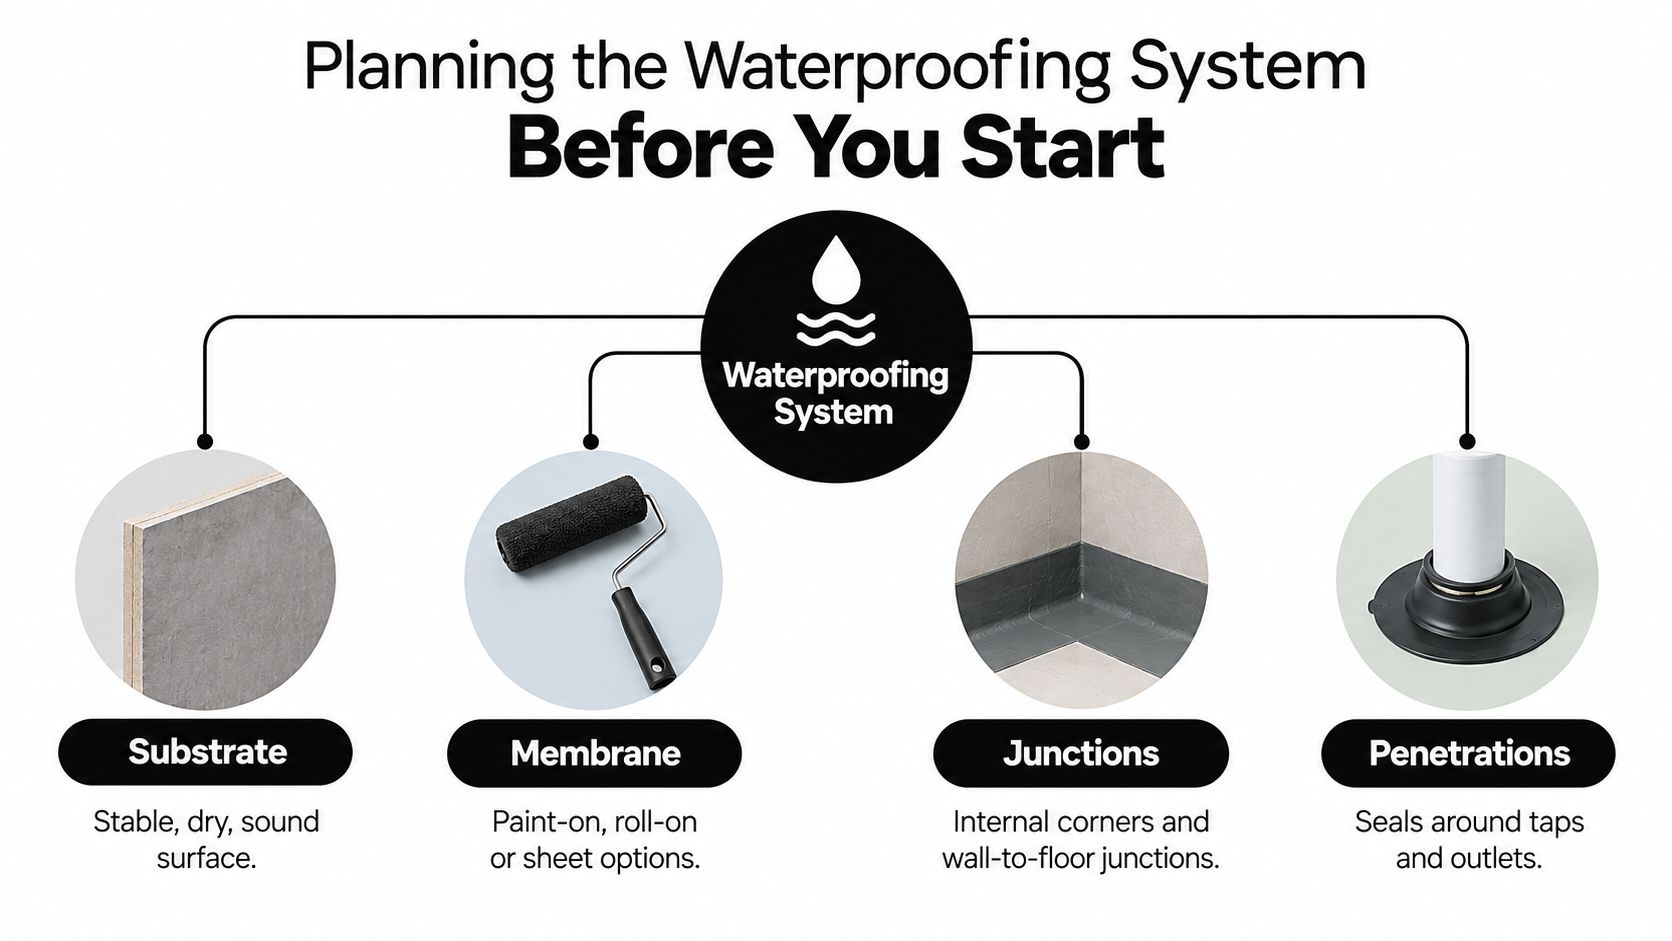
Mark the required wet-area zones
The wall heights matter, but so does where you measure from. In a residential shower, wall waterproofing generally needs to extend to at least 1,800 millimetres above the finished floor, and other wet-area walls commonly need protection to at least 150 millimetres above the floor, as outlined in Australian bathroom standards and waterproofing requirements. Measure from the finished floor level, not from the slab or an assumed tile build-up, otherwise the set-out can end up short.
A bath or spa without a shower is handled differently. The NCC requires wall waterproofing to reach at least 150 millimetres above the bath or spa lip, and the junctions in that zone need protection as part of the same continuous system. Basins, sinks and laundry vessels also need to be judged by where they sit and how the area is classified under the NCC Housing Provisions for wet-area waterproofing.
Choose the compliance pathway early
Floor falls cannot be left to the tiler to sort out on the day. AS 3740 requires falls to the floor waste of at least 1:80 and no steeper than 1:50, so the screed, membrane and tile layout need to be coordinated before installation, as reflected in ABCB guidance on using AS 3740. Get this wrong and water sits where it should drain, especially around wall to floor junctions and screen lines.
This is also the point where DIY usually runs out of road. If the job involves structural rectification, changed set-out, new wet-area linings, shower recess rebuilding, or any uncertainty about how the membrane system will comply as installed, a registered Victorian builder should take over. Compliance and sequencing are the same conversation on a bathroom job.
Practical rule: Set out the wet zones, junctions, penetrations and finished floor heights before demolition starts. If you cannot show where the membrane stops, how each opening is sealed and who is responsible for each stage, the bathroom is not ready for waterproofing.
Preparing the Substrate for a Lasting Bond
A membrane can't rescue a wall that's unstable, contaminated or still holding moisture. Before priming, inspect the wall like a waterproofer, not like someone choosing a paint colour.
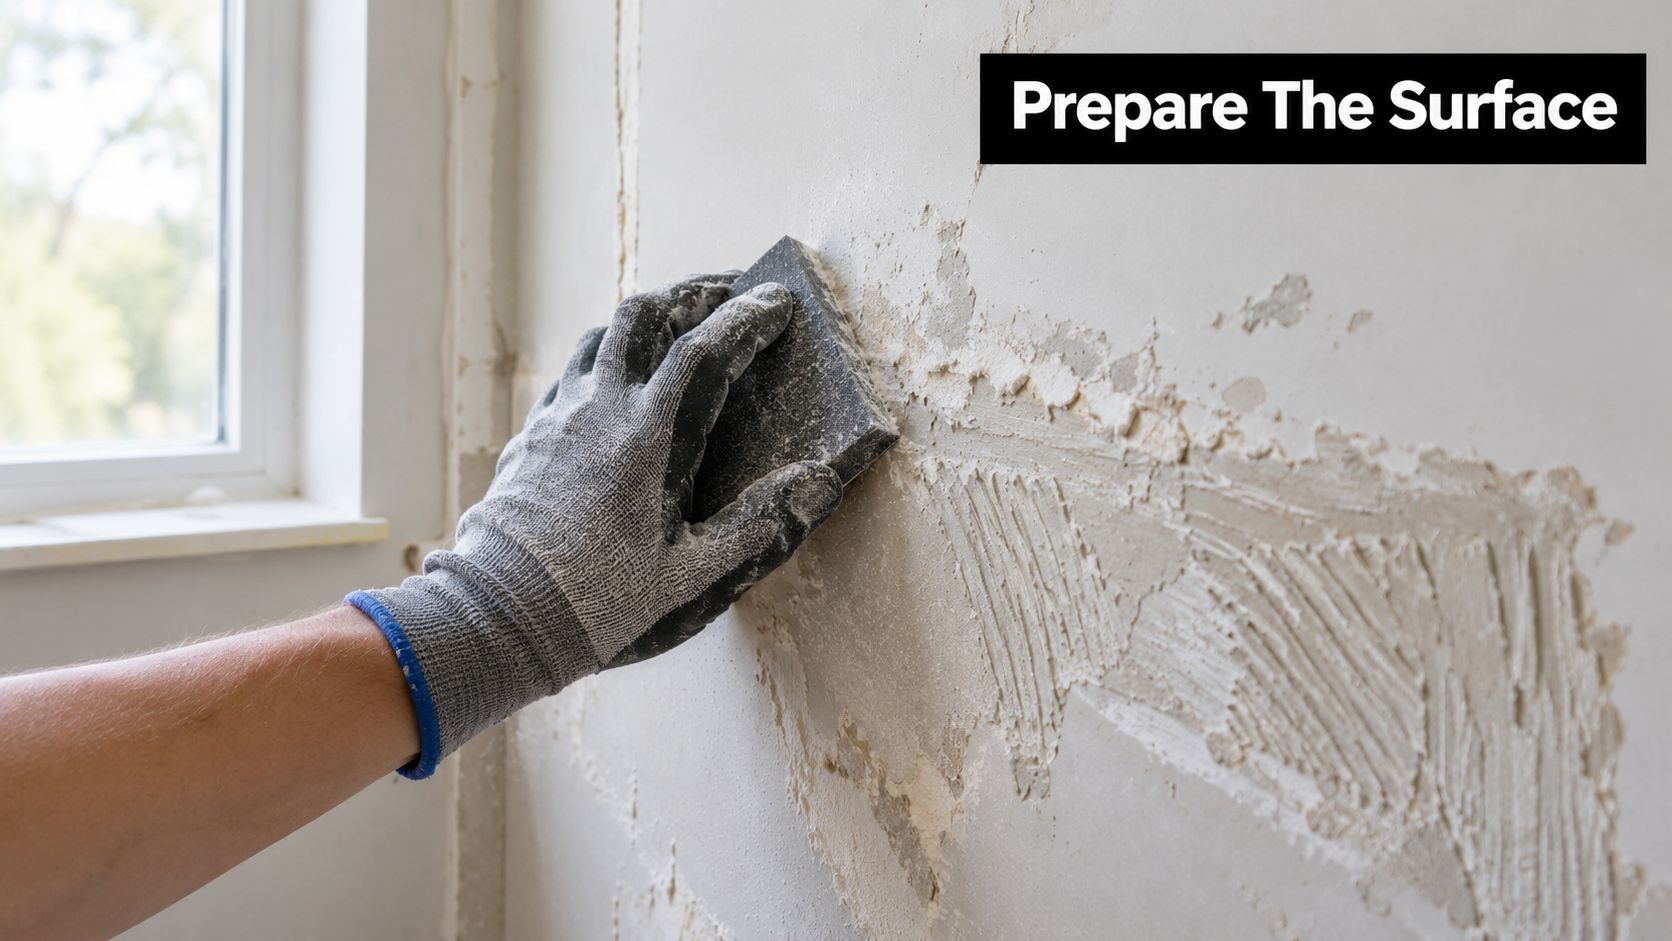
Run a straightedge or spirit level over the surface and mark hollows, ridges and sudden changes of plane. Tap sheet linings to find drummy areas, check that fixings are secure and inspect every joint for movement. A cracked sheet joint, loose screw or softened plasterboard area should be repaired or replaced before waterproofing.
Check, repair, dry and prime
Remove old adhesive, loose paint, grease, dust and powdery material. Sand high spots carefully, vacuum the residue and repair cracks using materials compatible with the wall lining and nominated membrane. If fibre-cement sheets meet at a joint, the joint must be formed and reinforced according to the system, rather than just smeared with filler.
Water-damaged plasterboard shouldn't be left in place because it looks intact from the front. Replace unsuitable lining with an appropriate wet-area board, then make sure the sheets are properly fixed and the surface is sound, clean and dry. Masonry and rendered walls also need attention where they're friable, contaminated or uneven.
The right primer depends on the substrate and membrane manufacturer's instructions. A primer chosen by habit can create poor adhesion, while skipping primer on a surface that requires it can leave the coating vulnerable to peeling.
Detail movement before the field coat
Internal corners, wall-to-floor junctions, sheet joints and changes of plane need a flexible detail. Use a compatible fillet, bond-breaker seal, tape, preformed corner or other proprietary treatment specified for the membrane system. The purpose is to accommodate movement and maintain continuity where two surfaces meet.
Keep the prepared wall free from other trades. Photograph the substrate, repairs, joints and corner details before the first coat. A clear record becomes useful if a warranty, insurance question or later leak investigation depends on proving what was covered.
For a practical explanation of the preparation stage, see this guide to bathroom substrate preparation. The important point is simple: the membrane should meet a stable, dry and compatible surface, not conceal a problem.
Choosing Between Sheet and Liquid Membrane Systems
Sheet and liquid membranes can both form part of a compliant wet-area system, but they behave differently on a Melbourne renovation site. The right choice depends on the wall shape, plumbing layout, substrate, tile adhesive and the installer's ability to detail the system consistently.
A liquid membrane is often easier to work around an irregular niche, an existing renovation or several closely spaced penetrations. It can follow unusual shapes and changes of plane, but the installer must achieve the specified coverage and dry-film thickness. Applying a thin coat because the wall appears covered is not a quality check.
A sheet membrane provides a predictable manufactured thickness across a broad, regular surface. It can be efficient on straight walls, but the installer must form, lap and seal every join accurately. A poorly sealed lap can be just as serious as a missed liquid coat.
| Consideration | Liquid membrane | Sheet membrane |
|---|---|---|
| Internal corners | Conforms readily, but corners still need compatible reinforcement or bond-breaker detailing. | Requires accurate folding, corner pieces or sealed joints. |
| Pipe penetrations | Can be detailed with collars and compatible sealants before the field coat. | Needs carefully fitted collars, cuts and sealed laps. |
| Odd wall shapes | Usually more forgiving around niches, hobs and irregular geometry. | Less tolerant of wrinkles, gaps and poorly fitted sections. |
| Film thickness | Must be controlled through coverage, coats and wet-film checks where specified. | Manufactured thickness is more predictable, provided joins are sealed. |
| Drying and sequencing | Each coat needs the manufacturer's curing window before the next stage. | Adhesive and membrane compatibility still needs confirmation before tiling. |
| Falls and transitions | Can follow prepared falls, but it won't correct poor drainage. | Needs careful installation over correctly formed surfaces. |
Polyurethane and acrylic liquid systems can suit complex layouts, while sheet systems can make sense on large, regular wall planes. Neither option fixes a substrate that moves or a floor that holds water. The installer also needs to confirm that the nominated tile adhesive is compatible with the membrane, because a mismatch can lead to debonding after handover.
For homeowners comparing prefabricated shower layouts with built-in tiled construction, the practical shower advice from Value Tools Co can help clarify how wall geometry and enclosure choices affect installation decisions. In a full renovation, the choice still needs to sit within the project's NCC and AS 3740 compliance pathway.
Applying the Membrane to Walls, Corners and Penetrations
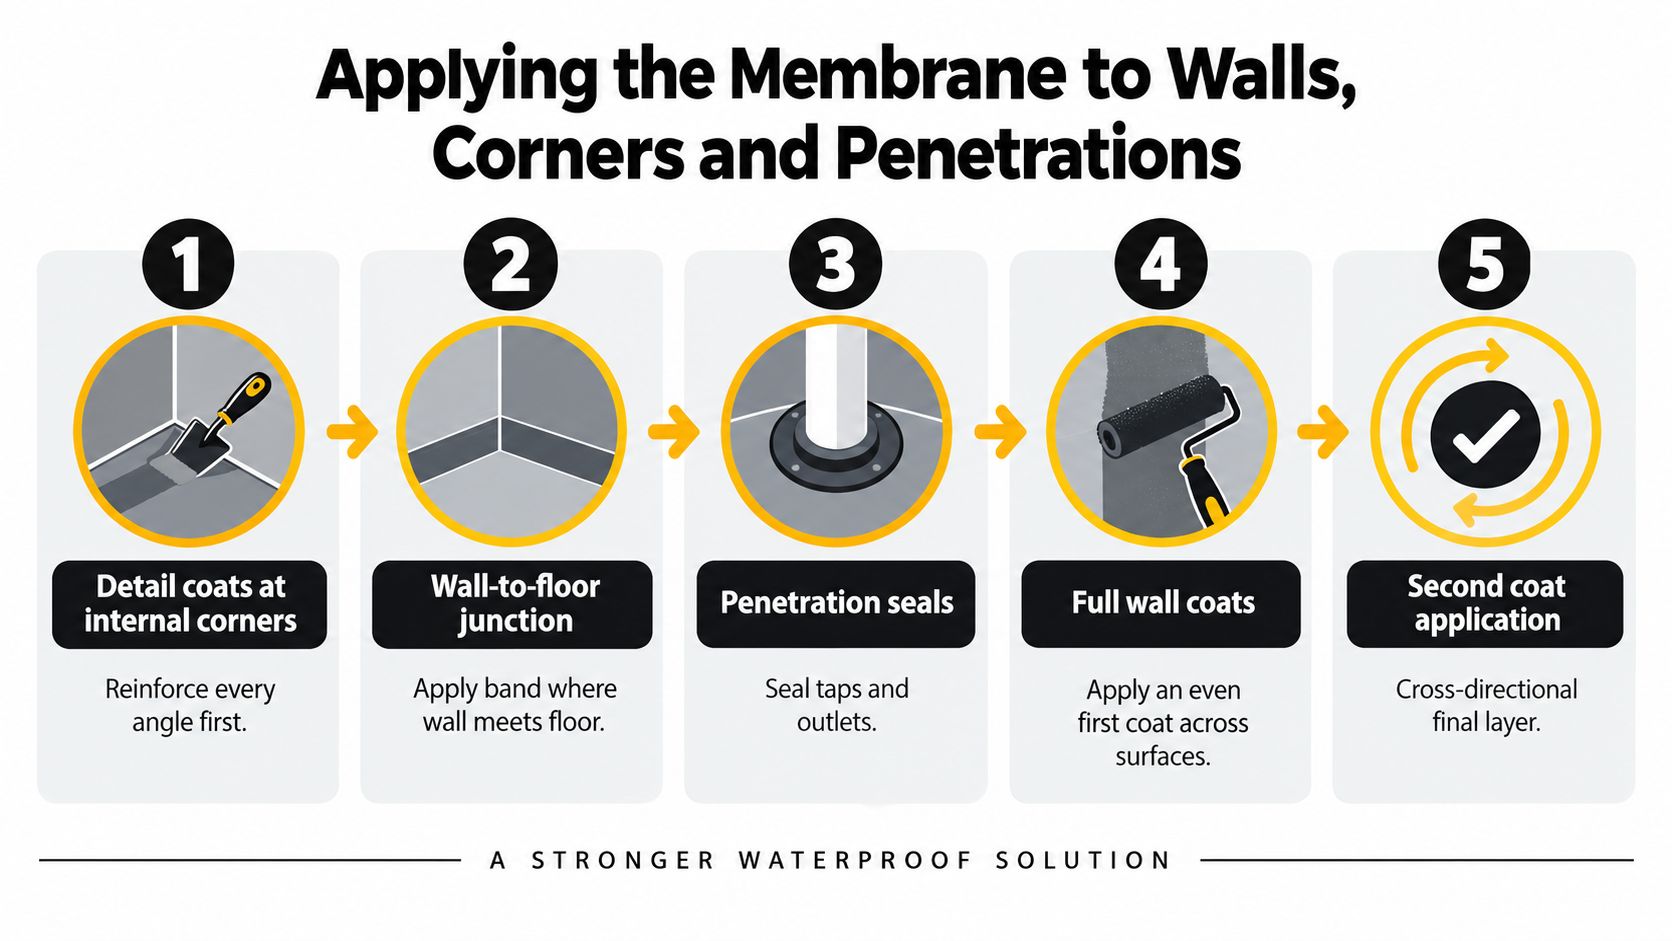
Once the substrate is sound and the system is selected, application should follow a deliberate sequence. Don't start by rolling the broad wall and leave the corners for later. The high-risk details need to be built first, while they're accessible and visible.
Begin with detail coats at internal corners, wall-to-floor junctions, sheet joints and changes of plane. Apply the compatible bond-breaker or reinforcement treatment, then embed approved tape, collars, preformed corners or sealants into the wet membrane as specified by the system. The detail must remain continuous without pinholes, lifted edges or open ends.
Seal every penetration individually
Treat each plumbing opening as its own detail. Mixer bodies, shower outlets, spouts, niches, screen channels and other penetrations need compatible collars, sealants or reinforcing products. A broad coat over the wall doesn't seal the annular gap around a pipe.
After the detail work has cured as required, apply the field coat across the full waterproofed zone. Keep the application even and follow the manufacturer's specified number of coats, coverage rate and dry-film thickness. Where the system requires wet-film checks, use a wet-film gauge rather than judging thickness by colour.
Mark the 1,800 millimetre shower wall line from the finished floor and check that coverage reaches the required height without gaps behind niches, fittings or screen channels. The NCC Housing Provisions identify wall junctions, wall-to-floor junctions and penetrations as locations requiring protection tied to AS 3740 (NCC guidance on waterproofing houses).
The membrane is the barrier. Grout, silicone and tile adhesive are finishes and joint materials, not substitutes for continuous waterproofing behind the tiles.
Apply the final coat in the direction required by the product system, checking for missed spots, thin edges and damage to earlier detailing. Respect the curing period between coats. A membrane that's still soft, tacky or releasing odour shouldn't be covered just because the schedule is tight.
Once cured, protect the surface from dropped tools, foot traffic, stacked tile boxes and later trades. A plumber or carpenter can damage an excellent membrane in minutes if the work area isn't controlled. Photograph the completed membrane before the adhesive and tiles conceal it.
For recessed storage, the shower niche waterproofing guide is useful because niches concentrate corners, changes of plane and penetrations in a small area.
Curing, Inspecting and Photographing the Work
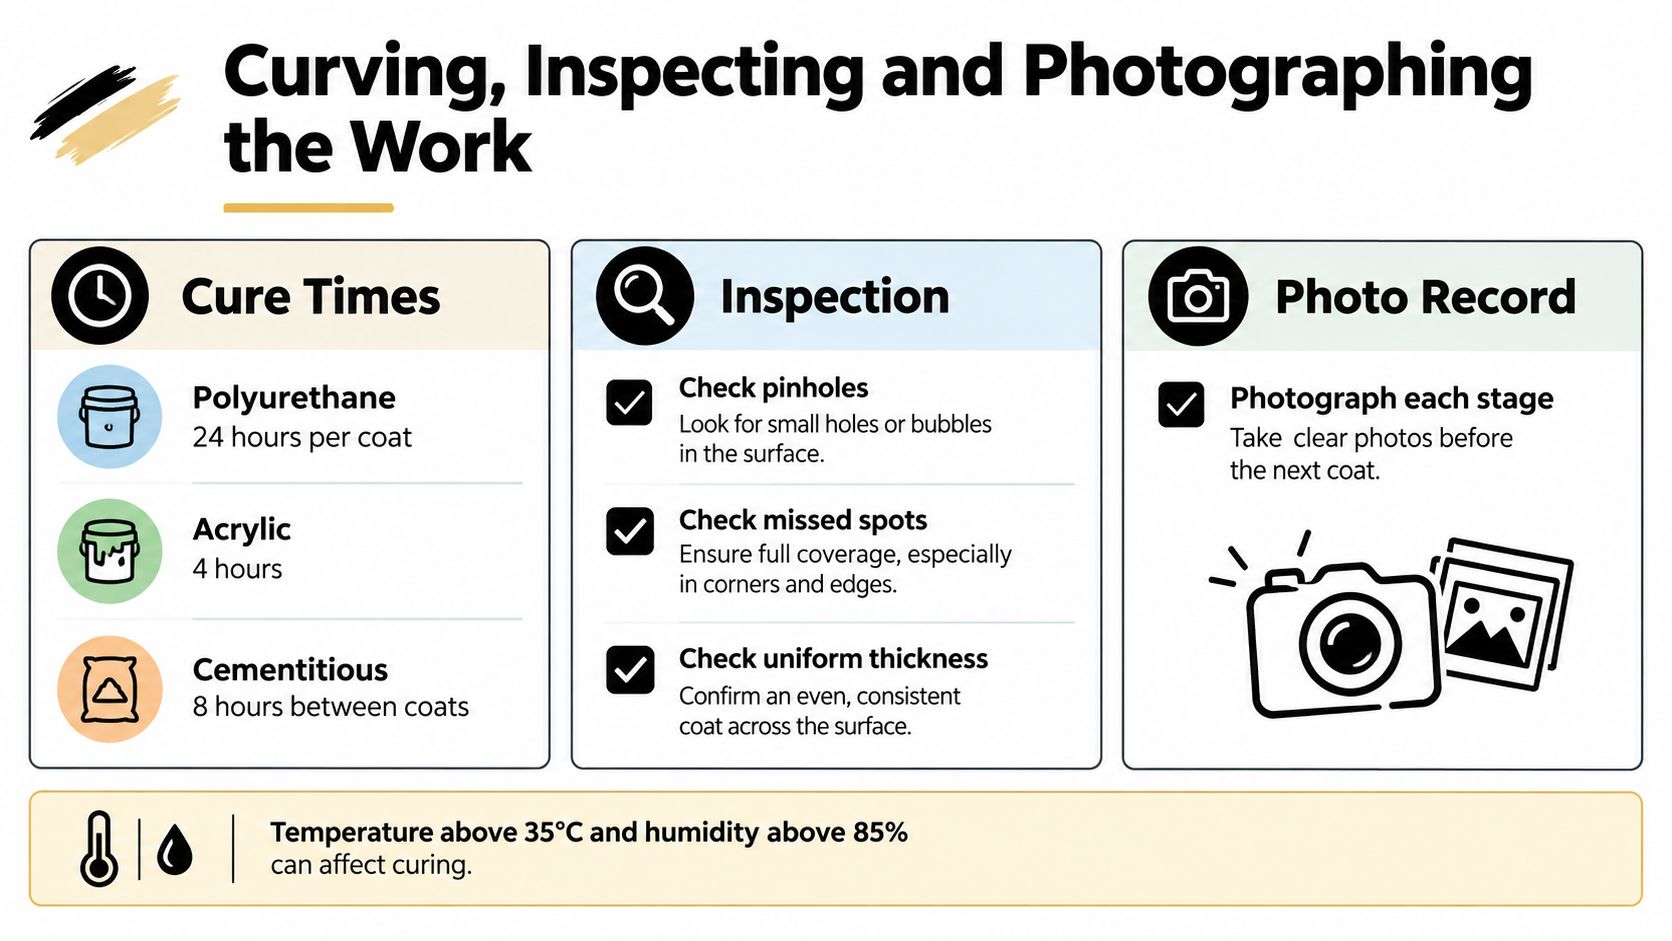
Give the membrane its full cure time before anyone starts tiling. On site, rushed jobs usually come undone. Polyurethane, acrylic and cementitious systems all cure differently, and the conditions in the room matter as much as the label, especially temperature, airflow and humidity. If the coating is still soft, tacky or giving off vapour, it is not ready to be covered.
Then inspect it properly, under strong light and from more than one angle. Look for pinholes, missed patches, thin edges, bubbling, bridged corners, damaged penetrations and laps that have not bonded down. Check the whole system, not just the open wall face. That means confirming continuity at wall-to-floor junctions, internal corners, pipe penetrations, tap bodies and any shower detailing required under AS 3740 and the NCC, including the full shower wall build-up to the required height. A membrane can look neat and still fail at a junction.
Treat inspection evidence as part of the system
A tidy finish does not prove compliant waterproofing. A Western Australian wet-area inspection snapshot found only 58 percent overall compliance across inspected points, even though wall sheeting, membrane selection and bond breakers often met the mark. The same snapshot also recorded generally sound floor-waste setups and shower screed falls, yet overall compliance still lagged. In a separate inspection record referred to in that same discussion, overall compliance sat at 60 percent, and one in five unsatisfactory points involved substandard or missing waterstops.
That lines up with what fails in real bathrooms. The broad surfaces get attention. The trouble starts at junctions, terminations and penetrations, where shortcuts are harder to see once the tiles are on.
Photograph the job like you may need to explain it later. Take clear shots of the substrate, each corner and wall-to-floor junction, every penetration, each coat, the cured finish and any tricky areas such as hobs, recesses or screen fixings. Record the product name, batch details and application notes. If the work includes complicated shower detailing, several trades, or anything that may need to be signed off, arrange an independent or supervisor inspection before tiling. If the bathroom scope crosses into broader domestic building work in Victoria, that is the point where a registered builder should be taking control of sequencing and responsibility, not a DIY homeowner.
A complete photo record helps builders, insurers and future buyers verify what sits behind the tile finish.
Knowing When to Call in a Licensed Waterproofer or Registered Builder
A homeowner can roll membrane onto a simple wall. A shower rebuild is a different class of work. Once the job includes wall to floor junctions, hob or threshold details, recesses, multiple penetrations, drainage changes, or movement in the structure, waterproofing stops being a weekend task and becomes a controlled system that has to be set out, applied, inspected and handed over properly.
That matters most in the shower. Under the NCC wet-area provisions, shower walls, junctions and penetrations are not isolated details. They are part of one waterproofed assembly that has to stay continuous from the substrate through to the finished terminations (Victorian domestic building practitioner registration information). If you cannot judge whether the wall height, bond breaks, corner reinforcement, flange treatment and pipe penetrations all work together, you are already at the point where a trade should take over.
In Victoria, the handover line is practical as much as legal. Bring in a licensed waterproofer for membrane selection, detailing and records that will need to stand up after tiling. Bring in a registered builder when the bathroom scope pulls several trades together, affects framing or floors, relocates plumbing, changes the shower base or threshold, or pushes the work into broader domestic building coordination. On jobs like that, sequencing is half the battle. The membrane only performs if the substrate, plumbing rough-in, electrical penetrations, screed and tiling are all controlled in the right order.
Electrical changes are a good example. New lighting, heated rails, underfloor heating or shifted outlets can add penetrations and trade overlap inside wet areas. The broader principle in this guide to hiring Brisbane electricians is sound. Check qualifications, scope and responsibility before anyone cuts into a waterproofed wall.
Ask for clear records:
- Responsible parties: identify the registered builder, the waterproofer and each trade working in the wet area.
- Scope and cost: keep the itemised renovation scope and any approved variations.
- Membrane records: retain product data sheets, batch details and application requirements.
- Site photos: keep images of corners, junctions, penetrations, upturns and cured coats.
- Compliance paperwork: request the waterproofing certificate, inspection notes and any sign-off tied to the job.
- Post-change records: document later changes to screens, plumbing fittings, niches or wall linings.
For higher-risk bathroom work, use licensed waterproofing contractors who can coordinate the concealed waterproofing with the tiling sequence and the builder's program. Homeowners should still approve the scope. The person carrying the responsibility needs the registration, trade judgment and documentation to back the work.
Caring for the Membrane After the Tiles Go On
The membrane is hidden after tiling, but the bathroom still needs sensible care. Most early warning signs appear at the finish before the concealed damage becomes extensive.
Use this handover checklist:
- Clean gently: Don't use harsh chemicals against silicone joints or sealants.
- Protect corners: Avoid impacts to hob edges, thresholds and tile junctions.
- Manage pooling: Dry persistent water around frameless screen edges instead of leaving it to sit.
- Watch the grout: Persistent darkening at corners can indicate moisture that deserves investigation.
- Check adjoining walls: Bubbling paint, swollen skirting or a musty smell shouldn't be ignored.
- Keep the records: Store the membrane photographs, product data sheets, scope and compliance certificate together.
A cracked tile isn't automatically a membrane failure, and a dark grout line doesn't prove the exact source of a leak. It does mean the area should be assessed before repeated cleaning, regrouting or silicone replacement conceals the path.
Don't cut into a waterproofed wall for a screen replacement, leak repair or renovation without planning how the membrane will be reinstated. The same applies to balcony remediation and any work that disturbs a wall-to-floor junction. A registered builder or licensed waterproofer should reconnect the new work to sound, dry and bonded membrane rather than applying a small patch over the visible symptom.
The durable result comes from the decisions made before the first coat, then protected through tiling and maintenance. A bathroom can have expensive tiles and neat silicone, yet still fail if the concealed system was never continuous.
Melbourne Tiling Services P/L offers bathroom waterproofing, substrate preparation, screeding, tiling and coordinated bathroom renovations across Melbourne and greater Victoria. For a site assessment, documented waterproofing sequence and a renovation plan that brings registered builders and licensed trades together, visit Melbourne Tiling Services P/L.
Write a Comment