

You've chosen the tiles, saved bathroom ideas, and perhaps even arranged time away from home. Then the builder mentions that the bathroom may be unavailable for several weeks, and the original “quick renovation” starts to feel less certain. In a Brunswick terrace, that can mean taping a hand shower to the laundry sink while the household waits for its only bathroom to return.
A reliable bathroom renovation timeline has two clocks. The first runs before construction, covering design, selections, approvals, procurement, and engaging a registered builder. The second runs on site, where demolition, plumbing, waterproofing, curing, inspections, tiling and fit-off must happen in the right order. For Melbourne and greater Victoria, a standard project commonly takes several weeks on site, while the complete calendar period is longer once planning and approvals are included. Australian renovation guidance places a standard renovation at 2 to 4 weeks from demolition to completion, with cosmetic work taking 1 to 2 weeks and complex work extending to 4 to 8 weeks or more.
Table of Contents
- What a Realistic Bathroom Renovation Timeline Looks Like in Melbourne
- The Core Phases of a Bathroom Renovation Timeline
- Why Waterproofing Quietly Drives the Bathroom Renovation Timeline
- Pre-Construction Steps That Add Weeks to Your Bathroom Renovation Timeline
- Permits and Registered Builders in the Bathroom Renovation Timeline
- The Hidden Delays That Stretch a Bathroom Renovation Timeline
- Timeline Ranges for Cosmetic, Standard, and Structural Bathroom Renovations
- Practical Scheduling Tips for a Smoother Bathroom Renovation Timeline
What a Realistic Bathroom Renovation Timeline Looks Like in Melbourne
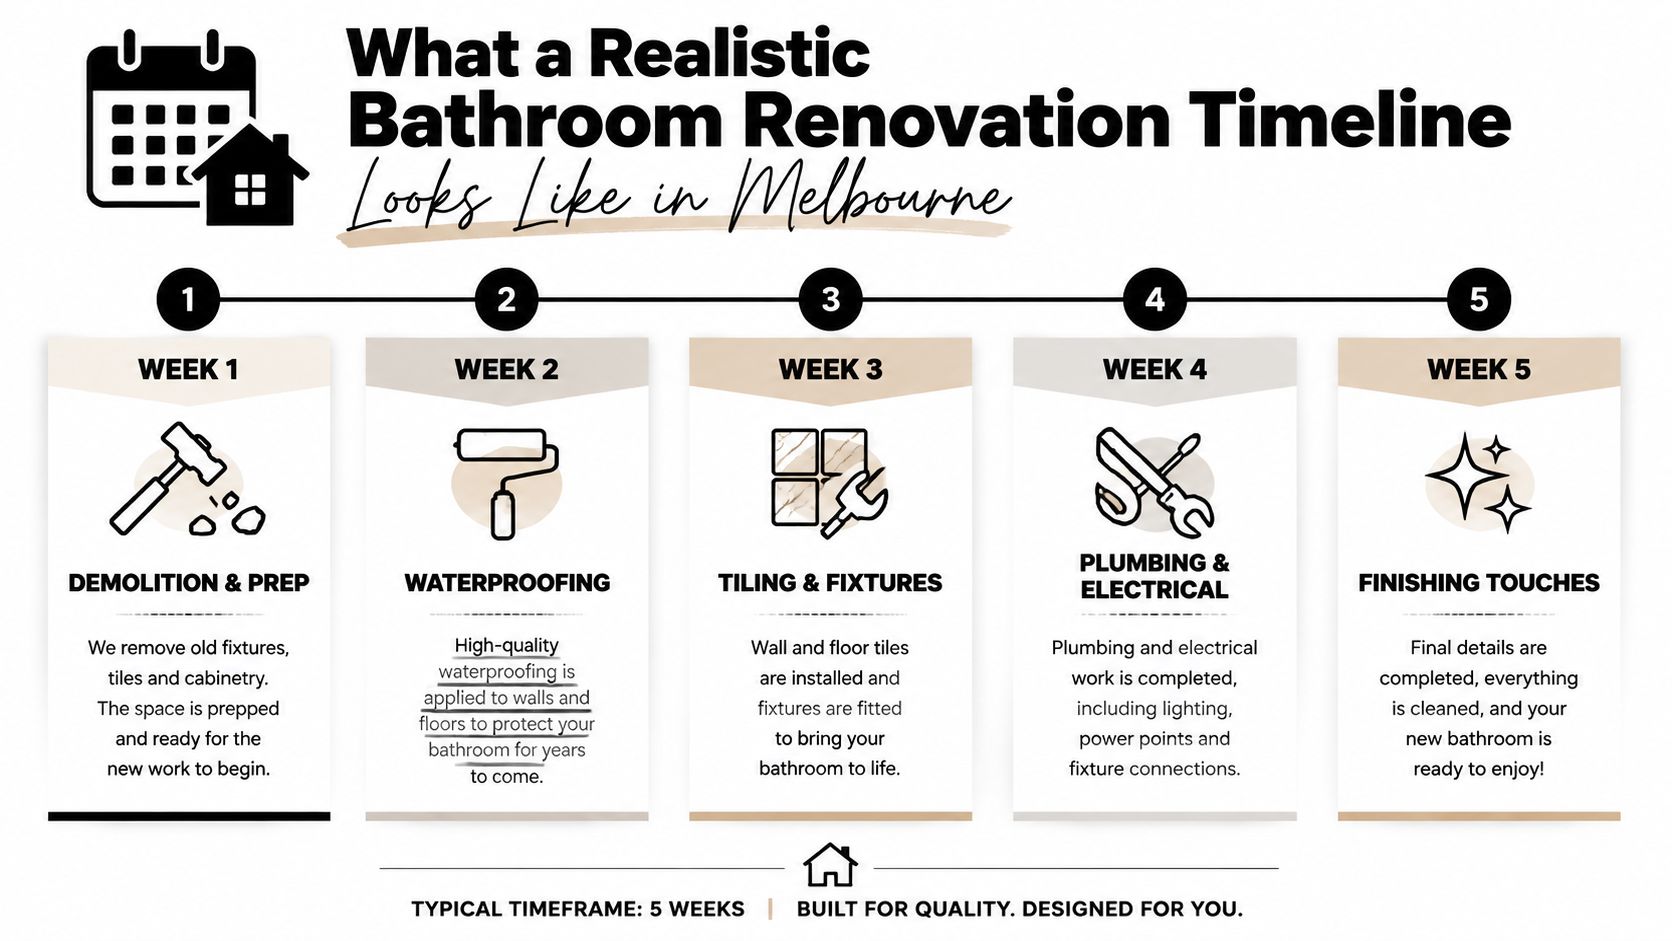
The homeowner in that Brunswick terrace may describe the job as “five weeks without a bathroom”, but the physical construction didn't occupy every one of those days. Some time went into confirming the layout, ordering fittings, coordinating trades and satisfying approval requirements. Other time was spent waiting for waterproofing to cure, arranging an inspection, or allowing one trade to finish before another could safely begin.
That distinction matters because glossy renovation promises often quote only the active build. A more useful end-to-end view includes the weeks before demolition, when a registered builder checks the scope, confirms whether a Domestic Builder (Unlimited) or another registered building practitioner is needed, and identifies any permit or inspection requirements.
A straightforward project with no hidden defects and no layout changes is commonly allowed 4 to 6 weeks in total, although the active site work occupies only part of that period, according to Australian bathroom renovation planning guidance. Living in the home during the work can add 30% to 50% to the timeline because access, temporary amenities and staged work become more complicated.
Practical rule: Treat the quoted construction period and the full calendar period as separate commitments. Ask where approvals, ordering, inspection holds and contingency sit before accepting a start date.
A standard Melbourne bathroom renovation usually follows a controlled sequence. Leak rectification, structural repairs, relocated services, apartment access restrictions or older substrates can extend it substantially. The schedule is governed less by how quickly someone can remove tiles and more by whether each handover is ready for the next trade.
The Core Phases of a Bathroom Renovation Timeline
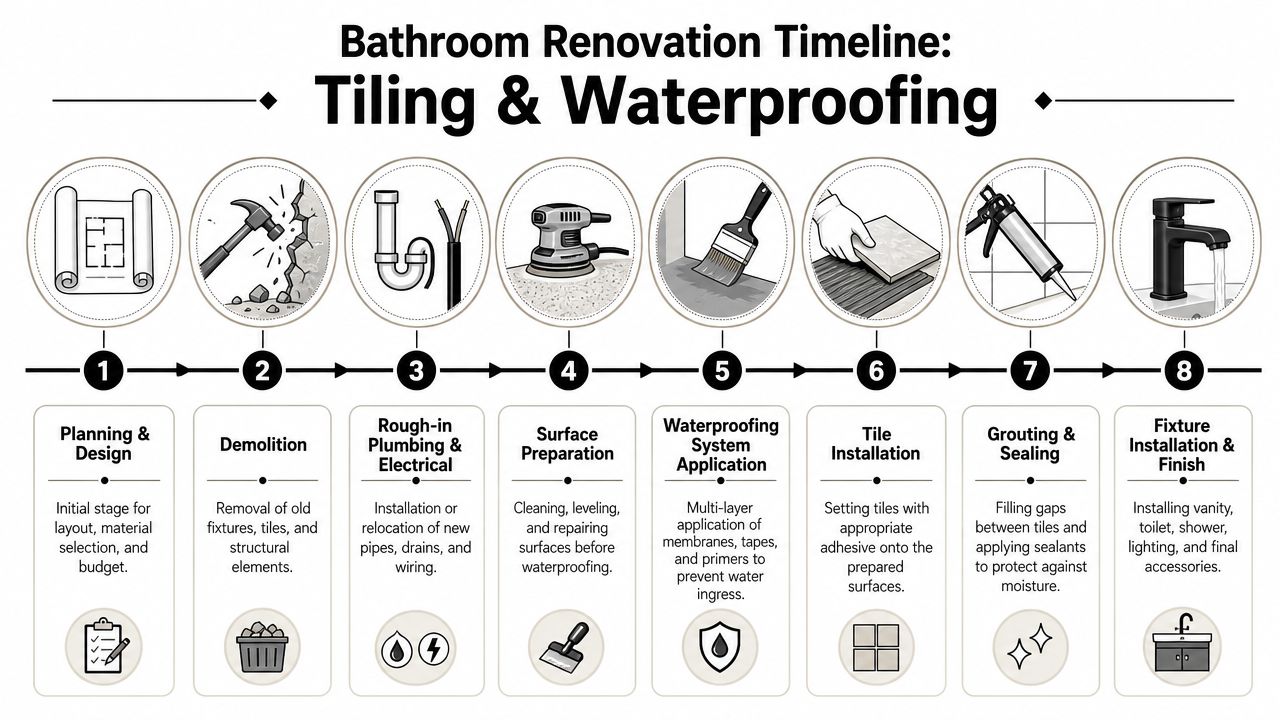
A registered Melbourne builder sequences bathroom renovations around dependencies, not around whoever is available first. The following table shows the working structure for a standard project.
| Phase | Typical duration | Key dependency |
|---|---|---|
| Design and quoting | 1 to 3 weeks | Confirmed layout, scope and selections |
| Selections and procurement | 1 to 4 weeks | Tiles, tapware, vanity and fittings available |
| Demolition and strip-out | 2 to 4 days | Site access, protection and waste removal |
| Rough-in plumbing and electrical | 3 to 5 days | Final set-out and approved drawings |
| Waterproofing application | 1 day plus curing | Prepared substrate and correct falls |
| Tiling | 3 to 5 days | Waterproofing cured and inspected |
| Fit-off | 1 to 2 days | Tiles, grout and sealants complete |
| Final inspection and handover | Variable | Testing, documentation and defect close-out |
Start with decisions, not demolition
Design and quoting establish the room's dimensions, fixture positions, finishes and scope. Selections and procurement then turn the design into physical materials. A late decision about a wall-hung vanity or tap position can force the plumber and electrician to revisit their rough-in work.
Demolition is comparatively quick, but it reveals the condition of the room. Once the walls and floor are open, the builder can check the substrate, existing pipework, framing and signs of water damage. If the base is uneven or damaged, preparation must happen before waterproofing. Substrate preparation guidance is particularly relevant where old adhesive, movement or moisture has compromised the surface.
Rough-in and wet-area preparation
The plumber and electrician install concealed services before wall linings and tiles cover them. Their positions should be checked against marked-up drawings, because moving a waste, mixer or power point after tiling has begun creates rework.
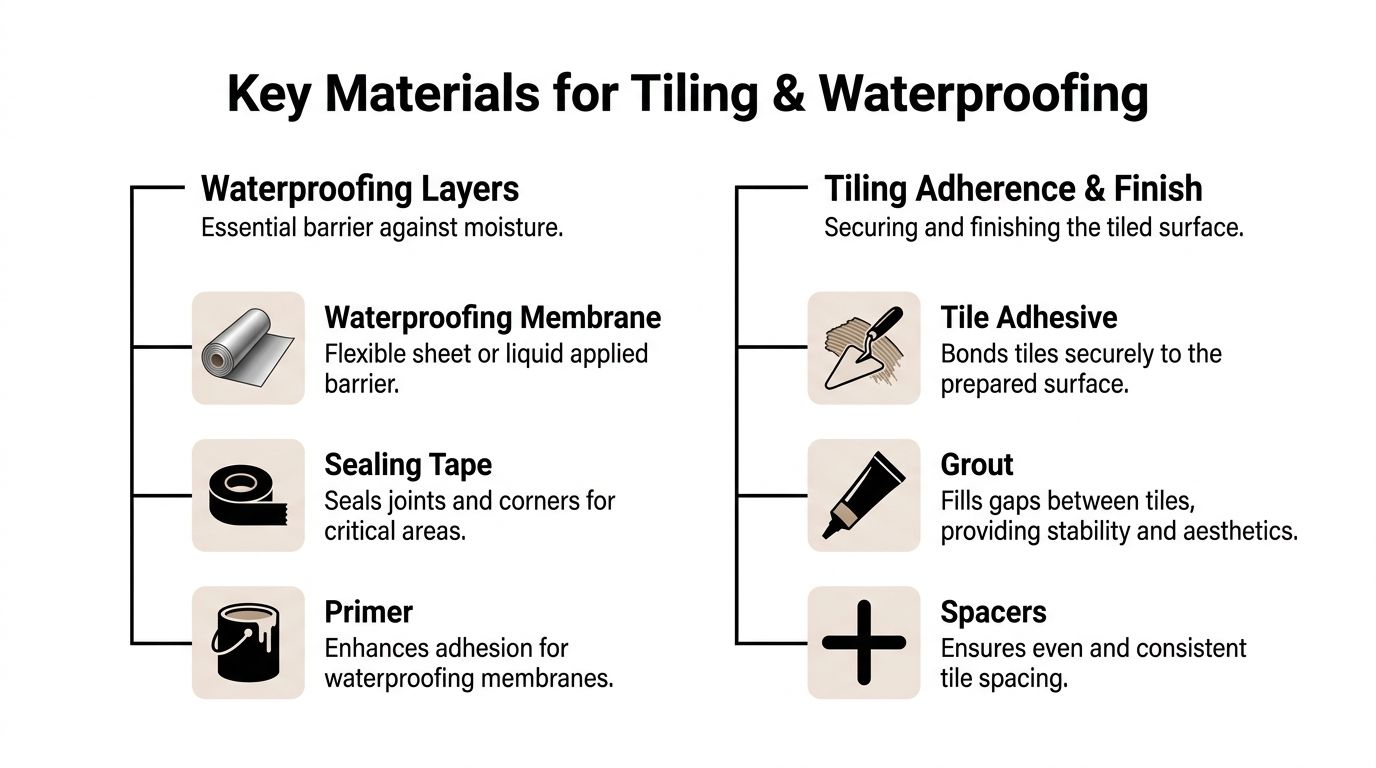
Waterproofing application may take only a day, but the curing period controls the next handover. Australian industry timelines commonly allow 2 to 3 days for the waterproofing stage, including curing between coats and before tiles are installed, as outlined in bathroom renovation timeline guidance.
Tiling and fit-off
Tiling follows inspection and cure verification. The tiler needs a sound, dry and compliant surface, and the grout and sealants need sufficient time before fixtures are installed. The vanity, shower screen, tapware, toilet, accessories and electrical fittings are fitted only after the tiled surfaces are ready.
These phases overlap only marginally. Inner-city access restrictions, narrow streets, shared driveways and limited delivery windows can compress the working week, while weekends don't usually solve a missed trade handover. That's why a “two-week” quote may describe productive site work but fail to match the calendar.
Why Waterproofing Quietly Drives the Bathroom Renovation Timeline
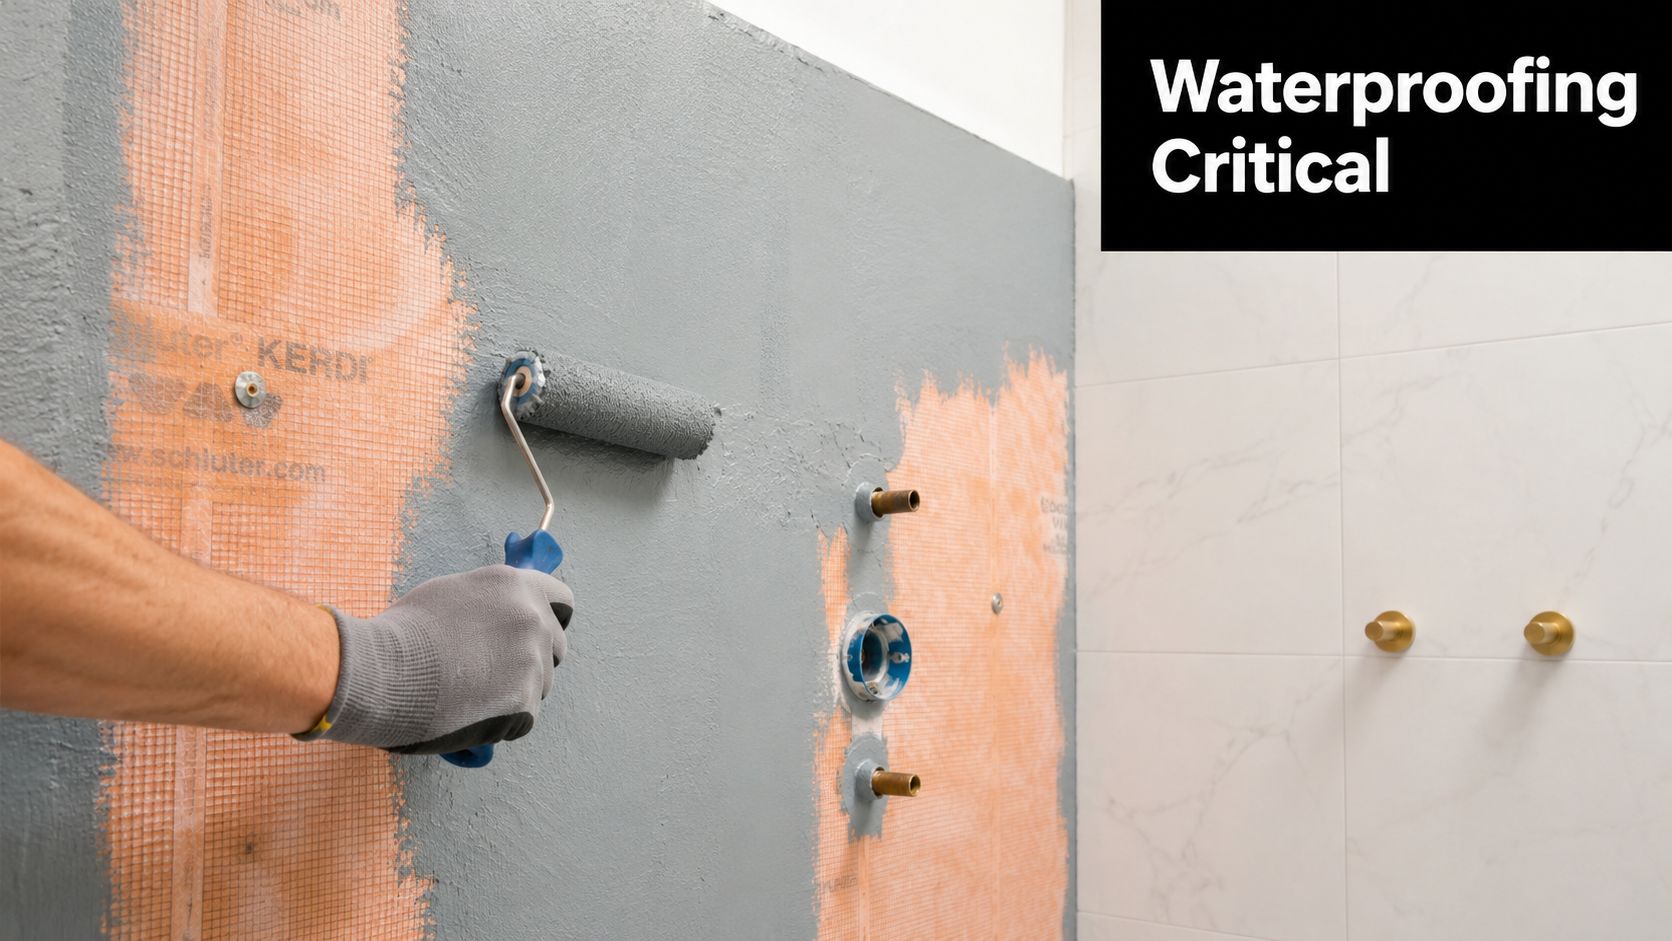
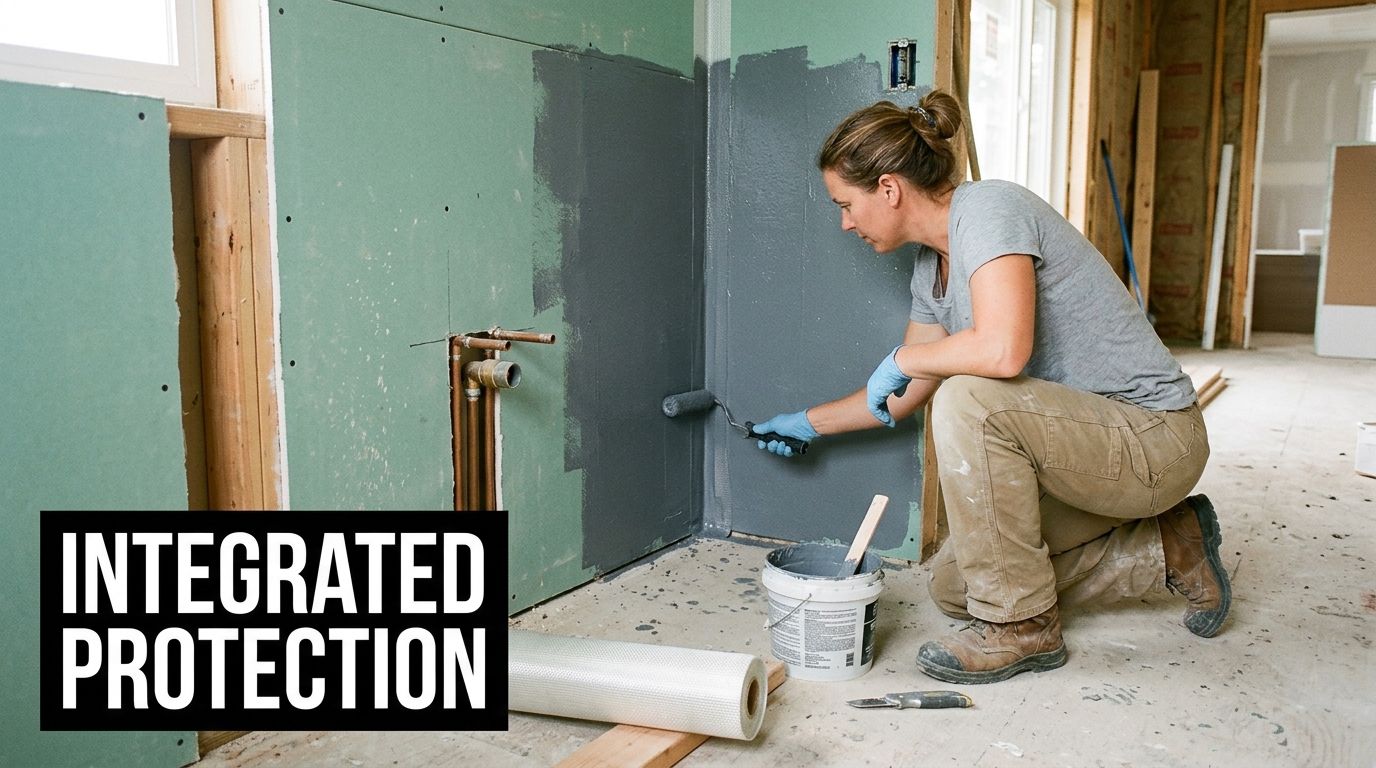
Waterproofing is often the least visible stage and the most important scheduling gate. The membrane must be applied to a properly prepared substrate, installed to the wet-area requirements of AS 3740, and allowed to cure before tiling begins. The application itself may be brief, but the waiting time is mandatory.
Australian renovation timelines commonly allow 24 to 48 hours for curing before inspection, while other product specifications and site conditions can require a longer period. Australian bathroom renovation sequencing information notes that screeds may also require 24 to 48 hours before they can be walked on, and membranes may require 24 to 72 hours depending on the product and weather conditions.
A Melbourne winter can make the practical programme less forgiving. Cold or damp conditions may slow curing, and the waterproofer can't be hurried because the tiler is waiting. The builder must also coordinate inspection and documentation before the membrane disappears behind tiles.
The hold point that protects the rest of the job
The registered builder or licensed plumber arranges the relevant inspection and compliance documentation. Depending on the work and practitioner involved, that may include a Form 12 or plumbing compliance certificate. The tiler should proceed only when the membrane has been checked, the substrate is ready and the builder has authorised the handover.
A failed inspection, missed booking or moisture reading outside the acceptable range can stop the tiler from starting. The delay then moves through every following task, including grouting, screen installation and final plumbing. Repair-led work can take longer again because the original leak may have damaged the substrate or framing.
For a detailed local explanation of the wet-area process, review waterproofing in Melbourne. Experienced builders contact the waterproofing contractor before demolition because availability and inspection timing need to be built into the programme from the start.
Pre-Construction Steps That Add Weeks to Your Bathroom Renovation Timeline
A bathroom can look ready for demolition while the programme remains unsettled. Before the first tile is removed, a measured survey records room dimensions, door swings, window positions, floor levels and service locations. Working drawings turn those measurements into set-out information for the plumber, electrician, carpenter, waterproofer and tiler.
Substrate preparation also belongs in this early review. Existing floors and walls may need levelling, patching or replacement before finishes can be installed, so confirm the bathroom substrate preparation requirements before fixing the trade sequence.
Selections create another common hold-up. Tapware, tiles, vanity sizes, basins, toilets, shower screens, mirrors, exhaust fans and lights must suit the drawings and arrive before the relevant trade reaches site. Imported ranges can carry lead times of 3 to 6 weeks, as described in the project planning notes for Melbourne bathroom renovation preparation.
What happens before the site start
A registered builder will generally confirm:
- Existing conditions: The home's age, framing, concealed plumbing and signs of termite damage or water entry may change the scope once the room is opened.
- Final selections: Vanity, tapware and fittings must match the drawings, rough-in locations and available clearances.
- Scope inclusions: The pre-start meeting records what the quote covers, which decisions remain with the owner and how variations will be handled.
- Approvals: Strata or council processes are identified where they apply, particularly in apartments or work involving structural changes.
- Trade availability: The plumber, electrician, carpenter, waterproofer, tiler and screen installer are booked around the required handovers and inspection points.
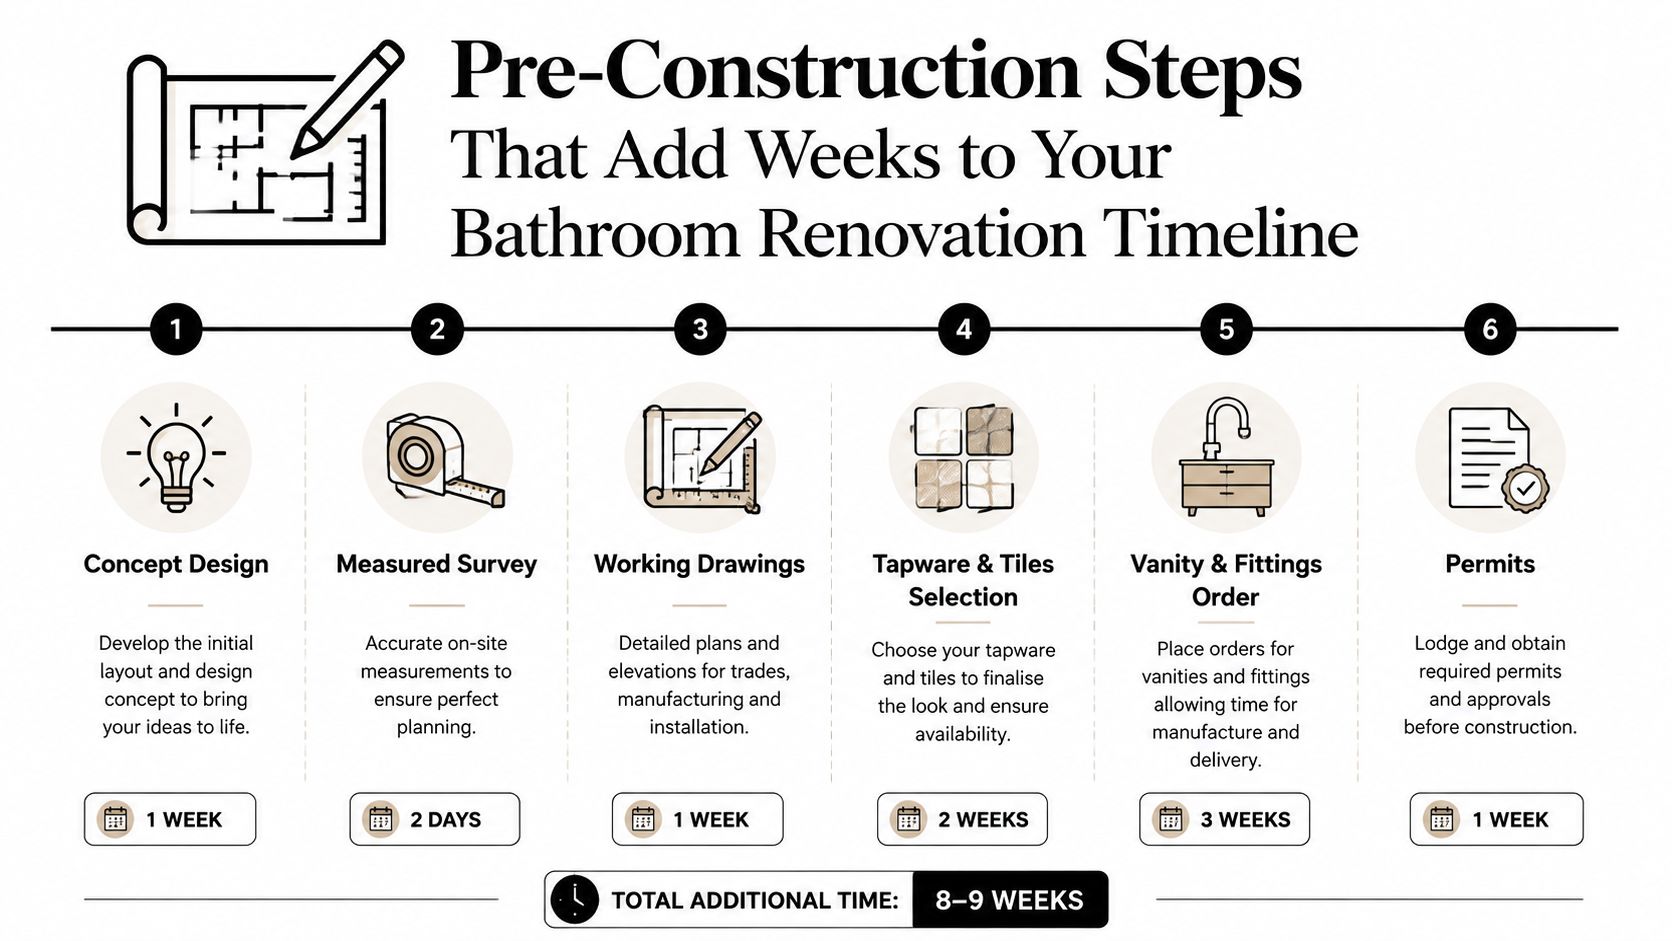
Design and quoting commonly take 2 to 6 weeks. Strata or council approval can take 4 to 12 weeks where required, according to Australian bathroom renovation planning guidance. Permit review adds another variable. Victoria-focused renovation guidance places permit approval commonly at 1 to 4 weeks, with some Melbourne applications taking 3 to 6 weeks when additional checks are needed, as explained by a Melbourne renovation builder.
Do not book demolition while critical materials, drawings or approvals remain unresolved. A short pre-start meeting can prevent a longer pause after the room has already been stripped.
Permits and Registered Builders in the Bathroom Renovation Timeline
A bathroom schedule can look ready on paper while still lacking the approvals that allow work to start. In Victoria, check two separate matters: whether the person doing the work must be registered, and whether the project needs a building permit. One does not automatically answer the other.
Domestic building work valued over A$10,000 must be carried out by a person registered with the Building and Plumbing Commission, with registration approved before work begins. The same requirement applies at any value when the work needs a building permit, according to the Victorian registration requirements for building practitioners.
For domestic building work over A$16,000, the project also requires a domestic building contract and domestic building insurance. That threshold is separate from the registration threshold. Review the quoted value and the actual scope together, because treating them as the same requirement can create a late compliance issue.
Cosmetic work and structural work follow different paths
Replacing tiles, fixtures, mirrors, towel racks or cabinetry generally remains cosmetic work and usually does not need a building permit. Moving a load-bearing wall, altering windows, extending the room or adding heavy fixtures that need structural reinforcement can change the approval path, as explained in Victorian bathroom renovation permit guidance.
| Trigger | Threshold | Requirement |
|---|---|---|
| Domestic building work | Over A$10,000 | Registered building practitioner required |
| Work requiring a building permit | Any value | Registered practitioner required before work starts |
| Victorian domestic building work | Over A$16,000 | Domestic building contract and domestic building insurance |
| Structural alteration | No stated value threshold | Building permit may be required |
A building surveyor assesses the application and issues the permit when the proposed work complies. The builder then works to the required inspection and documentation process. Those checks sit on the calendar before demolition, even though the build sequence on site has not started.
Owner-builder arrangements need specific Victorian advice, particularly for wet-area work. Waterproofing, structural changes and compliance sign-off still require qualified practitioners, so an owner-builder decision can shift responsibility without removing the technical hold points.
Before signing, use Victorian guidance on verifying a builder's registration status to check the builder on the public register. It takes little time before construction, but can prevent a larger scheduling and compliance problem after materials and trades have been booked.
The Hidden Delays That Stretch a Bathroom Renovation Timeline
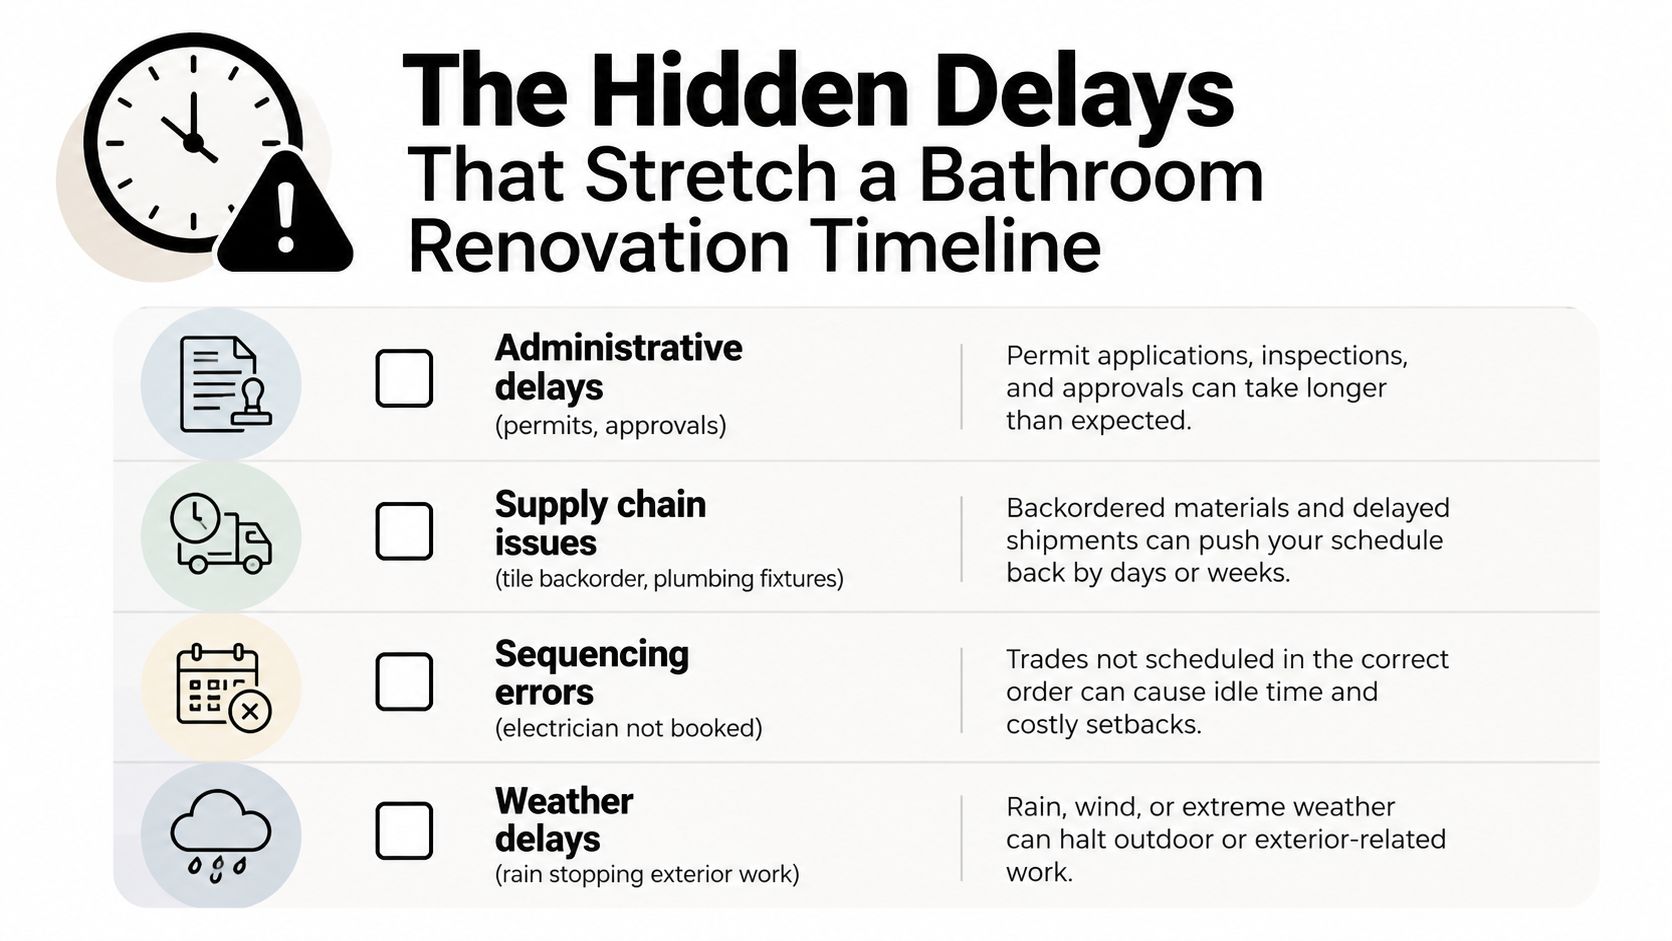
A bathroom can look ready for demolition while its build timeline remains unsettled. Final selections, Victorian approvals, trade bookings and product deliveries must line up before the first wall is opened. If one handover is missing, the delay usually appears later, when the next trade has no compliant surface or fitting to work on.
A compressed programme may promise a two-week turnaround. In practice, a standard renovation commonly takes 3 to 6 weeks from demolition to completion, with rough-in, waterproofing, tiling, grouting and fit-off controlling the sequence, as shown in a weekly Australian renovation timeline.
Where the programme usually slips
- Late selections: The plumber sets out services for one tapware range, then the owner changes the specification after the wall is prepared.
- Supply problems: Back-ordered tapware, an unavailable vanity or inconsistent tile batches leave the next trade without the required material.
- Sequencing errors: The electrician is not booked before wall lining closes, or the tiler arrives before the waterproofing inspection and required hold point.
- Hidden substrate damage: Soft flooring, water-damaged framing or uneven surfaces require repair before waterproofing can start.
- Missed hold points: A delayed waterproofing inspection pushes tiling, grouting, shower screens and final fit-off together.
The problem is usually a chain reaction rather than one slow day. A late rough-in postpones lining, lining postpones waterproofing, and waterproofing postpones the tiler. The calendar absorbs each missed handover, while the on-site build sequence cannot safely skip a required check.
Keep every trade handover visible in the programme. Confirm selections before rough-in, check deliveries before demolition, and book inspections before the membrane is installed.
A short visual explanation of the construction sequence is available in the video below.
Timeline Ranges for Cosmetic, Standard, and Structural Bathroom Renovations
A Melbourne bathroom can look like a short job on the calendar yet require several weeks of organised site work. Classify the scope first, then separate the on-site duration from the total elapsed time, which also includes selections, approvals, inspections, curing and trade availability.
| Renovation Type | On-Site Duration | Total Elapsed Time | Key Trigger Factors |
|---|---|---|---|
| Cosmetic refresh | 5 to 10 working days on site | Longer if selections or supplies aren't ready | Existing layout, plumbing and waterproofing retained |
| Standard rebuild | 4 to 6 weeks on site | Often several additional weeks | Full strip-out, new waterproofing, tiling and fit-off |
| Structural or leak rectification | 6 to 10 weeks or more on site | Longer where approvals and engineering apply | Framing, sub-floor repairs, relocated drains or walls |
A cosmetic refresh may involve a vanity replacement, new tapware, re-silicone work and accessories. The short programme depends on retaining the existing plumbing and waterproofing. Damaged walls or floors, mismatched service positions, or a changed brief can extend the job quickly.
A standard rebuild follows a controlled wet-area sequence. Strip-out comes first, followed by substrate checks, plumbing and electrical rough-in, wall preparation, waterproofing, the required hold points, curing, tiling and final fit-off. Victorian requirements and the waterproofing standard, AS 3740, mean the tiler cannot start when the room looks ready. Bathroom renovation planning resources also separates smaller refreshes from full renovations because layout changes, material availability and concealed conditions affect the programme.
Structural or leak rectification belongs in a separate category. Timber rot, sub-floor movement, relocated drains or wall changes can require investigation, repairs, engineering or approvals before the normal sequence resumes. Those stages sit in the calendar even when no trade is actively working inside the bathroom.
Use a bathroom renovation calculator to organise the initial scope, then confirm dates against measured conditions, selected products, Victorian registration or permit requirements, and the builder's actual trade programme.
Practical Scheduling Tips for a Smoother Bathroom Renovation Timeline
The best schedule protection happens before demolition. Make the major decisions while the room is still usable, then give the builder a written record of what has been selected, ordered and approved.
Remove decision bottlenecks
- Lock the finishes early: Confirm tiles, tapware, vanity, toilet, shower screen, mirror, exhaust fan and light fittings before demolition day.
- Mark up the drawings: Confirm plumbing rough-in positions on the drawings, not through a verbal conversation at the doorway.
- Check every delivery: Make sure the vanity, basin, tapware and fittings suit one another before the relevant trade is booked.
- Use a written variation process: Agree how changes will be priced, approved and scheduled so scope changes don't stop the queue without a decision.
- Review access constraints: Confirm parking, waste removal, lift access, working hours and protection of shared areas, particularly in inner-city apartments and terraces.
Book the waterproofer and tiler as a sequenced pair. The waterproofer needs to complete the membrane, allow the specified cure period and arrange inspection before the tiler starts. A tiler booked without that preceding gate may have to leave site and return later, which is one of the simplest ways to lose calendar time.
Plan for the household
If the bathroom is the only one in the home, arrange access to a second bathroom, gym facilities or temporary amenities before the strip-out. Australian renovation planning guidance notes that living in the home during renovation can add 30% to 50% to the timeline, so household access isn't a minor convenience. It changes how the builder stages the work, protects occupied areas and coordinates daily access.
Schedule progress inspections before rough-ins and waterproofing are covered. Check that pipe positions, electrical points, falls, niches and shower dimensions match the drawings while the work remains visible. Fixing a mismatch before lining or tiling is far easier than removing finished surfaces.
Treat the schedule as a chain of gates
A practical Melbourne bathroom renovation timeline has several approval and handover points:
- Design finalisation: The layout, fixtures and finishes are decided.
- Registered builder engagement: The scope, contract, insurance and responsibilities are confirmed.
- Permit review: Any structural or regulated work is assessed before demolition.
- Demolition: The room is opened carefully and hidden conditions are recorded.
- Rough-in sign-off: Plumbing and electrical positions are checked before surfaces close.
- AS 3740 waterproofing: The membrane is applied, cured and inspected.
- Tiling: The tiler works from a compliant, prepared surface.
- Fit-off: Fixtures, screens, accessories and electrical items are installed.
- Final inspection: Plumbing, drainage, electrical fittings, finishes and documentation are checked.
A realistic programme isn't a countdown that ignores waiting. It's a sequence of gates, and each gate needs a person to approve the handover.
A registered Melbourne builder coordinates most of this work, but homeowners still control many of the decisions that create bottlenecks. Front-load selections, keep the scope stable and plan family routines around weeks of elapsed time rather than a few optimistic site days. That approach won't eliminate hidden defects or supply problems, but it gives the project room to absorb them without turning every small issue into a complete restart.
Melbourne Tiling Services P/L coordinates bathroom renovations, waterproofing, screeding, substrate preparation, tiling and fit-off with registered builders and licensed trades across Melbourne and greater Victoria. Visit Melbourne Tiling Services P/L to discuss your scope, request a quote and plan the sequence of work before demolition begins.

Recent Comments