
You're probably staring at tile samples that all look good under showroom lights. Large format stone-look porcelain on one board. A soft matt terrazzo look on another. Maybe a polished option that seems premium until you start wondering what it'll be like on a wet bathroom floor at 7 am when everyone's rushing.
That's where most bathroom renovations go off course. People choose with their eyes first, then deal with the consequences later. In Melbourne homes, the true measure isn't how a tile looks on display. It's how it performs after years of hot showers, cleaning products, foot traffic, movement in the substrate, and moisture sitting where it shouldn't.
As a tiler and registered builder, I can tell you this. Porcelain tile durability is rarely about one feature on a box. It's about whether the tile suits the room, whether the substrate is prepared properly, whether the waterproofing is done right, and whether the installation matches the format and conditions. Get those parts right and the finish can stay solid for decades. Get them wrong and even a premium tile can fail.
Table of Contents
- Why Porcelain Tile Durability Matters in Your Renovation
- Decoding the Technical Durability Ratings
- Glazed vs Full-Body Porcelain Tiles
- How Installation Quality Impacts Tile Longevity
- Choosing Tiles for Bathrooms Showers and Balconies
- Long-Term Maintenance and Repair Tips
- Conclusion Making a Durable Choice for Your Project
Why Porcelain Tile Durability Matters in Your Renovation
A bathroom can look finished on handover day and still be heading for trouble. I see it in Melbourne renovations where the tile choice was driven by colour and price, while the floor levels, waterproofing details, and installation method were treated as secondary. A few months later, the problems show up. Slippery floors, chipped edges, stained grout, drummy spots, and water finding its way where it should not.
Porcelain is a strong material, but durability in a renovation is never just about the tile itself. In a bathroom, the tile has to work as part of a system that includes the substrate, falls, adhesive coverage, movement joints, grout, and waterproofing. If one part is wrong, the finished surface wears poorly even when the tile was a decent product.
That matters even more in Melbourne homes, where I often see timber subfloors in older properties, mixed substrates in extensions, and bathrooms updated over surfaces that needed more correction than the quote allowed for. Those conditions affect how a tile performs long after the showroom sample has been forgotten.
Showroom appeal versus site conditions
A tile can look perfect under display lighting and still be a poor choice for a family bathroom. Polished finishes can show wear and residue faster. Some large-format tiles suit walls better than wet floors because the layout leaves less room to manage falls cleanly. A tile with hard square edges can chip if the substrate moves or if the installer leaves poor support under corners.
Homeowners usually focus on the visible finish. Builders and tilers have to look at the load the room puts on the whole assembly.
I tell clients to assess bathroom tiles in this order:
- Location: main floor, shower floor, wall, niche, or balcony edge all place different demands on the tile
- Surface performance: grip, cleanability, and how the finish handles soap, water, and daily use
- Tile size and edge type: whether the format suits the room dimensions, floor falls, and set-out
- Installation conditions: whether the substrate is flat, stable, and properly prepared before waterproofing and tiling start
A durable bathroom comes from matching the tile to the room, then building the substrate and waterproofing to suit it.
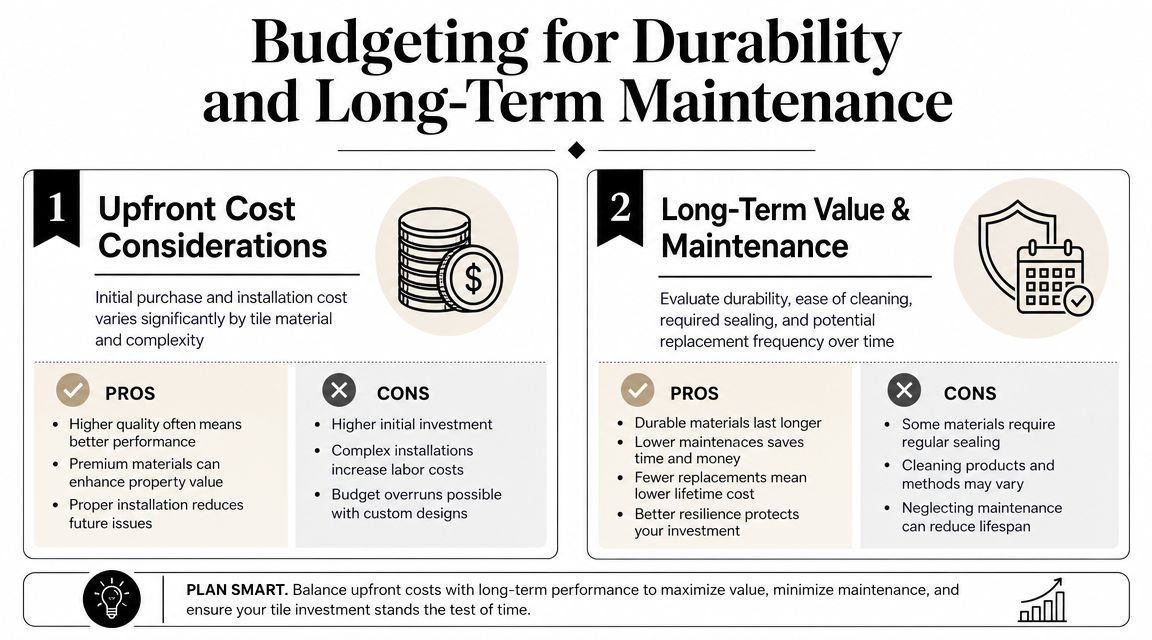
Why durability affects the whole renovation budget
The tile itself is rarely the expensive part of a failure. The cost sits in the rework. Pulling out screens or vanities, removing surrounding tiles without damaging adjacent finishes, repairing the base, redoing waterproofing, and trying to match discontinued tiles is where a cheap decision turns into an expensive one.
This is why porcelain tile durability should be treated as a renovation risk issue, not just a product feature. A registered builder should be looking at the hidden work and the finished surface together. If that coordination is missing, even a good porcelain tile can end up in a bathroom that ages badly, needs repairs early, or fails where water management should have been sorted from the start.
Decoding the Technical Durability Ratings
The technical sheet matters, but only if you know what the terms mean. Most homeowners see a string of abbreviations and ratings and assume the highest number must be best. It doesn't work like that. The right tile for a shower floor isn't necessarily the same tile you'd use on a laundry wall or an alfresco balcony.
Here's the image I'd want any renovator to understand before picking a tile:
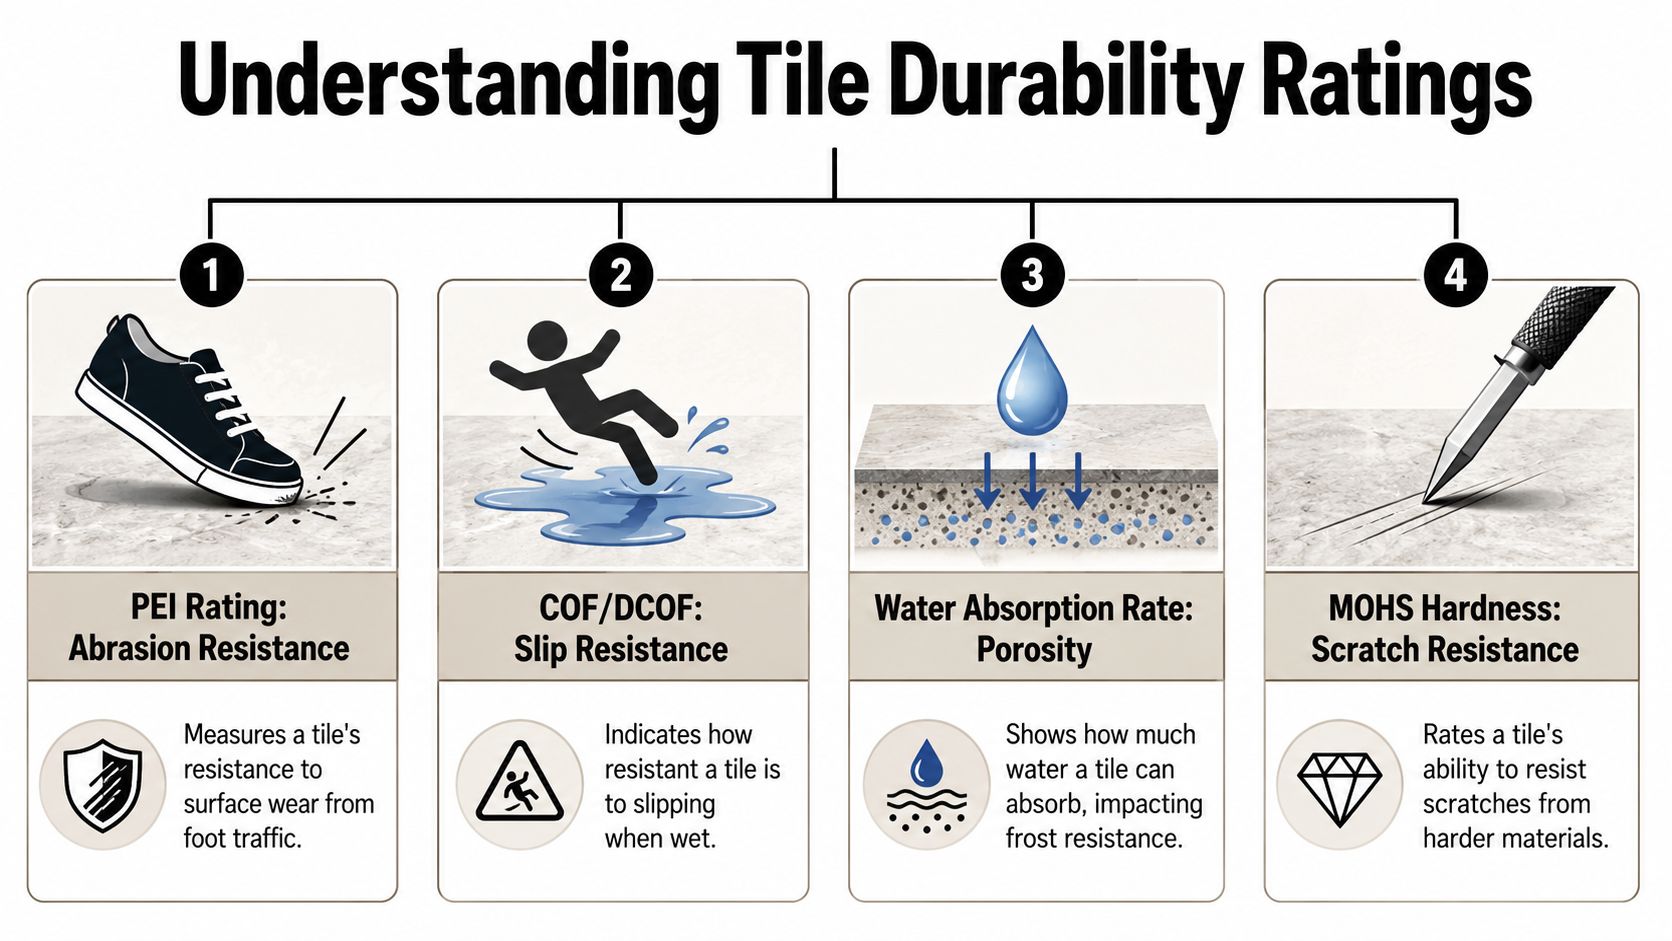
What the ratings actually tell you
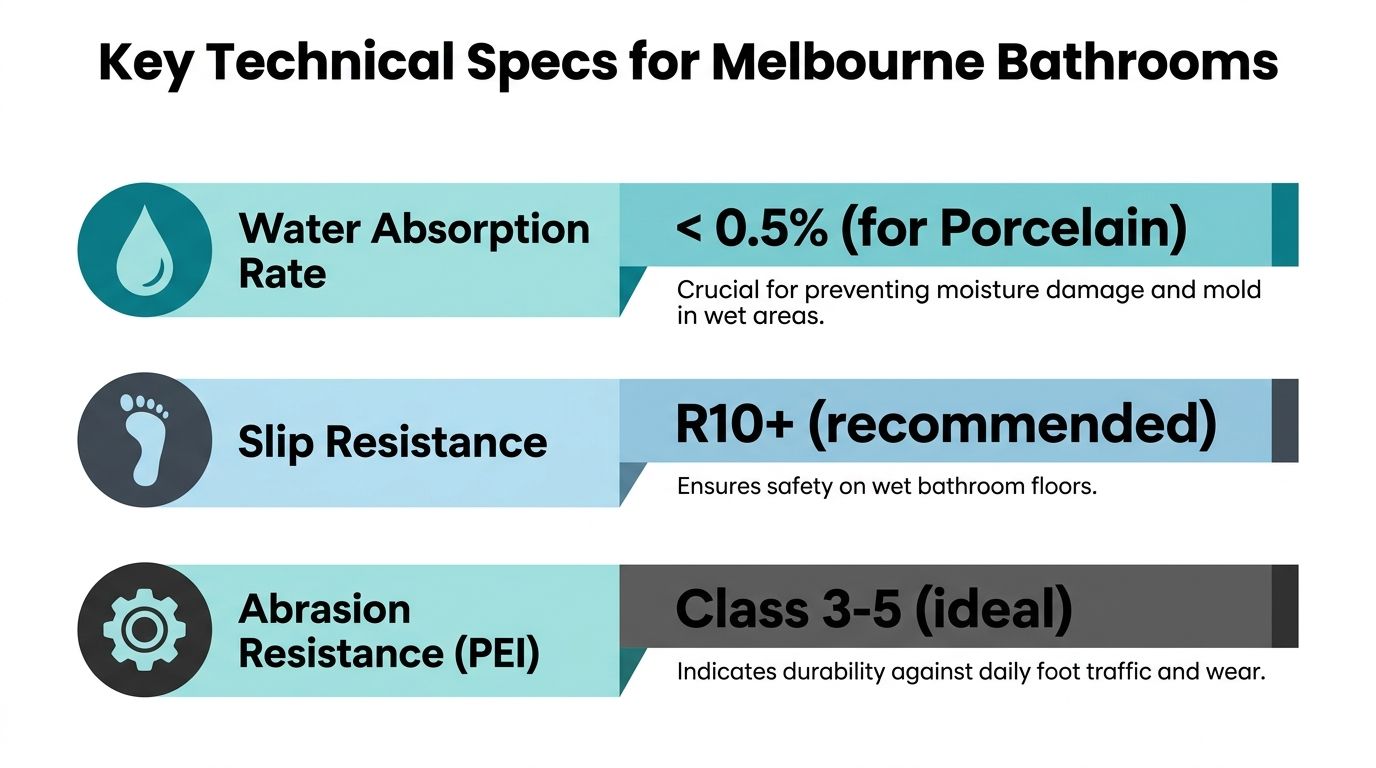
Start with water absorption. This is one of the clearest indicators of whether a tile belongs in a wet area. Porcelain used in these settings should have a water absorption rate of less than 0.5%, and Group B Ia porcelain tiles with water absorption ≤0.5% are mandatory for exterior and wet-area applications in Australia under AS ISO 13006, as explained in this discussion of PEI ratings and porcelain classification. If a bathroom or balcony tile doesn't meet that threshold, I wouldn't specify it for a moisture-heavy area.
Then there's PEI. Think of PEI as a surface wear guide for glazed tiles, not a full measure of structural strength. That distinction matters. The same source notes that PEI ratings 1 to 5 only apply to glazed surfaces and don't reflect the structural durability of the unglazed porcelain body. A lot of homeowners mistake visible wear on the finish for the tile body failing, especially with natural-look and large-format products.
Mohs hardness tells you how resistant the surface is to scratching. Porcelain used for residential flooring typically sits around 5 to 6 on the Mohs scale, with premium options reaching 7 or higher, according to Jasmine McClelland Design's guide to selecting tiles. In plain terms, that means porcelain is hard-wearing enough for daily family use, but the finish still needs to suit the room. Hardness doesn't cancel out poor slip resistance or a weak installation.
Slip performance needs its own attention. The same source notes that a Pendulum BPN of 35 after 500 accelerated wear cycles is a suitable initial benchmark for level surfaces likely to be contaminated with water. That's useful because a tile needs to stay safe after wear, not just on day one.
PEI Wear Rating Guide for Residential Projects
| PEI Rating | Description | Ideal Melbourne Application |
|---|---|---|
| PEI 1 | Very light wear on glazed surfaces | Ensuite wall tile or decorative low-contact area |
| PEI 2 | Light residential wear | Guest bathroom floor with light use |
| PEI 3 | General residential wear | Standard bathroom floor in a smaller household |
| PEI 4 | Heavy residential wear | Main bathroom floor, busy family home |
| PEI 5 | Very heavy wear on glazed surfaces | Entry-adjacent wet areas or demanding residential settings |
The spec sheet traps that catch homeowners
The biggest trap is assuming one rating tells the whole story. It doesn't.
- PEI isn't everything: It only covers wear on a glazed surface. It doesn't tell you how the tile body behaves under movement or impact.
- Low absorption is essential in wet areas: For bathrooms, showers and external areas, the body of the tile must resist moisture uptake.
- Hard tiles still chip if installed badly: A strong material laid over voids or on an uneven substrate can fail at edges and corners.
- Slip rating must match the location: A wall tile finish and a shower floor finish are often two different products for a reason.
Practical rule: Read the spec sheet like you'd read a building report. No single line tells the whole story. You need the tile body, the finish and the intended location to line up.
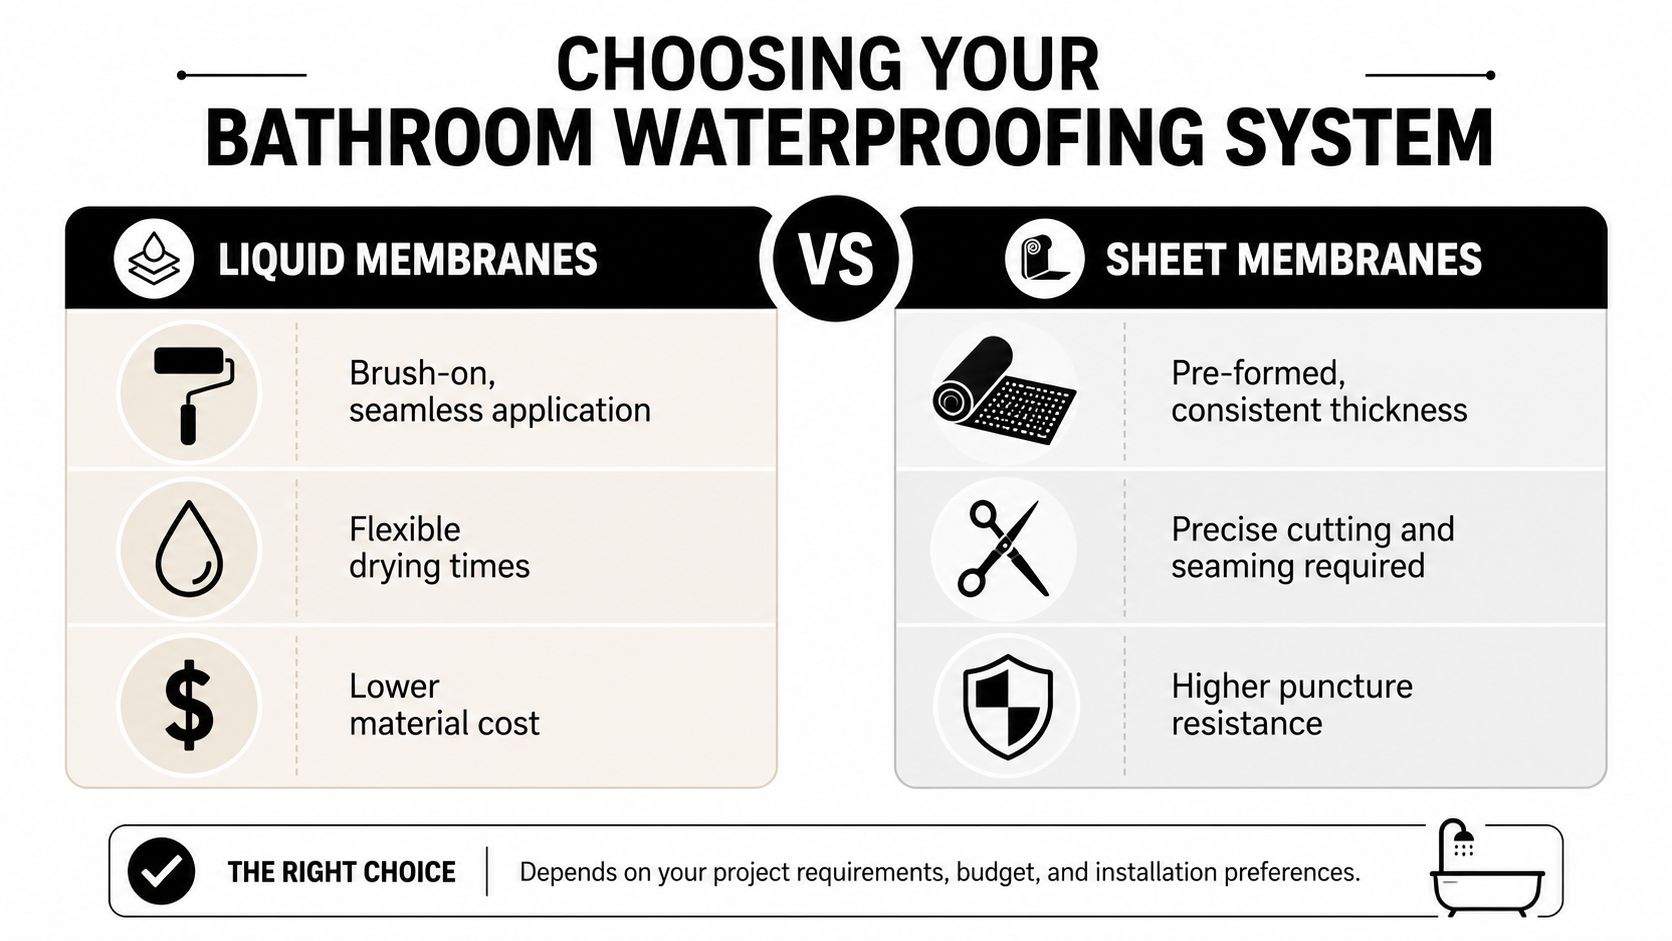
Glazed vs Full-Body Porcelain Tiles
You finish a bathroom, everything looks sharp, and six months later a shampoo bottle clips the niche edge or a metal stool hits the floor near the vanity. The tile itself may still be sound, but the way that damage shows is very different between glazed and full-body porcelain. That difference matters more than many homeowners realise, especially in Melbourne bathroom renovations where edges, trims, and shower entries get hard daily use.
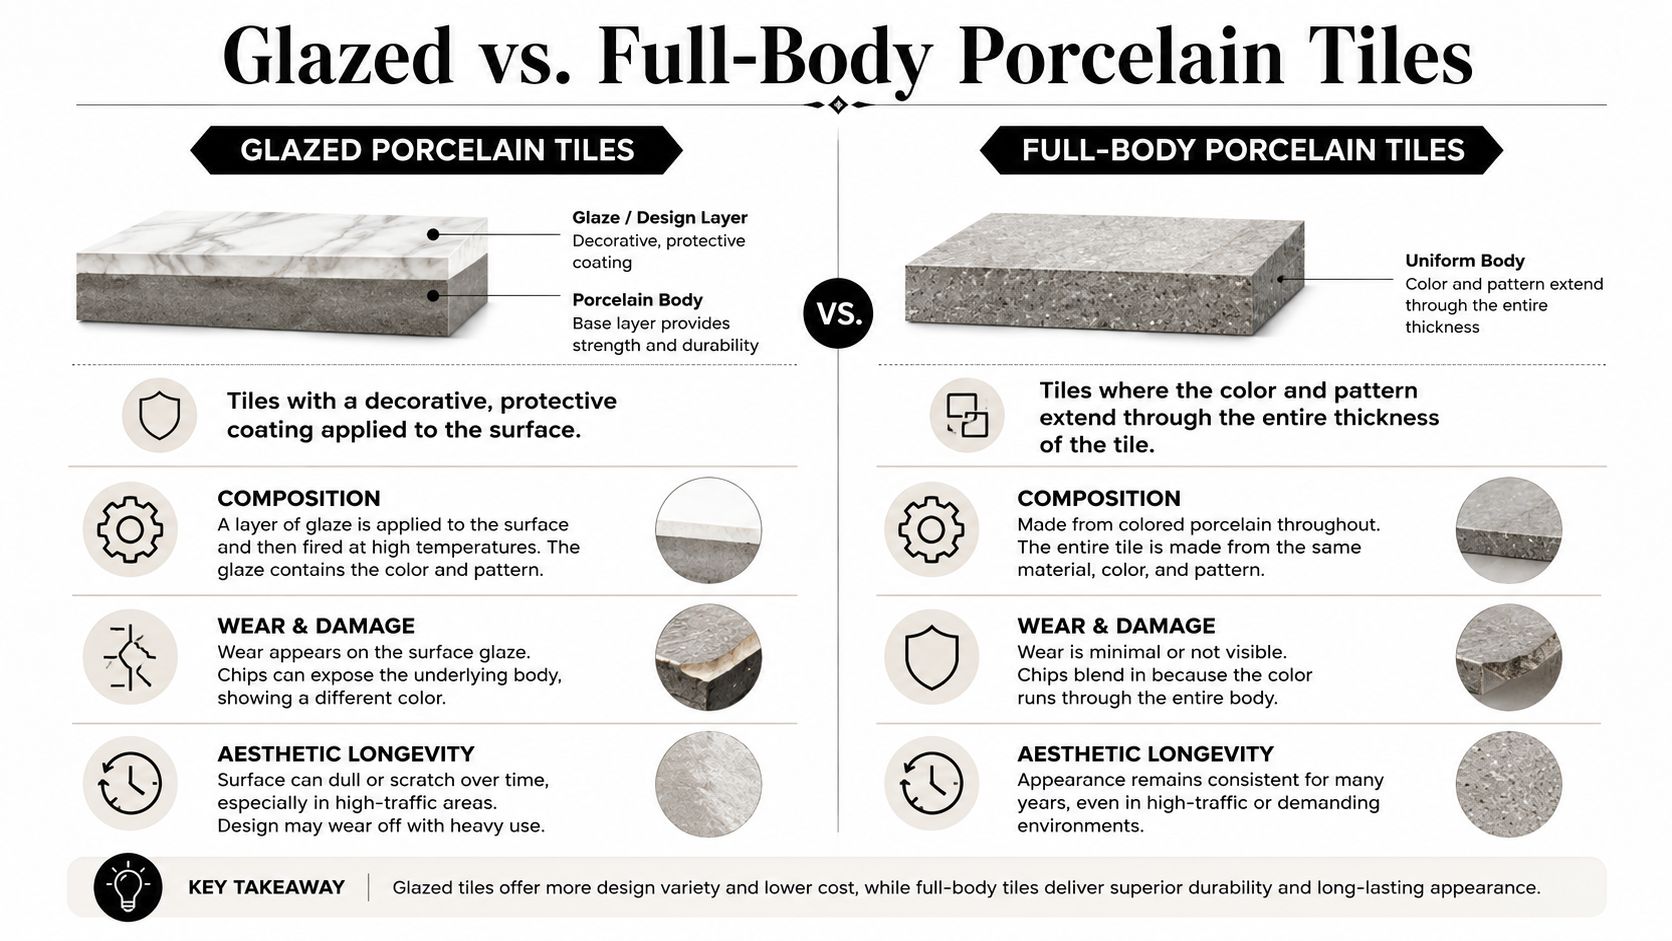
How the tile is built matters
A glazed porcelain tile has a dense porcelain body with a finished surface applied over it. That surface is what gives you the detailed look of stone, concrete, terrazzo, timber, or travertine. In a residential bathroom, a good glazed porcelain tile usually performs well and gives you far more choice in colour, texture, and pattern.
A full-body porcelain tile has colour and material running through the body of the tile, or close enough in appearance that a chip is less obvious. It is often the better option where exposed edges can take knocks, or where long-term cosmetic wear matters more than decorative range.
The key point is simple. Both types can be durable. They just fail differently under impact and wear.
What that means on a real job
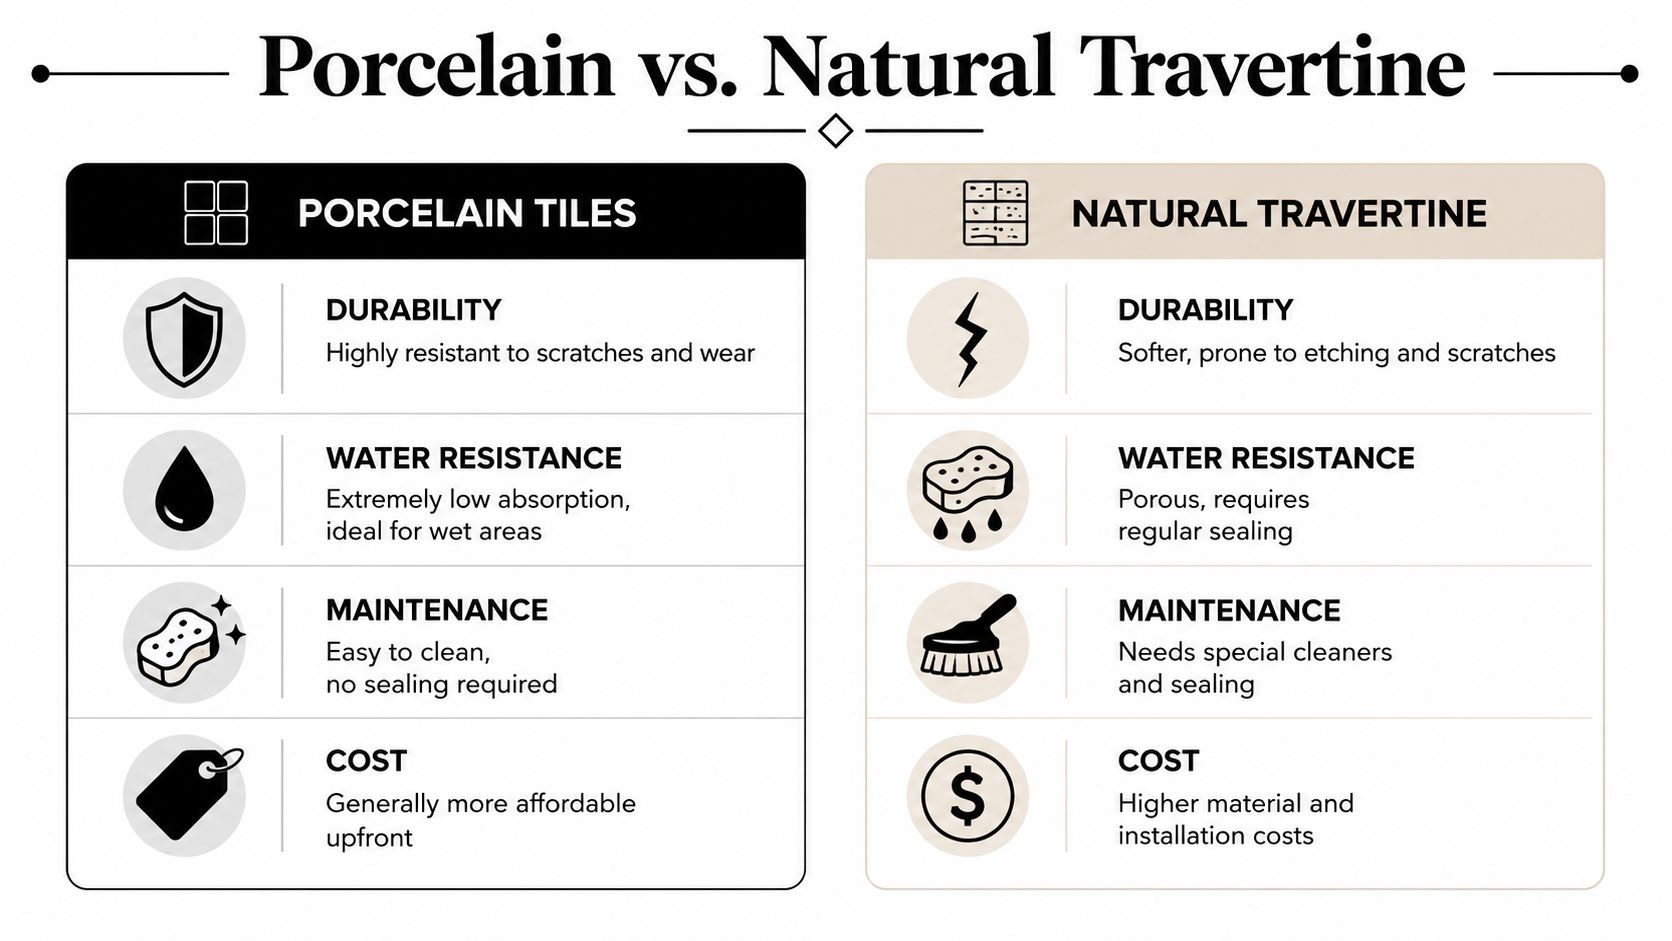
In most Melbourne bathrooms, glazed porcelain is the practical pick. The better products hold up well, the finish options are broader, and the visual result is usually stronger for residential design. If a client wants a natural stone look without the sealing and maintenance that comes with real stone, glazed porcelain is usually where I start. That includes finishes such as travertine-look porcelain tiles, which give you the look many homeowners want with a far more predictable maintenance profile.
Full-body porcelain earns its keep in tougher spots. Entry thresholds, laundry floors, outdoor links, stair treads, and commercial-style wet areas are the obvious examples. In those locations, a small chip on a glazed tile can expose a contrasting body and catch the eye straight away. On a full-body tile, the same damage is often much less noticeable.
That does not mean full-body is automatically the better buy. It often costs more, the design range is narrower, and it will not fix poor installation.
Where homeowners make the wrong call
The mistake I see is choosing by label instead of location.
A family bathroom with proper substrate prep, correct waterproofing, and a suitable glazed porcelain tile can last very well for years. On the other hand, an expensive full-body tile laid over movement, poor falls, or hollow spots will still chip, drum, or crack at stress points. The tile type matters, but in wet areas it has to be matched to the build-up underneath. That is where a registered builder and experienced tiler save you from the expensive failures that show up after handover.
A few practical rules help:
- Choose glazed porcelain for most bathroom walls and floors where design realism and finish choice matter.
- Choose full-body porcelain where exposed edges, hard use, or impact risk make visible chips a concern.
- Look closely at niches, external corners, step edges, and trims. These areas show damage first.
- Do not assume a harder-sounding spec solves everything. If the substrate moves or the waterproofing build-up is wrong, both tile types can fail.
Glazed porcelain usually wins on design. Full-body porcelain usually wins on hiding chips. For a bathroom renovation, the better choice depends on the room, the edge details, and whether the installation system is being built properly from the substrate up.
How Installation Quality Impacts Tile Longevity
A premium tile can still fail on a poor base. This is the part many homeowners don't see until the bathroom is already finished. The tile gets all the attention because it's visible. The substrate, waterproofing and adhesive bed decide whether the installation lasts.
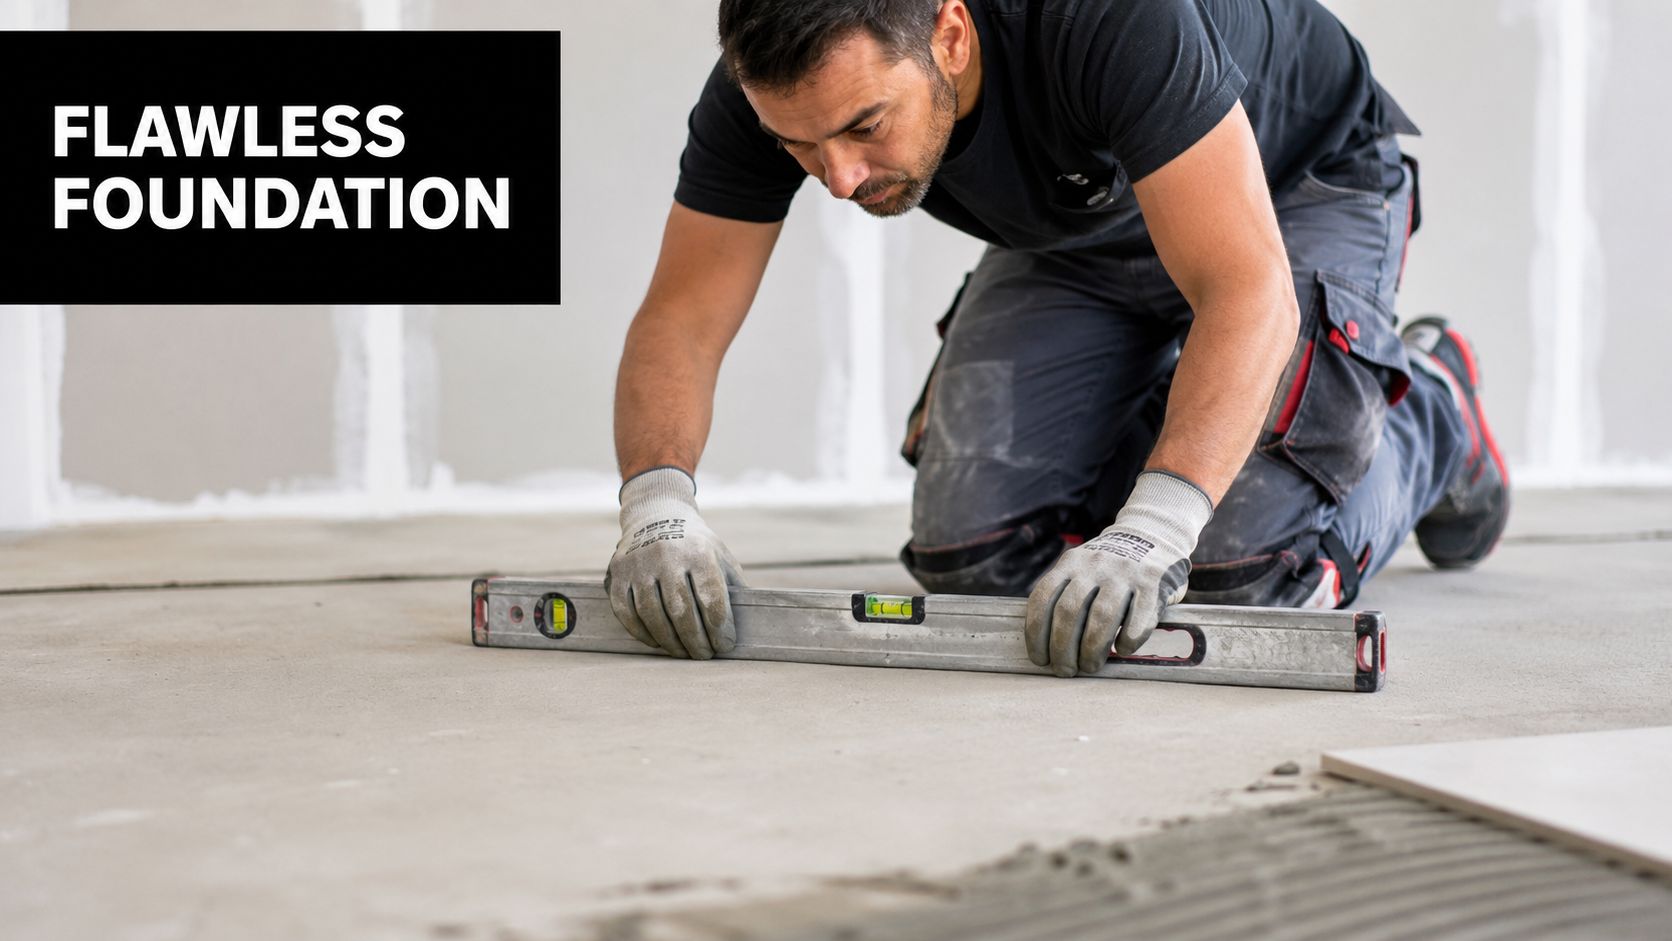
The tile is only one part of the system
In Melbourne bathroom renovations, slip safety and wear resistance need to line up with the location. Porcelain tiles used in these projects must meet a minimum slip rating of R10, or higher in wet zones, under AS/NZS 4586 and HB 198:2014, and PEI Class IV or V is recommended for areas with heavy foot traffic, as outlined in Surface Studio's guide to reading a tile data sheet. Those are useful benchmarks, but they only matter if the rest of the assembly is done properly.
A registered builder looks at the bathroom as a system:
- Substrate condition: Is the floor level, stable and suitable for tile?
- Falls to waste: Will water drain instead of sitting in corners?
- Waterproofing sequence: Are junctions, penetrations and bond breakers handled properly?
- Tile format: Does the room suit large-format porcelain or does it need more forgiving sizing?
- Adhesive selection: Dense porcelain needs the right adhesive and coverage, especially on floors and wet walls.
If one of those steps is skipped or rushed, the symptoms show later as cracked grout, hollow-sounding tiles, poor drainage or water escaping the wet area.
Where cheap jobs usually fail
The common failures aren't mysterious. They're usually predictable.
One problem is lippage over an uneven base. Large porcelain tiles make a room look cleaner and more modern, but they also show every dip and hump in the substrate. If the floor hasn't been screeded or levelled properly, the installer ends up fighting the base the whole way through.
Another is poor adhesive coverage. Porcelain is dense. If the tile isn't bedded correctly, you can end up with voids under corners or edges. That's where impact damage and drummy sounds often start.
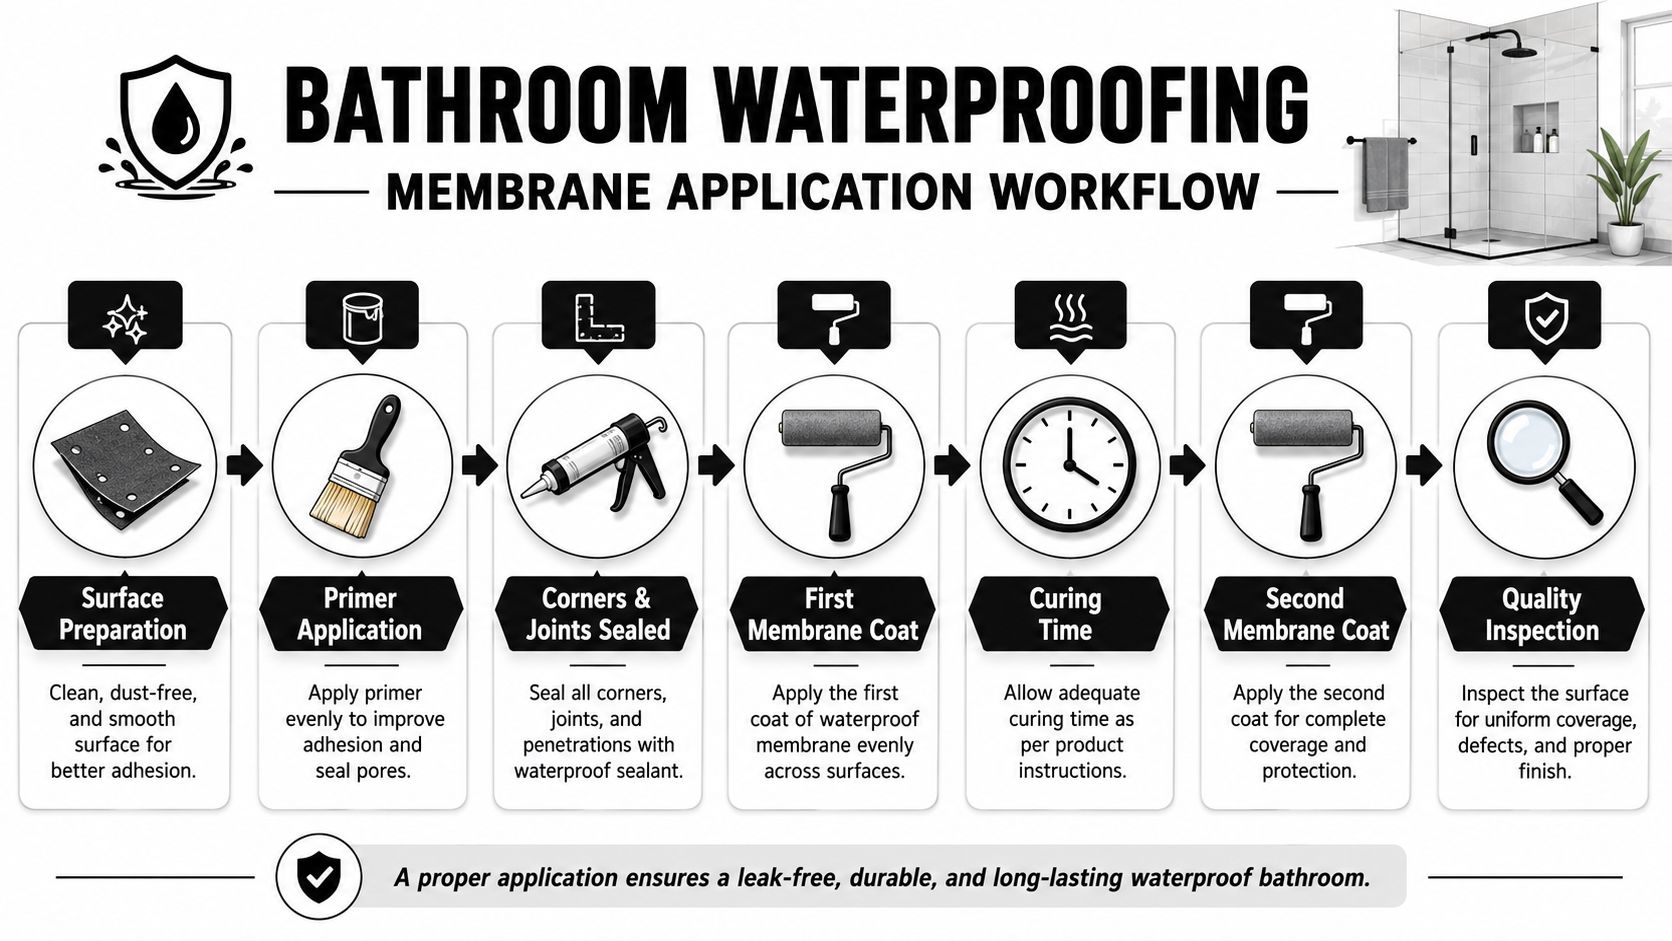
Then there's waterproofing that exists on paper more than in practice. A bathroom can look flawless at handover while the membrane detailing underneath is incomplete. Once moisture gets where it shouldn't, the visible tile layer won't save the room.
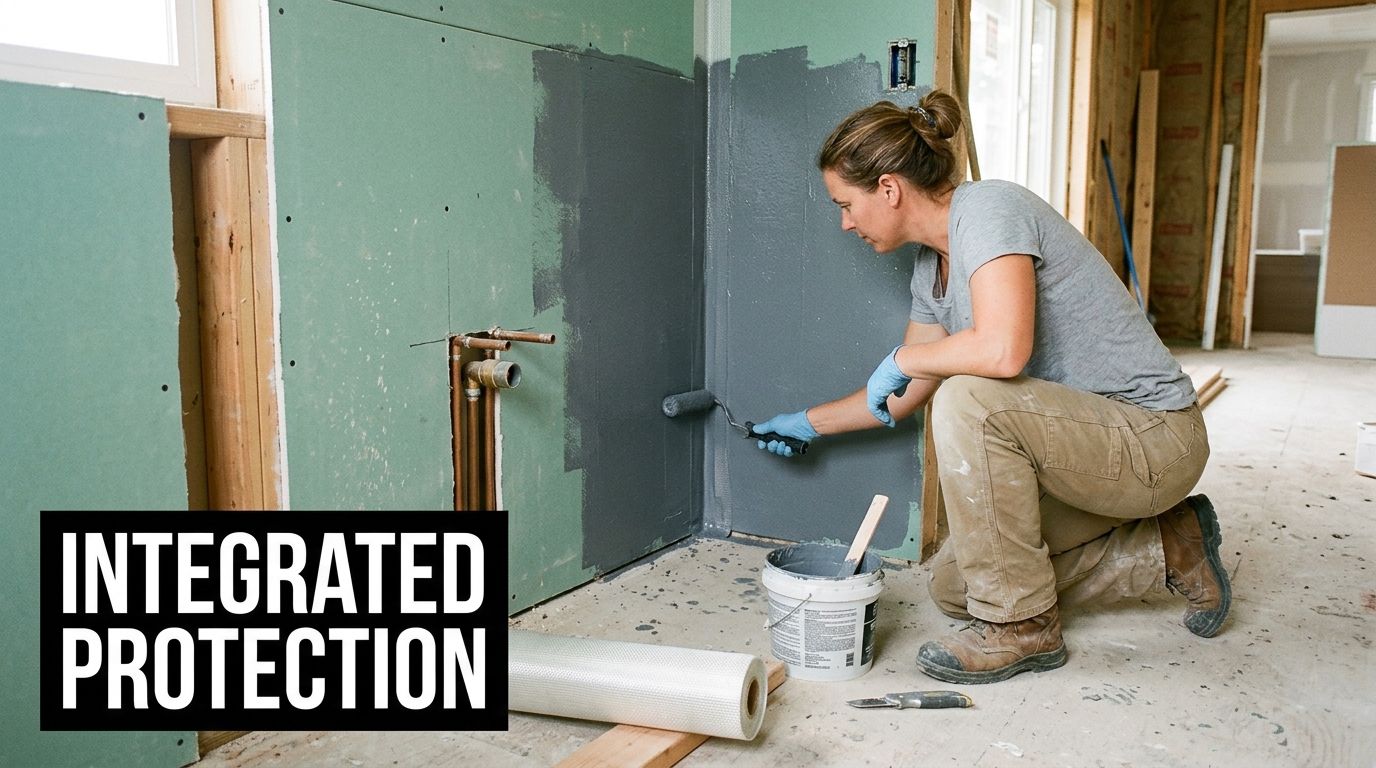
That's why proper coordination matters in tiling and waterproofing. The best outcomes happen when the builder, waterproofer and tiler are working to the same plan, rather than treating each trade as an isolated task.
The tile doesn't fail by itself. Usually the base moves, the water gets through, or the support under the tile was never right to begin with.
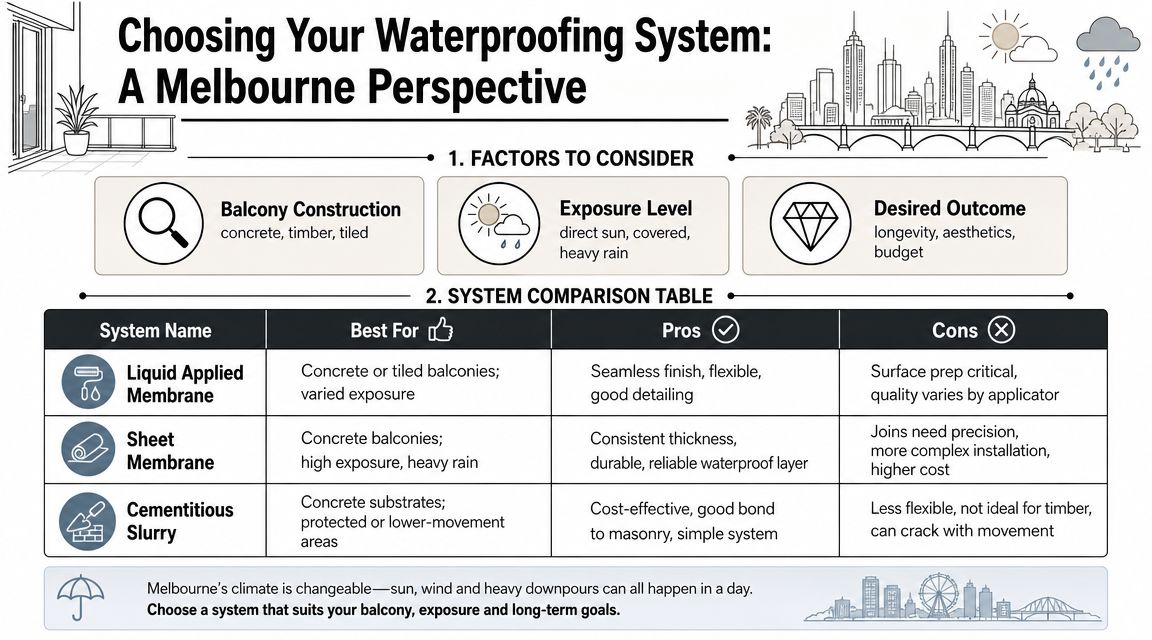
Choosing Tiles for Bathrooms Showers and Balconies
Different areas of the home punish tiles in different ways. A main bathroom floor deals with daily traffic and cleaning. A shower floor deals with constant wetting and soap residue. A balcony deals with weather exposure, drainage pressure and movement. If you choose one tile for all three without checking the technical side, you're asking one product to solve three separate problems.
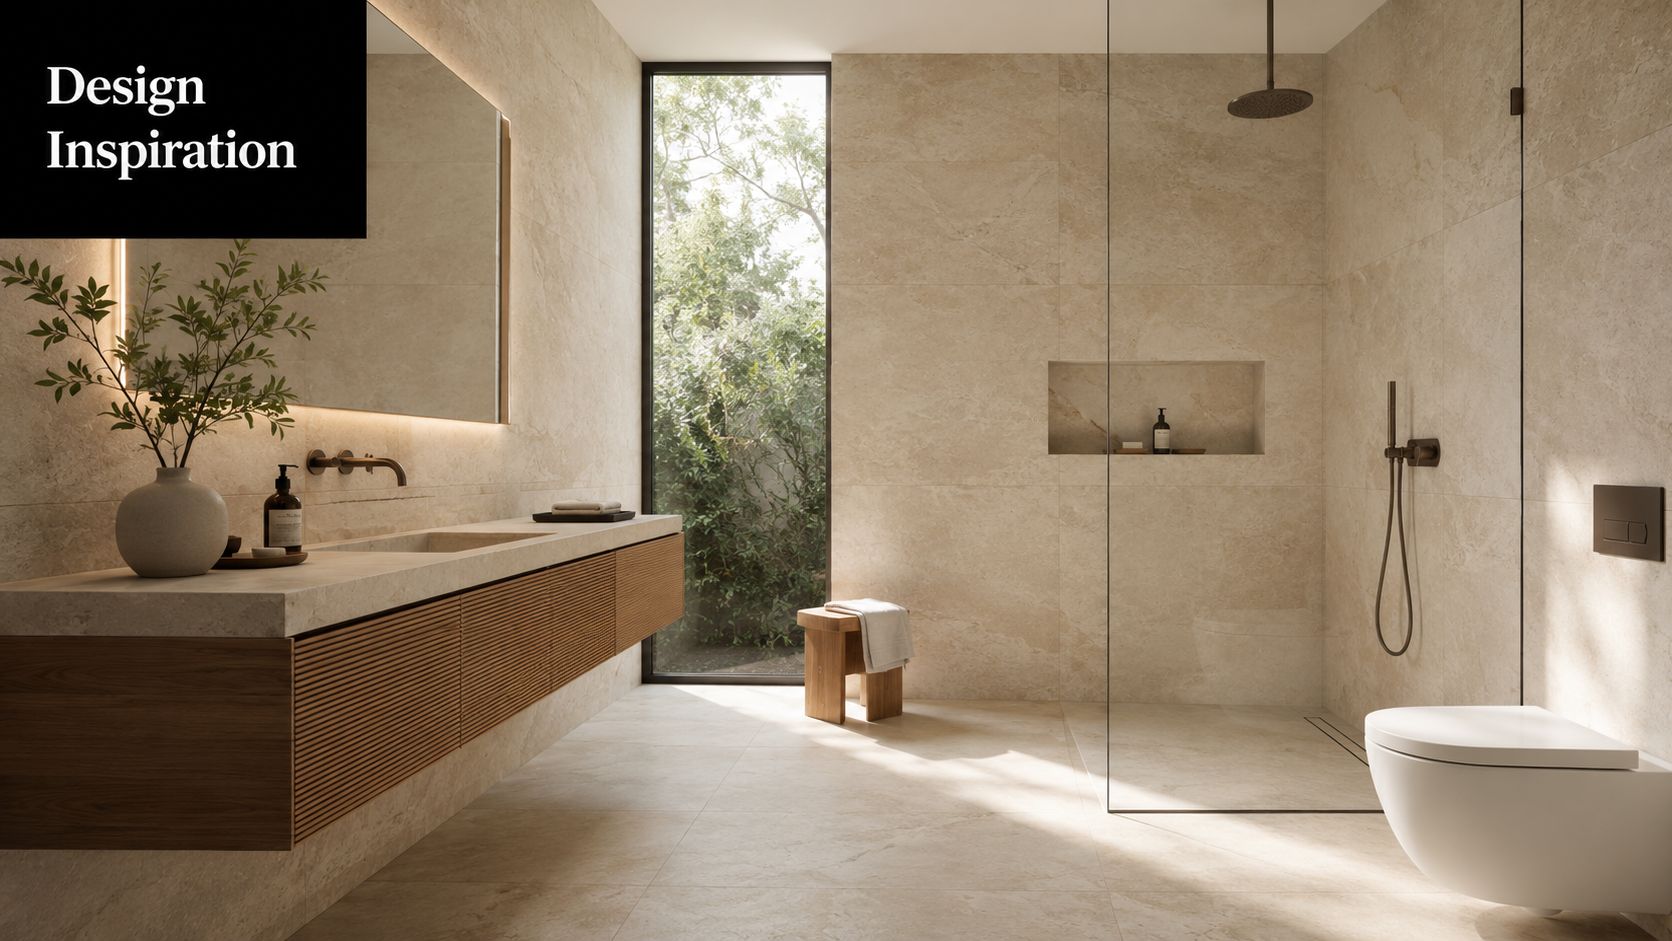
This kind of outcome only happens when the specification and installation suit the space:

Main bathroom floors
For the main bathroom floor, I look for a tile that balances wear resistance, slip performance and ease of cleaning. Often, a lot of homeowners make the wrong call with highly polished finishes that look impressive dry and clean, then become hard work once toothpaste, water marks and soap residue build up.
Porcelain is well suited here because it's vitrified at high temperatures and achieves a water absorption rate of less than 0.5%, making it nearly impervious to moisture and ideal for Australian bathroom renovations where waterproofing is critical, according to Plusco's comparison of bathroom tile materials. For a main bathroom, that low absorption is a major advantage because routine moisture exposure is unavoidable.
For most homes, I'd lean toward:
- Matt or structured finishes: Better everyday practicality than polished surfaces.
- Mid to large formats: Fewer grout joints, cleaner appearance, but only if the floor is prepared properly.
- A layout that respects the room: Centre lines, door thresholds and waste locations should all be planned before tiling starts.
If you're weighing options, it helps to compare products specifically made for porcelain bathroom tiles, rather than choosing from a general tile display without reference to wet-area use.
Shower floors and wet zones
Shower floors need a different mindset. The safest and most durable tile in this area is often smaller and more textured than the wall tile beside it. That's not a design compromise. It's good planning.
Smaller formats conform to falls more easily and usually give better grip because there are more grout joints and more surface texture. What doesn't work well is forcing a large rectified tile onto a shower floor with tight falls and expecting it to drain neatly without awkward cuts or pooling.
A practical shortlist for shower areas looks like this:
- Prioritise grip over gloss: Wet bare feet don't care how premium a polished tile looked in the showroom.
- Match tile size to the waste and falls: The drainage layout should influence the format.
- Keep maintenance in mind: Some heavily textured finishes hold grime more than others, so there's always a balance.
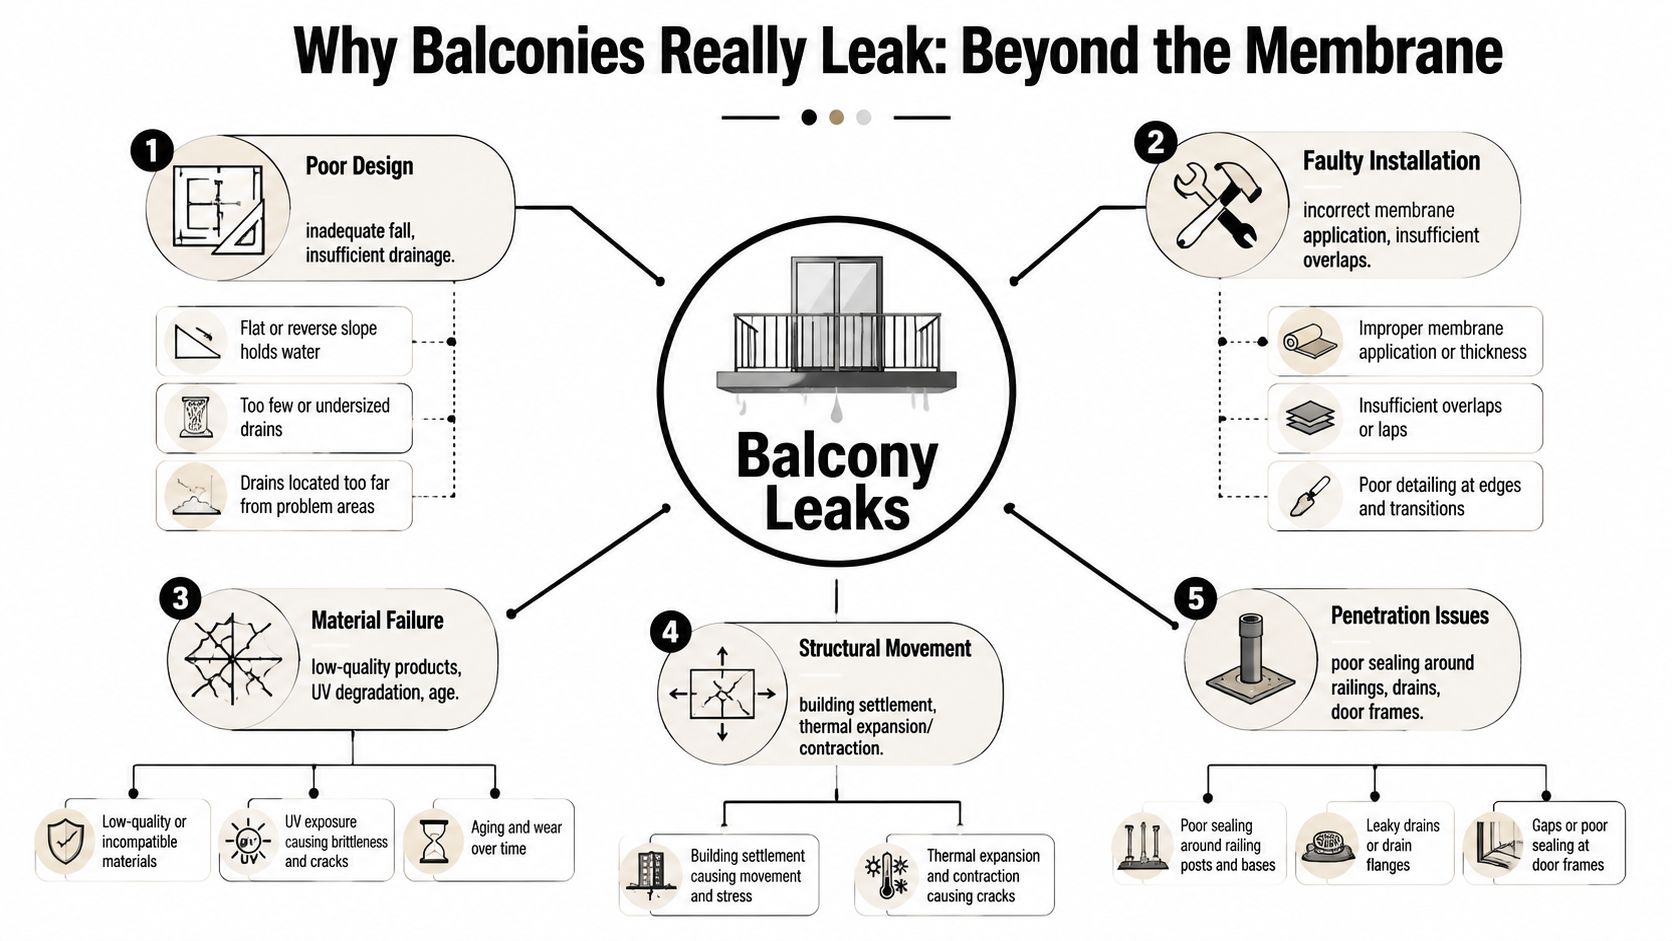
Balconies and exposed areas
Balconies are unforgiving. They deal with water, movement, temperature swings and edge exposure. A tile that behaves perfectly indoors can become a problem outside if the whole assembly isn't built for external conditions.
Large-format porcelain can work beautifully on balconies, but only when the substrate, falls, drainage points and movement joints are handled properly. That's doubly true with slim or panel-style products such as Kerlite. They can deliver a very clean finish with fewer joints, but they also demand accurate handling and support. On the wrong base, they won't forgive shortcuts.
The best balcony results usually come from restraint. Don't chase the biggest tile solely for its uninterrupted appearance. Choose the format your substrate is able to support, then install it to suit exposure, drainage and movement.
Long-Term Maintenance and Repair Tips
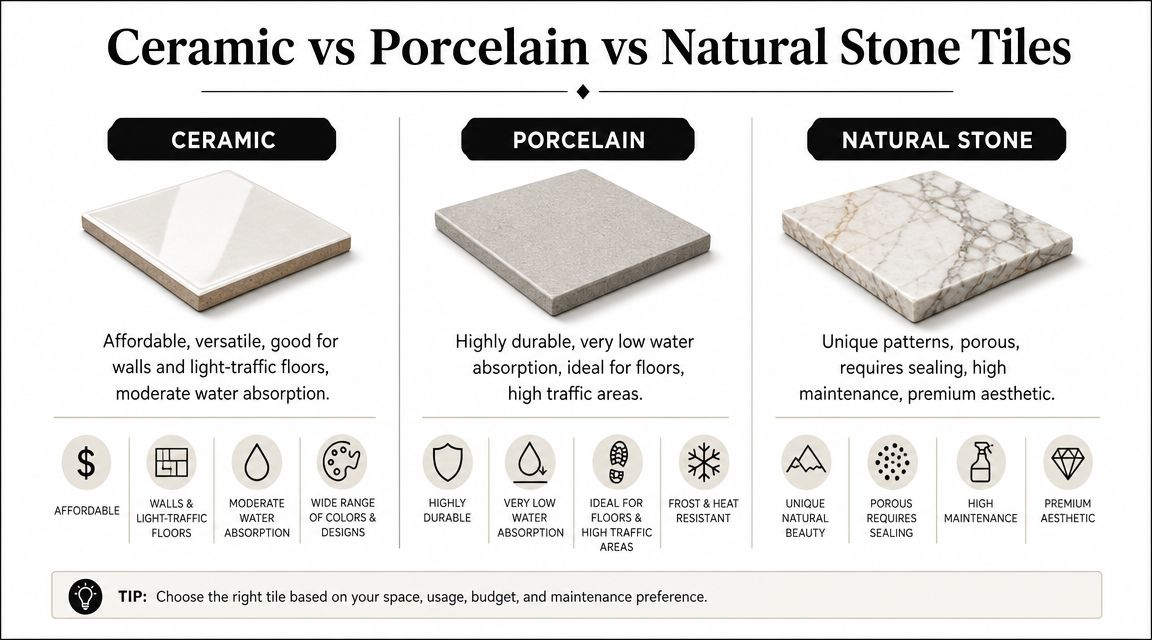
One reason homeowners choose porcelain is that it doesn't ask for much once it's installed properly. Due to its density and chip resistance, properly installed porcelain tiles can last over 50 years, offering stronger long-term durability than ceramic tiles, which are more prone to cracking in cold weather during outdoor balcony remediation, according to ABI Interiors' comparison of ceramic and porcelain tiles.
That doesn't mean no maintenance. It means sensible maintenance.
What to do routinely
Most of the ongoing care is straightforward:
- Use pH-neutral cleaners: They clean the surface without being harsh on grout or finishes.
- Wipe up residues early: Soap film and body oils are easier to remove before they build up.
- Avoid abrasive pads: They can dull some glazed faces and roughen grout lines.
- Check silicone and grout visually: The tile may still be perfect while surrounding joints are what need attention.
Keep the cleaning mild and consistent. Heavy-duty chemicals usually create more problems than they solve in a well-finished bathroom.
When a tile does get damaged
Porcelain is chip-resistant, not chip-proof. A dropped tool, metal ladder or hard edge impact can still damage a tile. When that happens, replacing a single tile often sounds easier than it is.
A proper repair usually involves cutting out grout cleanly, removing the broken tile without damaging the waterproofing or neighbouring edges, preparing the base again, then reinstalling and colour-matching the grout. That's why I always tell clients to keep spare tiles from the original batch. The repair is much cleaner when the replacement tile matches.
The key to avoiding repair work is getting the substrate, tile type, and installation right the first time.
Conclusion Making a Durable Choice for Your Project
The strongest takeaway is simple. Porcelain tile durability isn't just a property of the tile. It's the result of a complete system. The right tile body matters. The correct finish matters. The ratings matter. But substrate preparation, waterproofing, falls, adhesive coverage and installation quality matter just as much.
That's especially true in bathroom renovations, where moisture exposure is constant and small mistakes become expensive. A durable result comes from choosing the tile for the exact location, not for the showroom display. It also comes from working with registered builders and trades who understand how the waterproofed structure and tiled finish have to work together.
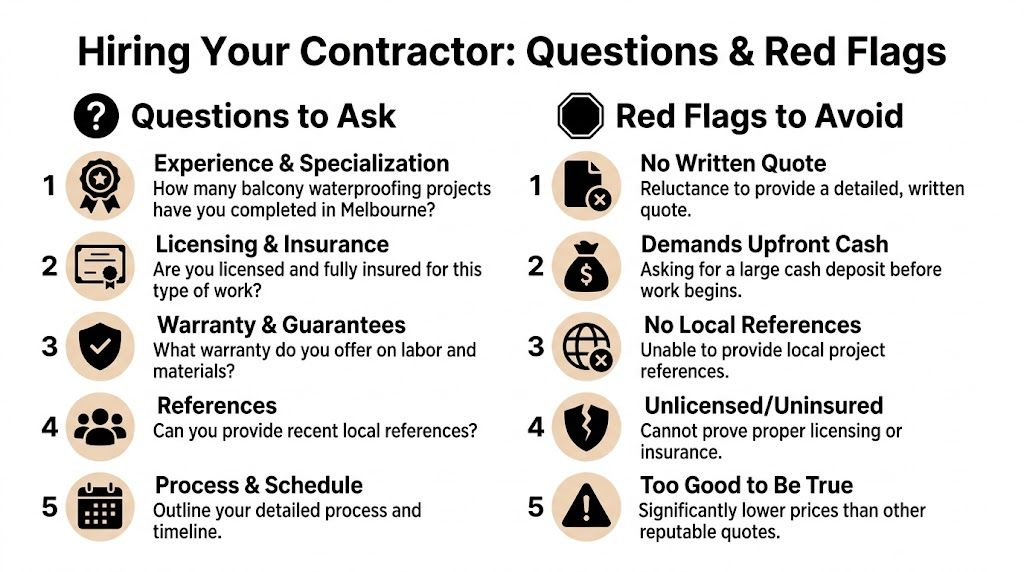
If you're planning a bathroom, ensuite, shower rebuild or balcony remediation in Melbourne, take the technical sheet seriously. Ask how the floor will be prepared. Ask what slip rating suits the wet zone. Ask how the builder is coordinating waterproofing and tiling. Those questions save money.
If you want project-specific advice from a team that handles bathroom renovations, waterproofing, screeding and porcelain installation under one roof, speak with Melbourne Tiling Services P/L. As registered builders working across Melbourne, they can assess the substrate, recommend suitable porcelain options, and help you build a bathroom or balcony finish that's designed to last.


Recent Comments