Bath Tile Installation: Melbourne’s Expert Guide 2026

You're probably at the stage where the bathroom still looks simple on paper. Pick a tile, book a tiler, get it done. In practice, bath tile installation in Melbourne is rarely just about the tile. The finish you see on day one only lasts if the work underneath it was handled properly.

As a Melbourne-based Registered Builder and master tiler, I can tell you the same thing I tell homeowners at quoting stage. The expensive mistakes in bathroom renovations usually happen before the first tile is laid. Poor substrate prep, rushed waterproofing, bad falls, and sloppy junction detailing create the leaks and failures that cost the most to fix later.

Table of Contents

Planning Your Bathroom Renovation and Tile Selection

The best bathroom renovations start with decisions that most homeowners can't see. Before you compare colours, you need to know whether you're doing a cosmetic re-tile, a full wet-area rebuild, or a broader renovation involving plumbing, waterproofing, fixtures and layout changes. That scope determines cost, sequencing, who needs to be involved, and whether a Registered Builder should manage the job.

Start with scope, not samples

If the room has movement, an old screed, patched surfaces, or a history of leaks, tile selection is not the first conversation. The first conversation is whether the existing base is suitable to tile over at all. In many Melbourne bathrooms, it isn't.

Use these early planning checks:

  • Confirm the wet-area condition: Look for cracked grout lines, drummy tiles, swollen skirtings, stained ceilings below, or movement around shower bases and corners.
  • Define the renovation level: A simple surface refresh is very different from a strip-out that includes screeding, waterproofing, plumbing adjustments and fixture replacement.
  • Decide who coordinates trades: Bathroom renovations often need a builder to sequence tilers, plumbers, electricians, carpenters and waterproofers properly.

Practical rule: If you're changing waterproofed areas, drainage, wall linings, or the bathroom layout, treat it as construction work first and decorating second.

Choose tile by performance first

Homeowners often choose on appearance, then try to force the room to suit the tile. That's backwards. Tile size, material and edge profile all affect labour, substrate tolerance and installation difficulty.

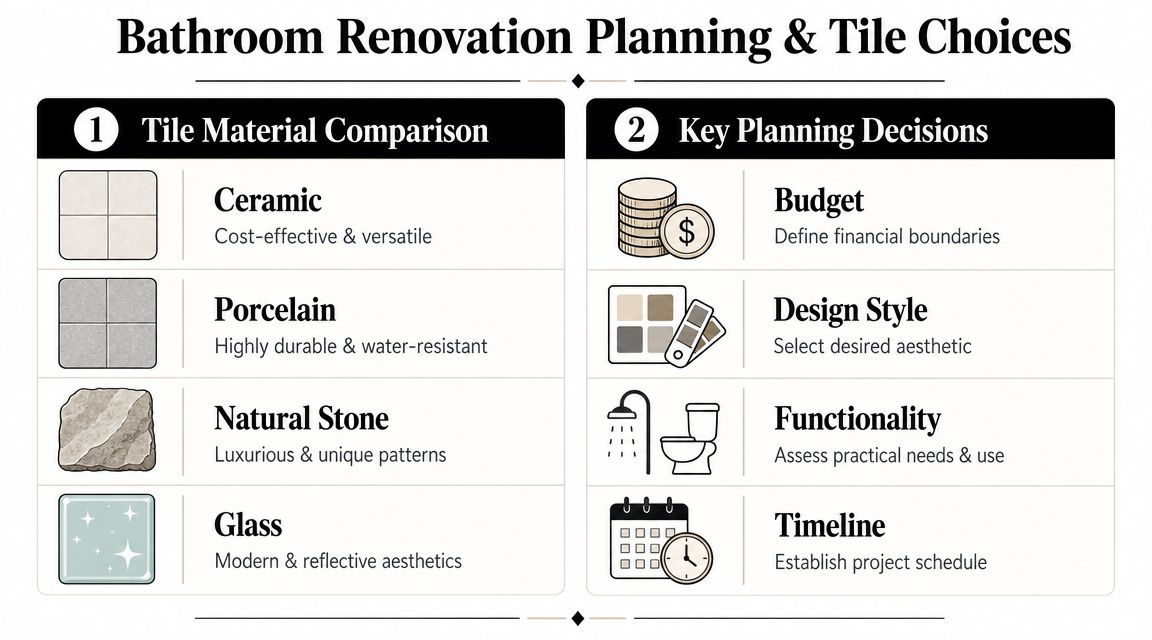
Here's a practical comparison.

Tile Type Durability Water Resistance Average Cost (Supply) Best For
Ceramic Good Good Lower entry point Budget-conscious wall and floor updates
Porcelain High High Mid to higher range Family bathrooms, floors, showers
Natural Stone Varies by stone Varies, often needs sealing Higher Premium bathrooms and feature areas
Glass Good in the right application High Varies Feature strips, splashbacks, decorative walls

For style ideas, many homeowners start by browsing modern bathroom tiling options and then narrow choices based on cleaning, slip resistance, edge detail and how much movement the room is likely to see.

Large-format tiles can look sharp, but they're less forgiving. If the walls are out, the floor has poor falls, or the corners aren't true, a large porcelain tile will expose every flaw. Natural stone gives a premium look, but it asks more from the installer and from the owner after handover.

An infographic titled Bathroom Renovation Planning and Tile Choices listing material types and key planning decisions.

Budget for the hidden work

A realistic budget needs to separate visible finishes from technical preparation. Australian renovation guides commonly report bathroom tiling costs of about A$50 to A$150+ per m² for standard ceramic or porcelain, with higher-end stone, mosaics or complex layouts rising above that range, according to Angi's tile installation cost guide.

That spread tells you something important. Labour intensity changes dramatically when the room needs levelling, screeding, tighter set-out, shower detailing, niche work, or difficult cuts around fixtures.

DIY can work for a dry, simple, low-risk area. A bathroom is different. Wet-area work has compliance implications, and once waterproofing, falls and penetrations are involved, cutting corners stops being a styling issue and becomes a defect issue.

The Critical Foundation Substrate Prep and Waterproofing

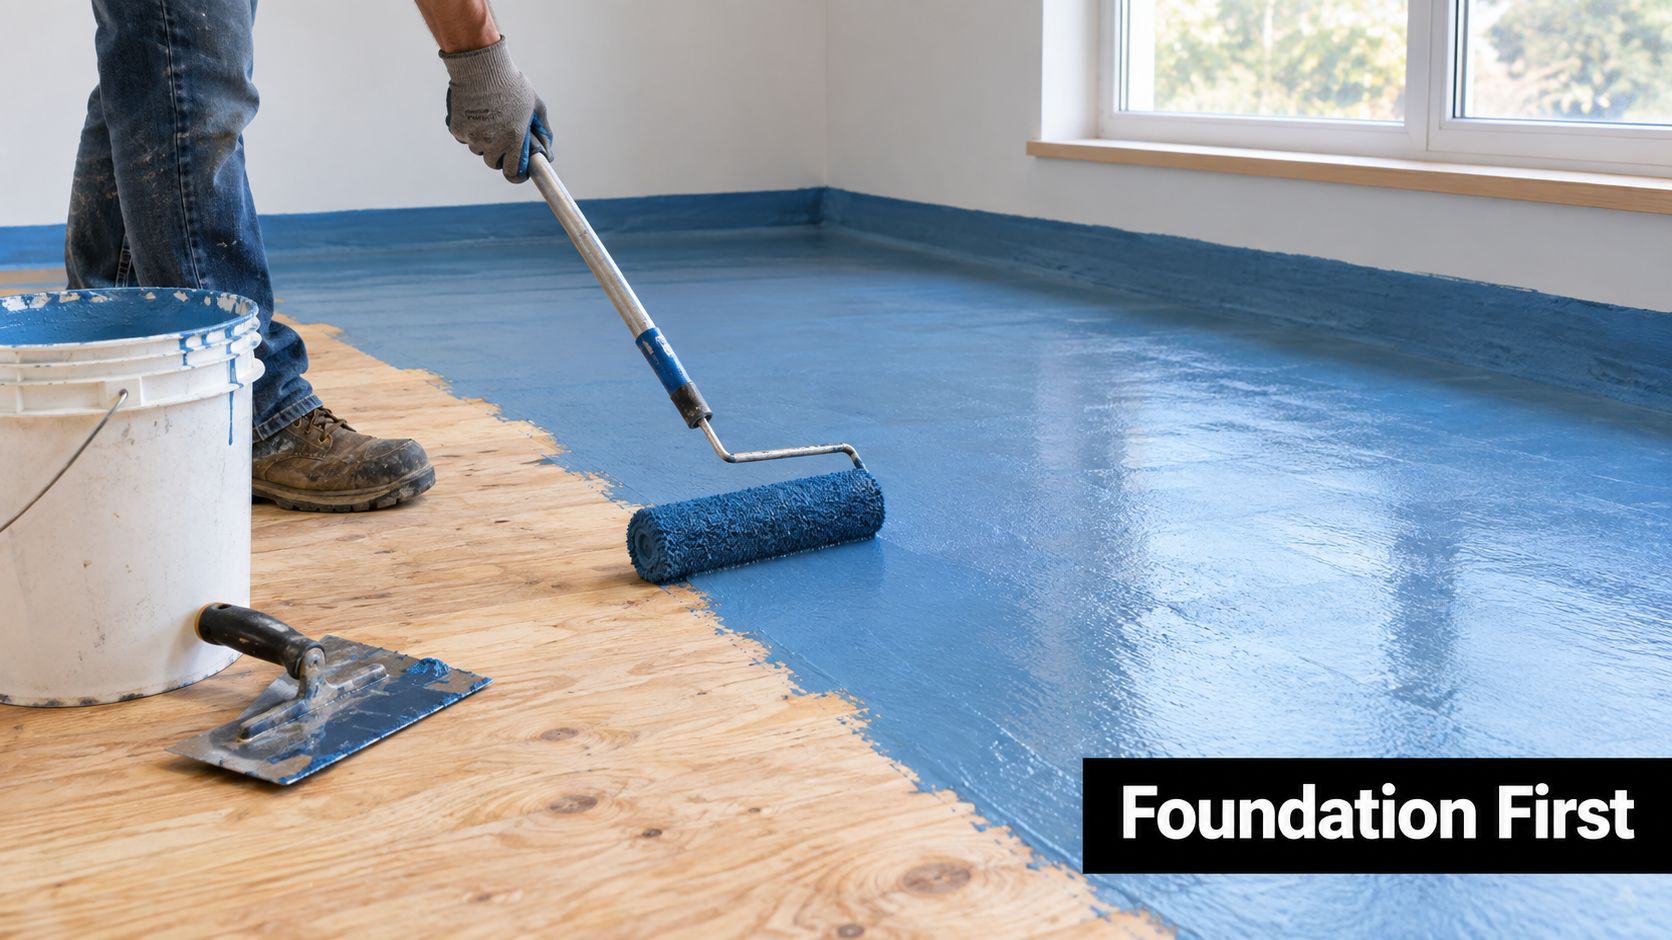
The success or failure of bath tile installation depends heavily on the preparation. A bathroom can look perfect at handover and still be heading for failure if the base under the tiles wasn't sound. Tiles don't waterproof a bathroom. They protect and finish the surface. The actual defence sits below them.

Why the substrate decides the outcome

Australian wet-area work is governed by AS 3740:2021, and in domestic bathrooms the membrane must be installed before tiles are laid. That's part of why compliant bathroom work in Victoria is primarily about waterproofing and substrate preparation, not just appearance, as outlined in this explanation of AS 3740:2021 and bathroom tile installation.

Before any membrane goes down, the substrate has to be checked for stability, flatness, cleanliness and movement risk. On renovation projects I regularly see old bathrooms with patched screeds, mixed materials, previous repair work and surfaces that were never flat to begin with. If you tile over that without correcting it, the room may still leak, pond, crack or produce lippage.

The common weak points are predictable:

  • Wall and floor junctions
  • Pipe penetrations
  • Shower recess transitions
  • Drain detailing
  • Changes between old and new substrates

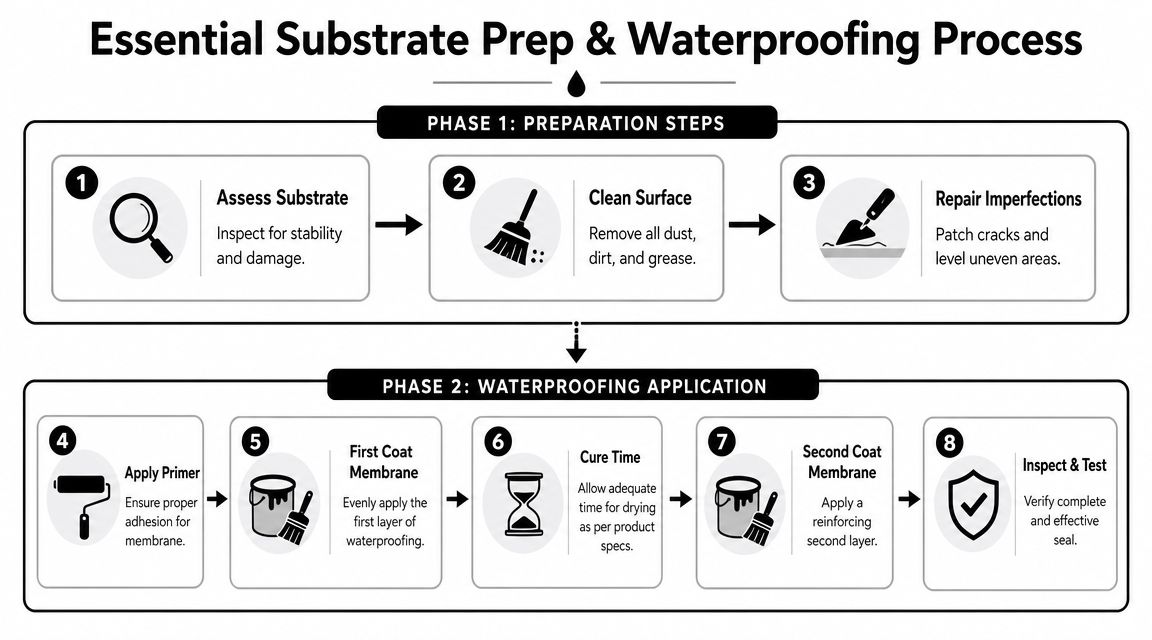
An infographic detailing the eight steps of the essential substrate preparation and waterproofing process for construction.

What compliant waterproofing actually involves

A proper system starts with substrate prep, then primer where required by the product system, then membrane application, reinforcement and detailing at critical junctions, followed by curing and project-specific verification before tile setting starts. If you're comparing contractors, ask them to explain the sequence in plain language. If they skip straight to tile choice, that's a warning sign.

For homeowners reviewing system options, one useful reference point is this page on bathroom waterproofing systems, because it reflects the fact that membranes, primers, detailing and tile adhesives need to work as a coordinated assembly rather than as isolated products.

Waterproofing failures rarely begin in the middle of the wall. They begin at edges, joins, penetrations and places where one trade assumed another trade had handled it.

What goes wrong when this stage is rushed

The hardest defects to fix are the ones hidden behind finished surfaces. If a tiler lays over a substrate that still moves, you can get cracking, drummy tiles and broken grout lines. If falls are wrong, water sits where it shouldn't. If the membrane is poorly detailed, moisture finds the path.

Consumer advice often reduces prep to “make sure the surface is clean.” In real bathroom renovations, that's nowhere near enough. The room needs a base that is true, stable and ready for a membrane that remains continuous through corners, edges and penetrations.

A premium tile doesn't rescue poor prep. In fact, high-end porcelain, stone and large-format panels tend to punish bad prep more severely because they reveal unevenness and demand better coverage and tighter movement control.

Tile Layout Adhesives and Setting Your Tiles

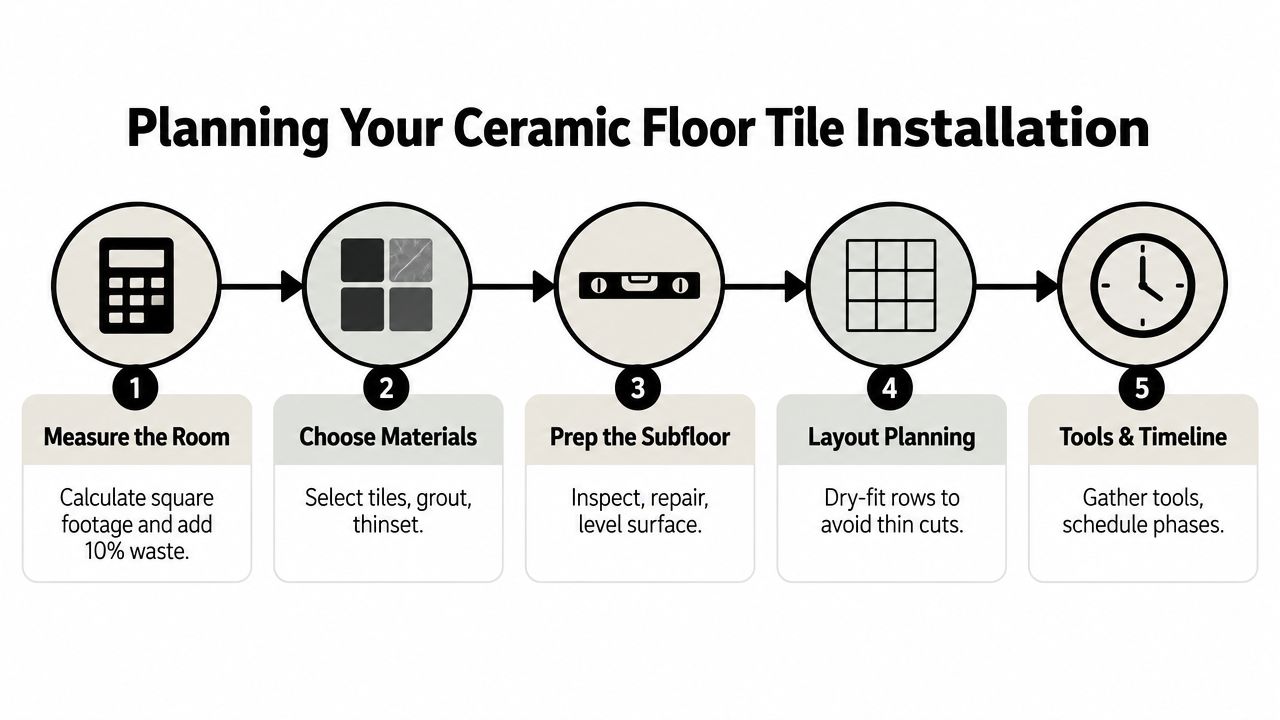
Once the room is properly prepared, the visible craft begins. This is the stage most homeowners think of when they hear bath tile installation, but the method matters more than speed. A neat finish comes from planning cuts, controlling lines and maintaining coverage, not from pushing tiles onto adhesive as fast as possible.

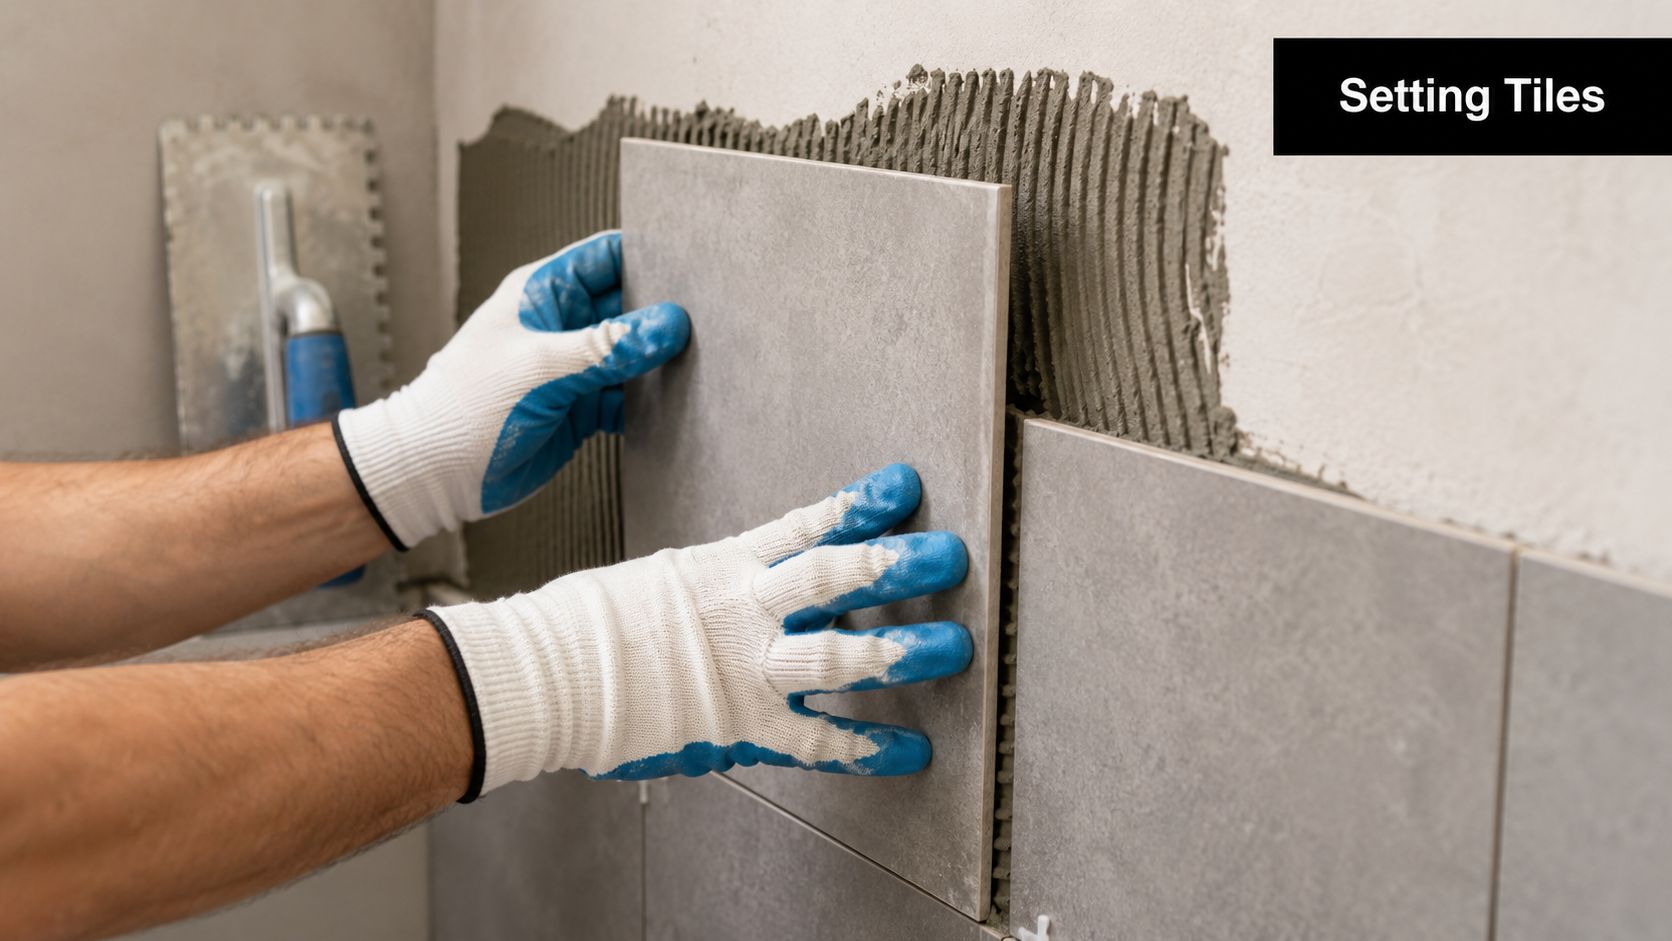
A tiler wearing blue and white gloves carefully setting a grey ceramic tile onto a mortar-covered wall.

A clean layout prevents a messy finish

Professional workflow starts with a dry layout. That means working out where full tiles land, where cuts fall, how the room centres visually, and whether niche edges, corners and floor wastes will look balanced. Industry installation guidance commonly recommends laying full tiles first and leaving perimeter cuts until last, with movement gaps maintained at walls. Mortars typically need about 24 hours before grouting, and ordering about 15% extra tile is a sensible allowance for cuts, breakage and future spares, based on Daltile's floor tile installation guidance.

The room should dictate the set-out, not the packet size. In a small ensuite, for example, a centred wall can still produce ugly slivers at an external edge if nobody thought through the sightlines from the doorway.

Adhesive choice and coverage matter

The right adhesive depends on the tile, the substrate and where the tile is going. Porcelain, natural stone, vertical applications and large-format pieces all ask more from the adhesive system than a basic ceramic wall tile in a low-stress area.

A few things matter on every job:

  • Coverage: Hollow spots come from poor transfer and bad technique.
  • Trowel selection: Notch size needs to suit tile size and substrate condition.
  • Working time: Spread only what can be tiled while the adhesive remains workable.
  • Movement allowance: Hard-setting every edge tight against walls invites later stress.

If you're comparing products for porcelain, stone or large-format work, this overview of tiling materials for bathroom and renovation projects is a practical starting point.

Here's a short visual demonstration of controlled tile setting technique in action:

Set in control zones, not in a rush

Good installers don't try to cover the whole room in one go. They work in smaller zones, check plane continuously, and keep adjusting as they go. On walls, that helps maintain clean lines around niches and tapware. On floors, it keeps falls readable and prevents drifting joints.

If the set-out is right, the room feels calm. If the set-out is off, even expensive tiles look second-rate.

Large-format work often benefits from levelling clips and wedges, but those are aids, not solutions. They don't replace a flat substrate, proper adhesive coverage or a well-planned layout.

Grouting Sealing and Installing Fixtures

A lot of bathrooms are spoiled at the finish line. The tiles are straight, the cuts are clean, then the grout is inconsistent, the haze isn't removed properly, or fixtures are installed with too much pressure on fresh tilework. Finishing trades need restraint.

Grout is part of the system

Grout choice should suit the location and maintenance expectations. Cement-based grout remains common and works well when correctly mixed, packed and cleaned. Epoxy grout can be a sensible option in areas where stain resistance and lower absorption matter more, but it needs more skill to install neatly.

What matters most is technique:

  • Pack the joints fully: Shallow joints don't protect edges well and often look patchy.
  • Clean in stages: Overwashing weakens colour consistency and can drag material from the joint.
  • Watch the timing: Cleaning too early smears grout. Too late, and haze becomes much harder to remove.

In showers and splash-prone areas, movement joints and junctions should be handled appropriately rather than being treated like ordinary field joints. That's one of the details that separates durable work from work that only photographs well.

Seal where the material calls for it

Not every tile needs sealing. Porcelain often doesn't. Many natural stones and other porous finishes do. The key is matching the sealer to the material and applying it at the correct stage.

Homeowners often assume sealing makes a bathroom waterproof. It doesn't. Sealing helps protect porous tile or grout from staining and moisture absorption at the surface. It does not replace the waterproofing system beneath.

Fixtures must be installed without compromising the tilework

The final stage includes shower screens, tapware trim-outs, wastes, mirrors, accessories and silicone finishing. This is where coordinated bathroom renovations matter. The tiler, plumber, glazier and builder all affect the final outcome.

A few details deserve close attention:

  • Frameless shower screens: Fixings need to respect waterproofed zones and finished tile lines.
  • Tap penetrations: Escutcheons should sit cleanly without forcing uneven cuts or leaving messy gaps.
  • Floor wastes: The grate position should align with the tile layout and still allow proper drainage.
  • Silicone joints: Neat flexible joints at changes of plane matter for movement and appearance.

Melbourne Tiling Services P/L is one example of a contractor that handles bathroom renovations with coordinated tiling, waterproofing and fixture integration under Registered Builder oversight, which is often the cleanest path when several trades need to work in sequence.

Common Tiling Mistakes and Melbourne Regulations

The most expensive assumption in bathroom work is that tiling is just a finish trade. It isn't. In a wet area, tiling sits on top of construction decisions that affect durability, leak risk and compliance.

The mistakes I see most often

The failures are rarely mysterious. Most can be traced back to basic shortcuts.

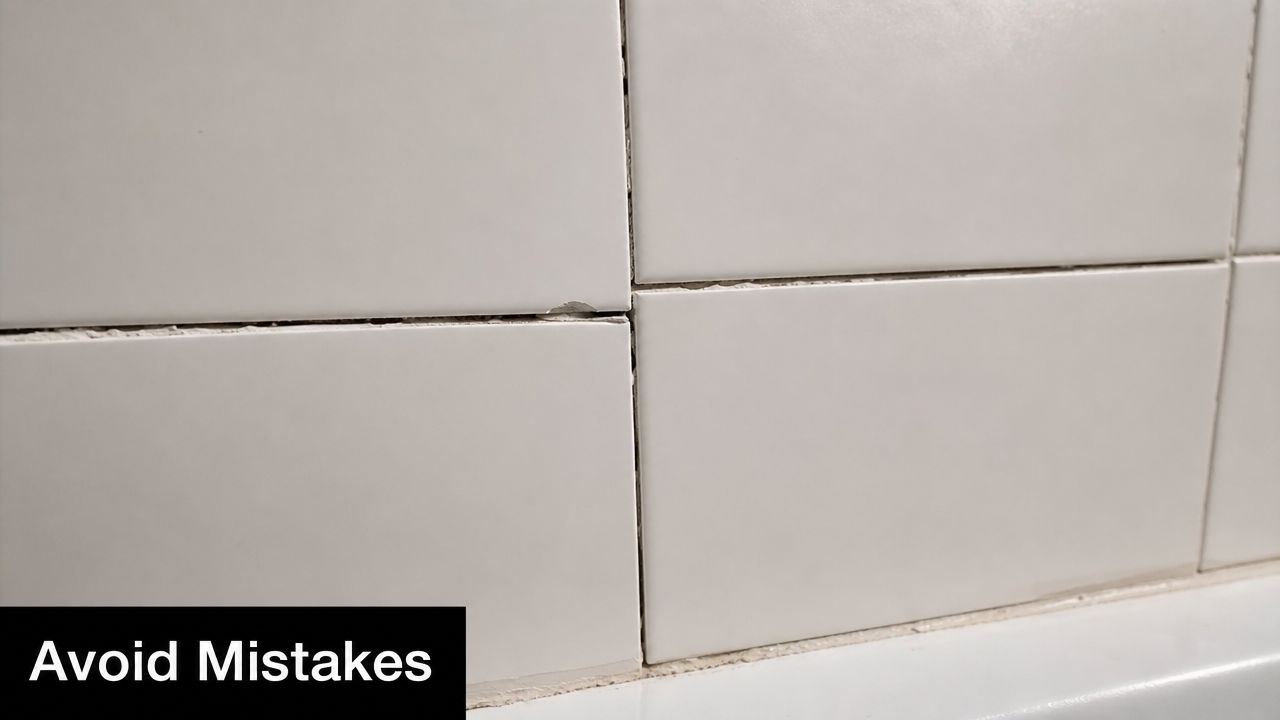
A close-up view of white bathroom wall tiles showing a cracked corner and poor grouting work.

Common examples include:

  • Tiling over uncured waterproofing: That traps risk into the room before the finish is even complete.
  • Ignoring substrate movement: Cracks, hollow spots and lippage often start here.
  • Bad junction detailing: Corners, penetrations and waste areas are frequent failure points.
  • Chasing appearance over drainage: Nice tile lines don't help if water doesn't fall correctly to waste.
  • Using premium tiles to hide poor prep: Expensive material usually makes defects more obvious, not less.

A recognised failure mode is tiling over uncured or discontinuous waterproofing, especially at junctions and penetrations. Guidance tied to Australian wet-area practice notes that AS 3740 requires these areas to be systematically sealed and cured before tiling starts, as explained in this article on how bathroom tile is laid over waterproofed areas.

A bathroom can survive a dated colour scheme. It won't survive failed waterproofing for long.

Why builder oversight matters in bathroom renovations

Melbourne homeowners sometimes split a bathroom job between separate trades without anyone taking full responsibility for sequencing. That's where defects get born. The plumber assumes the substrate issue has been fixed. The waterproofer assumes the carpentry is final. The tiler assumes penetrations are complete. Nobody owns the junction between trades.

That's why many bathroom renovations benefit from Registered Builder oversight. A builder doesn't just hire people. A competent builder coordinates the order of work, checks whether the room is ready for each trade, and prevents one shortcut from being buried by the next layer.

The homeowner benefit is practical. You get one scope, one sequence and one accountable party managing the room as a wet-area build, not as a patchwork of individual tasks.

Bringing It All Together Your Bathroom Renovation Checklist

A lasting bathroom isn't built by starting with the prettiest tile. It's built by getting the hidden work right and then finishing it with care. This is the difference between a bathroom that still performs years later and one that starts showing defects far too early.

Use this checklist before you commit:

  • Scope the job properly: Re-tile, rebuild, or full renovation.
  • Match the tile to the room: Don't choose large-format or stone without checking substrate suitability.
  • Verify the base: Flatness, movement, falls and junction condition all matter.
  • Treat waterproofing as essential: The membrane system has to be complete before tiling.
  • Plan the layout: Good set-out prevents poor cuts and awkward visual balance.
  • Use the right adhesive and curing sequence: Don't rush grouting or traffic.
  • Finish carefully: Grout, seal where required, and install fixtures without compromising the tilework.
  • Use qualified trades: Bathroom renovations work best when a Registered Builder coordinates the room as one system.

If you're spending money anywhere, spend it on the work you won't see once the room is complete. That's what protects everything you will see every day.


If you're planning a bathroom renovation and want practical guidance on tile selection, waterproofing, layout, or full project coordination, Melbourne Tiling Services P/L handles bathroom tiling and renovation work across Melbourne with Registered Builder oversight.

How to Fix a Tile: A Melbourne Pro’s Guide

A lot of people first notice a tile problem in the most ordinary way. You step out of the shower and feel a slight movement underfoot. You hear a drummy hollow sound when you tap a floor tile. Or you spot one cracked tile and assume it's just bad luck.

Sometimes it is. Sometimes it isn't.

If you want to fix a tile properly, the primary consideration isn't just patching the surface. It involves deciding whether you're dealing with a cosmetic defect, a bond failure, or the early sign of a waterproofing issue. In bathrooms especially, that distinction matters. A neat-looking repair can still be the wrong repair if water is already getting where it shouldn't.

Table of Contents

That First Cracked Tile and What It Really Means

You notice one cracked tile after a shower, and the temptation is to treat it like a small patch job. Sometimes it is. Sometimes that tile is the first visible sign that the bed, substrate, or waterproofing underneath has already started to fail.

The difference matters.

A single chip from a dropped tool on a splashback is usually cosmetic. One cracked floor tile after a sharp impact can also be a straightforward replacement. I see those jobs often enough, and if the surrounding tiles are solid, level, and dry, the repair is usually contained to that spot.

The risk changes once the damage shows a pattern. A loose shower tile, grout that keeps cracking back out, hollow-sounding tiles in one area, or multiple cracks running through the same line usually point to movement below the surface. In a bathroom, that can mean water has found a path behind the finish, and a new tile on top of the same problem only hides it for a while.

Wet areas need a harder assessment. The Victorian Building Authority guidance on waterproofing wet areas makes the point clearly. Bathrooms and showers rely on the whole assembly being right, not just the tile face. Once water gets past failed grout, poor junction sealing, or movement cracks, the visible tile damage is rarely the full story.

That is why I do not start with the repair method. I start with the cause.

Location tells you a lot. A cracked tile on a laundry wall is usually low risk if the wall is dry and stable. A cracked tile on a shower floor, around a bath hob, or at a wall to floor junction deserves caution straight away. Those are the areas where movement and moisture do the most damage.

Use this as a first filter before touching anything:

  • Local impact damage: one isolated chip or crack, with firm neighbouring tiles and no grout failure nearby
  • Movement below the tile: drummy spots, lipping, repeated grout cracks, or several loose tiles in the same zone
  • Wet-area warning signs: mould at junctions, persistent damp smell, staining, swollen trims, or grout that breaks down again soon after repair
  • Patterned cracking: multiple tiles affected along a line or concentrated around a doorway, waste, or sheet joint

Good tile repair is not just swapping one broken piece for another. The craft is knowing when a neat patch will hold, and when lifting that first tile is likely to expose a bigger rectification job. In bathrooms especially, that judgment saves people from paying twice.

Your Tiling Repair Toolkit and Materials List

A decent repair starts before the first cut. Most failed patch jobs come from using the wrong removal tool, the wrong adhesive, or no plan for keeping the replacement tile flush with the surrounding field.

If you're trying to fix a tile neatly, think like a tradesperson. Every tool has a job. Precision matters more than speed.

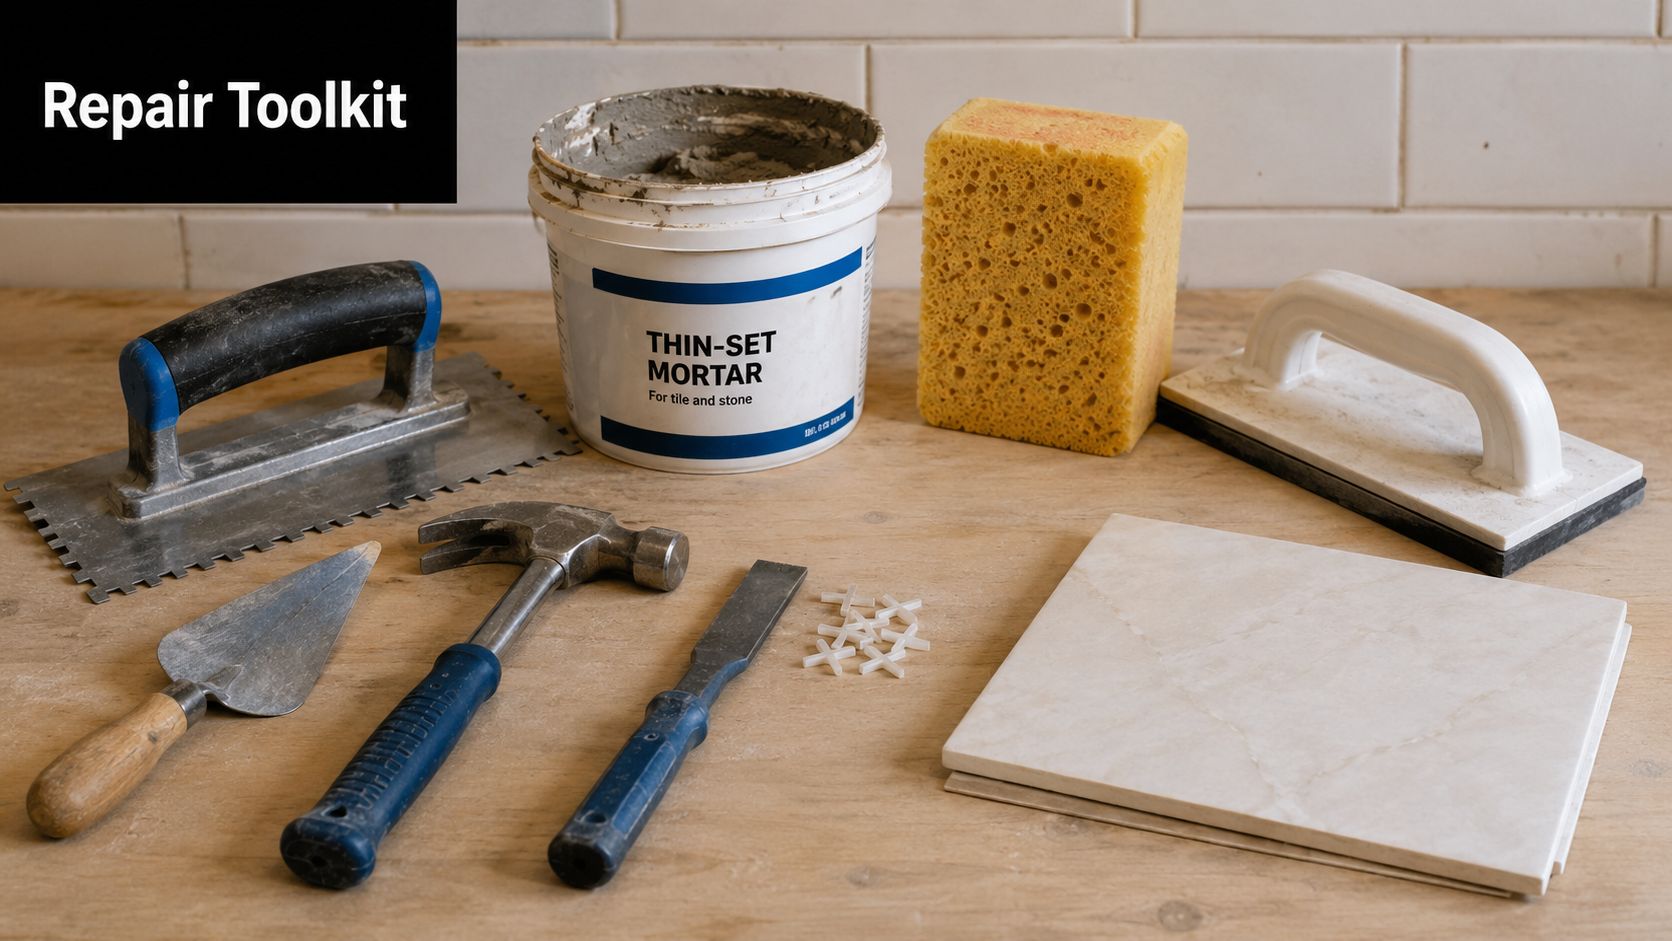
A professional tile repair toolkit with thin-set mortar, trowels, hammer, chisel, and ceramic tiles on wood.

What belongs in a proper repair kit

For grout removal, a grout rake gives control on small jobs and reduces the chance of clipping the tile edge. An oscillating multi-tool with a grout blade is faster, but it's less forgiving in tight joints or on brittle glazed tiles.

For tile removal, keep it simple. A hammer and cold chisel, a narrow bolster, and a shop vacuum are the basics. Start from the centre of the damaged tile, not the edges, so you don't transfer force into the adjoining tiles.

Adhesive choice matters. For a replacement tile, use a fresh tile adhesive or thin-set suited to the application and substrate. If there's minor movement risk, a flexible adhesive is usually the safer choice than a rigid bed. For cosmetic chips, the materials are different again. You're into fillers, colour-matched repair compounds, and light abrasives, not full bedding products.

A few other items separate a rough patch from a proper finish:

  • Notched trowel: Spreads adhesive evenly.
  • Margin trowel: Good for small repair areas and back-buttering.
  • Tile spacers: Keep joint widths consistent.
  • Straightedge or level: Checks lippage before the adhesive grabs.
  • Sponge and clean water: Essential for grout cleanup.
  • Safety glasses and gloves: Tile shards are sharp and unpredictable.

If you want a broader look at specialist gear, this guide to tiling tools used on repair and installation work is worth reviewing before you buy.

Essential Tools & Materials for Tile Repair Jobs

Item Use for Cracked/Chipped Tile Use for Loose/Lifted Tile Pro Tip
Grout rake Removes grout around a tile marked for replacement Opens joints for assessment or regrouting Hand tools give better control near delicate edges
Oscillating multi-tool Speeds up grout removal on harder joints Helps cut out failing grout across larger sections Keep the blade centred in the joint
Hammer and cold chisel Breaks and lifts a damaged tile from the middle Removes tiles that have lost bond completely Never start levering from the edge against the next tile
Shop vacuum Clears dust and loose debris before bedding Keeps joints and cavities clean for rework Clean surfaces bond better than dusty ones
Thin-set or tile adhesive Beds the replacement tile Reinstalls removed loose tiles where suitable Only use fresh material, not adhesive that's started to skin
Margin trowel Back-butters small tiles Places adhesive into localised areas Useful when a full-size trowel is too clumsy
Notched trowel Creates even adhesive ridges Re-beds lifted tiles over prepared substrate Match notch size to tile size and repair area
Grout float Not usually needed for a chip-only cosmetic repair Packs new grout into open joints Hold it diagonally across the joint for cleaner fill
Sponge and bucket Wipes repair compounds and dust Cleans grout haze before it hardens Rinse often so you don't smear residue
Spacers Helps reset one replacement tile accurately Keeps reopened joints even during reinstatement Dry-lay first if the tile size is slightly off batch

A repair kit should match the failure. Don't use replacement methods for a tiny chip, and don't use cosmetic fillers where the bond has already failed.

How to Diagnose the Real Problem

There's a temptation to skip straight to the repair, which often results in wasted time. The correct fix hinges on whether the tile is damaged, debonded, or sitting over a failing base.

Independent repair guidance separates chipped tiles from loose or hollow tiles for a reason. It recommends tapping to find hollow spots, using grout-line access for adhesive injection in some cases, and sometimes removing tile to inspect or replace the substrate rather than re-bonding the surface, as outlined in this guidance on loose or hollow tile repair. In Melbourne and across Victoria, that matters because shower and balcony rectification often ties back to hidden moisture movement.

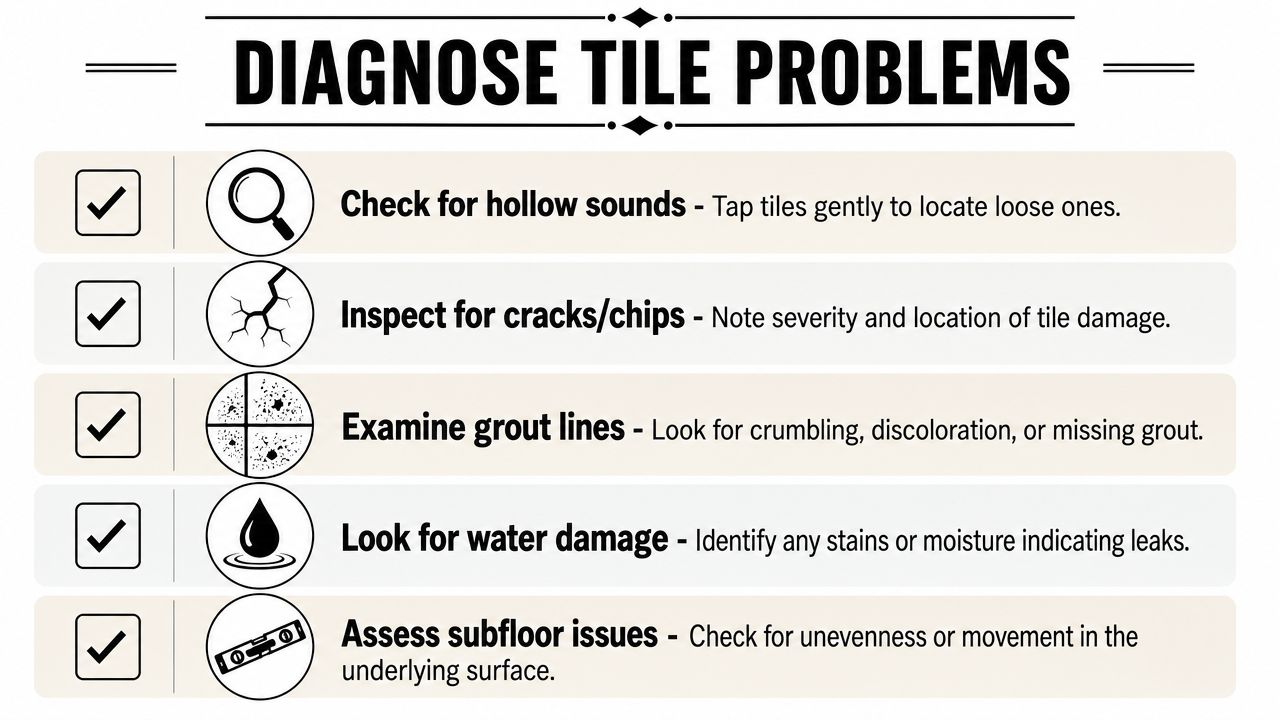
A checklist infographic titled Diagnose Tile Problems with icons showing how to inspect for common floor damage.

Start with the pattern of damage

A lone chip near a doorway usually points to impact. A cluster of hollow tiles in a shower base points somewhere else entirely. Patterns tell you more than the tile surface does.

Look for these differences:

  • One isolated crack: Often impact-related.
  • Several cracks following a line: Can indicate movement or stress below.
  • Loose tile with sound grout nearby: Often a bond issue under that tile.
  • Loose tile with cracked or powdery grout around it: More likely movement, moisture, or both.
  • Discolouration at joints or edges: Often worth treating as a moisture warning.

Use simple site checks before you touch a tool

The tap test is basic but useful. Tap the tile lightly with a hard plastic handle or similar non-sharp tool and compare the sound with surrounding tiles. A well-bonded tile sounds solid. A debonded tile often sounds hollow or drummy.

Then inspect the grout lines closely. Are they cracked in one spot, missing in sections, or crumbling out with very little effort? Failing grout on its own is repairable. Failing grout plus movement underfoot is different.

Use your eyes and feet as much as your hands:

  1. Check for movement under load: Stand near the area and feel for flex.
  2. Look at adjacent tiles: Damage rarely stays alone if the substrate is the issue.
  3. Inspect corners and junctions: Changes in plane often show the first signs of stress.
  4. Watch for damp clues: Staining, mildew, soft silicone, and musty smells matter.
  5. Compare dry and wet behaviour: Some problems only reveal themselves after regular use.

If the tile sounds hollow and the grout is already breaking down, don't assume fresh grout will fix it. It usually won't.

One of the biggest mistakes in DIY tile repair is treating every defect as a surface problem. That approach works for chips. It doesn't work for moisture, movement, or failed bonding.

Replacing a Single Cracked or Broken Tile

If the damage is localised and the surrounding tiles are firm, replacement is usually the cleanest fix. The job has to be done carefully. Most collateral damage happens during removal, not installation.

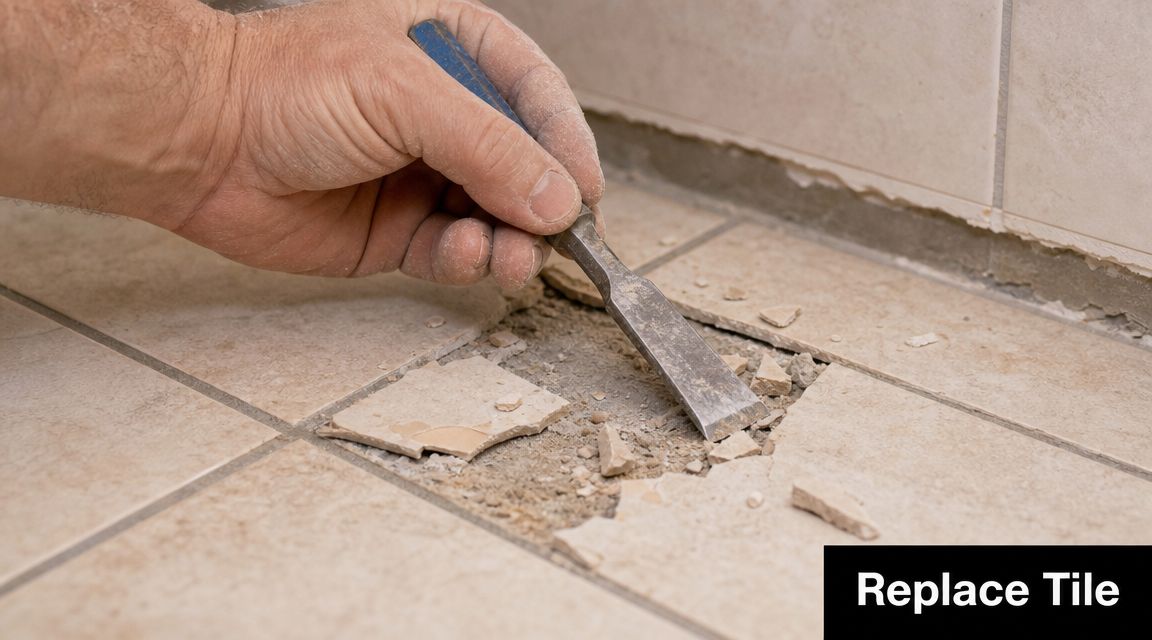
A person using a chisel to remove a damaged ceramic tile from a bathroom floor.

Remove the tile without damaging the ones beside it

Start by removing the grout around the full perimeter. Don't rush this part. If the grout stays locked between the damaged tile and the good ones, your chisel force transfers into the surrounding field.

Once the grout joint is clear, break the damaged tile from the centre. Use controlled taps, not heavy blows. Lift the broken pieces inward and upward. Don't pry against the edges of neighbouring tiles.

After the tile is out, clean the bed properly. Old adhesive ridges, loose debris, and mortar sitting in the joints will cause trouble later. The replacement tile needs a flat, stable base and clean joint lines.

Clean-out is where a lot of DIY jobs go wrong. If old mortar stays in the joint, the new tile can sit proud and leave visible lippage.

Bed the new tile properly

Dry-fit the replacement first. Check the size, shade, thickness, and joint spacing before you mix anything. Even matching tiles can vary slightly by batch.

Then apply fresh adhesive to the prepared area and, where needed, back-butter the new tile for better coverage. Bed it firmly, align it with the joint lines, and check it with a straightedge so it sits level with the adjacent tiles.

A visual walkthrough helps if you haven't done this before:

For replacement work, one practical benchmark matters. A trade guide notes that the most reliable method is to remove grout first, lift the damaged tile, clean off old thin-set, re-bed the new tile into fresh material, and wait about 24 hours before grouting, as described in this tile replacement method guide. The same guidance warns that residual mortar in the joints or setting while the bed is still wet can force the tile proud of adjacent surfaces.

A neat sequence looks like this:

  1. Dry-fit first: Confirm the tile fits before bedding.
  2. Spread fresh adhesive: Don't use material that has started to skin.
  3. Set and align: Press the tile in evenly and maintain joint width.
  4. Check flushness: Use a straightedge across multiple tiles, not just one edge.
  5. Leave it alone: Let the adhesive cure before grouting.

If the replacement tile won't sit flush without forcing it, stop and correct the bed. Pushing harder isn't the answer.

Repairing Loose Tiles and Failing Grout Lines

A tile can stay uncracked and still be a problem. Loose tiles, hollow tiles, and crumbling grout joints often show up together, especially in older bathrooms and on floors that have seen slight movement over time.

The important distinction is whether the tile is worth saving. Sometimes it is. Sometimes lifting and reinstating is the only honest repair.

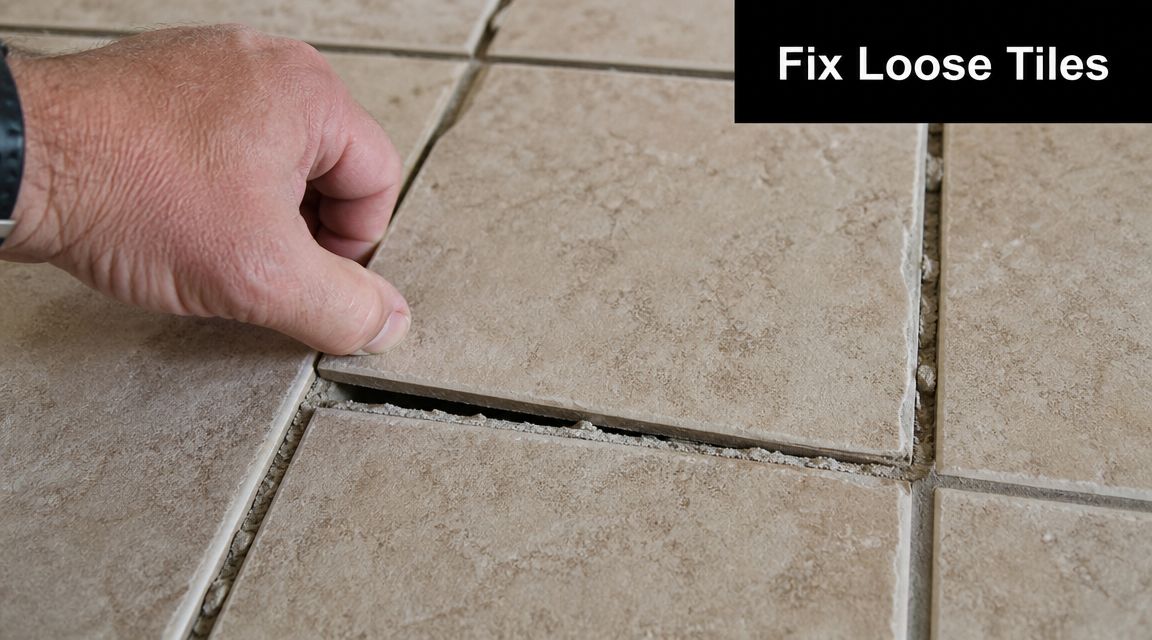
A person's hand pressing down on a loose stone tile needing repair on a tiled floor.

When a loose tile can be saved

If a tile is intact, the surrounding area is stable, and the problem appears localised, an adhesive injection repair can make sense. That method is usually reserved for hollow or loose tiles where removal risks damaging the tile or the surrounding finish.

It's not a cure-all. If the substrate is deteriorated, if moisture is active below, or if multiple tiles are affected, injecting adhesive only masks the symptom for a while.

A tile is more likely to be salvageable when:

  • The tile itself is sound: No structural cracks through the body.
  • Movement is isolated: One or two tiles, not a broad field.
  • The area is dry: No sign of active leakage or trapped moisture.
  • The base is still serviceable: No soft or failing substrate underneath.

For wet areas, it's smart to be conservative. If you're weighing patching against leak work, this overview of how leaking showers are properly fixed helps frame where grout repair ends and waterproofing rectification begins.

How to regrout without creating a moisture path

Grout repair looks simple, but poor technique leaves voids and porous edges. That's exactly what you don't want in bathrooms.

Remove all loose, powdery, or contaminated grout before regrouting. Don't smear fresh grout over weak material and expect it to last. The joint has to be clean enough to accept a proper fill.

For tile-edge leak rectification, installer guidance recommends compacting grout into the joint at about a 45° angle, then scraping the excess diagonally. It also notes that grout is usually workable for about 30 minutes before it stiffens, which is why late cleanup often leaves porous edges or haze, according to this DIY grouting guidance.

A practical sequence is:

  • Cut out failed grout fully: Partial removal gives patchy results.
  • Pack the joint firmly: Push grout into the full depth, not just the face.
  • Work on manageable sections: Don't spread more than you can clean in the working window.
  • Clean early, not late: Once grout starts to stiffen, you're dragging the finish instead of shaping it.
  • Seal when appropriate: Only after the grout has settled and the surface is properly cleaned.

Good grout work is compacted, even, and clean at the edges. If it's washed out, pinholed, or smeared over the surface, water will find those weaknesses.

Red Flags When You Must Call a Registered Builder

A lot of bathroom failures start with a small job that looks harmless. One cracked tile near the shower entry. One loose floor tile beside the waste. One grout joint that keeps opening up no matter how neatly it is patched.

That is the point where experience matters. A single damaged tile can be a straightforward repair. It can also be the first visible sign that the bedding, substrate, falls, or waterproofing below the tile has already failed.

Signs the problem is beyond tile repair

Look at the pattern, not just the tile in front of you. If more than one of these signs is present, stop patching and investigate the bathroom as a system:

  • Multiple loose or drummy tiles: Common around shower floors, perimeters, and high-moisture zones.
  • Grout that keeps cracking in the same area: Repeated failure usually means movement underneath or ongoing moisture.
  • A soft, springy, or hollow feel underfoot: That points to substrate breakdown, poor adhesion, or water damage.
  • Persistent damp smells or mould that returns after cleaning: Moisture may be trapped behind the tile finish.
  • Staining at skirtings, doorways, or the room next door: Water often travels well past the point where it entered.
  • Silicone failure at corners and junctions: If sealant and grout are both failing, there is often movement or moisture behind them.

A cosmetic repair will not fix any of that. It only hides it for a while.

Why registered builders matter in bathroom renovations

Once the fault extends past the tile face, the repair stops being a tiling job only. Bathrooms rely on the substrate being sound, the falls being correct, the waterproofing being continuous, and the reinstatement being done in the right order. If one part is wrong, the new tilework can fail again even if the finish looks good on day one.

In Melbourne bathrooms, I treat recurring wet-area failures very cautiously. Replacing one tile makes sense when the damage is localised, dry, and stable. It does not make sense when tiles are lifting in clusters, the floor feels soft, or moisture has started affecting adjoining surfaces. At that stage, the priority is finding the cause before any reinstatement begins.

The Victorian Building Authority publishes guidance on waterproofing wet areas in residential buildings, and it reflects what trades see on site. Wet area defects are rarely improved by surface patching alone when the membrane, sheeting, screed, or framing is already compromised.

If you need a second opinion before opening up the whole bathroom, a specialist in tile repair in Melbourne can help determine whether the fault is isolated or part of a larger rectification job.

Use a simple test. Repair the tile only when the area is dry, firm, and not moving. Call a registered builder when you see repeated failure, signs of moisture migration, substrate softness, or anything that suggests the waterproofed assembly has been breached. In bathrooms, covering over those signs usually makes the eventual repair larger and more expensive.