Balcony Waterproofing Australian Standard: A Melbourne Guide

Approximately 73% of identified balcony defects in Victoria were attributed to water ingress, and 33% involved insufficient waterproofing. The balcony waterproofing Australian standard therefore requires more than selecting a compliant membrane, it requires a properly designed substrate, reliable drainage and correctly sequenced installation.

A membrane can be the right product and still fail when the slab holds water, the outlet is poorly integrated or a door threshold leaves the system vulnerable to wind-driven rain. Melbourne's changing weather exposes these weaknesses repeatedly, especially on tiled balconies where the waterproof layer disappears beneath the finished surface and repairs begin only after staining appears inside.

Table of Contents

Why Balcony Leaks Persist in Melbourne Despite Compliant Membranes

The hard truth is that membrane selection doesn't guarantee a watertight balcony. Victorian government research identified water ingress as the cause of approximately 73% of identified balcony defects, while 33% involved insufficient waterproofing (Victorian Building Authority research insights).

That finding changes how a leaking balcony should be investigated. A failed membrane is only one possible cause. Water may be entering through a balcony outlet, movement joint, balustrade penetration, threshold junction or crack in the substrate, then travelling beneath tiles before appearing at a ceiling or internal wall.
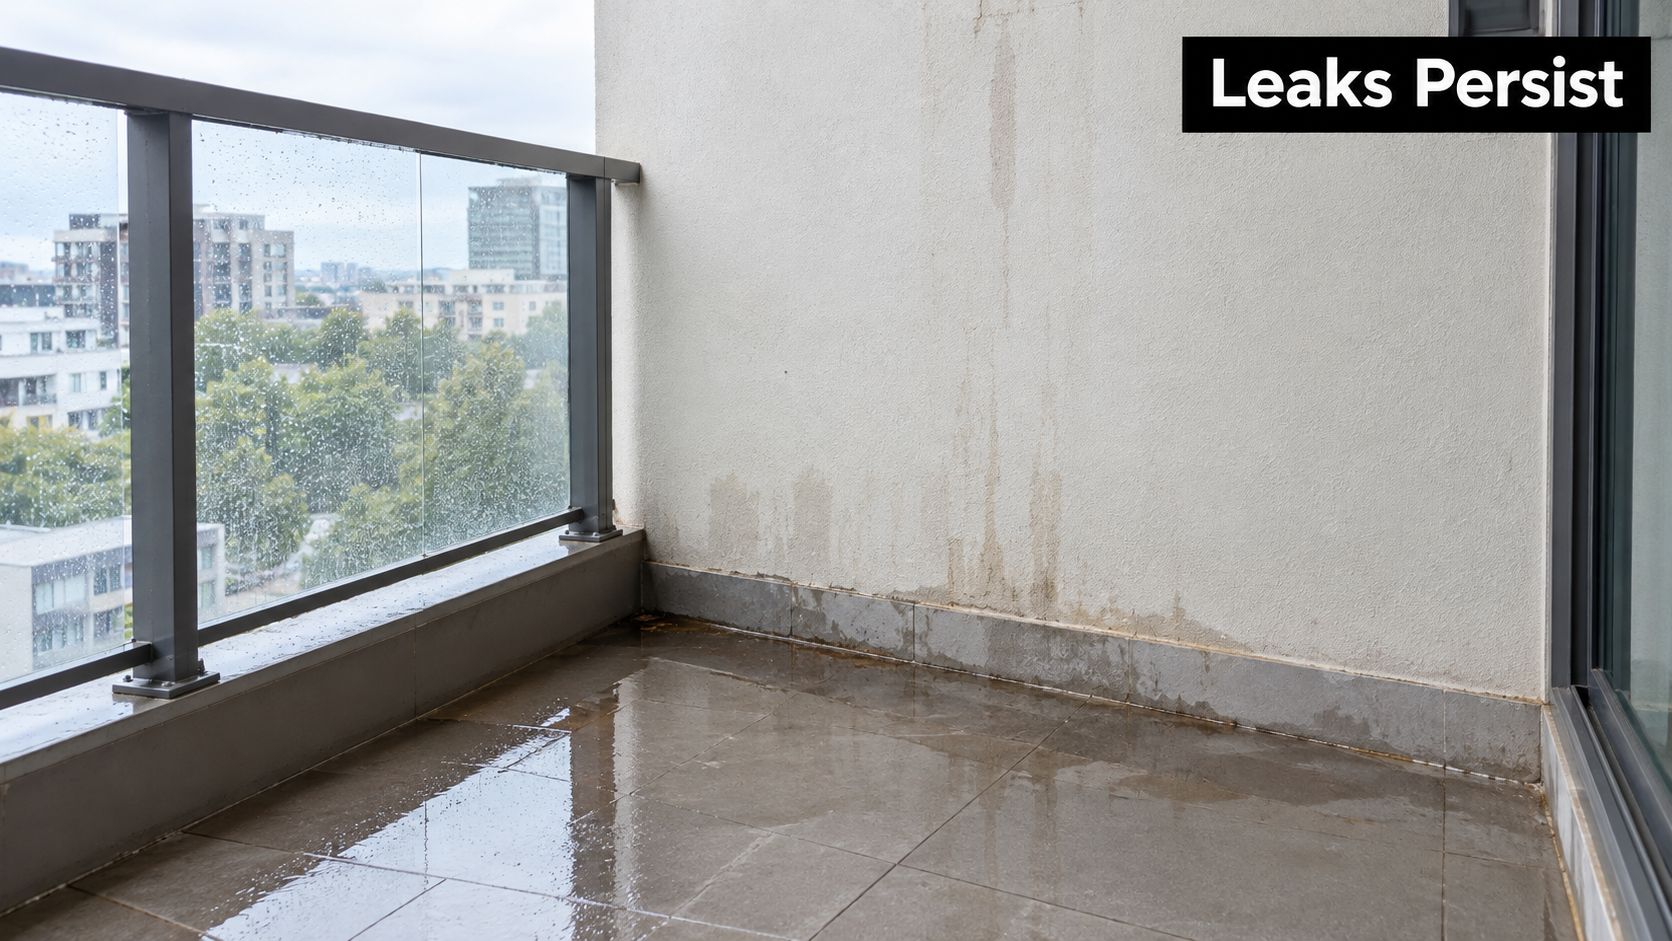
A wet apartment balcony floor with water stains and streaking damage on the exterior wall.

The system matters more than the tub

A balcony works as a connected assembly. The slab or screed must direct water towards an outlet, the membrane must remain continuous across changes in direction, and the finished surface must not obstruct drainage or damage the waterproof layer.

Common failures include:

  • Flat or inconsistent falls: Water remains on the surface instead of reaching the outlet.
  • Poor sequencing: Trades install the membrane, screed, tiles or fixtures without protecting the preceding work.
  • Weak junction detailing: Door sills, wall edges and penetrations receive less attention than open floor areas.
  • Blocked drainage: Leaves, tile adhesive, grout or construction debris restrict the outlet.
  • Unverified substrate condition: Dust, moisture, movement or incompatible materials prevent proper adhesion.

Practical rule: A product datasheet proves what a membrane is designed to do. It doesn't prove that the balcony was prepared, detailed, installed and drained correctly.

The most reliable Melbourne repairs start with the complete water path. Before anyone quotes for regrouting or applies a surface coating, the inspection should establish where water lands, where it should flow, where the membrane terminates and which junctions could allow concealed entry.

Understanding AS 4654.2 Design and Installation Requirements

Australia's principal technical benchmark for external balcony waterproofing is AS 4654.2-2012, titled Waterproofing membranes for external above-ground use, Part 2: Design and installation. Standards Australia published the 2012 edition on 14 September 2012, and it applies to membrane systems used above ground on balconies, decks, roofs and similar building elements (Standards Australia, AS 4654.2-2012).

The important distinction is between AS 4654.1, which sets material requirements, and AS 4654.2, which addresses design and installation. Buying a membrane that meets material requirements is only one part of the compliance pathway. The substrate, falls, membrane placement, curing, movement control, drainage, overflows and detailing around openings and junctions must also be considered.
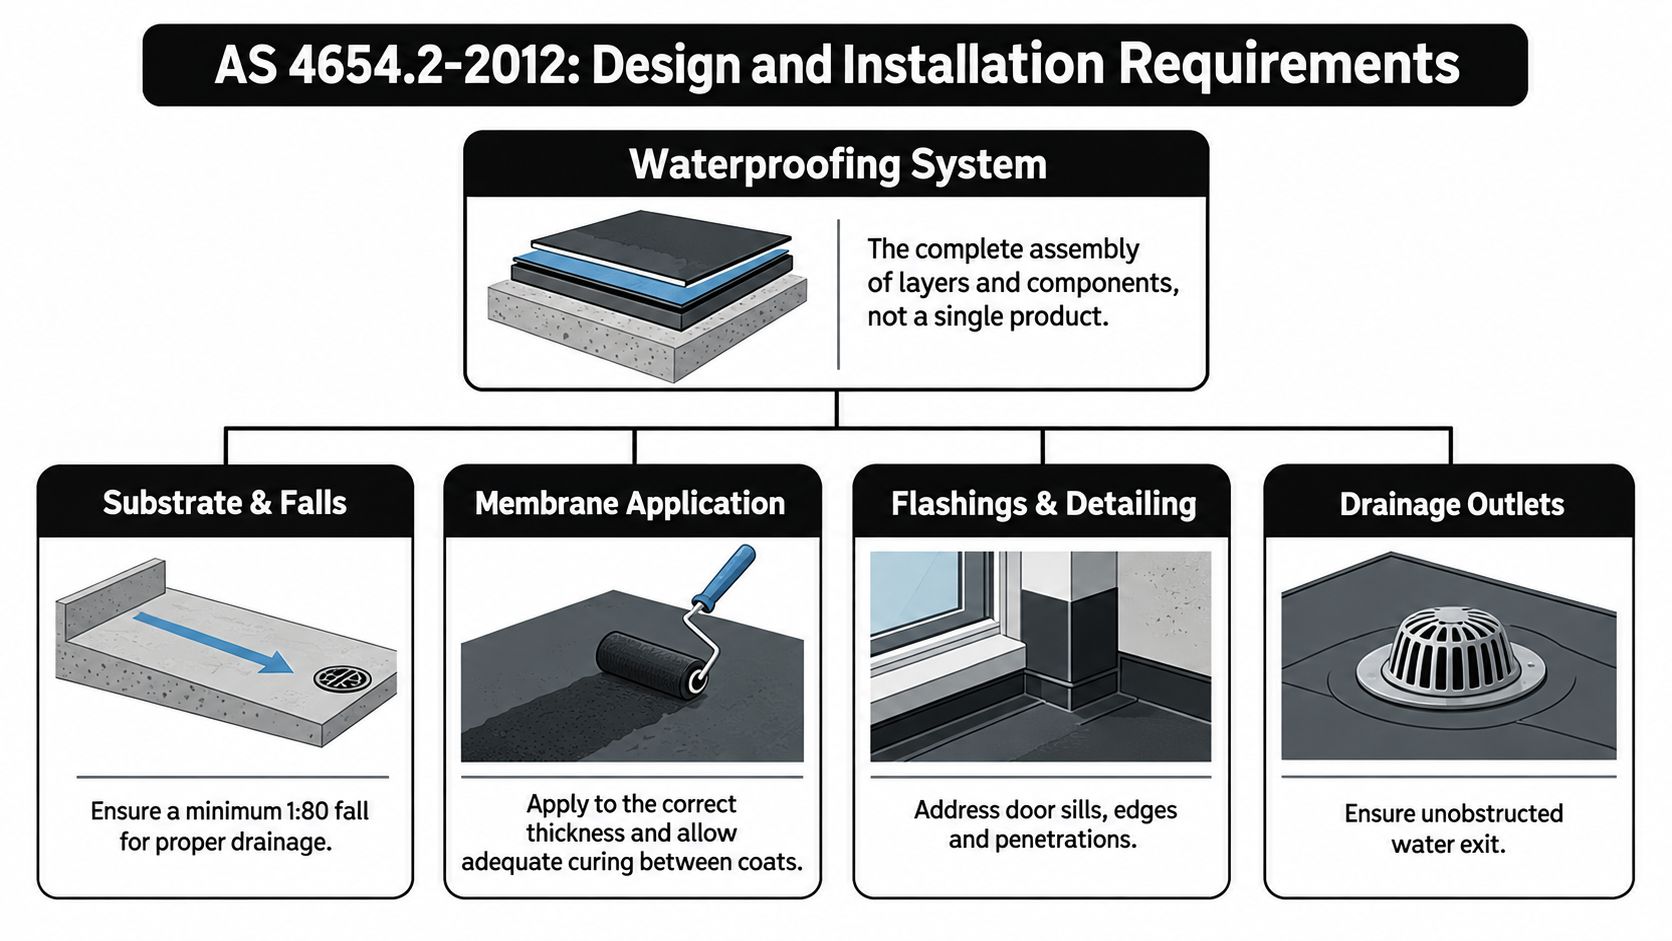
An infographic showing the design and installation requirements for balcony waterproofing systems based on AS 4654.2-2012 standards.

What compliant sequencing looks like

The installation sequence should protect each completed layer from damage and preserve the intended drainage geometry.

  1. Assess the substrate first. It must be suitable, stable, clean and compatible with the selected membrane system. Dust, contamination, moisture and cracking can undermine adhesion before the membrane is ever exposed to rain.

  2. Form the falls in the substrate. Don't rely on a tile layer to correct a flat balcony. A mortar screed placed over the membrane may conceal the geometry problem rather than solve it, particularly if water can remain beneath the finished surface.

  3. Detail changes of direction and penetrations. Corners, wall junctions, door openings, outlets and balustrade fixings require continuity. These are not places to compensate for poor preparation with extra sealant.

  4. Respect curing and protection requirements. Liquid membranes need the manufacturer's specified application conditions and curing time. Trades walking across an uncured or unprotected membrane can create damage that won't be visible after tiling.

For related guidance on how standards affect connected plumbing work, Ring Hot Water plumbing standards provides useful background on compliance considerations around plumbing systems. For balcony-specific application details, review the balcony waterproofing membrane guide before comparing products.

A sheet membrane summary identifies a minimum 100 mm vertical downward termination from the junction for roofs and similar structures. The exact detail must be checked against the applicable standard, system design and site conditions, but the principle is straightforward: water needs a controlled termination, not an exposed edge that can be overtopped or bypassed.

National Construction Code Requirements for Falls and Drainage

The National Construction Code treats balcony waterproofing as a building-performance issue, particularly where a balcony, terrace or podium sits above an internal space. NCC provisions link membrane materials to AS 4654.1 and require the system to be designed and installed in accordance with AS 4654.2.

For concrete roofs, balconies and similar surfaces, NCC 2025 reform material proposes a minimum structural-substrate fall of 1:80 towards a floor drain, rainwater outlet or another drainage outlet (ABCB provisions on damp and weatherproofing). The same material identifies a 70 mm step-down from the inside of a building to the outside and the use of integral perimeter hobs in relevant balcony construction.

Why the fall must be built in

A balcony should shed water because its underlying geometry directs it to the outlet. If the structural substrate is effectively flat, tiles and grout can't reliably create a compliant drainage system. Water may pond beneath the finished surface, remain against the membrane for extended periods and find weak points at joints or penetrations.

The practical inspection sequence is simple, although the remedial work may not be:

  • Measure the substrate: Use a suitable level before tiling or demolition decisions are finalised.
  • Trace the outlet path: Confirm that water has a clear route to the drain or rainwater outlet.
  • Check the threshold: Inspect the step-down, membrane termination and door sill detailing together.
  • Inspect the hob and perimeter: Confirm that the edge treatment controls water rather than directing it into the wall or interior.
  • Protect the outlet: Keep tile adhesive, grout and debris out of the drainage opening during installation.

A broader explanation of how drainage geometry affects wet-area performance is available in this floor slope for drainage guide. For a different roof context, Aastro Roofing Company's commercial roof drainage guide also illustrates why outlet capacity and planned flow paths matter, although balcony details must be assessed under the applicable Australian requirements.

Site observation: Regrouting a balcony with poor falls may improve its appearance, but it won't remove ponding or repair a discontinuous membrane.

The NCC framework focuses on preventing water penetration that could cause unhealthy or dangerous conditions, loss of amenity, undue dampness or deterioration of building elements. That makes drainage geometry a performance requirement, not a finishing preference.

Comparing Balcony Standards with Bathroom Waterproofing Rules

Balconies and bathrooms both need continuous waterproofing, but they don't follow the same compliance pathway. External above-ground balcony systems are governed through AS 4654.1 and AS 4654.2, as referenced by the NCC. Residential bathroom renovations generally use the NCC Housing Provisions and AS 3740 as a Deemed-to-Satisfy pathway, subject to the applicable clauses and limitations.

The dimensions make the difference clear. Under the NCC 2022 Housing Provisions, a shower floor, including a hob or step-down, must be waterproof, while shower walls must be waterproof to at least 1,800 mm above the floor substrate (NCC wet-area waterproofing provisions).

For baths and spas, the walls must be waterproof to at least 150 mm above the vessel lip, and an adjoining shelf must be waterproof with a waterstop beneath the vessel lip. These dimensions address predictable splash, overflow and wetting patterns inside a controlled room, whereas balcony design must manage weather, exposed joints, drainage and wind-driven rain.

Don't mix pathways casually

A common renovation mistake is to borrow a balcony detail for a bathroom or assume that a bathroom membrane product automatically satisfies external balcony requirements. The applicable building class, substrate, exposure and system design determine which requirements apply.

For houses, selecting AS 3740 under NCC Volume Two still requires compliance with the specified Housing Provisions clauses. For an unenclosed shower, the NCC requires a waterstop at least 1,500 mm horizontally from the shower rose (ABCB waterproofing FAQ).

Bathroom renovations also sit within Victoria's building-control framework. A homeowner arranging a combined bathroom and balcony project should keep the scopes separate in the documentation, then have the builder and relevant practitioners confirm the permits, waterproofing details and inspection records for each area.

Hidden Failure Points in Balcony Waterproofing Systems

Tiles are a poor diagnostic tool. They can look sound while water enters at a location hidden beneath the surface, then travels laterally through bedding, screed or the substrate before showing up elsewhere.

The first places I check are the outlet, movement joints, balustrade penetrations and external door openings. Each interrupts the broad, simple plane of the membrane. Each also carries a higher risk of movement, mechanical damage or poor hand detailing.

Follow the drainage path

A leak investigation should work backwards from the internal damage and forwards from the point where rain lands. Look for ponding, blocked outlets, cracked junctions, loose edge tiles, failed sealant and fixings that pass through the waterproofing layer. Surface cracks may be symptoms, not the entry point.

The NCC requires exposed joints in the drainage surface to be protected in accordance with AS 4654.2 Section 2.9, and those joints must not be located beneath or pass through planter boxes or water features (NCC surface-water management provisions).

That rule matters on apartment balconies where landscaping, planter boxes or decorative water features can hide inspection points and load joints with persistent moisture. A joint placed in the wrong location can remain problematic even when the surrounding membrane application appears neat.

A balcony outlet isn't just a hole in the tile. It is the point where the surface, membrane, drainage fitting and downstream water path must operate as one detail.

The repair method should follow the cause. A localised junction defect may need careful exposure and reinstatement. Widespread ponding may require substrate correction and removal of the finished surface. Applying a coating over tiles can hide the evidence, restrict future diagnosis and leave the original drainage problem untouched.

Navigating Renovations with Registered Builders in Victoria

Standards only protect a project when someone takes responsibility for applying them. In Victoria, the Building and Plumbing Commission requires registration when building work is valued at more than $10,000, and structural work triggers registration regardless of project cost. A building permit may also be required (Consumer Affairs Victoria guidance on builders and practitioners).

The homeowner remains responsible for determining whether permits are needed, ensuring they're obtained and obtaining the Certificate of Final Inspection or Occupancy Permit when the work is complete. That responsibility makes the builder's registration, scope and authority important checks before demolition begins.

A professional builder in a hard hat and high-visibility jacket reviewing blueprints on a residential balcony.

A practical Melbourne project pathway

For a leaking or deteriorated balcony, organise the work in this order:

  1. Contain the immediate risk. Protect the room below, remove unsafe loose materials and prevent further water entry where practical.
  2. Collect the records. Locate the permit, approved drawings, previous waterproofing information and maintenance history.
  3. Inspect the full system. Assess the substrate, falls, outlets, thresholds, junctions, penetrations and structural condition.
  4. Define the scope. Separate maintenance from substantial reconstruction or new work, then confirm the applicable NCC edition and approval pathway.
  5. Document the installation. Keep product evidence, preparation details, photographs, inspection records and completion documentation before the tiles conceal the membrane.

A general trade-licensing overview from TP Training can help homeowners understand why registration and authorised work matter. For Victoria-specific waterproofing records, use this waterproofing compliance certificate guide.

Melbourne Tiling Services P/L handles balcony leak rectification, substrate repairs, screeding, waterproofing, flood testing and retiling, with external balcony work aligned to the applicable AS 4654 requirements. The team also coordinates bathroom renovations with registered builders and relevant trades, so visit Melbourne Tiling Services P/L to arrange an assessment and discuss the documentation needed for your project.
Bathroom Waterproofing Standards: A Practical Guide

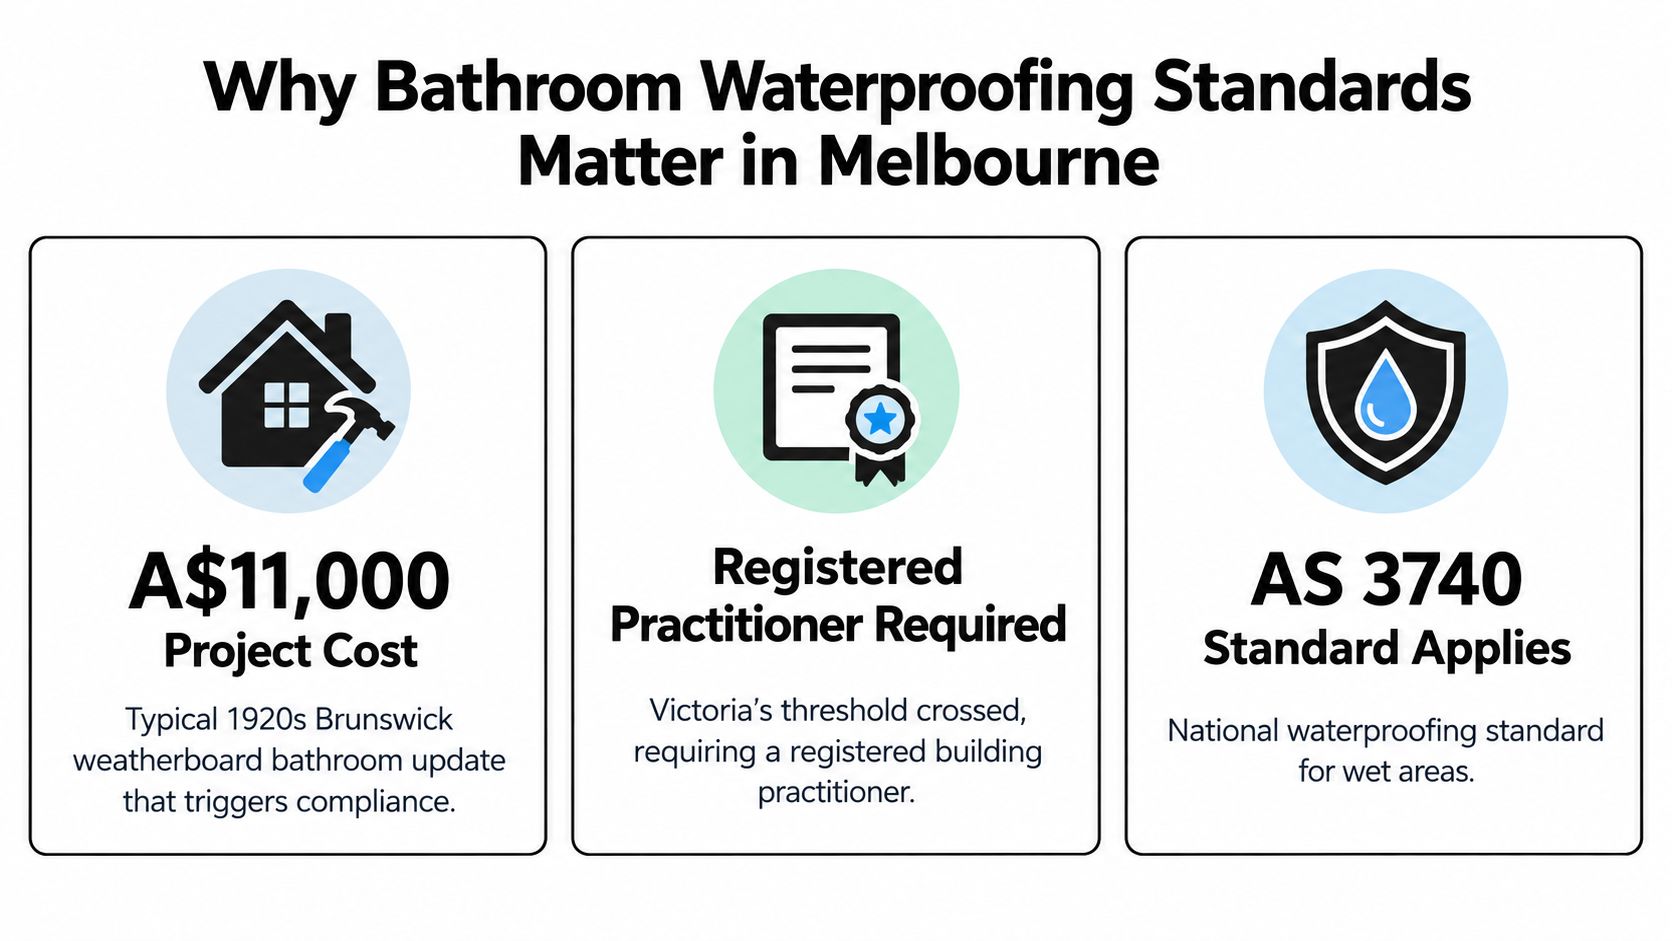
In Victoria, bathroom renovation work valued at A$5,000 or more must be carried out by a registered building practitioner (Hipages on bathroom water and renovation regulations by state). AS 3740:2021, first published on 23 July 2021, now sets the minimum waterproofing requirements for domestic wet areas and is the edition referenced through NCC 2022 and the wet-area provisions carried into NCC 2025 (AS 3740:2021 PDF).

If you're reading this, there's a good chance your bathroom is either leaking already, or you're about to renovate and want to avoid ending up with a failed shower in two years. In Melbourne, that concern is justified. A lot of local bathrooms sit over timber floors, older homes move more than people expect, and a tidy tile finish can hide bad waterproofing for a long time.

The part many owners miss is that tiles and grout aren't the waterproofing. The membrane, the falls, the junction detailing, and the way the substrate is prepared are what decide whether the bathroom lasts. Bathroom waterproofing standards aren't just paperwork. On site, they determine whether water reaches the drain or disappears into framing, sheet joins, and the room below.

Table of Contents

Why Bathroom Waterproofing Standards Matter in Melbourne

A typical Melbourne leak job starts the same way. The shower still looks presentable, the grout has been patched once or twice, and there is a faint stain on the ceiling below or swelling at the skirting outside the bathroom. Once the tiles come off, the problem usually shows up in the corners, around the waste, at sheet joints, or in a timber floor that has been taking water for years.

An infographic detailing bathroom waterproofing standards in Melbourne, showing project costs, practitioner requirements, and compliance regulations.

Melbourne bathrooms deserve closer attention than a generic national guide suggests. A large share of rectification work here is in older houses with suspended timber floors, mixed substrates, and previous renovations layered over original framing. Those jobs move more, deflect more, and hide damage better than bathrooms built on a sound concrete slab. A neat tile finish proves very little.

The Victorian renovation setting matters too. Once bathroom work reaches the threshold that requires a registered building practitioner, the expectation is not just a tidy finish but compliant wet-area construction, including waterproofing that suits the actual structure beneath it, as noted earlier from the Hipages guidance on Victorian renovation requirements. On site, that changes how the job should be approached. Existing floors need to be checked for bounce, damaged sheet flooring needs to be replaced, and the falls have to work before the membrane goes down.

Older Melbourne bathrooms fail in familiar ways:

  • Timber floors flex: Movement at floor-to-wall junctions and around wastes is a regular starting point for membrane failure.
  • Past water damage gets covered over: New tiles laid over a weak or contaminated substrate do not fix the cause.
  • Water travels sideways: Leaks often show up at a doorway, in an adjoining room, or through the ceiling below rather than at the shower outlet.
  • Falls are often poor or reversed: Water sits at corners, outside the shower screen, or against the wall base and keeps feeding the defect.

In leak rectification, grout is rarely the issue. Grout and tiles are the wear surface. The result depends on the membrane, the bond breakers, the set-down or hob detail where required, the puddle flange connection, and whether the floor falls push water to the waste instead of letting it pond.

Standards matter because they set the minimum line for details that are easy to get wrong and expensive to reopen later. In Melbourne, that usually comes back to practical site questions. Is the timber floor stiff enough for the system being used? Has the shower area been formed so the required falls can be achieved without creating a lip at the doorway? Is there enough height at the wall upturns and enough care at penetrations to stop water getting behind the lining? Those are the gaps that turn a bathroom renovation into a defect claim.

Understanding AS 3740 and the NCC Framework

A Melbourne owner strips out a 1970s bathroom, keeps the old timber floor, and assumes new tiles and a fresh membrane will satisfy code. Then the shower leaks into the hall three months later because the floor classification was read too loosely, the falls were never properly formed, and nobody treated the doorway and waste connection like the risk points they are.

That is the practical job AS 3740 does. It sets the minimum rules for waterproofing domestic wet areas in residential buildings, and the NCC pulls those rules into the compliance framework builders, waterproofers, certifiers, and insurers work under. On site, that means AS 3740 is not a product brochure or a suggestion. It is the reference point for how the wet area is classified, what gets waterproofed, where the membrane must continue, and how the whole assembly is expected to perform once the room is in use.

The part many generic guides miss is that the standard is only the starting point. In Victoria, the pressure comes from how those minimums meet older housing stock, especially timber-framed bathrooms in Melbourne's east, north, and bayside suburbs. A detail that is technically acceptable on a new slab can become risky on a springy first-floor renovation if the substrate prep, sheeting, and movement treatment are marginal.

How the wet-area categories affect the scope

AS 3740 does not treat every bathroom the same. It separates wet areas by exposure and layout, and that changes the required detailing.

In practice, the categories work like this:

Category Typical situation What it means on site
Category 1 Shower areas, including enclosed and open shower zones Highest water exposure. Full shower-area waterproofing, careful waste detailing, and correct wall and floor treatment matter most here.
Category 2 Bathroom areas outside higher-exposure shower zones The broader bathroom still needs water-resistance measures, but the scope differs from the shower proper.
Category 3 Lower-exposure wet areas, often depending on layout and enclosure Some floor areas are treated less aggressively, but only where the room configuration genuinely supports that approach.

This classification step is where renovation jobs often start drifting off course. An open or semi-open shower changes the risk to the whole room. A shower-over-bath changes the logic again. An enclosed shower in a small apartment bathroom may reduce the required treatment outside the enclosure, but only if the rest of the layout supports that classification and the installation matches it.

The other point that matters in Victoria is responsibility. Once the bathroom renovation value crosses registered-builder thresholds, or the work forms part of domestic building work that needs the right level of registration and documentation, the standard is no longer just a technical reference for the waterproofer. It becomes part of the builder's compliance trail. That is why the paperwork side, including a proper waterproofing compliance certificate in Victoria, needs to line up with what was built on site.

AS 3740 and the NCC are related, but they are not the same document

The NCC sets the legal performance and deemed-to-satisfy framework. AS 3740 gives the detailed wet-area method commonly used to meet that framework for internal domestic bathrooms, laundries, and similar spaces.

That distinction matters during disputes. I regularly see leak-rectification jobs where one trade quotes the NCC at a high level, another points to a product data sheet, and nobody has checked whether the installed system matches the AS 3740 wet-area detail for that room type. The result is a tiled bathroom that looks finished but has no reliable line of defence at the wall-floor junction, around penetrations, or at the waste.

Internal bathrooms also need to be kept separate from external waterproofing logic. Balconies, planters, and podiums are different assemblies with different exposure conditions and different detailing priorities. Applying external-area habits inside a bathroom can create unnecessary build-ups, bad transitions, or incompatible junctions. The reverse mistake is worse. Treating an exposed external area like an internal bathroom nearly always ends badly.

Industry commentary has also pointed out that residential teams can get into trouble by mixing AS 3740 references with other housing provisions without checking which pathway applies to the project scope. Chalkline's AS 3740 compliance note is a useful reminder that compliance is not just about quoting the right document. It is about using the right document in the right context.

Standards did not become central to wet-area work by accident. They grew out of repeated failures, trade specialisation, and insurance pressure, which is part of the broader history of plumbing trade in North America as well.

For Melbourne bathrooms, the takeaway is simple. AS 3740 tells you the minimum accepted method. The NCC gives that method its compliance force. Older timber floors, tight renovation set-downs, and poorly planned shower layouts are where that framework gets tested hardest.

Required Membranes and On-Site Installation Details

An upstairs shower in a Brunswick weatherboard can look perfect on handover and still be leaking into the hallway wall a month later. I see that pattern in rectification work all the time. The tiles are straight, the grout is clean, and the failure sits underneath at the waste, the hob, the screen line, or a floor that never had proper fall to begin with.

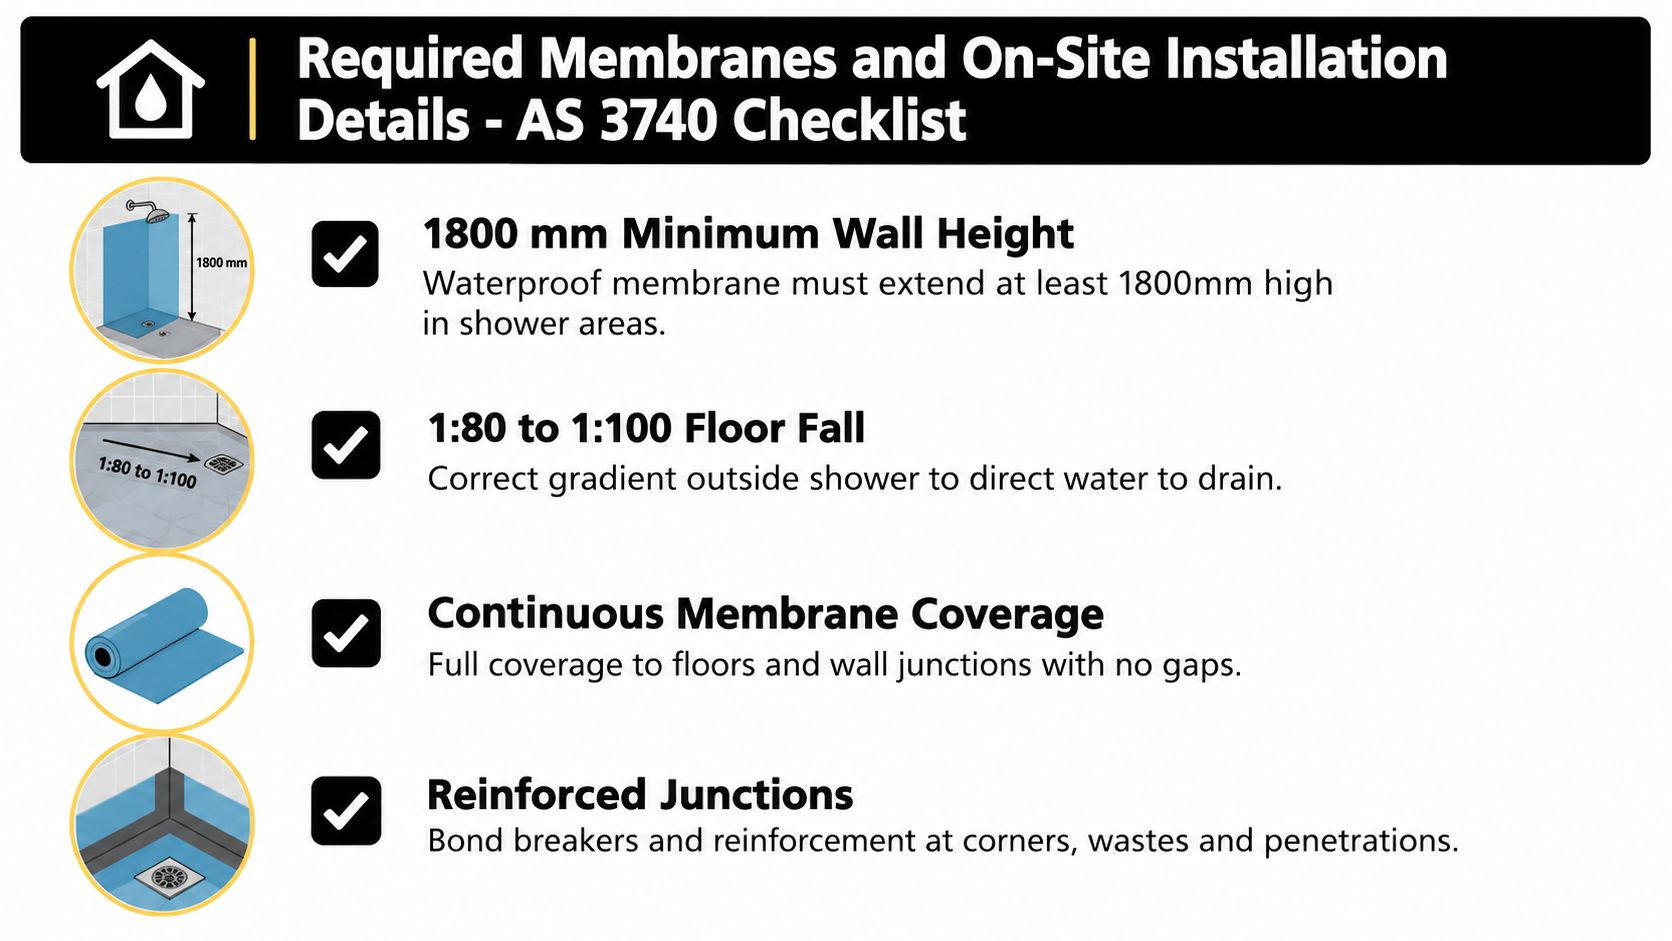
An infographic checklist for AS 3740 bathroom waterproofing standards, illustrating required membrane heights, floor falls, and junction reinforcement.

The dimensions that matter on site

On a compliant internal shower, the membrane is carried up the walls in the shower area to 1800 mm above the floor substrate. The shower floor also needs a continuous fall to the waste within the range set out by the NCC for wet areas, with no birdbaths, no back-falls, and no flat strip trapped under the screen line (NCC waterproofing and water-resistance requirements for wet areas).

That sounds straightforward on paper. It often is not on a Melbourne renovation.

Older timber-framed bathrooms are where the details get tight. There may be no set-down. The joists may already be undersized. The client wants a flush entry. The plumber has set the waste too high. The tiler is then asked to create fall, keep build-up down, and still hit the doorway level. That is how showers end up with compliant-looking wall membrane and a floor that holds water at the perimeter.

The weak points are predictable:

  • shower-to-bathroom transitions where the water stops short of the waste
  • floor-to-wall junctions that were not reinforced properly
  • tap penetrations and mixer points that were cut oversized or left poorly sealed
  • puddle flanges and floor wastes that were never integrated properly with the membrane
  • hobs, nib walls, and screen fixings where water tracks through small breaks in the system

Silicone does not fix any of that. Silicone is a maintenance joint. The waterproofing has to be continuous underneath.

Membrane choice and compatibility

The membrane itself has to suit the substrate, the movement you expect, and the full system around it. Liquid-applied membranes used internally are generally selected to meet AS 4858. Sheet-applied systems are selected under the relevant product and installation pathway, and external membrane standards such as AS 4654.1 are not a substitute for internal wet-area detailing unless the manufacturer and the project scope clearly support that assembly.

That compatibility question matters most in rectification and renovation work. On an older Fitzroy or Northcote bathroom, there may be fibre cement patching next to compressed sheet, old sand-cement falls in one area, and fresh levelling compound in another. If the primer, bond breaker, membrane, adhesive, and sealant are not specified as one system, the failure usually turns up at the change of plane first.

A proper scope should name the membrane system, the primer, the reinforcement method at junctions, and the waste detail. "Waterproof bathroom" is not a scope. It is a gap.

This walkthrough is useful if you want to see the sequence visually:

For owners comparing systems before signing off on a renovation, this guide to shower waterproofing membrane options gives a practical summary of where different membrane types suit the job.

In Victoria, the paperwork side matters too. Once bathroom renovation cost or scope pushes the project into registered-builder territory, vague waterproofing notes become a real risk for everyone involved. If I am reviewing a leak after the fact, one of the first things I look for is whether the installed build-up matched a documented system, or whether trades were left to sort it out on site. That gap is where failed showers start.

How Substrate Type Changes Waterproofing Requirements

A shower over a 1930s timber floor in Brunswick is not waterproofed the same way as a new ensuite on a concrete slab in Point Cook. The floor finish might be the same porcelain tile in both rooms, but the substrate underneath changes the whole job. If that difference is ignored, the leaks usually show up at the waste, the wall-floor junction, or a sheet join that kept moving after handover.

In Melbourne renovations, mixed substrates are common. Part of the floor might be original timber sheeting, part might be new fibre cement, and the shower area might have been packed or levelled during rectification work. Each surface absorbs primer differently, moves differently, and places different stress on the membrane. One membrane detail applied across all of it is where many failed bathrooms begin.

Timber floors need full attention, not partial treatment

On timber or particleboard floors, the practical approach is full-floor waterproofing because any escape of water can damage the structure below. Timber movement is the main issue. The floor deflects under load, sheet joints can telegraph through, and moisture getting into the substrate can lead to swelling, loss of bond, and cracked grout that owners often mistake for a tiling problem.

Older Melbourne homes make this harder. Joists are not always straight, previous repairs are common, and the floor may already be carrying some bounce before demolition even starts. If the substrate is not stiff enough, the membrane is being asked to cope with movement it was never meant to absorb. That is why substrate assessment matters before anyone starts talking about tiles.

Concrete behaves differently, but it still fails for predictable reasons

Concrete does not swell like timber, but slab jobs have their own failure pattern. The usual problems are poor falls, weak or dusty screeds, shrinkage cracking, and rough waste detailing. A membrane can be applied neatly and still fail in service if water sits against a screen channel, ponds outside the shower, or tracks through an unsealed penetration.

On slab renovations, I often see the membrane blamed for what is really a geometry problem. If the floor does not fall cleanly to the waste, waterproofing alone will not fix shower performance.

Substrate Primer requirement Typical membrane approach Fall method Common failure point
Timber or particleboard floor Primer matched to the sheet or board surface and any patched areas Full-floor liquid membrane or compatible sheet system, with careful treatment at joints and junctions Falls built into the floor build-up or formed with a suitable underlay system before tiling Deflection, sheet-joint movement, moisture damage below floor level
Concrete slab Primer matched to slab condition, porosity, and any screed or levelling layer Liquid or sheet membrane suited to the slab and waste detail Falls corrected with screed or floor preparation before membrane application Ponding, screed debonding, cracking, poor bonding around wastes

Mixed substrates are where good specifications matter

A lot of renovation bathrooms are not one clean substrate from wall to wall. They are patched. They have transitions. They have old and new materials meeting in the same wet area. That is where membrane systems get caught out if the installer has not allowed for reinforcement, cure times, and compatible primers across every change in surface.

This is also where registered-builder threshold jobs in Victoria need clearer documentation than they often get. If the scope only says "waterproof bathroom", the installer is left to make product and preparation decisions on site that should have been resolved before work started.

For owners and project managers, proper wet-area substrate preparation is usually the point that decides whether the membrane has a stable base or is covering over movement, dust, patchwork repairs, and poor falls.

Testing and Compliance Steps That Prove the Work

A shower can look finished, be fully tiled, and still be leaking into the hallway or ceiling below. I see that pattern regularly in Melbourne rectification work, especially in older timber-floor bathrooms where movement at the waste, screen line, or wall-floor junction was never picked up before handover. Testing is what separates a bathroom that only looks complete from one that has been proved.

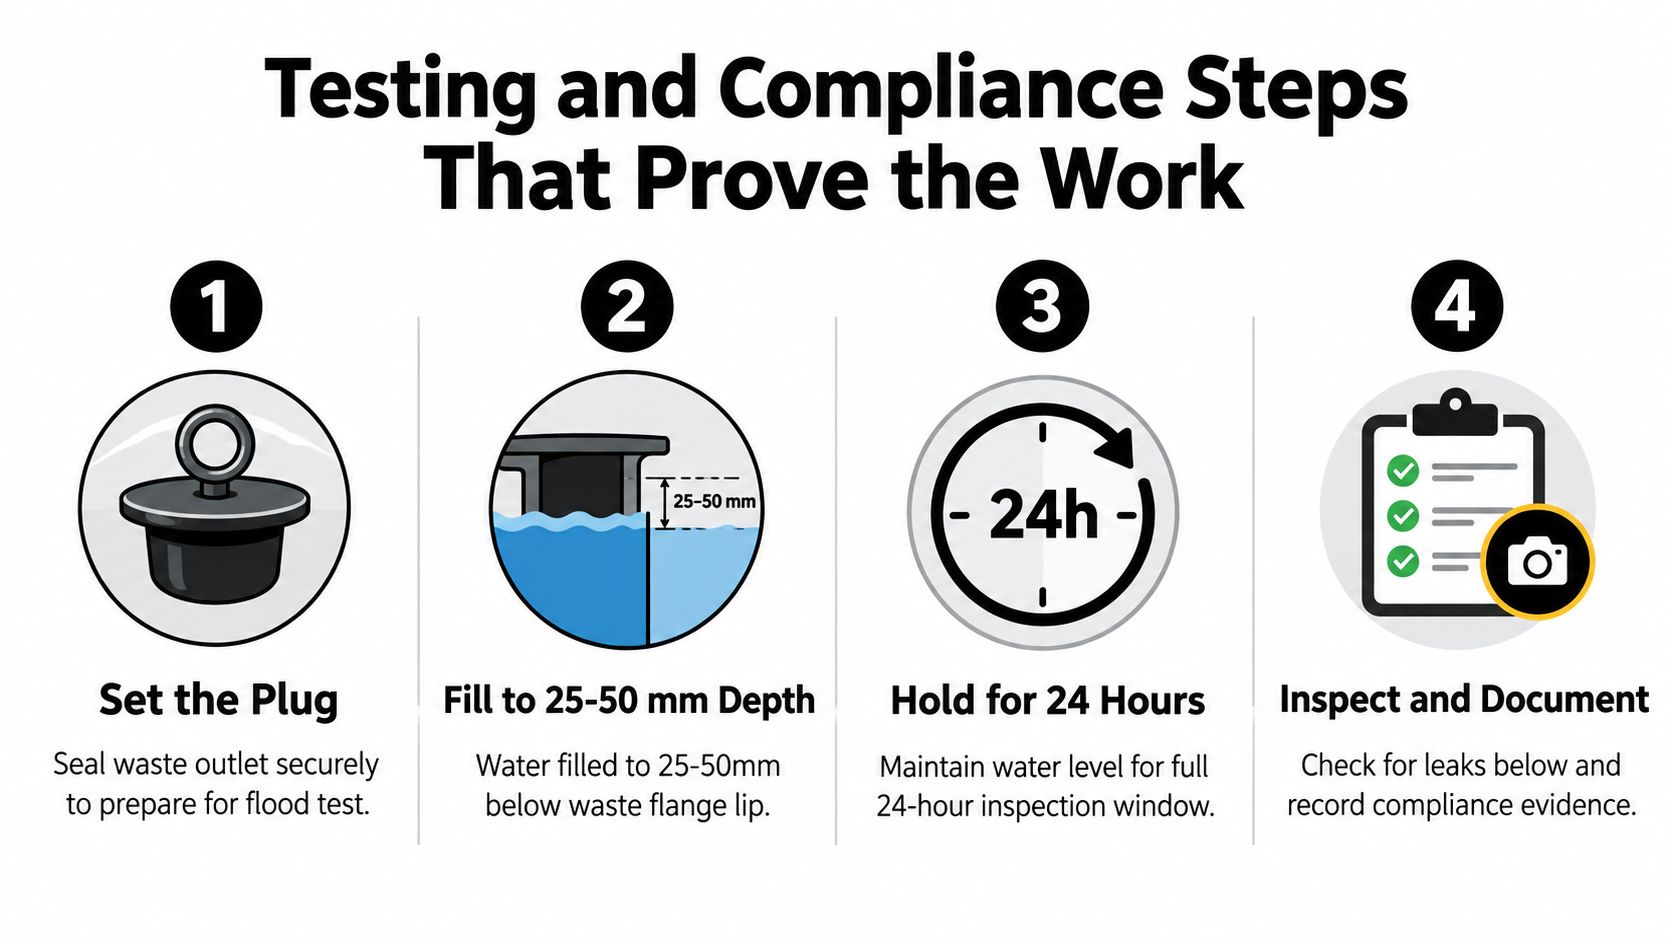
A four-step infographic illustrating standard bathroom waterproofing flood testing procedures for compliance and quality assurance.

What a flood test should show

On site, a flood test is the simplest way to check whether the membrane, corners, penetrations, and waste detailing hold water before tile finishes hide everything. It is particularly useful on renovations, because patched substrates and rebuilt shower bases are where small installation gaps tend to show up.

A useful test process looks like this:

  1. Seal the waste properly: A loose plug gives a false fail, and no plug gives no test at all.
  2. Fill the shower area to a defined level: The aim is to load the membrane and junctions, not just wet the surface.
  3. Hold the water long enough to observe performance: On many projects, that means a 24-hour hold period so slow leaks have time to show themselves.
  4. Check the level and inspect surrounding areas: Look for any drop in water level, moisture at adjacent rooms, and staining or seepage below if there is access from underneath.

On a concrete slab, a failed test often shows up as leakage at the waste or poor detailing at wall-floor junctions. On an older timber floor in a Victorian renovation, movement is the extra problem. The membrane might look sound when dry, then open up under load where the base flexes or where new sheeting meets old framing.

Flood testing also has limits. It does not prove the falls are right, and it does not excuse bad screen detailing or poor silicone work later. A shower can pass a water hold test and still perform badly if water sits at the entry, runs out through an uncontained opening, or ponds because the finished floor falls were not checked.

What to ask for: Photos of the set-up, the water level at the start, and the result at the end, with dates. On leak-rectification jobs, ask for photos of the waste seal, corners, and penetrations before tiling as well.

The paperwork that matters

Compliance is not just a membrane bucket and an invoice. The record should show what standard and manufacturer system the installer followed, what preparation was carried out, where the waterproofing was applied, and how it was tested.

For a bathroom renovation or shower rebuild, owners should expect:

  • a written scope of works
  • the membrane product details and data sheets
  • substrate and pre-tile installation photos
  • flood-test records
  • any relevant compliance documents for plumbing work completed by the licensed trade involved

That matters more in Victoria than many owners realise. Once the job value triggers registered-builder requirements, the paperwork trail becomes harder to ignore. It also matters on older Melbourne homes where leak claims often turn into disputes about whether the failure came from waterproofing, plumbing, movement in the floor, or later tile and screen work.

Good documentation will not stop a leak. It does make the cause easier to trace, the responsibility easier to sort out, and the rectification scope easier to justify if the shower has to come back out.

Common Defects and Real-World Rectification Examples

Rectification work teaches the lessons that new-build brochures leave out. Most failed bathrooms don't fail because one dramatic thing went wrong. They fail because several small decisions lined up badly.

A failed shower over timber

A typical example is a Melbourne bathroom from the 1990s over a timber floor. The shower starts leaking at the screen line, the skirting outside the bathroom softens, and the ceiling below develops staining. Once the shower base and lower wall tiles come up, the pattern is obvious. The membrane never had continuous perimeter coverage, the junction detailing was poor, and water had been tracking into the subfloor for a long time.

The fix usually isn't surgical. It means demolition back to a sound base, replacing damaged timber, rebuilding the substrate so it is stable, reinstalling compliant wet-area detailing, and only then retesting and retiling. If the owner is hoping for a grout-and-silicone repair, that's the point where expectations need resetting.

Key signs this kind of shower needs proper rectification:

  • Soft or drummy floor areas: Often a clue that moisture has affected the build-up below.
  • Swollen trims or adjacent skirting: Water has already moved beyond the shower zone.
  • Recurring mould at wall bases: Surface cleaning won't solve a concealed membrane failure.

External waterproofing failures are a different category

A second scenario is a leaking second-storey balcony tied to the bathroom or ensuite. The owner assumes it's the same problem as a shower recess. It isn't. External areas are governed separately, and balcony detailing fails for different reasons. Poor terminations, bad falls, weak door threshold treatment, or an incompatible membrane system can all send water into the unit below.

That matters because a trade can be competent inside bathrooms and still mishandle a balcony. The membrane may need to be stripped, falls corrected, terminations resealed, and the whole external build-up rebuilt to suit the relevant external standard rather than internal bathroom rules.

Leak rectification isn't a membrane-only exercise. If the substrate, falls, or terminations are wrong, the waterproofing system is only part of the repair.

The lesson owners should take from both

The common thread is simple. Once leakage is established, the question isn't "What membrane should I use?" It's whether the existing structure, geometry, and detailing are still worth saving. Some showers can be rebuilt efficiently. Others need a full strip-out because every layer under the tile has already been compromised.

Practical Guidance for Homeowners and Property Managers

A common Melbourne renovation scenario goes like this. The old ensuite on a timber floor is stripped, the quote looks tidy, and everyone assumes waterproofing is covered because the word appears on page one. Then the builder opens the floor, finds sheet movement around the waste, discovers the room has almost no fall, and decisions start. If the scope was vague from the start, the owner ends up arguing about variations instead of getting a bathroom that will stay dry.

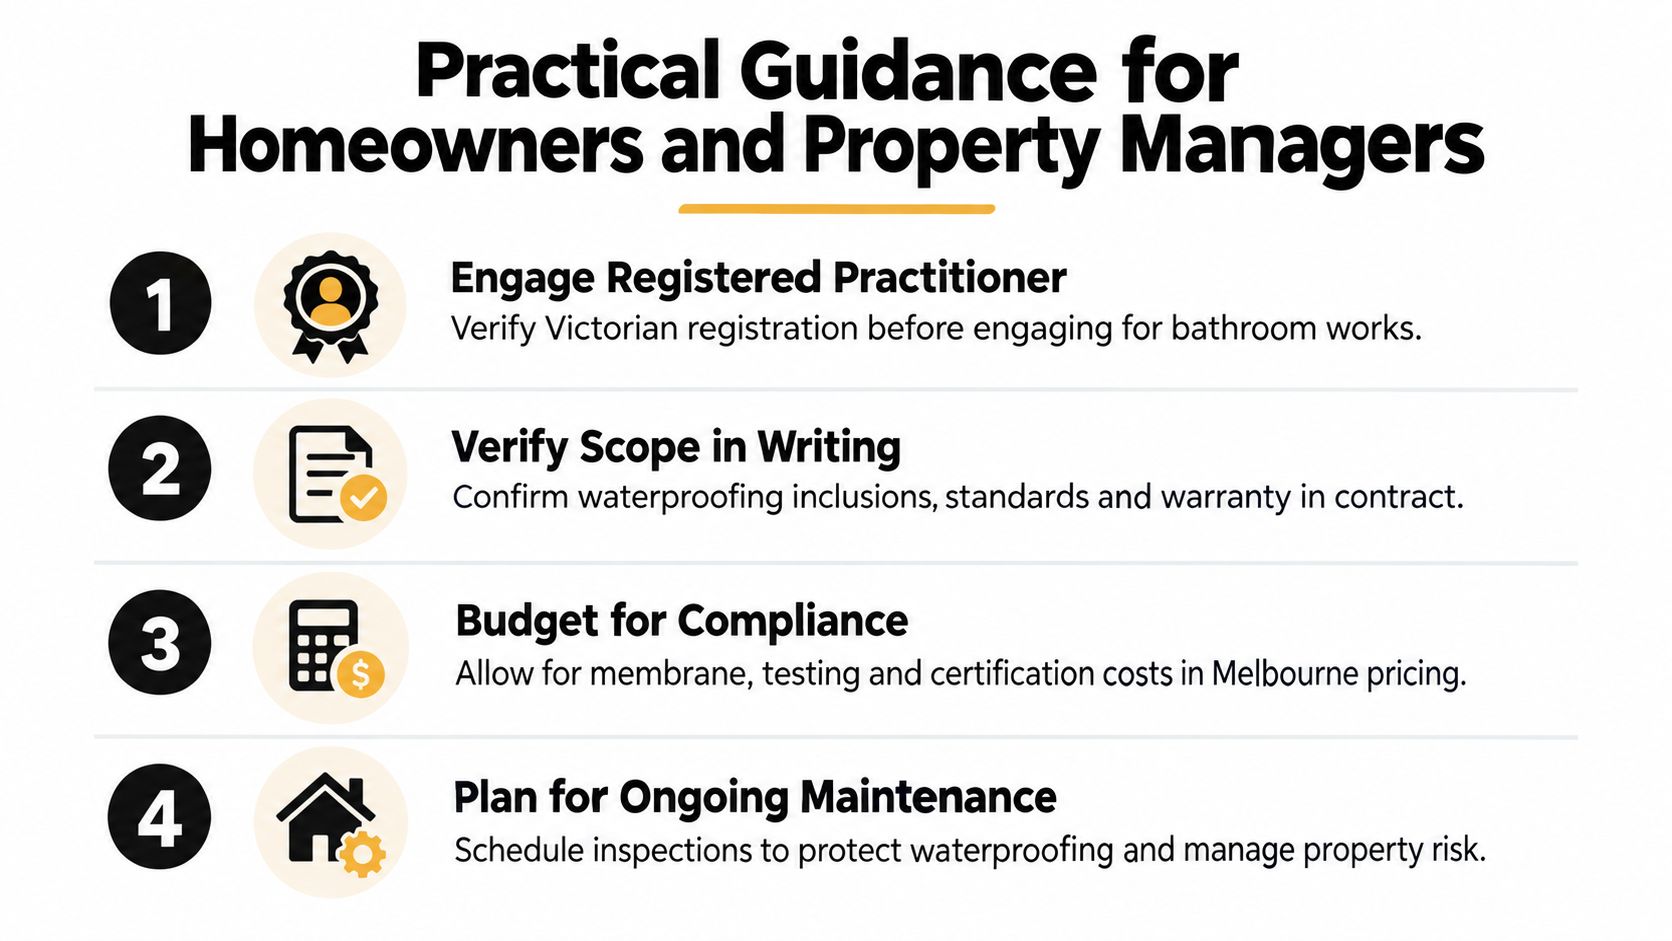
An infographic providing four steps of practical guidance for homeowners and property managers on bathroom waterproofing.

In Victoria, the registration threshold for bathroom renovation work has already been noted earlier in this article. The practical point for owners and managers is simple. Check who is taking responsibility for the wet-area build-up before demolition starts, especially in older apartments and post-war homes where timber floors, patched sheeting, and out-of-level framing are common.

What to put in the contract

A workable contract does more than say "renovate bathroom" or "waterproof wet area". It needs enough detail that everyone can tell what is included once the tiles are off and the substrate is exposed.

On renovation jobs, I want to see these items written clearly:

  • The compliance target: State that internal wet-area work is to comply with AS 3740:2021 and the relevant NCC requirements.
  • Demolition and make-good: Identify what gets removed and what happens if damaged sheeting, rot, or loose flooring is found.
  • Substrate preparation: Record whether floor levelling, screeding, sheet replacement, bedding around the waste, or framing correction is included.
  • Waterproofing system: Name the membrane brand and system, including primers, bond breakers, sealants, and compatible tile adhesives where relevant.
  • Set-downs, thresholds, and falls: If the room has limited height, say how the contractor will achieve compliant falls and water containment without creating a trip point at the door.
  • Proof before tiling: Require progress photos and, where appropriate, a flood test before tiles hide the work.

That last point matters on leak-rectification jobs. Plenty of failed showers in Melbourne look acceptable once retiled. The problem sits underneath.

For managers comparing repair scopes, the overview of Good Boy Plumbing for bathroom repairs is a useful example of how repair categories can be explained in plain language, even though the compliance checks still need to match Victorian requirements.

How to read a quote properly

Cheap quotes usually leave out the parts that cause disputes later. On older timber floors, that is often the structural preparation needed to stop movement and create proper falls to the waste. Membrane applied over a bouncing floor or a flat shower base is money spent in the wrong order.

Ask direct questions and get written answers:

  • Who holds the builder registration for the renovation scope?
  • Who is carrying out the waterproofing, and what system are they applying?
  • Is allowance made for replacing swollen fibre cement sheet, damaged villaboard, or loose flooring?
  • Are the shower falls being checked and corrected before waterproofing starts?
  • Is flood testing included, and who signs off on it?
  • What is the variation process if demolition exposes rotten framing or non-compliant plumbing set-out?

Property managers should also ask who will be dealing with access, tenant coordination, and drying time if a leak has already affected the unit below. Those practical delays are rarely captured in the lowest quote.

One practical option in Melbourne is Melbourne Tiling Services P/L, which coordinates bathroom renovation trades including waterproofing and leak rectification as part of full wet-area scopes. The useful part of that model is accountability. One party manages the substrate preparation, membrane stage, tiling sequence, and handover records instead of leaving gaps between trades.

What to keep before final payment

Do not rely on texts and verbal assurances.

Keep the contract, approved variations, product data sheets, invoices, progress photos, and any flood-test record. If the bathroom is in an older building with body corporate involvement, keep correspondence about access, leak reports, and any direction from the owners corporation as well.

Before releasing final payment, confirm that the completed work matches the written scope. That includes the practitioner details, the membrane system used, and the documented evidence that the waterproofing stage was completed before tiling covered it. On rectification work, that paper trail often matters as much as the tile finish, because if the shower leaks again, the first question is whether the failure was repaired or just covered up.