

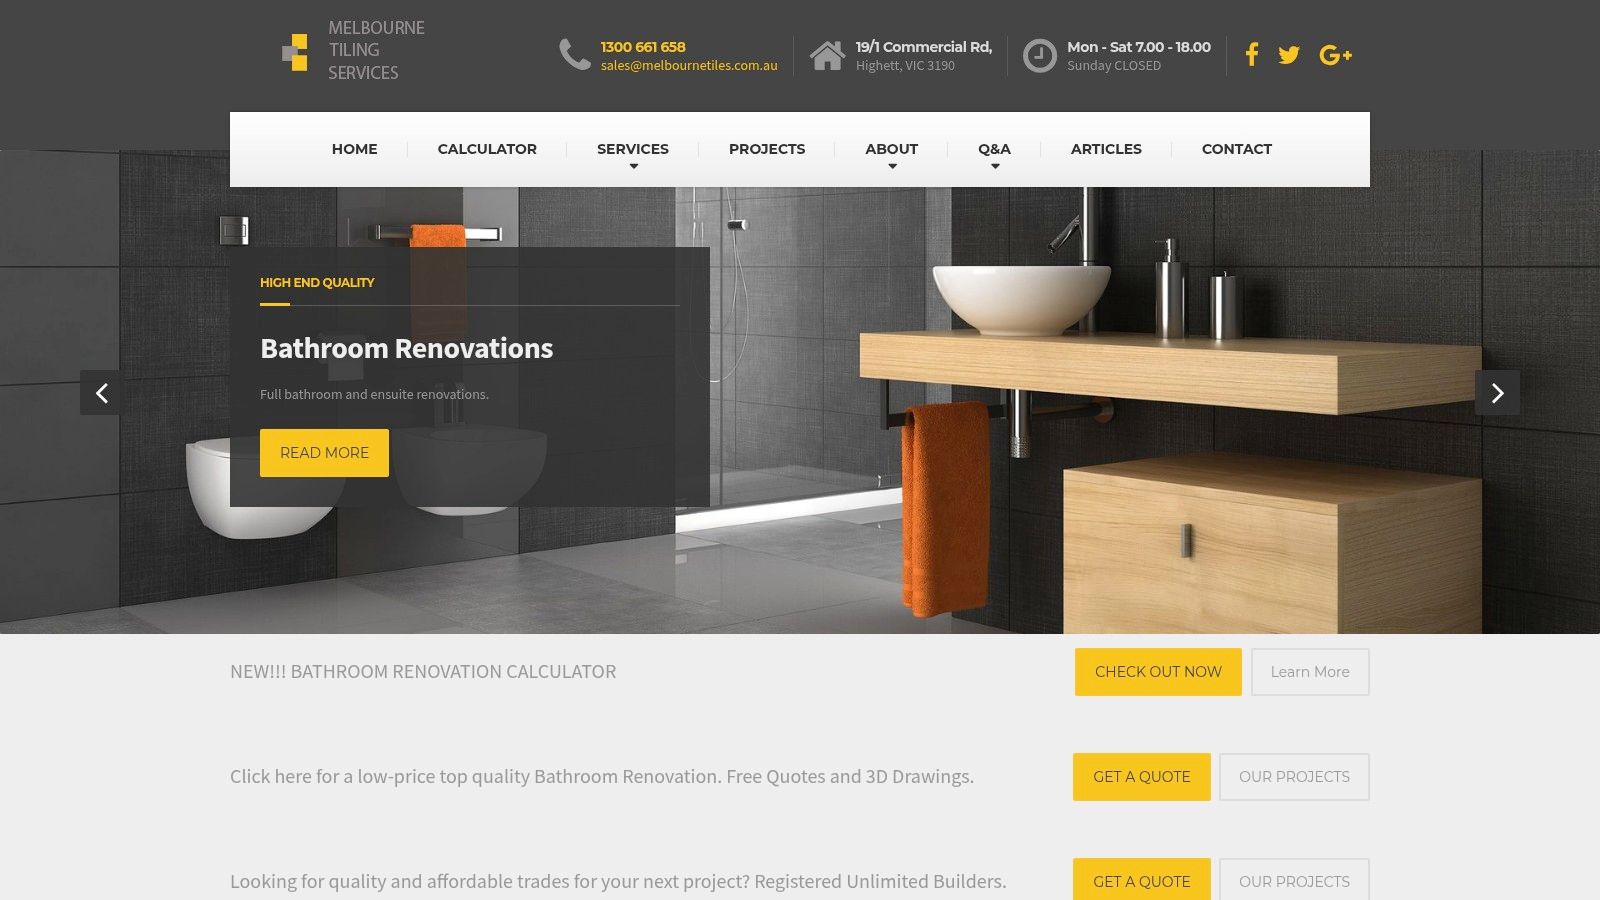
You're usually looking at the shower screen near the end of the job.
The tiles are selected. The vanity is in. Tapware finishes are locked in. The waterproofing, falls, screed, set-out, and trim details have already done the heavy lifting. Then one decision changes how the whole room reads. Open and architectural, or boxed in and busy.
That's why a frameless shower screen in Melbourne shouldn't be treated as a simple glass add-on. In a proper bathroom renovation, it's part of a larger system. The screen has to suit the layout, respect the waterproofing, work with the tile joints, and perform well in daily use. If the renovation is being run by registered builders, that coordination is much easier to get right because one party is looking at the room as a whole, not just one trade item.
Table of Contents
- The Final Touch to Your Melbourne Bathroom Renovation
- What Exactly Is a Frameless Shower Screen
- Design and Customisation for Your Bathroom
- Why Professional Installation Is Non-Negotiable
- Budgeting for Your Frameless Shower Screen in Melbourne
- How to Choose a Trusted Melbourne Installer or Builder
- Frequently Asked Questions
The Final Touch to Your Melbourne Bathroom Renovation
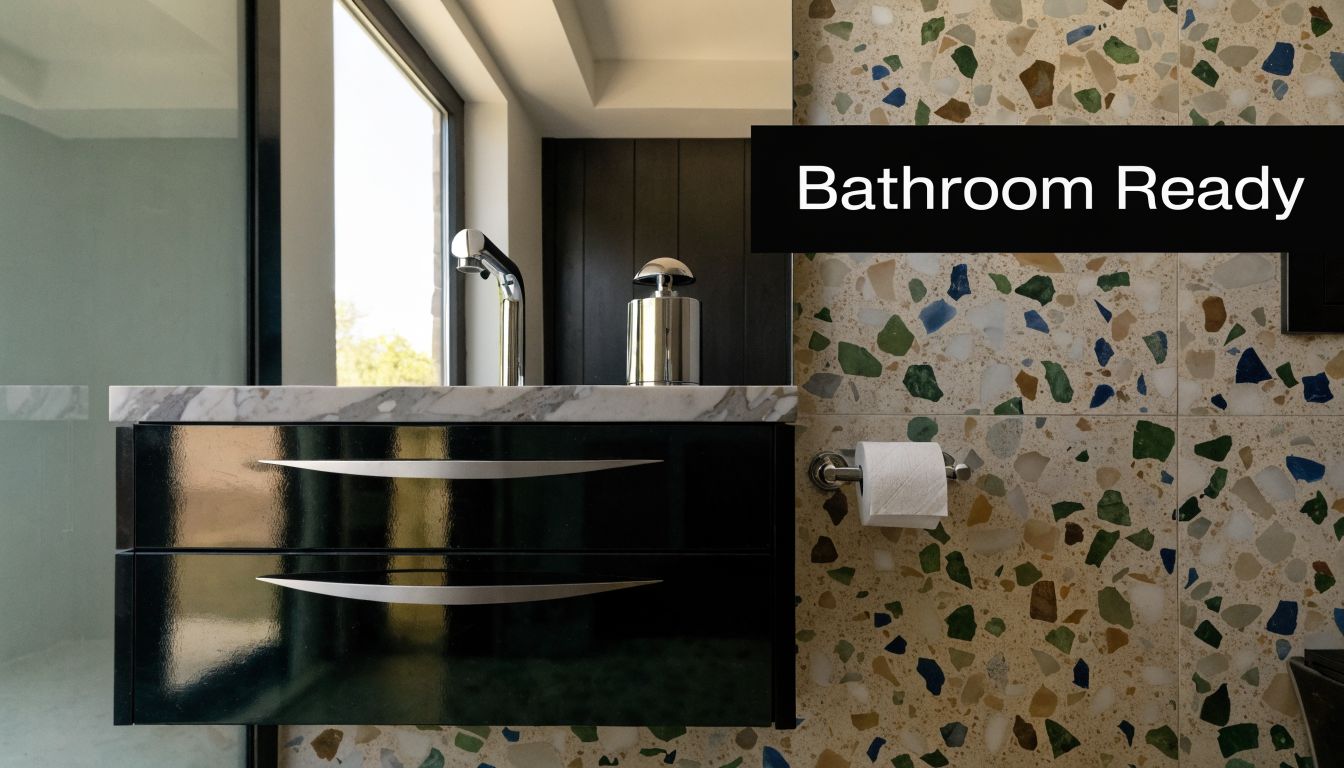
A lot of homeowners get to the same point. The renovation has been disruptive, expensive, and full of decisions. Then the bathroom finally starts to look like a room again. You can see the tile pattern, the vanity proportions, and the way the light moves across the walls. The shower screen becomes the final call that either keeps that space feeling open or cuts it up visually.
In Melbourne renovations, that choice matters even more because many bathrooms are compact, older, or shaped by earlier building methods. A bulky enclosure can make a neat room feel tight. A well-planned frameless screen can do the opposite. It keeps sightlines cleaner and lets the tilework carry more of the design.
That's the appeal. Frameless glass feels quiet. It doesn't compete with stone, porcelain, feature tiling, or brushed metal finishes. It also tends to suit the direction many homeowners want from a modern bathroom renovation, which is less visual clutter and better use of light.
A frameless screen only looks effortless when the renovation behind it has been organised properly.
From a builder's point of view, the screen isn't the hero by itself. It's the finishing element that reveals whether the preceding work was done with care. If the walls are out, the falls are poor, the niche projects too far, or the waterproofing has been handled badly, frameless glass won't hide any of it. It will expose it.
That's why registered builders often push the discussion earlier than homeowners expect. The right time to decide on a frameless shower screen in Melbourne is during layout and waterproofing planning, not after the tiler has packed up.
What Exactly Is a Frameless Shower Screen
It's not just glass without a frame
A frameless shower screen is a shower enclosure made without the perimeter metal frame you see in older or more budget-driven systems. The structure comes from the glass itself, along with hinges, brackets, clamps, channels, or other discreet fixings.
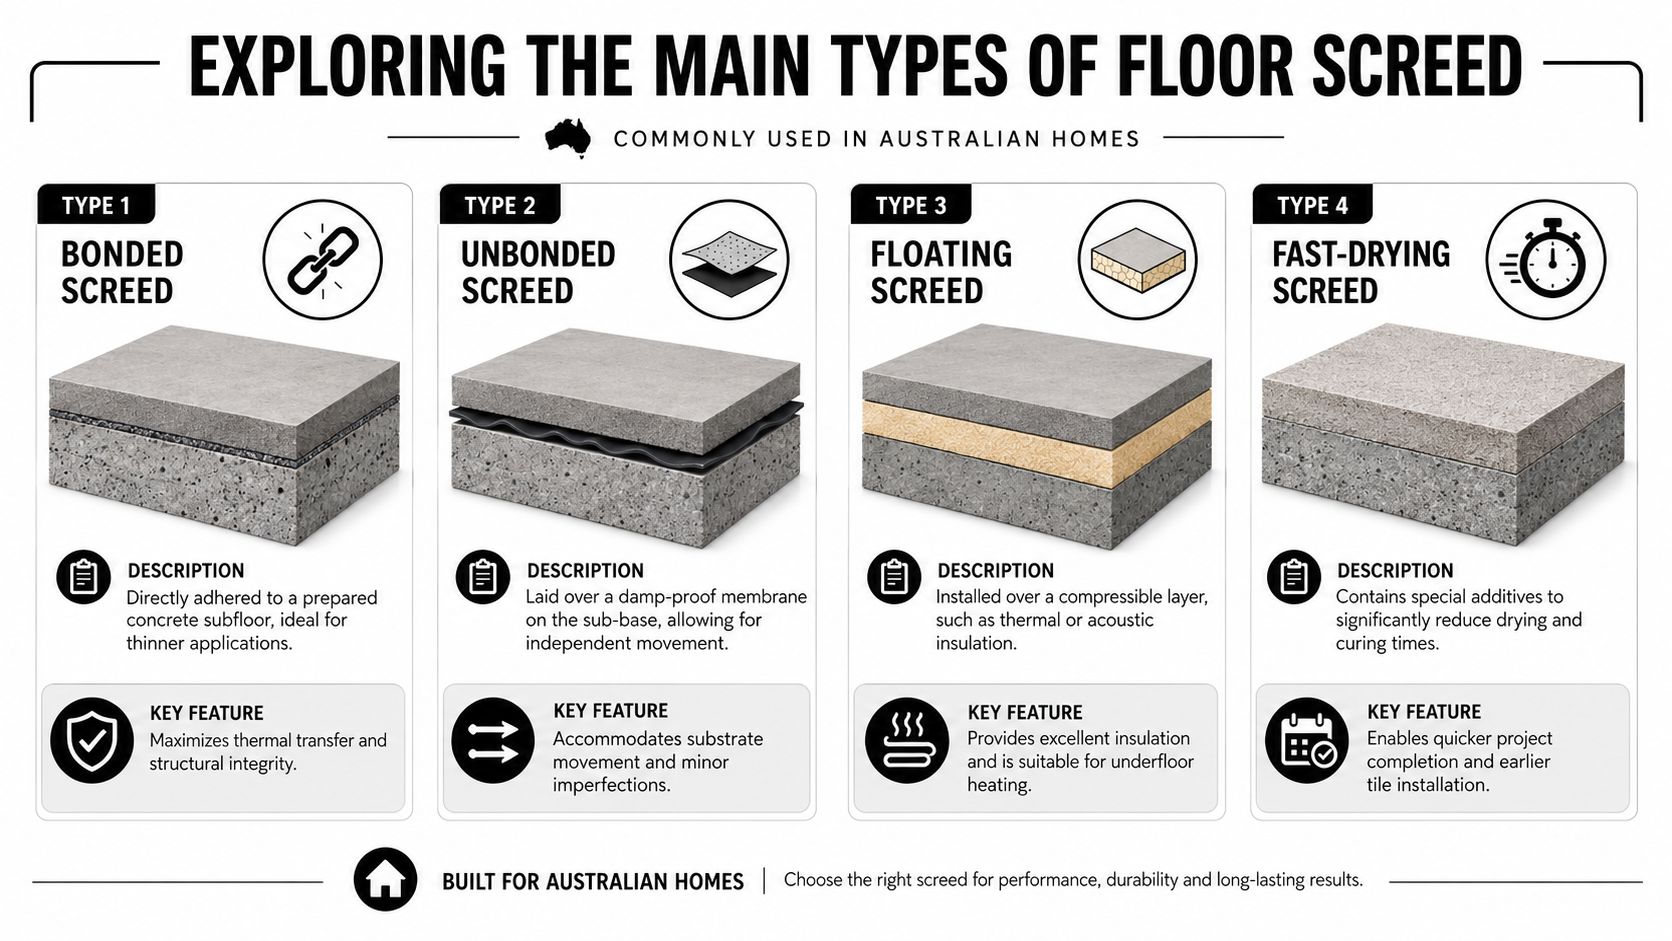
In Australia, frameless shower screens are generally built with 10 mm toughened safety glass and must comply with AS 2208, with industry guidance also noting a common finished height of about 2100 mm for local supply and installation norms, including Melbourne bathroom renovations, as outlined in this guidance on frameless shower screen safety. That's a practical point, not just a specification. The glass has to do the work that a frame would otherwise help with.
This is why homeowners often notice frameless systems feel heavier, cleaner, and more premium at the same time. The edges are polished, the hardware is more deliberate, and every alignment line matters because there's nowhere to hide mistakes.
Shower Screen Types Compared
| Feature | Frameless | Semi-Frameless | Framed |
|---|---|---|---|
| Appearance | Minimal, open, premium | Lighter than fully framed, but still defined by metal lines | Most visually enclosed |
| Structure | Thick toughened safety glass with discreet fixings | Mixed support from glass and partial framing | Frame carries much of the structure |
| Water containment | Good when well designed, but more sensitive to layout and sealing details | Often easier to manage in tighter or splash-prone layouts | Usually the most forgiving for sealing |
| Cleaning | Fewer frame edges to collect grime | Moderate cleaning effort | More frame lines and corners to maintain |
| Cost position | Usually the premium option | Mid-range | Usually the most budget-oriented |
| Best fit | Design-led renovations with solid wet-area planning | Good balance of looks and practicality | Utility-first bathrooms and tighter budgets |
Where frameless works well and where it doesn't
Frameless works well when the bathroom layout supports it. That usually means sensible shower orientation, enough room for door swing if hinged, good falls to the waste, and clean set-out around tiles, hob lines, or recesses.
It's also a strong option when the renovation is aiming for visual simplicity. If you've invested in rectified porcelain, stone-look slabs, or a custom vanity, a framed screen can interrupt the result. Frameless lets those finishes read properly.
There are trade-offs though.
- Water control matters more: Frameless systems rely on layout, seals, clearances, and installation accuracy. They aren't as forgiving as framed units in difficult splash zones.
- Tolerance is tighter: If walls are out of square or the floor isn't true, those issues have to be managed before fabrication.
- Upfront cost is higher: You're paying for thicker glass, premium hardware, custom measurement, and more exact installation.
- Not every room suits a hinged door: In narrow recesses, conflict points with vanities, toilets, or towel rails can make the design awkward fast.
A good renovation team doesn't push frameless glass into every bathroom. They use it where it improves the room and where the rest of the build can support it.
Design and Customisation for Your Bathroom
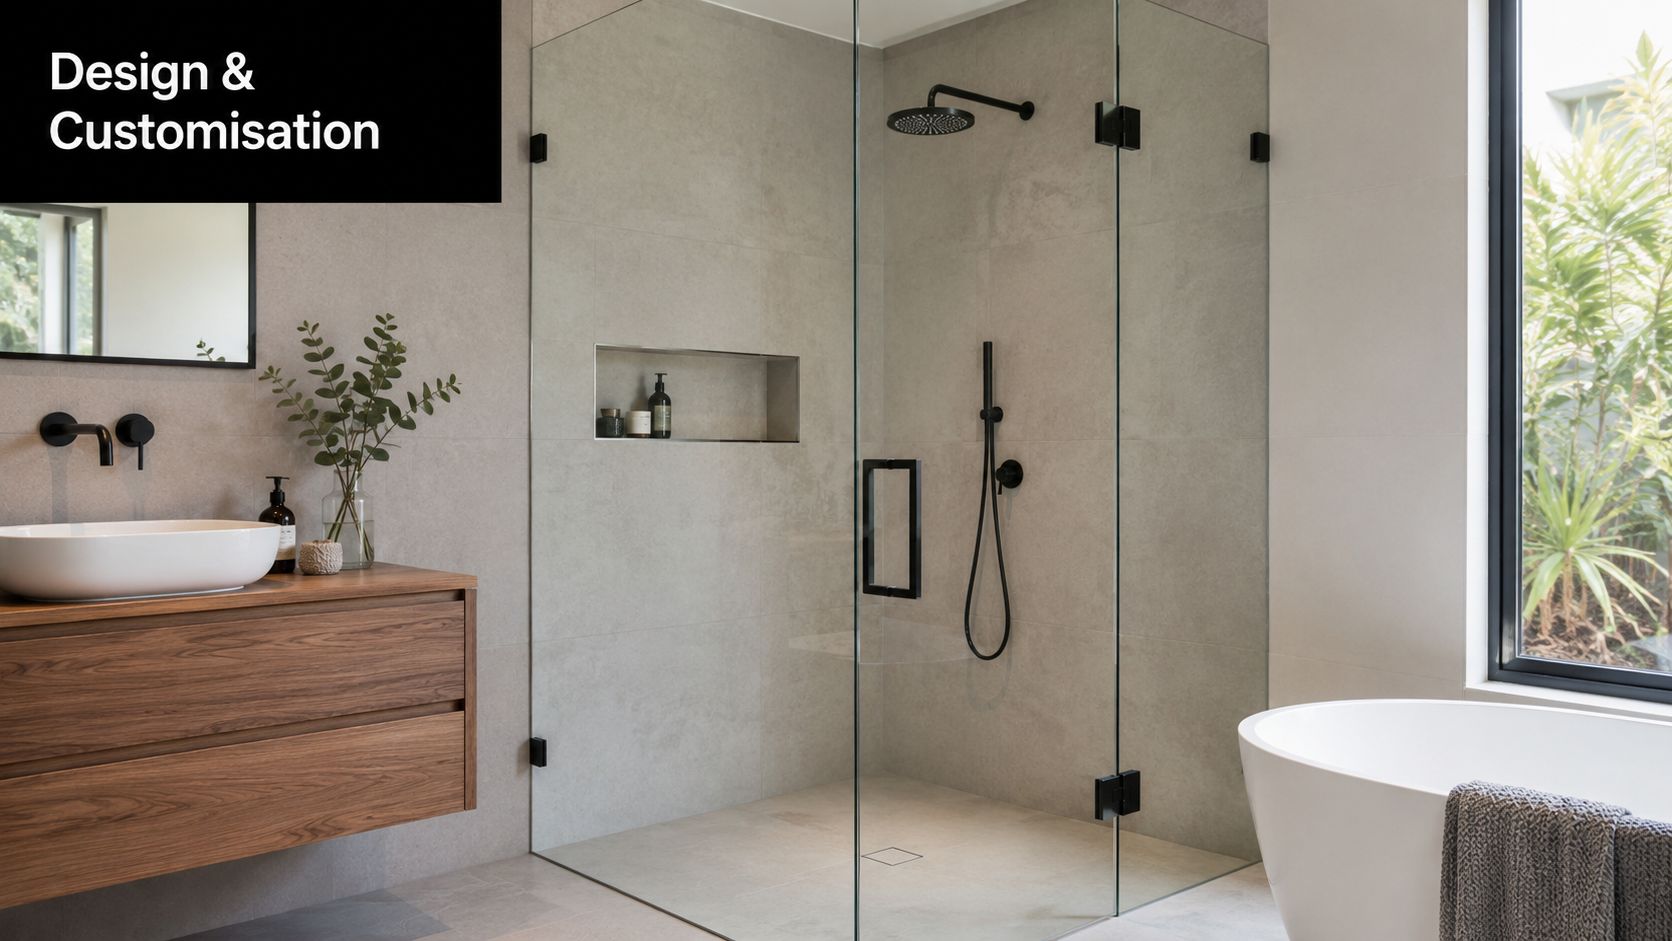
The visual decisions homeowners notice first
Once the layout works, design choices start to matter, allowing a frameless shower screen in Melbourne to be tuned to the rest of the renovation rather than dropped in as a standard item.
The main variables usually come down to glass appearance, hardware finish, and door operation. Clear glass keeps the room feeling larger. Frosted or obscure treatments can add privacy. Tinted glass can work well in darker, moodier bathrooms, but it needs to be balanced carefully with the tile colour and available light.
Hardware changes the character quickly. Chrome stays neutral. Matte black creates stronger outlines. Brushed brass or warm metallics can tie the screen into tapware, cabinet handles, and mirror trims if the rest of the palette has been resolved properly.
A few common configurations include:
- Fixed panel only: Good for open walk-in layouts where splash can be controlled by room planning.
- Hinged door and panel: Often chosen when full enclosure and easier heat retention matter.
- Sliding arrangement: Useful where swing space is limited.
- Return panel setup: Helps when the shower needs more controlled containment from two sides.
Practical rule: Choose the door style after the room has been measured, not before.
The structural decisions that sit behind the look
Not every design idea is buildable in the exact way it's sketched. Technical guidance from the Australian Glass and Window Association notes that the maximum safe width of a fixed frameless shower panel depends on glass thickness, which means sizing is a structural decision affecting door swing stability, hinge loading, and deflection control, not just an aesthetic one, as explained in AGWA's technical note on shower screens.
That's why a good builder or screen specialist will sometimes reshape the design slightly. They may reduce a door width, add a return panel, alter hinge placement, or recommend a different opening method. Those decisions protect long-term alignment and reduce stress on the hardware.
In practice, the best-looking result is usually the one that respects those constraints early. Trying to force a wide dramatic panel into a room that doesn't support it often creates a screen that looks elegant on day one and troublesome later.
Why Professional Installation Is Non-Negotiable
A shower screen sits on top of critical wet-area work
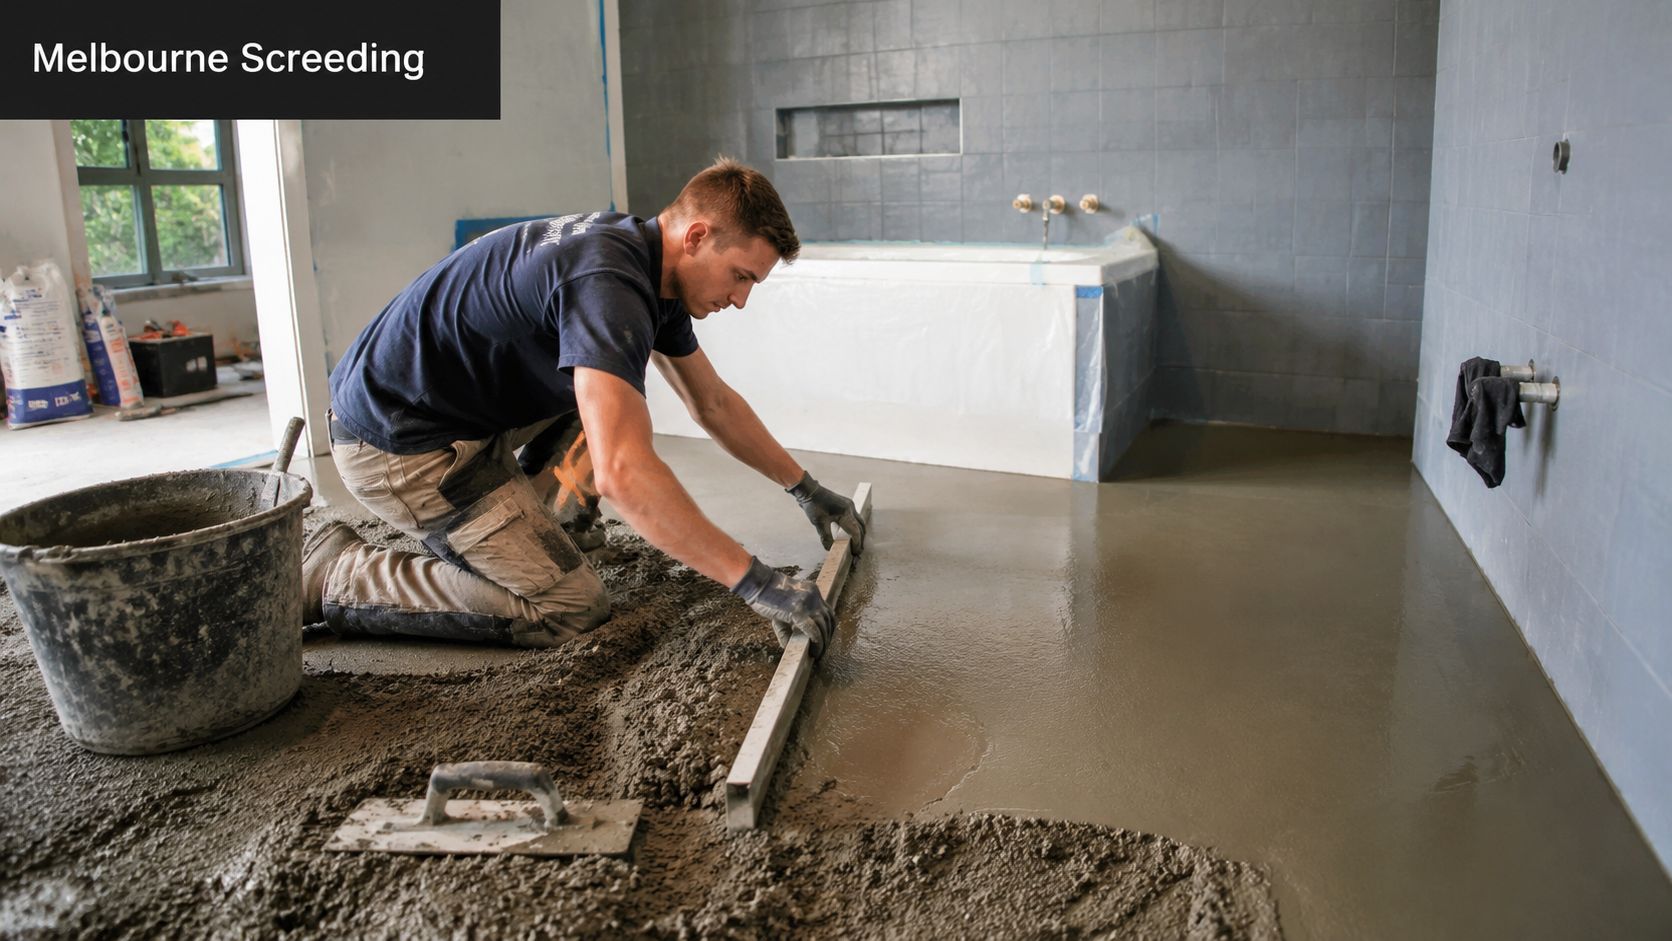
Homeowners often think of shower screen installation as the last easy step. In reality, it lands on top of the most failure-sensitive part of the bathroom. By the time the glass arrives, the waterproofing, falls, tile build-up, wall straightness, and fixing locations have already determined whether the result will perform well.
That's why professional installation matters. The screen has to be fitted in a way that works with the wet-area system, not against it. Poor drilling locations, bad sealant practice, incorrect clearances, and sloppy set-out can all create problems that don't show up on handover day.
Australian guidance on shower screens points to an important issue that sales-led content often misses. Waterproofing, leak risk, and compliance trade-offs should drive the product choice in many bathrooms, especially in high-use rentals or showers with existing defects, where substrate quality and installation method can matter more than aesthetics, as discussed in this shower screen and wet-area guidance.
If you're trying to understand the wet-area side before choosing glass, it helps to review how bathroom waterproofing in Melbourne fits into the renovation sequence.
What a proper installation process looks like
A professional process should be calm, methodical, and measured twice before anything is fabricated or fixed.

Key steps usually include:
- Final measure after finishes are complete: Frameless glass should be measured from actual finished surfaces, not drawings alone.
- Assessment of tile lines and substrate condition: The installer needs to know where fixings can go and what sits behind the tile.
- Fabrication to the measured opening: Out-of-square conditions and required tolerances are built into the glass and hardware plan.
- Controlled installation on site: Packing, levelling, hinge adjustment, alignment, and sealing all need patience.
- Operational check: The door should swing correctly, gaps should be consistent, and the water path should make sense.
Where a registered builder is managing the bathroom renovation, that coordination is easier because the screeder, waterproofer, tiler, and screen installer aren't working in isolation. Melbourne Tiling Services P/L is one example of a company that handles bathroom renovations, waterproofing, tiling, and frameless shower screen installation under the one project scope.
Cheap installs usually fail in familiar ways
The same defects keep appearing.
- Misaligned doors: Usually caused by bad measure-up, rushed hinge positioning, or movement in weak fixing zones.
- Persistent leaks: Often linked to poor falls, wrong panel layout, or unrealistic expectations about what an open frameless design can contain.
- Cracked tiles around fixings: A sign the installer treated the job like general hardware fitting instead of wet-area work.
- Premature hardware issues: Loose hinges, dragging doors, and seal failures often come back to the original install quality.
If the installer never asks about waterproofing, substrate, or wall straightness, they're only looking at the glass, not the bathroom.
That's the difference between a product install and a renovation-standard install. In a proper bathroom renovation, the frameless screen is fitted as part of a system.
Budgeting for Your Frameless Shower Screen in Melbourne
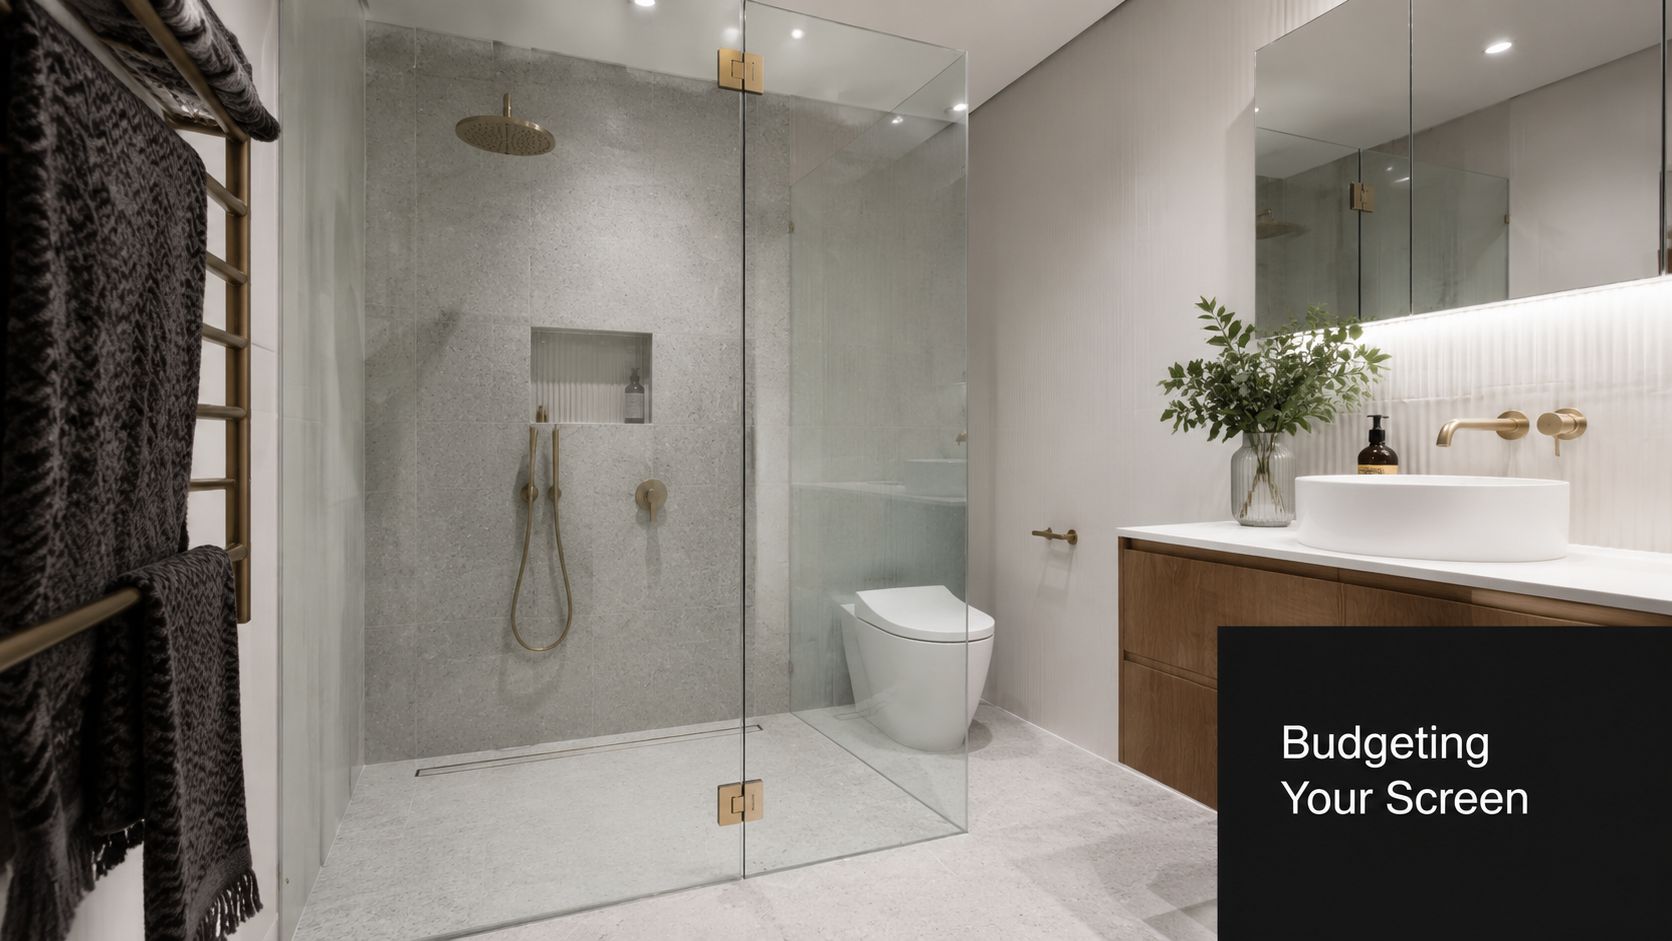
What you're actually paying for
A frameless shower screen quote usually has three moving parts. The glass, the hardware, and the labour. Homeowners often compare only the bottom-line number, but that misses where quality differences sit.
For the labour side alone, Melbourne's market is active. Airtasker lists 90 local shower screen installation services in Melbourne, and its service page shows an average installer cost of $150–$350, while also noting common screen dimensions of 900 mm to 1500 mm wide, which gives a useful benchmark for installation only, not a full premium frameless package, as shown on Airtasker's Melbourne shower screen installation page.
The rest of the quote depends on what's being supplied and how custom the job is. If you want a clearer breakdown of labour and scope, this guide to shower screen installation cost is a practical place to start.
What pushes the quote up
Not all frameless screens are equal to fabricate or install. Some bathrooms are straightforward. Others need custom work because the room itself is difficult.
Common quote drivers include:
- Custom sizing: Non-standard openings, returns, and recesses usually need exact fabrication.
- Complex glass processing: Cut-outs around fixtures, nib walls, or unusual details add work.
- Premium hardware selections: Hinge finish, handle style, and mounting method all affect cost position.
- Access and handling: Carrying heavy glass through tight internal spaces is slower and riskier than a clear run.
- Layout complications: Older bathrooms often introduce tolerance issues that require more planning and fitting time.
A cheap quote can still be the expensive option if it leaves out site complexity, proper adjustment, or coordination with the bathroom renovation team. Good quotes are usually specific. They tell you what's included, what assumptions have been made, and what could change if site conditions differ from the original measure.
How to Choose a Trusted Melbourne Installer or Builder

Questions worth asking before you sign
The product matters, but the person fitting it matters just as much. If the shower screen is part of a larger bathroom renovation, a registered builder usually gives you better accountability because one party is responsible for how the tiling, waterproofing, carpentry, and glazing decisions meet on site.
Ask direct questions. Good operators won't dodge them.
- Who is responsible for the final measure-up: If no one owns this clearly, errors get blamed across trades.
- How do you handle out-of-square walls: The answer should involve actual tolerance planning, not “we'll make it work”.
- What is included in the install scope: You want clarity on hardware, seals, drilling, adjustment, and final fit.
- How is waterproofing protected during installation: This is one of the most important questions in the room.
- Who coordinates defects if there's a problem later: Multiple subcontractors can create a blame loop if nobody is leading the renovation.
The safest choice is usually the contractor who talks most clearly about risk, not the one who talks most about style.
Older Melbourne homes need better planning
The value of experience is clear. Guidance aimed at Melbourne homeowners points to a real gap in most consumer content. Fit, tolerance, and awkward-layout planning are major issues in older bathrooms, especially where custom-made frameless screens may be necessary and hardware adjustment has limits, as discussed in this Melbourne frameless shower screen planning article.
In practical terms, watch for these red flags:
- Walls that aren't straight: Frameless glass doesn't hide taper or bowing.
- Tight recesses: A hinged door may clash with a vanity, toilet pan, or heated towel rail.
- Protruding services: Pipes, ledges, and trims can complicate both measurement and door path.
- Sloping ceilings or heritage irregularities: These often push the job into custom territory.
If the installer treats every bathroom like a standard square opening, move on. Melbourne housing stock includes plenty of rooms that need custom thinking. A builder who manages bathroom renovations regularly will usually spot the risks before the glass is ordered.
Frequently Asked Questions
Do frameless shower screens leak more
They can if the layout is wrong or the installation is rushed. A frameless design depends heavily on falls, panel placement, door swing, seals, and how the shower is used. In a well-planned bathroom renovation, they perform well. In a poorly planned one, they expose mistakes quickly.
Why is there a small gap around the door
Because the door has to move freely and the hardware needs operating clearance. Frameless systems aren't built like framed boxes. A small gap is normal. The important question is whether the overall design controls water in the right direction.
Can frameless glass work in an older bathroom with uneven walls
Sometimes yes, but not always in the exact style you first imagined. Older homes often need custom measurement, hardware adjustments, or a different door configuration. In some rooms, a fixed panel or semi-frameless option is more practical than a hinged frameless recess door.
What's the best way to keep the glass clean
Use a squeegee regularly and don't let soap residue sit on the glass for long periods. Keep the hardware dry where possible and avoid harsh abrasive cleaners. If hard water marks are already established, don't attack the glass aggressively. Start with the mildest suitable method and protect the surrounding finishes.
Should the shower screen be chosen before waterproofing
Yes, or at least the type and likely layout should be. The screen affects opening size, fixing logic, and water containment strategy. If you're planning the wet area from scratch, it helps to understand how to waterproof a shower properly before the glass is measured.
If you're planning a frameless shower screen as part of a bathroom renovation, Melbourne Tiling Services P/L can help coordinate the full job from waterproofing and tiling through to final screen installation, with registered builders overseeing compliance, finish quality, and long-term performance.


Recent Comments