

You're probably standing in a bathroom that no longer feels worth defending. The tiles look tired, the grout lines are stained, a wall may be slightly out, and every quote you get seems to describe a different job. One tiler talks about square metres. Another talks about waterproofing. A builder talks about the whole bathroom renovation, plumbing, electrical, timelines, and compliance.
That difference matters more than most homeowners realise.
A quality wall tiling job in Melbourne isn't just about sticking tiles to a wall and hoping the room looks sharp when the silicone goes in. It's a chain of decisions. Tile selection, wall preparation, waterproofing, adhesive coverage, cuts around fittings, and who is legally managing the work all affect how the bathroom performs after handover. If one part is weak, the finish may still look good at first, but problems usually show up later as cracked grout, drummy tiles, movement, moisture issues, or outright failure.
For bathroom renovations, the best results come from treating wall tiling as part of a complete building process. That's where registered builders, organised trades, and proper sequencing separate a lasting renovation from a cosmetic patch-up.
Table of Contents
- Your Vision for a Perfect Tiled Wall
- Selecting the Right Wall Tile for Your Melbourne Home
- Beyond the Tiles The Foundation of a Lasting Finish
- What to Expect During Your Wall Tiling Project
- Understanding the Costs of Professional Wall Tiling
- Choosing Your Tiler Why a Registered Builder Matters
- Common Tiling Mistakes Melbourne Homeowners Should Avoid
Your Vision for a Perfect Tiled Wall
Often, the focus begins with the visible part. This typically involves a desire for cleaner lines, brighter walls, better proportions, and a bathroom that feels easier to live with. That's fair. Wall tiles do a lot of the visual heavy lifting in a bathroom. They set the tone of the room long before you notice the vanity, tapware, or shower screen.
In Melbourne homes, that vision often runs into site realities quickly. Older properties can have non-plumb walls, patched substrates, dated linings, or hidden moisture damage. Newer homes bring different issues, usually around rushed construction sequencing or tight tolerances around fixtures. Good wall tiling Melbourne work has to solve both appearance and performance at the same time.
Beauty follows process
A tiled wall that looks crisp usually comes from work you'll never see once the room is finished. The walls need to be clean, flat enough for the tile selected, and properly prepared for wet-area conditions. Set-out matters as much as adhesive. So do cuts around mixers, niches, windows, and trims.
Practical rule: If a contractor talks only about tile style and not about substrate, waterproofing, movement, and coverage, the conversation is incomplete.
That's also why bathroom renovations should never be treated as a single-trade job when the scope is larger. Tiling touches waterproofing, carpentry, plumbing set-outs, shower screen tolerances, and final fit-off. A registered builder looks at how those pieces work together instead of leaving each trade to solve its own corner.
What a lasting project usually gets right
A sound wall tiling project tends to share the same basics:
- Clear tile selection: The tile suits the room, the substrate, and the level of maintenance you're comfortable with.
- Accurate wall preparation: Irregular walls are corrected before tiling starts, not disguised during installation.
- Wet-area compliance: Bathrooms need proper waterproofing and installation methods that respect Australian Standards.
- Tidy sequencing: Plumbing rough-in, linings, waterproofing, tiling, grouting, and final trades happen in the right order.
- Single-point accountability: On full bathroom renovations, someone qualified needs to own the whole process.
A perfect tiled wall isn't luck. It's what happens when design choices are matched by trade discipline.
Selecting the Right Wall Tile for Your Melbourne Home
A tile sample can look perfect under showroom lights and still be the wrong choice for the room. That shows up later, on the wall, when cuts get awkward, edges do not line up cleanly, maintenance becomes a chore, or the installation method has to be forced to suit the product.
Tile selection affects more than style. It changes setting-out, cutting time, trim choices, grout lines, substrate tolerance, and how much risk sits in the build. In a bathroom renovation, a registered builder should be weighing those knock-on effects with the tiler, plumber, waterproofer, and shower screen supplier, not leaving each trade to deal with the result after the tile has already been ordered.
What changes from one material to the next
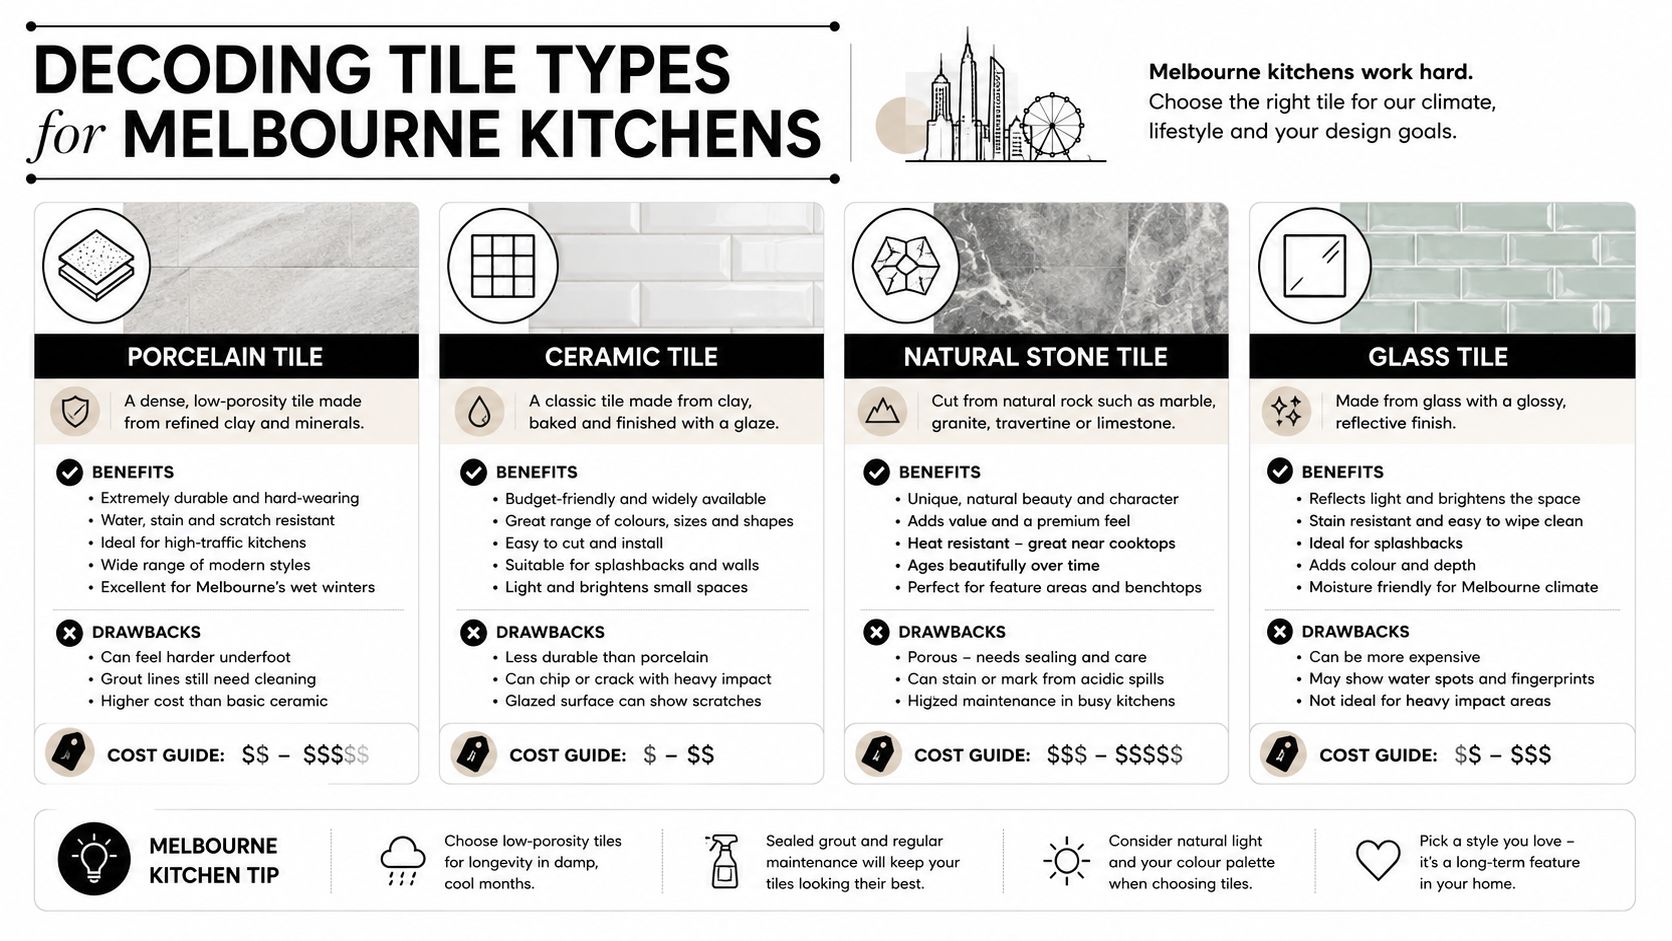
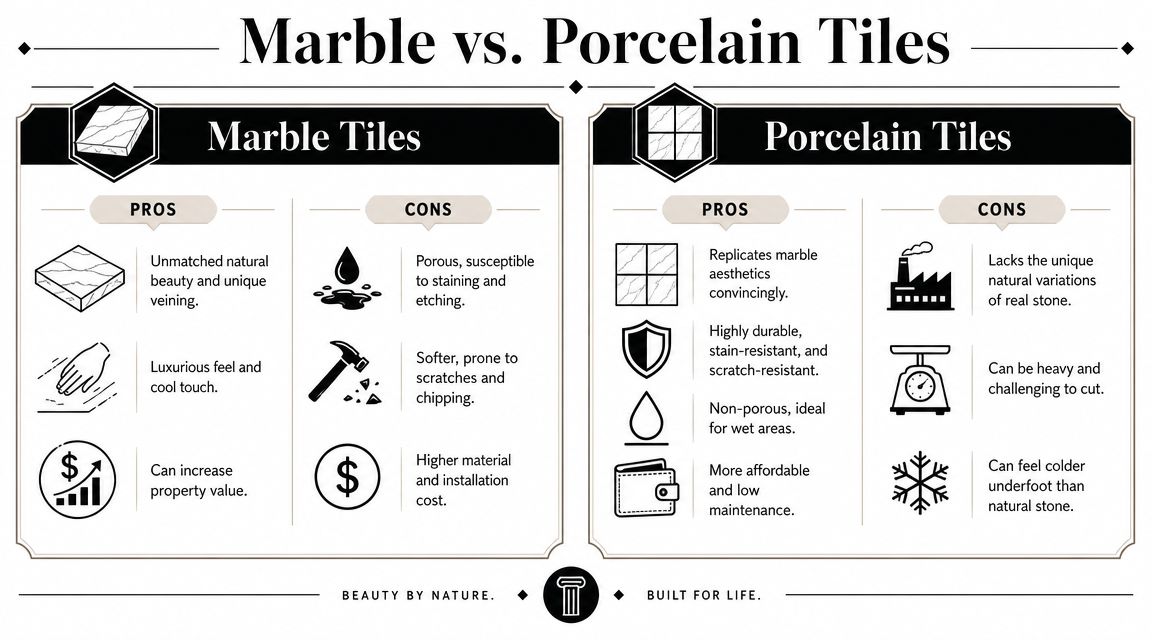
Ceramic is the practical starting point for many Melbourne bathrooms. It is easier to cut than denser products, suits a wide range of wall sizes, and keeps labour under better control on straightforward layouts. If the walls are reasonably true and the design is simple, ceramic often gives good value without making the job harder than it needs to be.
Porcelain is denser, harder, and less forgiving to cut. It gives a sharper look and often suits newer homes and apartment bathrooms where clean lines matter, but it demands better blades, more time on cuts, and tighter planning around penetrations. The finish can be excellent. The labour is rarely the same as a basic ceramic job, even when the room size matches.
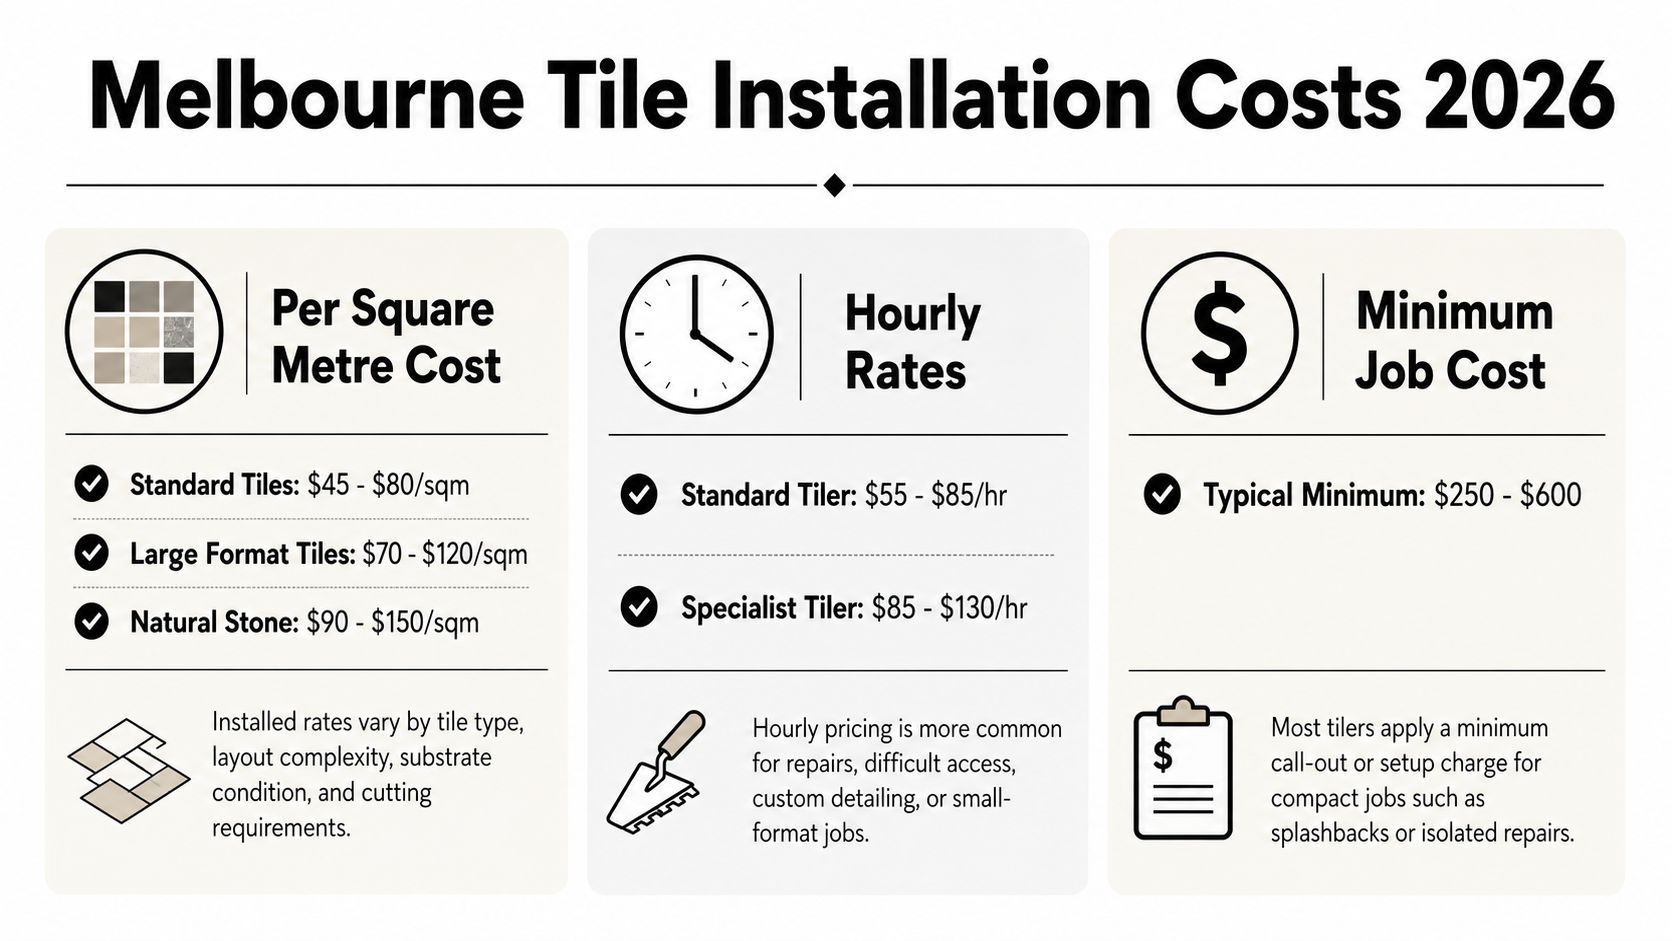
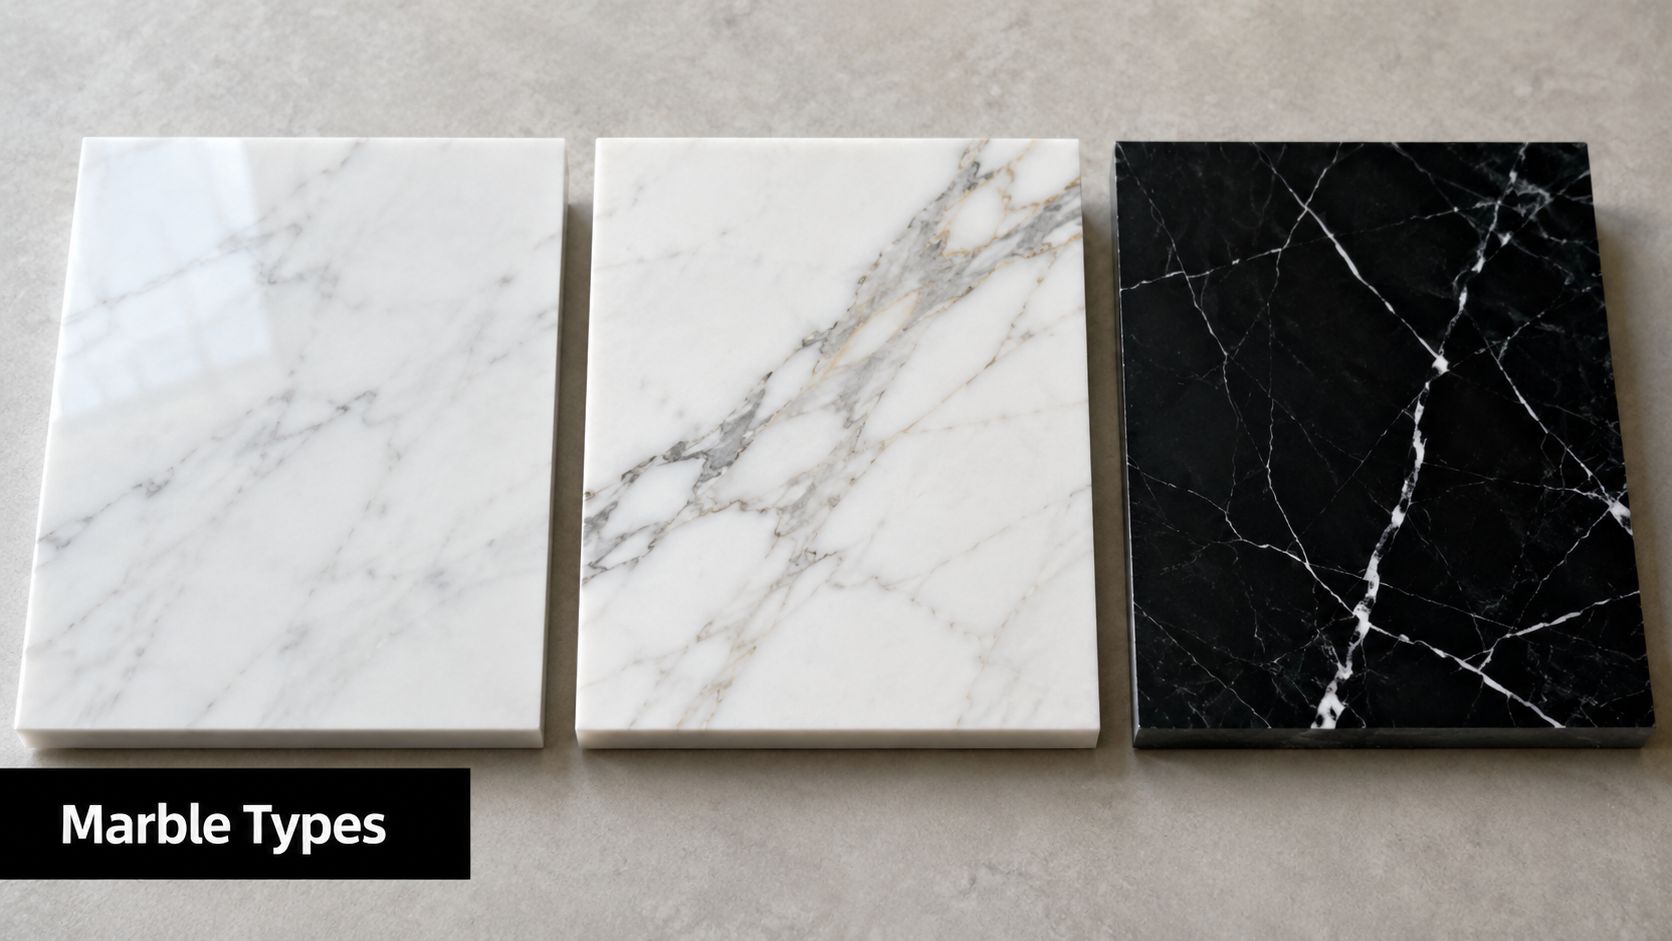
Natural stone, including marble, changes the whole brief. Stone needs careful selection, sealing, handling, and set-out because variation is part of the product. Veining, edge finish, sheet size, and the sequence of each cut all matter. The Australian Tile Council tiling facts guide notes that standard wall tiling labour in Melbourne often sits around $50 to $80 per m² for ceramic or porcelain, while natural stone can range from $100 to $160 per m² because the work is slower and more exacting.
Large-format products reduce grout joints and can make a bathroom feel calmer and larger. They also expose every defect in the wall. In older Melbourne homes, that matters. A substrate that might accept a smaller tile can become a problem with 600 x 1200 tiles, panels, or slab-style products, especially if someone tries to compensate with heavy adhesive dabs or old spot-bonding habits. Homeowners weighing oversized tiles should understand the handling and wall-preparation demands of large-format wall tiles before making a final call.
Wall Tile Material Comparison
| Material | Best For | Durability | Cost (Material & Labour) |
|---|---|---|---|
| Ceramic | Standard bathroom renovations, simple wall layouts, practical budgets | Durable for normal residential use | Labour often falls in the $50 to $80 per m² range in Melbourne, according to the same guide |
| Porcelain | Contemporary bathrooms, cleaner lines, refined finishes | Strong and dependable in wet areas | Labour often falls in the $50 to $80 per m² range in Melbourne, according to the same guide, though cutting complexity can push real project costs higher |
| Natural stone | Premium bathrooms, marble features, period homes, custom work | Performs well when installed and maintained correctly | Labour often falls in the $100 to $160 per m² range in Melbourne, according to the same guide |
Matching the tile to the house
The right tile depends on the room, the age of the home, and how the bathroom will be used.
- For apartments: Porcelain and large-format tiles often suit the cleaner geometry and tighter visual style.
- For period homes: Stone, textured ceramics, or smaller formats can sit more naturally with older proportions and detailing.
- For family bathrooms: Easy-clean finishes, sensible grout choices, and readily replaceable products matter just as much as appearance.
One more point gets missed too often. The best-looking tile is not always the best renovation choice if the project also involves new plumbing positions, wall straightening, niches, recessed shaving cabinets, or custom shower screens. At that point, it is no longer just a tiling decision. It is part of a full bathroom build, and the tile should be chosen with the whole scope in mind.
A beautiful tile that is wrong for the wall, wrong for the room, or wrong for the budget is still the wrong tile.
The stronger choice balances appearance, installation tolerance, maintenance, and the practicalities of the build.
Beyond the Tiles The Foundation of a Lasting Finish
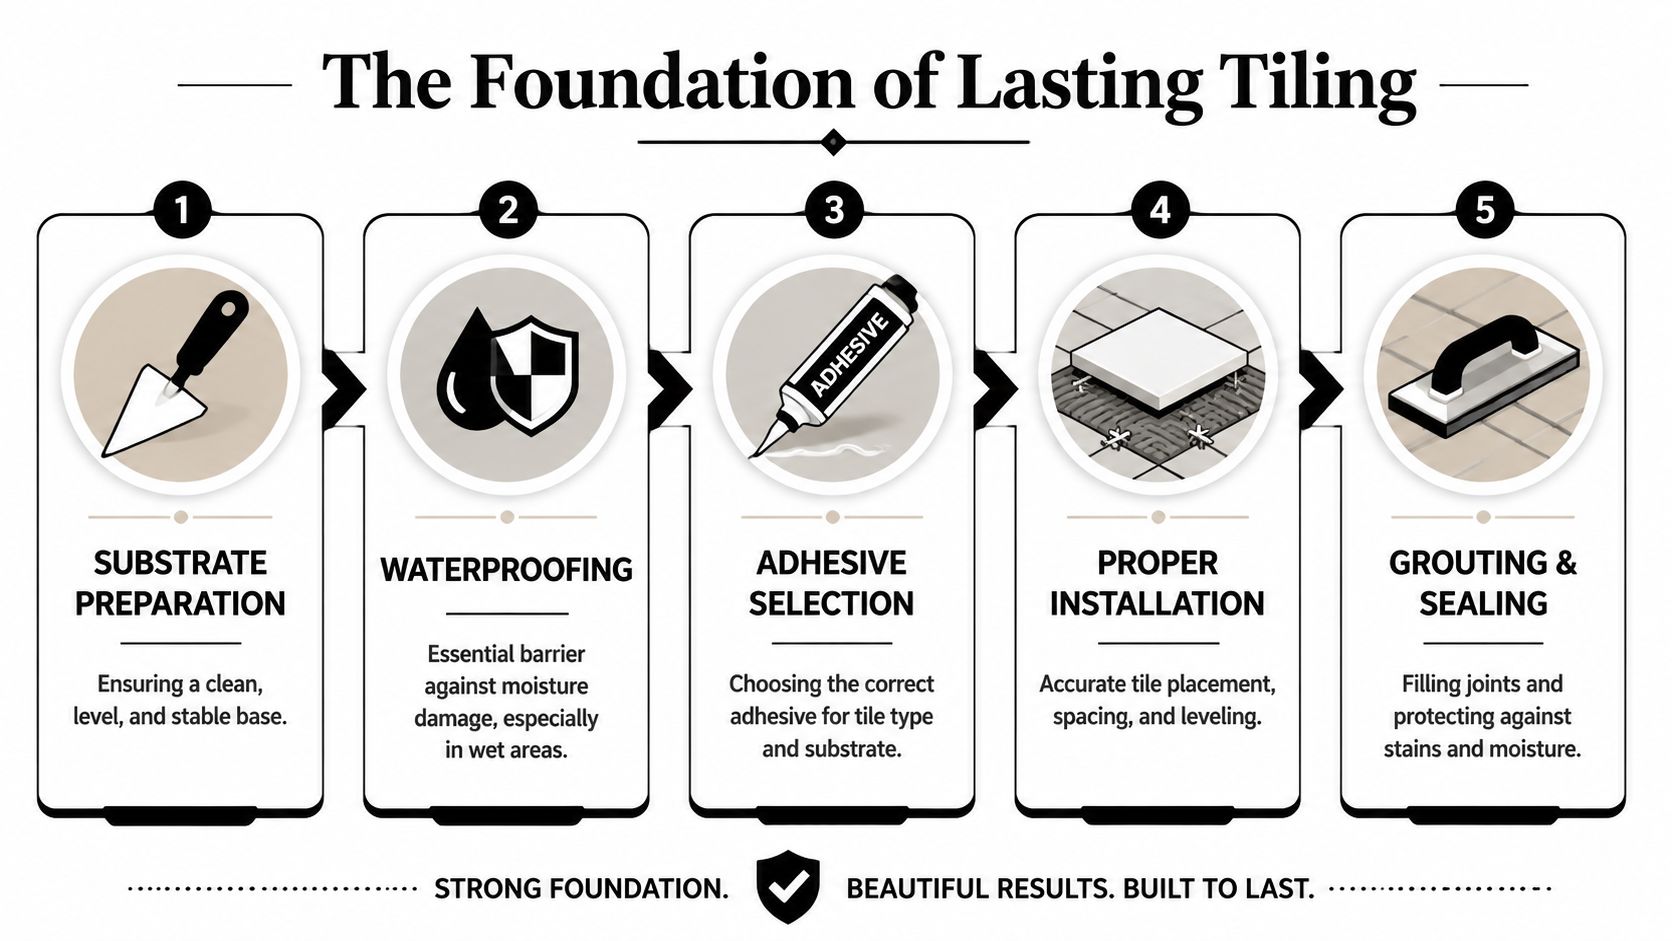
The visible tile layer gets the attention. The hidden work decides whether the bathroom lasts.
In wet areas, wall tiling only performs when the substrate is stable, the walls are properly prepared, and the installation method suits the room. That's why experienced tilers and registered builders spend so much time on surfaces before the first tile is laid.
Preparation decides the result
Melbourne bathrooms often reveal problems once demolition starts. Walls may not be straight. Old plaster can be soft. Previous repairs may have left hollows, bumps, or loose sections. If those issues stay in place, the tile finish has to fight the wall the whole way.
That's where levelling, patching, screeding, and sheet preparation become essential. On older homes in particular, correcting non-plumb walls before tiling is often far more sensible than trying to hide defects with cuts and thicker adhesive. If you want a closer look at how professionals bring irregular walls back into line, this guide to screeding for tiles explains the groundwork.
A sharp tiled wall usually depends on three things before install day:
- The wall is sound. Loose, damp, or unstable linings need attention first.
- The surface is flat enough for the tile chosen. Larger tiles demand tighter tolerances.
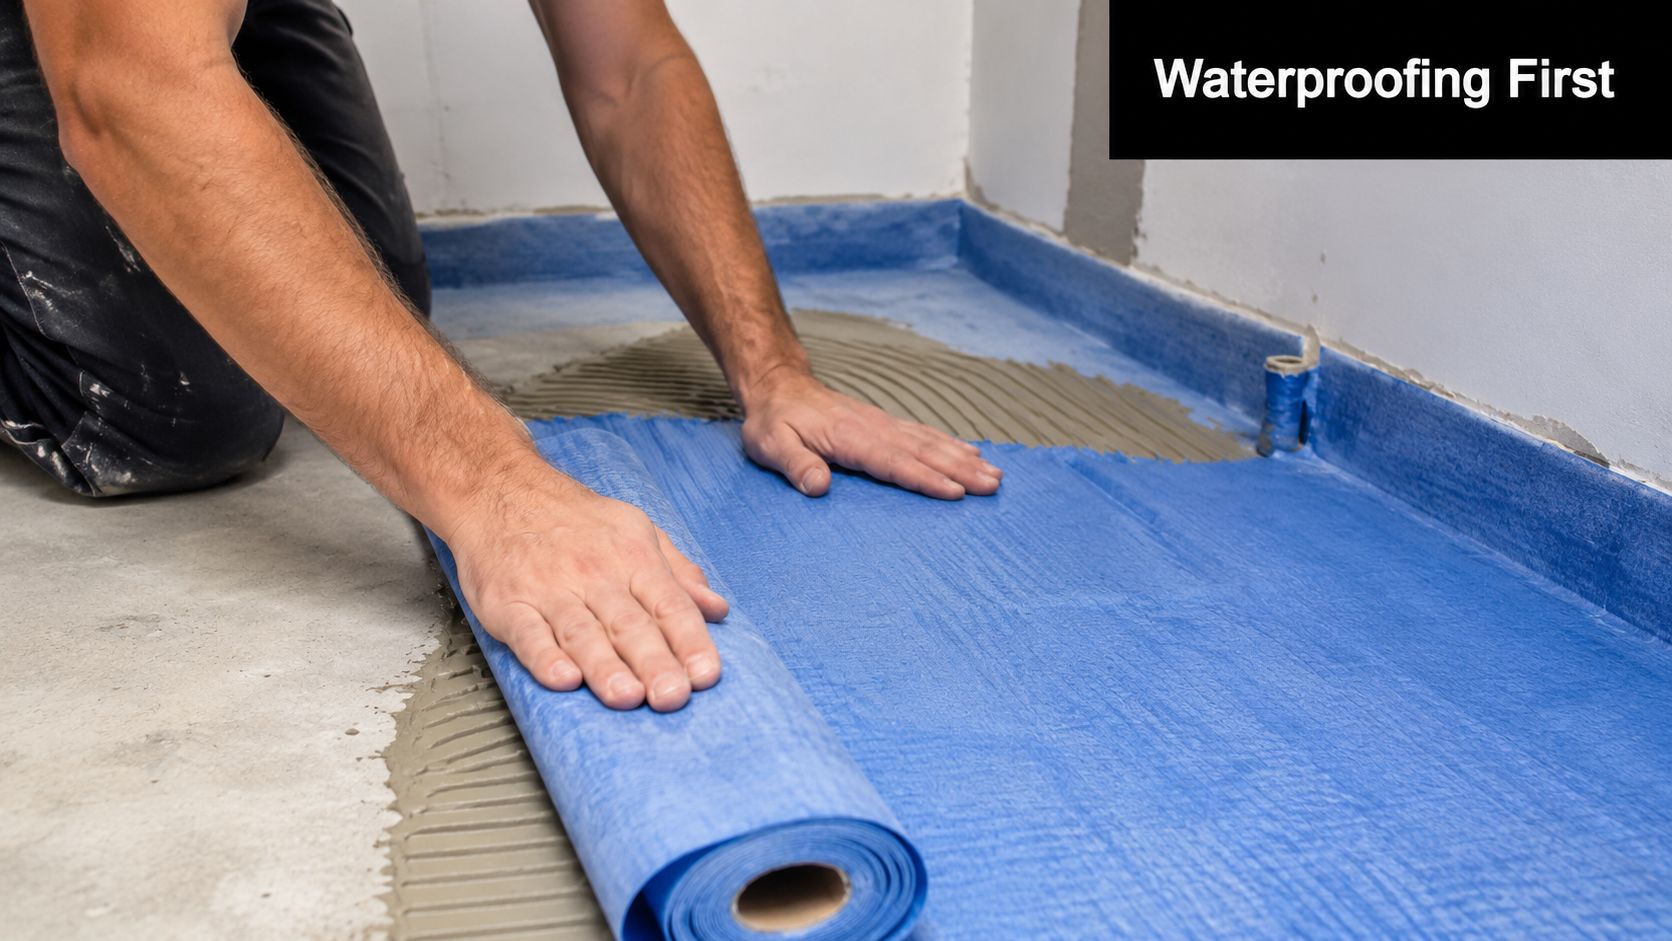
- Waterproofing and tiling are sequenced properly. One rushed step can compromise the next.
Why spot fixing fails
One shortcut causes more trouble than many homeowners realise. Spot fixing, sometimes called spot bonding, uses blobs of adhesive instead of a continuous bed. It can help an installer move quickly over rough walls, but it's the wrong approach in wet areas.
According to the Qualicer paper referencing AS 3958.1 requirements, ceramic wall tiles in Victorian wet areas must be fixed with a continuous adhesive bed, not spot-fixed, to protect long-term waterproofing integrity. That matters in Melbourne bathrooms, where moisture and humidity shifts can expose weak installation methods over time.
Full coverage is not a luxury detail. It's basic trade discipline in a bathroom.
This is also why old, uneven walls shouldn't be “solved” by adding adhesive in random amounts behind the tile. Correct the wall first. Then tile it properly. That approach takes longer, but it gives the wall a fighting chance of staying bonded, square-looking, and serviceable for years.
What to Expect During Your Wall Tiling Project
Most bathroom clients feel better once they know the order of works. Tiling looks neat and controlled at the end, but the project itself moves through noisy, dusty, and highly technical stages before the room settles down.
From first visit to finished wall
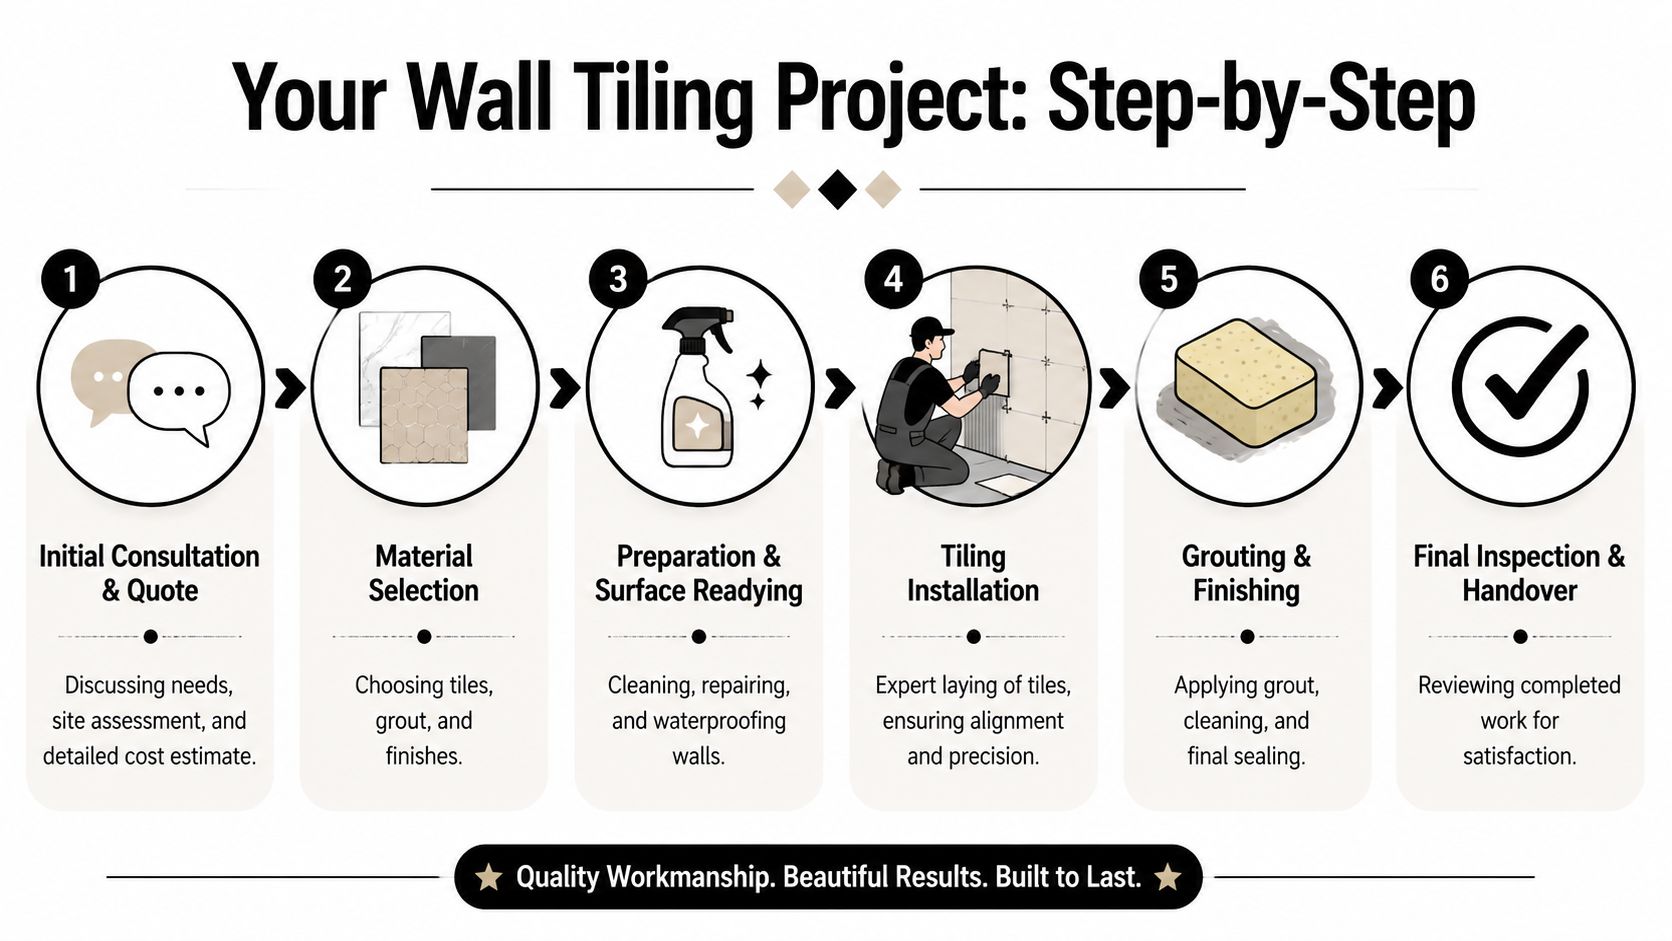
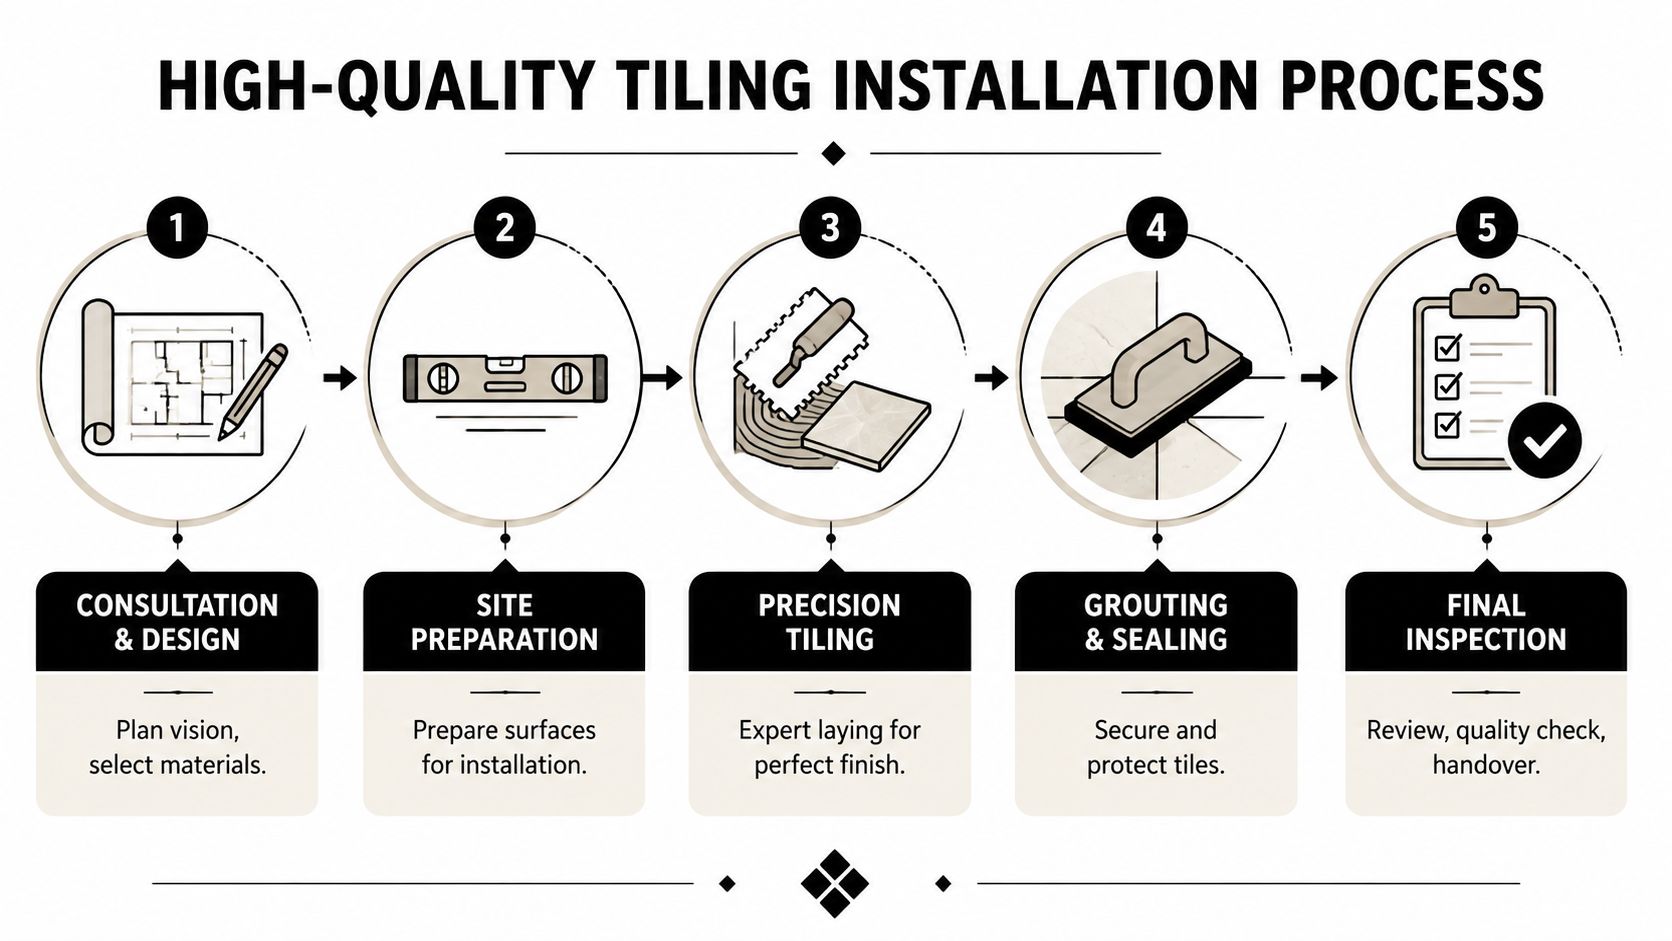
A typical wall tiling project in a bathroom renovation usually starts with a site assessment. The contractor checks wall condition, tile selection, fixture set-outs, access, and any signs of moisture or previous failure. That first visit should also flush out whether the job is simple tiling or a broader bathroom renovation needing builder-led coordination.
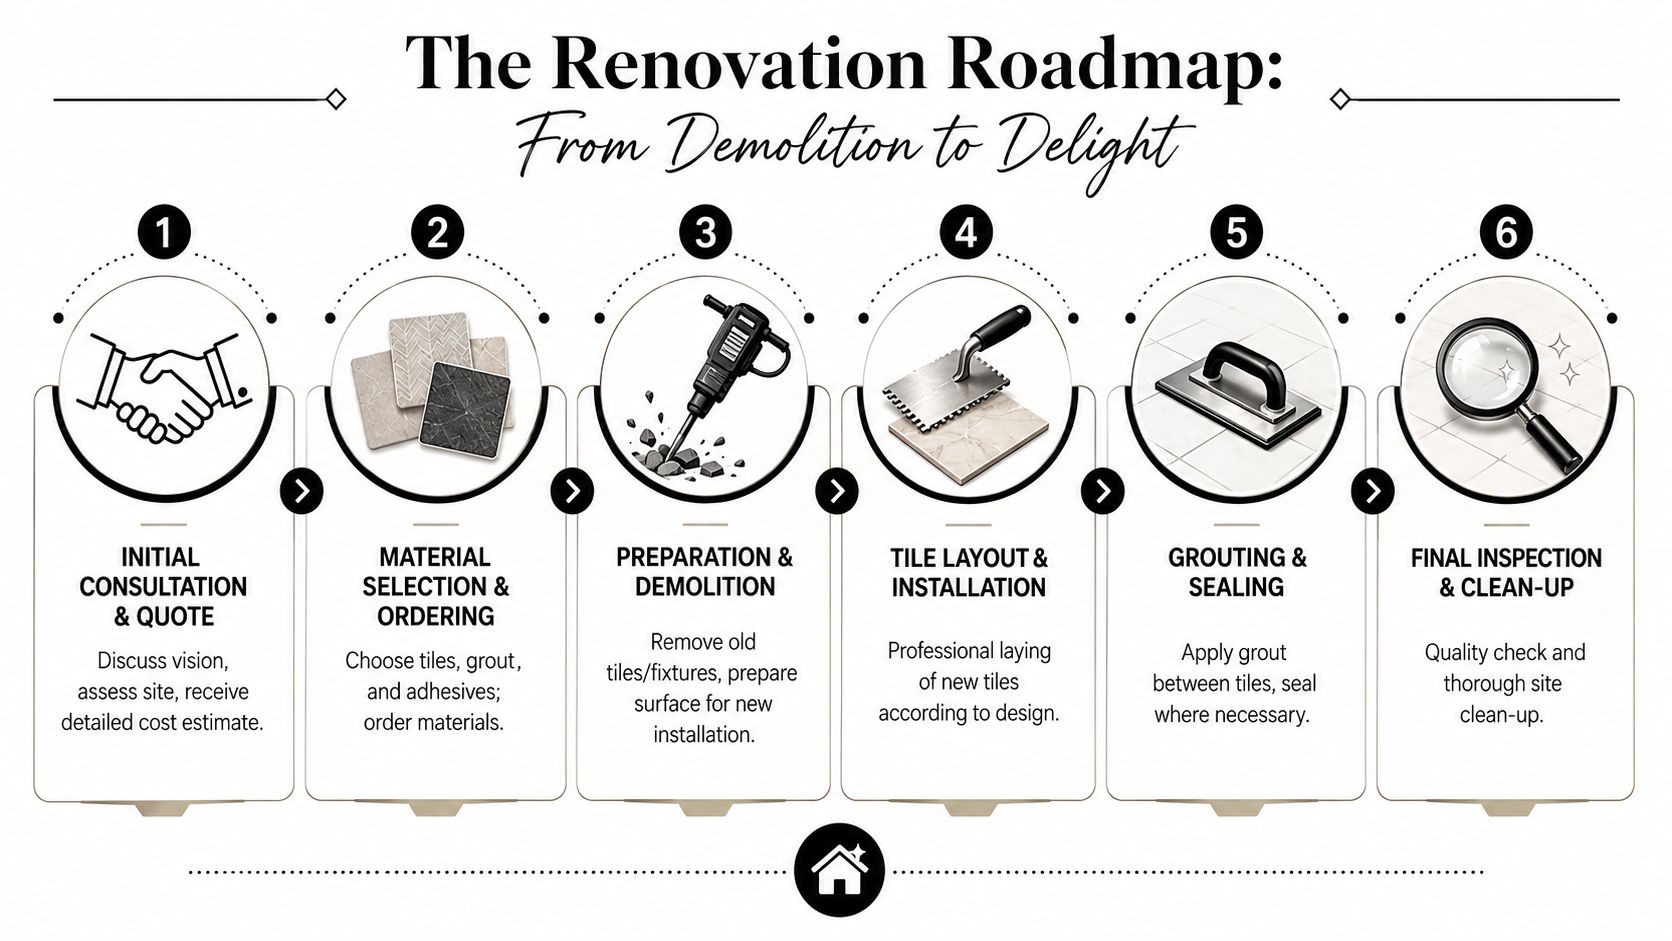
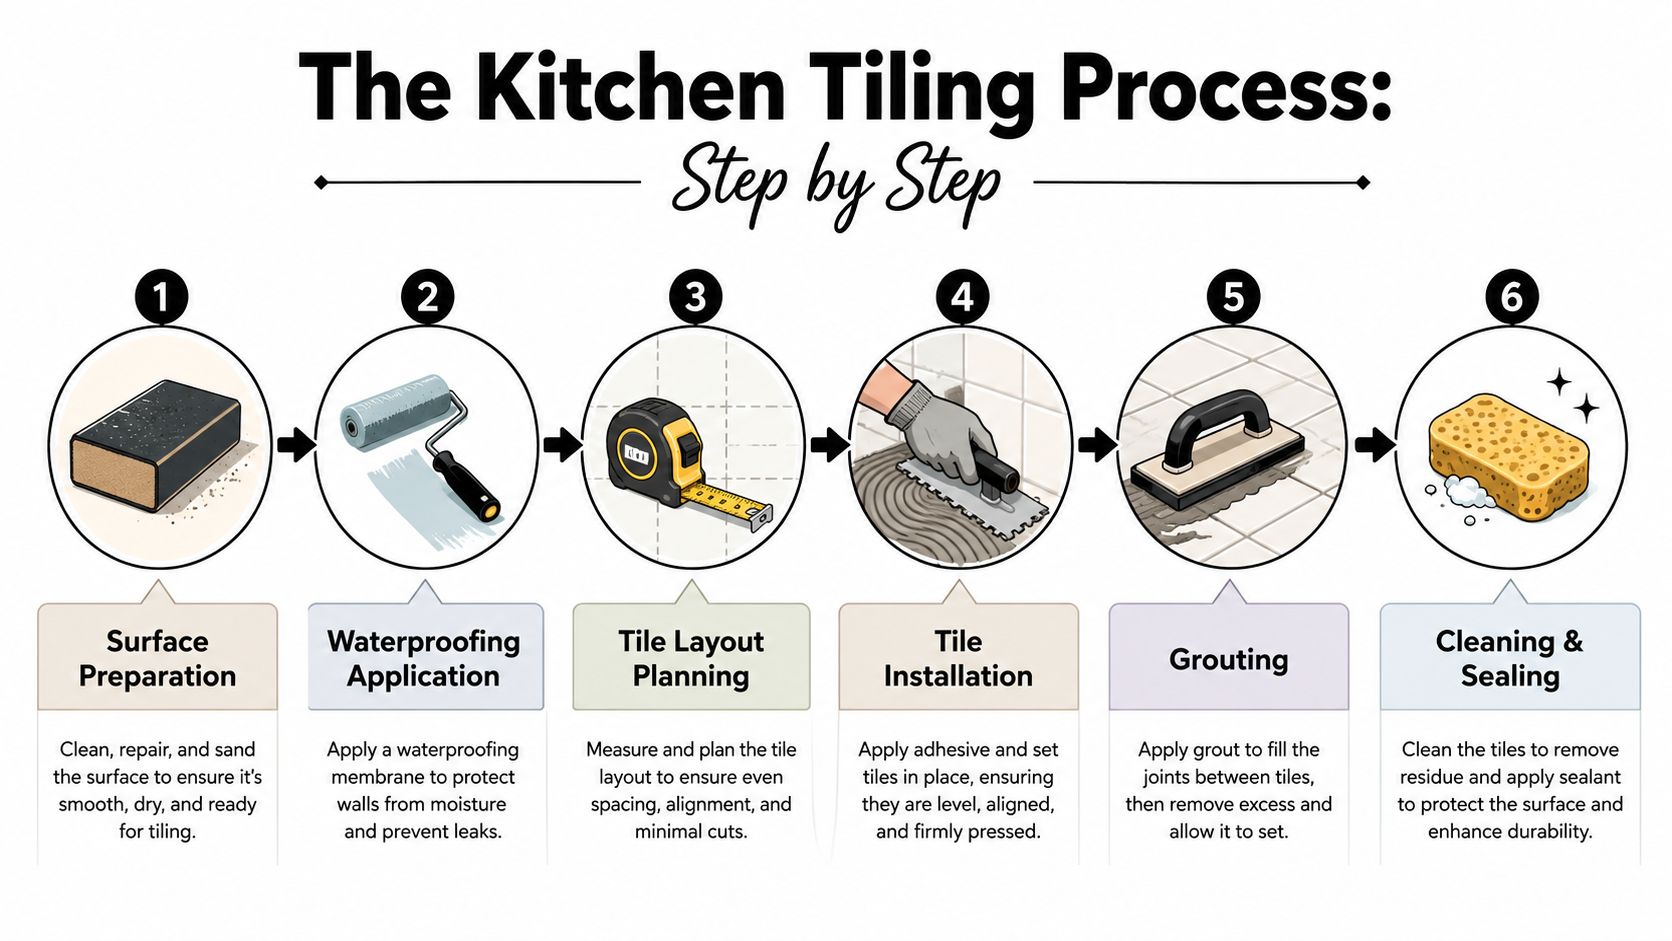
After that, the sequence usually looks like this:
- Consultation and quoting: Scope is defined, tile types are discussed, and hidden risks are identified early.
- Demolition and strip-out: Existing tiles, damaged linings, and any failed substrate are removed.
- Wall correction: Non-plumb or uneven areas are repaired or levelled so the set-out works properly.
- Waterproofing and prep: Wet-area surfaces are readied for tile installation.
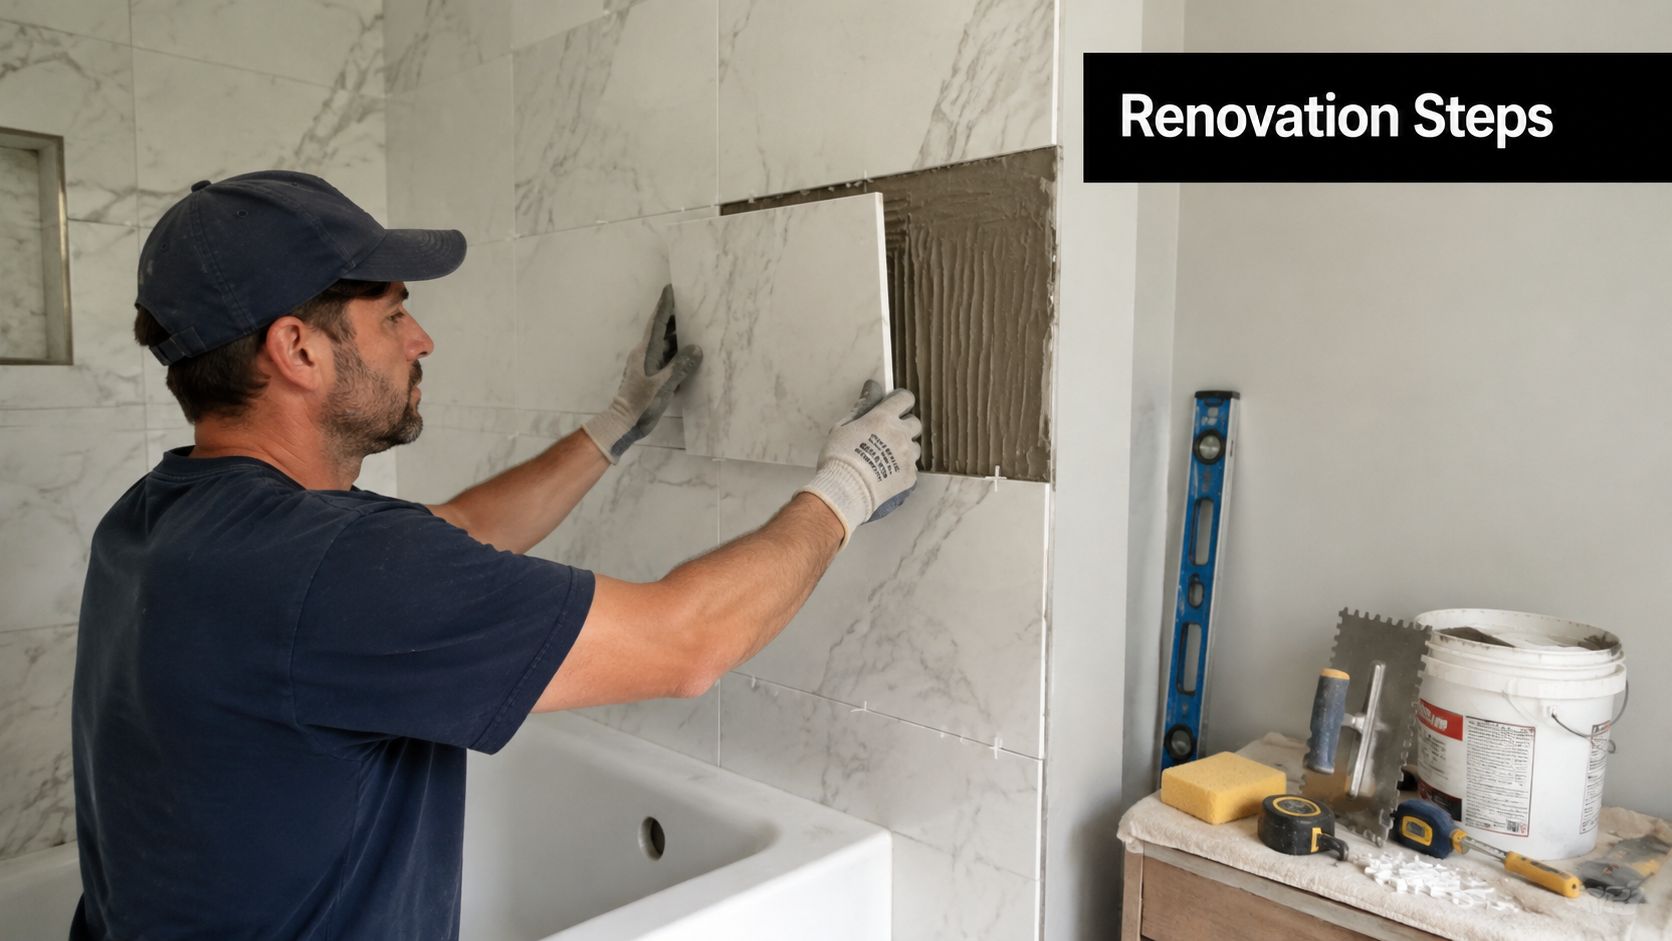
- Tile installation: Set-out lines, cuts, trims, and alignment are managed wall by wall.
- Grouting and finishing: Joints are filled, surfaces are cleaned, and final details are checked at handover.
Clients often focus on the laying day, but the earlier stages are what make the tiling look calm and intentional instead of improvised.
Large format tiles need a tighter process
If you've selected large-format wall tiles, installation becomes more demanding. According to Ardex Australia technical bulletin TB001.010, tiles sized at or above 400mm x 400mm require a minimum of 95% adhesive coverage, achieved through back-buttering, and the total weight must not exceed 32 kg/m² to avoid substrate failure.
That changes what good practice looks like on site. Walls need to be flatter. Adhesive has to be applied without voids. The tile itself is buttered as part of the process. Installers also need to watch weight, handling, and bond quality much more closely than they would on a standard ceramic wall.
When large-format wall tiles fail, they usually expose a preparation or coverage problem, not a style problem.
For homeowners, the useful takeaway is simple. Ask how the wall will be prepared, how coverage will be achieved, and whether the tile selected is suitable for the substrate. A professional should answer that without hesitation.
Understanding the Costs of Professional Wall Tiling
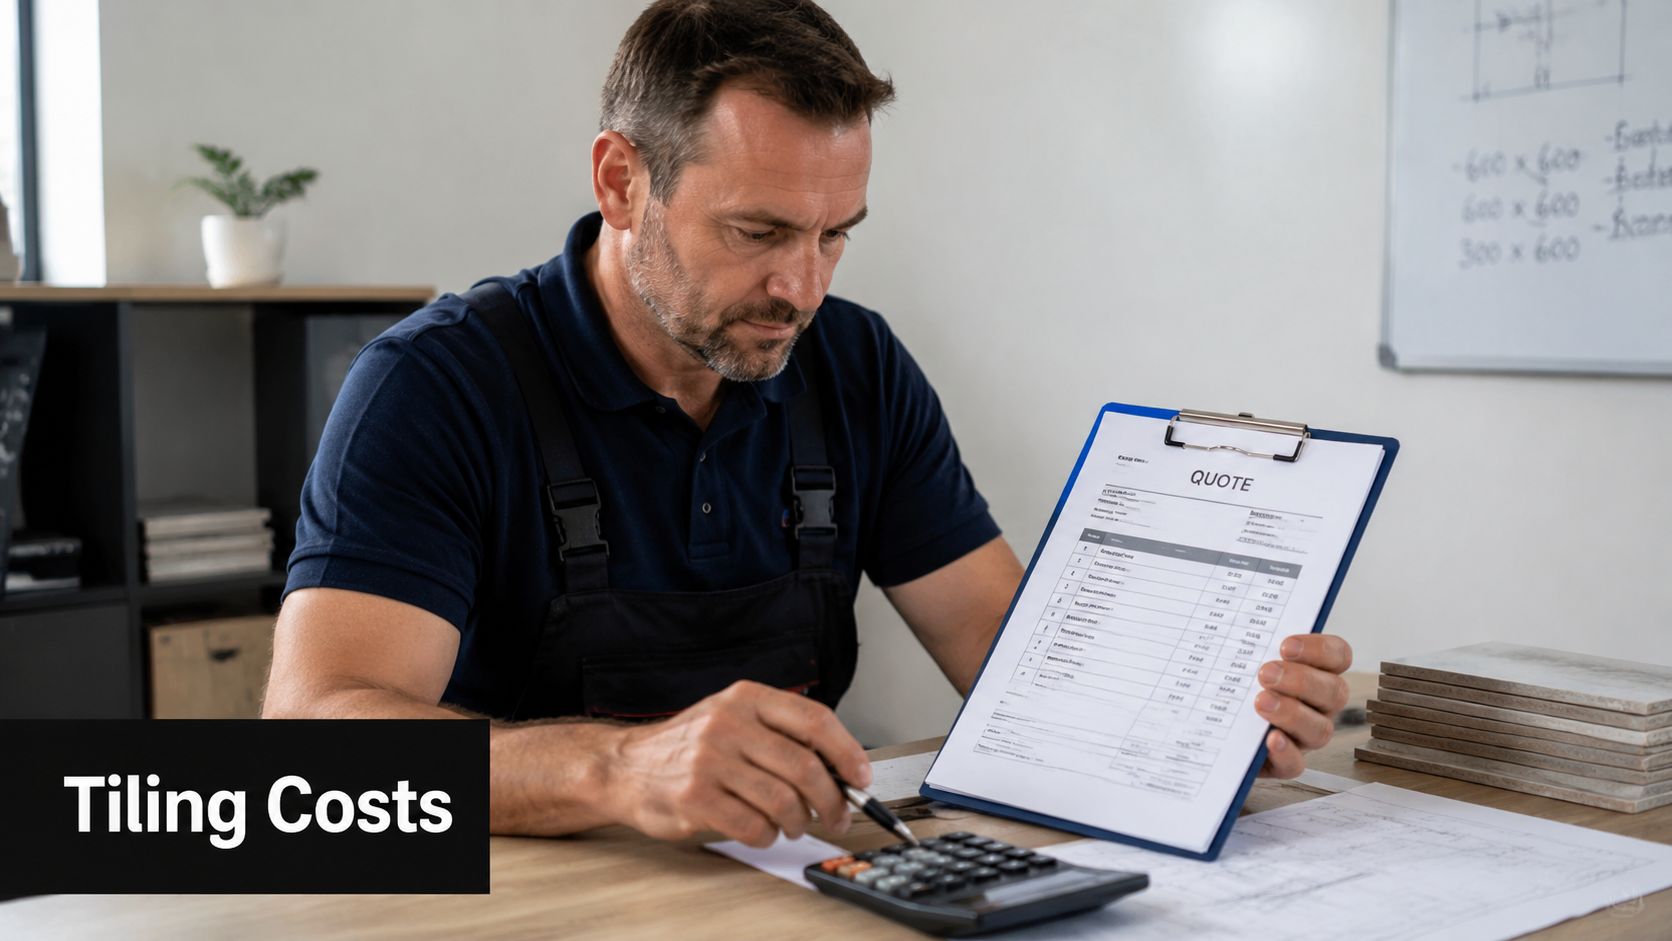
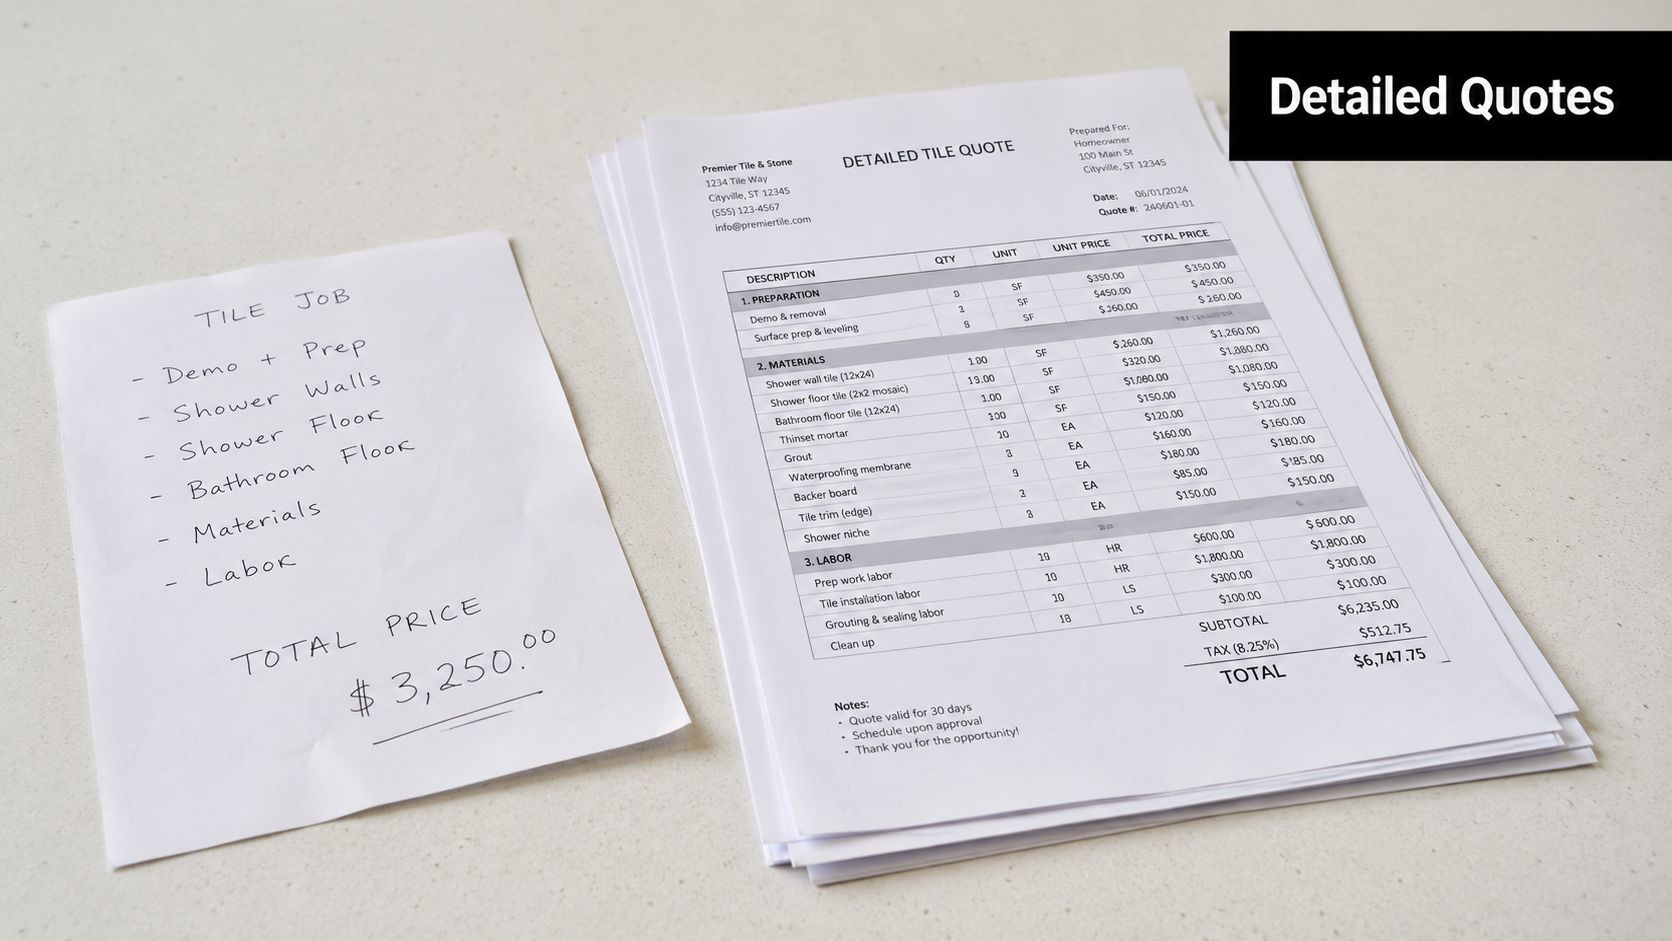
A wall tiling quote can look sharp on paper and still leave you paying more later. I see this in Melbourne bathrooms all the time. One price covers tile fixing only. Another includes demolition, substrate repair, trims, waterproofing coordination, and builder supervision. If you compare totals without checking scope, you are not comparing the same job.
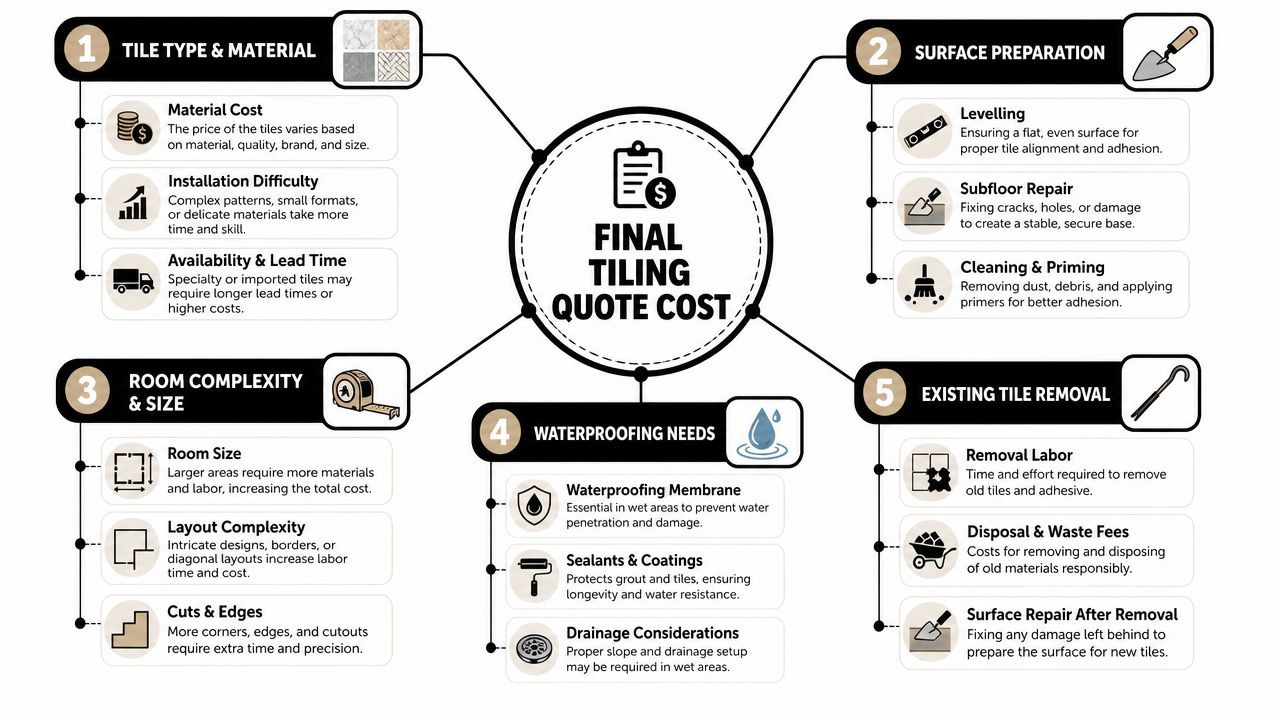
What Your Quote Covers
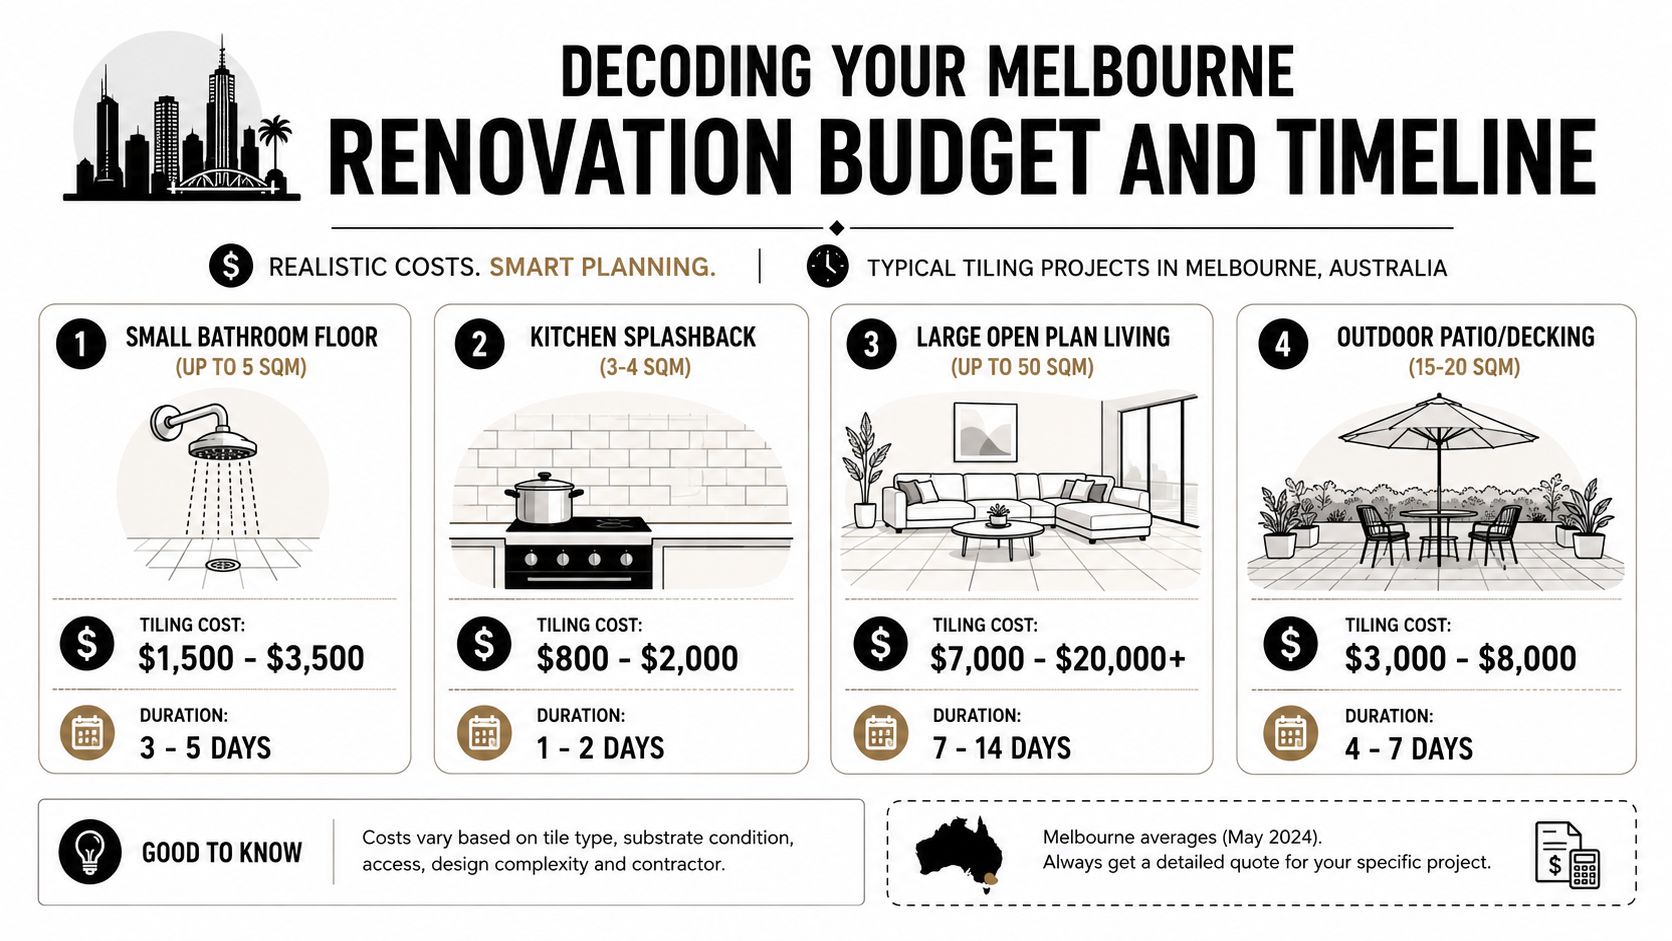
For residential bathroom wall tiling, the price often includes far more than fixing tiles to a wall. According to the IBISWorld overview of Australia's tiling and carpeting services industry, residential bathroom wall tiling projects cost between $1,800 and $4,500 for labour and consumables, and vertical work adds $10 to $30 per m² compared with floor work because wall tiling involves slower setting and more cutting around fittings.
That matches real site conditions. Wall tiling is measured at eye level. Out-of-plumb corners, uneven sheets, poorly centred cuts, and sloppy trim lines stand out immediately. Add tap penetrations, shower mixers, niches, ledges, and mitred external corners, and labour hours climb fast.
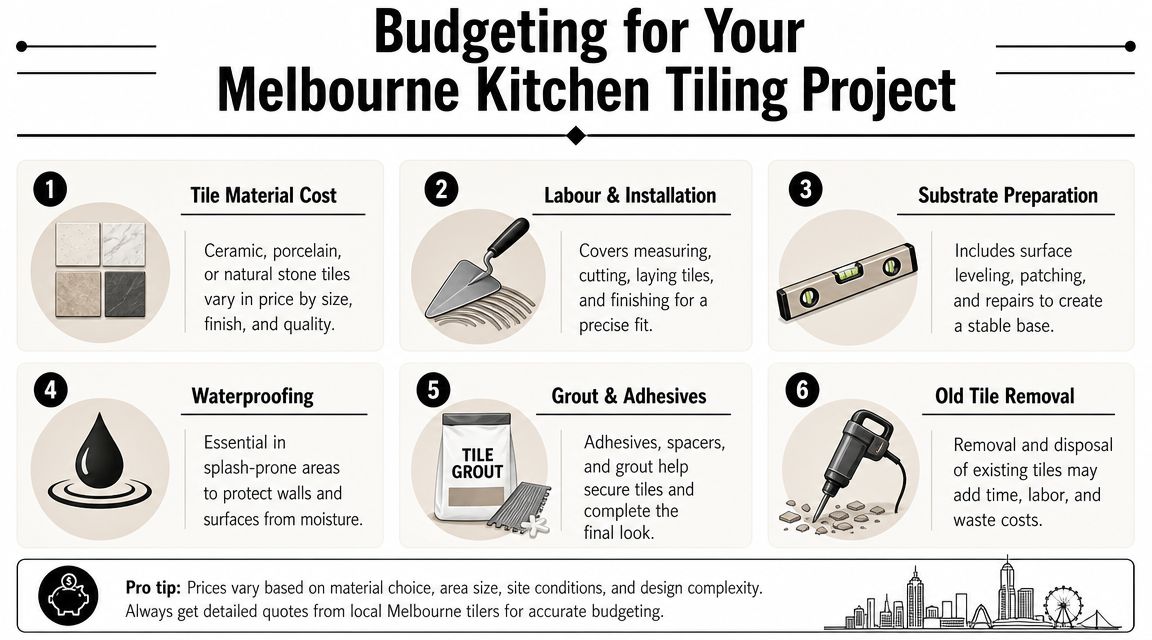
A solid quote may include:
- Installation labour: Set-out, cuts, fixing, alignment, grouting, and finishing
- Consumables: Adhesive, grout, trims, sealants, and sundries
- Substrate preparation: Wall straightening, patching, sheet replacement, or render correction
- Removal work: Demolition and disposal of old tiles or damaged linings
- Trade coordination: Programming with waterproofers, plumbers, carpenters, and shower screen installers
- Builder oversight: Site responsibility, sequencing, defect prevention, and compliance management on renovation work
That last point matters more than many homeowners expect. In a bathroom renovation, the tiling line item can sit inside a larger job where mistakes in framing, sheeting, falls, plumbing set-out, or waterproofing show up at the tile face. That is why many clients start with local tiling contractors for bathroom renovations in Melbourne and then realise the project needs builder-level control, not just a layer of tiles.
Why one quote is low and another is not
Cheap quotes often rely on assumptions. The walls are assumed to be straight. Existing linings are assumed to be sound. Tile sizes are assumed to suit the room. Access is assumed to be easy. Once those assumptions fail, variations start.
Older Melbourne homes are where costs can shift quickly. I often find walls that are out of square, cement sheet that has softened, previous patching that should never have been tiled over, or old spot-bonded tiles hiding voids behind the finish. Spot bonding saves time on a rushed job, but it creates hollow sections, weak support, and a higher risk of cracking or failure in wet areas. Rectifying that before retiling costs money, but leaving it in place costs more.
Three factors drive price more than anything else:
Tile and layout difficulty
Mosaic sheets, stacked feature walls, stone, large-format tiles, recessed niches, and wraparound patterns all add labour.Condition of the wall behind the tile
Good tiling starts with a surface that is flat, stable, and suitable for the system being used.Scope beyond tiling
A simple splashback is one thing. A bathroom renovation with demolition, waterproofing, carpentry, plumbing set-out, and final tolerances is another level of responsibility.
For broader budget context, the Canstar summary of HIA 2023 bathroom renovation data notes that the average bathroom renovation cost in Australia is $26,000, with ranges from $8,000 for basic work to more than $35,000 for premium or complex projects. Wall tiling is only one portion of that total, but it is the part everyone sees every day. A low quote can still be expensive if the finish looks rushed or starts failing after handover.
Choosing Your Tiler Why a Registered Builder Matters
A bathroom renovation can start with a simple plan to retile the walls and end with plumbing changes, rotten framing, uneven substrates, waterproofing defects, and door or shower screen clearances that no longer work. Once that happens, the job is no longer just about laying tiles neatly. It needs someone who can take responsibility for the whole build.
A builder coordinates the bathroom as a system
A good tiler focuses on set-out, adhesion, cuts, movement joints, finishes, and the visual result. A registered builder has a wider job. They coordinate demolition, carpentry, waterproofing, plumbing, electrical, glazing tolerances, sequencing, site issues, and defect responsibility so each trade works to the same outcome.
That matters legally as well as practically. In Victoria, the point where a bathroom renovation moves beyond a straightforward trade package can bring licensing, insurance, and clear project control into play. Homeowners often miss that line until the work is underway and trades start blaming each other for delays or defects.
If you're comparing local operators, look beyond the sales pitch and check whether they are tile installers or whether they can manage a renovation properly. This guide to tiling contractors near me is a useful starting point, but the key question is scope. Who is responsible when the substrate is wrong, the waterproofing needs to be redone, or the plumbing set-out throws off the tile layout?
In older Melbourne homes, that distinction is even more important. I regularly see bathrooms where the visible finish was only one part of the problem. The builder's role is to catch the issues behind the tile, adjust the sequence, bring in the right licensed trades, and keep the whole room compliant and buildable.
Questions worth asking before you sign
Ask these early, before deposits are paid and materials are ordered:
- Who is taking responsibility for the full bathroom scope? If several trades are involved, one party should own the program and the result.
- Who arranges and coordinates licensed plumbing and electrical work? Those decisions affect tile set-out, penetrations, and final fit-off.
- How will wall preparation, waterproofing, and rectification be documented? Good operators can explain the process clearly.
- What happens if demolition uncovers damaged framing, failed sheeting, or out-of-plumb walls? You want a method, not a shrug.
- Who handles defects after handover? If trades are loosely stitched together, homeowners often end up chasing each one separately.
A short video can help you think about the difference between a basic installer and a renovation partner.
If the bathroom is being rebuilt, the person you hire should be able to explain demolition, substrate prep, waterproofing, trade sequencing, tile layout, and final tolerances, not just the tile pattern.
That is usually the difference between a quote that looks cheaper at the start and a bathroom that stays on track, meets the required standard, and holds up after handover.
Common Tiling Mistakes Melbourne Homeowners Should Avoid
A lot of Melbourne bathrooms look fine on handover day and start showing their true condition six or twelve months later. Hollow-sounding tiles, cracked grout lines, movement around fittings, and moisture issues usually trace back to decisions made before the first tile was fixed.
The shortcut worth watching most closely is spot bonding. According to this Houzz discussion of common bathroom tiling questions, many homeowners are never told why it matters. On older Melbourne walls that are out of plumb or poorly sheeted, some installers use blobs of adhesive to save time instead of correcting the surface. That leaves voids behind the tile, weakens support, and creates a higher risk of drummy tiles, cracked corners, and failure around penetrations.
Another common mistake is choosing the tile before checking the wall.
Large-format wall tiles can look sharp, but they demand a flatter substrate, tighter set-out, and better cuts around mixers, niches, and trims. If the wall prep is poor, the tile size works against you. Lippage becomes harder to control, and the finished job can look cheap even with expensive tiles.
Preparation gets cut more often than clients realise. Crooked framing, damaged sheeting, failed waterproofing, and walls that are out of square do not disappear under adhesive. They need rectification. In a full bathroom renovation, that is also where the difference shows between a tiler who is there to stick tiles on a wall and a Registered Builder who is responsible for the room as a buildable, compliant wet area.
Homeowners also get caught by low quotes that leave out the hard parts. Removal, substrate correction, waterproofing details, allowance for pattern matching, tile waste, trim selection, and coordination with plumbing and electrical work all affect the final result. If those items are vague, the price is not lower because the operator is more efficient. It is lower because scope has been pushed aside.
The avoidable mistakes are usually these:
- Accepting spot bonding on wall tiles: Full adhesive coverage gives better support and a more durable bond.
- Skipping substrate correction: Uneven or unstable walls telegraph through the finish.
- Using large-format tiles on poorly prepared walls: The bigger the tile, the less room there is to hide bad prep.
- Comparing quotes without comparing scope: Cheap prices often exclude rectification, proper prep, or finishing details.
- Treating a bathroom renovation as a tiling-only job: Once waterproofing, demolition, plumbing, electrical, and structural issues are involved, someone needs to manage the whole build properly.
Good wall tiling Melbourne work comes from sound prep, proper coverage, clean set-out, and clear responsibility for the full scope. That is what separates a fast install from a bathroom that still looks right years after handover.
If you're planning wall tiling, leak rectification, or full bathroom renovations and want the job handled by experienced tilers and registered builders, Melbourne Tiling Services P/L offers start-to-finish support across Melbourne and greater Victoria. You can request a free quote, review design options, and get clear advice on preparation, waterproofing, tile selection, and full renovation scope before work begins.







Recent Comments