Porcelain Tiles Bathroom Guide for Melbourne Renovations

If you're planning a bathroom renovation in Melbourne, you're probably doing what most homeowners do at the start. Comparing tile samples, saving photos, and trying to work out why one porcelain tile costs more than another when they can look similar on a display board. The problem is that a bathroom isn't just a styling exercise. It's a wet area, a regulated build zone, and one of the easiest rooms in the house to get badly wrong if the product choice and the work underneath it don't match.

That's why porcelain keeps coming up in serious bathroom discussions. It has the look range people want, but it also offers the technical performance that suits showers, floors, walls, and busy family bathrooms. The global porcelain market was valued at USD 10.32 billion in 2025 and is projected to reach USD 18.13 billion by 2034 according to Fortune Business Insights' porcelain market outlook. For homeowners here, that scale matters because it supports broad product availability, better finish options, and ongoing investment in premium bathroom surfaces.

From a registered builder's perspective, tile choice is only one part of the job. The substrate, screed, waterproofing, set-out, drainage, and installation standards all matter just as much as the tile itself. A porcelain tiles bathroom should look sharp on day one, but it also needs to stay sound after years of steam, cleaning, movement, and daily use.

Table of Contents

Your Melbourne Bathroom Renovation Starts Here

A lot of bathroom projects begin with one simple question. “What tile should we use?” That sounds straightforward, but in practice it usually sits on top of bigger decisions about budget, layout, waterproofing, compliance, and who's coordinating the job.

In Melbourne homes, I often see two patterns. The first is a homeowner who has a clear visual style in mind but hasn't yet thought about falls, drainage, substrate movement, or slip safety. The second is a homeowner replacing a failed bathroom where the old tile might not have been the problem at all. The waterproofing, floor prep, or poor installation was.

That's why porcelain is usually where the serious conversation lands. It suits modern ensuites, compact family bathrooms, and higher-end renovations because it gives you a wide design range without asking you to compromise on wet-area performance. It can look restrained and architectural, or warm and textured, but the practical value is what keeps it in the specification.

A bathroom renovation works when the visible finish and the hidden build-up are treated as one system.

Registered builders look at the full chain. Not just tile colour and grout line. The order of trades, the condition of the substrate, the waterproofing method, penetrations, shower screen placement, and the final set-out all need to line up. If they don't, an expensive porcelain tile won't save the room.

For homeowners, that's the useful shift in mindset. Don't judge a porcelain tiles bathroom only by what's in the showroom. Judge it by how well it will perform once the room is used every day.

What Makes Porcelain the Ultimate Bathroom Tile

Porcelain is often described as a premium tile, but that's not really the key point. In bathrooms, what matters is performance.

Performance matters more than appearance

In Australia, a tile is classified as porcelain only if it has a water absorption rate of 0.5% or less, according to Australian industry guidance on porcelain tile performance. That threshold matters because bathrooms are exposed to constant moisture, steam, and cleaning. A dense, impervious tile body is far better suited to those conditions than a more absorbent alternative.

Many homeowners get misled. They look at a tile's surface finish and assume that's the whole story. It isn't. Two tiles can appear similar on the face, but the body of the tile can behave very differently once installed in a shower or on a bathroom floor.

A comparison chart showing why porcelain tiles are superior to ceramic tiles for bathroom flooring and walls.

Industry guidance for shower applications also describes porcelain as having water absorption of less than 0.5%, which places it in the impervious classification used under ASTM/ANSI-style standards in Robbins' guide to porcelain tile for showers. In practical terms, low porosity helps limit moisture migration into the tile body during repeated wetting and drying cycles.

Porcelain vs ceramic in a real bathroom

A porcelain tile and a standard ceramic tile don't behave the same way in a wet room. That difference shows up over time, not just on install day.

Feature Porcelain Tiles Ceramic Tiles
Water absorption Very low. Classified as porcelain at 0.5% or less Higher than porcelain
Density Dense and impervious Less dense
Bathroom suitability Strong choice for wet areas, showers, floors and walls Better suited to less demanding areas
Stain resistance Strong due to low porosity More dependent on product type and finish
Maintenance Generally low-maintenance Can require more caution in wet areas
Cutting and installation Harder to cut, needs proper tools and experience Usually easier to work with
Cost position Often a higher upfront material and labour choice Often lower upfront cost

The trade-off is simple. Porcelain usually costs more to buy and install, and it's less forgiving during cutting and laying. But in bathrooms, it earns that extra care.

Practical rule: If a tile is going into a shower base, bathroom floor, or any surface that gets wet often, performance should come before appearance.

That doesn't mean ceramic has no place. It can still work well on some bathroom walls or lower-demand areas. But if you want one material that covers most bathroom applications with fewer compromises, porcelain is usually the safer specification.

Choosing the Right Porcelain Format and Finish

Choosing porcelain isn't the end of the decision. The format and finish change how the room looks, how safe it feels underfoot, and how forgiving it'll be to live with.

A professional infographic titled porcelain tile selection guide showing different tile formats, finishes, and durability benefits.

Format changes the way the room works

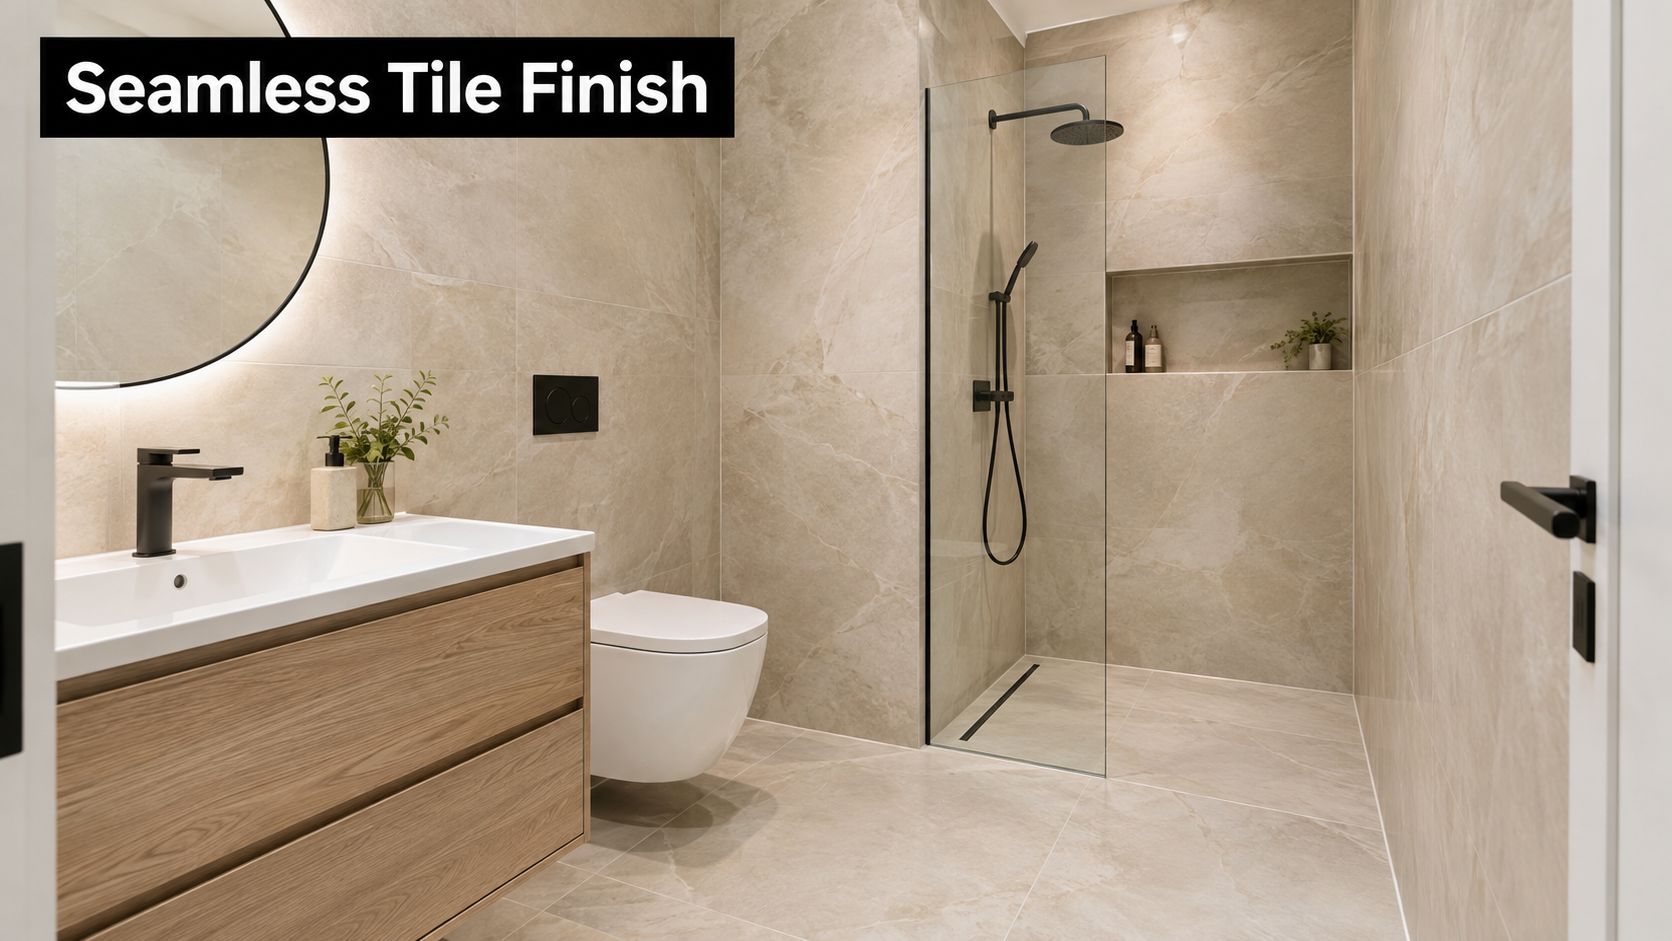
Large-format porcelain has become a standard request in Melbourne bathrooms for good reason. Fewer grout lines usually create a cleaner look, and the room can feel calmer and more spacious. On walls, that can be a major visual improvement. On floors, it can work very well too, but only if the set-out and substrate are right.

For homeowners considering slabs and oversized pieces, it helps to look at examples of large-format tile installations for bathrooms and interiors. The visual effect is strong, but the installation tolerance tightens as the tile size increases. Small errors in floor prep that might be hidden by smaller tiles become obvious with larger ones.

Some practical format choices:

  • Large format tiles work well on main bathroom walls and open floor areas where you want fewer grout joints.
  • Standard rectangular tiles are easier to set out around niches, windows, and tighter spaces.
  • Mosaics still make sense on some shower floors because they adapt more easily to falls and drainage points.

Finish affects safety as much as style

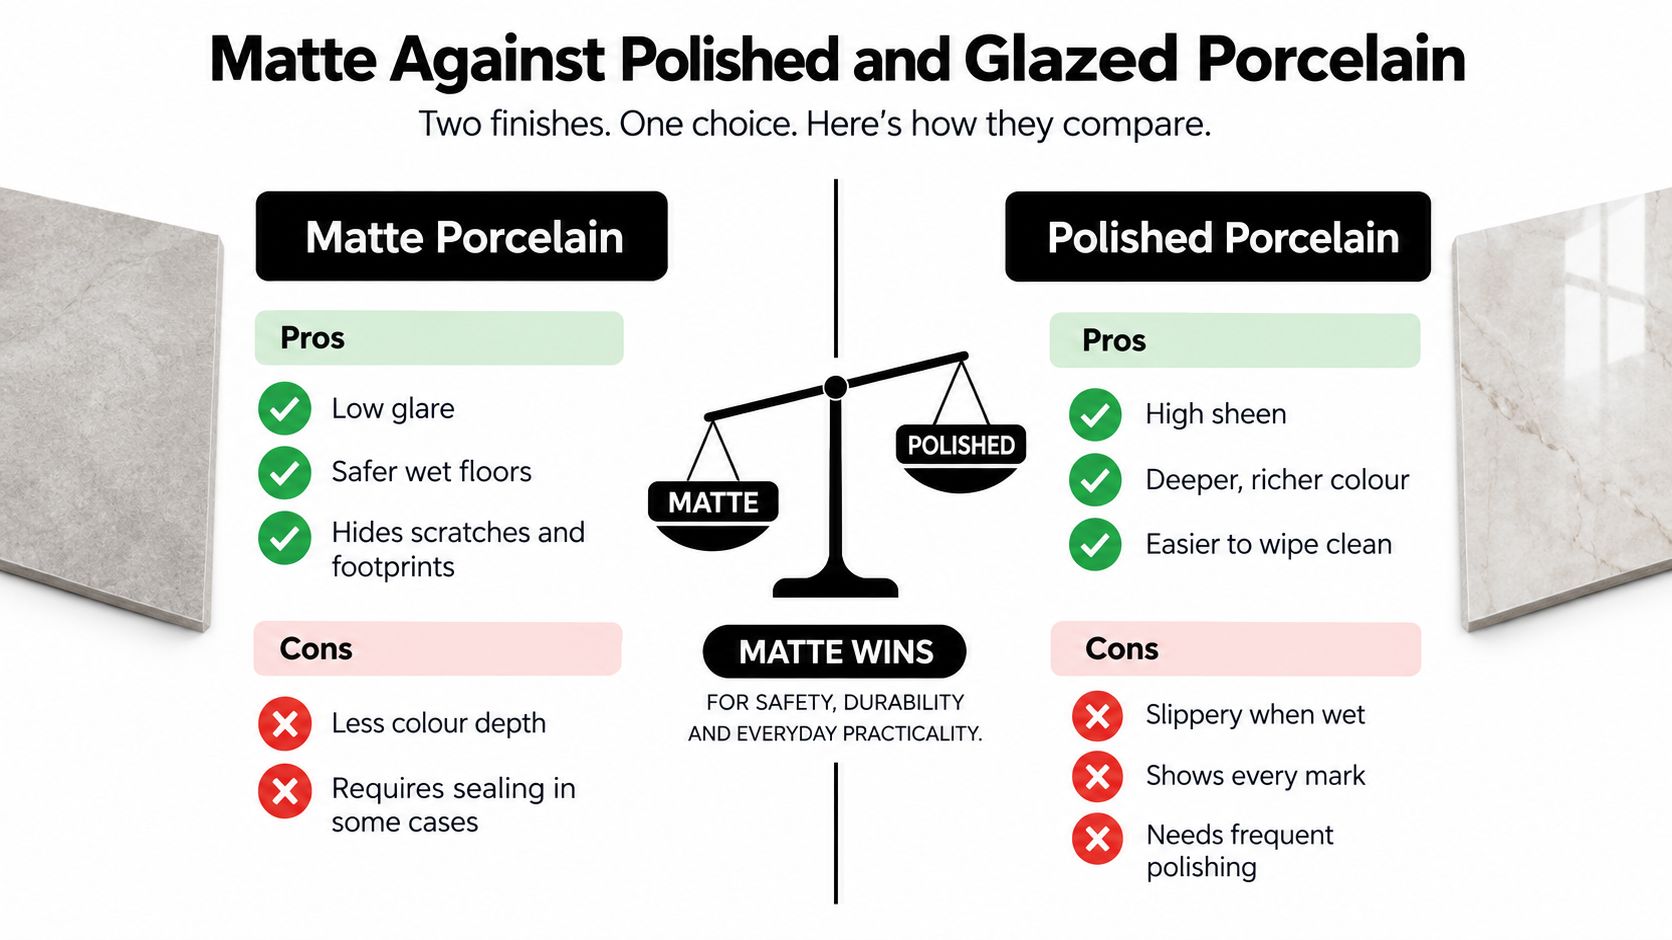
Finish matters more than many showrooms explain. A glossy tile may look sharp on a wall, but that doesn't make it the right choice for the floor. In wet areas, slip resistance has to be part of the selection process, not an afterthought.

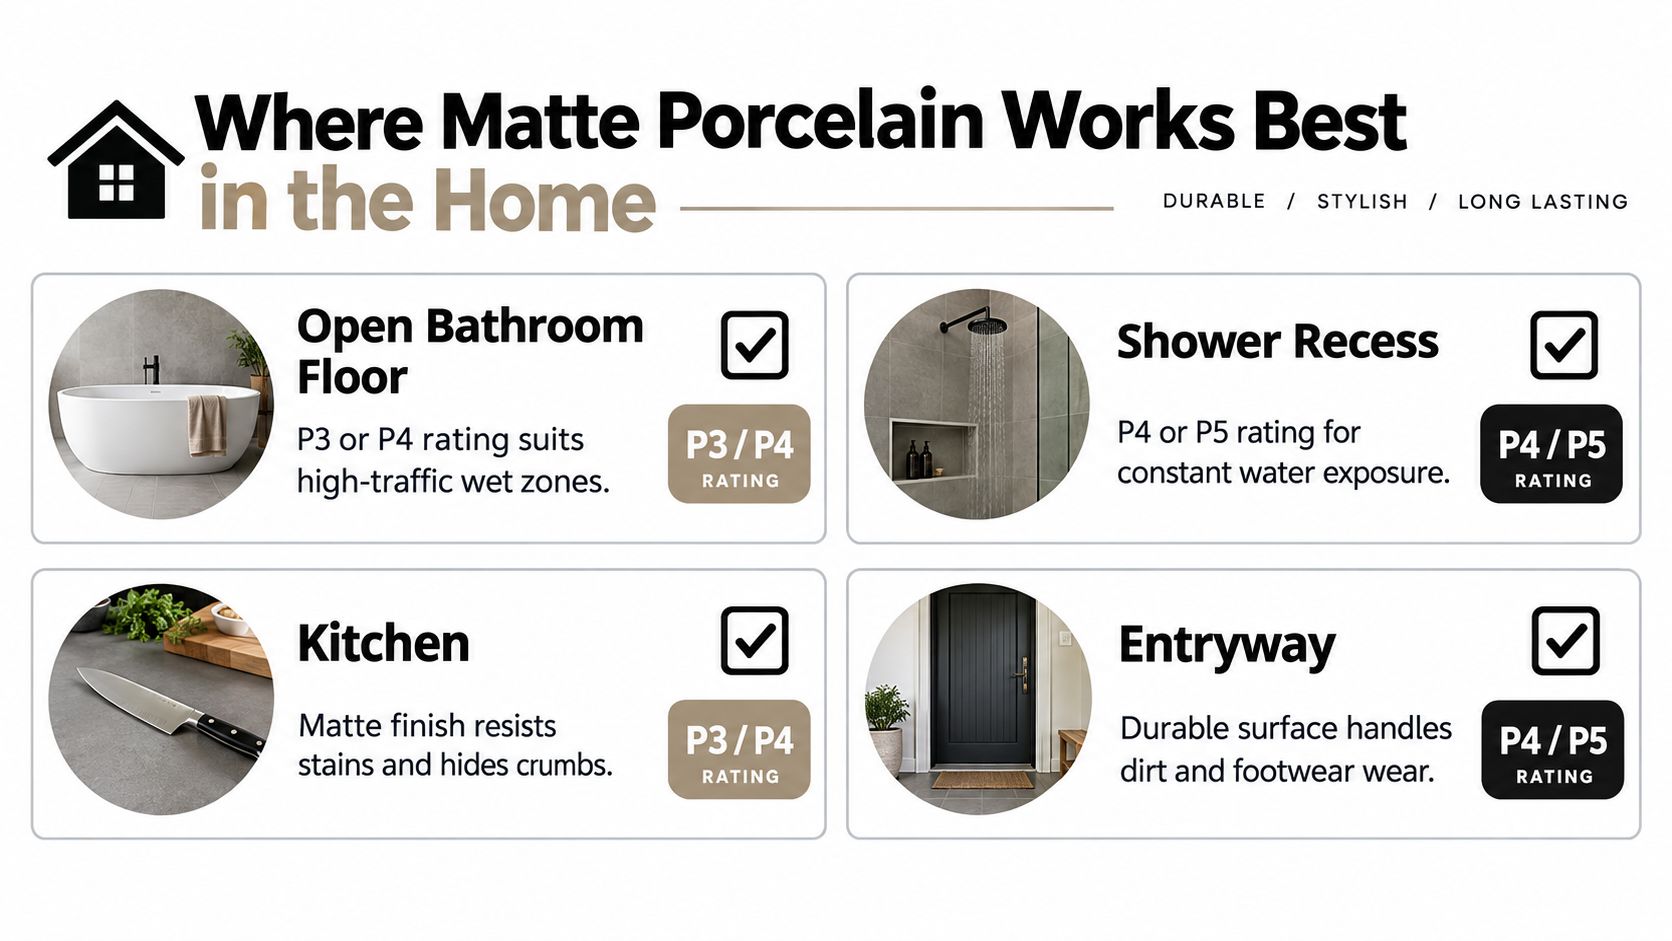
Independent tile guidance notes that unglazed or textured porcelain generally offers better slip resistance than highly polished glazed tile, especially for bathroom floors and shower bases, as outlined in clé's guidance on glazed vs unglazed porcelain. That lines up with what works on real jobs. High-shine finishes often belong on walls. Matte, textured, or unglazed finishes are usually the safer call underfoot.

A simple way to understand it:

  • Polished porcelain suits walls where reflection and a crisp finish are the goal.
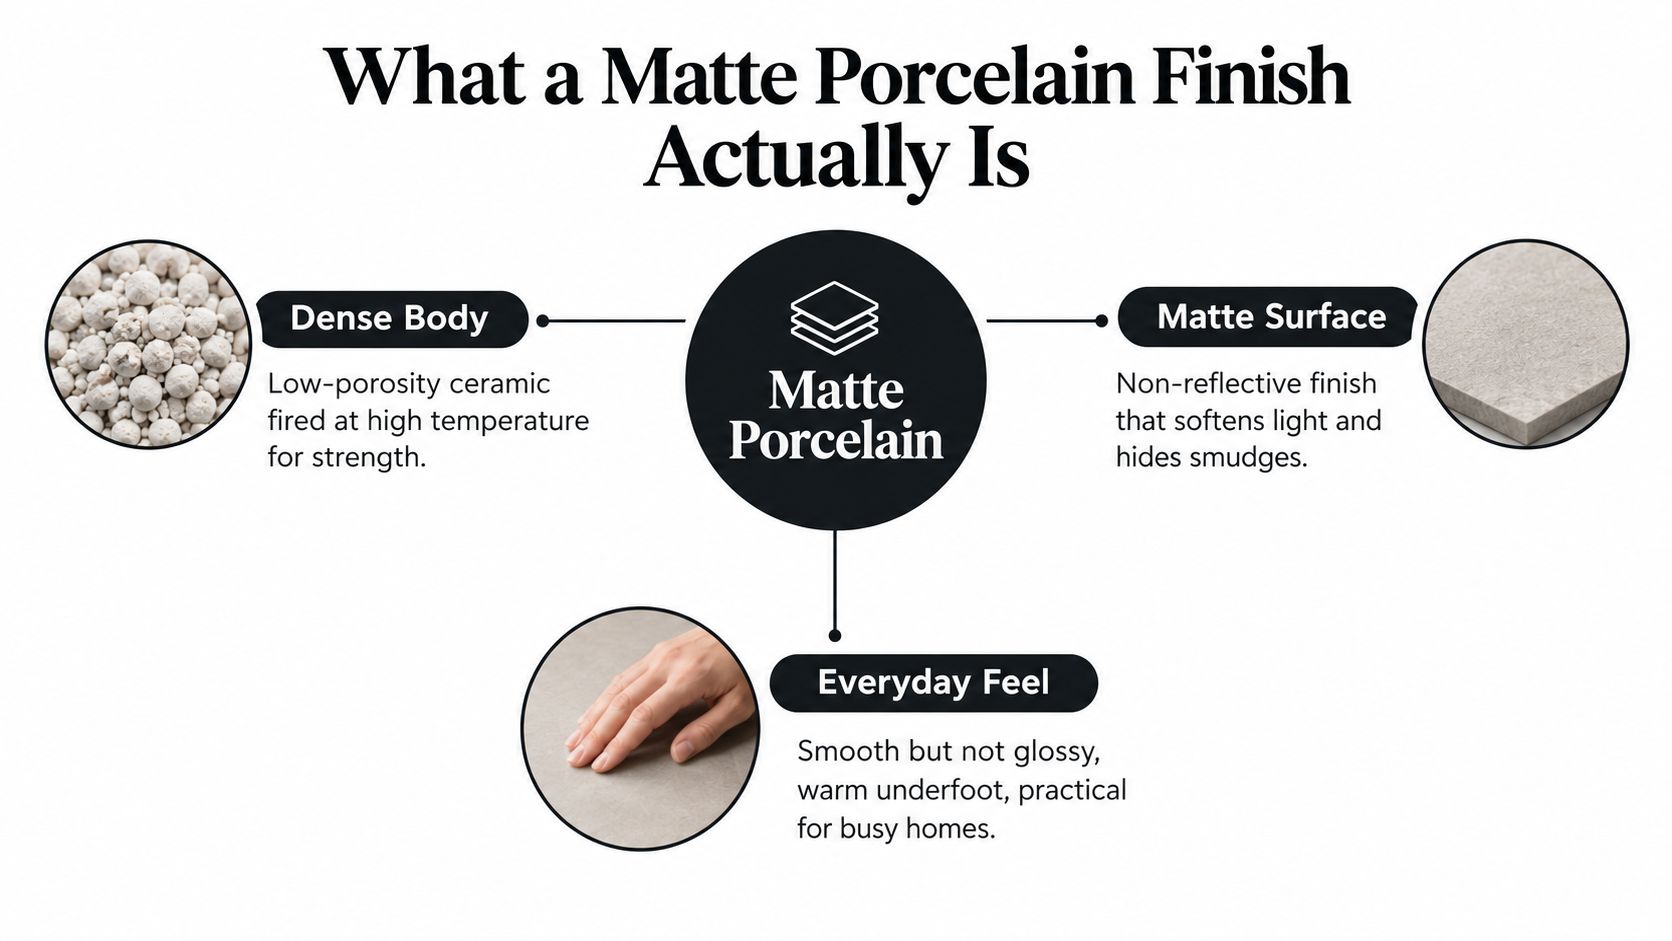
  • Matte porcelain is a strong all-rounder. It looks controlled and is often easier to live with.
  • Textured or unglazed porcelain is often better for shower floors and bathroom floors where traction matters.
  • Lappato or semi-polished finishes sit somewhere in between and need careful placement.

The right finish depends on where the tile is going. Wall decisions and floor decisions shouldn't be made the same way.

Through-body porcelain and long-term wear

This is one of the most overlooked details in a porcelain tiles bathroom. Through-body porcelain has colour and pattern running through the full thickness of the tile, so chips are less visually obvious than they are on surface-only products.

That matters most on floors, step transitions, and busy bathrooms where hard objects get dropped. Product coverage from Architessa's through-body porcelain range also reflects the wider shift toward anti-slip, unglazed, and performance-led porcelain choices for bathrooms and high-traffic spaces.

If you want a clean summary, choose format for layout, choose finish for safety, and choose body type for durability. Most bathroom tile mistakes happen when homeowners pick only on colour.

The Foundation of a Flawless Tiled Bathroom

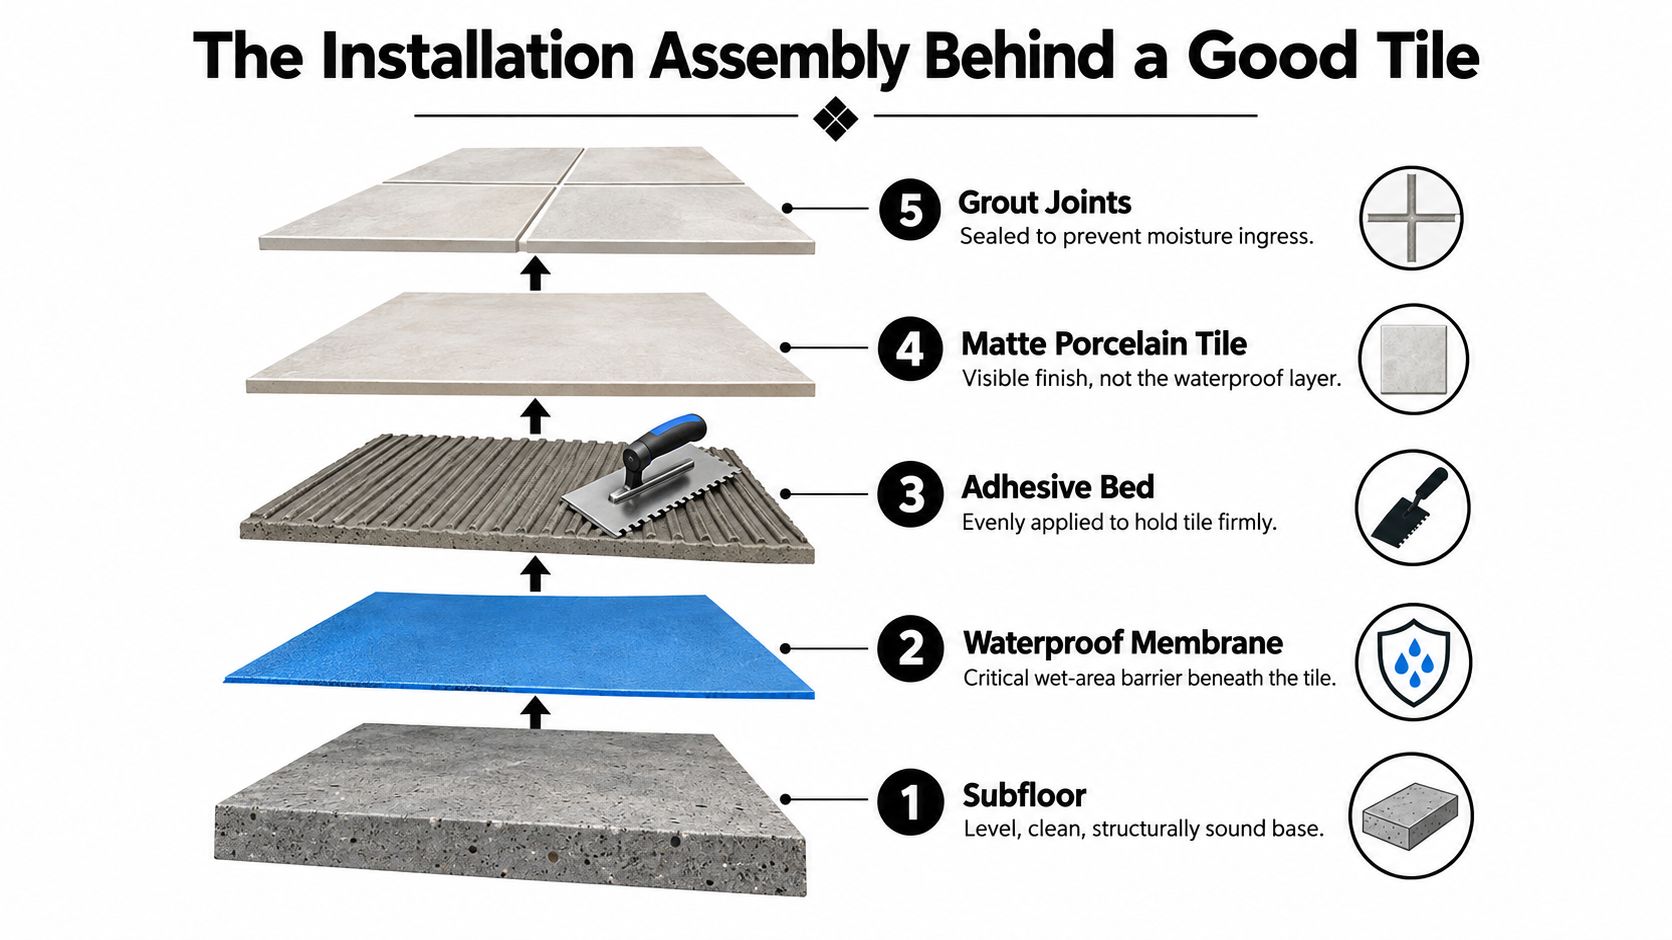
The tile is the visible finish. The foundation of the bathroom's success lies beneath it.

A registered builder looks at the room as a sequence of risk points. Floor deflection, wall condition, shower falls, waste placement, waterproofing continuity, movement joints, and penetrations all affect whether the bathroom stays sound. If any one of those is wrong, the porcelain on top won't fix it.

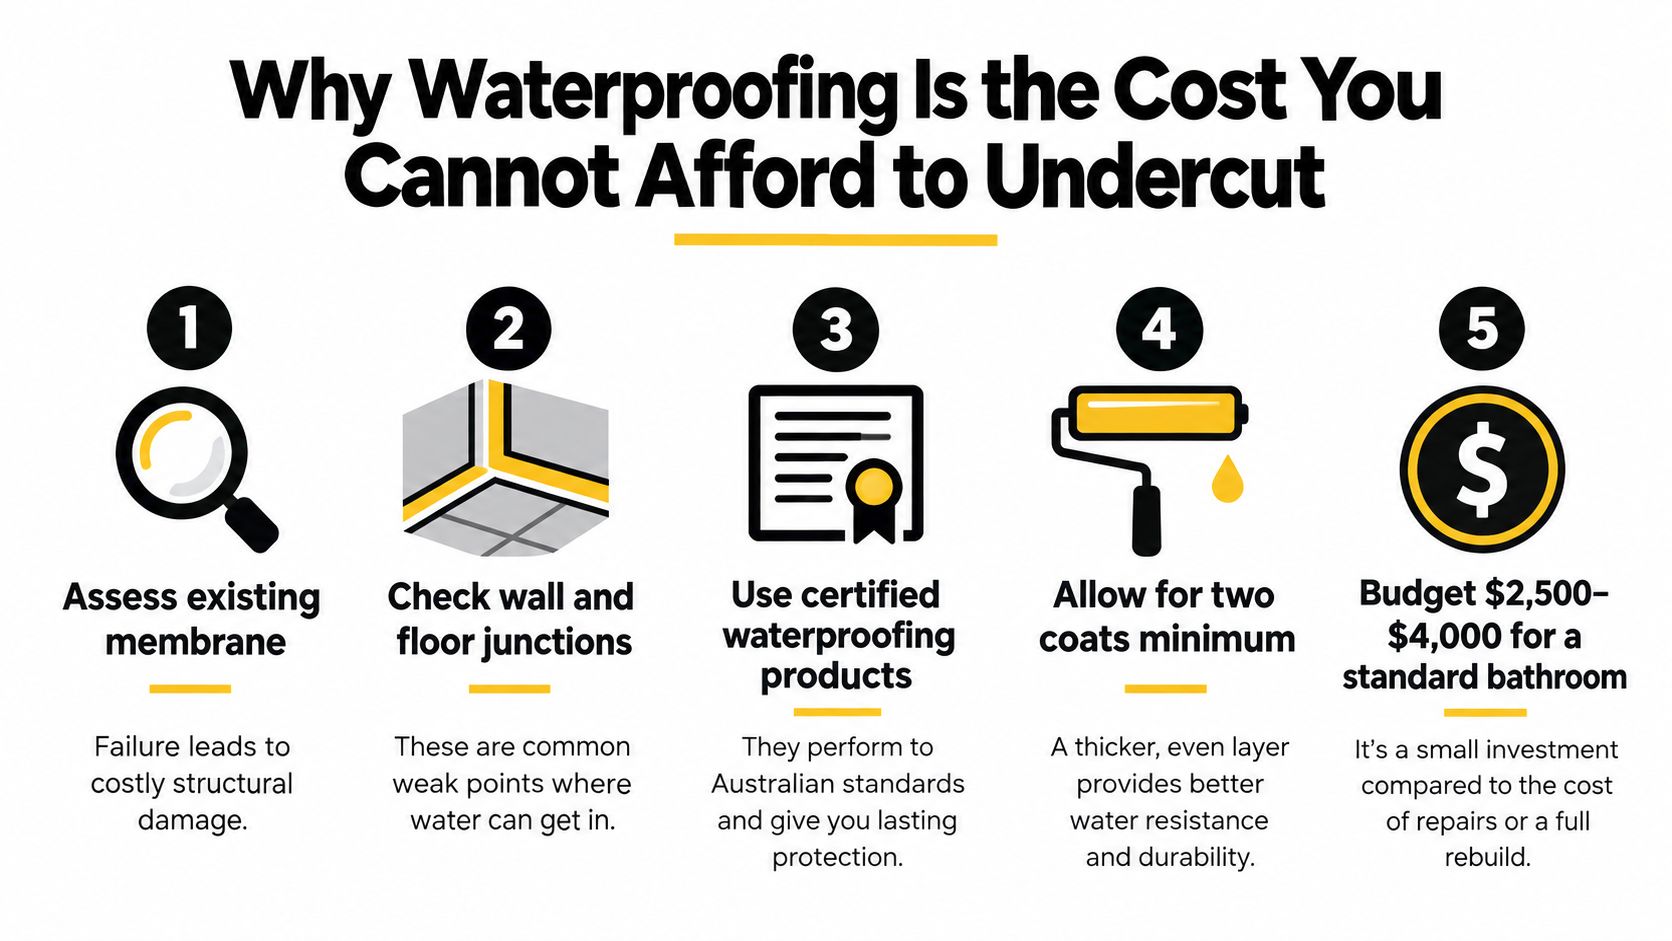
Waterproofing is not the place to improvise

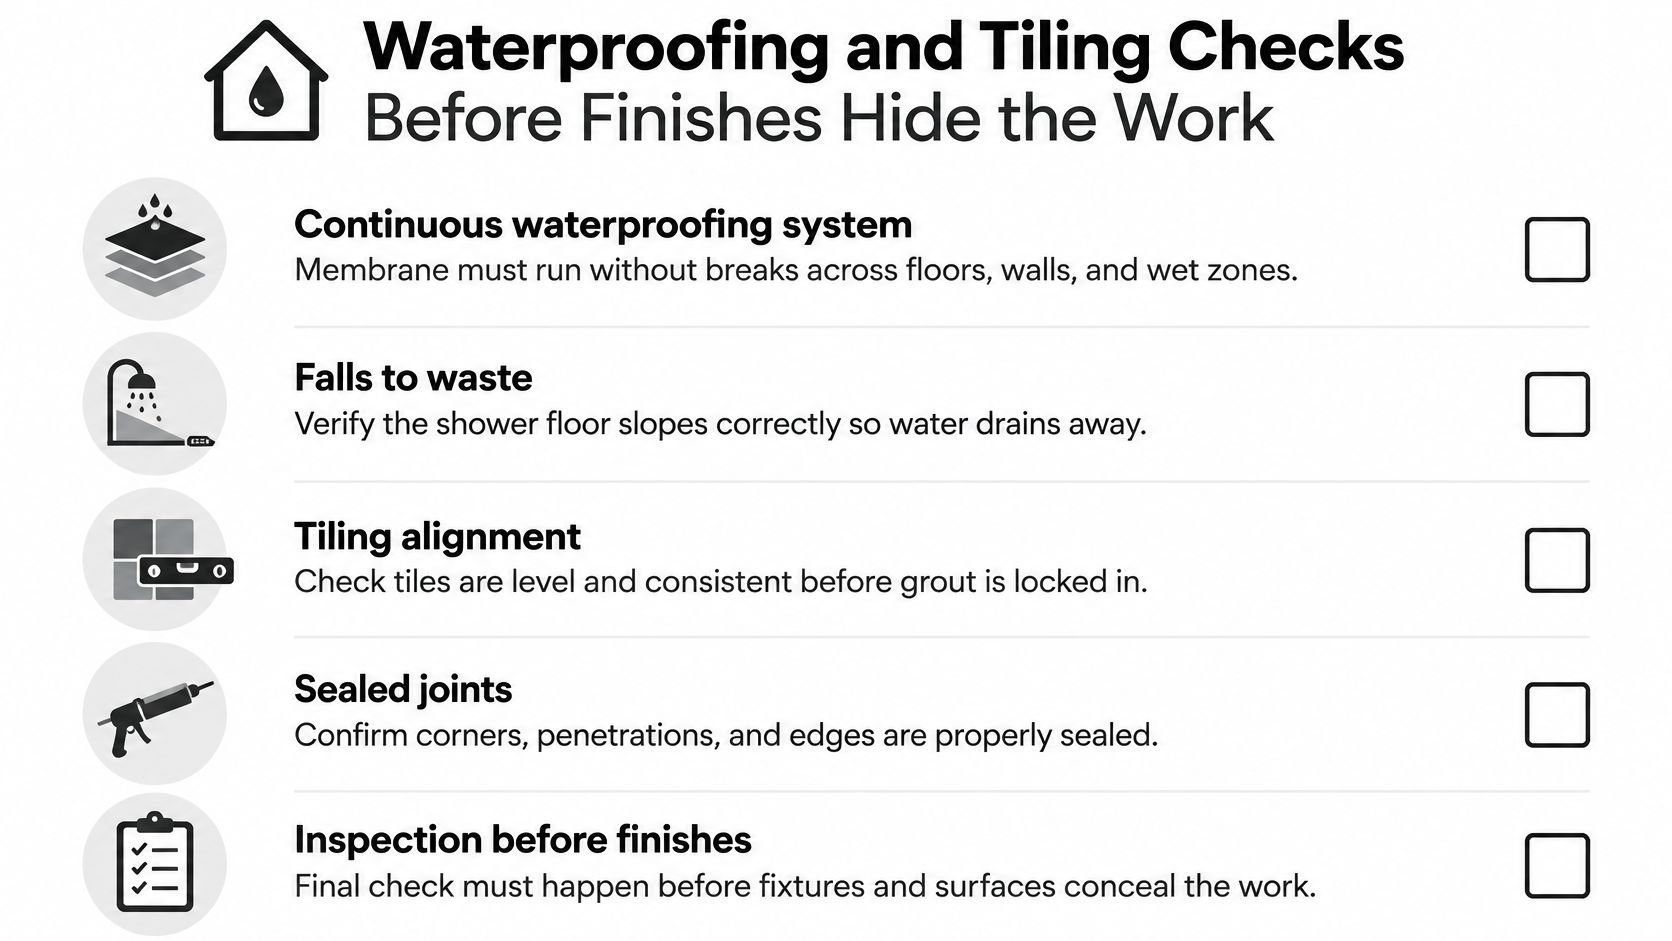
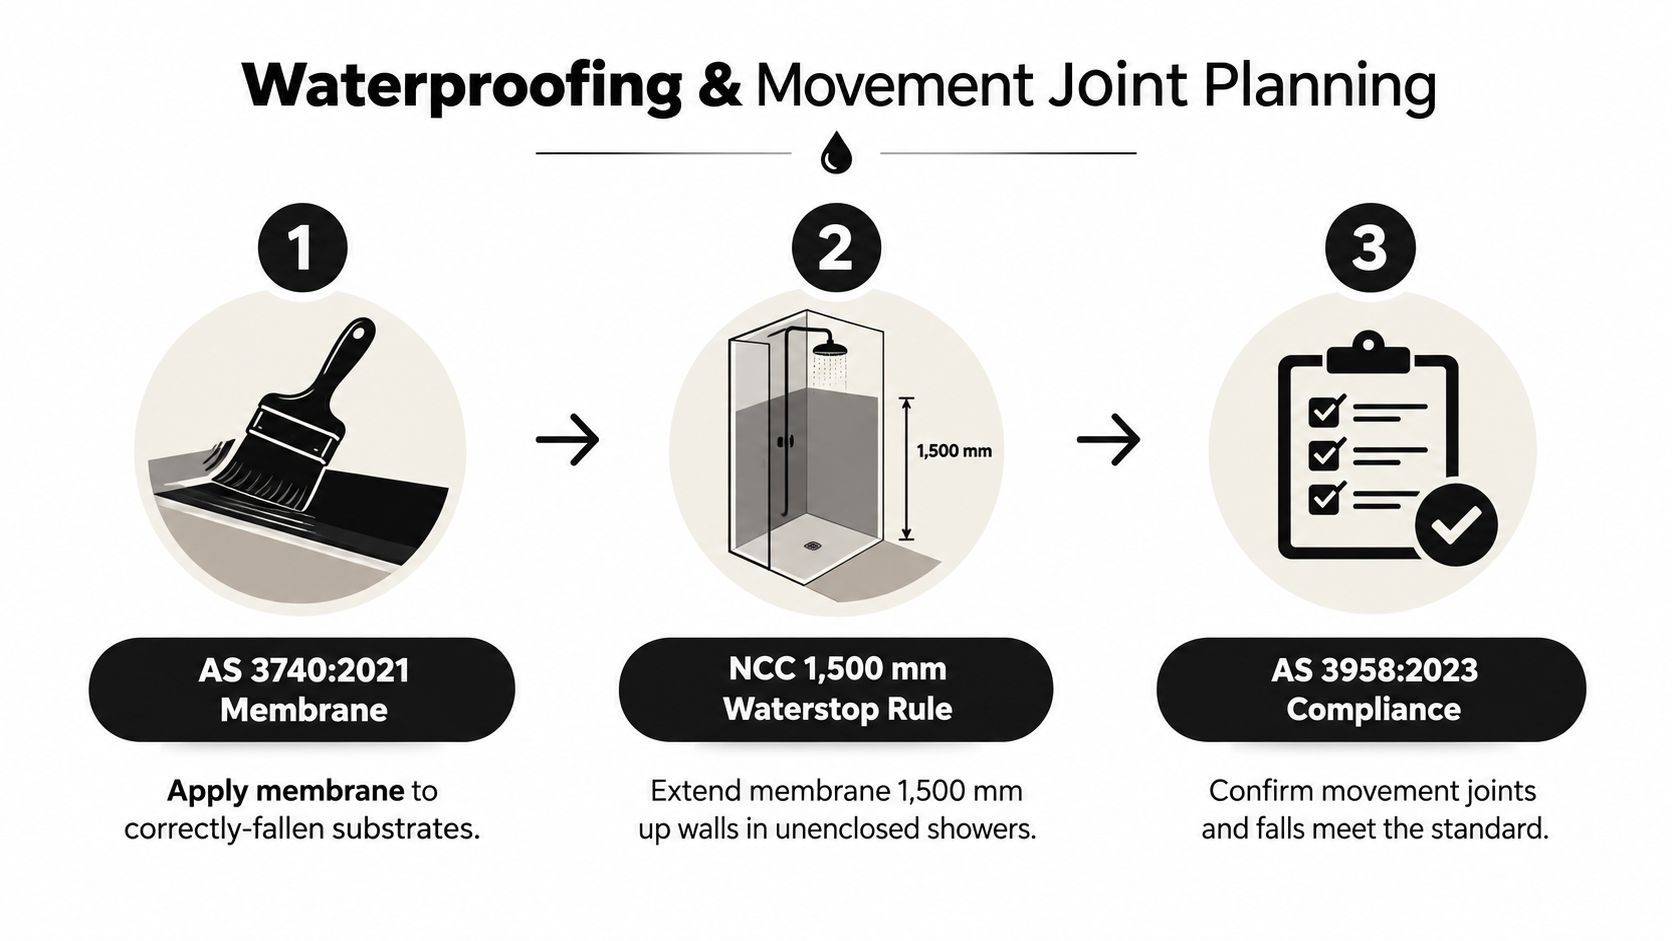
In a bathroom renovation, waterproofing has to be treated as core building work, not a side task squeezed in before tiling. The membrane has to suit the substrate, the detailing has to be correct, and the whole wet area assembly has to be executed with care.

A professional tradesman applying blue waterproof membrane to a shower floor with a paint roller.

Homeowners who want a practical overview of local wet-area requirements can read more about bathroom waterproofing work in Melbourne. The main point is simple. If waterproofing is rushed, patchy, or incompatible with the substrate, the failure may not show up immediately. When it does, the repair is rarely minor.

A leaking bathroom often starts as an unseen installation problem, not a tile problem.

Flat, level, and properly drained

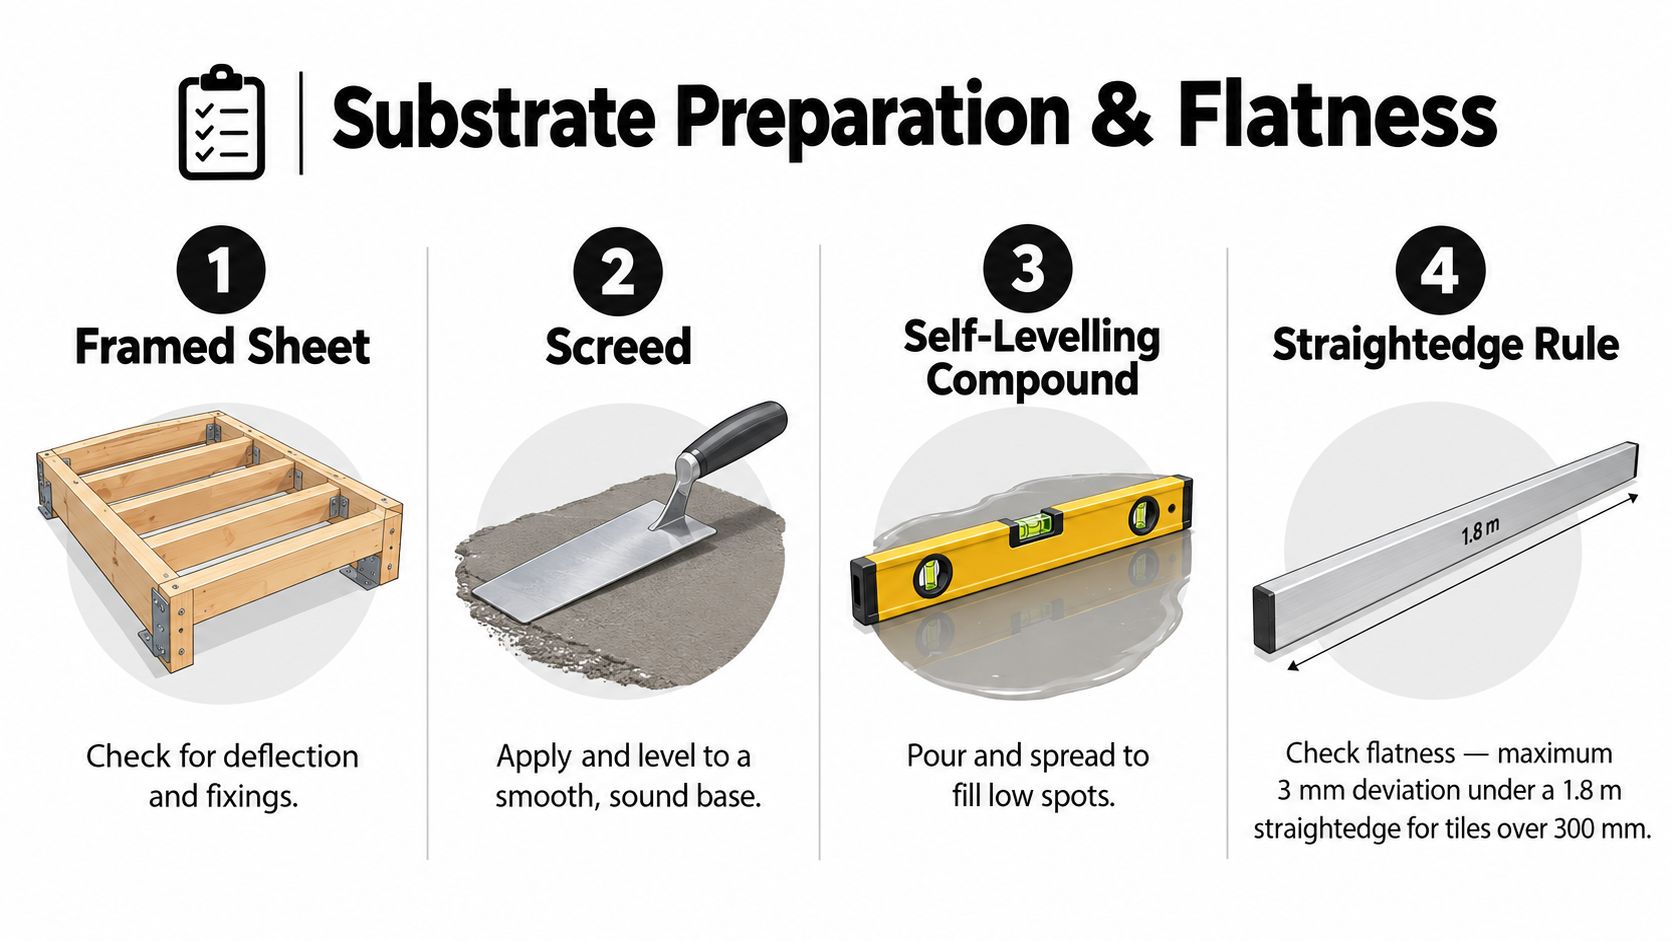
Substrate preparation is where many bathrooms are won or lost. Large-format porcelain needs a flat surface. Shower floors need proper falls to waste. Walls need to be plumb enough that layout lines stay true and lippage is controlled.

This usually involves steps such as:

  • Screeding the floor correctly so water runs where it should.
  • Using self-levelling compounds where needed to create a suitable surface for tile installation.
  • Checking framing and sheeting alignment before any membrane or adhesive goes on.
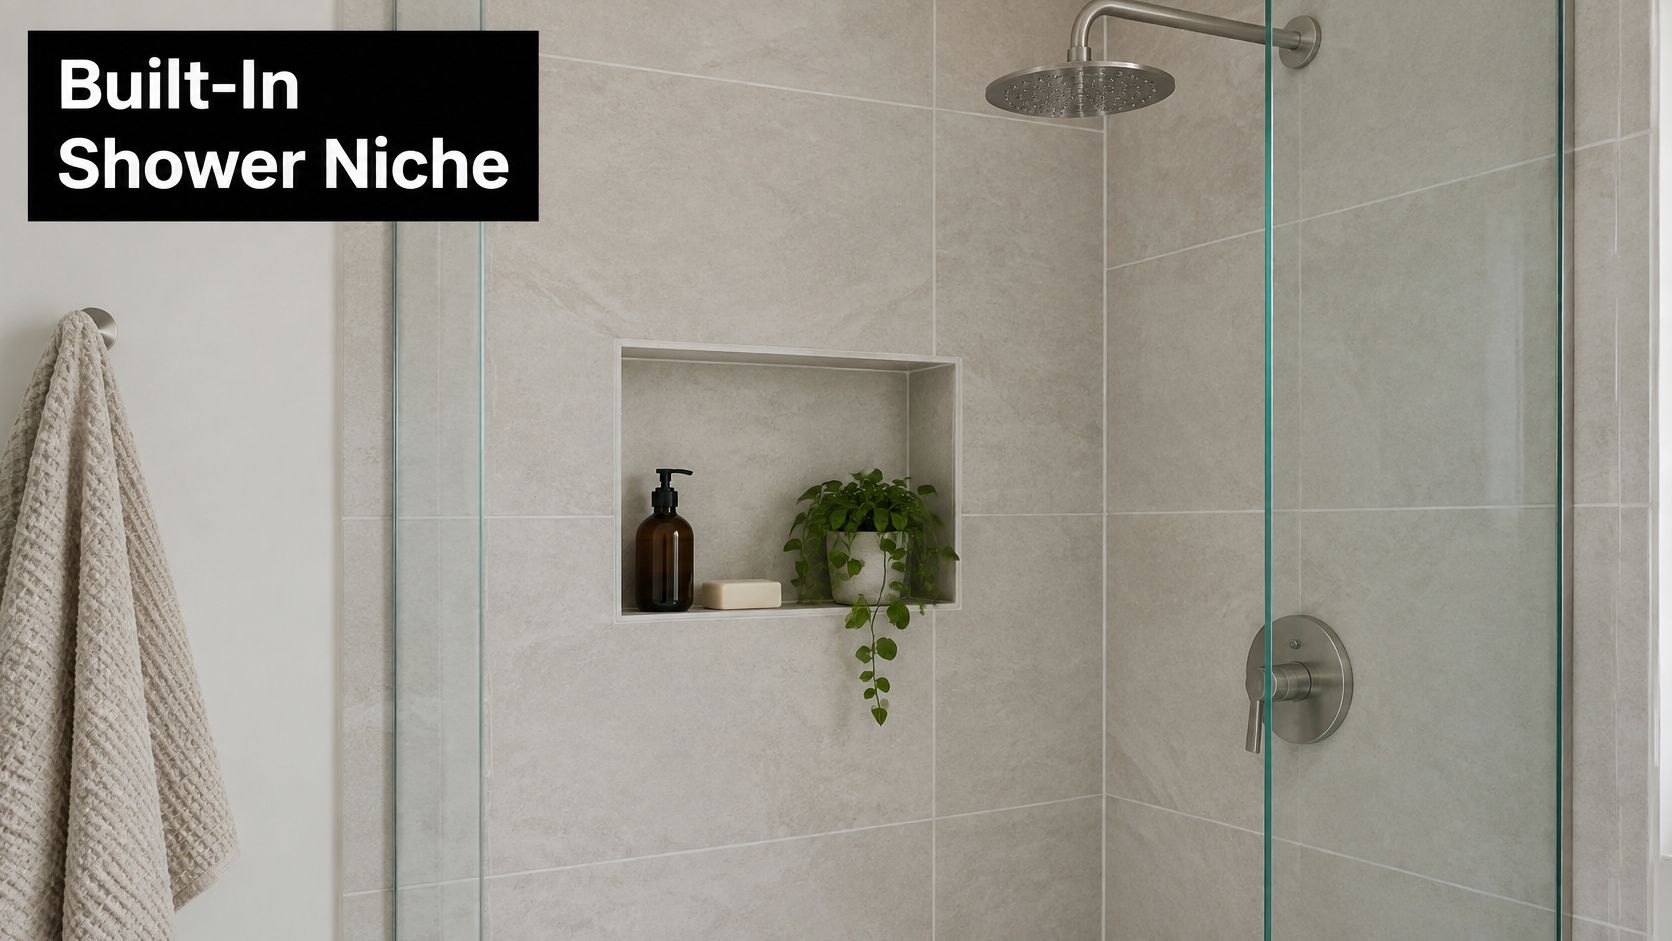
  • Planning penetrations early so mixers, wastes, niches, and shower screens don't compromise the set-out.

A bathroom can look neat at handover and still have hidden defects if those basics were skipped. That's why experienced renovators focus so much on the unseen work. It's what protects the visible finish.

Porcelain Tile Installation and Renovation Costs

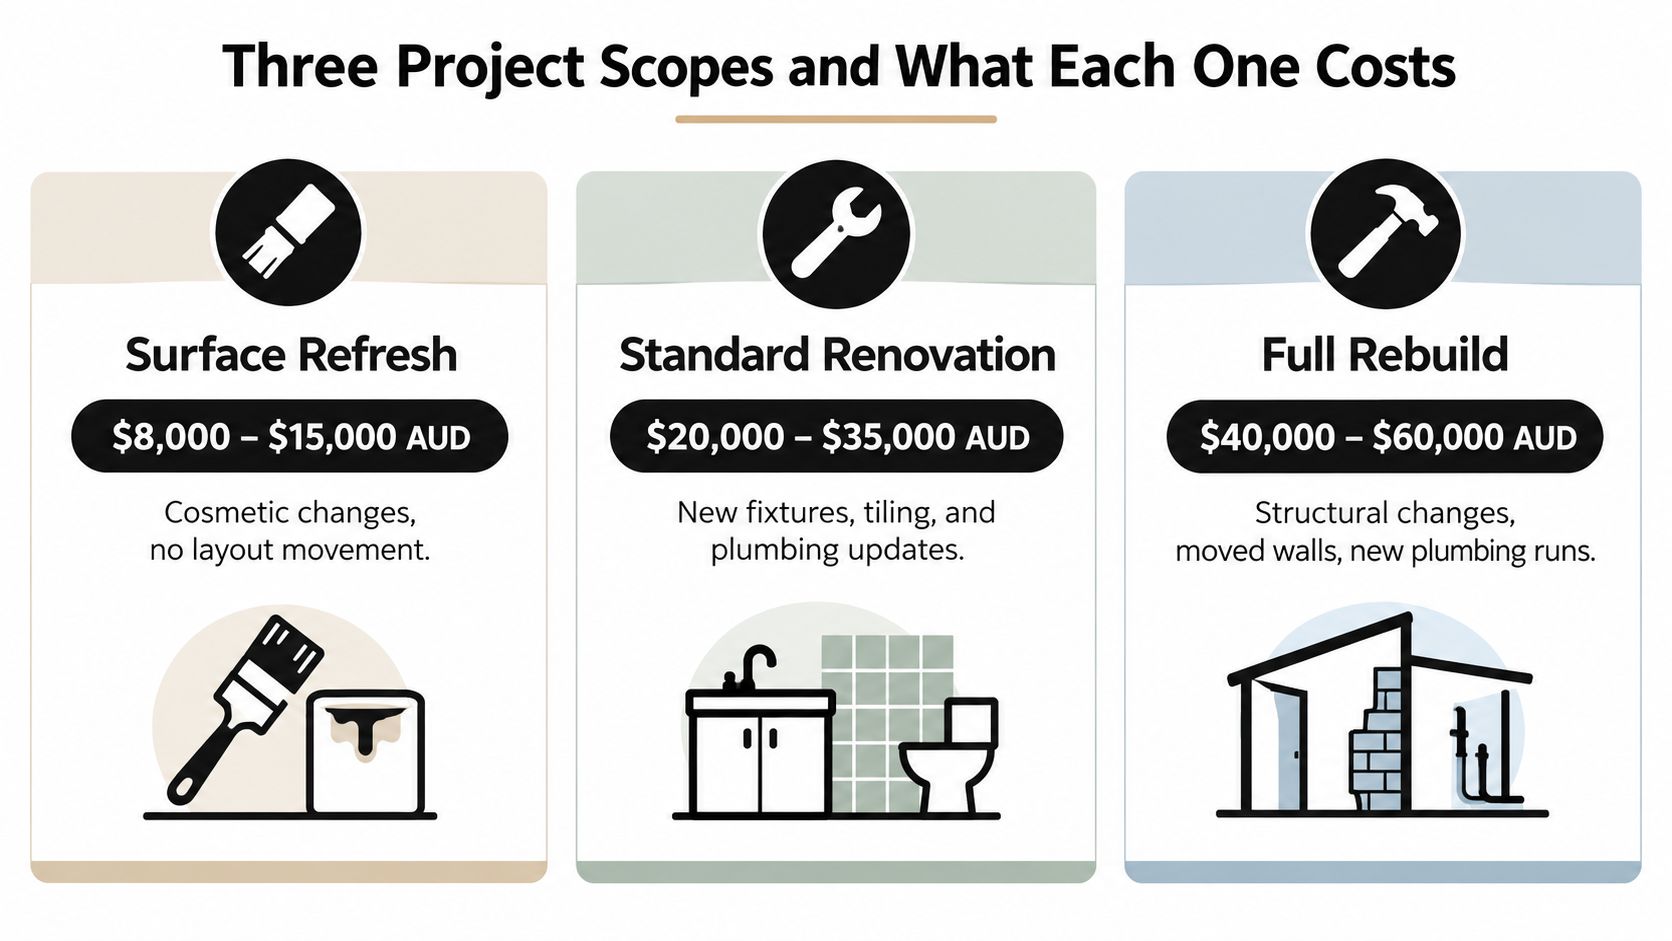
A bathroom budget can drift fast once the old room is stripped out and the hidden work shows itself. I see it often in Melbourne renovations. The porcelain tile selection is usually settled early, but the primary cost sits in everything required to install it properly and leave the room compliant, serviceable, and durable for years.

Why porcelain installation costs more than many homeowners expect

Porcelain is hard, dense, and exacting. That is part of its appeal, but it also means the installer has less margin for error. Cutting takes better equipment. Large-format tiles take more handling care, flatter surfaces, and tighter set-out control. If the room is out of square, the walls are out of plumb, or the floor has poor falls, porcelain tends to show every one of those problems.

The labour component often rises for practical reasons, not sales reasons. Good installers spend time dry-laying key areas, checking levels, planning trim positions, and making sure fixtures line up with grout joints and tile centres where possible. In a full renovation, that work only happens properly when tiling is coordinated with demolition, plumbing, electrical, waterproofing, and fit-off.

That coordination matters just as much as the tile itself.

Common cost drivers include:

  • Tile size and thickness. Larger porcelain usually needs flatter substrates, more careful handling, and more time on the saw.
  • Room condition after demolition. Damaged sheeting, uneven floors, and rotten or swollen substrate materials add repair work before tiling starts.
  • Detailing requirements. Niches, mitred corners, feature walls, linear drains, and recessed wastes all increase labour.
  • Access and site conditions. Tight inner-suburban properties, apartment access, and limited parking can affect delivery, waste removal, and setup time.
  • Add-ons integrated into the build. If you are considering under-tile heating for bathroom renovations, the wiring layout, thermostat position, floor build-up, and testing all need to be allowed for before tiling begins.

What a bathroom renovation budget actually covers

Homeowners often compare quotes by tile rate alone, then wonder why one figure is much higher than another. In a bathroom renovation, the tile installation cost is only one part of the total. The broader budget usually includes demolition, disposal, substrate repairs, waterproofing, plumbing rough-in and fit-off, electrical work, tiling, sealing, silicone, and fixture installation.

A builder-led scope usually breaks down more clearly because it reflects the full sequence of work, not just the visible finish:

Budget area What it generally relates to
Preliminaries Site protection, demolition, strip-out, waste removal
Wet-area preparation Substrate repairs, floor screeding, wall straightening, waterproofing
Services Plumbing and electrical rough-in, connections, fit-off
Tiling works Adhesive, tile installation, trims, grout, silicone
Fixtures and finishes Vanity, bath, shower screen, toilet, tapware, mirrors, accessories
Project management Trade coordination, inspections, scheduling, defect prevention

The trade-off is simple. A lower quote can look attractive at contract stage, but if it excludes preparation work or leaves grey areas around waterproofing, set-out, or fixture coordination, the final cost can climb once the job is underway. I would rather see a homeowner get a blunt, well-scoped price at the start than a cheap allowance that falls apart halfway through the build.

How to assess value, not just price

The best cost question is not “What do porcelain tiles cost per square metre?” It is “What is included to get this bathroom built properly?” Those are very different questions.

A sound quote should identify who is responsible for demolition, substrate rectification, waterproofing, tile supply or tile handling, trim details, grout type, silicone work, and final fit-off. It should also be clear about whether the person pricing the job is only tiling the room or managing the renovation sequence as a whole. Melbourne Tiling Services P/L can be considered on that basis alongside other registered renovation providers if you want one scope covering both the tiling work and the wider bathroom build.

That is usually where long-term value is decided. A porcelain bathroom that is installed on the right base, with the right falls and trade sequencing, costs more to do well. It also avoids the far more expensive exercise of repairing leaks, cracked tiles, drummy floors, or failed finishes after handover.

Design and Layout Tips for a Stunning Result

A bathroom can have excellent materials and still look unresolved if the layout isn't handled properly. Good design in tiled bathrooms is usually quiet. The lines are balanced, cuts are where they should be, and nothing feels accidental.

Near the start of the design process, sample boards help more than catalogues do.

A professional interior designer pointing at a material sample board during a bathroom renovation consultation.

Layout decisions that improve the room

In smaller Melbourne bathrooms, large-format wall tiles can help the room feel less busy. Fewer grout joints usually mean less visual interruption. On the floor, though, scale has to be balanced with drainage and room shape. A tile that looks perfect in a showroom can create awkward cuts if the room is narrow or loaded with obstacles.

Three layout decisions make a major difference:

  • Centre the important sightlines. The wall behind the vanity, the shower entry, or a feature niche usually deserves the cleanest set-out.
  • Use grout colour intentionally. Matching grout softens the grid. Contrast grout makes the pattern more visible.
  • Keep cuts consistent. Tiny slivers at one edge and full tiles at the other make even premium porcelain look second-rate.

A lot of homeowners also overlook comfort. If you're already opening the floor, it's worth considering under-tile heating for bathroom renovations, especially with porcelain, which performs well as a finished surface over heating systems.

Details that separate a clean job from a messy one

Feature walls work best when they're controlled. One textured porcelain wall inside a shower or behind a vanity can be enough. More than that, and the room can start competing with itself.

Design visualisation also helps before any tile is ordered. A 3D drawing or scaled elevation can show whether the niche lines up with grout joints, whether the feature tile should run full height, and whether the selected format will force poor cuts around fittings.

A short visual walkthrough can make those choices easier to judge:

Good bathroom layout isn't about adding more detail. It's about removing visual mistakes before they're built.

Maintaining Your Porcelain and Solving Common Issues

Porcelain is popular partly because it's easy to live with once the bathroom is finished. Day-to-day care is usually straightforward, and that's one of its strongest practical advantages.

Simple care that works

For regular cleaning, keep it simple. Use a suitable pH-neutral cleaner, soft mop or cloth, and don't let soap residue build up in corners, around wastes, or at the shower entry. On matte and textured finishes, routine cleaning matters more because surface texture can hold residue more easily than a polished wall tile.

A few habits make a difference:

  • Wipe water from shower floors and screens if you want less residue build-up.
  • Clean grout lines gently rather than attacking them with harsh products.
  • Check silicone joints occasionally around screens, corners, and fixtures.
  • Deal with stains early before they sit in grout or surface film.

Problems worth fixing early

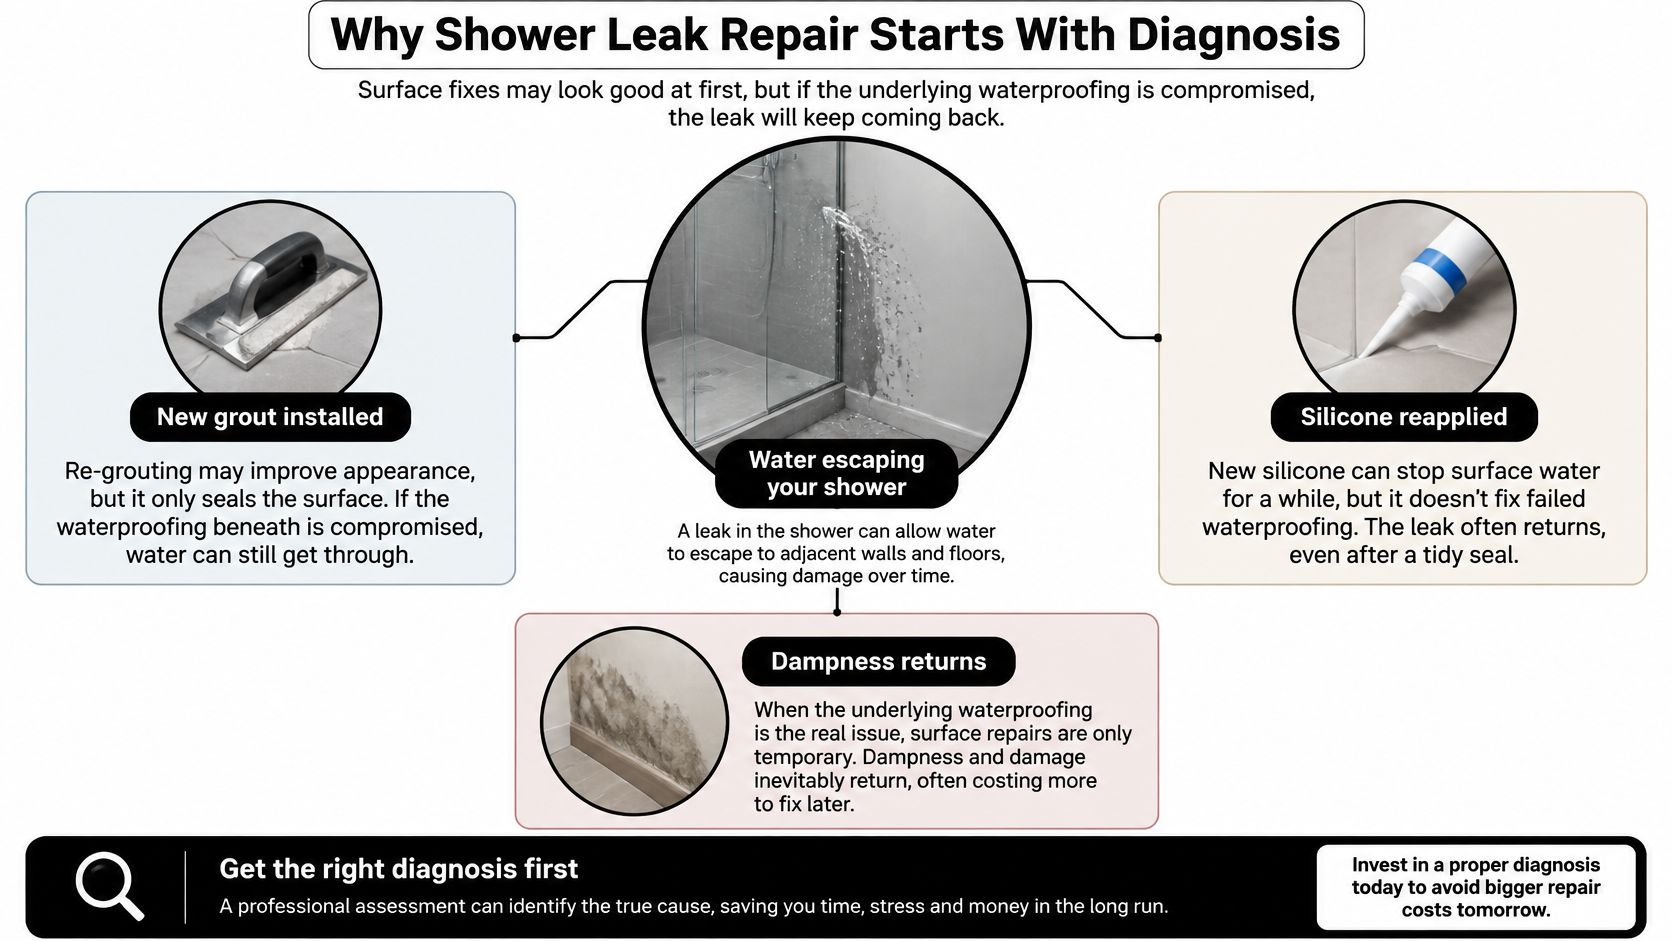
If something looks wrong after installation, it's better to ask questions early. Grout haze, uneven tile edges, drummy-sounding tiles, poor drainage, or persistent damp smells can all point to different issues. Some are cosmetic and easy to resolve. Others suggest a deeper problem with falls, adhesion, or an older waterproofing failure behind the tiled surface.

The key is diagnosis. A leaking shower in an older bathroom isn't always fixed by regrouting. Likewise, a chipped tile doesn't always justify replacing a whole room. The remedy depends on what failed, and where.

When porcelain has been specified well and installed on a sound substrate, maintenance is generally low effort. Most of the serious problems seen in bathrooms come from shortcuts underneath the tile, not from porcelain itself.

Your Bathroom Renovation Questions Answered

Can you use porcelain on both bathroom walls and floors

Yes, and that's one reason it's so common in full renovations. The finish still needs to match the location, especially on floors and shower bases where slip resistance matters.

Is porcelain always better than ceramic in a bathroom

Not in every single location, but it's usually the stronger all-round choice for wet areas. Ceramic can still suit some wall applications. For floors, showers, and bathrooms that get hard daily use, porcelain is generally the safer specification.

Can you tile over existing tiles

Sometimes, but it depends on the condition of the existing surface, the substrate below it, room levels, and whether the assembly remains suitable for the renovation. In many bathrooms, removing the old build-up gives a more reliable result because it allows proper inspection and preparation.

Why hire a registered builder instead of only a tiler

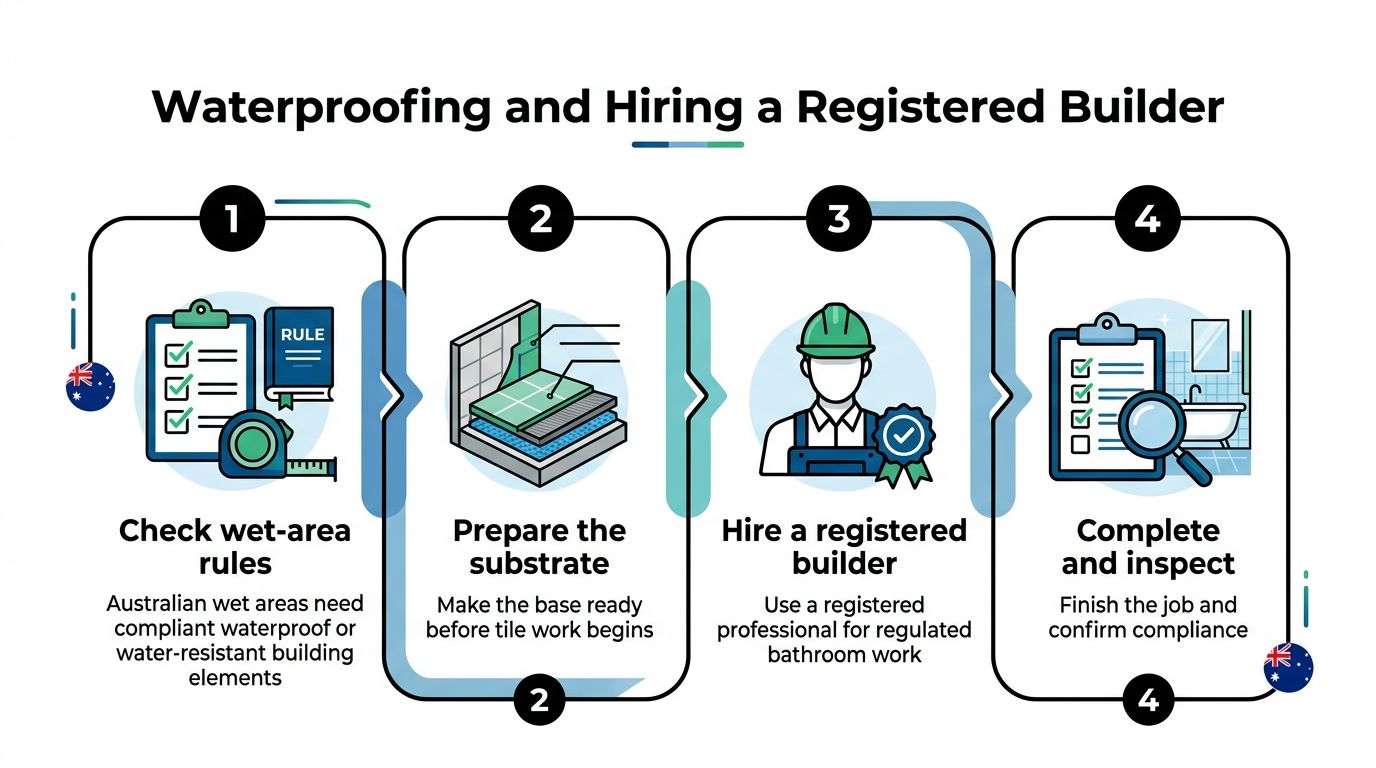
Because a bathroom renovation involves more than tile laying. It includes demolition, waterproofing, plumbing, electrical work, substrate correction, compliance, and trade coordination. A registered builder manages the whole sequence and carries responsibility for the broader build outcome.

How long will a porcelain bathroom last

That depends far more on workmanship and the build-up beneath the tile than on the showroom sample. A well-built bathroom with proper preparation and waterproofing should give long service. A poorly built one can fail early even if the tile itself is premium.

What usually causes bathroom failures

Most failures come back to the hidden work. Inadequate waterproofing, poor falls, movement, weak substrate preparation, and rushed detailing around penetrations and junctions are the usual culprits.


If you're planning a bathroom or ensuite and want the tiling, waterproofing, layout, and renovation scope assessed together, Melbourne Tiling Services P/L provides quotes, renovation planning, and builder-managed bathroom works across Melbourne and greater Victoria.

Tile Repair Melbourne: Expert Solutions for 2026

A lot of tile problems start small. One cracked floor tile near the vanity. A shower tile that sounds hollow when you tap it. Grout that keeps darkening no matter how often you clean it. Most homeowners in Melbourne look at that and think the same thing. Can this be patched quickly and cheaply so life can get back to normal?

Sometimes yes. Often, no.

Good tile repair in Melbourne isn't just about swapping a broken tile for a new one. It's about working out why the tile failed in the first place. In bathrooms, ensuites, laundries, balconies, and wet areas, a surface defect can be the visible part of a deeper issue involving movement, moisture, drainage, screed failure, or waterproofing breakdown. That's where a repair decision overlaps with the bigger picture of bathroom renovations and building compliance. A proper fix protects the room, not just the tile face.

Table of Contents

That Cracked Tile Is Telling You a Story

You step out of the shower and feel a slight crunch underfoot. Later, you notice a fine crack running from the corner of a floor tile to the grout line. A week after that, one patch of grout near the screen always looks damp. None of those signs seem dramatic on their own, but together they usually mean the room is asking for attention.

In Melbourne homes, tile failures often get treated as cosmetic problems first. A handyman replaces one tile. Fresh grout goes in. Silicone gets neatened up. The bathroom looks better for a while, but the same spot starts failing again because the actual problem was underneath.

A close-up view of a cracked white floor tile in a bathroom near the grout lines.

That's why the first question isn't “How do we hide this?” It's “What caused it?”

A single cracked tile can come from impact. Several cracks appearing over time can point to movement in the substrate. A loose shower tile may be a bond failure. Damp grout can be surface moisture, but it can also be a warning sign that water is getting where it shouldn't. In wet areas, especially older bathrooms, the tile layer is only one part of the system. If the waterproofing, screed, falls, or base preparation has failed, a neat patch-up won't last.

Practical rule: If the same area keeps cracking, sounding hollow, leaking, or losing grout, stop treating it as a one-off tile problem.

A Registered Builder matters. A tiler can replace tiles. A builder looks at the room as an assembly of trades, substrate, waterproofing, drainage, and compliance. That broader view is what separates a worthwhile repair from a false economy. In many bathroom renovations, the smartest money is spent on diagnosis first, because that determines whether a local repair will hold or whether the room needs deeper remedial work.

Diagnosing Your Tiles Repair, Regrout, or Renovate?

Many homeowners want the smallest possible job. That's understandable. But the right answer depends less on what you can see and more on what the symptoms are telling you. One of the biggest mistakes in tile repair Melbourne jobs is choosing a cosmetic fix for a structural or waterproofing problem.

Many Melbourne homeowners ask “Can you just replace the broken tile?” when the more important question is “Why did it fail?” A diagnostic approach matters because failed waterproofing is treated as a systemic risk, and recurring grout loss, hollow tiles, and leaks after rain often mean concealed water damage makes a simple patch repair short-lived, as discussed by Melbourne tile regrouting guidance.

A comparison chart outlining the pros and cons of tile repair, regrouting, and full renovation projects.

When a repair is usually enough

A localised repair can work well if the failure is clearly isolated.

  • Single impact damage: One chipped or cracked tile after something heavy was dropped.
  • Stable surrounding area: Adjacent tiles are firm, level, and well bonded.
  • No moisture signs: No mould smell, staining, soft walls, or recurring grout issues.
  • Replacement tile available: The colour, calibre, and finish can be matched closely enough.

This kind of job is still delicate. Removing one tile without damaging its neighbours takes care, especially with rectified porcelain or tightly jointed walls.

When regrouting makes sense

Regrouting is useful when the tiles are sound but the joints are tired, porous, stained, or crumbling. It can improve hygiene, appearance, and water shedding at the surface. It isn't a cure for movement or waterproofing failure.

Good regrouting depends on removing failed grout properly, cleaning the joints, and choosing the right product for the area. If you're comparing surfaces and finishes before any rework, it helps to understand how ceramic, porcelain, marble, and other tiling materials behave in wet areas and repairs.

Regrouting works best when the tile assembly is still healthy. It fails fast when the base underneath is moving or staying wet.

When renovation is the smarter call

There comes a point where repair costs stack up without solving the room. That's when a bathroom renovation or partial rebuild becomes the better decision.

Common signs include:

  • Multiple drummy tiles
  • Leaks outside the shower recess
  • Recurring grout cracking at the same joints
  • Loose floor tiles near the waste or doorway
  • Swelling skirtings, damaged architraves, or staining in adjacent rooms
  • Older bathrooms with repeated patch jobs

In those cases, the issue is rarely just the visible tile. It's more often the system beneath it. A renovation gives access to the substrate, waterproofing, falls, drainage points, and penetrations. That lets the repair address the cause instead of chasing symptoms.

A useful way to think about it is this:

Symptom Best first response
One cracked tile after impact Local repair
Sound tiles, dirty or failing joints Regrout assessment
Hollow tiles plus dampness Investigate substrate
Shower leak or balcony leak Builder-led inspection
Repeated failures in same area Renovation assessment

The cheapest quote is often for the smallest scope. The best value comes from choosing the scope that corresponds to the failure.

A Guide to Common Tile Failures in Melbourne Homes

Tile failure usually follows a pattern. Once you know what to look for, it becomes easier to describe the problem properly and get the right trade involved from the start.

Impact cracks versus movement cracks

An impact crack is usually obvious. Something heavy hits the tile and the damage is centred around that point. The surrounding tiles often stay stable, and the grout lines may remain intact.

Movement cracks behave differently. They tend to appear along stress lines, near corners, across several tiles, or repeatedly in the same zone. That points to movement below the tile surface. In bathrooms, that can mean deflection in the floor, substrate instability, or stress around penetrations and transitions.

Loose tiles and drummy floors

A “drummy” tile sounds hollow when tapped. Homeowners often notice it first by feel rather than sound. The floor feels different. The tile may flex slightly, or grout around it starts powdering out.

That hollow sound usually means the bond between tile and base has been compromised. Sometimes the issue is poor adhesive coverage. Sometimes moisture has weakened the bond. In older wet areas, persistent water exposure can affect more than one layer of the assembly, so the tile is only the first thing you notice.

Grout breakdown that keeps returning

Grout does age, and not every grout problem means a major rebuild. But if the same joints keep cracking or washing out, there's usually a reason. Recurrent failure often points to movement, trapped moisture, or both.

Watch for these clues:

  • Same line, same problem: Grout keeps reopening in exactly the same joint.
  • Dark joints that never dry: Moisture is lingering where it shouldn't.
  • Powdering and edge staining: Water is moving through the assembly.
  • Silicone failure nearby: Junctions are under stress or staying wet.

If grout fails once after many years, that may be age. If it fails again soon after replacement, assume the grout isn't the real problem.

Leaks that show up away from the tile

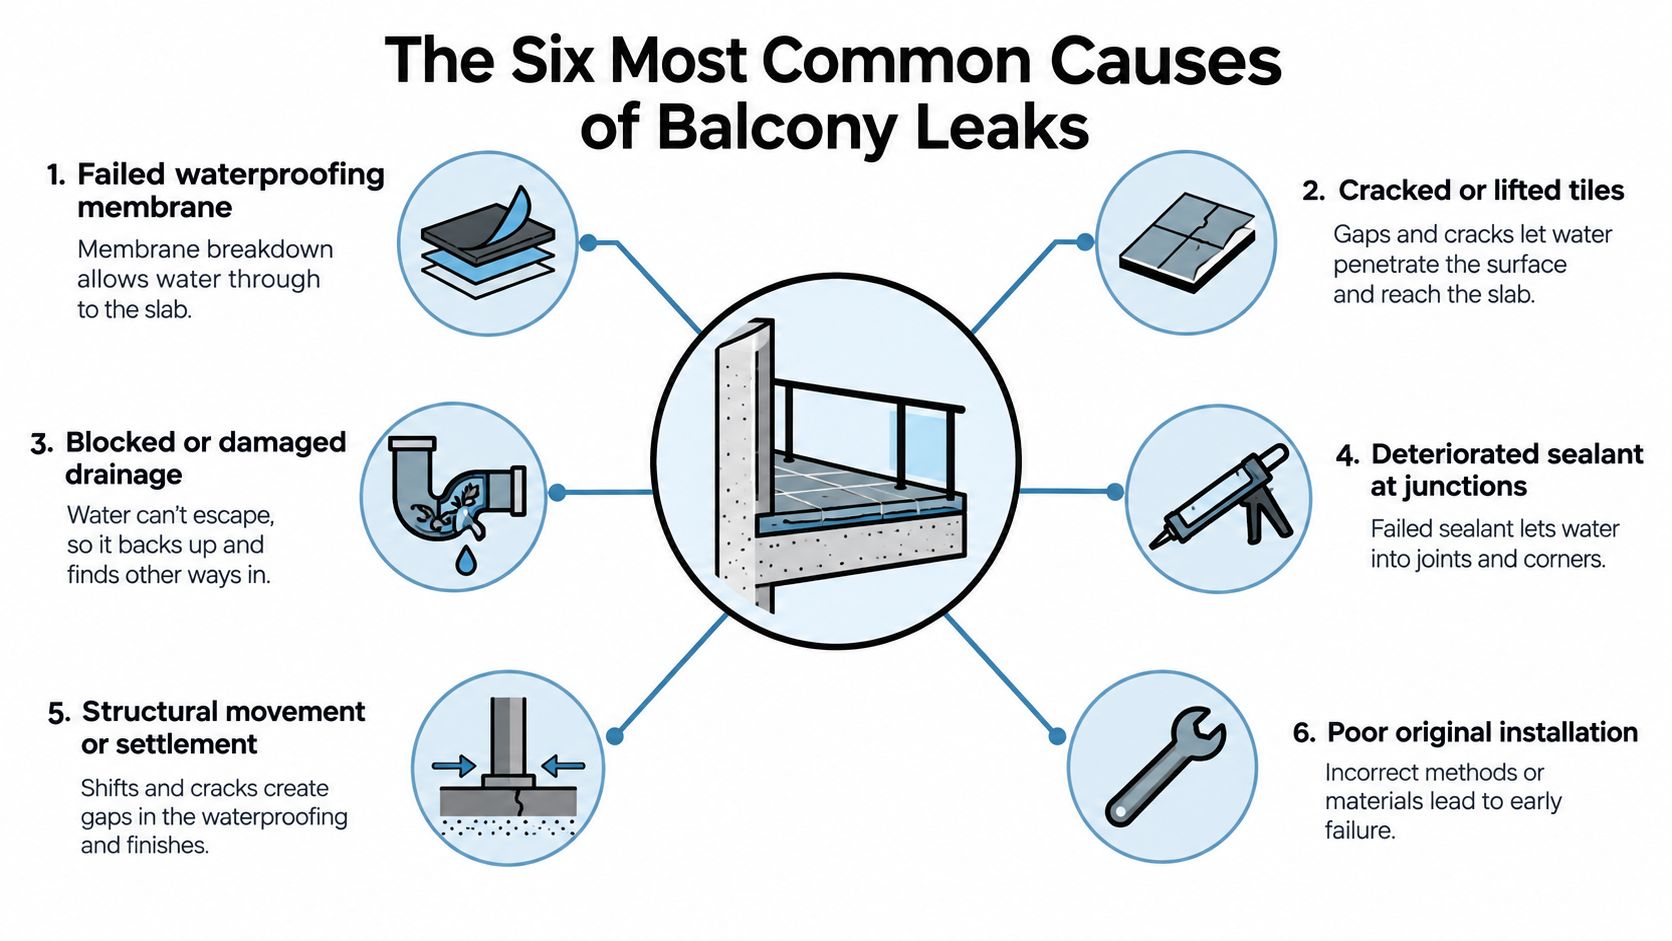
Leaking showers and balconies rarely announce themselves neatly. The visible stain may appear outside the bathroom, below the slab edge, in a wardrobe backing onto the shower, or on a ceiling below. That's why homeowners sometimes miss the link between a small tile issue and a bigger waterproofing defect.

Tiles and grout are not the waterproof layer. They're the wearing surface. Once water gets past them and the membrane or substrate isn't doing its job, the moisture travels. By the time you see peeling paint or swollen trim, the repair decision is no longer just about replacing a tile. It's about protecting the building fabric.

DIY vs Professional Repair Is It Worth the Risk?

DIY has its place. Replacing a soap dish, scraping old silicone, or cleaning stained grout can be sensible if you know the limits. The risk starts when a visible tile defect tempts you into disturbing a wet area assembly without understanding what's beneath it.

Where DIY can work

DIY is usually safest when the job stays cosmetic and low-risk.

  • Surface cleaning and maintenance: Removing soap build-up, mould staining, or old sealant residue.
  • Minor aesthetic touch-ups: Small chips in non-critical areas where waterproofing isn't involved.
  • Observation and documentation: Marking crack progression, photographing damp spots, or checking whether a tile sounds hollow.

Once demolition starts, the stakes change. Matching tile size is one thing. Matching the original bed height, maintaining falls, protecting adjacent waterproofing, and avoiding collateral damage are another.

Where a registered builder changes the outcome

In Melbourne bathrooms, repairs often involve more than one trade. That's the point many homeowners discover they don't have a simple tiling issue at all. They have a leaking shower, damaged substrate, poor drainage, or a failed membrane.

If you're weighing up the risks in wet areas, it helps to understand how leaking showers are properly assessed and repaired before deciding whether a patch job is enough.

Here's the practical comparison:

Factor DIY Repair Professional Repair (Registered Builder)
Upfront cost Lower at the start Higher at the start
Long-term cost Can rise quickly if the repair fails Better aligned to root-cause repair
Tools required You source and learn as you go Trade tools and proven methods already in use
Time Weekends, delays, repeat attempts Planned sequence with coordinated trades
Tile matching Often limited to what you can find Better strategy for blending, substitution, or redesign
Waterproofing judgement Easy to underestimate Assessed within the whole room system
Compliance Hard to manage if the scope expands Managed as part of the build process

Professional repair isn't only about workmanship. It's also about decision-making. A registered builder looks at sequencing, protection of other finishes, access, moisture risk, and whether a local repair could create a larger liability later. That matters in family bathrooms, investment properties, and apartments where leaks affect neighbouring lots.

There's also the practical issue of accountability. If a repair touches waterproofing, drainage falls, or concealed damage, you want a scope that reflects the actual condition of the room. That's much harder to achieve with piecemeal patching.

The Professional Process A Registered Builder's Workflow

A sound tile repair job starts before a single tile is lifted. In Melbourne bathrooms and balconies, the visible crack is often the last sign to appear, not the first thing to go wrong. A registered builder approaches the work as fault finding first, repair second.

A professional infographic outlining the seven-step workflow for residential or commercial tile repair and restoration services.

Step one is always diagnosis

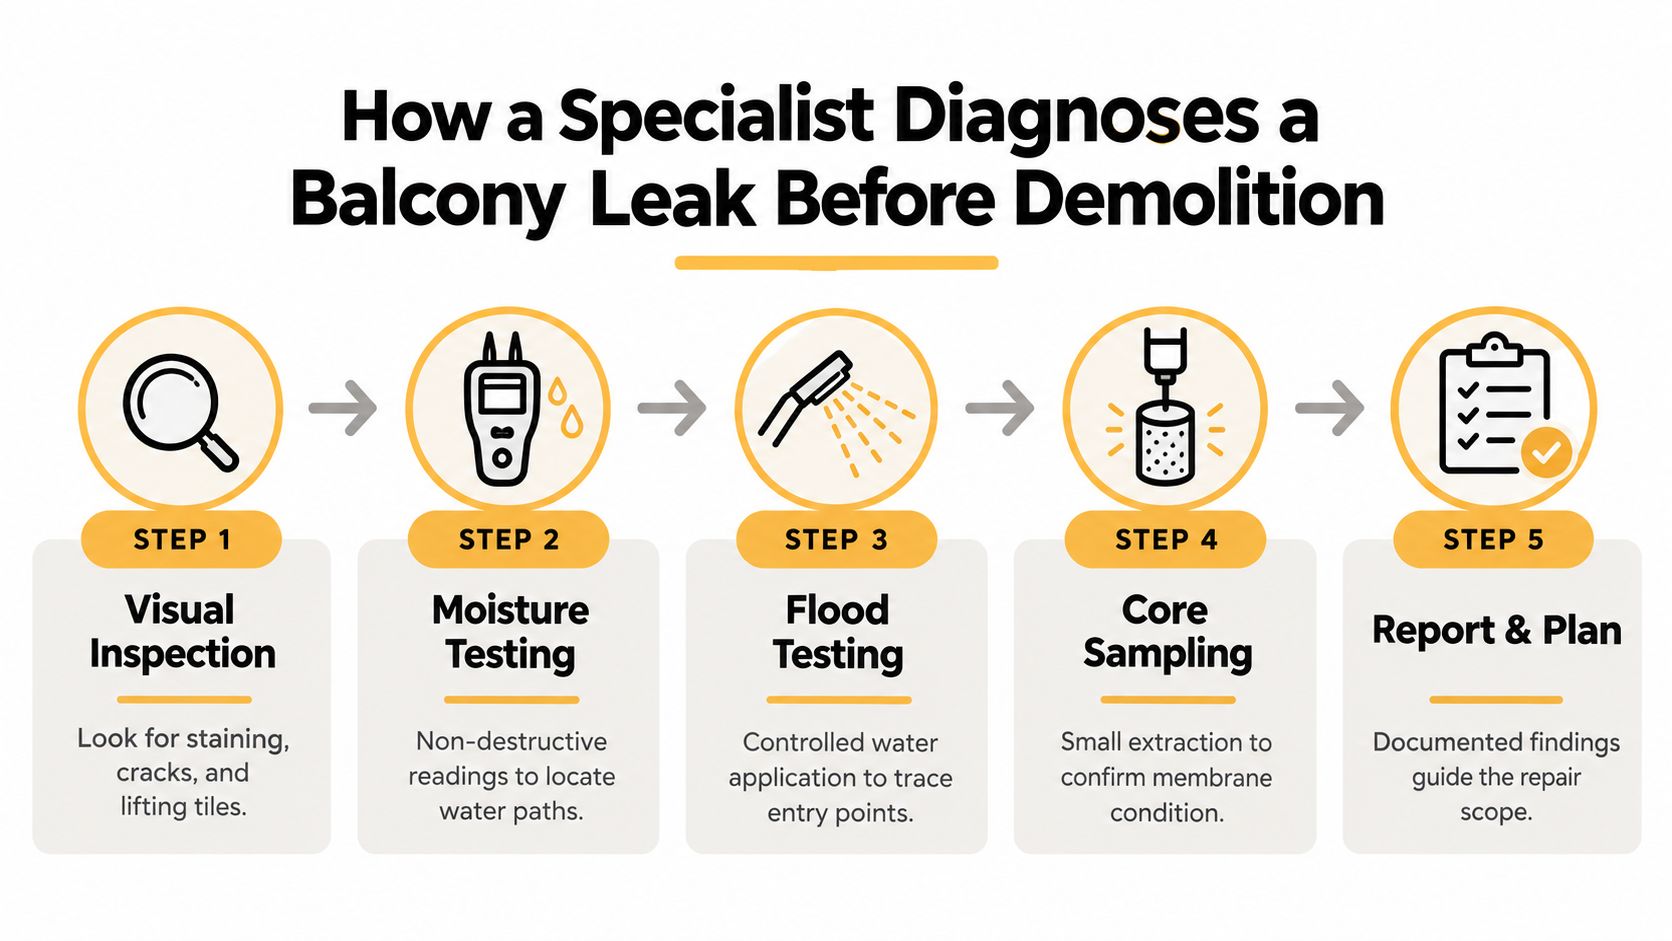
The first inspection should look beyond the broken tile. The pattern of failure matters. One loose tile near a doorway can point to movement. Repeated grout loss around a shower base can point to moisture. Hollow sounding tiles across a larger area can suggest bond failure or a problem in the substrate below.

That inspection usually includes checking cracked areas, tapping surrounding tiles, looking at grout joints, inspecting adjacent rooms, and asking practical questions about the room's history. Has the area been repaired before? Does the problem worsen after showers? Has silicon been replaced more than once? Those details help separate a local repair from a room-wide issue.

A builder-led assessment should narrow the scope into the right category:

  • Isolated tile failure
  • Localised debonding
  • Waterproofing concern
  • Drainage or screed defect
  • Full wet-area remedial work

That distinction matters because the repair method changes with the cause. Replacing one tile over a wet or unstable base usually means doing the same job twice. If the fault reaches the waterproofing layer, the work also needs to be judged against Victorian requirements for wet area repairs and certification. The standard for that is clearer when the scope is reviewed alongside waterproofing compliance requirements in Victoria.
Removal prep and rebuild

Once the cause is understood, the site gets prepared properly. In an occupied home, that means protecting vanities, shower screens, timber floors, and access paths. In apartments, it can also mean dust control, lift protection, acoustic limits, and strict work hours.

Tile removal needs control. The goal is to expose the failed area without damaging sound surrounding work that can stay in place. During removal, the underlying condition often becomes obvious. Failed patch repairs, weak bedding, poor adhesive coverage, cracked screeds, and moisture-damaged backing are common findings.
A proper rebuild may involve:

  • Substrate correction: Repairing unstable, damaged, or moisture-affected base materials
  • Screeding or levelling: Restoring the correct plane and falls so water drains as intended
  • Waterproofing repairs where required: Reinstating the wet-area system, not only the tile finish
  • Tile selection and set-out: Matching the existing layout and appearance as closely as practical

A registered builder adds value over a tile-only patch service. If the demolition exposes failed waterproofing, structural movement, or concealed water damage, the scope can be adjusted before the room is closed up again. That protects the rest of the bathroom, not just the spot you can see today.

Finishing the repair properly

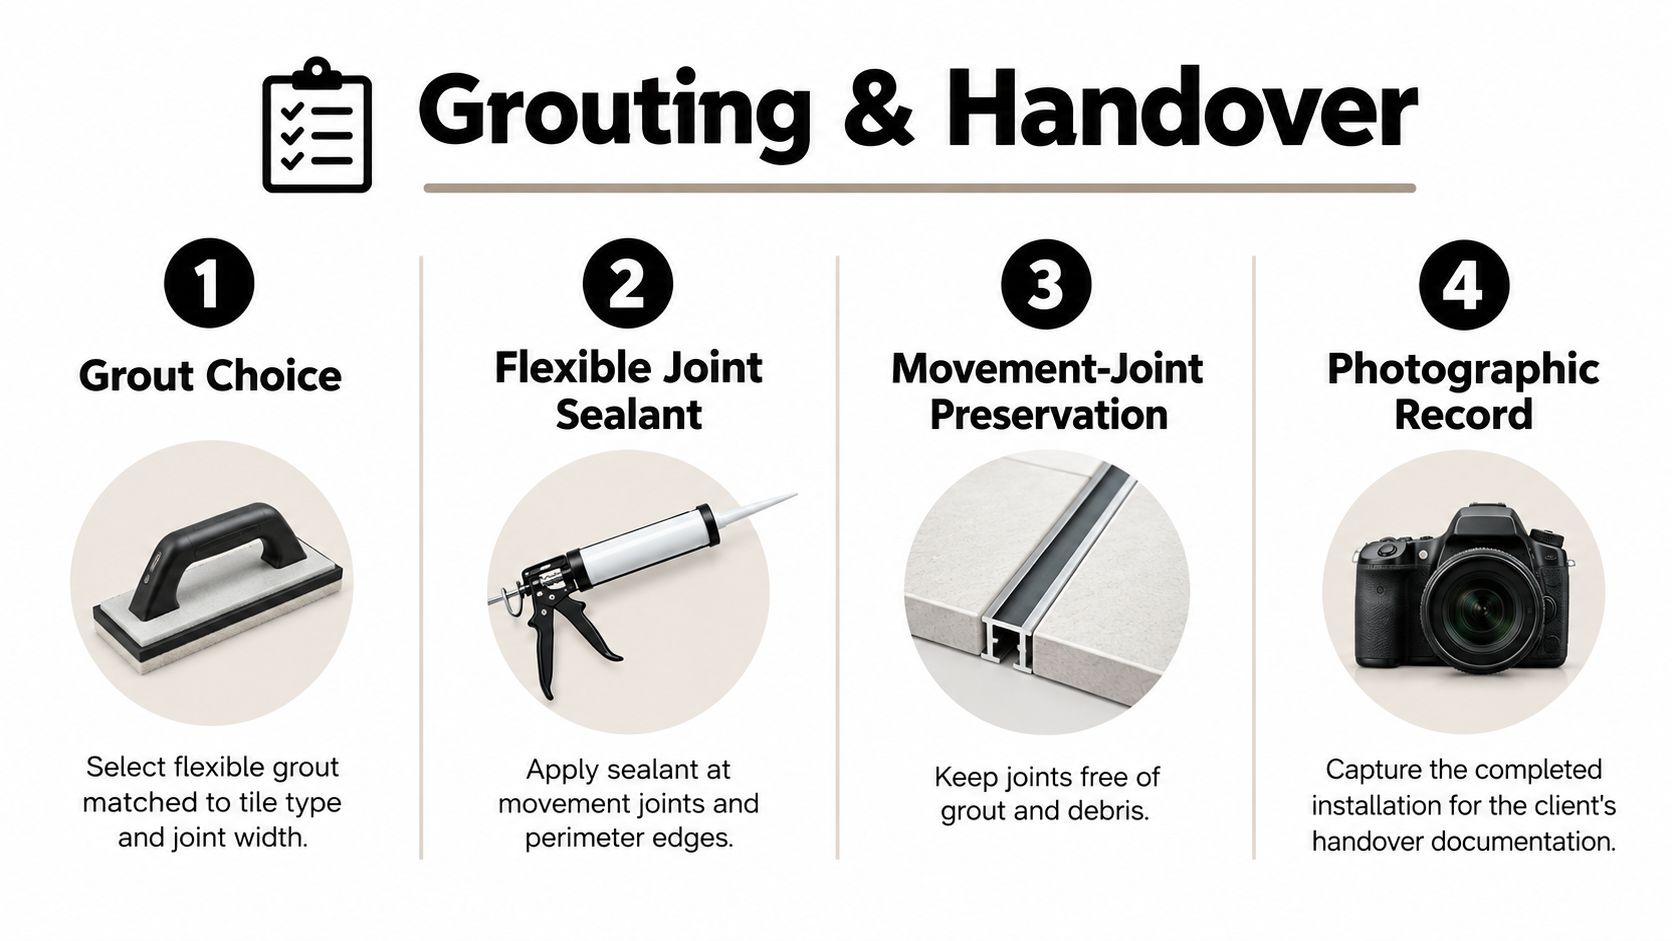
The final stage is about service life as much as appearance. Tiles need to sit flat, joints need to be consistent, and replacement pieces need to work with the existing room rather than draw attention to themselves. Grout colour matters. Joint width matters. Movement joints and sealant details at junctions matter as well, especially in showers, balconies, and floor-to-wall transitions.

A clean-looking repair can still fail if water keeps sitting in the wrong place, if the substrate still moves, or if the waterproofing was already compromised.

Melbourne Tiling Services P/L is one example of a builder-led operation that handles bathroom renovations, waterproofing, screeding, leak rectification, and tile installation under a registered building scope. That model suits repairs that affect the integrity of the room, involve more than one trade, or raise compliance questions.

The handover should be clear and practical. Homeowners should be told what failed, what was repaired, what remains outside the repaired area, and whether any further remedial work is recommended. That is how small tile repairs stay small, instead of turning into a larger bathroom problem six months later.

Understanding Costs Timelines and Compliance in Melbourne

A cracked shower tile can look like a half-day job. Then the tile comes up, the bed is damp, the substrate is soft, and the repair is no longer about one tile. That is why pricing and timing in Melbourne vary so much. The visible damage is only the starting point.

A proper quote has to allow for diagnosis, careful removal, protection of adjacent finishes, and making good once the cause is confirmed. If the problem stays local, costs stay contained. If the repair exposes failed waterproofing, movement, or water damage, the job shifts from tile replacement to remedial building work.

What affects cost

The main cost drivers usually include:

  • How much demolition is needed to reach sound material
  • Whether replacement tiles or suitable alternatives can be sourced
  • Tile size, finish, and breakage risk during removal
  • Access conditions in occupied homes, apartments, and strata buildings
  • The condition of the substrate, screed, or wall sheeting
  • Whether other trades are required, such as waterproofers or carpenters

Material also changes the risk profile. Standard ceramic is usually more forgiving. Large-format porcelain, stone, and older brittle tiles often take more time because removal has to be controlled and the finished repair is less tolerant of unevenness, lipping, or colour variation.

The Melbourne market has a wide spread in quoting styles and scope. Some quotes cover a patch only. Others include investigation, rectification, drying time, and compliance steps if the work affects a wet area. The cheaper figure is not always the lower-cost outcome if the original cause is left in place and the bathroom has to be opened again.

What affects timing

Area matters less than sequence.

A single dry-area tile with matching stock on hand can be repaired quickly. A shower repair can slow down for good reason. Materials may need time to dry. Waterproofing and adhesives have curing requirements. Access in apartment buildings can limit working hours, waste removal, and deliveries.

Common timing factors include:

  • Availability of matching tiles, trims, and grout
  • Drying time after leaks or moisture exposure
  • Trade coordination if the job goes beyond tiling
  • Noise, dust, and access rules in occupied properties
  • Strata booking windows, lift protection, and site restrictions

Homeowners usually want one firm timeframe. In practice, the honest answer depends on what is found once the room is opened. Builder-led repairs are better at managing that uncertainty because the scope can be adjusted properly instead of being forced into a tile-only fix that does not suit the condition underneath.

Why compliance matters

Compliance becomes part of the job as soon as the repair touches the waterproofed system or broader building elements. At that point, the question is no longer just how to replace a tile. The question is whether the bathroom still meets the standard expected of a wet area and whether the repair has been documented correctly.

That is where registered builder oversight matters. A builder can assess whether the failure is isolated or part of a larger defect, bring in the right trades, and make sure the repair method suits the actual condition of the room.

If your job may involve wet-area rectification, read more about a waterproofing compliance certificate in Victoria and when it applies. It helps clarify what work needs formal sign-off and why that matters for resale, insurance, and the long-term integrity of the bathroom.

Frequently Asked Questions About Tile and Bathroom Projects

Can you match old or discontinued tiles?

Sometimes. If spare tiles were kept from the original job, that's ideal. Without them, matching becomes a blend of size, edge profile, surface finish, and colour tone. In some repairs, a close match works. In others, a deliberate design change looks better than a poor patch.

Can premium tiles be repaired invisibly?

Not always. High-end porcelain, marble, and large-format products can be difficult to remove and replace without affecting adjacent tiles or revealing slight variation. Repairing premium or large-format tiles in occupied strata properties also brings practical issues like noise limits, dust control, and pattern mismatch risk, as highlighted in this discussion of premium tile repair in occupied properties.

Is a Registered Builder really necessary for bathroom work?

If the issue is confined to an isolated tile, not always. But once the job touches waterproofing, drainage, substrate failure, or multiple trades, builder oversight becomes far more important. Bathrooms are systems, not just finishes.

What about apartments and strata properties?

Access, working hours, waste removal, lift protection, and neighbour impact all need planning. The quality of the repair is only half the job. The other half is how the work is managed.

Should I repair or renovate?

If the failure is local and the cause is clear, repair can be the right move. If the room has repeat issues, hidden moisture, or signs of broader deterioration, renovation is often the more durable decision.


If you need clear advice on tile repair, leaking showers, balcony issues, or a bathroom renovation scope, Melbourne Tiling Services P/L can inspect the problem, explain whether repair or rebuild makes more sense, and provide a practical next step for your property in Melbourne.

Swimming Pool Tiling Melbourne: 2026 Guide

You're probably looking at one of two situations right now. Either you're planning a new backyard pool and want the finish to feel as refined as the rest of the home, or you've got an older tiled pool in Melbourne that's starting to show the usual warning signs: loose tiles, stained grout, hollow spots, water loss, or patch repairs that never quite matched.

That's where many homeowners get steered in the wrong direction. They focus on tile colour first, price second, and only much later discover that swimming pool tiling in Melbourne isn't a decorative add-on. It's a wet-area construction job tied to substrate preparation, waterproofing, movement, drainage, trade sequencing, and compliance.

A properly tiled pool has more in common with a high-end bathroom renovation than is often appreciated. In both, the visible finish only performs when the hidden system underneath has been built correctly. The difference is that a pool is exposed to permanent water load, exterior conditions, and structural movement. That raises the stakes.

Table of Contents

The Foundation of a Flawless Pool: Waterproofing and Screeding

A tiled pool only lasts when the shell underneath is prepared as a system. That means the shape has to be true, the falls have to be right, the substrate has to be sound, and the waterproofing has to be applied with discipline. If any one of those steps is handled casually, the finish above it becomes vulnerable.

A newly installed empty grey swimming pool shell ready for tiling in a backyard setting.

Homeowners often hear the word screeding and assume it just means flattening a surface. In pool work, it's more exact than that. Screeding creates the correct plane for the tile finish, resolves minor irregularities in the shell, helps maintain clean lines through walls and floor transitions, and allows steps, benches, entries and curves to read properly once tiled.

Why the hidden layers matter most

The same lesson comes up repeatedly in complex bathroom renovations. Clients see stone, porcelain, niches and fixtures. Trades see substrate condition, movement, falls, junctions and membrane continuity. Pools work the same way, only with a much harsher service environment.

For a technically sound Melbourne pool, substrates should not vary more than 10 mm in 3 m for thick-bed installations, and the waterproofing build-up should use two coats to achieve at least 1.2 mm dry-film thickness, followed by 24 hours curing before tiling, as outlined in ARDEX's Australian swimming pool tiling recommendation.

That's not paperwork for paperwork's sake. If the substrate is out, the tile bed becomes inconsistent. If the membrane is thin, rushed, or interrupted at changes in plane, water pressure eventually finds the weakness. In pool work, shortcuts don't stay hidden.

For homeowners comparing wet-area methods, it helps to understand how waterproofing systems for Melbourne tiling projects are structured across bathrooms, balconies and pools. The principle is the same. Contain water, protect the structure, and build the finish on a stable base.

What works and what doesn't

What works:

  • Accurate substrate correction so the shell presents a true surface for adhesive and tile.
  • Full membrane build-up applied in sequence, not patched in isolated spots.
  • Respect for curing time before the next trade steps in.
  • Set-out planning before tiling starts, especially around steps, returns, skimmer areas and curved walls.

What doesn't:

  • Tiling over an uneven shell and expecting adhesive to make up the difference.
  • Treating waterproofing as a quick coating job instead of a controlled wet-area process.
  • Rushing the handover between trades while surfaces are still green.
  • Assuming a nice tile can rescue poor prep.

Practical rule: If the shell, screed and membrane aren't right, the tile finish is already compromised before the first sheet goes on.

Choosing Your Pool Tiles: A Melbourne Style and Durability Guide

A tile can look perfect in the showroom and still be the wrong choice for your pool.

I see that mistake when owners choose on colour first, then try to force the material to suit the shell, the waterline, the steps and the maintenance demands later. Pool tiling is tied to structure, waterproofing and movement. That is one reason a registered builder approaches tile selection differently from a decorator or retail salesperson. The finish has to work with the build system underneath it, not just the design brief.

Melbourne conditions make that even more important. Summer heat, winter temperature swings, UV exposure, pool chemistry and regular cleaning all place pressure on the tile assembly. The right selection balances appearance, slip considerations, cleaning effort, pool geometry and the way the shell has been formed.

How each material behaves in a pool

Feature Glass Mosaic Tiles Porcelain Tiles Ceramic Tiles
Look Luminous, reflective, premium finish Clean, contemporary, versatile Traditional and varied
Best use Feature interiors, curves, waterline detailing Broad surfaces, steps, surrounds, modern formats Simpler layouts where the product is rated for pool use
Handling curves Very good with mosaic format Depends on tile size and pool shape Depends on tile size and pool shape
Visual effect in water Strong shimmer and colour depth More solid, architectural appearance Softer, classic look
Maintenance feel Needs careful installation and consistent backing Generally straightforward if selected well Varies with product quality
Budget position Higher material entry point Mid to premium depending on range Lower to mid depending on range

Material cost matters, but it should not drive the first decision. Industry guidance from SPASA Australia's pool and spa information resources is useful for understanding product suitability, safety and pool construction expectations, especially where different finishes and installation methods are being compared. In practice, renovation work usually costs more than new work because access, demolition, substrate correction and detailing are harder to price than tile supply alone.

A practical way to compare finishes before you commit is to review tiling materials used across wet areas and exterior applications. The same product questions apply in high-end bathrooms and balconies. Water absorption, slip resistance, edge quality, chemical resistance and compatibility with the fixing system all matter. In pools, there is less tolerance for getting any of them wrong.

What usually works best in Melbourne homes

Glass mosaics are often the right answer for curved pools, rounded entries, spa spillovers and feature interiors where water colour and light reflection are part of the design. They suit complex shapes well because the sheet format can follow curves that larger tiles fight against. The trade-off is that every inconsistency shows. If the substrate is uneven, the sheets are poorly aligned, or the adhesive coverage is patchy, the finish will read that way forever.

Porcelain is a strong option for geometric pools, steps, bench seats, surrounds and coping transitions where a sharper architectural line is wanted. Good porcelain is dense, stable and easier to keep visually consistent across large areas. The limitation is format. Large units can look excellent on straight runs, but they are less forgiving on tight curves, internal angles and irregular shells.

Ceramic can still be used successfully, but only when the product is correctly specified for pool conditions. That means checking more than colour and price. Water absorption, frost tolerance where relevant, slip rating on walkable surfaces and manufacturer suitability for submerged use all need to be clear before the tile is ordered.

The pool shape should guide the tile format. A small mosaic may suit a freeform shell. A larger porcelain tile may suit a rectilinear lap pool. A mixed scheme can also work well, with mosaics internally and porcelain to adjacent surrounds, but the junctions need to be resolved properly so the finish looks deliberate rather than pieced together.

This is where builder-level experience matters. Pool tiling sits in the same technical family as complex bathroom renovations. Both rely on sound substrate preparation, disciplined waterproofing and material compatibility. The difference is that a pool stays under constant water load. Selection is not just a style exercise. It is part of the construction method.

The right pool tile is the one that suits the shell, the waterproofed system, the pool's use and the level of maintenance you are prepared to live with for years.

The Pool Tiling Installation Process and Professional Timeline

Good pool tiling follows a sequence. When that sequence is respected, the finish looks calm and intentional. When trades overlap, materials are rushed, or decisions are made on the run, the defects usually show up later, not immediately.

A professional pool tiling installation timeline graphic showing the seven essential steps from preparation to handover.

A professional program starts with the shell, not the tile delivery. On renovation work, the pool may need to be drained, stripped, cleaned and assessed before anyone can confirm the final tile method. Old coatings, failed adhesive, substrate contamination and previous repairs can all alter the scope.

What happens before the first tile goes on

A registered builder or properly coordinated lead contractor will usually move through the job in this order:

  1. Pool assessment and preparation
    The shell is checked for soundness, contamination, visible cracking, and geometry issues. Existing finishes may need removal. Surfaces are cleaned and prepared so the next layers can bond properly.

  2. Repairs, screeding and surface correction
    During this stage, steps, floors, walls, curves and edges are brought into line. Clean set-out later depends on disciplined prep here.

  3. Waterproofing application
    The membrane system is applied as part of the wet-area build-up, then left to cure as required before tiling begins.

  4. Tile set-out and laying
    Sheet lines, corners, penetrations, returns, skimmer areas and step faces are planned before adhesive is spread. This is one of the biggest differences between trade craftsmanship and reactive installation.

Here's a visual overview of that sequencing in practice:

Why the timeline can't be rushed

Once tiles start going on, the pace still has to stay controlled. Adhesives need proper conditions. Grouting needs timing. Cleaning needs care. Final inspection needs a clear eye, not a race to fill the pool before a weekend event.

The timeline on swimming pool tiling Melbourne projects varies with access, weather, shell condition, detail complexity and whether it's new work or renovation. What matters most is not whether someone promises speed. It's whether they can explain the sequence and justify the waiting periods between stages.

A well-run job also protects finished work from following trades. That's another place where builder-led projects stand out. Someone is responsible for the whole site, not just for laying tile.

  • Preparation stage often reveals hidden issues that change the method.
  • Curing periods protect the waterproofing and tile bond from premature loading.
  • Inspection points catch alignment, lippage, sheet lines and coverage problems before they're locked in.
  • Final fill should only happen once the installation system is ready for service.

Budgeting for Swimming Pool Tiling in Melbourne

A budget blowout on a tiled pool usually starts with a cheap-looking quote and a shell that has not been properly assessed. By the time the old finish is removed, hollow areas show up, fittings need correction, falls are out, and the tiling allowance no longer reflects the actual job.

That is why pool tiling should be budgeted as a building and waterproofing project first, and a finish selection second. A registered builder prices the shell condition, substrate preparation, waterproofing continuity, movement detailing, and compliance risk. A tiler pricing off photos or a rough square metre rate often does not.

What actually drives the cost

Square metre rates are only one part of the picture. The final cost usually turns on five things. Shell condition, access, tile selection, detail complexity, and who is taking responsibility for the work as a whole.

New pools are generally more predictable because the substrate and sequencing are controlled from the start. Renovations are different. Removal of old finishes, rectification of cracked or uneven surfaces, resetting falls, and coordinating waterproofing repairs can add a large amount of labour before a single new tile is laid.

Industry guidance from SPASA Australia is useful here because it frames pool construction and renovation as a specialist trade area with compliance, sequencing, and handover obligations, not a simple surface upgrade.

A smaller plunge pool can also cost more per square metre than owners expect. The total area is lower, but the setup, detailing, waterproofing, cutting, and cleanup are still there. Steps, benches, curved walls, spas, wet edges, and feature bands increase labour quickly because they slow set-out and demand tighter finishing.

Where quotes separate

The differences usually sit in the parts of the quote that are easy to miss:

  • Preparation and repairs
    Grinding, render correction, crack treatment, screed work, and substrate rebuilding are often provisional or excluded.

  • Waterproofing scope
    Some contractors allow for patching only. Others include a full system with detailing at penetrations, coves, corners, and changes in plane.

  • Tile type and format
    Glass mosaics, custom blends, small modules, and patterned layouts take more time to install and clean correctly than a simple standard format tile.

  • Site access and protection
    Tight access, manual handling, waste removal, and protection of surrounding finishes all affect labour.

  • Responsibility for the whole job
    Builder-led projects usually include coordination of repairs, sequencing of trades, inspections, and accountability if latent issues appear once surfaces are opened up.

The cheapest quote often pushes risk back onto the homeowner. If the shell is worse than expected, if the substrate is out, or if the waterproofing needs more than patch repairs, variations arrive fast.

Ask direct questions. Has the quote allowed for demolition and disposal? How are shell repairs handled? Is waterproofing included, and to what extent? Who is responsible if fittings, corners, or movement joints need correction? If the answer is vague, the budget is not settled.

A good quote does not have to be the lowest figure. It has to define the scope clearly, separate allowances from fixed work, and show who carries responsibility when site conditions change. That clarity is where long-term value sits.

Common Pool Tiling Problems and Ensuring Long-Term Durability

Most tiled pool failures aren't random. They're built in early. The symptoms appear later as hollow tiles, cracked grout, leaking junctions, staining, movement at corners, or tiles that start to release after the pool has been in service for a while.

Homeowners often blame the visible product first. In practice, the root cause is usually deeper. Bond failure, poor substrate preparation, inadequate waterproofing continuity, weak detailing at changes in plane, or no allowance for movement are far more common explanations than “bad tiles”.

Failures that start below the tile

A drummy tile isn't just an annoyance. It's a warning. It can point to incomplete adhesive coverage, contamination on the substrate, movement beneath the tile bed, or a tiling system that was forced onto an unprepared surface.

Grout deterioration can also mislead people. Grout is often treated as if it failed on its own. In reality, grout may be responding to movement, water migration, poor joint design, or stresses transmitted from the shell.

Problems that repeatedly show up in pool rectification work include:

  • Hollow-sounding areas where the tile bond has weakened.
  • Cracking at corners and transitions where movement concentrated but no proper allowance was made.
  • Persistent leaks tied to junctions, penetrations, or membrane failure beneath the finish.
  • Patchy repairs that solve the symptom but leave the underlying cause in place.

Movement joints are not optional

Trade discipline is paramount. A pool moves. It moves with temperature, moisture, load and settlement. Tiling doesn't stop that movement. It has to accommodate it.

Australian training guidance for domestic pools and spas recommends movement joints every 2.5–4 m, and notes that a 50 m pool can allow for about 10 mm average expansion after filling, with joint widths around 3–4 times the anticipated movement, or about 30–40 mm, to reduce bond failure from moisture-driven dimensional change, as set out in this Australian pool tiling training standard.

That's the technical version of a simple truth. If the system doesn't have room to move, the stress shows up somewhere else.

Tiles don't fail because they got wet. They fail because the installation didn't account for what water, movement, and pressure do over time.

A long-lasting pool build manages movement early, not after the cracks appear.

Why Your Pool Tiler Should Be a Registered Builder

A tiled pool sits across more than one trade boundary. That's the key point many homeowners miss. It involves structure, waterproofing, set-out, finishing, penetrations, coordination with pool systems, and site responsibility. That's why the person leading the work matters as much as the person laying the tiles.

An infographic explaining the benefits of choosing a registered pool builder for your swimming pool tiling project.

The Australian Bureau of Statistics separates Wall and Floor Tilers from Swimming Pool and Spa Builders, and notes that builders may install pool plumbing, electrical systems, hardscape areas and decorative elements, while registration or licensing may be required, as shown in the ABS occupation classification for pool builders and tilers. That distinction reflects what happens on real projects. A pool isn't one trade working in isolation.

A pool project involves more than tiling

A registered builder approaches a tiled pool as a managed construction package. That includes:

  • Trade coordination across tilers, waterproofers, plumbers, electricians and other required specialists.
  • Scope responsibility when the shell condition, penetrations, drainage or sequencing affect the tile finish.
  • Compliance mindset so the installation is treated as part of the building work, not a cosmetic overlay.
  • Risk control through documentation, staging, inspections and site management.

That broader oversight matters on renovation work especially. Once the old finish comes off, someone has to decide what gets repaired, what can remain, which trade returns next, and when the surface is ready for the following stage.

Why bathroom renovation experience matters

The connection to bathroom renovations is stronger than most homeowners expect. In premium bathroom work, the most reliable results come when one registered builder manages waterproofing, screeding, plumbing, electrical, carpentry and finishes under one program. Pool work benefits from the same structure.

A contractor such as Melbourne Tiling Services P/L on its commercial tiling page presents itself as a registered builder coordinating multi-trade tiling and waterproofing work across Melbourne. That model is relevant to pool tiling because it reflects the same need for oversight, trade sequencing and wet-area discipline.

If you hire only for the visible finish, you may still need someone else to carry the structural and compliance side. If you hire a registered builder with tiling expertise, those responsibilities are more likely to sit under one roof.

Selecting Your Tiling Professional: Quotes, Designs, and Warranties

By the time you're comparing contractors, you should be looking for clarity, not sales language. The right professional won't just tell you the pool will look good. They'll show you how the work will be documented, staged and protected.

A quality proposal for swimming pool tiling Melbourne work should read like a project plan, not a one-line rate. If the quote is vague, the disputes usually arrive later.

What a proper quote should include

Look for a quote that breaks out the practical parts of the job:

  • Preparation scope
    Removal, cleaning, grinding, repairs, substrate correction and disposal should be identified.

  • Waterproofing and setting methodology
    You want to know what wet-area build-up is being proposed and who is responsible for it.

  • Tile supply and installation detail
    The quote should identify what's being supplied by whom, and whether trims, edges, fittings and feature areas are included.

  • Allowances and exclusions
    Unknown substrate repair work, specialist access equipment, or owner-supplied materials should be clearly stated.

For design-led projects, visual planning is valuable. Many homeowners benefit from sample boards, layout sketches or 3D drawings before work starts, especially when they're balancing water colour, interior tile choice, coping, and adjacent paving. That's common in quality bathroom renovation work and it translates well to pools.

What to ask before you sign

Ask direct questions.

Who is managing the whole project if additional trades are needed?
Who carries responsibility for waterproofing and substrate readiness?
What happens if hidden defects are found during demolition or surface preparation?
How will variations be approved?
What workmanship warranty is being offered, and how are material warranties handled?

Also ask for evidence of organisation. Clean documentation usually reflects clean site management.

A reliable contractor should be comfortable discussing:

  • Builder registration status
  • Public liability insurance
  • Who supervises the job
  • How defects are rectified if they arise
  • How the final finish is protected before handover

The best appointments are calm, specific and transparent. No pressure. No evasive answers. Just a clear explanation of how the pool will be built, tiled and signed off.


If you're planning a new pool finish or renovating an existing tiled pool, Melbourne Tiling Services P/L is one Melbourne option to consider for builder-led tiling and waterproofing work. The company operates as a registered builder and bathroom renovation specialist, which is relevant for pool projects that need coordinated wet-area expertise, detailed preparation, and clear quoting before work begins.

Modern Bathroom Tiling: A Melbourne Homeowner’s Guide

You're probably standing in a bathroom that still functions, but only just. The shower works, the vanity holds together, and the tiles might even look acceptable from the doorway. Then you step in closer. The grout is tired, the layout feels cramped, the floor never quite drains properly, and the whole room tells you it belongs to another decade.

That's usually the point where homeowners start looking at modern bathroom tiling. They want cleaner lines, better light, fewer visual breaks, and finishes that feel calm instead of cluttered. In Melbourne, that decision also sits inside a bigger renovation picture. Tile demand doesn't move on style alone. It follows the building cycle, and the ABS reported 15,924 new private sector houses approved in Australia in April 2024, which matters because bathrooms are specified and finished during fit-out stages, after approvals and before final handover, as noted in this overview of Australian bathroom tile demand and housing activity.

A good bathroom renovation isn't won by choosing an attractive tile in a showroom. It's won by getting the structure, waterproofing, drainage, set-out, and trade coordination right first, then choosing tiles that suit the room and the way it will be used.

Table of Contents

Your Guide to a Modern Bathroom Renovation

A modern bathroom has to do two jobs at once. It has to look resolved, and it has to perform properly in a wet area that gets daily use. Homeowners often focus first on the visible layer. Tile colour, vanity shape, brushed tapware, niche positions. Those choices matter, but they only work when the renovation has been planned as a complete system.

That's why bathroom renovations should be approached as building work, not just surface replacement. In a full renovation, the room gets stripped back, the substrate is assessed, plumbing and electrical rough-in are coordinated, waterproofing is completed correctly, and only then does tiling begin. If any of those steps are rushed, the finished room can still look polished on day one and fail later.

The renovation lens

The most reliable way to think about modern bathroom tiling is to ask three practical questions:

  • How will the room drain: A clean tiled floor means little if water sits against the shower screen or tracks toward the door.
  • What movement will the room experience: Bathrooms expand, contract, and carry moisture. The build has to accommodate that.
  • Who is responsible for the full result: A tiler can lay tile. A registered builder manages the whole bathroom renovation and coordinates compliance across trades.

Practical rule: If you're renovating the whole bathroom, choose the tile after the layout, plumbing points, and substrate strategy are settled. Not before.

In Melbourne homes, that distinction matters. Many bathrooms sit inside older houses where walls aren't straight, floors aren't level, and previous work may already be hiding moisture damage. A high-end result doesn't come from pretending the room is perfect. It comes from correcting what's behind the walls and under the floor, then setting out the tile work so the finished space feels intentional.

Envisioning Your Style Modern Tiling Trends for 2026

The best modern bathrooms don't chase trends blindly. They use current ideas in a way that suits the room, the light, and the house around them. Most homeowners are after one of a few clear moods. Calm and spa-like. Crisp and architectural. Warm and natural. Dark and dramatic.

An infographic showing five key 2026 trends for modern bathroom tiling, including large format, biophilic, and sustainable designs.

Seamless and quiet

One strong direction is the pared-back bathroom. Large wall tiles, narrow grout joints, floating vanity, frameless shower screen, and very little visual interruption. This style works well in smaller Melbourne bathrooms because it reduces clutter. Fewer cuts and fewer grout lines make the room feel more settled.

Warm whites, soft greys, stone-look porcelain, and matte finishes usually carry this look best. It's modern without feeling cold.

Natural and textured

Another direction leans into biophilic design. Stone-look porcelain, timber-look joinery, earthy colours, and textured feature walls all sit here. The room feels softer and less clinical. This approach works particularly well when the tile has movement in the face but the overall palette stays restrained.

A common mistake is overdoing it. If the floor has heavy pattern, the wall tile should usually quieten down. If a feature wall has texture, the vanity and mirror selection should stay simple.

Good modern bathroom tiling doesn't need every surface to compete. One hero surface is usually enough.

Graphic and directional

Some homeowners want a bathroom with more edge. Vertical stack layouts, geometric mosaics, fluted surfaces, and deeper tones can create that. Navy, charcoal, olive, and warm clay tones can all work, but they need control. In a bathroom without much natural light, too much darkness can flatten the room.

A sharper look often comes from pattern and layout more than colour alone. A standard tile, laid vertically or stacked with precision, can feel far more contemporary than an expensive tile with a busy face.

Where style meets restraint

If a design trend is worth following, it still has to survive daily use. That means the room should be easy to clean, the floor should suit wet conditions, and the feature choices should age well. The bathrooms that date fastest are usually the ones where every current idea got added at once.

A more durable approach is simple:

  • Use texture selectively: Feature wall, niche back, or vanity splashback.
  • Keep floor tiles practical: Especially in shower zones where grip and drainage matter.
  • Let the layout do some of the design work: Pattern can create interest without introducing too many colours.

Choosing Your Tiles Materials Sizes and Finishes

Most bathroom tile decisions come down to balancing appearance with performance. Homeowners usually arrive with a look in mind. The better question is whether the chosen material suits a wet area, the expected maintenance, and the substrate it's being fixed to.

Porcelain ceramic and natural stone

Porcelain is the workhorse of modern bathroom tiling. It's dense, low porosity, and suits both walls and floors in most bathroom renovations. It also gives you the widest design range, including stone-look, concrete-look, and timber-look finishes that are easier to live with than the natural materials they imitate.

Ceramic can still work well, especially on walls. It's often easier to cut and handle, but it's generally better suited to lighter-duty applications than porcelain. In a full bathroom renovation, many homeowners use ceramic only where the wall finish is the priority and the loading is low.

Natural stone can look exceptional, but it comes with obligations. Stone needs more care, usually more sealing attention, and tighter planning around maintenance. Marble and travertine can be beautiful, but they aren't forgiving if you want a low-fuss family bathroom.

Material Durability Water Resistance Maintenance Typical Cost (per m²)
Porcelain High High Low to moderate Varies by product and format
Ceramic Moderate to high Good Low to moderate Varies by product and finish
Natural stone High when suitable stone is selected and installed properly Varies by stone and sealing Moderate to high Varies by stone type and finish

Size changes the install

Large-format tile is a major part of modern bathroom tiling because it creates a clean, spacious look. Industry guidance notes that bathroom wall tiles commonly move into the 12 x 24 inch to 30 x 15 inch range for contemporary layouts, and that same guidance points out the trade-off clearly. As tile size increases, substrate flatness becomes more critical, so screeding and self-levelling have a direct effect on visual quality and durability, as explained in this guide to bathroom tile dimensions and substrate requirements.

That's why large format isn't just a style choice. It's an installation choice. A wall that was “good enough” for small tiles often won't be good enough for larger ones. The bigger the tile, the more every dip, bow, and twist in the surface shows up as lippage, hollow spots, or poor alignment.

For homeowners considering slim panel products and premium oversized finishes, it helps to understand the handling and substrate demands involved in large format tile installations.

Finish matters as much as colour

Gloss tiles reflect more light and can help a small room feel brighter. They're commonly used on walls where cleaning is straightforward and slip resistance isn't the issue. Matte finishes feel more contemporary in many bathrooms and are often better at softening glare.

Floor selection needs more discipline.

  • For shower floors: Smaller mosaics or compact tiles usually work better because they follow the falls more cleanly.
  • For main bathroom floors: Matte or lightly textured finishes generally give a better balance of appearance and practicality.
  • For feature walls: You can be more expressive because those surfaces don't carry foot traffic.

A tile that looks perfect in a showroom board can be the wrong tile for a wet floor. That's one of the most common disconnects between design intent and daily use.

The Art of Tiling Layouts and Patterns

Layout changes everything. The exact same tile can read as calm, sharp, classic, or busy depending on how it's set out. In tight bathrooms especially, the pattern isn't decoration alone. It changes how the room feels in height, width, and rhythm.

A modern bathroom vanity featuring geometric grey and white patterned wall tiles and a contemporary faucet.

Layouts that make a room feel larger

Stack bond is one of the cleanest options. Tiles line up directly above each other, which gives a disciplined, architectural finish. This works particularly well with rectified porcelain and minimalist bathrooms.

Vertical stack layouts draw the eye upward. In bathrooms with lower ceilings, that can make the walls feel taller. Horizontal stack can widen the room visually, which is useful in narrow spaces.

Running bond, sometimes called brick pattern, is softer and more familiar. It can still suit a modern bathroom, but with larger contemporary tiles many homeowners now prefer the cleaner order of stacked layouts.

Patterns that add movement and detail

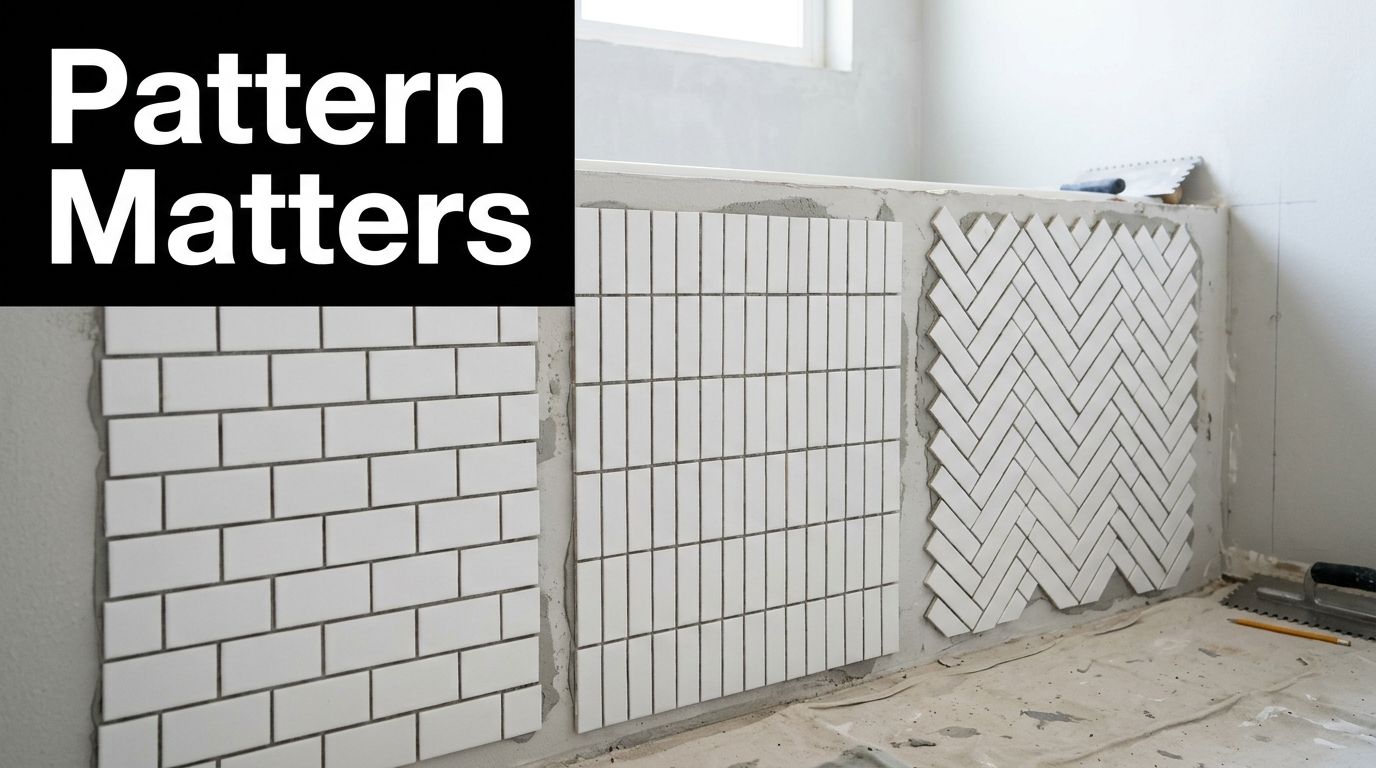
Herringbone introduces movement and texture. It works well in shower feature walls, vanity splashbacks, or smaller statement zones. It looks premium when the set-out is tight and the cuts are balanced. It looks messy when the room hasn't been measured properly from the outset.

Geometric and patterned tiles can also carry a room, but they need restraint around them. If the wall pattern is bold, the floor usually needs to be quieter.

Set-out is where expensive tile can be wasted or elevated. Centre lines, edge cuts, niche alignment, and tap penetrations should all be planned before adhesive is mixed.

This walkthrough gives a useful visual sense of how pattern affects the final room.

A practical way to discuss layout with your renovator is to focus on effect, not jargon:

  • Want more height: Ask about vertical stacking.
  • Want a quieter look: Ask for a full grid set-out with even cuts.
  • Want a luxury detail: Use herringbone or feature mosaics in one controlled area.
  • Want the room to feel wider: Review horizontal emphasis and larger wall modules.

The most successful patterns are the ones that suit the room's proportions and the tile's shape. Not the ones copied from a display without checking the actual space.

Behind the Tiles Waterproofing and Installation Essentials

The tile surface is what you see. It isn't what keeps the bathroom dry. That job belongs to the waterproofing system, the substrate preparation, and the drainage falls beneath the finish.

Australian bathroom tiling is built around durability and wet-area compliance. The NCC 2022 references AS 3740 for waterproofing of wet areas, and contemporary bathrooms are built as a compliant system with the waterproof membrane first, then tile finish, reflecting hard-earned lessons from leaks and mould, as outlined in this guide to bathroom waterproofing and AS 3740.

An infographic showing seven essential steps for professional bathroom waterproofing and tiling installation processes.

What sits under the tile finish

A proper install usually starts with demolition and assessment. Once the old bathroom is removed, the structure, floor condition, framing, and sheeting can be checked. If the substrate is unstable or out of tolerance, no tile choice will rescue the result.

The next steps are where a lot of cheap jobs go wrong:

  1. Substrate preparation
    Walls and floors need to be suitable for the chosen tile format. Large tiles need flatter surfaces. Shower floors need controlled falls.

  2. Waterproofing
    Membranes are applied to the correct wet areas, junctions, penetrations, and transitions. This isn't decorative work. It's the wet-area defence layer.

  3. Screeding and falls
    Shower bases and bathroom floors must direct water to waste points. If falls are wrong, water ponds, tracks, or sits against edges.

  4. Tile fixing and movement allowance
    Adhesive selection, coverage, levelling, and movement treatment all affect longevity.

A homeowner who wants a useful technical overview can also review waterproofing requirements and bathroom wet-area practice in Melbourne.

Tiles are not waterproof. If water management is poor under the surface, grout and silicone won't save the room.

Why registered builders matter in bathroom renovations

The difference between a tiler and a registered builder becomes important. In a full bathroom renovation, multiple trades need to be coordinated. Carpentry, plumbing, electrical, waterproofing, tiling, glazing, and fit-off all affect one another. If the sequencing is wrong, one trade can undo another trade's work.

A registered builder takes responsibility for that overall sequence and the compliant outcome. That matters in practical ways:

  • Penetrations are planned properly: Tapware, shower rails, and wastes need to work with waterproofing and tile set-out.
  • Trades don't clash: Plumbing points, niches, and vanity locations get resolved before final tiling.
  • Defects are easier to trace and prevent: One party manages the room as a system, not as disconnected tasks.

Melbourne Tiling Services P/L is one example of a company that handles bathroom renovations under registered builder oversight while coordinating tiling, screeding, waterproofing, and the required supporting trades.

Budgeting Your Melbourne Bathroom Tiling Project

The number that catches most homeowners out isn't the tile price. It's everything around the tile. Adhesives, trims, waterproofing, screeding, labour, demolition, substrate correction, plumbing changes, and electrical updates can all shift the budget more than the face value of the chosen tile.

Where the money actually goes

A bathroom tiling budget usually includes several layers of work:

  • Demolition and disposal: Removing old tiles, fittings, sheeting, and debris.
  • Preparation: Levelling floors, correcting walls, replacing damaged substrate, and setting falls.
  • Waterproofing and fixing materials: Membrane systems, adhesives, grout, sealants, trims, and movement detailing.
  • Labour: Tiling itself, plus all the time spent measuring, setting out, cutting, and finishing.
  • Associated renovation trades: Plumbing, electrical, carpentry, shower screens, painting, and fit-off if it's a full bathroom renovation.

If you're comparing quotes, many misunderstandings often begin. One quote may include complete preparation and compliant wet-area work. Another may only price laying tile onto whatever surface is already there. They're not comparable.

What changes the final price

Some bathrooms are straightforward. Many aren't. These factors usually move the cost most:

Cost driver Why it matters
Tile size Larger tiles need flatter substrates and more exact handling
Layout complexity Herringbone, feature bands, niches, and mitred edges add labour
Existing room condition Uneven floors, damaged walls, and moisture issues require rectification
Scope of renovation Full bathroom renovations cost more than tile-only replacement because more trades are involved
Fixture relocation Moving plumbing points or electrical locations adds trade coordination

A transparent quote should separate products, labour, prep, and exclusions clearly. It should also state who is managing the job. If a builder is coordinating the renovation, that should be obvious in the paperwork.

The cheapest bathroom quote often assumes the existing room is ready for tiling. That's rarely the reality once demolition starts.

How to Choose the Right Tiling Professional in Melbourne

Hiring well matters more than choosing the perfect tile. A strong installer can make a straightforward tile look sharp and long-lasting. A poor installer can ruin expensive materials very quickly.

A hiring checklist that protects you

Start with questions that reveal how the contractor thinks about the whole room.

  • Ask who manages the renovation: If it's a full bathroom renovation, you want clarity on who coordinates plumbing, electrical, waterproofing, and final compliance.
  • Review wet-area experience: Ask how they handle falls, membrane sequencing, niches, movement joints, and penetrations.
  • Check large-format experience: Not every tiler handles oversized porcelain or panel products well.
  • Request a written quote: It should outline demolition, substrate prep, waterproofing, tiling, and exclusions in plain language.
  • Look at completed bathrooms: You're checking alignment, cuts, niche detailing, silicone finish, and overall set-out, not just nice photography.
  • Confirm insurance and registration status: Especially important where broader building work is involved.

For owners comparing providers across project types, including larger fit-outs, it can help to see how a contractor presents their capabilities in areas such as commercial tiling work in Melbourne, because it often reveals how they think about scale, coordination, and finish quality.

When a tiler is not enough

A tiler may be the right hire for a very limited scope. Replacing a splashback tile or carrying out isolated tile repairs is different from rebuilding a bathroom. But once the project involves demolition, waterproofing, layout revision, multiple trades, and responsibility for the finished room, a registered builder is the safer structure.

That doesn't make the tiler less important. It means the project needs one accountable party above the trade level.

Choose the team that can answer practical questions clearly. How will the floor be prepared. Who sets the falls. Who waterproofs. Who signs off the sequencing. What happens if demolition reveals substrate damage. Those answers tell you far more than a mood board ever will.


If you're planning modern bathroom tiling as part of a full renovation, Melbourne Tiling Services P/L handles bathroom and ensuite projects across Melbourne with registered builder oversight, trade coordination, waterproofing, screeding, and wall and floor tiling as part of the same scope.

Melbourne Frameless Shower Screens: Design & Cost Guide 2026

You're probably looking at a bathroom that still works, but doesn't feel good to use. The shower may be boxed in by heavy framing, the room feels tighter than it is, and every edge seems to collect soap scum. In many Melbourne homes, that's the point where people start thinking about a frameless screen.

A frameless shower screen can absolutely change the feel of a bathroom. It opens sightlines, lets tilework do the visual heavy lifting, and gives the room a cleaner, more modern finish. But in a real renovation, the screen isn't a standalone upgrade. It sits at the end of a chain of decisions about layout, waterproofing, falls, wall straightness, hardware, and compliance.

That's where many projects go wrong. Clients often compare screens by appearance alone, then find out too late that the chosen layout doesn't contain water well, the door swing clashes with the vanity, or the glass can't be safely detailed the way they imagined. A good result comes from treating the shower screen as part of the full bathroom build, not as an afterthought.

Table of Contents

Elevating Your Bathroom with a Frameless Shower Screen

A dated bathroom usually has the same problems. The screen chops the room into smaller visual zones, aluminium edges catch grime, and the shower feels like a separate box rather than part of the room. Even when the floor area is reasonable, the bathroom can still feel cramped.

A frameless screen changes that because it removes visual bulk. You see tile, light, stone, and fittings first. The glass becomes part of the architecture rather than the feature itself. In an ensuite, that often makes the room feel calmer. In a family bathroom, it can make the whole space read as newer even when the footprint hasn't changed.

What matters is using the right frameless solution for the room you have. A wide, open panel can look excellent in a large bathroom with generous circulation space. In a tight room, the best result may be a smaller fixed panel, a door with inline glass, or a more contained corner layout.

A good shower screen should make the bathroom easier to live with, not just nicer in a photo.

In full bathroom renovations, the most successful frameless shower screens are the ones designed around how the room will be used day after day. That means thinking about cleaning, splash control, who uses the bathroom, where towels sit, where the showerhead points, and how the waterproofing and tile set-out support the final glass.

Frameless vs Framed Screens Understanding Your Options

The first decision isn't hardware finish or handle style. It's which screen type suits the renovation brief. Most bathrooms come down to three categories: framed, semi-frameless, and frameless.

What changes visually and practically

A framed screen uses metal framing around the glass. It's usually the most forgiving option when budget is tight or the room needs stronger water containment. It does, however, create more edges, more visual interruption, and more places for residue to build up.

A semi-frameless screen sits in the middle. You still get some visible framing, but less than a fully framed system. For many households, it's a practical compromise. It can deliver a cleaner look than a traditional framed screen while keeping more structure around the enclosure.

A frameless screen strips the enclosure back to glass and hardware. That's what gives it its premium and sought-after aesthetic. The room feels more open, and the tilework stays visible. The trade-off is that detailing has to be much sharper. Measurements, wall condition, hardware selection, and shower layout all matter more.

Quick comparison for renovation planning

Feature Framed Semi-Frameless Frameless
Visual style More traditional and defined Cleaner than framed, still has visible structure Minimal, open, contemporary
Cleaning More edges and channels to clean Moderate cleaning around partial frame Easier to wipe down due to fewer interruptions
Water containment Generally stronger containment Often a good balance of style and sealing Can be less forgiving if the layout is too open
Flexibility in design Practical for standard layouts Good for many common bathroom plans Best when custom measured and designed carefully
Renovation feel Functional Updated Premium
Budget position Usually lowest Mid-range Usually highest

If your priority is keeping costs down and controlling splash in a busy household bathroom, framed or semi-frameless can make sense. If your priority is a clean architectural finish and uninterrupted sightlines, frameless usually wins.

There's also a maintenance question. Clients often assume frameless means no compromises. In reality, each system has a place.

  • Choose framed when the room is heavily used, the budget is tighter, or containment matters more than appearance.
  • Choose semi-frameless when you want a more current look without going fully into premium detailing.
  • Choose frameless when the bathroom design, tile finish, and overall renovation quality justify a more exacting system.

Practical rule: Pick the screen type after the layout is resolved, not before. The wrong enclosure in the wrong room creates more problems than the right enclosure ever solves.

Choosing the Right Glass and Hardware

The look of a frameless shower screen is simple. The build behind it isn't. Glass thickness, panel width, hardware type, wall support, and finish selection all need to work together.

Glass thickness and panel limits

In Australian practice, frameless shower screens should use safety glass compliant with AS/NZS 2208 and be installed in accordance with AS 1288, with common guidance pointing to 10 mm toughened glass as the standard frameless option and 8 mm generally kept for smaller panels or situations with extra bracing, as outlined in guidance on shower screen glass thickness and installation.

For fixed unframed panels, width matters more than height when you're thinking about deflection. Guidance for Australia and New Zealand recommends a maximum width of 750 mm for 8 mm toughened glass and 1,500 mm for both 10 mm and 12 mm toughened glass, which effectively sets 1,500 mm as a practical upper limit for unframed shower panels according to the Window & Glass Association technical bulletin.

Choosing the Right Glass and Hardware

That's why asking for “thicker glass” isn't enough. Once the panel gets too wide, layout and bracing become more important than adding weight. If a client wants a broad, open walk-in look, the design may need a stabiliser bar, a header, or a different panel arrangement to keep movement under control.

Glass style and hardware finishes

After thickness and sizing are sorted, the visual choices become easier.

  • Clear glass suits most bathrooms because it keeps the room open and shows off feature tiles.
  • Low-iron glass reduces the green tint you see on some glass edges. It's often worth considering when the palette is light, especially with white or pale stone finishes.
  • Obscure or patterned glass gives more privacy and can soften the visual impact of water spots.

Hardware deserves more attention than it usually gets. Hinges, brackets, handles, channels, and stabiliser bars carry the visual style, but they also carry load. The finish has to suit the bathroom, and the hardware has to suit the actual glass weight and configuration.

In practice, these are the decisions that hold up best:

  • Stainless steel fittings are a reliable choice for a clean, modern bathroom.
  • Solid brass hardware is often selected where a heavier, more decorative finish is wanted.
  • Chrome stays popular because it pairs easily with many tapware ranges.
  • Matte black, brushed nickel, and brushed brass can look sharp, but the full room needs to be coordinated so the finish feels intentional.

A well-built frameless screen should feel quiet in use. No obvious flex, no awkward handle placement, and no hardware that looks undersized for the panel.

Designing the Perfect Shower Screen Layout

Most problems with shower screens start at layout stage, not installation day. A screen can be beautifully made and still be wrong for the room. The right layout depends on space, movement, and how water behaves once the shower is running.

Designing the Perfect Shower Screen Layout

Layouts that work in real bathrooms

In a small ensuite, a single fixed panel can be the cleanest answer. It keeps the room visually open and avoids the clutter of a swinging door. This works best when the showerhead is positioned to throw water away from the opening and the floor falls are set correctly.

In a standard alcove shower, a door with an inline fixed panel often gives a more controlled result. You still get the frameless look, but entry is more defined and the enclosure usually contains water better than a very open walk-in arrangement.

A corner unit can solve awkward planning in family bathrooms, especially where the vanity, toilet, and doorway are all competing for space. The glass can be arranged to preserve circulation without making the shower recess feel cramped.

For tight rooms where door swing becomes a problem, a sliding configuration can be the practical choice. It won't suit every design style, but it can prevent the door from clashing with a vanity, towel rail, or toilet pan.

The details that decide whether it works

The layout only works if the surrounding details support it. These are the checks that matter most on site:

  • Showerhead placement decides where splash goes. A beautiful open panel can still flood the bathroom if the outlet is aimed toward the opening.
  • Door swing clearance has to be tested against actual room use, not just the plan drawing.
  • Screen height and return positioning affect privacy, cleaning access, and water control.
  • Nib walls, benches, and recessed shelves can either improve the enclosure or make the glass detailing harder if they're not planned early.

In small bathrooms, the smartest frameless design is often the one that looks slightly more contained on paper and performs far better in daily use.

The best layout is rarely the most extreme one. It's the one that respects the room, the users, and the renovation as a whole.

The Installation and Renovation Workflow

A frameless shower screen should be one of the final fitted elements in the bathroom. If it's measured or installed at the wrong time, everything downstream gets harder. This part of the job only runs well when the renovation sequence is controlled properly.

Here's the overall process in visual form.

The Installation and Renovation Workflow

How the sequence should run

The job starts with site assessment. The room is checked for dimensions, wall condition, floor levels, plumbing locations, and the practical constraints that affect the final screen layout. A registered builder earns their keep during this process, because the screen decision can't be separated from the rest of the bathroom renovation.

Then the wet area build has to be completed in the right order.

  1. Structural and set-out work first
    If walls need straightening, carpentry adjustment, plumbing relocation, or substrate correction, that happens before finishes. Frameless glass is unforgiving. Crooked walls and poor set-out don't disappear under minimal hardware.

  2. Waterproofing before tiling
    The membrane is what protects the structure. Penetrations, junctions, and floor-to-wall transitions need to be resolved before tile goes down. The shower screen sits on top of a waterproofed, finished system. It doesn't fix a weak one.

  3. Tiling and final finished surfaces
    Only after the tiles are laid, cured, and finished should the final measure be taken. A few millimetres matter. If you measure too early, the fabricated glass may not suit the actual finished opening.

A practical demonstration helps clients understand how accurate the process needs to be.

Why timing matters

Custom glass isn't a flexible product once it's made. Holes for hinges, handle positions, notch details, and edge sizes are all locked in. That's why the final site measure should happen after the room is fully ready, not when it is “close enough”.

A coordinated bathroom renovation also means the glass installer isn't working in isolation. Plumbers, waterproofers, tilers, and the screen supplier all affect the final result. On larger or more detailed jobs, Melbourne Tiling Services P/L handles that sequence as part of the bathroom renovation scope, including the integration of tiling, waterproofing, and shower screen installation.

Measure from finished reality, not from intentions. That one habit prevents a lot of expensive rework.

The cleanest installs usually come from disciplined timing. The screen becomes the final precision element in a bathroom that has already been built properly.

Budgeting for Frameless Screens in Melbourne

Frameless shower screens sit in the premium end of the bathroom market. That doesn't mean they're automatically overpriced. It means the cost is tied to heavier toughened glass, custom fabrication, more exact measuring, and a more careful fitting process.

What drives the final quote

Australian cost benchmarks show why frameless sits above simpler options. A standard shower door installation is commonly priced around AU$530 to AU$1,380, while frameless options sit at the higher end of that range. Angi also notes that glass shower door installation and materials typically cost about US$500 to US$1,500, with custom frameless doors reaching about US$3,300, and that with proper maintenance a frameless door can last 20 to 30 years, according to this shower door cost and lifespan guide.

Budgeting for Frameless Screens in Melbourne

On actual renovation jobs, the final price usually moves for practical reasons rather than marketing reasons:

  • Bigger panels cost more because the glass is heavier and harder to handle.
  • More complex layouts need more fabrication detail, more hardware, or both.
  • Special finishes on hinges, handles, and brackets can push the figure up.
  • Custom conditions on site such as angles, nib walls, benches, and uneven existing structures often increase labour.

If you want a more project-specific breakdown, this shower screen installation cost guide for Melbourne is a useful starting point.

Thinking beyond the ticket price

A cheaper screen can still become the more expensive choice if it ages badly, contains water poorly, or needs early replacement. The better way to budget is to ask what you're paying for:

Cost driver Why it matters
Glass specification Heavier toughened glass affects both material and installation complexity
Hardware quality Better fittings usually give smoother operation and longer service life
Site conditions Straight walls, good tile set-out, and prepared openings reduce headaches
Design complexity Simpler layouts are usually easier to fabricate and fit

For most homeowners, the right question isn't “What's the cheapest frameless screen?” It's “What screen suits the room, performs well, and still feels worth the spend years from now?”

Waterproofing, Compliance, and Long-Term Care

The best-looking shower screen in the world won't save a bathroom that leaks. In a proper renovation, compliance and waterproofing come ahead of appearance every time.

Compliance isn't optional

In Australia, all glass shower screens are a safety glazing application and must comply with AS/NZS 2208, which means they use toughened safety glass and certified hardware as part of a compliant installation, as explained in this overview of frameless shower door safety requirements in Australia.

That matters because a shower screen lives in one of the highest-risk interior glass locations in the home. It's in a wet area, it's used constantly, and it needs the right clearances, fixings, and edge protection. Compliant products should also carry the required safety glazing identification or marking.

The other half of compliance is the substrate beneath it. Waterproofing isn't a box to tick. It's the layer that stops water migrating into walls, framing, and surrounding finishes. If the membrane, junctions, and penetrations are wrong, leaks often show up long after the bathroom looks “finished”.

For Victorian projects, homeowners should also understand the paperwork side. Where waterproofing forms part of the work, clear records and certification matter. This guide to a waterproofing compliance certificate in Victoria gives a useful overview of what to expect.

Care and leak prevention

Frameless screens need sensible maintenance, but not fussy maintenance. The simplest routine is usually the best.

  • Squeegee after use to reduce water spotting and soap residue.
  • Clean hardware gently so finishes aren't damaged by harsh products.
  • Check silicone and seals as part of normal bathroom upkeep.
  • Act early on movement or leakage instead of waiting for minor issues to become substrate damage.

Most shower leaks blamed on the screen are really layout, waterproofing, or detailing problems.

Long-term performance comes from the whole assembly. Glass, fixings, tile falls, shower position, and membrane work together. When that system is built correctly, frameless shower screens can be both refined and dependable.

Why a Registered Builder Is Essential for Your Project

A frameless shower screen looks simple because the visible parts are simple. The renovation work behind it is not. You're combining design, plumbing, substrate preparation, waterproofing, tiling, glazing, and final fit-off in a wet area where errors are expensive.

One system, one scope of responsibility

This is why a registered builder matters. Instead of treating the screen as a separate purchase bolted onto the end of the job, a builder looks at the bathroom as one connected system. The shower area is planned around use, not just appearance. Door swing, set-out, floor falls, waterproofing terminations, recesses, and glazing details are coordinated together.

That approach is especially important with frameless designs because they can have more limited water containment than framed options. In smaller Australian bathrooms, splash control becomes a real planning issue. The answer isn't to talk clients out of frameless. It's to design the enclosure geometry, showerhead placement, and waterproofing detail properly, as highlighted in this discussion of frameless shower screen trade-offs and splash control.

Where builder oversight changes the outcome

A registered builder reduces common renovation risks in a few very practical ways:

  • One point of accountability means the tiler, waterproofer, plumber, and screen installer aren't passing problems around.
  • Sequencing is controlled so final measurements happen when the bathroom is ready.
  • Compliance is built in rather than checked after the fact.
  • Layout decisions are tested against real use including family traffic, cleaning access, and leak risk.

For homeowners planning a broader upgrade, it helps to look at the shower screen inside the full renovation brief. This bathroom renovations project overview in Altona shows the kind of integrated planning that produces better wet area outcomes.

The end result is usually less stress and fewer surprises. You're not buying a piece of glass. You're building a shower that has to perform every day, in a room where water management, compliance, and workmanship all matter just as much as the final look.


If you're planning a bathroom upgrade and want clear advice on frameless shower screens, waterproofing, layout, and renovation sequencing, Melbourne Tiling Services P/L can help you assess the full scope before any glass is ordered.

Expert Leak Detection Melbourne: Your 2026 Guide

A lot of Melbourne homeowners arrive at the same point the same way. There's a faint musty smell near the bathroom door. A skirting board starts to swell. Paint bubbles for no obvious reason. Or the shower looks fine on the surface, but the room on the other side of the wall doesn't.

That's usually when the worry starts. Is it a pipe leak, a shower leak, failed grout, a cracked tray, bad waterproofing, or something coming from upstairs?

The important thing to know is this. Leak detection in Melbourne isn't the finish line. It's the first diagnostic step. Finding where water is escaping matters, but a lasting result depends on understanding why it's happening and who should fix it properly. In bathrooms, balconies, laundries, and apartment wet areas, the underlying issue is often bigger than a simple patch.

Table of Contents

That Unsettling Feeling of a Hidden Leak

It often starts with something small that doesn't quite make sense. The laundry smells damp even after you've aired it out. A ceiling stain appears below an upstairs bathroom, then seems to dry, then comes back. The shower still drains, the taps still work, and nothing looks dramatic, so it's tempting to leave it for another week.

That delay is where leaks become expensive. Water rarely stays where the original problem began. It tracks along framing, under tiles, through slab edges, behind cabinetry, and into rooms that seem unrelated to the source.

In Victoria, the broader scale of hidden water loss is serious. A University of Technology Sydney paper citing National Performance Report data noted a Victorian real-loss figure of 778 litres per service connection per day, which shows how much water can disappear before anyone sees obvious evidence on the surface (UTS leak detection research).

Practical rule: If the signs are intermittent, that doesn't mean the problem is minor. It often means water is moving through the building in a way that's harder to trace.

Homeowners usually call for leak detection because they want a location. Fair enough. But in real building work, location is only part of the answer. A leak from a failed mixer connection is one kind of job. A shower leaking through failed membrane junctions, cracked movement joints, or poor bathroom renovation detailing is another.

That difference matters because the right trade can change. Sometimes you need a plumber. Sometimes you need a registered builder to coordinate demolition, substrate repair, waterproofing, tiling, and compliant reinstatement. Often you need both, in the right order.

Telltale Signs Your Melbourne Home Has a Water Leak

Telltale Signs Your Melbourne Home Has a Water Leak

The clearest clues usually come from your senses before any tool confirms them. If you're trying to work out whether you need leak detection in Melbourne, start by slowing down and looking at the pattern, not just the damage itself.

What you can see

A hidden leak often shows up as a surface symptom first:

  • Ceiling stains: Brownish or yellowish marks under bathrooms, balconies, or roof-adjacent wet areas often mean water has travelled before becoming visible.
  • Bubbling paint: Paint that lifts or blisters usually points to moisture trapped behind the finish.
  • Swollen skirting or architraves: Timber products absorb moisture early and often reveal a problem before tiles do.
  • Loose or drummy tiles: If tiles sound hollow or start shifting, moisture may have affected the adhesive bed or substrate.
  • Efflorescence on brick or grout: That white, powdery residue is a sign that water has been moving through masonry or cement-based materials.

One detail many people miss is location. A stain directly beside a shower hob suggests one type of failure. Dampness appearing in the hallway outside the bathroom can suggest water is escaping beyond the immediate wet area.

What you can hear and smell

Not every leak leaves a puddle.

A quiet hiss in the wall after taps are turned off can indicate pressure-side pipe issues. Dripping sounds at night, when the house is quiet, are worth paying attention to. So is a musty smell that gets stronger after showers or after using a particular vanity, toilet, or washing machine.

Here's a practical demonstration of signs homeowners often notice before they know the cause:

A bathroom can smell “old” when it's actually staying damp behind the tiles, under the tray, or inside the wall cavity.

When the location gives the game away

Different rooms suggest different causes. That doesn't replace testing, but it helps narrow the field.

Area where you notice it Common underlying issue
Around a shower screen Failed seals, movement joints, grout cracking, poor falls
Wall behind a vanity Flexible hose connection, trap leak, basin waste issue
Ceiling below bathroom Shower leak, toilet seal issue, pipe connection, failed waterproofing
Balcony door threshold Membrane failure, poor drainage, flashing detail problem
Laundry cabinet base Tap connection, appliance hose, waste leak

If you've got more than one sign at once, such as smell plus swollen skirting plus loose tiles, the issue usually isn't cosmetic. Water has been there long enough to affect surrounding materials.

Safe DIY Leak Checks You Can Perform This Weekend

You can do a few useful checks yourself without damaging the building. The key word is safe. A good DIY check helps you decide how urgent the problem is. It doesn't replace proper leak detection when the source is hidden.

Start with the water meter

The most useful homeowner test is a basic meter isolation check.

  1. Turn off all water fixtures and appliances inside and outside the home. That includes dishwashers, washing machines, irrigation, and any tap that may be dripping.
  2. Check that toilets have finished refilling before you start.
  3. Read the water meter and note the position carefully.
  4. Don't use any water for a set period. Overnight is practical because the house is usually quiet and still.
  5. Recheck the meter in the morning.

If the reading has changed despite no water use, there's a strong indication that water is moving somewhere it shouldn't. That doesn't tell you whether the problem is under the slab, in a wall, in a toilet cistern, or in an external line. It does tell you the issue deserves proper testing.

Check the fixtures that commonly leak quietly

A lot of small leaks hide in plain sight.

  • Toilet cisterns: Add a few drops of food colouring to the cistern and wait before flushing. If colour appears in the bowl, water is passing where it shouldn't.
  • Under-sink pipework: Run your hand around trap connections and isolation valves. Look for moisture on the cabinet floor, not just obvious drips.
  • Shower edges and corners: Check silicone joints, base junctions, and adjacent skirtings. If the shower leaks after use but no plumbing is exposed, failed waterproofing becomes more likely.
  • Appliance hoses: Pull the washing machine or dishwasher forward if it's safe to do so and inspect for slow weeping around hose connections.

If you're dealing with a shower specifically, it also helps to understand the difference between a surface seal issue and a deeper waterproofing failure. This guide on how to fix leaking showers is useful for understanding where basic resealing ends and proper rectification begins.

What not to do

Don't start removing tiles, cutting plaster, drilling exploratory holes, or tightening fittings you can't properly assess. Those moves often create a second problem.

Avoid these mistakes:

  • Don't chase stains blindly: The visible mark is often not the source.
  • Don't rely on grout as waterproofing: Grout can crack and absorb moisture. It isn't the system that protects the structure.
  • Don't keep resealing without diagnosis: Fresh silicone can hide evidence and delay the actual fix.
  • Don't ignore intermittent leaks: Shower-related leaks often appear only after use, then dry out enough to mislead you.

An Inside Look at Professional Leak Detection Methods

Professional leak detection works best when the method matches the failure type. Good operators don't wave one gadget at every problem. They test a theory, isolate possibilities, and use the least destructive method that can produce reliable evidence.

An Inside Look at Professional Leak Detection Methods

Thermal imaging and moisture tracing

Thermal imaging cameras pick up temperature differences on surfaces. They're useful when hidden moisture changes the temperature profile of a wall, ceiling, or floor. Hot water line leaks can show clearly. Shower leaks can also create patterns, though interpretation matters because not every cool patch is a leak.

Moisture meters are often used alongside thermal imaging. The camera shows where to look. The meter helps confirm whether the material is retaining moisture.

What works well:

  • Locating broad zones of concern behind finished surfaces
  • Tracing moisture migration paths
  • Narrowing down areas before opening up

What doesn't:

  • Treating a thermal image as final proof on its own
  • Assuming every anomaly is the exact leak point

Acoustic testing and pressure testing

Acoustic listening devices help detect the sound of water escaping under pressure. In the right conditions, they can be very effective on concealed pressure pipes and underground services. Background noise, pipe material, and building layout all affect accuracy.

Pressure testing is more controlled. A technician isolates a section of pipework, applies test pressure, and watches for pressure loss. This doesn't always show the precise physical hole, but it does confirm whether a section is compromised.

A practical benchmark from Australia comes from a NSW Smart Sensing Network trial in urban pipes. Its failure-prediction model was cross-checked against real failures every three months and achieved approximately 80% detection in validation tests, which shows how predictive leak workflows improve when sensor data is checked against real-world outcomes rather than treated as guesswork (NSW Smart Sensing Network trial results).

On site, the best result usually comes from combining methods. One tool narrows the field. Another confirms it.

Drain cameras and targeted investigation

CCTV drain cameras are used for waste lines and stormwater, not pressure pipes. They're useful when the concern is a cracked drain, displaced joint, blockage, or a defect causing water escape around waste systems.

Homeowners sometimes misunderstand that a drain camera won't diagnose every shower leak. If the issue is failed waterproofing around a bathroom floor waste, the camera may show the drain condition but not the membrane problem around it.

At the utility level, Melbourne is also testing more advanced monitoring. An Australian Water Association report described an Intelligent Water Networks trial using existing telecommunications fibre in Melbourne's west as a massive array of vibration sensors to detect leaks, with partners including Greater Western Water, Veolia, and FiberSense. The aim is early warning for leaking pipes, including both large and small leaks, without waiting for obvious bursts (Melbourne fibre-based leak detection trial).

That same thinking applies on private property. The less guesswork, the less unnecessary demolition.

Beyond Detection From Diagnosis to a Lasting Repair

A leak report can tell you where water is showing up. It doesn't automatically solve the defect that allowed water in. That's the turning point many homeowners miss.

Beyond Detection From Diagnosis to a Lasting Repair

Why bathroom leaks often need more than a plumber

If a copper line pinholes in a wall, a plumber may be the main trade. But many bathroom leaks in Melbourne aren't really pipe failures. They're wet-area construction failures.

That can include:

  • damaged or poorly installed waterproofing membranes
  • failed shower base junctions
  • incorrect falls that hold water where it shouldn't sit
  • cracked grout and movement joints that allow ongoing water entry
  • deteriorated substrate behind tiles
  • previous patch repairs that sealed the symptom, not the system

This is why a leak can “come back” after a seemingly successful repair. The original path for water was never properly addressed.

According to the Insurance Council of Australia, water damage is one of the most common home insurance claims, and Victorian building data consistently shows waterproofing failures in wet areas are a recurring source of those problems (water damage and wet-area failure context). In practical terms, that means a wet bathroom wall isn't just a nuisance. It can point to a failed assembly.

What a builder-led rectification process looks like

A registered builder looks at the whole build-up, not just the first wet spot.

That usually means asking:

Question Why it matters
Is this a plumbing leak or a waterproofing failure? The repair path changes completely depending on the answer
Has moisture damaged the substrate? Tiles can be replaced, but swollen or degraded backing materials need rectification
Does the wet area still comply once opened? Partial patching can leave non-compliant details in place
Would a renovation be more sensible than piecemeal repair? In older bathrooms, repeated rectification can be poor value

In many jobs, the lasting fix isn't a dab of silicone. It's a controlled strip-out, repair of affected structure or linings, proper waterproofing, and reinstatement by the right licensed trades under one scope.

That's where bathroom renovations come into the conversation. If the shower is leaking because the wet area assembly has failed, a renovation isn't cosmetic. It can be the correct rectification method. The same applies to ensuites and apartment bathrooms where access is tight and damage has spread beyond one wall.

For homeowners trying to understand that threshold, a focused shower leak repair service in Melbourne is a better starting point than repeated patching. Melbourne Tiling Services P/L is one example of a registered builder-led business that handles wet-area rectification and bathroom renovation work under a coordinated scope.

Fix the leak path, not just the wet mark. If the membrane, substrate, or shower build-up has failed, surface repairs won't last.

How to Choose Your Melbourne Leak Detection Specialist

Not every leak detector is the right fit for every job. Some are strong on pipe tracing but stop at the report. Others understand wet-area construction, waterproofing failure, and what rectification will involve afterward.

How to Choose Your Melbourne Leak Detection Specialist

Questions worth asking before anyone starts

Ask direct questions. A good operator won't be offended.

  • Are you licensed for the work you're doing? If there's plumbing investigation, that matters. If the issue may lead into bathroom rectification or rebuilding, ask whether a registered builder is involved.
  • Do you handle waterproofing-related diagnosis, or only pipe leaks? That answer tells you whether they understand bathroom failures properly.
  • What testing methods do you use on this type of leak? The right method should match the scenario, not the other way around.
  • Will your findings help with insurer, strata, or builder discussions? A vague verbal opinion isn't much use once responsibility gets disputed.

One of the most useful indicators is whether they speak in terms of cause, not just location.

What a useful report should tell you

A report should be clear enough that another party can act on it. That matters in apartments, landlord matters, and renovation planning.

Look for:

  • Source findings: where the leak is likely originating
  • Affected areas: where moisture or damage has spread
  • Method used: thermal, acoustic, pressure, camera, or visual inspection
  • Recommended next step: plumber, registered builder, waterproofer, or combined scope
  • Limits of the inspection: what was and wasn't accessible

If your concern is shower failure, balcony leakage, or a bathroom that may need rectification, it also helps to choose someone who understands the broader waterproofing context. This overview of waterproofing in Melbourne is relevant because many recurring leaks are building-envelope or wet-area issues rather than simple fixture faults.

A specialist who can find the problem but can't explain the repair pathway leaves you with half a solution.

Frequently Asked Questions About Melbourne Leaks

How much does leak detection in Melbourne cost?

It depends on the suspected leak type, access, and the testing required. A simple fixture-related investigation is different from a shower leak through a slab edge, balcony, or apartment boundary. The useful question isn't only price. It's whether the inspection will tell you what failed and what trade needs to rectify it.

How long does leak detection take?

Some leaks are identified quickly. Others need staged testing because the water appears far from the source or only leaks when a fixture is used. Bathrooms are a common example. A shower may only leak under use conditions, which means proper testing matters more than speed.

Can a leak be fixed without removing tiles?

Sometimes, yes. If the issue is a tap connection, toilet seal, hose, or accessible plumbing fitting, there may be no need for demolition. If the waterproofing system behind the tiles has failed, tile removal and builder-led rectification are often the correct path.

Who pays for a leak between apartments?

When a leak crosses apartment boundaries, responsibility usually depends on where the leak originates, whether that source is in private property or common property. A professional leak detection report is often the key piece of evidence the owners corporation needs to act under strata rules in Victoria (apartment leak responsibility in Victoria).

Should I call a plumber or a builder first?

If you've got an obvious pipe or fitting problem, start with a plumber. If the leak involves a shower, wet-area floor, balcony, repeated dampness, or signs of failed waterproofing, a builder-led assessment is often the smarter first move because the repair may go beyond plumbing.


If you're dealing with a shower leak, bathroom moisture problem, or a wet-area failure that needs more than a quick patch, Melbourne Tiling Services P/L can help assess the cause and advise on the right rectification path, including bathroom renovations, waterproofing repair, and registered builder-led rebuilds where needed.

Roof Tiling Melbourne: Your 2026 Guide to a Flawless Job

A lot of roof tiling jobs in Melbourne start the same way. You notice a brown mark on the ceiling, a damp patch near a cornice, or flaking paint above the shower, and you hope it's a one-off. Then the next spell of rain hits, and the stain grows.

That's when most homeowners find out the roof problem and the internal damage are rarely separate jobs. Water gets in at the roof line, tracks along timbers, insulation, wiring paths or wall cavities, and eventually shows up where you least want it. Bathrooms are a common casualty because they already deal with moisture, exhaust penetrations, tiled junctions and ceiling linings that can hide damage until it's advanced.

A practical fix isn't just replacing a few tiles and walking away. The smarter approach is to assess the roof, the cause of the leak, and any inside damage as one project. That's where a Registered Builder becomes valuable. Instead of hiring one contractor for the roof, another for plaster, another for waterproofing, and then trying to work out who owns the defect if the leak returns, you've got one accountable party managing the sequence properly.

Roof tiling also sits inside a large, active Australian trade category. The Australia roofing market is estimated at AUD 7.22 billion in 2025 and projected to reach AUD 11.21 billion by 2035, with forecast growth at a 4.50% CAGR from 2026 to 2035, according to Australia roofing market research. That matters because it tells you roof tiling in Melbourne isn't a niche sideline. It's established building work with clear systems, suppliers and standards.

Table of Contents

Your Guide to Roof Tiling in Melbourne

Roof tiling in Melbourne isn't just about kerb appeal. It's about keeping water out, controlling wind uplift, protecting insulation and ceilings, and stopping a small external fault from turning into a much larger internal repair.

In practice, homeowners usually come to this decision in one of three situations. The first is obvious leakage. The second is a roof that looks tired but hasn't failed yet. The third is a renovation project, often a bathroom renovation, where hidden moisture damage is found and the investigation traces the problem upward.

A proper roof tiling job starts with diagnosis, not product selection. If the roof has broken field tiles, loose ridge capping, deteriorated flashing, sagging battens or failed underlay, the visible leak point inside the house may be well away from the actual entry point outside. That's why quick patch jobs often disappoint. They treat symptoms, not the water path.

Practical rule: If water damage has already reached internal linings, treat the roof, ceilings, framing and wet-area finishes as one connected building issue.

The end-to-end job usually involves more than laying tiles. It can include access equipment, strip-out, timber checks, sarking, battens, valleys, flashing, ridge work, debris removal and internal rectification. If the leak has affected a bathroom, that may also mean replacing damaged plaster, checking mould risk, re-waterproofing wet area junctions, and retiling.

Why one managed scope works better

When separate trades each quote only their own slice, gaps open up. The roofer fixes tiles. The plasterer patches the ceiling. The bathroom contractor repairs finishes. If the leak returns, each points somewhere else.

A Registered Builder can coordinate those moving parts under one scope and one sequence. That matters in occupied homes, especially where the roof leak has affected bathrooms, ensuites or upper-storey wet areas.

What good roof tiling Melbourne work looks like

You should expect clear defect identification, a written scope, compliant installation methods, tidy staging, and handover that explains what was repaired, what was replaced, and what still needs monitoring if any staged works remain. Good work is organised long before the first tile is lifted.

Choosing Your Roof Tiles for Melbourne's Climate

Melbourne weather is hard on roofs. Heat, cold, wind, hail and sudden rain all test how well the system has been designed and fixed. Material choice matters, but not in isolation. The tile has to suit the house, the roof structure, the exposure level and the level of maintenance the owner is prepared to keep up with.

What matters more than colour

A lot of owners start with appearance. That's understandable, but performance comes first. Australian tile guidance notes that properly installed tiled roofs offer higher resistance to wind suction than lightweight sheet roofing, and they can also reduce external noise by up to 30 dB, compared with about 12 dB for sheet metal, according to Australian roof tile technical guidance. In Melbourne suburbs near tram routes, busy roads or flight paths, that noise difference is worth taking seriously.

The main trade-off isn't “good tile versus bad tile”. It's which tile is right for your house.

  • Terracotta suits owners who want strong visual character and stable colour over time.
  • Concrete suits practical budgets and broad style choice.
  • Slate suits heritage work or high-end custom projects where weight, detailing and premium finish are part of the brief.

If you're comparing finishes for broader renovation work as well, it helps to look at tile materials used across residential projects so your roof choice and internal tile selections don't clash.

Roof Tile Material Comparison for Melbourne Homes

Material Typical Cost (per m²) Lifespan Pros Cons
Terracotta Varies by supplier, profile, access and scope Long service life when maintained Distinct appearance, colour runs through the material, suits many classic Melbourne homes Higher upfront cost in many cases, brittle if impacted, replacement tiles can be harder to match on older roofs
Concrete Varies by profile, brand and roof complexity Good long-term performance when maintained Broad style range, practical option for many suburban homes, commonly available Can weather differently over time, surface appearance may age faster than terracotta
Slate Varies significantly depending on source and detailing Long-lasting when properly installed Premium look, strong heritage and architectural fit Heavy, usually more demanding structurally, higher install complexity and cost

How the three options behave on site

Terracotta works well where the roof is a visible architectural feature. It's often chosen for period homes and homes where owners want a finish that doesn't rely on surface colour alone.

Concrete is the workhorse option. It's widely used because it balances appearance, availability and practicality. For many roof tiling Melbourne projects, it's the material that solves the brief without turning the roof into the most expensive part of the renovation.

Slate is different again. It's less forgiving to budget and structure, but when the house suits it, nothing else really substitutes for it visually.

Don't choose a roof tile by sample board alone. Look at weight, fixing method, edge detailing, availability of matching accessories and whether the existing structure is suitable.

Budgeting for Your Melbourne Roof Tiling Project

Roof tiling prices vary because roofs vary. A simple single-storey house with clean access, a straightforward pitch and no hidden timber issues is one thing. A steep roof with difficult access, old valleys, multiple penetrations and internal water damage is another.

A person reviewing a detailed roofing project cost estimate on a clipboard with a roof in background.

The mistake homeowners make is comparing quotes as if they cover the same scope. Often they don't. One quote might include removal, disposal, sarking upgrades, ridge works and flashing renewal. Another may price only the visible tile replacement and leave the rest as variations.

What usually drives the budget

The biggest cost variables are usually:

  • Roof size and shape. More roof area means more material and labour. Complex roof geometry adds cutting, detailing and time.
  • Pitch and access. Steeper roofs and restricted sites need more safety planning and slower production.
  • Material choice. Terracotta, concrete and slate sit in different supply and labour brackets.
  • Substrate condition. Once old tiles are removed, damaged battens, sarking or localised timber decay can add repair work.
  • Penetrations and flashings. Skylights, chimneys, vents and valleys create the details that separate a watertight job from a leaking one.
  • Internal damage rectification. If the leak has reached a bathroom or ceiling below, the project may extend beyond roofing into plaster, waterproofing and tiling repairs.

What a proper quote should spell out

A thorough quote should identify inclusions clearly. Look for:

  • Site setup and protection
  • Scaffolding or edge protection if required
  • Strip and disposal of existing materials
  • Sarking and batten scope
  • Tile type and profile
  • Ridge, hip and valley works
  • Flashing details
  • Allowances or exclusions for structural repair
  • Clean-up and waste removal
  • Whether internal make-good is included

If the roof leak has affected a bathroom, ask whether the builder is pricing the internal works now or leaving them for later. Delaying that question often creates budget creep because the ceiling, waterproofing and tiling trades end up being procured separately after the roof is finished.

A cheap roofing quote can become the expensive option if it excludes the parts of the job that actually stop the leak.

The Professional Roof Tiling Process Explained

A Melbourne roof tiling job usually starts after a problem has already shown itself. A stain appears on the bathroom ceiling. Paint lifts near a cornice. After heavy rain, water tracks down a wall even though the damage started much higher up at a valley, ridge, flashing or cracked field tile. By the time the roof is opened up, the work often extends beyond the outside skin of the house.

That is why process matters. A re-roof is not just tile removal and tile replacement. It is diagnosis, weather protection, repair of the roof system, then proper reinstatement of any internal damage the leak caused. If water has reached a wet area, it also makes sense to deal with the inside under one scope, especially where waterproofing compliance requirements in Victoria may be part of the rectification.

An infographic showing the seven essential steps of a professional roof tiling and installation process.

How the work should run on site

  1. Site setup and protection
    Access, fall protection, material staging and protection of gardens, paths and internal ceilings are handled first. On occupied homes, the builder also needs a plan for keeping the roof watertight if weather turns mid-job.

  2. Strip-off and controlled removal
    Old tiles, ridge materials and failed flashings are removed in stages, not ripped off blindly. That gives the team a chance to isolate active leak points and avoid unnecessary damage to salvageable areas.

  3. Open-up inspection
    Once the old covering is off, the condition of the roof becomes clear. Battens may be out of gauge, sarking may be torn or missing, and local timber repairs may be needed around valleys, eaves, skylights or chimneys.

  4. Roof preparation
    Good jobs are distinguished from cosmetic ones during this stage. The roof plane is set out properly, underlay or sarking is installed or repaired, battens are fixed to suit the selected tile profile, and drainage paths are checked before the new covering goes on.

A practical installation walkthrough is also easier to follow on screen:

The installation stages that decide whether the roof stays dry

After preparation, the visible work starts. Tiles are laid to the correct gauge and line so water sheds as intended and the finished roof does not look uneven from the street. Cutting around penetrations needs care. Small errors here tend to show up later as leaks, rattling tiles or untidy edge lines.

Flashings, valleys, ridges and hips are then completed as a system, not as separate patch jobs. That point matters on older Melbourne homes where multiple repairs have often layered new materials over failed old ones. A registered builder managing the whole scope can coordinate the roofing work with plaster repairs, bathroom make-good, and any tiling or waterproofing reinstatement inside the house, instead of leaving the owner to organise separate trades after the leak path has already affected internal finishes.

Where shortcuts usually show up

The defects I see after poor roof tiling work are usually predictable:

  • Tile courses drift out of line, which affects both appearance and water run-off
  • Flashings are surface-fixed or patched, instead of being integrated properly into the roof build-up
  • Ridge bedding and pointing are rushed, which leads to early cracking or loose caps
  • Debris is left in valleys and gutters, creating drainage problems at the first heavy rain
  • Internal moisture damage is ignored, so the roof is finished but the ceiling, bathroom wall or wet-area substrate keeps deteriorating

The final inspection should cover more than the roof face. It should include penetrations, gutters, downpipe discharge, visible alignment, and any internal areas that were affected by the original leak.

Roof tiling failures rarely start with the tile itself. They usually start at the junctions, the flashings, or the decision to treat the roof and the internal water damage as two unrelated jobs.

Navigating Permits and Victorian Regulations

Permits confuse a lot of homeowners because roofing work can look straightforward from the street while still triggering formal requirements. The legal position depends on scope. Replacing isolated damaged tiles is one thing. Major re-roofing, structural changes or broader building work are another.

When permits enter the picture

If the project changes the structure, involves substantial replacement, or forms part of wider remedial works, permit requirements can become relevant. That's especially true where roof failure has led to internal building damage and the rectification extends into ceilings, framing, wet areas or other building elements.

The practical issue isn't just paperwork. It's accountability. A roof is a weatherproofing system tied into structure, flashings, drainage paths and adjacent finishes. Once a project affects more than the visible tile layer, permit and compliance questions need to be checked early, not after demolition starts.

Why builder-led coordination matters

Using a Registered Builder makes life easier. Instead of trying to interpret permit triggers yourself, you're engaging someone who can assess the whole scope, identify whether approvals are needed, and coordinate the right sequence of trades and inspections.

For homeowners also dealing with shower leaks, balcony remediation or wet-area reinstatement, that broader compliance mindset matters just as much inside the house. It's worth understanding how a Victorian waterproofing compliance certificate fits into regulated wet-area work, because roof leaks and internal moisture damage often end up crossing over into bathroom and waterproofing rectification.

A Registered Builder also gives you one point of responsibility for the project logic. That means fewer gaps between roofing, carpentry, waterproofing and internal finishes, and less risk of discovering late that a piece of required compliance work was never allowed for.

Selecting Your Melbourne Roofing Professional

A roof leak rarely stays a roof-only problem for long. Water gets into insulation, stains ceilings, swells cornices, and if it tracks far enough, it can end up affecting a bathroom, ensuite or hallway below. That is why the right hire is not just the person who can replace tiles. It is the person who can assess the whole chain of damage and take responsibility for the repair sequence.

A professional roofer discussing a project estimate with a homeowner outside a suburban house.

Roof tiling is a recognised trade, and on many Melbourne homes the job quickly overlaps with broader building work. If the scope includes substrate damage, structural rectification, internal reinstatement, waterproofing, or wet-area repairs, a Registered Builder is usually the safer way to run the project. You get one party looking at cause, access, sequencing and liability across the whole job, not separate trades each covering only their own piece.

What to verify before signing anything

Start with documents, not promises.

  • Registered Builder details, where the scope goes beyond straightforward tile repair or replacement
  • Public liability insurance that is current and appropriate for residential site work
  • WorkCover and properly managed labour, especially if subcontractors will be on site
  • A written scope with exclusions, so you know whether flashings, battens, disposal, scaffold, make-good and internal repairs are included
  • Experience in occupied homes, because weather protection, site cleanliness and access planning matter more when people are living there

For larger properties or jobs with several trades working in sequence, it also helps to use a contractor familiar with commercial tiling and coordinated project delivery in Melbourne. That kind of experience usually shows up in better site control, clearer programming and fewer gaps between trades.

Questions that expose weak operators fast

A proper contractor should answer these clearly:

  • Who inspects the roof before the quote is issued?
  • What is the process if rotten battens, damaged sarking or timber issues are found after strip-out?
  • Who is responsible for flashings, penetrations and weatherproofing details?
  • What protection is in place if rain arrives mid-project?
  • Are ceiling repairs, plaster replacement, repainting or bathroom rectification included, excluded, or costed separately?
  • Who manages the internal trades if the leak has already damaged rooms below?

Those answers matter because a cheap roofing quote can become an expensive coordination problem. I have seen owners hire a roofer for the external repair, then chase separate plasterers, waterproofers, tilers and painters once the inside damage becomes clear. The work drags out, and each trade points back to someone else when defects or delays appear.

A better approach is to use a Registered Builder who can manage both the roof fault and the resulting building repairs under one scope. A factual example is Melbourne Tiling Services P/L, which handles bathroom renovations, waterproofing and multi-trade remedial work. That model suits Melbourne homes where a roof leak has already affected an upstairs bathroom, ensuite, ceiling cavity or adjacent finishes.

If a contractor cannot explain what happens after the tiles come off, they are not ready to run the job properly.

Roof Maintenance and When to Repair or Replace

A roof that leaks into the house is rarely just a roofing problem for long. In Melbourne homes, water can start at a cracked tile or failed ridge line, then track into insulation, ceiling plaster and wet-area finishes below. Once that happens, the decision is no longer just about swapping a few tiles. It is about stopping the source and limiting the building repairs that follow.

Repair is fine when the fault is isolated

Repairs are usually the right call when the defect is local and the rest of the roof is still performing properly. That includes a handful of broken tiles after a storm, one flashing detail that has opened up, or a small section of ridge capping that has shifted while the balance of the roof remains stable.

Maintenance helps keep those smaller jobs small. Clear gutters and valleys, check the roof after heavy wind, and take recurring ceiling marks seriously. Mortar in gutters, damp insulation and musty roof spaces are all signs worth inspecting early.

A good repair should deal with the cause, not just the visible entry point.

Replace when the roof is failing as a system

For Melbourne homes with recurring leaks or widespread cracked ridge capping, patch repairs are often a false economy, and the decision becomes about triaging whether the roof has broader systemic failures, as discussed in Victorian consumer-focused guidance on roofing scam risks and repair triage.

Common signs include repeated leak callouts in different areas, brittle or slipping tiles, deteriorated bedding and pointing across large sections, and underlay that has failed in more than one location. In that situation, each small repair buys limited time and can make owners pay twice. Once for patching, then again for the proper reroof.

This is also where the inside of the house matters. If water has reached an upstairs bathroom, ensuite or ceiling cavity, delaying the roof replacement often increases the internal scope. Ceiling linings may need replacement. Exhaust penetrations may need resealing. Waterproofing, tile reinstatement or repainting may also be part of the final job.

That is why many Melbourne owners are better served by one Registered Builder managing the roof fault and the internal rectification under a single scope. It reduces handover gaps between trades and gives you one party responsible for sequencing the external repair with the plaster, waterproofing, tiling and finishing work inside.

Frequently Asked Questions About Roof Tiling

Can a roof leak end up causing bathroom renovation work

Yes. Water rarely drops in a straight line from roof to floor. It can track through framing, along penetrations and into wet-area ceilings or walls before it becomes visible. If the leak reaches a bathroom, the fix may involve ceiling replacement, waterproofing checks, tile reinstatement and mould-related clean-up. That's why one Registered Builder managing both the roof and the bathroom-side repairs is often the cleanest approach.

Can you tile over an existing roof

Sometimes people ask about laying new roofing over the old system to save time. In most remedial situations, that's the wrong move. The old roof usually needs to come off so the structure, battens, flashings and underlay can be inspected. If you skip that, you're covering defects instead of fixing them.

What's the difference between restoration and re-roofing

Restoration usually means keeping the existing roof and carrying out remedial work such as replacing damaged tiles, addressing ridge issues, cleaning, sealing or related maintenance items. Re-roofing means stripping and installing a new roof system. The right choice depends on whether the roof still has sound bones.

How long does a roof tiling job take

It depends on access, weather, roof complexity, the extent of repairs under the old roof, and whether internal damage also needs rectification. A straightforward job moves much faster than one that includes structural fixes, permit steps or bathroom reinstatement after a leak.

What should I ask before signing a contract

Ask who is responsible for permits if required, who manages safety, what happens if hidden damage is found, whether flashings are included, how the site is protected during rain, and whether internal make-good is included or excluded. Also ask who your main contact is once the work starts.

Is a Registered Builder necessary if the leak seems minor

If it's a small isolated roof repair, not always. But if the leak is recurring, the roof needs larger-scale tiling work, or water has affected a bathroom or internal finishes, a Registered Builder is usually the safer path because the work has moved beyond a basic patch.


If you're dealing with a leaking roof, damaged bathroom ceiling, or a project that needs both external roof tiling and internal rectification, Melbourne Tiling Services P/L can assess the full scope and coordinate the work under one registered building team.

Ceramic Tiles Bathroom: Melbourne Renovation Guide 2026

You're probably standing in a bathroom that's overdue. The tiles look tired, the shower feels dated, and once you start browsing showrooms, every decision seems to multiply. White subway, terrazzo-look, matte grey, stone-look porcelain, mosaics, large format. It's easy to get lost in looks and miss the part that determines whether the room performs well for years.

That's where ceramic tiles for a bathroom still make sense. They've been around for a reason. The National Park Service preservation brief on ceramic tile floors notes that tilemaking can be traced back to the fourth millennium B.C., and modern ceramic tile is still valued because firing creates a hard, water-resistant surface that suits wet areas.

In Melbourne bathroom renovations, that history matters less as trivia and more as proof of a material that's lasted through changing building methods, design trends, and daily wear. Good tile selection isn't about chasing what looks current on social media. It's about matching the right tile to the right part of the room, then installing it as part of a compliant waterproofed system.

Table of Contents

Your Melbourne Bathroom Renovation Starts with the Right Tile

I usually see the same moment early in a Melbourne bathroom renovation. A client has a tile they like, then we put that sample against the actual room. Suddenly the real questions show up. Will it work on a shower floor with proper fall? Will it hide soap marks? Will it suit an older home where the walls are rarely dead straight? Will it support a bathroom build that stays sound years after handover?

That is why tile selection needs to start with function, not the showroom display. The tile affects cleaning, slip risk, set-out, grout joints, trim details, and how forgiving the installation will be once the waterproofing and substrate preparation are locked in. In Melbourne, I also look at the age of the home, likely movement in the structure, and whether the chosen format will help or fight the room.

Why ceramic still holds its place

Ceramic remains a practical choice because it performs well in the right areas and gives good value without creating unnecessary complexity. For bathroom walls, splash zones outside the shower, and feature areas, it often does the job well. It is lighter to handle than many dense tiles, usually easier to cut, and available in a wide range of finishes and sizes.

Its long history matters, but performance matters more. Ceramic still earns its place because it can be matched to the right part of the bathroom instead of being forced into every part of it. If you want a clearer breakdown of how different products behave on site, this guide to bathroom tiling materials and their practical uses is a useful starting point.

A good bathroom does not need one tile everywhere.

In many projects, the smarter build is a straightforward ceramic wall tile paired with a floor tile that is selected for grip, density, and wet-area suitability. That approach usually gives better long-term results than choosing one look and trying to make it solve every problem.

Practical rule: Choose tiles by zone first. Start with the shower floor, then the main floor, then wall areas, then any feature tile.

What homeowners usually get wrong

The common mistake is choosing from a display board without thinking through how the bathroom will be used. Showrooms are flat, bright, and dry. Real bathrooms deal with steam, residue, cleaning products, movement in the substrate, and wet feet on cold mornings.

From a builder's perspective, the better questions are practical:

  • Where will water sit or drain slowly
  • Which surfaces need more grip underfoot
  • What finish will show less residue and be easier to clean
  • Is the tile suitable for the specific wall or floor location
  • Will the tile size and edge detail work with falls, trims, grout joints, and the waterproofing system

That last point gets missed too often. Tile is the visible finish, but it sits on top of a system that has to comply and perform. In a bathroom renovation, the best-looking tile is the wrong choice if it makes set-out difficult, creates problems at junctions, or pushes the job away from sound wet-area practice and Australian Standards.

Ceramic vs Porcelain vs Natural Stone Tiles

A tile can look right on a sample board and still be the wrong product for a Melbourne bathroom. I see that regularly on renovation jobs. The problem usually is not colour or style. It is whether the tile suits a wet area, works with the waterproofing system underneath, and will still perform after years of steam, cleaning, and daily use.

The first technical difference is porosity. Denser tiles absorb less water, which generally makes them a better fit for shower floors and other hard-working wet zones. More porous materials can still be used, but only in the right locations and with the right expectations around maintenance and sealing.

A comparison chart of ceramic, porcelain, and natural stone tiles highlighting their features, durability, and maintenance requirements.

What changes in a bathroom

For bathroom work, water absorption is one of the clearest dividing lines between tile types. Porcelain sits in the impervious class, which is why builders and tilers often prefer it for shower bases, bathroom floors, and other areas that stay damp for long periods. A low-absorption tile does not replace proper waterproofing, but it does add a more stable and durable wearing surface over a compliant system.

Ceramic still earns its place. On bathroom walls, it is often the practical choice because it is lighter, easier to cut, and usually more cost-effective than porcelain. That can help with set-out, trims, and penetrations around mixers, niches, and fittings. For many projects, a good ceramic wall tile plus a properly rated porcelain floor tile is the sensible build.

Natural stone is different again. Stone can produce an excellent result, but it introduces more variables on site. Some stones stain easily, some need regular sealing, and some finishes are less forgiving under soap residue or aggressive bathroom cleaners. From a registered builder's perspective, stone only makes sense if the owner accepts the upkeep and the installer details the substrate, sealing, movement joints, and edge treatments properly. For a broader overview of tiling materials used in renovations, it helps to compare the material first, then choose the finish.

Tile Comparison for Bathroom Use

Attribute Ceramic Tile Porcelain Tile Natural Stone
Water absorption Higher than porcelain Very low absorption, suited to wetter locations Varies by stone type and is often more porous
Best bathroom use Walls, splash zones, and some lighter-duty floors if correctly specified Shower floors, main floors, and heavily used wet areas Feature walls, vanity splashbacks, and selected floors where maintenance is accepted
Durability Good in the right location Dense and hard-wearing Depends heavily on stone type, finish, and care
Maintenance Usually straightforward, especially glazed finishes Generally low maintenance Requires more cleaning care and often sealing
Slip options Available in different finishes Wide range of textured and wet-area finishes Depends on finish, cut, and stone type
Typical trade-off Lower cost and easier wall installation, but not ideal for every wet floor application Strong long-term performer, but usually dearer and harder to cut Premium look with higher upkeep and more installation risk

In practice, I rarely recommend using one tile type everywhere just to keep the look uniform. Bathrooms are built in zones, and each zone places different demands on the tile, the adhesive, the falls, and the waterproofed substrate below.

Natural stone is not a bad choice. It is less forgiving. If low maintenance, predictable performance, and easier compliance are the priorities, porcelain usually gives the cleanest result on the floor, while ceramic remains a reliable option on the walls.

Understanding Tile Ratings for Safety and Performance

A bathroom tile only performs if it stays safe under wet feet, works with the falls in the floor, and holds up over years of cleaning. In Melbourne renovations, I treat tile ratings as a buildability and compliance issue as much as a finish selection issue.

A close-up view of bare feet walking on modern grey textured ceramic tiles in a bathroom.

Why slip resistance matters

Slip resistance is one of the first checks for any bathroom floor tile, particularly in shower areas and other regularly wet zones. A tile can look suitable in a showroom and still be the wrong product once soap, water, and cleaning residue hit the surface.

As noted earlier, wet-area tile selection should be backed by proper slip data rather than appearance alone. A common assumption I see is that homeowners can judge slip resistance by touch or by looking at a sample board. That is unreliable. Some lightly textured tiles become slippery in service, while some flatter-looking products perform well because they were designed and tested for wet-floor use.

The finish also affects how well the floor works with the rest of the bathroom build. The guidance on glazed and unglazed porcelain in wet areas explains why unglazed or purpose-textured surfaces usually give better grip, especially on shower floors.

Finish matters as much as colour

Finish choice always involves a trade-off. More grip can mean more effort to clean. A smoother surface is easier to wipe down, but it may be less forgiving under wet feet.

In practice, I look at finishes by zone, not by trend:

  • Glossy glazed finishes usually work best on walls where easy cleaning matters more than underfoot grip.
  • Matte finishes are often a sensible middle ground for general bathroom floors.
  • Unglazed or textured finishes deserve close attention for shower floors and other wet zones where slip risk is higher.
  • Highly polished finishes are usually a poor fit for bathroom floors, even if they suit the look of the room.

There is another practical issue here. Heavy texture can trap grime in the face of the tile and make regular cleaning harder, especially in family bathrooms. Good tile selection is about getting enough grip for the location without creating a surface that is frustrating to maintain.

From a builder's point of view, ratings are only useful if they match the way the bathroom is being constructed. The tile, adhesive, grout joints, floor falls, and waterproofed substrate all have to work together. If the supplier cannot clearly state where a tile is suitable, or cannot provide the relevant slip information, I would not specify it for a wet-area floor.

Best Practices for Wall and Floor Tiles

A bathroom can look right at handover and still fail in use if the tile selection ignores where each product is being installed. I see that problem regularly in Melbourne renovations. The wall tile is too delicate for floor traffic, or the floor tile is so awkward for the shower base that the tiler has to fight the falls and drain layout from day one.

A modern bathroom featuring dark ceramic tile flooring, a floating wooden vanity, and white subway tiled walls.

Wall tiles and floor tiles are not interchangeable

Wall tiles and floor tiles are designed for different loads and different risks. A glazed ceramic tile that performs well on a wall may chip or crack under foot traffic, point loading, or movement in the substrate. In a bathroom, that matters well beyond appearance. Once tiles or grout start failing on the floor, water management, cleanability, and service life usually suffer with them.

From a registered builder's point of view, tile choice also has to respect the broader wet-area system. The waterproofing membrane sits behind the finish, but the finished surface still needs to work with the intended falls, drainage, and daily use. Australian wet-area standards do not let you treat tile selection as a styling exercise separate from construction detail.

I assess bathroom tile zones like this:

  • Walls need reliable adhesion, reasonable weight for the substrate, and a finish that is easy to keep clean.
  • General bathroom floors need durability, slip resistance suited to wet barefoot traffic, and a surface that will not become a maintenance problem.
  • Shower floors need tiles that can follow the required falls cleanly around the waste without creating lipping, ponding, or awkward cuts.

Tile size affects buildability, not just appearance

Size changes how easy the bathroom is to build properly. Large tiles can give walls and open floor areas a cleaner look, but they also demand flatter substrates, tighter set-out, and more planning around corners, niches, and fixtures. If the room is out of square, large pieces make that obvious fast.

On shower floors, smaller formats still earn their place for practical reasons. They conform to the fall more naturally, reduce the risk of unsupported corners, and usually give better footing because there are more joints across the surface. Large tiles can still work in some bathrooms, especially with the right waste location and a set-out planned early. The margin for error is smaller.

If you are weighing up sizes, this guide to large-format tiles for bathroom renovations explains where they perform well and where they create avoidable installation problems.

This video gives a good visual sense of how tile layout and installation detail affect the result:

Smaller tile is often the safer and more buildable choice in wet zones.

For ceramic tiles bathroom renovations, the strongest result usually comes from using different tile formats where they suit the room, the drainage layout, and the waterproofed substrate, rather than forcing one tile across every surface.

Making Smart Grout and Sizing Choices

Grout is where many bathrooms either stay looking sharp or start looking tired. People often treat it as filler. It isn't. It affects maintenance, appearance, and how forgiving the finished room is in daily use.

Grout is part of the system

On a wall, grout choice is mostly about appearance and cleanability. On a shower floor, it becomes more serious. The grout joints are exposed to regular water, soap, cleaning products, and movement around drains and corners.

In demanding wet areas, epoxy grout is often worth considering because it resists water and staining better than standard cementitious grout. Cementitious grout still has a place and is common, but it usually needs more care over time and is less forgiving when owners want a very low-maintenance bathroom.

A few practical rules help:

  • Use epoxy where the exposure is harsh: Shower floors, niches, and splash-prone areas benefit most.
  • Don't choose white grout by default: It can look crisp at handover and become a cleaning burden later.
  • Match grout to tile edge quality: Rectified tiles allow tighter, cleaner lines. Irregular edges need more tolerance.

Choosing width and colour

Grout width changes the whole look of the bathroom. Tight joints feel cleaner and more contemporary. Wider joints can suit handmade-look or smaller-format tiles, but they also create more visible grid and more cleaning area.

Colour matters just as much:

  • Blended grout colours make the surface feel calmer and hide minor variation.
  • Contrasting grout highlights the layout and every alignment decision.
  • Mid-tone grout is often the most forgiving on floors.
  • Very light grout shows staining more readily in hard-working bathrooms.

If you're weighing scale as well as grout, this guide to large-format tiles and layout decisions helps clarify the trade-offs between fewer joints and more complex installation.

The best bathrooms usually don't have the most dramatic grout choice. They have the one that still looks good after months of steam, cleaning, and normal family use.

Budgeting for Durability and Long-Term Maintenance

Bathroom tile budgets usually blow out in one of two places. The first is at selection, where money goes into a feature tile that adds very little to day-to-day performance. The second shows up years later, when a surface is hard to keep clean, wears poorly, or contributes to avoidable slip risk.

An infographic titled Budgeting for Durability and Long-Term Maintenance detailing costs, pros, and cons of tile installation.

A bathroom in Melbourne has to handle regular moisture, cleaning chemicals, movement in the building, and wet-area construction requirements. That means the cheapest square-metre rate is rarely the true cost. Tile choice affects how well the room wears, how easily it cleans up, and how much pressure the whole assembly places on the substrate, set-out, and waterproofed areas. If you want context around that underlying system, this guide to bathroom waterproofing in Melbourne renovations explains why the visible finish is only one part of a durable bathroom.

Cheap to buy can be expensive to live with

The long-term trade-off usually sits between cleaning, safety, and durability.

A low-cost glossy tile might be easy to wipe down on a wall and a poor choice on a floor. A heavily textured tile can improve grip underfoot and still create more scrubbing in the shower than many owners expect. Natural stone can look excellent in the right project, but sealing, product selection, and ongoing care need to be budgeted properly from the start. Ceramic wall tiles remain one of the most economical options in many bathrooms because they give a consistent finish without adding much maintenance.

I usually tell clients to price the bathroom for ten years of use, not just for handover day.

Budget by zone, not by one tile for everything

Trying to force one tile across every surface often creates the wrong compromises. Bathrooms perform better when each area is costed for its actual job.

Bathroom zone What to prioritise Typical budgeting mindset
Shower floor Grip, wet performance, installability on falls Spend for function first
Main bathroom floor Safety, wear resistance, ease of cleaning Choose for daily traffic, not just appearance
Walls Cleanability, finish consistency, cost control Ceramic often gives strong value here
Feature areas Appearance and detail Keep these selective so they do not distort the whole budget

This approach also helps with compliance and buildability. Smaller tiles or mosaics on shower floors usually work better over falls. Large-format tiles can reduce grout lines elsewhere, but they may increase labour if the room is out of square or the set-out needs more cutting. Good budgeting accounts for both the material and the installation method.

For early planning, some owners use builder or contractor calculators to map scope before requesting quotes. Melbourne Tiling Services P/L has a renovation calculator intended to help homeowners frame likely project scope before selections are locked in.

The best tile choice is usually the one that still performs well after years of steam, cleaning, and wet feet.

Why You Need a Registered Builder for Your Bathroom Renovation

Tile is the visible finish. The actual risk sits underneath it. Most bathroom failures I'm called to inspect aren't caused by the tile itself. They come from poor substrate preparation, weak set-out decisions, bad falls, or failed waterproofing around penetrations, joints, and transitions.

Bathrooms fail at the joins between trades

A bathroom renovation usually involves demolition, carpentry, plumbing, electrical work, waterproofing, screeding, tiling, silicone finishing, and fixture installation. Problems start when no one is properly coordinating how those pieces connect.

That's why builder oversight matters. In Victoria, bathrooms aren't just decorating projects. They're controlled wet-area works that need the room to function as a system. The tile, grout, puddle flange, sheet or liquid membrane, waste location, movement joints, and shower screen all affect one another.

The tile doesn't keep the bathroom waterproof on its own. The waterproofing system does. The tile assembly has to support it, not undermine it. If you want context on how critical that layer is, this explanation of bathroom waterproofing in Melbourne renovations is worth reading before you approve any scope.

Questions worth asking before work starts

When you speak to a contractor, ask direct questions. If the answers sound slippery, that usually tells you enough.

  • Who is coordinating the full scope if plumbing, electrical, waterproofing, and tiling all overlap?
  • Who is responsible for substrate preparation before membrane and tile go down?
  • How are shower falls being formed and checked before tiling starts?
  • What tile is being specified for each zone and why?
  • What documentation or certification applies to the waterproofing work?
  • Who rectifies failures if leaks or cracked finishes appear after handover?

A registered builder doesn't just organise trades. They control sequencing, accountability, and compliance. That's what keeps a bathroom renovation from becoming a patchwork of separate jobs with no one taking ownership when something goes wrong.

If you're choosing ceramic tiles for a bathroom, don't separate tile selection from build responsibility. They belong together.


If you're planning a bathroom renovation in Melbourne and want clear advice on tile selection, waterproofing, and buildable layouts, Melbourne Tiling Services P/L can help you assess the scope before work starts and align your tile choices with long-term performance.

Frameless Shower Screen Installation: A Builder’s Guide

You're often at the same point when a frameless shower screen becomes a real decision. The tiles are in, the room finally looks like a bathroom, and the last major piece seems simple enough: measure the opening, order the glass, fix it in place, run a bead of silicone, done.

That's where plenty of problems start.

A frameless shower screen installation looks clean because there's nowhere for mistakes to hide. No aluminium frame to disguise a crooked wall. No chunky channel to distract from a floor that falls the wrong way. In bathroom renovations, the screen doesn't forgive poor prep. It exposes it. As a Melbourne registered builder, I'm often brought into bathrooms where the glass wasn't the first mistake. The fundamental issue was earlier: out-of-plumb walls, weak substrate, rushed waterproofing, or hardware fixed without thinking through movement and load.

Table of Contents

Is DIY Frameless Shower Screen Installation for You

If your shower opening is square, the walls are plumb, the hob is solid, and you've handled delicate drilling into finished tile before, a simple install might look manageable. If any of those conditions are uncertain, DIY gets risky quickly.

A frameless shower screen installation isn't hard because there are lots of parts. It's hard because the tolerances are tight. The screen has to line up with finished surfaces that are rarely perfect, and every small error ends up visible in the final reveal. The door binds. The gaps look uneven. Water escapes where you didn't expect it to. In the worst jobs, the panel is put under stress from the day it's installed.

The real DIY question

The right question isn't “Can I fit a shower screen?” It's “Is my bathroom ready for frameless glass?”

That means checking a few things:

  • Wall accuracy matters: If the wall leans or bellies, frameless glass won't hide it.
  • Tile drilling needs control: One rushed hole near an edge can crack a finished tile.
  • Substrate strength is essential: Heavy glass needs a stable fixing point and a rigid base.
  • Water management has to be understood: A clean-looking screen can still produce a wet bathroom if placement and sealing are wrong.

Practical rule: If you're relying on silicone to make up for bad alignment, the job is already off track.

Homeowners also underestimate how much cost sits behind a failed attempt. Replacing one cracked tile in a completed shower can be awkward. Reworking waterproofing after hardware has been drilled through the wrong spot is worse. If you're still deciding whether to DIY or hand it over, it helps to compare the broader shower screen installation cost considerations against the cost of rework, not just the cost of the initial labour.

What tends to work and what doesn't

A straightforward opening with good site prep can work with a basic frameless layout.

What doesn't work well is confidence without checking the conditions first. In bathroom renovations, that's usually how people end up paying twice. The visual simplicity of frameless glass gives the impression that the install is forgiving. It isn't. It's one of the least forgiving items in the room.

Preparing Your Site for a Perfect Installation

The screen is the last thing people see, but site preparation is what determines whether it performs properly. By the time the glass arrives, most of the important decisions should already be settled.

A six-step site preparation checklist infographic for installing a frameless shower screen in a bathroom.

What has to be true before glass is ordered

Start with the opening itself. Check the walls for plumb with a long spirit level or laser. Check the hob or floor for level. Check the corners for square. If there's a bow in the wall, a dip in the base, or a twist through the opening, note it before anyone measures for glass.

Industry guidance used in frameless work sets a clear threshold for panel sizing. For 3/8-inch glass, about 10 mm, the maximum recommended height is 84 inches, about 2134 mm, while 1/2-inch glass, about 12 mm, can extend to 120 inches, about 3048 mm, when the panel is supported on two vertical edges and the base or on two horizontal edges, as outlined in Glass Magazine's discussion of frameless design limits. That matters in Melbourne bathroom renovations because the glass choice isn't just a design preference. It has to suit the support conditions and the actual geometry on site.

Here's the basic site checklist I use before signing off on measurement:

  • Plumb walls: Hardware must sit flat and true.
  • Level base or hob: The panel should sit evenly on packers, not rock or twist.
  • Rigid fixing zones: Know where brackets, clamps, or channels will anchor.
  • Finished tile quality: Lipping, hollow spots, and weak edges create drilling problems.
  • Clear drainage logic: Water has to fall back into the shower area, not toward the room.

Why waterproofing and substrate come first

Many DIY guides become insufficient here. They show the glass going in, but skip the fact that frameless hardware is being installed into a wet area assembly that already has layers doing important work.

Your waterproofing membrane must be intact and properly planned before the screen goes anywhere near the room. In bathroom renovations, the screen isn't a substitute for waterproofing. It's a finishing element that sits on top of a waterproofed and properly graded substrate. If the membrane is poor, the glass won't save the bathroom. If the falls are wrong, the screen won't solve that either.

For homeowners comparing methods and materials, a proper understanding of waterproofing in Melbourne bathrooms helps more than any generic installation checklist.

Good frameless installs start before the tiler leaves site. If the screed, tile set-out, and hob details are wrong, the glass installer inherits a problem rather than a clean opening.

A solid hob or tiled substrate is critical because the panel load needs to transfer into something stable. Movement under the panel leads to failed seals, poor alignment, and stress in the glass and hardware.

If you're doing a full renovation rather than a simple replacement, treat the shower screen as part of the bathroom build. That's how registered builders and experienced bathroom renovations teams avoid the common chain reaction where one trade finishes neatly, but leaves the next trade an impossible fixing condition.

The Art of Measurement and Hardware Selection

A lot of the call-backs I see start here. The bathroom looks ready, the tiles are in, and someone has taken a quick measure off the widest points of the opening. The glass arrives, the gaps are wrong, the door binds, or the panel needs to be forced into position. Frameless glass does not forgive that kind of guesswork.

A professional installer measures a bathroom wall for a frameless shower screen installation with tools and hardware.

How professionals measure openings

A proper measure-up is taken from the finished room, not from the plan and not from a rough set-out. Walls are rarely perfectly plumb, hobs can drift out of level, and tiled corners often carry small variations that become obvious once clear glass is installed. On a framed screen, some of that can be hidden. On a frameless screen, it stays visible every day.

The opening needs to be checked at several points because the dimension often changes from bottom to top. The smallest usable measurement usually controls the panel size, and then allowances are worked out for hardware, door swing, and the clearances needed so the glass does not clip tile, stone, or adjoining glass.

A measure-up usually includes:

  1. Width at the bottom, middle, and top
  2. Height on both sides
  3. Plumb check on each fixing wall
  4. Level check across the base, hob, or floor
  5. Door swing path and clearance to vanities, toilets, and tapware
  6. Locations of niches, taps, shower heads, and any projections that affect the glass line

Good installers also check how the door will behave in the room. A door can fit on paper and still be wrong on site if it opens into a towel rail, misses the preferred entry path, or leaves an awkward gap at the return panel.

Choosing glass thickness and hardware

Glass thickness is a structural decision as much as a visual one. In residential work, the common discussion is usually 10 mm versus 12 mm toughened safety glass. The heavier panel can suit taller screens and give a more solid feel, but the extra weight increases the demand on hinges, fixings, and the wall or hob receiving that load.

That trade-off matters. Heavier glass is not automatically better if the substrate is marginal or the opening leaves very little tolerance.

Hardware selection also changes how much adjustment is available during installation. A wall channel gives more room to deal with slight irregularities in the opening, but it adds visible bulk. Clamps and brackets give a cleaner frameless look, but they rely on tighter set-out and a truer fixing surface. Hinges and pivots need accurate positioning, solid fixing points, and enough clearance for the door to operate without stressing the glass.

Hardware type Best suited to Main trade-off
Wall channel Openings with minor variation or limited tolerance More visible aluminium
Clamps or brackets Cleaner frameless appearance Less adjustment on uneven walls
Pivot or hinge sets Door panels that need a full swing path Higher demand on fixing accuracy and substrate strength

Cheap hardware often causes expensive problems later. I have seen covers loosen, clamp pressure vary across the glass, and hinge sets lose alignment because the tolerances were poor from the start. Good hardware costs more, but it gives a more stable install and a better chance of keeping the door true over time.

For custom bathroom renovations, some homeowners engage a specialist glass contractor directly. Others have the screen coordinated through Melbourne Tiling Services P/L as part of wider bathroom works. The practical benefit is coordination across trades. The final measurements, the tile set-out, the fixing locations, and the hardware choice are handled as one build sequence instead of being split between separate contractors who may never check each other's work.

Fitting and Fixing the Glass Panels

A lot of the call-backs I get happen after the glass is already on site, the holes are already drilled, and the bathroom already looks finished. Then the door drags, the fixed panel sits under stress, or water starts working into places it should never reach. By that stage, the expensive part is not the glass. It is correcting the substrate, the fixings, and sometimes the waterproofed surfaces around them.

A seven-step instructional diagram for installing a frameless glass shower screen with tools and safety tips.

What goes wrong on site

Frameless panels have no trim to hide bad set-out. Every millimetre shows.

The usual problems are not dramatic at first. A bracket gets fixed from a reference line that looked straight but was taken off a wall that was out. A panel gets set hard onto tile without proper packers. A hinge is tightened before the door position is fully checked. Each mistake looks minor on its own. Together, they create twisted glass, uneven margins, dropped doors, and stress on tiles and fixings.

These are the failures I see most often on Melbourne renovation jobs:

  • Fixings marked from the room, not the actual glass position: The panel ends up true to the wrong line.
  • No isolation under the glass: Direct contact with tile or stone puts the glass edge at risk.
  • Forced alignment during install: If pressure is needed to make it sit, the opening or fabrication is wrong.
  • Weak or unknown fixing points behind tile: Hardware may hold initially, then loosen with use.
  • Rushed drilling through brittle finishes: Chips, cracks, and broken waterproof details are common results.

The structural side gets ignored in DIY guides. Frameless hardware transfers load into a small number of fixing points, especially at hinges and pivots. If the wall build-up is weak, if the tile adhesive bed is inconsistent, or if the fixing lands in the wrong place, the screen can move even when the glass itself is cut correctly.

This is the video I'd show a client who wants to understand the handling side of the process before trying it themselves:

The professional fitting sequence

A proper install starts with a dry fit and a hard look at how the load will be carried. The fixed panel should sit on packers or setting blocks so the glass is isolated from the floor or hob. From there, the installer checks reveals, plumb, door clearance, and whether the hardware still lands on sound fixing points. If any of that is off, drilling should wait.

I have stopped installs at this stage more than once. It is far cheaper to pause and correct a wall, a nib, or a tile edge than to hang toughened glass into a bad opening and hope adjustment will save it.

A sound sequence usually looks like this:

  1. Stand the fixed panel on packers and confirm the opening suits the fabricated glass.
  2. Check plumb, level, and reveal lines off the actual panel position.
  3. Confirm fixing locations into solid backing before any hole is drilled.
  4. Mark and drill tiled surfaces carefully with the correct bit, speed, and support.
  5. Install channels, brackets, or hinges without distorting the hardware.
  6. Set the fixed panel back in place with isolation maintained at all contact points.
  7. Hang and adjust the door until the swing, gap, and latch line are all consistent.
  8. Tighten hardware in a controlled sequence so clamp pressure stays even across the glass.

One trade-off matters here. Channels can forgive a little variation, but clamp-fixed panels and hinge sets demand a truer opening and better fixing accuracy. The cleaner the look, the less tolerance the installation usually has.

The other issue is restraint. Over-tightening hardware is a common mistake. Installers trying to remove a small rattle or pull a panel into line can load the glass, crush packers, or stress the tile face. The right result comes from correct set-out, correct support, and controlled fixing pressure, not brute force.

Where perimeter support or finishing details are being coordinated with professional shower screen caulking and sealing work, the glass installation needs to stay clean and deliberate so the final sealing stage works as intended.

One simple test applies on every job. If the panel only works when somebody is holding it, pushing it, or pulling the door back into line, the installation is not ready to fix off.

Sealing, Finishing, and Common Pitfalls to Avoid

A lot of shower screens look fine on the day they go in. Then the first long shower sends water under the panel, the silicone skins over unevenly, and a door that seemed acceptable starts clipping or drifting out of line. I get called to these jobs after the tiles, waterproofing, and glass are already finished, which is exactly why the sealing stage needs more discipline than many DIY guides suggest.

An infographic detailing best practices and common pitfalls for sealing and finishing frameless shower screen installations.

Where sealing works and where it causes trouble

Silicone is a finishing material, not a fix for poor set-out, movement, or bad water control. On a frameless screen, the goal is a neat perimeter seal where the system is meant to be sealed, with clean junctions and no contamination under the bead. If the panel is under stress, the wall is out, or the floor falls the wrong way, more silicone will not solve it.

Neutral-cure silicone is generally the right product around glass, tile, and metal hardware. Cure time matters. A bathroom that looks complete still should not be used until the sealant has cured properly, or the bead can tear, lift, or trap moisture against the edge.

Good finishing usually comes down to a few disciplined steps:

  • Seal only where the detail calls for it: Random beads around hinges, brackets, and channels usually create a mess and can interfere with drainage paths.
  • Keep the bead small and consistent: Heavy silicone lines attract dirt and announce every mistake.
  • Clean and dry all contact surfaces first: Dust, soap residue, or moisture under the bead shortens the life of the seal.
  • Test the door and fixed panels before sealing: Adjustment after silicone goes in is slower, dirtier, and more likely to damage the finish.

If you want a clear reference for what neat, durable wet-area finishing should look like, this guide to professional shower screen caulking and sealing is useful.

Mistakes that lead to leaks, movement, and broken glass

The biggest errors at this stage usually started earlier and only become obvious once water hits the enclosure.

A common one is relying on the screen to compensate for a bad substrate. Frameless glass needs a stable base and reliable fixing points. If the hob moves, the wall packs out inconsistently, or the tile build-up changes across the opening, the screen can twist under load. What shows up first is often a failing silicone joint. What follows can be chipped tile, loose hardware, or a cracked panel.

Another frequent problem is sealing before the shower has been checked as a working system. Water should fall back to the drain, not sit against the outside edge of the screen or run toward a bathroom floor junction. If the falls are wrong, or if the bottom detail has been chosen for appearance without enough containment, the leak is not a sealant problem. It is a design or construction problem.

Watch for these finish-stage mistakes:

  • Forcing a panel to close a gap: Glass should sit in its natural position. If it only lines up under pressure, the opening or the fabrication is wrong.
  • Ignoring wall taper or tile lippage: Small variations matter with frameless glass, especially on premium clamp-fixed installations.
  • Sealing the inside and outside indiscriminately: That can trap water where the system is supposed to shed it.
  • Using silicone to hide poor cuts or oversized holes: It looks rough and usually fails early.
  • Installing frameless glass over movement-prone bases: Flex at the base transfers stress into the screen and the sealant joints.

My rule on site is simple. If the screen needs persuasion to sit right before sealing, it is not ready to finish.

A frameless shower screen should look restrained and boring at this stage. Straight lines, even gaps, controlled sealant, no visible stress, and no water path that relies on luck. That is what keeps a high-end bathroom looking sharp six months later, not just on handover day.

When to Hire a Registered Builder for Your Installation

Some frameless shower screen jobs are straightforward. Many aren't. The point where DIY should stop is earlier than commonly believed.

Projects that should not be treated as a kit install

If the opening is angled, the niche is out of plumb, the shower is doorless, or the layout uses return panels and custom reveals, you're no longer dealing with a basic enclosure. You're dealing with a design and construction problem that happens to involve glass.

A known gap in DIY advice is the treatment of non-standard openings such as angled walls and out-of-plumb niches, which are common in premium Melbourne renovations. These installations can be feasible, but they require professional verification of wall geometry, fall to drain, and waterproofing details, and getting that wrong can compromise water control and trigger expensive rework, as shown in this discussion of angled frameless shower layouts.

That's where a registered builder becomes useful, not because builders are the only people who can fit glass, but because complex bathroom renovations are never just about the glass.

What a registered builder coordinates

In a proper bathroom renovation, the screen sits at the end of a chain:

  • Structural support for where the hardware loads go
  • Waterproofing integrity before the finished tile goes on
  • Screed and falls that return water to the drain
  • Tiling set-out so hardware lands in sensible positions
  • Glass specification that suits the opening and support conditions

When those elements are coordinated, the frameless screen looks effortless because the room has been built to receive it. When they aren't, the installer ends up trying to solve structural or waterproofing defects with hardware and silicone. That never ends well.

If your bathroom involves custom geometry, movement concerns, premium finishes, or any uncertainty about the substrate, professional involvement isn't an admission that you can't do it. It's the sensible way to protect the bathroom, the waterproofing, and the value of the renovation.


If you're planning a frameless shower screen installation as part of bathroom renovations in Melbourne, Melbourne Tiling Services P/L can coordinate the full scope through registered builders, tilers, waterproofers, and shower screen installation within one project workflow.

Expert Shower Leak Repair Melbourne: Fix Leaks Fast

You notice it after a normal shower. Maybe it's peeling paint on the wall outside the bathroom. Maybe it's a damp smell that won't leave. Maybe it's a stain on the ceiling below. Most Melbourne homeowners hope it's just old grout or a bit of tired silicone.

Sometimes it is. Often it isn't.

A leaking shower is rarely just a plumbing annoyance. In many bathrooms, the fault often sits in the waterproofing system, the tile assembly, the wall and floor junctions, or the drain detail. That's why proper shower leak repair in Melbourne often needs more than a quick visit from a plumber. It can involve a registered builder, a waterproofer, a tiler, and sometimes bathroom renovation work if the leak has been active for a while.

If you've found a leak, the main thing is to stop guessing. A cheap surface patch on the wrong problem usually means more water in the walls, more damage to adjoining rooms, and a bigger job later.

Table of Contents

That Sinking Feeling Discovering a Shower Leak

You step out of the shower and notice the skirting outside the bathroom has swollen. A patch of paint near the door is bubbling. In a two-storey home, the first sign is often a stain on the ceiling below. By the time those symptoms show up, water has usually been escaping the shower area for a while.

That is what catches homeowners off guard. The shower can look serviceable while moisture is already moving into plaster, timber, tile bedding, and adjoining finishes. The taps still run. The screen still closes. The problem often sits in the construction behind the surface, where failed waterproofing, poor falls, movement at junctions, or a badly detailed waste connection let water travel.

Practical rule: If water is appearing outside the shower recess, treat it as a building defect until proven otherwise.

That distinction matters in Melbourne. A leaking shower is often approached as a plumbing job because water is involved, but many failures sit in the wet-area system itself. That means tiles, grout, sealant, substrate, drainage falls, and waterproofing all need to be assessed together. If you want a plain-language overview before arranging inspections, this guide on how to fix leaking showers properly explains the common failure points.

In Victoria, the repair method also has to line up with VBA registration requirements and NCC wet-area waterproofing provisions where rectification or rebuild work is involved. If the membrane has failed, or if parts of the shower need to be opened up and rebuilt, the job moves beyond a quick maintenance fix. It becomes building work that must be scoped, sequenced, and signed off correctly.

Why homeowners often get the wrong first advice

The understandable first instinct for many homeowners is to call a plumber. That makes sense if the leak is coming from a pipe, mixer body, shower arm connection, or waste fitting. But a plumber-only response will not fix water getting through cracked grout, failed junction sealant, defective waterproofing, or an underbuilt shower base.

I see this mistake often. Fresh silicone gets applied over a leaking junction, or a fitting gets replaced, and the wall keeps getting wetter because the actual fault is under the tile finish. The repair then costs more because the water has had extra time to spread.

What ongoing moisture actually does

The visible stain is a symptom. The greater issue is what moisture does once it gets into the surrounding structure. Plaster softens, skirtings swell, timber can distort, tile adhesive loses bond, and mould can develop in concealed areas with little airflow.

A small leak can stay local for a short time. Left alone, it rarely stays small.

That is why fast diagnosis matters more than fast patching. A proper repair deals with the source of the leak, checks the condition of nearby materials, and decides whether local rectification is realistic or whether the shower needs a partial or full rebuild. In many Melbourne bathrooms, that decision is also the point where a repair should be weighed against a full renovation, especially if the bathroom is already dated or the shower was not built to a standard you would want to preserve.

How to Diagnose Your Shower Leak Before You Call Anyone

The best first step is to narrow the problem down before anyone starts cutting, resealing, or quoting. A proper diagnosis follows a sequence. First isolate whether the fault is in the plumbing penetrations or the waterproofing and tile envelope. Then test in that order. That workflow is reflected in this guide to isolating shower leaks with pressure checks and flood testing.

A man inspecting a shower glass door base with a flashlight to diagnose a water leak.

Start with what you can see

Don't start by applying fresh silicone. Start by looking closely at the shower as a system.

Check these areas carefully:

  • Grout lines: Look for cracking, fretting, missing sections, or spots that stay dark after the rest of the shower dries.
  • Silicone joints: Focus on wall-floor junctions, vertical corners, and where the shower screen meets tile.
  • Tiles: Tap lightly and listen for hollow spots or movement underfoot.
  • Drain area: Look for cracking around the waste, staining, or loose fittings.
  • Shower fittings: Inspect the shower arm, head connection, mixer penetrations, and any obvious moisture around them.

If you want a plain-language walkthrough of common symptoms, this page on how to fix leaking showers is a useful reference point before booking trades.

Separate plumbing faults from waterproofing faults

A lot of confusion comes from treating every leak as the same type of leak. They aren't.

Use a simple sequence:

  1. Run the shower briefly and observe. If water appears quickly near tap penetrations or behind the wall opposite the mixer, the supply side needs checking.
  2. Inspect the shower arm and fittings. Even a small leak at a penetration can track internally.
  3. Stop using the shower and monitor. If dampness reduces when the shower isn't used, that confirms the shower as the trigger but not the exact source.
  4. Arrange a controlled flood test of the base and drain area. This helps distinguish a base or membrane issue from a fitting issue.

If a flood test passes but water still appears on the opposite side of the wall or below the room, the likely problem is wall membrane continuity, junction detailing, or a concealed penetration, not the mixer itself. That's why Australian Standard AS 3740 matters. Wet-area membranes must be installed as a system, not treated as isolated patch points.

Don't read cracked grout as a diagnosis. Read it as a clue.

A short demonstration can help you picture the process before you speak with a contractor:

What your findings usually mean

The pattern matters more than any single defect.

Sign you notice What it can point to
Moisture near shower arm or mixer area Plumbing penetration or fitting issue
Dampness at skirting outside bathroom Failed junction, poor falls, or membrane breakdown
Water below bathroom after shower use Base, drain, or wall-floor waterproofing failure
Recurrent mouldy silicone in corners Ongoing moisture movement, not just old sealant
Loose tiles or hollow sound Moisture affecting the tiled assembly or substrate

A homeowner can do useful observation, but not full diagnosis. Once water is moving beyond the shower line, don't rely on guesswork. The point of checking first is to make the next conversation more precise, not to self-certify the repair scope.

Permanent Shower Leak Repair Options

A permanent repair starts with the right scope. If the leak is coming from a failed joint, a local repair can hold. If water has been getting past the tiled surface for some time, patching grout or silicone usually just delays the rebuild.

A diagram outlining three progressive options for permanent shower leak repair, ranging from minor fixes to major overhauls.

Option one reseal and local surface repair

This repair suits showers where the waterproofing system is still doing its job and the problem is limited to the exposed finish.

The work involves cutting out failed silicone completely, removing loose or cracked grout where needed, drying the area properly, and resealing with a suitable sanitary-grade silicone. Surface preparation matters. New sealant over old residue, soap film, or damp corners fails early, and that is why quick handyman-style bead-over jobs rarely last.

This option can make sense when:

  • The leak is recent and minor: no swelling, no soft substrate, no damp transfer outside the shower area.
  • The defect is visible: a failed corner joint, a gap around a penetration, or isolated grout loss.
  • Testing points to the surface layer: there is no sign that water is tracking through the wall or floor assembly.

It is a maintenance repair, not a cure for failed waterproofing.

Option two targeted rectification

Some showers sit in the middle ground. The leak is beyond simple resealing, but the failure is still confined to one area such as a wall junction, niche, hob, or drain surround.

In that case, the sensible repair is to open the affected section, remove damaged tile and substrate, rebuild the local area properly, and re-waterproof it as part of the surrounding system. The trade-off is clear. This costs more than resealing, but it avoids paying for a full strip-out when the defect is isolated.

For homeowners trying to understand what a compliant wet-area build-up should include, this guide to bathroom waterproofing systems in Victoria shows how membranes, junction treatment, drainage, and tile finishes are meant to work together.

Targeted rectification only holds when the leak path is well defined. If water has reached multiple junctions, the repair area often grows once tiles come off.

Option three full shower rebuild

A full rebuild is usually the right call where the leak is systemic, long-running, or already causing substrate damage.

In Melbourne homes, I see this after years of minor patch-ups. The grout gets redone. The silicone gets replaced. The leak keeps returning because the underlying problem sits behind the tiles. Failed membrane detailing, poor falls to waste, movement in the substrate, and wet wall sheeting are building defects, not cosmetic defects. At that point, the repair should be handled as regulated building work with the right licensed trades and clear compliance to Victorian requirements.

A full rebuild usually includes:

  • Strip-out of the shower area: tiles, adhesives, screed, trims, and affected wall linings are removed.
  • Assessment of hidden damage: wet or deteriorated substrate is replaced rather than covered up.
  • Correction of falls and drainage: water must be directed to the waste, not allowed to pond at edges or corners.
  • New waterproofing system: the membrane is installed as a complete system across the required junctions and penetrations.
  • Retiling and finishing: tiles, movement joints, and sealant are reinstated to match the new build-up.

This is the option that protects the structure. It also gives the cleanest path if the shower leak is the trigger for a wider bathroom renovation, which is often the smarter investment once demolition exposes age, non-compliant work, or dated finishes.

What works, and what wastes money

Homeowners usually want the least disruptive fix. That is reasonable. The trouble starts when the chosen repair is based on hope instead of the failure point.

Repair approach Usually works when Usually fails when
Re-silicone only A joint has failed and water has not moved behind the system Moisture is already tracking through wall or floor junctions
Re-grout only Surface wear is light and local Cracks are a symptom of movement or membrane breakdown
Local rectification The defect is contained to one accessible area Multiple details are failing, especially at the base and penetrations
Full rebuild The shower has systemic defects or hidden damage The scope is cut back to save on upfront cost

The cheapest quote often becomes the expensive one. If a shower leak is tied to waterproofing, substrate condition, or drainage set-out, the permanent repair is the one that addresses the full cause and is carried out by the right registered, compliant trades.

Melbourne Repair Costs and Builder Licensing Explained

The price of a shower leak repair in Melbourne can range from a small maintenance bill to a full building rectification job. The gap is wide because homeowners are often comparing different scopes, not different prices for the same work.

A simple reseal might suit a shower with an isolated sealant failure and no evidence of moisture behind the tiles. Once the leak has reached the substrate, framing, adjoining wall, or floor junction, the work changes. At that point the quote usually includes demolition, waste removal, drying time, substrate replacement, waterproofing, tiling, and coordination between trades.

What Melbourne shower leak repairs often cost

These are broad 2026 market ranges for Melbourne. Site access, tile selection, hidden damage, and how far the water has travelled will shift the final number.

Repair Type Typical Cost Range (AUD) Typical Scope
Silicone and minor grout rectification $350 to $900 Remove failed sealant, clean joints, re-silicone, minor grout touch-up where the waterproofing system is still performing
Leak investigation and targeted opening-up works $600 to $1,800 Moisture testing, inspection, limited demolition to confirm where water is entering and what has been damaged
Localised shower rectification $2,500 to $5,500 Open one section of the shower, repair local substrate or waterproofing defects, then reinstate finishes
Full shower rebuild $6,500 to $12,000+ Strip-out, substrate repair, new waterproofing, fall correction where needed, retiling, and refit of shower area
Shower repair as part of broader bathroom works $15,000 to $35,000+ Leak rectification integrated into a larger bathroom renovation with new finishes, fittings, and possible layout changes

Those figures are a guide, not a shortcut around inspection. I have seen showers that looked like a $700 reseal from the outside and turned into a full rebuild once the base was opened and the wall sheet behind the tiles had gone soft.

Why one quote is $800 and another is $8,000

The cheaper quote is often pricing the symptom. The higher quote is usually pricing the cause and the reinstatement.

That difference matters in leaking showers. Cracked grout, mouldy silicone, and swollen skirting boards are what the homeowner sees. The actual failure may sit at the wall-floor junction, around penetrations, at the hob, or in the membrane system below the tile finish. If the leak has been active for months, drying time and substrate replacement can become part of the job as well.

Two quotes can both be honest and still be miles apart. One contractor may be offering a cosmetic repair. Another may be taking responsibility for a compliant wet-area rebuild.

Why registered builders matter in Victoria

In Victoria, many shower leaks are not just plumbing defects. They are building defects involving waterproofing, substrate failure, set-out, falls, and trade sequencing. That is why a registered builder is often the right lead contractor, especially where more than one trade is needed or the shower needs to be stripped and rebuilt.

A licensed plumber still has a clear role where the leak involves pipework, outlets, mixers, wastes, or drainage connections. But a plumber alone does not take over the whole wet-area rectification if the problem sits in the shower assembly itself. The membrane, sheeting, screed, tile bed, movement joints, and finish layers all need to work as one system.

For homeowners comparing quotes, paperwork matters too. If the scope includes regulated wet-area work, review what is being allowed for and what compliance records will be provided. This guide to a Victorian waterproofing compliance certificate explains the sort of documentation many owners do not ask about until there is a dispute.

What to check before you accept a quote

Ask what is included.

A proper quote for a serious leak should state whether the contractor is allowing for demolition, disposal, substrate repair, waterproofing, flood or cure time where required, tiling, sealant, plumbing refit, and making good to adjoining finishes. It should also make clear who is responsible for compliance and trade coordination.

Low prices can still be reasonable for small maintenance work. They become expensive when they delay a lasting fix, allow moisture to keep spreading, and leave you paying for the same shower twice.

Repair Your Shower or Renovate the Whole Bathroom

Sometimes the right answer is to repair the shower and leave the rest of the bathroom alone. Sometimes that's false economy.

A leaking shower often exposes the age and condition of the entire room. Once tiles are dated, fittings are tired, falls are poor, and the waterproofing is at the end of its life, the repair scope starts overlapping with bathroom renovation work anyway.

A man stands in a dated bathroom, contemplating whether to repair or renovate the shower area.

When a repair makes sense

A focused shower repair is usually the sensible move when the rest of the bathroom is in good condition and the defect is limited.

That often applies if:

  • The bathroom still performs well: Tiles, fittings, ventilation, and layout are all serviceable.
  • Damage is contained: The leak hasn't affected adjacent rooms or broader finishes.
  • You're not planning a renovation soon: There's no point rebuilding the whole room if you'd only be replacing good work.

When renovation is the smarter move

The decision shifts when the shower leak is one part of a bigger story.

The Melbourne market has moved toward treating shower leaks as specialised building-envelope problems, with providers commonly offering full remediation for water damage and mould. That reflects a mature local market where a leak repair is often the starting point for a regulated, multi-trade bathroom renovation project, as described in this overview of Melbourne shower and bathroom leak services.

Renovation is often worth serious consideration if:

  • The bathroom is dated overall: You'd be rebuilding a new shower inside an old room.
  • Water has spread beyond the recess: Repairs now affect walls, flooring, trim, or adjacent spaces.
  • You want one disruptive project, not two: It's often easier to rectify the leak and upgrade the bathroom in the same build.
  • You're improving value and liveability: New waterproofing, better layout, cleaner detailing, and fresh finishes solve more than the immediate leak.

A lot of owners resist renovation because they only wanted the leak gone. Fair enough. But once a registered builder is opening up the shower, assessing substrate, coordinating trades, and reinstating finishes, it makes sense to ask whether a broader bathroom renovation will give you a better long-term result than rebuilding one corner of a tired room.

Partnering With Melbourne Tiling Services for a Lasting Fix

When a shower leak turns out to be more than a sealant issue, the primary need is usually coordination. Someone has to diagnose the failure properly, define the scope, organise the right licensed trades, and carry the job through to compliant completion.

One accountable path from leak to completion

That's where a builder-led service is useful. Melbourne Tiling Services P/L operates as a bathroom renovation and leak rectification contractor with Registered Unlimited Builders overseeing start-to-finish work across waterproofing, tiling, shower repairs, and full bathroom renovations. That matters when the leak isn't isolated to a bead of silicone and the fix may involve substrate repair, drainage correction, membrane work, and reinstatement of finishes.

Another gap many homeowners run into is what happens after the leak is found. Responsibility can get messy. In Victoria, rental providers have duties under the Residential Tenancies Act, and owners corporations may become involved if common property or neighbouring lots are affected. Guidance on landlord, strata, and leaking shower responsibilities in Victoria highlights why compliant documentation and rectification matter when disputes or adjoining damage are in play.

If you're engaging any contractor for shower leak repair in Melbourne, ask practical questions:

  • Who diagnoses the cause: Are they testing before quoting a repair method?
  • Who manages waterproofing compliance: Is regulated wet-area work being handled properly?
  • Who coordinates the trades: Is there one point of accountability?
  • Can the work scale up if needed: If the leak reveals larger bathroom issues, can the same team handle the renovation?

The right partner isn't just someone who can stop the water today. It's someone who can stop it properly, document the work, and leave you with a bathroom that won't need the same argument again in a few months.


If your shower is leaking, don't settle for a surface patch before the cause is clear. Melbourne Tiling Services P/L handles shower leak rectification, waterproofing, bathroom repairs, and full renovations under registered builder oversight, with free quotes, transparent scope planning, and coordinated trade management across Melbourne.