

You're probably doing what most Melbourne homeowners do at the start of a bathroom renovation. You've saved inspiration photos, picked out a vanity style, maybe even chosen tiles, then realised the hard part isn't the look. It's figuring out who can pull the job together without turning your house into a mess of delays, leaks, and cost blowouts.
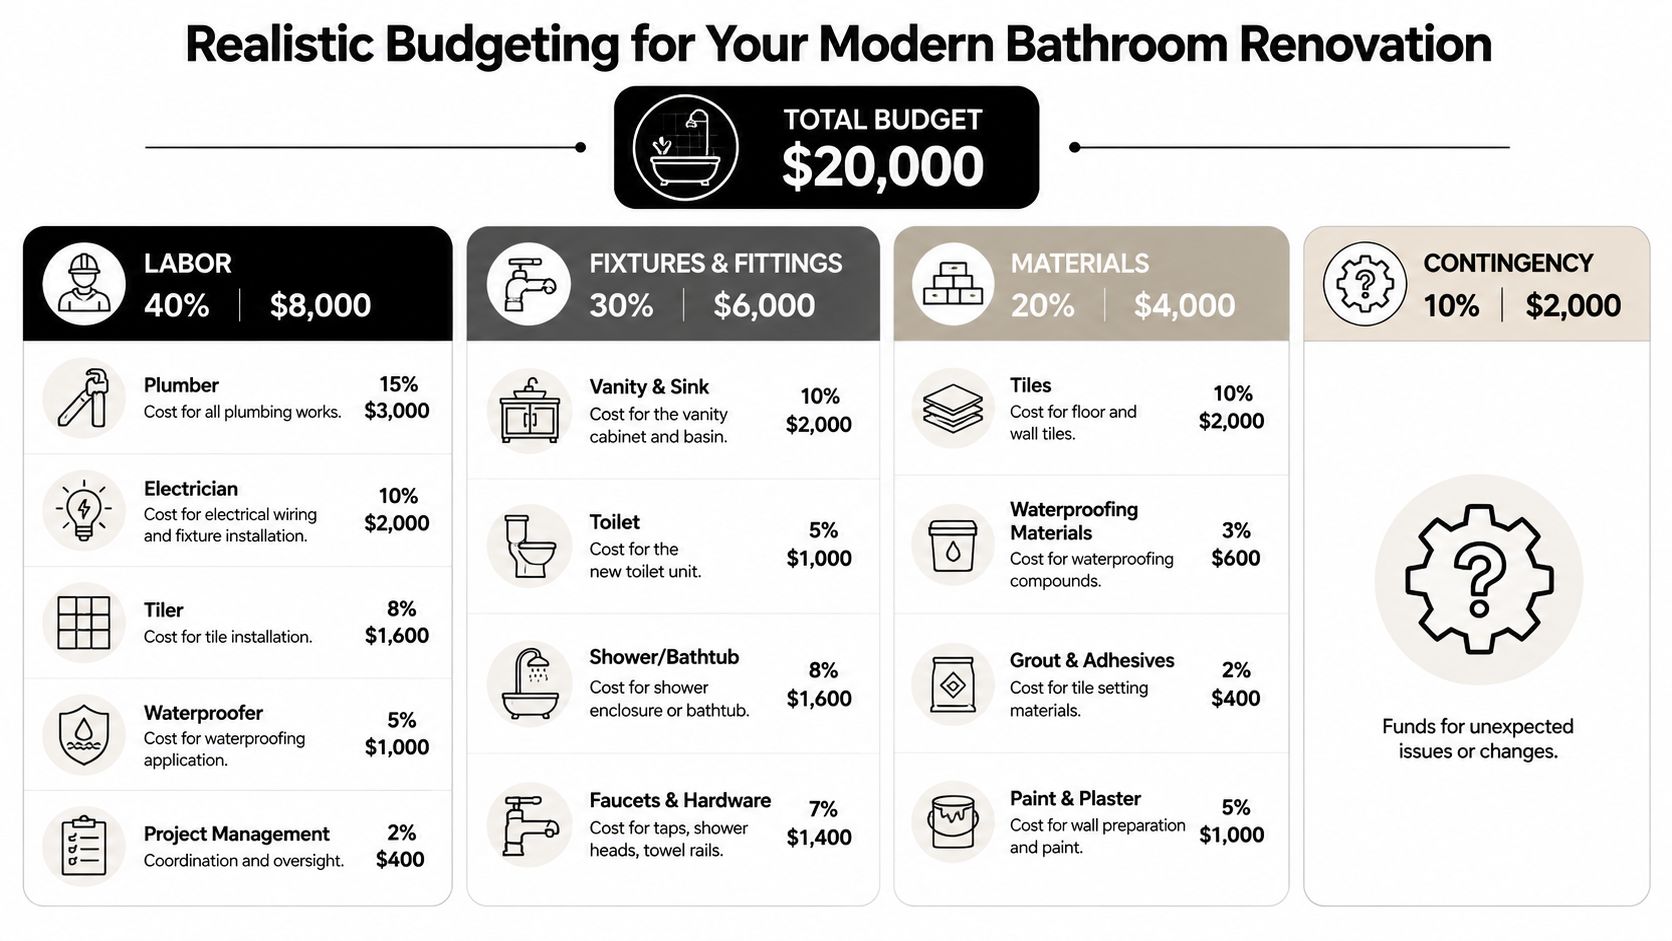
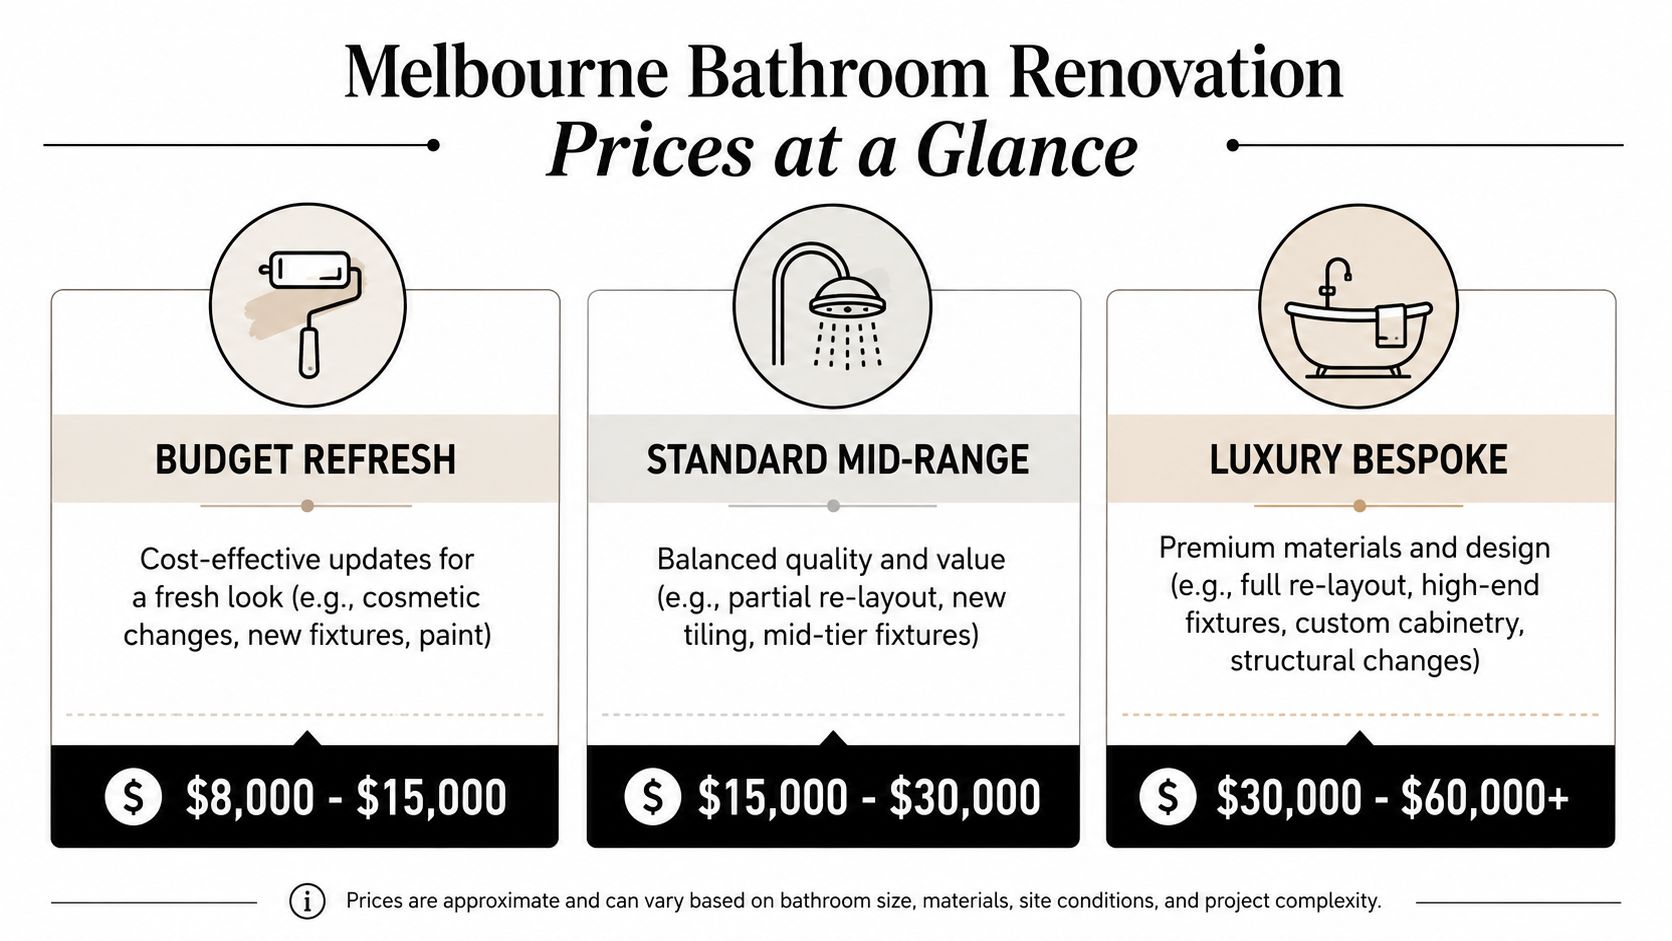
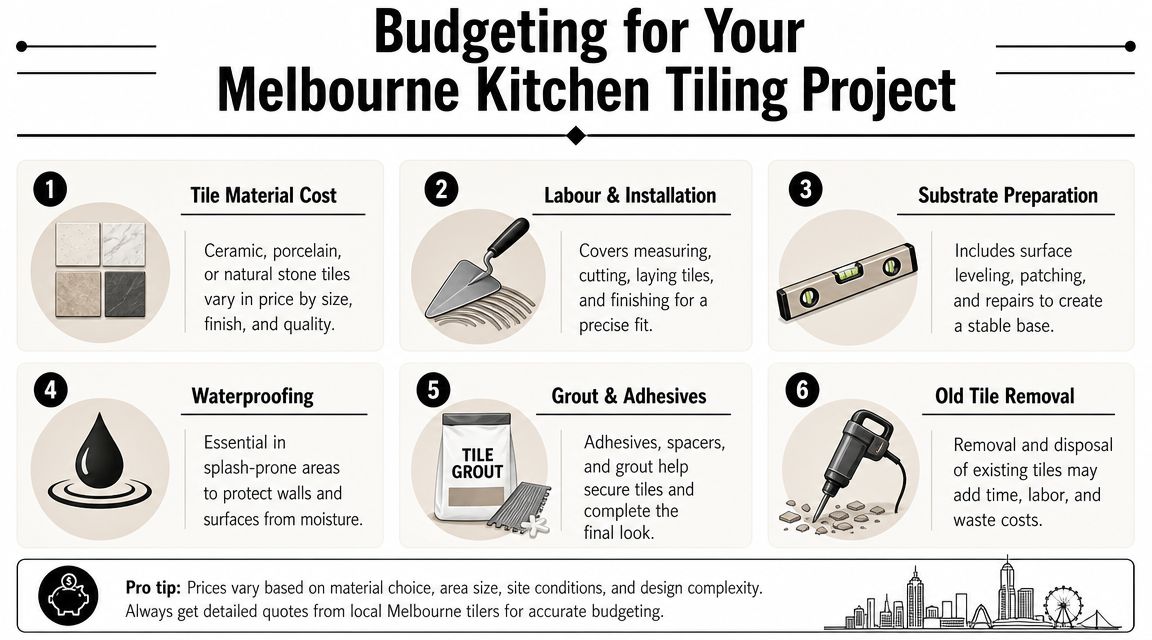
That concern is justified. A bathroom renovation isn't a decorating exercise. It's a wet-area rebuild with compliance, sequencing, and defect risk baked into every stage. And because industry cost guides commonly place a standard bathroom renovation in the tens of thousands of dollars, with higher-end projects rising substantially when waterproofing upgrades, layout changes, and premium tiles are added, this is not the place to gamble on the cheapest quote or the nicest Instagram gallery, as noted in this Australian bathroom remodel cost guide.
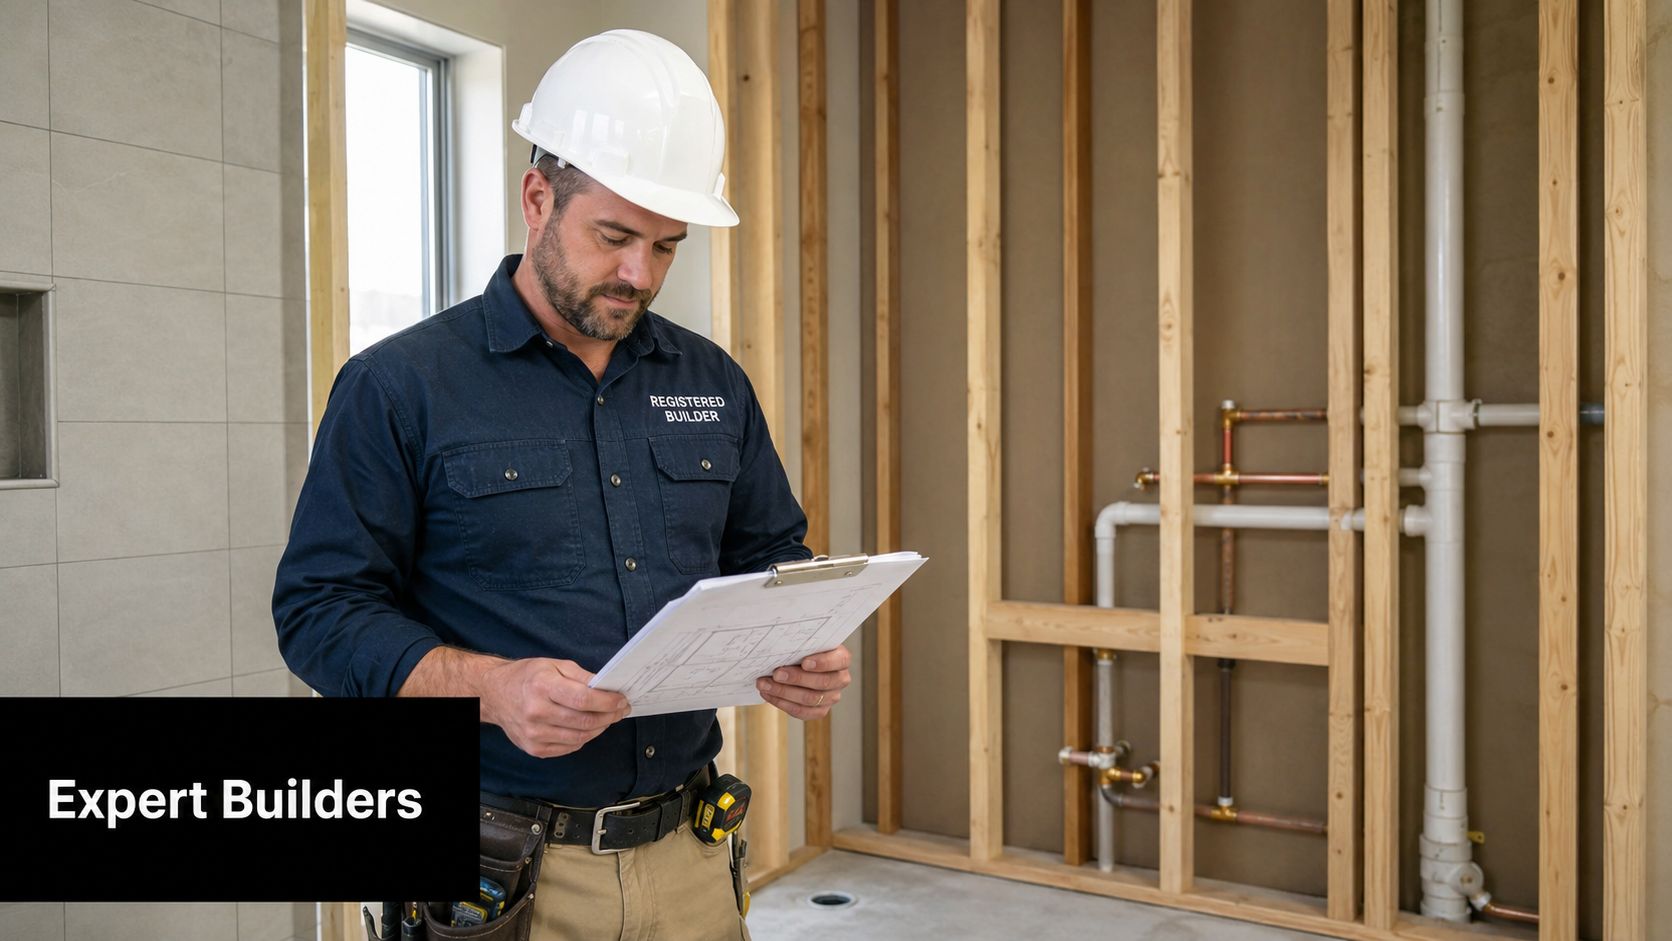
Most first-time renovators think they need a good tiler. Sometimes they think they need a plumber who “does bathrooms”. In Victoria, that's often the wrong starting point. Instead, you need a registered builder who specialises in bathrooms, manages licensed trades properly, and treats waterproofing and compliance as the backbone of the project.
That's what separates a bathroom that merely looks new from one that performs properly for years.
Table of Contents
- Your Bathroom Renovation Dream and the Reality
- The Full Scope of a Bathroom Renovation Specialist
- Why Your Specialist Must Be a Registered Builder
- Setting Realistic Costs and Timelines in Melbourne
- Your Guide to Vetting and Hiring a Specialist
- Common Pitfalls and What Success Looks Like
Your Bathroom Renovation Dream and the Reality
A typical renovation starts with excitement. You're tired of cracked grout, dated fittings, poor storage, and a shower that never quite drains properly. You want a bathroom that feels cleaner, sharper, and easier to live with.
Then reality arrives. The vanity you want affects plumbing positions. The new shower screen changes set-out. The tile you love needs flatter walls and tighter prep. The “simple refresh” starts picking up questions about substrate condition, falls, waterproofing, extraction, lighting, and whether the last renovation was done properly in the first place.
The gap between a nice bathroom and a sound bathroom
Many projects often go sideways. Homeowners focus on finishes because they're visible. Builders focus on what sits underneath because that's what fails.
A bathroom renovation specialist understands both. They know the room must look right, but they also know that beauty means nothing if the floor doesn't fall correctly to the waste, the membrane is weak at penetrations, or the trades arrive in the wrong order.
A bathroom is one of the smallest rooms in the house, but it demands some of the tightest coordination.
That's why I push homeowners to think beyond “Who can tile this?” and ask a better question. Who can take responsibility for the whole wet area from demolition to handover?
Why specialist management matters from day one
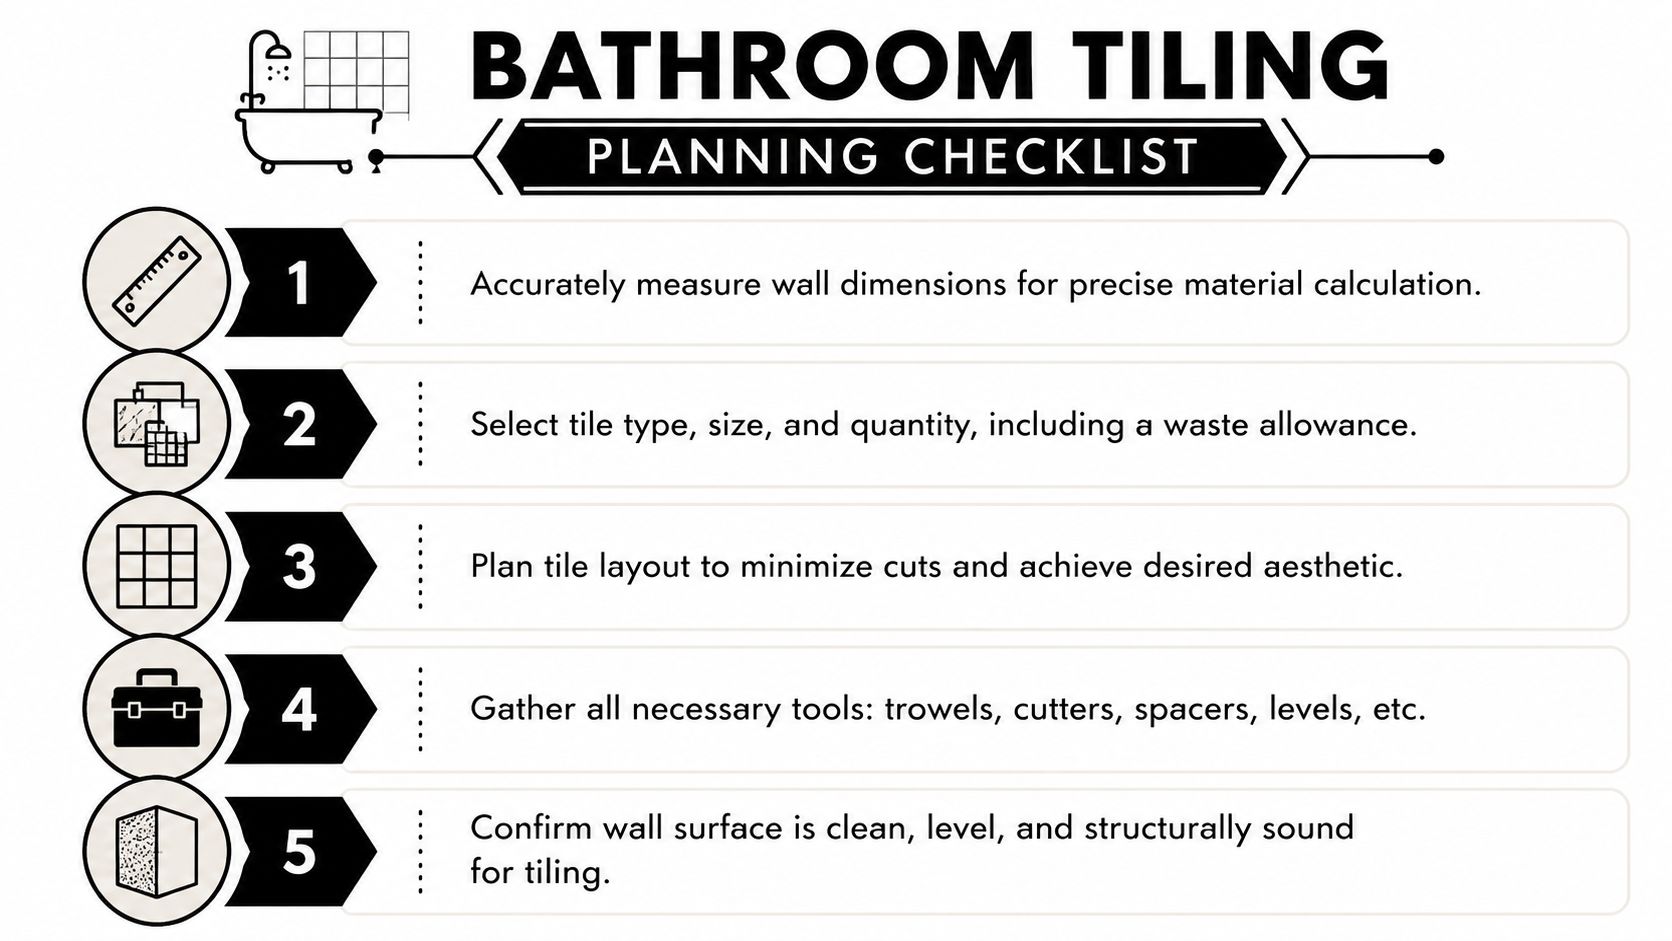
Good bathroom renovation specialists don't start with tile samples. They start with scope. They assess what stays, what moves, what needs diagnosis, and what carries compliance risk. That early discipline protects your budget and your sanity.
Here's what that means in practice:
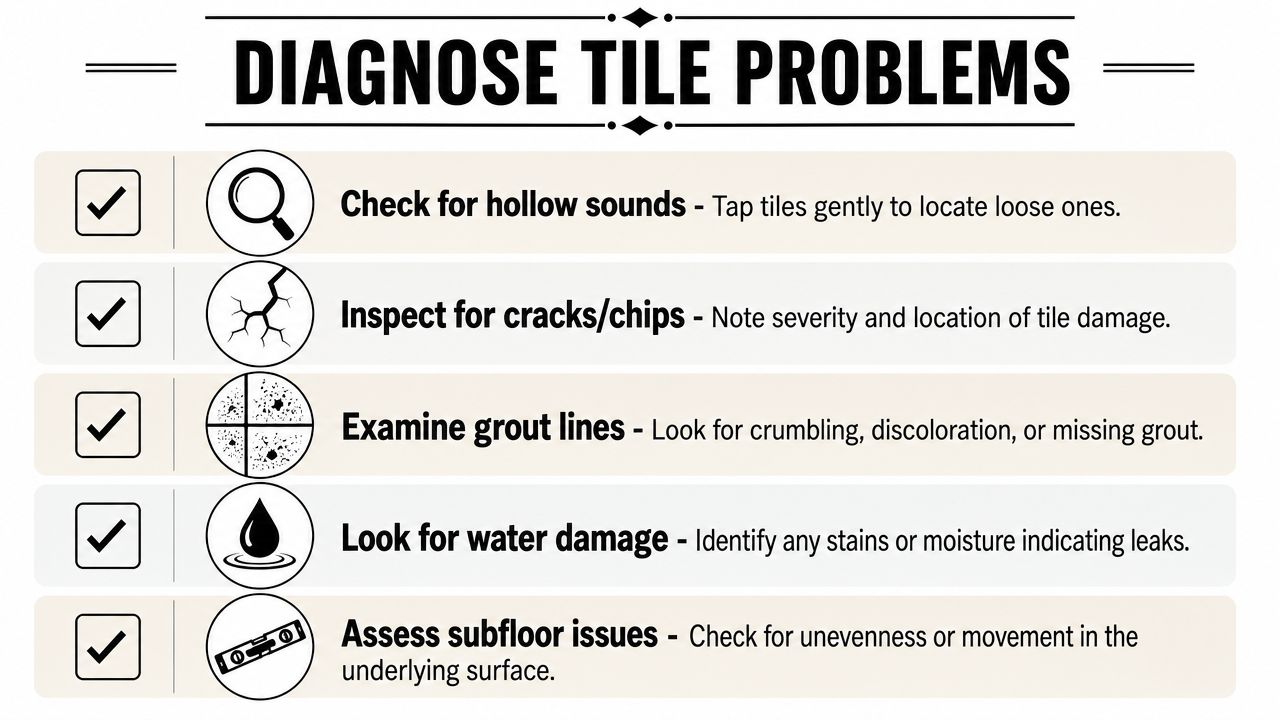
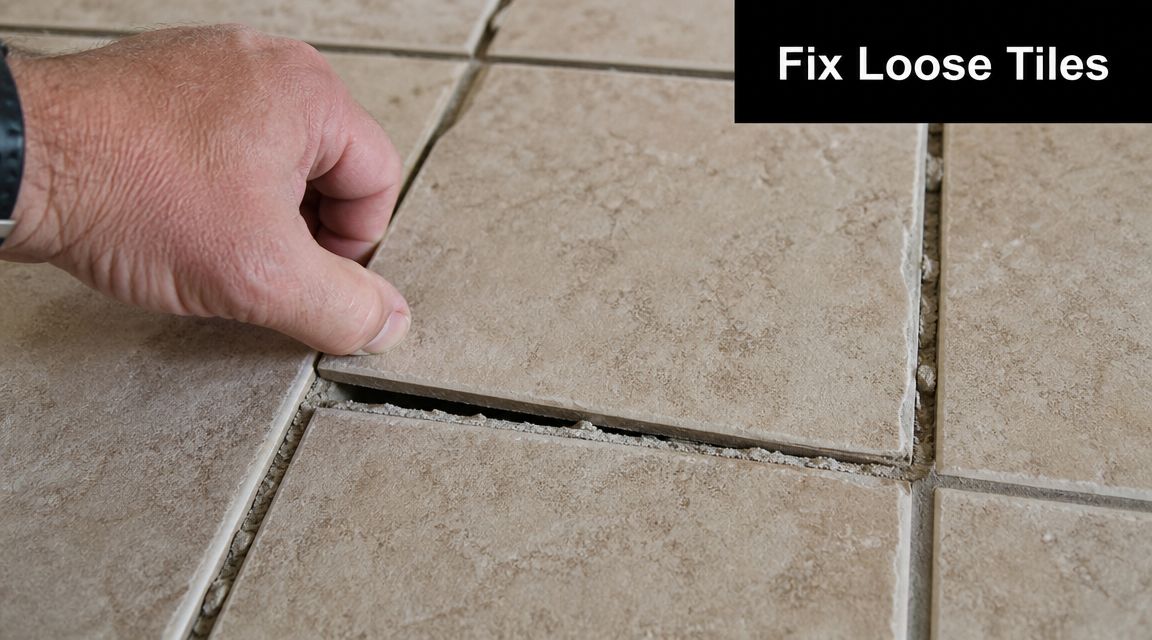
- They check the existing room properly. Not just measurements, but signs of prior leaks, movement, poor ventilation, rotten skirtings, and failed silicone patch jobs.
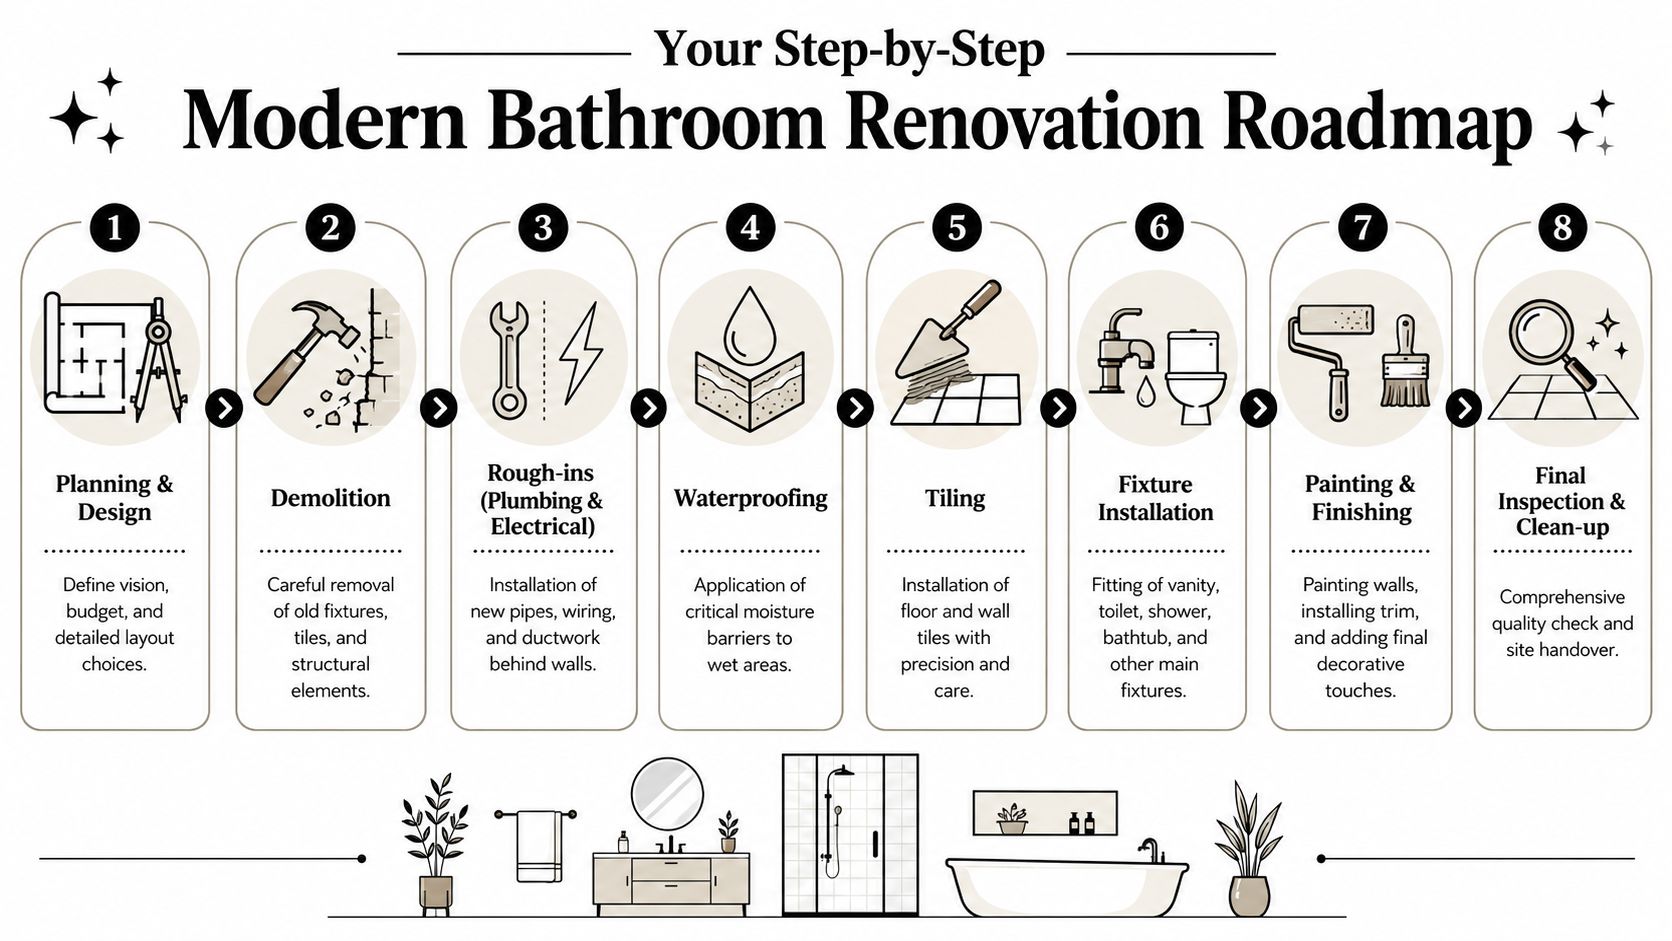
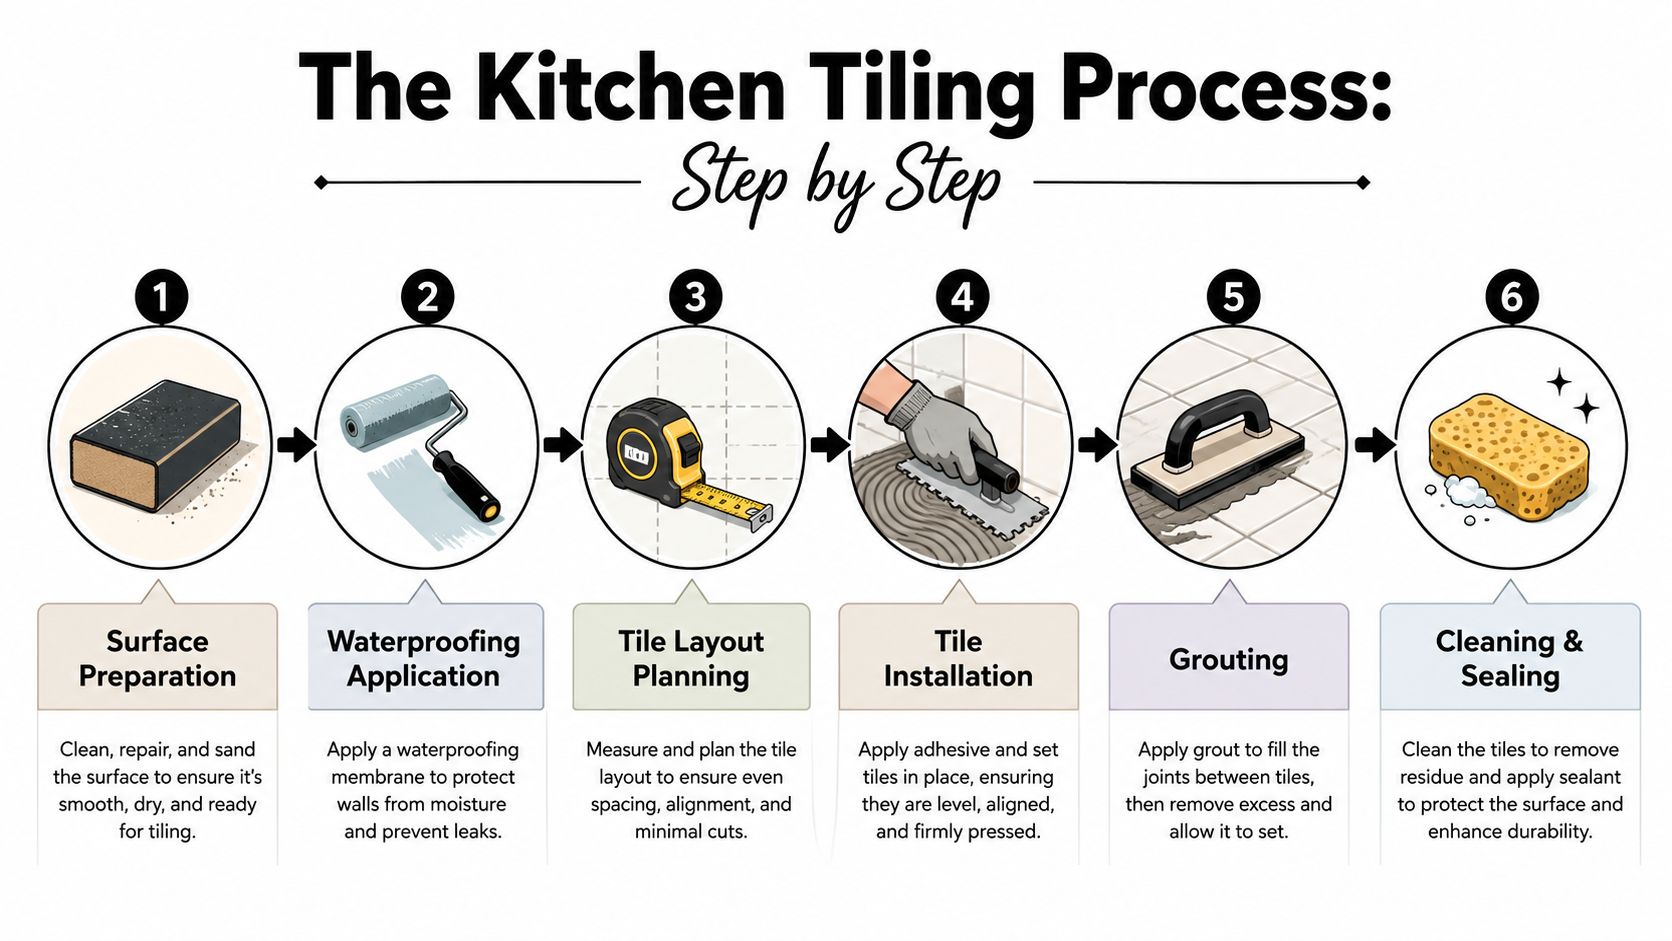
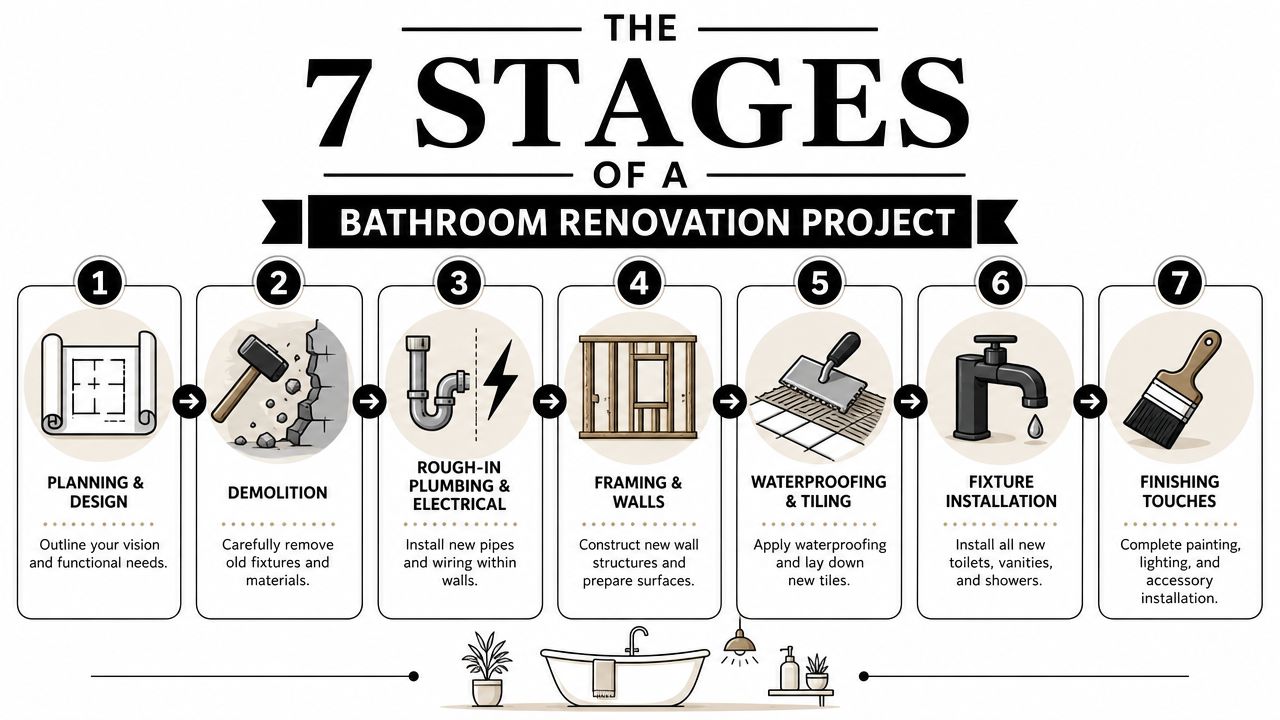
- They plan the sequence. Demolition, rough-in, substrate prep, waterproofing, tiling, fit-off, and final detailing must happen in the right order.
- They price the complete job. Not a cosmetic fantasy that falls apart once walls are opened.
- They coordinate trades. Bathrooms involve more than one trade almost every time. Someone has to own that coordination.
If you want a renovation that feels smooth, don't hire for one visible skill. Hire for control. A specialist should reduce decision fatigue, keep quality consistent, and stop avoidable defects before they're buried behind tile adhesive and grout.
The Full Scope of a Bathroom Renovation Specialist
A real bathroom specialist is effectively the general contractor for one of the most technical spaces in your home. That role has nothing to do with sounding impressive and everything to do with reducing failure points.
What the homeowner sees and what the specialist controls
From your side, the job may look straightforward. Remove the old bathroom, install the new one, done. On site, it's much more exacting.
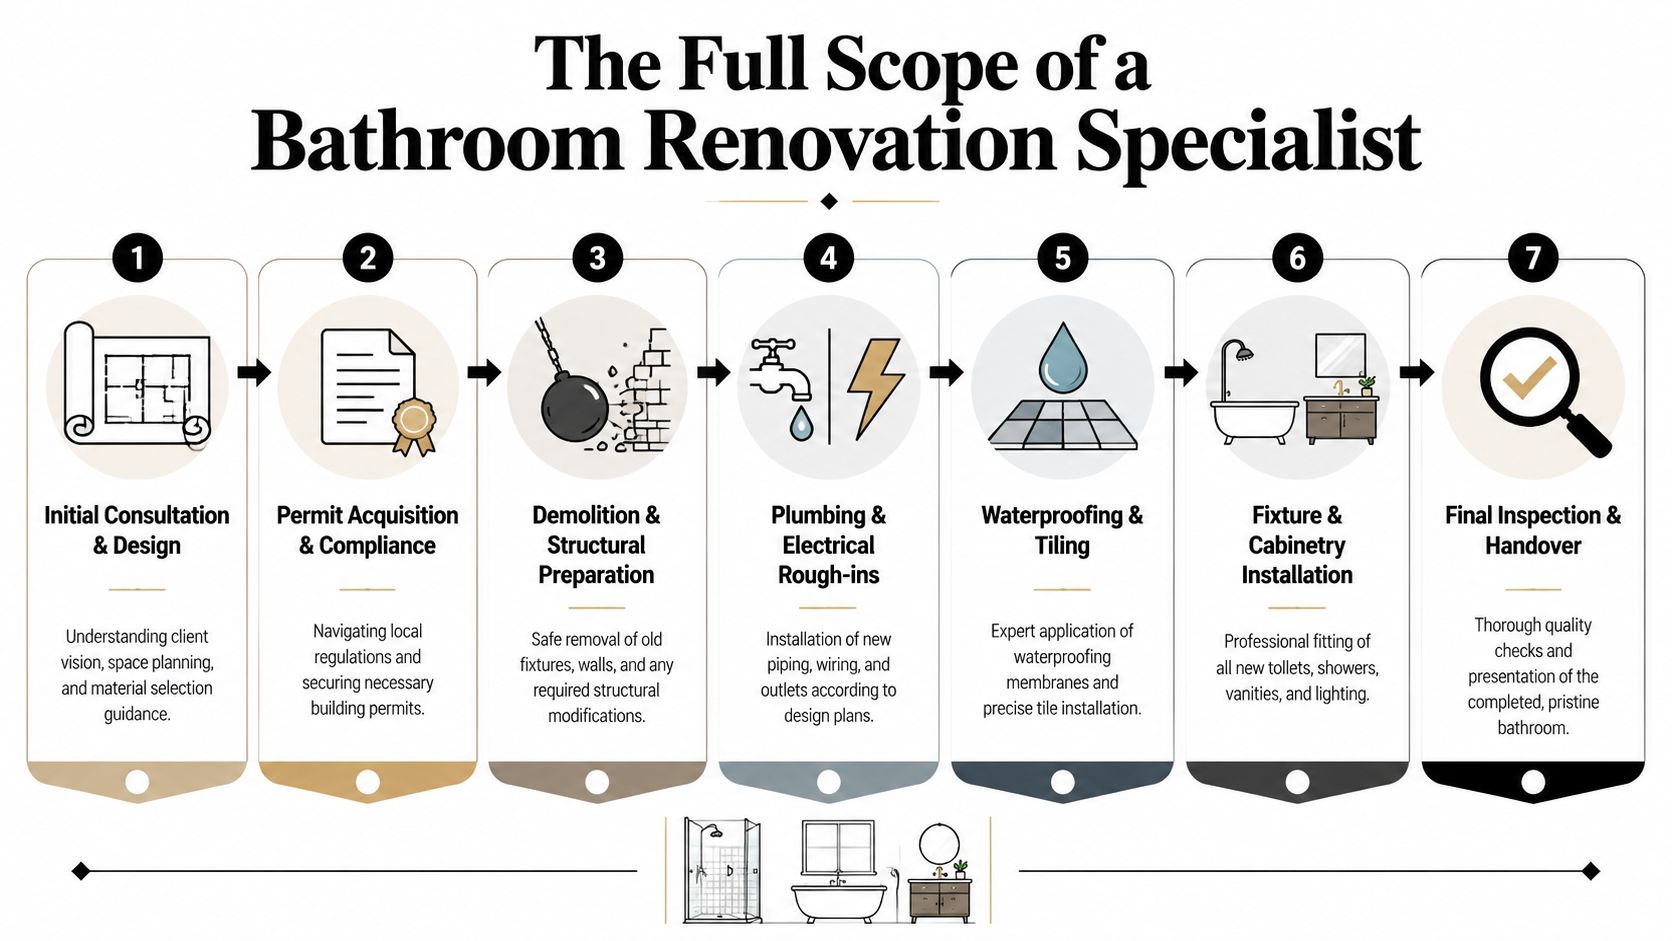
A bathroom renovation specialist usually handles or coordinates:
Consultation and layout planning
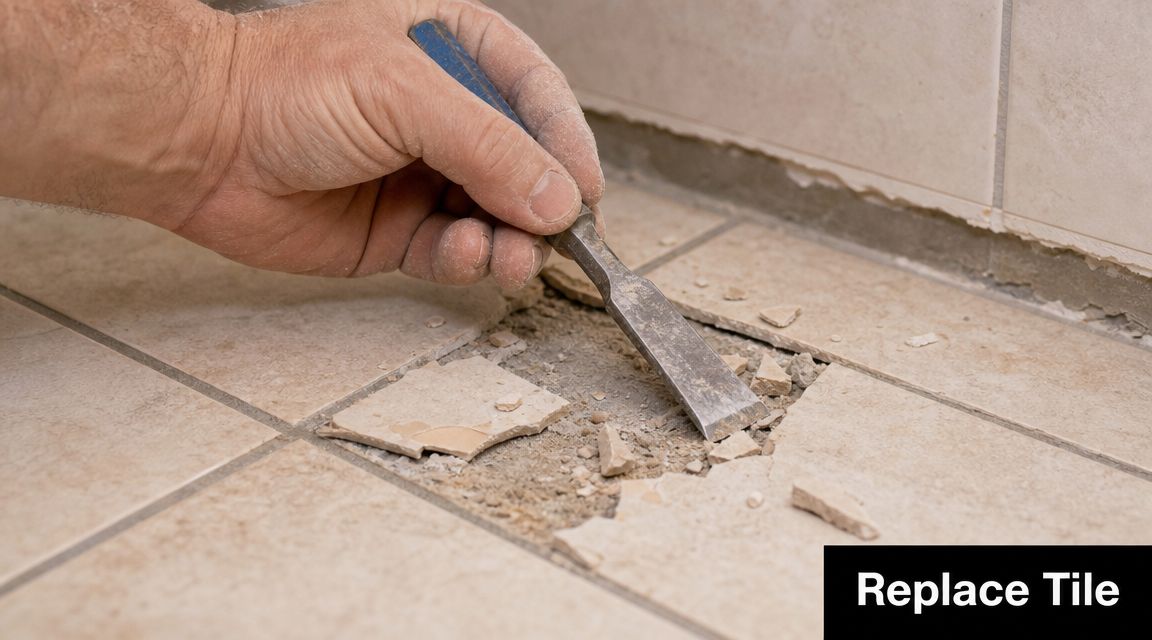
The room has to work before it looks good. Door swing, shower width, vanity depth, storage, towel rail positions, and cleaning access all matter.Demolition and preparation
Old bathrooms often hide poor patchwork, damaged sheeting, out-of-level floors, and moisture problems. If prep is rushed, everything after it suffers.Plumbing and electrical coordination
A proper renovation needs licensed trades working to a clear plan, not improvising on the day.Substrate correction and screeding
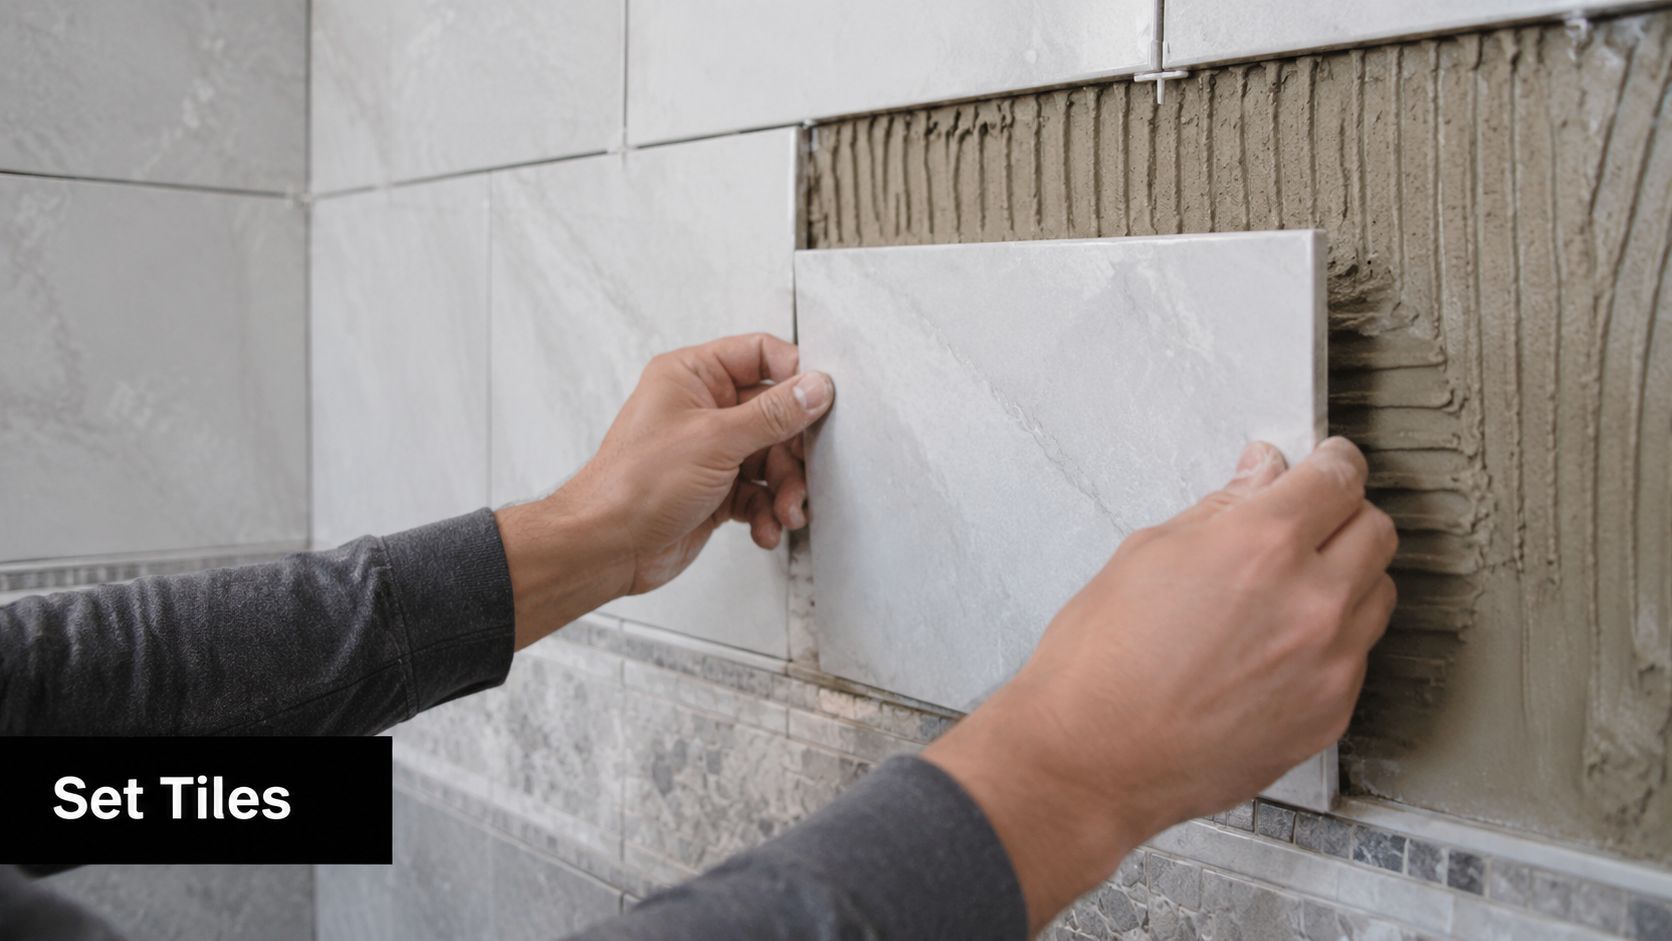
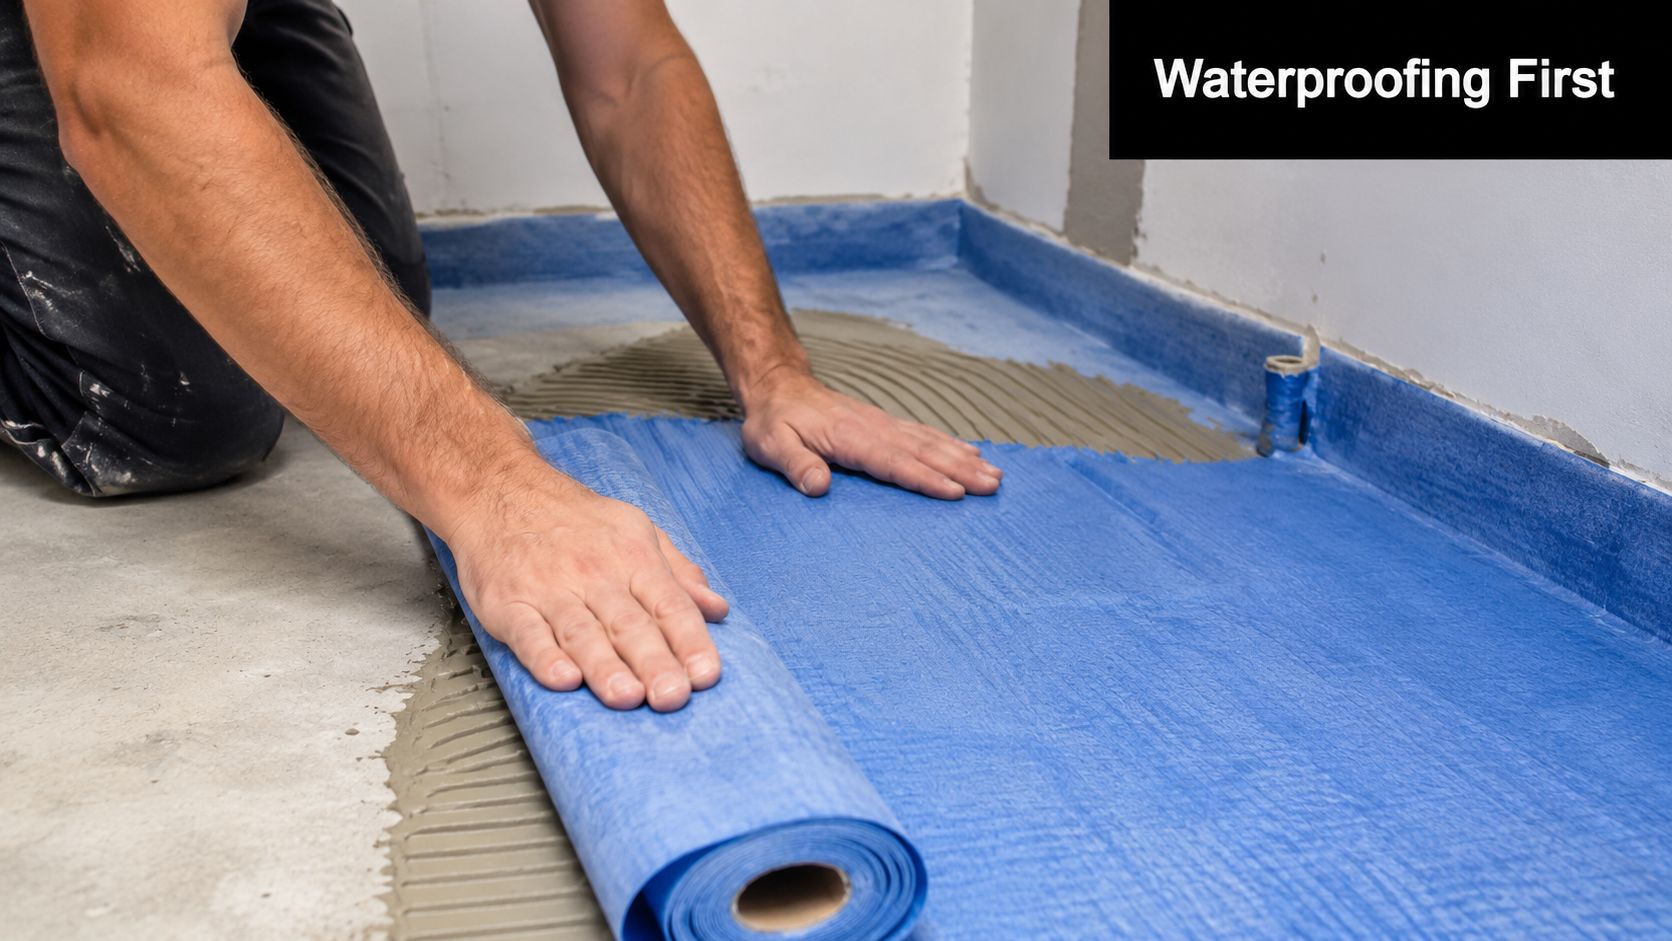
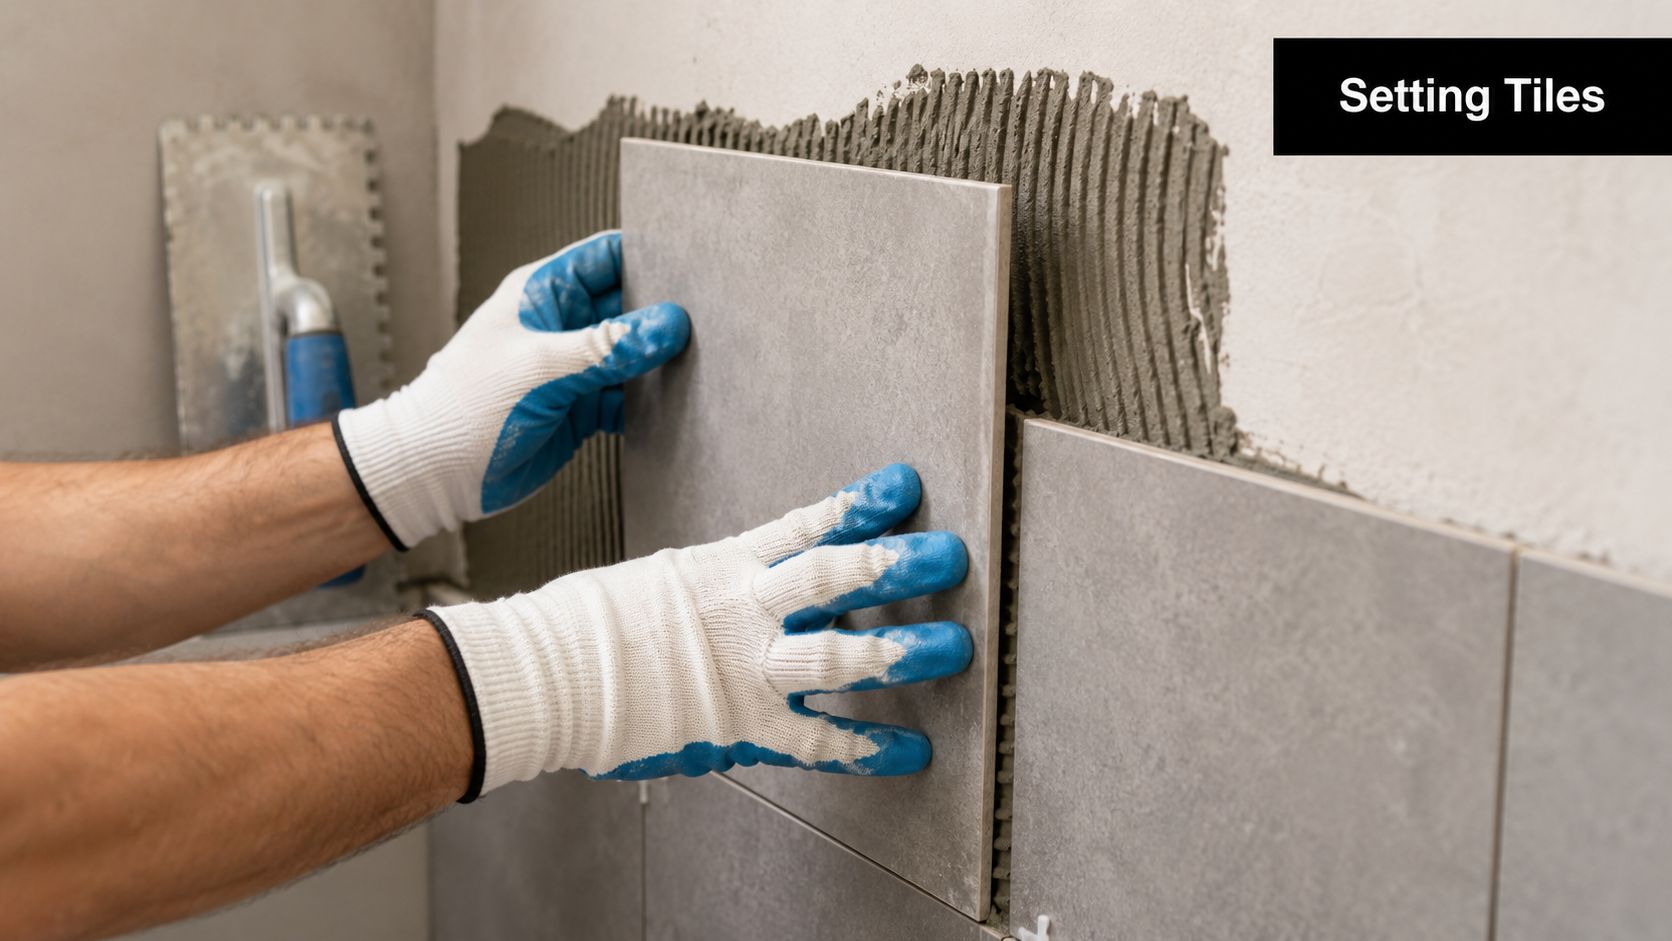
Large-format tiles, niches, frameless screens, and linear drains all demand accuracy. If the surfaces aren't straight and the falls are wrong, the finish won't save the job.Waterproofing and tiling
Many failures originate in these stages. If you want a deeper look at how these two stages interact, this guide on tiling and waterproofing in Melbourne bathrooms is useful.Fixture installation and finishing
Vanities, toilets, tapware, screens, mirrors, trims, sealants, and final alignment all affect usability and longevity.
Why sequencing matters more than style
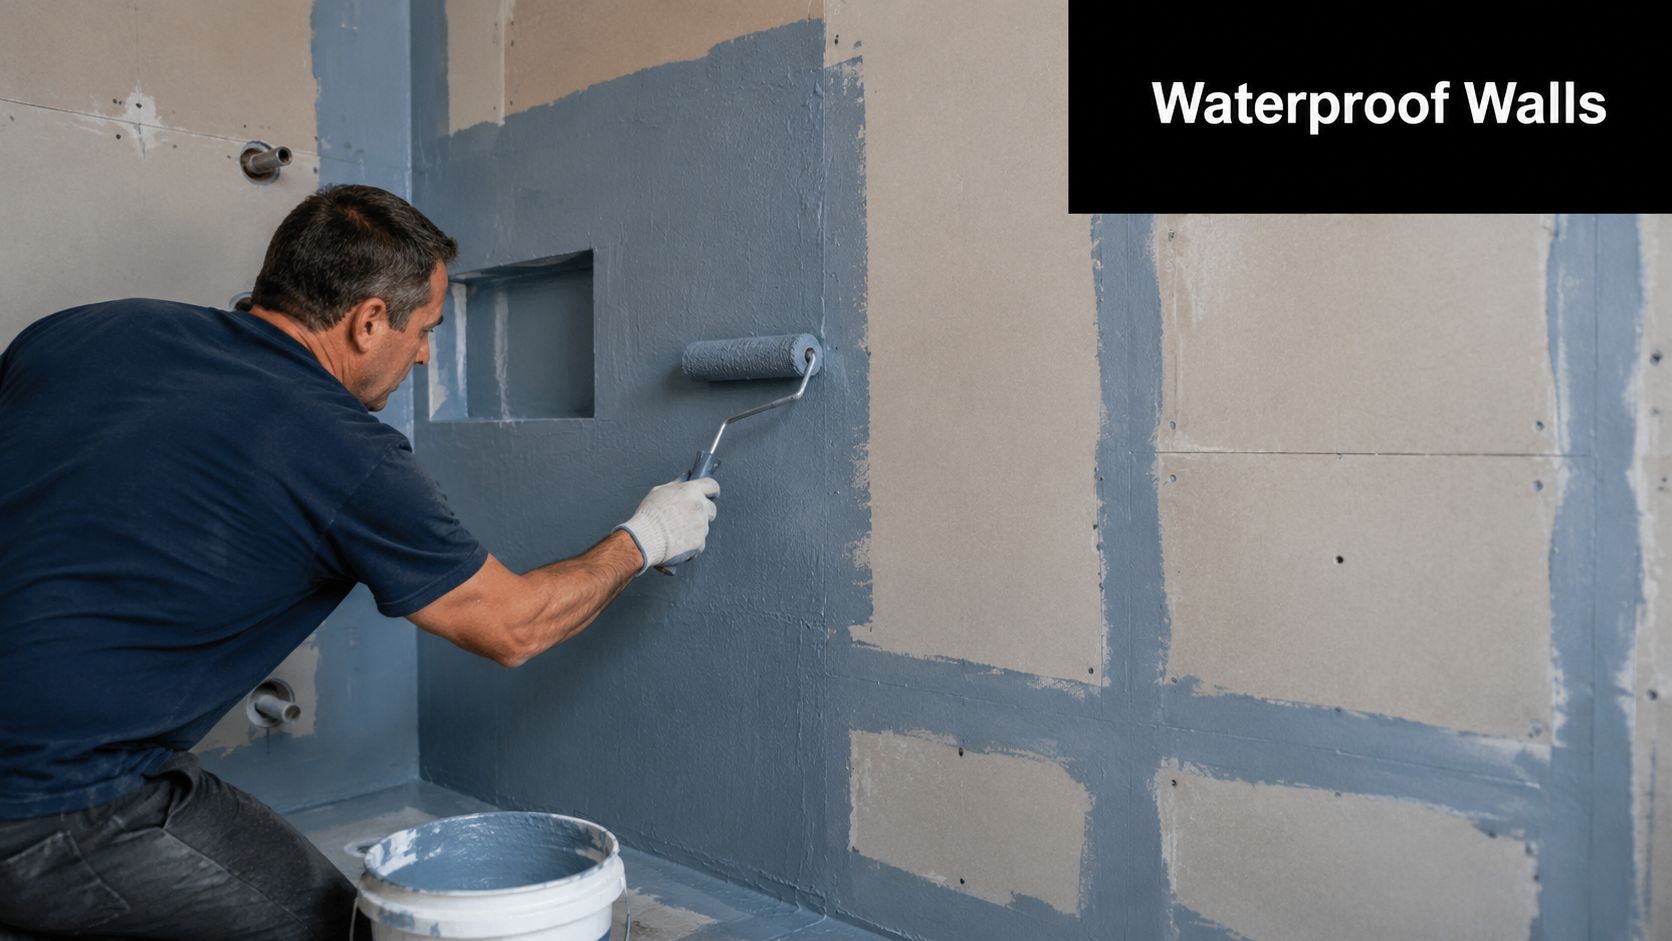
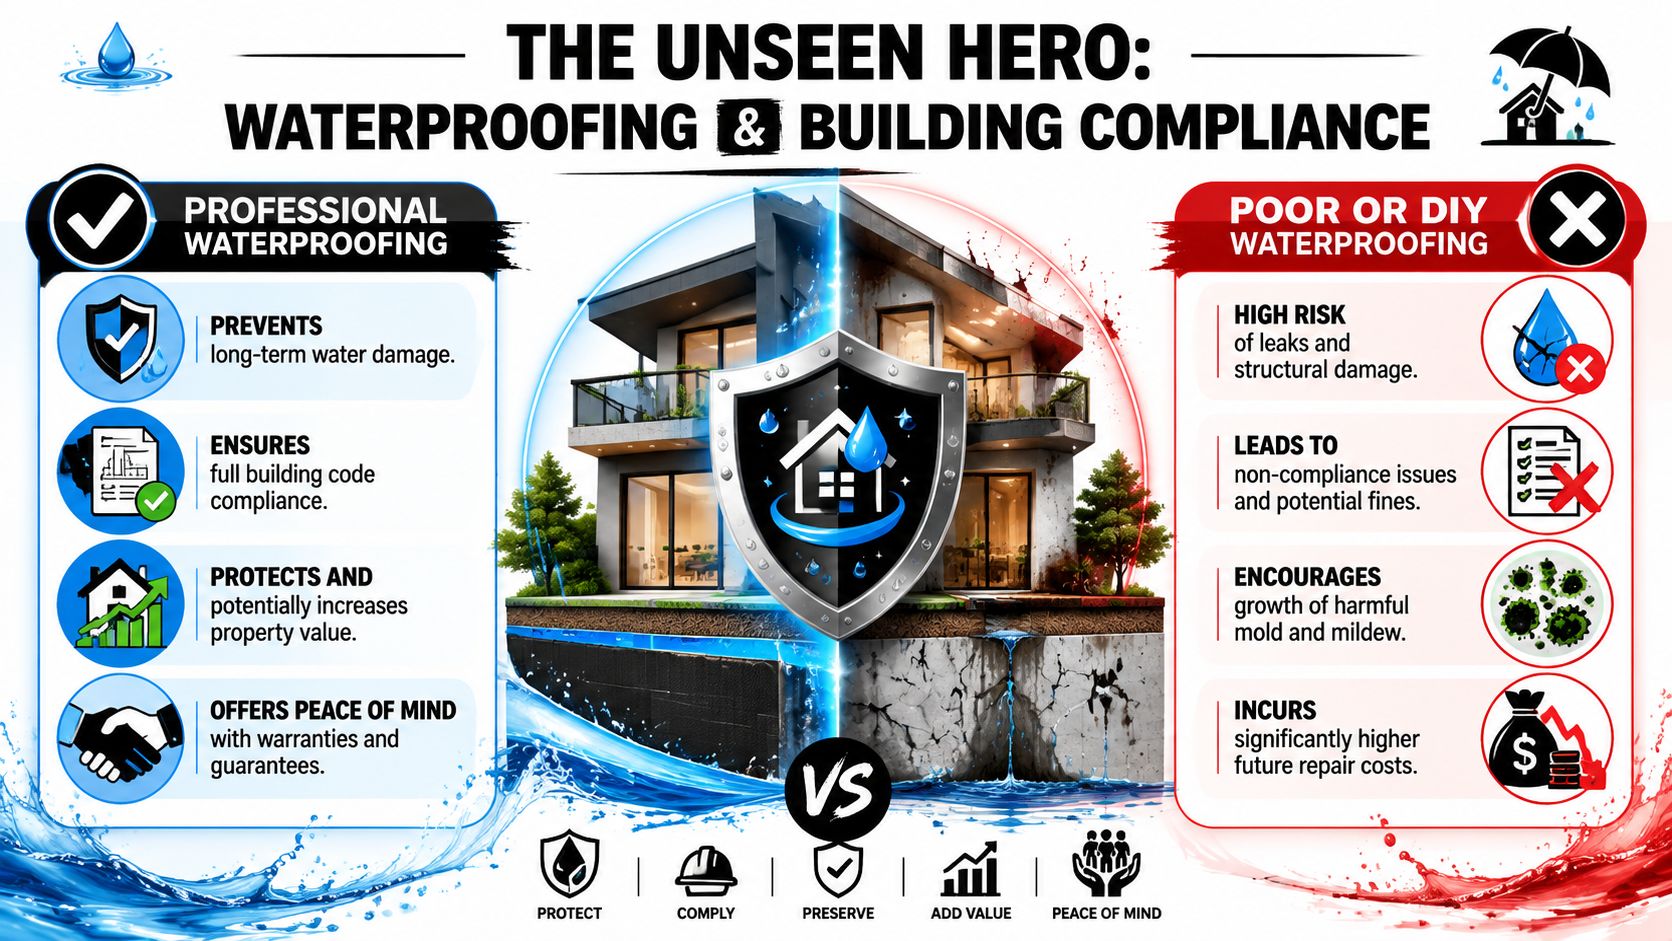
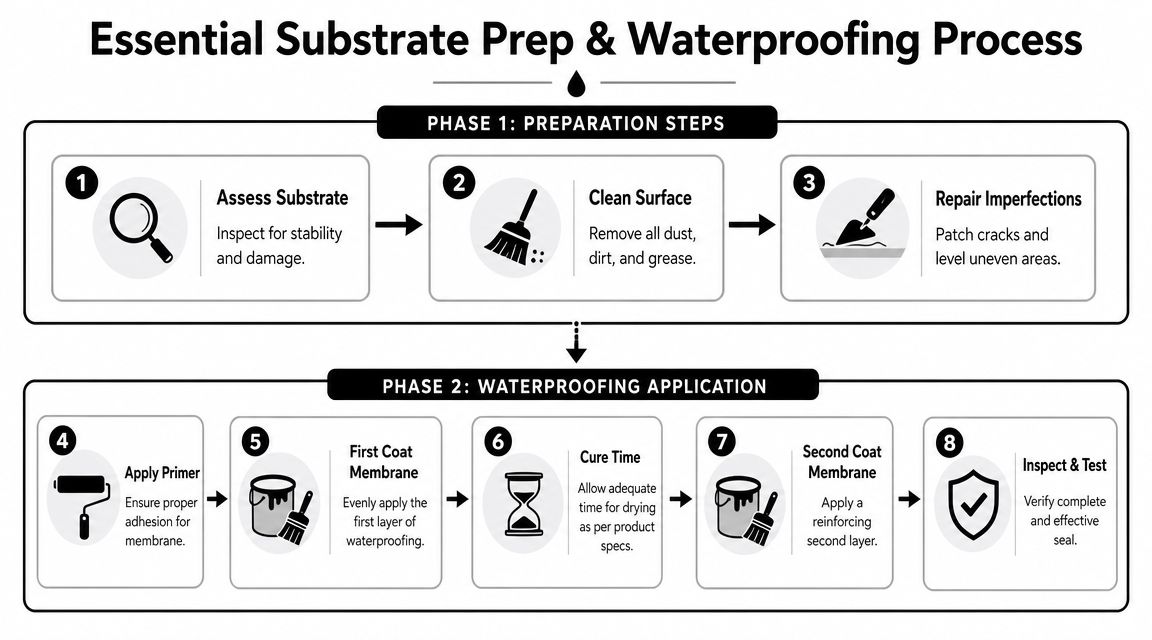
In Victoria, the National Construction Code requires waterproofing of wet areas to be installed in accordance with AS 3740:2021, and the Victorian Building Authority treats failures in bathroom waterproofing as a major source of residential defects, as outlined in this Victorian waterproofing compliance guidance.
That one point should change how you hire.
If waterproofing is a major defect-risk area, then the person running your job must understand membrane continuity, junction treatment, penetrations, shower recess preparation, and what can't be covered up before it's right. A tiler who only wants to “get on with the tiles” is not enough.
Practical rule: If the contractor talks more about tile colours than substrate prep and waterproofing detail, keep looking.
A specialist also knows where modern bathrooms become technically demanding:
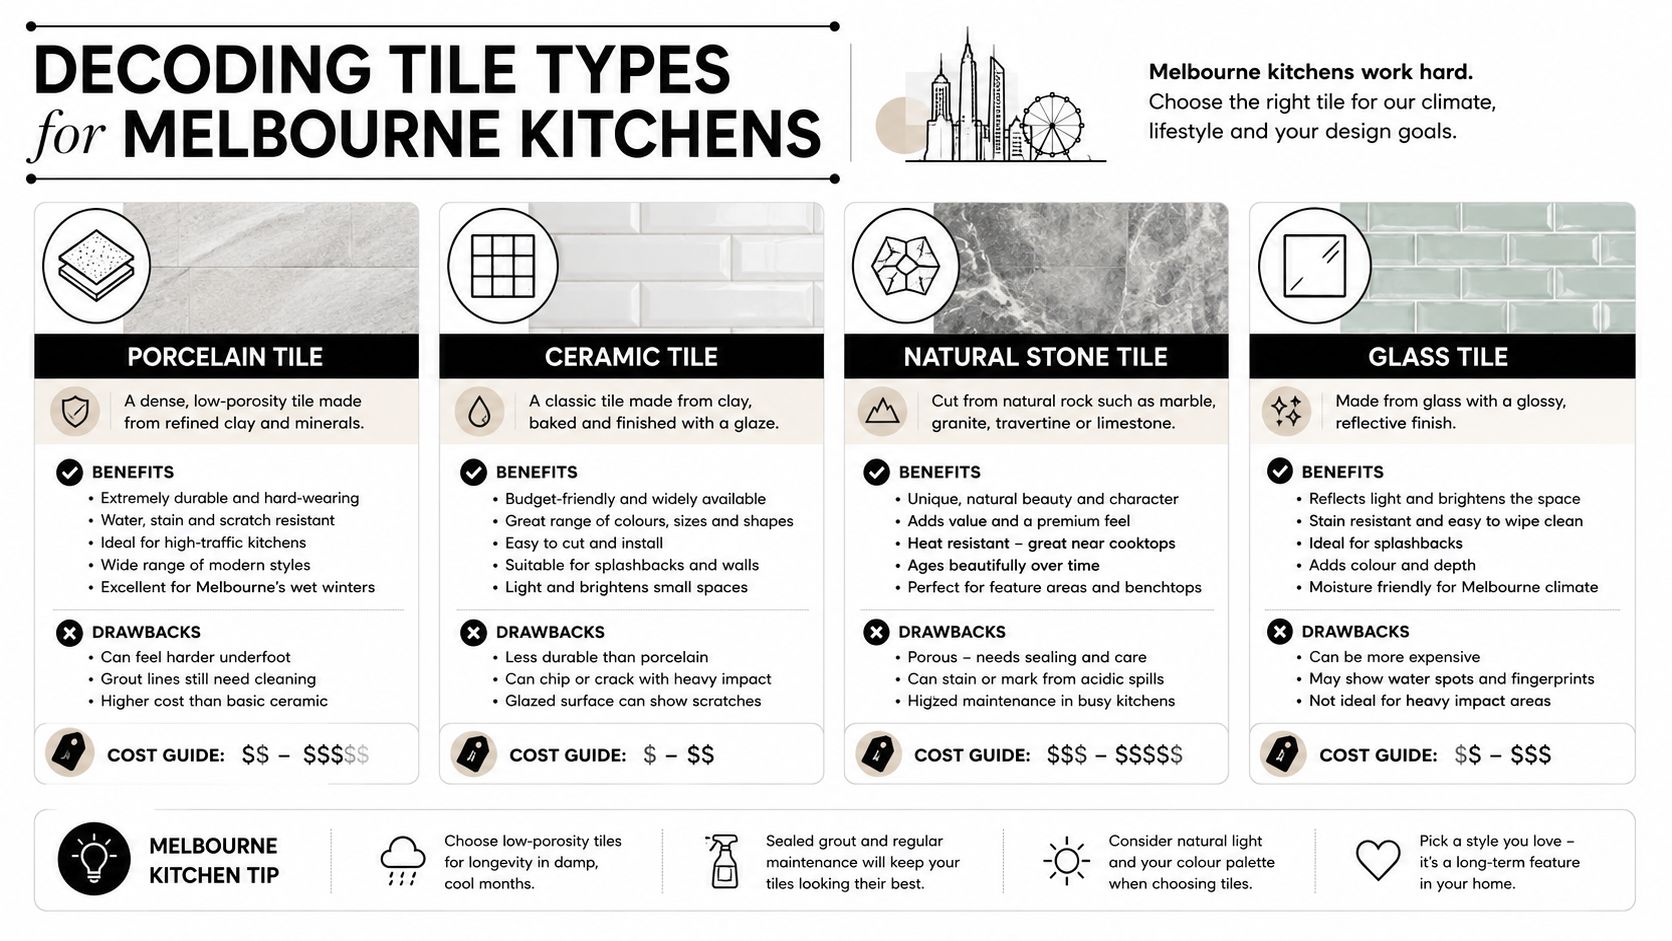
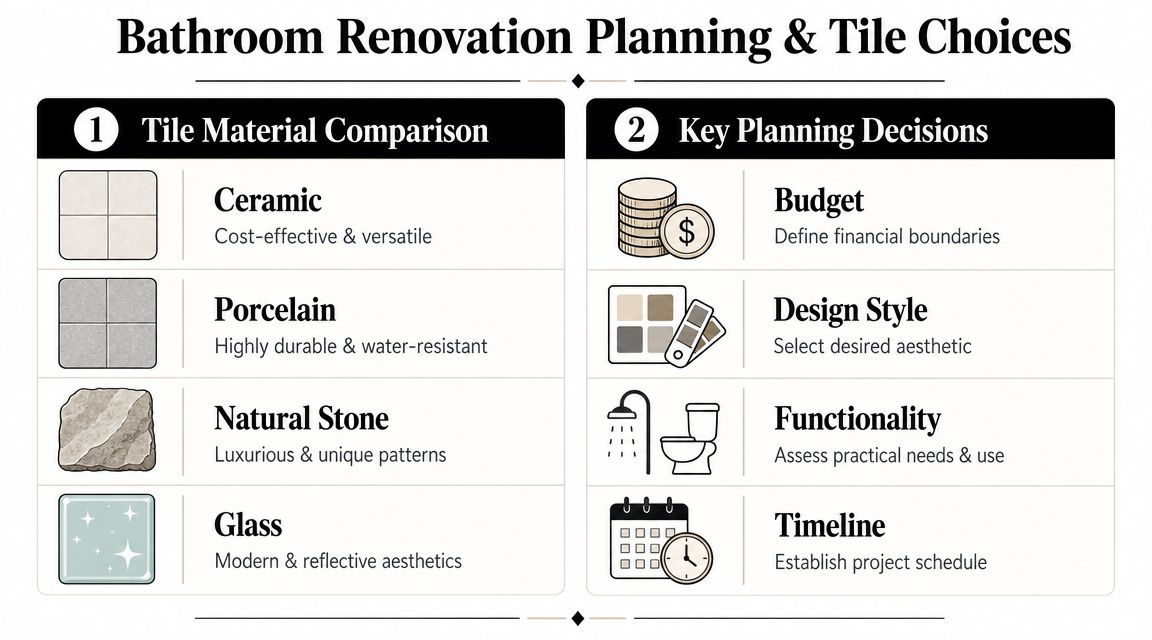
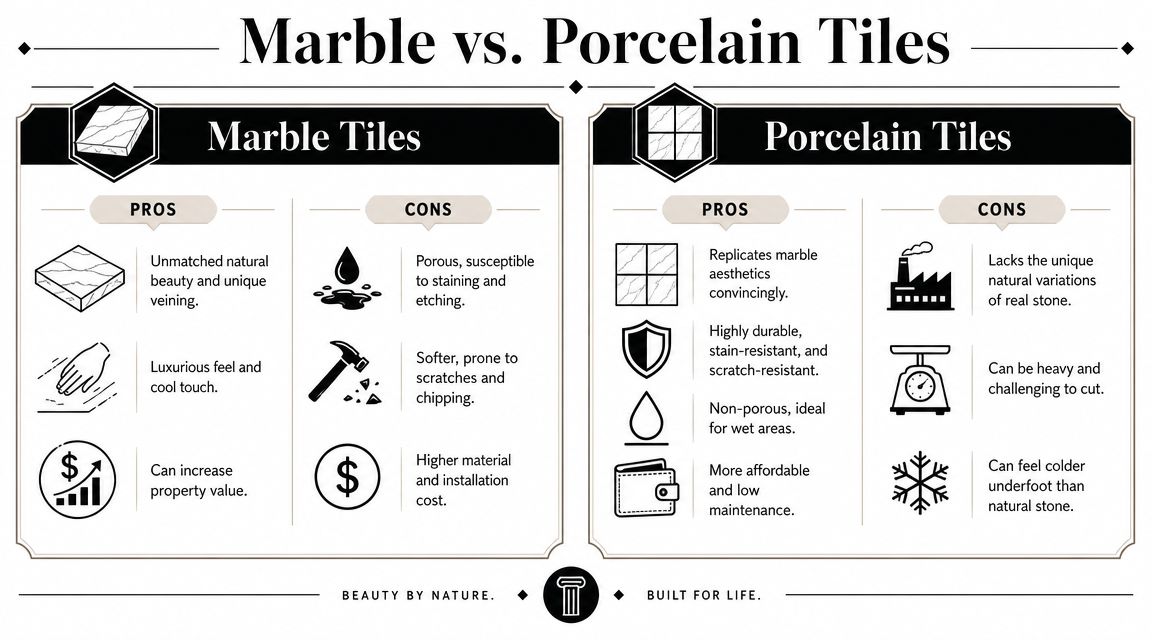
- Large-format porcelain and Kerlite panels need flatter surfaces and cleaner set-out than many older bathrooms can provide without extra prep.
- Frameless shower screens rely on accurate levels, plumb walls, and finished dimensions that don't drift mid-job.
- Walk-in showers need disciplined fall creation. If water sits outside the wet zone, the design has failed no matter how good it photographs.
A homeowner sees one room. The specialist sees a chain of dependencies. That mindset is exactly why bathroom renovation specialists earn their keep.
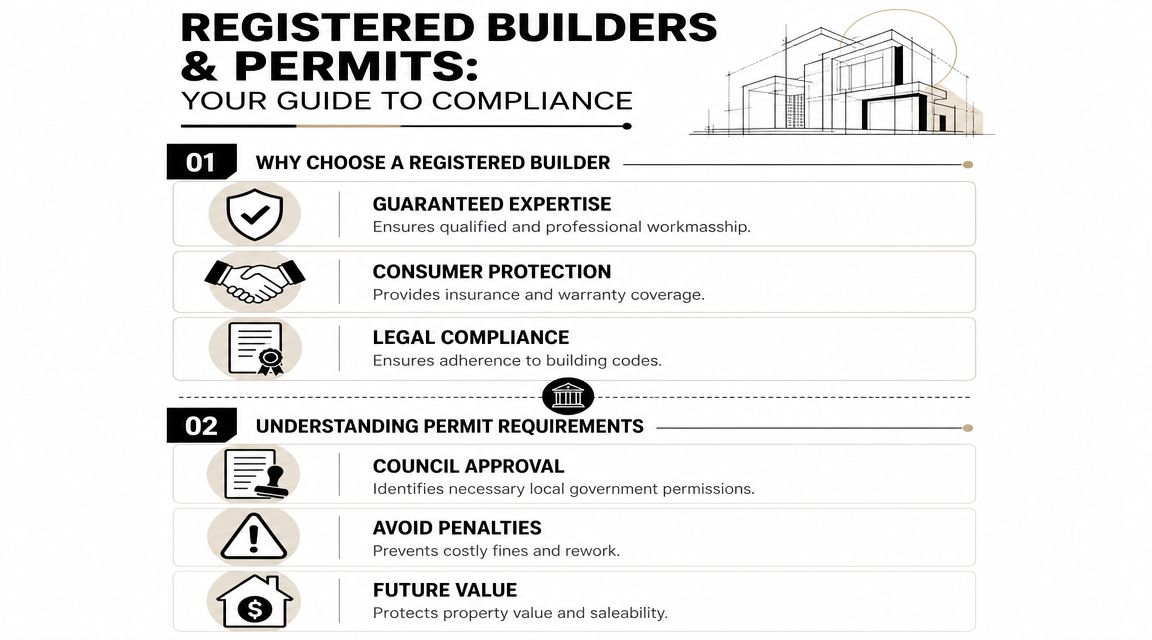
Why Your Specialist Must Be a Registered Builder
If your renovation involves multiple trades, wet-area compliance, and meaningful spend, a registered builder isn't a nice extra. It's the right level of responsibility.
A tiler installs finishes, a builder carries the project
A good tiler is valuable. A good plumber is valuable. A good electrician is valuable. None of them, acting alone, should be treated as the person responsible for the whole bathroom unless they're legally and professionally equipped to take that role.
A registered builder specialising in bathrooms does more than organise trades. They carry accountability for sequencing, coordination, workmanship standards, and project control. That matters when the job moves beyond replacing like-for-like fittings and into real renovation territory.
Many homeowners get trapped. They hire the trade they understand best, then discover too late that no one is properly managing interfaces between demolition, rough-in, waterproofing, tiling, cabinetry, and final fit-off. Once that happens, problems get pushed downstream. Everyone blames the previous trade. You're left sorting it out.
You want one responsible party, not a circle of subcontractors explaining why the defect belongs to someone else.
For bathroom floors alone, details such as falls, waste positioning, tile set-out, and transitions need careful planning. That's why even a focused element like bathroom floor tiling should sit inside a bigger managed scope rather than being treated as an isolated task.
Choosing your bathroom professional
The differences are clearer when you put them side by side.
| Attribute | Handyman / Tiler | Bathroom Renovation Specialist (Unregistered) | Registered Builder (Specialising in Bathrooms) |
|---|---|---|---|
| Primary focus | One trade or small repair scope | Renovation coordination without full formal protection | Full bathroom project responsibility |
| Trade coordination | Limited | May coordinate informally | Coordinates licensed trades as part of a managed build |
| Compliance mindset | Often finish-focused | Varies widely | Should treat compliance as core project work |
| Accountability across the whole job | Narrow | Often unclear | Clearer single-point responsibility |
| Risk if hidden issues appear | Higher | Higher if scope isn't formalised | Better equipped to diagnose, re-scope, and manage |
| Suitability for full bathroom renovation | Poor to moderate | Moderate | Strong |
| Best use case | Minor maintenance or isolated tiling | Small cosmetic projects with low complexity | Full wet-area renovations and higher-risk projects |
The main point is simple. Bathrooms are small, but they're not simple. If the work requires design judgement, compliance discipline, multiple trades, and defect prevention, hire at the level the project demands.
That's the difference between buying labour and buying a properly managed result.
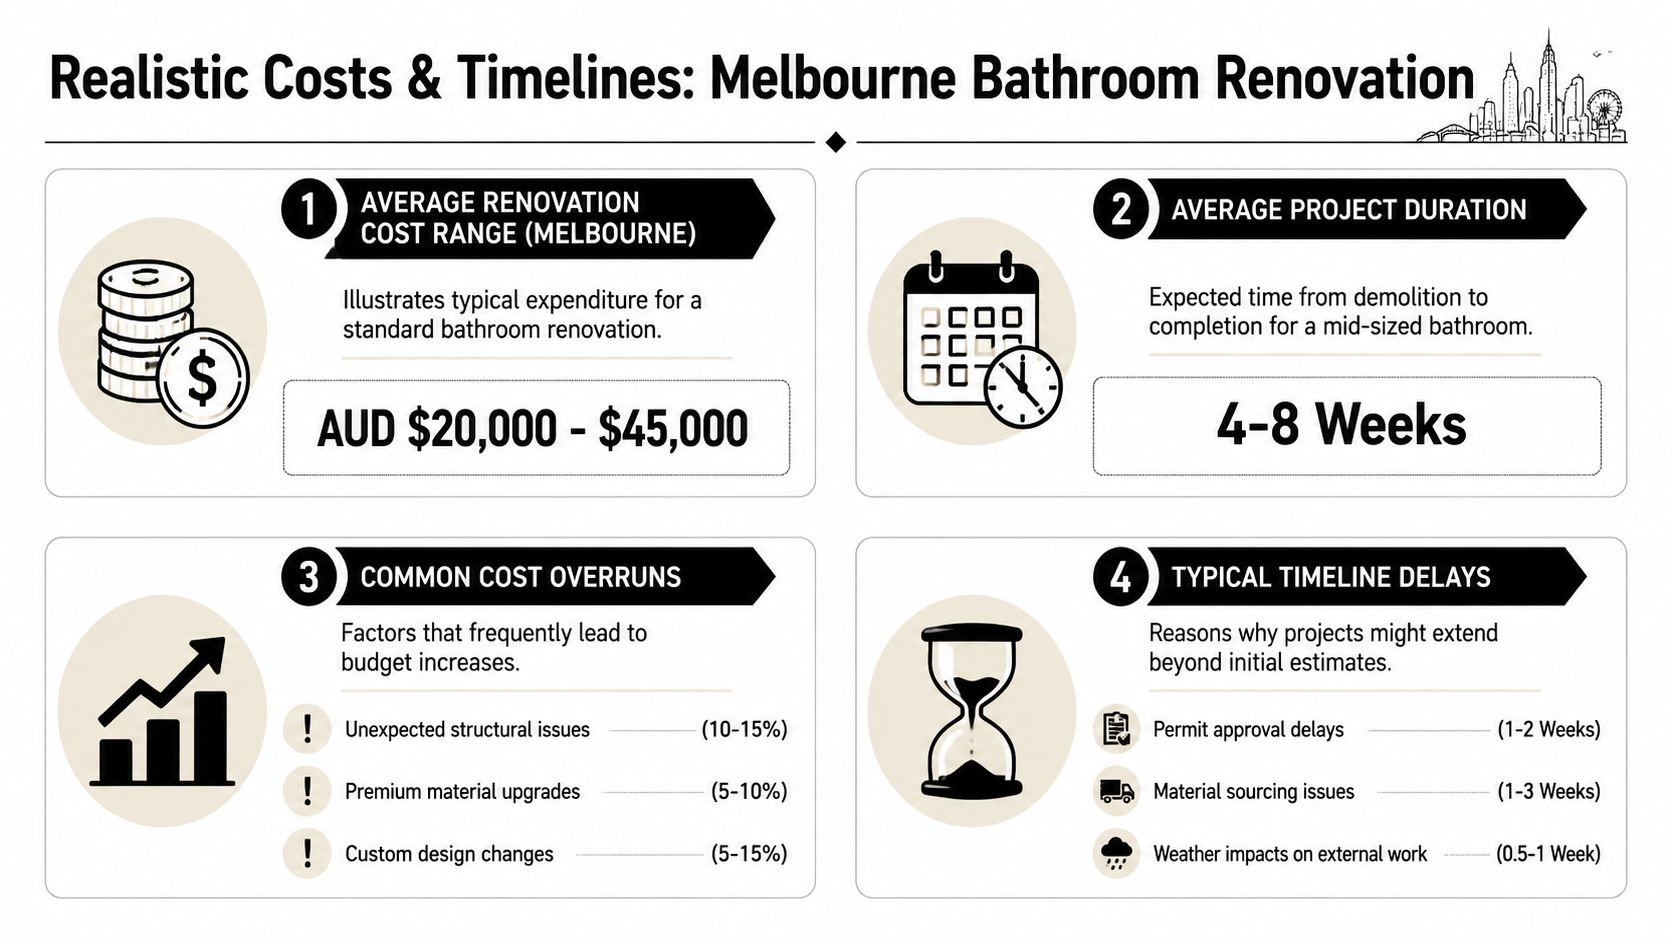
Setting Realistic Costs and Timelines in Melbourne
Most budget problems don't start with greed. They start with false simplicity. Homeowners are shown a neat before-and-after price idea, but the actual room needs waterproofing work, plumbing changes, substrate correction, and compliance-driven upgrades that weren't part of the original mental budget.
Why Melbourne budgets drift
Public bathroom cost advice is often broad and national. That's not much help when your actual project is a Melbourne wet-area renovation in an older home or apartment. A better way to think about budgeting is this: the visible items are only part of the spend. The hidden work often determines whether the budget holds.
Recent Australian industry reporting has highlighted that many public cost guides are national averages, while small wet-area jobs in Melbourne are especially vulnerable to scope creep from waterproofing, plumbing, and compliance upgrades, which is exactly why cheap headline estimates so often unravel, as discussed in this Melbourne bathroom renovation cost article.
For local planning, this page on the cost of bathroom renovation in Melbourne is a more relevant starting point than generic interstate advice.
Here's where homeowners often underestimate:
- Waterproofing-related rectification if the old bathroom has already failed
- Plumbing adjustments when fixtures move or old connections need upgrading
- Subfloor or wall correction for modern tile formats and frameless installations
- Compliance-driven changes that weren't visible at quote stage
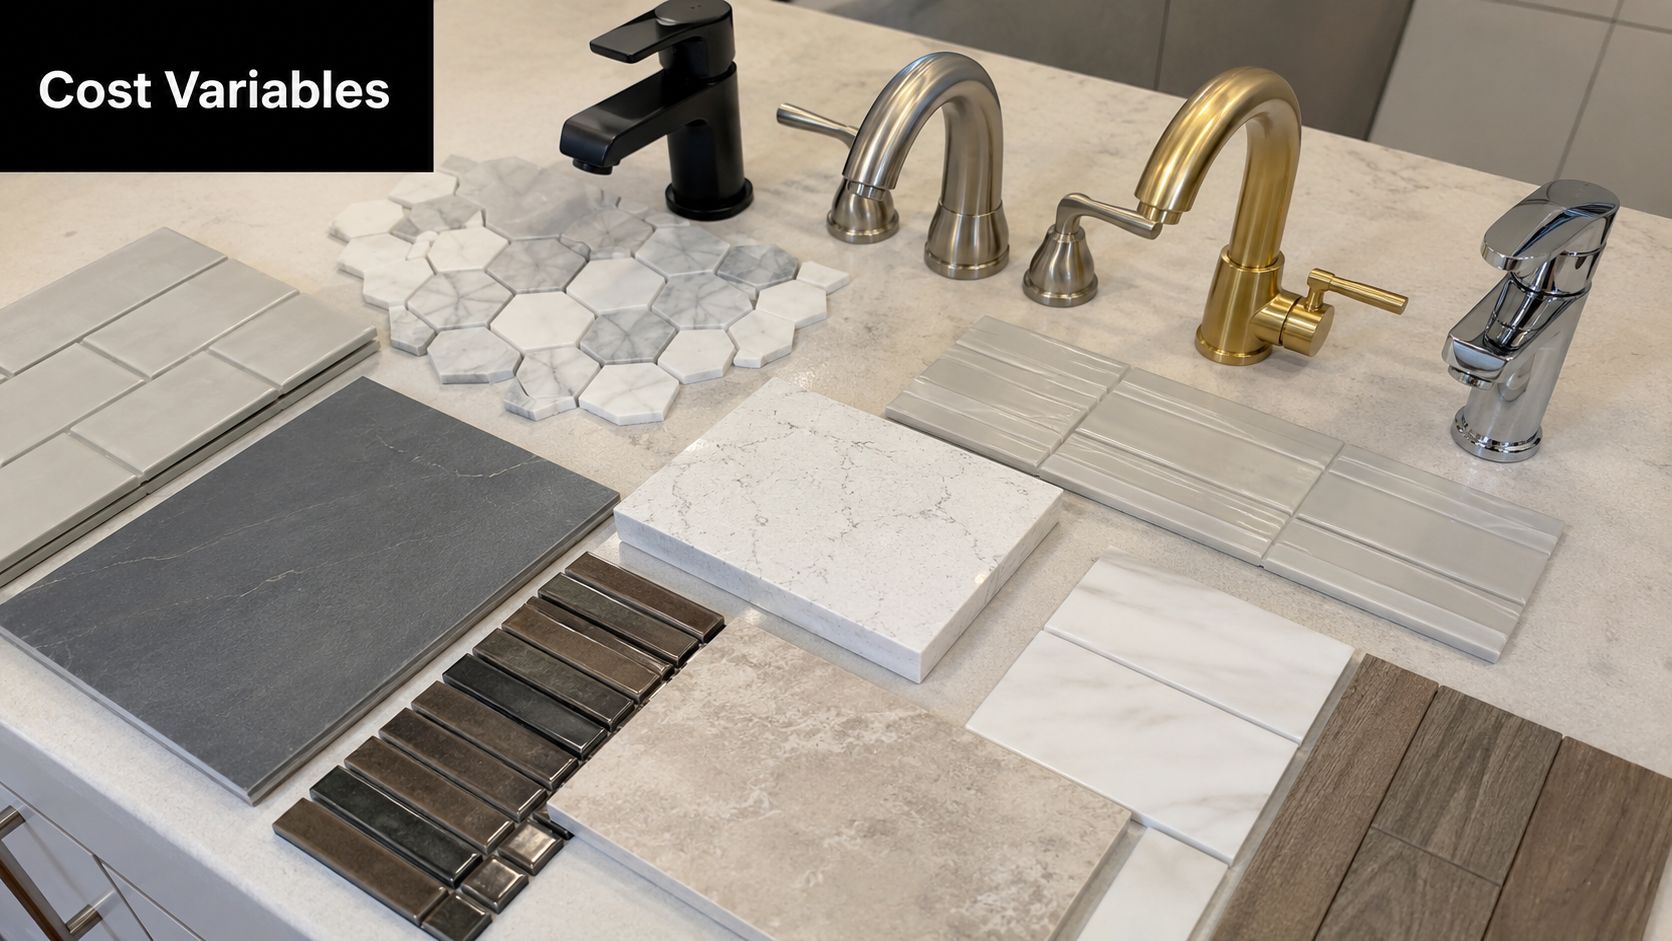
- Finish upgrades that seem minor individually but add up quickly
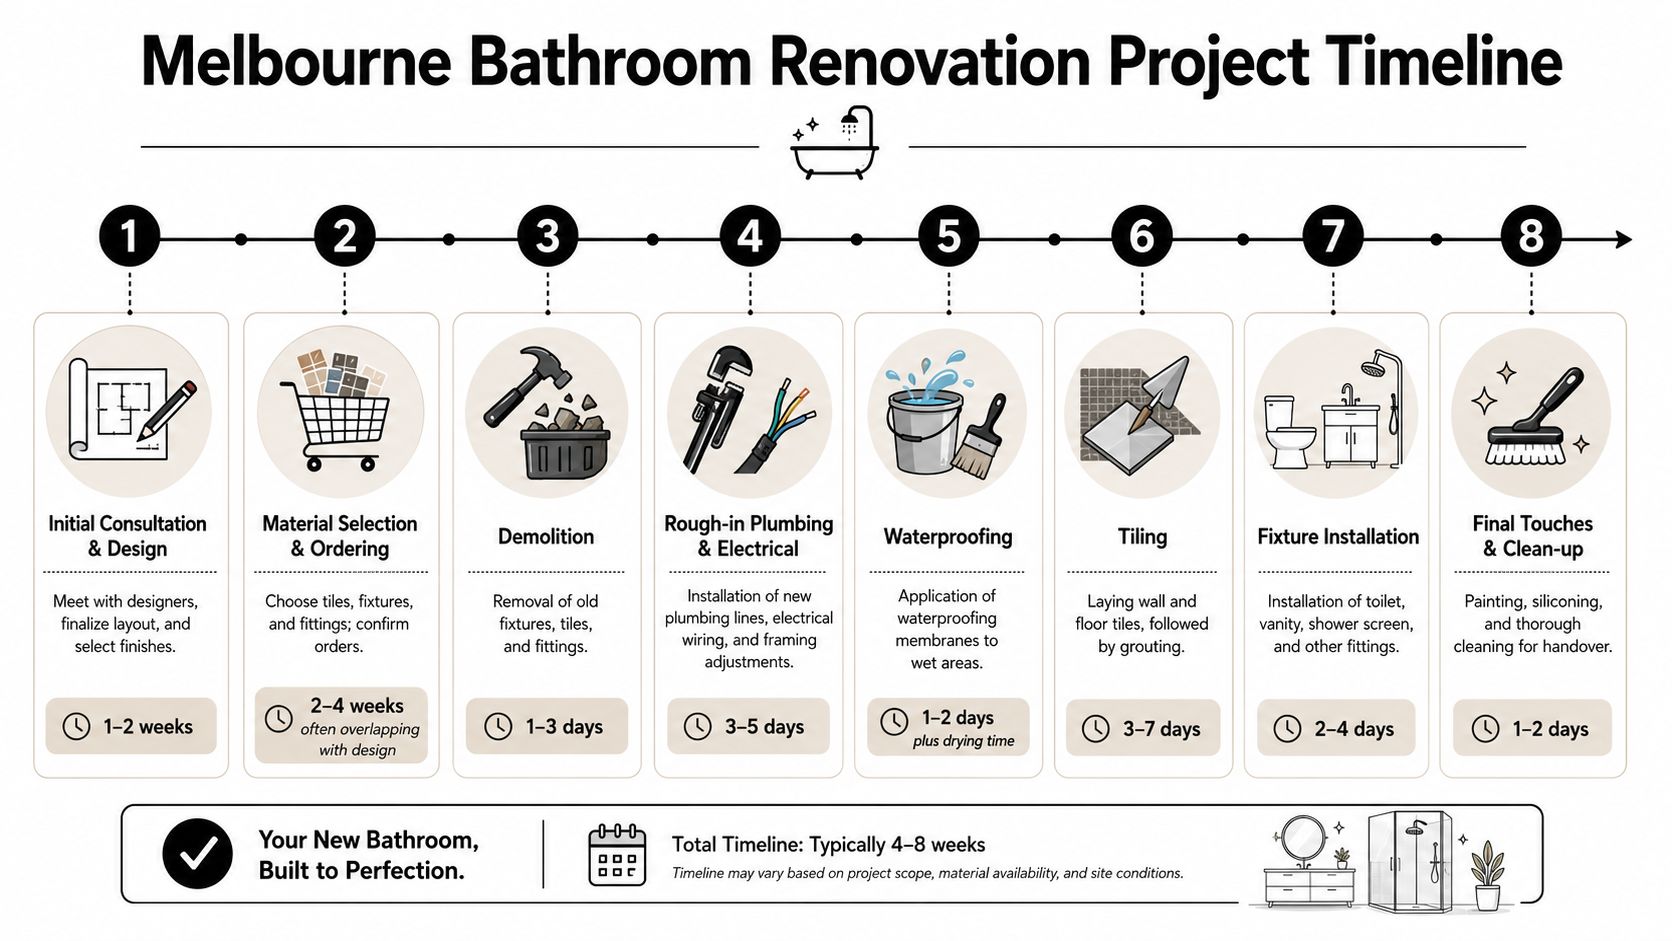
What a realistic programme looks like
The timeline problem follows the same pattern. People think in terms of tile installation days. Builders think in terms of dependencies, curing times, inspections, procurement, and fit-off coordination.
A sensible programme usually includes:
Pre-construction decisions
Final selections, measurements, site review, and ordering. Delays here ripple through everything.Strip-out and diagnosis
Hidden leaks, movement, poor framing, or failed past work are often revealed during this stage.Rough-in and prep
Plumbing and electrical changes happen before the room can be closed up and prepared.Waterproofing, setting, and curing
This stage can't be rushed because later layers depend on it.Tiling, fit-off, and defect check
The last phase often looks fast, but it still needs discipline.
Fast bathrooms are often expensive bathrooms later.
The right expectation isn't “How quickly can someone finish?” It's “How cleanly can someone move from one stage to the next without compromising the work?” If you approach cost and time with that mindset, you'll make better decisions from the first quote onward.
Your Guide to Vetting and Hiring a Specialist
You meet two contractors. One talks about tile colours, quick turnaround, and a sharp price. The other starts with builder registration, scope control, waterproofing responsibility, and how variations will be documented if demolition reveals a problem. Hire the second one.
That decision saves people from expensive bathroom failures in Victoria. A bathroom renovation is not a tiling job with a few extras attached. It is a building project with legal, sequencing, and compliance obligations. If the person pricing the work cannot explain how the whole room will be managed, they are not the right specialist to trust with it.

Questions that expose weak operators fast
Ask direct questions. Then judge the quality of the answer, not the confidence of the delivery.
A registered builder who specialises in bathrooms should answer clearly, explain their process, and tell you who carries responsibility from demolition through fit-off. If they dodge, generalise, or keep pulling the conversation back to finishes, keep looking.
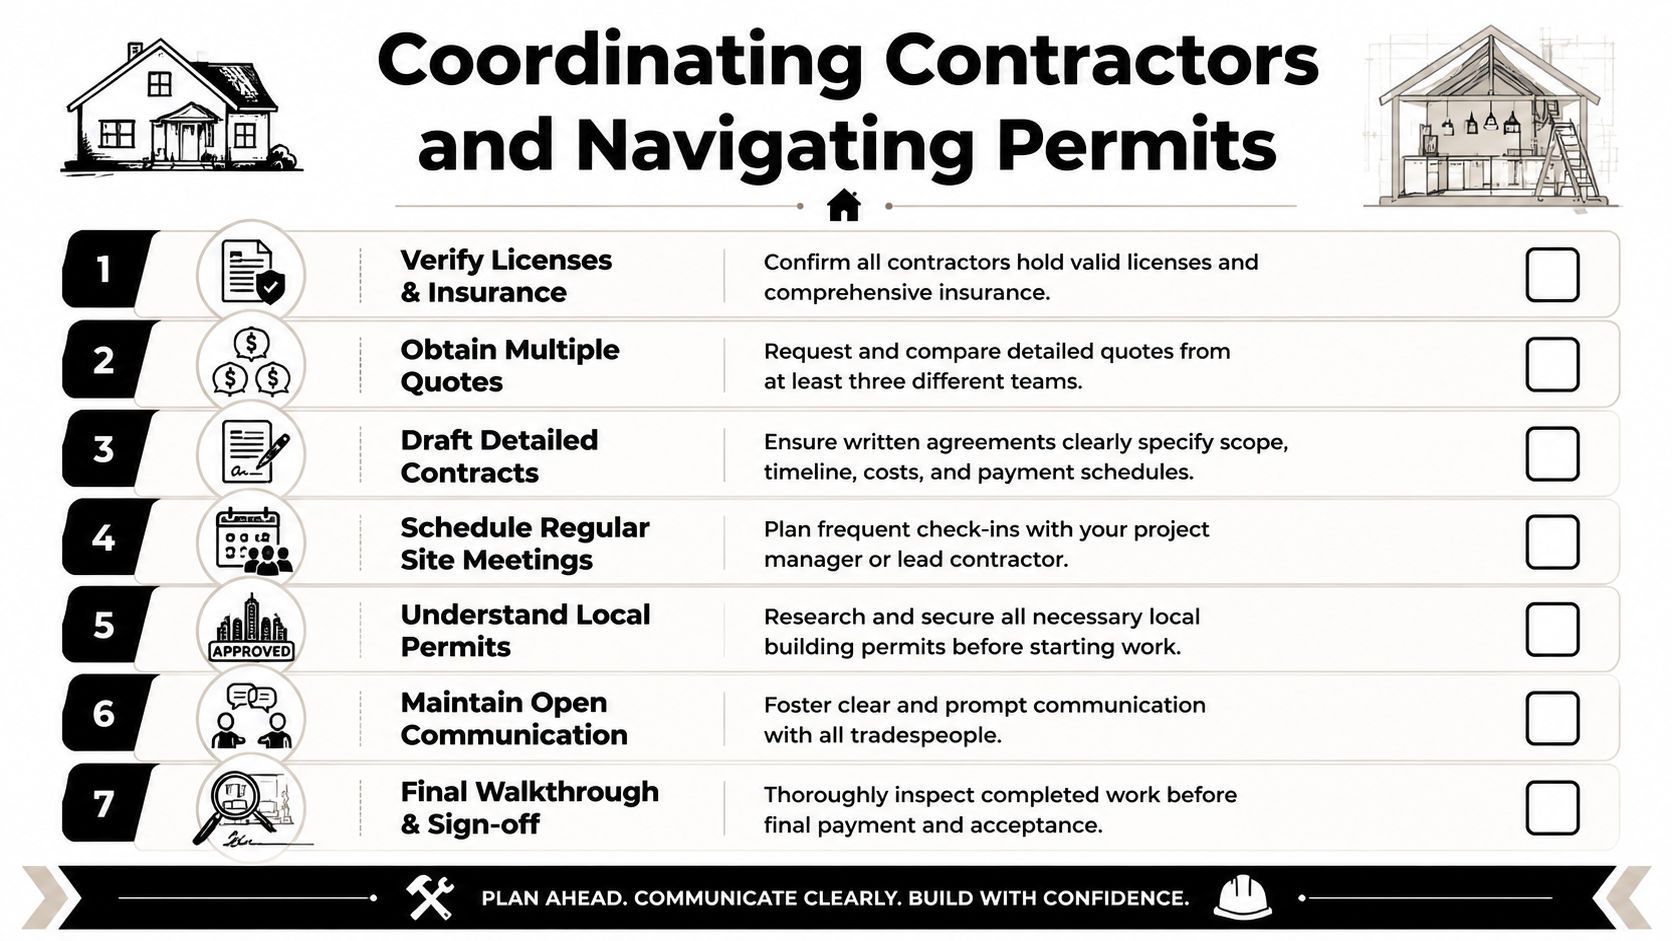
Use this checklist:
Builder registration
Ask whether they are a registered builder in Victoria and what class of work they are taking responsibility for.Single-point responsibility
Ask who is accountable for the full bathroom outcome, including defects, coordination, and compliance, not just tiling or waterproofing in isolation.Waterproofing method
Ask how they prepare substrates, treat junctions and penetrations, and verify the bathroom is ready before tiles go down.Trade coordination
Ask who sequences the plumber, electrician, carpenter, waterproofer, tiler, and glazier, and who checks each stage before the next starts.Hidden condition procedure
Ask what happens if demolition exposes rot, leaks, out-of-square framing, or failed past work. You want a documented process for scope review, pricing, and approval.Experience with your type of bathroom
Ask for recent examples that match your project, whether that means an apartment ensuite, an older Melbourne home, a curbless shower, or large-format tile.Protection of the rest of the house
Ask how they manage dust, waste removal, access, and protection to adjoining finishes while the room is under construction.
Good operators hear these questions every week. Poor ones get irritated because they rely on assumptions.
How to read a quote properly
A short quote is a risk document disguised as a low price.
You are not comparing numbers alone. You are comparing scope definition, risk control, material assumptions, and whether someone has priced the job as a managed renovation or as a patchwork of trades. Bathrooms blow out when the quote leaves too much unsaid.
Check for these items:
| What to check | Why it matters |
|---|---|
| Detailed scope of works | Stops disputes about what was included in the contract price |
| Named materials or specifications | Prevents quiet substitutions that reduce quality |
| Clear exclusions | Shows what you may still need to pay for separately |
| Allowance language | Identifies items that can change once selections or site conditions are confirmed |
| Builder-led coordination | Shows whether one party is managing sequencing and responsibility across the whole job |
| Variation process | Protects you when hidden issues are found after demolition |
If one quote is cheap because it is vague, it is not cheap. It is unfinished.
What to look for in a portfolio
Judge a portfolio like a record of build quality, not a collection of pretty photos.
Styled images hide the details that matter. Ask for whole-room shots, close-ups around wastes and niches, and projects that show difficult conditions rather than only clean new builds. A specialist bathroom builder should be able to show controlled set-out, straight lines, balanced cuts, and fixtures that align with the tile grid.
Look for:
- Straight cuts and disciplined set-out around corners, niches, wastes, and doorways
- Consistent joints across walls, floors, and returns
- Level fixture alignment at vanities, mirrors, mixers, and accessories
- Evidence of problem-solving in older homes, tight layouts, or awkward existing structures
- Photos of complete bathrooms with enough detail to assess workmanship, not just styling
Later in the process, it helps to watch how an experienced installer thinks about execution, not just presentation.
If you narrow it down to two similar prices, choose the contractor who gives clearer documentation, sharper answers, and stronger control of the full bathroom scope. In this trade, ambiguity is where defects and disputes start.
Common Pitfalls and What Success Looks Like
You finish the bathroom, everything looks neat, and six months later the shower starts leaking into the wall behind it. That usually happens because the job was treated like a tiling project instead of a building project. Surface finishes looked fine. The assembly underneath was wrong.
The most common failures
A common scenario in Victoria involves homeowners looking for a fast fix to a shower leak and getting advice about grout colour, tile style, or resealing, when the actual problem sits behind the tiles. In older homes and apartments, leak rectification depends on defect diagnosis, substrate condition, waterproofing continuity, and the order of work, not cosmetic touch-ups.
The failures I see most often are predictable:
Treating leaks as surface problems
Regrouting, resealing, or replacing silicone does not fix a failed waterproofing system or a moving substrate.Hiring by trade, not by accountability
A plumber handles one part, a tiler handles another, and nobody takes responsibility for compliance, sequencing, or the finished room as a whole.Ignoring floor falls and drainage behaviour
If water sits in corners or escapes the shower zone, the bathroom has failed, no matter how good the tiles look.Locking in finishes before checking the room
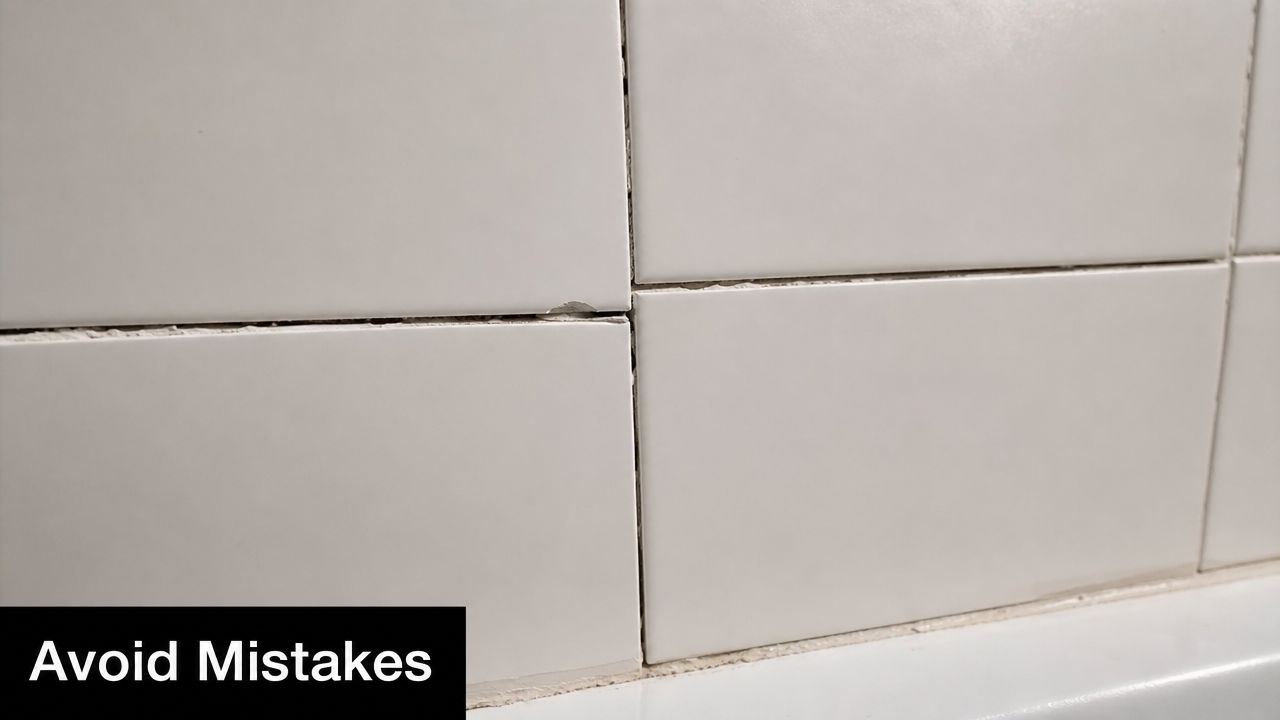
In older bathrooms, rotten framing, out-of-plumb walls, and damaged sheeting change the scope. You find that out before selections matter.Using silicone to hide bad set-out or bad detailing
Silicone is a sealant, not a substitute for proper construction.
Good bathroom work starts with diagnosis. Then it moves to scope, documentation, sequencing, and build quality. That is why a registered builder who specialises in bathrooms gives you a better result than a good tiler working without full project control.
What a well-run bathroom renovation looks like
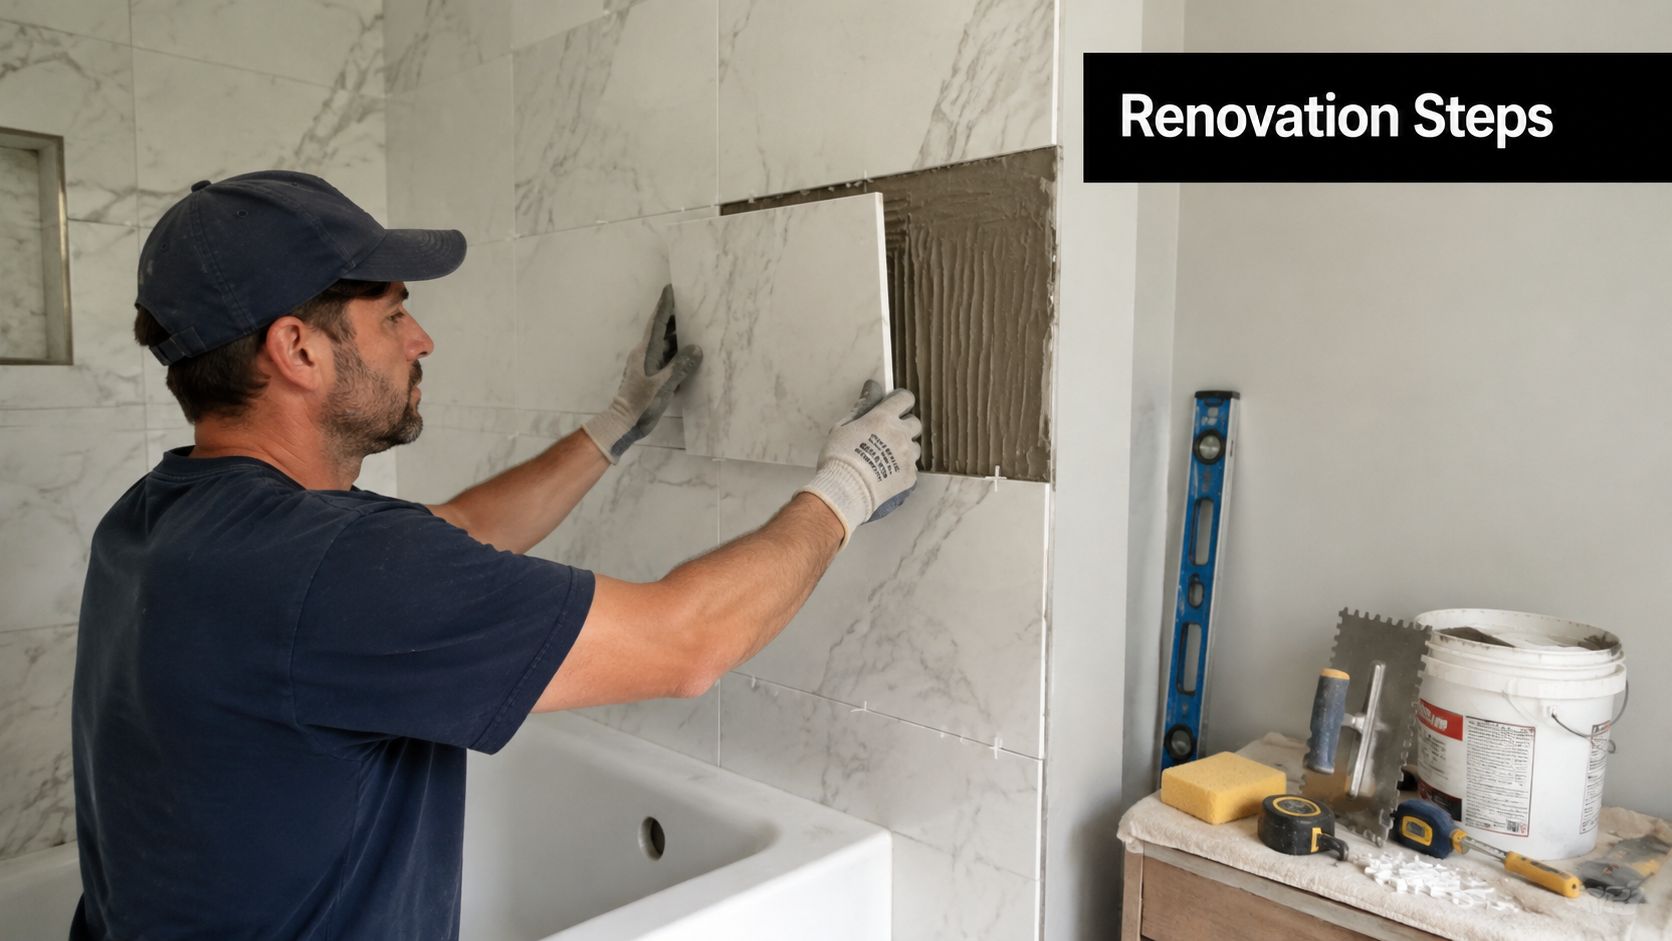
A successful bathroom renovation feels organised from the start. The room is measured properly. Existing defects are identified early. Trades arrive in the right order. Fixtures, tile set-out, waterproofing details, and drainage outcomes are resolved before installation starts.
The finished room should do more than photograph well. Water should drain properly. Fixtures should align cleanly. Tile cuts should look deliberate. Doors should clear. Niches should sit in the right place. Nothing should rely on last-minute patching to look acceptable.
A heritage home update shows the difference clearly. The owner wants better function, but the room still has to suit the house. A bathroom specialist who is also a registered builder checks the structure, confirms what can stay, adjusts the scope to suit the existing conditions, and rebuilds the room so it performs properly without looking out of place.
An apartment ensuite is another test. Access is tighter. Service locations matter more. Noise, waste removal, neighbours, and body corporate conditions can affect how the job runs. A bathroom builder with registration and bathroom-specific experience controls those constraints and delivers a room that meets performance, compliance, and finish standards.
That is the benchmark. A bathroom renovation in Victoria should be treated as a controlled wet-area rebuild with one party responsible for the outcome. Hire bathroom renovation specialists who understand compliance, sequencing, waterproofing, and defect prevention, not just finishes. If you get that part right, you protect the room, the budget, and the value of the home.
If you're planning a bathroom renovation in Melbourne and want a registered builder's view before committing to scope, layout, or finishes, speak with Melbourne Tiling Services P/L. They handle bathroom renovations, waterproofing, tiling, leak rectification, and full trade coordination for residential projects across Melbourne and greater Victoria.


Recent Comments