Self Levelling Compound for Outdoor Use: Melbourne Guide

You've probably seen the warning signs already. A Melbourne balcony feels uneven underfoot, water sits near the doorway after a sudden downpour, and the tiles have started to sound hollow or crack at the edges. The tempting fix is to buy a bag of smooth-flowing compound, pour it across the slab and create a clean surface for new tiles. That shortcut is responsible for many failed balconies, because self levelling compound for outdoor use isn't interchangeable with an indoor floor product, and it must be installed in the right relationship with waterproofing.

Exterior work has to cope with sunlight, rain, temperature changes and wet foot traffic. It also has to preserve drainage, respect the substrate and deliver a surface that's safe when Melbourne weather turns quickly. The sections below focus on the details that decide whether an outdoor restoration lasts or becomes another expensive repair.

Table of Contents

What Outdoor Self Levelling Compound Actually Does

A sloping balcony isn't always defective. Some fall is necessary so water can move towards the drainage point instead of collecting against a wall or door. The problem starts when the slab has local depressions, ridges or damaged patches that interrupt that drainage path. A tile may bridge a hollow, flex under load and eventually crack, while trapped moisture works its way into joints and adjacent building materials.

Self levelling compound for outdoor use corrects those surface irregularities by flowing across a prepared mineral substrate and forming a more consistent plane. It doesn't replace structural repairs, rebuild a failed balcony or magically create a compliant drainage design. It provides the stable, even base that a tile adhesive and exterior finish need.
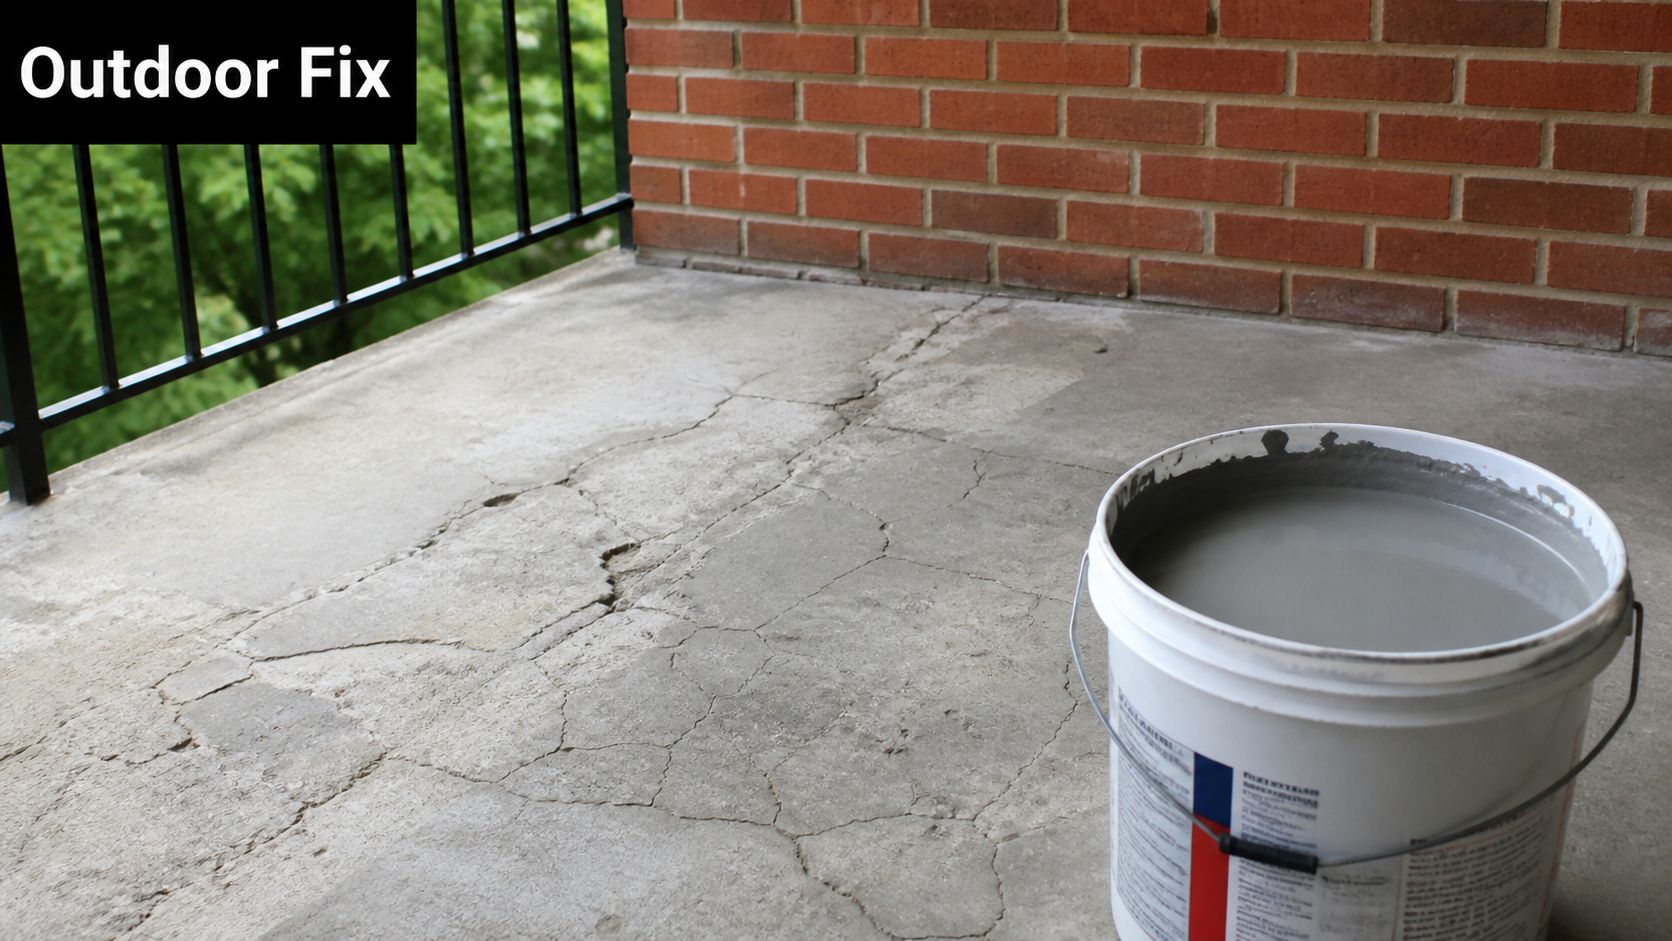
A bucket of grey self-leveling compound sitting on a damaged concrete balcony floor ready for repair.

Where the product earns its place

On a terrace restoration, the compound can smooth a rough concrete surface before the waterproofing and tiling stages. It can also help create a controlled transition where an old surface meets a repaired section, provided the underlying slab is sound and the system has been designed around the existing fall.

The Australian technical information for ARDEX K 301 exterior levelling compound describes it as suitable for internal and external applications. It's designed to resist sun, rain, heat, cold and freeze-thaw conditions, making its rated exposure scope distinctly different from an indoor-only leveller.

That distinction matters in Victoria. A balcony may be dry when the compound is mixed, then face harsh sun, wind-driven rain and cold conditions during its service life. An indoor product can look perfect on installation day and still be the wrong material for that exposure.

Practical rule: A smooth finish doesn't prove exterior suitability. The technical sheet must specifically rate the product for external use.

The same ARDEX Australian information gives useful planning milestones. K 301 is walkable after 2–3 hours and ready for tile, carpet and floating floors after 24 hours, subject to the product instructions and site conditions. Those timings help organise access to a balcony or patio, but they don't remove the need to check moisture, substrate stability and the complete waterproofing system.

For related floor preparation terminology, the guide to what screed means in tiling is useful. Levelling compound and screed can both alter a floor build-up, but they aren't automatically the same product or suitable for the same application.

Cementitious vs Polymer-Modified Formulations

The word “cement” on a bag tells you very little about whether the product belongs outside. The important questions are where the compound is rated for use, how it bonds, how it handles movement and what system the manufacturer specifies around it.

A conventional cementitious leveller can be durable on a stable, correctly prepared substrate. It still depends heavily on accurate water measurement, proper mixing, suitable curing conditions and protection from contamination. If the slab moves, the layer is too thick for the product or the installer adds water to make it flow more easily, the finished result can lose strength or adhesion.

Polymer-modified compounds add polymer technology to the cementitious binder. Depending on the formulation, those polymers can improve adhesion, workability and tolerance of minor movement compared with a basic mix. They don't make a cracked or structurally unstable balcony safe, and they don't turn a leveller into a waterproofing membrane.
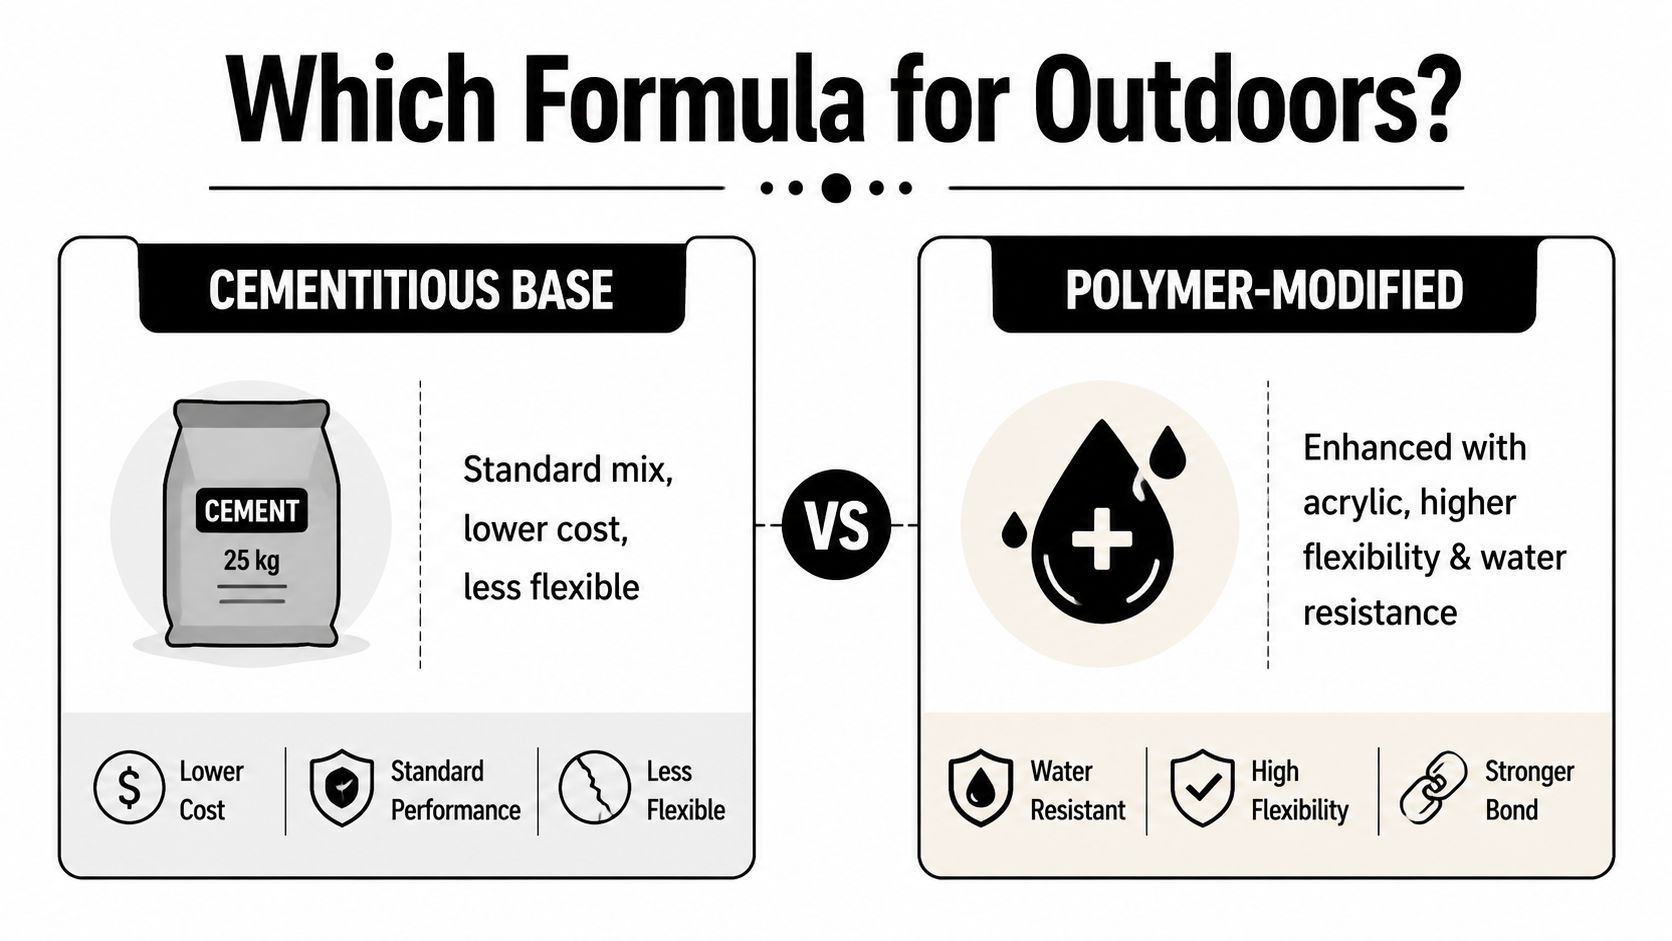
A comparison chart showing the differences between cementitious base and polymer-modified formulas for outdoor applications.

A practical product comparison

Consideration Standard cementitious formulation Exterior-rated polymer-modified formulation
Exposure May suit stable internal work, depending on its technical sheet Designed for specified external conditions when the manufacturer confirms that use
Movement tolerance More dependent on a rigid, stable substrate and careful curing Polymer modification can improve adhesion and flexibility, but it isn't a substitute for structural repair
Water exposure Not automatically suitable for rain or repeated wetting May be suitable where the product is explicitly rated for external exposure
Selection risk The label can be mistaken for universal suitability The technical data makes the intended application clearer

ARDEX provides a useful Australian example. K 301 is identified for internal and external applications and exposure to sun, rain, heat, cold and freeze-thaw conditions in its Australian product information. By contrast, the Australian balcony guidance from Remedial Building Australia's external self-levelling reference identifies internal-only products such as K 15 as unsuitable for exposed outdoor use.

That's the trade-off in plain terms. A cheaper indoor compound may be perfectly reasonable for the correct interior substrate, but using it on a Melbourne balcony because it pours smoothly is false economy. An exterior-rated product costs less than removing failed tiles, repairing water damage and repeating the waterproofing.

Before choosing, check the entire system rather than only the bag front:

  • Rated location: Confirm internal, external or submerged suitability in the technical documentation.
  • Substrate: Make sure the slab is sound, clean and free from loose material, coatings, oil and contaminants.
  • Movement: Identify cracks, joints and structural movement before levelling.
  • Finish: Confirm compatibility with the membrane, adhesive, tile and final surface treatment.

Critical Substrate Prep and Waterproofing Rules

On a Melbourne balcony, the membrane may look like a suitable base for a flowing compound. It is not. Never pour self-levelling compound over a waterproofing membrane. The leveller belongs on prepared concrete first, then the cured layer receives the external membrane. The two products perform different jobs, and reversing the order can cause delamination or compromise waterproofing.

The correct sequence

  1. Inspect the concrete. Remove loose, flaky or poorly bonded material. A leveller cannot stabilise a slab that is already failing underneath.

  2. Clean thoroughly. Dust, oil, grease, old adhesive and paint can stop primer and compound bonding. Embedded contamination may require mechanical preparation.

  3. Repair defects first. Treat cracks, open joints and damaged edges with a compatible repair system. A flowing compound will not accommodate movement or correct structural damage.

  4. Prime the substrate. Porous concrete generally requires the primer specified for the selected compound. It controls absorption and supports consistent adhesion. Follow the manufacturer's dilution, drying and application instructions.

  5. Check drainage and falls. A balcony must not be levelled into a flat ponding area. Retain or form the required fall towards the drain, threshold or discharge point, and check finished heights at doors and edges.

  6. Apply the external leveller to prepared concrete. Use the specified water quantity, then spread the mix with the suitable gauge rake or flooring trowel. A smoother or spike roller may be used where the system permits. Keep movement and perimeter joints correctly detailed.

  7. Allow the layer to harden. Protect it from rain, contamination and early traffic. A product being walkable does not mean the waterproofing and tiling system is ready.

  8. Install the external membrane over the cured leveller. Select a membrane rated for external above-ground exposure. Complete corners, penetrations, junctions and outlets in line with the system requirements.

  9. Tile with compatible materials. Choose an exterior adhesive and surface finish suited to the exposure, movement and slip requirements.

The levelling layer sits below the waterproofing membrane. Reversing that order risks delamination and can compromise the waterproofing system.

The Melbourne waterproofing service guide reflects the practical sequence. Waterproofing is not a decorative coating added after the visible work. It is a system that depends on a prepared substrate, sound detailing and protection from the layers installed above it.

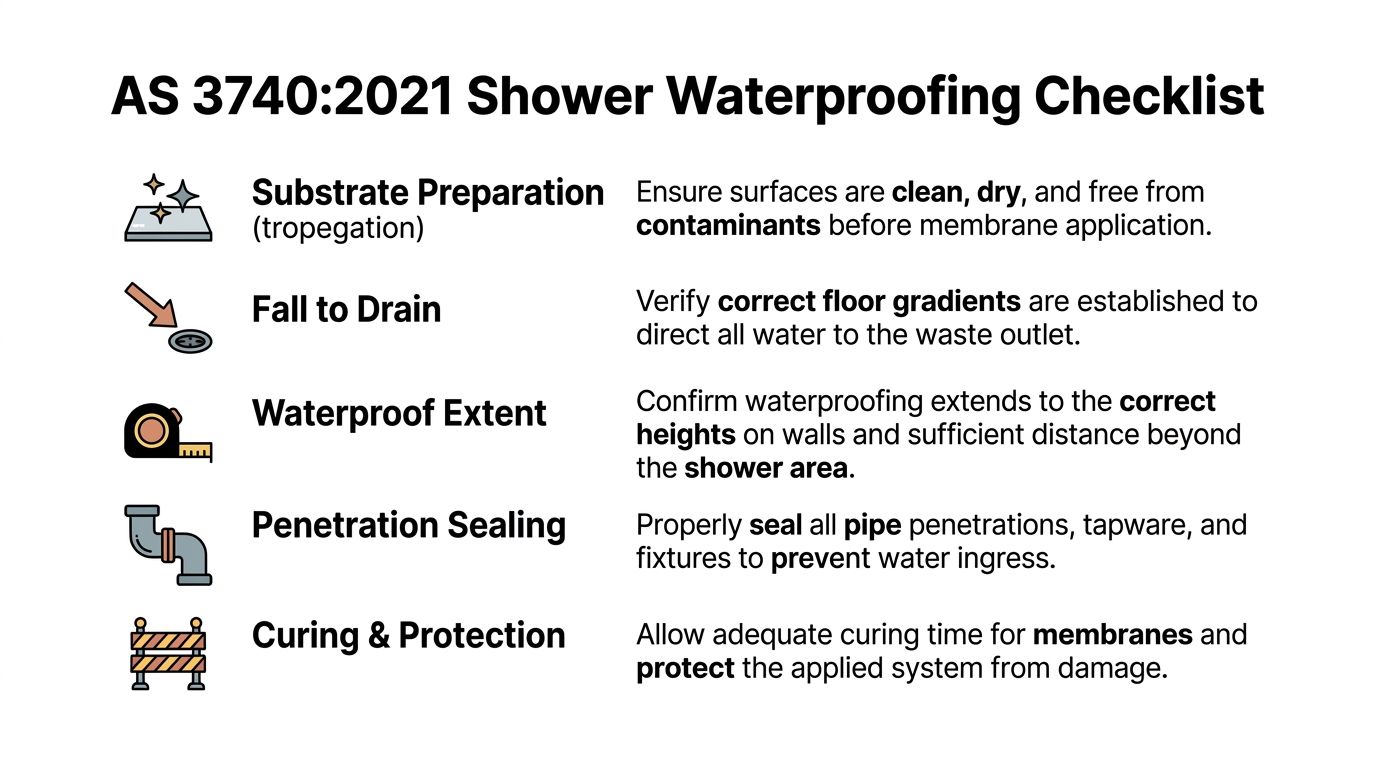
Membrane selection also matters. Australian guidance distinguishes membranes for external above-ground applications under AS 4654.2 from domestic internal wet-area products governed by AS 3740:2021, as outlined in this Australian waterproofing and tiling reference. A bathroom membrane and an exposed balcony membrane are not interchangeable because both may be liquid-applied or sheet-based.

AS 4586 Slip Ratings and Melbourne Weather

A level surface can still be dangerous. Outdoor floors collect rainwater, condensation, dirt and leaf residue, and a glossy finish can become hazardous when wet. The final result must be judged as a complete pedestrian surface, not just by how flat the levelling compound looks before the tiles or sealer are installed.

AS 4586 is the Australian Standard used to classify new pedestrian surface materials, including external walkways, balconies and pool-adjacent areas. The relevant classification affects material choice, surface texture and the finish applied over the prepared base. AS 4586 guidance for pedestrian slip classification.pdf) is the reference point for checking how the completed surface is assessed.

Why the P-rating belongs in the design

Published Australian guidance maps higher-risk external locations such as balconies, driveways and external walkways to ratings such as P4 or P5. That doesn't mean every outdoor surface receives the same classification without assessment. Location, exposure, slope, contamination and the selected finish all influence the safe specification.

Area Design concern
Exposed balcony Rain, wind-driven moisture and limited shelter can make a smooth finish unsafe
External walkway Frequent pedestrian traffic requires reliable wet slip resistance
Pool-adjacent surface Bare feet and persistent water demand careful texture and material selection
Driveway or access zone Vehicle and pedestrian use create different performance considerations

Melbourne's weather makes this more than a paperwork exercise. A terrace can dry quickly in bright sun, then become slippery during a sudden shower. The sealer should complement the tile or exposed finish, not create a glossy film that undermines the texture. If the leveller will remain visible, confirm that the product and topcoat are designed for that use and can achieve the required friction category.

The same thinking applies to covered outdoor areas. A roof overhead reduces direct rain but doesn't eliminate condensation, tracked water or wet footwear. For interior wet areas, the discussion shifts to products and detailing suited to bathrooms, such as the considerations in this guide to non-slip bathroom flooring. The principle remains consistent, choose the finished surface for its real wet conditions.

Before approving a finish, ask for the specified slip classification and the test or product evidence supporting it. Don't accept “rough enough” as a substitute for an appropriate AS 4586-based selection.

Thickness Limits and Bathroom Renovation Standards

A few extra millimetres can affect door clearances, drain levels, tile transitions and the space available for waterproofing and finishes. For external resurfacing, the specified system may allow 2–20 mm in a single layer, increasing to 30 mm only with aggregate. Those limits are a design constraint, not a suggestion. An internal-only compound is unsuitable for exposed outdoor work.

Measure before mixing

Start by mapping the existing levels. A shallow hollow may suit the product's normal range, while a deep depression, damaged edge or abrupt height change may need repair mortar, a screed system, aggregate extension or wider substrate repairs. Adding extra compound beyond the manufacturer's stated thickness can leave a weak, poorly cured build-up.

Check these points on site:

  • Lowest and highest levels: Use a straightedge or laser level to establish the existing plane and calculate the actual build-up.
  • Drain and threshold heights: Confirm the new layer will not obstruct an outlet, reduce the fall or create a trip at a doorway.
  • Perimeter movement: Keep specified joints and edge details clear so the surface can move without cracking.
  • Layer compatibility: Check that the primer, leveller, waterproofing membrane, adhesive and tile are approved for use together.

The finished height also affects the waterproofing sequence. On an outdoor balcony, the leveller is applied to the prepared substrate, then the compatible membrane and finish are installed as specified. Pouring self-levelling compound over a membrane can bury movement details, trap moisture and leave the membrane working on an unsuitable base. Plan the drain and threshold before mixing, because correcting levels after waterproofing is far more disruptive.

Product limits still require site judgment. ARDEX K 301 documentation lists a 2–20 mm single-layer thickness, with aggregate allowing a greater build-up under the specified system. That information helps calculate material and set levels, but temperature, humidity, substrate moisture and the membrane or adhesive requirements still control the installation sequence.

Bathroom renovations need their own compliance path

A balcony build-up cannot be copied into a bathroom. Australian bathroom waterproofing follows AS 3740:2021 and the NCC wet-area provisions, including renovation work. Shower walls must be waterproofed to at least 1800 mm above the floor substrate, or to 50 mm above the shower rose when the rose is higher, as summarised in Australian bathroom renovation waterproofing guidance.

Junctions and floor construction change the detailing. Guidance summarising AS 3740:2021 states that wall-and-floor junction protection extends at least 40 mm on either side of the joint, while timber-based wet-area floors must be fully waterproofed, as explained in Australian waterproofing standards guidance. These requirements affect the compound, sheet substrate, screed and finished floor height selected for the renovation.

Cost Guidance and When to Hire Professionals

There isn't a responsible single price for an exterior levelling job without inspecting the site. The cost depends on the area, substrate condition, preparation required, thickness variation, drainage adjustments, access, membrane system and finished surface. A small, clean concrete area with minor correction is a different job from a cracked balcony with failed waterproofing and a difficult threshold.

DIY may be reasonable when the substrate is stable, the drainage layout is already correct, access is straightforward and the product instructions are fully understood. It becomes a poor risk calculation when the work involves a balcony membrane, active leaks, structural cracking, complex falls, multiple transitions or a finish that must satisfy a slip classification.
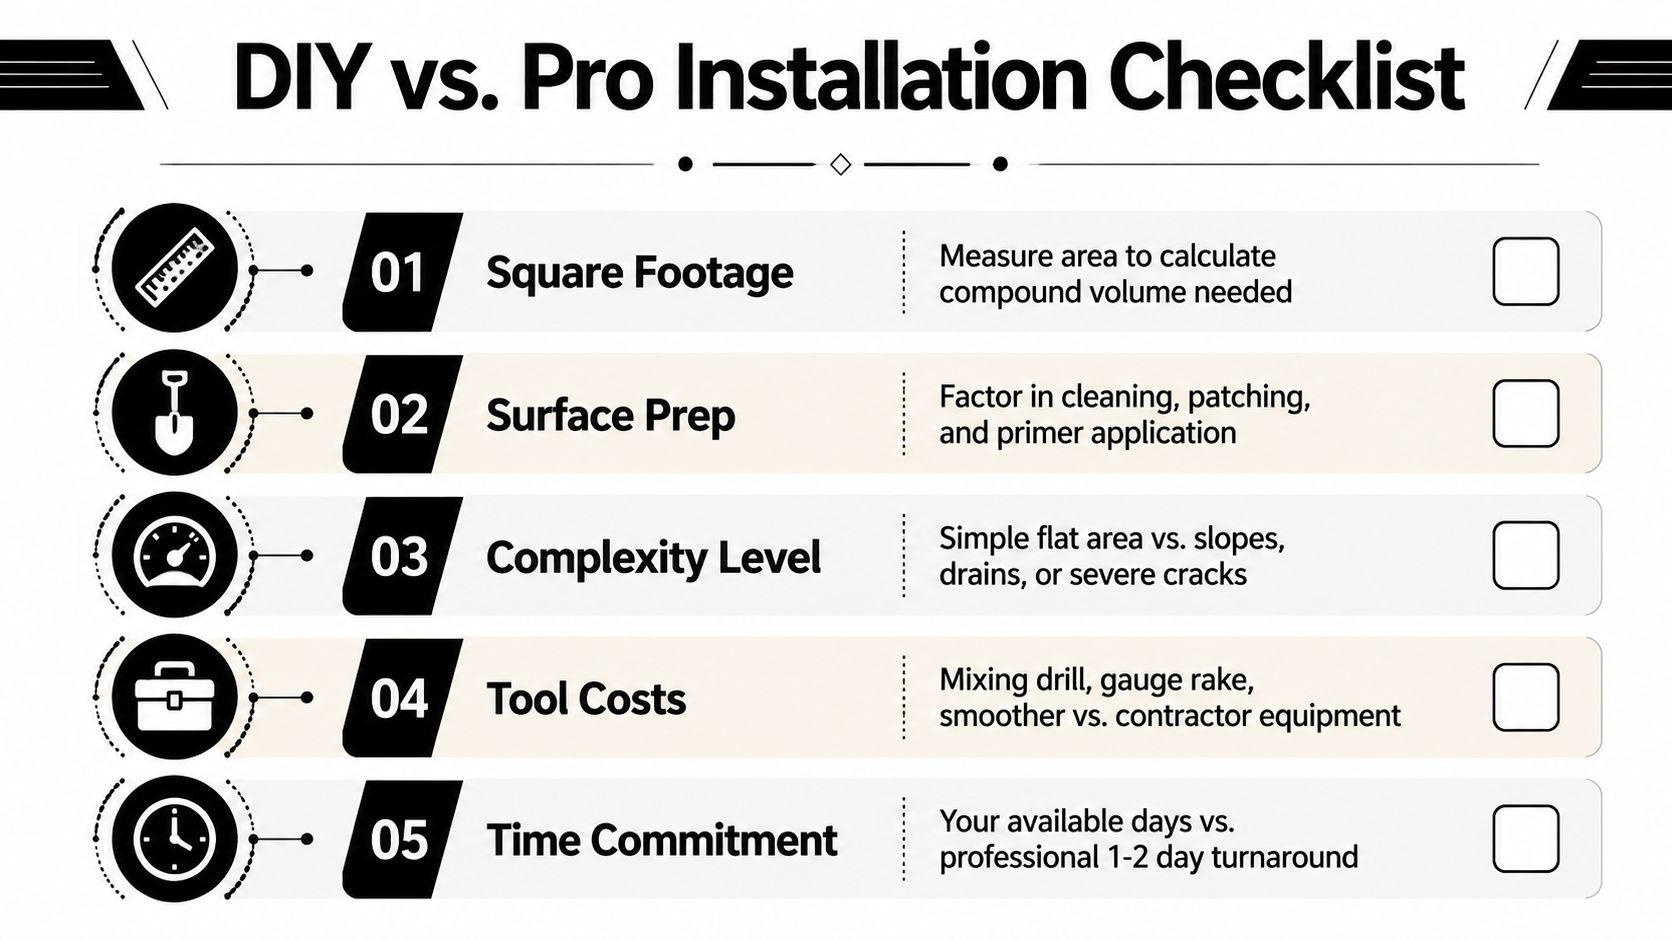
A checklist infographic comparing DIY versus professional installation considerations for self-leveling compound projects.

Use this decision checklist

  • Inspect the base: If the concrete is unstable, contaminated or cracked through movement, arrange a professional assessment before buying compound.
  • Check the system order: The leveller goes onto prepared concrete, then the cured layer receives the correctly rated waterproofing membrane.
  • Confirm the thickness: Keep the application within the product's stated range, including any aggregate requirement for deeper correction.
  • Plan drainage: Check falls, outlets, door thresholds and edge levels before the pour.
  • Specify slip performance: Choose the completed outdoor surface with AS 4586 classification in mind, especially for balconies, walkways and pool-adjacent areas.
  • Coordinate bathroom work: Waterproofing, plumbing, electrical work, substrate preparation and tiling need to be organised as one compliant renovation.

Victoria also has a legal threshold that homeowners shouldn't overlook. A person must be registered with the Building and Plumbing Commission for domestic building work where the contract value exceeds $10,000, and the requirement applies regardless of cost to re-blocking, re-stumping, demolishing or removing a home, according to the Victorian registered building practitioner requirements. A full bathroom or ensuite renovation can exceed that threshold once labour and materials are combined, so confirm the builder's registration and scope before work starts.

Melbourne Tiling Services P/L offers bathroom and ensuite renovations, waterproofing, screeding, self-levelling and balcony remediation, with coordination across the relevant trades. For a project involving exterior levelling or a bathroom renovation, request a site assessment, confirm the membrane and slip-resistance specification, and have the proposed build-up documented before materials are ordered.


Melbourne Tiling Services P/L can assess your balcony, terrace, bathroom or ensuite substrate, then coordinate self-levelling, waterproofing and tiling as a complete system. Visit Melbourne Tiling Services P/L to arrange a quote and discuss the correct product sequence for your Melbourne property.
Melbourne Waterproofing and Tiling: Your 2026 Guide

You've found the right tiles, chosen the vanity and probably saved a few inspiration photos. Then the builder mentions membrane thickness, floor falls, a flood test and a waterproofing certificate, and the bathroom suddenly feels less like a design project and more like a technical job. That reaction is normal. In Melbourne bathroom renovations, the tiles are the visible finish, but the waterproofing, drainage and substrate underneath decide whether the room performs.

Good Melbourne waterproofing and tiling treats the bathroom as one connected system. The membrane, screed, waste, wall linings, tile adhesive, grout, silicone and shower screen all need to work together. A neat-looking bathroom can still be poorly built if the falls are wrong, penetrations are unsealed or tiling starts before the membrane is ready.

Table of Contents

What Melbourne Waterproofing and Tiling Actually Covers

A bathroom renovation doesn't begin with a tile trowel. It begins with demolition, access planning and a close look at what sits behind the existing finishes. Once old tiles and fixtures are removed, the team can inspect framing, the structural floor, existing damage and the position of plumbing services. That information determines whether the project needs a straightforward refresh or a deeper rebuild.

A full scope commonly involves:

  • Strip-out and disposal: Remove tiles, fixtures, wall linings and failed waterproofing, then organise safe disposal and site protection.
  • Carpentry and substrate work: Repair framing, prepare cement sheet or other approved linings, and correct surfaces that aren't flat or stable.
  • Plumbing and electrical coordination: Complete rough-ins before waterproofing and tiling conceal access points behind the finished room.
  • Screeding and self-levelling: Form the drainage falls and create a suitable base for the membrane and tiles.
  • Waterproofing: Prime the substrate, treat corners and penetrations, and apply the membrane according to the system requirements.
  • Tiling and finishing: Set out wall and floor tiles, grout the joints, apply flexible silicone at movement points, and coordinate frameless shower screens.

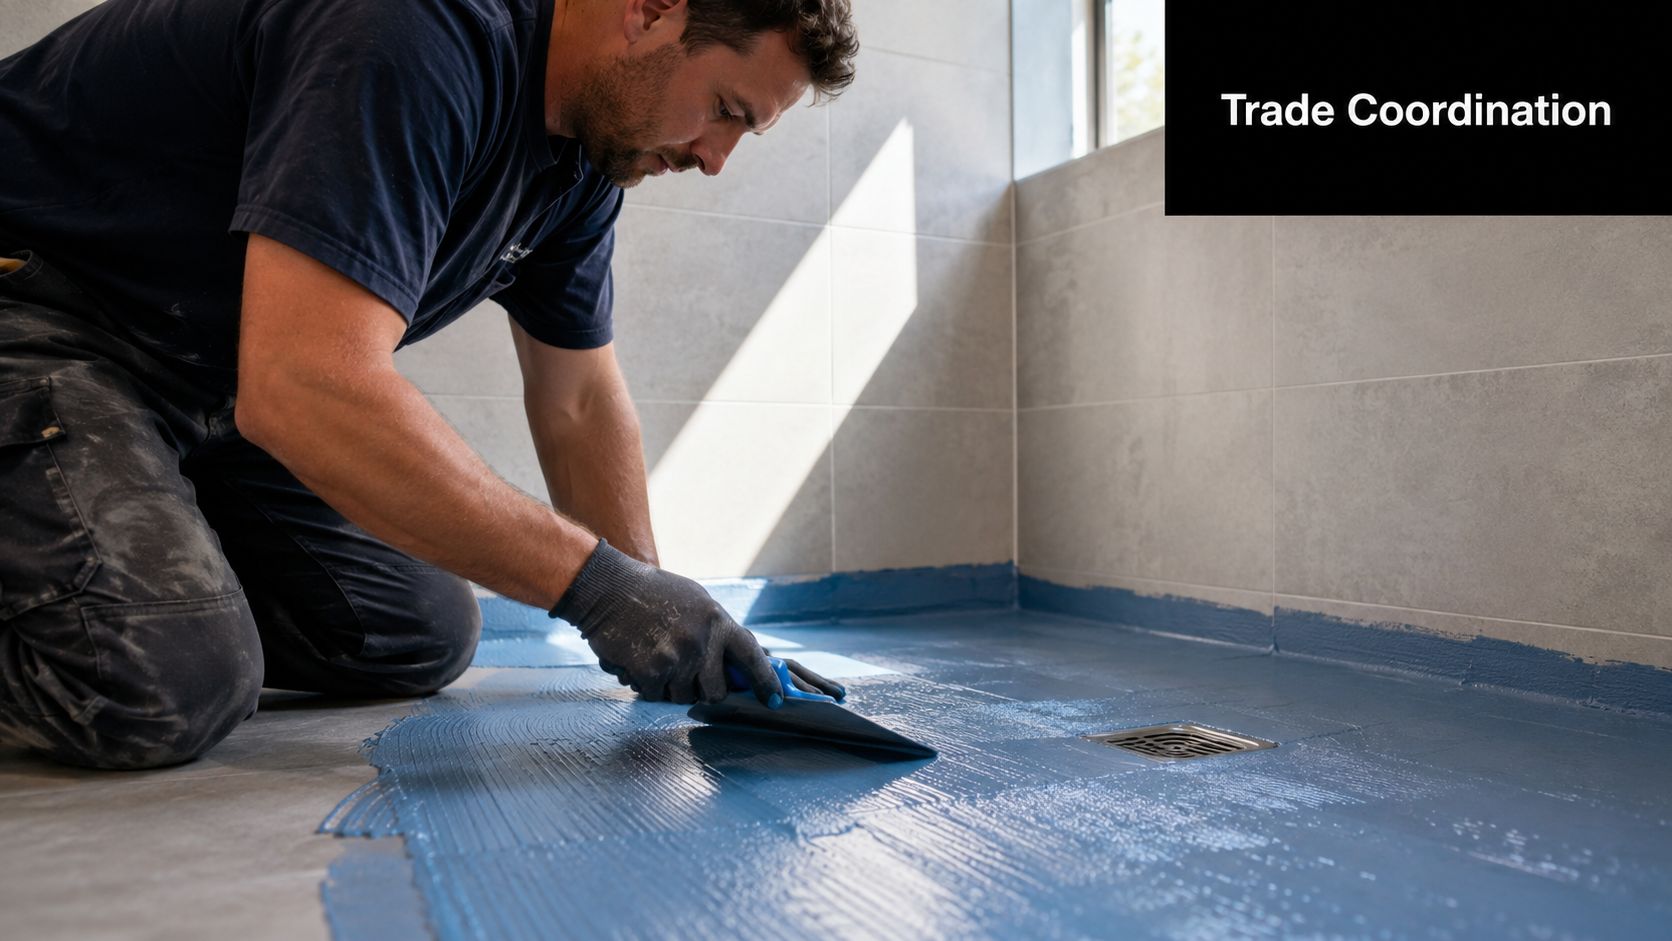
A professional construction worker applying blue waterproof membrane to a bathroom floor using a trowel

Why one person needs to own the sequence

Waterproofing and tiling are separate skills, but they shouldn't be separate accountability lines. A tiler who brings in an unknown waterproofing subcontractor may still produce a good result, but the homeowner needs to know who prepared the substrate, which membrane system was used, who inspected it and who will return if water appears later.

An integrated team can coordinate the practical handovers. Plumbing penetrations need to be finished before the membrane. Screed needs to be stable and ready before waterproofing. The membrane needs to pass its inspection or test before tiles cover it. The shower screen measure must account for the finished tile plane, not an early drawing.

Practical rule: Ask for the renovation sequence in writing. If a quote only lists “waterproof and tile bathroom” without identifying preparation, testing, curing and finishing, it doesn't describe the full risk.

A start-to-finish specialist may coordinate licensed carpenters, plumbers and electricians while keeping waterproofing, screeding, tiling, grouting and screen installation aligned. That matters for warranty discussions because a leak rarely respects trade boundaries. The person responsible for the finished bathroom should be able to explain the work from the first site visit through to handover, including what happens if the substrate isn't suitable.

The Building Code for Your Bathroom

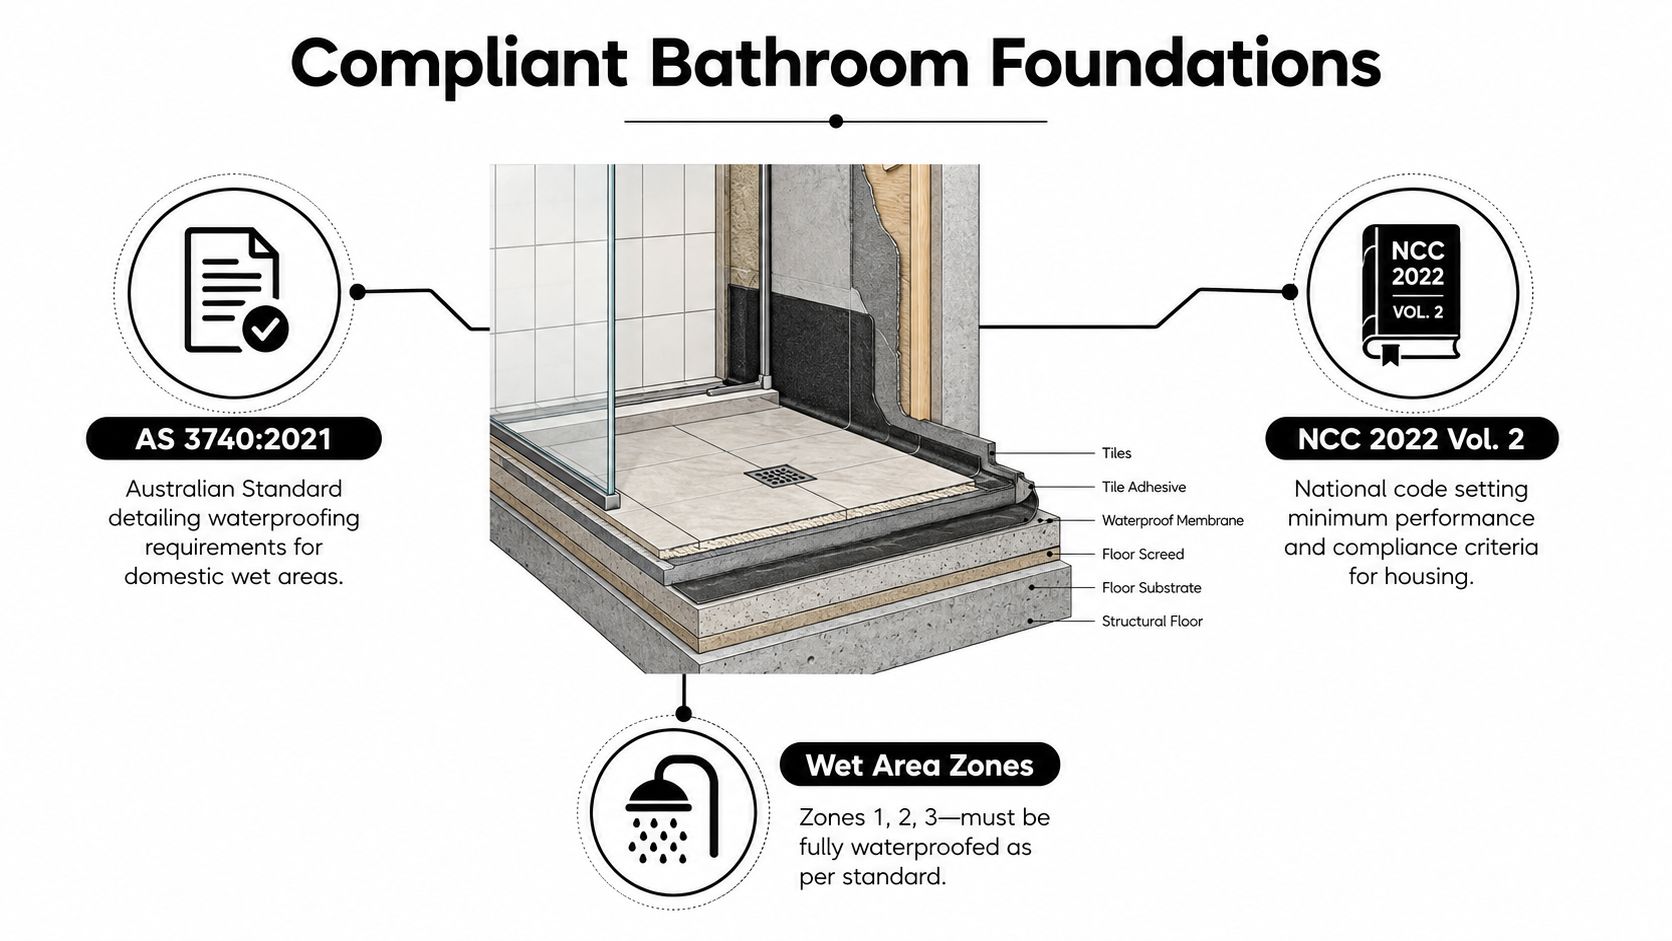
A compliant Melbourne bathroom starts with two documents: AS 3740:2021, the Australian Standard for waterproofing domestic wet areas, and NCC 2022, which adopted it on 1 May 2023. The Housing Industry Association's explanation of AS 3740 outlines minimum requirements for waterproofing materials, design and installation. On site, those requirements become measurable details rather than a checkbox.

The NCC 2022 wet-area provisions require shower floors to be fully waterproofed. Shower walls need protection to at least 1,800 mm above the finished floor level, while walls around baths or laundry tubs require protection to at least 150 mm above the fixture. The NCC also recognises membranes complying with AS/NZS 4858 as acceptable waterproofing materials.

A diagram illustrating compliant bathroom waterproofing layers, including tiles, membrane, screed, and structural floor components.

The measurements affect the build

In an unenclosed shower, Victorian guidance identifies waterproofing extending 1.5 metres from the shower rose connection, with a waterstop at a minimum horizontal distance of 1,500 mm from the shower rose. Where a floor waste is installed, the floor plane must fall continuously to the waste at a minimum of 1:80, as the Victorian Building Authority explains in its waterproofing guidance.

These measurements control the work. The shower radius determines how far the membrane and waterstop extend. The required fall affects screed depth, waste placement, tile set-out and the risk of ponding beside a large-format tile. Expensive tiles cannot correct a substrate that sends water away from the waste.

Before tiling, ask the contractor:

  1. Which parts of the room are classified as wet areas?
  2. Which membrane system is being used, and does it meet the applicable requirements?
  3. How will the floor fall be formed and checked?
  4. How will penetrations, corners, niches and wastes be detailed?
  5. What inspection or testing occurs before the membrane is covered?

Independent guidance on AS 3740 commonly describes a flood test that holds water within the membrane area for at least 24 hours without a drop in level. Treat that test as quality control before tile installation, not paperwork completed after the surface is hidden. A clear explanation of Melbourne waterproofing requirements should match the site method, drawings and product documentation.

How a Bathroom Renovation Actually Unfolds on Site

The order of work controls the result. Start tiling before the substrate, membrane or services are ready, and the project accumulates shortcuts that are difficult to see once the room is finished.

The work before waterproofing

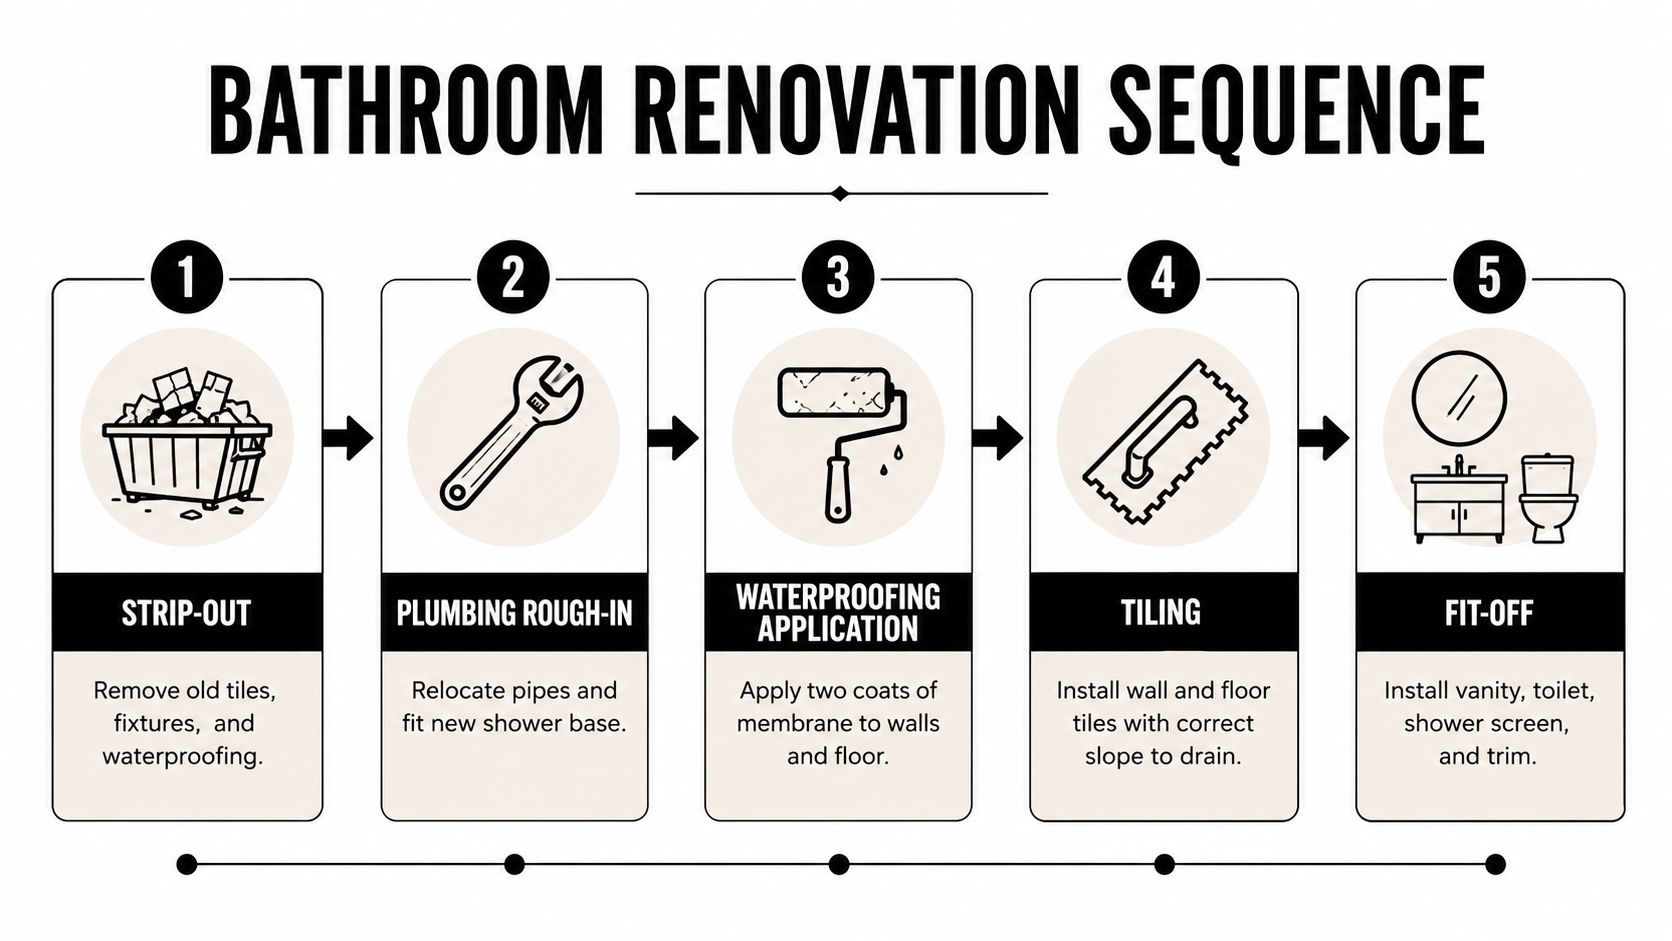
The first stage is strip-out. The team removes the existing tiles, fittings and wall linings, then checks for movement, water damage, damaged studs and unsuitable surfaces. A bathroom that's being altered around a new shower position may need more carpentry than a like-for-like replacement.

Plumbing rough-in follows. New wastes, mixers and outlets are positioned, then the plumber completes the relevant checks before the walls and floor are closed. Electrical first-fix work also needs to happen before waterproofing covers the substrate. The aim is simple, no one should cut into a finished membrane to install a service that was missed.

The screed then creates the drainage plane. It must direct water to the waste while leaving a stable, sufficiently prepared surface for the membrane. Self-levelling compounds can help in suitable areas, but they don't replace correct falls. The substrate needs time to cure and dry according to the materials used.

Membrane, inspection and tile set-out

Once preparation is complete, the applicator primes the surface, reinforces corners and changes of plane, seals penetrations and applies the membrane system in its required coats. The product data sheet matters here. A membrane isn't ready because it feels dry at the surface, and tiles shouldn't be used to hide incomplete detailing.

A second inspection or flood test provides a hold point before the finish goes over the work. If the level drops or water escapes, the cause needs to be addressed while the membrane remains accessible.

A five-step infographic showing the sequence of a bathroom renovation from strip-out to final fit-off.

Large-format porcelain and Kerlite raise the preparation standard. Thin tiles reveal humps, hollows and inconsistent adhesive coverage, so the substrate and set-out need more control than a small-format tile can sometimes disguise.

Site reality: Most delays aren't caused by laying the tile. They happen when demolition reveals movement, services need relocation, screed or membrane needs curing time, or a failed inspection sends the work back a stage.

After approval, the tiler establishes reference lines, checks the drain relationship and fixes the tiles with the correct adhesive and coverage. Grouting comes after the adhesive has set. Flexible silicone belongs at movement joints, internal corners and junctions where rigid grout is likely to crack. The frameless shower screen is measured against the completed tile surfaces, then fitted after the finished levels are known.

What a Melbourne Bathroom Renovation Really Costs in 2026

A single renovation price hides the decisions that control the quote. A shower reseal and limited re-tiling are different from stripping a room to the stud frame, relocating plumbing, rebuilding the floor and installing new fixtures.

Melbourne Tiling Services P/L references a typical median spend around $10,000 for bathroom renovation planning, but that figure should be read as a scope reference rather than a promise. The final price depends on access, demolition, substrate condition, fixture selection, tile format, plumbing changes, electrical work, screen design and the amount of rectification discovered after strip-out.

Cost Driver Impact on Quote Typical Trade-Off
Existing substrate A sound base keeps preparation controlled. Damaged framing or slab work adds labour and materials. Save on demolition only when inspection confirms the base is suitable.
Plumbing layout Keeping fixtures near existing positions usually limits service relocation. Moving a waste or shower can improve the design but increases coordination and floor work.
Tile format Large-format Kerlite and porcelain demand flatter substrates, careful handling and accurate set-out. Fewer grout lines can create a cleaner finish, but preparation becomes less forgiving.
Waterproofing scope Niches, penetrations, unenclosed showers and complex junctions require more detailing. Simplifying the layout can reduce risk without compromising the room's function.
Shower screen Frameless glass, hardware and final measurement add to the finishing package. A simpler screen may reduce cost, while frameless glazing keeps the visual field open.
Design changes Late fixture or tile changes affect ordering, labour and sequencing. Confirming finishes early protects the programme and reduces rework.

A useful quote should identify demolition and skip hire, substrate preparation, screeding, waterproofing, testing, tiling, grouting, silicone, fixtures and screen installation. It should also state exclusions. “Waterproofing included” isn't enough if the quote doesn't say who prepares the substrate or provides the certificate.

Free quotes, 3D drawings and a renovation calculator can help test the scope before signing. Compare line items, not just totals. The cheapest tender often leaves out preparation, testing or coordination, and those omissions tend to reappear as variations once the floor is open.

Choosing a Registered Builder Versus a Tiler-Only Quote

A tiler-only quote can suit a limited job where the substrate is already sound, plumbing and electrical work are complete, and the scope stops at preparation, waterproofing and tiles. It becomes a poor fit when the project involves structural changes, multiple licensed trades, new services, major demolition or a contract for the whole renovation.

The Victorian Building Authority states that only a registered domestic builder can enter into a major domestic building contract with an owner-builder, and that a builder must be registered where the work exceeds the prescribed cost threshold. The VBA owner-builder information guide sets out that registration requirement.

What registration does and doesn't prove

Registration doesn't guarantee perfect workmanship. It does provide a formal regulatory status for the type of work being contracted and gives the homeowner a clearer party to hold responsible for coordination. A registered builder can manage the relationship between the plumber, electrician, carpenter, waterproofing applicator, tiler and screen installer rather than leaving the owner to resolve gaps.

A tiler-only arrangement may cost less on paper because it excludes project management and other trades. That can work when the boundaries are real and documented. It becomes risky when the tiler informally organises plumbing or electrical work without a clear contract, licence checks or defined responsibility for defects.

Use a repeatable vetting process:

  • Check registration: Search the VBA register and confirm the registration matches the work being proposed.
  • Read the contract: The written scope should identify the registered builder, inclusions, exclusions, allowances and variation process.
  • Verify waterproofing records: Ask who applies the membrane, what system is specified and what inspection or certificate is supplied.
  • Confirm insurance: Request evidence of current public liability insurance and clarify any relevant domestic building insurance obligations.
  • Inspect comparable work: Look at finished bathrooms and ask how the contractor handled leaks, failed substrates or changes in scope.

Bathroom renovation specialists should be assessed on evidence, not polished images alone. Ask who owns the job after handover. If every trade points to somebody else when a leak appears, the low initial price wasn't a complete measure of risk.

Leaks, Balconies and Rectification Work

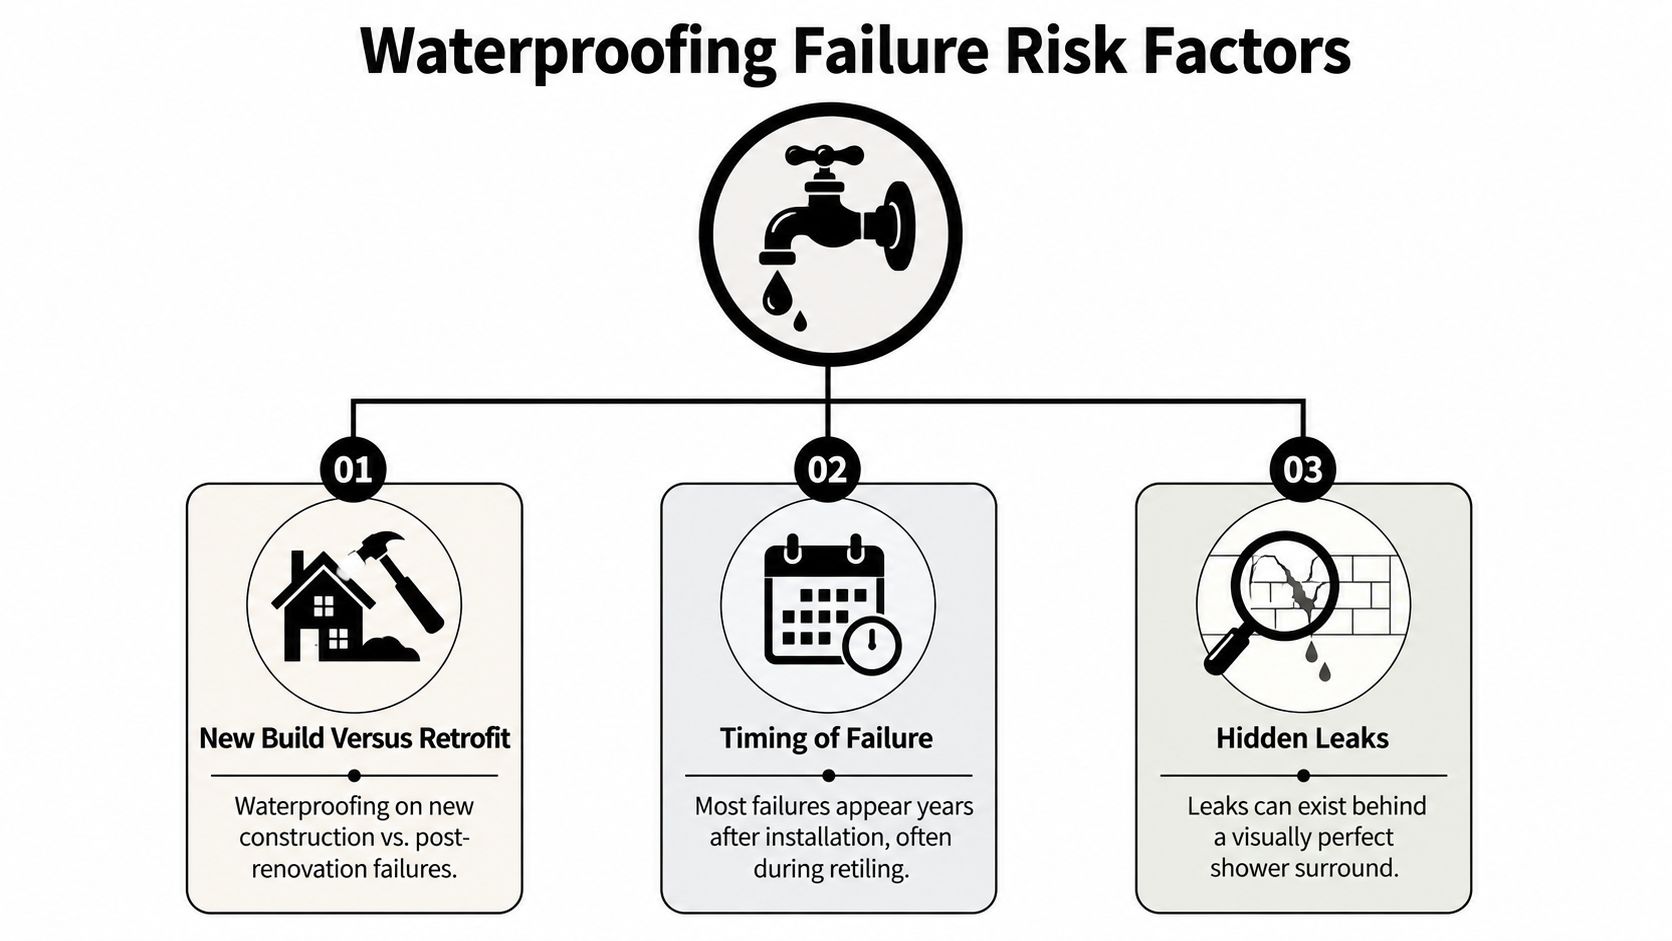
A shower can look clean while water is moving behind it. On a balcony, the first visible sign may appear on the ceiling below, around a balustrade fixing or at a door threshold rather than at the actual membrane breach.

Australian defect research used in NCC discussions reports that waterproofing accounts for 63% of incidences of waterproofing defects in Class 2 and Class 7 buildings, as documented in the ABCB waterproofing cost-benefit analysis. Separate NSW strata defect data identifies waterproofing as a material defect category at 22% of registered buildings in 2022–2024, also discussed in that source. The figures don't diagnose a particular Melbourne property, but they explain why leak rectification needs investigation rather than cosmetic patching.

A diagram outlining three major risk factors for waterproofing failures in home construction and renovations.

Surface repair or full remediation

Re-grouting or replacing silicone may be appropriate where the membrane is sound and the problem is limited to a failed joint. It won't repair a breached membrane, inadequate drainage fall, movement in the substrate or a badly detailed waste. Painting a coating over existing tiles can also trap water rather than solve the path that lets it in.

A proper assessment may include:

  1. Visual inspection of the shower, balcony, thresholds, corners and penetrations.
  2. Moisture readings and inspection of the room or ceiling below.
  3. Drainage and ponding checks.
  4. Localised tile removal where the membrane condition can't be established from the surface.
  5. Substrate and framing inspection after strip-out.
  6. A written scope that identifies the cause, not only the visible damage.

Full rectification commonly means removing tiles and failed layers, checking the substrate, repairing movement or damage, replacing the membrane and screed where necessary, then testing before re-tiling. The correct scope depends on evidence. A balcony with one isolated defective detail shouldn't automatically receive the same treatment as a slab with widespread moisture, but a growing stain shouldn't be covered with fresh paint.

Property managers should record the location, timing and progression of staining, mould, loose tiles or odours, then arrange an assessment. Apartment owners should notify the owners corporation or strata manager before starting work because responsibility can depend on the building structure, plan of subdivision and location of the defect.

Balcony waterproofing services in Melbourne should begin with diagnosis. The useful question isn't “Can you reseal this?” It's “What evidence shows where the water is entering, and what layer needs to be repaired?”

Planning Your Next Steps with Confidence

Start by collecting the information a contractor needs. Measure the room, photograph every wall and floor, note the age of the existing bathroom, record any previous leaks and list the fixtures you want to keep or move. For a balcony, include photos of drainage points, balustrade bases, door thresholds and the ceiling or wall below.

Request a written quote that separates:

  • Demolition and preparation: Strip-out, disposal, framing and substrate repairs.
  • Services: Plumbing and electrical rough-in, testing and fit-off.
  • Waterproofing: Membrane system, wet-area extent, detailing and inspection records.
  • Finishes: Tile supply or installation, grout, silicone, trims and screen work.
  • Design support: 3D drawings, fixture selections and any renovation calculator assumptions.
  • Handover: Certificates, warranties, maintenance notes and the process for reporting defects.

Use 3D drawings to settle tile direction, niche positions, vanity dimensions and screen layout before materials arrive. Ask how long each stage needs to cure, what could trigger a variation and who approves changes. Maintenance still matters after handover. Keep drains clear, inspect grout and silicone, avoid harsh chemical cleaners, and respond quickly to damp patches, mould, bubbling paint or loose tiles.

A practical timeline should account for demolition, trade coordination, substrate preparation, curing, waterproofing, testing, tiling, grout, silicone and screen installation. The exact duration depends on the room and discoveries behind the old finishes, so a contractor who gives a confident completion date without discussing these hold points hasn't allowed for the work.


Melbourne Tiling Services P/L coordinates bathroom renovations, waterproofing, screeding, self-levelling, premium tiling, Kerlite installation, frameless shower screens and shower or balcony leak rectification across Melbourne and greater Victoria. For a measured scope, 3D design support and a quote that separates compliance work from finishes, visit Melbourne Tiling Services P/L and arrange the next site discussion.

Terrazzo Tiles Melbourne: Cost, Installation & Care

I've pulled up to jobs where the owner loved the look of terrazzo, then changed their mind the moment I explained the floor build-up under a bathroom door. The material can be beautiful in a Melbourne home, but only if the finish, sealer, and substrate are chosen like a wet-area system, not a showroom sample.

Table of Contents

Melbourne's Terrazzo Heritage and Modern Revival

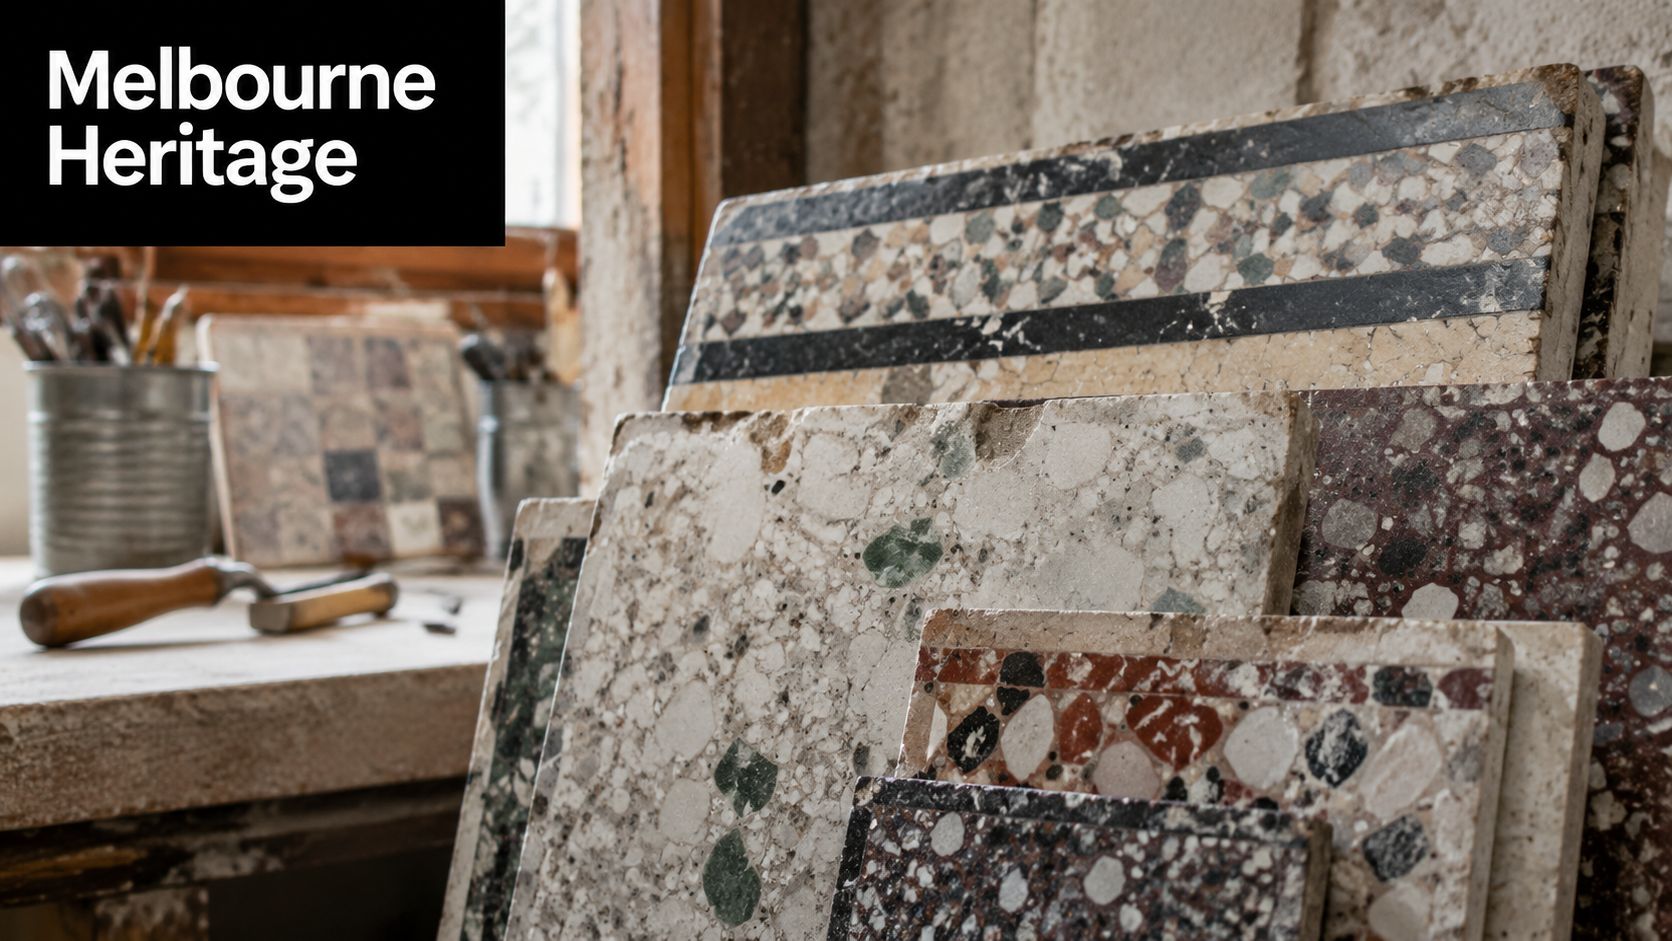
Melbourne didn't just import terrazzo, it helped make it local. Museum Victoria records the De Marco Brothers' Melbourne work from approximately 1914 to 1955, and notes that they introduced terrazzo to Australia while helping popularise it as a bathroom finish in eastern-suburbs homes, which ties the material to real Victorian renovation culture rather than a vague overseas trend Museum Victoria. That matters because terrazzo has already proved it can sit comfortably in Melbourne houses, not just in glossy design magazines.

The older story is even more specific. A Melbourne heritage source documents imported terrazzo tiles in the city by 1884–1885, including examples at St Kilda's Bundalohn house and the Safe House basement, and it notes that imported terrazzo tiles in Australia predated in-situ terrazzo heritage paving record. In other words, terrazzo wasn't recently discovered by Melbourne designers. It was already appearing in built examples in one of the city's oldest residential precincts.

Various samples of decorative terrazzo stone tiles displayed in a workshop setting with tools nearby.

Why Melbourne keeps coming back to it

What drives the modern revival is simple. Homeowners want a bathroom surface that looks intentional, carries some history, and can still be detailed properly in a wet area. Terrazzo gives you that mix, but only if the rest of the system is built with equal care.

The strongest terrazzo jobs in Melbourne are the ones where the heritage look is matched by modern wet-area detailing.

In bathroom renovations, that usually means the surface is only one part of the decision. The work sits underneath, in waterproofing, fall planning, sealers, and the way the finish handles water on a daily basis. That's why terrazzo has stayed relevant here, it suits a city that values period character, but it still needs the practical discipline of a contemporary renovation.

Understanding Terrazzo Types and Finish Options

Terrazzo in Melbourne usually comes down to two system families, cement-based and resin-based. Cement-based tiles and slabs are commonly offered at 15 to 20 mm, while resin-based systems can be supplied as thin as 12 mm in tile form, and heavier-duty concrete terrazzo systems can be much thicker, around 32 to 80 mm Bernini specification PDF. That thickness difference isn't trivia, it affects floor height, door clearances, transition strips, and the amount of load your substrate needs to carry.

Finish choice changes performance

The finish matters just as much as the body of the tile. A polished surface has a different look and different underfoot behaviour to a honed or sandblasted finish, and in a wet area that difference is practical, not cosmetic. Australian terrazzo floors are commonly specified in R9 to R13 slip-resistance classes, with R10 explicitly mapped to wet-area uses such as kitchens, toilets, changing rooms, and laundries, while R11 to R13 suit progressively higher-risk external or traffic areas EUVAL technical specifications.

Here's the decision rule I use on site. If the floor is for a bathroom or ensuite, the finish has to be chosen with water on it, not just a dry sample in a showroom. A more polished surface can lower slip resistance relative to honed or sandblasted finishes, so the pretty option isn't always the best option.

Finish Type Slip Rating Best For Maintenance Level
Polished Lower practical grip in wet areas Feature floors, low-splash spaces Higher
Honed Often preferred where wet-area performance matters Bathrooms, ensuites, laundries Moderate
Sandblasted Stronger grip feel Higher-risk wet areas, external transitions Moderate to higher

A lot of people start by asking which terrazzo looks best. The better question is which finish works with the bathroom's exposure, cleaning routine, and safety requirement. That framing saves mistakes later, especially when the same floor has to look refined and still behave properly when it's wet.

See one example of a terrazzo bathroom tile range

Weighing the Advantages and Practical Limitations

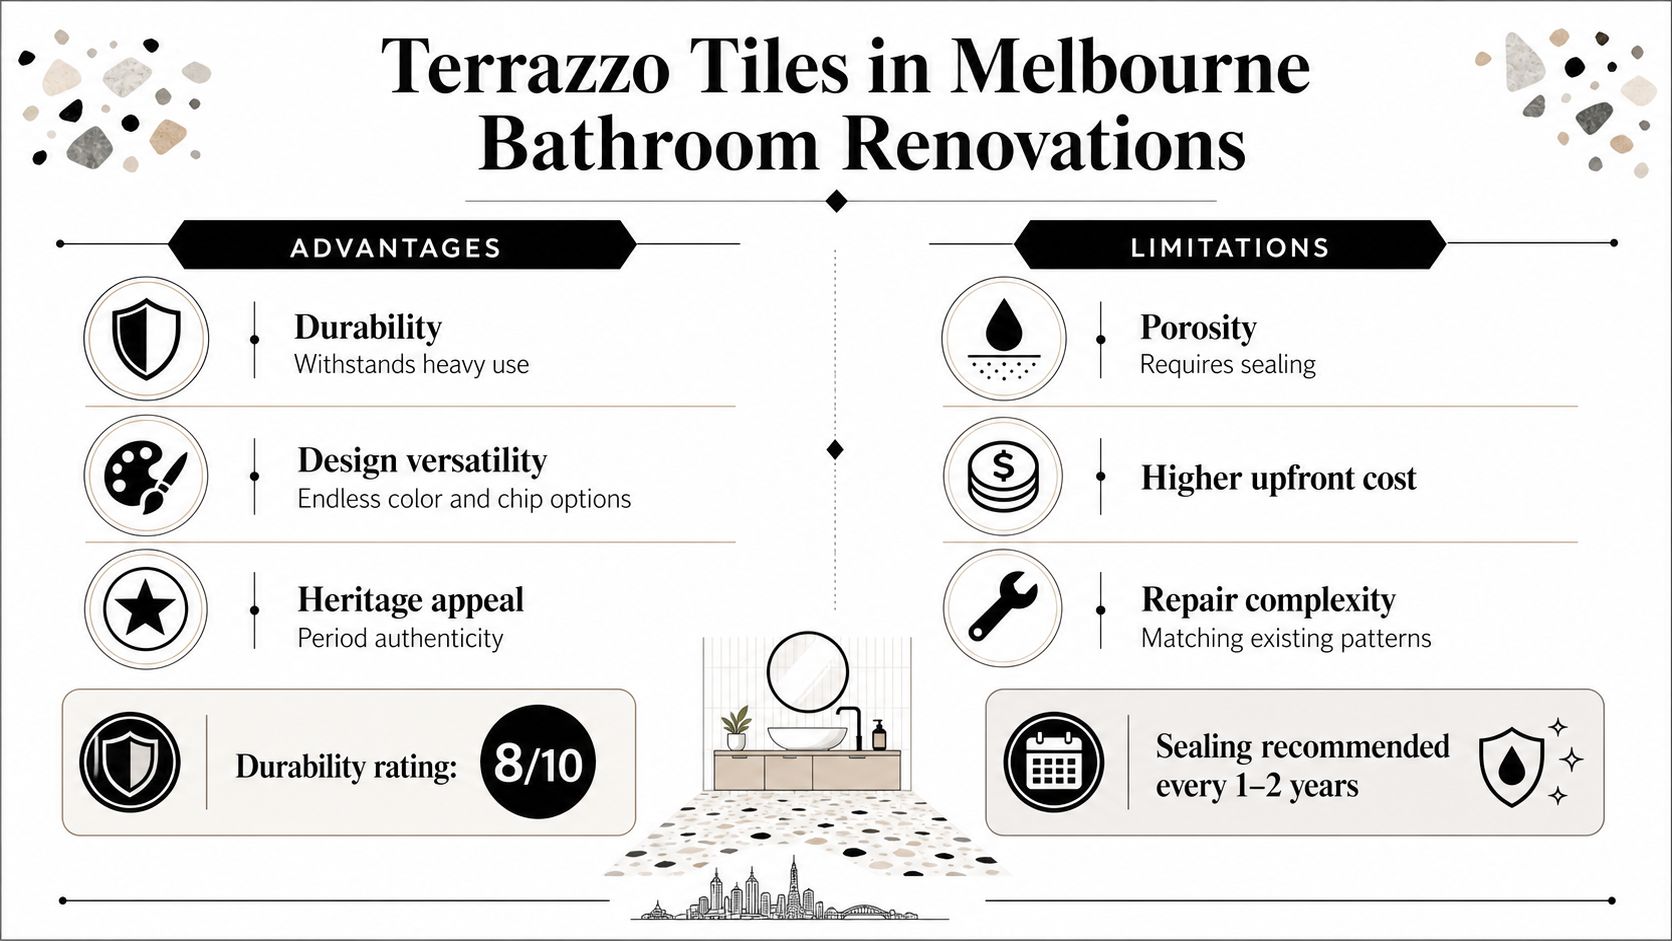
Terrazzo earns its place in Melbourne bathrooms because it does three things well. It brings durability, strong design versatility, and clear heritage appeal into one surface, which is why it keeps showing up in renovations where the owner wants something more distinctive than standard ceramic. In the right home, it can look period-correct in a Victorian terrace, cleaner and more architectural in a modern ensuite, or somewhere in between.

An infographic titled Terrazzo Tiles in Melbourne Bathroom Renovations detailing advantages like durability and limitations like porosity.

The part many guides leave out

The trade-off is maintenance and wet-area behaviour. Terrazzo is porous enough to need regular sealing, and polished finishes can be more slippery when wet, which is why the finish choice needs to be treated as part of safety planning. Weight also matters on upper floors, especially when the tile profile is thicker or the substrate already has limited capacity for build-up.

Practical rule: if the bathroom sees daily showers, choose the finish and sealer for traction and cleaning first, then worry about the gloss level.

Bathroom floors in Australia also need to satisfy wet-area waterproofing requirements under the National Construction Code and AS 3740, so the question isn't whether terrazzo is stylish. It's which finish, grout detail, and sealer system will be safest and easiest to maintain in a Melbourne bathroom. That's where terrazzo either becomes a smart renovation choice or a costly mistake.

The upside is that once the system is right, terrazzo can age gracefully. The downside is that it won't forgive lazy detailing, especially around showers, vanity edges, and changes in level. If you want the look without the upkeep, porcelain that mimics terrazzo will often suit better. If you want authentic terrazzo, accept the maintenance commitment and build it properly from day one.

Budgeting for Terrazzo Installation in Melbourne

A terrazzo quote usually looks tidy until the wet-area work is priced properly. The tile itself is only one part of the bill. Thickness, format, cutting, labour, substrate correction, waterproofing, adhesives, grout, sealing, and edge detailing all change the final number, and terrazzo tends to expose any shortcuts in those items faster than simpler finishes.

In Victoria, the contract side matters as much as the tile choice. A person must not carry out domestic building work valued over A$10,000 unless it is covered by a major domestic building contract, and the Victorian Building Authority says this applies to most renovation jobs above that amount, including bathroom renovations when they exceed the limit Victorian Building Authority information via renovation contract guidance. That affects how the job is set up, who coordinates it, and what consumer protections sit behind the work.

What that means in practice

If an ensuite passes that threshold once waterproofing and the full tiling scope are included, the contract needs to be treated as part of the renovation, not as an afterthought. The same applies to larger family bathrooms where tiling, plumbing coordination, and waterproofing are linked from the start.

Once the total work value crosses the contract threshold, do not treat the bathroom as a loose collection of trades. Treat it as a regulated domestic building project.

A registered builder matters because builder registration is the legal mechanism that lets the right person contract for and coordinate regulated domestic building work within the scope of that registration Victorian Building Authority builder registration guidance. Terrazzo jobs bring that issue into focus quickly, since the surface choice is usually tied to waterproofing, floor height, and plumbing coordination.

For homeowners, the cleanest way to budget is in layers. Price the tile and installation first. Then add substrate correction. Then waterproofing. Then sealing and finishing details. If the total creeps past the threshold, contract form and builder registration become part of the budget, not just the admin.

Installation Requirements and Substrate Preparation

Terrazzo fails fast when the base is wrong. The tile might look forgiving on a sample board, but once it's on a bathroom floor, every hump, dip, and awkward transition shows up under light and underfoot. That's why substrate prep matters more with terrazzo than with many cheaper finishes.

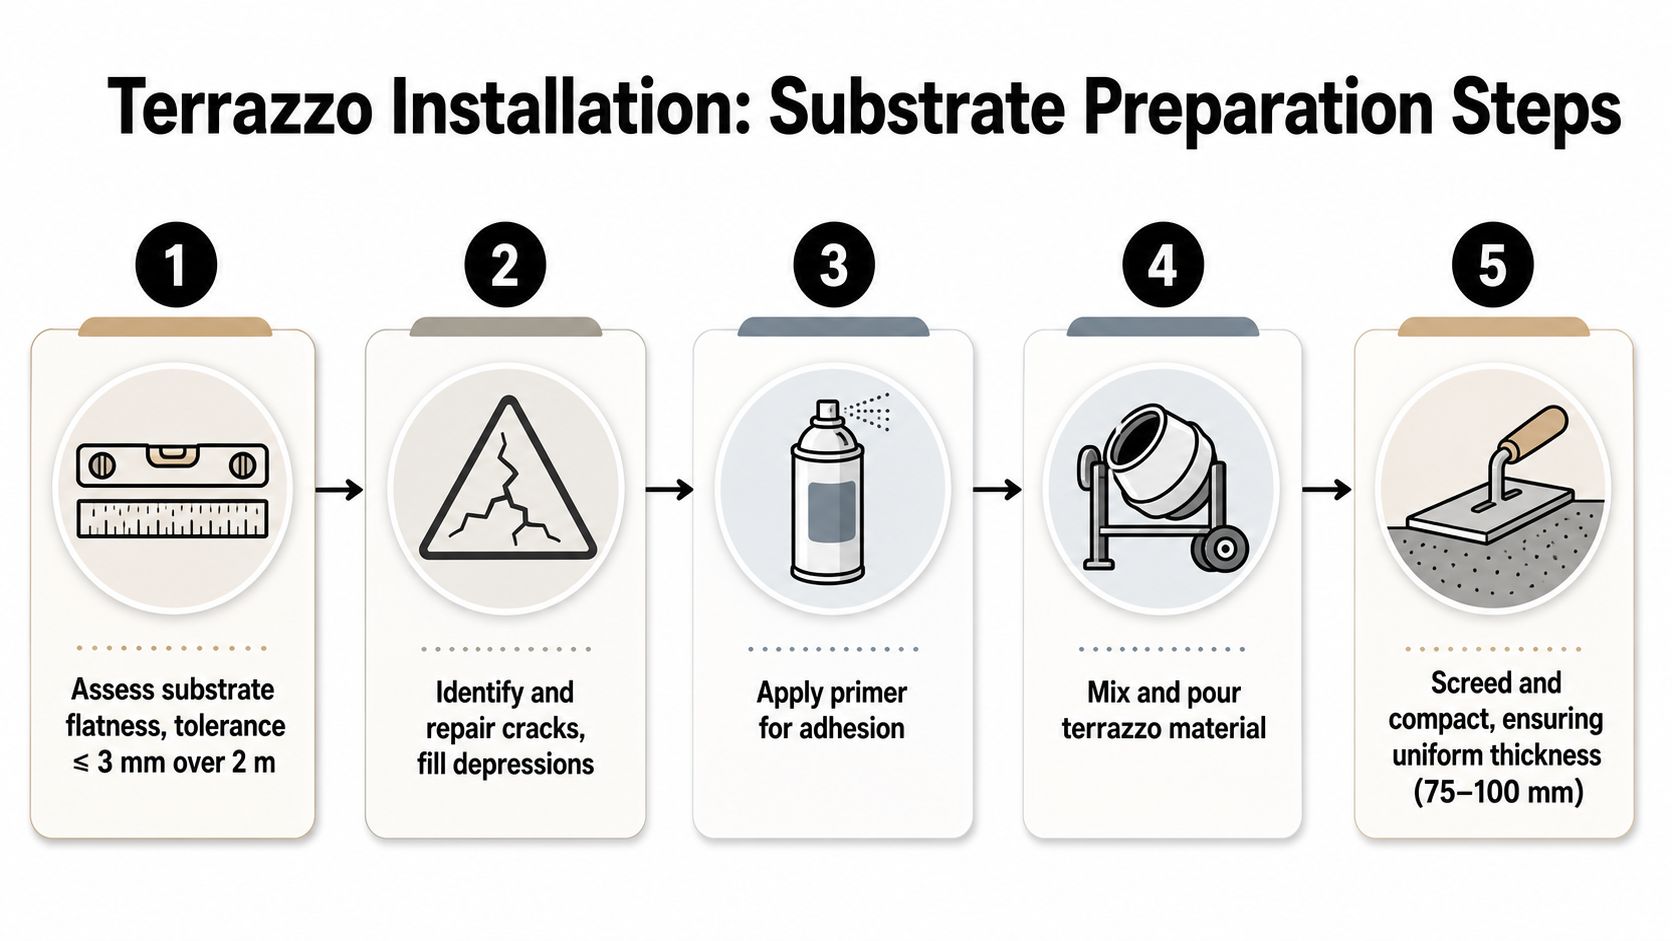
A step-by-step infographic illustrating the professional process for preparing a substrate before installing terrazzo flooring.

Start with flatness and load

The first check is simple. Assess the substrate, repair cracks, and decide whether the floor needs levelling before any tile goes down. Large-format terrazzo is less forgiving of poor tolerances, and the thickness of the tile system affects door clearances, drainage points, and junctions to hallways or adjacent bedrooms.

For wet areas, waterproofing has to be integrated into the build, not patched in later. In Melbourne bathroom renovations, that means the membrane system and its application need to suit the room layout, shower set-out, and substrate condition, with the finished floor still allowing correct falls and clean transitions. If the floor needs levelling, that work has to sit inside the overall system, not compete with it.

The thickness-to-load trade-off matters here too. Thin resin tiles are easier to manage on height, while thicker concrete terrazzo profiles create a heavier build-up. That can be a real issue in older homes where the floor levels already fight every extra millimetre.

The practical sequence is usually:

  1. Check the slab or timber substrate for movement and defects.
  2. Correct the base so the finished floor won't telegraph high spots.
  3. Coordinate waterproofing with the tile set-out.
  4. Confirm adhesives and setting materials suit the tile type.
  5. Allow for lippage control, especially with large-format pieces.

Read more about screed in tiling

Skimp on substrate work, and terrazzo will remind you of it every day.

That's why self-levelling compounds, screeding, and careful waterproofing coordination are not optional extras. They're the difference between a floor that looks crisp and one that shows every mistake at the first clean.

Long-Term Maintenance and Sealing Strategies

Terrazzo looks best when it's treated like a maintained surface, not a set-and-forget one. In bathroom conditions, the sealer is the line between a handsome floor and one that stains, dulls, or starts to hold moisture where it shouldn't. The finish chosen at installation also affects the cleaning burden later, especially if the surface is polished rather than honed.

Keep the routine simple

A pH-neutral cleaner is the safest daily or weekly option for normal care, because acidic products can attack both the sealer and the stone elements in the mix. If water stops beading on the surface, or the floor starts to look hungry and harder to clean, it's time to inspect the seal rather than push through with harsher products. High-moisture bathrooms tend to show wear sooner than dry circulation areas.

Sealing frequency depends on the system and finish. Polished terrazzo generally needs resealing more often than honed surfaces, and the infographic guidance used on this page places polished terrazzo at every 1 to 2 years and honed finish at every 2 to 3 years. That's a sensible maintenance rhythm for wet-area use, especially when showers are used daily.

If a stain does get through, don't scrub aggressively first. Identify the source, remove surface residue gently, and let the sealer be tested before assuming the floor has failed. In many cases, the problem is a worn patch or a neglected grout line, not the terrazzo itself.

See sealing guidance for stone tiles

The lesson is that long-term performance starts at the finish decision. A lower-grip, higher-gloss surface may look dramatic on day one, but it often asks for more care later. A more modest honed surface can be easier to live with in a Melbourne bathroom, and that usually matters more after the first month than the first photograph.

Choosing Qualified Suppliers and Registered Builders

I've seen strong terrazzo work start with a supplier who understands wet areas and finish differences, then fall apart because the wrong crew handled the bathroom. A good supplier should talk plainly about slip ratings, sealing, grout choice, finish options, and whether the tile belongs in a shower zone or only in a drier part of the room. If the conversation stays on colour and pattern, and skips the practical side, that's a warning sign.

What to check before you buy

Start with the sample itself, then ask for technical details that matter on site. You want clear answers on availability, the finish recommended for bathrooms, how the tile performs in wet areas, and whether the product suits the floor build-up your renovation can allow. In a Melbourne bathroom, thickness, surface finish, and substrate height all affect the final result, so the supplier should be able to discuss those limits without hesitation.

The contractor side matters just as much. In Victoria, a registered builder is the legal route for coordinating regulated domestic building work within the scope of that registration, which becomes important when bathroom renovations involve waterproofing, plumbing coordination, or structural changes Victorian Building Authority registration guidance. If the job value goes over A$10,000, the major domestic building contract requirement also comes into play VBA contract threshold guidance.

Ask these questions before you sign anything:

  • Registration status: Are you registered for the type of domestic building work this bathroom needs?
  • Wet-area experience: How many terrazzo bathrooms have you coordinated, not just tiled?
  • Subcontractor control: Who handles waterproofing, plumbing adjustments, and any floor levelling?
  • Previous work: Can you show similar Melbourne bathrooms with terrazzo finishes?
  • Maintenance advice: What sealer and care routine do you recommend after handover?

If the builder can't explain waterproofing, substrate prep, and finish selection in plain language, keep looking.

That point matters because terrazzo leaves little room for shortcuts. The right supplier helps you choose a suitable tile, but the right registered builder makes sure the whole wet-area system works together, from the slab or screed through to the final seal. For homeowners planning bathroom renovations, that combination is what turns terrazzo from a nice idea into a durable result.

If you're planning terrazzo tiles Melbourne wide, bring the wet-area details into the conversation early and don't leave them until the last site visit. Melbourne Tiling Services P/L handles bathroom renovations, waterproofing, screeding, and terrazzo-style tile installation with the practical coordination these jobs need, so visit Melbourne Tiling Services P/L to discuss your bathroom, ensuite, or renovation scope.

What Is Tile Adhesive: A Complete Guide

Tile adhesive is a factory-blended, polymer-modified bonding layer engineered to secure tiles mechanically and chemically, and C2 products are built for tougher jobs than basic C1 products. The wrong adhesive is one of the fastest ways to turn a bathroom renovation or balcony job into cracked grout, hollow spots, or debonding.

Many people still call it “glue”, but that framing is too simple for Melbourne conditions. In real tiling work, the adhesive has to suit the tile, the substrate, the moisture load, and the amount of movement the surface will see.

Table of Contents

Tile Adhesive Is Not Just Glue

The biggest mistake homeowners make is treating tile adhesive like a commodity. It's not just glue, it's a performance layer that has to bond, hold, and sometimes flex while the structure beneath it moves, dries, or heats up.

A construction worker spreading thin-set mortar on a floor using a notched trowel to prepare for tiling.

In Australian bathrooms, that distinction matters because the tiled surface sits inside a wet-area system, not a dry decorative finish. Adhesive choice has to work with waterproofing, substrate preparation, and the tile format, which is why the wrong product can fail even when the install looks neat on day one. Tile adhesive usage is tied closely to renovation and high-performance tiling applications, especially where moisture resistance and flexibility matter.

What the bond actually does

Tile adhesive creates two kinds of hold. It forms mechanical interlock with the substrate and tile back, and it also cures into a bonded layer that resists lifting, sliding, and separation. That's why surface condition, trowel coverage, and curing matter as much as the label on the bag.

Practical rule: If the substrate is moving, dusty, slick, or poorly prepared, a premium adhesive still won't save the job.

That's the reason professionals treat adhesive as one part of a system. Screeding, leveling, waterproofing, tile type, and adhesive classification all affect the final outcome. If you're planning bathroom renovations, the adhesive choice should sit alongside the surface prep work, not after it. Screeding is often the step that makes the adhesive perform properly.

Why this matters more in Melbourne renovations

Melbourne homes throw up real-world complications. Older slabs can be uneven, balconies can move, and renovated bathrooms often combine new board substrates with waterproofed wet zones. A generic product might hold a kitchen splashback, but that same product can struggle in a shower recess or on a balcony where temperature swings and moisture exposure are part of daily life.

That's why the better question isn't “what is tile adhesive?” in the simple sense. It's “what engineering job does this adhesive need to do on this specific surface?” Once you ask that, the product category starts to make sense fast.

The Main Types of Tile Adhesive Explained

Tile adhesive comes in a few practical families, and each one behaves differently once it hits the wall or floor. The type you choose affects how you mix it, how fast you can work, and how forgiving the job will be.

Cement-based powder adhesives

This is the professional default for most tiled floors and walls. It's mixed on site with water, which gives the tiler control over consistency and working time, and it's the most common choice for everyday installations because it balances cost and performance well. Market data also shows cementitious adhesives leading with 36.6% of the market in 2024 in one global market view, which lines up with their broad use in routine wall and floor work (Grand View Research).

Powder adhesives are also the right starting point when the job involves porcelain, larger formats, or wet-area work. For bathroom renovations, that flexibility matters because the adhesive often has to bridge different substrates and hold up under moisture.

Epoxy adhesives

Epoxy is the tougher, more specialised option. It's used when chemical resistance, stain resistance, or heavy-duty wet-area performance is required, and it's less about convenience than resilience. Most homeowners won't need epoxy everywhere, but in demanding commercial zones or very exposed conditions, it earns its place.

Acrylic-modified adhesives

Acrylic-modified products are chosen for added flexibility and improved bond behaviour. They can help where the surface isn't perfectly forgiving, but they still need to match the tile and substrate properly. A flexible product doesn't excuse poor prep.

Ready-mix tub products

Ready-mix products are the ones many homeowners recognise first because they're easy to open and apply. They can suit small, dry-area wall tiles, but they're not interchangeable with powder products in wet zones, large-format installs, or floors that need stronger performance. That's where a lot of DIY confusion starts.

The simplest way to sort them is this, powder products cover most serious renovation work, epoxy handles demanding environments, acrylic-modified products add flexibility, and premixed tubs are limited in scope.

For larger projects, especially those involving wall-to-floor continuity, the adhesive type has to line up with the tile weight and the substrate. That's why many tilers look at large-format tiles and the adhesive together, not separately.

Understanding Performance Classifications and Technical Criteria

The codes on a technical sheet only look abstract until you map them to the job in front of you. On site, they tell you whether an adhesive can handle a waterproof bathroom, a balcony with movement, or a feature wall carrying heavier tiles. That is the actual value, because tile adhesive works as an engineered performance system, not generic glue.

What the codes mean in practice

A C1 adhesive meets the standard bond-strength baseline. A C2 adhesive is the improved class, and it gives more confidence on porcelain, large-format tiles, and moisture-exposed surfaces. Technical guidance also ties these classes to minimum tensile adhesion values, which is one reason installers usually move to C2 for tougher residential work, especially where the substrate has been waterproofed or the tile is carrying more weight (Wacker).

Classification Meaning Typical Use Case
C1 Standard bond strength General interior tiling where conditions are stable
C2 Improved bond strength Porcelain, large-format tiles, wet areas, moisture-exposed substrates
T Reduced slip Vertical wall work where sag control matters
E Extended open time Jobs that need a wider window for placement and adjustment

For homeowners planning a renovation, those letters matter because they tell you where a product is built to perform and where it is likely to struggle. If the tile is dense, the room is wet, or the installation includes a substrate that has already been waterproofed, the extra margin from a C2 adhesive is usually worth having.

Why S1 and S2 matter

The S1 and S2 classes describe deformability, which is the adhesive's ability to cope with small movement without losing the bond. S1 is the flexible class most DIYers hear about, and it sits in the moderate deformability range in the technical standard. That matters when a substrate moves slightly, because a rigid adhesive can crack or let the tile lose contact. The same technical guidance also frames S2 as highly deformable, which pushes it into more specialist territory for jobs where movement is more likely.

Practical rule: Flexibility helps with movement, but it does not fix a bad floor, bad screed, or poor waterproofing.

In Melbourne bathrooms, I treat deformability as insurance against minor movement, not a shortcut around preparation. If the substrate is unstable, the adhesive is only one part of the system, and it cannot carry the whole problem.

Open time and adjustment time

Workability matters just as much as strength. One AU-relevant technical sheet for large-format tile adhesive specifies more than 30 minutes open time, about 45 minutes adjustment time, and 24-hour foot-traffic readiness. Those figures matter because large tiles are unforgiving once they are bedded in, and installers need enough time to correct alignment without the adhesive skinning over too early (Mapei technical data sheet_10c709f9b9a64d3bb0605fbf4612ba43.pdf?sfvrsn=f8939151_0)).

That is especially relevant on bathroom floors, where you are juggling falls, drains, and waterproofing details at the same time. A product with the wrong working time can turn a careful layout into a rushed fix, and rushing is where tile lines start drifting.

Slip resistance on walls

The T classification is there for vertical work. It reduces the risk of tiles sliding before the adhesive grabs, which is especially useful with heavier wall tiles and larger formats. In practice, that is a quiet detail that keeps a bathroom wall line straight and saves a lot of re-setting later.

If you are comparing products across tile types, it helps to cross-check the adhesive class with the tile material itself. A good place to start is a practical overview of tile materials for bathroom and renovation work, then match the adhesive to the demands of the tile, the substrate, and the room.

Matching Adhesive to Tile Material and Installation Environment

Tile adhesive has to be matched to the tile, the substrate, and the room conditions. A product that behaves well on a small ceramic splashback can be the wrong call for porcelain, natural stone, or a balcony that moves with Melbourne's weather.

Tile material changes the adhesive choice

Ceramic tiles are usually more forgiving than dense porcelain, so many standard wall jobs feel straightforward. Porcelain is denser and often needs higher bond performance, which is why C2 products are usually the safer choice. Natural stone adds another layer of care because staining, colour bleed, and movement sensitivity can affect the result, so the adhesive and grout system both need to suit the stone.

Large-format tiles, including thinner slab-style products such as Kerlite, call for a different approach. The adhesive needs enough working time to stay open, enough body to resist slumping, and enough coverage under more of the tile back. If the bed is uneven, the result can be lipping, hollow sounds, or bond failure later.

Wet areas, balconies, and heated floors

Bathrooms and ensuites are wet areas first and decorative spaces second. Adhesive selection has to work with waterproofed substrates and handle the regular moisture load around showers, vanities, and floor waste transitions. The same applies to balconies, where external exposure and movement put more pressure on flexibility and bond strength.

Situation What to prioritise What usually fails
Shower or ensuite Moisture resistance, coverage, compatibility with waterproofing Cheap premix products in wet zones
Balcony Flexibility, external durability, movement tolerance Rigid adhesive on a moving substrate
Large-format floor tile Extended open time, high bond strength, good bed support Fast skinning and poor coverage
Stone feature wall Material compatibility and careful product selection Generic adhesive chosen only for price

For a practical overview of tile materials for bathroom and renovation work, the key point is simple, the tile, the substrate, and the room need to be matched before the adhesive is chosen.

That trade-off is clearer on the jobs that fail first. Exterior areas and heavier internal installs place more demand on the bond, which is why adhesive specification matters more as the installation gets more exposed or more demanding.

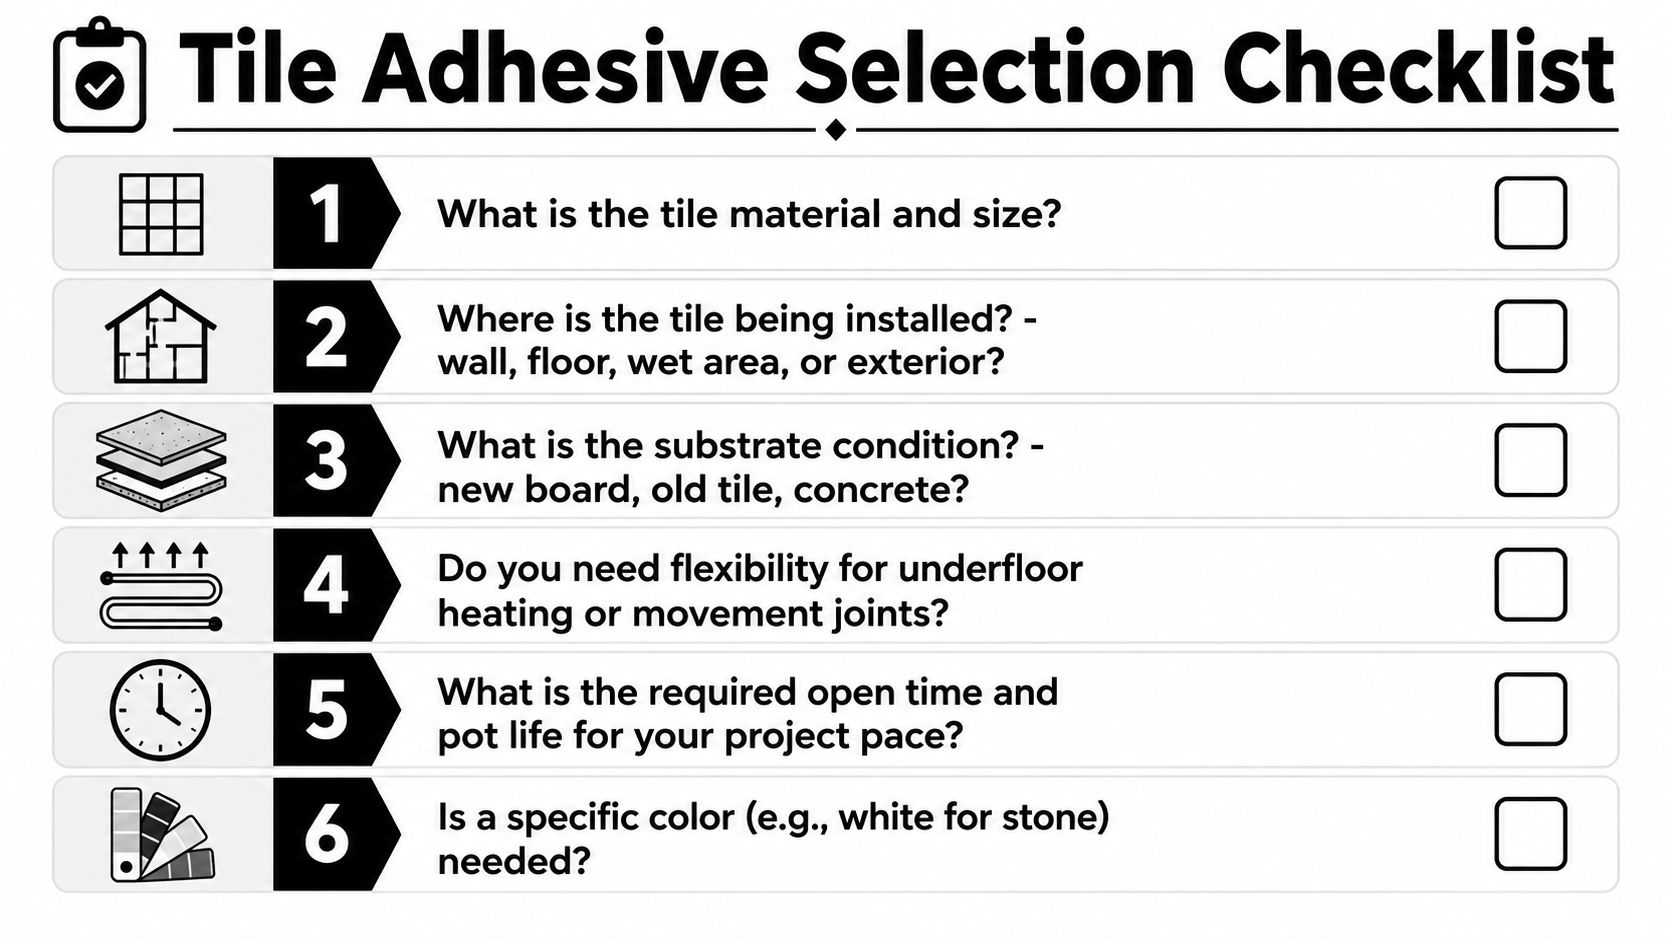
Your Tile Adhesive Selection Checklist

A good quote should tell you more than a price and a tile brand. It should show that the installer has matched the adhesive to the material, substrate, and room conditions.

A checklist infographic titled Tile Adhesive Selection Checklist, featuring six numbered steps for choosing the right adhesive.

What to ask before you sign off

  • What tile size and material are being used? Dense porcelain, ceramic, natural stone, and large-format panels don't behave the same way.
  • Where is the tile going? Wall, floor, shower, balcony, and exterior areas each put different demands on the adhesive.
  • What is the substrate? Concrete, fibre-cement board, waterproofed wall systems, and old tile overlays all need different preparation.
  • Does the project need flexibility? Movement joints, underfloor heating, and balcony conditions can change the adhesive class you need.
  • What open time does the job require? Large-format tiling often needs a more forgiving product so the bed doesn't skin over too fast.
  • Is colour important? White adhesive is often chosen where light stone or translucent finishes are involved.

Red flags in a quote

If a quote says “tile adhesive included” with no further detail, ask for the actual product class. If a premixed product is being used in a wet area, that's another question mark unless the installer can justify it for a very specific application. If waterproofing compatibility isn't mentioned at all, the system hasn't been thought through properly.

Ask for the adhesive class, not just the brand name. The class tells you more about suitability than the marketing label does.

A clear quote should also show whether the installer has allowed for substrate work before the tiles go down. In bathroom renovations, the adhesive is only as good as the surface underneath it.

When Professional Installation and Registered Builders Matter

A good adhesive can still fail in the hands of a rushed installer. Wet-area tiling is a system job, and the system includes waterproofing, screeding, service coordination, tile setting, and cure time.

Why the installer matters as much as the product

Professional tilers don't just spread adhesive and walk away. They check substrate flatness, set trowel size, manage coverage, and choose a product that suits the tile and room. In showers and balconies, that judgement matters because moisture, movement, and transitions are where defects show up first.

Bathroom renovations also bring multiple trades into the same space. Plumbers, electricians, carpenters, waterproofers, and tilers all affect the final result, so the schedule and sequence have to line up. If one trade cuts corners, the adhesive often gets blamed for a problem that started elsewhere.

Registered builders and coordination

In Victoria, registered unlimited builders play a useful role in that coordination because they can manage the whole renovation sequence rather than treating each trade as an isolated task. That matters in bathrooms where waterproofing must be completed before tiling, and where screeding or self-levelling can determine whether the adhesive bed performs the way it should.

The technical side also matters on specialist jobs. Large-format Kerlite and similar systems need careful handling, even bed coverage, and the right adhesive class for the substrate and tile weight. A builder or tiler who has seen enough failure points will ask different questions before the first bag is mixed.

For some homeowners, a full-service tiling and renovation outfit such as Melbourne Tiling Services P/L is one practical option because it coordinates tiling, waterproofing, screeding, and bathroom renovation work under one roof. That kind of setup can reduce handover errors when the job involves wet areas or complex floor preparation.

Melbourne Considerations for Tile Adhesive and Tiling Projects

Melbourne jobs tend to expose weak products and weak prep quickly. Temperature swings affect exterior work, older homes can hide uneven substrates, and apartment balconies add movement and waterproofing pressure that basic products don't always handle well.

Bathroom renovations in older Melbourne homes often need more surface correction than new builds. That's where screeding, levelling, and the right adhesive class come together, because a poor base will show through as soon as the tiles go down. For balcony remediation, the product choice also has to account for external exposure and structural movement, not just appearance.

The local market is also shifting toward premium formats, especially large-format porcelain and Kerlite-style panels. That pushes adhesive selection away from the “cheap bag of glue” mindset and toward a more technical approach, because the tile format can dictate the open time, slip resistance, and deformability required.

Melbourne homeowners planning a renovation should expect a tiler to ask practical questions before quoting. What's the substrate, what's the waterproofing state, what tile size is being installed, and is the area wet or exposed? Those answers drive the adhesive choice, and the adhesive choice drives the durability of the result.


If you're planning bathroom renovations in Melbourne and want the adhesive, waterproofing, screeding, and tile selection handled as one system, visit Melbourne Tiling Services P/L to request a quote and discuss the right setup for your bathroom, balcony, or large-format tiling project.

Exhaust Fan Installation Guide for Bathroom Renovations

Getting the exhaust fan installation right is non-negotiable in a bathroom reno. It keeps moisture in check, saves your finishes from damage, and keeps the building inspectors happy. In plenty of Melbourne homes, a cheap, undersized fan is exactly why grout and paint start failing within twelve months. In major bathroom renovations, this task is best left to registered builders who can coordinate all the necessary trades.

Table of Contents

Why Exhaust Fan Installation Matters in a Bathroom Renovation

We saw this firsthand with a newly tiled ensuite not long ago. The builder had stuck an undersized fan in there, ducting it straight into the roof cavity. The waterproofing membrane ended up holding condensation it was never designed to handle. Mould set in, and the tiles started delaminating within months.

Moisture acts differently in modern, tightly sealed bathrooms. All that warm, humid air rises and hits the cooler ceiling linings and joists, where it condenses. You have to size your ventilation to the actual room volume and the number of air changes you need per hour. For significant bathroom renovations, only registered builders have the expertise to manage the entire process, from structural changes to coordinating electricians and waterproofers, ensuring a compliant and long-lasting result.

Why You Should Treat the Fan as Essential Work

  • Stops tile adhesives and grout from breaking down due to constant condensation
  • Prevents paint from bubbling and plasterboard from staining
  • Keeps mould at bay, which can void warranties and throw insurance claims into chaos
  • Guarantees compliance with the National Construction Code and AS 1668.2 ventilation standards

For registered builders, the fan sits on the same checklist as the waterproofing sign-off. Getting the electrician, plumber, and tiler coordinated at the rough-in stage saves a massive headache. It drastically cuts the risk of someone drilling through a cured membrane or putting the isolator switch in the wrong spot.

Always specify a bathroom fan that fits the renovation sequence, ensuring your waterproofing, tiling, and ceiling linings stay fully protected.

Real-world scenarios to consider:

  • Working with a tight ensuite? Go for a higher L/s capacity fan with a humidity sensor to stop chronic condensation before it starts.
  • Got a short duct run? A quiet, high-capacity ceiling fan will always outperform a low-power unit fighting a long flex run.

For a deeper dive into airflow standards, check out our guide on Bathroom Ventilation Requirements.

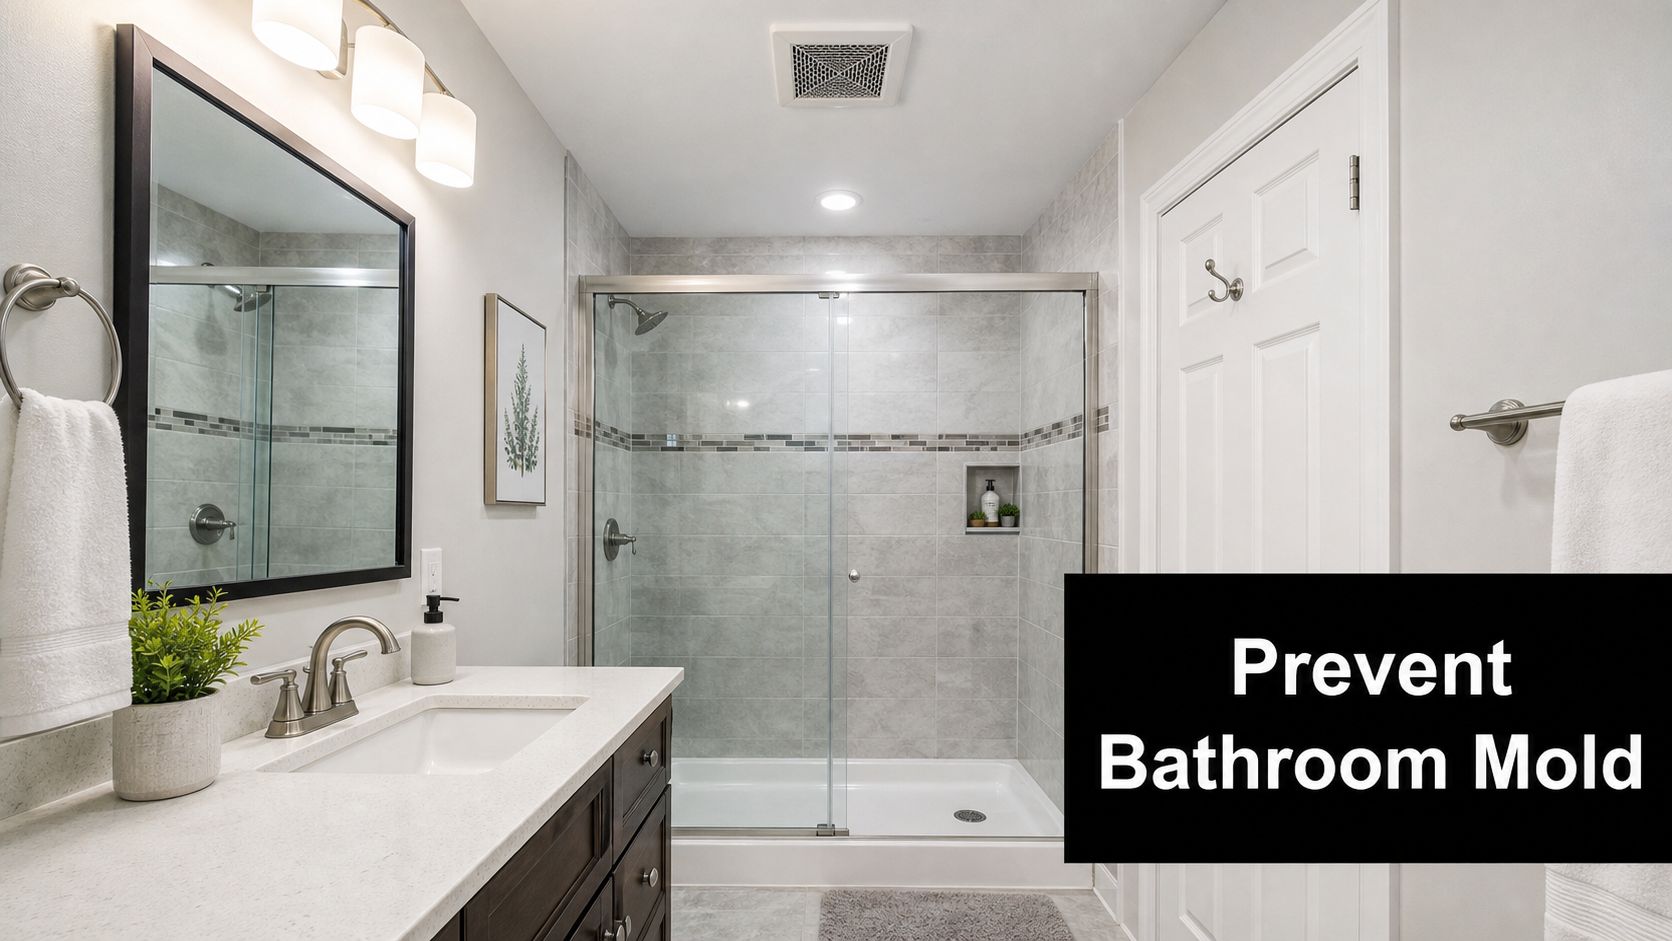
A modern, well-lit bathroom featuring a walk-in glass shower, a vanity, and an overhead exhaust fan.

Choosing the Right Fan for Your Bathroom or Ensuite

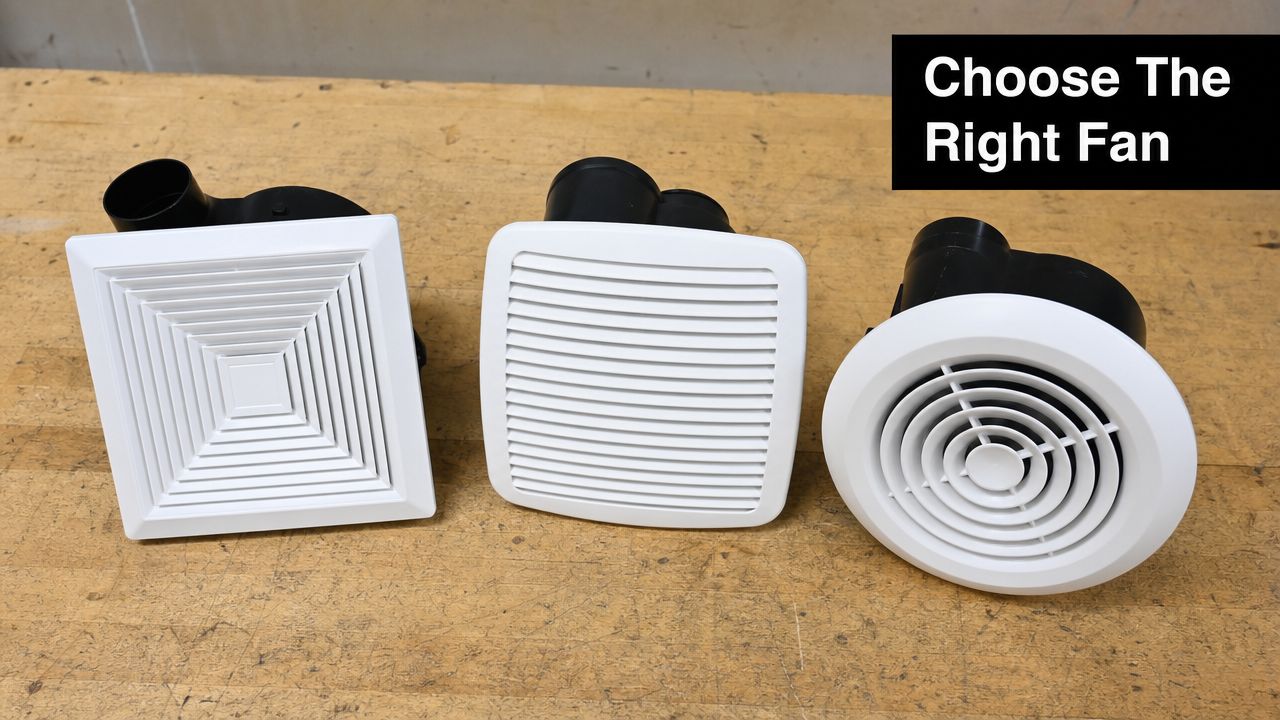
Three different styles of white bathroom exhaust fans sitting on a wooden workshop table.

Start by sizing the fan to your room volume and target air changes rather than relying on brand marketing. For a small ensuite, a quieter unit with smart controls will serve you better than raw power, while family bathrooms typically need sustained extraction during showers. This is a critical decision during bathroom renovations, where a registered builder can help select the most appropriate unit for the space.

A practical rule I've seen work well on Melbourne renovations is to follow the AS 1668.2 guidance so moisture never overwhelms your finishes. Bathroom exhaust fans should achieve a minimum of 25 litres per second for rooms up to 12 m², rising to 40 L/s for larger bathrooms — this ensures the fan can clear humid air within the recommended air change rates. Learn more about these ventilation findings.

You'll need to decide between continuous-rated fans for whole-house or long-run ventilation and intermittent-rated units for short bursts after showers. Continuous fans can reduce condensation risk in tightly sealed homes, while intermittent fans work perfectly fine for powder rooms.

Fan Types and Noise Considerations

Noise becomes a real issue in bedrooms-adjacent bathrooms. Look for ratings in sones or decibels and aim for models under 1.5 sones for ensuites near sleeping areas. Mixed-flow inline fans tend to be quieter and more energy efficient when you're dealing with a long duct run.

  • Three-speed fans give you the flexibility to balance quiet background ventilation with higher extraction for post-shower runs.
  • Humidity-sensing fans automate performance and often reduce runtime, which saves energy.

Matching Fan to Room Size

Room Size Typical Minimum L/s Recommended Fan Type
Up to 6 m² 25 L/s Quiet intermittent ceiling fan
6–12 m² 25–30 L/s Three-speed or humidity-sensing unit
>12 m² 40 L/s Inline mixed-flow or high-capacity ceiling fan

A fan with a backdraft damper and easy-clean grille pays dividends over time — fewer service visits and better long-term performance.

Checklist for Renovation Projects

  1. Confirm your L/s requirement and match it to AS 1668.2 guidance.
  2. Prefer humidity sensors for sealed bathrooms.
  3. Specify an IP rating suitable for the fan location.
  4. Require a built-in backdraft damper and removable grille for cleaning.

These choices align with how registered builders coordinate ventilation on site and protect waterproofing and tiling through the renovation sequence.

Planning the Duct Run, Position, and Penetrations

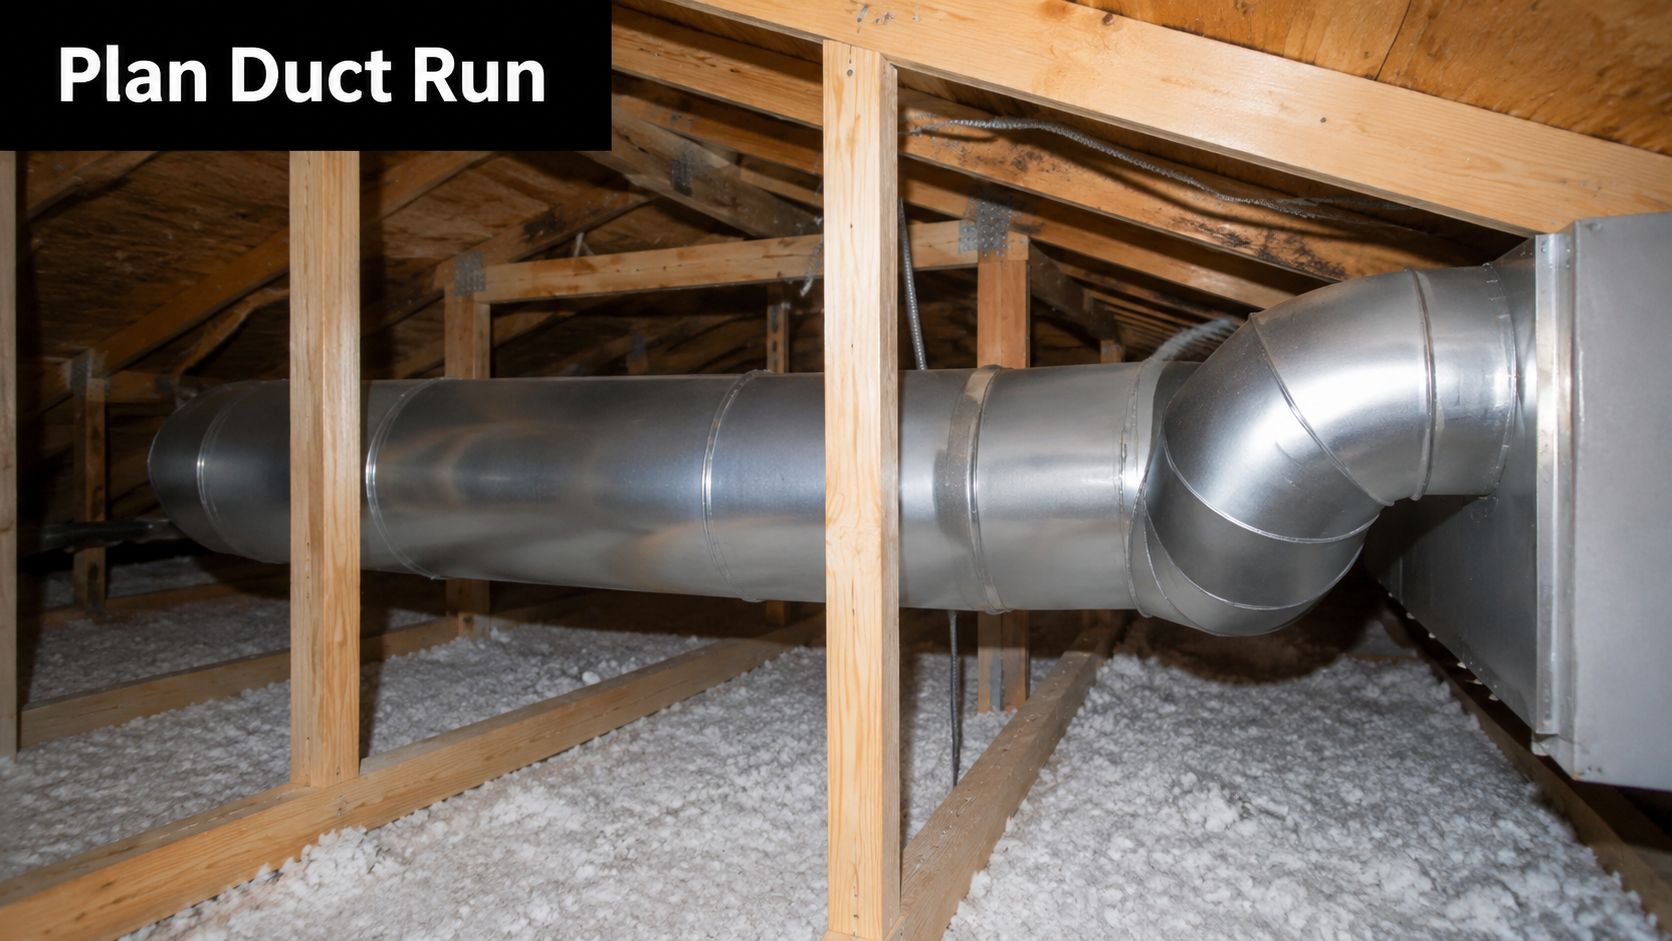
A long cylindrical metal HVAC duct running through an unfinished residential attic space with insulation.

Getting the fan position right makes or breaks the whole setup. Aim to sit the grille roughly 600–900 mm from the shower head so you're pulling steam out before it drifts across the room. That proximity cuts extraction time noticeably and stops moisture from settling on the ceiling plaster. In an ensuite with a 2.4 m ceiling, for instance, centring the grille over the shower recess rather than tucking it near the wall makes a visible difference in how quickly the mirror clears.

Once you've picked your spot, keep the first 900 mm of duct run dead straight. Any bend too close to the fan inlet chokes the airflow and costs you rated litres-per-second performance. A clean, straight lead lets the fan hit its spec without needing to upsize the motor.

Practical Duct Choices

Rigid smooth-bore duct is the honest winner here. It moves more air and you can actually get a brush through it when lint builds up over the years. Flexible duct has its place, but it sags between joists and can chew through 10–30% of your airflow depending on how much it deflects. If you're working in a tight ceiling cavity, a short rigid stub into an elbow beats a long stretch of flex every time.

A sagging flex run is the single most common reason retrofit fans underperform. You can spec the best motor on the market and still lose the battle if the duct is pooling water and collapsing between rafters.

Routing Through Tight Victorian Ceilings

Low-set Victorian-era ceilings don't give you much room to play with. Downlights, beams, and cable trays crowd the cavity, so you need to plan vertical drops carefully. Try to run the duct alongside existing framing rather than crossing through service zones. If the roof space above is genuinely inaccessible, mounting an inline fan at the soffit lets you relocate the noise source outside the living area altogether.

Before cutting any penetrations, sit down with your registered builder and agree on the termination point. You want to dodge waterproofing laps and fire-rated elements, and the timing matters—penetrations need to happen during rough-in, not after the membrane has been applied and cured. Otherwise someone's drilling through waterproofing that's already signed off.

Common Duct Termination Options Compared

Each termination style carries trade-offs around airflow, weather resistance, and cost. The right pick depends on your roof type, storey count, and how exposed the external wall is.

Termination Type Airflow Loss Weather Exposure Typical Cost Best Fit For
Wall cap Low Medium Low Single-storey homes
Roof cowl Medium High Medium Double-storey or tiled roofs
Soffit vent with inline fan Low Low Higher Tight ceilings, apartments

Wall caps work fine on single-storey brick veneer where the run is short and the exterior wall is sheltered. Roof cowls handle double-storey or steep tiled roofs better, though they catch more wind-driven rain. Soffit termination with an inline fan costs more upfront but suits apartments and tight ceiling cavities where you can't afford to lose airflow through a long run.

Practical Examples

  • Short run under roof battens: use 100 mm rigid duct with an insulated elbow.
  • Long attic run up to a roof cowl: a mixed-flow inline fan keeps motor size and noise down.
  • Apartment balcony termination: soffit vent with a damper to stop cold air pushing back through the duct.

Numbered Checklist

  1. Map the duct route to avoid downlights and existing service runs.
  2. Specify rigid duct for the first 900 mm, then minimise flex.
  3. Lock in your termination type with the registered builder before anyone cuts a penetration.

Nail this planning stage and your exhaust fan installation will run reliably for years—without anyone having to patch up compromised waterproofing halfway through the bathroom renovation.

Tools, Materials, and Coordinating Trades on Site

Getting an exhaust fan installed properly isn't just about the fan itself — it's about making sure the carpenter, electrician, waterproofer, and tiler all show up in the right order. Nail the sequencing early and you'll avoid the kind of rework that blows out timelines and budgets. This level of coordination is a core part of comprehensive bathroom renovations handled by registered builders. Rough-in happens after framing but before plaster goes up, and final fit-off waits until tiling and paint are completely finished.

Before anyone sets foot on site, the registered builder or renovation specialist typically arrives with a fairly specific kit:

  • Hole saws matched to the fan collar, plus spare blades for plasterboard and fibre cement
  • Stud finder and contour gauge to steer clear of joists and hidden services
  • Cordless driver, vibration-reducing screws, and adjustable mounting brackets
  • Acoustic foam gaskets, anti-vibration brackets, and acoustic-rated duct hangers to keep noise transfer down
  • Rigid duct sections, insulated elbows, and aluminium foil tape with flexible clamps for airtight joints
  • Exterior vent with an integrated backdraft damper and weather collar suited to either roof or wall termination
  • Fire-rated sealant and intumescent collars for any penetration through a fire-rated ceiling assembly
  • IP-rated isolator switch and labelled circuit breakers for electrical safety

A few practical on-site habits save a lot of headaches. Agree with the waterproofer exactly where penetrations will sit — nobody wants to drill through a cured membrane. The tiler needs the ceiling finished and fully cured before wall tiles near a shower area go up. And split the electrical visits: one for the rough-in cable to the isolator, another for the final connection once the fan housing is mounted.

Common DIY Misses

Some mistakes come up again and again. Forgetting acoustic gaskets is a big one — without them, you'll get rattle through the ceiling linings that drives everyone mad. Using normal cloth tape instead of aluminium foil tape is another; cloth tape degrades and undermines airflow ratings over time. And skipping a backdraft damper on roof terminations means cold air pours straight back in on winter nights.

When getting a quote from a renovation specialist like Melbourne Tiling Services P/L, make sure it includes a clear materials list, sequencing milestones, electrical certification, waterproofing sign-off, and a warranty on the ventilation work.

Checklist for Quotes

  1. Itemised fan model and L/s rating
  2. Duct type and termination chosen
  3. Trades schedule and sign-off milestones
  4. Certificates from electrician and waterproofer

Practical Installation Walkthrough For A Ceiling-Mounted Fan

Start by marking the cut-out between the joists, then scan the area with a stud finder and an insulating camera to check for hidden cables or plumbing. On a standard 2.4 m ceiling, you'll want to centre the grille about 600–900 mm from the shower — close enough to grab steam before it spreads across the room. Always check for services first, then confirm your joist spacing before making any cuts.

Cut the ceiling opening with a hole saw matched to the fan collar size, clear away the dust, and test-fit the housing before you touch the waterproofing. This is where experienced builders take a measured approach: rough-in before the plaster goes up, then do the final fit-off once the tiling and paint have fully cured.

Mount the housing on adjustable brackets and fix it to the joists with vibration-reducing screws. For short duct runs, keep the first 900 mm rigid and straight, then connect the duct to the fan outlet with a short straight section before the first elbow. Use clamps and aluminium foil tape on every joint to keep things airtight.

  • Slip acoustic foam gaskets between the housing and ceiling to kill any rattle or vibration.
  • Fit an intumescent collar when you're penetrating a fire-rated ceiling, and make sure the registered builder signs off on the penetration.

Run the mains cable to an isolating switch positioned within sight of the bathroom entry. Leave the final connection to a licensed electrician — that's the requirement under Victoria regulations. Always isolate the circuit at the switchboard and test with a residual current device when you're commissioning the fan.

Waterproofing And Tiling Crossover

Waterproofing, paint, and tile adhesives need to be completely cured before you fit the grille. If the fan cover goes on too soon, you trap solvents and moisture against the roof lining and tiles, which can lead to delamination and void your warranty.

A properly sequenced install prevents rework and protects the waterproofing sign-off from the registered builder

On a recent ensuite job, we left the grille off for a full 7 days after tiling. That gave the paint time to cure without staining, and it let the tiler get back in for any edge touch-ups if needed. Once everything's ready, seat the grille, run a smoke pencil test to confirm extraction is working, and hand over the certificates of electrical safety and waterproofing to close out the job.

A six-step instructional graphic showing how to install a ceiling-mounted exhaust fan safely and effectively.

The infographic visualises the six-stage workflow from marking the cut-out to fitting the cover, clarifying sequencing and critical checks.

Key insight — keeping the first duct run straight and coordinating sign-off with the registered builder are the two actions that prevent most post-install faults.

Electrical, Permits, and Compliance in Victoria

When it comes to bathroom renovations in Victoria, the rules around electrical work are non-negotiable, especially in wet areas. While you might be keen to tackle the installation yourself, it's crucial to understand where the DIY line is drawn and when you absolutely must call in the professionals.

Any new wiring, changes to existing circuits, or switchboard modifications for a fixed appliance like an exhaust fan must be done by a licensed electrician. They are the only ones who can legally perform the final connection and provide a Certificate of Electrical Safety, which is your proof of a safe and compliant installation.

You'll also notice a specific rule about the fan's isolation switch. In Victoria, it must be located within sight of the bathroom entry. This isn't just a random requirement; it’s a critical safety measure linked to IP zoning, ensuring anyone can quickly kill the power before entering a potentially hazardous wet zone.

How IP Ratings Affect Fan Placement

Choosing the right fan isn't just about airflow; it's about safety. Every fan has an IP (Ingress Protection) rating, which tells you how well it’s sealed against solids (like dust) and liquids (like water and steam).

The fan you choose must have an IP rating suitable for its specific location, or "zone," within the bathroom. A fan directly over a shower, for instance, will need a much higher rating than one mounted on the ceiling in the middle of the room, far from any direct spray. Getting this right prevents corrosion, dangerous short circuits, and potential headaches with your insurance down the track.

Don't be surprised if your licensed electrician or registered builder insists on a specific IP-rated fan. They’re protecting you—and their own licence—by ensuring the installation won’t cause warranty or resale nightmares later on.

When Do You Need a Building Permit?

A simple fan swap-out probably won't require a permit. However, if your project involves structural changes like cutting new joists, penetrating the roof for ducting, or installing new waterproofing, a building permit is almost always necessary. Bathroom renovations often fall into this category.

The Victorian Building Authority (VBA) has strict requirements, especially around waterproofing and coordinating different trades on a single project.

  • You'll likely need to engage a Registered Unlimited Builder if the job involves modifying plasterboard, altering the roof structure, or tying into existing waterproofing.
  • The builder's role is to act as the head contractor, coordinating the electrician, plumber, tiler, and waterproofer to ensure everything is done in the correct sequence and to Australian Standards.

Your Handover Paperwork Checklist

Once the dust settles and the job is done, make sure you have all the essential compliance documents in hand.

  1. The Certificate of Electrical Safety from your electrician.
  2. A Waterproofing Compliance Report signed off by the licensed waterproofer.
  3. All final paperwork from your registered builder, detailing the trades involved and any inspections passed.

For a deeper look at waterproofing expectations and how they tie into exhaust fan installation, check out our guide on Waterproofing in Melbourne.

Testing, Common Faults, and Long-Term Maintenance

Once the fan is wired and the grille is fitted, the job isn't quite done. A few post-install checks make the difference between a fan that performs reliably for years and one that becomes a nagging headache. Grab a smoke pencil and hold it near the grille — you want to see that smoke get pulled straight in without hanging or drifting sideways. If it doesn't, the problem is almost certainly in the duct or the damper, not the electrics. That simple test tells you exactly where to focus your attention.

While the fan is running, pay attention to what you hear. A steady, low hum is what you're after. Rattles, clunks, or a metallic ringing usually point to loose clamps, a housing that hasn't seated properly, or a section of flex duct that's sagging and vibrating. Tighten the brackets, slip in some acoustic foam gaskets, and re-route any pooled flex to see if the noise clears up.

  • Fan runs but extraction is weak
    • Look for crushed or kinked ducting and pull out any sagging sections.
    • Check taped joints for gaps and reseal with aluminium foil tape.
    • Make sure the first 900 mm of duct is rigid and straight — this alone can restore the rated L/s.

A common service-call pattern is a fan that runs fine but extracts poorly — in almost every case the duct lost the battle, not the motor.

If you notice condensation dripping from the cover, the duct is likely missing insulation in the roof space. Slip on an insulated duct sleeve and check that the roof cavity has proper vapour control. On colder nights, backflow often traces back to a failed damper — either replace it or fit a correctly sized backdraft assembly.

Simple Annual Maintenance Every Homeowner Can Do

  1. Pop off the grille and give it a wash in warm soapy water.
  2. Vacuum the impeller from the room side using a small crevice tool.
  3. Run the smoke pencil test again and listen for any new noises.

If extraction has dropped off spec, note it down and get a technician to do a flow measurement. For registered builders and renovators in Victoria, keep your certificates of electrical safety and waterproofing accessible — they're invaluable when you need to figure out whether a fault came down to installation sequencing or a material failure.

Case example: A recent Melbourne ensuite call turned up a failing damper and uninsulated duct run. Replacing the damper and insulating the duct brought performance back to 40 L/s, stopped the nightly backflow, and protected the tiled finish for years to come.

DIY Versus Hiring a Registered Builder in Melbourne

Deciding whether to tackle an exhaust fan installation yourself or bring in a professional usually comes down to scope and risk rather than just the bottom line. Swapping out an old ceiling fan for a new one on an existing duct run is a realistic weekend project for a handy homeowner with basic tools and a multimeter. You'll skip the permit paperwork and can often keep parts costs under $200, which is a decent saving.

But once you start cutting new holes through the roof or wall, disturbing waterproofing membranes, or adding circuits to the switchboard, the equation changes fast. These jobs affect your home's warranties and compliance under Victorian regulations. This is where bathroom renovations cross into territory best handled by registered builders. In Melbourne, labour rates also climb when ceiling access is awkward or the duct run stretches across a long distance.

When to Hire a Professional

  • New duct penetrations through the roof or wall
  • Work that alters waterproofing membranes
  • Full switchboard or circuit additions requiring a Certificate of Electrical Safety
  • Bundled bathroom renovations where sequencing matters

Hiring a registered builder often saves money overall by protecting the waterproofing warranty and coordinating trades.

Making the Call

Start by listing every task involved and flag anything that touches the membrane or structure. Then get a fixed quote that breaks down the fan model, ducting, electrical certification, and how the work will be sequenced. If the savings from going DIY come in under $500, it's usually worth handing it to a builder to protect your warranty and resale value.

You might be interested in learning more about bathroom renovation specialists at Melbourne Tiling Services P/L bathroom renovation specialists.


For reliable, registered builder coordination and full compliance, contact Melbourne Tiling Services P/L at https://melbournetilingservices.com.au

Shower Waterproofing Membrane: The Ultimate 2026 Guide

You notice it in small ways first. A faint musty smell after a shower. Grout that never seems to dry properly. A paint bubble on the ceiling below. By the time water shows itself, it has usually been travelling for a while.

That's what catches people out in bathroom renovations. The tiles still look good. The tapware still shines. The room feels finished. But the part that decides whether the bathroom lasts is buried underneath all of that. It's the shower waterproofing membrane.

In Melbourne, that hidden layer matters even more than is commonly understood. Bathrooms deal with daily water exposure, cleaning chemicals, movement in the building, and stop-start drying conditions. Add variable humidity and cold spells, and rushed work gets exposed fast. A shower can look perfect on handover day and still be heading towards failure if the membrane was applied badly, cured poorly, or installed without proper falls to the drain.

If you're planning a bathroom renovation, fixing a leak, or comparing registered builders, this is the part worth understanding before a single tile goes on the wall.

Table of Contents

The Hidden Threat in Your Bathroom

A leaking shower rarely starts with a dramatic flood. More often, it starts with a pinhole weakness somewhere no one can see. Water gets past a junction, sits under tile, works into a wall cavity, and keeps going. Months later, the owner is staring at swollen skirting, lifting paint, or a dark patch in the room next door.

That's why I tell clients the shower membrane is the essential bathroom, and the tiles are just the finish. The membrane is the layer doing the hard work every day. If it fails, the rest of the bathroom becomes decoration over a defect.

Where the trouble usually starts

Most failures come from one of a few places:

  • Wall to floor junctions: Movement and water pressure converge.
  • Around the drain: If the system doesn't direct water properly, moisture hangs around where it shouldn't.
  • Penetrations: Shower roses, mixers, spouts, and pipes interrupt the surface and need proper sealing.
  • Hobs, niches, and corners: These details look simple on a plan, yet poor workmanship often becomes evident.

A bathroom can survive a chipped tile. It won't survive a failed waterproofing system.

A shower leak is rarely about one bad tile. It's usually about one broken chain in a waterproofing system.

Why cosmetic finishes fool people

Tiles, grout, silicone, and water-resistant linings all have a job, but none of them replaces membrane work. Grout absorbs moisture. Silicone ages. Tile assemblies move. If the waterproofing behind them isn't continuous, water finds the break.

That's what makes this part of bathroom renovations so often botched. Owners can compare tile colours and tapware brands easily. They can't see dry film thickness, curing discipline, or whether the membrane was detailed correctly around a puddle flange.

The result is simple. The most important layer in the room is also the easiest one for a rushed contractor to hide.

The Unseen Shield What Is a Waterproofing Membrane

A shower waterproofing membrane is the sealed barrier between everyday shower water and the structure of the building. The easiest way to think about it is a raincoat under the tiles. The tiles are the outer clothing. They look finished and tidy, but they are not the thing keeping the frame dry.

A shower wall under construction featuring cement backer board, waterproofing tape at seams, and partially installed marble tiles.

What the membrane actually does

Its job is blunt and uncompromising. It must stop water from passing through the tiled surface and reaching substrate, framing, and adjoining materials. That means it has to work across flat areas, corners, pipe penetrations, drains, and transitions.

If that barrier is broken anywhere, the shower stops being a controlled wet area and starts feeding moisture into places never meant to stay wet.

In Australia, faulty waterproofing is one of the top three building defects, with up to 90% of all bathroom complaints relating to waterproofing and leakages in shower areas, as noted in Siniat's summary of bathroom waterproofing requirements. That figure tells you something important. This isn't a minor trade detail. It's one of the biggest defect points in the whole renovation process.

Why tiles and grout aren't enough

A lot of people still assume tiled equals waterproof. It doesn't.

  • Tiles resist wear: They give you a cleanable finish.
  • Grout fills joints: It helps lock the surface together, but it is not a guaranteed water barrier.
  • Water-resistant boards help manage exposure: They are not a substitute for a compliant membrane.
  • Silicone handles movement at changes of plane: It can't carry the waterproofing system on its own.

That's the mistake. People trust the visible layer because it looks solid. In practice, the visible layer sheds some water and slows the rest. The membrane is what stops it.

Why continuity matters more than product marketing

The membrane only works when it forms one uninterrupted system. It can't stop at the easy parts and leave the critical details weak. Corners, drains, hobs, and penetrations are where good installs separate from bad ones.

If you want a practical walkthrough of the sequence, this guide on how to waterproof a shower properly shows the process in the order it needs to happen.

Practical rule: If someone tells you the tiles, grout, and silicone will “keep most of the water out”, they've already missed the point.

Choosing Your Armour Sheet vs Liquid-Applied Membranes

Not all membranes are installed the same way, and not all showers suit the same system. In practice, most bathroom renovations come down to sheet membranes or liquid-applied membranes. Both can work. Both can fail. The difference is usually in the detailing, substrate, and the person installing them.

A comparison infographic between sheet and liquid-applied shower waterproofing membranes, explaining their pros, cons, and use cases.

The core difference

A sheet membrane is a manufactured layer that gets cut, bonded, lapped, and sealed into place. A liquid membrane starts wet and is rolled, brushed, or trowelled on, then dries into a continuous barrier.

That sounds straightforward, but the trade-offs are real.

  • Sheet systems give you factory-made consistency in the membrane body itself.
  • Liquid systems adapt better to odd shapes, fiddly details, and irregular geometry.

The catch is that each system has its own failure points. Sheet systems rely heavily on seam treatment. Liquid systems rely heavily on application control.

Sheet vs Liquid-Applied Waterproofing Membranes

Feature Sheet Membrane (e.g., Fabric-Reinforced) Liquid-Applied Membrane (e.g., Polyurethane)
Thickness control Factory-made membrane thickness is consistent Installer must achieve correct thickness across the whole area
Corners and junctions Needs careful folding, bandaging, or preformed corner details Conforms easily to corners and complex shapes
Seams Seams are the critical weak point if badly lapped or bonded Fewer sheet joins, but continuity still depends on careful detailing
Speed on open areas Often efficient on simple, larger surfaces Can be slower because multiple coats and drying stages are needed
Complex penetrations Can be more fiddly around pipes and niches Usually easier to dress around penetrations
Substrate variation Good on flat, well-prepared surfaces More forgiving on shapes, less forgiving on poor prep
Quality risk Usually in overlaps, corners, and drain integration Usually in thin spots, pinholes, or rushed recoating
Best fit New builds or straight-forward layouts with clean geometry Renovations with awkward details, mixed surfaces, or custom shapes

What works well with sheet membranes

On clean, square substrates, sheet membranes can be an excellent choice. If the shower base, walls, and corners are well built, the installer can create a very controlled system. The membrane thickness isn't being guessed at on site because the material arrives as a manufactured sheet.

That's the upside. The downside is precision. One sloppy overlap, trapped air pocket, badly dressed corner, or poor drain connection can compromise the system. Sheet work rewards methodical installers.

What works well with liquid-applied membranes

Liquid membranes suit renovation work because bathrooms are rarely perfect once stripped out. Walls can be out slightly. Penetrations can be awkward. Niches, hobs, and transitions can be easier to detail with a brush and roller than with cut sheets.

The trade-off is consistency. The installer has to build the membrane to the required thickness everywhere, not just where it's easy. The verified Australian guidance around shower membrane application is very clear on the importance of thickness and cure. The ARDEX guide to liquid-applied waterproofing membranes states a minimum total dry film thickness of 1.0 mm for floor applications, notes full curing after 3 days at 23°C or 5 days at 10°C for an example system, and requires the membrane over the hob to extend at least 150 mm beyond the outside edge.

That's why liquid systems don't forgive rushed work. If someone lays it on too thin, skips reinforcement where required, or tiles before cure, the barrier looks finished before it is finished.

How I'd decide between them on a real job

I'd look at the job in this order:

  1. Substrate condition: Flat and simple can suit sheet. Irregular renovation work often suits liquid.
  2. Detail complexity: More penetrations, nib walls, niches, and custom geometry usually push the decision towards liquid.
  3. Installer skillset: A membrane is only as good as the team applying it. Product choice doesn't rescue poor workmanship.
  4. Programme pressure: If the timeline is compressed, that's a warning sign. The right answer isn't the “fastest” membrane. It's the system the team can install properly without forcing the next trade in too early.

Good waterproofing isn't about choosing the fanciest product. It's about choosing the system the site conditions and installer can support without shortcuts.

The Rulebook Meeting AS 3740 and Builder Compliance

Most owners hear “AS 3740” and switch off because it sounds like paperwork. That's a mistake. The standard matters because it tells you how a wet area must be built so water goes where it should, and nowhere else.

In plain terms, AS 3740 is not there to make bathroom renovations harder. It's there because bathrooms fail in predictable ways, and the standard is written around preventing those failures.

A checklist infographic outlining AS 3740:2021 standards for proper shower waterproofing preparation and installation steps.

The wall height requirement is about splash and saturation

One of the most important changes people need to understand is shower wall coverage. In Victoria, all bathroom renovations, including complete stripping back to substrate, must comply with AS 3740:2021, which mandates shower walls be waterproofed to a minimum height of 1800mm above the finished floor level, or 50mm above the shower rose if the rose is higher, according to this explanation of AS 3740 requirements for Victorian wet areas.

That requirement isn't arbitrary. Showers don't just wet the bottom of walls. They create repeated splash, misting, and runoff well above the old minimal treatment zones. Waterproofing only at the junction is like wearing gumboots in a storm and expecting your shirt to stay dry.

Falls and drainage are part of waterproofing

People often separate waterproofing from drainage. On site, they're tied together. A membrane can be intact and the shower can still fail if water sits where it should be moving.

The updated AS 3740:2021 guidance in Australia requires shower walls to be waterproofed to 1800 mm above the finished floor level or 50 mm above the shower rose, whichever is higher, and in commercial wet areas the membrane must be graded to the drain waste puddle flange, with no opting out, as outlined by ABCG's overview of the new waterproofing standard.

That grading requirement matters because standing water increases stress on every junction, every penetration, and every weakness in workmanship. If the shower floor doesn't fall properly, the membrane and the tile assembly stay wetter for longer.

Why registered builders matter

Compliance isn't just a membrane brand and a ticked box. It's coordination.

A registered builder looks at the whole chain:

  • Substrate preparation: Framing, sheeting, and set-out have to support the waterproofing system.
  • Drain location and puddle flange detailing: These are not accessories. They are part of the system.
  • Trade timing: Waterproofing can't be rushed because the tiler is due tomorrow.
  • Inspection and documentation: The work has to stand up later, not just look neat on the day.

If you're engaging a builder or waterproofer, ask how they handle compliance records and whether they issue the right documentation. This guide to a waterproofing compliance certificate in Victoria is useful because it shows what proper accountability looks like.

Rules only work when someone enforces them on site

Standards don't build bathrooms. People do.

The reason registered builders matter is simple. Someone has to control sequencing, reject bad substrate, hold back tiling until waterproofing is ready, and make sure each trade leaves the next one a compliant surface to work from. Without that oversight, the standard becomes a set of good intentions buried under tile adhesive.

Why Waterproofing Fails and How to Prevent It

Waterproofing failures usually aren't mysterious. They come from predictable mistakes, repeated on jobs where someone is rushing, guessing, or relying on cosmetic finishes to cover technical defects.

The pattern is familiar. The bathroom looks complete. The leak shows up later.

A close up view of shower floor tiles with a drain showing potential gaps needing waterproofing.

Failure starts before the membrane goes on

A membrane can't fix a dirty, damp, unstable, or badly formed surface. If the substrate is dusty, contaminated, or moving, adhesion suffers. If falls are wrong before waterproofing, the membrane follows bad geometry.

These are the common red flags:

  • Poor prep: Dust, residue, loose sheeting, or moisture left in the substrate.
  • Bad geometry: No proper fall to waste, uneven transitions, or awkward build-ups around the drain.
  • Untreated penetrations: Pipes and fittings interrupt the membrane plane and need proper detailing.
  • Damage between trades: A membrane can be compromised after application if later work isn't controlled.

Thin application means weak protection

This is one of the biggest issues with liquid systems. People see coverage and assume performance. They're not the same thing.

If the membrane goes on too thin, the cured layer may look continuous but still allow moisture transmission. Weak spots often show up at corners, around floor wastes, over hobs, and at changes of plane where the brush or roller work gets inconsistent.

If the waterproofing is only heavy where the installer can see it easily, it probably isn't right where it matters most.

Melbourne's climate punishes rushed curing

Local conditions really matter. Recent 2025–2026 data from Australian Waterproofing Company shows 25% of shower membrane failures in Melbourne are due to tiling before the membrane fully cured, and that Melbourne's variable climate can extend drying times beyond manufacturer claims, according to Dunlop Trade's discussion of shower waterproofing membrane selection and curing.

That aligns with what experienced site teams already know. A membrane doesn't cure by the calendar on the box if the room is cold, closed up, or carrying high humidity. In Melbourne, one day can be dry and mild, the next cool and damp. If a contractor treats every bathroom like a laboratory-controlled environment, they're taking a gamble with your walls and floor.

The mistake owners rarely see

Tiling too early is dangerous because it hides the problem immediately. Once adhesive and tile go over a membrane that hasn't fully cured, the system gets sealed in before it has reached proper performance. You can't inspect that later without demolition.

A useful visual explanation sits below. It helps homeowners understand where leaks often begin and why drain zones and transitions deserve extra attention.

How to prevent failure on a live renovation

Prevention isn't glamorous. It's disciplined.

  1. Start with the substrate: Clean, dry, stable, and formed correctly to falls.
  2. Use the membrane system as specified: Don't mix random components because they're “close enough”.
  3. Control thickness and detailing: Corners, penetrations, hobs, and drains need deliberate work, not quick touch-ups.
  4. Respect cure times: Programme pressure is not a technical justification.
  5. Protect the membrane before tiling: Damage from later trades is still membrane failure.

Most shower leaks are expensive because they stay hidden while the damage spreads. The fix isn't heroic workmanship later. It's patient workmanship at the exact moment people are tempted to rush.

The Full Picture Cost Compatibility and Maintenance

Owners often ask the wrong cost question. They ask what waterproofing adds to the renovation instead of what failure removes from it. Waterproofing is one of the least visible parts of the job and one of the most important to get right.

A proper membrane system has to work with the substrate, the adhesive, the tile format, the falls, and the sequencing of the trades. If one part is mismatched, the room might still finish neatly, but long-term performance starts to slip.

Cost is tied to complexity, not just area

A simple shower on straight walls is one thing. A shower with a niche, a hob, awkward penetrations, mixed substrates, and detailed stone work is another. The membrane itself is only part of the cost. The primary value is in proper preparation, detailing, cure management, and accountability if something goes wrong.

That's why cheap quotes can be misleading. The number on paper may exclude the patience required to do the work properly.

Compatibility matters more than people think

Large-format porcelain, mosaics, natural stone, sheet systems, liquid systems, adhesives, and substrates all interact differently. A good installer doesn't just ask what tile you like. They ask what the tile requires underneath.

  • Large-format tiles: These demand flatter surfaces and place a premium on accurate substrate preparation.
  • Mosaics on shower floors: They follow falls well but increase the number of grout joints and need careful drainage detailing.
  • Natural stone: This may need specific adhesive and sealing considerations depending on the stone and substrate.
  • Membrane-to-adhesive compatibility: The waterproofing product and tile adhesive have to be used as a system, not guessed at from separate brands and assumptions.

If that compatibility conversation never happens, that's a warning sign.

Maintenance protects the system you already paid for

Even the best shower waterproofing membrane doesn't mean the bathroom can be neglected. Surface maintenance won't replace the membrane, but it does reduce avoidable stress on the assembly.

A simple maintenance routine helps:

  • Check silicone joints: If movement joints are splitting or shrinking, deal with them early.
  • Watch drainage: If water lingers after a shower, don't ignore it.
  • Keep ventilation working: Bathrooms need moisture removed, not trapped.
  • Treat cracked grout as a signal: It may be minor movement, or it may be showing a bigger issue underneath.
  • Don't assume new means permanent: Wet areas age through use, cleaning, and movement.

According to Precision Business Insights' overview of the Australian waterproofing membranes market, high-quality waterproofing membranes typically last between 7 to 10 years under normal conditions, with industry guidelines recommending a refresh every 10 to 15 years to prevent water penetration.

That doesn't mean every bathroom suddenly fails at a set age. It means membranes are part of a working wet-area system, not a forever product you install once and stop thinking about.

Your Renovation Checklist Hiring the Right Professional

If you want a leak-free bathroom, don't start by asking what membrane brand someone uses. Start by asking how they run the whole job. Waterproofing succeeds when the builder, waterproofer, and tiler work in sequence and someone takes responsibility for the final outcome.

That's why bathroom renovations go better under registered builders who control the process instead of leaving each trade to protect itself.

Questions worth asking before work starts

Use this as a practical shortlist when you're interviewing contractors.

  • Are you a registered builder, or who is taking overall responsibility for the renovation? If no one owns the whole chain, defects get bounced between trades later.
  • How do you make sure the shower meets AS 3740 requirements on site? The answer should mention substrate, falls, wall extent, penetrations, and drainage details, not just “we waterproof everything”.
  • What membrane system are you using, and why does it suit this bathroom? A real answer connects the product to the substrate and layout.
  • How do you deal with niches, hobs, corners, and pipe penetrations? These are the places that reveal whether someone has a process or just confidence.
  • What is your curing process before tiling starts? If the answer sounds vague or too fast, keep digging.
  • How do you protect the membrane between application and tiling? Damage after waterproofing still counts as failed waterproofing.
  • What documentation do I receive at the end? This matters for compliance, future sale, and dispute protection.

What a good answer sounds like

A capable professional usually speaks in sequence. They talk about demolition, substrate condition, rectification if needed, falls, membrane application, cure management, inspection, then tiling. They don't jump straight to tile finish, grout colour, or how quickly they can start.

They also won't promise that waterproofing is easy. Good operators know wet areas are detail-heavy and don't like pretending otherwise.

The best contractor isn't the one who sounds the fastest. It's the one who can explain where showers fail and what they do to stop that happening.

One team is often safer than multiple disconnected trades

There's a reason many difficult bathrooms go wrong when owners split the job across separate people. One person strips the room, another sheets it, another waterproofs it, another tiles it. If a leak appears later, everyone says the defect started before they arrived.

A single accountable team reduces that problem. It doesn't eliminate the need for skill, but it does reduce the handover gaps where defects get buried.

If you're comparing local options, this list of tiling contractors near you in Melbourne is a useful place to begin your shortlist.

The final filter

Before you sign anything, ask yourself one plain question. Does this contractor talk about waterproofing like a hidden technical system, or like a quick prep step before the main work starts?

That answer tells you almost everything.


If you want a bathroom renovation team that understands shower waterproofing membrane systems from demolition through to final tiling, Melbourne Tiling Services P/L offers registered builder oversight, coordinated licensed trades, and practical wet-area experience across Melbourne and greater Victoria. For homeowners who want the job done once and done properly, they're worth speaking to early.

Frameless Shower Screens Prices: Melbourne 2026 Cost Guide

A professionally installed frameless shower screen in Melbourne typically costs between $560 and $1,090, with a median around $800. That's the realistic starting point for a standard job, but the final number moves depending on the glass, hardware, layout, and how the screen fits into the rest of your bathroom renovation.

Many individuals start in the same place. They've picked the tiles, they know they want a clean modern shower, and then the quote for the screen lands with less detail than they expected. One supplier gives a supply-only figure. Another gives an installed price with no breakdown. Then someone else talks about custom glass, black fittings, wall prep, and suddenly it's hard to tell what you are paying for.

That confusion gets worse when you're planning a full bathroom renovation, not just replacing a screen. In Melbourne, the shower screen sits inside a bigger chain of work that usually includes waterproofing, floor falls, tiling, plumbing set-out, and compliance. If any of those pieces are off, the frameless screen becomes harder and more expensive to install properly.

Table of Contents

Introduction

A common Melbourne renovation scenario goes like this. The old shower has started leaking, the tiles are dated, and the homeowner wants the room to feel larger without moving walls. A frameless screen is usually one of the first items on the wish list because it changes the look of the room immediately.

The problem is that shower screen pricing often gets treated like it exists on its own. It doesn't. In real bathroom renovations, the screen only goes in properly after the waterproofing is right, the walls are straight enough, the floor falls have been formed correctly, and the tile layout has been planned to suit the glass and hardware.

Practical rule: If the bathroom hasn't been measured after tiling decisions are locked in, the shower screen number is still only a rough allowance.

That's why online calculators can be misleading. They might give you a number for a panel and a door, but they usually don't account for out-of-square walls, a hobless shower, reeded glass, matte black hardware, or the fact that a Registered Builder may be coordinating the full job.

For homeowners in Victoria, that matters. Bathroom renovations and registered builders belong in the same conversation because the screen is part of a regulated wet-area build, not just a decorative add-on. When the work is quoted properly, you can see where the money is going and where it makes sense to spend more.

Typical Frameless Shower Screen Prices in Melbourne

The clearest starting point comes from current Australian market pricing. A basic frameless shower screen starts at about $360 for a standard 2100mm x 900mm walk-in panel including aluminium channel, while a larger 1740mm x 1785mm x 2000mm three-panel sliding frameless screen can reach $690. Installation usually adds $200 to $400, which puts a standard all-in project at $560 to $1,090, with a commonly observed median total around $750 to $850 across Melbourne and greater Victoria according to hipages frameless glass shower screen cost data.

A visual guide illustrating estimated price ranges for four types of frameless shower screens in Melbourne.

Those numbers are useful because they show the difference between entry-level frameless and more complex layouts. A simple walk-in panel is one thing. A three-panel sliding setup needs more glass, more hardware, and more installation time. That's why frameless shower screens prices can look inconsistent if you compare quotes without checking the actual configuration.

What standard Melbourne quotes usually include

In a straightforward quote, you'll generally see:

  • Glass supply that reflects the panel count and size
  • Basic hardware suited to the selected design
  • Installation labour based on how long the job should take
  • A separate allowance for delivery or related site issues, because not every supplier handles that the same way

Two-panel systems sit near $410 plus $195 installation, while rectangular units sit near $550 with similar installation fees in the same pricing guide above. That places frameless firmly in the mid-to-high end of bathroom fit-out items.

The number that matters most to homeowners isn't the cheapest panel price. It's the installed number once the bathroom is ready for glass.

Why the screen cost can feel smaller or bigger inside a full reno

A frameless screen can look modest on paper until it's viewed alongside waterproofing, tiling, plumbing trim-off, and builder coordination. If you're pricing the whole room, it helps to compare the screen as one line item within the broader renovation budget rather than treating it as an isolated purchase. For a more job-specific local breakdown, this guide to shower screen installation cost in Melbourne is a practical next step.

What Drives the Cost of a Frameless Shower Screen

If two frameless screens look similar in photos but the prices are nowhere near each other, there's always a reason. The cost usually moves because of four things: the glass itself, the hardware finish, the layout, and the site conditions.

An array of glass panels and various metal shower door hardware components laid out on a table.

Glass and compliance

Frameless screens in Australia must use toughened safety glass certified to AS/NZS 2208:1996, and the requirement for fixed panels and sliding doors is a minimum thickness of 10mm under Victorian plumbing and building expectations, as outlined by Best n Buy's shower screen specification notes.

That requirement matters because thicker glass isn't just a style choice. It affects weight, hardware performance, transport, handling, and installation method. Once you move into premium selections such as 12mm tempered glass, reeded textures, or darker designer finishes, the price can rise sharply. The Australian market also shows a real premium material tax on luxury frameless products, with Bella Vista catalogue pricing including fully frameless reeded panels at $843 RRP and sliding systems at $1,628+, well above the common entry-level ranges shown elsewhere in the market, as seen in the Bella Vista shower screen catalogue.

Hardware and finish selection

Hardware changes the number faster than many homeowners expect. Hinges, handles, stabiliser bars, brackets, channels, and seals all sit in the quote somewhere. Chrome is usually the easiest place to stay sensible. Matte black, brushed finishes, and more decorative hardware push the screen into a more coordinated design package.

That's often the right move in a high-end ensuite. If the room has large-format tiles, premium tapware, and a minimal palette, basic hardware can make the shower look like the one item that was value-engineered too hard.

A frameless screen only looks expensive when the hardware and glass feel out of place. When they match the bathroom, the cost makes more sense.

Configuration and labour

Labour is one of the most misunderstood parts of frameless shower screens prices. In Australia, installation labour runs at $45 to $65 per hour. A two-panel frameless setup typically takes 3 to 4 hours, which totals $195 to $260, while a three-panel sliding door system can take 6 to 8 hours, resulting in installation fees of $400 or more, based on hipages shower screen installation pricing.

That same source notes that semi-frameless and fully frameless options broadly range from $200 to $700 excluding installation, while framed alternatives remain around $250. It also notes a clear price hierarchy, with frameless carrying a 44% to 180% premium over basic framed models because of glass thickness, hardware durability, and the cleaner minimalist finish.

Here's a short video that helps visualise what proper frameless installation involves:

Site conditions and custom work

Some bathrooms make installation easy. Others don't.

The expensive jobs usually have one or more of these issues:

  • Out-of-plumb walls that require tighter measuring and custom glass
  • Non-standard openings such as nib walls, angled ceilings, or recessed shelves
  • Bench seats or notches that force more fabrication detail
  • Hobless entries where water control and exact levels matter more
  • Tile variation that affects how neatly channels, clamps, or hinges can sit

If you want the most cost-effective outcome, standard sizes and straightforward geometry are your friends. Once a screen needs special cuts or has to solve poor preparation from earlier trades, the quote climbs quickly.

Frameless vs Framed and Semi-Frameless Screens

A lot of homeowners know they like the frameless look but still want to know if it's worth paying more for. That's a fair question. The answer depends on what matters more in your bathroom: upfront price, ease of cleaning, visual weight, or water containment.

The basic market hierarchy is already clear from the cost data cited earlier. Framed sits at the bottom end, semi-frameless occupies the middle, and frameless is the premium option. But price alone doesn't tell you what you're living with day to day.

Shower Screen Comparison

Feature Frameless Semi-Frameless Framed
Price Highest upfront cost in the three categories Mid-range Lowest entry cost
Aesthetics Cleanest sightlines and most open look Good balance of openness and structure Heavier visual presence
Cleaning and maintenance Fewer channels and edges to collect grime Some framed sections still need attention Most frame lines and channels to clean
Durability Strong glass and quality hardware, but relies on accurate install Good practical compromise Structurally familiar and budget-friendly

Where frameless earns its keep

Frameless tends to suit bathrooms where the tiles, niches, and fittings are part of the visual result. You see more of the wall finish, more of the floor, and less metal. In smaller bathrooms, that often makes the room feel more open.

It also tends to be easier to keep looking sharp because there are fewer framed edges to trap soap residue. That doesn't make it maintenance-free, but it does remove some of the spots where grime usually builds up.

Where the other options still make sense

Semi-frameless is often the practical middle ground. It keeps some of the lighter look while giving a bit more structure and often slightly easier water management around the opening.

Framed still has a place in budget-sensitive bathrooms, rentals, and straightforward replacements where cost matters more than the minimalist finish.

If the rest of the bathroom is being renovated to a premium standard, framed screens can look like a shortcut. If the room is basic and functional, framed can still be the sensible choice.

How to Get an Accurate Quote for Your Bathroom Renovation

The best quotes don't start with glass. They start with the room.

A proper shower screen quote depends on finished dimensions, wall condition, floor level, hinge position, and how the door will open around vanities, toilets, and towel rails. If you ask for a price too early, you'll get a broad estimate, not a dependable number.

Screenshot from https://melbournetilingservices.com.au

What to have ready before the site visit

You'll get a much clearer quote if you can show these decisions upfront:

  • Your preferred screen type such as fixed panel, hinged door, sliding system, or corner layout
  • Your tile selection because grout joints, tile thickness, and layout affect the final measure
  • Your hardware finish if you already know whether you want chrome, black, or another look
  • Any design constraints such as niches, shaving cabinets, wall taps, or underfloor heating transitions

A measured site visit after waterproofing and tiling planning is usually where vague estimates turn into real numbers.

Questions worth asking

Not every quote is built the same way. Ask whether the price includes supply, installation, hardware, measure, and delivery. Ask what happens if the walls are not square. Ask who is responsible for checking finished set-out before the glass is ordered.

A useful quote should also make it clear whether the screen is being considered as a standalone install or part of full bathroom renovations and registered builders coordination. That difference changes who carries responsibility if another trade leaves the opening out.

Why registered builders matter in Victoria

In Victoria, bathroom renovation projects involving frameless shower screens typically require Registered Builders to ensure compliance with the Building Act 1993. The same source notes that the median cost for a full bathroom renovation in Melbourne, including waterproofing and frameless screen installation, is approximately $10,000, according to Fresh Screens' Melbourne bathroom renovation guidance.

That's the bigger picture many screen-only quotes miss. In a full renovation, the screen is connected to waterproofing, substrate prep, drainage, tiling, plumbing trim-off, and final fit. A Registered Builder coordinates those moving parts and carries the compliance mindset across the whole room.

One practical option for that type of integrated job is frameless shower screen installation in Melbourne, where the screen is handled within the renovation process rather than treated as an isolated afterthought.

Project Timeline Warranties and Cost-Saving Tips

A frameless screen is usually one of the last visible items to go into the bathroom, but it depends on earlier work being finished properly. If the waterproofing, screed, tiling, and final set-out are still moving around, glass can't be ordered confidently.

How the job usually runs

The smooth jobs tend to follow a simple sequence:

  1. Layout is locked in and plumbing positions are confirmed.
  2. Waterproofing and tiling are completed so the finished opening can be measured accurately.
  3. Final measure happens on site after the critical surfaces are done.
  4. Glass is manufactured to suit the actual opening.
  5. Installation is booked once the bathroom is ready and protected.

That order matters because frameless glass doesn't forgive guesswork. Even small set-out changes affect how doors swing, how seals land, and whether the margins look even.

What to check on warranties

Ask separately about the glass, the hardware, and the installation workmanship. They're not always covered under one simple promise. You also want to know what maintenance is expected, especially around sealant, cleaning products, and moving hardware.

Because the product must use AS/NZS 2208:1996 toughened safety glass with a minimum 10mm thickness for fixed panels and sliding doors, compliance isn't optional. It's part of the baseline for a lawful and safe installation in Victoria, as outlined in the earlier cited specification guidance.

Cheap glass isn't the bargain in a wet area. Correct glass, correct set-out, and correct waterproofing are what prevent expensive callbacks.

Where you can save without regretting it

There are smart ways to reduce cost without gutting the result:

  • Choose standard sizes where possible because custom fabrication pushes the quote up fast.
  • Keep the layout simple. A fixed panel or straightforward door arrangement is easier to build and install than a heavily customised enclosure.
  • Use standard finishes if your budget is tight. Chrome usually keeps the number under better control than premium decorative hardware.
  • Coordinate the screen with the renovation program so the measuring and installation happen at the right time, not as a rushed add-on.
  • Make sure waterproofing paperwork is in order. For wet-area projects, understanding Victorian waterproofing compliance certificates helps avoid issues later.

Start Your Bathroom Transformation with a Free Quote and Design

Frameless shower screens are a premium item, and the price reflects that. You're paying for thicker compliant glass, better hardware, more precise measuring, and an installation that has to work with the finished waterproofed bathroom, not just sit inside it.

That's why the cheapest number isn't usually the most useful one. The right figure is the installed cost for your actual layout, with your tile choices, your fittings, and your renovation scope taken into account. For Melbourne homeowners, that often means looking at the screen as one part of the wider bathroom build rather than shopping it in isolation.

If you're planning a renovation in Melbourne or greater Victoria, it helps to get a quote encompassing the whole picture. A proper process should include a site assessment, realistic pricing, and clear advice on what will affect the number before anything is ordered.

A free, no-obligation quote and a professional 3D design make that process easier because you can see the room before committing. It also gives you a practical way to compare design choices, especially if you're weighing standard frameless glass against more premium finishes or a more customised layout.

Working with registered builders also gives you a cleaner line of responsibility across the project. The shower screen, waterproofing, tiling, plumbing, and final fit-out all need to line up. When they do, the result looks better and performs the way it should.

Frequently Asked Questions

Can I install a frameless shower screen myself

It's possible in theory, but it's not a good idea for most homeowners. Frameless glass is heavy, the margins are tight, and mistakes can damage tiles, hardware, or the waterproofed area. In a renovation, the bigger risk is not the fitting itself. It's getting the set-out wrong.

Do black or designer finishes cost more than chrome

Yes, they often do. The exact difference varies by supplier and hardware range, so it's better to ask for that item to be broken out in the quote rather than guessed as a blanket upgrade.

Are frameless screens durable enough for a family bathroom

Yes, provided the glass is compliant, the hardware is decent quality, and the screen is installed properly on a bathroom that has been set out correctly. In busy bathrooms, the quality of hinges, seals, and wall fixing matters just as much as the glass.

Can a frameless screen go on any floor surface

Not automatically. The floor needs the right falls, a stable substrate, and a finished surface that suits the fixing method and water control. This is one reason the screen should be planned together with the rest of the bathroom renovation.


If you want a practical quote for a frameless shower screen as part of a full bathroom renovation, Melbourne Tiling Services P/L can assess the space, provide a free quote, and help you line up the design, waterproofing, tiling, and installation under one renovation process.

Natural Stone Bathroom Tiles: A 2026 Melbourne Guide

Thinking about a bathroom upgrade? If you're aiming for something beyond the ordinary, natural stone bathroom tiles are in a class of their own. They can elevate a simple, functional room into a space that feels like a genuine retreat. Unlike a mass-produced tile, every single piece of stone has a unique character, formed over millions of years. For anyone planning bathroom renovations, understanding the unique appeal of stone is the first step towards creating a truly luxurious space.

Table of Contents

Why Choose Natural Stone for Your Melbourne Bathroom?

Here in Melbourne, we see a lot of bathroom renovations. While porcelain and ceramic tiles are always popular, there's a definite pull towards the unique elegance that only natural stone delivers. It's about creating a space that feels truly personal and calming—a proper escape from the hustle and bustle. Engaging a registered builder for these types of high-end bathroom renovations ensures that the vision is executed flawlessly.

The real magic is in its authenticity. A manufactured tile is designed for uniformity, but a slab of marble or a travertine tile is a complete one-off, with its own veining, textures, and subtle colour shifts. This connection to the natural world brings a level of sophistication that simply can't be duplicated.

A luxurious bathroom featuring elegant natural stone tiles, a white freestanding bathtub, and a wooden stool.

A Considered Choice for a Premium Finish

While porcelain is a fantastic, durable choice for most Aussie bathrooms, stone is what people turn to when they want that undeniable 'air of luxury'. As noted in a recent look at Australian bathroom trends on Elite Makeovers, many homeowners accept that stone is pricier and needs more care simply because it "looks just that much better". It's a deliberate choice for a premium outcome in any bathroom renovation.

But getting that high-end finish is about more than just the tiles themselves. A natural stone bathroom is a serious project. The weight of the stone, its porosity, and its sheer value demand a professional approach from day one.

This is exactly why we always stress the importance of using registered builders for this kind of high-end renovation. A builder is essential for coordinating all the licensed trades—from waterproofing and plumbing to structural checks—making sure every single detail is handled correctly and to code.

At the end of the day, choosing natural stone is an investment. It’s a statement about your commitment to quality and timeless design, and the result is a stunning space that genuinely adds character and value to your home.

Matching the Right Stone to Your Bathroom’s Style

Choosing the right natural stone for your bathroom tiles is much more than a technical decision—it’s about setting the entire mood. Every piece of stone has its own story and a character forged over millions of years. This choice will define the personality of your bathroom renovation, so it's worth having a clear vision before you even start looking at samples.

Think of it like casting the lead role in your bathroom's design. Are you aiming for the timeless drama of a five-star hotel, or the warm, earthy feel of a rustic retreat? The stone you choose is the foundation of that story.

Defining Your Bathroom’s Personality

Let's walk through the most popular stone choices we see in Melbourne homes. Understanding their inherent style and character is the first step in creating a space you’ll truly love.

  • Marble for Timeless Drama: Marble is the undisputed classic for a reason. Its distinctive, sweeping veins create a sense of movement and luxury that is simply unmatched. It makes a powerful statement of sophisticated elegance, perfect for a feature wall behind a freestanding tub or a stunning vanity top.

  • Travertine for an Earthy, Warm Feel: If you want your bathroom to feel like a warm, welcoming sanctuary, travertine is a fantastic choice. Its creamy, honey-toned palette and naturally pitted surface bring to mind a rustic Mediterranean villa. It’s brilliant for creating a refined yet relaxed atmosphere, especially on floors.

  • Slate for Bold, Modern Texture: For anyone leaning towards a contemporary or even industrial look, slate delivers a bold, textural impact. Its deep, moody colours—from dark charcoal to rich greens and blues—provide a dramatic backdrop. A honed slate floor not only looks sleek and modern but also offers excellent natural slip resistance.

  • Limestone for Soft, Understated Elegance: Limestone is the master of subtlety. Its soft, muted tones of beige, ivory, and gentle grey are perfect for creating a serene and calming environment. With a more consistent, quiet pattern, limestone is ideal for minimalist designs where tranquillity is the ultimate goal.

Your choice of stone directly influences the entire feel of your bathroom renovation. A registered builder can provide samples and guide you on how each option will interact with your home's lighting and space, ensuring the final result matches your vision perfectly.

From Feature Walls to Family Floors

Beyond just looks, it's crucial to match the stone's practical properties to its intended use. That breathtaking polished marble might be perfect for a feature wall in a master ensuite, but its softer nature makes it a poor choice for the high-traffic floor of a busy family bathroom. In that scenario, a more hard-wearing option like honed travertine or slate would be a far more practical and durable choice.

This is where a detailed conversation with your tiler or builder becomes invaluable. By discussing how you use the space every day, they can recommend a stone that is not only beautiful but also tough enough for your lifestyle. For example, the slip resistance of a tumbled finish makes it ideal for shower floors, while a glossy polished finish should be reserved for vertical surfaces where it can be admired without risk.

If you find yourself captivated by the allure of marble tiles in Melbourne, it's worth exploring the nuances of its application to ensure it's the right fit for your project.

Ultimately, the best natural stone bathroom tiles are those that reflect your personal style while meeting the real-world demands of your home. A well-informed choice ensures your new bathroom isn't just beautiful on day one, but a space you will love and enjoy for decades to come.

Why Professional Installation Is Non-Negotiable

Choosing beautiful natural stone tiles is one of the most exciting parts of planning a bathroom renovation. But the real measure of success—the difference between a showpiece and a disaster—comes down to the installation. This isn't your average tiling job.

Laying natural stone is a true craft, a specialised skill that's worlds away from a weekend DIY project with ceramic tiles. Get it wrong, and you're not just looking at a wonky finish. You could be facing ruined, expensive stone, cracked tiles, persistent leaks, and even serious water damage to the structure of your home.

The Hidden Complexities of Stone Tiling

So, what makes it so different? For starters, the sheer weight. Natural stone is incredibly heavy, and your average bathroom subfloor, built for lightweight timber or ceramic, might not be up to the task. Without a professional assessment, the floor could sag or flex over time, leading to cracked tiles and failed grout.

Then there’s the precision. When you're dealing with premium materials, every single cut has to be perfect. An experienced tiler has the specialised equipment and skill to make intricate cuts for drains and corners with minimal waste. It’s a level of detail that a general handyman simply can’t match.

The infographic below highlights the unique beauty of different stones, giving you a sense of what you're trying to protect.

A comparison chart of four natural stone bathroom tiles including marble, travertine, slate, and limestone with descriptions.

Whether it's the dramatic veining of marble or the earthy texture of travertine, flawless installation is the key to letting the stone's character shine.

The Role of Registered Builders in Bathroom Renovations

The single most important step you can take to protect your investment is to entrust your project to a registered builder. A registered builder isn't just a project manager; they are legally responsible for the quality and compliance of the entire renovation.

A registered builder coordinates all the licensed trades needed for the job—from the plumber and electrician to the waterproofer and screeder. This ensures every single part of the project meets strict Australian Standards and building codes, giving you a renovation that is fully warrantied and compliant.

This level of professional oversight is absolutely essential for a natural stone bathroom. For example, because all stone is porous to some degree, perfect waterproofing is non-negotiable. You can learn more about this crucial step in our guide to professional waterproofing in Melbourne.

Ultimately, hiring a registered builder gives you peace of mind. It’s the assurance that your luxurious new bathroom is built on a foundation of structural integrity, expert craftsmanship, and flawless waterproofing. It's the only way to guarantee your beautiful space will last a lifetime.

Budgeting for Your Natural Stone Bathroom Renovation

So, you’re dreaming of a natural stone bathroom, but what's it really going to cost? Let's get one thing straight: when you're working with materials like marble or travertine, you have to look well beyond the price per square metre on the tile itself. The real cost lies in the total project, and stone brings its own unique set of considerations to the table.

Unlike lightweight porcelain or ceramic tiles, natural stone demands a different level of planning and expertise. Understanding what drives the final price is the key to budgeting accurately and avoiding any nasty surprises down the track.

Factors That Shape Your Final Quote

The final quote you receive is a careful calculation of materials, specialised labour, and the unique complexities of your space. A huge factor is the sheer weight of the stone. This isn't something you can just slap on the wall; it often means reinforcing the subfloor to handle the load, which is a job strictly for qualified professionals. The added weight also makes installation a much more intensive and costly process.

The specific stone you fall in love with will also have a major impact on the budget:

  • Stone Rarity: A beautiful, common limestone or travertine will always be more wallet-friendly than a slab of rare Calacatta marble sourced from a specific quarry in Italy.
  • Tile Size and Layout: Large-format slabs create a stunning, seamless look but require expert handling and specialised equipment to install. Similarly, intricate patterns like herringbone or basketweave take more time and skill, which is reflected in the labour costs.
  • Finishing Details: It’s the little things that add up. Custom-cut shower niches, perfectly mitred edges on corners, and complex trim work all require a master tiler's touch and will influence the final cost.

While the median cost for standard bathroom renovations in Melbourne can sit around $10,000, projects featuring premium natural stone will almost certainly push past this figure. It's not just the higher price of the stone itself; it's the investment in the specialised skills needed to install it flawlessly.

A Long-Term Investment in Your Home

It’s true that the initial outlay for natural stone is higher, but it’s one of the best long-term investments you can make in your home. This isn't a material you'll need to replace in a decade. Its incredible durability means you get a timeless, hard-wearing finish that adds significant and lasting value to your property.
Working with registered builders is non-negotiable. They can provide a comprehensive quote that covers every single detail, from the initial structural checks right through to the final sealing and polishing. If you're starting to plan your project, our detailed guide on the cost of a bathroom renovation in Melbourne is a great place to get a clearer picture of the expenses involved.

Caring for Natural Stone: Simplicity is Key

One of the biggest misconceptions we hear from clients is that natural stone is a nightmare to look after. Let's be honest, you've invested in a beautiful, unique material, and the last thing you want is a high-maintenance headache. The good news is that caring for natural stone bathroom tiles is far less about hard work and much more about a simple, consistent routine.

A little bit of know-how is all it takes to keep that stone looking as stunning as the day it was installed.

A woman cleaning a marble countertop in a modern bathroom to maintain natural stone bathroom tiles.

The secret weapon in protecting your stone is the sealant. Think of it like a high-quality, invisible shield that stops moisture and stains from penetrating the naturally porous surface. When we complete a bathroom renovation, applying a professional-grade sealer is one of the final, crucial steps. It’s your first and best line of defence.

A Simple Cleaning Rhythm

Keeping your stone pristine doesn't mean endless scrubbing. It’s all about getting into a few easy habits and using the right products.

Here’s a straightforward rhythm that will ensure your stone remains the stunning centrepiece of your bathroom for years to come.

  • Daily Habits: The most effective thing you can do is simply to be mindful. Wipe up any spills—water, soap, makeup—as they happen with a soft, dry cloth. This prevents any potential marks from setting in. A fantastic trick is to keep a squeegee in the shower; a quick wipe-down of the walls after you shower goes a long way.

  • Weekly Care: Once a week, give your tiles a clean with a pH-neutral stone cleaner. These formulas are made specifically to wash away grime without stripping the protective sealant or harming the stone itself. This is probably the most important part of any long-term care plan.

A word of caution: never use common household cleaners that are acidic or abrasive. Anything with vinegar, lemon, or harsh chemicals will etch the surface of your stone, creating dull spots that are difficult and expensive to fix.

Over time, that protective sealant will need a top-up. Depending on the stone and how much traffic the bathroom sees, this is usually a simple DIY job every few years. This small amount of maintenance is all that stands between you and a lifetime of enjoying your beautiful investment.

The Eco-Friendly Advantage of Natural Stone

When you're planning a bathroom renovation, your mind probably jumps straight to aesthetics—the colours, the textures, the overall feel. But for many Melbourne homeowners, the story behind the materials is just as important. If sustainability is on your mind, you'll be glad to know that choosing natural stone bathroom tiles is one of the greenest decisions you can make.

The beauty of stone's eco-credentials lies in its simplicity. It's a raw material, quarried directly from the earth. Think about what that means: it completely skips the energy-guzzling manufacturing needed for tiles like porcelain or ceramic, which have to be fired in intensely hot kilns. Stone is already made by nature.
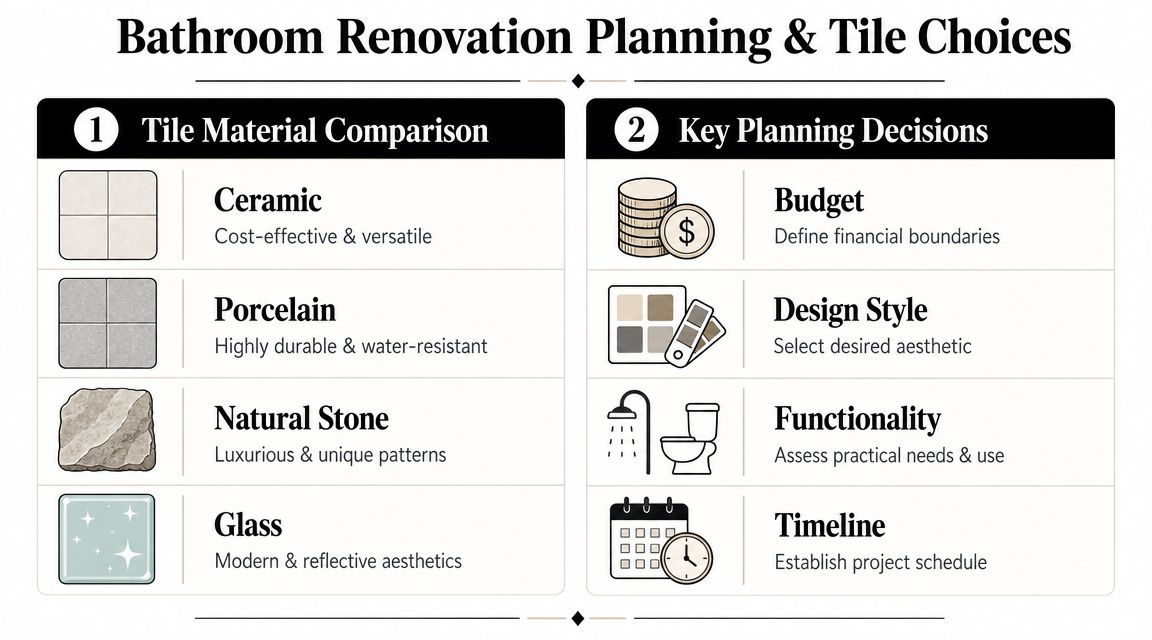
A Lower Ecological Footprint

That difference isn't just a small detail; it has a massive flow-on effect. When researchers look at the entire lifecycle of building materials, natural stone consistently comes out on top. In fact, studies show that natural stone tiles have an ecological footprint that's a staggering 84% lower than large ceramic tiles.

This is a direct result of it being a 'found' material rather than a heavily manufactured one. You can read more about the research and sustainable benefits over at Stone3.

But the green story doesn't end there. The incredible durability of stone is where its eco-friendly nature truly shines.

A natural stone finish is built to last for an immensely long time, which means you aren't constantly replacing it. That simple fact translates to less manufacturing, less quarrying, less transport, and less waste heading to landfill over the decades.

When you invest in a stone bathroom, you're not just thinking about the next five or ten years. You're choosing a surface for the life of your home. By opting for a material that endures, you're actively reducing the wasteful cycle of renovating and replacing.

Working with registered builders who are well-versed in sustainable practices can amplify this benefit. They can guide you on sourcing and ensure your entire renovation aligns with your environmental values, making your beautiful new bathroom a truly responsible choice.

Your Top Questions About Natural Stone Bathrooms

Even with all the stunning photos and design ideas, it’s completely normal to have a few practical questions before you commit to a material like natural stone. These are exactly the kinds of details you should be thinking about. Answering them upfront usually highlights why getting professional advice and craftsmanship is so important for a bathroom renovation that lasts.

Let's get into the most common questions we hear from homeowners.

Are Natural Stone Tiles Too Slippery for a Bathroom Floor?

That's a great question, and the answer comes down to one thing: the finish. A highly polished, glossy stone looks incredible on a feature wall, but you're right—it's far too slippery for a wet floor.

The solution is to choose a different finish. A honed, tumbled, or brushed finish gives the stone a more matte, textured surface with plenty of grip. These finishes are perfect for bathroom and shower floors, giving you that beautiful natural look while being safe and compliant with Australian standards. We can guide you to a finish that’s both safe and stunning.

Can My Floor Actually Support Heavy Stone Tiles?

This is a critical point, and it’s precisely why you need a registered builder involved in a natural stone project. Stone is significantly heavier than standard ceramic or porcelain, and your floor structure needs to be up to the task. A professional builder will always assess your subfloor to make sure it can handle the load before any work begins.

If your floor joists do need strengthening, your builder will manage those structural reinforcements. This is a complex job that can only be legally and safely handled by a qualified, registered builder, giving you total peace of mind that your home's integrity is protected.

Can I Really Use Natural Stone in a Shower?

Absolutely! A shower wrapped in natural stone is the definition of luxury. The key to getting it right involves two non-negotiables: choosing a suitable, less porous stone and, most importantly, flawless waterproofing and sealing.
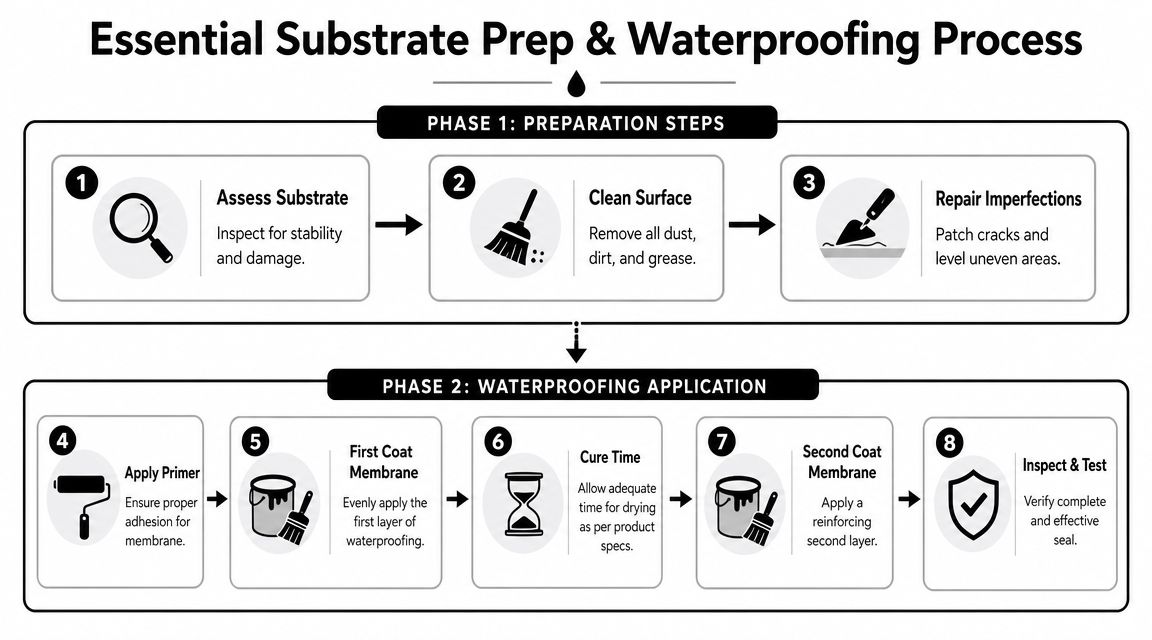
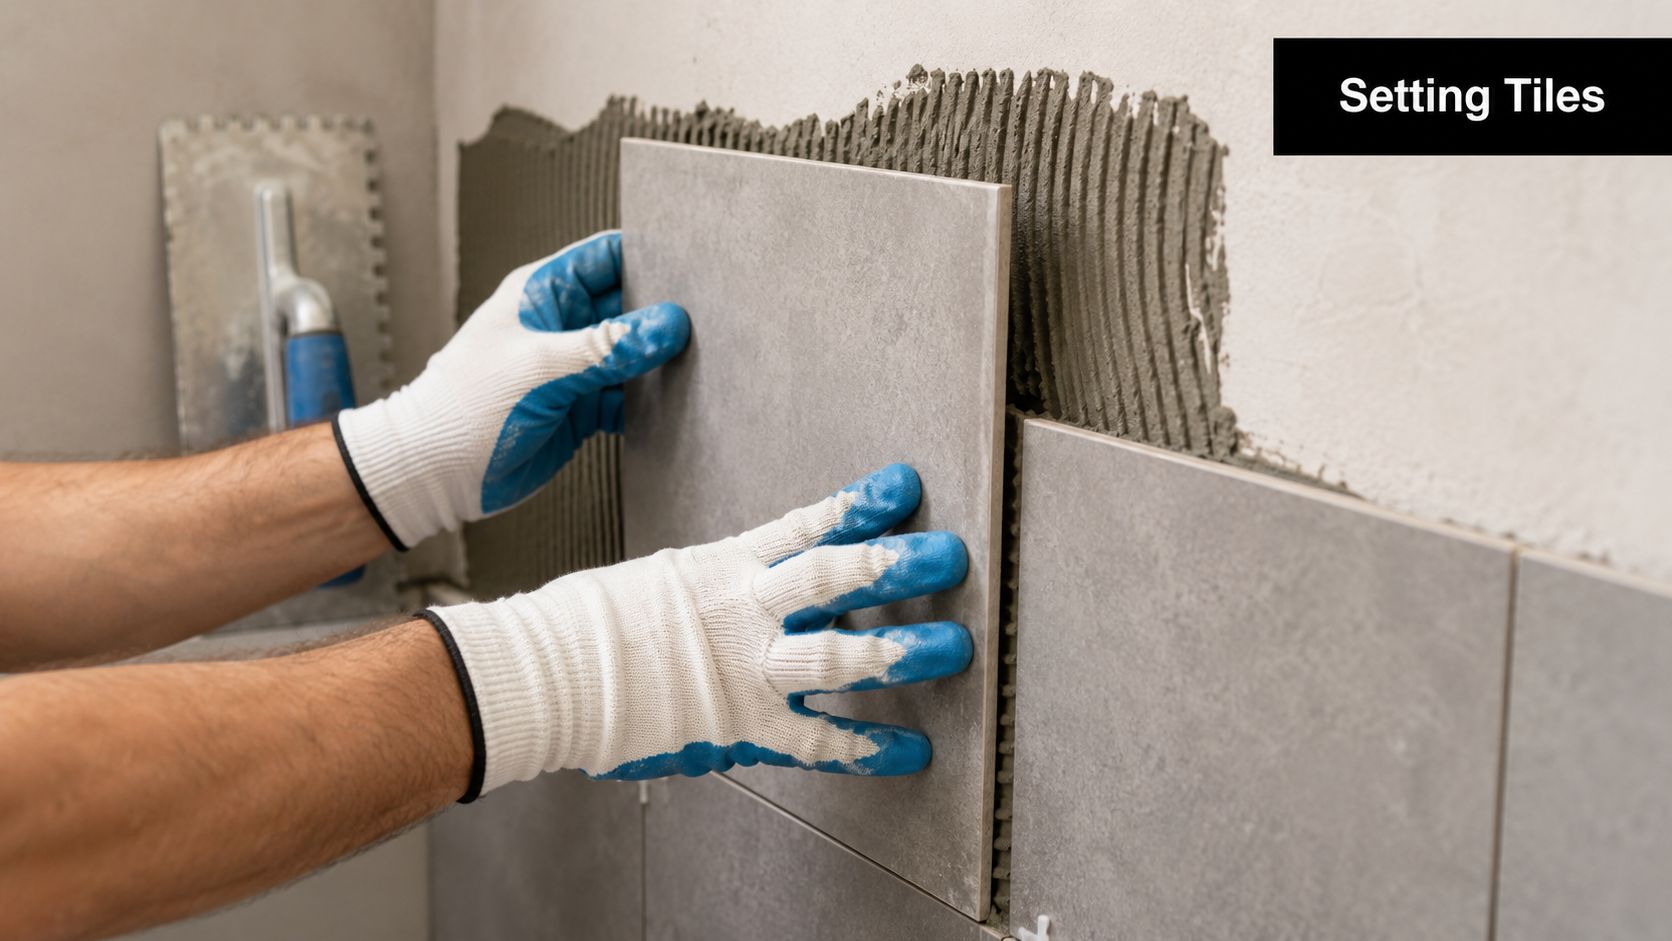
Expert waterproofers essentially build a fully sealed "tank" in the shower recess before a single tile goes on the wall. After the tiles are installed, the stone itself is then sealed with a high-quality impregnating sealer to stop water from soaking in. It's this careful, two-step process that guarantees your shower will be a beautiful, water-tight space for decades.

What Is the Difference Between a Tiler and a Registered Builder?

A tiler is a skilled tradesperson who specialises in laying tiles. A registered builder, however, is the captain of the ship for the entire renovation.

For a complex bathroom renovation involving natural stone, the builder is your single point of accountability. They coordinate everything—from the initial structural checks and demolition to the plumbing, waterproofing, electrical work, tiling, and final project sign-off. Using a registered builder ensures your project is managed properly, meets all building codes, and is covered by the necessary warranties from start to finish.


Ready to transform your bathroom with the timeless beauty of natural stone? The team at Melbourne Tiling Services P/L are registered builders and renovation experts. Contact us today for a free quote and 3D design consultation.

How to Tile a Bathroom Wall: A Melbourne Guide 2026

Individuals often start in the same place. They stand in an outdated bathroom, look at the stained grout, the tired wall tiles, the crooked lines around the shower mixer, and think tiling a new wall can't be that hard. Buy the tiles, grab some adhesive, watch a few videos, and get stuck in.

That's the part where bathroom renovations usually split into two paths. One becomes a clean, durable finish that still looks right years later. The other looks fine for a few weeks, then the corners crack, a row drifts out, or moisture finds its way behind the wall because the prep was wrong from the start.

In Melbourne, the second path is common in older homes. Solid-looking bathrooms often hide walls that are out of plumb, patched substrates, old movement cracks, and framing that was never set up for large-format wall tile. That's why knowing how to tile a bathroom wall properly means understanding more than tile adhesive and a spirit level. It means knowing where tiling ends and compliant wet-area construction begins.

Table of Contents

The Reality of a Flawless Tiled Wall

A flawless tiled wall is built long before the first tile goes up. The visible part is the finish. The real work sits behind it in the set-out, substrate correction, waterproofing, and movement detailing.

In older Melbourne homes, I regularly see bathrooms where the wall looks serviceable until a long straight edge goes on it. Then the problems show up fast. One side bellies out, the corner isn't square, the nib wall leans, or an old repair has left a hump exactly where a large porcelain tile needs to sit flat. None of that gets fixed by pushing on more adhesive.

There's also a big difference between a cosmetic re-tile and a proper bathroom renovation. If you're replacing a splashback outside a wet zone, a capable DIYer can sometimes manage it. If you're working inside a shower area, around penetrations, niches, wall-to-floor junctions, and waterproofed surfaces, the stakes go up sharply. A pretty finish won't save a wall system that isn't compliant.

Practical rule: If water will regularly hit the wall, treat the job as wet-area construction first and tiling second.

A lot of online guides miss that distinction because they assume flat walls, generic room layouts, and standards that don't apply in Australia. Melbourne bathrooms don't always play nicely. Period homes, post-war homes, and fast-renovated investment properties all throw up their own versions of the same issue. The wall behind the tile often needs more work than the tile itself.

That's also why registered builders matter in bathroom renovations. A proper builder doesn't just look at tile colour and grout width. They coordinate substrate repair, waterproofing, plumbing penetrations, and sequencing so the wall system works as one assembly.

A good tiled bathroom wall should do three things at once:

  • Look balanced: full tiles or larger cuts land where the eye goes first.
  • Stay bonded: no hollow spots, sagging, lippage, or weak bedding.
  • Manage movement and moisture: corners, junctions, and wet zones are detailed correctly.

If one of those is missing, the job usually tells on itself.

Planning Your Layout and Materials

The cleanest bathroom wall jobs are usually won before any adhesive is opened. Planning decides how the wall will look, how much material you'll need, and whether the install can be built without ugly compromises.

Start with the wet area rules

In Australia, bathroom wall tiling sits within the framework of the National Construction Code and AS 3740, and shower wall linings are commonly detailed to extend to at least 1800 mm above the finished floor. For estimating, a standard allowance is at least 10% extra tile, with 20% or more often needed for complex layouts, patterned tile, or difficult cuts, as outlined in this bathroom tile measurement guide.

That matters at the planning stage because your tile height, waterproofing extent, substrate, trim selection, and fixture set-out all need to line up. If they don't, the wall can end up looking improvised even when the workmanship is neat.

A checklist infographic titled Bathroom Tiling Planning Checklist with five numbered steps for successful wall tile installation.

For homeowners choosing finishes, a practical place to compare options is this guide to tiling materials for bathroom renovations.

Measure the wall like a tiler, not a shopper

Don't just measure width by height and order off that. Measure each wall separately, then note every interruption.

Use a tape, laser, and a notepad. Record:

  • Openings and penetrations: windows, doors, niches, mixer bodies, shower outlets, and power points.
  • Termination points: where tile stops at architraves, ceilings, benchtops, screens, or trims.
  • Out-of-square conditions: check the width at the top, middle, and bottom, not only once.

Then lay out the tile grid on paper or with a story pole. Dry planning tells you where your cuts will land. The goal is simple. Keep cut tiles larger and place them in lower-visibility areas instead of creating thin slivers in the first thing people see.

Narrow cuts at eye level are rarely a tile problem. They're usually a planning problem.

Choose tile size with the wall in mind

Ceramic wall tile is forgiving. Porcelain is tougher and often cleaner looking, but it's less forgiving to cut and heavier on the wall. Large-format panels and Kerlite can look excellent in a modern ensuite, but they demand a flatter substrate and tighter control over set-out.

A quick trade-off table helps:

Tile type What works well What catches people out
Ceramic Easier cutting, good for standard walls Can look busy with many grout joints
Porcelain Dense finish, sharp modern look Harder cuts, heavier handling
Large-format or Kerlite Fewer joints, premium appearance Exposes uneven walls fast

If the wall is patchy, bowed, or out of plumb, a smaller format often gives you more forgiveness. If the design calls for large-format tile, sort the wall first. Don't expect adhesive to rescue the finish.

Wall Preparation and Waterproofing

The best-looking tile in the showroom won't compensate for a bad wall. If the substrate moves, is damp, is powdery, or is out of plane, the tiled finish is already in trouble.

A tiled wall only performs as well as the substrate

Start with a hard inspection. Tap the wall. Check for drummy patches, loose sheeting, old swelling from moisture, soft plaster, or cracked cement render. Then check flatness and plumb with a straight edge and level.

If the wall is visibly uneven, fix the wall. Don't try to hide it with thick blobs of adhesive. That approach creates inconsistent bedding, poor bond, and a much higher chance of lippage on the face.

A professional construction worker applies waterproof membrane sealant onto bathroom wall boards using a paint roller.

In older Melbourne bathrooms, this stage often decides whether the project stays DIY-friendly. Minor patching is one thing. Re-sheeting walls, correcting bad framing, and rebuilding shower substrates is another.

Waterproofing isn't a decorative extra

In wet areas, waterproofing is part of the system. It isn't something you squeeze in because the tiles are nearly ready to go. Corners, wall-to-floor junctions, and changes of plane all need to be treated as movement points, and expert guidance is clear that these areas should use flexible sealant, not grout. The same guidance also recommends back-buttering tiles when coverage is uncertain so you don't leave voids on vertical surfaces, which can lead to bond failure, as explained in this bathroom wall tile installation guide.

If you're working on a full renovation, at this stage many homeowners should stop and bring in the right trade team. Waterproofing compliance is not the place to guess. If there's any doubt about membrane selection, penetration treatment, or wet-area detailing, get a qualified waterproofer involved and have the work coordinated properly. For system-level context, this page on bathroom waterproofing systems is a useful reference point.

What DIYers usually get wrong

The common failures are nearly always behind the tile, not on it.

  • They tile over a poor base: dusty sheeting, weak old plaster, or walls that aren't flat enough.
  • They grout movement joints: internal corners and fixture junctions crack later because the assembly can't move.
  • They ignore penetrations: mixer points, outlets, and niche corners need careful detailing before the finish goes on.

If the wall needs waterproofing, sealant strategy should be decided before tile layout, not after grouting.

Another trap is sequencing. Plumbing rough-in, sheeting, waterproofing, set-out, tile installation, grouting, and silicone all need to happen in the right order. Registered builders are useful here because they don't treat the tiler in isolation. They coordinate the whole bathroom renovation so one trade doesn't undo the next.

Setting Tiles From Adhesive to Final Cut

This is the stage commonly thought of when considering how to tile a bathroom wall. It's also the stage where rushed work becomes visible immediately.

Set out first, then mix adhesive

A reliable wall-tiling method starts with set-out, not adhesive. Dry-lay the field tiles, establish a reference line from the most visible area, and push smaller cuts into less noticeable corners. On bathroom walls, pros also recommend using a notched trowel at about 45° and pressing each tile with a slight twist to collapse the ridges properly. For ordering, a practical benchmark is about 15% extra tile to cover cuts, breakage, and pattern matching, especially where penetrations and niches increase waste, as noted in this tile-setting guide.

A tiler carefully installs a grey marble-look wall tile onto mortar during a bathroom renovation.

Mark your verticals and horizontals clearly. If the floor isn't perfectly level, don't trust it as your starting point. Use a straight batten or laser line and build the wall from a known level reference.

For the actual setup, I'd keep the process disciplined:

  1. Dry-check the layout so you know where your cuts, trims, and fixture openings will fall.
  2. Mix adhesive in small batches so it doesn't skin over while you're still adjusting tiles.
  3. Spread only what you can tile in a short run on a vertical wall.
  4. Comb in one direction and keep the notch lines consistent.
  5. Use spacers and keep checking level rather than assuming the first row will carry the rest.

How to place each tile so it actually bonds

The tile has to be bedded properly, not just stuck on. Press it in, give it a slight twist, and check the first few pieces by lifting one back off if needed. You're looking for proper adhesive transfer, especially on porcelain and large-format tile.

Back-buttering helps when the tile back pattern or wall condition makes full contact less certain. It's a simple habit that prevents hollow spots and weak corners.

The biggest practical mistakes happen fast:

  • Over-spreading adhesive: the surface skins and the bond suffers.
  • Letting joints wander: one bad line multiplies across the wall.
  • Forcing a tile to correct a crooked wall: the face may look close, but the bedding will be inconsistent.

This video shows the kind of careful handwork wall tiling needs, especially around alignment and tile placement.

Large-format tiles on Melbourne walls

Large-format tile is where many bathroom wall jobs stop being forgiving. On a straight, well-prepared wall, it can look sharp and modern. On an older Melbourne wall with a belly, twist, or patched substrate, it exposes every flaw.

That's why set-out and substrate correction matter more with bigger tiles. A small ceramic can ride over slight inconsistency. A large porcelain tile won't. It will telegraph the defect, bridge a low area, or leave a void if the installer tries to cheat the wall with adhesive thickness.

For cuts around taps, outlets, windows, and niches, measure twice and cut with the finished edge in mind. Good wall jobs aren't judged only by the full tiles. They're judged by the cuts around the details.

Good tilers don't just install the field neatly. They make the awkward cuts look intentional.

If the room has sloping ceilings, angled walls, difficult niches, or premium large-format panels, that's often the point where a professional install makes more sense than learning on the wet wall of your own bathroom.

Applying Grout and Sealing for a Perfect Finish

A tiled wall can be set well and still be spoiled in the final stage. Grouting and sealing need patience, clean timing, and a clear understanding of where grout belongs and where it doesn't.

Grouting without ruining the joints

Wait until the tiles are properly set before you start. Then mix the grout to a smooth, workable consistency and apply it with a rubber float on an angle, forcing it firmly into the joints from more than one direction.

The cleanup matters as much as the application. Wipe too early and you drag grout back out of the lines. Wipe too aggressively and you wash out the face of the joint so it dries shallow and patchy.

A tidy routine works best:

  • Pack the joints fully: don't skim over them and hope the sponge fixes it.
  • Strike off diagonally: this helps avoid pulling grout from the gaps.
  • Use a well-wrung sponge: too much water weakens the finish and makes a mess of the joints.

If haze forms later, deal with it carefully. Don't panic and flood the wall. Most grout cleanup problems come from using too much water, too early.

Where grout must stop

Many DIY bathroom walls fail early at internal corners, wall-to-floor junctions, and the edges around fixtures. These are movement points. They should be sealed with a quality flexible silicone sealant, not filled with grout.

As noted earlier, grout in those areas will crack because the wall system moves. Once that line opens up, moisture has a path.

A simple division keeps the finish durable:

Area Use
Tile joints in the field Grout
Internal corners Flexible sealant
Around fixtures and changes of plane Flexible sealant

The neatest bathroom wall finish usually comes from restraint. Clean joints, clean silicone lines, and no attempt to grout every gap in sight.

Colour matching also matters. If the silicone clashes with the grout, the finish looks patched even when the detailing is correct. Professional tilers spend time here because this is the point the client stares at from close range.

Troubleshooting and When to Call a Registered Builder

Some bathroom wall problems are cosmetic. Others are warning signs that the system behind the tile isn't right.

Problems you can sometimes fix

Minor grout haze can often be cleaned up. A small low spot in a grout line can usually be repaired. A chipped edge at a trim may be improved if it's isolated and accessible.

Other issues are more serious:

  • Lippage: one tile sits proud of the next. This usually points to poor substrate prep or poor bedding.
  • Hollow-sounding tiles: often a sign of inadequate adhesive coverage or voids behind the tile.
  • Cracked corner joints: commonly caused by grout being used where flexible sealant should have been used.

Screenshot from https://melbournetilingservices.com.au

If a shower has angled planes or tricky drainage geometry, caution matters even more. Recent VBA data shows that 22% of bathroom leak complaints in 2024–2025 stemmed from improper tile-to-drain alignment in angled showers, which is exactly the kind of issue generic tutorials usually ignore.

Red flags that need a professional

If any of these apply, I'd stop treating the project as a casual DIY wall-tiling job:

  • The walls aren't straight or plumb: common in older Melbourne homes and hard to correct without proper prep work.
  • The shower area needs full wet-area compliance: membrane detailing, penetrations, and junctions can't be guessed.
  • You're using large-format tile or Kerlite: these materials demand better substrate control and handling.
  • The layout includes niches, windows, sloping ceilings, or awkward returns: the cutting and sequencing get technical quickly.

A registered builder earns their keep when the bathroom renovation needs coordination across trades, not just tile setting. That includes sheeting, waterproofing, plumbing points, screeding, electrical clearances, and final finish alignment. One practical option for homeowners dealing with failed sections or localised defects is to start with a tile repair assessment in Melbourne.

For full bathroom renovations, Melbourne Tiling Services P/L is one example of a registered builder-led contractor that handles tiling as part of the broader wet-area build sequence rather than as a standalone cosmetic trade.

If you're confident, organised, and working on a straightforward wall outside the highest-risk wet areas, some parts of the job are achievable. If the bathroom has movement, moisture risk, uneven walls, or premium finishes, professional help isn't overkill. It's good judgement.


If your bathroom wall project has moved beyond a simple DIY refresh and into full wet-area work, Melbourne Tiling Services P/L can help with bathroom renovations, waterproofing, substrate preparation, tile installation, and repair work across Melbourne. As registered builders, they coordinate the full process so the finished wall looks right and performs properly.

Bath Tile Installation: Melbourne’s Expert Guide 2026

You're probably at the stage where the bathroom still looks simple on paper. Pick a tile, book a tiler, get it done. In practice, bath tile installation in Melbourne is rarely just about the tile. The finish you see on day one only lasts if the work underneath it was handled properly.

As a Melbourne-based Registered Builder and master tiler, I can tell you the same thing I tell homeowners at quoting stage. The expensive mistakes in bathroom renovations usually happen before the first tile is laid. Poor substrate prep, rushed waterproofing, bad falls, and sloppy junction detailing create the leaks and failures that cost the most to fix later.

Table of Contents

Planning Your Bathroom Renovation and Tile Selection

The best bathroom renovations start with decisions that most homeowners can't see. Before you compare colours, you need to know whether you're doing a cosmetic re-tile, a full wet-area rebuild, or a broader renovation involving plumbing, waterproofing, fixtures and layout changes. That scope determines cost, sequencing, who needs to be involved, and whether a Registered Builder should manage the job.

Start with scope, not samples

If the room has movement, an old screed, patched surfaces, or a history of leaks, tile selection is not the first conversation. The first conversation is whether the existing base is suitable to tile over at all. In many Melbourne bathrooms, it isn't.

Use these early planning checks:

  • Confirm the wet-area condition: Look for cracked grout lines, drummy tiles, swollen skirtings, stained ceilings below, or movement around shower bases and corners.
  • Define the renovation level: A simple surface refresh is very different from a strip-out that includes screeding, waterproofing, plumbing adjustments and fixture replacement.
  • Decide who coordinates trades: Bathroom renovations often need a builder to sequence tilers, plumbers, electricians, carpenters and waterproofers properly.

Practical rule: If you're changing waterproofed areas, drainage, wall linings, or the bathroom layout, treat it as construction work first and decorating second.

Choose tile by performance first

Homeowners often choose on appearance, then try to force the room to suit the tile. That's backwards. Tile size, material and edge profile all affect labour, substrate tolerance and installation difficulty.

Here's a practical comparison.

Tile Type Durability Water Resistance Average Cost (Supply) Best For
Ceramic Good Good Lower entry point Budget-conscious wall and floor updates
Porcelain High High Mid to higher range Family bathrooms, floors, showers
Natural Stone Varies by stone Varies, often needs sealing Higher Premium bathrooms and feature areas
Glass Good in the right application High Varies Feature strips, splashbacks, decorative walls

For style ideas, many homeowners start by browsing modern bathroom tiling options and then narrow choices based on cleaning, slip resistance, edge detail and how much movement the room is likely to see.

Large-format tiles can look sharp, but they're less forgiving. If the walls are out, the floor has poor falls, or the corners aren't true, a large porcelain tile will expose every flaw. Natural stone gives a premium look, but it asks more from the installer and from the owner after handover.

An infographic titled Bathroom Renovation Planning and Tile Choices listing material types and key planning decisions.

Budget for the hidden work

A realistic budget needs to separate visible finishes from technical preparation. Australian renovation guides commonly report bathroom tiling costs of about A$50 to A$150+ per m² for standard ceramic or porcelain, with higher-end stone, mosaics or complex layouts rising above that range, according to Angi's tile installation cost guide.

That spread tells you something important. Labour intensity changes dramatically when the room needs levelling, screeding, tighter set-out, shower detailing, niche work, or difficult cuts around fixtures.

DIY can work for a dry, simple, low-risk area. A bathroom is different. Wet-area work has compliance implications, and once waterproofing, falls and penetrations are involved, cutting corners stops being a styling issue and becomes a defect issue.

The Critical Foundation Substrate Prep and Waterproofing

The success or failure of bath tile installation depends heavily on the preparation. A bathroom can look perfect at handover and still be heading for failure if the base under the tiles wasn't sound. Tiles don't waterproof a bathroom. They protect and finish the surface. The actual defence sits below them.

Why the substrate decides the outcome

Australian wet-area work is governed by AS 3740:2021, and in domestic bathrooms the membrane must be installed before tiles are laid. That's part of why compliant bathroom work in Victoria is primarily about waterproofing and substrate preparation, not just appearance, as outlined in this explanation of AS 3740:2021 and bathroom tile installation.

Before any membrane goes down, the substrate has to be checked for stability, flatness, cleanliness and movement risk. On renovation projects I regularly see old bathrooms with patched screeds, mixed materials, previous repair work and surfaces that were never flat to begin with. If you tile over that without correcting it, the room may still leak, pond, crack or produce lippage.

The common weak points are predictable:

  • Wall and floor junctions
  • Pipe penetrations
  • Shower recess transitions
  • Drain detailing
  • Changes between old and new substrates

An infographic detailing the eight steps of the essential substrate preparation and waterproofing process for construction.

What compliant waterproofing actually involves

A proper system starts with substrate prep, then primer where required by the product system, then membrane application, reinforcement and detailing at critical junctions, followed by curing and project-specific verification before tile setting starts. If you're comparing contractors, ask them to explain the sequence in plain language. If they skip straight to tile choice, that's a warning sign.

For homeowners reviewing system options, one useful reference point is this page on bathroom waterproofing systems, because it reflects the fact that membranes, primers, detailing and tile adhesives need to work as a coordinated assembly rather than as isolated products.

Waterproofing failures rarely begin in the middle of the wall. They begin at edges, joins, penetrations and places where one trade assumed another trade had handled it.

What goes wrong when this stage is rushed

The hardest defects to fix are the ones hidden behind finished surfaces. If a tiler lays over a substrate that still moves, you can get cracking, drummy tiles and broken grout lines. If falls are wrong, water sits where it shouldn't. If the membrane is poorly detailed, moisture finds the path.

Consumer advice often reduces prep to “make sure the surface is clean.” In real bathroom renovations, that's nowhere near enough. The room needs a base that is true, stable and ready for a membrane that remains continuous through corners, edges and penetrations.

A premium tile doesn't rescue poor prep. In fact, high-end porcelain, stone and large-format panels tend to punish bad prep more severely because they reveal unevenness and demand better coverage and tighter movement control.

Tile Layout Adhesives and Setting Your Tiles

Once the room is properly prepared, the visible craft begins. This is the stage most homeowners think of when they hear bath tile installation, but the method matters more than speed. A neat finish comes from planning cuts, controlling lines and maintaining coverage, not from pushing tiles onto adhesive as fast as possible.

A tiler wearing blue and white gloves carefully setting a grey ceramic tile onto a mortar-covered wall.

A clean layout prevents a messy finish

Professional workflow starts with a dry layout. That means working out where full tiles land, where cuts fall, how the room centres visually, and whether niche edges, corners and floor wastes will look balanced. Industry installation guidance commonly recommends laying full tiles first and leaving perimeter cuts until last, with movement gaps maintained at walls. Mortars typically need about 24 hours before grouting, and ordering about 15% extra tile is a sensible allowance for cuts, breakage and future spares, based on Daltile's floor tile installation guidance.

The room should dictate the set-out, not the packet size. In a small ensuite, for example, a centred wall can still produce ugly slivers at an external edge if nobody thought through the sightlines from the doorway.

Adhesive choice and coverage matter

The right adhesive depends on the tile, the substrate and where the tile is going. Porcelain, natural stone, vertical applications and large-format pieces all ask more from the adhesive system than a basic ceramic wall tile in a low-stress area.

A few things matter on every job:

  • Coverage: Hollow spots come from poor transfer and bad technique.
  • Trowel selection: Notch size needs to suit tile size and substrate condition.
  • Working time: Spread only what can be tiled while the adhesive remains workable.
  • Movement allowance: Hard-setting every edge tight against walls invites later stress.

If you're comparing products for porcelain, stone or large-format work, this overview of tiling materials for bathroom and renovation projects is a practical starting point.

Here's a short visual demonstration of controlled tile setting technique in action:

Set in control zones, not in a rush

Good installers don't try to cover the whole room in one go. They work in smaller zones, check plane continuously, and keep adjusting as they go. On walls, that helps maintain clean lines around niches and tapware. On floors, it keeps falls readable and prevents drifting joints.

If the set-out is right, the room feels calm. If the set-out is off, even expensive tiles look second-rate.

Large-format work often benefits from levelling clips and wedges, but those are aids, not solutions. They don't replace a flat substrate, proper adhesive coverage or a well-planned layout.

Grouting Sealing and Installing Fixtures

A lot of bathrooms are spoiled at the finish line. The tiles are straight, the cuts are clean, then the grout is inconsistent, the haze isn't removed properly, or fixtures are installed with too much pressure on fresh tilework. Finishing trades need restraint.

Grout is part of the system

Grout choice should suit the location and maintenance expectations. Cement-based grout remains common and works well when correctly mixed, packed and cleaned. Epoxy grout can be a sensible option in areas where stain resistance and lower absorption matter more, but it needs more skill to install neatly.

What matters most is technique:

  • Pack the joints fully: Shallow joints don't protect edges well and often look patchy.
  • Clean in stages: Overwashing weakens colour consistency and can drag material from the joint.
  • Watch the timing: Cleaning too early smears grout. Too late, and haze becomes much harder to remove.

In showers and splash-prone areas, movement joints and junctions should be handled appropriately rather than being treated like ordinary field joints. That's one of the details that separates durable work from work that only photographs well.

Seal where the material calls for it

Not every tile needs sealing. Porcelain often doesn't. Many natural stones and other porous finishes do. The key is matching the sealer to the material and applying it at the correct stage.

Homeowners often assume sealing makes a bathroom waterproof. It doesn't. Sealing helps protect porous tile or grout from staining and moisture absorption at the surface. It does not replace the waterproofing system beneath.

Fixtures must be installed without compromising the tilework

The final stage includes shower screens, tapware trim-outs, wastes, mirrors, accessories and silicone finishing. This is where coordinated bathroom renovations matter. The tiler, plumber, glazier and builder all affect the final outcome.

A few details deserve close attention:

  • Frameless shower screens: Fixings need to respect waterproofed zones and finished tile lines.
  • Tap penetrations: Escutcheons should sit cleanly without forcing uneven cuts or leaving messy gaps.
  • Floor wastes: The grate position should align with the tile layout and still allow proper drainage.
  • Silicone joints: Neat flexible joints at changes of plane matter for movement and appearance.

Melbourne Tiling Services P/L is one example of a contractor that handles bathroom renovations with coordinated tiling, waterproofing and fixture integration under Registered Builder oversight, which is often the cleanest path when several trades need to work in sequence.

Common Tiling Mistakes and Melbourne Regulations

The most expensive assumption in bathroom work is that tiling is just a finish trade. It isn't. In a wet area, tiling sits on top of construction decisions that affect durability, leak risk and compliance.

The mistakes I see most often

The failures are rarely mysterious. Most can be traced back to basic shortcuts.

A close-up view of white bathroom wall tiles showing a cracked corner and poor grouting work.

Common examples include:

  • Tiling over uncured waterproofing: That traps risk into the room before the finish is even complete.
  • Ignoring substrate movement: Cracks, hollow spots and lippage often start here.
  • Bad junction detailing: Corners, penetrations and waste areas are frequent failure points.
  • Chasing appearance over drainage: Nice tile lines don't help if water doesn't fall correctly to waste.
  • Using premium tiles to hide poor prep: Expensive material usually makes defects more obvious, not less.

A recognised failure mode is tiling over uncured or discontinuous waterproofing, especially at junctions and penetrations. Guidance tied to Australian wet-area practice notes that AS 3740 requires these areas to be systematically sealed and cured before tiling starts, as explained in this article on how bathroom tile is laid over waterproofed areas.

A bathroom can survive a dated colour scheme. It won't survive failed waterproofing for long.

Why builder oversight matters in bathroom renovations

Melbourne homeowners sometimes split a bathroom job between separate trades without anyone taking full responsibility for sequencing. That's where defects get born. The plumber assumes the substrate issue has been fixed. The waterproofer assumes the carpentry is final. The tiler assumes penetrations are complete. Nobody owns the junction between trades.

That's why many bathroom renovations benefit from Registered Builder oversight. A builder doesn't just hire people. A competent builder coordinates the order of work, checks whether the room is ready for each trade, and prevents one shortcut from being buried by the next layer.

The homeowner benefit is practical. You get one scope, one sequence and one accountable party managing the room as a wet-area build, not as a patchwork of individual tasks.

Bringing It All Together Your Bathroom Renovation Checklist

A lasting bathroom isn't built by starting with the prettiest tile. It's built by getting the hidden work right and then finishing it with care. This is the difference between a bathroom that still performs years later and one that starts showing defects far too early.

Use this checklist before you commit:

  • Scope the job properly: Re-tile, rebuild, or full renovation.
  • Match the tile to the room: Don't choose large-format or stone without checking substrate suitability.
  • Verify the base: Flatness, movement, falls and junction condition all matter.
  • Treat waterproofing as essential: The membrane system has to be complete before tiling.
  • Plan the layout: Good set-out prevents poor cuts and awkward visual balance.
  • Use the right adhesive and curing sequence: Don't rush grouting or traffic.
  • Finish carefully: Grout, seal where required, and install fixtures without compromising the tilework.
  • Use qualified trades: Bathroom renovations work best when a Registered Builder coordinates the room as one system.

If you're spending money anywhere, spend it on the work you won't see once the room is complete. That's what protects everything you will see every day.


If you're planning a bathroom renovation and want practical guidance on tile selection, waterproofing, layout, or full project coordination, Melbourne Tiling Services P/L handles bathroom tiling and renovation work across Melbourne with Registered Builder oversight.