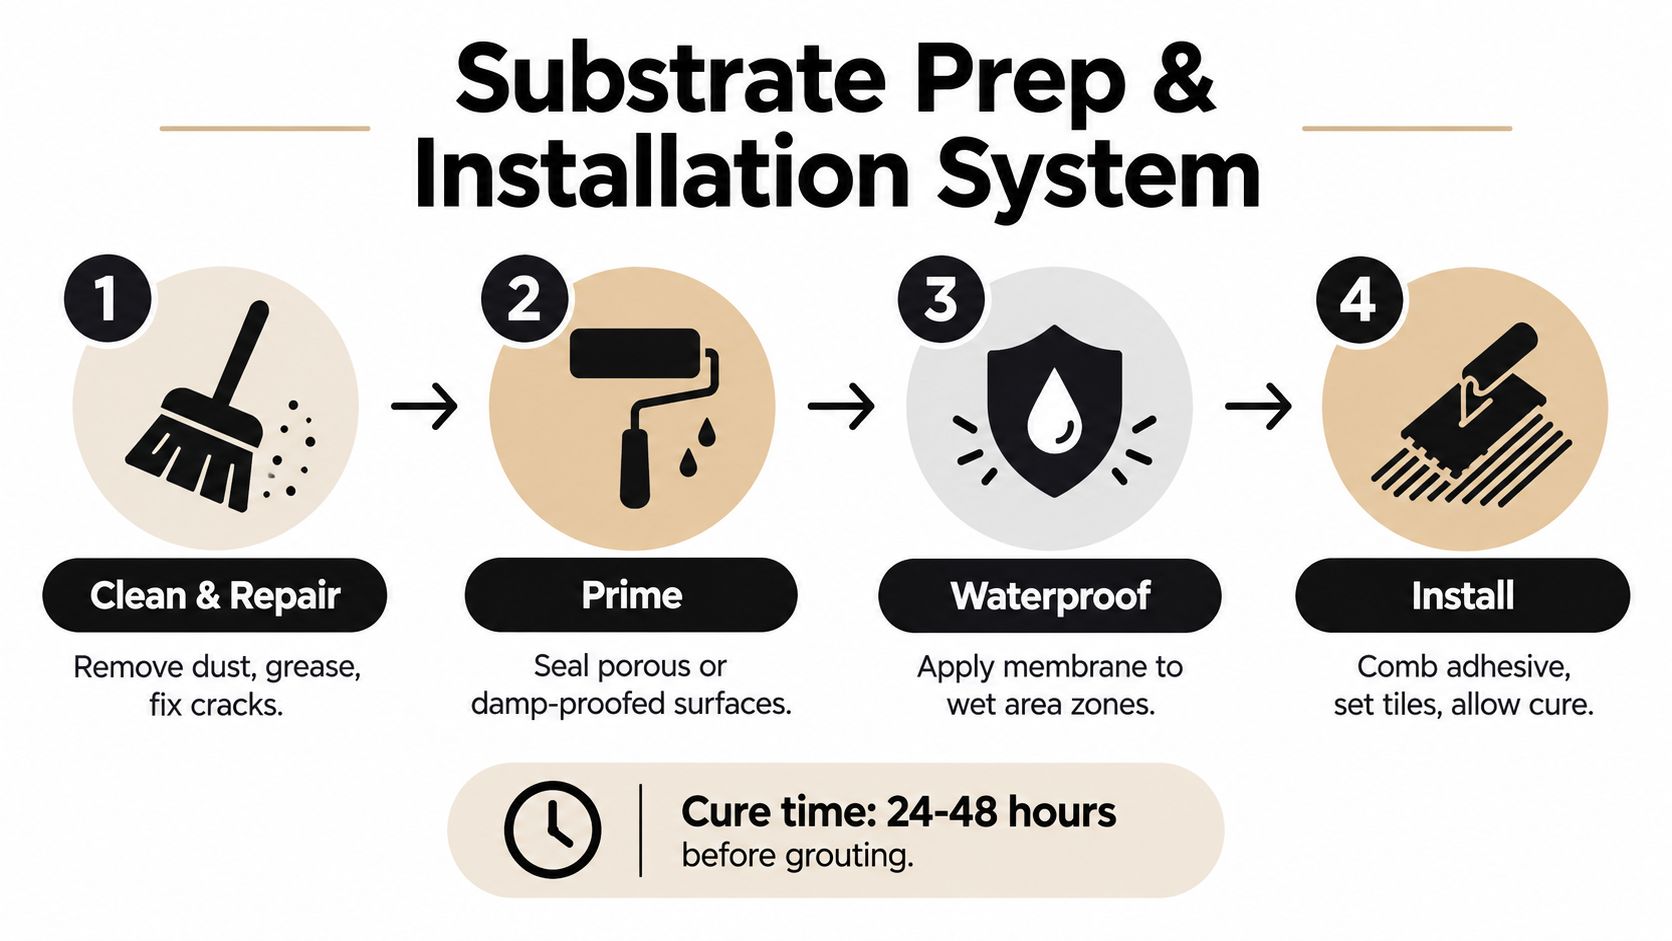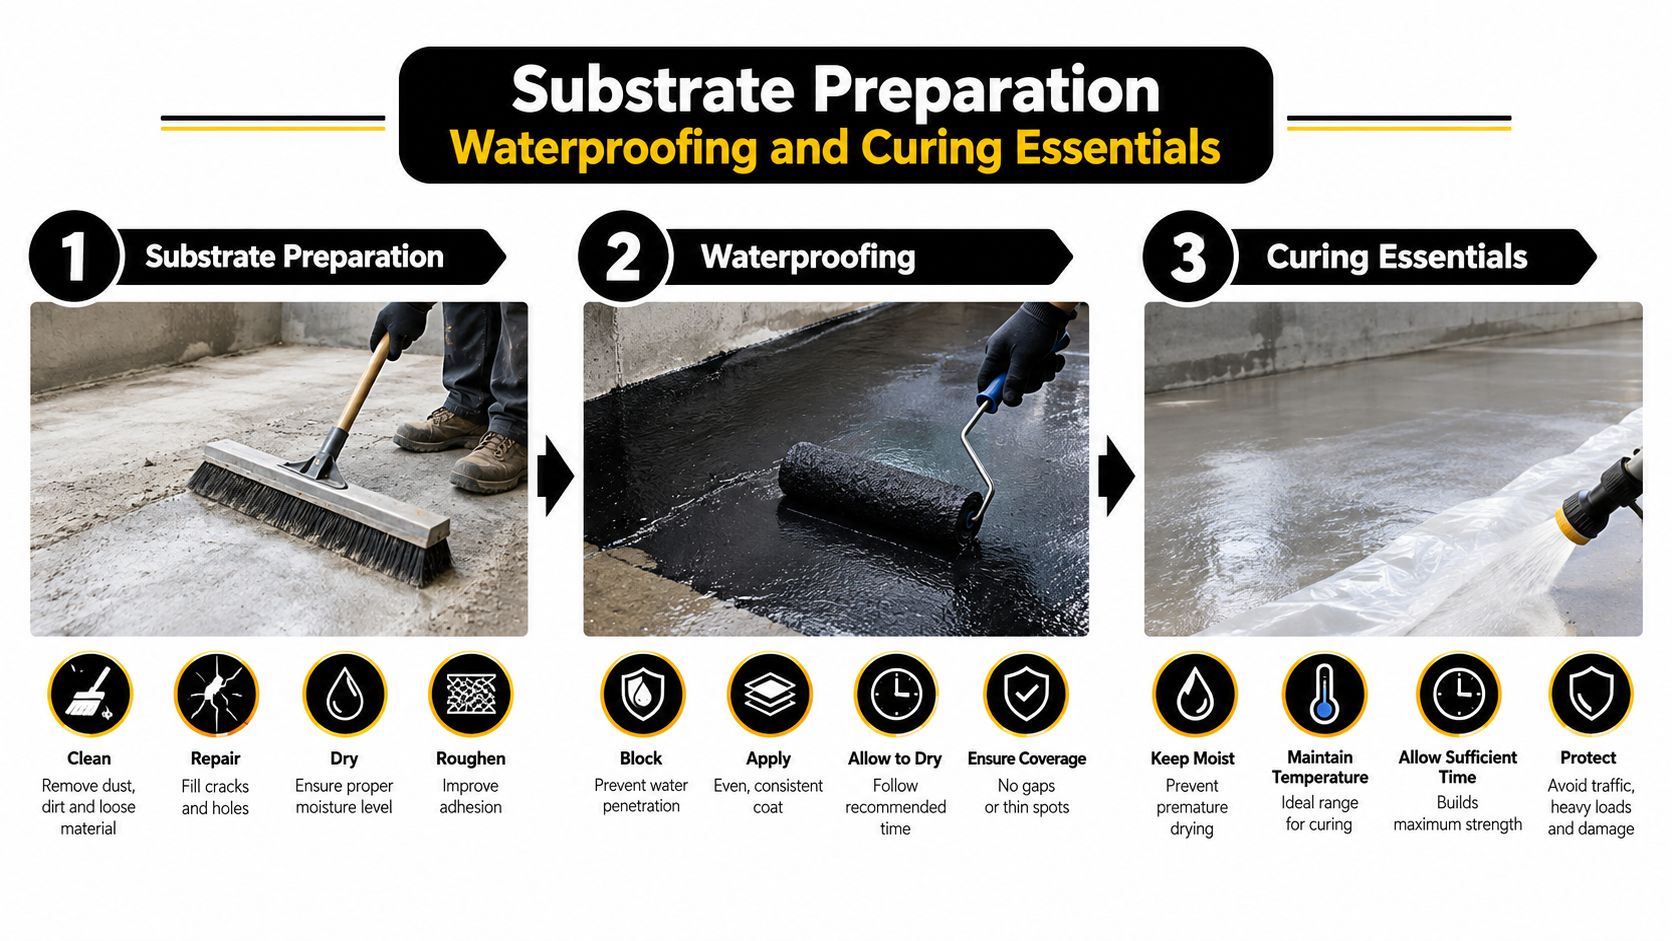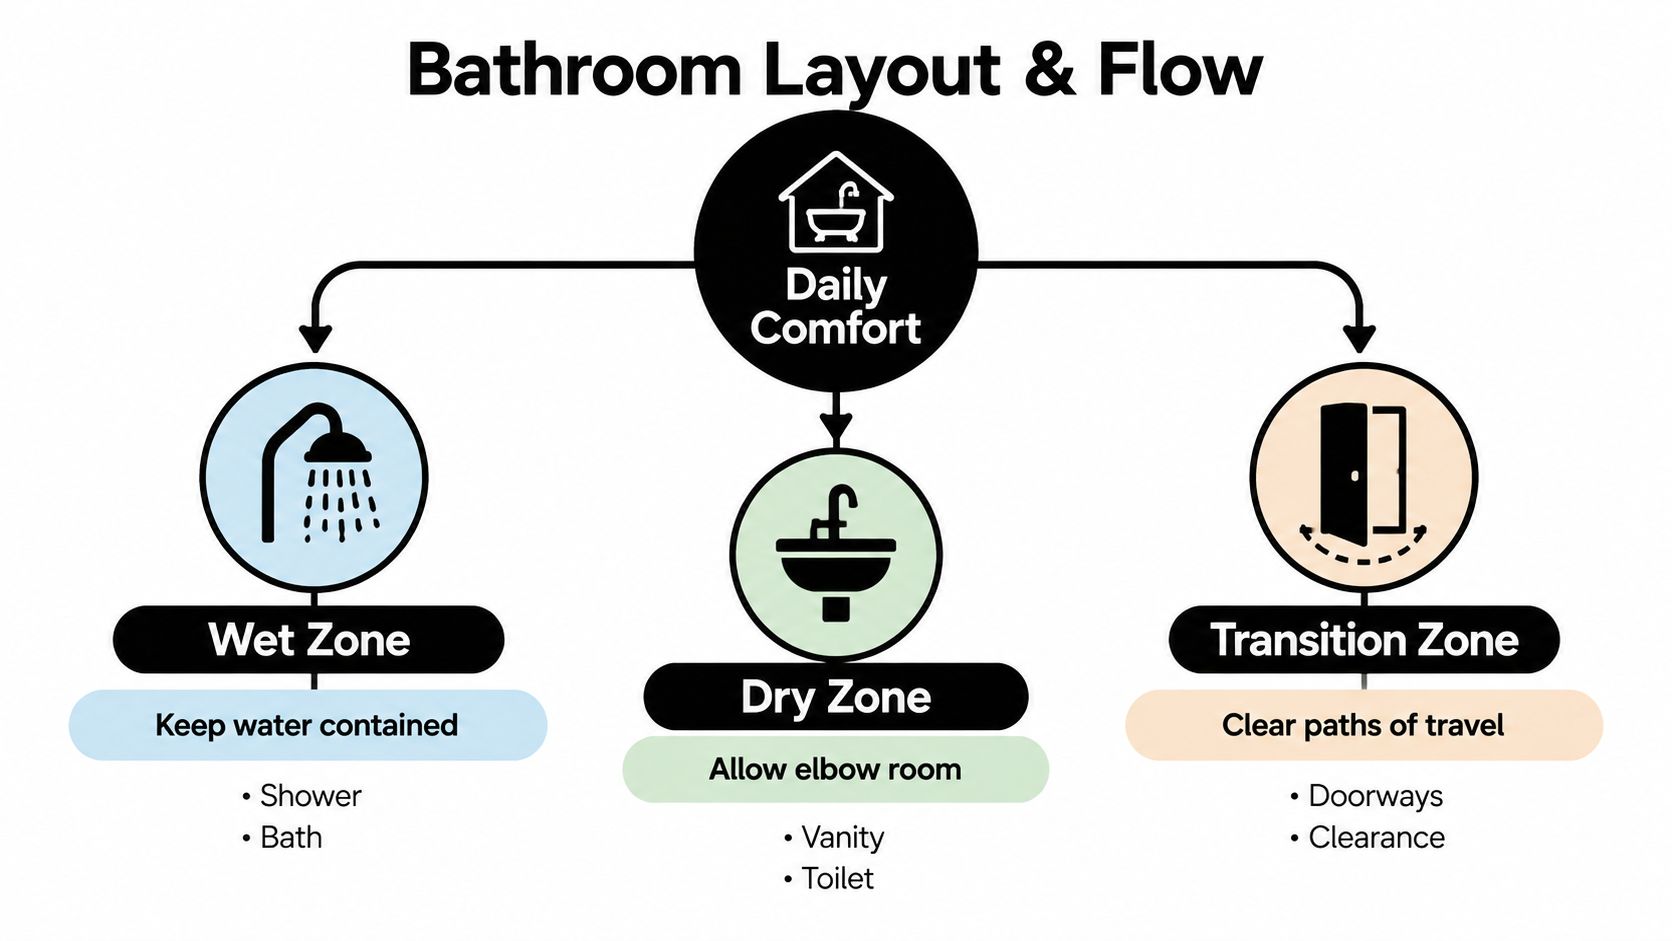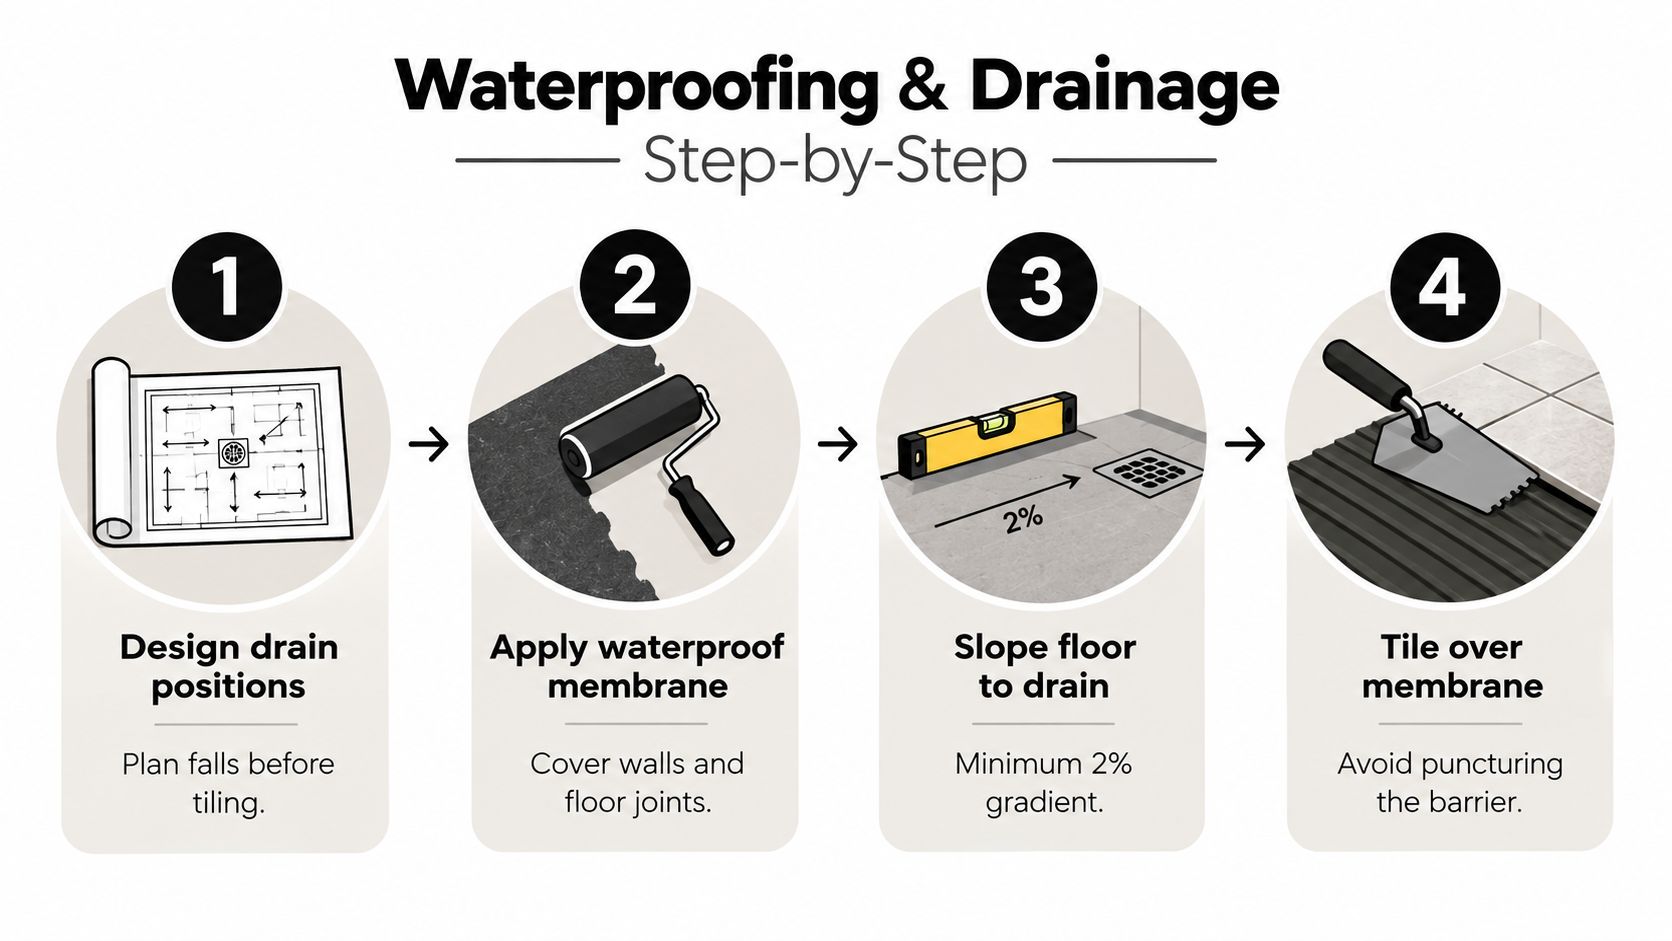
How to Waterproof Bathroom Walls the Right Way

You've chosen the tiles, booked the tiler and stripped the old bathroom back, only to discover that the shower wall has an unsealed pipe penetration and a suspicious gap where the sheets meet. The wall may look ready for a roller, but waterproofing over dust, movement or poor junctions can hide a failure until water reaches the framing.

Learning how to waterproof bathroom walls properly means treating the work as a continuous system. The substrate, membrane, corners, penetrations, floor junctions, drainage and inspection all need to work together under the National Construction Code (NCC) and AS 3740. Tiles make the room look finished, but the membrane behind them is what provides the primary barrier.

Table of Contents

Planning the Waterproofing System Before You Start

A bathroom job can be off track before anyone opens a membrane pail. I've walked into plenty of renovations where the tile selection was done, the screen was ordered and the wall linings were already up, but nobody had set out the waterproofing heights, the floor falls or the pipe penetrations. By the time that gets picked up, you are not planning anymore. You are pulling work apart and paying twice.

Treat substrate, membrane, junctions and penetrations as one system from day one. Check what the walls are built from, whether that is fibre-cement sheet, masonry, render or another lining the membrane manufacturer accepts. Then mark the shower area, screen position, niche, mixer body, shower outlet, bath edge, spout and every penetration that will break the waterproofed surface. If a detail is not marked now, it usually turns into a weak point later.
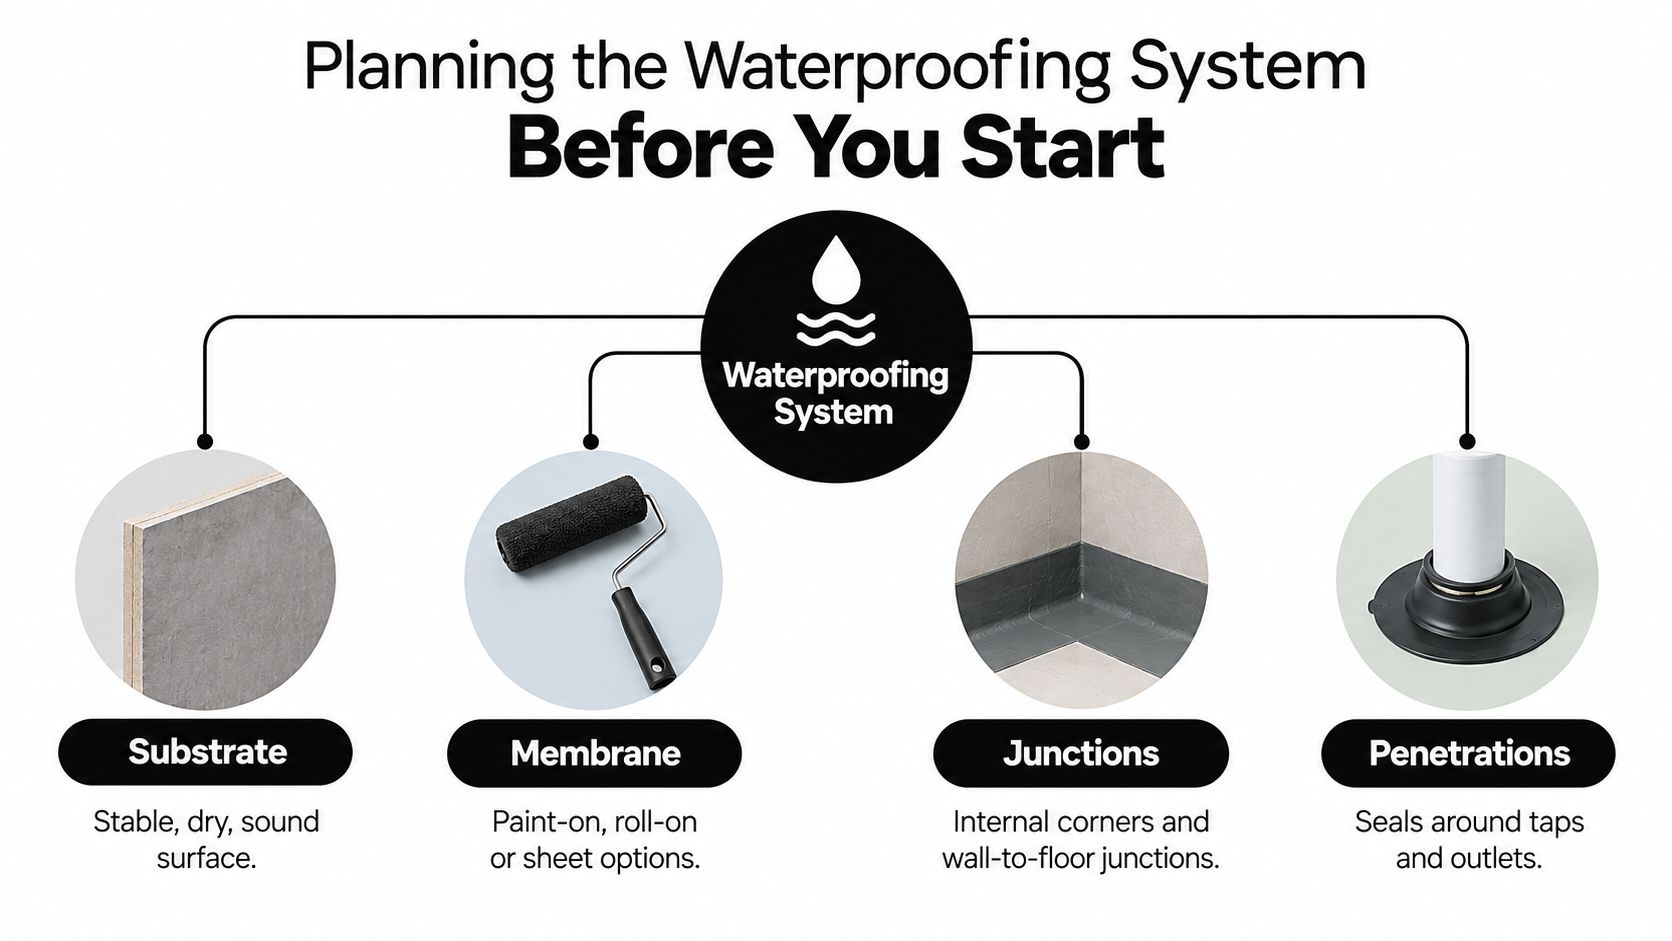
A diagram illustrating the four key components for planning a bathroom waterproofing system: substrate, membrane, junctions, and penetrations.

Mark the required wet-area zones

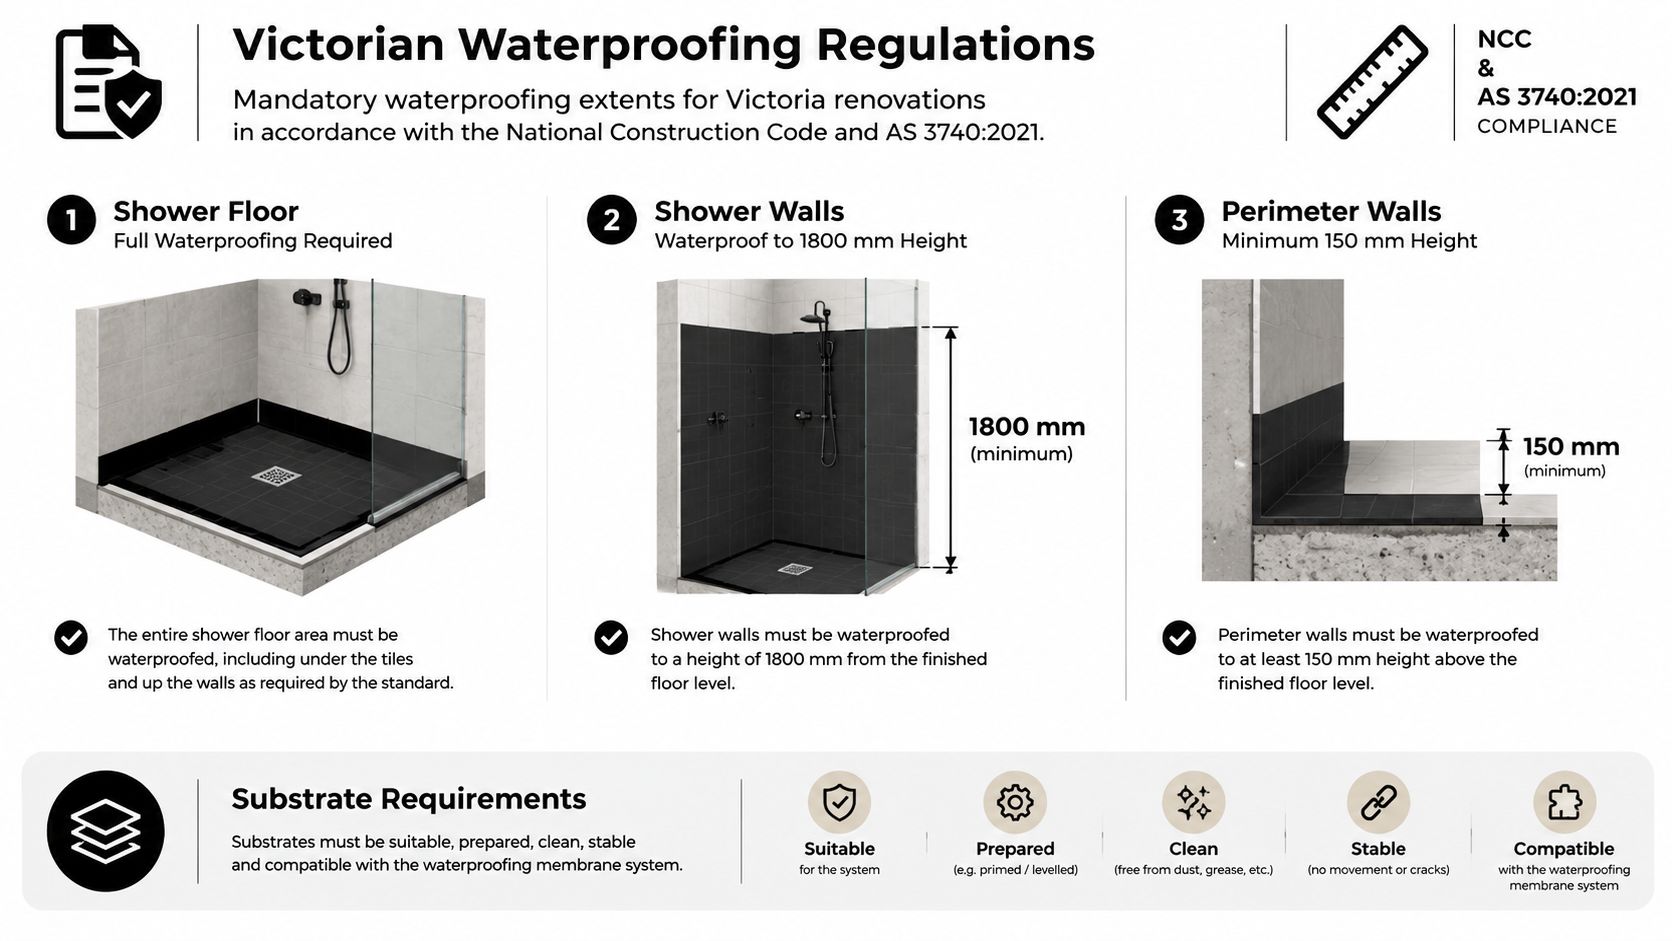
The wall heights matter, but so does where you measure from. In a residential shower, wall waterproofing generally needs to extend to at least 1,800 millimetres above the finished floor, and other wet-area walls commonly need protection to at least 150 millimetres above the floor, as outlined in Australian bathroom standards and waterproofing requirements. Measure from the finished floor level, not from the slab or an assumed tile build-up, otherwise the set-out can end up short.

A bath or spa without a shower is handled differently. The NCC requires wall waterproofing to reach at least 150 millimetres above the bath or spa lip, and the junctions in that zone need protection as part of the same continuous system. Basins, sinks and laundry vessels also need to be judged by where they sit and how the area is classified under the NCC Housing Provisions for wet-area waterproofing.

Choose the compliance pathway early

Floor falls cannot be left to the tiler to sort out on the day. AS 3740 requires falls to the floor waste of at least 1:80 and no steeper than 1:50, so the screed, membrane and tile layout need to be coordinated before installation, as reflected in ABCB guidance on using AS 3740. Get this wrong and water sits where it should drain, especially around wall to floor junctions and screen lines.

This is also the point where DIY usually runs out of road. If the job involves structural rectification, changed set-out, new wet-area linings, shower recess rebuilding, or any uncertainty about how the membrane system will comply as installed, a registered Victorian builder should take over. Compliance and sequencing are the same conversation on a bathroom job.

Practical rule: Set out the wet zones, junctions, penetrations and finished floor heights before demolition starts. If you cannot show where the membrane stops, how each opening is sealed and who is responsible for each stage, the bathroom is not ready for waterproofing.

Preparing the Substrate for a Lasting Bond

A membrane can't rescue a wall that's unstable, contaminated or still holding moisture. Before priming, inspect the wall like a waterproofer, not like someone choosing a paint colour.

Run a straightedge or spirit level over the surface and mark hollows, ridges and sudden changes of plane. Tap sheet linings to find drummy areas, check that fixings are secure and inspect every joint for movement. A cracked sheet joint, loose screw or softened plasterboard area should be repaired or replaced before waterproofing.
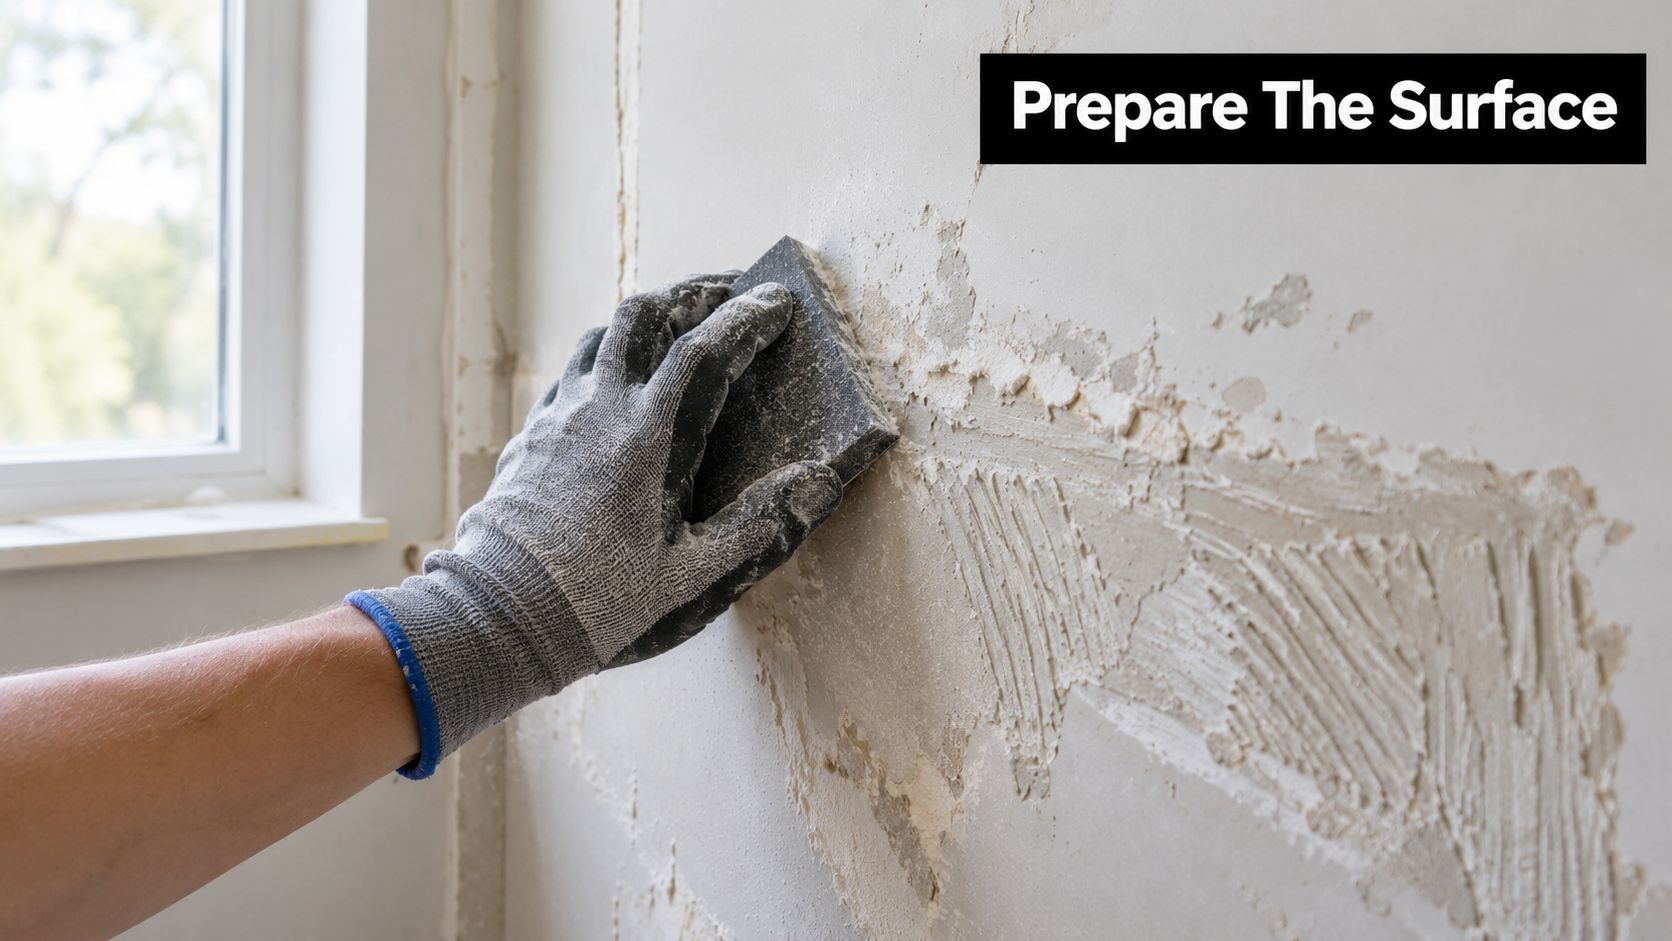
A gloved hand sanding down a rough wall surface in preparation for bathroom wall waterproofing.

Check, repair, dry and prime

Remove old adhesive, loose paint, grease, dust and powdery material. Sand high spots carefully, vacuum the residue and repair cracks using materials compatible with the wall lining and nominated membrane. If fibre-cement sheets meet at a joint, the joint must be formed and reinforced according to the system, rather than just smeared with filler.

Water-damaged plasterboard shouldn't be left in place because it looks intact from the front. Replace unsuitable lining with an appropriate wet-area board, then make sure the sheets are properly fixed and the surface is sound, clean and dry. Masonry and rendered walls also need attention where they're friable, contaminated or uneven.

The right primer depends on the substrate and membrane manufacturer's instructions. A primer chosen by habit can create poor adhesion, while skipping primer on a surface that requires it can leave the coating vulnerable to peeling.

Detail movement before the field coat

Internal corners, wall-to-floor junctions, sheet joints and changes of plane need a flexible detail. Use a compatible fillet, bond-breaker seal, tape, preformed corner or other proprietary treatment specified for the membrane system. The purpose is to accommodate movement and maintain continuity where two surfaces meet.

Keep the prepared wall free from other trades. Photograph the substrate, repairs, joints and corner details before the first coat. A clear record becomes useful if a warranty, insurance question or later leak investigation depends on proving what was covered.

For a practical explanation of the preparation stage, see this guide to bathroom substrate preparation. The important point is simple: the membrane should meet a stable, dry and compatible surface, not conceal a problem.

Choosing Between Sheet and Liquid Membrane Systems

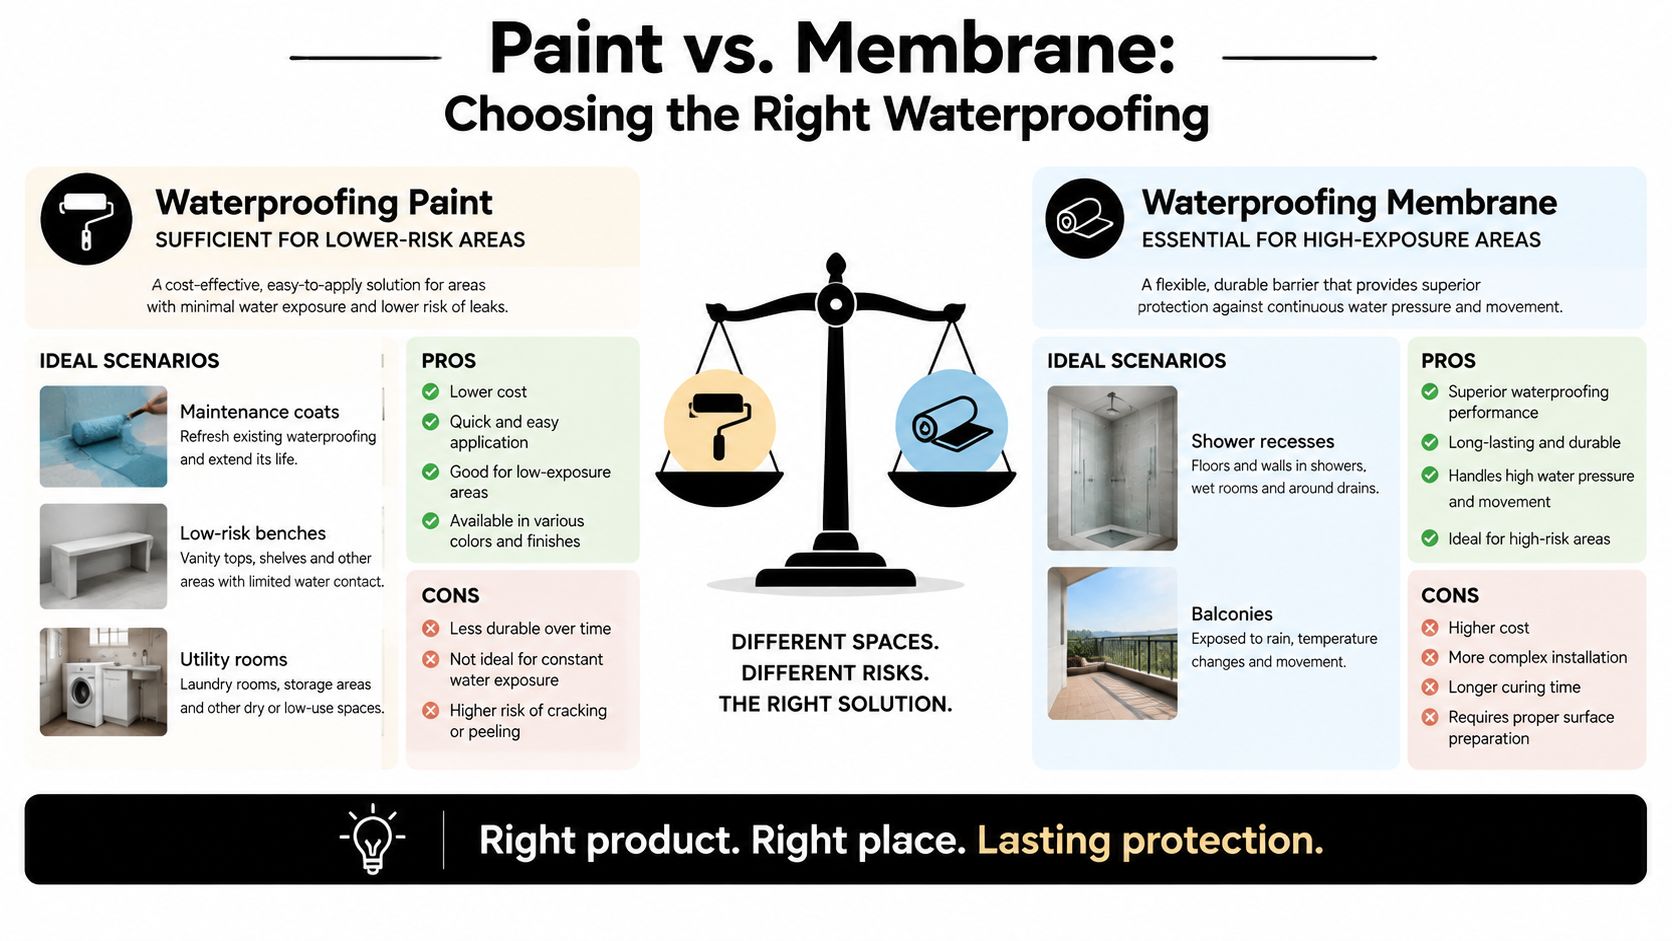
Sheet and liquid membranes can both form part of a compliant wet-area system, but they behave differently on a Melbourne renovation site. The right choice depends on the wall shape, plumbing layout, substrate, tile adhesive and the installer's ability to detail the system consistently.

A liquid membrane is often easier to work around an irregular niche, an existing renovation or several closely spaced penetrations. It can follow unusual shapes and changes of plane, but the installer must achieve the specified coverage and dry-film thickness. Applying a thin coat because the wall appears covered is not a quality check.

A sheet membrane provides a predictable manufactured thickness across a broad, regular surface. It can be efficient on straight walls, but the installer must form, lap and seal every join accurately. A poorly sealed lap can be just as serious as a missed liquid coat.

Consideration Liquid membrane Sheet membrane
Internal corners Conforms readily, but corners still need compatible reinforcement or bond-breaker detailing. Requires accurate folding, corner pieces or sealed joints.
Pipe penetrations Can be detailed with collars and compatible sealants before the field coat. Needs carefully fitted collars, cuts and sealed laps.
Odd wall shapes Usually more forgiving around niches, hobs and irregular geometry. Less tolerant of wrinkles, gaps and poorly fitted sections.
Film thickness Must be controlled through coverage, coats and wet-film checks where specified. Manufactured thickness is more predictable, provided joins are sealed.
Drying and sequencing Each coat needs the manufacturer's curing window before the next stage. Adhesive and membrane compatibility still needs confirmation before tiling.
Falls and transitions Can follow prepared falls, but it won't correct poor drainage. Needs careful installation over correctly formed surfaces.

Polyurethane and acrylic liquid systems can suit complex layouts, while sheet systems can make sense on large, regular wall planes. Neither option fixes a substrate that moves or a floor that holds water. The installer also needs to confirm that the nominated tile adhesive is compatible with the membrane, because a mismatch can lead to debonding after handover.

For homeowners comparing prefabricated shower layouts with built-in tiled construction, the practical shower advice from Value Tools Co can help clarify how wall geometry and enclosure choices affect installation decisions. In a full renovation, the choice still needs to sit within the project's NCC and AS 3740 compliance pathway.

Applying the Membrane to Walls, Corners and Penetrations

Once the substrate is sound and the system is selected, application should follow a deliberate sequence. Don't start by rolling the broad wall and leave the corners for later. The high-risk details need to be built first, while they're accessible and visible.

Begin with detail coats at internal corners, wall-to-floor junctions, sheet joints and changes of plane. Apply the compatible bond-breaker or reinforcement treatment, then embed approved tape, collars, preformed corners or sealants into the wet membrane as specified by the system. The detail must remain continuous without pinholes, lifted edges or open ends.
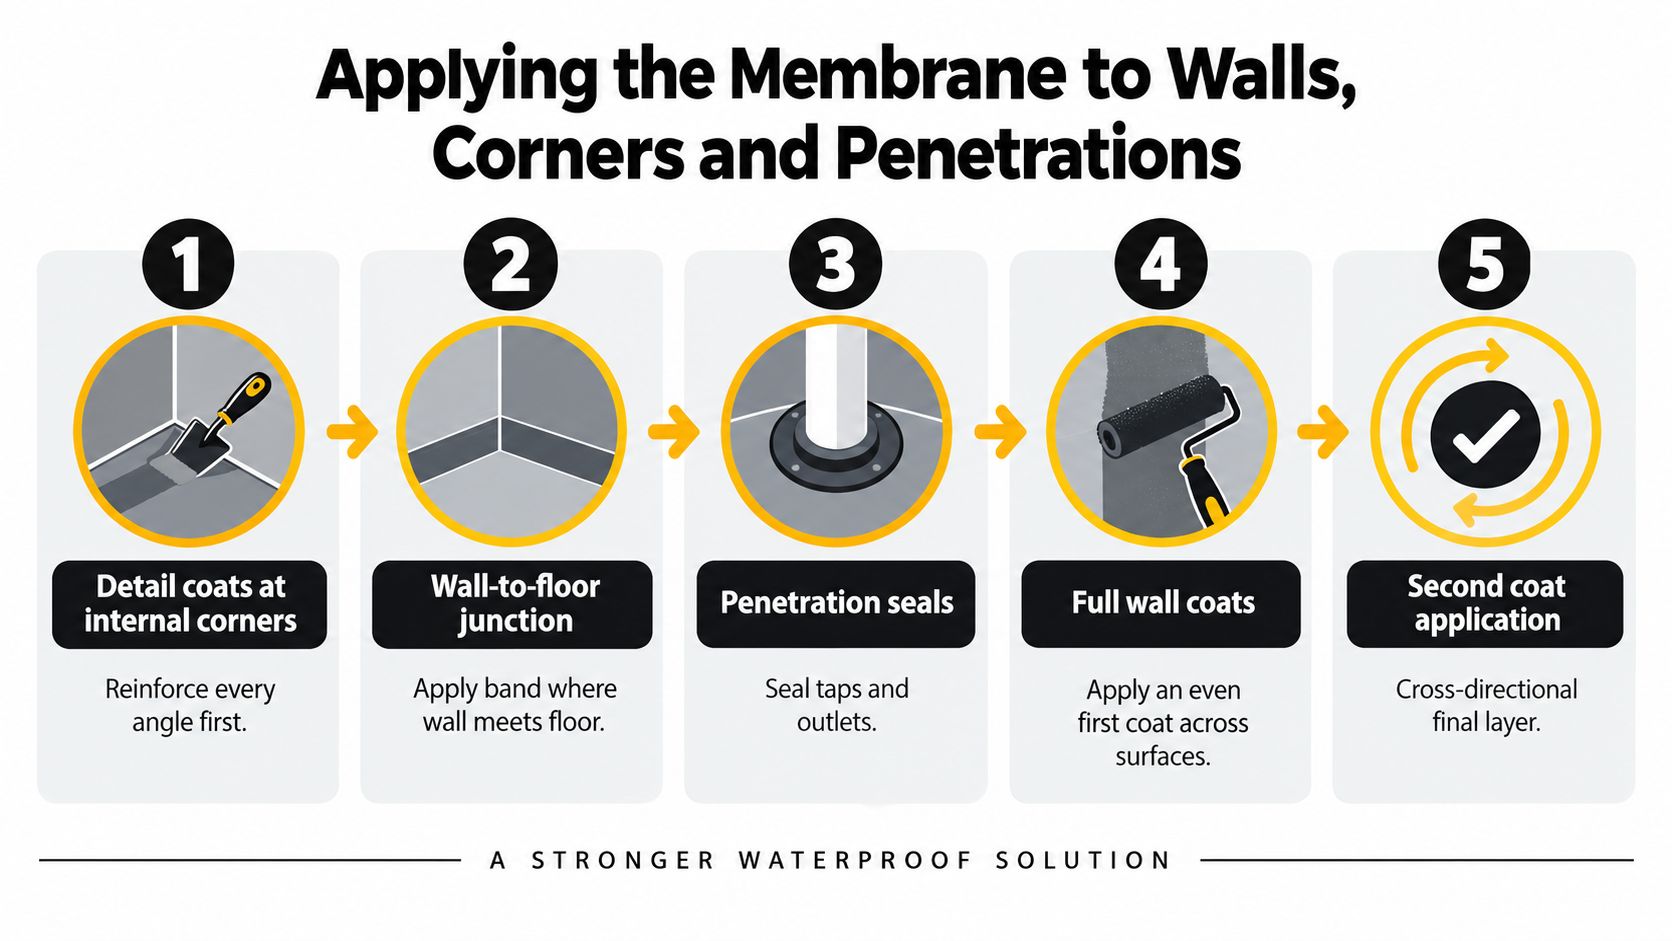
A step-by-step infographic showing how to apply waterproof membrane to walls, corners, and plumbing penetrations.

Seal every penetration individually

Treat each plumbing opening as its own detail. Mixer bodies, shower outlets, spouts, niches, screen channels and other penetrations need compatible collars, sealants or reinforcing products. A broad coat over the wall doesn't seal the annular gap around a pipe.

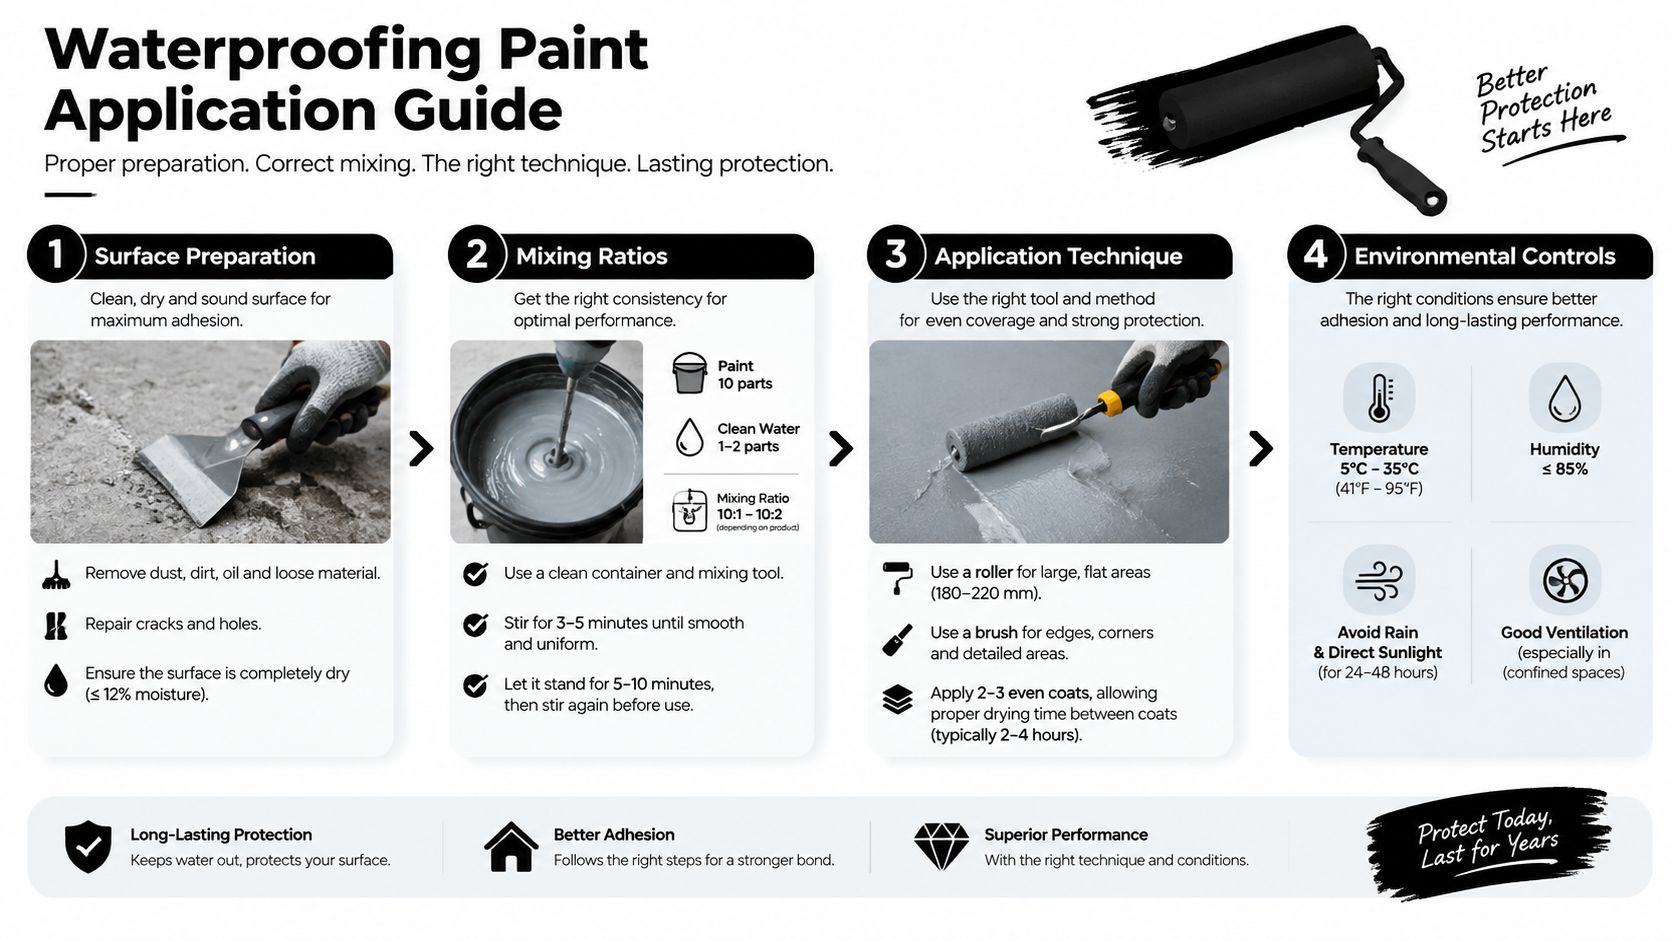
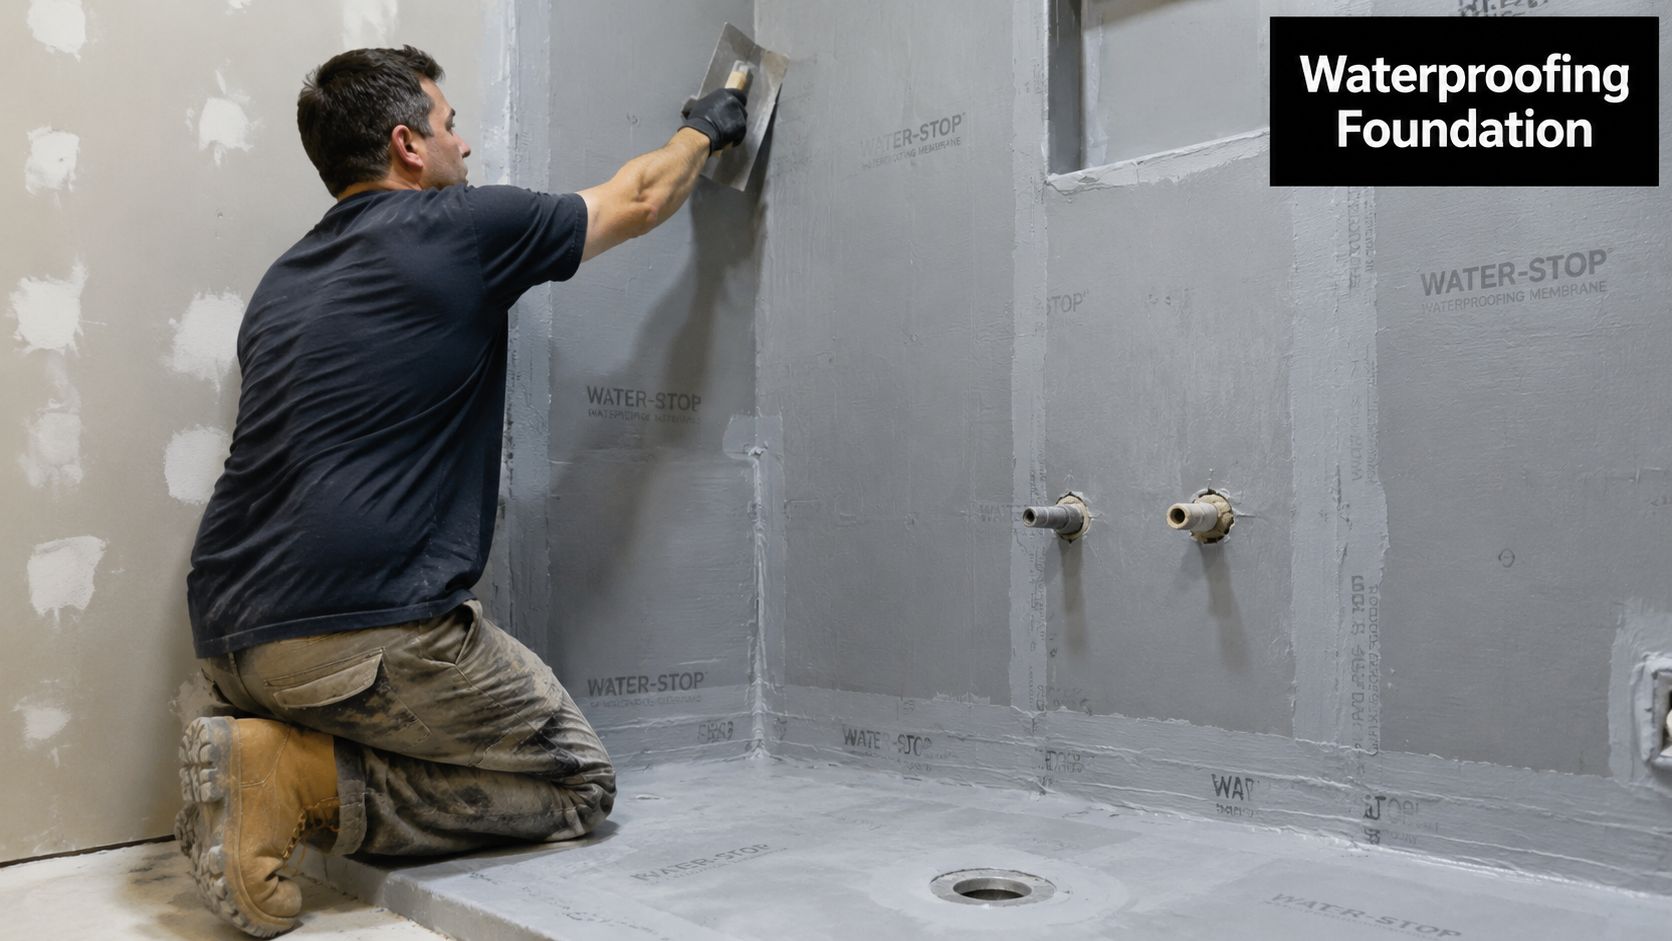
After the detail work has cured as required, apply the field coat across the full waterproofed zone. Keep the application even and follow the manufacturer's specified number of coats, coverage rate and dry-film thickness. Where the system requires wet-film checks, use a wet-film gauge rather than judging thickness by colour.

Mark the 1,800 millimetre shower wall line from the finished floor and check that coverage reaches the required height without gaps behind niches, fittings or screen channels. The NCC Housing Provisions identify wall junctions, wall-to-floor junctions and penetrations as locations requiring protection tied to AS 3740 (NCC guidance on waterproofing houses).

The membrane is the barrier. Grout, silicone and tile adhesive are finishes and joint materials, not substitutes for continuous waterproofing behind the tiles.

Apply the final coat in the direction required by the product system, checking for missed spots, thin edges and damage to earlier detailing. Respect the curing period between coats. A membrane that's still soft, tacky or releasing odour shouldn't be covered just because the schedule is tight.

Once cured, protect the surface from dropped tools, foot traffic, stacked tile boxes and later trades. A plumber or carpenter can damage an excellent membrane in minutes if the work area isn't controlled. Photograph the completed membrane before the adhesive and tiles conceal it.

For recessed storage, the shower niche waterproofing guide is useful because niches concentrate corners, changes of plane and penetrations in a small area.

Curing, Inspecting and Photographing the Work

Give the membrane its full cure time before anyone starts tiling. On site, rushed jobs usually come undone. Polyurethane, acrylic and cementitious systems all cure differently, and the conditions in the room matter as much as the label, especially temperature, airflow and humidity. If the coating is still soft, tacky or giving off vapour, it is not ready to be covered.

Then inspect it properly, under strong light and from more than one angle. Look for pinholes, missed patches, thin edges, bubbling, bridged corners, damaged penetrations and laps that have not bonded down. Check the whole system, not just the open wall face. That means confirming continuity at wall-to-floor junctions, internal corners, pipe penetrations, tap bodies and any shower detailing required under AS 3740 and the NCC, including the full shower wall build-up to the required height. A membrane can look neat and still fail at a junction.
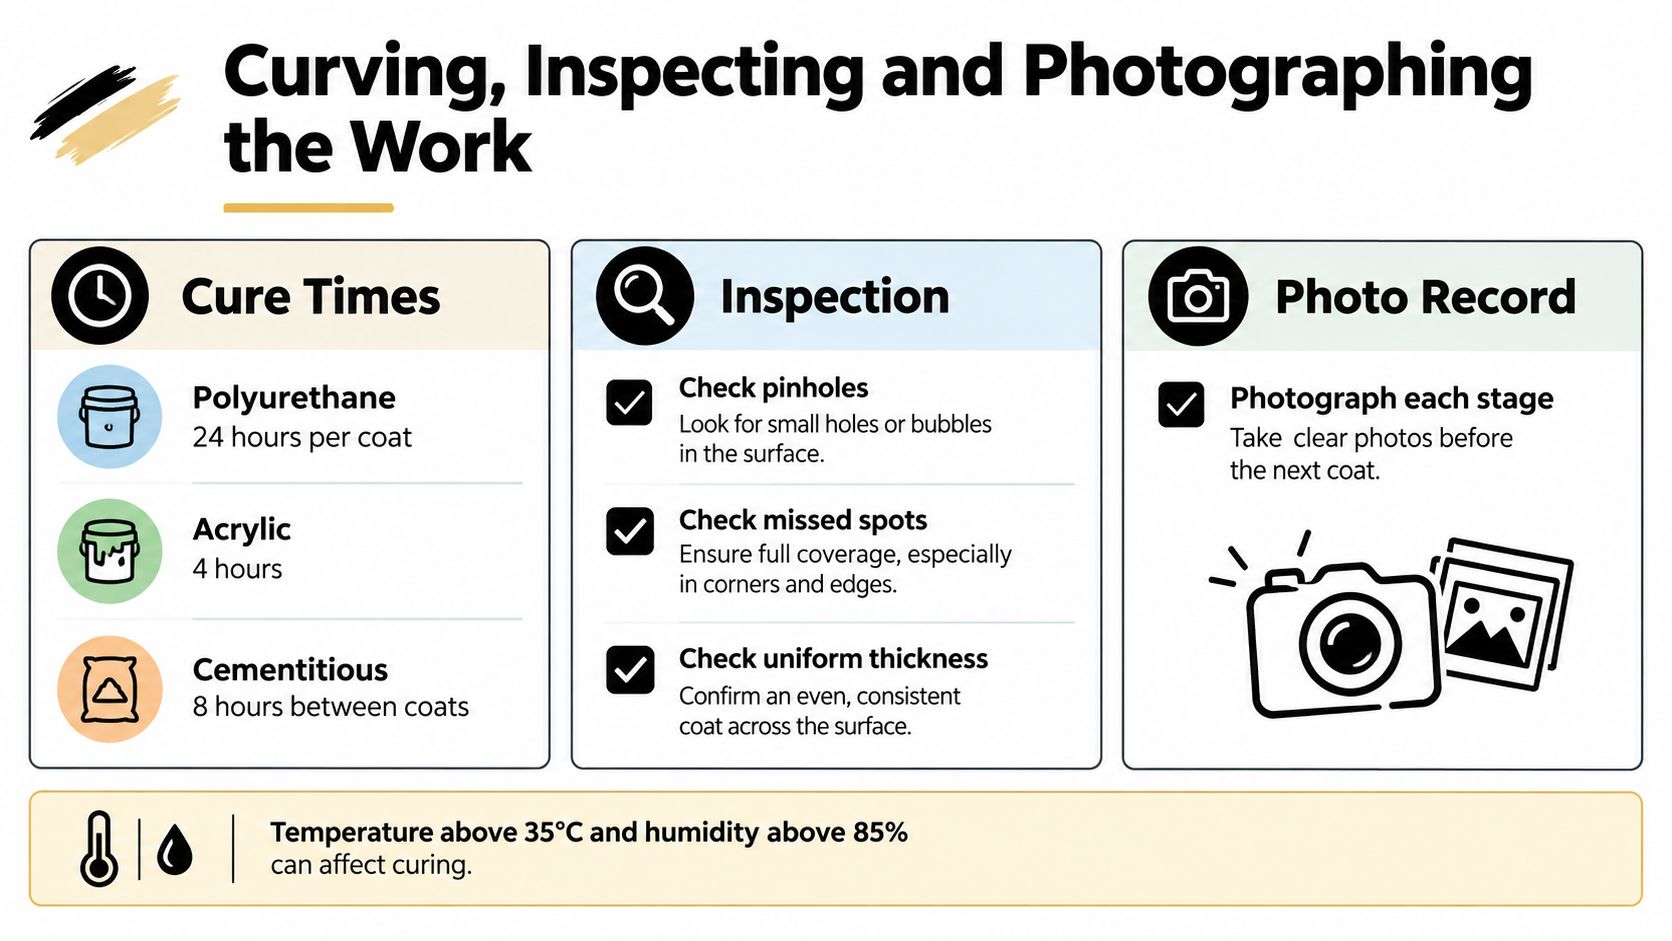
A guide showing cure times, inspection steps, and photo recording procedures for waterproofing bathroom wall coatings.

Treat inspection evidence as part of the system

A tidy finish does not prove compliant waterproofing. A Western Australian wet-area inspection snapshot found only 58 percent overall compliance across inspected points, even though wall sheeting, membrane selection and bond breakers often met the mark. The same snapshot also recorded generally sound floor-waste setups and shower screed falls, yet overall compliance still lagged. In a separate inspection record referred to in that same discussion, overall compliance sat at 60 percent, and one in five unsatisfactory points involved substandard or missing waterstops.

That lines up with what fails in real bathrooms. The broad surfaces get attention. The trouble starts at junctions, terminations and penetrations, where shortcuts are harder to see once the tiles are on.

Photograph the job like you may need to explain it later. Take clear shots of the substrate, each corner and wall-to-floor junction, every penetration, each coat, the cured finish and any tricky areas such as hobs, recesses or screen fixings. Record the product name, batch details and application notes. If the work includes complicated shower detailing, several trades, or anything that may need to be signed off, arrange an independent or supervisor inspection before tiling. If the bathroom scope crosses into broader domestic building work in Victoria, that is the point where a registered builder should be taking control of sequencing and responsibility, not a DIY homeowner.

A complete photo record helps builders, insurers and future buyers verify what sits behind the tile finish.

Knowing When to Call in a Licensed Waterproofer or Registered Builder

A homeowner can roll membrane onto a simple wall. A shower rebuild is a different class of work. Once the job includes wall to floor junctions, hob or threshold details, recesses, multiple penetrations, drainage changes, or movement in the structure, waterproofing stops being a weekend task and becomes a controlled system that has to be set out, applied, inspected and handed over properly.

That matters most in the shower. Under the NCC wet-area provisions, shower walls, junctions and penetrations are not isolated details. They are part of one waterproofed assembly that has to stay continuous from the substrate through to the finished terminations (Victorian domestic building practitioner registration information). If you cannot judge whether the wall height, bond breaks, corner reinforcement, flange treatment and pipe penetrations all work together, you are already at the point where a trade should take over.

In Victoria, the handover line is practical as much as legal. Bring in a licensed waterproofer for membrane selection, detailing and records that will need to stand up after tiling. Bring in a registered builder when the bathroom scope pulls several trades together, affects framing or floors, relocates plumbing, changes the shower base or threshold, or pushes the work into broader domestic building coordination. On jobs like that, sequencing is half the battle. The membrane only performs if the substrate, plumbing rough-in, electrical penetrations, screed and tiling are all controlled in the right order.

Electrical changes are a good example. New lighting, heated rails, underfloor heating or shifted outlets can add penetrations and trade overlap inside wet areas. The broader principle in this guide to hiring Brisbane electricians is sound. Check qualifications, scope and responsibility before anyone cuts into a waterproofed wall.

Ask for clear records:

  • Responsible parties: identify the registered builder, the waterproofer and each trade working in the wet area.
  • Scope and cost: keep the itemised renovation scope and any approved variations.
  • Membrane records: retain product data sheets, batch details and application requirements.
  • Site photos: keep images of corners, junctions, penetrations, upturns and cured coats.
  • Compliance paperwork: request the waterproofing certificate, inspection notes and any sign-off tied to the job.
  • Post-change records: document later changes to screens, plumbing fittings, niches or wall linings.

For higher-risk bathroom work, use licensed waterproofing contractors who can coordinate the concealed waterproofing with the tiling sequence and the builder's program. Homeowners should still approve the scope. The person carrying the responsibility needs the registration, trade judgment and documentation to back the work.

Caring for the Membrane After the Tiles Go On

The membrane is hidden after tiling, but the bathroom still needs sensible care. Most early warning signs appear at the finish before the concealed damage becomes extensive.

Use this handover checklist:

  • Clean gently: Don't use harsh chemicals against silicone joints or sealants.
  • Protect corners: Avoid impacts to hob edges, thresholds and tile junctions.
  • Manage pooling: Dry persistent water around frameless screen edges instead of leaving it to sit.
  • Watch the grout: Persistent darkening at corners can indicate moisture that deserves investigation.
  • Check adjoining walls: Bubbling paint, swollen skirting or a musty smell shouldn't be ignored.
  • Keep the records: Store the membrane photographs, product data sheets, scope and compliance certificate together.

A cracked tile isn't automatically a membrane failure, and a dark grout line doesn't prove the exact source of a leak. It does mean the area should be assessed before repeated cleaning, regrouting or silicone replacement conceals the path.

Don't cut into a waterproofed wall for a screen replacement, leak repair or renovation without planning how the membrane will be reinstated. The same applies to balcony remediation and any work that disturbs a wall-to-floor junction. A registered builder or licensed waterproofer should reconnect the new work to sound, dry and bonded membrane rather than applying a small patch over the visible symptom.

The durable result comes from the decisions made before the first coat, then protected through tiling and maintenance. A bathroom can have expensive tiles and neat silicone, yet still fail if the concealed system was never continuous.


Melbourne Tiling Services P/L offers bathroom waterproofing, substrate preparation, screeding, tiling and coordinated bathroom renovations across Melbourne and greater Victoria. For a site assessment, documented waterproofing sequence and a renovation plan that brings registered builders and licensed trades together, visit Melbourne Tiling Services P/L.

Why Is My Shower Leaking and How to Fix It Fast

You notice damp skirting outside the shower after your morning routine. A musty smell has appeared, the paint beside the bathroom feels swollen, or water is collecting on the floor beyond the screen. The tiles still look intact, so you may be wondering, why is my shower leaking?

For Melbourne homeowners, landlords and property managers, the visible symptom is often several steps away from the actual defect. Water can travel behind tiles through a failed junction, a pipe penetration, a poorly sealed screen track or a shower floor that holds water instead of directing it to the waste. By the time staining appears in an adjoining room, the shower may have been allowing moisture into the building system for some time.

A quick silicone patch can sometimes contain surface water, but it can't repair a failed membrane or incorrect fall. This guide explains how a shower is designed to stay watertight, which failure points deserve attention, how to carry out safe observations at home and when bathroom renovations or registered builders are the sensible next step.

Table of Contents

Introduction Why Your Shower Leak Needs Attention Now

You finish a shower and notice a dark mark beside the bathroom. The floor outside the screen feels damp, or a skirting board has started to soften. Nothing looks seriously wrong inside the shower, yet the moisture keeps returning. That is often how a concealed leak begins to announce itself.

A shower can remain usable while water is escaping from the system around it. Moisture may pass through a failed joint, pipe penetration, screen seal or membrane, then travel sideways before appearing in a wall, ceiling or adjoining room. The visible stain is therefore more like the end of a trail than a map of the original defect.

Possible sources include concealed plumbing, mixer cartridges, showerheads, hoses, wall penetrations, grout, seals and membranes. Recent guidance on common shower leak causes also separates leaks that occur during use from moisture that becomes visible after the shower has finished. That timing can help narrow the investigation, but it does not prove that the wettest spot is the source.

Why the tiles aren't the whole barrier

Tiles provide the hard, washable surface you see and touch. They are part of the finish, not the complete waterproofing system. The layers behind them work together, much like a sealed container with a protective outer surface. If the hidden barrier is interrupted at a corner, wall-to-floor junction, hob, step-down or pipe penetration, water can enter the structure while the tiles still look sound.

Grout can crack, powder or allow surface water through, but replacing grout alone will not restore a membrane that has been damaged or poorly connected. A recurring damp patch should be treated as a building-system problem until inspection shows that a simple seal is the only fault.

What to do first

Do not start by assuming regrouting will solve the leak. Note whether the dampness appears during showering or later, photograph stains and loose finishes, and keep the area as dry as practical. Avoid removing tiles or cutting into walls before the source has been assessed, because those actions can hide useful evidence and create further damage.

Arrange an inspection if the moisture returns, spreads, smells musty or affects another room. The next steps are to identify how a shower is designed to stay watertight, then separate safe temporary containment from repairs that require a qualified plumber or waterproofer.

How a Shower Is Supposed to Stay Watertight

A properly built shower keeps water moving through connected layers. The substrate supports the walls and floor, the screed creates the fall, the waterproof membrane blocks moisture from reaching the structure, and tiles protect the finished surface. Flexible sealant joints accommodate movement where walls meet, floors change direction and fittings pass through the surface.

The membrane works like a raincoat beneath a shirt. Tiles provide the visible, hard-wearing finish, while the membrane stops water entering the building. Grout fills tile joints, but neither grout nor tiles should be treated as the primary waterproof barrier. A shower can therefore look sound while its hidden system is failing.

The barrier must continue through vulnerable points

The NCC 2022 wet-area provisions require waterproofing across the shower floor, including a hob or step-down. Shower walls must be waterproofed to at least 1800 mm above the floor substrate. The waterproofing must also continue through wall junctions, wall-to-floor junctions and penetrations within the shower area, with not less than 40 mm either side of wall junctions within the shower area.

These measurements correspond to places homeowners can see. A shower rose can wet an area well above a low splash line, and corners repeatedly expand and contract as they become wet and dry. A mixer, shower rose or screen fixing interrupts the wall surface, so the membrane detail around each penetration must remain continuous.

The floor needs to move water, not store it

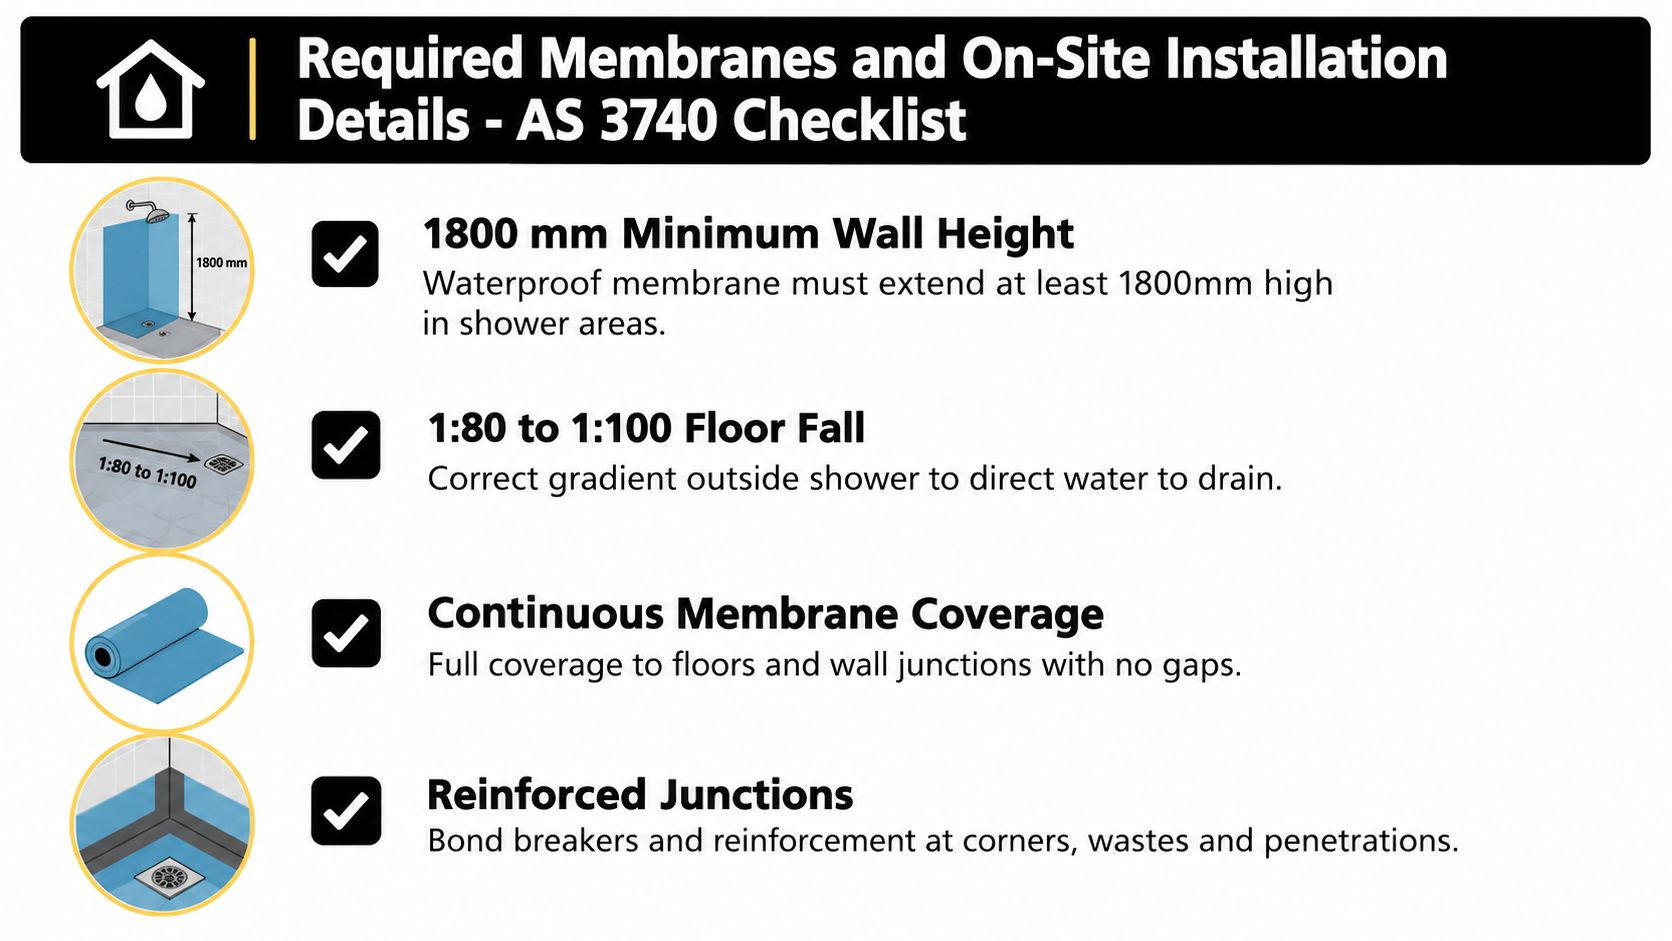
The floor screed should guide water towards the waste. Australian wet-area guidance aligned with AS 3740 commonly cites a shower fall of about 1:80 to 1:100, while other guidance may use about 1:80 to 1:50 depending on the application. Waterproofing and tiling guidance explains how falls, drainage and testing work together. This practical overview of shower and wet-area falls also explains the geometry that helps prevent ponding.

A flat or interrupted fall leaves water sitting beside the waste, at the base of the screen, against a wall junction or near a threshold. Even with an intact membrane, standing surface water keeps grout, silicone and perimeter details visibly wet. It can also mask a deeper fault behind the tiles.

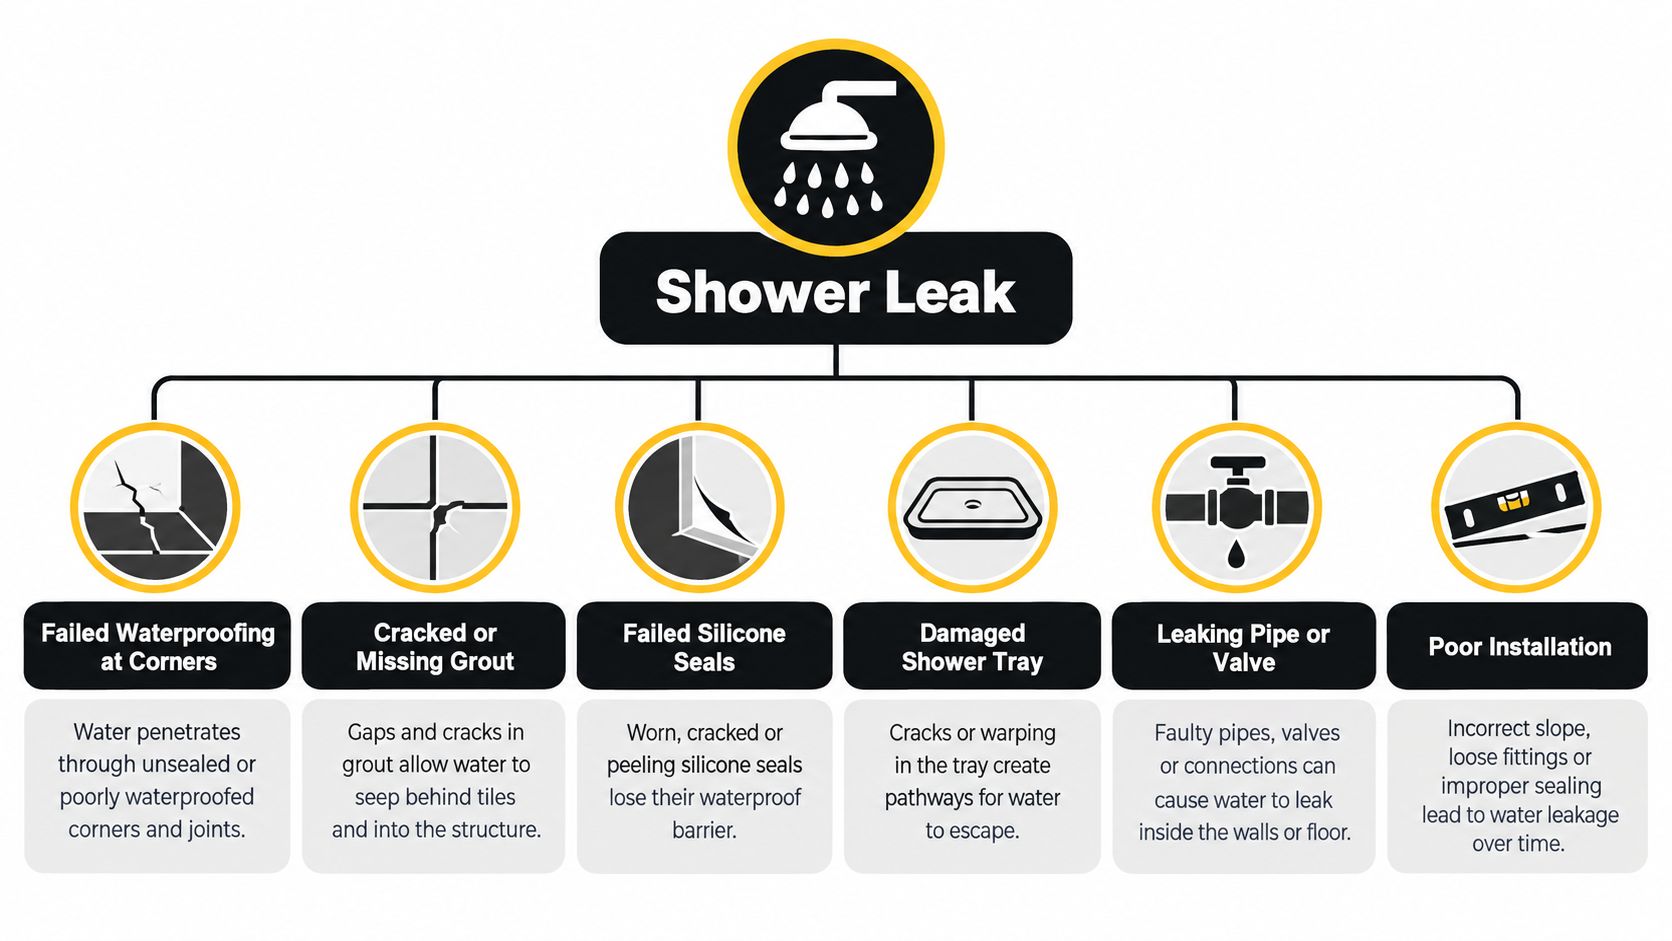
A diagram illustrating common causes of shower leaks, including cracked grout, failed seals, and poor installation.

For a closer look at the construction sequence, this guide to how to waterproof a shower shows why surface preparation and junction detailing matter as much as the final tile finish.

Common Reasons Why Your Shower Is Leaking

A shower leak can follow several pathways, and the visible clue depends on where water leaves the system. A stained skirting board may point to moisture moving through a wall, while a puddle outside the screen may be a surface containment problem. The same symptom can have different causes, so avoid treating the first damaged joint as conclusive proof.

Six failure pathways to check

Failed membrane at corners and junctions is a high-probability cause because these areas require continuous waterproofing. If the membrane stops short, wrinkles, separates or fails around a wall-to-floor transition, water can pass behind the tiles and migrate into the substrate. Loose tiles, swollen skirtings and staining in an adjacent room may appear after repeated use rather than immediately.

Cracked or missing grout can allow water into the tile assembly, especially where joints have opened or tiles move. Regrouting may improve the surface, but it won't restore a missing membrane beneath the finish. Cracks beside corners, fixtures or a shower waste deserve more attention than an isolated cosmetic mark.

Failed silicone seals often appear as peeling, mould-stained or separated beads at changes of plane. Silicone is a flexible surface joint, not a substitute for waterproofing. If water is entering because the substrate or membrane is defective, applying a new bead only covers the symptom.

Screen seals and tracks can direct water outside the shower even when the wall system is sound. A worn bottom seal, blocked track or poorly sealed frame may leave a neat trail across the bathroom floor. This is a surface escape, but persistent water at the screen base can also expose weaknesses in the floor junction.

Leaking plumbing connections can occur at the mixer, shower rose, flexible hose, valve or another wall penetration. Water that appears when the shower is running suggests one set of possibilities, while dripping after the shower is off may indicate a concealed valve or cartridge problem. Don't cut into the wall to investigate. A licensed plumber can test the fitting and identify whether the source is plumbing rather than waterproofing.

Waterlogged substrates, screeds or adjoining wet areas can confuse the diagnosis. Moisture from a balcony, neighbouring bathroom or shared wall may travel into the same room and imitate a shower leak. Substandard original construction, inadequate falls and missing or poorly installed flashings are why surface patching often fails to deliver lasting results, as discussed in this Australian review of waterproofing failures.

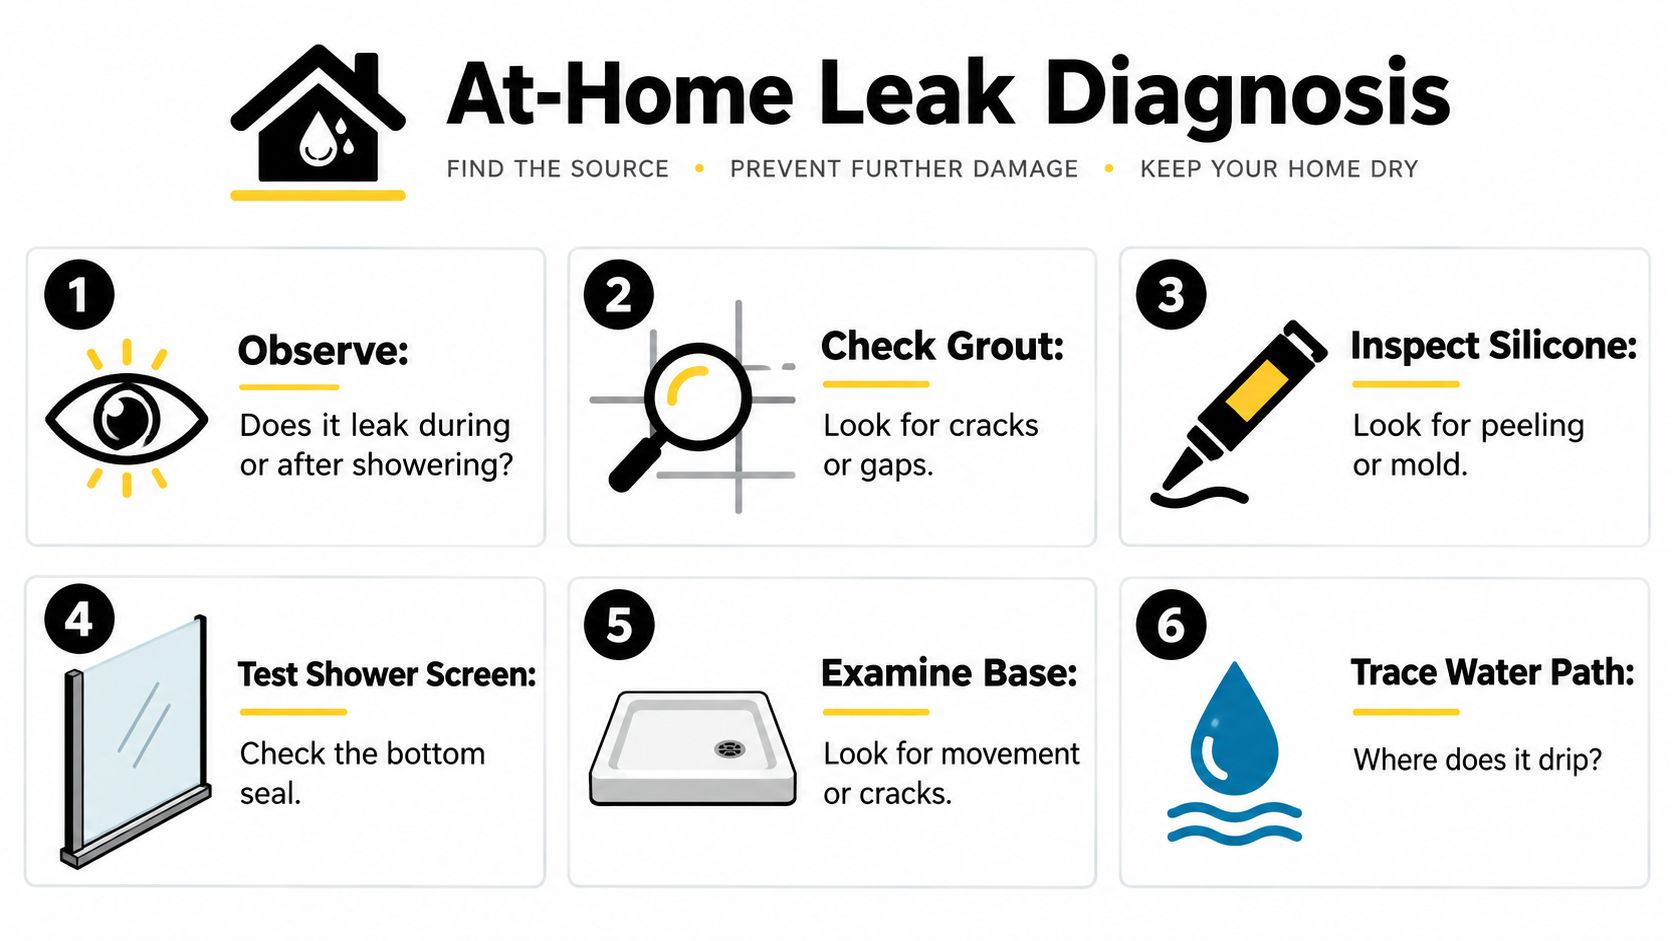
An infographic titled At-Home Leak Diagnosis providing six steps to identify and prevent shower water leaks.

A useful first distinction is whether water escapes visibly during showering or appears later as delayed staining. The first pattern often points towards the screen, hose, showerhead or surface joints. Delayed moisture is more consistent with water moving through concealed building or plumbing components, although only inspection can confirm that.

How to Diagnose Where the Leak Is Coming From

Start with observation, not demolition. Dry the bathroom as thoroughly as practical, note the condition of the floor and nearby walls, then record what changes when the shower operates. A simple timeline can separate a leak that happens at the fixture from moisture that travels through the building after use.

Work from visible water to concealed defects

  1. Observe the timing. Does water appear while the shower is running, shortly afterwards or without recent use? A showerhead or hose connection is easier to suspect when droplets appear directly during operation. Moisture that returns later needs a wider inspection.

  2. Inspect the grout and silicone. Look for open joints, hairline cracks, peeling beads and mould concentrated along a corner. These observations help identify entry points, but they don't prove the membrane below has failed.

  3. Check the screen and track. Run your eyes along the bottom seal, corners and frame. Water escaping at the screen can be a containment defect rather than a waterproofing defect.

  4. Watch the waste. During normal use, look for water pooling at the wall, screen track or threshold instead of moving steadily to the waste. Poor geometry can keep the perimeter wet and increase pressure on joints.

  5. Inspect nearby rooms. Check skirtings, flooring, cupboards, ceilings below and the reverse side of the shower wall. Don't rely only on the point directly outside the shower, because moisture can travel laterally.

  6. Record evidence. Photograph damaged finishes and write down when the mark changes. This gives a waterproofer or plumber useful information without invasive testing.

For concealed valve problems, this guide on how to spot hidden shower valve leaks offers helpful background on why a fitting behind the wall can mimic a waterproofing failure. If the shower continues dripping when it isn't being used, arrange a plumbing assessment rather than sealing over the visible fitting.

A specialist service such as shower leak detection in Melbourne can then use controlled inspection and targeted testing to narrow the source before repair work begins.

Shower leak clues and what they suggest

What You See Most Likely Source Next Check
Water runs outside the screen during use Screen seal, track or surface containment Inspect the bottom seal, frame corners and track
Damp skirting appears after showering Membrane, junction or plumbing penetration Photograph timing and inspect the adjoining wall
Showerhead drips after being turned off Showerhead connection, hose, valve or cartridge Check visible washers and arrange plumbing inspection if it persists
Water sits at the wall or screen base Poor fall, ponding or blocked drainage path Observe movement towards the waste
Loose tiles or staining near a corner Failed junction waterproofing or substrate moisture Avoid surface-only patching and seek professional assessment
Mould is concentrated in silicone Persistently wet joint or poor ventilation Clean safely, dry the area and inspect the underlying cause

Don't remove tiles or drill inspection holes unless a qualified professional has planned the investigation. Uncontrolled opening can damage waterproofing further and make the original moisture path harder to identify.

Temporary Fixes You Can Try Before Calling a Professional

Temporary work is useful when it reduces water exposure while you arrange a proper assessment. It becomes risky when it creates confidence that a failed waterproofing system has been repaired. Keep that distinction clear.

Clean and dry surface joints first. Remove loose residue from a failing silicone bead, allow the area to dry, then apply a compatible bathroom-grade silicone only where the defect is clearly a surface seal. Follow the product instructions and keep the shower unused for the required curing period.

Low-risk containment measures

  • Limit water spread: Use a shower curtain or temporary barrier where appropriate, dry the floor after use and keep towels away from prolonged contact with damp skirtings.
  • Improve ventilation: Run the exhaust fan, open suitable windows and leave the bathroom dry between uses. Ventilation won't repair a membrane, but it can reduce lingering humidity.
  • Check visible fittings: A loose shower hose or showerhead connection may respond to careful tightening or a replacement washer. Don't force corroded fittings or disturb concealed wall connections.
  • Monitor the result: Photograph the area before and after the temporary measure, then record whether dampness returns during or after use.

A leaky pipe with repair tools and tape displayed on a white background, suggesting plumbing solutions.

What patches can't achieve

Painting grout with a surface sealer, adding silicone over mouldy joints or spreading a waterproof coating across tiles won't rebuild a failed membrane. It also won't correct a reversed fall, repair a waterlogged screed or seal a pipe penetration hidden behind the wall.

A proper caulking service in Melbourne may be suitable when the inspection confirms that a deteriorated surface joint is the actual source. If dampness continues after the patch, stop repeating the same repair and arrange a system-level diagnosis.

Don't use the shower if water is reaching electrical fittings, causing a slip hazard or spreading into flooring and walls. A short period of careful containment is reasonable, but persistent moisture needs a qualified plumber, waterproofer, tiler or builder to identify the cause and specify the correct rectification.

Bathroom Renovations and When to Call Registered Builders

A leak becomes a renovation issue when access to the failed component requires removal of tiles, screed, substrate or fittings. At that point, replacing one visible joint can leave the surrounding system untouched. Coordinating the work properly matters because waterproofing, plumbing, falls, tiling and screen installation must work together.

Registered Unlimited Builders can manage that coordination by engaging licensed carpenters, plumbers, electricians, tilers and waterproofers. For a Melbourne bathroom or ensuite, the scope may include removing affected finishes, checking framing and substrate, rebuilding screeds, correcting falls, applying a compliant membrane, testing the wet area and reinstalling the selected finishes.

What a durable rectification should include

The repair brief should identify the suspected source, the areas requiring removal and the tests planned before the bathroom is closed up again. Australian guidance aligned with AS 3740 and current wet-area practice commonly describes a flood test holding water to a minimum depth of 25 mm for at least 24 hours, with no drop in level. This waterproofing reference also explains the practical importance of continuous shower waterproofing under NCC requirements.

A controlled test before tiling gives the team an opportunity to find membrane or drainage problems while the work remains accessible. It is much more useful than discovering a leak after the screen, vanity and finished floor have been installed.

Choosing the right renovation scope

A registered builder should explain whether the work is a local repair, a partial rebuild or a full bathroom renovation. Ask for a written scope that covers demolition, waste removal, plumbing alterations, substrate preparation, waterproofing, testing, tile installation, silicone joints and screen reinstatement.

Premium finishes such as porcelain, marble and large-format Kerlite can be installed successfully, but they still depend on a correctly prepared base. Three-dimensional drawings and a renovation calculator can help homeowners understand layout, material choices and the likely scope before work starts. In the publisher's stated planning information, a typical renovation budget is discussed around a median $10,000, though the actual price depends on the condition, design and finishes of each project.

Landlords and property managers should also keep inspection records, photographs and compliance documents. Those records help separate a fixture repair from concealed building damage and make it easier to plan urgent access without approving a cosmetic fix that won't address the source.

Take Action Before a Small Leak Becomes Major Damage

A shower can look presentable while moisture is reaching framing, flooring or an adjoining room. Start by documenting the timing, location and visible clues. Then reduce water exposure, avoid invasive DIY work and ask a qualified professional to determine whether the source is a fitting, screen, fall, substrate or waterproofing detail.

A practical when-to-call checklist

  • Call a plumber when water drips from a mixer, showerhead, hose or concealed valve, especially when dripping continues while the shower is off.
  • Call a waterproofer or builder when tiles loosen, staining spreads, dampness is delayed or the shower repeatedly fails after surface repairs.
  • Ask about testing before approving retiling. The scope should address falls, membrane continuity, junctions, penetrations and pre-tile flood testing.
  • Record the damage with photographs and dates, including the reverse side of walls, skirtings, cupboards and ceilings below.
  • Clean mould carefully with suitable precautions. This resource on how to clean shower mould safely can help with surface hygiene, but mould removal doesn't replace leak rectification.

For Melbourne and greater Victoria, request a free inspection and quote that explains the cause and the proposed repair sequence. A durable result comes from correcting the system behind the tiles, not only making the visible joint look new.


Melbourne Tiling Services P/L provides bathroom renovations, shower leak rectification, waterproofing, screeding, tiling and shower-screen installation across Melbourne and greater Victoria, with registered builder coordination for connected trades. Visit Melbourne Tiling Services P/L to arrange an inspection, request a free quote and discuss the right repair scope for your leaking shower.

Bathroom Waterproofing Standards: A Practical Guide

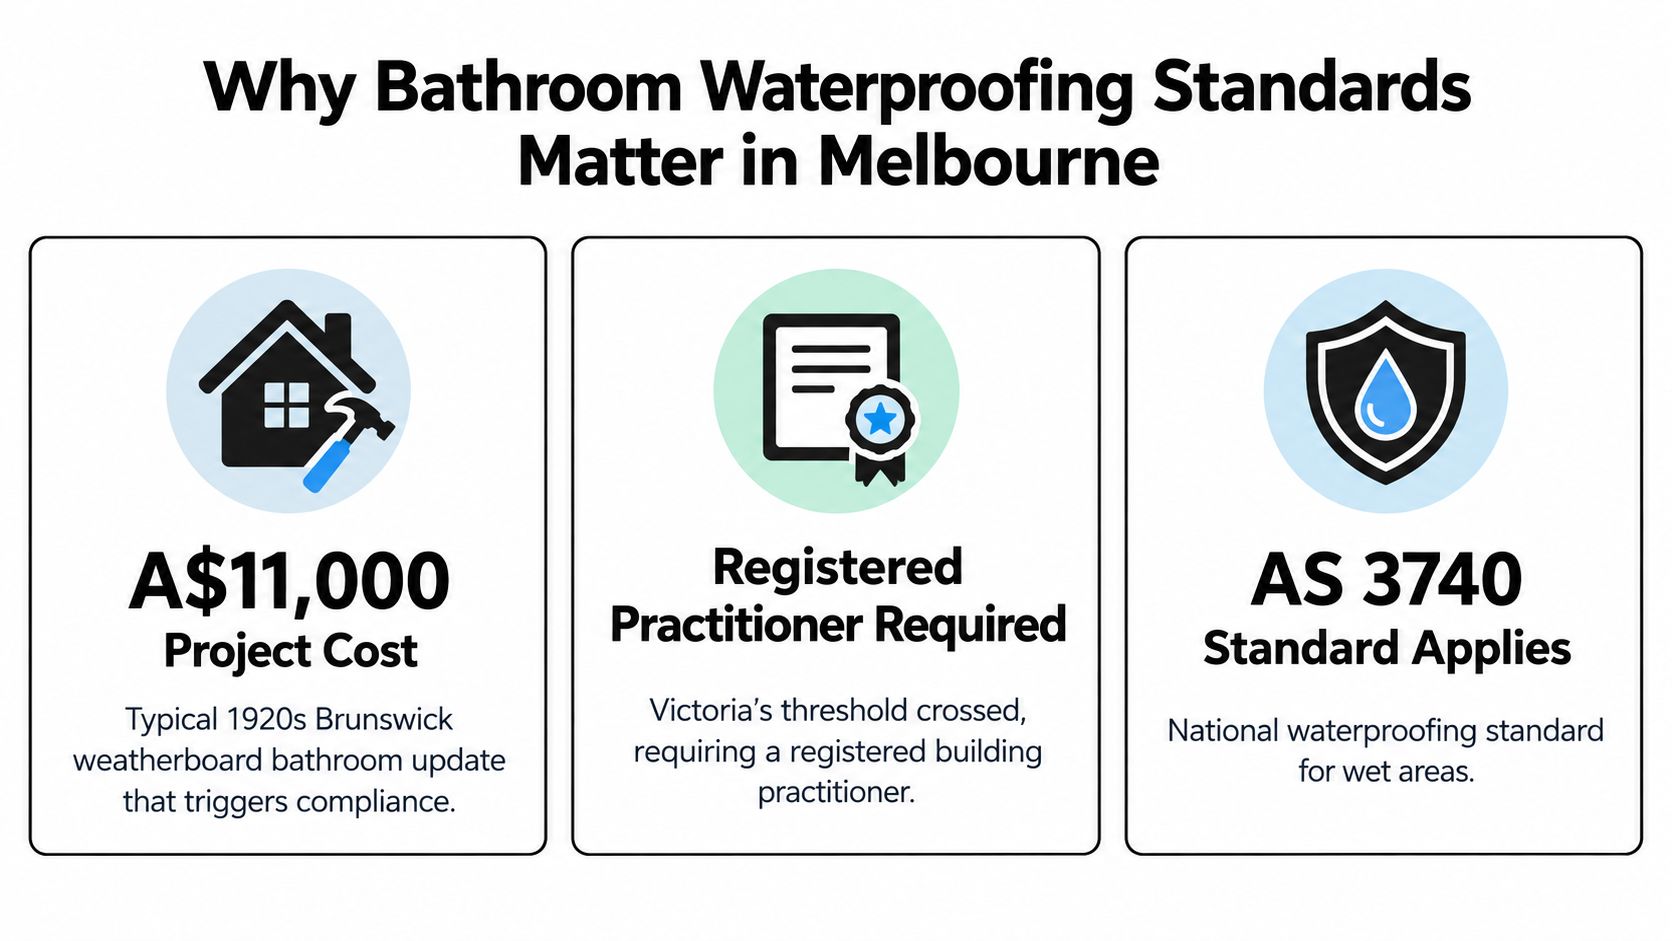
In Victoria, bathroom renovation work valued at A$5,000 or more must be carried out by a registered building practitioner (Hipages on bathroom water and renovation regulations by state). AS 3740:2021, first published on 23 July 2021, now sets the minimum waterproofing requirements for domestic wet areas and is the edition referenced through NCC 2022 and the wet-area provisions carried into NCC 2025 (AS 3740:2021 PDF).

If you're reading this, there's a good chance your bathroom is either leaking already, or you're about to renovate and want to avoid ending up with a failed shower in two years. In Melbourne, that concern is justified. A lot of local bathrooms sit over timber floors, older homes move more than people expect, and a tidy tile finish can hide bad waterproofing for a long time.

The part many owners miss is that tiles and grout aren't the waterproofing. The membrane, the falls, the junction detailing, and the way the substrate is prepared are what decide whether the bathroom lasts. Bathroom waterproofing standards aren't just paperwork. On site, they determine whether water reaches the drain or disappears into framing, sheet joins, and the room below.

Table of Contents

Why Bathroom Waterproofing Standards Matter in Melbourne

A typical Melbourne leak job starts the same way. The shower still looks presentable, the grout has been patched once or twice, and there is a faint stain on the ceiling below or swelling at the skirting outside the bathroom. Once the tiles come off, the problem usually shows up in the corners, around the waste, at sheet joints, or in a timber floor that has been taking water for years.

An infographic detailing bathroom waterproofing standards in Melbourne, showing project costs, practitioner requirements, and compliance regulations.

Melbourne bathrooms deserve closer attention than a generic national guide suggests. A large share of rectification work here is in older houses with suspended timber floors, mixed substrates, and previous renovations layered over original framing. Those jobs move more, deflect more, and hide damage better than bathrooms built on a sound concrete slab. A neat tile finish proves very little.

The Victorian renovation setting matters too. Once bathroom work reaches the threshold that requires a registered building practitioner, the expectation is not just a tidy finish but compliant wet-area construction, including waterproofing that suits the actual structure beneath it, as noted earlier from the Hipages guidance on Victorian renovation requirements. On site, that changes how the job should be approached. Existing floors need to be checked for bounce, damaged sheet flooring needs to be replaced, and the falls have to work before the membrane goes down.

Older Melbourne bathrooms fail in familiar ways:

  • Timber floors flex: Movement at floor-to-wall junctions and around wastes is a regular starting point for membrane failure.
  • Past water damage gets covered over: New tiles laid over a weak or contaminated substrate do not fix the cause.
  • Water travels sideways: Leaks often show up at a doorway, in an adjoining room, or through the ceiling below rather than at the shower outlet.
  • Falls are often poor or reversed: Water sits at corners, outside the shower screen, or against the wall base and keeps feeding the defect.

In leak rectification, grout is rarely the issue. Grout and tiles are the wear surface. The result depends on the membrane, the bond breakers, the set-down or hob detail where required, the puddle flange connection, and whether the floor falls push water to the waste instead of letting it pond.

Standards matter because they set the minimum line for details that are easy to get wrong and expensive to reopen later. In Melbourne, that usually comes back to practical site questions. Is the timber floor stiff enough for the system being used? Has the shower area been formed so the required falls can be achieved without creating a lip at the doorway? Is there enough height at the wall upturns and enough care at penetrations to stop water getting behind the lining? Those are the gaps that turn a bathroom renovation into a defect claim.

Understanding AS 3740 and the NCC Framework

A Melbourne owner strips out a 1970s bathroom, keeps the old timber floor, and assumes new tiles and a fresh membrane will satisfy code. Then the shower leaks into the hall three months later because the floor classification was read too loosely, the falls were never properly formed, and nobody treated the doorway and waste connection like the risk points they are.

That is the practical job AS 3740 does. It sets the minimum rules for waterproofing domestic wet areas in residential buildings, and the NCC pulls those rules into the compliance framework builders, waterproofers, certifiers, and insurers work under. On site, that means AS 3740 is not a product brochure or a suggestion. It is the reference point for how the wet area is classified, what gets waterproofed, where the membrane must continue, and how the whole assembly is expected to perform once the room is in use.

The part many generic guides miss is that the standard is only the starting point. In Victoria, the pressure comes from how those minimums meet older housing stock, especially timber-framed bathrooms in Melbourne's east, north, and bayside suburbs. A detail that is technically acceptable on a new slab can become risky on a springy first-floor renovation if the substrate prep, sheeting, and movement treatment are marginal.

How the wet-area categories affect the scope

AS 3740 does not treat every bathroom the same. It separates wet areas by exposure and layout, and that changes the required detailing.

In practice, the categories work like this:

Category Typical situation What it means on site
Category 1 Shower areas, including enclosed and open shower zones Highest water exposure. Full shower-area waterproofing, careful waste detailing, and correct wall and floor treatment matter most here.
Category 2 Bathroom areas outside higher-exposure shower zones The broader bathroom still needs water-resistance measures, but the scope differs from the shower proper.
Category 3 Lower-exposure wet areas, often depending on layout and enclosure Some floor areas are treated less aggressively, but only where the room configuration genuinely supports that approach.

This classification step is where renovation jobs often start drifting off course. An open or semi-open shower changes the risk to the whole room. A shower-over-bath changes the logic again. An enclosed shower in a small apartment bathroom may reduce the required treatment outside the enclosure, but only if the rest of the layout supports that classification and the installation matches it.

The other point that matters in Victoria is responsibility. Once the bathroom renovation value crosses registered-builder thresholds, or the work forms part of domestic building work that needs the right level of registration and documentation, the standard is no longer just a technical reference for the waterproofer. It becomes part of the builder's compliance trail. That is why the paperwork side, including a proper waterproofing compliance certificate in Victoria, needs to line up with what was built on site.

AS 3740 and the NCC are related, but they are not the same document

The NCC sets the legal performance and deemed-to-satisfy framework. AS 3740 gives the detailed wet-area method commonly used to meet that framework for internal domestic bathrooms, laundries, and similar spaces.

That distinction matters during disputes. I regularly see leak-rectification jobs where one trade quotes the NCC at a high level, another points to a product data sheet, and nobody has checked whether the installed system matches the AS 3740 wet-area detail for that room type. The result is a tiled bathroom that looks finished but has no reliable line of defence at the wall-floor junction, around penetrations, or at the waste.

Internal bathrooms also need to be kept separate from external waterproofing logic. Balconies, planters, and podiums are different assemblies with different exposure conditions and different detailing priorities. Applying external-area habits inside a bathroom can create unnecessary build-ups, bad transitions, or incompatible junctions. The reverse mistake is worse. Treating an exposed external area like an internal bathroom nearly always ends badly.

Industry commentary has also pointed out that residential teams can get into trouble by mixing AS 3740 references with other housing provisions without checking which pathway applies to the project scope. Chalkline's AS 3740 compliance note is a useful reminder that compliance is not just about quoting the right document. It is about using the right document in the right context.

Standards did not become central to wet-area work by accident. They grew out of repeated failures, trade specialisation, and insurance pressure, which is part of the broader history of plumbing trade in North America as well.

For Melbourne bathrooms, the takeaway is simple. AS 3740 tells you the minimum accepted method. The NCC gives that method its compliance force. Older timber floors, tight renovation set-downs, and poorly planned shower layouts are where that framework gets tested hardest.

Required Membranes and On-Site Installation Details

An upstairs shower in a Brunswick weatherboard can look perfect on handover and still be leaking into the hallway wall a month later. I see that pattern in rectification work all the time. The tiles are straight, the grout is clean, and the failure sits underneath at the waste, the hob, the screen line, or a floor that never had proper fall to begin with.

An infographic checklist for AS 3740 bathroom waterproofing standards, illustrating required membrane heights, floor falls, and junction reinforcement.

The dimensions that matter on site

On a compliant internal shower, the membrane is carried up the walls in the shower area to 1800 mm above the floor substrate. The shower floor also needs a continuous fall to the waste within the range set out by the NCC for wet areas, with no birdbaths, no back-falls, and no flat strip trapped under the screen line (NCC waterproofing and water-resistance requirements for wet areas).

That sounds straightforward on paper. It often is not on a Melbourne renovation.

Older timber-framed bathrooms are where the details get tight. There may be no set-down. The joists may already be undersized. The client wants a flush entry. The plumber has set the waste too high. The tiler is then asked to create fall, keep build-up down, and still hit the doorway level. That is how showers end up with compliant-looking wall membrane and a floor that holds water at the perimeter.

The weak points are predictable:

  • shower-to-bathroom transitions where the water stops short of the waste
  • floor-to-wall junctions that were not reinforced properly
  • tap penetrations and mixer points that were cut oversized or left poorly sealed
  • puddle flanges and floor wastes that were never integrated properly with the membrane
  • hobs, nib walls, and screen fixings where water tracks through small breaks in the system

Silicone does not fix any of that. Silicone is a maintenance joint. The waterproofing has to be continuous underneath.

Membrane choice and compatibility

The membrane itself has to suit the substrate, the movement you expect, and the full system around it. Liquid-applied membranes used internally are generally selected to meet AS 4858. Sheet-applied systems are selected under the relevant product and installation pathway, and external membrane standards such as AS 4654.1 are not a substitute for internal wet-area detailing unless the manufacturer and the project scope clearly support that assembly.

That compatibility question matters most in rectification and renovation work. On an older Fitzroy or Northcote bathroom, there may be fibre cement patching next to compressed sheet, old sand-cement falls in one area, and fresh levelling compound in another. If the primer, bond breaker, membrane, adhesive, and sealant are not specified as one system, the failure usually turns up at the change of plane first.

A proper scope should name the membrane system, the primer, the reinforcement method at junctions, and the waste detail. "Waterproof bathroom" is not a scope. It is a gap.

This walkthrough is useful if you want to see the sequence visually:

For owners comparing systems before signing off on a renovation, this guide to shower waterproofing membrane options gives a practical summary of where different membrane types suit the job.

In Victoria, the paperwork side matters too. Once bathroom renovation cost or scope pushes the project into registered-builder territory, vague waterproofing notes become a real risk for everyone involved. If I am reviewing a leak after the fact, one of the first things I look for is whether the installed build-up matched a documented system, or whether trades were left to sort it out on site. That gap is where failed showers start.

How Substrate Type Changes Waterproofing Requirements

A shower over a 1930s timber floor in Brunswick is not waterproofed the same way as a new ensuite on a concrete slab in Point Cook. The floor finish might be the same porcelain tile in both rooms, but the substrate underneath changes the whole job. If that difference is ignored, the leaks usually show up at the waste, the wall-floor junction, or a sheet join that kept moving after handover.

In Melbourne renovations, mixed substrates are common. Part of the floor might be original timber sheeting, part might be new fibre cement, and the shower area might have been packed or levelled during rectification work. Each surface absorbs primer differently, moves differently, and places different stress on the membrane. One membrane detail applied across all of it is where many failed bathrooms begin.

Timber floors need full attention, not partial treatment

On timber or particleboard floors, the practical approach is full-floor waterproofing because any escape of water can damage the structure below. Timber movement is the main issue. The floor deflects under load, sheet joints can telegraph through, and moisture getting into the substrate can lead to swelling, loss of bond, and cracked grout that owners often mistake for a tiling problem.

Older Melbourne homes make this harder. Joists are not always straight, previous repairs are common, and the floor may already be carrying some bounce before demolition even starts. If the substrate is not stiff enough, the membrane is being asked to cope with movement it was never meant to absorb. That is why substrate assessment matters before anyone starts talking about tiles.

Concrete behaves differently, but it still fails for predictable reasons

Concrete does not swell like timber, but slab jobs have their own failure pattern. The usual problems are poor falls, weak or dusty screeds, shrinkage cracking, and rough waste detailing. A membrane can be applied neatly and still fail in service if water sits against a screen channel, ponds outside the shower, or tracks through an unsealed penetration.

On slab renovations, I often see the membrane blamed for what is really a geometry problem. If the floor does not fall cleanly to the waste, waterproofing alone will not fix shower performance.

Substrate Primer requirement Typical membrane approach Fall method Common failure point
Timber or particleboard floor Primer matched to the sheet or board surface and any patched areas Full-floor liquid membrane or compatible sheet system, with careful treatment at joints and junctions Falls built into the floor build-up or formed with a suitable underlay system before tiling Deflection, sheet-joint movement, moisture damage below floor level
Concrete slab Primer matched to slab condition, porosity, and any screed or levelling layer Liquid or sheet membrane suited to the slab and waste detail Falls corrected with screed or floor preparation before membrane application Ponding, screed debonding, cracking, poor bonding around wastes

Mixed substrates are where good specifications matter

A lot of renovation bathrooms are not one clean substrate from wall to wall. They are patched. They have transitions. They have old and new materials meeting in the same wet area. That is where membrane systems get caught out if the installer has not allowed for reinforcement, cure times, and compatible primers across every change in surface.

This is also where registered-builder threshold jobs in Victoria need clearer documentation than they often get. If the scope only says "waterproof bathroom", the installer is left to make product and preparation decisions on site that should have been resolved before work started.

For owners and project managers, proper wet-area substrate preparation is usually the point that decides whether the membrane has a stable base or is covering over movement, dust, patchwork repairs, and poor falls.

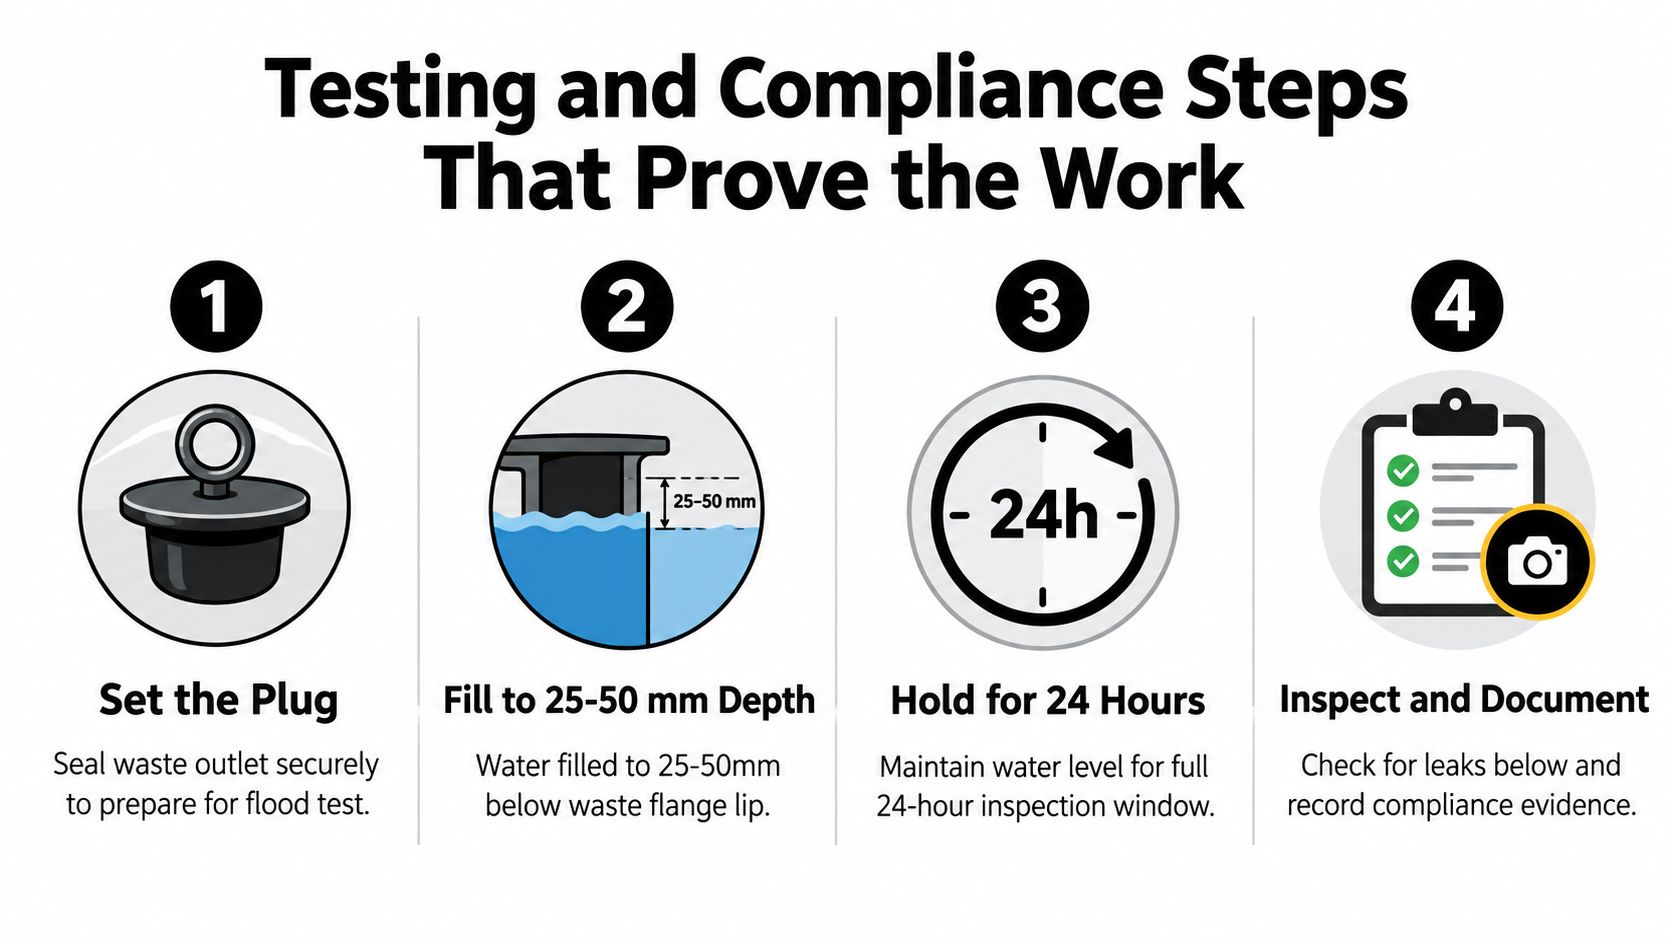
Testing and Compliance Steps That Prove the Work

A shower can look finished, be fully tiled, and still be leaking into the hallway or ceiling below. I see that pattern regularly in Melbourne rectification work, especially in older timber-floor bathrooms where movement at the waste, screen line, or wall-floor junction was never picked up before handover. Testing is what separates a bathroom that only looks complete from one that has been proved.

A four-step infographic illustrating standard bathroom waterproofing flood testing procedures for compliance and quality assurance.

What a flood test should show

On site, a flood test is the simplest way to check whether the membrane, corners, penetrations, and waste detailing hold water before tile finishes hide everything. It is particularly useful on renovations, because patched substrates and rebuilt shower bases are where small installation gaps tend to show up.

A useful test process looks like this:

  1. Seal the waste properly: A loose plug gives a false fail, and no plug gives no test at all.
  2. Fill the shower area to a defined level: The aim is to load the membrane and junctions, not just wet the surface.
  3. Hold the water long enough to observe performance: On many projects, that means a 24-hour hold period so slow leaks have time to show themselves.
  4. Check the level and inspect surrounding areas: Look for any drop in water level, moisture at adjacent rooms, and staining or seepage below if there is access from underneath.

On a concrete slab, a failed test often shows up as leakage at the waste or poor detailing at wall-floor junctions. On an older timber floor in a Victorian renovation, movement is the extra problem. The membrane might look sound when dry, then open up under load where the base flexes or where new sheeting meets old framing.

Flood testing also has limits. It does not prove the falls are right, and it does not excuse bad screen detailing or poor silicone work later. A shower can pass a water hold test and still perform badly if water sits at the entry, runs out through an uncontained opening, or ponds because the finished floor falls were not checked.

What to ask for: Photos of the set-up, the water level at the start, and the result at the end, with dates. On leak-rectification jobs, ask for photos of the waste seal, corners, and penetrations before tiling as well.

The paperwork that matters

Compliance is not just a membrane bucket and an invoice. The record should show what standard and manufacturer system the installer followed, what preparation was carried out, where the waterproofing was applied, and how it was tested.

For a bathroom renovation or shower rebuild, owners should expect:

  • a written scope of works
  • the membrane product details and data sheets
  • substrate and pre-tile installation photos
  • flood-test records
  • any relevant compliance documents for plumbing work completed by the licensed trade involved

That matters more in Victoria than many owners realise. Once the job value triggers registered-builder requirements, the paperwork trail becomes harder to ignore. It also matters on older Melbourne homes where leak claims often turn into disputes about whether the failure came from waterproofing, plumbing, movement in the floor, or later tile and screen work.

Good documentation will not stop a leak. It does make the cause easier to trace, the responsibility easier to sort out, and the rectification scope easier to justify if the shower has to come back out.

Common Defects and Real-World Rectification Examples

Rectification work teaches the lessons that new-build brochures leave out. Most failed bathrooms don't fail because one dramatic thing went wrong. They fail because several small decisions lined up badly.

A failed shower over timber

A typical example is a Melbourne bathroom from the 1990s over a timber floor. The shower starts leaking at the screen line, the skirting outside the bathroom softens, and the ceiling below develops staining. Once the shower base and lower wall tiles come up, the pattern is obvious. The membrane never had continuous perimeter coverage, the junction detailing was poor, and water had been tracking into the subfloor for a long time.

The fix usually isn't surgical. It means demolition back to a sound base, replacing damaged timber, rebuilding the substrate so it is stable, reinstalling compliant wet-area detailing, and only then retesting and retiling. If the owner is hoping for a grout-and-silicone repair, that's the point where expectations need resetting.

Key signs this kind of shower needs proper rectification:

  • Soft or drummy floor areas: Often a clue that moisture has affected the build-up below.
  • Swollen trims or adjacent skirting: Water has already moved beyond the shower zone.
  • Recurring mould at wall bases: Surface cleaning won't solve a concealed membrane failure.

External waterproofing failures are a different category

A second scenario is a leaking second-storey balcony tied to the bathroom or ensuite. The owner assumes it's the same problem as a shower recess. It isn't. External areas are governed separately, and balcony detailing fails for different reasons. Poor terminations, bad falls, weak door threshold treatment, or an incompatible membrane system can all send water into the unit below.

That matters because a trade can be competent inside bathrooms and still mishandle a balcony. The membrane may need to be stripped, falls corrected, terminations resealed, and the whole external build-up rebuilt to suit the relevant external standard rather than internal bathroom rules.

Leak rectification isn't a membrane-only exercise. If the substrate, falls, or terminations are wrong, the waterproofing system is only part of the repair.

The lesson owners should take from both

The common thread is simple. Once leakage is established, the question isn't "What membrane should I use?" It's whether the existing structure, geometry, and detailing are still worth saving. Some showers can be rebuilt efficiently. Others need a full strip-out because every layer under the tile has already been compromised.

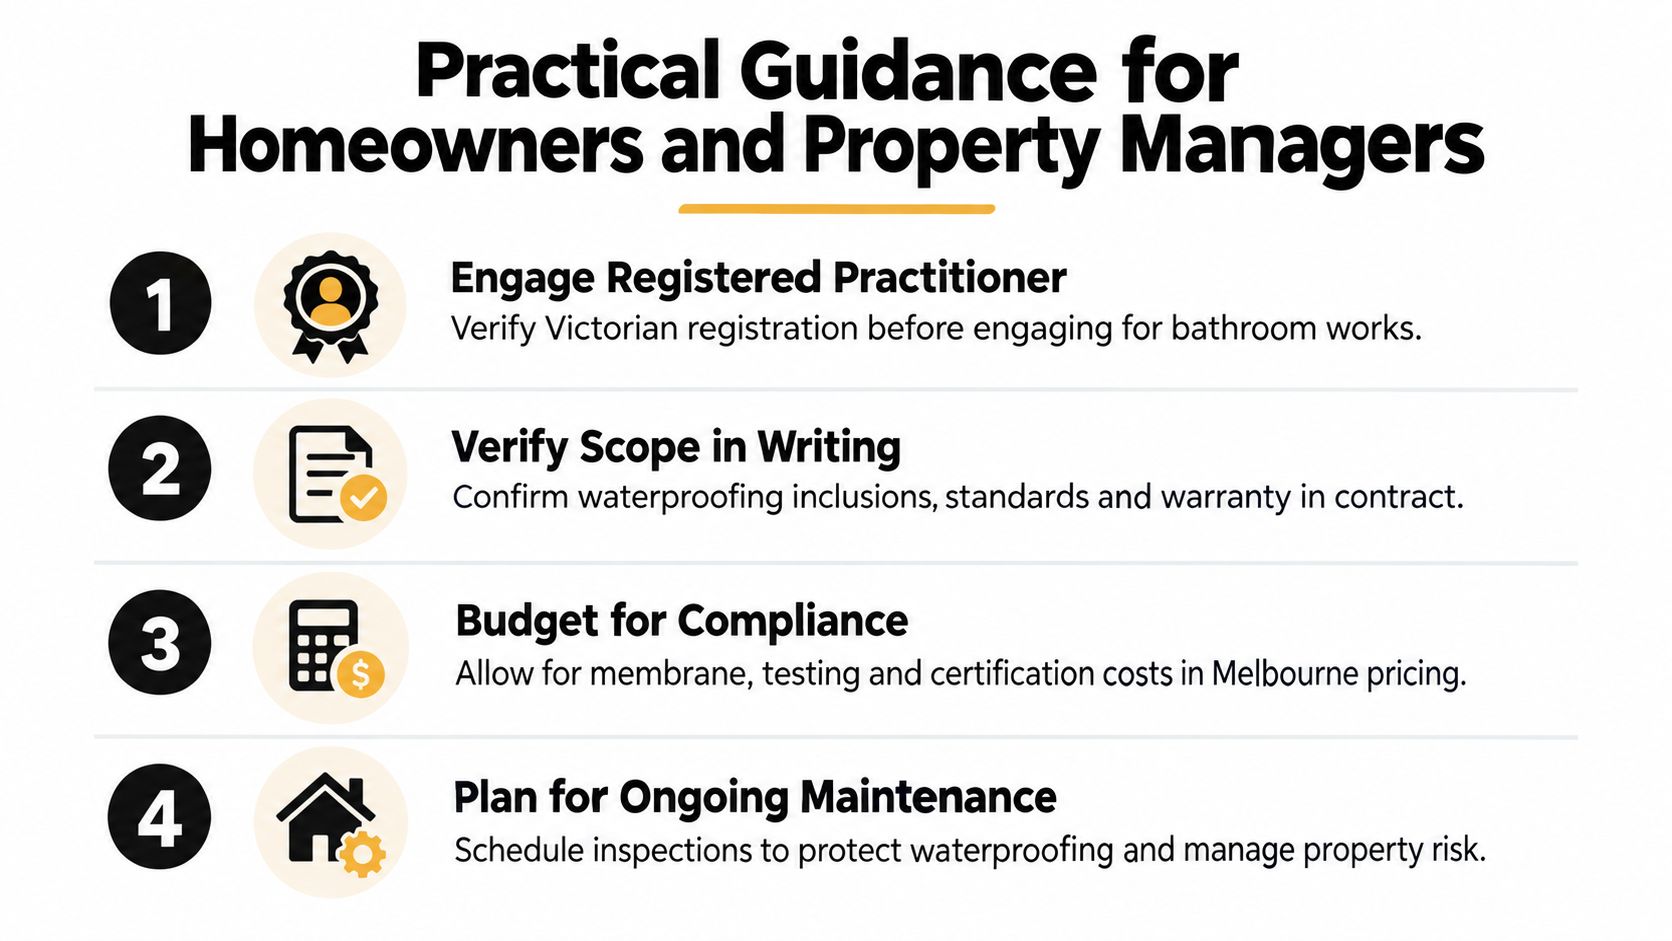
Practical Guidance for Homeowners and Property Managers

A common Melbourne renovation scenario goes like this. The old ensuite on a timber floor is stripped, the quote looks tidy, and everyone assumes waterproofing is covered because the word appears on page one. Then the builder opens the floor, finds sheet movement around the waste, discovers the room has almost no fall, and decisions start. If the scope was vague from the start, the owner ends up arguing about variations instead of getting a bathroom that will stay dry.

An infographic providing four steps of practical guidance for homeowners and property managers on bathroom waterproofing.

In Victoria, the registration threshold for bathroom renovation work has already been noted earlier in this article. The practical point for owners and managers is simple. Check who is taking responsibility for the wet-area build-up before demolition starts, especially in older apartments and post-war homes where timber floors, patched sheeting, and out-of-level framing are common.

What to put in the contract

A workable contract does more than say "renovate bathroom" or "waterproof wet area". It needs enough detail that everyone can tell what is included once the tiles are off and the substrate is exposed.

On renovation jobs, I want to see these items written clearly:

  • The compliance target: State that internal wet-area work is to comply with AS 3740:2021 and the relevant NCC requirements.
  • Demolition and make-good: Identify what gets removed and what happens if damaged sheeting, rot, or loose flooring is found.
  • Substrate preparation: Record whether floor levelling, screeding, sheet replacement, bedding around the waste, or framing correction is included.
  • Waterproofing system: Name the membrane brand and system, including primers, bond breakers, sealants, and compatible tile adhesives where relevant.
  • Set-downs, thresholds, and falls: If the room has limited height, say how the contractor will achieve compliant falls and water containment without creating a trip point at the door.
  • Proof before tiling: Require progress photos and, where appropriate, a flood test before tiles hide the work.

That last point matters on leak-rectification jobs. Plenty of failed showers in Melbourne look acceptable once retiled. The problem sits underneath.

For managers comparing repair scopes, the overview of Good Boy Plumbing for bathroom repairs is a useful example of how repair categories can be explained in plain language, even though the compliance checks still need to match Victorian requirements.

How to read a quote properly

Cheap quotes usually leave out the parts that cause disputes later. On older timber floors, that is often the structural preparation needed to stop movement and create proper falls to the waste. Membrane applied over a bouncing floor or a flat shower base is money spent in the wrong order.

Ask direct questions and get written answers:

  • Who holds the builder registration for the renovation scope?
  • Who is carrying out the waterproofing, and what system are they applying?
  • Is allowance made for replacing swollen fibre cement sheet, damaged villaboard, or loose flooring?
  • Are the shower falls being checked and corrected before waterproofing starts?
  • Is flood testing included, and who signs off on it?
  • What is the variation process if demolition exposes rotten framing or non-compliant plumbing set-out?

Property managers should also ask who will be dealing with access, tenant coordination, and drying time if a leak has already affected the unit below. Those practical delays are rarely captured in the lowest quote.

One practical option in Melbourne is Melbourne Tiling Services P/L, which coordinates bathroom renovation trades including waterproofing and leak rectification as part of full wet-area scopes. The useful part of that model is accountability. One party manages the substrate preparation, membrane stage, tiling sequence, and handover records instead of leaving gaps between trades.

What to keep before final payment

Do not rely on texts and verbal assurances.

Keep the contract, approved variations, product data sheets, invoices, progress photos, and any flood-test record. If the bathroom is in an older building with body corporate involvement, keep correspondence about access, leak reports, and any direction from the owners corporation as well.

Before releasing final payment, confirm that the completed work matches the written scope. That includes the practitioner details, the membrane system used, and the documented evidence that the waterproofing stage was completed before tiling covered it. On rectification work, that paper trail often matters as much as the tile finish, because if the shower leaks again, the first question is whether the failure was repaired or just covered up.

Bathroom Tile Adhesive Guide for Wet Areas and Renovations

A bathroom renovation in Melbourne can look flawless on handover day. The grout lines are straight, the porcelain reflects the light, and the shower feels ready for use. Months later, a hollow sound under the tiles, a cracked grout joint or a loose floor tile can reveal that the problem started beneath the surface, often with an adhesive chosen for convenience rather than compatibility.

Bathroom tile adhesive isn't a stronger version of household glue. It forms part of an installation system that has to work with the substrate, waterproofing membrane, tile type, moisture exposure and movement. A product that performs well on a dry wall splashback may be unsuitable for a shower floor, porcelain feature wall or large-format Kerlite installation.

Australian guidance gives renovators a useful technical framework. Adhesives are classified under AS ISO 13007, while the broader tile-installation framework was consolidated through AS 3958:2023. Wet-area waterproofing also has its own requirements under AS 3740:2021. These standards help shift the buying question from “Which brand is strongest?” to “Which performance class suits this complete system?”

The practical path is straightforward. First, understand what the adhesive does. Then compare cementitious, pre-mixed and epoxy products. After that, match the adhesive to porcelain, stone, large-format tiles, heated floors and substrate movement. Finally, check preparation, membrane compatibility, curing and the level of professional coordination your bathroom renovations require.

Table of Contents

Introduction Why Bathroom Tile Adhesive Matters More Than You Think

A typical Melbourne renovation starts with a decision about finishes. The homeowner chooses a warm stone-look porcelain, a terrazzo wall tile or a dramatic marble slab. The tiler measures the room, the plumber roughs in the fittings, and someone buys adhesive from a trade counter. Because the powder is hidden once the work is complete, it can receive less attention than the tile itself.

That approach creates risk. A bathroom exposes the bond line to moisture, changes in temperature and movement between materials. Porcelain has a dense, low-absorption surface. A large tile creates a broad area where small variations in the wall or floor can place stress on the bond. A waterproofing membrane may also move differently from the substrate and tile above it.

Site rule: The tile is the visible finish, but the adhesive and preparation determine how that finish behaves over time.

Australian classification makes this easier to assess. Under AS ISO 13007, C1 identifies a standard cementitious adhesive, while C2 identifies an improved cementitious adhesive. S1 and S2 describe increasing deformability, which matters where the installation must tolerate movement. Australian tiling guidance commonly treats C2 as the minimum benchmark for residential wet areas, rather than relying on a basic C1 product. Australian tile installation guidance on adhesive classes explains this distinction in practical terms.

The choice also has to fit the waterproofing sequence. A membrane isn't a substitute for adhesive, and adhesive isn't a waterproofing membrane. The membrane protects the wet-area structure, while the adhesive bonds the tile to the prepared, compatible surface above it.

By the end of this guide, you'll be able to read adhesive classifications, recognise the limits of mastics and compare flexible systems for demanding tiles. You'll also know when a product label is missing the information that matters most.

Understanding Bathroom Tile Adhesive and How It Works

At the bond line, adhesive has three jobs. It must grip the substrate, hold the tile in position while it cures and continue transferring loads after the bathroom is in use. Water, heat, cleaning, foot traffic and material movement all test that connection.

A cementitious adhesive starts as a powder and is mixed with water or an approved liquid additive. The cement hydrates as it cures, while polymers can improve adhesion, workability and tolerance of movement. The final performance depends not only on the powder, but also on the substrate, mixing method, trowelling, coverage and curing conditions.

Think of the classification like a building foundation. A C1 adhesive is the standard foundation for suitable, lower-stress applications. A C2 adhesive is the reinforced option, designed to provide improved bond performance. The letters don't replace the technical data sheet, but they give you a measurable starting point instead of a vague phrase such as “bathroom safe”.

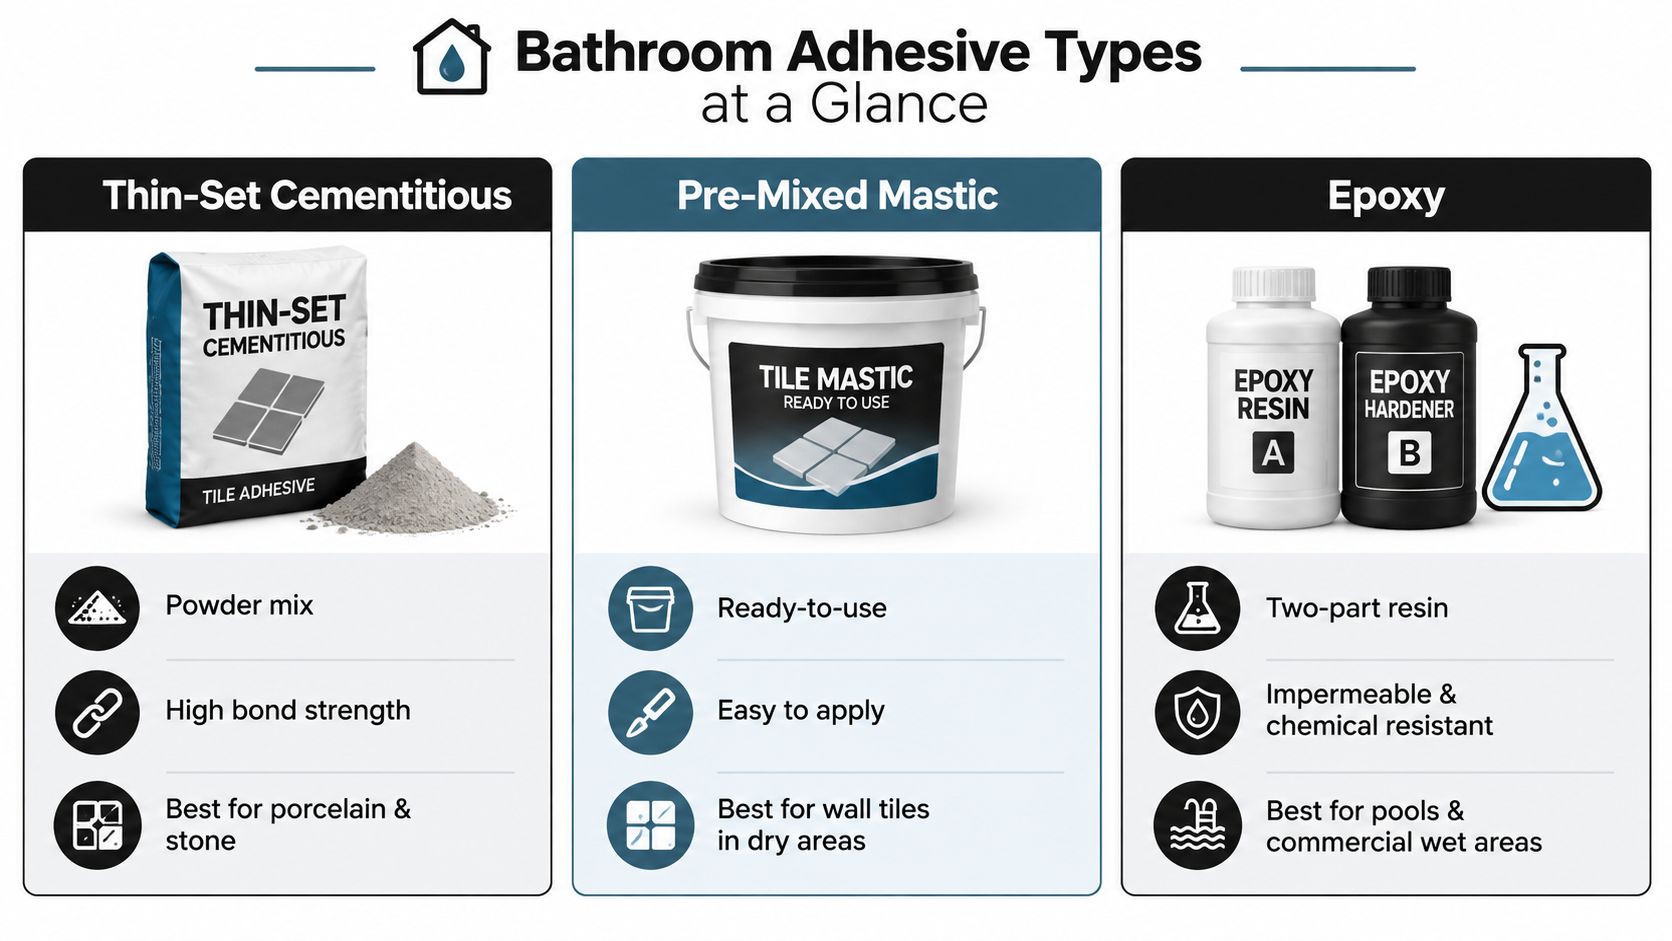
An infographic comparing three types of bathroom tile adhesives: thin-set cementitious, pre-mixed mastic, and epoxy.

Reading the performance classes

The “S” classification describes deformability. S1 indicates a slightly deformable adhesive, while S2 indicates a highly deformable adhesive. These classes become relevant where the substrate, membrane, tile or temperature conditions create greater movement across the bond.

A bathroom in an older Melbourne home may contain a patched floor, a fibre-cement sheet wall, a concrete slab or a timber-based structure. Those backgrounds don't all move in the same way. A rigid adhesive may struggle when the materials expand, contract or flex, while a suitably flexible system can accommodate more movement.

Australia's installation framework places this decision in context. The 2023 update through AS 3958:2023 tile installation guidance consolidated earlier ceramic and stone tile guidance into one national standard. Adhesive selection therefore sits alongside background preparation, tile placement and grouting, rather than operating as an isolated product choice.

What the label should tell you

Look for the classification, recommended substrates, tile limitations, primer requirements, open time, curing conditions and compatibility with waterproofing products. A label that only promises flexibility or superior grip doesn't tell you enough.

Australia has regulated tile adhesive performance for decades. The historical AS 2358-1990 preview shows that earlier guidance covered organic adhesives, cement-based adhesives and mortars containing organic additives. The modern approach is more useful for today's renovations because it describes performance classes and system requirements.

Main Types of Bathroom Tile Adhesive Compared

The three adhesive families most likely to appear in a bathroom discussion are thin-set cementitious adhesive, pre-mixed mastic and epoxy. They aren't interchangeable. Each has a different chemistry, application method and tolerance of wet conditions.

Thin-set cementitious adhesive is the usual starting point for bathroom floors, shower walls and porcelain. The installer mixes the powder to the manufacturer's specified consistency, spreads it with a notched trowel and beds the tile into the ridges. Polymer-modified C2 products are widely used where wet-area bond performance matters.

Pre-mixed mastic arrives ready to use, which makes it attractive for small wall jobs. It can be convenient on a dry internal splashback or a light ceramic wall tile, but prolonged moisture exposure changes the decision. A product that's easy to spread isn't automatically suitable for a shower floor, a continuously wet wall or a location where water can remain behind a dense tile.

Epoxy is a two-part resin system. It can provide strong adhesion and resistance to chemicals and water, but it requires careful proportioning, application and cleaning. It tends to suit specialised situations, such as demanding commercial wet areas or locations exposed to aggressive substances, rather than every domestic bathroom.

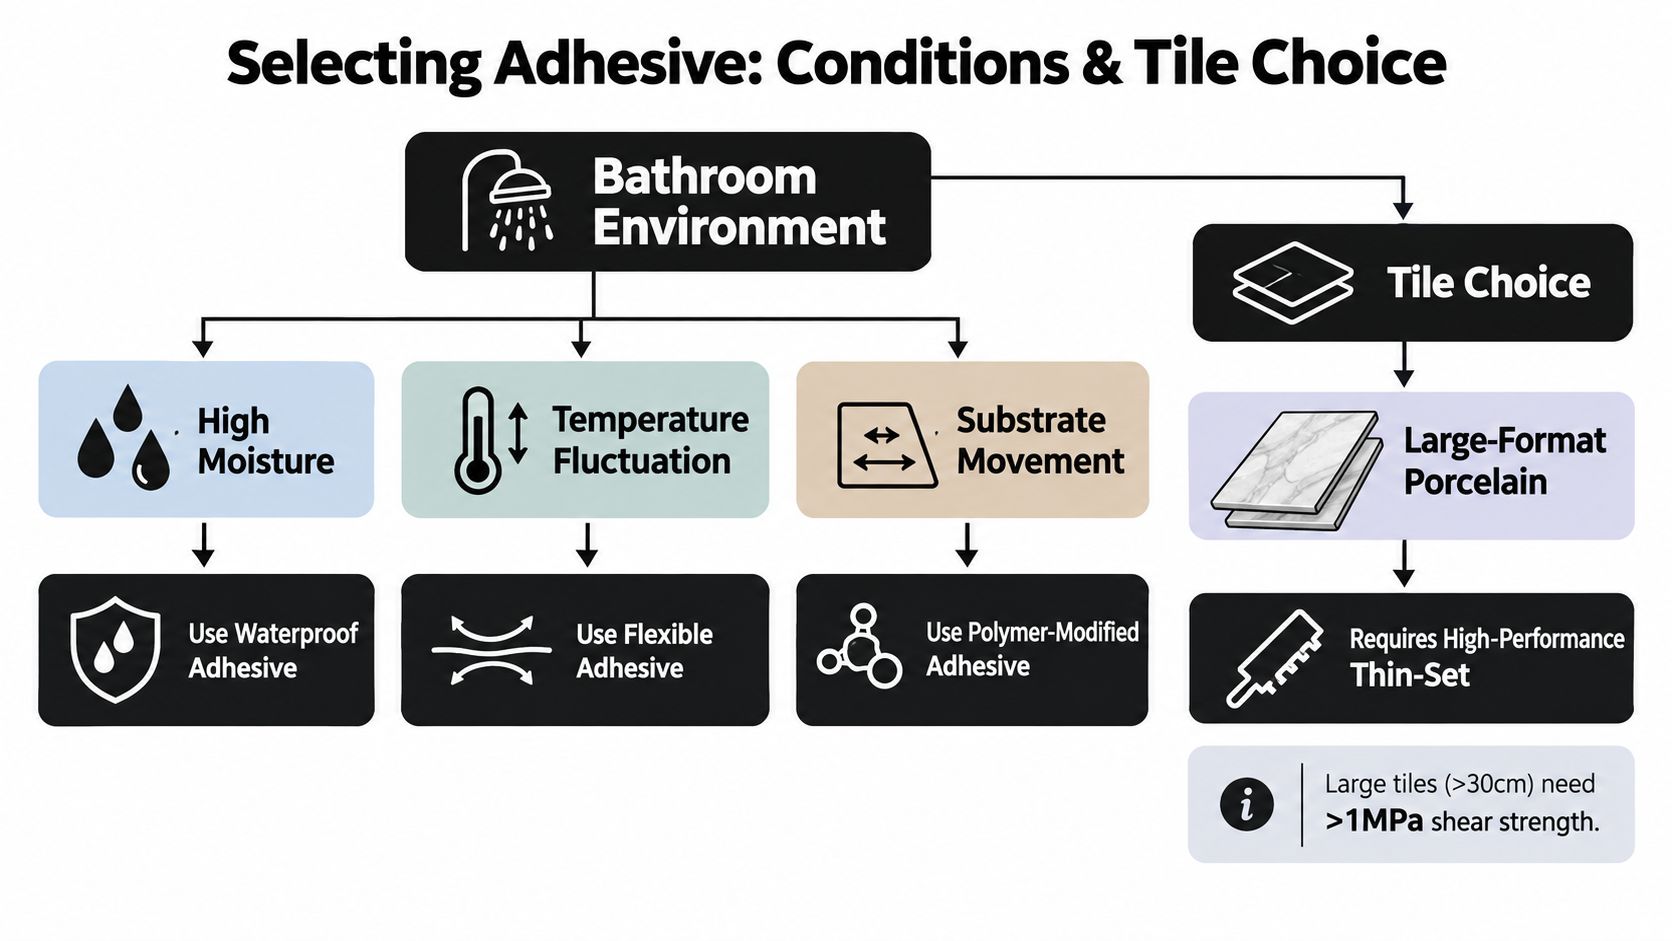
A flowchart guide explaining how to select the correct bathroom tile adhesive based on environmental conditions and materials.

Bathroom adhesive types at a glance

Adhesive Type Best For Wet Area Suitability Key Limitation
Thin-set cementitious Porcelain, ceramic, stone and floor tiling Common choice for wet-area systems when the class and membrane are compatible Requires accurate mixing, coverage and curing
Pre-mixed mastic Selected internal wall tiles and dry splashbacks Limited, check the specific product and location May be unsuitable for prolonged or submerged moisture
Epoxy Specialist commercial wet areas, pools and chemical-exposed locations High resistance where the complete system allows it More demanding application and clean-up

Choosing by situation

For a standard Melbourne ensuite with porcelain wall and floor tiles, start by checking a suitable C2 cementitious product and then confirm the tile and membrane requirements. For a dry kitchen splashback, a ready-to-use product may be appropriate if the technical sheet allows it. For a commercial washroom or chemical-exposed area, epoxy may justify its extra handling requirements.

The mistake is treating “ready to use” as a performance class. Convenience describes how the product arrives. It doesn't confirm how it will behave behind a large porcelain tile in a wet shower.

Matching Adhesive to Bathroom Conditions and Tile Choices

The tile and the room set the workload for the adhesive. A small ceramic wall tile on a stable, prepared background places different demands on the bond than a large porcelain panel over a membrane or a heavy marble tile beside a heated floor.

Porcelain is dense and absorbs little water, so the adhesive must develop an appropriate bond to its back. Large-format tiles also expose more of the substrate's imperfections. If the wall has hollows, the installer may struggle to achieve a consistent bed, and voids can become weak points under impact or movement.

For that reason, C2 is a safer benchmark for many high-stress bathroom applications. Australian guidance links improved cementitious performance with porcelain, large-format tiles, exterior-adjacent areas and installations where moisture or movement increases shear stress. Where the system needs deformation tolerance, the S1 or S2 classification becomes part of the specification rather than a decorative label.

Match the class to the installation

Underfloor heating introduces repeated temperature changes through the floor build-up. An exterior-adjacent bathroom can also experience more pronounced environmental changes than a room fully enclosed within the building. Older substrates, timber backgrounds and membranes may move in their own way.

Natural stone requires extra care because the tile can vary in weight, absorption and sensitivity to staining. Marble also deserves a technical check before installation, including whether the adhesive colour and chemical behaviour are suitable for the stone. The product data sheet, tile supplier and installer should agree on the system.

For large-format porcelain or Kerlite, large-format tile installation guidance is more useful than a generic adhesive recommendation because handling, substrate flatness, trowel selection and coverage all influence the result.

Coverage is part of the bond

Wet-area guidance points to at least 90% adhesive coverage beneath wall and floor tiles. Australian waterproofing and tiling guidance discusses this benchmark and the risks of spot-fixing, where adhesive dabs leave too much of the underside unsupported.

A notched trowel creates ridges, but the installer must still bed the tile correctly. Back-buttering may be needed for large or heavily profiled tiles, and the installer should lift an occasional tile during the work to check that the adhesive is contacting the back as intended.

A step-by-step infographic showing substrate preparation and tile installation process for bathroom flooring and walls.

A product can carry the right classification and still fail if the background is dusty, the ridges collapse, the tile is pressed unevenly or the installer grouts before the adhesive has cured.

Substrate Preparation Waterproofing and Curing Essentials

Adhesive can't flatten a dirty wall, repair a moving sheet or replace a waterproofing membrane. The installer needs to build the bathroom from the background outward, with each layer ready to receive the next.

AS 3958.1 covers background preparation, fixing and grouting for wall and floor tiles, including wet-area applications. The AS 3958.1 reference document reinforces the practical point: the adhesive must be selected for the background, moisture conditions and fixing method.

Prepare the background first

Remove dust, grease, loose material and old adhesive that isn't sound. Repair cracks and damaged areas, check levels and confirm that the surface is suitable for the selected system. A porous background may need a primer, while a non-porous or damp-proofed surface may require a specific primer stated by the adhesive or membrane manufacturer.

A primer isn't a universal cure. It changes the surface so the next material can bond consistently, but the installer still has to respect drying and recoat requirements. For a deeper explanation of this stage, see what substrate preparation involves.

Waterproof before tiling

The membrane comes before the tile adhesive. It protects the wet-area structure, while the adhesive bonds the tile to the membrane or prepared surface above it. The adhesive must be compatible with that membrane, and it shouldn't be expected to block water on its own.

AS 3740:2021 requires waterproofing adhesives in the system to be waterproof where waterproof materials meet and compatible with the materials they bond to. It also states that ceramic and stone tile adhesives must be water-resistant when bonding tiles to waterproof or water-resistant surfaces. The AS 3740:2021 document provides that technical context.

The required waterproofing zones also affect the work sequence. Under AS 3740:2021, shower floors must be fully waterproofed, shower walls must be waterproofed to at least 1800 mm, and bathroom walls must be waterproofed to at least 150 mm. Where a bathroom floor contains timber or sits on a second storey or higher, the whole floor must be waterproofed to at least 100 mm. This AS 3740 waterproofing overview summarises those extents.

A professional guide showing the three steps of substrate preparation, waterproofing application, and concrete curing essentials.

Allow the system to cure

Fast-track membrane products can state that some areas are ready for tiling as little as 4 hours after application, as shown in this wet-area membrane product literature. That doesn't mean every bathroom is ready on the same schedule. Temperature, humidity, film thickness, substrate condition and the manufacturer's written instructions still control the decision.

Don't tile over a membrane that feels soft, transfers material to a finger or hasn't reached its stated cure. Confirm the product, batch instructions and compatible adhesive before proceeding. A rushed sequence can trap moisture, weaken the bond or compromise the membrane.

Bathrooms can also develop mould when moisture management fails. If a property has a persistent damp smell, staining or suspected concealed moisture, a resource such as mold assessment for Georgetown properties explains why assessment should precede cosmetic repairs, even though the location differs from Melbourne.

How to Choose and Buy the Right Bathroom Tile Adhesive

Start with the installation, not the shopping aisle. Write down the substrate, membrane, tile material, tile size, room location and whether the floor has heating. That short description gives a supplier or tiler enough context to recommend a performance class rather than a generic product.

A practical buying matrix looks like this:

  • Prepared internal wall with standard ceramic: Check whether a C1 product is permitted, but confirm the wet-area location and manufacturer's instructions.
  • Bathroom floor or shower wall: Use a product meeting the wet-area benchmark, commonly C2, with compatibility confirmed for the substrate and membrane.
  • Porcelain, marble or large-format tile: Ask about C2 performance, deformability, tile weight, coverage and any primer requirements.
  • Heated or movement-prone floor: Discuss S1 or S2 suitability and confirm that the complete system allows the expected movement.
  • Non-porous or damp-proofed background: Ask which primer is required and whether the adhesive has been tested or approved for that surface.

Questions for the supplier

Ask for the technical data sheet, not just the front label. Confirm the classification, recommended tile formats, substrate restrictions, mixing instructions, open time, curing guidance and grout timing. If the adhesive is going over a membrane, provide the membrane name and ask for written compatibility.

Budget matters, but the cheapest bag can become expensive if tiles need to be removed, the membrane is damaged or a leaking shower requires rectification. Buying a premium product also isn't a substitute for correct preparation and coverage.

For a full bathroom renovation, Melbourne Tiling Services P/L can prepare free quotes and 3D drawings while coordinating waterproofing, screeding, self-levelling and tile installation. That planning process helps align the tile format, adhesive system and renovation scope before materials arrive on site.

When to Call Registered Builders and Tiling Professionals

DIY tiling can suit a small, dry wall project where the background is sound and the materials are straightforward. A shower renovation is different because waterproofing, plumbing, falls, substrate preparation and tile fixing interact. If one layer is wrong, the finished tile surface may hide the problem until water damage appears.

Victoria has specific registration rules. A person must be registered with the Building and Plumbing Commission for domestic building work worth more than $10,000, and registration is also required for building work that needs a permit regardless of cost. Consumer Affairs Victoria states that tiling alone, involving only wall and floor tiling, doesn't require registration unless multiple building trades are combined in one contract. Consumer Affairs Victoria's registered practitioner checklist sets out these conditions.

A registered builder adds value when the project includes demolition, carpentry, plumbing, electrical work, waterproofing and tiling under one coordinated contract. That matters for leak rectification, screeding, large-format porcelain, marble and complex shower layouts, where sequencing and documentation affect the final result.

If you're comparing tiling contractors near Melbourne, ask who handles the membrane, what adhesive class they specify, how they check coverage and how they document curing and substrate preparation. Those answers reveal more than a brand name or a low material allowance.


Melbourne Tiling Services P/L delivers bathroom and ensuite renovations, waterproofing, screeding, self-levelling and porcelain, marble, ceramic and large-format Kerlite tiling across Melbourne and greater Victoria. Visit Melbourne Tiling Services P/L to discuss your tile format, substrate and wet-area adhesive requirements, then request a free quote and 3D renovation plan.

Bathroom Renovation Design Guide for Lasting Results

You've chosen the vanity, saved a dozen tile images and started imagining warm lighting over a frameless shower. Then a builder asks where the floor waste goes, a tiler asks about the substrate, and the budget starts moving before the first tile is ordered. That moment is common in Melbourne bathroom renovations because the room's appearance depends on decisions hidden beneath the finishes.

Good bathroom renovation design isn't only about colour, tapware or a beautiful stone look. The layout controls how people move, the substrate controls how water drains, the membrane protects the structure, and the tile choice affects cleaning and installation. A design can look calm and expensive while still creating avoidable problems if those parts aren't planned together.

Table of Contents

Introduction to Bathroom Renovation Design That Lasts

A bathroom may be small, but its surfaces and services work hard every day. Water, steam, cleaning products, plumbing connections and constant movement all test the room, especially in an older Melbourne home where floors, walls and pipework may not be perfectly predictable. A durable renovation treats the bathroom as a comfortable living space supported by a coordinated building system.

The budget and programme depend on that coordination. A 2026 Australian renovation market report estimated that Australians spent more than A$50 billion on home renovations, with bathroom and kitchen projects accounting for over 60% of that spend. It placed a full bathroom renovation at roughly A$10,221 to A$20,443 nationwide, while a typical project took 2 to 3 weeks. Owners who remain at home during construction may add 30% to 50% to the schedule. These are estimates only. Your property, scope and trade availability will determine the final result. See the Australian renovation market estimates.

Design principle: Choose the visual finish only after you understand the surface, drainage and installation conditions supporting it.

Begin with the room's geometry. Check the door, window, plumbing routes, shower, bath, toilet, vanity and storage before choosing finishes. Then confirm how the floor falls towards the waste, how the waterproofing membrane protects the wet areas, and how lighting and ventilation will support daily use. These decisions determine whether attractive tiles perform well, rather than look good in a sample.

Melbourne homeowners also need to clarify responsibility before work starts. A renovation involving plumbing, waterproofing or structural alterations may require proper building oversight, rather than being treated as a cosmetic update. The Victorian bathroom renovation permit guidance explains why permit requirements should be checked before demolition.

A tile is only the visible surface. Its long-term result depends on the substrate beneath it, the membrane below that, and the drainage plan that moves water away. Get those layers right and the finished room can stay easy to clean, comfortable to use and visually settled for years.

How Bathroom Layout Shapes Daily Comfort and Flow

Layout is the first design decision because every finish has to fit inside it. A bathroom with expensive tiles can still feel awkward if the door collides with the vanity, the toilet dominates the entry view or there's nowhere to place a towel after a shower.

A diagram illustrating bathroom layout and flow, categorizing areas into wet, dry, and transition zones for comfort.

Think of the room as three connected areas rather than a collection of fixtures.

  • Wet zone: The shower and bath should contain water where possible. This makes cleaning simpler and reduces the amount of floor exposed to regular spray.
  • Dry zone: The vanity and toilet need enough room for dressing, washing hands and opening cupboards without blocking the rest of the room.
  • Transition zone: The doorway, circulation path and clearances act like traffic lanes. If they're crowded, the bathroom feels smaller than its measurements suggest.

Start by drawing the room as an empty rectangle. Mark the door swing, windows, existing soil pipe and likely plumbing routes. Then place the shower, toilet and vanity as simple blocks. Don't draw tapware or decorative details yet. You're testing movement, not styling.

Test the plan like a daily routine

Walk through the sequence in your head. Enter the room, turn on the light, hang a towel, use the vanity, open the shower screen and clean the floor. If another person needs to pass behind you, mark that path. A layout that works only when one person stands still won't feel comfortable in a family bathroom.

Storage needs the same practical test. Deep vanity drawers can hold more than a narrow cupboard, but they need clearance to open. Recessed shelving keeps bottles off the floor, yet its location must be decided before wall linings, waterproofing and tile set-out. A mirrored cabinet can provide useful storage without consuming floor area, provided it works with lighting and electrical planning.

A good plan behaves like a well-organised kitchen. You shouldn't have to cross the room repeatedly to complete one ordinary task.

Privacy also belongs in the layout discussion. If possible, avoid placing the toilet directly in the first sightline from the hallway. A partial nib wall, vanity position or shower screen can create visual separation without making a compact room feel closed in.

Finally, consider future flexibility. A shower that can accommodate a seat later, wall construction that can support grab rails and a vanity with usable knee space can serve changing needs without looking institutional. Layout decisions are difficult to correct once plumbing and waterproofing are complete, so test them with cardboard templates or a scaled plan before approving the final drawings.

Choosing Tiles and Materials for Style and Durability

Tiles create the visible character of a bathroom, but they also change the installation workload. The right material depends on where it will be used, how much maintenance you accept and how accurately the substrate can be prepared.

A comparison chart showing features like slip resistance, durability, and style for porcelain, ceramic, marble, and kerlite tiles.

Porcelain is a strong general option for floors and wet areas. It offers a dense surface and can reproduce concrete, limestone or marble appearances with less ongoing care than many natural stones. The exact product still matters, particularly its slip characteristics and suitability for the intended floor.

Ceramic works particularly well on walls, where it can provide colour, texture and pattern without receiving the same foot traffic as a floor. It's often easier to cut than dense porcelain, which can help with detailed wall layouts, borders and niches.

Marble brings genuine variation and a refined appearance, but it's porous and needs appropriate sealing and maintenance. Its veining also creates a set-out decision. You'll need to decide whether the pattern should continue across corners, align around niches or be treated as a more relaxed natural composition.

Kerlite, a large-format porcelain slab, creates fewer visible joints and a clean architectural effect. It can reduce grout maintenance, but its size makes handling, substrate flatness, cutting and installation accuracy especially important. Large formats don't hide an uneven wall. They reveal it.

Match the material to the surface

For floors, prioritise grip, drainage and cleanability before visual drama. Small tiles can follow falls more easily because their edges accommodate changes in plane, while large tiles require a carefully formed substrate and deliberate cuts around wastes. On walls, larger formats can make a compact room feel calmer by reducing grout lines, but they demand precise setting out around doors, windows and fittings.

Grout deserves more attention than it usually receives. A contrasting grout highlights the pattern and makes every alignment visible. A closely matched grout creates a quieter surface and can make cleaning marks less visually prominent. Neither choice fixes poor installation, so the tile, adhesive, joint width and substrate must be considered as one system.

Use samples in the actual room. Melbourne daylight, warm lamps and cool LEDs can change how a cream tile or stone-look surface reads. Place the floor sample beside the vanity finish, tapware, wall colour and grout sample before ordering. For practical selection guidance, this bathroom tile selection guide can help you compare appearance with installation and maintenance requirements.

A tile can look timeless without being expensive. Often, the durable choice is the one that gives you a convincing natural finish, manageable grout lines and enough tolerance for the room's drainage geometry.

This video provides a visual introduction to tile selection and bathroom finishes:

Planning Wet Areas Waterproofing and Drainage the Right Way

Waterproofing should be resolved before tile set-out, not treated as a coating applied just before the tiler arrives. Tiles and grout form the visible surface, but the membrane and substrate beneath them provide the protective envelope that keeps water away from framing and adjoining rooms.

A four-step infographic illustrating the waterproofing and drainage process for a bathroom renovation project.

Australian requirements specify that the shower floor, including any hob or step-down, must be waterproof. Shower walls must also be waterproofed to at least 1,800 mm above the finished floor level, or to 50 mm above the shower rose, whichever is higher. The NCC 2022 wet-area waterproofing provisions set out the relevant requirements.

That height affects design details. A recessed niche, mixer penetration, shower screen channel or wall junction must be positioned so the waterproofing remains continuous. If the designer selects the niche after the wall lining is installed, the tiler and waterproofer may be forced into awkward alterations, increasing the possibility of membrane damage or rework.

Build the drainage plane first

Where a floor waste is installed, the floor must fall continuously towards it. The required fall is a minimum grade of 1:80, and shower areas must not exceed 1:50 under the relevant drainage geometry. Stormtech's wet-area drainage whitepaper explains the practical relationship between falls, drainage and tile installation.

The simple analogy is a shallow funnel. If the funnel is too flat, water sits. If it's too steep, the surface becomes uncomfortable and difficult to tile neatly. Screeding or self-levelling creates the intended plane before the membrane and tiles are installed, so the substrate must be checked rather than assumed to be flat enough.

Large-format tiles make this stage more demanding. A floor with multiple planes, a linear drain and large porcelain pieces needs careful cuts and consistent support. Excessive variation can create lippage, where adjacent tile edges sit at different heights. Insufficient fall can leave ponding at the junction between the shower and the rest of the bathroom.

Ask for evidence, not reassurance

Before work starts, ask who is responsible for waterproofing, what system is being used, how penetrations will be treated and how the floor falls will be checked. You should also confirm how the shower screen, hob, niche and floor waste connect to the waterproofing detail. The wet-area waterproofing service information provides useful context for the sequence and trades involved.

Australian bathroom waterproofing is connected to standards including AS 3740:2021, AS 3958.1, AS 4654.2, AS/NZS 4858 and NCC Volume Two Part 10.2. This Australian waterproofing and tiling overview summarises how those requirements relate to shower floors, walls and drainage.

A membrane isn't a substitute for good detailing. It's the barrier that works when the layout, substrate, falls and penetrations have been designed to support it.

Lighting Ventilation and Universal Design for Everyday Ease

A bathroom should be easy to use early in the morning, relaxing at night and safe when the floor is damp. That calls for layers rather than one bright ceiling fitting.

A modern, bright bathroom with a soaking tub, wooden vanity, and a large walk-in glass shower.

Begin with ambient lighting, such as a ceiling fitting or evenly distributed downlights. Add task lighting beside or around the mirror so your face isn't lit from above, which can create unhelpful shadows. Accent lighting can highlight a textured wall, niche or joinery detail, but it should support the room rather than compete with the mirror.

Place the mirror and vanity lighting together on the drawing. A round mirror can soften a room dominated by straight tile lines, while a mirrored cabinet can provide storage. In either case, the electrician needs the final dimensions before rough-in so switches, lights and power points land where they belong.

For more ideas about combining function, ambience and electrical planning, DLG Electrical's lighting guide for Brisbane homeowners offers a useful lighting reference, even though the advice isn't specific to Melbourne conditions.

Control steam before it becomes a maintenance problem

Ventilation removes humid air and helps limit condensation on mirrors, ceilings and joinery. Choose the fan location with the shower and window in mind, and make sure the system vents appropriately rather than moving moisture into a roof cavity. A quiet fan is more likely to be used consistently, particularly in a shared home.

Natural light can improve the room, but privacy and heat control still matter. Obscure glazing, a high window or a considered blind can bring daylight without exposing the bathroom to neighbours.

Universal design doesn't require an institutional appearance. A level-entry shower, carefully selected floor surface, reachable storage and reinforced wall areas for future grab rails can look completely contemporary. Wall blocking is easiest to provide while the room is open, even if rails aren't needed immediately.

Comfort-height fixtures, a hand shower and a clear route through the room can help children, older residents and anyone recovering from an injury. The universal bathroom design guide explains how these choices can be integrated into a refined renovation rather than added as an afterthought.

From Mood Board to 3D Drawings and Builder Collaboration

A mood board is useful only when it becomes a buildable brief. Start with a small group of reference images, then identify what you like in each one. It might be the warm timber tone, the quiet grout, the curved mirror or the way the shower is separated from the vanity. This prevents you from copying a look without understanding its ingredients.

Collect physical samples where possible. Hold tiles beside the proposed joinery, basin, paint and tapware in the bathroom's actual light. A screen image can't show the texture of a handmade-look ceramic tile or the variation within marble. It also won't reveal whether two warm neutrals clash beside one another.

Use drawings to expose expensive surprises

A 3D drawing can test more than appearance. It can show whether the vanity feels too deep, whether the shower screen blocks the mirror, whether a niche aligns with the tile grid and whether the pendant or wall light sits at the right visual height. It can also help you decide between a freestanding bath and additional storage before the plumber sets pipework.

Your drawing package should identify the fixture positions, tile direction, joint alignment, niche dimensions, screen location, floor waste and lighting points. Make changes on paper, where they're inexpensive, rather than after waterproofing or tile installation.

A useful quote-stage checklist includes:

  • Scope: Confirm demolition, carpentry, plumbing, electrical work, waterproofing, screeding, tiling, grouting, sealing and screen installation.
  • Responsibilities: Ask which registered practitioners and specialist trades are involved, and who coordinates them.
  • Materials: Confirm product names, sizes, quantities, wastage allowances and whether natural stone requires sealing.
  • Quality checks: Ask how substrate flatness, floor falls, membrane continuity and tile alignment will be reviewed.
  • Variations: Require changes to be recorded with their effect on cost and timing before the work proceeds.

Victoria treats registration as a meaningful part of bathroom renovation work. Bathroom renovations valued at A$5,000 or more must be carried out by a registered building practitioner under the guidance summarised by the Victorian bathroom renovation regulations overview. A Domestic Builder: Limited, or DBL-L, registration specifically covers bathroom, kitchen and laundry renovations.

The VBA application for limited registration requires evidence such as industry qualifications, project work evidence, a technical referee report, a criminal history check, photo identification and declarations. The VBA registration application document shows why registration is different from registering a business name.

For a coordinated project, Melbourne Tiling Services P/L provides bathroom renovation, waterproofing, screeding, self-levelling, tiling and shower-screen installation while coordinating the relevant trades. Treat that as one option to investigate, then compare the proposed scope, registration details, drawings and quality controls with other registered builders.

Bringing Your Bathroom Renovation Design Together

A bathroom can look polished on paper yet fail in daily use if the design ignores maintenance, water movement or construction details. Treat the design like a chain. The tiles, falls, membrane, drainage and workmanship must support one another, or a weak link can lead to cracked finishes, pooling water or leaks.

Before approving the work, confirm the decisions that still affect the build:

  • The finish schedule is complete: Tile names, sizes, quantities, grout, trims and sealants are listed, with spare tiles allowed for future repairs.
  • Supply responsibilities are clear: Confirm who orders, receives and stores the tiles on site. Record what happens if a selected batch is delayed or discontinued mid-project.
  • Product compatibility is checked: Ensure adhesives, grout, sealers, fixtures and waterproofing products suit the selected surfaces and manufacturer requirements.
  • The handover plan is agreed: Ask who protects finished surfaces, removes packaging, tests fixtures and provides care instructions.
  • Changes have a paper trail: Any substitution or variation should show its cost, timing and effect on the finished design before approval.

Set the budget before the mood board becomes fixed. A full renovation may cost more when Melbourne access, structural changes, material choices or rectification work add complexity, so request a detailed quote rather than relying on an early allowance.

Use a renovation calculator, review samples in the actual room and request 3D visuals before ordering products. The strongest result is a bathroom where attractive choices also make cleaning, drainage and future maintenance easier.

Melbourne Tiling Services P/L can coordinate 3D drawings, waterproofing, screeding, self-levelling, wall and floor tiling, and shower-screen installation. Visit Melbourne Tiling Services P/L to discuss your Melbourne or Victorian project and request a clear quote.

Bathroom Renovation Quote Guide for Melbourne Homes

In Victoria, a standard full bathroom renovation typically costs AUD 15,000 to AUD 35,000, while Melbourne homeowners commonly see AUD 15,000 to AUD 22,000 for a standard full renovation. The national average is often quoted at about AUD 26,000.

You may be looking at three bathroom renovation quotes that seem to describe the same room, yet one says AUD 12,000, another AUD 21,000, and the third AUD 30,000. The gap feels alarming until you read past the totals. One builder may have included demolition, substrate repairs, waterproofing certification and licensed trades. Another may have priced only visible finishes and left several important items as allowances.

That confusion is normal. A bathroom is a small room, but a large amount of specialised labour is concentrated inside it. Moving a toilet, repairing a damaged substrate or changing the shower design can affect plumbing, electrical work, waterproofing, tiling and certification at the same time.

A useful bathroom renovation quote isn't just a price tag. It's a written story about scope, risk, materials, labour and compliance. Once you understand that story, you can compare quotes fairly, identify exclusions and decide whether a lower figure represents genuine efficiency or missing work.

Table of Contents

Introduction What a Bathroom Renovation Quote Really Tells You

The first question to ask isn't “Which quote is cheapest?” It's “What work does each quote buy?” A quote for bathroom renovations should let you trace the project from the first site inspection through demolition, rough-in services, surface preparation, waterproofing, tiling, fixture installation and final completion.

Melbourne pricing guides place a full renovation around AUD 10,500 to AUD 21,000 in one reported range, while another commonly cited Melbourne range for a standard full renovation is AUD 15,000 to AUD 22,000. These figures vary because “full renovation” can describe very different jobs, from a straightforward replacement that keeps the existing layout to a structural transformation with relocated plumbing and premium finishes. (Canstar's Australian bathroom renovation cost guide provides broader national and Victorian benchmarks.)

The same room can contain different projects

Suppose all three builders have measured the same Highett bathroom. The AUD 12,000 quote might retain the existing toilet, vanity and shower positions, use standard fixtures and assume the wall substrates are sound. The AUD 30,000 quote might include new plumbing locations, extensive demolition, upgraded stone surfaces, custom cabinetry, more complex tiling and a larger allowance for concealed damage.

Neither number tells you enough on its own. You need to know what each builder has assumed, what each trade will do and which decisions remain unresolved.

Practical rule: Treat the total as the last line of the conversation, not the first.

The quote should also show who carries responsibility for coordination. Bathroom renovations involve plumbers, electricians, carpenters, waterproofers, tilers and sometimes shower-screen installers. If separate trades aren't coordinated, a delay or mistake in one stage can affect the next stage and create a cost dispute.

Why the lowest number can mislead

A low quote can be perfectly legitimate when the scope is simple and the existing room is in good condition. It becomes risky when it omits preparation, waterproofing documentation, permits, waste removal or the work needed to correct hidden defects.

This guide gives you a practical way to read the scope, identify the main cost drivers, understand waterproofing and registered builder requirements, benchmark Melbourne and Victorian pricing, and collect comparable written quotes. The aim isn't to push you towards the highest figure. It's to help you choose a quote that is complete, lawful and clear enough to manage.

How a Bathroom Renovation Quote Is Built From Scope to Finish

Think of a quote as a house plan rather than a shopping list. A shopping list might name tiles, a vanity and tapware. A house plan explains where those items go, what must happen before installation and which people are responsible for each stage.

A complete quote usually brings together four connected parts:

  • Scope: Demolition, layout changes, plumbing, electrical work, carpentry and finishing tasks.
  • Materials and finishes: Tiles, fixtures, cabinetry, tapware, shower screens, adhesives, grout and paint.
  • Labour and trades: The hours and specialist work required to prepare, install, test and finish the room.
  • Allowances and contingency: Items such as waterproofing, certificates, provisional sums and allowances for conditions that can't be confirmed before strip-out.

An infographic titled From Scope to Finish detailing the key components of a bathroom renovation quote.

Read the line items as a sequence

Start with the existing room. The builder should identify access, measurements, current fixture positions, visible damage and any design constraints. Demolition then exposes the walls and floor, rough-in work prepares plumbing and electrical services, and substrate preparation creates a stable surface for waterproofing and tiles.

The quote should distinguish between a fixed scope and an allowance. A fixed scope describes a defined task and its inclusions. A prime cost item generally represents an allowance for a product you'll select, such as a toilet or tapware. A provisional sum covers work whose final extent is uncertain, such as repairs found after demolition. These aren't interchangeable, so ask what can change and how the builder will approve additional work.

Layout changes usually have a greater effect than a small finish upgrade. Keeping plumbing in place can avoid extensive service relocation, while moving a toilet or shower may require new pipe runs, different floor preparation and further coordination. A tile colour might change the materials selection, but a changed layout can alter the entire sequence of trades.

For a broader operational perspective on organising service-based work, the playbook for service businesses offers useful context around clear processes and customer communication. For homeowner-specific planning, compare the scope sequence with this bathroom renovation planning guide.

The final price should emerge from the inspection, drawings, selections and written assumptions. If the quote jumps straight from a brief phone conversation to one unexplained total, you don't yet have a reliable basis for comparison.

Key Factors That Drive Your Quote Up or Down

A bathroom renovation quote moves when the work, access or risk changes. The most useful way to assess it is to examine each lever and ask what consequence follows from the decision.

A chart detailing key factors that increase, decrease, or have a neutral impact on renovation quotes.

Scope and layout

Keeping the vanity, toilet and shower in their current positions generally creates a simpler plumbing scope. Relocating them can involve floor access, new pipework, additional labour and more complicated coordination. Structural changes, niche construction and altered wall positions can also expand carpentry, waterproofing and tiling requirements.

The key question is whether the quote describes a refresh or a rebuild. A refresh may replace fixtures and finishes without changing the room's arrangement. A rebuild strips the room back and reconstructs several systems.

Materials and finishes

Materials affect more than the purchase price. Large-format products such as Kerlite or premium stone may need specialised handling, accurate substrate preparation and experienced installation. Custom cabinetry and detailed shower-screen designs can also increase fabrication and coordination work.

A mid-range fixture can provide a sound specification without carrying the cost or installation demands of a highly customised product. Ask each builder to identify the assumed product range, size, finish and supplier rather than accepting “quality fixtures” as a description.

Plumbing, electrical work and waterproofing

Plumbing and electrical services must be coordinated around walls, floors, lighting, ventilation and fixture positions. A change to the shower location can affect pipework, falls, wall preparation and the waterproofing boundary.

Waterproofing also depends on the condition of the substrate. If the existing surface is uneven, damaged or unsuitable, the builder may need to remove material, repair the base and prepare it before applying the membrane. That preparation is part of the system, not an optional cosmetic extra.

Accessibility, compliance and site conditions

Grab rails, step-free access, altered door openings or other accessibility decisions can change the design and construction scope. Compliance work may also require documentation, certificates or inspections.

Location matters too. A bathroom inside an apartment, a narrow terrace or an upper-level property may offer less convenient access for demolition waste, deliveries and materials. A regional property may have different trade availability and travel considerations. Those conditions should appear in the assumptions instead of remaining hidden inside a lump sum.

The Australian market guide linked by Mercateer's plumbing answering service resource is useful background for understanding why plumbing enquiries need clear details before a contractor can assess them. Your own quote still needs a site-specific inspection.

When reviewing the quote, mark each item as fixed, selected, provisional or excluded. That simple classification often explains the price difference more clearly than the headline total.

Why Waterproofing and Compliance Can Make or Break Your Quote

Waterproofing is the part of a bathroom renovation that homeowners see least and depend on most. Tiles, grout and fixtures are visible, but the membrane and prepared substrate protect the structure behind them.

In Australia, AS 3740 requires domestic wet areas to be waterproofed to code by licensed trades. Industry pricing guides commonly place waterproofing around AUD 500 to AUD 1,000 for an average bathroom, or AUD 1,000 to AUD 3,500 where the design is more complex or remediation is required. (Co-architecture's Australian bathroom renovation guide explains these cost categories.)

A professional construction worker uses a caulking gun to seal bathroom wall tiles during a renovation project.

Preparation belongs beside the membrane

A quote that says only “waterproof bathroom” leaves important questions unanswered. Ask whether it includes substrate preparation, junction treatment, falls, penetrations, curing requirements and the relevant certificate or documentation.

Rewaterproofing is different from applying a membrane over a ready surface. If the existing waterproofing has failed, the contractor may need to strip out tiles, repair the substrate and retile the affected area. Recent Australian guides place failed waterproofing repairs at AUD 3,000 to AUD 8,000 or more, compared with standard waterproofing around AUD 500 to AUD 1,800, because the repair includes several layers of work. (Yellow Pages' waterproofing cost guide outlines this distinction.)

A quote that excludes preparation may look cheaper while transferring the risk to you. The apparent saving disappears when the builder discovers loose surfaces, moisture damage or an unsuitable base after demolition.

For a clearer explanation of certification and Victorian requirements, review this guide to a waterproofing compliance certificate in Victoria.

Registered builders in Victoria

Victoria also has a compliance threshold that affects how you appoint a contractor. A person must be registered with the Building and Plumbing Commission when carrying out domestic building work worth more than AUD 10,000. Registration is also required for structural building work or work requiring a building permit, regardless of value. (Consumer Victoria's guidance on builders and tradespeople sets out these requirements.)

For work above AUD 10,000, the builder must use a written major domestic building contract. Consumer Victoria also explains that the requirements apply to renovations above that value even when the work is divided across multiple contracts, so splitting a project doesn't avoid the threshold. (The Victorian renovation checklist covers this point.)

A registered builder isn't a guarantee that every quote is complete, but an unregistered arrangement can create a serious compliance problem. The Victorian registration checklist confirms that practitioners must be registered and approved before commencing relevant domestic building work above AUD 10,000. (The registered building practitioner checklist provides the registration context.)

Typical Bathroom Renovation Costs Across Melbourne and Victoria

Cost bands are useful only when you attach them to a defined scope. A budget bathroom that keeps the existing layout isn't comparable with a premium renovation involving structural changes, specialist surfaces and extensive service relocation.

For Australia, a commonly cited benchmark is about AUD 26,000, with a broad national range of roughly AUD 8,000 to AUD 35,000 or more. In Victoria, typical full renovations are often placed around AUD 15,000 to AUD 35,000, while a Victoria-specific estimator gives low, mid and high estimates of AUD 14,000, AUD 23,000 and AUD 42,000. (Canstar's bathroom renovation cost reference provides these national and Victorian comparisons.)

Location and scope Typical cost range AUD What it usually includes
Melbourne, full renovation scope AUD 10,500 to AUD 21,000 A complete renovation range, with the final amount shaped by layout, products and site conditions
Melbourne, standard full renovation AUD 15,000 to AUD 22,000 Demolition, services, waterproofing, tiling, fixtures and fit-off at a standard specification
Victoria, typical full renovation AUD 15,000 to AUD 35,000 A broad full-renovation scope, with regional and specification differences
Victoria, low to high estimator range AUD 14,000 to AUD 42,000 Low, mid and high project positions from a Victoria-specific estimator
Victoria, basic to high-end guide AUD 14,150 to AUD 59,000 Basic updates through high-end transformations

Other Victorian guidance illustrates the spread more sharply, placing budget projects around AUD 5,905 and premium bathrooms around AUD 32,832. Another guide places a complete Victorian renovation around AUD 29,500, with basic updates near AUD 14,150 and high-end work reaching about AUD 59,000. (RenoCalc's Victoria bathroom cost guide presents these regional and finish-level variations.)

What the bands mean for Melbourne homeowners

Melbourne sits above some lower-cost Australian markets in several published comparisons. A broader market report places a full renovation nationally around AUD 10,221 to AUD 20,443 and Melbourne around AUD 10,500 to AUD 21,000, while reporting that the same scope can cost 28% more in Darwin than Hobart. (RenoCalc's Australian comparison data provides that geographic context.)

Use these numbers as a starting filter, not a promise. A quote around the middle of the Melbourne range may still be incomplete if it excludes waterproofing preparation, while a higher quote may be reasonable if it includes structural repairs, premium stone or complex access.

Current Australian guidance is also moving towards component-level and per-square-metre budgeting rather than relying on one lump sum. (The TFO bathroom renovation cost guide discusses this more transparent way to break down scope and finishes.)

How to Get an Accurate and Comparable Quote in Melbourne

A reliable quote starts with the same information going to every builder. If one contractor receives a sketch and another receives measured drawings, product selections and a written scope, their totals won't be comparable.

Start with the site, then document the scope

An onsite inspection lets the builder check dimensions, access, existing services, visible moisture damage and the condition of walls and floors. Phone estimates can help with an early conversation, but they can't confirm concealed conditions or the practical difficulty of removing materials from your property.

Give each builder a brief containing:

  • Room details: Measurements, photos, ceiling height, door position and fixture locations.
  • Design decisions: Whether the layout stays, which fixtures you want and your preferred tile formats.
  • Work boundaries: Demolition, waste removal, carpentry, plumbing, electrical work, waterproofing, tiling and final fit-off.
  • Documentation needs: Drawings, product allowances, certificates, registration details and insurance information.

A five-step infographic showing how to get an accurate bathroom renovation quote for properties in Melbourne.

Compare the unknowns, not just the totals

Ask for an itemised written quote and separate fixed items from prime cost items and provisional sums. Confirm who supplies tiles, adhesive, grout, fixtures and shower screens, and ask how variations will be approved if the builder finds damaged substrate after demolition.

Three quotes can be useful when each builder has priced the same scope. More quotes aren't automatically better if every contractor has made different assumptions.

Tools can help test those assumptions before you commit. A bathroom renovation calculator can organise room size, materials, fixtures and upgrades into a clearer cost breakdown. For another example of how a plumbing cost sheet can present trade items, review the MG Plumbing Services cost sheet, while remembering that an overseas or general reference can't replace a Victorian site assessment.

Melbourne Tiling Services P/L offers free quotes, 3D drawings and a transparent renovation calculator, alongside bathroom renovation, tiling and waterproofing services. Use those tools to clarify the intended finish before asking builders to price the work.

Finally, verify the builder's registration before work begins, check the contract requirements and keep the written scope with all selections and approved variations. Clear paperwork is what turns a verbal expectation into something you can manage.

How to Compare Quotes and Reduce Costs Without Cutting Corners

Place the quotes side by side and compare each scope line, not just the totals. Check whether every quote includes demolition, waste removal, plumbing, electrical work, substrate preparation, waterproofing, certificates, tiling, fixtures, shower screens and final cleaning.

Use this decision checklist:

  • Scope: Confirm the same layout, demolition extent and finish schedule.
  • Allowances: Identify every prime cost item and provisional sum, then ask what happens if the allowance changes.
  • Waterproofing: Look for preparation, membrane application, documentation and rectification assumptions.
  • Credentials: Verify registered builders and licensed trades where the work requires them.
  • Contract: For relevant Victorian domestic building work above the threshold, request the required written contract.
  • Quality controls: Ask about warranties, inspections, variation approvals and the planned sequence.
  • Access: Confirm delivery, protection of adjoining areas and removal of demolition waste.

The safest savings usually come from reducing complexity rather than removing protection. Retaining the existing layout can limit service relocation, durable mid-range fixtures can avoid unnecessary premium costs, and non-essential upgrades can be phased if the written scope allows it. Don't cut waterproofing, substrate preparation, licensed trade work or compliance documentation to force the total lower.

A good bathroom renovation quote gives you confidence because you can see what you're paying for and what could still change. Choose the builder who offers the clearest scope and strongest coordination, not automatically the builder with the smallest number.


Melbourne Tiling Services P/L can prepare a free, itemised bathroom renovation quote with 3D drawings, waterproofing, tiling and coordinated trade scope for homes across Melbourne and greater Victoria. Visit Melbourne Tiling Services P/L to discuss your bathroom, test the budget with transparent planning tools and arrange the next step.

Bathroom Waterproofing Paint Guide for Renovations

You've finished a Melbourne bathroom makeover, the tiles are down, and the new shower looks exactly as planned. Then a damp patch appears on the wall beside the recess. A few days later, paint begins to bubble, or the ceiling below develops a stain. The first suspicion is often the bathroom waterproofing paint, but the underlying issue may be a missing membrane, a poorly sealed junction, a drainage fall, or a substrate that was wet before coating began.

Waterproofing paint can be useful, but it's frequently marketed as though one product can protect every bathroom surface. Australian wet-area construction doesn't work that way. A coating must form part of a correctly designed and applied system, particularly around showers, hobs, steps, drains and wall-to-floor junctions.

Table of Contents

Introduction to bathroom waterproofing paint

A Melbourne homeowner carrying out a DIY ensuite renovation may search for waterproofing paint after removing old tiles. The product appears simple. Roll it onto the wall, let it dry, tile over it, and avoid the cost and disruption of a full waterproofing process.

That shortcut becomes risky when the surface receives daily water. A shower recess isn't just a painted wall. It's a coordinated assembly involving the substrate, falls, drain, penetrations, junctions, membrane coverage and tile finish. If one part is incomplete, water can travel behind the visible surface and damage framing, plasterboard or flooring.

Registered builders generally treat liquid-applied products as membrane systems, not ordinary decorative paint. They check the manufacturer's technical data, prepare the substrate, reinforce vulnerable junctions and allow the coating to cure before tiling. The National Construction Code wet-area provisions and AS 3740:2021 also define where waterproofing must extend.

The practical question isn't solely, “Which bathroom waterproofing paint should I buy?” It's, “What level of protection does this area need, and does the complete system meet the required standard?”

Understanding waterproofing paint mechanisms

Bathroom waterproofing paint works only when its formulation, thickness and installation create a continuous barrier. The raincoat analogy is useful: protection comes from an unbroken outer layer, including around seams and openings, rather than from one thick patch. A coating that looks even on an open wall can still fail where the wall meets the floor, a pipe passes through, or the surface changes.

Liquid-applied membranes contain polymers that join together as the product cures. The cured film should remain flexible enough to accommodate ordinary building movement while resisting liquid water. That performance matters at corners, junctions and different substrates. A decorative, water-resistant coating may handle splashes, yet lack the tested elongation, adhesion or wet-area classification expected of a shower system.

One component or two

Single-component products arrive ready to use, though stirring and a compatible primer may still be required. They suit smaller jobs because the installer does not have to combine separate chemical components.

Two-component systems combine a base with a curing component. The mixing ratio affects working time, adhesion and final performance, so it is not a minor instruction. Follow the specified method, use clean tools and apply the product within its stated working window. A mixture that merely looks uniform may still be unsuitable if the proportions are wrong.

A technical data sheet can reveal limits that the tin label does not. Depending on the product, it may state the membrane class, curing time, volatile organic compounds, or VOC, and water vapour transmission. Those details help distinguish an engineered membrane from ordinary bathroom paint. They also apply only to the named product. Compare the exact data sheet, intended use and installation requirements before treating a coating as part of a wet-area system.

An infographic comparing waterproofing paint and membranes for different areas, explaining when to choose each solution.

Why classification matters

AS/NZS 4858 classifications indicate that a membrane has been tested for relevant wet-area demands. Classification alone does not make every application compliant. The result still depends on substrate preparation, specified coverage, reinforcement at vulnerable points, curing and compatible finishes.

Australian requirements state that shower floors must be waterproofed, shower walls must be waterproofed to at least 1800 mm above the finished floor level, and the wall-to-wall angle in the shower must be waterproofed to at least 1800 mm high (AS 3740:2021 product and standards information). Information about Superior elastomer coatings can clarify how flexible elastomeric materials differ from ordinary paint. The product still needs assessment against Australian wet-area requirements, including its installation instructions and complete system details.

When to use paint and when to use membranes

Bathroom waterproofing paint makes sense only when the surface and exposure match the product's intended use. A low-risk utility-room wall, a bathroom ceiling exposed mainly to steam, or a maintenance coat over an existing sound system presents a different risk from a shower floor above a living area.

The mistake is treating “water-resistant” as “compliant waterproofing system”. A coating may shed surface water while failing at a drain flange, pipe penetration or wall-to-floor corner. Those points need continuity and detailing, not just visible colour.

A practical comparison

Situation Paint or coating role Main concern
Ceiling above a shower Moisture-resistant finish may be suitable Steam and ventilation still affect the finish
Wall outside direct splash Supplementary surface protection Confirm the substrate is sound and dry
Utility room or low-exposure area Possible coating application Follow the product's intended-use instructions
Shower recess Use a compliant membrane system Daily water reaches walls, floor and junctions
Shower floor or hob Membrane coverage is required Drains, falls and junctions must be detailed
Upper-level or timber-floor bathroom Full system planning is especially important Water can damage the structure below

Practical rule: If the area receives direct, repeated shower water, don't choose a product based only on the word “waterproof” on the label.

The pros of a paint-like liquid system are clear. It can be easier to handle than sheet materials, it can cover irregular surfaces, and it can form a continuous layer when applied correctly. The trade-offs are equally important. It still needs careful preparation, controlled coverage and curing, and a decorative coating may not provide the tested performance of a compliant membrane.

Australian wet-area rules require specific membrane extents and sealed junctions, which is why bathroom waterproofing paint is often better treated as a supplementary coating, not a standalone shower solution (wet-area waterproofing requirements). If you're assessing a shower before tiling, compare the proposed scope with a dedicated shower waterproofing membrane rather than assuming the two terms describe the same work.

A four-step instructional infographic guide for applying professional waterproofing paint on surfaces for long-lasting protection.

The decision also depends on the floor level and substrate. A ground-floor concrete bathroom may contain a leak with less immediate structural consequence than an upper-level timber bathroom, but neither should rely on a decorative coating where the code requires a membrane. Reworking the drain, correcting the fall or repairing damaged substrate comes before product selection.

Application process and performance insights

A bathroom can look ready for coating while the substrate remains dusty, damp or unstable. Waterproofing follows the condition beneath it, much like paint follows the condition of a wall. Covering movement or trapped moisture only hides the fault until the coating is stressed.

Prepare the substrate

Remove loose material, adhesive residue, laitance, grease and dust. Vacuuming is preferable to sweeping fine particles into corners. Inspect the surface under strong side lighting, checking for cracks, pinholes, swollen plasterboard, open joints and movement around pipe penetrations.

Repair defects with compatible materials and let them dry as directed. If the substrate remains damp, find the cause before applying a product. Water may be entering from plumbing, rising through the floor or remaining after cleaning. A membrane can limit moisture migration, but it cannot repair a leaking pipe or make unstable backing board sound.

Primer is part of the system only when the product instructions specify it. Compatibility matters. A primer designed for porous cement sheet may not suit painted plasterboard, glazed surfaces or old adhesive.

Mix and apply methodically

Single-component products still require thorough stirring. Two-component systems require the stated mixing ratio and working time. Do not add water, solvent or a third-party additive unless the technical data permits it.

Use the specified roller, brush or notched trowel. Work material into corners and around penetrations with a brush, then use the recommended roller or trowel to create an even coat. Check for pinholes, thin edges and puddled material. A membrane performs through continuous coverage and the required dry-film thickness, not through one thick patch over the most visible area.

A practical site sequence is:

  1. Clean and inspect: Remove contaminants and identify cracks, movement and moisture.
  2. Repair and prime: Stabilise the substrate and use compatible preparation products.
  3. Detail junctions: Reinforce corners, joints, drains and penetrations where the system requires it.
  4. Apply coats: Follow recoat windows and do not stretch material beyond its stated coverage.
  5. Inspect before tiling: Check continuity, edges, penetrations and visible defects.
  6. Allow full cure: Keep trades and water away until the technical data permits the next stage.

Temperature, humidity and ventilation affect adhesion and curing. Follow the product's limits. Ventilation can help remove vapours, while forced heat or strong airflow may skin the surface too quickly and leave the layer uneven. Protect the coating from dust as it cures.

Cure time is part of the system

A surface that feels dry may still be unsuitable for tile adhesive. As noted earlier, the example product data requires a 7-day full cure. Touch-dry and hard-cure stages are different, and premature tiling can trap moisture, disturb the membrane or reduce bond performance.

Keep the packaging, batch details and technical data sheet with the renovation records. Photograph the coating before tiles conceal it, especially around drains, hobs and penetrations. These records give a builder, inspector or future repairer a clearer view of what was installed.

Maintain the finished area

Maintenance begins with observation. Look for cracked grout, loose tiles, discoloured surfaces, musty odours or recurring damp patches. These signs do not prove that the paint failed. A drain connection, plumbing defect, building movement, failed sealant or incorrect fall may be responsible.

Clean with products compatible with the tile, grout and sealants. Avoid aggressive abrasion that could damage an exposed coating. Do not apply a new coat over mould, loose paint or damp material. If a maintenance coating suits the system, clean, dry and check adhesion before recoating.

Practical record-keeping and careful preparation support the aim of reducing avoidable defects described in tips for fewer home warranty claims. Where a floor needs protection before tiling, follow a documented bathroom floor waterproofing process rather than treating floor paint as a cosmetic finish. Paint may assist a compliant system, but it does not replace the substrate preparation, detailing and membrane coverage that the installation requires.

A visual guide explaining the Victorian waterproofing regulations for bathroom renovations in accordance with Australian standards.

Compliance requirements for Victoria renovations

A bathroom can look finished while its waterproofing remains non-compliant. In Victoria, renovation work sits within the National Construction Code and the AS 3740:2021 wet-area framework. The shower floor must be waterproof, including a hob or step-down, and shower walls must reach at least 1800 mm above the floor substrate. These requirements describe the protected system, not just the product brushed onto a surface.

Room geometry matters just as much. Paint cannot redirect water from a low point created by an incorrectly formed substrate. For an unenclosed shower, Victorian guidance specifies a 1.5 metre horizontal waterproofing extent from the shower rose connection. Floor falls to a waste must be at least 1:80, while industry guidance identifies a maximum continuous fall of 1:50 (wet-area slope guidance). The surface therefore needs enough fall to drain, without becoming unnecessarily steep.

What changed for renovation planning

The NCC 2022 wet-area provisions were adopted in Victoria from 1 May 2023 (Victorian bathroom standards overview). AS 3740:2021 applies to domestic wet areas in Class 1, Class 2 and Class 4 buildings. Together, these requirements make coverage, junctions, penetrations, drains and substrate preparation part of the installation record. Bathroom waterproofing paint may supplement a suitable system, but it cannot substitute for those details.

Before tiling, document the membrane coverage, substrate condition, drain detailing and falls. Demolition and substrate work may expose older materials or generate hazardous dust, so workers should consider a crystalline silica and asbestos awareness course. Training does not replace site-specific risk controls or professional advice.

For handover records, ask how a waterproofing compliance certificate for Victoria will be issued and stored. A certificate cannot make defective work compliant, but clear documentation helps show what was installed and supports later maintenance.

Deciding between paint and professional systems

Budget matters, but the cost of a coating is only one part of the decision. The larger question is what could be damaged if water passes through the finish. A low-risk wall outside direct splash can justify a simpler treatment. A shower over a timber floor demands a more cautious system because hidden moisture can affect the structure below.

A sound decision rule has three parts: exposure, substrate and consequence. Direct daily shower water increases exposure. Timber, upper-level or movement-prone construction increases substrate risk. Damage to rooms below, framing or finishes increases the consequence of failure.

Use a supplementary coating when

A paint-like product may be suitable where the surface is stable, dry and outside the primary wet-area protection zone. Examples include a ceiling exposed to steam, a wall beyond direct splash, or a maintenance coat over a previously tested and intact membrane. Confirm the product's intended use and don't assume that a maintenance coat restores a failed system.

Choose a complete membrane system when

A shower recess, shower floor, hob, step-down, balcony or wet area with structural exposure needs system planning. The same applies when the substrate has cracks, movement, moisture damage or an altered drain. In these situations, the correct response may include demolition, substrate repair, screeding, fall correction, junction reinforcement and membrane application.

The marketing language around waterproofing products can obscure this distinction. Australian market discussion describes growth in waterproofing solutions and links current change to code-driven efforts to reduce defects, but product availability doesn't remove the need to identify the actual failure mechanism (Australian waterproofing solutions market context).

Include the contract and insurance context

Domestic building work in Victoria over $10,000 must be carried out under a major domestic building contract, and work exceeding $16,000 requires domestic building insurance before it can lawfully proceed (Victorian domestic building contract and insurance information). Those thresholds make the project's scope and contractor arrangements important, particularly when waterproofing forms part of a broader bathroom renovation.

A registered builder can coordinate the licensed trades and sequence the work so plumbing, substrate preparation, waterproofing, tiling and inspection don't conflict. Victoria Building Authority registration material for bathroom, kitchen and laundry renovation builders refers to qualifications, project evidence, technical referee reports, criminal history checks, photo identification and declarations (VBA registration application).

Renovation examples from registered builders

Consider a ground-floor Melbourne ensuite with a sound, previously tested membrane. The homeowner wanted to refresh the room without opening the entire tiled assembly. A registered builder treated the bathroom waterproofing paint as a maintenance coat, not as the original waterproofing layer. The team checked adhesion, cleaned the surface, repaired minor defects and confirmed that the existing membrane and drainage remained suitable before applying the coating.

The lesson is the order of decisions. The product saved disruption because the underlying system was already known and intact. It wouldn't have been an appropriate response to a confirmed leak at the shower drain or a saturated substrate.

An upper-level heritage townhouse presents a different problem. The floor required fall correction and a liquid membrane underlay before tiling. Registered builders coordinated carpenters, plumbers, waterproofers and tilers, protecting the older structure while checking the shower coverage, junction detailing and drainage geometry against AS 3740 requirements.

The paint choice was secondary to the system design. The team first established a stable substrate and reliable path to the waste, then selected compatible waterproofing materials and allowed the membrane to cure before the tiler began. For homeowners, the takeaway is simple: two rooms may both be called bathrooms, but their exposure, substrate and consequences can make the correct waterproofing scope completely different.

Key takeaways and next steps

Bathroom waterproofing paint can resist moisture and support maintenance, but it isn't automatically a compliant shower membrane. The deciding factors are where the product is used, what lies beneath it, how water drains, and whether the complete system meets the relevant requirements.

Before starting, check:

  • Exposure: Is the surface outside direct splash, or inside a shower?
  • Substrate: Is it dry, stable, clean and properly repaired?
  • Drainage: Do the floor falls direct water continuously to the waste?
  • Coverage: Does the membrane reach the required walls, floor, corners and penetrations?
  • Documentation: Do you have the technical data sheet, application records and curing requirements?
  • Contractor: Does the work require a registered builder and coordinated licensed trades?

Ask for a substrate inspection before buying paint. Request the exact product data sheet, confirm its wet-area classification and plan the curing period before tiling or allowing water onto the surface. Check the NCC, AS 3740:2021 and Victorian Building Authority guidance before work begins.

Melbourne Tiling Services P/L provides bathroom renovations, shower and floor waterproofing, substrate preparation, screeding, tiling and coordination with licensed trades across Melbourne and greater Victoria. Visit Melbourne Tiling Services P/L to discuss your bathroom scope, request a quote and plan the waterproofing sequence before tiles conceal the work.

Melbourne Apartment Bathroom Renovation Guide 2026

If you're staring at a tired apartment bathroom in Melbourne, you're probably weighing up two competing thoughts. One is practical: the room needs fixing, the shower may be dated, storage is poor, and every morning feels cramped. The other is caution: in an apartment, a bathroom renovation isn't just about tiles and tapware. It runs through strata rules, access restrictions, neighbour concerns, waterproofing certificates, and the question of who carries legal responsibility if something goes wrong.

That difference matters. A house renovation gives you more freedom. An apartment bathroom renovation sits inside a shared building, with common property, by-laws, booking systems, and a much tighter tolerance for mistakes. If a waterproofing failure happens in a detached house, it's bad. If it happens in an apartment, it can affect the lot below, trigger insurance disputes, and stop a project in its tracks.

In Melbourne, older apartment stock adds another layer. Existing plumbing can be awkward, walls aren't always straight, ventilation is often poor, and owners' corporations can be strict about noise, working hours, and waste removal. Done properly, though, bathroom renovations in apartments can transform how the space works and protect long-term property value.

Table of Contents

Navigating Strata Rules and Council Approvals

You can have tiles chosen, fixtures ordered, and a start date pencilled in, then lose two weeks because the owners' corporation has not signed off and the building manager will not allow trades into the lift. In Melbourne apartments, that is a common way bathroom jobs stall before demolition even starts.

Approval is often the part owners underestimate. A bathroom sits inside your lot, but the work rarely affects only your lot. Trades need access through common property. Noise carries. Waste has to leave the building without damaging lifts or hallways. In many apartment blocks, especially older ones across Melbourne's inner suburbs, the owners' corporation wants the scope of works, contractor details, insurance certificates, work hours, and a plan for protecting common areas before anyone sets foot on site.

Wet-area compliance is the issue that catches people out most often. Generic renovation articles spend plenty of time on tapware and finishes, then gloss over the paperwork required for the job to proceed and remain insurable. In an apartment, that omission matters. If waterproofing is altered, the certification path needs to be clear from the start. The Victorian waterproofing compliance certificate process should be understood before work begins, not chased once the bathroom is closed up.

A checklist infographic guiding apartment owners through the essential strata and council steps for a bathroom renovation.

Council is not involved in every apartment bathroom renovation, but permits and formal approvals can come into play when the scope changes regulated building elements. Moving plumbing points, altering floor wastes, changing the waterproofed area, or reworking the layout can push the job beyond a like-for-like update. The trigger is the work itself, not whether the room is small or the budget is modest.

Practical rule: Get written approval before booking demolition. A verbal go-ahead from a building manager does not protect you if the owners' corporation later objects.

I see this in older Melbourne apartments all the time. An owner wants to shift the vanity, replace the shower base with a hobless shower, and retile the floor. It sounds straightforward. In practice, that can involve altered falls, plumbing changes, new waterproofing, and a formal submission to the owners' corporation because leaks in apartments do not stay contained to one bathroom.

A good strata submission makes the committee's job easier and reduces the back-and-forth. Include these items before lodging anything:

  1. A clear scope of works
    Set out what is being demolished, what stays, and whether plumbing, electrical, ventilation, waterproofing, tiling, or layout changes are proposed.

  2. Drawings or marked-up plans
    They do not need to be elaborate, but they do need to show the room clearly enough for review and approval.

  3. Contractor and licence details
    List the licensed plumber, electrician, waterproofer, and the registered builder or project manager responsible for coordinating the work.

  4. Insurance documents
    Many owners' corporations will not approve access until they have current public liability and other relevant cover on file.

  5. Site logistics
    Explain lift bookings, protection to hallways and lifts, delivery times, parking, rubbish removal, and permitted work hours.

  6. Compliance pathway
    Show how certificates, inspections, and required sign-offs will be handled at the end of the job.

The strongest applications answer the questions the strata manager is likely to ask before they have to ask them.

Older buildings usually need tighter planning. Services can be brittle, original waterproofing may have failed years ago, and committees are often more cautious because they have dealt with previous leaks. That does not mean the renovation is difficult. It means apartment work rewards proper documentation, realistic scope, and trades who understand how Melbourne strata buildings function.

Budgeting Your Apartment Bathroom Renovation

A Melbourne apartment bathroom can look like a small room on plan and still cost like a complex build once demolition starts. Limited access, older pipework, acoustic requirements, booked lift times, and strict weekday work windows all affect price before you choose a single tile.

The budget needs to match the type of renovation.

Cosmetic update or full rebuild

A cosmetic update suits bathrooms where the layout still works, the shower area is sound, and there is no reason to open up the substrate. National pricing guides put standard bathroom renovations across a wide range, from entry-level works through to high-end projects, but those averages are only a rough reference point for apartment owners because apartment constraints push labour and coordination higher than many house-based examples suggest. Canstar's bathroom renovation cost guide gives a useful broad market range, while CO-architecture's breakdown of bathroom renovation costs in Australia helps show how quickly costs rise once the work moves beyond surface upgrades.

A full rebuild is a different budget category. Once you remove tiles, bedding, screed, and wall linings, you may also be dealing with failed waterproofing, uneven floors, outdated drainage falls, or service locations that do not meet the new layout. In apartments, that rebuild scope also carries more site management because materials and waste have to move through common property without damaging it.

The practical question is simple. Are you refreshing finishes, or are you rebuilding the room properly?

Where the money usually goes

Small bathrooms are not cheap bathrooms. The fixed trade stack stays much the same whether the room is compact or generous. Demolition, plumbing, electrical, waterproofing, tiling, waste removal, and protection to common areas still need to be done properly, and each trade has to work within the building's access rules.

That is why budget blowouts usually come from hidden condition issues rather than from the vanity or mirror choice.

A useful way to price an apartment bathroom is to separate base construction cost from finish cost. Base construction covers the work that makes the room compliant and usable. Finish cost covers what you see and touch, such as tile selection, tapware, custom joinery, shower screens, and accessories. Owners often focus on finishes first, but the base construction cost is where apartment projects are won or lost.

Item Cost Percentage Estimated Cost
Demolition and waste removal 8% $2,400
Plumbing and drainage work 16% $4,800
Electrical and ventilation 8% $2,400
Waterproofing and screeding 8% $2,400
Tiling labour and setting out 18% $5,400
Tiles and finish materials 15% $4,500
Fixtures and fittings 14% $4,200
Design, approvals and site management 13% $3,900

Sample Mid-Range Apartment Bathroom Renovation Budget (Melbourne)

That sample uses a $30,000 mid-range allowance to show how costs are commonly distributed on an apartment job. It is a planning example, not a fixed schedule of rates.

Two allowances deserve protection in the budget. Tiling labour is highly sensitive to substrate condition, tile size, pattern, edge trims, and how much cutting is needed around tight apartment bathrooms. Hipages' guide to bathroom renovation costs and tiling rates is a reasonable benchmark for understanding how labour is priced separately from tile supply.

Waterproofing is the other area owners should never squeeze. In a house, poor waterproofing is bad enough. In an apartment, it can affect the lot below, trigger an owners corporation dispute, and leave you paying to rectify work twice.

The cheapest quote often assumes the walls are straight, the floor falls are workable, the waste is in the right spot, and no latent water damage appears. Older Melbourne apartments rarely give you all four.

Before signing a contract, compare your scope against a Melbourne apartment bathroom renovation cost guide and keep a contingency for what demolition may uncover. In older buildings, that reserve often covers the things no one can confirm until the room is stripped, such as rusted penetrations, damaged sheeting, unstable screeds, or plumbing that should be replaced while access is open.

Smart Design and Material Choices for Apartment Bathrooms

A small apartment bathroom doesn't need more decoration. It needs fewer visual interruptions and better function. The best rooms feel calm because the layout is disciplined, the materials are doing real work, and every fitting earns its place.

A modern, minimalist bathroom with a floating wood vanity, circular backlit mirror, and a spacious glass shower.

Materials that make small rooms work harder

Large-format tiles are one of the smartest choices in apartment bathrooms. They reduce grout lines, make the room feel less chopped up, and create a cleaner visual run across walls and floors. In practical terms, less grout also means less maintenance and fewer lines for soap residue to cling to.

Porcelain is usually the safest all-rounder. It handles moisture well, gives plenty of finish options, and suits both contemporary and more restrained apartment interiors. If you're weighing colours and finishes, these porcelain tile options for bathrooms are the kind of material decision worth making early because they affect grout selection, trim details, and the overall light in the room.

Frameless shower screens do more than look modern. They keep sightlines open, which matters in tight plans, and they let feature tile or stone read as part of one room instead of a boxed-off shower compartment.

In apartment bathrooms, visual width matters almost as much as actual width.

Design moves that improve function

Storage is where many apartment bathrooms fail. A vanity with workable drawer storage is usually more useful than a decorative basin cabinet with dead space. Recessed shaving cabinets help reclaim wall depth without making the room feel crowded. Shower niches stop the need for hanging caddies and keep the enclosure looking deliberate.

Lighting also changes how the bathroom reads. A single ceiling light flattens everything. Layered lighting, such as mirror lighting combined with general room light, makes grooming easier and softens shadows. If natural light is limited, reflective tile finishes and a careful mirror position can help bounce available light further into the room.

The layout should be solved before finishes are chosen. In most apartment bathrooms, these moves improve daily use:

  • Keep plumbing points close to existing locations: It reduces complexity and usually protects budget and approval risk.
  • Use a floating vanity: More visible floor area makes the room feel larger.
  • Choose wall-hung accessories carefully: Towel rails, hooks, and toilet roll holders should sit where they don't interrupt circulation.
  • Build in niche storage: It looks neater and avoids aftermarket clutter.

This walkthrough gives a useful visual sense of how modern detailing changes a compact bathroom without overfilling it.

Premium materials only work when the detailing is controlled. A beautiful tile with poor set-out, awkward cuts, or badly placed trims will still read as a compromised renovation. In apartment work, restraint usually beats over-design.

Waterproofing and Tiling The Foundation of a Lasting Renovation

A bathroom can look finished and still be built to fail. In an apartment, that failure does not stop at your door. Water tracks into corridors, ceilings below, timber framing, and service penetrations, and once an owners corporation is involved, a small defect becomes a much larger problem.

That is why waterproofing is one of the first places I slow a job down.

In Melbourne apartments, especially in older blocks, I often find uneven substrates, patched sheeting, loose screeds, and floor wastes that were never set up properly to begin with. None of that improves by covering it with membrane and tile. The base has to be sound, dry enough, and correctly formed before the waterproofing system goes on.

The sequence matters. Substrate preparation comes first. Junctions, corners, hobs, wastes, and pipe penetrations need the right treatment. The membrane then has to be applied to the required areas and left to cure properly before tiling starts. Drying time is not a suggestion, and pressure from booking windows, lift access, or a household trying to get the bathroom back does not change that.

Skip time in waterproofing and you do not save days. You create a defect.

Apartment owners also need to think beyond appearance when selecting fixtures. Plumbing product compliance is tightening, and lead-free plumbing products with no more than 0.25% weighted lead are scheduled to become mandatory from September 2026. If your renovation is being planned around that period or later, it makes sense to confirm tapware and mixers meet the current and upcoming requirements rather than treating it as a last-minute purchasing issue.

What proper tiling work involves

Tiling quality is decided well before adhesive is mixed. Good set-out, straight lines, correct falls, and controlled cuts are what make a bathroom feel resolved. Poor planning shows up fast in a compact apartment bathroom because every small error is more visible.

The core checks are simple:

  1. Establish the set-out early
    Start from the lines that matter visually. That usually means centring to the main wall, vanity, or shower screen, not just starting in the nearest corner.

  2. Get the falls right
    Shower floors need to drain cleanly to the waste without ponding. In apartment renovations, correcting falls can be harder because the slab and waste position usually stay where they are.

  3. Choose tiles that suit the room
    Porcelain is a reliable choice for most apartment bathrooms because it is durable and consistent. Natural stone can look excellent, but it needs sealing, ongoing care, and a client who understands the maintenance.

  4. Control trims, edges, and penetrations
    Mixers, outlets, niches, and floor wastes need clean cuts and tight detailing. These are the points people notice first, even if they cannot name why the room looks good or poor.

  5. Finish the joints properly
    Grout colour, joint width, movement joints, and silicone work all affect both performance and finish. Untidy silicone can make an otherwise solid job look second-rate.

Many tile problems are not tile problems. Hollow spots, cracked grout, lipping, and water sitting where it should not usually trace back to preparation, movement, poor sequencing, or a floor that was never set correctly. In an apartment bathroom, waterproofing and tiling need to be treated as one system, because that is how they fail and that is how they last.

Why You Need a Registered Builder for Your Renovation

A bathroom renovation in a Melbourne apartment can look straightforward until the building manager asks for trade licences, waterproofing details, access dates, lift protection, and confirmation that the proposed work matches the approved scope. That is usually the point where owner-managed projects start to come unstuck.

An infographic detailing five key benefits of hiring a registered builder for construction projects.

One point of responsibility matters in apartments

In a house, a delayed trade is frustrating. In an apartment, it can affect booked lifts, waste removal, parking, neighbour notices, and the hours your building allows noisy work. A registered builder manages that chain properly and keeps the job aligned with the approved scope, the building rules, and the sequence each trade needs.

That matters most in wet areas because the work is interconnected. Plumbing rough-in affects sheeting. Sheeting affects waterproofing. Waterproofing affects tiling. If one step is wrong or incomplete, the next trade either stops or covers a defect that becomes expensive later.

The other issue is compliance. Apartment bathrooms are not a place for informal trade coordination or DIY decision-making on the run. If the renovation involves changes to plumbing, drainage, electrical work, or structural elements, the work has to be carried out and documented by the right licensed people. In older Melbourne buildings, that also means dealing with uneven substrates, dated services, and details that are rarely obvious until demolition is complete.

A registered builder gives the owner one accountable party for:

  • Programming so demolition, rough-in, substrate preparation, waterproofing, tiling, fit-off, and final checks happen in the right order
  • Trade coordination so licensed plumbers, electricians, waterproofers, carpenters, and tilers are not working off different assumptions
  • Quality control so defects are picked up before they are buried behind tiles or fixtures
  • Documentation so certificates, insurances, and records are collected and matched to the actual work completed
  • Strata communication when access conditions change or hidden site issues require clarification before work continues

If a leak shows up after handover, a clear responsibility path matters.

That is one reason owner-builder style coordination often becomes false economy in apartments. I have seen jobs where the plumber blamed the waterproofer, the waterproofer blamed the substrate, and the tiler was left defending a finish over a base he did not control. The owner then has to sort out access for rectification, explain the issue to strata, and pay for parts of the room to be opened up again.

For owners comparing contractors, Melbourne Tiling Services P/L is one example of a firm that operates as Registered Unlimited Builders coordinating licensed carpenters, plumbers, electricians, tilers and waterproofers. That structure suits apartment bathrooms because design, compliance, sequencing, and defect responsibility sit under one roof.

What to check before signing anyone

Ask direct questions before you commit. Who is supervising the job day to day? Who is responsible for waterproofing certification? Who books inspections if they are required? Who protects common property, manages demolition waste, and deals with the building manager if site conditions change?

Ask how the builder handles variations as well. In apartments, variations often come from hidden conditions rather than owner indecision. A competent builder should be able to explain what happens if they uncover damaged framing, non-compliant past work, asbestos risk in an older building, or plumbing locations that limit the new layout.

The final test is clarity. A builder with real apartment experience should be able to explain what can be changed, what should stay put, where strata approval may be needed, and where a good design idea is not worth the compliance or cost risk. That advice saves owners money because it prevents the kind of mid-project changes that cause delays, disputes, and failed inspections.

The Renovation Timeline from Demolition to Handover

Owners usually want a simple answer to timing. The honest answer is that apartment bathrooms move in stages, and some stages are fixed while others depend on access, approvals, product lead times, and the condition of the existing room. The sequence is predictable. The pace isn't always identical from building to building.

A six-week infographic timeline for an apartment bathroom renovation outlining step-by-step construction and remodeling phases.

What happens week by week

A typical apartment bathroom renovation often unfolds along lines like this:

Week 1 is site protection and demolition. Common areas are protected first, then fixtures, wall linings, floor finishes, and outdated waterproofing are removed. This is also when hidden issues tend to show themselves. Rotten framing, prior leak repairs, loose sheeting, and untidy old plumbing all become visible once the room is stripped.

Week 2 is rough-in work. The plumber and electrician come through to adjust services within the approved scope. If the layout is changing, this is the point where accuracy matters because every later trade depends on the position of drains, mixers, waste points, and power.

Week 3 is the technical backbone. Substrates are corrected, falls are formed where needed, and waterproofing is completed. This isn't the stage to pressure for speed. If curing time is cut short, later finishes may look fine at handover and still fail later in use.

Why apartment jobs can slow down

Apartment conditions create delays that don't show up on a simple builder's calendar. Lift bookings can restrict deliveries. Some buildings only allow noisy works within narrow windows. Rubbish removal may need staged collection rather than an open skip. Trades also lose time moving through protected common areas compared with walking straight onto a house site.

The final stages usually run like this:

  • Week 4 brings tiling and grouting, with close attention to set-out, cuts, trims, and falls.
  • Week 5 is fit-off. Vanity, toilet, shower screen, tapware, accessories, and lighting are installed.
  • Week 6 is finishing, defect checking, clean-up, and handover documentation.

A renovation that seems slow on paper often isn't being slow. It's being built in the right order. Apartment owners are better served by a controlled sequence than by a fast-looking program that starts stacking trades on top of one another before the room is ready.

A bathroom can be rebuilt quickly or carefully. In an apartment, only one of those is safe.

Avoiding Common Pitfalls and Maintaining Your New Bathroom

A lot of apartment bathroom problems start before the first tile is laid. In Melbourne, the usual pattern is simple. The owner gets excited, demolition starts, then the owners corporation asks for approval details, waterproofing records, acoustic notes, or proof that common property will be protected. At that point, the job is already harder and more expensive to control.

The biggest mistake is assuming an apartment bathroom renovation follows the same rules as a house. It does not. In many apartment buildings, walls, slab penetrations, membranes, and service locations affect common property or trigger owners corporation review. Older Melbourne buildings add another layer again. Floors can be out of level, pipe locations may not match current plans, and previous repairs often leave hidden problems behind linings or under screeds.

Price is another trap. A cheap quote can look fine until you compare what is included. Protection to lifts and hallways, rubbish removal through common areas, after-hours restrictions, make-good work, compliance certificates, and waterproofing documentation are often left vague. Owners usually find those gaps only after the contract is signed.

Design decisions cause trouble too. A nice layout on paper can become expensive fast if the new shower wastes need to move, if the vanity location conflicts with existing services, or if the building rules restrict penetrations. In apartments, good planning means checking what can stay, what can shift, and what approvals follow from each change.

Waterproofing failures remain one of the costliest problems because the damage rarely stays inside one lot. A failed membrane can affect the apartment below, trigger an insurance dispute, and turn a modest renovation into a building claim. For that reason, I always tell apartment owners to treat waterproofing records, product compatibility, and curing time as part of the finished job, not paperwork to sort out later.

A short warning list helps:

  • Get written strata or body corporate approval before demolition starts.
  • Confirm who is responsible for common property protection, waste removal, and lift bookings.
  • Check whether layout changes affect plumbing locations, penetrations, or acoustic requirements.
  • Use licensed trades for regulated work and keep the compliance documents.
  • Allow proper curing time for waterproofing, adhesives, grout, and silicone.
  • Do not overlook ventilation, especially in bathrooms with no operable window.

Once the bathroom is finished, maintenance is straightforward if it starts early. Clean surfaces regularly with non-abrasive products. Aggressive cleaners can shorten the life of sealants, mark fittings, and dull tile finishes.

Keep an eye on silicone around the shower base, wall junctions, bath edges, and vanity splashbacks. If it starts to shrink, split, or lift, arrange repairs before water gets behind the surface. That small maintenance item is far cheaper than replacing swollen skirtings, damaged cabinetry, or affected plaster in the room next door.

Ventilation matters every day. Run the exhaust fan long enough after showers to clear steam properly, and keep the grille clean so airflow does not drop off over time. In apartments with limited natural ventilation, that simple habit helps control mould, odour, and moisture build-up.

Check the bathroom as you use it. Loose tiles, hollow spots, hairline cracks, slow drainage, or a damp smell are all signs worth investigating early. They do not always mean a major failure, but they should not be ignored.

For owners who want one contractor to handle demolition, waterproofing, tiling, and fit-off in line with apartment requirements, Melbourne Tiling Services P/L provides start-to-finish bathroom renovation work across Melbourne.

Bathroom Ensuite Renovations Melbourne: Your 2026 Guide

A full strip-out and rebuild for a Melbourne ensuite typically sits between $20,000 and $35,000, with $25,000 to $35,000 being the most common mid-range spend bracket for Australian ensuites. If you're staring at tired tiles, a leaking shower base, or a layout that never really worked, that range is the realistic starting point for planning bathroom ensuite renovations properly.

The decision to renovate often emerges from similar experiences. The grout keeps darkening no matter how often it's cleaned. The old hob shower feels tight. The vanity has no storage, the exhaust fan never clears the steam, and somewhere in the back of your mind is the bigger worry that water may already be getting where it shouldn't.

That's where good planning matters. In Melbourne, ensuite work isn't just about choosing a vanity and tile colour. It's about whether the layout can be improved without blowing the budget, whether the waterproofing is being done to Victorian requirements, and whether the people running the job understand both bathroom renovations and registered builders obligations.

A lot of poor renovations look fine for six months. Then the silicone opens up, the falls are wrong, balcony junctions start tracking water, and the owner ends up paying twice. The right approach is simpler. Start with layout, lock in the scope, price the work transparently, and build it so it lasts.

Table of Contents

Your Melbourne Ensuite Renovation Starts Here

A dated ensuite usually doesn't fail all at once. It starts with little signs. Cracked silicone at the shower base. Hollow-sounding tiles. A vanity that swells near the kickboard because moisture keeps getting into the board. Then the owner starts putting off the job because they assume the process will be messy, expensive, and hard to control.

That hesitation is understandable. An ensuite is a small room, but it's one of the most technical rooms in the house. Every trade touches it. The plumber needs clean set-outs. The waterproofer needs the right substrate. The tiler needs correct falls and straight walls. If one stage is rushed, the next stage has to compensate, and that's where bad workmanship gets buried behind new finishes.

In Melbourne homes, there's another layer. Older houses often bring movement, uneven floors, odd wall lines, and previous patch repairs that make demolition more revealing than expected. Apartments bring tighter access, stricter site rules, and balcony or external wall interfaces that can become leak points if they're not handled carefully.

Practical rule: If an ensuite has an active leak, stained skirtings outside the bathroom, or movement underfoot, don't plan it as a cosmetic update. Treat it as a rebuild until proven otherwise.

The jobs that run best usually start with a plain conversation about what isn't working. Some owners need better storage. Some want easier cleaning and a walk-in shower. Others need a more durable result for a rental or family home. Those goals shape the right renovation more than trends do.

A good ensuite should solve daily problems first. It should give enough circulation space, enough ventilation, enough storage, and a shower area that drains correctly without relying on heavy silicone maintenance to stay watertight. Good bathroom ensuite renovations do that effectively. They don't just look sharp on handover day. They still perform after years of steam, water, and movement.

The Melbourne Ensuite Renovation Roadmap

Most ensuite jobs feel overwhelming when they're looked at as one big renovation. They're easier to manage when you see them as a sequence. Each stage sets up the next one, and if the early decisions are right, the build becomes much smoother.

A step-by-step roadmap infographic for Melbourne ensuite renovations, covering consultation, planning, permits, construction, and final handover.

Start with the room you actually have

Ensuites are often smaller than people realise once clearance, door swings, shower screens, and wall thickness are taken seriously. The practical minimum footprint for a functional ensuite with a shower, toilet, and vanity in Australia is 1.5 m × 2.0–2.2 m, or about 3.0–3.3 m², while a more comfortable layout is 1.8 m × 2.4 m (4.32 m²) according to Australian small bathroom dimension guidance.

That matters because layouts fail on paper all the time. A toilet might fit, but the clearance in front of it is poor. A vanity may look fine in a showroom, but once a shower screen is in, the room feels pinched. Good planning starts with accurate measure-ups and honest discussion about what can fit without making the room awkward.

Three early decisions shape nearly everything:

  • Keep or change the layout: Keeping plumbing in roughly the same positions usually keeps the build cleaner and simpler.
  • Choose the shower type early: A hob shower, walk-in shower, or framed screen each drives different waterproofing and tiling details.
  • Decide how much storage matters: Slim vanities save space, but many owners regret going too small once they start using the room.

The build sequence that works

An ensuite renovation runs best when trades don't trip over one another and no one is guessing what comes next.

  1. Initial consultation and measure-up
    The room is assessed properly. Existing problems matter here. Loose tiles, failed grout lines, poor ventilation, and water damage behind walls all affect the final scope.

  2. Design and selections
    During this stage, layouts are tested, tapware locations are set, and finishes are chosen. It's also where practical choices beat impulse decisions. Large-format tiles can look excellent, but only when the substrate is prepared for them.

  3. Quoting and contract stage
    A proper quote needs a defined scope. Ambiguity is what causes disputes. If an item is assumed but not written down, it usually turns into a variation later.

Good renovations are built twice. First on paper, then on site.

  1. Demolition and site preparation
    The old room is stripped out so the structure and substrate can be checked. This stage often exposes the difference between an old bathroom that was ugly and an old bathroom that was failing.

  2. Rough-in work
    Plumbing and electrical rough-ins go in before the room is closed up. If fixtures are being relocated, the complexity increases.

  3. Waterproofing, screeding, and tiling
    This is the technical heart of the job. Get this wrong and no tapware brand in the world will save the renovation.

  4. Fit-off and finishing
    Vanity, screen, toilet, basin, mirrors, lighting, accessories, and sealants go in after the wet work has cured and the tiling is complete.

  5. Final inspection and handover
    The room should be checked for finish quality, drainage, alignment, and clean presentation.

The smartest owners stay focused on sequence, not speed. A rushed ensuite often costs more because mistakes in wet areas aren't cheap to undo.

Budgeting Your Ensuite Renovation Costs in Melbourne

The budget question needs a straight answer. For a full strip-out and rebuild, ensuite renovation costs in Australia in 2026 are typically $20,000 to $35,000, with $25,000 to $35,000 sitting in the most common mid-range bracket, based on 2026 ensuite renovation cost guidance. That's the range many Melbourne owners should expect when planning bathroom ensuite renovations with proper waterproofing, tiling, and new fixtures.

That number doesn't mean every ensuite costs the same. Small rooms can be deceptive. They often cost more per square metre because the fixed labour and waterproofing components don't shrink as much as people think. The room might be compact, but it still needs demolition, plumbing, electrical work, waterproofing, tiling, and fit-off.

What different budget levels usually mean

The easiest way to budget is by scope, not wishful thinking.

Tier Estimated Cost (AUD) Typical Scope
Budget $8,000 to $15,000 Cosmetic refresh, often keeping layout and major finishes where possible
Standard $15,000 to $35,000 Full renovation range where most homeowners spend
Premium $35,000+ Higher-end finishes, more complex layouts, and luxury inclusions

The broader bathroom renovation market in Australia commonly falls into those three brackets according to Australian bathroom renovation pricing on hipages.

A cosmetic refresh usually suits owners who want a visible lift without tearing the room back to the frame. Retaining the layout, some surfaces, or cabinetry can hold the cost down. A standard renovation is where most complete ensuite upgrades sit. This is the practical middle ground where the room is rebuilt properly and looks current without drifting into luxury spend. A premium renovation often includes relocated plumbing, imported finishes, feature tapware, or high-end design details that push labour time and coordination higher.

For a closer local pricing reference, compare your scope against this Melbourne bathroom renovation cost guide.

Where the budget moves fast

Cost usually climbs for a few predictable reasons, and owners are better off knowing them early.

  • Layout changes: Moving waste points, water lines, or power points adds labour and coordination.
  • Tile selection: Material choice matters, but so does tile size. Large-format porcelain and slab products often need flatter substrates and slower handling.
  • Access issues: Tight stair access, apartment rules, and limited parking can all affect labour efficiency.
  • Hidden repairs: Water-damaged framing, failing substrate, or out-of-level floors can turn a simple price into a wider rebuild.

A few trade rates help explain why labour is such a strong driver. General building and renovation labour commonly ranges from $90 to $150 per hour, while plumbing sits around $100 to $150 per hour in the pricing guidance cited above through hipages. The rates aren't the whole story, but they explain why repeated visits, design changes, and difficult sequencing add up quickly.

Some line items are easy to underestimate. Waterproofing alone accounts for $500 to $750 in an average-sized bathroom, and tiling costs vary sharply by material. Tilers charge $35 to $120 per m², averaging $60 per m² in the cited ensuite cost guide, while floor tiling can range from $35 to $50 per m² for ceramic or porcelain and $80 to $130 per m² for natural stone in that same source.

The cheapest quote often becomes the most expensive room if it skips prep, waterproofing detail, or realistic allowances.

The best budgeting move isn't choosing the cheapest tapware package. It's deciding where quality matters. Spend where failure is expensive to fix. Waterproofing, substrate preparation, drainage, and tiling accuracy are the parts that protect the whole room.

Hiring a Registered Builder and Navigating Victorian Regulations

In Victoria, the legal side of an ensuite renovation isn't optional admin. It's part of protecting the owner, the property, and the quality of the work. For a full bathroom renovation valued at $10,000 or more, a building permit and the engagement of a registered builder are required in Victoria, and domestic building insurance becomes mandatory for work over $16,000, as set out in this Victorian renovation threshold reference.

Those thresholds matter because many ensuites easily move past them once demolition, trades, waterproofing, tiling, fixtures, and finishes are included. If the contract amount crosses the trigger, the job has to be handled properly from the start.

A flowchart detailing steps for hiring a registered builder for Victorian home renovations and regulatory compliance requirements.

Why the registered builder requirement matters

A lot of owners hear “registered builder” and think it's just a licensing detail. It isn't. In bathroom renovations, the registered builder is the party responsible for coordinating the work, carrying the right obligations, and making sure the job is delivered in a compliant sequence.

That matters for a few reasons.

  • Wet areas are high-risk areas: Water damage can travel well beyond the ensuite.
  • Trades need coordination: Plumbing, carpentry, waterproofing, electrical, and tiling all depend on correct timing.
  • Insurance and paperwork matter: If things go wrong, informal arrangements leave owners exposed.

Victoria also sets its own thresholds, and they're not the same everywhere. The verified guidance notes that Victoria's $10,000 trigger differs from NSW's $5,000 and Queensland's $3,300 threshold for comparable renovation licensing requirements, according to NSW licensing information referenced in the verified guidance. That's why Melbourne owners shouldn't rely on advice from interstate forums or generic renovation videos.

Compliance isn't there to slow a job down. It's there because failed wet-area work is expensive, disruptive, and often hidden until the damage spreads.

What compliance should look like on a real job

A compliant ensuite job should feel organised before demolition starts. The scope should be clear. The contract should reflect the actual work. The builder should understand whether the value triggers permit and insurance requirements. If the room involves structural or wet-area work, that should be treated seriously from day one.

A simple checklist helps:

  • Check the registration status: Don't assume a tiler or bathroom company can legally run the whole project.
  • Confirm who is coordinating the trades: If no one clearly owns the sequence, problems get passed around.
  • Ask how permit obligations are being handled: This matters more when scope grows during quoting.
  • Make sure insurance obligations are understood: If the contract value pushes past the threshold, this is not optional.

The reason experienced builders are firm on this is simple. Once walls are closed and tiles are on, a lot of defects become difficult to prove and expensive to rectify. The right paperwork, supervision, and compliance structure reduce that risk before the first tile is laid.

Waterproofing and Tiling A Foundation for Quality

The best-looking ensuite in the house is still a failed renovation if water gets behind it. In wet areas, appearance matters, but performance matters first. That's why waterproofing and tiling should be treated as the structural heart of the room, not just the finish.

A professional construction worker applying grey waterproofing membrane to a shower wall in a bathroom.

What proper waterproofing looks like

In Victoria, compliance with AS 3740:2021 is mandatory for bathroom waterproofing. That means the entire shower floor and walls up to 1,800 mm above the finished floor must be waterproofed, plus at least 150 mm on the remaining walls, with a mandatory waterstop angle at the shower entry, as outlined in this Victorian waterproofing requirement summary.

That requirement exists for good reason. Most shower leaks aren't dramatic pipe bursts. They're slow failures. Water gets through a weak junction, an underdone corner, a poor screen transition, or a floor that doesn't shed water cleanly to the waste. Once that starts, damage can spread into skirtings, robes, ceilings below, or adjoining balconies.

A proper wet-area build relies on sequence:

  1. Sound substrate first
    Waterproofing over unstable sheeting, movement, or loose patching is asking for trouble.

  2. Correct falls to waste
    If the screed is wrong, the room will fight the user every day. Water sits. Grout stays wet. Cleaning gets harder.

  3. Membrane continuity
    Corners, penetrations, wall-floor junctions, and entry transitions need care. These are the places that usually fail first.

For a deeper look at wet-area failures and repair methods, this Melbourne waterproofing guide is useful.

Tiling choices that perform in ensuites

Tiles do more than set the look of the room. They affect maintenance, slip behaviour, cleaning, visual scale, and installation complexity.

Porcelain remains a strong choice in ensuites because it's durable and suits modern formats. Natural stone can look excellent but demands more care in both selection and long-term maintenance. Large-format tiles and slab-style products create a cleaner, more uniform result, but they also expose poor prep instantly. If the wall is out, the tile shows it. If the floor isn't flat enough, lippage becomes harder to control.

A tiler can't fix a bad substrate with a premium tile. Expensive finishes usually make prep errors more obvious, not less.

The tile layout should be worked out before adhesive hits the wall. Niche positions, tapware centring, vanity alignment, and screen lines all need to relate to each other. The jobs that look calm and balanced usually had those set-outs planned early.

This short video gives a useful visual reference for wet-area work and bathroom build sequencing.

Good tiling isn't just straight joints. It's straight decisions. The right tile for the room is the one that suits the substrate, the drainage, the maintenance expectations, and the level of workmanship being applied.

Visualising Your Vision The 3D Design and Quote Process

Most disputes in ensuite projects start before demolition. They start when the owner and the contractor think they're talking about the same room, but they aren't. One is imagining a recessed niche, a wall-hung vanity, and brushed tapware centred to the tile grid. The other is pricing a more basic build with standard set-outs and provisional assumptions.

That's why 3D design has become such a useful step in bathroom ensuite renovations. It turns vague ideas into an actual room. Owners can see whether the walk-in shower feels open enough, whether a niche lines up, and whether the vanity depth makes the circulation too tight.

Screenshot from https://melbournetilingservices.com.au

Why drawings save money

A proper drawing process cuts out a lot of expensive uncertainty. Owners usually change their mind less when they can see the room clearly. Builders and trades also make fewer assumptions when fixture positions, tile extents, and joinery sizes are documented.

The key benefit isn't style. It's coordination.

  • Layout confidence: You can test whether the room feels cramped before any demolition starts.
  • Selection clarity: Tiles, vanity style, mirror size, and screen type become easier to compare when they're shown in context.
  • Trade accuracy: Plumbers, sparkies, waterproofer, and tiler work better from defined set-outs than verbal descriptions.

What a usable quote should include

A quote is only useful if the scope is stable. If the design is half-formed, the quote usually carries assumptions, and assumptions are where projects drift.

A strong ensuite quote should make clear:

  • What is being removed and rebuilt
  • Which fixtures and finishes are included
  • Whether the layout is staying or changing
  • Who is responsible for supply and installation
  • What site conditions may affect final scope

The more detail resolved before demolition, the less money gets spent on fixing preventable changes during the build.

Owners don't need a flashy rendering for the sake of it. They need enough visual and written detail to know that the room they're approving is the room being priced. When that link is missing, budgets become slippery and expectations split.

Solving Common Renovation Problems Leaks and Balconies

Not every ensuite renovation starts as an upgrade. A lot start because something has already failed. The owner may notice swollen architraves, bubbling paint outside the bathroom, or a musty smell that never really goes away. In homes with an adjoining balcony, the symptoms can spread further and become harder to diagnose.

Why shower leaks keep coming back

Shower leaks are often misdiagnosed. People blame grout first because that's what they can see. In reality, recurring leaks usually come from deeper issues. Failed membrane junctions, poor floor falls, movement in the substrate, and badly handled penetrations are more common causes than a simple surface problem.

That's why patch jobs often disappoint. Replacing silicone or regrouting can freshen the appearance, but if the waterproofing system underneath has failed, the water path is still there. The right response starts with diagnosis, not cosmetic repair.

A practical leak investigation usually checks:

  • Moisture pattern: Is the damage isolated to the shower, or is it travelling into nearby walls or flooring?
  • Drainage behaviour: Does water clear properly to the waste, or does it sit near corners and screen lines?
  • Movement points: Are there cracked joints, loose tiles, or flex in the floor or wall lining?
  • Previous repair history: Multiple patch repairs usually suggest the original system was never resolved.

Balcony junctions need more attention than most builders give them

Where an ensuite meets an external balcony or sits near one, leak risk increases because the waterproofing transitions become more demanding. Water doesn't respect room names. If a balcony threshold, door track, or adjacent wall detail is weak, moisture can track laterally and show up where the owner least expects it.

Balcony problems usually aren't fixed by treating the bathroom and balcony as separate jobs. The junctions need to be looked at together. That often means reviewing falls, membrane continuity, threshold detailing, and whether previous work trapped water instead of directing it away.

For owners dealing with that type of issue, this Melbourne balcony waterproofing page gives a useful overview of the problem area.

The main lesson is simple. Leaks rarely care about where one trade stopped and the next one started. Rectification needs someone who understands the whole water path, not just the visible symptom.

Frequently Asked Questions for Melbourne Renovators

How do I know if my ensuite needs a full renovation or just a refresh

If the room has active leaks, movement, mould returning around joints, or damage outside the shower area, a cosmetic refresh usually won't solve the underlying issue. A refresh suits rooms that are dated but still structurally sound.

Is a small ensuite cheaper just because it uses fewer tiles

Not always. Smaller ensuites often have tighter working conditions and similar fixed trade stages to larger bathrooms. That's why small wet areas can still carry a substantial renovation cost.

What should landlords and property managers focus on

Prioritise durability and easy maintenance. Choose finishes that clean well, avoid awkward grout-heavy detailing, and make sure the drainage and waterproofing are done properly. Tenants notice function long before they notice designer tapware.

Do large-format tiles work in compact ensuites

They can work very well, especially if you want a cleaner visual finish with fewer joints. The catch is preparation. Walls and floors need to be true enough to support the format properly.

How do I reduce surprises during the build

Lock in your selections early, approve drawings before demolition, and make sure the quote reflects the actual room being built. Mid-project decision changes are one of the fastest ways to create cost drift.

What matters most at handover

Check the room like a user, not just like a buyer. Run the shower, look at where water sits, open the vanity, inspect silicone lines, and make sure fittings, lighting, and screen operation feel right in daily use.


If you're planning an ensuite upgrade, leak rectification, or a full bathroom renovation in Melbourne, Melbourne Tiling Services P/L handles start-to-finish bathroom renovations, waterproofing, screeding, tiling, shower screens, 3D drawings, and compliance-led project delivery across Melbourne and greater Victoria. Reach out for a clear scope, practical advice, and a quote that reflects how the room should be built.

Bathroom Renovation Specialists: Melbourne Expert Guide

You're probably doing what most Melbourne homeowners do at the start of a bathroom renovation. You've saved inspiration photos, picked out a vanity style, maybe even chosen tiles, then realised the hard part isn't the look. It's figuring out who can pull the job together without turning your house into a mess of delays, leaks, and cost blowouts.

That concern is justified. A bathroom renovation isn't a decorating exercise. It's a wet-area rebuild with compliance, sequencing, and defect risk baked into every stage. And because industry cost guides commonly place a standard bathroom renovation in the tens of thousands of dollars, with higher-end projects rising substantially when waterproofing upgrades, layout changes, and premium tiles are added, this is not the place to gamble on the cheapest quote or the nicest Instagram gallery, as noted in this Australian bathroom remodel cost guide.

Most first-time renovators think they need a good tiler. Sometimes they think they need a plumber who “does bathrooms”. In Victoria, that's often the wrong starting point. Instead, you need a registered builder who specialises in bathrooms, manages licensed trades properly, and treats waterproofing and compliance as the backbone of the project.

That's what separates a bathroom that merely looks new from one that performs properly for years.

Table of Contents

Your Bathroom Renovation Dream and the Reality

A typical renovation starts with excitement. You're tired of cracked grout, dated fittings, poor storage, and a shower that never quite drains properly. You want a bathroom that feels cleaner, sharper, and easier to live with.

Then reality arrives. The vanity you want affects plumbing positions. The new shower screen changes set-out. The tile you love needs flatter walls and tighter prep. The “simple refresh” starts picking up questions about substrate condition, falls, waterproofing, extraction, lighting, and whether the last renovation was done properly in the first place.

The gap between a nice bathroom and a sound bathroom

Many projects often go sideways. Homeowners focus on finishes because they're visible. Builders focus on what sits underneath because that's what fails.

A bathroom renovation specialist understands both. They know the room must look right, but they also know that beauty means nothing if the floor doesn't fall correctly to the waste, the membrane is weak at penetrations, or the trades arrive in the wrong order.

A bathroom is one of the smallest rooms in the house, but it demands some of the tightest coordination.

That's why I push homeowners to think beyond “Who can tile this?” and ask a better question. Who can take responsibility for the whole wet area from demolition to handover?

Why specialist management matters from day one

Good bathroom renovation specialists don't start with tile samples. They start with scope. They assess what stays, what moves, what needs diagnosis, and what carries compliance risk. That early discipline protects your budget and your sanity.

Here's what that means in practice:

  • They check the existing room properly. Not just measurements, but signs of prior leaks, movement, poor ventilation, rotten skirtings, and failed silicone patch jobs.
  • They plan the sequence. Demolition, rough-in, substrate prep, waterproofing, tiling, fit-off, and final detailing must happen in the right order.
  • They price the complete job. Not a cosmetic fantasy that falls apart once walls are opened.
  • They coordinate trades. Bathrooms involve more than one trade almost every time. Someone has to own that coordination.

If you want a renovation that feels smooth, don't hire for one visible skill. Hire for control. A specialist should reduce decision fatigue, keep quality consistent, and stop avoidable defects before they're buried behind tile adhesive and grout.

The Full Scope of a Bathroom Renovation Specialist

A real bathroom specialist is effectively the general contractor for one of the most technical spaces in your home. That role has nothing to do with sounding impressive and everything to do with reducing failure points.

What the homeowner sees and what the specialist controls

From your side, the job may look straightforward. Remove the old bathroom, install the new one, done. On site, it's much more exacting.

An infographic showing the seven stages of a bathroom renovation project by a specialist.

A bathroom renovation specialist usually handles or coordinates:

  1. Consultation and layout planning
    The room has to work before it looks good. Door swing, shower width, vanity depth, storage, towel rail positions, and cleaning access all matter.

  2. Demolition and preparation
    Old bathrooms often hide poor patchwork, damaged sheeting, out-of-level floors, and moisture problems. If prep is rushed, everything after it suffers.

  3. Plumbing and electrical coordination
    A proper renovation needs licensed trades working to a clear plan, not improvising on the day.

  4. Substrate correction and screeding
    Large-format tiles, niches, frameless screens, and linear drains all demand accuracy. If the surfaces aren't straight and the falls are wrong, the finish won't save the job.

  5. Waterproofing and tiling
    Many failures originate in these stages. If you want a deeper look at how these two stages interact, this guide on tiling and waterproofing in Melbourne bathrooms is useful.

  6. Fixture installation and finishing
    Vanities, toilets, tapware, screens, mirrors, trims, sealants, and final alignment all affect usability and longevity.

Why sequencing matters more than style

In Victoria, the National Construction Code requires waterproofing of wet areas to be installed in accordance with AS 3740:2021, and the Victorian Building Authority treats failures in bathroom waterproofing as a major source of residential defects, as outlined in this Victorian waterproofing compliance guidance.

That one point should change how you hire.

If waterproofing is a major defect-risk area, then the person running your job must understand membrane continuity, junction treatment, penetrations, shower recess preparation, and what can't be covered up before it's right. A tiler who only wants to “get on with the tiles” is not enough.

Practical rule: If the contractor talks more about tile colours than substrate prep and waterproofing detail, keep looking.

A specialist also knows where modern bathrooms become technically demanding:

  • Large-format porcelain and Kerlite panels need flatter surfaces and cleaner set-out than many older bathrooms can provide without extra prep.
  • Frameless shower screens rely on accurate levels, plumb walls, and finished dimensions that don't drift mid-job.
  • Walk-in showers need disciplined fall creation. If water sits outside the wet zone, the design has failed no matter how good it photographs.

A homeowner sees one room. The specialist sees a chain of dependencies. That mindset is exactly why bathroom renovation specialists earn their keep.

Why Your Specialist Must Be a Registered Builder

If your renovation involves multiple trades, wet-area compliance, and meaningful spend, a registered builder isn't a nice extra. It's the right level of responsibility.

A tiler installs finishes, a builder carries the project

A good tiler is valuable. A good plumber is valuable. A good electrician is valuable. None of them, acting alone, should be treated as the person responsible for the whole bathroom unless they're legally and professionally equipped to take that role.

A registered builder specialising in bathrooms does more than organise trades. They carry accountability for sequencing, coordination, workmanship standards, and project control. That matters when the job moves beyond replacing like-for-like fittings and into real renovation territory.

Many homeowners get trapped. They hire the trade they understand best, then discover too late that no one is properly managing interfaces between demolition, rough-in, waterproofing, tiling, cabinetry, and final fit-off. Once that happens, problems get pushed downstream. Everyone blames the previous trade. You're left sorting it out.

You want one responsible party, not a circle of subcontractors explaining why the defect belongs to someone else.

For bathroom floors alone, details such as falls, waste positioning, tile set-out, and transitions need careful planning. That's why even a focused element like bathroom floor tiling should sit inside a bigger managed scope rather than being treated as an isolated task.

Choosing your bathroom professional

The differences are clearer when you put them side by side.

Attribute Handyman / Tiler Bathroom Renovation Specialist (Unregistered) Registered Builder (Specialising in Bathrooms)
Primary focus One trade or small repair scope Renovation coordination without full formal protection Full bathroom project responsibility
Trade coordination Limited May coordinate informally Coordinates licensed trades as part of a managed build
Compliance mindset Often finish-focused Varies widely Should treat compliance as core project work
Accountability across the whole job Narrow Often unclear Clearer single-point responsibility
Risk if hidden issues appear Higher Higher if scope isn't formalised Better equipped to diagnose, re-scope, and manage
Suitability for full bathroom renovation Poor to moderate Moderate Strong
Best use case Minor maintenance or isolated tiling Small cosmetic projects with low complexity Full wet-area renovations and higher-risk projects

The main point is simple. Bathrooms are small, but they're not simple. If the work requires design judgement, compliance discipline, multiple trades, and defect prevention, hire at the level the project demands.

That's the difference between buying labour and buying a properly managed result.

Setting Realistic Costs and Timelines in Melbourne

Most budget problems don't start with greed. They start with false simplicity. Homeowners are shown a neat before-and-after price idea, but the actual room needs waterproofing work, plumbing changes, substrate correction, and compliance-driven upgrades that weren't part of the original mental budget.

Why Melbourne budgets drift

Public bathroom cost advice is often broad and national. That's not much help when your actual project is a Melbourne wet-area renovation in an older home or apartment. A better way to think about budgeting is this: the visible items are only part of the spend. The hidden work often determines whether the budget holds.

Recent Australian industry reporting has highlighted that many public cost guides are national averages, while small wet-area jobs in Melbourne are especially vulnerable to scope creep from waterproofing, plumbing, and compliance upgrades, which is exactly why cheap headline estimates so often unravel, as discussed in this Melbourne bathroom renovation cost article.

An infographic showing realistic costs and timelines for a bathroom renovation project in Melbourne, Australia.

For local planning, this page on the cost of bathroom renovation in Melbourne is a more relevant starting point than generic interstate advice.

Here's where homeowners often underestimate:

  • Waterproofing-related rectification if the old bathroom has already failed
  • Plumbing adjustments when fixtures move or old connections need upgrading
  • Subfloor or wall correction for modern tile formats and frameless installations
  • Compliance-driven changes that weren't visible at quote stage
  • Finish upgrades that seem minor individually but add up quickly

What a realistic programme looks like

The timeline problem follows the same pattern. People think in terms of tile installation days. Builders think in terms of dependencies, curing times, inspections, procurement, and fit-off coordination.

A sensible programme usually includes:

  • Pre-construction decisions
    Final selections, measurements, site review, and ordering. Delays here ripple through everything.

  • Strip-out and diagnosis
    Hidden leaks, movement, poor framing, or failed past work are often revealed during this stage.

  • Rough-in and prep
    Plumbing and electrical changes happen before the room can be closed up and prepared.

  • Waterproofing, setting, and curing
    This stage can't be rushed because later layers depend on it.

  • Tiling, fit-off, and defect check
    The last phase often looks fast, but it still needs discipline.

Fast bathrooms are often expensive bathrooms later.

The right expectation isn't “How quickly can someone finish?” It's “How cleanly can someone move from one stage to the next without compromising the work?” If you approach cost and time with that mindset, you'll make better decisions from the first quote onward.

Your Guide to Vetting and Hiring a Specialist

You meet two contractors. One talks about tile colours, quick turnaround, and a sharp price. The other starts with builder registration, scope control, waterproofing responsibility, and how variations will be documented if demolition reveals a problem. Hire the second one.

That decision saves people from expensive bathroom failures in Victoria. A bathroom renovation is not a tiling job with a few extras attached. It is a building project with legal, sequencing, and compliance obligations. If the person pricing the work cannot explain how the whole room will be managed, they are not the right specialist to trust with it.

Screenshot from https://melbournetilingservices.com.au

Questions that expose weak operators fast

Ask direct questions. Then judge the quality of the answer, not the confidence of the delivery.

A registered builder who specialises in bathrooms should answer clearly, explain their process, and tell you who carries responsibility from demolition through fit-off. If they dodge, generalise, or keep pulling the conversation back to finishes, keep looking.

Use this checklist:

  • Builder registration
    Ask whether they are a registered builder in Victoria and what class of work they are taking responsibility for.

  • Single-point responsibility
    Ask who is accountable for the full bathroom outcome, including defects, coordination, and compliance, not just tiling or waterproofing in isolation.

  • Waterproofing method
    Ask how they prepare substrates, treat junctions and penetrations, and verify the bathroom is ready before tiles go down.

  • Trade coordination
    Ask who sequences the plumber, electrician, carpenter, waterproofer, tiler, and glazier, and who checks each stage before the next starts.

  • Hidden condition procedure
    Ask what happens if demolition exposes rot, leaks, out-of-square framing, or failed past work. You want a documented process for scope review, pricing, and approval.

  • Experience with your type of bathroom
    Ask for recent examples that match your project, whether that means an apartment ensuite, an older Melbourne home, a curbless shower, or large-format tile.

  • Protection of the rest of the house
    Ask how they manage dust, waste removal, access, and protection to adjoining finishes while the room is under construction.

Good operators hear these questions every week. Poor ones get irritated because they rely on assumptions.

How to read a quote properly

A short quote is a risk document disguised as a low price.

You are not comparing numbers alone. You are comparing scope definition, risk control, material assumptions, and whether someone has priced the job as a managed renovation or as a patchwork of trades. Bathrooms blow out when the quote leaves too much unsaid.

Check for these items:

What to check Why it matters
Detailed scope of works Stops disputes about what was included in the contract price
Named materials or specifications Prevents quiet substitutions that reduce quality
Clear exclusions Shows what you may still need to pay for separately
Allowance language Identifies items that can change once selections or site conditions are confirmed
Builder-led coordination Shows whether one party is managing sequencing and responsibility across the whole job
Variation process Protects you when hidden issues are found after demolition

If one quote is cheap because it is vague, it is not cheap. It is unfinished.

What to look for in a portfolio

Judge a portfolio like a record of build quality, not a collection of pretty photos.

Styled images hide the details that matter. Ask for whole-room shots, close-ups around wastes and niches, and projects that show difficult conditions rather than only clean new builds. A specialist bathroom builder should be able to show controlled set-out, straight lines, balanced cuts, and fixtures that align with the tile grid.

Look for:

  • Straight cuts and disciplined set-out around corners, niches, wastes, and doorways
  • Consistent joints across walls, floors, and returns
  • Level fixture alignment at vanities, mirrors, mixers, and accessories
  • Evidence of problem-solving in older homes, tight layouts, or awkward existing structures
  • Photos of complete bathrooms with enough detail to assess workmanship, not just styling

Later in the process, it helps to watch how an experienced installer thinks about execution, not just presentation.

If you narrow it down to two similar prices, choose the contractor who gives clearer documentation, sharper answers, and stronger control of the full bathroom scope. In this trade, ambiguity is where defects and disputes start.

Common Pitfalls and What Success Looks Like

You finish the bathroom, everything looks neat, and six months later the shower starts leaking into the wall behind it. That usually happens because the job was treated like a tiling project instead of a building project. Surface finishes looked fine. The assembly underneath was wrong.

The most common failures

A common scenario in Victoria involves homeowners looking for a fast fix to a shower leak and getting advice about grout colour, tile style, or resealing, when the actual problem sits behind the tiles. In older homes and apartments, leak rectification depends on defect diagnosis, substrate condition, waterproofing continuity, and the order of work, not cosmetic touch-ups.

The failures I see most often are predictable:

  • Treating leaks as surface problems
    Regrouting, resealing, or replacing silicone does not fix a failed waterproofing system or a moving substrate.

  • Hiring by trade, not by accountability
    A plumber handles one part, a tiler handles another, and nobody takes responsibility for compliance, sequencing, or the finished room as a whole.

  • Ignoring floor falls and drainage behaviour
    If water sits in corners or escapes the shower zone, the bathroom has failed, no matter how good the tiles look.

  • Locking in finishes before checking the room
    In older bathrooms, rotten framing, out-of-plumb walls, and damaged sheeting change the scope. You find that out before selections matter.

  • Using silicone to hide bad set-out or bad detailing
    Silicone is a sealant, not a substitute for proper construction.

Good bathroom work starts with diagnosis. Then it moves to scope, documentation, sequencing, and build quality. That is why a registered builder who specialises in bathrooms gives you a better result than a good tiler working without full project control.

What a well-run bathroom renovation looks like

A successful bathroom renovation feels organised from the start. The room is measured properly. Existing defects are identified early. Trades arrive in the right order. Fixtures, tile set-out, waterproofing details, and drainage outcomes are resolved before installation starts.

The finished room should do more than photograph well. Water should drain properly. Fixtures should align cleanly. Tile cuts should look deliberate. Doors should clear. Niches should sit in the right place. Nothing should rely on last-minute patching to look acceptable.

A heritage home update shows the difference clearly. The owner wants better function, but the room still has to suit the house. A bathroom specialist who is also a registered builder checks the structure, confirms what can stay, adjusts the scope to suit the existing conditions, and rebuilds the room so it performs properly without looking out of place.

An apartment ensuite is another test. Access is tighter. Service locations matter more. Noise, waste removal, neighbours, and body corporate conditions can affect how the job runs. A bathroom builder with registration and bathroom-specific experience controls those constraints and delivers a room that meets performance, compliance, and finish standards.

That is the benchmark. A bathroom renovation in Victoria should be treated as a controlled wet-area rebuild with one party responsible for the outcome. Hire bathroom renovation specialists who understand compliance, sequencing, waterproofing, and defect prevention, not just finishes. If you get that part right, you protect the room, the budget, and the value of the home.

If you're planning a bathroom renovation in Melbourne and want a registered builder's view before committing to scope, layout, or finishes, speak with Melbourne Tiling Services P/L. They handle bathroom renovations, waterproofing, tiling, leak rectification, and full trade coordination for residential projects across Melbourne and greater Victoria.