Large Format Tile Guide for Melbourne Renovations

You're standing in a 1990s Hawthorn ensuite, looking at a cracked 200 x 200 mm ceramic floor and deciding what replaces it. A 600 x 600 mm porcelain tile feels like the sensible upgrade. A 1200 x 600 mm large format tile promises fewer grout lines and a calmer, more expensive finish. The decision looks visual in the showroom, but on site it becomes a question of flatness, waterproofing, handling, adhesive coverage and movement.

That's the part many renovation quotes gloss over. A large format tile can make a bathroom feel open and refined, but it won't hide a poor screed or a wavering wall. It will expose them. Australian guidance identifies large format work as more demanding because larger faces magnify substrate irregularities, while current market analysis places large-format products within the premium direction of Australia's expanding ceramic tile sector. Australian ceramic tile market analysis links the trend with fewer grout lines and faster visual coverage.

The practical trade-off is straightforward. You may reduce grout cleaning and create a stronger visual finish, but you'll usually allow more time for substrate preparation, more careful cutting and handling, and a tiler who knows how to move heavy porcelain panels without damaging them. This guide covers the definition, material choices, substrate decisions, installation sequence and Victorian compliance issues that determine whether the result lasts.

Table of Contents

Why a Melbourne Renovation Turns to Large Format Tile

Large format tile is a build-quality decision before it's a style decision. In that Hawthorn ensuite, the choice between 600 x 600 and 1200 x 600 shouldn't be made from a sample board alone. The existing floor may have movement, old adhesive, uneven screed or falls that no longer suit the new drainage layout.

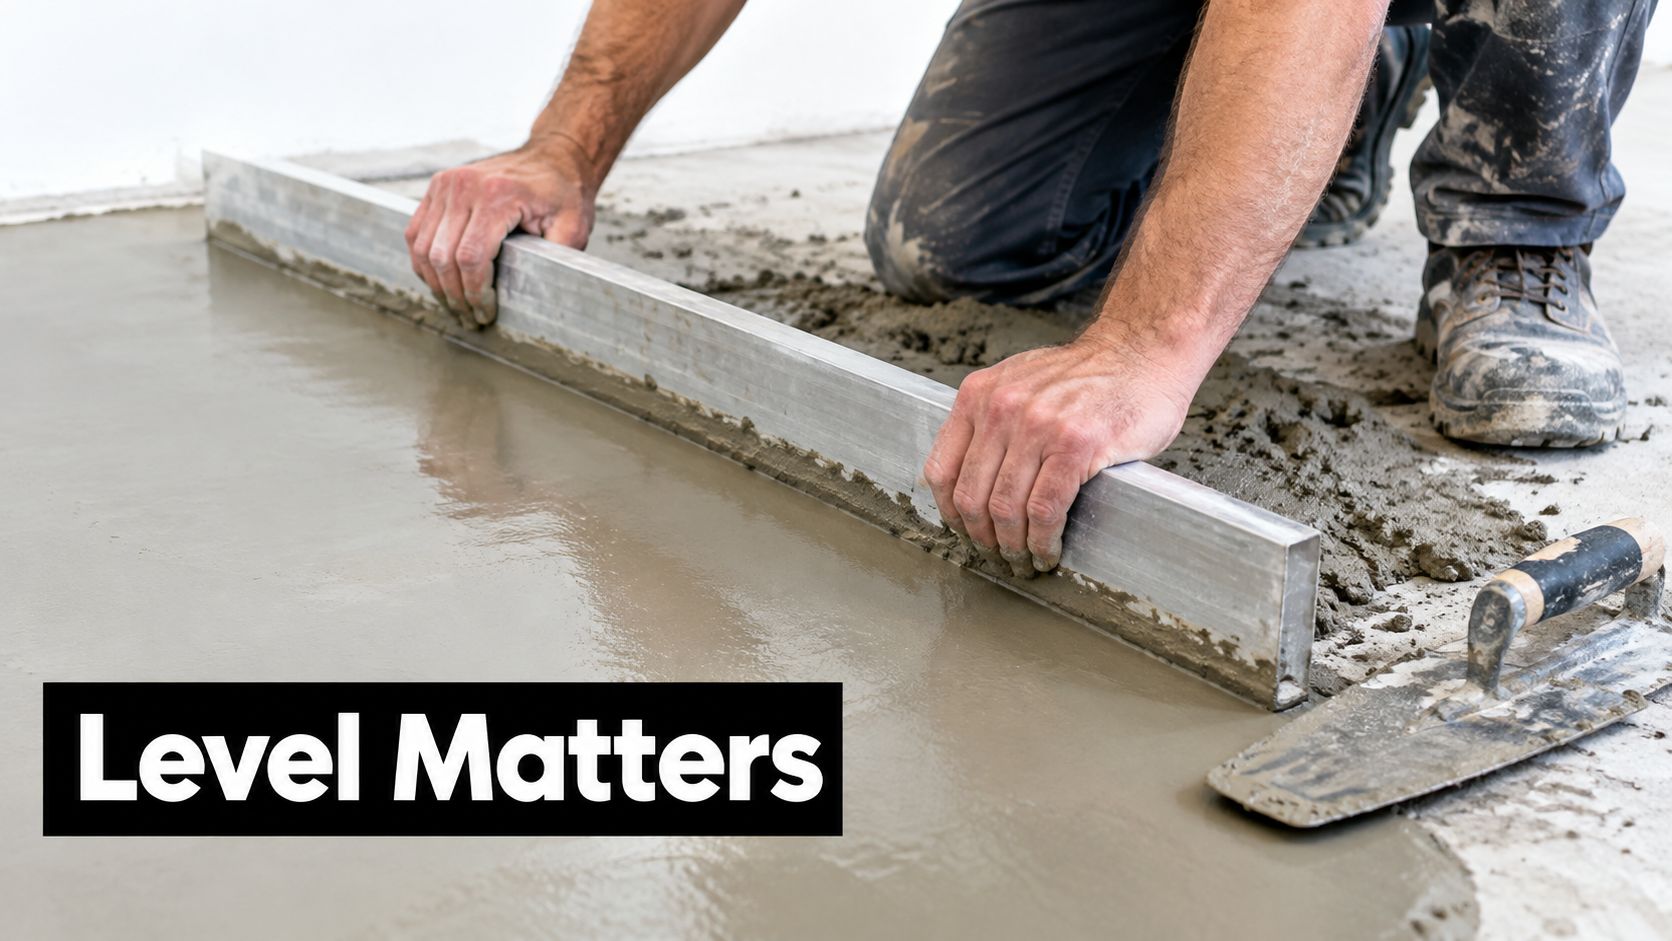
A smaller tile can follow minor changes in a surface because each piece spans less area and the grout grid breaks up the visual effect. A large panel bridges those changes. If the floor dips, the tile may rock, lose adhesive contact or sit higher at one edge. If the wall bows, the finished face can show lippage, meaning an unwanted height difference between adjacent tiles.

Practical rule: If the substrate isn't flat enough for the tile, changing adhesive won't rescue the installation.

The Australian market is moving towards larger formats, particularly porcelain sizes such as 600 x 600 and 600 x 1200, but the growth of the category doesn't make every bathroom suitable for the biggest panel. Current Australian bathroom tile trend coverage also points to structured, matte finishes for wet areas, which matters because a polished large panel may look impressive while offering a poorer floor solution.

The cost calculation homeowners miss

The tile itself is only one part of the decision. A large-format quote may need to account for:

  • Substrate correction: Screeding, grinding, patching or self-levelling can take longer than fixing standard tiles to a serviceable surface.
  • Handling equipment: Suction cups, panel carriers and additional installers become important as the face and weight increase.
  • Cutting and wastage: A single plumbing cut or misplaced panel can affect a much larger piece than a standard tile.
  • Movement control: Perimeters, junctions and changes of plane need flexible detailing rather than rigid grout.
  • Repair access: Replacing one damaged panel is more involved because removal can affect surrounding finishes and the underlying waterproofing system.

A 30-kilogram panel isn't just a bigger version of a small floor tile. It's awkward, vulnerable at the corners and difficult to correct once adhesive has started to grab. Good outcomes are decided during measuring, substrate preparation and layout planning, long before the first panel is lifted into position.

What Counts as a Large Format Tile

In plain terms, a large format tile has a face large enough to demand different planning and installation control from ordinary modular tile. Australian industry guidance commonly defines the category from about 400 mm on one side, while another Australian reference frames the AS 3958 threshold around a tile with an edge exceeding 1.2 metres or a face area greater than 1 square metre. Australian large-format tile guidance describes the local shift from smaller modular formats towards larger tiles and sheets.

The terminology can feel inconsistent because suppliers, standards and technical bulletins use different thresholds for different installation concerns. For a homeowner, the useful point is that the risk profile changes as the face grows. A tile that spans more of a wall or floor needs more accurate flatness, suitable adhesive, controlled handling and a layout that respects the room rather than forcing the room to suit the tile.

Common Melbourne renovation sizes

The categories below reflect the formats regularly discussed in local bathroom and interior renovation work.

Size Typical Use Large Format per AS 3958?
600 x 600 mm Bathroom floors, laundries and general wall applications Depends on the applicable threshold
900 x 450 mm Walls, floors and benchtop-style layouts Depends on the applicable threshold
1200 x 600 mm Bathroom walls, feature floors and full-height applications Yes, where the 1.2 metre edge threshold applies
1200 x 1200 mm Open floors, feature walls and premium interiors Yes
3000 x 1000 mm Feature walls, panels and benchtops Yes

A 300 x 300 tile gives you a familiar grid of relatively small faces. A 1200 x 600 panel is roughly comparable to eight A4 sheets arranged as one broad surface, which explains why a small hollow or hump becomes much more visible across the installation.

Thickness doesn't decide whether a product is large format. A 3 mm Kerlite panel and a 20 mm porcelain paver both belong to the large-format conversation, but their structural demands, weight and adhesive systems differ substantially. Once a panel reaches the larger thresholds, lippage control, adhesive selection and handling equipment need to be specified before ordering materials.

Porcelain, Kerlite, and Stone Compared

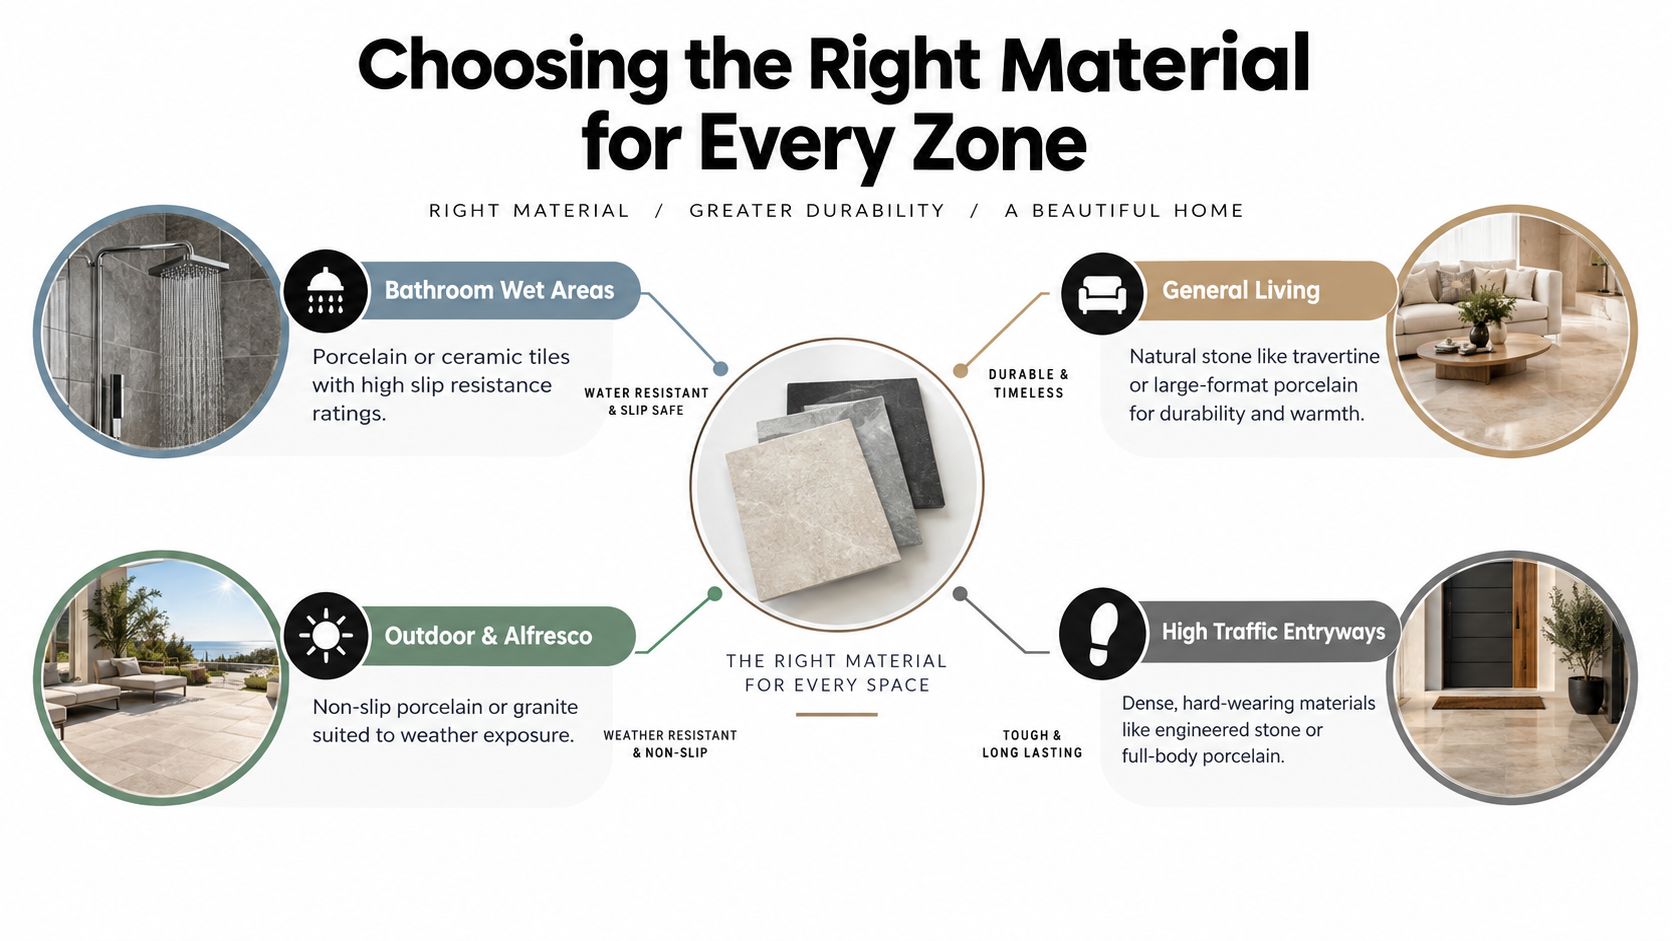
Melbourne homeowners usually arrive at one of three material directions: dense porcelain, thin laminated porcelain such as Kerlite, or natural stone. All can produce a premium finish, but they don't tolerate the same substrate, fixing method or maintenance routine.

Porcelain is the practical all-rounder. It's available in formats from 600 x 600 through to very large slabs, with polished, matte and textured finishes. A conventional 9 mm porcelain may weigh around 17 kg/m², while a 20 mm paver can reach around 50 kg/m², so the same material family can impose very different loads. Those figures come from the product comparison described in the local Kerlite and porcelain service context at Melbourne Tiling Services' Kerlite tiling information.

Kerlite is a laminated porcelain panel commonly produced between 3 mm and 6.5 mm thick, with face sizes reaching 3000 x 1000 mm and a weight of roughly 7 kg/m². Its lower dead load makes it useful for wall cladding, shower walls and some overlay renovations, but the thin panel leaves little room for a poor background. It needs a compatible fibre-reinforced adhesive and a remarkably flat substrate.

Natural stone, including marble, travertine and bluestone, commonly sits around 20 mm to 30 mm in the applications considered here. It's heavier, may vary in thickness between batches and needs sealing. Stone can be superb on a feature wall or benchtop, but its porosity, maintenance and sensitivity to installation conditions make it a more involved choice in wet zones.

Property Porcelain Kerlite Stone
Typical build Dense ceramic body, often rectified Laminated, thin porcelain panel Natural material with variable thickness
Weight profile Ranges from moderate to very heavy Lower dead load Heavy
Finish options Polished, matte and textured Large printed and design-led surfaces Veining and natural variation
Best-fit rooms Bathrooms, laundries, floors and alfresco areas Wall cladding, shower walls and lighter overlays Feature walls and benchtops
Main risk Weight, handling and substrate flatness Background imperfections and adhesive compatibility Sealing, weight and batch variation

The quick rule is simple: choose porcelain when you need a durable general-purpose surface, Kerlite when low wall load and panel scale matter, and stone when natural variation is central to the design and the maintenance commitment is understood.

Substrate, Adhesive, and Joint Decisions That Decide the Outcome

A large-format bathroom survives because three systems work together: the background is flat, the adhesive transfers load across the face, and the joints allow controlled movement. None of those jobs belongs to the tile itself.

Australian baseline guidance under AS 3958.1 identifies maximum plane variation of 5 mm in 3 m for thin-bed ceramic tile installation on a concrete floor and 4 mm in 3 m for wall installation. Australian tiling standards guidance also reflects the stricter approach now used for large panels, where local technical guidance is moving towards 3 mm in 3 m and 1.5 mm in 500 mm from the high spot. Large-format Kerlite and gauged porcelain can turn a minor hump into a visible edge mismatch or a hollow zone.

Prepare the background before choosing the adhesive

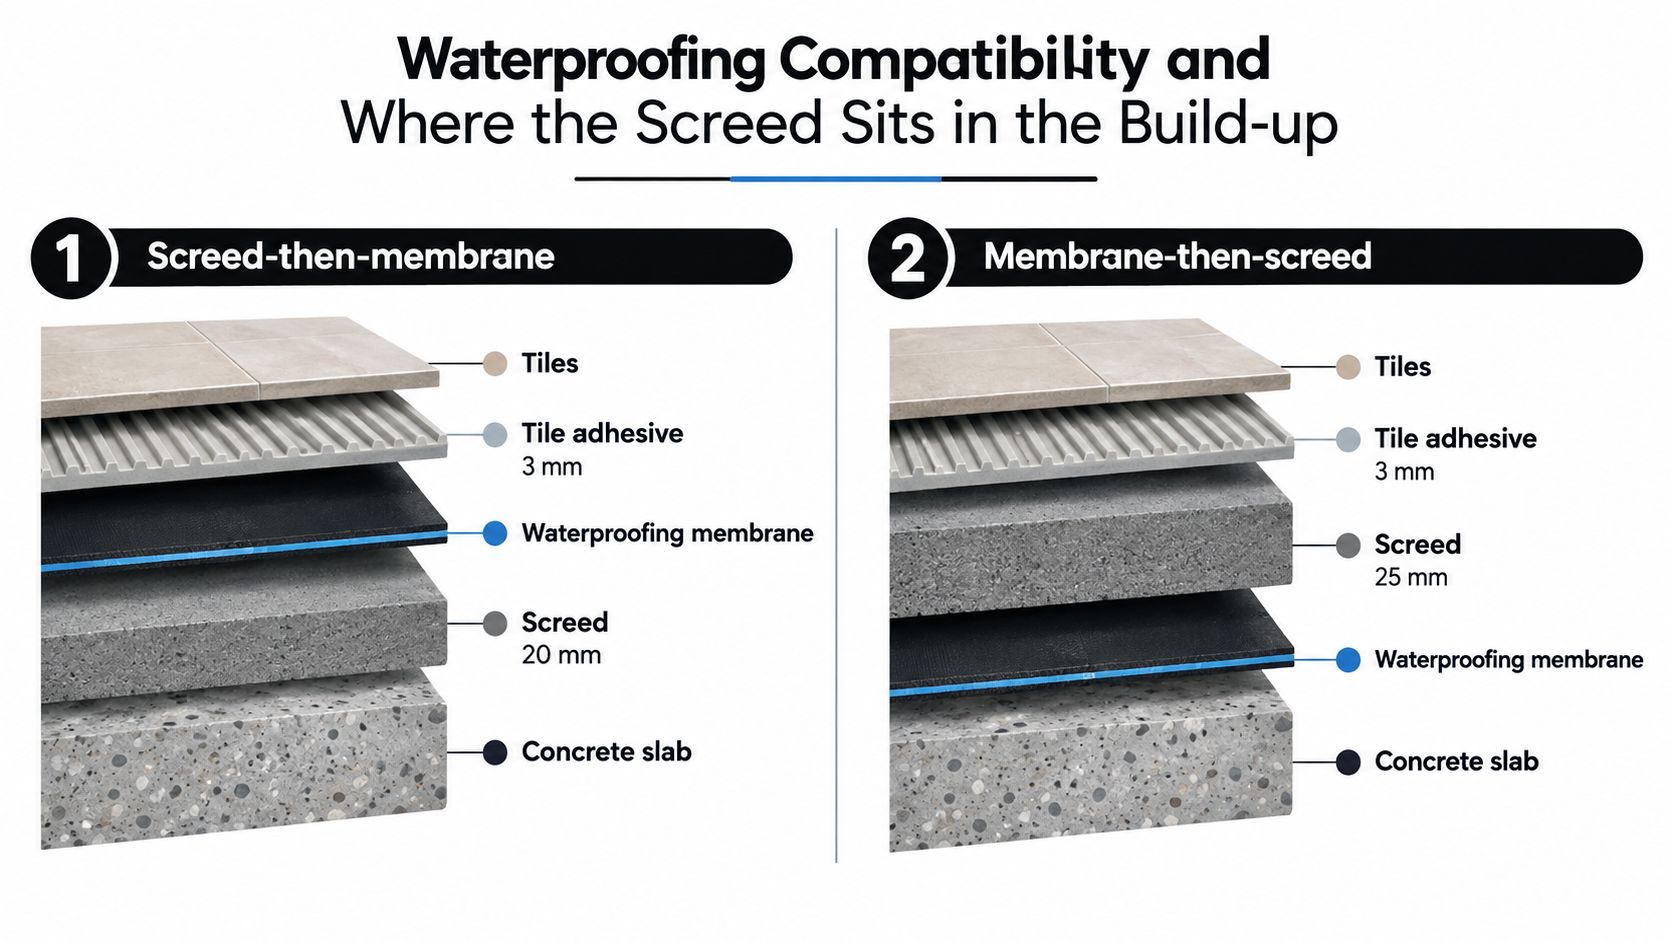
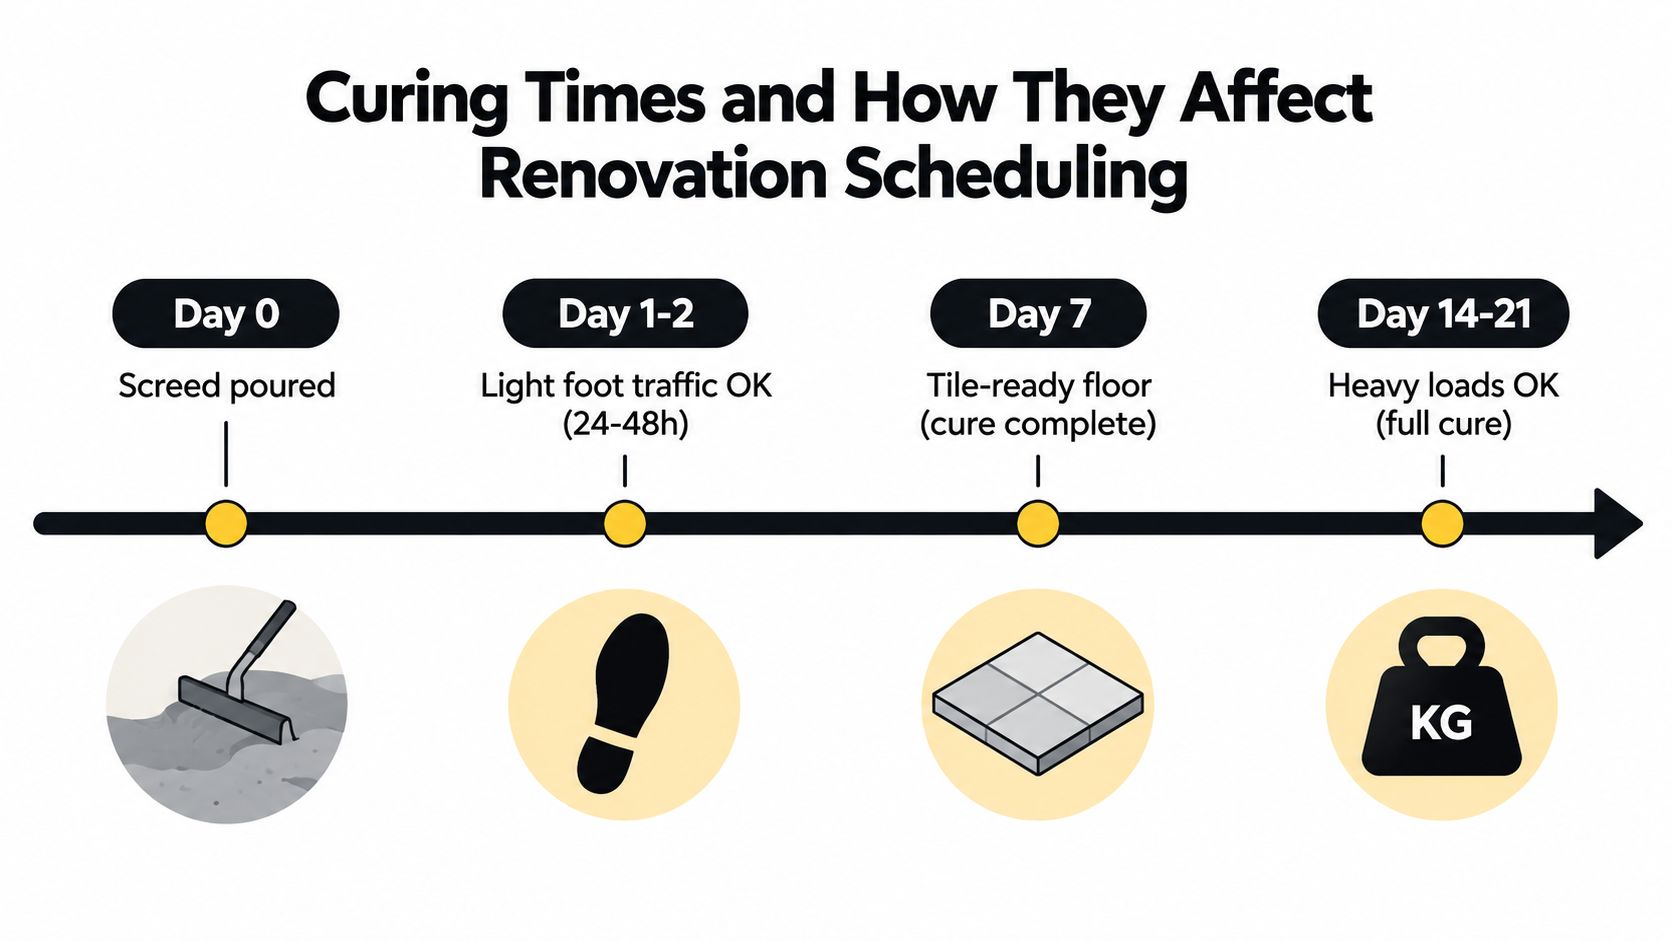
Concrete screeds need to be sound, clean, appropriately primed and sufficiently cured. A timber floor may require a suitable fibre-cement tile underlay or another approved system before the membrane and tile build-up begins. Self-levelling compounds and screeds correct a substrate, but they don't remove the need to confirm compatibility with the waterproofing and adhesive system.

Adhesive selection should follow tile size, weight, substrate and movement. Australian large-format guidance treats those factors as engineering controls, not cosmetic preferences. Australian guidance on fixing large-format and heavy tiles gives examples of maximum weight capacities, including 60 kg/m² on mechanically prepared concrete, 32 kg/m² on sand/cement render and 32 kg/m² on Hebel block walls.

The same guidance recommends double-buttering or double-notching, with vertical notch direction to help collapse adhesive ridges and reduce voids, particularly on tiles over 300 mm. A C2 adhesive with S1 or S2 deformability is commonly selected for large-format porcelain where the product and substrate require it. The installer should be able to explain why that classification suits the specific tile, rather than just naming a bag of adhesive.

Joints are part of the structure

Rectified porcelain often uses narrow joints, commonly around 1.5 mm to 3 mm, but the minimum practical joint depends on tile calibration, warpage, layout and manufacturer requirements. Perimeters, structural transitions and changes of plane need movement detailing, generally with a flexible sealant rather than hard grout.

Ask a quote to identify the substrate correction method, adhesive class, coverage approach and movement-joint locations. Tile adhesive guidance for Australian installations is useful background when you're checking whether a proposal describes a complete fixing system or only lists the tile and labour.

Substrate Flatness Tolerance Adhesive Class Trowel Notch Movement Joint Spacing
Concrete floor Confirm project-specific large-format tolerance, with stricter local guidance where required C2S1 or C2S2 where specified Commonly 12 mm or U-notched Perimeter, transitions and designed field locations
Screed Flat, cured and compatible with the membrane system Deformable class suited to tile and background Selected for full transfer Perimeter and changes of plane
Rendered wall Within applicable Australian tolerance Product-approved deformable adhesive Sized to panel and background Corners, junctions and structural changes
Timber floor with underlay Underlay system must be stable and flat Adhesive compatible with tile and board Selected from coverage testing Perimeters and movement zones

Installing Large Format Tile in a Bathroom or Ensuite

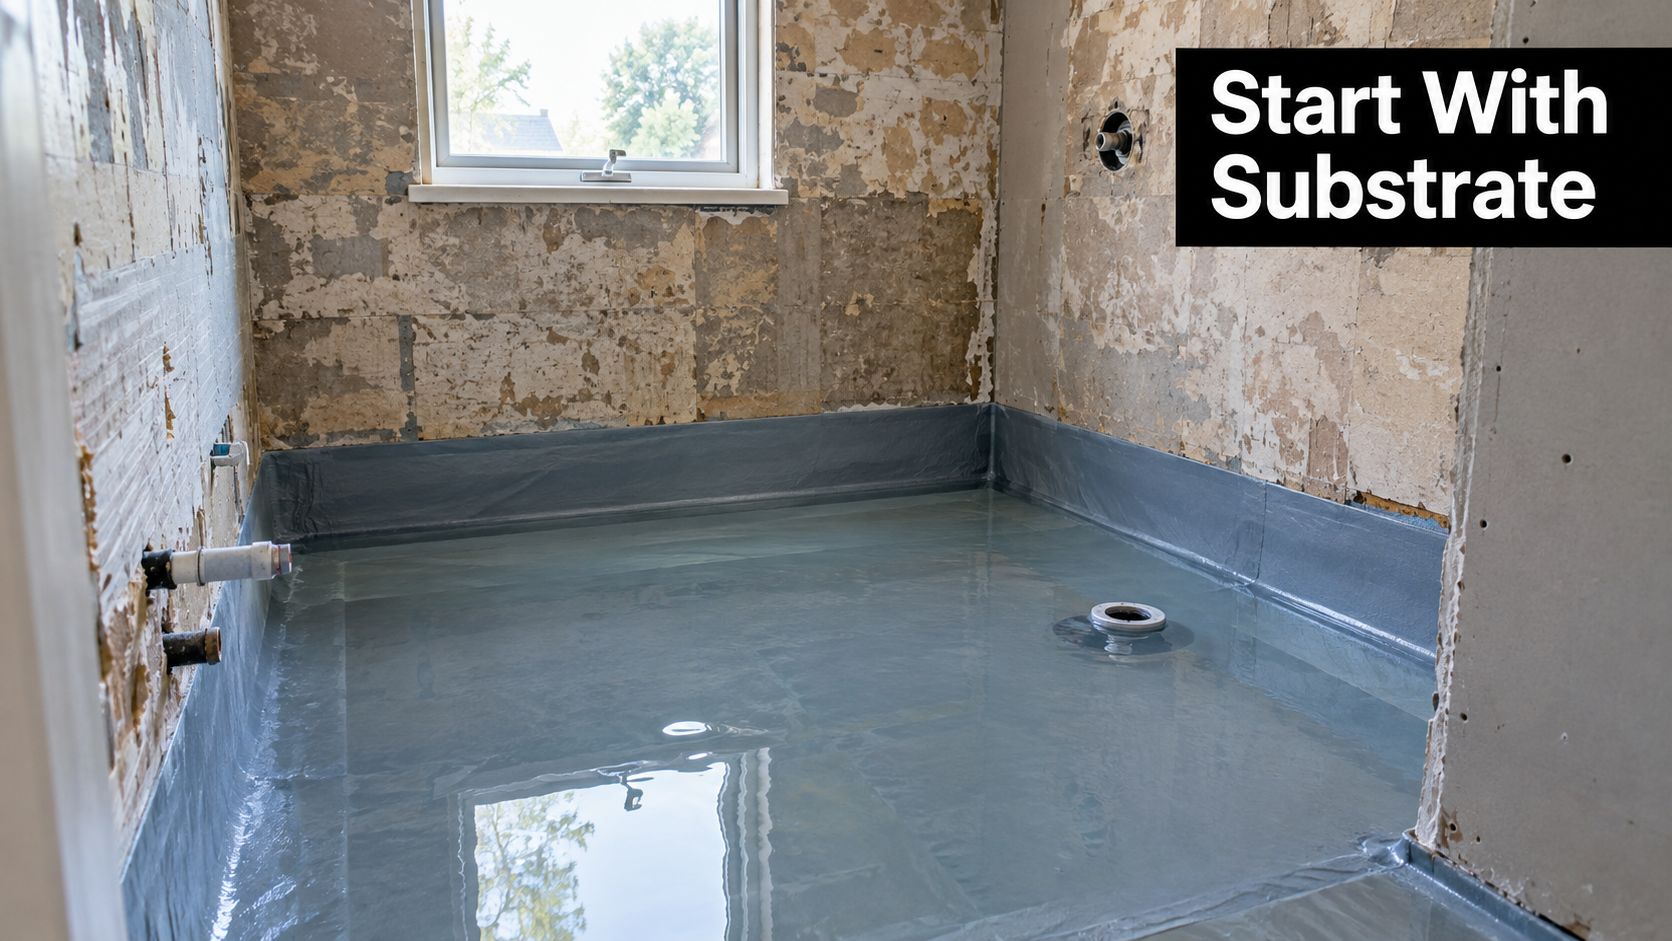
A bathroom is a waterproofed assembly with a tile finish, not a tiled box. The sequence matters because a beautiful panel can't correct a failed membrane, an unsuitable fall or a contaminated background.

A six-step infographic guide detailing the professional installation process for large format tiles in wet areas.

Start with inspection and waterproofing

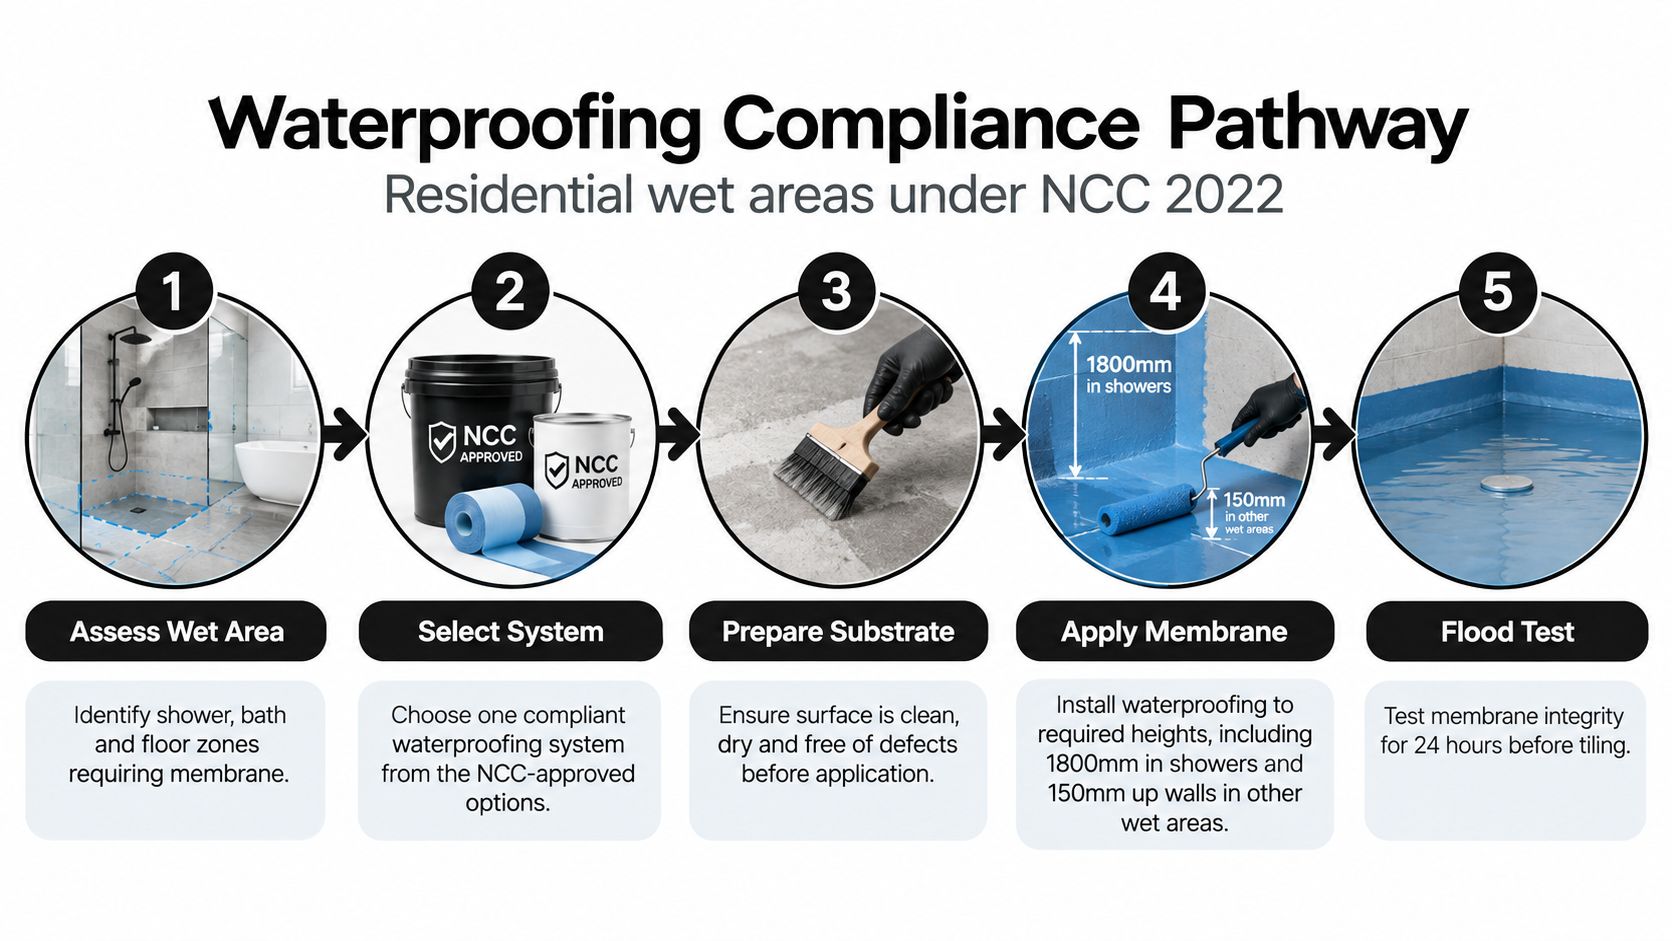
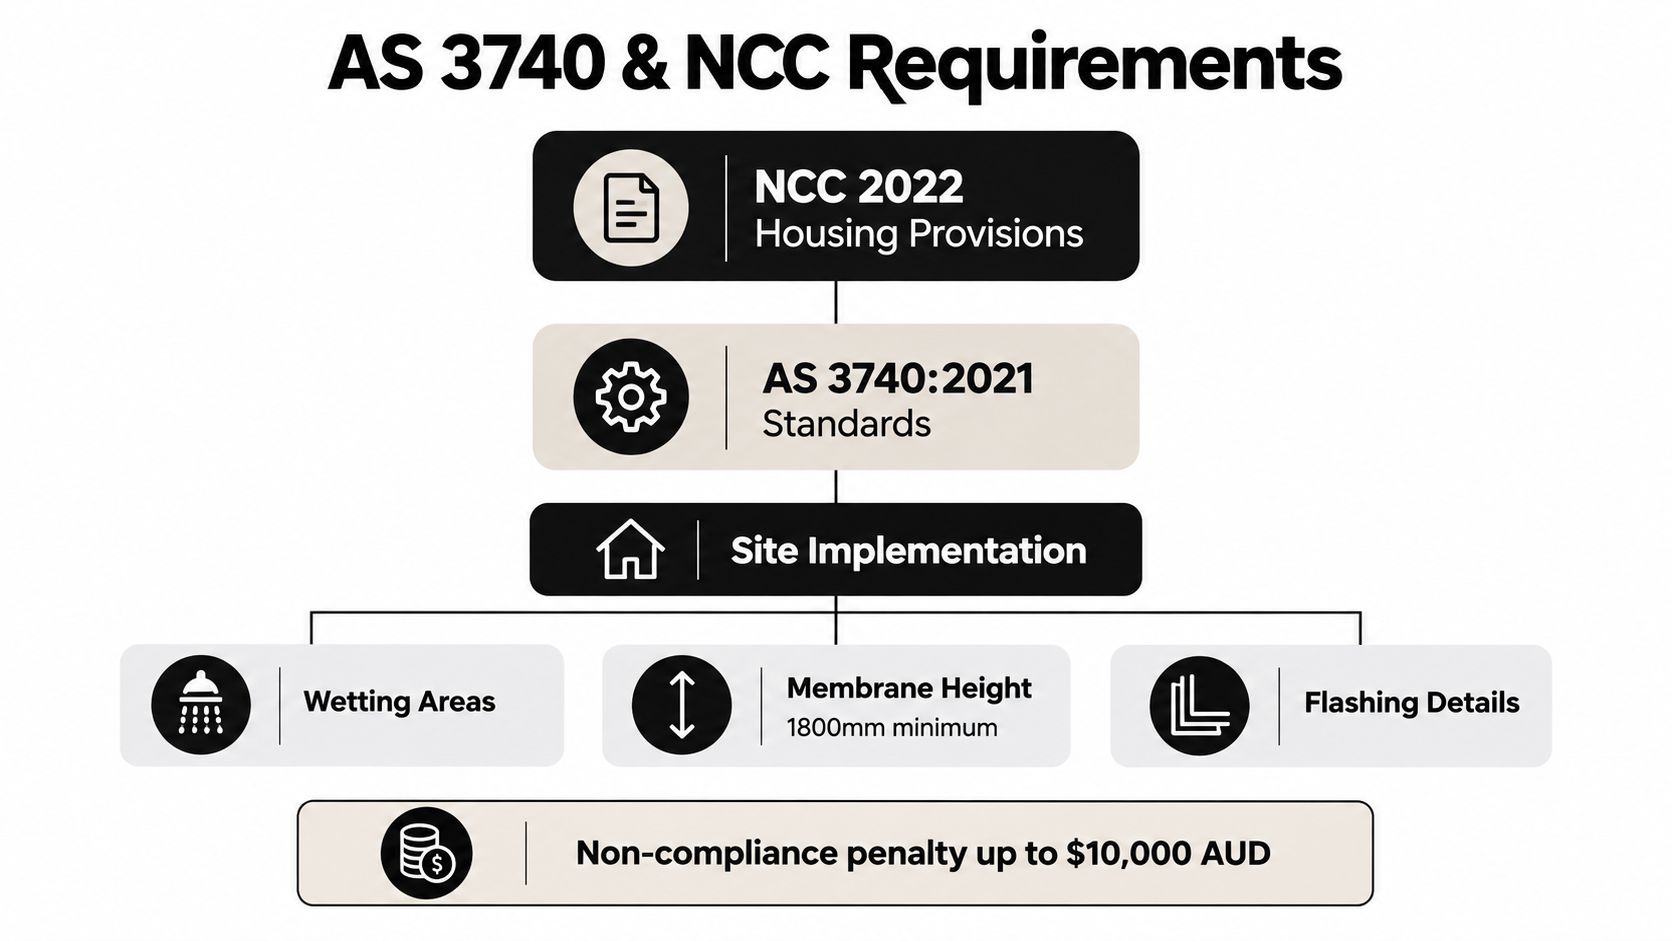
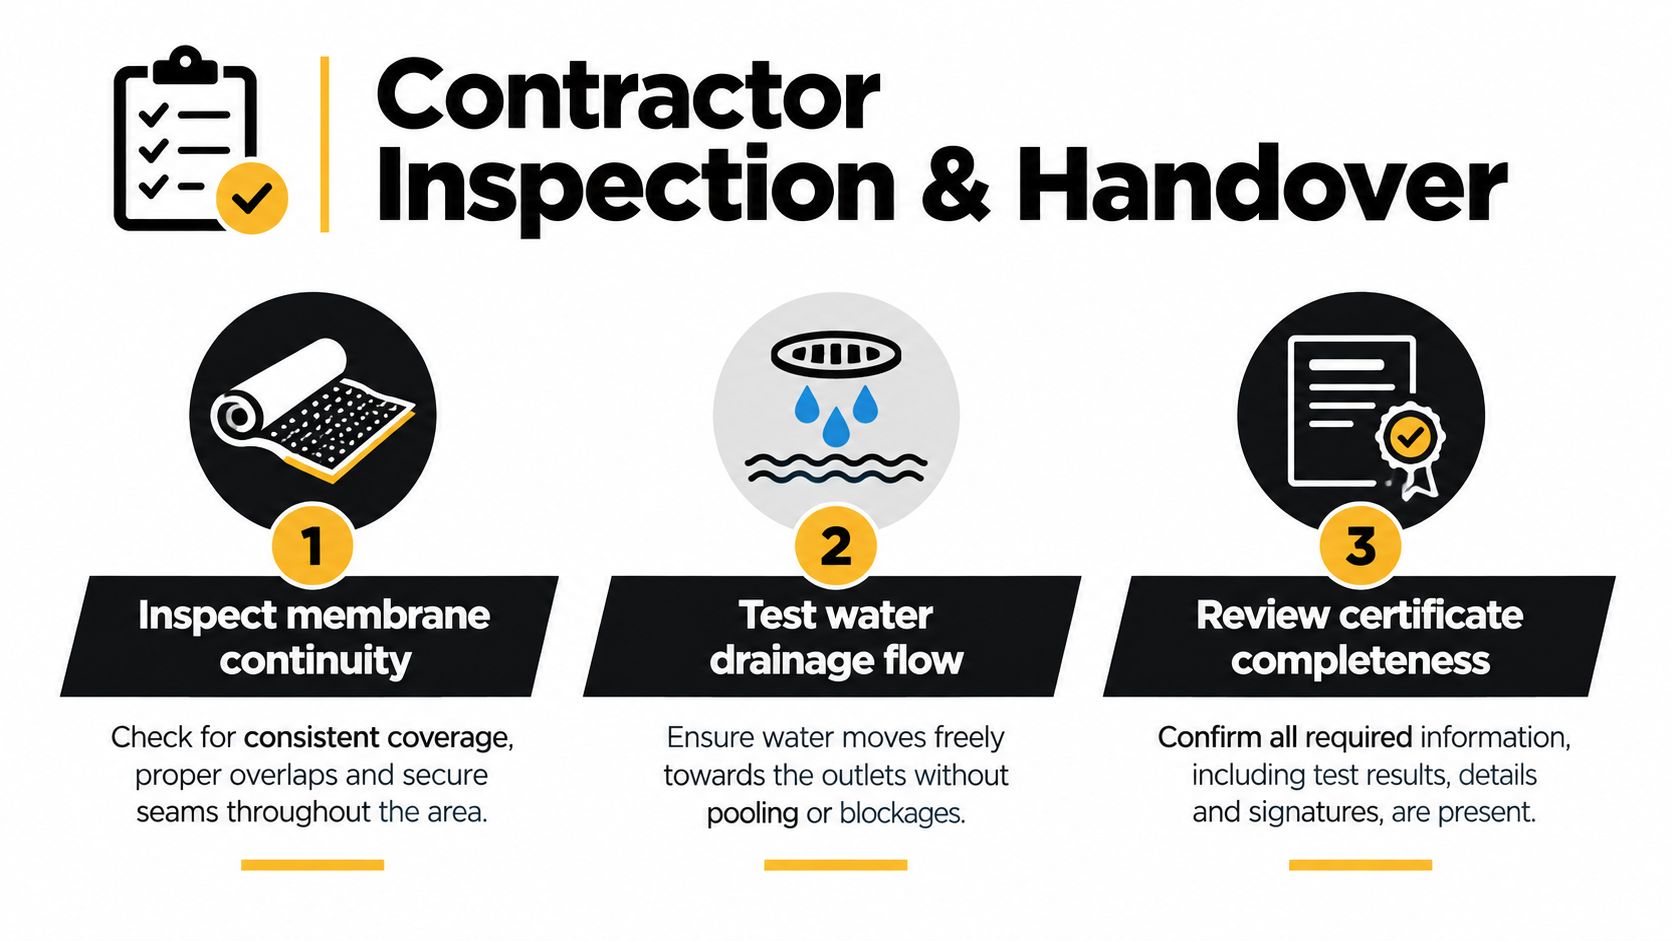
The installer should inspect the substrate, confirm flatness and resolve cracks, high points and low areas before priming. Wet-area falls need checking before the membrane is applied. Australian wet-area guidance states that shower floors must drain without pooling, and shower areas must be waterproofed across the floor and up the walls to at least 1,800 mm, or 50 mm above the shower rose height, whichever is higher. Walls around baths and laundry tubs require waterproofing to at least 150 mm above the fixture. Bathroom waterproofing and tiling guidance outlines these AS 3740:2021 requirements.

Flood testing and membrane inspection should happen before tile installation. The membrane, corners, penetrations, hob junctions and pipe collars need to be complete and compatible with the adhesive system. A membrane doesn't compensate for an uneven wall, so flattening generally belongs before waterproofing where the system permits, with any subsequent preparation carefully controlled.

Fix panels with full contact

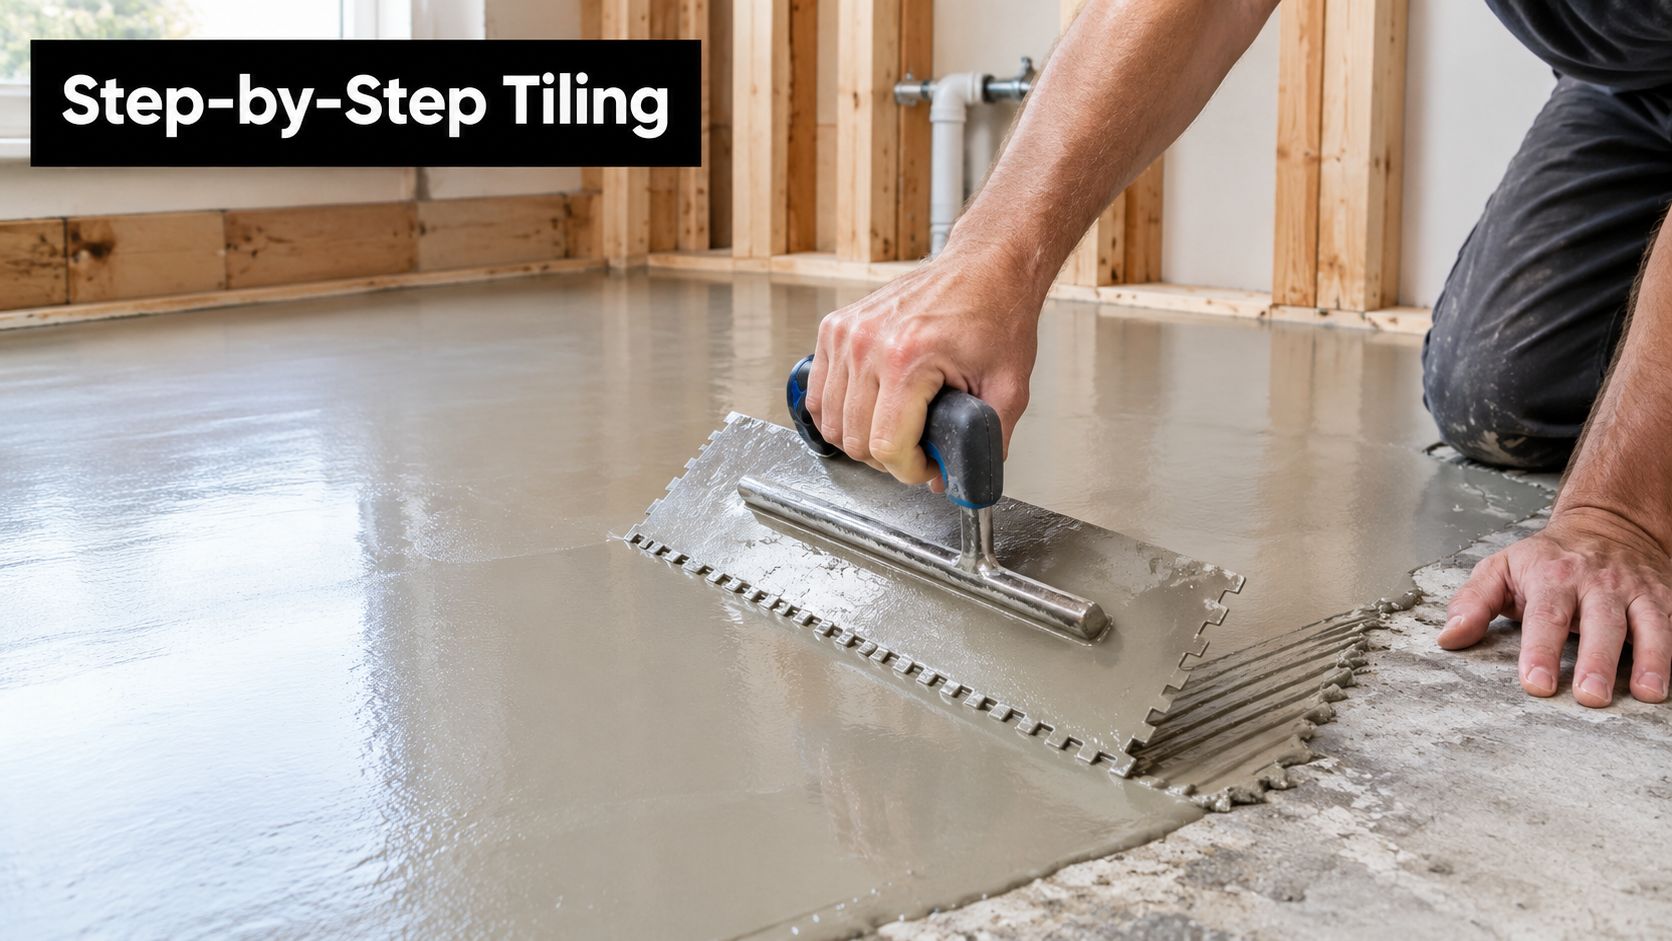
Once the waterproofed background is ready, the installer dry lays the pattern, checks cuts around niches and wastes, and confirms that feature veining or bookmatching runs as intended. Adhesive is combed consistently, the panel is back-buttered, and suction-cup lifters help position the piece without twisting it into place.

The tile is then beaten in with suitable tools, joints are cleaned immediately and levelling clips or wedges may assist where the product and joint design allow. Large-format bathroom installation guidance describes a planar target of plus or minus 3 mm over 2 metres and the use of C2 adhesive with S1 or S2 deformability to reduce cracking risk and support full coverage.

Falls must be designed around the drain and tile geometry. The cited bathroom guidance uses 1:80 for bathrooms and 1:50 for showers as practical fall gradients. A large panel may work on a carefully designed bathroom floor, but a conventional multi-direction shower fall often suits smaller pieces better. Internal corners and changes of plane should receive flexible silicone, not rigid grout.

A short installation overview is also shown below.

Where Fewer Grout Lines Stop Being a Benefit

Fewer grout lines can simplify wiping on a wall, but they don't automatically make a bathroom easier or safer to maintain. A 600 x 1200 floor panel still needs the correct fall, cleaning routine and slip-rated finish. Its broad surface can allow water to travel further before reaching the waste, particularly when the floor geometry hasn't been designed around the tile.

Structured and matte surfaces are often more suitable for wet-area floors than polished finishes, but texture can also hold soap residue and mineral spotting. Melbourne homeowners concerned about hard-water marks should choose a finish they can clean consistently, not just the surface that looks smoothest under showroom lighting.

A large wall tile can reduce grout maintenance. A large shower-floor tile can increase installation risk.

Match format to the surface

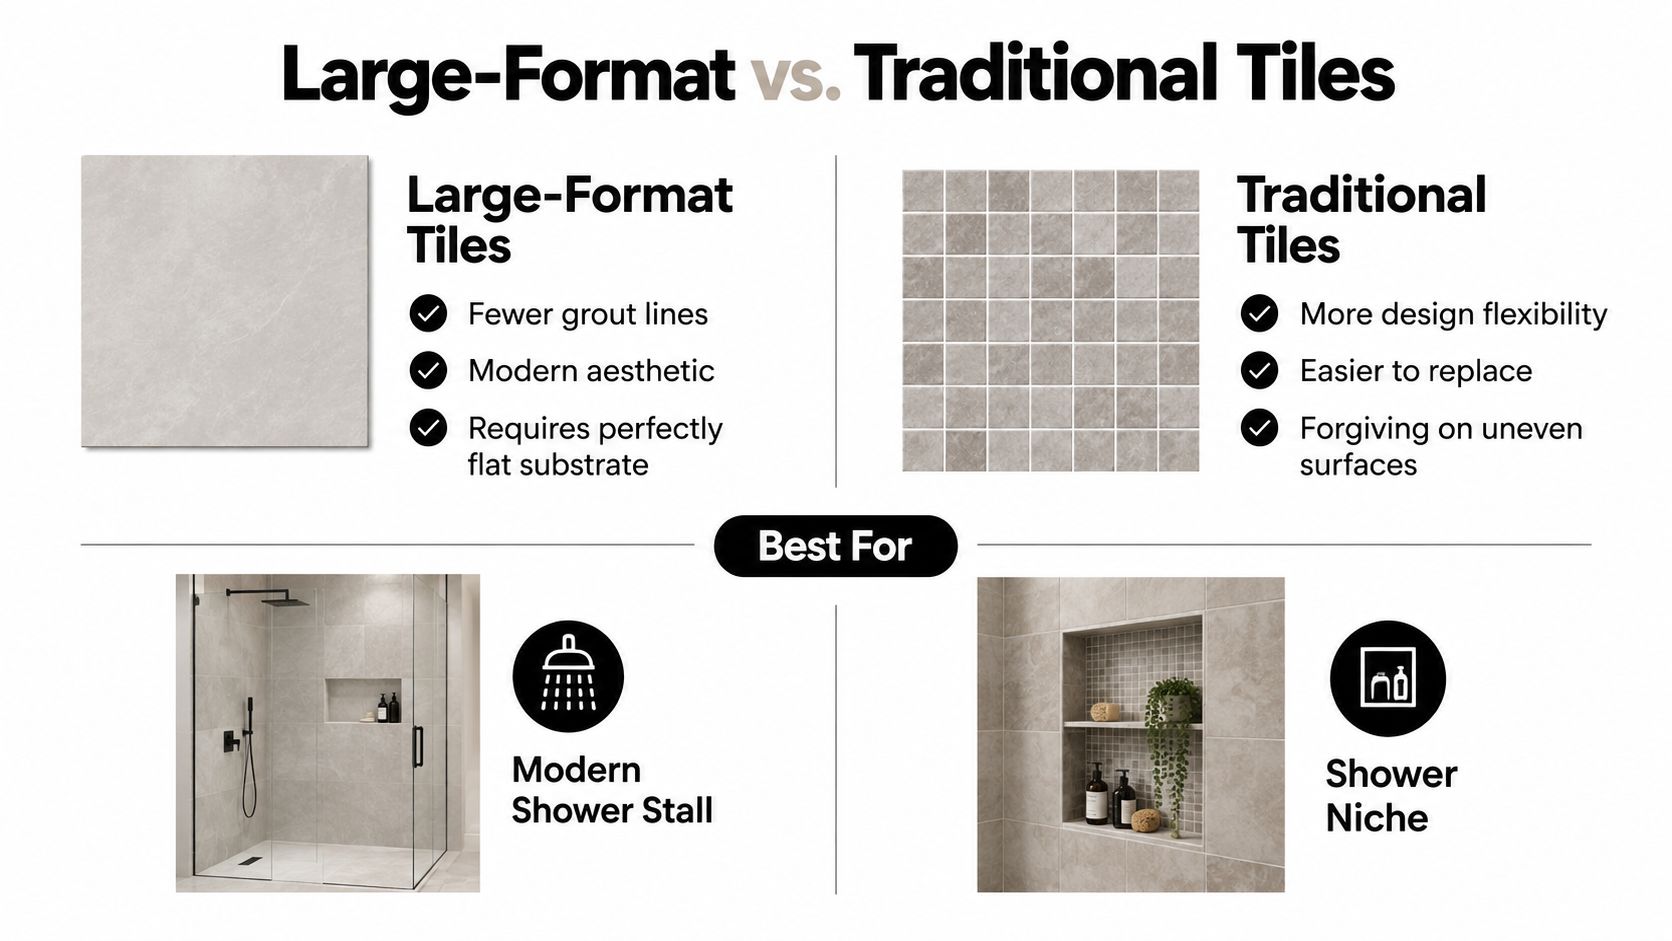
Walls are usually the strongest application for large panels because the surface can remain continuous and the layout is easier to control. Floors ask more from the tile. They need drainage, traction, edge support and movement detailing, all while carrying foot traffic and wet contamination.

The slip-resistance category should be confirmed from the product documentation rather than assumed from the tile size. The Australian trend towards matte and structured finishes reinforces the practical point that surface finish and wet-area use must be specified together.

Don't confuse a clean look with a flexible assembly

Large panels don't remove movement from a building. Timber floors, concrete transitions, wall junctions and changes of plane can move differently. Without suitable movement joints, a crack can telegraph across a broad panel instead of stopping at a grout line.

For many Melbourne bathrooms, the sensible arrangement is large format tile on walls, with smaller structured tile or mosaic on a shower floor where the fall and grip demand more flexibility. A linear drain and a carefully designed single-plane fall can make a larger floor format more workable, but that decision belongs in the drainage and substrate design, not after the tile has been ordered.

Registered Builders, Contracts, and Warranty in Victoria

The person laying tile and the person responsible for the domestic building contract aren't always the same person. Tiling by itself isn't a trade category that requires registration in every circumstance, but Victorian domestic building thresholds can make registration and contracting obligations relevant to the renovation as a whole.

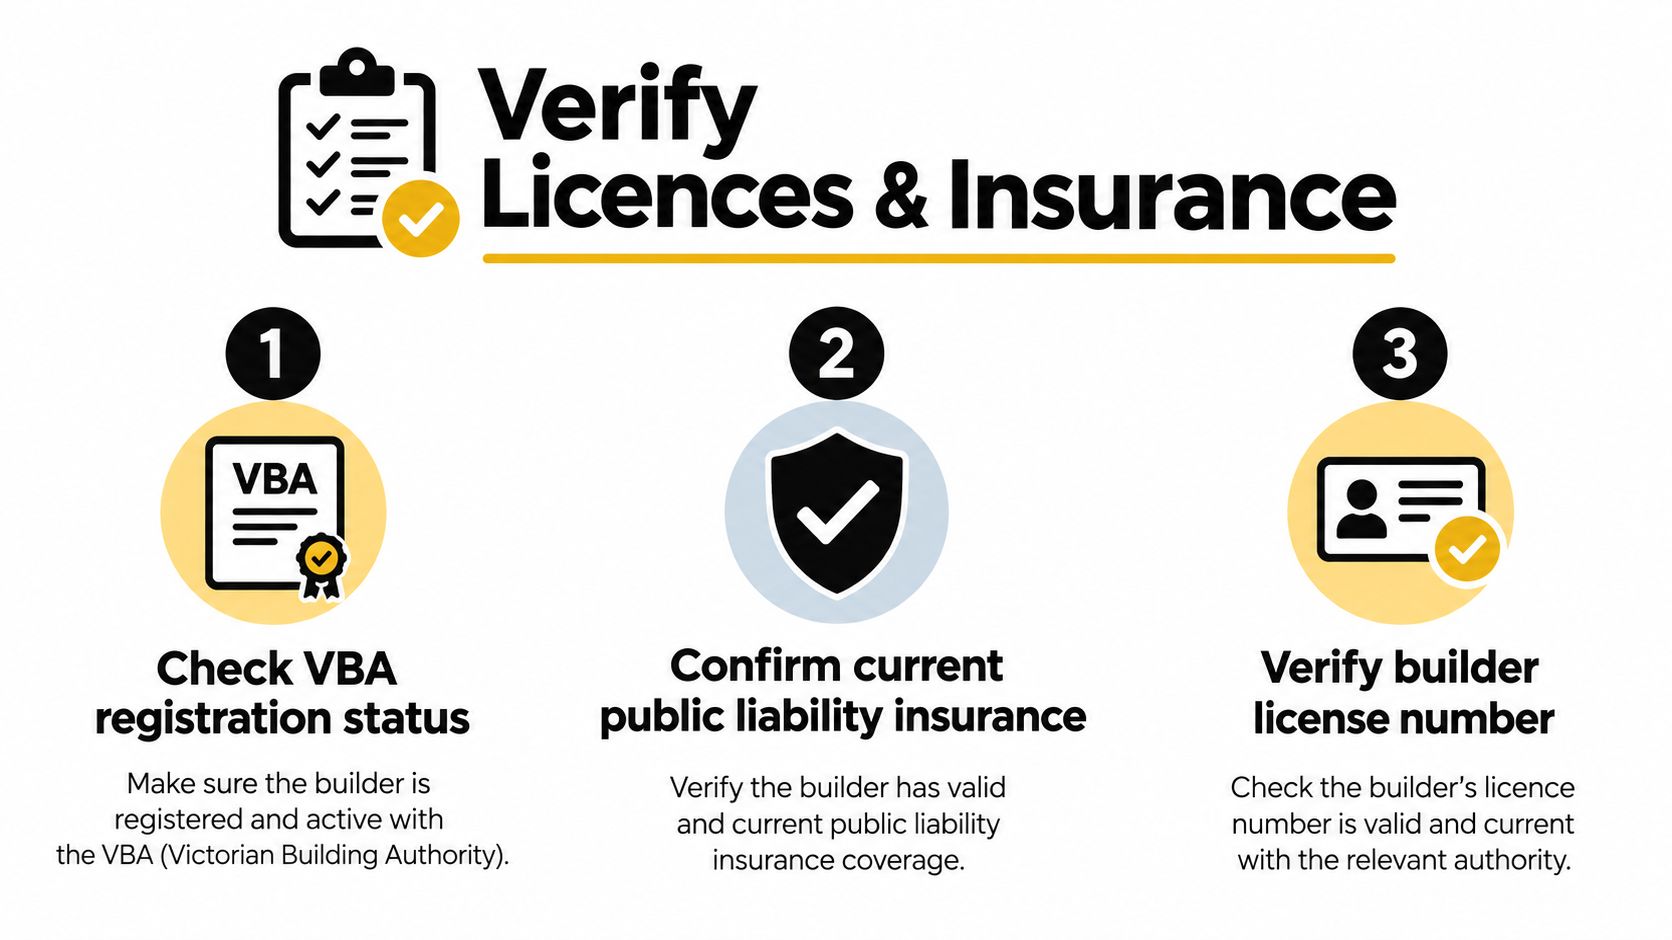
Victoria requires a registered building practitioner for domestic building work where the total cost, including labour and materials, exceeds $10,000, and registration must be approved before work starts. Consumer Affairs Victoria's registration checklist also makes clear that submitting an application isn't the same as holding approved registration.

Check who carries responsibility

For a bathroom renovation, ask who is coordinating the waterproofing, screeding, plumbing, electrical work, tiling and certification. If one builder controls the complete scope, that builder should explain the registration category, contract arrangement and responsibility for defects.

Consumer guidance states that a major domestic building contract is required for work worth more than $10,000, and that from 1 July 2026 builders must have Home Warranty insurance for work worth more than $20,000. Victoria's guidance on builders and domestic building projects also identifies wall and floor tiling as work that doesn't require registration by itself, while confirming that the overall domestic-building threshold still matters.

A written scope should identify demolition, substrate correction, waterproofing, falls, tile supply, adhesive, grout, silicone, trims, screens, waste protection, curing and handover documents. Clear records help homeowners reduce project risk with contracts, particularly when several trades work in the same wet area.

An infographic showing five key regulations for builders, contracts, and construction warranties in Victoria, Australia.

What a credible proposal should show

Look for a registration check where relevant, a detailed written scope, named waterproofing responsibility and confirmation of the applicable AS 3740 process. The quote should also state how the substrate will be surveyed and corrected, rather than assuming the existing wall or floor is ready.

Home Warranty insurance and contract requirements don't guarantee a perfect tile installation, but they give the renovation a clearer legal and documentary framework. That framework becomes more valuable as the project involves heavier panels, waterproofing interfaces and expensive finishes.

Putting the Renovation Plan Together

A reliable large-format renovation starts with a drawing and ends with a documented handover. Before ordering tile, confirm the room dimensions, door swings, niche locations, waste positions, shower screen lines and the direction of any feature veining. A beautiful slab pattern can lose its impact if the layout leaves narrow edge cuts or places a joint through the focal point.

A six-step checklist graphic outlining the renovation plan process for large format tiling projects.

Build the specification before the quote

Use the following as a site meeting checklist:

  • Confirm the scope: Record demolition, plumbing, electrical work, waterproofing, screeding, tiling, trims, silicone, shower screens and final cleaning.
  • Survey the substrate: Measure flatness, identify structural transitions and decide whether grinding, patching, screeding or self-levelling is required.
  • Specify the tile system: Note the tile thickness, dimensions, weight, finish, adhesive compatibility and intended room.
  • Design the wet area: Resolve AS 3740 waterproofing extents, falls, penetrations, hobs, niches and waste locations before fixing begins.
  • Map movement joints: Show perimeter gaps, changes of plane and any structural transitions on the tile layout.
  • Protect the finished work: Agree curing time, access restrictions, surface protection and the method for cleaning adhesive and grout residue.

The project should also allow realistic lead times for panels, replacement stock, trims and specialist equipment. Large-format tile installation cost guidance can help a homeowner frame the discussion, but the actual price depends on access, demolition, substrate condition, tile selection and the amount of cutting.

Trends worth planning for

Melbourne projects are using thinner Kerlite slabs, bookmatched veining, broad wall cladding, slip-rated outdoor porcelain and more detailed mitred edges. Those finishes look controlled because the layout and fabrication were controlled first. A mitred niche, for example, needs accurate wall geometry, consistent panel thickness and a fixing sequence that protects exposed edges.

At handover, request as-built drawings where relevant, waterproofing and product warranty certificates, care instructions and a documented maintenance schedule. Keep the tile batch information and spare pieces as well. Future repairs are easier when the exact product, finish and joint colour are recorded.

Melbourne Tiling Services P/L provides bathroom and ensuite renovations, waterproofing, screeding, self-levelling and large-format Kerlite, porcelain and stone installation across Melbourne and greater Victoria. For a site-specific assessment of substrate preparation, waterproofing and panel layout, visit Melbourne Tiling Services P/L and request a renovation discussion before choosing the tile size.

Floor Slope for Drainage: Australian Guide 2026

You've chosen the tiles, ordered the frameless screen and perhaps even removed the old vanity. Then the shower is used for the first time, and water sits along the wall instead of travelling cleanly to the waste. The finish may look expensive, but the floor slope for drainage was decided too late.

That problem is common in Melbourne bathroom renovations, especially where an older timber floor, shallow setdown or poorly positioned waste leaves little room for a compliant screed. A drainage fall isn't a cosmetic detail. It affects waterproofing, tile installation, thresholds, accessibility and the protection of the building below. The correct fall must be planned before demolition and coordinated between the builder, plumber, waterproofing contractor and tiler.

Table of Contents

Why Floor Slope for Drainage Matters in Australian Bathrooms

Ponding water is the visible warning. The less obvious risk is where that water goes afterwards. If a bathroom floor doesn't drain properly, repeated wetting can place pressure on junctions, penetrations and waterproofing details. In timber homes, a poorly resolved wet area can also expose the subfloor and adjoining structure to ongoing moisture.

Australian site drainage has long followed the same basic principle. External surfaces around a slab must grade away from the building, with a minimum fall of 25 mm over the first metre in low-rainfall areas for reasonably impermeable surfaces, or 50 mm over the first metre in other cases, as set out in the NCC Housing Provisions drainage requirements. Those gradients equal 2.5% and 5%, respectively. Internal wet areas apply their own requirements, but the principle is identical: water needs a deliberate path to a waste or away from the building.

Water leaking onto the bathroom floor from a glass shower enclosure indicating a potential drainage failure.

Why Melbourne retrofits are difficult

New construction gives the plumber and builder more control over the waste location, slab recess and finished floor level. A retrofit often gives you an existing slab or timber structure, a fixed bathroom doorway and a waste that sits too far from the shower's lowest point. Raising the floor can create a step into the hallway. Lowering the structure may involve carpentry, structural assessment and changes to plumbing connections.

A standard rule such as “use 1:80” doesn't solve those constraints on its own. The team must calculate the distance from the furthest wet point to the waste, establish the finished tile level, allow for adhesive and tiles, then check that the membrane and substrate can be formed without creating a thin or unstable edge.

Practical rule: Set the waste position and finished floor levels before the screed is ordered. A tile can hide a minor visual irregularity, but it can't correct a missing drainage path.

The same coordination matters in balconies and leak remediation. A balcony may appear reasonably level while still directing water towards a door or wall junction. A bathroom renovation should therefore begin with levels, not tile selection. Take measurements, locate the waste, inspect the substrate and decide whether the proposed shower is enclosed, hobless or accessible before any surface is removed.

Understanding Fall Ratios and Percentage Calculations

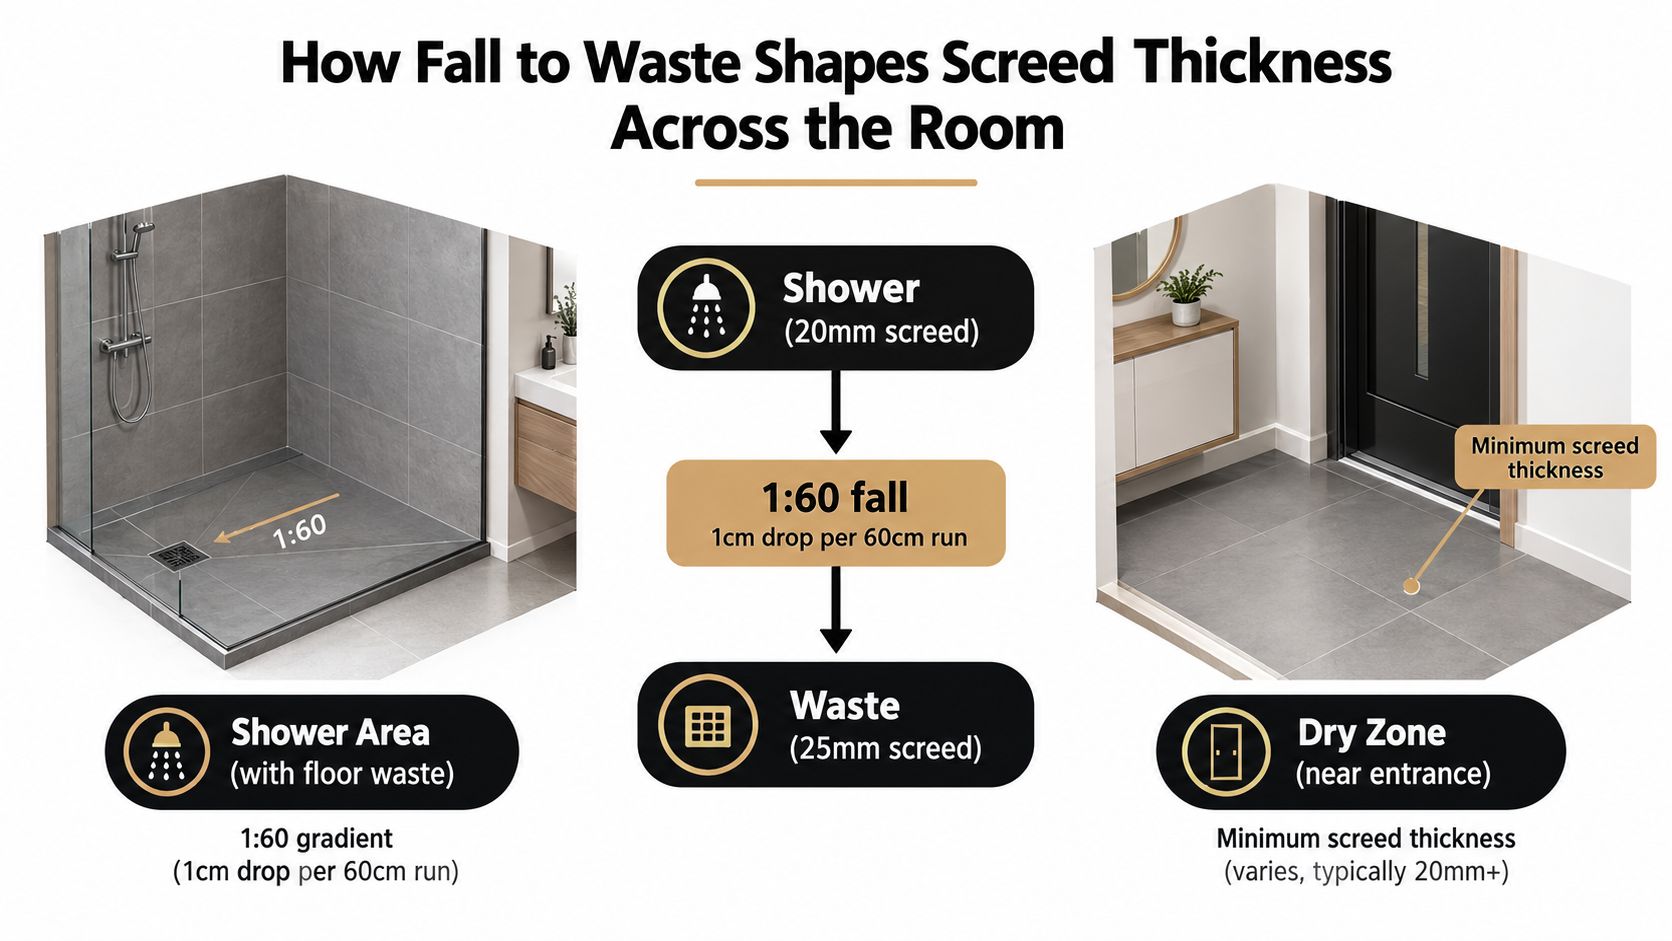
A fall ratio describes the drop over a horizontal distance. A 1:80 fall drops one unit for every 80 units travelled, so a 1,200 mm shower run requires a 15 mm drop, while a 900 mm run requires 11.25 mm. The same 1:80 gradient equals 12.5 mm per metre, or 1.25%, according to the Australian wet-area guidance discussed by Wyatt Tiling in its explanation of getting levels right.

The common conversions are straightforward:

  • 1:100 equals 10 mm per metre, or a 1% fall.
  • 1:80 equals 12.5 mm per metre, or a 1.25% fall.
  • 1:60 equals approximately 16.7 mm per metre.
  • 1:50 equals 20 mm per metre, or a 2% fall.

Worked shower examples

For a 900 mm by 900 mm shower, measure from the furthest corner to the waste, not just across one tile. If the waste is positioned centrally, each corner may need a compound fall. A 1:80 calculation over 900 mm gives an 11.25 mm difference. At 1:60, the difference is 15 mm, and at 1:50 it is 18 mm.

A 1,500 mm-wide walk-in shower needs more depth because the water travels further. At 1:80, the required drop is 18.75 mm. At 1:60, it's 25 mm. At 1:50, it's 30 mm. Those figures affect the screed edge, drain channel height, waterproofing details and the transition into the rest of the bathroom.

Shower Dimension 1:80 Fall (mm) 1:60 Fall (mm) 1:50 Fall (mm) Percentage Equivalent
900 mm 11.25 15 18 1.25% to 2%
1,200 mm 15 20 24 1.25% to 2%
1,500 mm 18.75 25 30 1.25% to 2%

The table shows why a longer shower run can change the construction method. If the waste is 25 mm below the finished tile height, the available screed depth must account for the calculated drop as well as the tile and adhesive build-up. A laser level is useful before demolition because it identifies the existing high and low points, while a straight edge helps expose local depressions that an average reading can miss. Practical tile screeding guidance is valuable here, particularly when the shower requires several planes directing water towards one drain.

A balcony or large bathroom floor must be assessed in the same way. Measure the longest drainage route and check the proposed gradient at every edge. A single flat plane may work towards a linear drain, but a central waste usually needs a compound fall. A 1:100 fall can be acceptable in some general wet-area situations, yet it leaves less tolerance for surface irregularities, tile lippage and construction debris than a faster fall.

Australian Code Requirements for Different Wet Areas

Wet-area drainage isn't governed by one universal number. The correct gradient depends on the shower arrangement, the presence of a floor waste, the finished surface and whether the design must accommodate accessibility. The NCC 2022 Housing Provisions require wet areas with a floor waste to be graded so water can drain, while Australian waterproofing guidance aligned with AS 3740:2021 distinguishes between substrate falls and finished surface falls.

For a substrate beneath a membrane, the minimum fall towards a waste is 1:100 where a waste is provided. Finished shower floors generally need a steeper fall. The technical distinction matters because a membrane substrate that ponds can hold moisture beneath the finished layer, while a finished tile surface that drains slowly can affect hygiene, slip resistance and adjacent building elements. The Stormtech technical whitepaper on wet-area drainage explains this relationship between substrate and finished falls.

Three common Australian arrangements

An enclosed shower recess with a hob can retain water within the shower zone, giving the installer a clear boundary and a shorter path to the waste. A hobless shower removes that physical barrier, so the fall, drain position and waterproofing detailing must work together. A linear drain at the shower edge changes the geometry because the floor can fall in one primary direction instead of forming multiple planes towards a central grate.

Accessible and zero-threshold showers require more careful coordination. Victorian guidance notes a continuous fall between 1:80 and 1:50 where a floor waste is installed, while accessible configurations may use 1:60 to 1:80 inside the shower and 1:80 to 1:100 elsewhere. That range reflects a trade-off. The surface must drain, but the surrounding floor also needs to remain suitable for movement and entry.

A chart showing Australian building code requirements for minimum floor drainage slopes in various wet areas.

An external balcony or verandah needs a drainage strategy that protects the building envelope, not just the visible finish. The relevant waterproofing design must account for falls, membrane detailing, door thresholds, overflow paths and junctions. A laundry may need a less aggressive general floor fall than a shower, but the waste position still needs to support practical drainage.

Grate size doesn't replace a correctly formed fall. A larger waste may receive water more easily, but it won't correct a low spot several hundred millimetres away. In a Melbourne renovation, the builder and tiler should also confirm whether the work requires a building permit or triggers other upgrade obligations. Don't assume that a generic diagram or a tile manufacturer's installation note settles the compliance question. The wet-area classification, drain arrangement and accessibility brief must be resolved as one design.

For detailed membrane sequencing and junction treatment, the wet-area waterproofing service guidance can help homeowners understand what should be coordinated before tiling begins.

Construction Methods to Achieve Correct Falls

The construction method determines how much control the installer has over the fall. Traditional sand-cement screeding remains flexible, especially when an existing Melbourne bathroom has an unusual shape or an off-centre waste. Preformed bases offer repeatable geometry. Self-levelling compounds are useful for correction, but the name is misleading when the objective is a directional slope.

Traditional screeding

A skilled tiler can shape a sand-cement screed from the perimeter towards a grate or channel, forming the compound planes needed around a central waste. The method suits custom shower footprints and allows the installer to adjust the build-up around existing levels. Its weakness is workmanship. A screed can appear smooth under a straight edge yet retain a shallow depression that collects water after the tiles are installed.

Preformed shower bases

Preformed systems from manufacturers such as Wedi or Tile Redi provide a manufactured fall and can simplify waterproofing integration. They're useful where the drain position matches the base and the finished height can be coordinated early. The limitations are equally clear. The base dimensions may restrict the layout, the waste must align accurately, and large-format tile layouts may need careful cutting around the formed geometry.

Self-levelling compounds

Self-levelling products can correct minor variations over a sound substrate, but they naturally seek a level surface. They aren't a substitute for a formed screed where water must travel consistently to a waste. Product compatibility, primer selection and waterproofing requirements must be checked before application, particularly where underfloor heating is present.

Method Typical Fall Achieved Setup Time Best For Key Limitation
Sand-cement screed Custom falls from 1:100 to steeper shower gradients Depends on site preparation and curing Irregular layouts and retrofit bathrooms Relies heavily on installer skill
Preformed shower base Factory-formed directional fall Faster once levels and waste are ready Standardised shower footprints Limited by base geometry and drain alignment
Self-levelling compound Minor substrate correction Relatively quick preparation Localised surface irregularities Doesn't reliably create a drainage fall by itself

Screed depth also controls the doorway. If the bathroom floor rises too far, the threshold can become a trip point. If the screed is forced too thin near an edge, cracking or debonding can follow. The plumber, builder and tiler should agree on waste height, setdown and finished tile level before the screed is mixed.

The same principle applies to external slabs and shed surrounds. A practical drainage guide by Firm Foundations is useful background when considering how a hard surface should shed water away from a structure. It reinforces a point that applies indoors too: drainage has to be built into the supporting surface, not painted onto the finish.

When Steeper Falls Create More Problems Than They Solve

A steeper fall can clear water faster, but more slope isn't automatically better. Australian wet-area guidance uses a range from 1:80 to 1:50 for relevant shower floors with a waste, while a substrate fall of 1:100 may apply beneath a membrane in the circumstances described by AS 3740:2021-aligned waterproofing guidance. The installer still has to keep the surface usable, tileable and compatible with the room's access requirements.

Large-format tiles expose poor geometry quickly. When a broad tile crosses several changing planes, the edges can sit at visibly different heights. That can create lippage, uneven adhesive coverage and awkward cuts around a central waste. Small-format mosaics often follow compound falls more easily, while a large porcelain panel needs a much more deliberate layout.

An infographic comparing the pros and cons of implementing steeper drainage falls in floor construction projects.

The accessibility trade-off

A zero-threshold shower has no raised hob to contain water, so the floor must transition smoothly into the surrounding bathroom. An aggressive fall can create a noticeable slope outside the shower, especially when the existing floor envelope is shallow. That may conflict with accessible movement requirements and make the entry uncomfortable or unsafe for someone using mobility equipment.

Water can also bypass a waste if the installer creates the wrong high point. A floor that looks steep overall may still direct water towards a wall, door or screen rather than the grate. This is why the drain position matters as much as the ratio. A laser level, straight edge and test pour before the membrane and tile installation can identify the problem while correction remains practical.

A useful fall is the one that takes water to the waste without making the room difficult to enter, tile or maintain.

Steeper isn't a cure for a misplaced waste, a blocked grate or a poorly detailed membrane. In many retrofits, a carefully designed 1:80 shower fall with a suitable linear drain performs better than a dramatic gradient forced into the wrong layout.

Why Registered Builders Matter for Bathroom Renovations

Floor slope for drainage sits inside a larger construction system. The builder must coordinate structural work, plumbing penetrations, waterproofing, falls, thresholds and finishes. Treating the task as a tiling-only decision is how retrofit problems become expensive.

In Victoria, a person must be registered with the Building and Plumbing Commission before performing domestic building work valued above $10,000, and registration applies to the individual rather than the company, as explained in the Victorian registration guidance. Bathroom projects that combine demolition, carpentry, plumbing, waterproofing, electrical work and tiling can require registration even where an individual trade might otherwise fall within a single-trade exception.

Victoria also has a specific Domestic Builder, limited to bathroom, kitchen and laundry renovation registration category. Applicants for that category must provide qualifications, evidence of project work, a technical referee report, a criminal history check, photo identification and declarations, according to the BPC registration application.

What to check before signing

Start with the individual's registration details, not just the trading name on a van or website. The Victorian consumer guidance on builders and tradespeople explains that single-trade exceptions can include tiling, plumbing, painting, glazing and electrical work, but a combined renovation or work requiring a building permit changes the position.

Ask for a written scope that identifies who is responsible for:

  • Level verification: Existing slab, timber floor and threshold measurements.
  • Drainage design: Waste location, fall direction and overflow considerations.
  • Waterproofing: Membrane system, substrate preparation and inspection points.
  • Trade coordination: Plumbing, carpentry, electrical, screeding and tiling sequence.
  • Documentation: Registration, insurance and relevant compliance certificates.

A registered practitioner isn't automatically a skilled wet-area installer, so check previous bathroom and leak-remediation work as well. Melbourne Tiling Services P/L coordinates bathroom renovations, waterproofing, screeding, self-levelling and tiling with other licensed trades, which is one model for managing the interfaces that determine whether a drainage fall works in practice.

A checklist infographic titled Choosing a Registered Builder for Victorian Renovations with five important professional steps.

Planning Your Drainage Strategy from Start to Finish

A reliable drainage plan follows the construction sequence, not the tile catalogue.

  1. Classify the wet area. Decide whether the project includes an enclosed shower, hobless shower, accessible bathroom, balcony, laundry or another wet-area arrangement.
  2. Map the levels. Locate the waste, measure the longest drainage path and record the existing floor, doorway and adjoining room levels.
  3. Choose the build-up. Compare a formed screed, preformed base or corrective compound against the available depth and chosen tile format.
  4. Coordinate the trades. Confirm plumbing heights before screeding, then schedule waterproofing and inspection hold points before adhesive and tiles conceal the substrate.
  5. Check the paperwork. Verify the builder's registration, contract scope, waterproofing system and any permit or certificate requirements.

For a new build, the plumber can position the waste while the slab and setdown are still adjustable. For a retrofit, the solution may involve a recessed substrate, a linear drain, a smaller shower footprint or a carefully designed threshold. If the property has an active leak or uncertain external drainage, a resource such as emergency drainage help from EZ Plumbing can help frame the broader drainage investigation.

Before tiles arrive, confirm the membrane manufacturer's compatibility with the selected substrate and screed method. A documented drainage system installation sequence also gives the homeowner a clearer record of what was formed, tested and covered.


Melbourne Tiling Services P/L can assess existing levels, design practical shower falls, complete waterproofing and screeding, and coordinate the tiling sequence for bathroom renovations across Melbourne. Visit Melbourne Tiling Services P/L to arrange a quote and discuss whether your project needs a standard shower fall, a zero-threshold solution or leak remediation.

Preventing Shower Leaks: A Practical Melbourne Guide

You notice it when you step onto the carpet outside the bathroom and the fibres feel sodden under your feet. The shower screen looks intact, the tiles still look presentable, and yet the skirting board is swelling or the room below has a faint brown mark on its ceiling. By the time water becomes visible outside the shower, it may already have travelled through joints, penetrations or the substrate.

Preventing shower leaks isn't about buying a better tube of silicone after the damage appears. It starts with the decisions made during a bathroom renovation, including the substrate, floor fall, membrane coverage, drain, screen and the people responsible for signing off the work. In Victoria, registered builders and waterproofing practitioners must work within the AS 3740 and NCC 2022 framework. The practical question is whether those requirements have been properly translated into the shower being built in your home.

Table of Contents

Why Shower Leaks Happen in Melbourne Homes

A shower leak is rarely one dramatic failure. More often, it's a chain of small decisions that drift away from the required construction detail. A membrane may be incomplete, the floor may hold water, a penetration may be left unsealed, or a screen may later be fixed through the waterproofing.

Australian building reviews and consultation material indicate that between 20% and 40% of modern multi-unit residential buildings have some form of waterproofing defect, with leaking showers, bathrooms and balconies repeatedly appearing among the common defect types over the past decade. The same review estimates the annual economic cost of residential apartment waterproofing defects at about A$121 million to A$314 million. These figures are discussed in the Australian review of waterproofing failures, and they explain why a shower shouldn't be treated as a cosmetic tiling job.

An infographic titled Why Shower Leaks Happen in Melbourne Homes, illustrating four main causes and results.

The house type changes the risk

A Melbourne brick home with timber joists doesn't respond to trapped moisture in the same way as an apartment with a concrete slab. Timber framing can move, swell and decay when moisture remains hidden. Concrete won't rot, but water can still migrate through slab edges, wall cavities and service penetrations, damaging finishes and neighbouring rooms.

Older fibro shower rooms, acrylic-lined bathrooms built over timber, and newer tiled apartments may all require different investigation before retiling. A registered builder should identify the existing substrate, check for deflection or swelling, and establish whether the old waterproofing can be retained. Covering a questionable base with fresh tiles doesn't remove the original failure.

Start with the wet-area chain

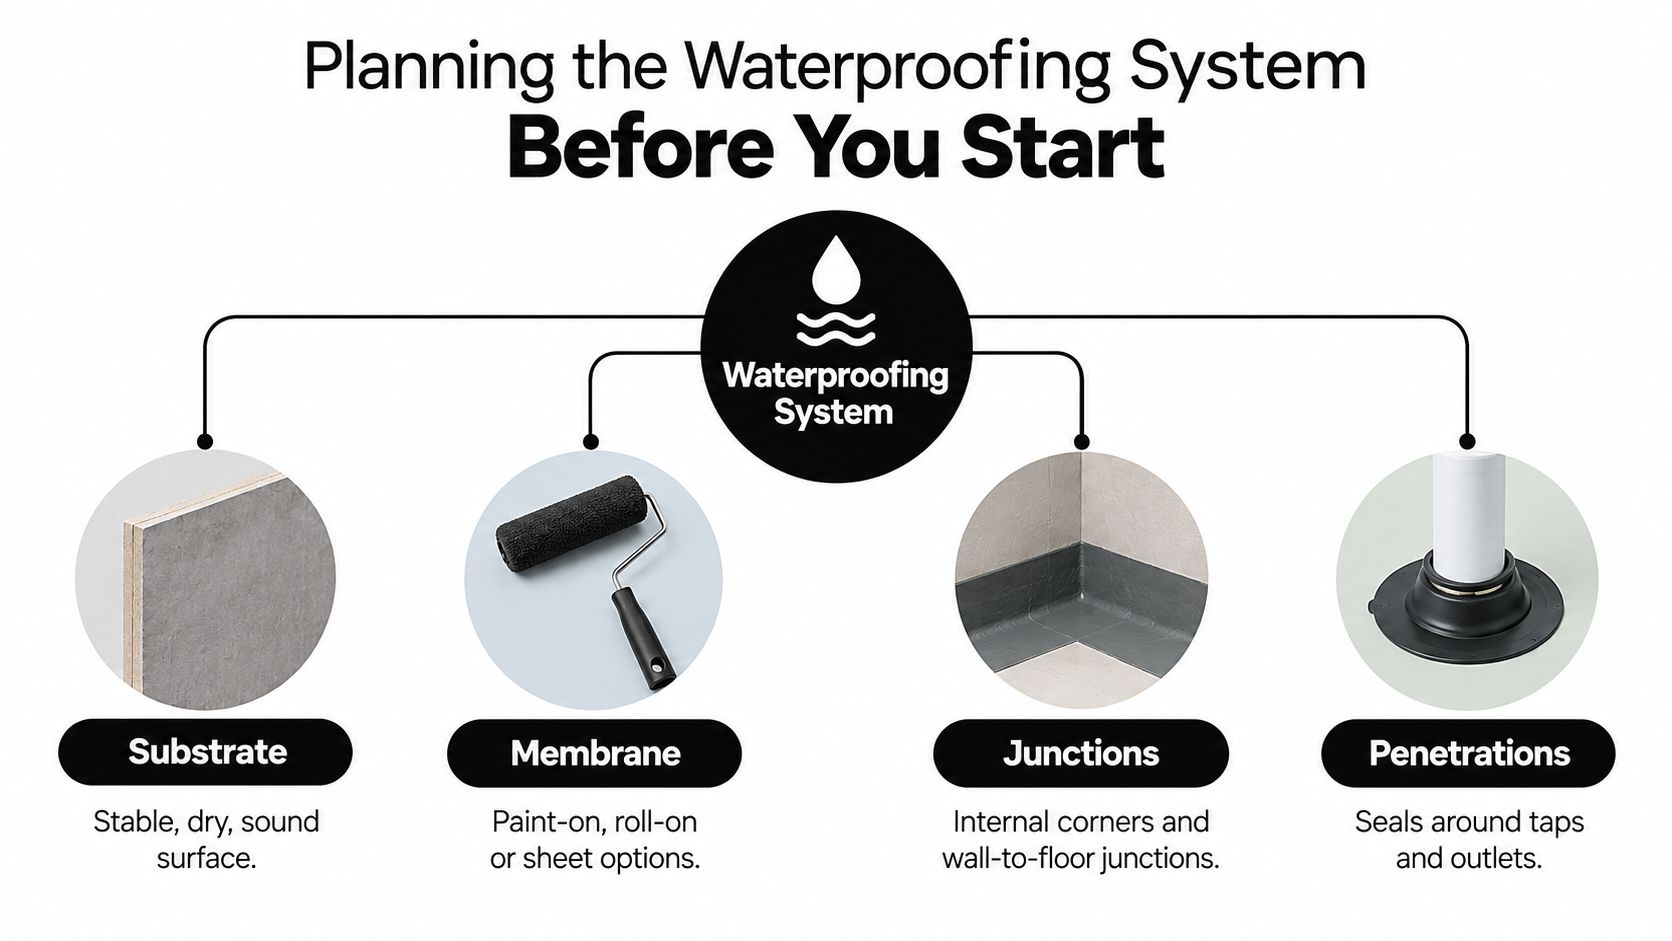
Think of the shower as a connected system:

  • Substrate: It must be stable, sound and suitable for the membrane and tile system.
  • Fall: Water needs a clear path to the waste rather than a place to pond.
  • Membrane: The waterproof layer must cover the required surfaces continuously.
  • Junctions: Corners, changes of plane, hobs and penetrations need deliberate detailing.
  • Screen and drain: Later fixtures mustn't compromise the waterproofing or obstruct drainage.

Practical rule: If the quote only says “waterproof bathroom” without describing coverage, system and testing, ask for the construction detail before work starts.

The Five Most Common Causes of Shower Leaks

The most useful way to assess a leak is to match what you see on site with the construction decision that failed. A stained ceiling might come from a shower waste, a membrane defect or water escaping at the screen. Guessing from the stain alone often leads to patching the visible symptom rather than repairing the source.

Five failure points worth checking

Missing or incomplete membrane is the first major concern. Renovations sometimes proceed with a tiler applying adhesive and tiles over a surface that was never waterproofed by a properly engaged practitioner. Tiles and grout aren't the waterproofing system. In the shower area, the floor, required wall surfaces, junctions and penetrations all need compliant treatment under the applicable requirements.

Insufficient fall to the waste leaves water sitting against tile edges, seals and junctions. Victorian Building Authority guidance points to a minimum 1:80 fall in shower areas, as outlined in its wet-area waterproofing guidance. A flatter surface may look acceptable once tiled, but it gives water more opportunity to track beneath a screen or remain around the drain.

Failed grout and silicone often appears at the wall-floor corner or at a change of plane. Grout isn't a flexible sealant, so movement can open a joint even when the tiles remain firmly attached. Those junctions need suitable mould-resistant silicone or another specified flexible seal, rather than a hard acrylic product used because it was cheaper or easier to apply.

Unsealed penetrations include mixer bodies, tap spindles, shower rose brackets, niches and screen-related fixings. Each hole through a wet-area surface is a potential route behind the finish. The problem may not show until water has travelled through the lining or framing.

Substrate movement is common where timber joists flex, sheets are compressed, joints aren't properly treated, or the surface wasn't primed for the membrane system. A crack along a grout line can be a finish issue, but repeated cracking, soft lining or movement underfoot points to a base that needs investigation.

Cause What You See On Site Standard Reference
Missing or incomplete membrane Damp lining, loose tiles or moisture outside the shower AS 3740 and NCC wet-area waterproofing provisions
Poor fall to waste Ponding, slow drainage or water sitting at the screen edge AS 3740 guidance, including the 1:80 minimum shower fall
Failed grout or silicone Open wall-floor joints, cracked corners or mould at changes of plane Wet-area junction and movement-joint detailing
Unsealed penetrations Damp around mixers, brackets, niches or fixings Waterproof treatment to shower-area penetrations
Moving substrate Cracked grout, flexing sheets, swollen edges or loose tiles Suitable substrate preparation and membrane-system installation

Building a Leak-Free Shower From the Substrate Up

The finished tile tells you very little about the quality of the waterproofing underneath. A reliable shower is built in sequence, and each stage makes the next stage possible.

Begin with a base that won't move

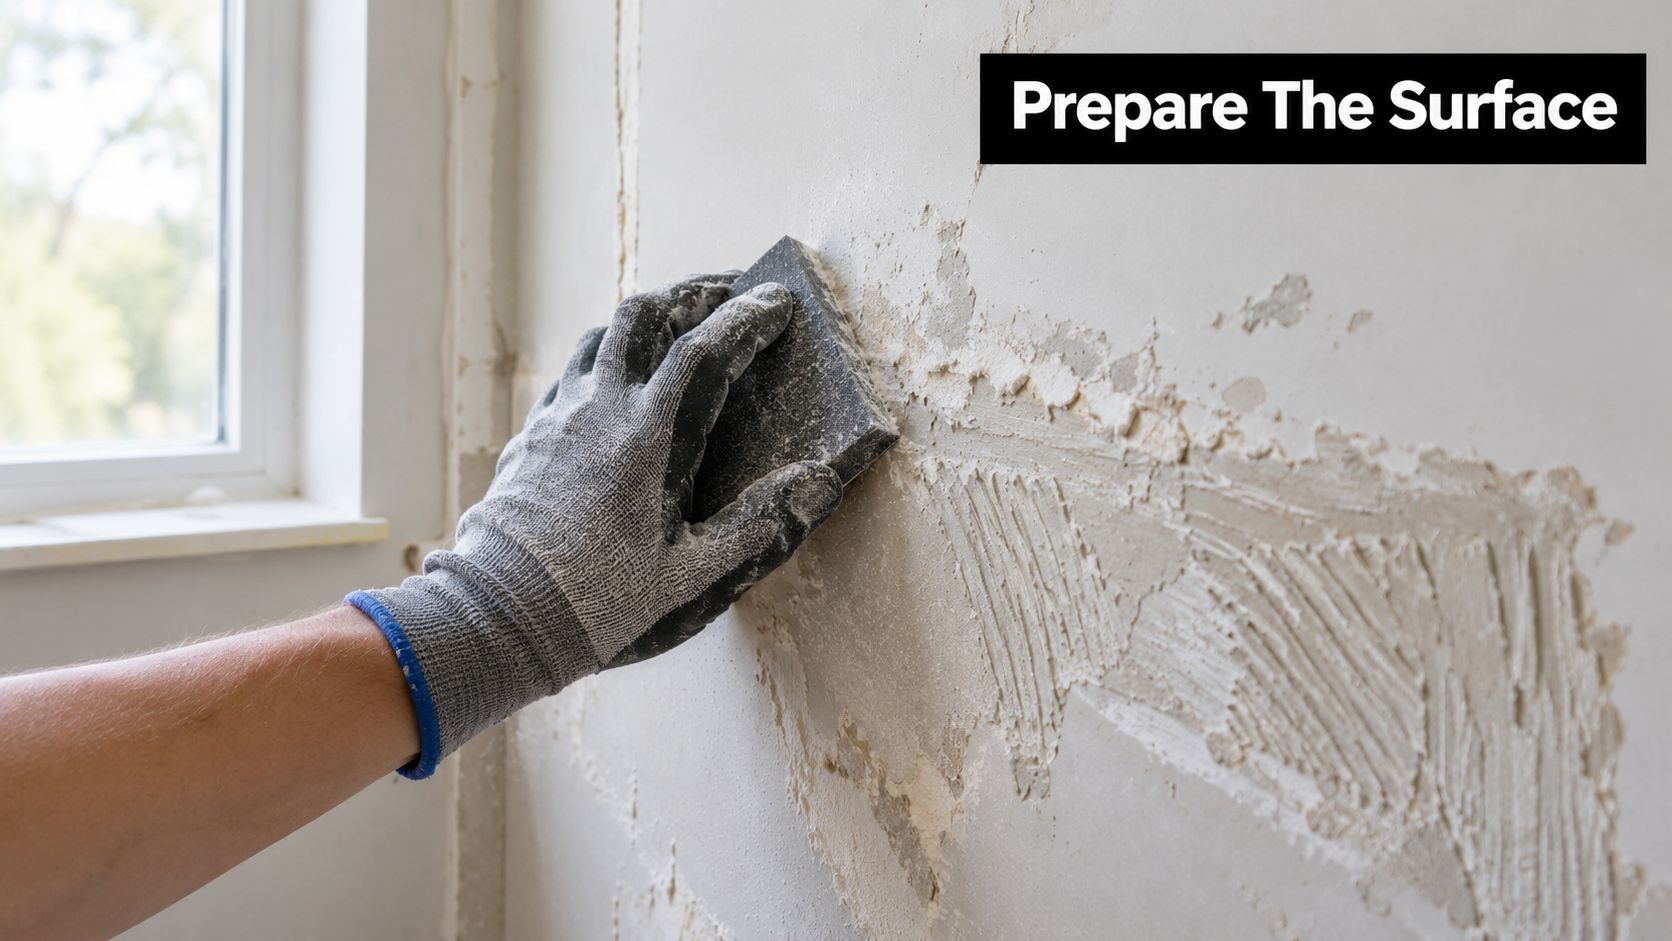
Remove loose materials and inspect the structural surface. Plywood or compressed fibre-cement sheets should be firmly fixed, joints should be treated as required by the system, and the base shouldn't deflect, swell or carry old water damage. If the substrate is compromised, a new membrane won't turn it into a sound floor.

For a practical explanation of the first stage, see substrate preparation for tiling. The preparation may look slow compared with rolling on a product, but it prevents the membrane and tile finish from being asked to bridge movement they weren't designed to absorb.

Form drainage before waterproofing

The shower floor must fall towards a suitable waste. AS 3740 guidance identifies 1:80 as the minimum fall in shower areas, and the fall needs to be formed before the membrane and tiles are installed. A centrally positioned waste and a linear drain can both work, provided the screed, grate and membrane details suit the assembly.

Don't rely on tile adhesive to correct a poorly formed floor. It creates inconsistent bedding, can leave unsupported tile edges and may produce a surface that still holds water. The drain also needs to be set at the correct height for the tile, adhesive and membrane system.

Apply the specified membrane system

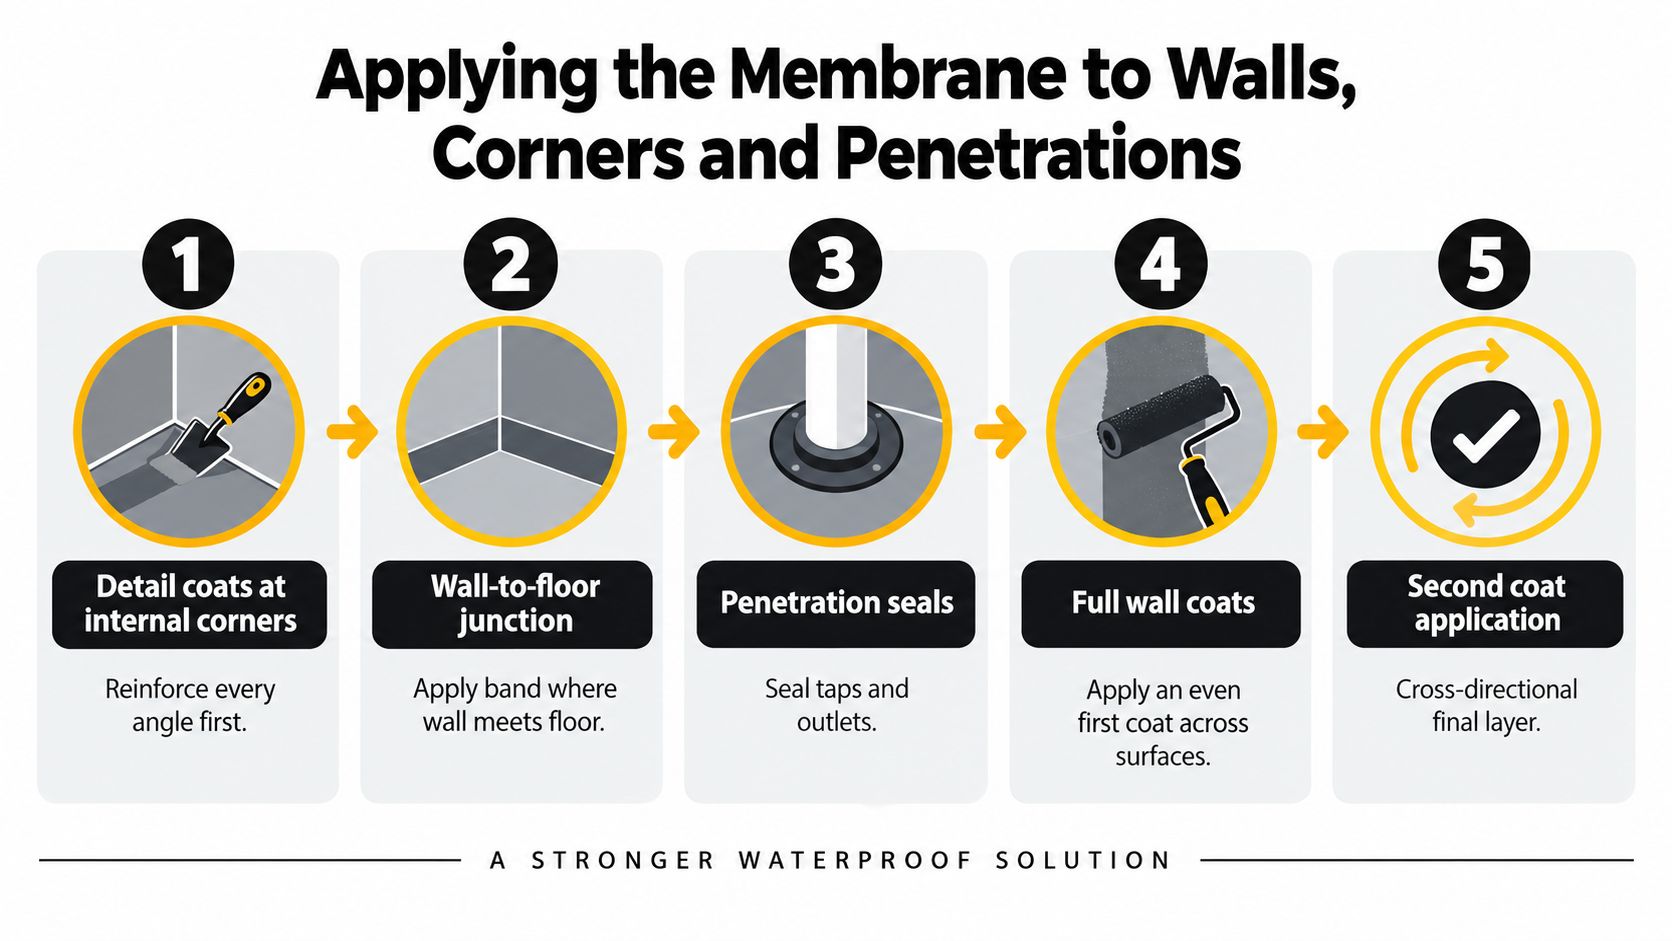
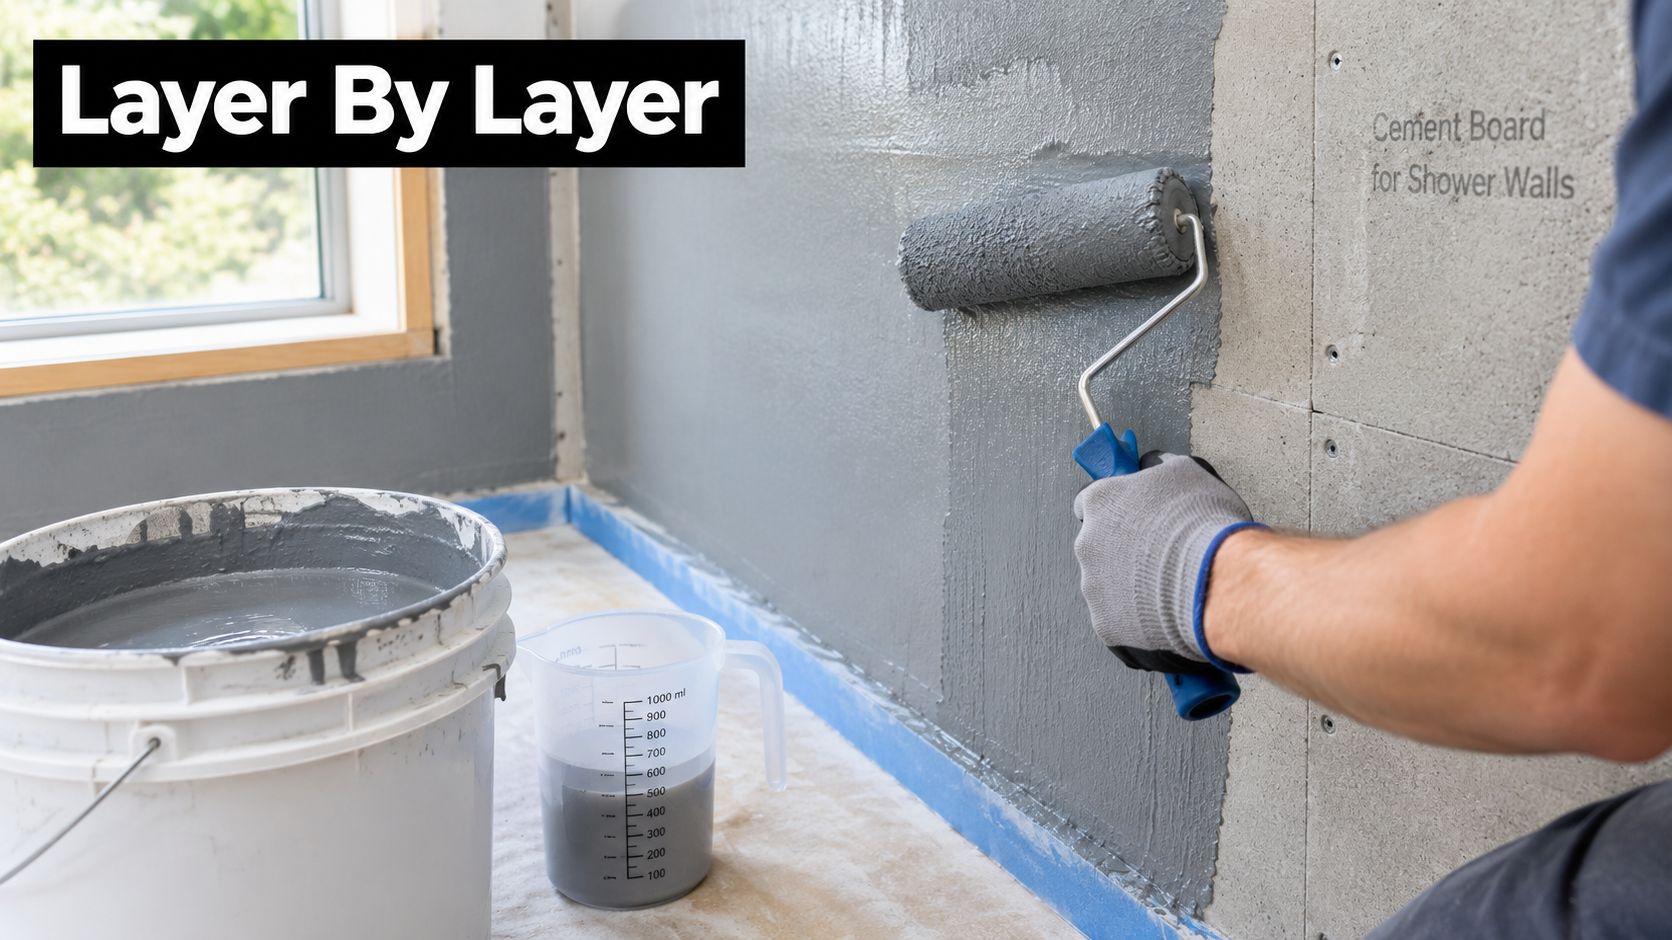
Once the surface is clean and suitably primed, the waterproofer applies the selected system to the required coverage. Liquid acrylic and polyurethane systems are common options, but the product data sheet controls primer choice, coat application, curing and detailing. Corners, hobs, wall-floor junctions, pipe penetrations and drain connections deserve more attention than broad open areas because that's where continuity is most often lost.

The shower walls must be waterproofed to at least 1,800 mm above the floor substrate, and the exact floor and wall coverage depends on the shower configuration. A shower within 200 mm of a wet-area exit requires a vertical water stop, according to guidance on AS 3740 wet-area waterproofing.

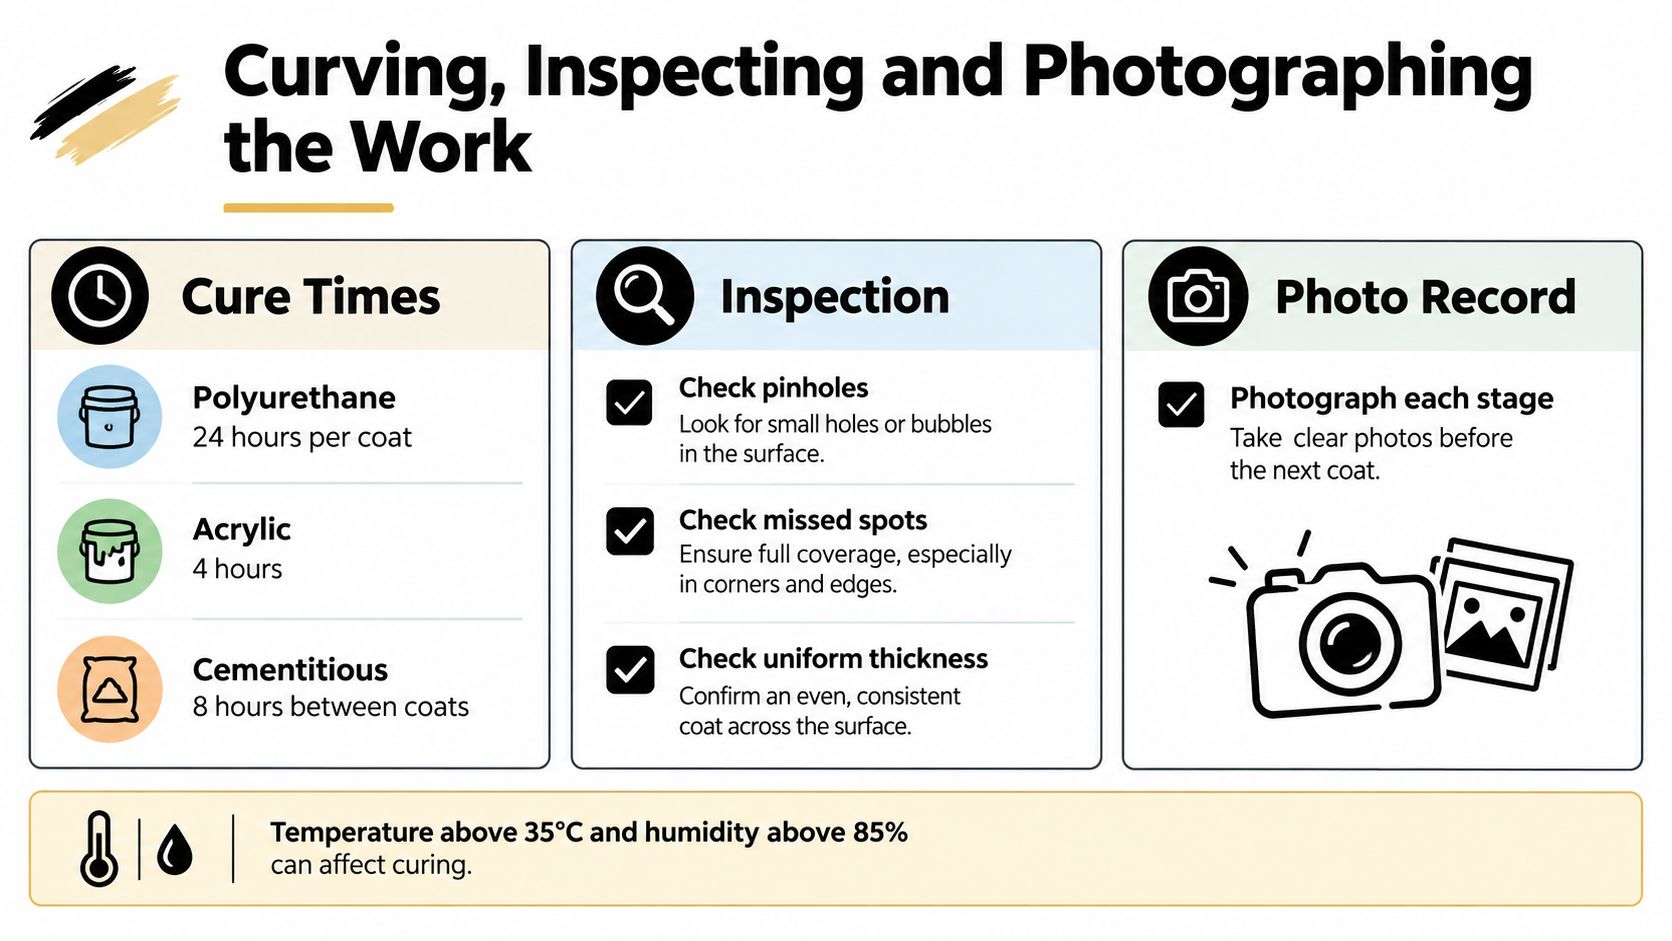
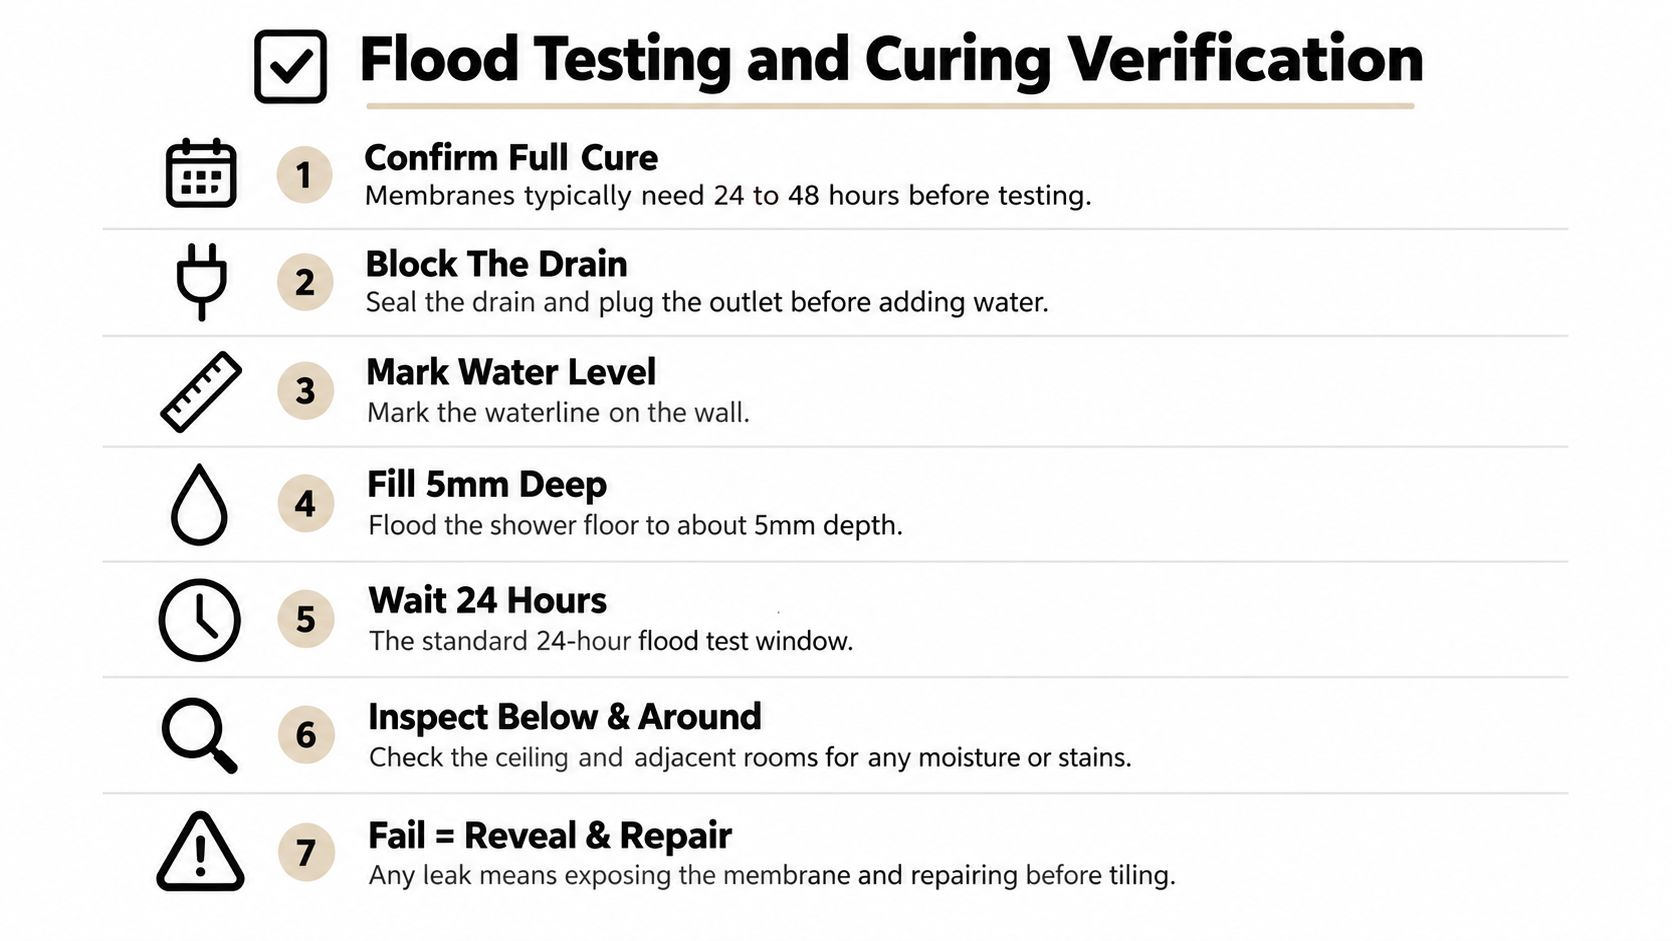
The membrane must cure before testing. Don't let tiling start just because the surface feels dry to the touch.

An infographic showing a four-step guide for building a leak-free shower base following construction standards.

A flood test belongs between waterproofing and tiling. Block the waste with a proper test plug, fill only to the prescribed level for the shower assembly, mark the water level and inspect surrounding areas. Australian guidance describes a shallow perimeter test of no more than 5 mm, while standards material refers to filling to the waterstop angle and holding for a minimum of 24 hours. Follow the approved system and test method rather than improvising a deeper fill.

Here is a useful visual reference for the sequence:

Only after a successful test should the tiler install tiles with a compatible flexible adhesive. Finish changes of plane with the specified flexible sealant, then install the screen without piercing the waterproofing where the system doesn't allow it.

Choosing Membranes, Tiles, Grout and Shower Screens

The product written on a quote matters, but compatibility matters more. A membrane, adhesive, tile and screen can each be reputable products and still form a poor assembly if the substrate, primer, cure time or fixing method doesn't match.

Compare the options before signing

Sheet membranes offer consistent factory thickness and can be useful where the installer is experienced with the particular system. They still require careful treatment at seams, corners, drains and penetrations. Liquid membranes suit irregular surfaces and detailed repairs, but the installer must achieve the specified coverage and dry-film thickness across the whole area.

For a clearer look at the membrane stage, review shower waterproofing membrane systems. The cheaper option isn't automatically the weaker option, but a low quote that removes preparation, detailing or testing is a reliability problem.

System Typical Use Pros Watch For
Sheet membrane Planned shower assemblies and compatible proprietary systems Controlled thickness and clear components Seams, corners, drains and penetrations
Liquid acrylic membrane General wet-area construction and suitable repairs Adaptable around details and irregular surfaces Primer, coat thickness and cure
Polyurethane membrane Areas requiring a flexible liquid system Useful movement tolerance when correctly specified Product compatibility and application conditions
Porcelain tile Floors, walls and higher-wear finishes Dense body and broad design range Correct adhesive, cutting and movement detailing
Ceramic tile Wall finishes and suitable bathroom applications Light, workable and available in many formats Body suitability, edge protection and wet-area use
Cement or polymer-modified grout Standard tile joints Familiar application and repairability Porosity, cracking and cleaning
Epoxy grout Joints needing greater stain and water resistance Dense finish and strong chemical resistance Installation skill and difficult cleanup
Framed screen Bathrooms needing a more forgiving enclosure More support and defined sealing lines Tracks, corners and regular cleaning
Frameless or semi-frameless screen Open, contemporary layouts Clean sightlines and less framing Precise floor fall, silicone and fixing details

Tile choice also affects safety and durability. Check the product's wet-area suitability, edge profile and slip characteristics rather than selecting only by colour or showroom appearance. A large format tile can look excellent, but it demands a flat substrate and careful falls, especially around a linear drain.

The screen should direct water back into the shower, not create a new route into the wall or floor. Silicone-to-tile and silicone-to-subsill joints need clean surfaces, correct profiles and a compatible sealant. If a screen installer drills through a membrane without a planned detail, the waterproofing can be compromised after the tiling work has passed inspection.

Routine Maintenance That Keeps a Compliant Shower Compliant

A compliant shower still needs maintenance. Silicone shrinks, surface joints collect soap residue, grout becomes harder to inspect, and drain hair can slow the flow enough to keep water around the enclosure.

Start with a visual inspection every six months. Look at the screen base, hob, wall-floor junction, tap penetrations and corners under a bright torch. You're looking for lifting, splitting, pinholes, discolouration or a seal that has separated from the tile.

Use a simple inspection rhythm

  • Silicone joints: Check the screen, hob and changes of plane for gaps or lifting.
  • Grout lines: Inspect annually with a pointed tool, without gouging the joint.
  • Drain: Remove the grate and clear hair and soap buildup without damaging the waste or seal.
  • Cleaning products: Use products suitable for the tile, grout and sealant. Vinegar and harsh acids can shorten the service life of some finishes and seals.
  • Water behaviour: Notice whether water drains promptly or remains around the screen and corners.

Silicone resealing is commonly planned around every 2 to 3 years, but condition matters more than a calendar alone. A clean, intact joint is normal wear management. Mould that returns quickly, a joint that has opened behind the tile, or moisture outside the shower calls for investigation.

A broader plumbing inspection checklist can help you prevent water damage with a home check, particularly if you manage a rental or have wet areas on more than one level. Use it as a general household check, not as a substitute for a Victorian wet-area assessment.

If a repair reaches the substrate, remove tiles, changes a penetration or disturbs the membrane, treat the work as a new waterproofing event. Let the repaired area dry, reinstate the system correctly and flood test it again before closing the surface.

Warning Signs That Point to Leak Rectification, Not Prevention

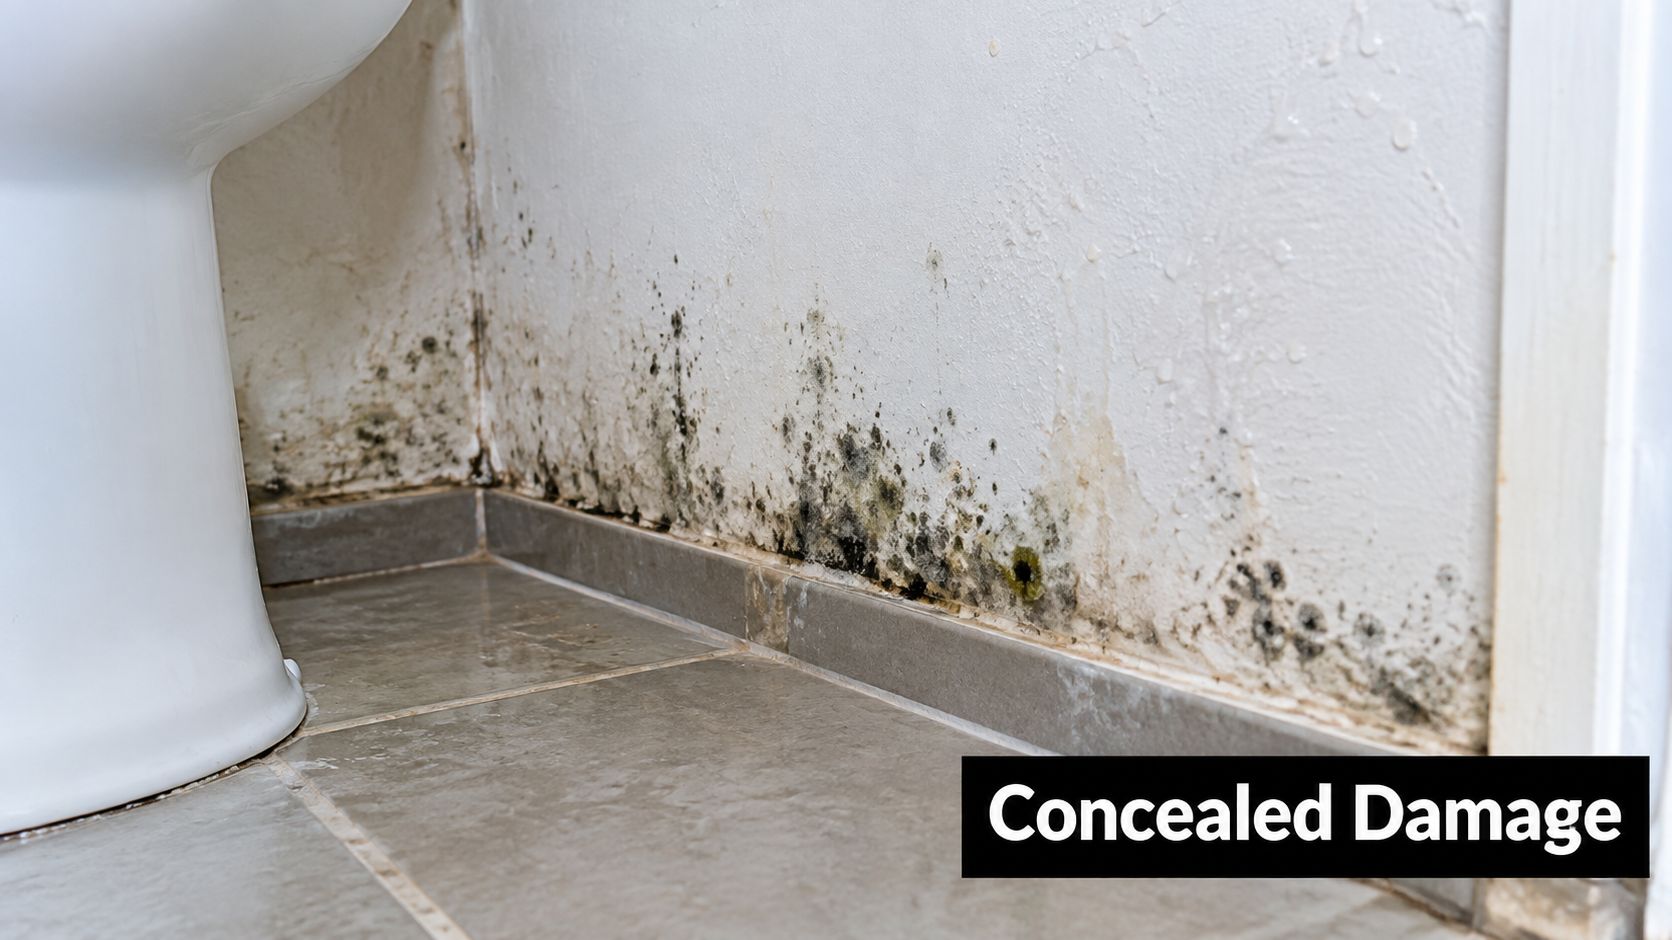
Routine cleaning and resealing are appropriate only when the waterproofing assembly remains sound. Once moisture has entered the substrate or adjoining structure, adding another bead of silicone may hide the evidence while the damage continues.

Watch for a combination of visible and sensory clues:

  • Persistent efflorescence: White crystalline deposits can indicate moisture moving through masonry or cement-based materials.
  • Swollen skirting or wall lining: Expansion, soft spots or bulging suggest water has travelled beyond the finished surface.
  • Returning mould: If mould reappears shortly after cleaning, the moisture source hasn't been removed.
  • Musty air: A damp smell in the bathroom, hallway or adjacent room can point to concealed moisture.
  • Ceiling marks below: Brown staining, bubbling paint or damp patches under the shower deserve prompt investigation.

An infographic listing four warning signs that indicate water damage requiring rectification rather than just simple prevention.

A plumber or builder may isolate the waste, carry out a shower-base flood test, inspect the screen and use moisture or thermal imaging equipment to trace the affected area. A pressure test can help separate a plumbing fault from a wet-area waterproofing failure. The aim is to identify the route before demolition, not to guess from the location of the stain.

For a plumbing-focused first assessment, property owners can use detect water leaks in Melbourne as a starting resource. For shower-specific investigation, shower leak detection in Melbourne can help define whether the problem sits with the waste, screen, penetrations or membrane.

Know when the work becomes regulated rectification

In Victoria, waterproofing work must be carried out or supervised by a registered building practitioner, and only registered practitioners can authorise compliance with the applicable standard, as outlined in Victoria-focused AS 3740 waterproofing guidance. Work that penetrates or reinstates the waterproofing should be documented appropriately, including the relevant waterproofing compliance documentation.

Rectification may involve removing tiles, inspecting the lining and framing, replacing damaged substrate, rebuilding falls, reinstating the membrane, testing, then retiling and resealing. The cost depends on how far water has travelled, what must be removed and whether plumbing or structural work is involved. A realistic Melbourne assessment should be based on an inspection and defined scope, not a fixed promise made from a photograph.

Your Melbourne Shower Leak Prevention Checklist

Use this checklist before a bathroom renovation starts, while the shower is open, and after handover. It turns waterproofing from an item buried in a quote into a sequence you can verify.

A checklist infographic titled Your Melbourne Shower Leak Prevention Checklist with four steps for waterproofing bathrooms.

Before the renovation

  • Engage the right practitioner: Confirm who will perform or supervise the waterproofing and check the relevant Victorian registration.
  • Write the standard into the scope: Require the work to address AS 3740 and NCC 2022 wet-area requirements, not just a generic “waterproofing allowance”.
  • Record the system: Ask for the membrane product, primer, coverage, curing requirements and treatment of corners, drains and penetrations.
  • Inspect the existing base: Look for swelling, soft lining, deflection, mould, damaged joists and evidence that water has already travelled beyond the shower.
  • Plan the screen early: Confirm where fixings will go and how the screen will be sealed without compromising the waterproofing.

During construction

  • Check the substrate: Sheets should be stable, clean and suitable for the nominated membrane and tile system.
  • Check the fall: The shower floor needs the required fall to the waste before membrane application. Victorian guidance identifies 1:80 as the minimum shower fall.
  • Check the membrane coverage: Confirm shower walls reach the required height, and that junctions and penetrations have been detailed.
  • Wait for cure: Don't accept tiling just because the membrane looks dry.
  • Witness the flood test: The test should use a proper plug, the correct fill level and a minimum 24-hour hold, with the surrounding areas inspected.
  • Confirm compatible finishes: Adhesive, grout, tile and sealant should suit the substrate, membrane and wet-area conditions.
  • Review screen fixing: The installer should avoid unplanned penetrations through the waterproofing.

After handover

  • Inspect silicone twice yearly: Look at the screen base, hob, corners and penetrations.
  • Inspect grout annually: Use a torch and look for cracks, hollow tiles, open joints or repeated mould.
  • Keep the waste clear: Remove hair and residue before drainage slows.
  • Treat alterations seriously: Any plumbing change, tile removal or membrane repair should trigger drying, reinstatement and another flood test.
  • Keep the paperwork: Retain product records, photos, compliance documentation and the renovation scope.

A failed flood test means the shower isn't ready to close up. Multiple substrate symptoms, such as soft lining combined with mould or swelling, mean maintenance has ended and rectification should begin. Call a registered Victorian builder before the damage spreads into framing, flooring or the room below.


For bathroom renovations, Melbourne Tiling Services P/L provides coordinated waterproofing, screeding, tiling, shower screen installation and shower or balcony leak rectification across Melbourne and greater Victoria. Visit Melbourne Tiling Services P/L to discuss your shower, request a quote and establish a compliant prevention or rectification scope before tiles go down.

How to Install Frameless Shower Screen in Melbourne

You've reached the stage of a Melbourne bathroom renovation where the tiles are finished, the fittings are on site, and the frameless shower screen looks like the last straightforward job. It isn't. A glass panel can be perfectly manufactured and still leak, bind, or put stress on the fixings if the waterproofing, waterstop, finished floor, and wall set-out aren't right first.

This is the practical answer to how to install frameless shower screen in a Victorian bathroom. The glass is the visible part, but it's only the final component of a wet-area system. The steps below cover preparation, tools, compliance, measuring, fixing, sealing, fault diagnosis, and the point where a registered builder needs to take responsibility.

Table of Contents

What You're Really Fitting Before the Glass Goes In

An ensuite is usually close to lockup when the shower screen installer arrives. The wall tiles have cured, the shower base or hob is installed, the floor falls toward the waste, and the waterproofing membrane should already have been inspected and tested. If those layers aren't settled, fitting glass is premature.

Under the Victorian Building Authority waterproofing guidance, an enclosed shower is a wet area that must be designed to prevent water spreading. The VBA also states that a fully frameless shower area is acceptable only when the relevant building surveyor is satisfied that it will prevent water escaping from the category 1 area.

The surfaces behind the finished bathroom

Before drilling or lifting glass, check the records and the physical set-out:

  • Waterproofing record: The wet-area work should comply with AS 3740, with a valid flood test record available before the finished surfaces conceal the membrane.
  • Wall and floor geometry: The floor must be level across the screen span, and the finished wall should be plumb. A builder's long level or laser exposes problems that a short spirit level can miss.
  • Waterstop position: The screen must align with the waterstop or hob. It isn't a free-standing line chosen for appearance after tiling.
  • Tile layout: Square, consistent joints make the screen easier to set out, but the screen still follows the wet-area boundary rather than blindly following a tile joint.

Drilling into a waterproofed wall without knowing where the membrane and structure sit can damage the system and create a path for moisture behind the tiles. The screen installation is the moment the assembly becomes loadable, so the wall, substrate, anchors, hinges, and panel all need to work together.

A four-step guide illustrating essential pre-glass preparation steps for installing a frameless shower screen.

Site rule: Don't book the final glass measure until the finished floor, tiles, waterstop, and shower fittings are fixed in their final positions.

For Melbourne bathroom renovations, a useful reference is the frameless shower screen installation service information, particularly where screen measurement follows completion of tiling. That sequence prevents a common mistake, ordering glass against dimensions that change during screeding, tiling, or floor-level adjustment.

Tools, Glass and Compliance Items to Have on Site

A frameless screen shouldn't be installed with a mixed collection of household tools. Glass is unforgiving, polished edges can chip on hard surfaces, and a badly placed hole can compromise both the tile and the substrate. Put every tool and document on the floor before marking the first hole.

The practical tool kit

You'll need a quality cordless drill with hammer function, suitable 6 mm and 8 mm diamond or masonry bits, a spirit level of at least 600 mm, and a 1.5 m laser or long level. Add a silicone gun, neutral-cure silicone, masking tape, pencil, 1 mm and 3 mm packers, and non-marking suction lifters rated above the panel weight.

A second pair of hands isn't optional for a large panel or hinged door. One person controls the glass while the other checks plumb, supports the panel, and manages fixings. Keep the glass on padded supports, never directly on tile, concrete, or metal.

Item Spec / Size
Drill bits 6 mm and 8 mm diamond or masonry bits matched to the tile
Levels 600 mm minimum spirit level, plus a 1.5 m laser or long level
Packers 1 mm and 3 mm packers for controlled adjustment
Suction lifters Non-marking, rated above the panel weight
Sealant Neutral-cure silicone
Glass 6 mm to 10 mm toughened safety glass
Fixings Stainless steel or zinc-plated screws suited to the substrate
Support A second person and temporary bracing

Glass and paperwork

Australian technical requirements centre on AS/NZS 2208 for safety glazing materials and AS 1288 for glass selection and installation, as outlined in this Australian frameless shower screen regulations guide. Frameless screens generally use toughened safety glass from 6 mm to 10 mm, with polished edges and the manufacturer's compliance stamp visible in a corner.

A wider frameless panel needs more careful hardware selection and structural support. Many Melbourne installers specify 8 mm as the minimum for a frameless panel wider than 700 mm, but the manufacturer's design and hardware rating still govern the final choice. The panel mass, hinge type, wall structure, brace requirements, and fixing pattern must be assessed together.

Keep the NCC Volume Two waterproofing records, any required plumbing sign-off, and the panel's compliance certificate with the renovation file. Silicone isn't a substitute for mechanical fixings, and a channel that's only bonded to a weak surface won't reliably carry a moving door.

Measuring and Setting Out Against the Waterproofing

The screen should be square to the wet zone, not automatically square to the nearest wall or tile joint. Melbourne walls and tiled screeds often vary enough that measuring one point gives a false sense of accuracy.

Start by measuring the finished wall-to-wall opening at the floor, midpoint, and top. Record each reading. That tells you whether the walls converge, whether the panel needs a controlled clearance, and whether a standard door configuration will work without binding.

Mark the wet-area line

Mark the screen centre line on the floor with a pencil or fine tape. Transfer it to the wall at screen height using the laser. Place the channel or base profile in position and dry-fit the panel before drilling.

The critical check is the relationship between the glass and the waterstop. The VBA guidance says a shower screen should lap 3–5 mm over the waterproofing membrane on either side. The shower waterproofing membrane guidance is useful background, but on site the installer must locate the actual membrane termination and waterstop rather than assume it from the tile pattern.

A professional construction worker uses a laser level and measuring tape to accurately mark a wall.

Dry-fit before making holes

With the panel supported, check the following:

  • Waterstop lap: Keep the glass within the 3–5 mm lap zone, never beyond the membrane termination.
  • Base level: Pack under the channel where necessary so it remains level along its full length. Don't shim more than 5 mm.
  • Fitting clearance: Confirm the panel remains clear of the shower rose swing by at least 1500 mm.
  • Door operation: Use the manufacturer's template to mark hinge or pivot points, then check the intended swing against the vanity, toilet, and entry.
  • Record condition: Photograph the dry-fit, waterstop relationship, and packers before installing any fixings.

The screen must sit over or inside the waterstop boundary. In a hobless shower, that floor interface is a compliance detail, not a cosmetic choice. If the finished floor build-up has moved the boundary, stop and resolve it before drilling.

Fixing the Channel, Hinges and Glass Panel

Fix the wall channel or jamb before lifting the main panel into its final position. The channel needs a sound substrate, accurate plumb, and fixings that suit the wall construction. A screw driven into tile adhesive alone won't provide the same support as a fixing into masonry or properly located framing.

Use the specified 6 mm masonry bit for the channel holes, while taking care not to drill blindly through the waterproofing. Keep the fixings vertical and target stud or masonry where the wall construction allows. Clean the holes, install the appropriate anchors or screws, and avoid overtightening against the tile.

Build the support before loading the glass

Drop the wall jamb or channel into position and pack the base until it's plumb. Check it in both directions with the long level. The panel must sit evenly, with no hard point where glass bears directly against tile, metal, or a screw head.

An instructional infographic detailing the four-step installation process for a glass shower screen wall panel.

For a hinged panel, use the manufacturer's template for hinge centres. A typical set-out may place the hinge centre 25 mm from each glass edge and 200 mm from the top, but the supplied hardware specification takes priority. Don't transfer a measurement from another screen because hinge mortices, glass preparation, and load ratings vary between systems.

Lift and secure in a controlled sequence

Have two people lift the panel with suction cups. Rest it on temporary timber bracing and packers while the hinges or channel are brought into alignment. Keep fingers away from the edge and don't let a polished corner touch the floor.

Tighten the hinge hardware to the manufacturer's torque setting. Some systems specify 15–20 Nm, so check the installation sheet rather than guessing. Fit the door panel with the same care, support its weight while aligning the hinges, and swing-test it before applying silicone.

Glass handling matters: If the panel rocks, binds, or contacts metal, don't solve the problem by tightening harder. Correct the support, clearance, or alignment first.

The technical guidance for Australian frameless glass compliance reinforces the need for safety glazing, suitable hardware, and mechanical fixing or bracing. Silicone seals joints. It doesn't replace engineered support.

Sealing, Door Gap and Final Alignment

Sealant should be the last adjustment, not a way to hide a crooked channel or a misplaced waterstop. Clean the tile, metal, and glass surfaces, allow them to dry, and mask both sides of each joint before applying silicone.

Run a 5 mm bead of neutral-cure silicone along the inside edge of the wall channel and along the waterstop where the glass meets the hob. Tool the bead flush so it forms a neat joint of approximately 3–4 mm between the masking lines. Remove the tape before the silicone skins over.

Set the moving parts before the seal cures

Use clear packers to set the door clearance. A practical arrangement is an 8 mm hinge-side gap and a 6 mm latch-side gap, then adjust the pivot blocks until the door self-centres. The exact hardware system can change those clearances, so use the manufacturer's sheet as the controlling document.

Check the bottom edge for contact throughout the swing. The drip rail belongs inside the shower line, directing water back toward the wet area rather than projecting over the bathroom floor. If there's a floor channel, make sure the drain path remains open and silicone hasn't bridged it.

  • Open and close the door repeatedly: Look for binding at the latch, jamb, floor, and adjacent panel.
  • Check the seal line: It should be continuous at the channel and waterstop, without gaps or pinholes.
  • Inspect the fixing points: Glass must remain isolated from metal by the supplied washers, bushes, or sleeves.
  • Protect the cure: Keep water off the installation for 24 hours so the silicone can cure properly.

A door that closes neatly but pushes water outside the screen still needs correction. Watch the first controlled shower and inspect the floor line, because a small failure at the waterstop interface can move moisture into the broader bathroom.

When a Registered Builder Should Take Over

The common assumption is that a shower screen is always a minor DIY fitting. That assumption fails when the screen forms part of regulated bathroom renovations. In Victoria, domestic building work valued at more than A$10,000 must be carried out by a person registered with the Building and Plumbing Commission, with registration approved before work starts, as outlined in the Victorian practitioner registration information.

The threshold applies to the broader residential renovation scope, not just the price of the glass. If the screen is one component of a bathroom renovation involving waterproofing, tiling, plumbing, carpentry, and finishing work, assess the total contract rather than treating the panel as an isolated purchase.

The paperwork changes with the project

Victoria also requires a major domestic building contract for work worth more than A$10,000, while domestic building insurance applies to work worth more than A$16,000. A projection published for work from 1 July 2026 states that Home Warranty insurance will be required above A$20,000, according to this Victorian bathroom renovation coverage guide.

DIY owner-builders can still undertake work on their own home, but the owner carries the insurance and coordination risk. The decision becomes less comfortable when waterproofing is being altered, structural framing is being changed, or the door is unusually wide and heavy. A pivot door exceeding 900 mm deserves a properly assessed wall structure and hardware system rather than a casual fixing decision.

Scenario Can You DIY? Why
Replacing a small, non-hinged panel on an established wet area Potentially, if competent The waterproofing boundary and structure still need to remain intact
Installing a hinged frameless screen during a bathroom renovation above A$10,000 Not as an unregistered contractor The broader domestic building work crosses the Victorian registration threshold
Drilling where the membrane location is unknown No Damage can compromise the waterproofing system
Altering framing, hob, set-down, or waterstop geometry No The work affects structure or wet-area compliance
Installing a heavy pivot door over 900 mm Use a registered builder and qualified installer Hinge loads and wall reinforcement need proper assessment

A registered builder also coordinates licensed plumbers, waterproofers, tilers, and screen installers when the work crosses trades. That coordination matters because the screen can't be corrected in isolation if the floor falls, membrane line, or waterstop was set incorrectly.

Common Installation Problems and How to Fix Them

Three faults appear repeatedly after frameless screens are installed: water tracking onto the bathroom floor, doors that bind, and cracks radiating from fixings. Each symptom points to a set-out or installation problem. Filling a visible gap with more silicone rarely fixes the cause.

Quick diagnosis on site

Symptom Likely cause Realistic fix
Water tracks across the floor Misaligned waterstop, missing channel seal, or excessive door gap Check the wet-area boundary, remove and reseal the affected channel, then reset the door
Door binds or won't close Hinge set-out error or out-of-plumb wall beyond the hardware tolerance Adjust packers and hinges, or relocate the fixing point where the system permits
Crack radiates from a hole Incorrect fastener, excessive torque, or glass touching metal Remove the panel, replace damaged glass if required, and correct the fixing assembly

Floor leakage often begins at the interface rather than in the middle of the glass. If the screen sits outside the waterstop, or if the channel base has an unsealed break, water can move under the finished surface even when the visible silicone bead looks tidy. Resetting the waterstop or screen position may be necessary, not just adding another surface bead.

Binding usually reflects geometry. Check the wall with a long level, inspect the hinge centres against the manufacturer's template, and look for a packer that has compressed or shifted. Forcing the door closed increases stress on the hinges and fixings.

A crack at a drill hole is a stop-work fault. Wrong screws, overtightened hardware, missing nylon bushes, or direct glass-to-metal contact can all concentrate stress. Remove the panel for proper inspection instead of filling the chip and putting the door back into service.

Melbourne Tiling Services P/L coordinates bathroom renovations, waterproofing, tiling, screeding, and frameless shower screen installation through registered builders and relevant trades. For a renovation where the membrane, waterstop, finished floor, and glass need to be treated as one system, visit Melbourne Tiling Services P/L to arrange a site discussion and quote.

Wet Area Waterproofing Guide for Melbourne Renovations

The most popular waterproofing advice is also the most misleading: choose a good membrane and your bathroom will be safe. A membrane matters, but it can't rescue a weak substrate, a badly positioned waste, an incorrect fall, or an unsealed pipe penetration. Wet area waterproofing is a water-management system, and every part of that system has to work before the first tile is fixed.

For Melbourne homeowners, that distinction matters during bathroom renovations because the work hidden beneath the tiles determines whether the finished room remains dry or becomes a source of mould, damaged materials and disruptive rectification. The current compliance framework also means a builder must account for the room layout, building class, shower arrangement and substrate, rather than applying one generic method to every renovation.

Table of Contents

Why Your Bathroom Leak Probably Isn't the Tile

A bathroom can appear finished and fault-free while water is already moving beneath it. Straight grout lines, clean tile faces and a well-fitted shower screen do not prevent moisture escaping through a waste, corner or wall junction. Staining outside the bathroom often appears only after the hidden path has been active for some time.

Tile defects are visible, but they do not explain every wet-area leak. A cracked tile can admit water, yet the consequences depend on the conditions below it. Movement in the substrate, poor drainage falls or waterproofing that ends short of a penetration can direct water into materials never intended to stay wet.

Practical rule: Assess the waterproofing before judging the tile finish. Once tiles cover the membrane, inspection becomes much harder.

I've seen renovation disputes centre on a loose tile while the actual defect sat at the floor waste or wall-to-floor junction. A sound investigation follows the complete water path, including adjoining construction and drainage, rather than treating the first visible symptom as the cause. Victorian regulator guidance recognises that water ingress can also involve balconies, roofs, drainage and other building areas beyond the bathroom. The diagnosis must therefore match the route water is taking. Victorian waterproofing and water-ingress guidance provides useful context for that broader assessment.

The four parts of a reliable system

A leak-resistant bathroom renovation depends on four connected decisions:

  • Substrate preparation: The surface must be stable, clean and suitable for the specified membrane.
  • Geometry: The floor must direct water to the waste instead of allowing ongoing pooling.
  • Membrane continuity: The barrier must remain unbroken at corners, wastes, penetrations and transitions.
  • Fixture detailing: Drains, shower screens, niches, thresholds and pipework must connect correctly to the waterproofed zone.

Homeowners mainly see the fixtures and tile finish. The builder and waterproofer must control the full system. If one responsibility is passed between trades, a visually impressive renovation can still hide a leak risk. For an existing problem, professional leak detection services in Melbourne can help identify the water path before tiles are removed or a repair method is chosen.

What Wet Area Waterproofing Is

Wet area waterproofing is a water-management system beneath the finished surface. It limits moisture movement into substrates, wall cavities and structural elements. Tiles and grout provide the finish, not the primary waterproofing barrier. The substrate, floor geometry, membrane and fixture details must work together before water reaches vulnerable building materials.

A membrane choice alone does not make a bathroom waterproof. The installer must control three connected areas, each with a separate role.

A professional infographic titled Wet Area Waterproofing explaining its key benefits and common areas requiring protection.

Start with the substrate

The substrate receives the waterproofing system. Concrete, fibre-cement sheet and other approved surfaces behave differently, so the installer must confirm that the surface is stable, clean, suitably prepared and compatible with the selected membrane.

Dust, movement, contamination and unsuitable sheet products can compromise the work before the membrane is applied. The Victorian Building Authority states that particleboard is no longer allowed to form part of the waterproofing system, making substrate selection a compliance and durability decision, not just a material preference. The VBA fact sheet on wet-area waterproofing explains why the treatment must suit the particular wet-area design.

Geometry controls where water goes

A membrane can resist water, but it cannot correct a flat or poorly formed floor. The screed, slab or sheet floor needs a controlled path to the waste, with fixture positions and finished levels resolved before tiling begins.

Hobless showers expose poor set-out quickly. Their larger uninterrupted floor area must drain without a raised step containing overspray. Accurate falls reduce standing water and the load placed on joints, corners and other details.

The membrane must stay continuous

Liquid, sheet and cementitious systems use different installation methods, yet every system must remain connected across changes in plane and interruptions. Floor wastes, pipe penetrations, wall corners, thresholds and niches require deliberate detailing.

A suitable product with poor joins is still a failed waterproofing system. Ask the builder how each penetration and transition will be treated, where the membrane will terminate, and how continuity will be checked before the finish conceals the work.

Australian Standards and Victorian Requirements

The national reference point for domestic wet-area waterproofing is AS 3740:2021. Standards Australia approved the standard on 7 July 2021, published it on 23 July 2021, and the NCC 2022 adopted it for housing provisions on 1 May 2023. The Housing Industry Association's explanation of wet-area waterproofing describes its role in setting minimum requirements for waterproofing materials, design and installation.

The standard applies across Class 1, Class 2 and Class 4 buildings. It also applies to wet areas in Class 3 to 9 buildings as though those wet areas were parts of a Class 2 or Class 4 building. For Melbourne renovations, that distinction matters because a detached house, townhouse, apartment and mixed-use project don't automatically carry the same practical compliance pathway.

The fall requirements are not cosmetic

For shower floor wastes, Victorian guidance identifies a minimum fall of 1:80, equivalent to 12.5 mm over 1 metre, and a maximum continuous fall of 1:50, equivalent to 20 mm over 1 metre. These requirements are set out in the NCC 2022 housing provisions for wet-area waterproofing.

The change is significant for renovations because earlier guidance under AS 3740-2010 had allowed 1:100 in some shower configurations with vertical separation. A builder who measures only the finished tile surface, rather than coordinating the substrate, screed, waste and tile thickness, can create a floor that looks acceptable but doesn't meet the required drainage geometry.

Shower walls must be waterproofed to 1800 mm above the floor substrate. Bathrooms are also classified into Category 1 high risk, Category 2 moderate risk and Category 3 low risk, with the room design determining the appropriate treatment.

Building class changes the conversation

Apartment and higher-risk projects need more than a generic residential bathroom specification. The ABCB notes that NCC 2025 waterproofing provisions were revised in connection with the DBP Act, which adds compliance complexity relevant to apartments, townhouses and mixed-use work in Victoria. The ABCB waterproofing compliance document is particularly relevant when the project extends beyond a straightforward Class 1 renovation.

For homeowners, the practical question is simple: ask the builder which compliance pathway applies to the building and why. Keep the waterproofing specification, product details, inspection records and certification together. If you need evidence for a project, discuss a Victorian waterproofing compliance certificate before tiling begins, not after the membrane has disappeared behind the finished surface.

Liquid, Sheet, and Cementitious Membranes Compared

Membrane selection should follow the conditions of the job, not the installer's habit or the lowest product price. Liquid-applied, sheet and cementitious membranes can all be appropriate, but they behave differently under movement, around penetrations and across complex layouts.

Liquid-applied systems

Liquid membranes are rolled, brushed or sprayed onto the prepared surface and cure into a continuous barrier. They suit irregular shapes, curved transitions and detailed areas because the installer isn't joining a series of factory sheets around every obstruction.

That flexibility brings a responsibility. Coverage and cured thickness need close control, and a thin area or missed section may be difficult to identify once tiling starts. The installer also needs to follow the specified preparation and curing conditions rather than rushing the next trade onto the surface.

Sheet systems

Sheet membranes provide controlled manufactured thickness and can offer a clean, consistent installation across suitable areas. They're useful where the layout is relatively straightforward and the team has a reliable method for bonding or fixing the sheet to the substrate.

Joints, corners and terminations are the trade-off. Each overlap and edge must be sealed correctly, and substrate movement can place stress on the sheet or its bonded interfaces. A sheet system isn't automatically safer than a liquid system. It moves the critical workmanship from coating thickness to joint and termination quality.

Cementitious systems

Cementitious membranes are brushed or trowelled over prepared substrates. They're familiar in many traditional bathroom applications and can work effectively where the substrate and design suit a more rigid coating.

Their limitation is flexibility. If the substrate shifts, a rigid coating can crack or lose continuity. That makes substrate stability and movement control central to the decision, particularly in complex renovations or areas exposed to changing conditions.

Membrane Type Best Suited For Key Advantage Primary Risk
Liquid-applied Irregular layouts, penetrations and complex shower details Continuous coating with fewer sheet joints Inconsistent thickness, missed areas or poor curing
Sheet Suitable, stable substrates and defined layouts Manufactured thickness and consistent material Failed laps, joints or terminations
Cementitious Simpler applications with compatible traditional substrates Familiar installation and substrate compatibility Cracking when the substrate moves

For a Melbourne bathroom renovation, the correct choice depends on the substrate, geometry, fixture arrangement and risk category. A hobless shower may favour a system that handles detailed transitions well, while a simpler layout may suit another product. The specification should name the system and detail its preparation, not merely state “waterproofing included”.

The following video can help visualise the practical principles behind membrane installation.

Critical Waterproofing Details That Prevent Leaks

A leak-free bathroom depends on how the whole water-management system is built. The substrate, floor geometry, membrane, waste connection and fixture penetrations must work together. Product selection matters, but poor detailing at a change of plane or opening through the membrane can defeat a suitable system.

Control the shower waste and floor shape

The shower waste must sit within a properly formed drainage plane. Water should run continuously towards it without persistent pooling, and the membrane must connect securely to the waste flange so moisture cannot pass around the drain.

Before waterproofing begins, coordinate the waste position, floor levels, screed thickness and tile build-up. Hobless showers require particular care because the finished floor must contain water while still directing it to the waste. A layout that appears simple can become difficult once tolerances and drainage are accounted for.

Treat transitions and penetrations as system details

At the bathroom threshold, the containment detail must direct water back towards the wet zone. The membrane needs a secure termination at that transition, rather than stopping near the doorway where the edge remains exposed.

Pipes, drains, fixings and shower fittings interrupt the waterproofed surface. Proprietary boots, collars or compatible sealants may form part of the detail, provided they are correctly bonded and installed without gaps. A neat escutcheon only conceals a pipe opening. It does not make the penetration waterproof.

Site observation: Membranes usually fail at details treated as an afterthought, not across the broad, uninterrupted field.

The wall-to-floor junction requires the same discipline. Horizontal and vertical waterproofing must form one continuous connection through corners and shower niches. If you are planning a recessed shelf, discuss shower niche waterproofing before finalising the wall lining and membrane specification.

An infographic showing six critical steps for professional wet area waterproofing to prevent leaks and water damage.

Respect the required protection zones

Victorian guidance requires shower wall waterproofing to reach 1800 mm above the floor substrate. Walls surrounding baths and laundry tubs in wet areas must be waterproofed to at least 150 mm above the fixture, as explained in this practical guide to waterproofing and tiling.

Mark and inspect these heights before tiling. Check floor edges, skirtings and thresholds as well. If the barrier stops short of a vulnerable junction, moisture can enter behind the finished surface even when the main shower field has been installed correctly. A builder should show these transitions clearly before they are covered.

Common Defects and How to Avoid Them

Waterproofing failures are often blamed on tiles because tiles are the first visible element to crack, sound hollow or stain. That diagnosis can send a homeowner towards regrouting when the actual defect sits in the substrate, drainage geometry or concealed membrane.

The VBA identifies several issues that deserve direct attention. The newer standard no longer permits particleboard to form part of the waterproofing system, and the regulator highlights falls to waste, shower wall coverage and correct treatment of hobless or unenclosed showers. The VBA's practitioner education material also supports looking beyond the membrane alone when investigating water ingress.

Defects that deserve a pre-tiling check

  • Membrane discontinuity: Gaps, tears and thin areas commonly occur at corners, edges and penetrations.
  • Poor drainage geometry: Inadequate fall leaves water sitting where the design expects it to move towards the waste.
  • Unsuitable substrate: Particleboard and unstable or incompatible surfaces can undermine the waterproofing system.
  • Incomplete wall coverage: Treating only a narrow splash zone won't satisfy the current shower wall requirement.
  • Unprotected transitions: Door thresholds, skirtings and wall-to-floor junctions can expose edges to moisture.
  • Incorrect hobless detailing: An unenclosed shower demands careful coordination because the floor has to manage a broader water path.

A good inspection isn't limited to asking whether the membrane has been applied. Check the substrate before application, confirm the waste and falls, inspect the corners and penetrations, and photograph the completed waterproofing before the tiler starts. If the tiler arrives while the membrane is still uncured or the details haven't been checked, the programme is moving too quickly.

What doesn't work: Choosing a cheap membrane, applying it over an unsuitable sheet and asking the tiles to hide the problem. The tile finish can disguise a defect, but it can't repair one.

Balconies need the same systems thinking at a larger exposure level. Drainage paths, junctions and membrane continuity remain central, while water may also enter through adjoining roof, façade or drainage details. A bathroom renovation and balcony rectification aren't identical jobs, but neither should be reduced to selecting a coating from a product shelf.

Hiring the Right Builder for Wet Area Waterproofing

A sound specification still depends on the people coordinating it. Bathroom renovations involve demolition, carpentry, plumbing, electrical work, screeding, waterproofing and tiling, and each trade can affect the next trade's work. If the builder doesn't control that sequence, one installer can damage a detail that another installer completed correctly.

Verify the builder first

For Victorian domestic building work, builder registration is required for larger renovation jobs. Homeowners should verify the builder's status with the Victorian Building Authority before signing a contract, rather than relying on a business card or verbal assurance. This Victorian waterproofing guidance for homeowners explains why registration checks matter when waterproofing and coordinated renovation work are involved.

Ask who is responsible for the waterproofing specification and who will inspect it. A registered builder should be able to identify the membrane system, substrate requirements, floor-fall method, penetration details and inspection point before the tiler covers the work.

Put the deliverables in writing

Use a written checklist that names the evidence you expect:

  • Registration verification: Confirm the builder's current Victorian registration before work starts.
  • System specification: Record the membrane type, compatible primer, substrate and detail products.
  • Geometry confirmation: Ask how the required fall, waste position and finished levels will be checked.
  • Trade coordination: Confirm that plumbers, carpenters, waterproofers and tilers work from the same set-out.
  • Pre-tiling inspection: Require photographs and inspection records while the membrane remains visible.
  • Certification records: Obtain the relevant waterproofing certification before tiles conceal the system.

Melbourne Tiling Services P/L operates as a Registered Unlimited Builder from Highett and coordinates licensed carpenters, plumbers, electricians, tilers and waterproofers across residential and commercial projects in Melbourne and greater Victoria. Its services include bathroom renovation management, waterproofing, screeding, self-levelling, tiling and leak rectification, with design support that can help coordinate the finished layout before construction begins.

Screenshot from https://melbournetilingservices.com.au

Don't accept “waterproofing included” as a complete scope. Demand the system details, ask who checks the work and make sure certification and inspection records are available before tiling starts.


For Melbourne bathroom renovations, Melbourne Tiling Services P/L can coordinate substrate preparation, wet area waterproofing, screeding, tiling and related licensed trades as one managed project. Visit Melbourne Tiling Services P/L to discuss your renovation, leak rectification or waterproofing requirements and request a detailed quote.

Bathroom Tiling and Waterproofing Guide for Melbourne Homes

You've stripped out the old bathroom in a Melbourne home, the plumber has finished the rough-in, and the room is finally starting to resemble the design you approved. Then the tiler asks a question that can't be postponed: what exactly is being waterproofed, and what evidence will be provided before the first tile is fixed? That decision matters more than whether you choose porcelain, marble or a patterned feature tile.

A bathroom can look perfectly finished while hiding a failed membrane, a poorly detailed puddle flange or falls that leave water sitting at the shower entrance. Bathroom tiling and waterproofing are one compliance system, and the tile finish is only the visible part. In Melbourne renovations, the durable result starts with the substrate, drainage, membrane, documentation and trade sequence.

Table of Contents

Planning a Bathroom Tiling and Waterproofing Project

Lock in the scope before ordering materials

Start by defining the wet area. Is the membrane limited to the shower, or will the entire bathroom floor and additional wall zones be treated? A hob, a frameless shower, a recessed niche, a linear drain and a set-down all change the preparation and detailing. The waterproofing scope drives labour, materials, curing time and tile quantities, so choosing tiles first often produces an inaccurate renovation price.

Demolition also needs a proper decision. Confirm what will be removed, who will dispose of it and whether the building may contain asbestos, particularly in older homes. Pre-1990s construction deserves careful checking before fibro sheeting, old floor coverings or wall linings are disturbed. Don't let a tiler arrive to find that the substrate is unstable, contaminated or still covered in demolition waste.

Identify the existing substrate before specifying primers and membranes. Fibro, plasterboard, brick, concrete, Scyon and existing tile surfaces behave differently. The plumber should also confirm fixture locations, pipe penetrations, the floor waste and the finished floor height before waterproofing begins. A change to the vanity, toilet, shower rose or waste after membrane work can create a new penetration and compromise the system.

A checklist for bathroom renovation showing six steps including rip-out, plumbing, and booking a tiler.

Sequence the trades, then keep the records

A reliable sequence generally has the carpenter preparing framing and linings, the plumber completing rough-in work, the waterproofer preparing and coating the wet area, the tiler installing the finish, the electrician completing fit-off, and the glazier measuring and installing the shower screen. The exact order can vary, but the membrane must be protected from avoidable damage after certification.

Keep a project file containing:

  • Approvals and permits: Retain the building permit and any relevant project approvals.
  • Waterproofing evidence: Keep the waterproofing compliance certificate, product information, photographs and test records.
  • Builder documentation: For work over $16,000, retain the relevant VBA documentation and builder records. The threshold and Victorian practitioner pathway should be confirmed for the specific contract and scope.
  • Product details: Record membrane, primer, sealant and adhesive batch information where available.
  • Variation history: Put changes to drains, niches, shower screens and tile layouts in writing.

Practical rule: Don't approve tiling because the room “looks ready”. Approve it when the substrate, membrane, curing and inspection evidence are ready.

Before waterproofing, check that the demolition is complete, the substrate is clean and stable, plumbing penetrations are fixed, the waste is correctly installed, falls are formed, corners are detailed and the final fixture layout is signed off. That checklist prevents the expensive return visit caused by a late plumbing change or a membrane punctured by another trade.

Waterproofing Standards and Membrane Choices

What the Australian standard controls

Australia's current bathroom waterproofing baseline is AS 3740:2021, published on 23 July 2021 and superseding AS 3740:2010. It defines minimum requirements for waterproofing materials, design and installation in domestic wet areas, including wet areas in Class 1, 2 and 4 buildings under the NCC, with wider application to relevant Class 3 to 9 wet areas as described in the standard. The standard was adopted by NCC 2022 on 1 May 2023, which is why the compliance framework matters directly to current Melbourne bathroom renovations. See the AS 3740:2021 standard reference and the Standards Australia product listing.

The shower floor must be waterproof. Shower walls need waterproofing to at least 1,800 mm above finished floor level, or 50 mm above the shower rose, whichever is higher. Relevant wet-area wall conditions also include a minimum of 150 mm above finished floor level outside the shower zone. These dimensions protect the substrate behind the tiles. They aren't a substitute for correct corners, penetrations, junctions or drain detailing.

A membrane system also has to suit the substrate and the intended wet-area application. Acrylic roll-on systems are common because they're practical for many residential layouts and can be applied around irregular corners. They depend heavily on correct primer selection, film thickness, reinforcement and curing between coats. A rushed single coat is not a waterproofing strategy.

Two-part polyurethane systems can provide a continuous coating, but they demand accurate mixing, careful application and controlled curing. Sheet systems, including products such as Schluter Kerdi, can offer consistent factory-controlled thickness and dependable overlaps when installed correctly. They're less forgiving of poor joint preparation, awkward penetrations and detailing that hasn't been planned before the sheet is cut.

Comparing practical membrane systems

Membrane Type Cost per m2 (AUD) Cure Time Best Application
Acrylic roll-on Varies by product and scope Product-dependent, between coats and before tiling Standard residential bathrooms with prepared substrates
Two-part polyurethane Varies by product and scope Product-dependent, with controlled mixing and curing Demanding wet-area detailing and compatible substrates
Sheet membrane Varies by product and scope Adhesive and joint system dependent Planned shower systems requiring controlled sheet overlaps

The figures above are deliberately qualitative because membrane pricing depends on access, preparation, penetrations, floor shape and product specification. A contractor should provide the selected system, primer, compatible sealants, required dry film thickness and curing instructions rather than quoting a membrane as an unnamed bucket of product. The shower waterproofing membrane guide can help homeowners understand the system choices before approving a scope.

The details that cause trouble are usually small. Shower tap penetrations, niche corners, internal wall-floor junctions and the puddle flange at the floor waste all need deliberate treatment. The membrane must bond to compatible surfaces and remain continuous around each penetration. Where a tiler also performs the waterproofing, ask who is responsible for inspection and certification. The concern isn't that one person can never do both tasks. It's that the person paid to continue into tiling may have a commercial reason to declare the membrane ready before every detail has been properly checked.

Screeding, Self-Levelling and Getting the Falls Right

A membrane can't correct a floor that sends water away from the waste. Screeding shapes the drainage plane, while self-levelling compound corrects suitable low spots and creates a flatter surface where a true fall isn't required. A pre-formed shower tray provides a manufactured fall and drain arrangement, but it still needs compatible waterproofing and accurate connections to the surrounding floor.

Australian guidance identifies a general wet-area floor fall of at least 1:100, or 10 mm per metre, to move water towards drainage and reduce ponding risk. The NCC wet-area provisions also describe fall requirements that can include a continuous fall between 1:80 and 1:50, depending on the application. Check the applicable detail for the exact bathroom design rather than assuming a steeper slope is automatically safer. Excessive fall can create its own compliance and usability problems.

Shape the floor for the actual drain

A centred waste normally needs a four-way fall. Each plane rises towards the walls, and the tile layout has to accommodate the resulting changes in angle. A linear drain allows a two-way fall and can suit larger tiles, but only if the drain is installed level and the surrounding screed reaches it without hollows.

For example, a brick shower base may need a bonded screed that forms the fall from the perimeter to a puddle flange. Outside the shower screen, the screed may need to feather into the tile underlay while preserving the required drainage direction. A frameless screen can also require a meaningful height relationship between the shower area and the rest of the bathroom, so the finished tile build-up must be designed before screeding.

Self-leveller won't hide a dropped slab, a hollow section or a structurally moving substrate. It also won't solve an incorrectly positioned waste. Those defects need correction first, otherwise a smooth-looking compound only creates a smooth-looking version of the same drainage problem.

A diagram illustrating the three steps of bathroom floor preparation including screeding, leveling, and drainage.

The timing matters just as much as the mix. Tiling over a screed before it has reached the product's required cure condition risks weak adhesion, trapped moisture and movement beneath the tile. Ask the installer to identify the product, application date and cure requirement in the site records before tiles are laid.

The video below illustrates the relationship between floor preparation and tile installation.

For a closer explanation of substrate shaping and preparation, review this guide to screeding for bathroom tiles.

Tiling Sequence, Adhesives, Grout and Sealants

The tiling crew should start only after the membrane has fully cured and passed the agreed inspection process. Wall layout is set from a datum line, not from the first visible corner. That line determines where cuts land around the vanity, shower screen and doorway, and it prevents a room from looking skewed because the installer followed an out-of-square wall.

Walls are generally tiled before the floor so the floor finish can run neatly into the wall junction and avoid unnecessary damage during wall work. If a ledger board is needed to support heavy or large-format tiles, every fixing point must be repaired and waterproofed in accordance with the membrane system before the area is closed.

An infographic illustrating the four-step wall-first tiling sequence on a cured waterproof membrane for bathroom installation.

Match the adhesive to the tile and substrate

Adhesive selection should account for tile size, tile absorption, substrate movement and the wet-area system. A basic C1 adhesive may suit limited stable applications, while C2 adhesives and deformable classes such as S1 or S2 are commonly considered where stronger adhesion and flexibility are required. The classification should be checked against AS ISO 13007, the tile manufacturer's instructions and the membrane manufacturer's compatibility requirements.

The trowel notch isn't a decorative preference. The installer selects it to achieve adequate coverage, then collapses the ridges by laying tiles in a consistent direction. Large-format and rectified tiles expose poor coverage quickly, especially around shower floors, niches and edges. The substrate needs to be flat enough for the tile, and the adhesive bed needs to support the tile without voids that can transmit movement or allow water to collect.

Use movement joints at internal corners and perimeter changes rather than filling every junction with rigid grout. Cementitious grout is practical and repairable, but it needs correct mixing, cleaning and maintenance. Epoxy grout resists staining and water absorption more effectively in suitable applications, though it costs more and requires disciplined installation.

Corners, wall-floor transitions and changes of plane should normally receive sanitary silicone compatible with the tile and membrane system. Grout in a moving corner is a common shortcut, not a movement joint. The sealant also needs adequate cure time before the shower is exposed to water.

A neat grout line can't compensate for the wrong adhesive, poor coverage or a joint that should have been flexible.

The final fit-off should protect the finished work. Avoid drilling through tiled waterproofed zones without a planned sealing method. Shower screens, accessories and shelves need fixings that don't create unsealed paths into the substrate.

Common Failure Points and How to Verify the Work

Good-looking tiles prove very little about waterproofing. The defects I'm most concerned about are usually hidden beneath a clean finish, where the puddle flange wasn't clamped correctly, the membrane stopped short at a junction or a later fixing punctured the system.

Small omissions create large repairs

A membrane applied below the specified dry film thickness may look complete while failing to provide the intended protection. The second coat matters where the approved system requires it, and the applicator should follow the product's coverage and thickness instructions rather than judging the finish by colour alone.

Corners and changes of plane need reinforcement or bond-breaker detailing where required by the system. If the wall-floor junction is grouted instead of sealed, movement can open a path behind the tile. A screed flatter than the applicable drainage requirement leaves water at the shower base, while tiling over a failed screed conceals the defect.

Common warning signs include:

  • Loose or drummy tiles: Hollow sounds can indicate poor adhesive coverage, substrate movement or a bond problem.
  • Efflorescence: White crystalline deposits may indicate moisture movement through the substrate or joints.
  • Persistent mould: Mould that repeatedly returns at the shower base can point to retained moisture, failed sealant or inadequate drainage.
  • Cracked junctions: Cracking at corners and wall-floor transitions often indicates that rigid grout has been used where movement accommodation was needed.
  • Recurring dampness: Damp adjoining walls, ceilings or skirtings require investigation rather than another bead of silicone.

Ask for evidence at every hold point

Photographs should show the prepared substrate, penetrations, corners, puddle flange, membrane coats and any reinforcement before the tiles cover them. Keep the membrane product name, batch details, applicator information and the completed waterproofing certificate in the project file.

A flood test should be recorded before tiling where the system and site conditions permit it. The evidence should show the test area filled to the agreed level, the start time, the inspection period and the result. Guidance for Australian bathroom waterproofing commonly identifies a 24-hour flood-test period, and the test should be completed before tile installation, not after a leak appears. See the Australian waterproofing defect guidance for the wider defect context.

The certificate needs to be appropriate to the work and the Victorian compliance pathway. Ask for the practitioner's details and the relevant VBA documentation instead of accepting a text message that says “waterproofed”. Product data sheets should also confirm that the membrane is suitable for the intended application, including compatibility with the substrate, adhesive and sealants.

Inspection evidence is part of the bathroom, even though it disappears behind the tiles.

If a contractor refuses to photograph concealed work or can't explain the test process, pause before approving the next stage. A tile finish can be repaired. A concealed membrane failure may require removal of tiles, screed, fixtures and adjoining linings.

Timelines, Costs and When to Hire a Registered Builder

A complete Melbourne bathroom renovation commonly takes three to five weeks, depending on the scope, access, structural work, product availability and the number of trades involved. Strip-out, plumbing rough-in, substrate correction, screed curing, membrane coats, flood testing, tiling, grouting and fit-off each create dependencies. A delay in one stage can leave several trades unable to proceed.

A straightforward cosmetic re-tile is a different engagement from a full renovation. If the existing membrane and substrate are sound, the work may be limited to tile removal, preparation, adhesive, new tiles and joints. If the shower leaks, the floor waste is defective or the substrate has moved, the job becomes a waterproofing and rectification project before new tiles are even considered.

Understand what changes the price

There are no reliable universal Melbourne rates for bathroom tiling and waterproofing because preparation often costs more than the visible installation. A small bathroom with difficult access, multiple niches, a frameless screen, large-format tiles or a herringbone layout can require more labour than a larger room with simple geometry.

Scope Element Cost Range (AUD) Notes
Waterproofing Project-dependent Changes with wet-area coverage, penetrations, corners, substrate preparation and membrane system
Screeding and floor preparation Project-dependent Depends on falls, waste position, slab condition, levelling and finished floor height
Tile supply Project-dependent Influenced by tile material, size, finish, wastage and pattern
Tile labour Project-dependent Large-format, rectified, stone, mosaics and complex layouts require additional control
Leak rectification Project-dependent Can expand when failed screeds, membranes, linings or adjoining areas need removal

A transparent quote should separate demolition, disposal, carpentry, plumbing, electrical work, waterproofing, screeding, tile supply, tiling, grout, sealants, shower screen and fit-off. The cost of bathroom renovation in Melbourne varies with precisely these scope decisions, so a single allowance for “bathroom tiles” doesn't provide a useful comparison.

Choose the right practitioner

In Victoria, bathroom, kitchen and laundry renovations commonly fall within the registered Domestic Builder pathway. A limited registration needs to be the DBL-L category for bathroom, kitchen and laundry renovations, while a Domestic Builder Unlimited registration covers a broader range of domestic building work. Confirm the registration, contract requirements and permit position for the actual project rather than relying on a trade label. The Australian state bathroom renovation regulation overview provides background on the Victorian pathway.

Work over $16,000 needs particular attention to Victorian builder documentation and the registered builder requirements. Structural waterproofing, altered layouts, new plumbing, wall removal, floor changes and significant rectification aren't suitable for an informal tiler-only arrangement. A tiler-only engagement makes sense for a cosmetic re-tile only when the underlying membrane, falls and substrate have already been properly assessed and remain sound.

Your contract should identify who prepares the substrate, who applies and certifies the membrane, who performs the flood test, what products are approved, how variations are authorised and what warranty documentation is supplied. It should also state who is responsible if another trade damages the waterproofing after certification.

For homeowners who want one coordinated scope, Melbourne Tiling Services P/L provides bathroom and ensuite renovations, waterproofing, screeding, self-levelling, tile installation and frameless shower-screen installation, with registered builder coordination across the relevant trades. The practical advantage of a coordinated engagement is clearer responsibility for the sequence, not a promise that documentation can be skipped.


If your Melbourne bathroom needs more than a tile refresh, ask Melbourne Tiling Services P/L to assess the substrate, drainage, waterproofing scope and trade sequence before work starts. Visit Melbourne Tiling Services P/L to discuss a documented bathroom renovation, waterproofing or leak-rectification plan and request a quote.

Shower Niche Waterproofing: A Complete Guide

You've finished a Melbourne bathroom renovation, the tiles look flawless, and the shower niche has become the room's neatest feature. Then, months later, a faint watermark appears on the adjoining wall. The grout still looks sound, so the cause isn't obvious. Often, the trouble began behind the niche, where a missed junction, flat shelf, unsealed penetration, or poorly integrated membrane allowed water into the wall assembly.

Shower niche waterproofing isn't a decorative upgrade. It's part of a regulated wet-area system governed by the National Construction Code and AS 3740:2021. The substrate, framing, membrane, bond breakers, falls, penetrations, tiles, and shower-screen detailing all have to work together. This guide follows the practical sequence used on Melbourne bathroom renovations, including the registration obligations that apply to builders and waterproofers and the frameless-screen details many generic guides leave out.

Table of Contents

Why a Shower Niche Is the First Place a Bathroom Leaks

A common rectification call starts with a renovation that appears complete. The homeowner has used the shower for months without noticing anything unusual. Then a discoloured patch appears on the wall beside the bathroom, paint begins to blister, or the ceiling below shows a damp mark. By the time the symptom is visible, the niche may have been receiving water every day.

A recessed niche interrupts the otherwise continuous wall plane. That creates more internal corners, more substrate joins, more membrane transitions, and often a penetration for lighting or plumbing. The base also becomes a small horizontal surface where water can sit if the fall is missing or directed the wrong way.

Stained wall next to a shower showing signs of water damage, highlighting potential shower niche waterproofing issues.

Where the water gets in

The membrane itself is rarely the only issue. In failed niches, the vulnerable points are usually:

  • Internal corners: The back, side, and base junctions need compatible fillets or bond-breaker detailing so movement doesn't open a direct path behind the membrane.
  • Shelf bases: A level shelf can hold water against the rear corner rather than directing it towards the shower.
  • Penetrations: Mixer outlets, pipework, niche lighting, and screen fixings all need compatible sealing.
  • Wall transitions: The niche lining must connect with the surrounding wet-area substrate without leaving an unprotected break in the waterproofing plane.

Australian guidance places the shower floor and shower walls within a defined waterproofing zone. Under the NCC 2022 wet-area waterproofing provisions, shower walls must be waterproofed to at least 1800 mm above the floor substrate, and wall junctions and joints within the shower area require waterproofing for at least 40 mm either side of the junction. A niche sits inside that regulated zone, so it must be treated as part of the assembly, not patched as an afterthought.

Practical rule: If the tiler can't show how the niche membrane joins the surrounding wall membrane, the tiles are hiding a risk rather than finishing a compliant detail.

Rectification is disruptive because the visible repair is only the beginning. Tiles may need removal, the niche substrate may need to be opened, the membrane may need to be reinstated, and the wet area may require another test before retiling. Spending time on framing, substrate preparation, membrane continuity, falls, and inspection before tiling is far cheaper than diagnosing a stained adjoining room later.

The Code and Registration Baseline Every Melbourne Project Should Meet

The starting point is AS 3740:2021, which sets minimum waterproofing requirements for domestic wet areas in Class 1, 2, and 4 buildings. It also applies to wet areas in Class 3 to 9 buildings as if they were Class 2 or 4 parts of a building, making it relevant beyond detached homes and standard apartment bathrooms. The Standards Australia description of AS 3740:2021 identifies it as the core standard for materials, design, and installation of waterproofing in these wet areas.

The NCC 2022 provisions translate that framework into practical coverage. The shower floor, including a hob or step-down, must be waterproof. Shower walls need waterproofing to at least 1800 mm above the floor substrate, while shower-area wall junctions and joints require coverage for at least 40 mm on either side. Penetrations also need sealing, which matters around mixers, shower outlets, shelves, and any niche lighting.

Falls and shower risk categories

The finished shower floor must fall towards the waste between 1:80 and 1:50. The Australian Building Industry Services information on waterproofing explains that this range corresponds to 12.5 mm to 20 mm per metre. The Victorian Building Authority treats both enclosed and unclosed showers as Category 1 high-risk areas, with a minimum 1:80 fall in shower areas. The VBA material also identifies 1:100 where vertical separation applies and no fall requirement for a Category 3 area where an enclosed shower retains water, conditions that shouldn't be casually applied to an open or frameless design. These distinctions are set out in the VBA wet-area waterproofing practitioner material.

A summary of AS 3740-2021 code baseline requirements for residential waterproofing and installer registration.

Registration questions to ask

Victoria separates bathroom renovation work from waterproofing work through different domestic builder categories. The Victorian regulations include a class limited to bathroom, kitchen and laundry renovation, and another class limited to waterproofing, so a renovation builder and a waterproofing practitioner aren't automatically the same registration scope. The relevant categories appear in Schedule 12 of the Victorian Building Regulations.

Victoria also requires registration to perform domestic building work over $10,000 in labour and materials, or to carry out building work requiring a permit regardless of cost, as explained by Consumer Affairs Victoria's registered practitioner guidance. Before signing a quote, ask:

  • Who holds the registration: Confirm the builder's registration class and the waterproofer's relevant scope.
  • What the quote includes: Check that framing, substrate, falls, membrane, penetrations, testing, and documentation aren't excluded.
  • Which system is specified: The membrane needs to be compatible with the substrate, adhesive, corners, collars, and tile finish.
  • What evidence you'll receive: Ask for photographs, product details, and test records before tiling covers the work.

For a renovation, a waterproofing compliance certificate in Victoria should form part of a properly documented handover where applicable.

Preparing the Framing, Substrate, and Falls Before Any Membrane

A niche can't be waterproofed properly if the opening moves, the lining is unsuitable, or the shelf starts flat. Preparation decides whether the membrane has a stable, continuous surface to protect.

Build a rigid opening

The niche opening should be framed with plumb studs and solid noggings. The upper and lower members need to support the lining and shelf without flexing, while the opening must avoid clashes with plumbing, electrical services, insulation, and structural elements. A wide horizontal niche deserves particular caution because removing too much existing framing can reduce wall stiffness. If the wall is structural or external, the builder needs to resolve that issue before the niche is cut.

The lining choice depends on the system and site conditions. Fibre cement sheet, compressed sheet, and proprietary foam tile backer can all be suitable when used according to their product instructions and integrated with a compatible membrane. The important point is continuity. A waterproof niche box installed against a poorly prepared opening still leaves a weak perimeter.

A prefabricated niche saves time only when its flange, substrate, membrane, and surrounding wall have been designed as one detail.

The niche lining must cover the back, sides, top, and base. AS 3740:2021 material quoted in this technical reference on niche waterproofing requires all niche surfaces to use a water-resistant substrate, with the niche separated from the lining on the opposite side of the wall. That separation matters where the recess would otherwise press directly against or share a vulnerable lining on the other face.

Establish the falls before coating

The niche base needs a minimum 1:100 fall towards the shower. That requirement is separate from the main shower-floor fall. A tiler can create the niche slope by packing, screeding, or forming the substrate before the membrane is applied, but the method must leave a sound, even surface.

The base should fall out of the recess, not towards the back wall. The back and side corners need to remain clean and continuous so water can travel across the shelf and out rather than collect in the rear junction. A registered waterproofer should check the substrate for dust, contamination, loose material, and excessive moisture, then use the specified primer before applying the membrane.

A four-step infographic illustrating the preparation process for building a shower niche, featuring construction diagrams.

The practical order is straightforward:

  1. Frame the opening: Make the structure square, plumb, and adequately supported.
  2. Install noggings: Provide firm support for the shelf and each lining edge.
  3. Install the substrate: Line every niche face and keep it separated from the opposite wall lining where required.
  4. Set the fall: Form the base slope before membrane application and confirm that it drains towards the shower.

A short site video can help illustrate the construction sequence, but it doesn't replace the membrane manufacturer's instructions or the registered waterproofer's inspection.

Sheet Membrane Versus Liquid Membrane for a Shower Niche

Both sheet and liquid membranes can produce a reliable shower niche when the products are compatible and the installer follows the system requirements. Neither option fixes poor framing, a flat shelf, contamination, or an unsealed penetration.

Criterion Sheet Membrane Liquid Membrane
Internal corners Preformed corners and proprietary tapes can make geometry consistent. The material conforms to complex shapes but needs careful reinforcement at corners.
Application control Coverage is visible, with overlaps and bonding carrying the main risk. Coat thickness, drying, and recoating windows carry the main risk.
Speed Fast on prepared, regular surfaces. Flexible for custom shapes, but requires curing between stages.
Common failure Poorly bonded overlaps, wrinkles, or incomplete corner adhesion. Thin spots, pinholes, or coating applied before the previous layer is ready.
Best fit A clean, stable niche with a compatible proprietary detailing system. A complex recess where an experienced applicator can control coverage and curing.

What works on site

Sheet systems are useful where the niche has crisp, predictable geometry. The membrane is cut to suit the back, sides, top, and base, then joined with compatible tapes or corner pieces. Overlaps must be fully bonded, pressed free of wrinkles, and integrated with the surrounding wall membrane. A sheet that appears to cover the area but isn't properly bonded at an edge is not a finished waterproofing detail.

Liquid polyurethane and acrylic systems are more forgiving around irregular geometry because the coating follows the substrate. That flexibility comes with discipline. The waterproofer needs to apply the specified coats at the specified coverage, allow the correct drying period, and avoid trapping moisture between layers. Cold and humid Melbourne conditions can make rushed recoating particularly risky.

The membrane system should also suit the tile adhesive and substrate. Product instructions govern primers, reinforcement, curing, and compatibility, so choosing a brand from a catalogue without checking the complete system is poor practice. A useful shower waterproofing membrane service overview can help homeowners understand what should be discussed, but the installer still needs to nominate the actual compatible system for the project.

Treat corners and penetrations as separate details

At wall-to-floor and wall-to-niche junctions, the applicator uses compatible fillets, bond-breaker tape, or the proprietary equivalent. These details accommodate movement and help the membrane remain continuous through a change in plane. Mixer outlets, shower penetrations, and niche lights need collars or reinforced detailing, not a casual smear of membrane around the pipe.

The choice between sheet and liquid should follow the geometry, substrate, enclosure, and applicator's demonstrated skill. Brand loyalty is a poor substitute for a complete, documented system.

Flashing, Taping, and the Niche Base That Drains

A niche must drain into the shower, not function as a small tiled shelf that holds water. The membrane covers the back, sides, top, and base, then turns into each junction with compatible fillets or bond breakers. All niche surfaces require waterproofing, with a minimum 1:100 fall towards the shower under the applicable wet-area requirements, as noted earlier.

Form the internal corners

Sharp changes of plane can thin a membrane, leave gaps beneath reinforcement, or crack when the framing moves. The applicator prepares each junction, installs the specified fillet or bond-breaker tape, and dresses the membrane continuously over the detail. Back and side upturns must remain continuous, with no pinholes or open lower corners.

The niche base should slope outward into the shower. A single sloping shelf is easier to clean and inspect than a concealed step or complicated channel. A drained shelf can work, but it adds an outlet, another junction, and another component requiring compatible products and ongoing cleaning. A full-width niche also needs stronger framing and more accurate tile setting than a compact recess.

An infographic detailing shower niche waterproofing steps, including upturns, taping, base drainage, and shelf angle techniques.

Connect the niche to the floor system

The wall membrane must join the floor membrane, which then dresses into a compatible floor-waste flange or puddle-flange arrangement. Waterproofing is incomplete if it stops short of the waste, finishes behind an unsealed penetration, or leaves the shower-screen line outside the planned wet-area detail.

The main shower floor fall remains between 1:80 and 1:50, or 12.5 mm to 20 mm per metre, under VBA guidance and the AS 3740 framework. A shower drainage installation service should coordinate the waste, screed, membrane, tile thickness, and finished levels. The grate is not a trim item to position after everything else.

Frameless screens change the exposure

Frameless and walk-in screens let more spray reach the wall and niche opening. The screen rail, channel, and fixing line must be planned before membrane application, especially where a waterstop sits beneath the rail. Drilling through a completed tiled wall can breach the waterproofing when the fixing detail was not allowed for during construction.

An enclosed shower contains spray more effectively, but it does not correct poor niche detailing. An open shower exposes more wall area, so the designer, builder, waterproofer, and screen installer need agreed falls and water-containment details before tiling begins. This coordination is where many otherwise neat niches fail.

Leak Testing, Sign-Off, and Documentation Before Tiling

Waterproofing should be inspected before tile adhesive hides it. A visual check looks for missed corners, pinholes, uncoated substrate, damaged membrane, incomplete collars, and poor transitions around the niche. It should also confirm that the shelf still has its intended fall after all reinforcement and coating have been applied.

Run a controlled flood test

Where the construction and project requirements call for it, the shower area can be temporarily flooded and held for the standard 24-hour period. The NCC wet-area waterproofing provisions provide the broader regulatory context for wet-area waterproofing, while the site team must follow the applicable testing method and membrane instructions.

Before filling, the tester marks the water level and protects openings and test drains appropriately. During the hold period, the adjoining room, skirtings, ceiling below, penetrations, and accessible edges should be checked for moisture or movement in the level. A niche may not be the lowest point, so the inspection must cover the whole wet zone rather than focusing only on the recess.

If the test fails, the team shouldn't just dry the area and tile over it. The membrane system needs diagnosis. A localised defect may allow a controlled repair followed by another test, but widespread separation, missing coverage, or a poor floor-to-wall connection can justify removing and rebuilding the wet-zone membrane.

Record the work

A useful handover file includes:

  • Photographs: Capture the substrate, niche corners, membrane coverage, penetrations, waste connection, and screen-zone detail before tiling.
  • Product records: Keep membrane and primer names, batch numbers, and manufacturer instructions.
  • Application notes: Record coat sequence and applied thickness where the system requires it.
  • Site checks: Include substrate moisture readings, preparation notes, and inspection dates.
  • Test evidence: Note the test method, water level, duration, observations, and any repairs.

Once tiling begins, later diagnosis becomes slower and more destructive. Documentation gives the owner and builder a clear record of what was installed, and it provides useful evidence if a warranty or rectification question arises.

Common Shower Niche Defects, Fixes, and Long-Term Maintenance

A neat tile finish can conceal a badly performing niche. The recurring defects in Melbourne rectification work are usually simple geometry or detailing mistakes, not mysterious product failures.

The failures that keep returning

Ponding on the shelf usually means the base was left level or falls towards the rear. The repair involves removing enough tile to expose the substrate, correcting the fall, reinstating the compatible membrane detail, and repeating the required test before retiling.

Delamination at the back wall can follow inadequate substrate preparation, movement, or a niche lining installed flush against the opposite wall lining where separation was required. The affected lining and membrane may need removal rather than a surface patch.

Perimeter silicone failure allows water behind the finished edge, especially where the joint is contaminated, too thin, or applied to a moving connection without proper preparation. Silicone is a maintenance joint, not a replacement for membrane coverage.

Capillary tracking at mixer penetrations often starts where the pipe collar or seal was omitted. Water follows the small gap around the penetration and travels behind the tile. The correct remedy depends on the extent of damage, but it can require opening the wall around the fitting and reinstating the penetration detail.

Repair or rebuild

Local tile and membrane removal makes sense when the defect is isolated and the surrounding system is documented and sound. A full wet-zone rebuild is often the safer decision where multiple junctions are missing, the floor membrane doesn't connect to the waste, or the substrate has moved. Any repair should include a new inspection and, where required, a repeat flood test.

Maintenance still matters after handover:

  • Inspect while cleaning: Look for cracked grout, open silicone, staining, and persistent moisture.
  • Maintain flexible joints: Replace failed silicone before water reaches the substrate.
  • Avoid excessive shelf loading: Heavy rigid objects can stress a small shelf and its tile edges.
  • Keep the recess clear: Remove residue so water can run out rather than sit in corners.
  • Report changes early: A stain outside the shower is a reason to investigate, not a mark to paint over.

Melbourne Tiling Services P/L provides bathroom renovations, shower niche waterproofing, screeding, drainage detailing, tiling, frameless shower screens, and leak rectification across Melbourne and greater Victoria, coordinating registered builders and relevant trades for the wet-area scope. For a niche renovation or an existing leak, visit Melbourne Tiling Services P/L to arrange a project discussion and request a quote before the tiles conceal the detail.

Bathroom Tile Sealing in Melbourne: A Practical How-To Guide

You've probably got one of two jobs in front of you right now. The shower still looks fine from the doorway, but the grout line at the tray edge keeps darkening, the fan fogs the mirror for too long, or a renovated ensuite in Highett has started picking up the same mould line again after cleaning. In Melbourne, that's rarely just a cosmetic issue. It usually means bathroom tile sealing sits inside a wider wet-area maintenance problem, where ventilation, grout condition, and waterproofing all matter at once.

That's the part most homeowners miss. Australian construction guidance treats showers, bathroom floors, and other wet areas as high-risk moisture zones that need sealed or waterproofed systems, not just a quick grout touch-up, and resealing in showers is commonly done every 6–12 months while less exposed tiled areas can stretch to 1–3 years. In practice, sealing is part of a maintenance cycle, not a one-off finish, especially in Melbourne and Victoria where humidity and older housing stock make bathroom failures expensive and messy. The Australian wet-area sealing benchmark shows why routine upkeep matters, while the repair side of the ledger is why sealing is treated as preventive asset protection rather than a nice extra.

An infographic detailing the cycle of bathroom tile sealing and recurring mould issues in Melbourne homes.

Table of Contents

Why Bathroom Tile Sealing Matters in Melbourne Homes

A common Melbourne job starts the same way. A bayside ensuite has already been renovated, the shower looks sharp, and yet mould keeps returning along the floor line where the tray meets the wall. The owner asks whether another round of sealer will solve it, and that question tells you most of what you need to know. Sealing can help, but only if the problem is porous grout or stained stone, not a failed wet-area system.

Melbourne conditions change the maintenance equation

Bayside humidity, older brick homes, and bathrooms with weak exhaust fans all make moisture linger longer than people expect. That matters because the national move toward mandatory waterproofing and wet-area detailing shifted the job away from ad hoc sealing and toward a broader moisture-management system. Bathroom tile sealing now protects surfaces, but it doesn't replace the waterproofing layer beneath them.

Practical rule: if the shower smells damp after use, or the grout keeps changing colour after cleaning, start with moisture management before you buy another sealer.

For homeowners, the decision usually falls into three buckets. You're either protecting a new renovation, maintaining an existing bathroom, or figuring out whether DIY sealing is enough before you bring in a professional. Those are different jobs, and they need different answers.

Treat sealing as scheduled maintenance

The better way to think about it is simple. Sealing is a planned service, like gutter cleaning or repainting, not a decorative afterthought. In wet areas, that schedule is what helps keep water, mould, and substrate damage from turning into major remedial work later.

That's why a tile seal in Melbourne should be read as part of the room's moisture strategy. If the bathroom is already leaking, spongy, or lifting, sealing is only a short-term surface treatment. If the structure is sound, sealing can extend the life of the grout, keep cleaning easier, and buy time between more invasive repairs.

Which Tiles and Grout Actually Need Sealing

Not every bathroom surface needs the same treatment, and that's where money is often wasted. The usual mistake is buying one product for the whole room, then assuming everything from glazed porcelain to cracked grout reacts the same way. It doesn't. A Melbourne bathroom has at least four material cases worth separating before you open a bottle.

The materials behave differently

Glazed porcelain and ceramic tile bodies generally don't need sealing, because the face is already dense and low-absorbency, but the grout joints still do. Natural stone, including marble and travertine, is different again, because both the stone surface and the grout usually need protection. Cement-based grout is the most common maintenance target, since it's porous and vulnerable to staining and moisture uptake.

Material Needs Sealing? Notes
Glazed porcelain Usually no Tile face is generally low-absorbency, grout still needs attention
Ceramic tile Usually no Same practical rule as glazed porcelain in most bathrooms
Natural stone Yes Surface and grout often need protection
Cement-based grout Yes Most common resealing target in showers and bathroom floors

Independent consumer guidance on tile materials supports that split between tile and grout, and it's the right way to think about maintenance in mixed bathrooms. Floor & Decor's guidance on tile sealing is useful because it separates tile body from grout rather than treating them as one surface. For a broader grout choice discussion, see the practical comparison at epoxy grout versus cement grout.

The edge cases matter more than the easy ones

Mixed-material showers are where real-world jobs get messy. A feature wall might be ceramic, the niche might be stone, and the floor might have pre-sealed grout from the factory. Add cracked or discoloured joints, and you're no longer asking “Do I seal this bathroom?” You're asking which parts are still sound and which ones are already failing.

If water beads on one surface but darkens another, the bathroom is telling you where the porous material is.

The safest move is to inspect each surface separately. If the tile face is glazed, skip unnecessary topical products. If the grout is cement-based, protect it. If natural stone is present, treat it as a different substrate entirely.

Choosing the Right Sealer for Your Bathroom

Sealer choice matters more than most hardware-store labels suggest. In wet areas, there are really two families that count. Penetrating sealers soak into porous material, while topical sealers sit on the surface and form a film. In a Melbourne bathroom, that difference decides whether the finish keeps working or turns into a maintenance headache.

A comparison chart explaining the differences between penetrating and topical sealers for bathroom tiles and grout.

Penetrating sealers suit porous substrates

Penetrating sealers are the safer default for cement grout and many natural stones. They work by soaking into the pores rather than sitting on top, so the surface still looks natural and can breathe better than a film coating. That makes them more practical for showers, niches, and bathroom floors where constant cleaning and steam are part of daily use.

The chemistry matters too. For stone, fluoropolymer and silane/siloxane systems are the kinds of products that belong in this conversation, because they're built for porous mineral surfaces rather than decorative shine. For grout, dedicated grout sealers are the cleaner option.

Topical sealers have a narrower place

Topical sealers can look tidy on decorative feature walls, but they're a poor match for most shower floors. They sit on the surface, which can create a glossy or satin finish, but in a humid bathroom with limited ventilation that film can trap moisture or wear unevenly. Wax and acrylic finishes are especially risky in showers, because residue build-up and poor adhesion are common failure points.

The trade-off is simple. A topical product may look better on day one, but a penetrating product usually ages more sensibly in a working bathroom. That's the reason serious tilers tend to match chemistry to substrate rather than reach for the cheapest bottle on special.

For stone-specific work, the detail matters enough that I'd point people to the guidance on sealing stone tiles. If you're choosing between product types, the distinction is less about marketing and more about whether the substrate accepts the treatment.

Step-by-Step Sealing Process for a Melbourne Bathroom

The jobs that fail are usually rushed at the start, not the end. A bathroom in Melbourne can look dry on the surface while the grout is still holding moisture deep in the joints, especially after cleaning or a recent renovation. If you seal too early, the product can sit on contamination, haze on the tile face, or fail to penetrate where it's supposed to.

Start with the surface, not the bottle

Inspect the grout and stone for cracks, powdering, staining, or loose sections. If the joints are soft or missing material, sealing won't fix that. Clean out soap residue first, then treat any mould growth before you think about the sealer itself.

The key is clean, rinsed, and fully dry joints. Trade guidance is blunt here, because wax, soap, and residue can block uptake and leave a film on glazed tile. Bromley Tilers' sealing guidance reinforces the same point, and it's the mistake I see most often in DIY bathrooms.

Apply in small sections and respect dwell time

Work in short runs with a brush or foam applicator. On new bathroom grout, the practical sequence is to let the grout cure 48–72 hours before sealing, apply the sealer in small sections, wipe residue off the tile face within about 5 minutes, and then let the bathroom cure for 24–48 hours before wet use. Product guidance also commonly calls for 2 coats on porous grout lines. Loctite's grout sealing guide matches the curing and wipe-off windows people need to plan around.

A simple working rhythm helps:

  • Prepare the room: Vacuum or wipe dust, then deep-clean grout and tile faces.
  • Dry fully: Leave the bathroom ventilated until the joints are completely dry.
  • Seal in sections: Use a foam applicator or brush, don't flood the joint.
  • Watch the clock: Remove residue before haze forms on the tile face.
  • Let it cure: Keep the shower dry for the full cure period.

Rushing the drying stage is the fastest way to waste a good sealer.

Ventilation matters during cure. Run the exhaust fan, leave the door ajar if the room can stay secure, and don't put the shower back into service early just because the surface feels dry to the touch. In Melbourne humidity, touch-dry and fully cured are two different things.

When Sealing Is Not the Actual Problem

An infographic titled When Sealing Is Not the Real Problem, highlighting warning signs and deeper structural water issues.

Some bathrooms keep failing because sealing is the wrong fix. If mould comes back soon after resealing, the grout keeps breaking apart, or water marks appear on an adjacent wall, the room is pointing to a problem below the tile surface. Sealer can slow down absorption. It cannot repair a failed membrane or stop water moving through a bad junction.

Warning signs point past cosmetic maintenance

Soft or crumbling grout means the joint is failing, not just staining. Efflorescence, swollen door jambs, and musty smells that return within days all point to moisture moving where it should not. If the shower floor still darkens after careful resealing, the water path is likely deeper than the surface layer.

That distinction matters because sealing over a failed waterproofing membrane only buys time. It does not correct structural water ingress, poor original installation, or hidden leakage around the tray, wall junctions, or penetrations. A proper inspection is the better call than another coat of product, especially in Melbourne bathrooms where humidity can keep problems active long after the surface looks dry. For a broader look at how waterproofing fits into Melbourne bathroom work, the membrane under the tiles is the layer doing the actual protection.

Renovation work can cross into builder territory

Bathroom renovations in Victoria often combine tiling, waterproofing, plumbing, and carpentry. Once the work becomes structural or high-risk, it may need to be handled by a Registered Unlimited Builder, not only a tiler or handyman. Under Victorian Domestic Building Contracts law, a domestic building contract is generally required for residential building work over AUD 10,000, so the paperwork and the scope matter as much as the tile finish.

If the bathroom needs leak rectification, waterproofing replacement, framing repairs, or a full renovation, sealing is only one small part of the job. The work has moved into a larger remedial scope, and that is the point where a registered builder should be on the job description.

Costs, DIY vs Professional Service, and Reseal Timelines

Bathroom tile sealing is cheap compared with the damage it helps prevent. International benchmarks put grout sealing at about US$0.30–US$0.50 per square foot for DIY-equivalent work and around US$1–US$2 per square foot when professionally applied, with one published estimate placing an average job at US$150–US$250 for 160 square feet. Those numbers aren't Australia-specific, but they show why sealing is treated as routine maintenance rather than major expenditure. Angi's grout sealing cost guide gives a useful baseline.

DIY works for simple maintenance

For a straightforward grout reseal, DIY usually makes sense when the surface is sound, the joints are clean, and the area isn't crossing into waterproofing work. You're buying the sealer, applicator, cleaner, and time. The payoff is decent if you're protecting a small bathroom floor or a few metre runs of grout and you're careful with prep.

Professional help makes more sense when the bathroom is large, the surfaces are mixed, or the work sits beside a renovation scope that already needs a trades sequence. That's especially true for bathrooms, balconies, and any job where waterproofing or leak rectification is involved. A professional tiler or registered builder isn't just selling labour, they're managing substrate condition, cure windows, and the risk of rework.

Reseal timing depends on exposure

The practical Melbourne schedule is straightforward. High-exposure shower zones usually want resealing every 6–12 months, while less exposed tiled areas can run 1–3 years depending on use and ventilation. In wet rooms with better airflow and gentler cleaners, those intervals can stretch. In humid bathrooms with heavy daily use, they shorten.

If water stops beading on the grout, it's time to check the surface again.

Cleaning products matter too. Soap-based residue and harsh cleaners can leave films that interfere with future sealer uptake, so a pH-neutral, residue-free cleaner is the better maintenance habit. If you're budgeting a full bathroom refresh, Melbourne Tiling Services P/L also offers tile sealing as part of larger bathroom work, but only where it fits the surface and scope.

Melbourne-Specific Tips and Your Next Steps

Melbourne bathrooms don't age uniformly. Bayside homes deal with humid air, inner-city apartments often rely on weak ventilation, and hill suburbs can swing between damp mornings and warm, closed-up evenings. That's why the same sealing product can behave differently from one suburb to the next. The fix is usually less about a magic brand and more about ventilation, cleaner choice, and knowing when the job has become renovation work.

Keep the maintenance plan tied to the room

Use the exhaust fan during showers and leave it running long enough to clear the room. Avoid cleaning products that leave soap films or strip the sealer early, because that shortens the life of the joints. If the shower is repeatedly showing mould at the base, stop treating it as a stain problem and check the whole moisture path.

Bring in the right licence when the scope changes

A Registered Unlimited Builder should be involved when the work includes waterproofing, leak rectification, balcony remediation, or a full bathroom renovation with multiple trades. That's not red tape for its own sake, it's the difference between surface maintenance and building work. Ask for credential details, waterproofing warranties, material specs, and a clear timeline before anyone starts.

A practical checklist helps keep the project grounded:

  • Identify the substrate: porcelain, ceramic, natural stone, or cement grout.
  • Inspect the failure mode: staining, mould, cracking, or deeper water damage.
  • Match the product: penetrating for porous materials, not a glossy film everywhere.
  • Check the scope: if waterproofing or plumbing is involved, ask for builder oversight.
  • Plan the cure time: don't book the shower back in too early.

If you want a bathroom that holds up in Melbourne conditions, treat sealing as part of the renovation and maintenance cycle, not as a last-minute fix. For a local assessment, quote, or a bathroom scope that may involve tiling, waterproofing, or builder coordination, visit Melbourne Tiling Services P/L and talk through what your shower, grout, and wet-area details need.

Feature Wall Tiling in Melbourne: A Complete Guide for 2026

In Melbourne, a feature wall usually sits inside a bathroom reno that's already around the $10,000 mark, and the wall itself only works when the wall behind it is flat, waterproofed, and detailed properly. For a realistic 2026 project, the right question isn't “what tile looks best”, it's “which wall system will still hold up after years of steam, cleaning, and movement?”

A homeowner usually gets to this point after staring at a tired ensuite or shower wall and deciding the room needs more than another coat of paint. That's where feature wall tiling comes in, not as a cosmetic add-on, but as a precision wet-area finish that has to look sharp and perform at the same time. In Melbourne and greater Victoria, the decision usually comes down to three things, material, layout, and who installs it.

Table of Contents

Why a Feature Wall Changes the Whole Bathroom

A Melbourne homeowner might start with a single wall in the shower, then realise the whole room needs to be treated as one visual and waterproofing system. That's the shift with feature wall tiling, it changes the feel of the bathroom, but it also changes the standard the wall has to meet. What used to be a small decorative strip now often runs full height and reads like part of the architecture, especially in modern bathrooms and ensuites.

The practical role of the wall

The design side matters, but the wall also has a job to do in a wet area. Australian feature-wall guidance now leans heavily towards large-format porcelain around 1,200 x 600 mm and above, because fewer grout joints create a more continuous slab effect and a cleaner visual line in bathrooms across Melbourne and greater Victoria (Australian tile design guide). That's why small tiles are often kept for niches or accent details rather than the main feature wall.

A feature wall in a bathroom isn't a wallpaper decision. It's a substrate, waterproofing, and fixing decision that happens to look good when it's done properly.

The project scope is broad enough to suit a shower wall, vanity wall, ensuite splashback, or a full-height wall behind a freestanding bath, but the room has to support the material. Australian renovation guidance treats the job as a wet-area detail with surface preparation, adhesive application, spacers, grouting, and sealing built into the sequence, not as a decorative afterthought (feature wall installation guidance). That's the part homeowners don't see on the mood board.

What drives the decision

A good result usually comes down to three questions.

  • What material suits the room? Porcelain, ceramic, stone, and slab-like panels all behave differently in moisture and light.
  • How flat is the wall? Large-format tiles expose substrate defects fast.
  • Who is installing it? In Victoria, that matters for both quality and compliance.

If you're reading this to decide whether a feature wall belongs in your bathroom renovation, the practical answer is yes, if you want the room to feel finished and you're prepared to build it as a system, not a surface.

Substrate, Adhesive and Wall Tolerance Explained

A feature wall is only as flat as the wall behind it. That sounds obvious, but it's where most disappointing bathrooms start, because large-format tiles don't hide much and low-absorption surfaces can make every bump or hollow look worse once the light hits the wall.

Flatness decides the finish

Australian tiling practice expects a stable, clean, dry substrate, and for internal wall tiling, industry guidance points to at least 80% adhesive coverage plus vertical deviation below 3 mm over 2 m to control lippage and alignment (wall tiling guide). In plain terms, if the wall bows, dips, or carries old adhesive ridges, those flaws will telegraph through the tile face. That's why a straightedge check before quoting is not optional.

An infographic detailing the three essential foundations for a durable feature wall tiling project: substrate preparation, adhesive selection, and wall tolerance.

Why adhesive choice matters more on big tiles

Large-format panels commonly used in feature walls sit around 6–20 mm thickness, with sizes up to 1200 × 2400 mm, and porcelain wall systems are typically engineered around ≤0.5% water absorption and ≥35 MPa flexural strength (panel specification guidance). Those figures matter because the bigger and denser the panel, the more it depends on full bedding, good coverage, and careful handling. In practical terms, installers often use 2–3 mm grout joints on properly prepared walls and back-butter where needed to keep edges aligned.

Practical rule: if the quote says “feature wall” but doesn't mention wall prep, levelling, or adhesive coverage, the quote is incomplete.

That's also where screeding and self-levelling come in. They're not upsells when the wall is out of tolerance, they're the reason a premium wall stays flat after curing. If you want to understand what an adhesive line item is really doing, see the technical overview at this adhesive guide.

Comparing Feature Wall Materials for Melbourne Bathrooms

The material choice sets the tone, but it also sets the maintenance burden and the installer's workload. For Melbourne bathrooms, the four materials that come up most often are porcelain, ceramic, natural stone, and large-format Kerlite or panel systems.

Material Wet-area suitability Finish range Durability Substrate demand Installed cost (per m², indicative)
Porcelain Strong for bathrooms and showers Broad, from stone-look to matte slab styles High Moderate to high Not stated in verified data
Ceramic Suitable for many bathroom walls Broad, especially decorative and budget-friendly looks Moderate Moderate Not stated in verified data
Natural stone Suitable with correct sealing and maintenance Premium, natural variation High, but maintenance-sensitive High Not stated in verified data
Large-format Kerlite / panels Strong for premium wet areas when installed correctly Seamless, slab-like, minimalist High when substrate is excellent Very high Not stated in verified data

Porcelain, the safest all-rounder

Porcelain is the material most homeowners end up with when they want durability without constant upkeep. It handles moisture well, comes in a wide finish range, and suits the cleaner slab effect that's now common in Australian bathrooms. For that reason, I'd treat it as the default option unless the room demands a specialist finish.

Ceramic, the budget-friendly wall option

Ceramic can work well on a feature wall when the design is lighter, the tile format is manageable, and the budget needs to stay contained. It's often easier to source in decorative ranges, which makes it useful in powder rooms, smaller ensuites, and walls that aren't under constant water exposure. It's less demanding than stone, but it also doesn't give the same premium weight in a large wet area.

Natural stone and large-format panels

Natural stone gives depth and variation that manufactured products can't fully mimic, but it also asks more of the owner. Sealing, maintenance, and careful product selection matter more with stone. Large-format Kerlite-style panels go in the opposite direction, they create the cleanest visual result, but they demand the flattest substrate and the most experienced installer, which is why they suit higher-end bathroom renovations where the wall can be brought to tolerance before the tile is set.

For a broader look at porcelain wall applications in bathrooms, see porcelain tile bathroom guidance.

Waterproofing, Screeding and the Installation Sequence

A Melbourne feature wall in a bathroom starts well before the first tile goes on. If the substrate is out of tolerance, damp, or poorly prepared, the finish will show it later as cracked grout, hollow patches, or movement that was there from day one but only becomes visible after a few months in service.

The compliant build order

The wall comes first. It needs to be checked for stability, cleanliness, and dryness before any membrane or adhesive is applied. If the surface is not flat enough, it needs screeding or levelling first, because membrane is not a substitute for a true substrate. After that, waterproofing is applied to the wet area in line with AS 3740, and the surface is left to cure before tiling begins.

A membrane that has not cured properly becomes a soft layer under a rigid finish. That is a common starting point for bathroom failures.

Once the wall is ready, the tiler sets out the tile layout, checks the cut positions, and starts fixing with enough adhesive coverage to avoid voids. Internal corners and perimeter joints should be treated with flexible silicone rather than grout, because grout is too rigid for the movement those joints need to absorb. Industry guidance also calls for 2–5 mm grout joints and at least 24 hours of undisturbed curing for adhesive, which is why rushed jobs often fail early (wall tiling guidance).

The shortcuts that cause problems

The common misses are easy to spot once you know what to look for.

  • Skipping levelling: large tiles magnify wall defects and make lippage obvious.
  • Using grout in movement joints: corners and perimeters crack sooner when they are locked with rigid grout.
  • Poor membrane continuity: one break in the waterproofing detail can compromise the whole wall.
  • Thin adhesive coverage: hollow sounds and edge lift usually come from poor bedding.

Australian bathroom renovation work also has a licensing side. In Victoria, domestic building work with a contract price of $10,000 or more must be carried out by a registered builder, and waterproofing-related work can sit within the domestic building regulation framework as well. That is why feature wall sequencing and licensing are part of the same job, not separate issues.

For a practical look at how substrate prep affects tile performance, see screeding for tiles.

A six-step infographic illustrating the professional installation process for a Melbourne feature wall with tiles.

Cost Ranges and Budgeting for a Melbourne Feature Wall

A realistic feature wall budget starts with the wall size, then gets shaped by the tile format, the wall prep, and what has to happen around the room to install it properly. The reason quotes vary so much is that the visible tile is only part of the job.

What actually drives the price

The main cost buckets are materials, labour, preparation, and design complexity. Materials cover the tile, adhesive, grout, and sealants. Labour covers cutting, setting, alignment, finishing, and cleanup. Preparation covers substrate repair, waterproofing, and levelling. Design complexity rises when you add mitred corners, tight herringbone or stacked layouts, shower screen removal, or awkward cuts around niches and vanities.

An infographic detailing the budget factors for installing a Melbourne feature wall including materials, labour, and preparation costs.

Why cheap quotes get expensive later

The cheapest quote is often the one that leaves out the work nobody wants to explain. If the wall needs levelling, if the membrane is thin or incomplete, or if the room needs shower screen removal and refitting, those items show up later as variations. That's where homeowners get caught, because the tile price looked manageable, but the system underneath wasn't priced transparently.

A sensible budget also needs to sit inside the wider renovation context. In Melbourne, many bathrooms and ensuites land around the $10,000 renovation mark for mid-range work, so a feature wall shouldn't be priced in isolation from the rest of the room. If the wall is the statement piece, the rest of the bathroom still has to support it.

Budget checks before you sign

  • Confirm the substrate work: ask whether levelling, patching, or screeding is included.
  • Check waterproofing scope: make sure the membrane detail is priced, not assumed.
  • Ask about corners and trims: mitred edges take time and skill.
  • Clarify removal works: shower screens, old tiles, and rubbish disposal can all alter the quote.
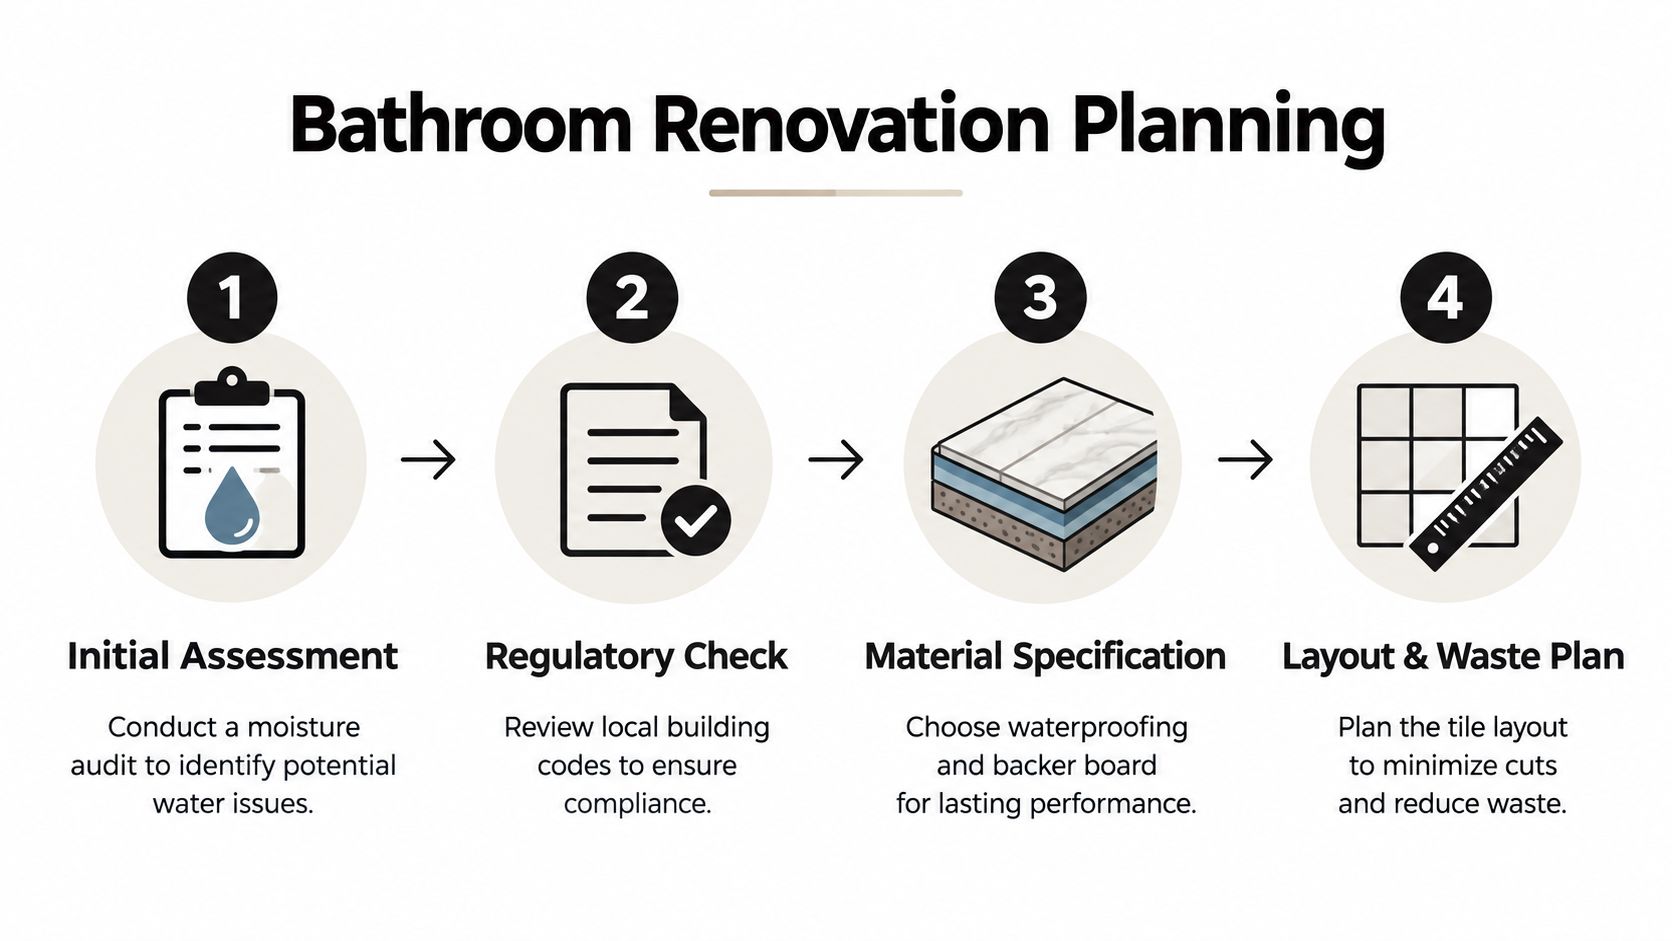
  • Match the material to the wall: a panel that the substrate can't support is a false economy.

If you want the renovation scope managed as a single project, Melbourne Tiling Services P/L handles bathroom and feature wall coordination alongside tiling, waterproofing, and screeding, which is the kind of setup that reduces missed items rather than adding them.

DIY Versus Hiring a Licensed Melbourne Tiler

A feature wall sounds like a finish decision until the wall starts acting like part of the bathroom's wet-area system. That is the point where DIY stops being a casual savings exercise and starts carrying real risk, because the visible tile is only as good as the substrate, waterproofing, and fixings behind it.

What a capable homeowner can handle

A careful homeowner can still do useful work on the front end. Demolition, removing old tiles, basic room prep, and even simple splashback-style tiling in a dry zone can be manageable if the wall is straight and the scope is small. Those jobs take time and effort, but they do not usually carry the same failure risk as a shower wall or an ensuite feature wall.

The practical difference is the setting. A small laundry wall or vanity splashback can tolerate a modest mistake far better than a bathroom wall that sits behind waterproofing or meets regular spray. If the wall is dry, the surface is sound, and the layout is simple, DIY has a place.

Where the licensed trades start to matter

Waterproofing, structural changes, and large-format panel installation are the jobs that deserve a professional from the start. In Victoria, domestic building work for a bathroom renovation must be carried out by a registered builder when the contract price is $10,000 or more, and that is the level many feature-wall bathrooms quickly move into (Victorian domestic building reference). For a homeowner, that affects warranty cover, insurance, and the confidence a buyer or inspector may place in the work later.

A Registered Unlimited Builder can coordinate the trades that have to be sequenced properly, including carpenters, plumbers, electricians, tilers, and waterproofers. That matters most where the wall meets a shower screen, niche, vanity, or an area with past leaks, because each trade can affect the next one if the order is wrong.

DIY saves money only when the scope stays small and the wall remains dry. Once the room becomes wet-area work, the cost of a failed membrane, loose substrate, or poorly set-out feature panel can exceed the labour saved on day one.

For a small feature wall, a capable DIYer can still strip the room, remove rubble, and prepare surfaces for the licensed installer. For an ensuite or main bathroom, the safer move is to leave the wet-area work to a registered professional and use your own effort on the parts that do not sit behind waterproofing.

How Melbourne Tiling Services Plans a Feature Wall Project

A well-run Melbourne project starts with a site visit, not a sales pitch. The first step is usually a free on-site quote, where the wall is measured, the substrate is checked, and the layout constraints are identified before anyone orders material. That saves a lot of guesswork later, especially when the feature wall has to sit cleanly against a vanity, niche, or shower screen.

A professional tiler discussing home renovation project plans with a client using a digital tablet.

The next step is usually design refinement with 3D drawings, so the homeowner can see the wall in context before demolition starts. A renovation calculator then turns the scope into a clearer budget figure, which helps when the job includes more than just tile setting. Material selection follows, then scheduling of the licensed trades needed for the room, including carpenters, plumbers, electricians, tilers, and waterproofers.

When the wall intersects with a leak issue or an awkward enclosure, the same planning process also covers rectification work, shower screen coordination, and cleanup controls. That's the benefit of a Registered Unlimited Builder approach, the work gets sequenced as one renovation rather than a set of disconnected trades. It's also where feature wall tiling stops being guesswork and starts being a managed build.

Maintenance, Longevity and Your Final Decision Checklist

A good feature wall should still look intentional years later, not tired after the first humid summer. The easiest walls to maintain are the ones built with the right material and the right jointing from the start, because cleaning is only one part of the long-term equation.

What lasts and what wears

Porcelain is the easiest of the main wall finishes to keep clean. Natural stone needs more attention because sealing and top-ups become part of the maintenance routine. Grout and silicone are the wear points to watch, especially at corners, edges, and around the shower opening. If you see cracked grout, soft silicone, musty smells, or visible lippage at corners, the wall needs checking, not just wiping.

The final decision checklist

  • Confirm substrate tolerance before you choose a large-format tile.
  • Match the material to the wet area, not just the style board.
  • Treat waterproofing and movement joints as essential.
  • Decide what's DIY and what needs a licensed builder.
  • Read the quote for prep work, not only for the tile price.
  • Ask who coordinates the trades if the wall touches a shower, niche, or screen.

The clearest feature wall is the one that feels simple because the system underneath was done properly. That's the standard worth aiming for in a Melbourne bathroom renovation, whether the wall is porcelain, ceramic, stone, or a large-format panel.


If you're planning bathroom renovations and want the feature wall built as part of a proper wet-area system, Melbourne Tiling Services P/L can assess the substrate, waterproofing, screeding, and tile selection together. Visit Melbourne Tiling Services P/L to organise a quote and discuss a feature wall that's designed to look sharp and hold up in a Melbourne bathroom.

Rising Damp Solutions for Melbourne Homes

You're usually not standing in front of a wall thinking about capillary action. You're looking at a shower wall with a tide mark, a skirting board that's swollen, or a balcony tile that's just started to lift, and you want the problem gone before the next quote turns into a bigger renovation. In Melbourne bathrooms, that moment matters, because the finish you can see is often only the last symptom of a moisture problem that started lower down in the wall or outside at ground level.

Table of Contents

Why Rising Damp Shows Up When You Start a Renovation

The call usually starts with a tile problem, not a wall problem. A homeowner sees a line of staining in a shower, a balcony edge that sounds hollow, or paint that keeps blistering at the bottom of a plaster wall, then asks for a tile repair because that feels like the cheapest fix.

Close-up view of wooden baseboard showing severe water damage and wood rot near tiled bathroom floor.

The quote changes the minute moisture enters the picture

That first quote often gets wider the moment the substrate is inspected properly. Australian guidance treats rising damp as a building-defect issue tied to moisture movement through masonry, not just a surface stain, and NSW Environment notes that the moisture source, drainage, and barriers all need attention if the repair is going to last. NSW Environment salt attack and rising damp guide

A tidy finish over damp masonry is just a temporary disguise.

That's the hard lesson many owners only learn after a repaint or re-grout fails. The visible damage, whether it's plaster decay, paint failure, or efflorescence, is usually the end point of a longer moisture pathway, so the scope changes from “repair the tile” to “treat the wall base, then rebuild the finish.”

What the renovation sequence needs to answer

The right sequence is driven by four questions. Is it really rising damp, what caused it, what can be left in place, and what has to come out before new tile work begins?

In older Melbourne homes, those questions matter even more because past renovation layers can trap moisture behind newer finishes. That's why a builder who understands moisture source control will often slow the job down at demolition, even when the owner wants the tiling back fast.

The practical takeaway is simple. If the inspection only looks at the stain, the job is probably being priced as a cosmetic patch. If the inspection starts at the wall base, the ground around it, and the drainage path, the repair has a real chance of holding.

What Rising Damp Actually Is and Why It Keeps Coming Back

A damp patch at the bottom of a wall often starts in the ground, then works its way into the masonry through capillary action. Porous brick, mortar, and render can pull moisture upward through tiny voids when the base of the wall stays wet. NSW Environment describes the problem in those terms, and the same guidance links the moisture movement with salts that travel into the wall and crystallise as it dries. NSW Environment salt attack and rising damp guide

Why the damage appears where it does

The wall usually does not fail in a neat, even pattern. The damage tends to show up low on the wall as plaster decay, paint failure, or efflorescence, because evaporation leaves the salts behind at the surface. A fresh paint job can look fine for a short time, then start blistering, peeling, or breaking down again once the moisture keeps moving.

Australian heritage and conservation guidance treats this as a long-term maintenance and building fabric issue, not a one-off stain. The repair has to stop the moisture source and reduce further salt loading, otherwise the same contamination keeps travelling through the wall and spoiling the finish.

Why surface repairs don't hold

A surface patch can hide the symptom, but it leaves the moisture behaviour unchanged. Repainting, re-grouting, or sealing a patch of plaster usually buys a short reprieve, then fails again if the masonry below is still damp.

The repair has to work at the base of the wall, or the problem just comes back through the finish.

Time also matters. By the time the stain is obvious, the moisture pathway has often been active long enough for salts to build up in the masonry. Once that happens, the contaminated finish often needs to come off before a proper rebuild can start, because trapped salts keep attacking the new surface.

A bathroom or laundry renovation makes that pattern easier to see, which is why source finding belongs before the tiles go back. A proper inspection may also need leak detection in Melbourne if the wall base, shower base, or nearby plumbing could be feeding the damp. Rising damp is a moisture movement problem that only shows up as a tiling issue once it reaches the room.

How to Tell Rising Damp Apart From Lookalike Problems

Many homeowners searching for rising damp solutions are dealing with a different moisture source. NSW Environment guidance on heritage maintenance, along with the SPAB, points to lookalikes such as external ground levels, bridged cavity walls, leaking gutters and downpipes, plumbing leaks, and poor site or sub-floor drainage. NSW Environment heritage maintenance rising damp sheet

The five common imposters

Before anyone starts drilling a wall, check for these first.

  • External ground too high: If paving or soil sits too close to the wall base, it can bypass the intended barrier.
  • Bridged cavities or finishes: Tiled floors, screeds, or render can create a moisture bridge across the DPC line.
  • Gutter and downpipe faults: Overflow or poor discharge can keep the wall base wet.
  • Plumbing leaks: A leaking shower or pipe can mimic damp that looks like it's coming up from below.
  • Poor drainage around the building: If water stays near the foundations, the wall base keeps getting fed moisture.

A bathroom leak often gets mistaken for rising damp because the symptoms can spread across the same lower wall area. If the shower base, wastes, or nearby pipework are suspect, leak detection in Melbourne should come before any wall treatment.

What to look for on site

A quick field check usually tells you a lot. Rising damp tends to show a lower-wall pattern, often with salts or white deposits near the base rather than random patches higher up. A wall that feels cold and wet at the bottom points more toward masonry moisture, while a clammy wall higher up can suggest condensation or another source.

Layered renovations need extra care. New tiles, altered bathroom levels, or raised external paving can bridge the damp-proof course and make a wall look like it has rising damp when the problem is a detail failure at the base.

The decision point is practical. If there is a clear external water source or a bridge at the DPC line, fix that first. If the wall base is still wet after those causes are removed, the damp diagnosis is worth pursuing, because the finish will only fail again if the source stays active.

Comparing DIY Fixes, Handyman Repairs and Full Remediation

Not every damp job needs a full wall rebuild, but the cheap path is usually cheap only once. Surface coatings, sealants, and patch repairs can improve appearance, yet they don't alter the movement of moisture through porous masonry, so the finish often fails again when salts and damp keep working behind it.

Repair pathways compared

Repair Path Typical Cost Band (Melbourne) Disruption Realistic Lifespan
DIY surface fix Low upfront, materials only Low at first, then repeated touch-ups Short, because the source stays active
Handyman patch repair Moderate Moderate, with partial finish removal Better than paint, but still vulnerable if the base remains wet
Full professional remediation Higher upfront Highest, because the contaminated finish and moisture source are addressed The strongest option when diagnosis is correct and the rebuild is done properly

Why the cheapest option often costs more

Anti-mould paint, silicone, and bitumen patches all work on the visible layer. They can hide staining for a while, but they don't recreate a continuous barrier where the moisture is entering, and they don't remove salts already sitting in the wall. That means the underlying problem stays alive.

A handyman repair can help if the issue is limited and the moisture source has already been removed. But if the wall is still bringing groundwater up through the masonry, skim coats and partial re-renders often just give the next tradie a harder job later.

When full remediation makes sense

Full remediation is the only path that deals with the wall as a system. It means diagnosing the source, removing contaminated finishes where needed, installing or restoring the barrier, and then rebuilding the finish on a dry, stable substrate.

That doesn't mean every room needs the most invasive option. It does mean the repair should match the diagnosis, not the sale pitch on the tin.

The Professional Remediation Pathway Step by Step

A credible damp repair starts at the wall base, not at the tile colour. The right sequence is source control first, then barrier creation, then rebuild, because each stage depends on the one before it. As noted earlier, that is the part many quick fixes miss.

Inspection, drilling and injection

The physical work starts by opening up contaminated finishes where needed and checking the wall, the skirting line, and the surrounding ground for ingress, bridging, or a failed damp-proof course. Chemical DPC systems are then installed into mortar beds or selected brick courses, using drilled holes at 6 to 8 inch intervals, about 150 to 200 mm, with hole depth around one-half to three-quarters of wall thickness. For thicker walls, access from both sides improves penetration. Safeguard Europe rising damp book

Pressure control matters too. Preservation procedure guidance specifies 50 to 100 psi and staged pumping in 4-inch to 6-inch increments so the treatment distributes evenly rather than pooling in one spot. GSA treating rising damp by injecting chemical dampproofing

Dry-out, strip-out and rebuild

After injection, the wall needs time to dry before the next trade starts closing it in. The holes are plugged with sand-cement mortar after the initial dry-out period, then the contaminated plaster or lining comes out back to sound material. If the finish stays wet or salt-loaded, the new tile system is sitting on a weak base from the start.

Practical rule: if someone wants to retile before the wall has dried and the barrier has settled, the job is being rushed.

That rebuild has to suit the wall, not fight it. Compatible finishes matter because the new surface cannot be forced to sit against residual salts, trapped moisture, or bridging details, and that is where the coordination between carpenter, waterproofing trade, tiler, and Registered Builder pays off. The wall base gets corrected first, then the lining is rebuilt to match the drying profile and the intended wet-area finish.

For balcony work, the same logic applies but the edge details change the risk. External tiling can bridge the DPC line, hold moisture against the wall edge, and create a path back into the substrate, so balcony waterproofing in Melbourne has to be planned around drainage fall, edge treatment, and substrate flatness from the start.

The quote should spell out the diagnosis, the injection layout, the dry-out period, the replastering scope, and the rebuild detail. If those parts are not itemised, the repair has not been thought through as a whole.

Bathrooms, Balconies and the Tiling Finish on Top

A damp wall can be treated properly and still fail if the finish above it is built carelessly. In bathrooms and laundries, the waterproofing, screed, tile choice, grout, and substrate flatness all shape how easily moisture can work its way back into the repaired wall.

Wet areas need clean transitions

Where waterproofing is required, the National Construction Code sets wet-area waterproofing expectations, including an upturn of at least 150 mm above the finished floor level in shower areas and other wet areas where the membrane is required. That detail matters more after a damp repair, because a membrane that stops short or gets bridged by a later finish can undo the wall work.

The sequence on site has to stay disciplined. Correct the damp source first, let the wall dry, then install compatible render or lining, followed by waterproofing, then screed or levelling, then tile installation, and finally grout and sealant detailing.

Balconies need a different eye

Balconies fail in a different way because external tiling can bridge the DPC line and hold moisture against the wall edge. Drainage fall, edge detailing, and substrate flatness become critical, especially with large-format porcelain, Kerlite, or stone, where movement and uneven support show up quickly.

For balcony-specific waterproofing and detailing, see balcony waterproofing in Melbourne.

A balcony can look perfect and still be wrong if the drainage path feeds the wall base.

A Registered Unlimited Builder earns their keep here. They should coordinate the sequence so the membrane, screed, and tiling do not create a new bridge over the repaired DPC, particularly around shower screens, thresholds, and balcony edges.

Once the wall is treated, the finish on top still has to function as a wet-area system with proper waterproofing transitions. If the base beneath it is still moving moisture, even premium materials are only hiding a structural mistake.

Quotes, Costs and Choosing the Right Team in Melbourne

A proper quote for damp remediation and bathroom renovation should read like a scope of work, not a guess. It needs to itemise diagnosis, injection works, dry-out time, replastering, waterproofing, screed or levelling, tile supply and installation, and the finish details that stop moisture bridge-back.

What to ask before you sign

  • Who diagnosed the cause: Ask whether the team checked for bridged DPCs, gutter faults, plumbing leaks, or drainage problems before proposing injection.
  • Who is coordinating the job: A Registered Unlimited Builder should be able to sequence the trades, not just quote the tile layer.
  • How the waterproofing is detailed: The membrane upturn, junctions, and transitions should be specified clearly.
  • How the rebuild avoids bridge-back: You want to know how new tiles, screeds, and thresholds will stay clear of the repaired moisture path.

Reading the scope, not just the price

A quote that only mentions “damp proofing” is too thin. A quote that explains the repair stages tells you the contractor understands that moisture source control comes before finishes.

That matters in Melbourne bathrooms because the wrong sequence can turn a renovation into a repeat job. The clean-looking finish is only reliable when the wall base has been treated, the contaminated material has been dealt with, and the waterproofing system has been rebuilt around the repaired substrate.

For compliance and waterproofing documentation in Victoria, see waterproofing compliance in Victoria.

The usual budget conversation in renovation planning is simple enough, but the better question is whether the scope covers moisture control or only surface renewal. If the team can't explain the difference, they're probably pricing the visible work and hoping the hidden work won't matter later.


If you're planning a bathroom, ensuite, or balcony repair in Melbourne and the wall base looks suspicious, Melbourne Tiling Services P/L can help you sort out the source first and rebuild the finish properly. Visit Melbourne Tiling Services P/L to discuss damp-affected renovations, waterproofing, and tiling work that's built to last.