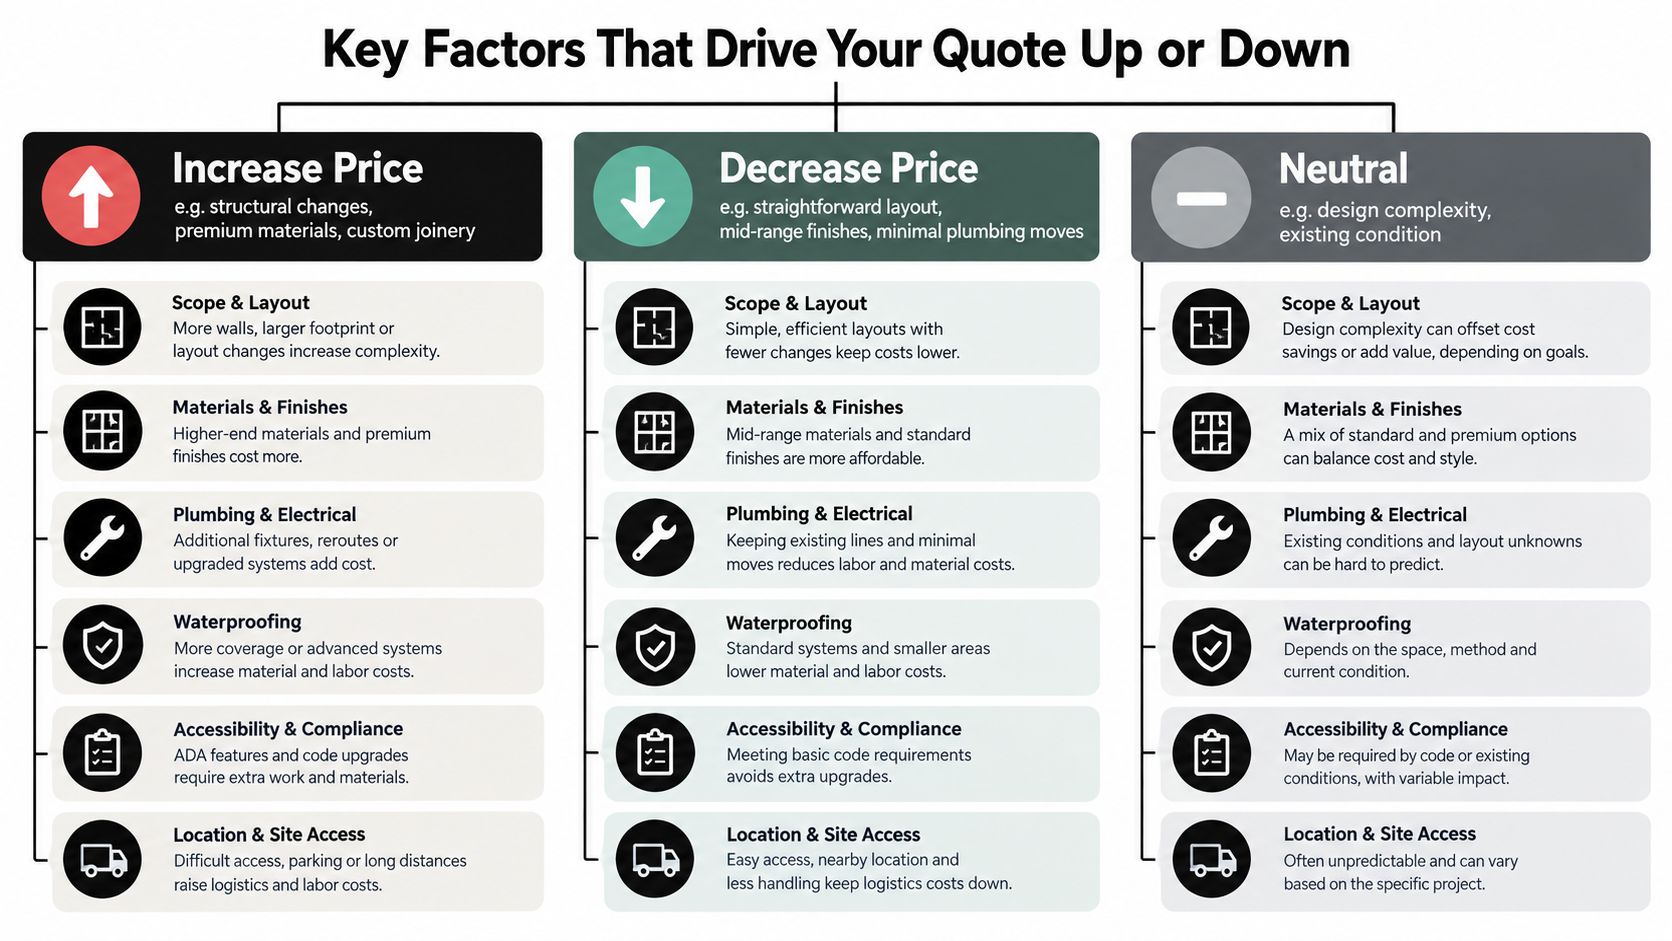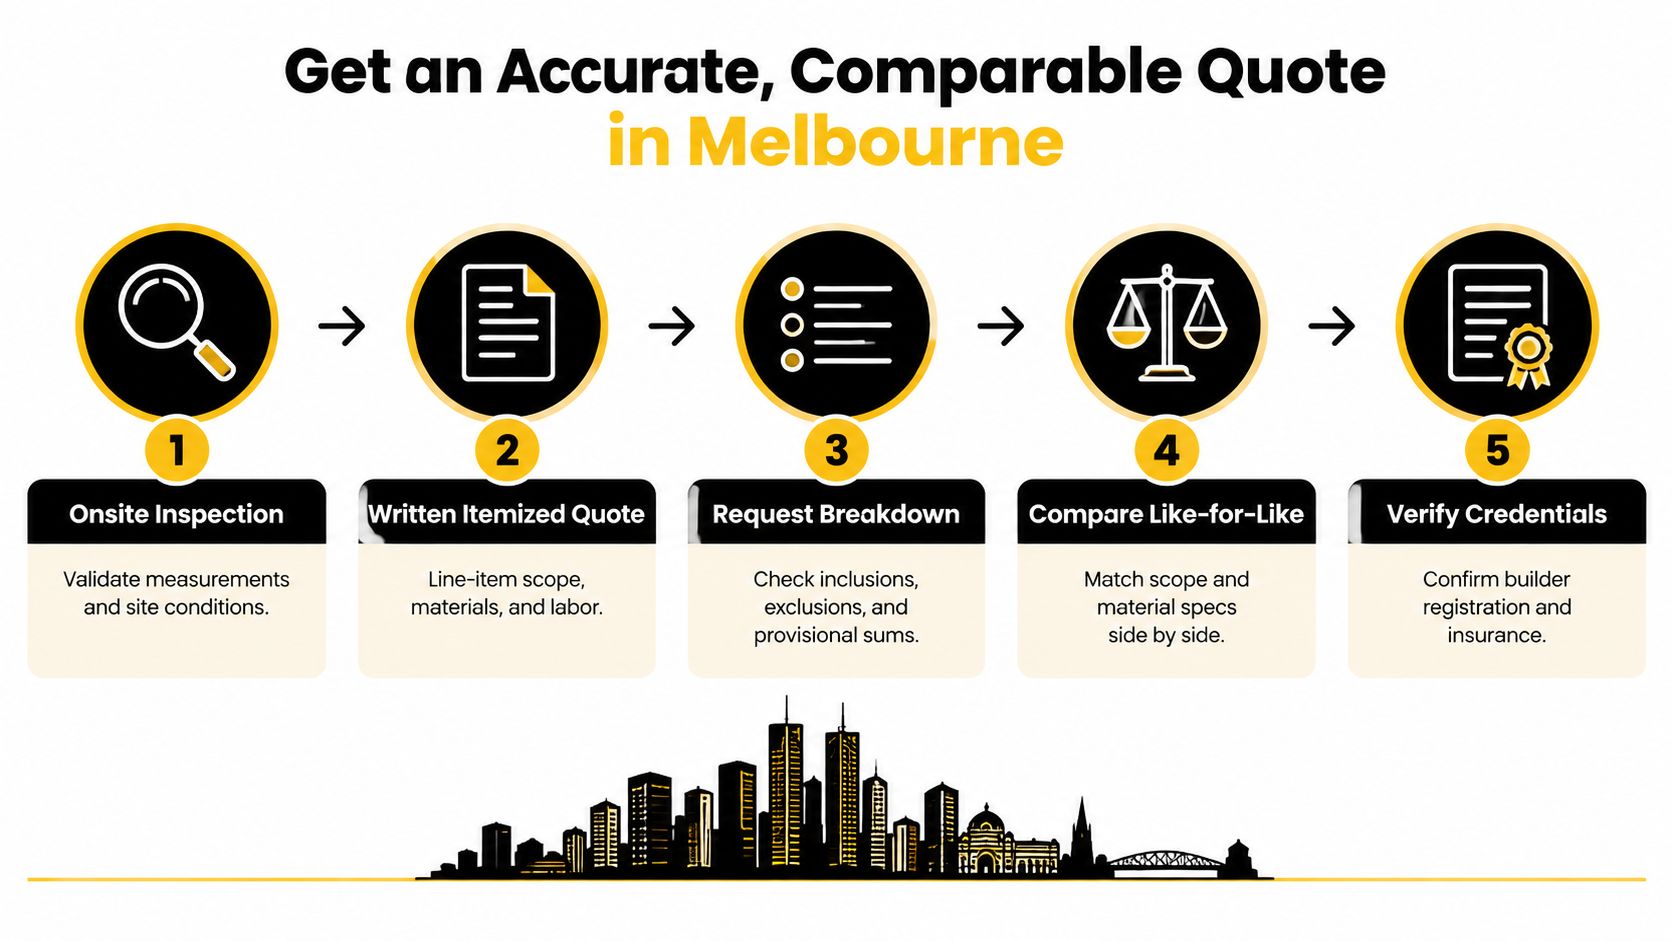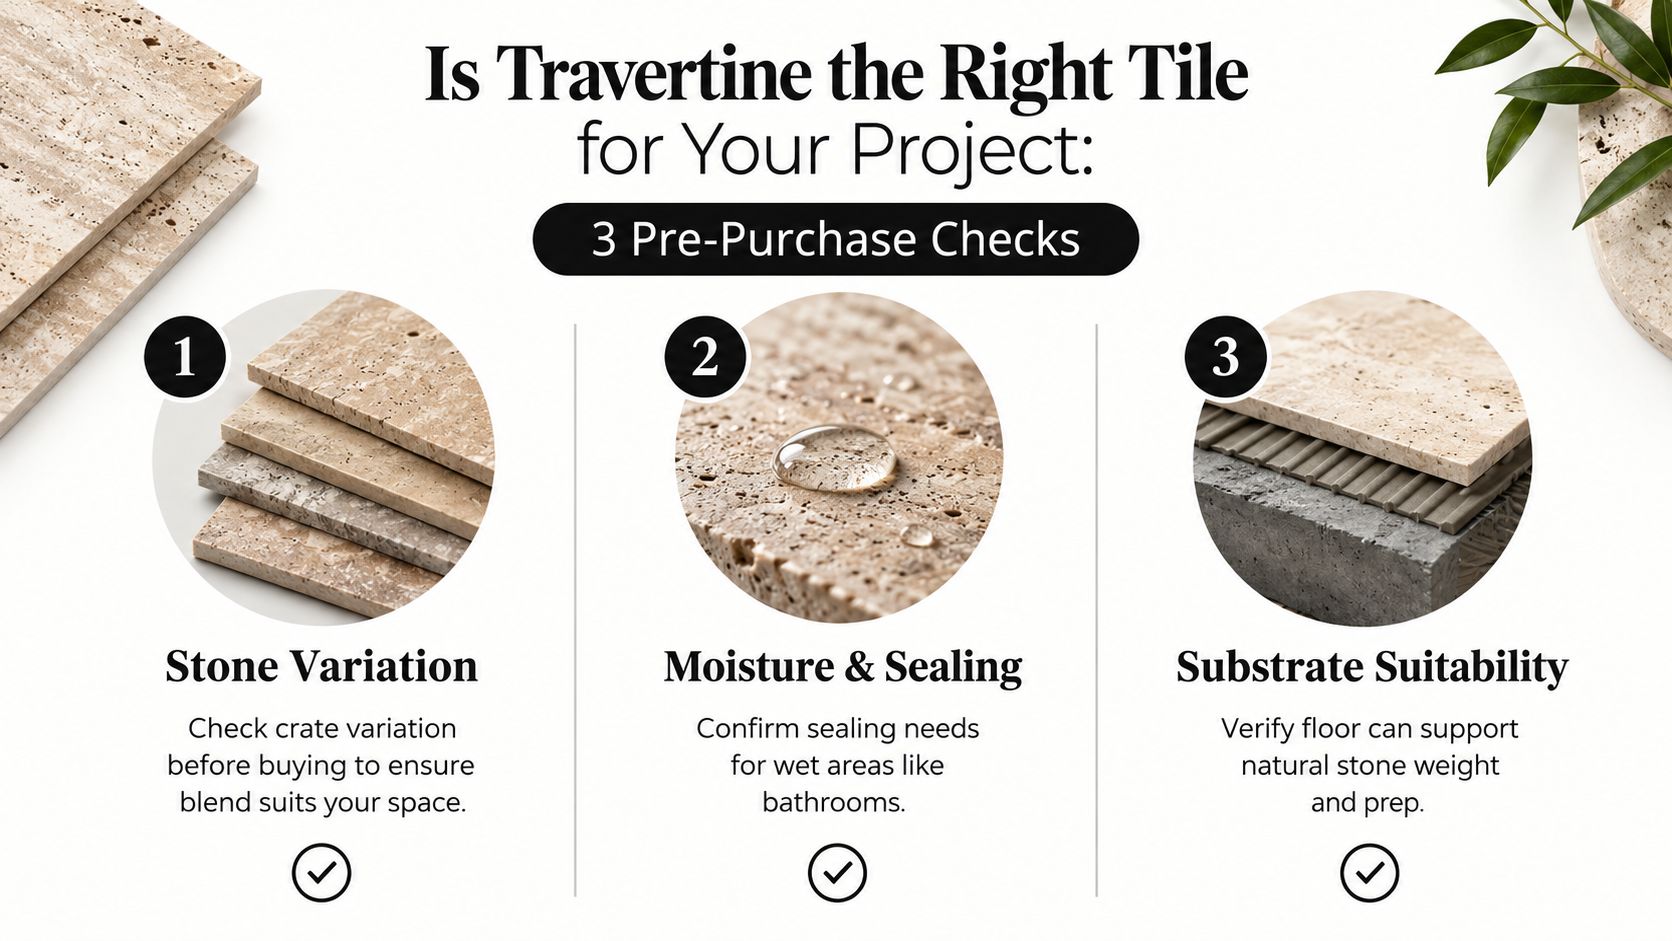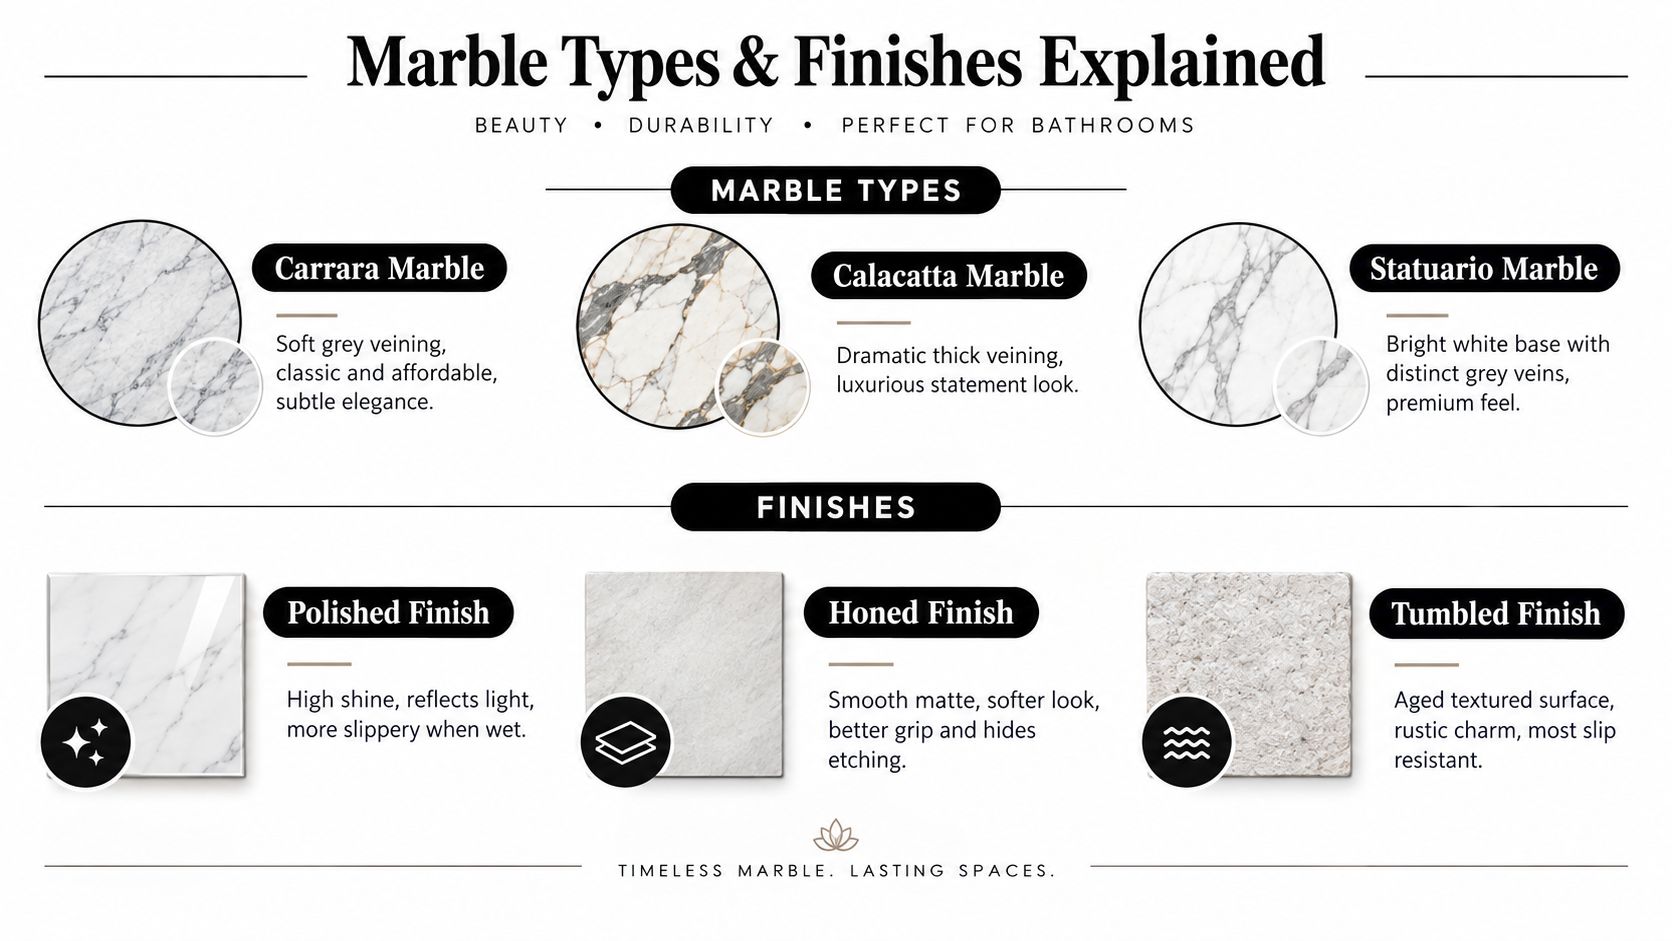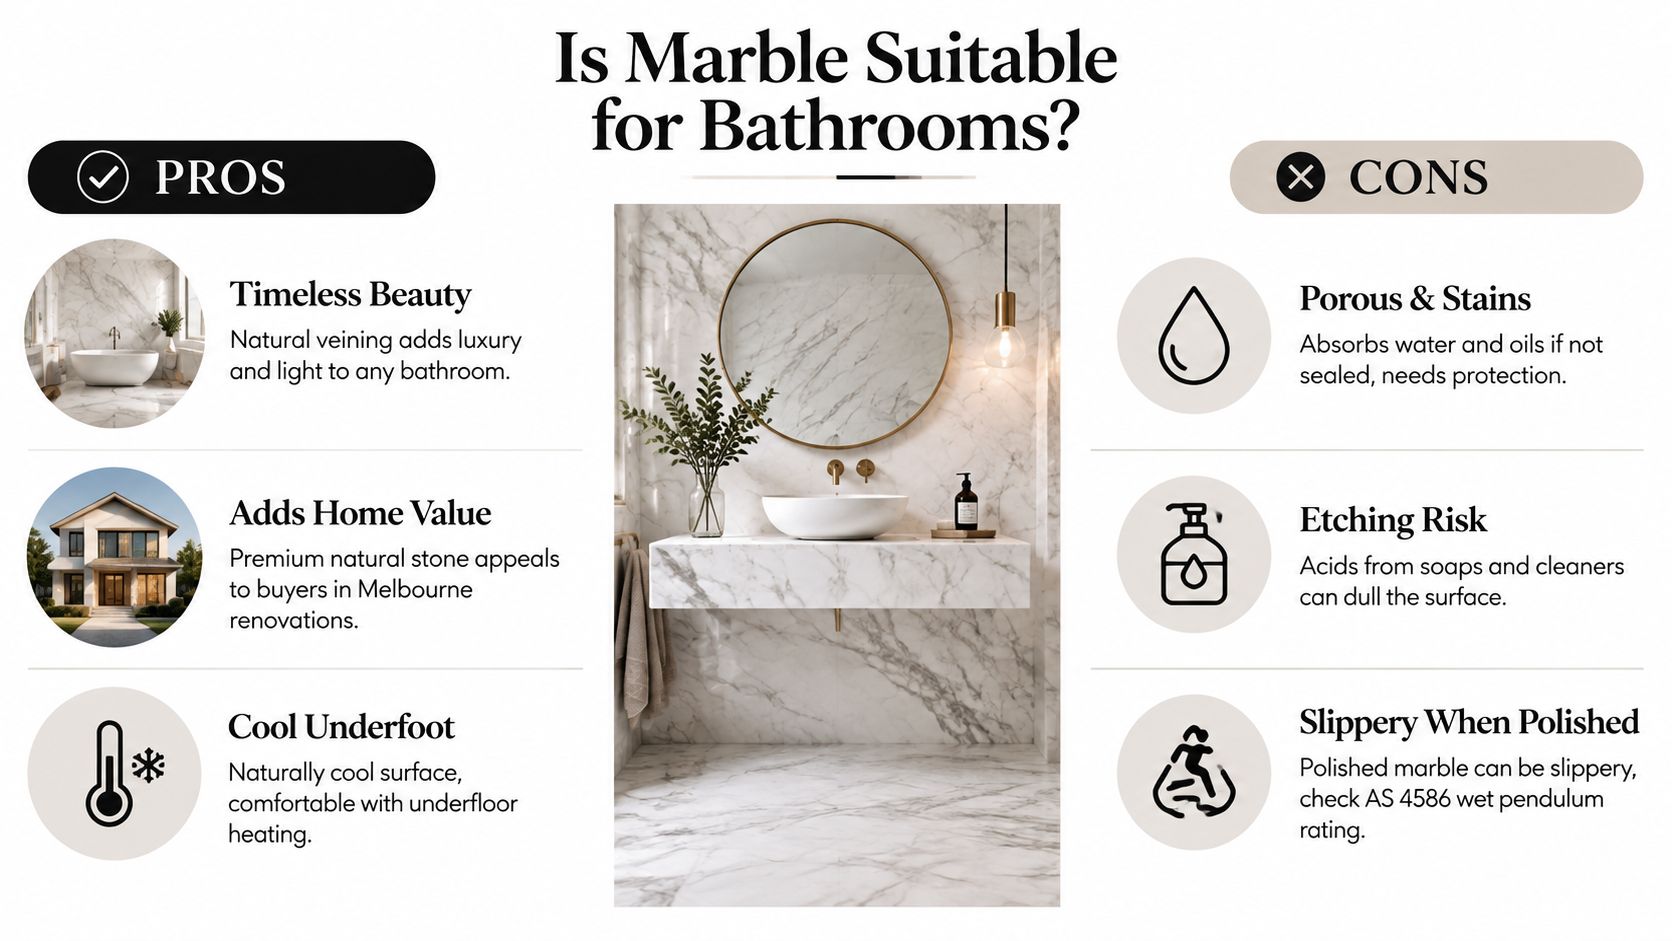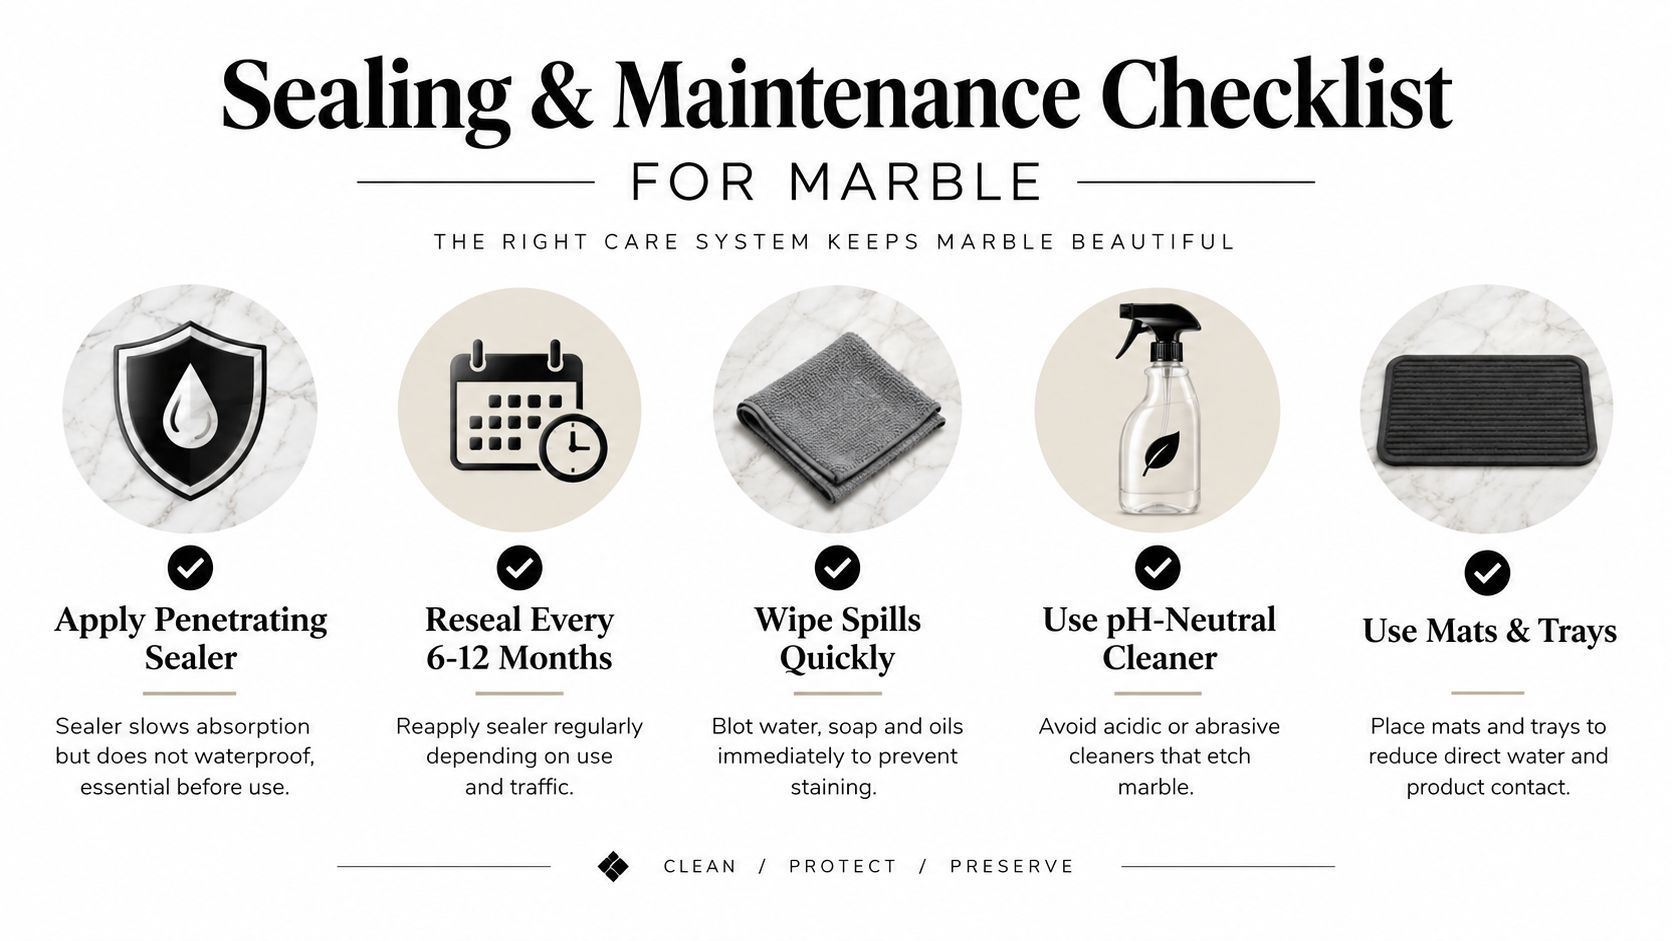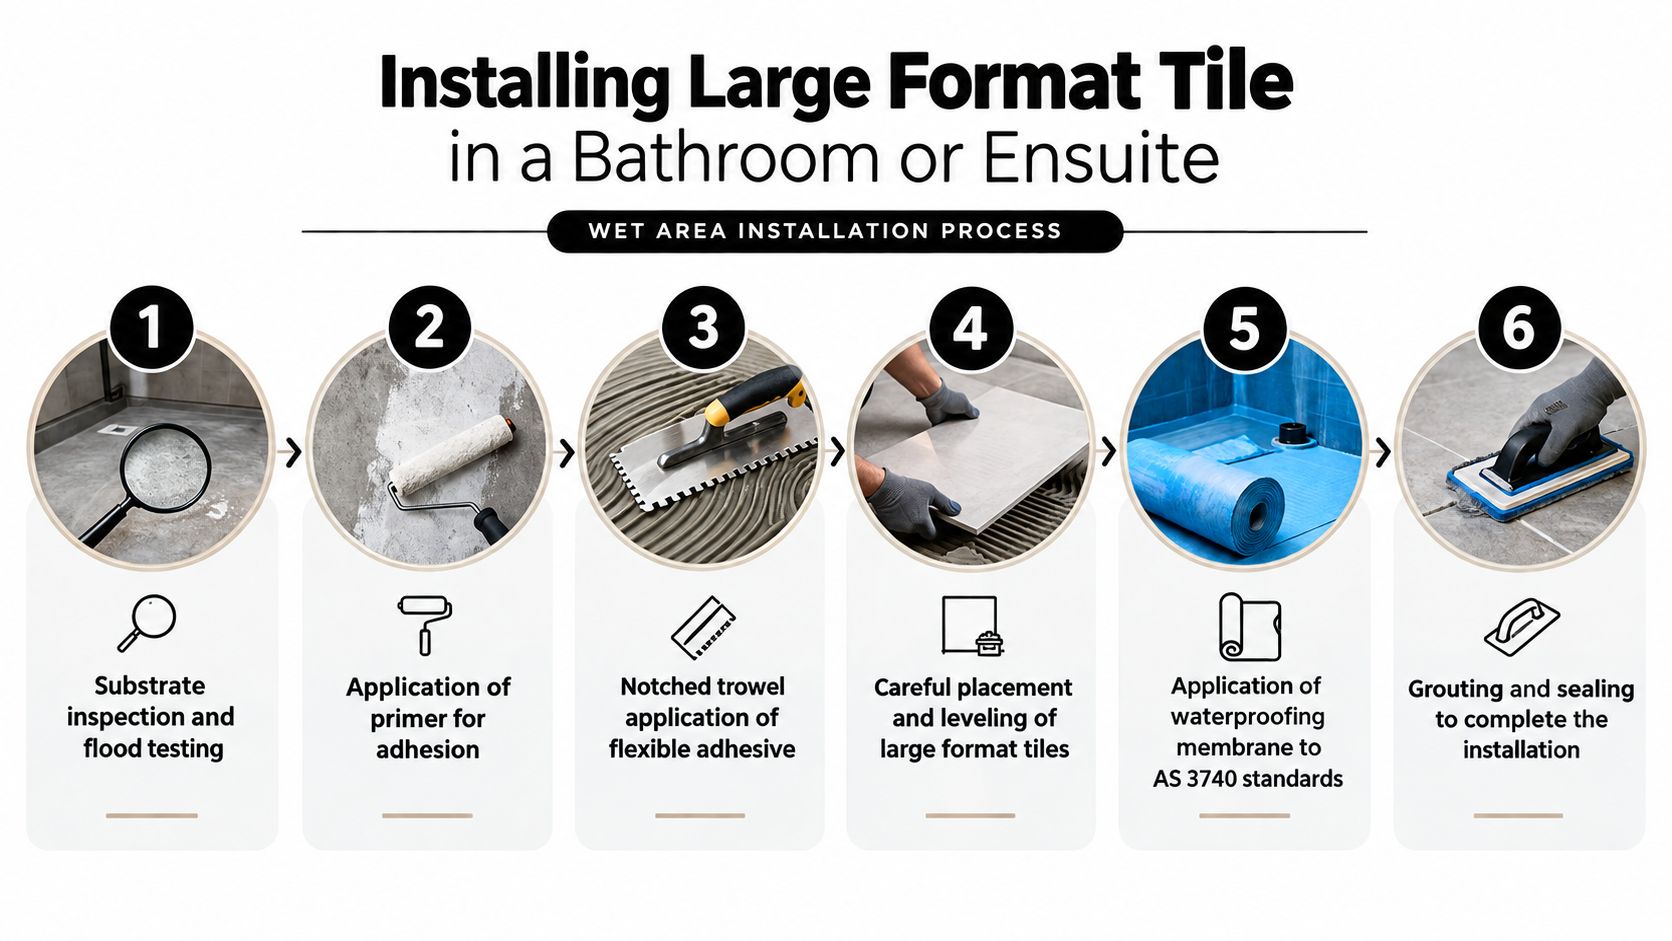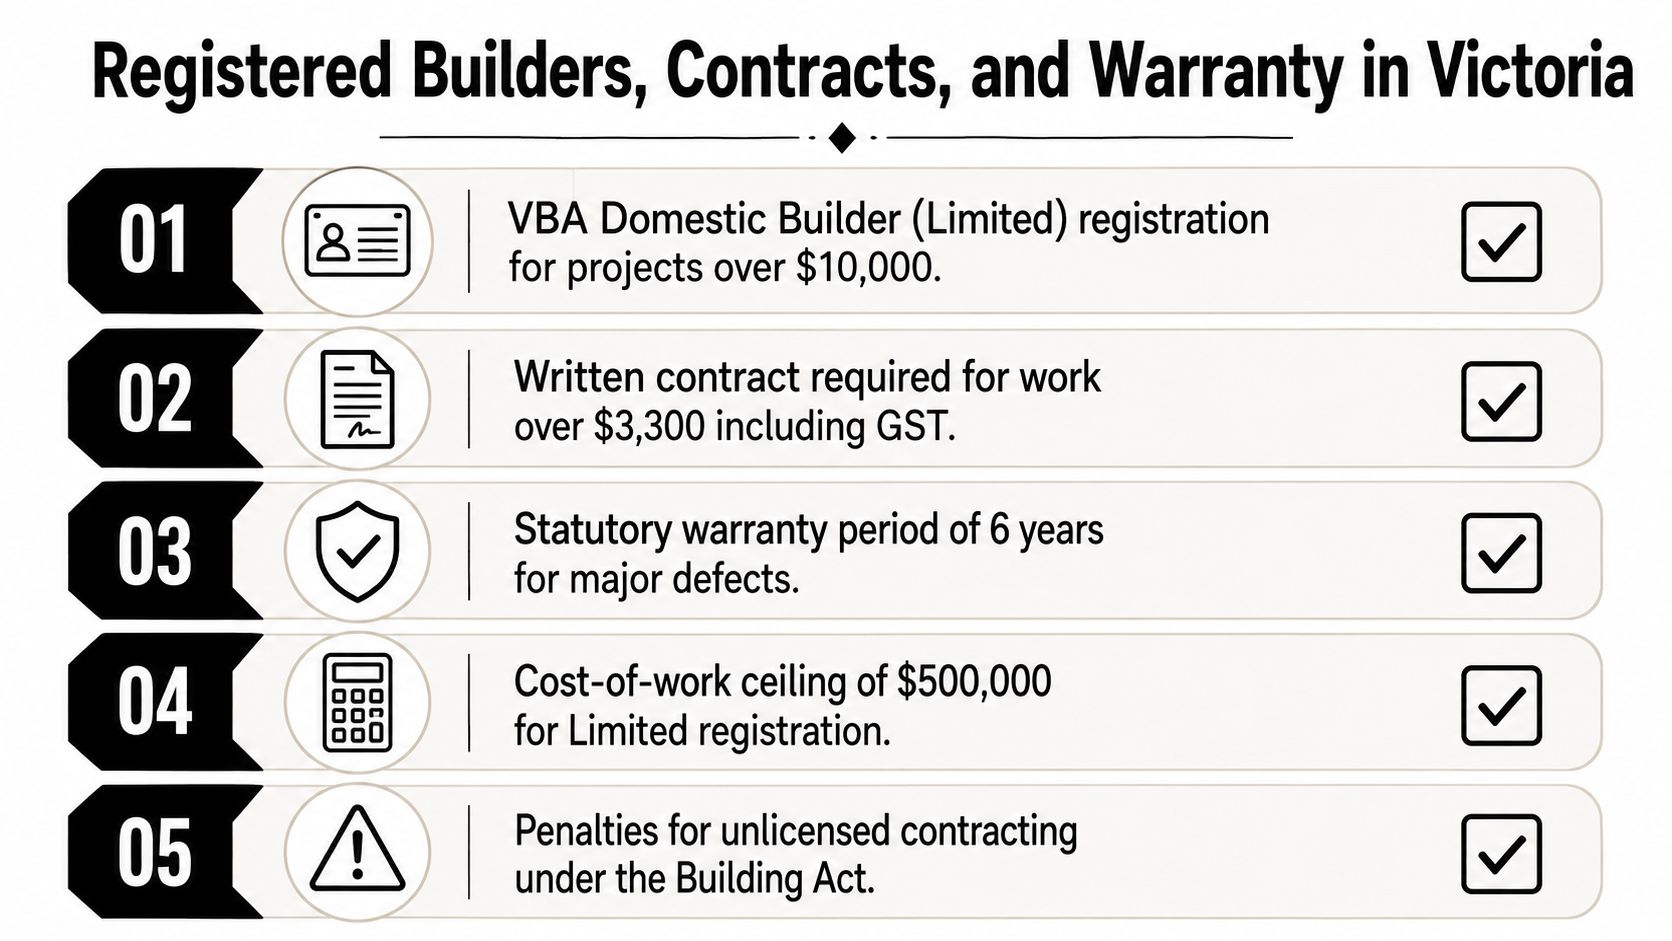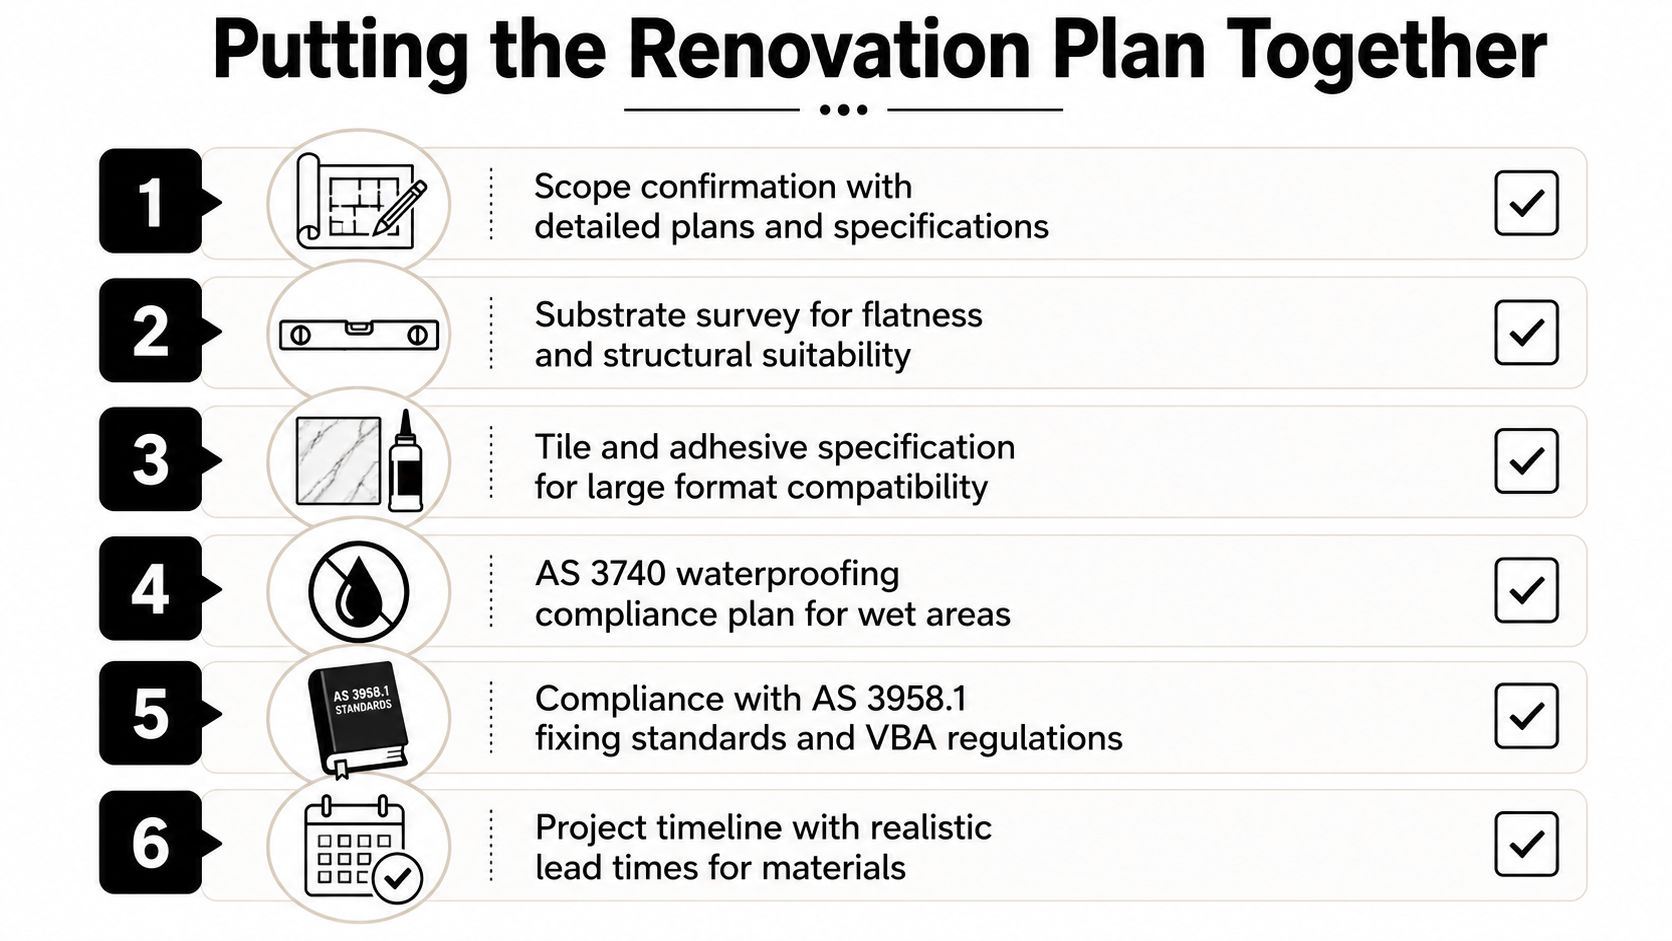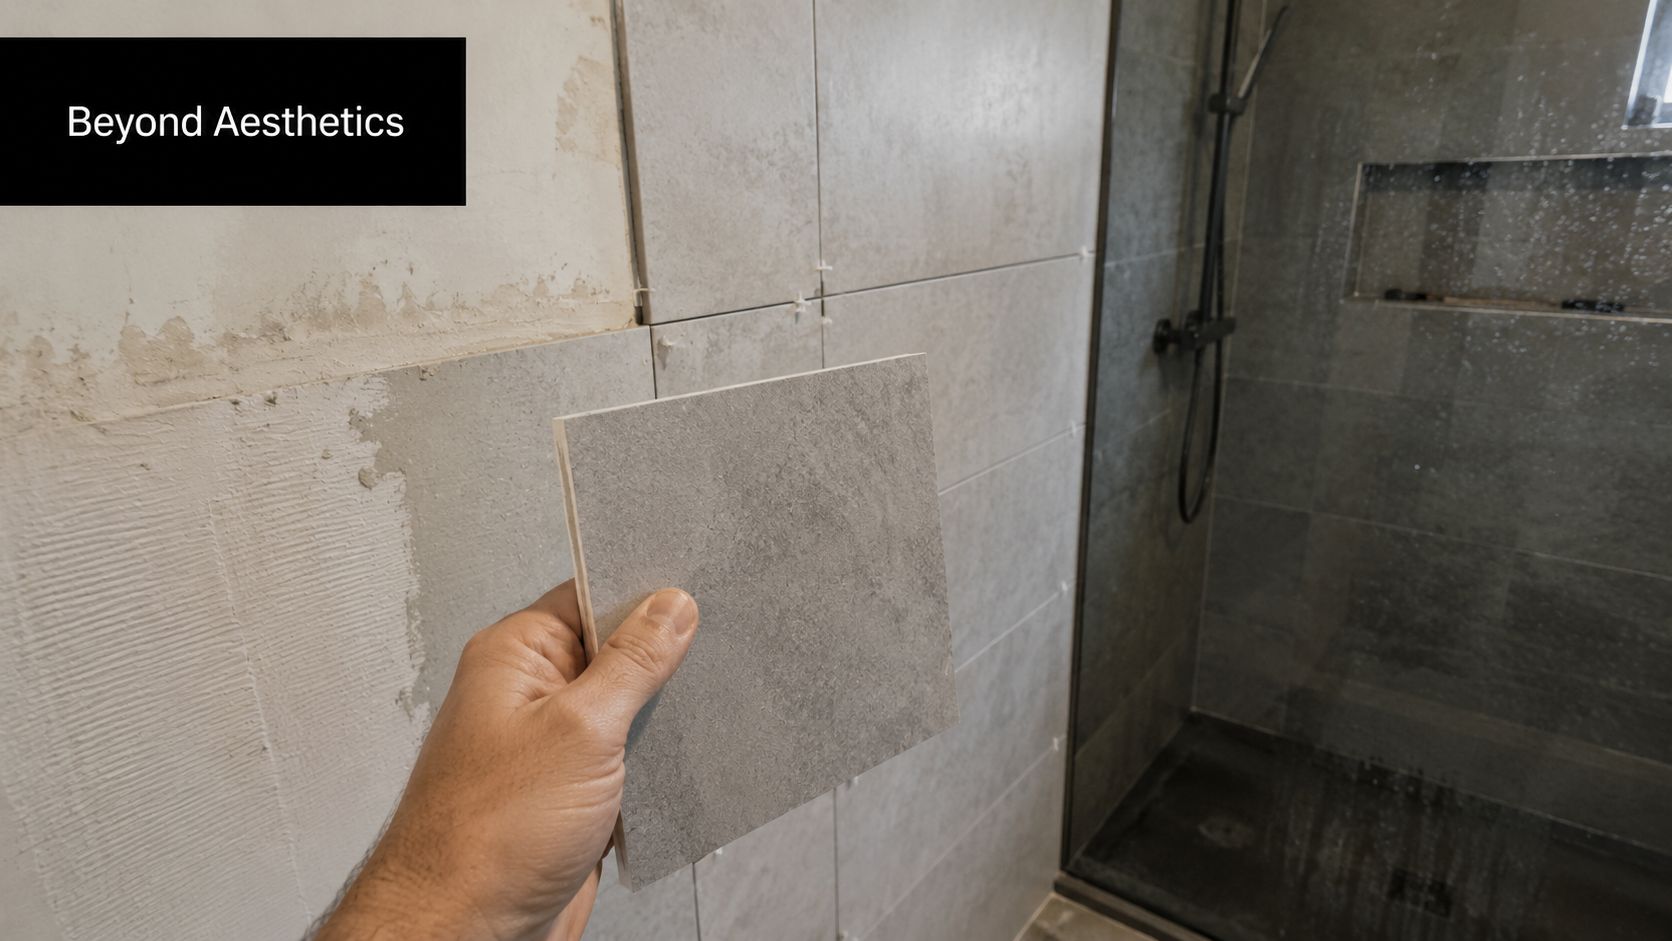
Best Non Slip Bathroom Flooring for Melbourne Homes

You're probably looking at bathroom tiles right now and thinking about colour, format, and whether the room will feel bigger with a lighter floor. That's normal. Then someone in the house steps out of the shower onto a smooth tile, their foot shifts, and the whole decision suddenly looks different.

In bathroom renovations, the floor isn't a finishing touch. It's a safety surface, a compliance item, and part of a waterproofing system that has to work every day under wet feet, soap residue, cleaning products, and steam. In Melbourne homes, where families often need a bathroom to suit children now and ageing parents later, non slip bathroom flooring is one of the most important calls you'll make.

Table of Contents

Why Your Bathroom Floor Is Your Most Important Safety Decision

A bathroom floor has to do more than look good under downlights. It has to keep its grip when water splashes out of the shower, when someone walks through barefoot, and when soap film starts building up. That's why flooring deserves more attention than many homeowners give it at the start of bathroom renovations.

The common mistake is choosing a tile collection first and asking safety questions later. On a showroom wall, a polished or lightly textured tile can look almost identical to a properly slip-rated floor tile. Under wet feet, they don't behave the same way. The difference only shows up when the room is in daily use.

Practical rule: If a tile supplier can't clearly tell you the slip rating and where that tile should be used, it shouldn't be your bathroom floor tile.

Safety is only one part of the decision. Compliance matters too. A bathroom floor sits within a larger build sequence that includes substrate preparation, falls to waste, waterproofing, tile selection, grout choice, and installation quality. If one part is wrong, the room can become slippery, hard to maintain, or vulnerable to leaks.

For homeowners, the long-term value is straightforward. A compliant floor protects the people using the room and protects the renovation itself. That's especially important in family homes, investment properties, and homes being updated for ageing in place.

Why this matters in everyday use

Some rooms forgive bad material choices. Bathrooms don't. They combine hard surfaces, moisture, bare feet, and repeated cleaning. Even a premium tile can become the wrong tile if it's too smooth for the application.

Registered builders look at the floor as part of the whole room, not as a stand-alone product. That's the right way to approach it. The safest result usually comes from choosing a floor that balances grip, cleanability, durability, and compatibility with the rest of the system.

Decoding Australian Slip Resistance Ratings

Slip ratings matter because the tile you choose in a showroom is not being judged under the same conditions as a wet bathroom floor in daily use. In Melbourne renovations, I regularly see homeowners shown attractive floor tiles first and the test data second. That order should be reversed.

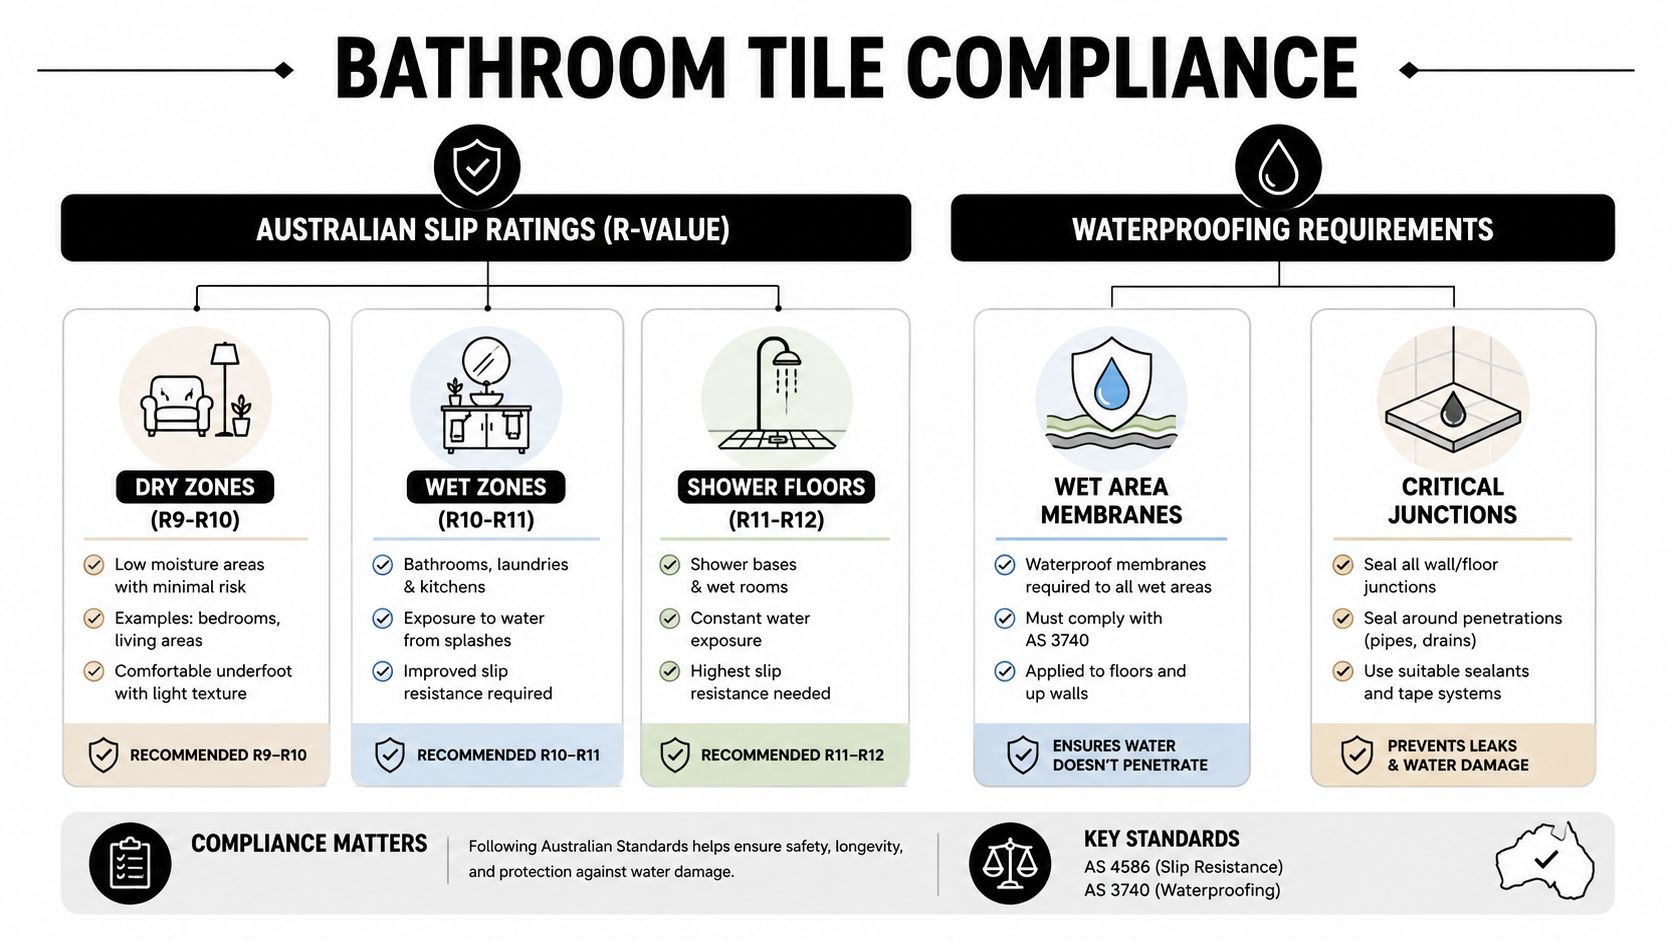
For bathroom floors in Australia, the two classifications homeowners will hear most often are the P rating and the R rating. They come from different test methods under AS 4586, which is the Australian Standard used to classify slip resistance for new pedestrian surface materials. The P classification comes from the wet pendulum test. The R classification comes from the oil-wet ramp test. Both tell you something useful, but they are not interchangeable shorthand for “safe everywhere.”

An infographic explaining Australian slip resistance ratings including P-ratings for barefoot traffic and R-ratings for shod feet.

What P and R ratings actually mean

For a residential bathroom, the P rating is usually the more practical starting point because bathrooms are barefoot, wet environments. The R rating still has value, especially when comparing product ranges, but it comes from a different test setup and should be read in context.

The bigger point is compliance. AS 3740 governs waterproofing of domestic wet areas, and the bathroom floor must be selected and built as part of that full wet area system. A registered builder does not treat slip resistance as a stand-alone tile question. The floor finish, substrate, set-down or hob detail, falls, drainage, waterproofing, grout joints, and cleaning regime all affect how the room performs once people are using it.

That is why I tell clients to ask for the manufacturer's tested classification under AS 4586, not a brochure description like “ideal for bathrooms” or “anti-slip finish.” If the supplier cannot produce the test result, there is no solid basis for specifying that tile on a wet bathroom floor.

Minimum compliance and real-world use are not the same thing

A compliant product can still be the wrong choice for a particular household. A tight ensuite used by healthy adults has different demands from a family bathroom used by children, older parents, or anyone with reduced balance or mobility. The safest choice is the one that suits the users and the layout, while still being practical to clean and durable over time.

Surface texture is part of that trade-off. More grip often means more texture. More texture can mean more cleaning effort, especially where soap residue, body oils, and hard water build up. That is one reason many builders and tilers favour slip-rated porcelain tiles for bathrooms. Good porcelain ranges can balance grip, maintenance, and durability better than many softer or more porous materials.

What to ask for in a tile showroom

A useful showroom conversation is direct. Ask for the information that relates to compliance and actual use:

  • Ask for the tested slip classification under AS 4586. Verbal assurances are not enough.
  • Ask which test applies to the intended area. Barefoot wet areas and other traffic areas are assessed differently.
  • Ask where the product is approved to be used. Bathroom floor, shower floor, wall tile, and feature tile are different applications.
  • Ask for the exact finish being quoted. One colour may be available in multiple surfaces with different slip performance.
  • Ask who is coordinating the whole wet area system. The tile choice has to work with the waterproofing design, falls, and installation method required under AS 3740.

Homeowners do not need to read the standards cover to cover. They do need enough clarity to distinguish a tested, suitable floor tile from a product that looks the part. In a bathroom renovation, that difference affects safety on day one and the durability of the whole room over the next decade.

Choosing the Best Non Slip Flooring Materials

Once the ratings make sense, the next question is material. This material choice determines whether many bathroom renovations come together properly or drift into compromises that look good on day one and frustrate everyone later.

In most Melbourne bathrooms, the strongest candidates are porcelain, ceramic, textured natural stone, and mosaic tiles. Each can work. Each also has trade-offs. The right choice depends on who's using the room, how much maintenance you're comfortable with, and how much visual continuity you want between the floor and walls.

What works well in real bathrooms

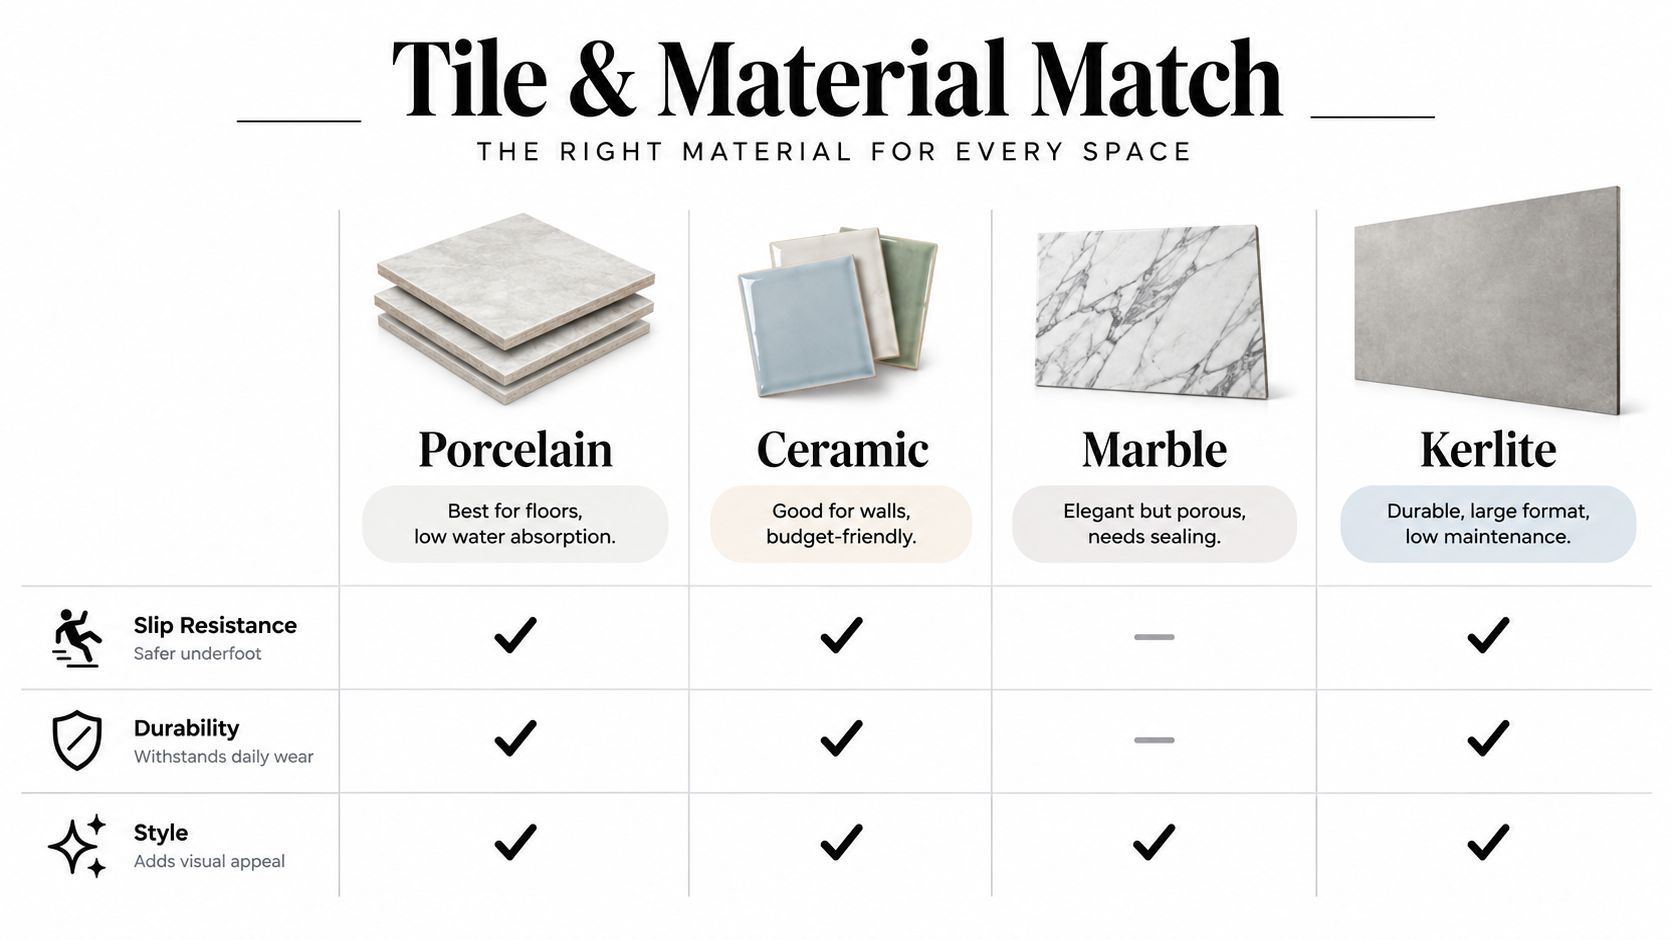
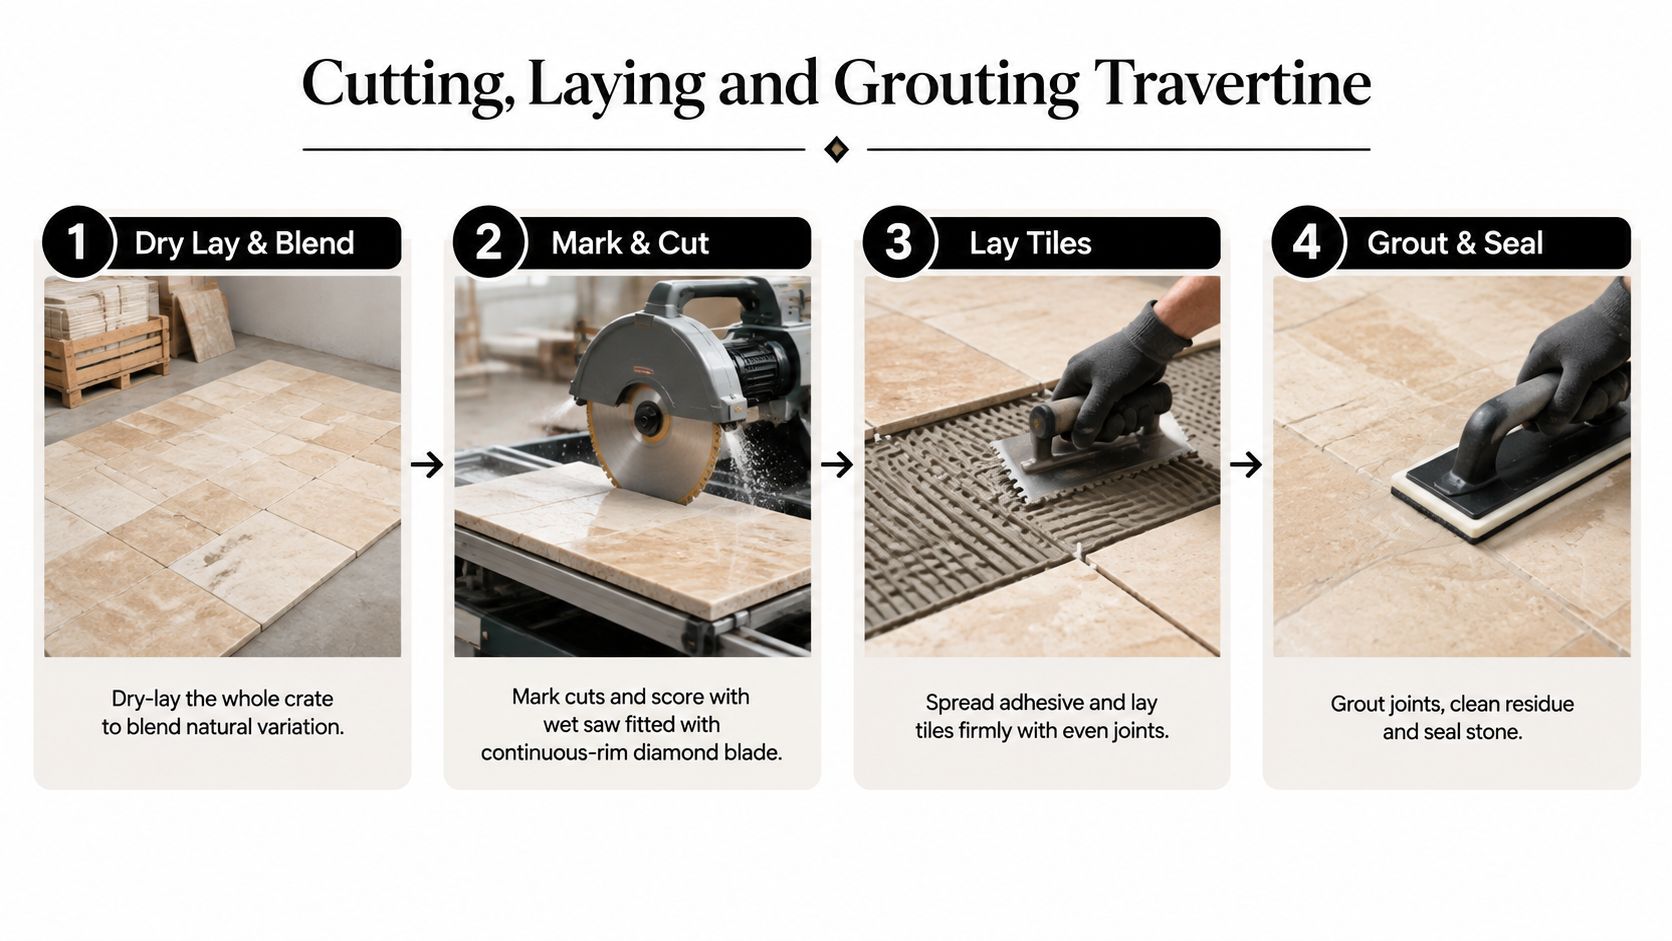
Porcelain is usually the safest all-round recommendation for a busy home bathroom. It's dense, durable, and widely available in matte and textured slip-rated finishes. It also gives you the broadest design flexibility, from stone-look neutrals to concrete-look large format pieces. If you're comparing finishes, this guide to porcelain tiles for bathrooms is useful for understanding where porcelain suits wet area work.

Ceramic can also perform well, particularly in standard bathroom floors where you want a practical finish at a more accessible price point. The limitation is range and durability. Some ceramic lines are excellent. Others are better suited to walls or lighter-duty applications. You need to check the actual rating and product suitability, not assume all ceramic is equal.

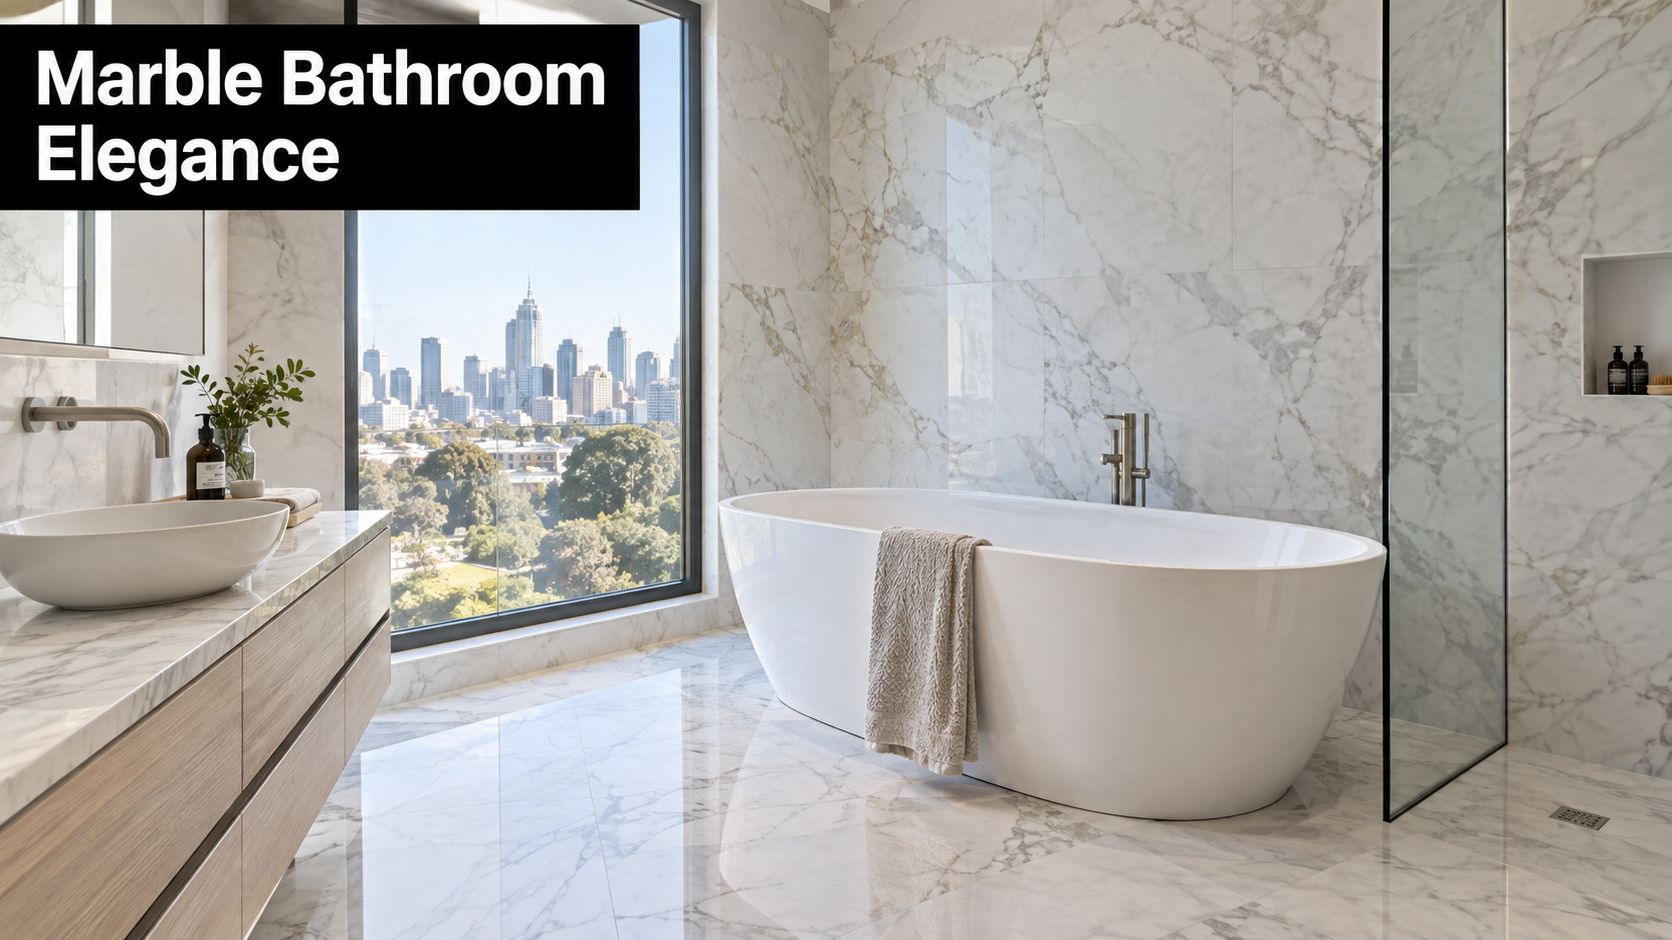
Textured natural stone appeals to homeowners who want a premium, organic look. It can provide good underfoot grip when the finish is right, but it demands more care. Stone choice, sealing, pore structure, and ongoing cleaning all affect how it performs over time. In homes where low maintenance is a priority, stone often loses out to porcelain that mimics stone visually.

Non Slip Bathroom Flooring Material Comparison

Material Common Slip Ratings Pros Cons Average Cost (per sqm)
Porcelain Available in slip-rated options including bathroom-suitable finishes Durable, water-resistant, broad style range, strong option for floors and wet zones Some textured products can hold more residue if cleaning is neglected Varies by product and range
Ceramic Available in bathroom-suitable matte and textured finishes Practical, widely available, easier to coordinate with wall tiles Product quality varies, not every ceramic tile is suitable for floors or showers Varies by product and range
Textured natural stone Can be selected for slip resistance when properly specified Premium appearance, natural texture, strong design character More maintenance, sealing requirements, variation between stone types Varies by stone type and finish
Mosaic tiles Commonly used in shower floors and detailed wet zones Extra grout lines improve grip, easier to form to falls, strong shower-floor choice More grout joints mean more cleaning, can look visually busy in larger spaces Varies by material and sheet type

The cost column stays broad for a reason. Material pricing shifts heavily based on brand, size, finish, origin, and whether the tile is standard stock or special order. A cheap floor tile that fails on maintenance or suitability is rarely cheap in the long run.

What usually works best by area

Different zones often call for different formats.

  • Main bathroom floor. Slip-rated porcelain is often the cleanest balance of safety, durability, and design.
  • Shower base. Mosaics or small-format textured porcelain usually perform best because they follow the falls well and add traction through grout lines.
  • Family bathroom. Matte finishes tend to age better visually than glossy surfaces that show water spotting and soap film.
  • Luxury ensuite. If the brief calls for a stone look, many homeowners get a better maintenance outcome with stone-look porcelain than real stone.

A floor can be easy to clean or forgiving to look at. The best products manage both.

What doesn't work well is choosing polished floor tiles because they looked elegant under showroom lights. In dry areas, maybe. In a bathroom, especially near the shower, that's usually the wrong compromise. Another weak choice is selecting oversized smooth tiles for a shower floor. They can make falls harder to form properly and reduce practical grip where you need it most.

The strongest results come from treating material selection as a performance decision first and a style decision second. Fortunately, with current tile ranges, you usually don't have to give up the look to get the safety.

Installation The Foundation of a Safe Bathroom Renovation

A bathroom floor usually looks finished long before it is safe. I see this on Melbourne renovations where the tile choice was sensible, but the floor still ponds water at the shower entry, the grate sits too high, or movement in the base starts showing up as cracked grout and loose tiles months later. Safe wet area flooring depends on the whole build. Tile, substrate, waterproofing, falls, drainage, and trade sequencing all have to work together.

A professional tiler kneeling on a construction site while carefully installing gray non slip bathroom flooring tiles.

Why the system matters more than the tile alone

AS 4586 helps you choose a slip-resistant surface. AS 3740 governs how the wet area is waterproofed. In practice, a bathroom renovation has to satisfy both. A tile with the right slip resistance rating can still underperform if the shower floor is too flat, if the screed is uneven, or if the substrate was never prepared for tile.

The common failures are predictable. Water sits where it should drain. Tile edges lip because the base was not corrected properly. Grout cracks because there is movement underneath. Membrane details fail around wastes, hobs, and penetrations because the work was rushed or poorly coordinated.

That is why installation quality carries so much weight.

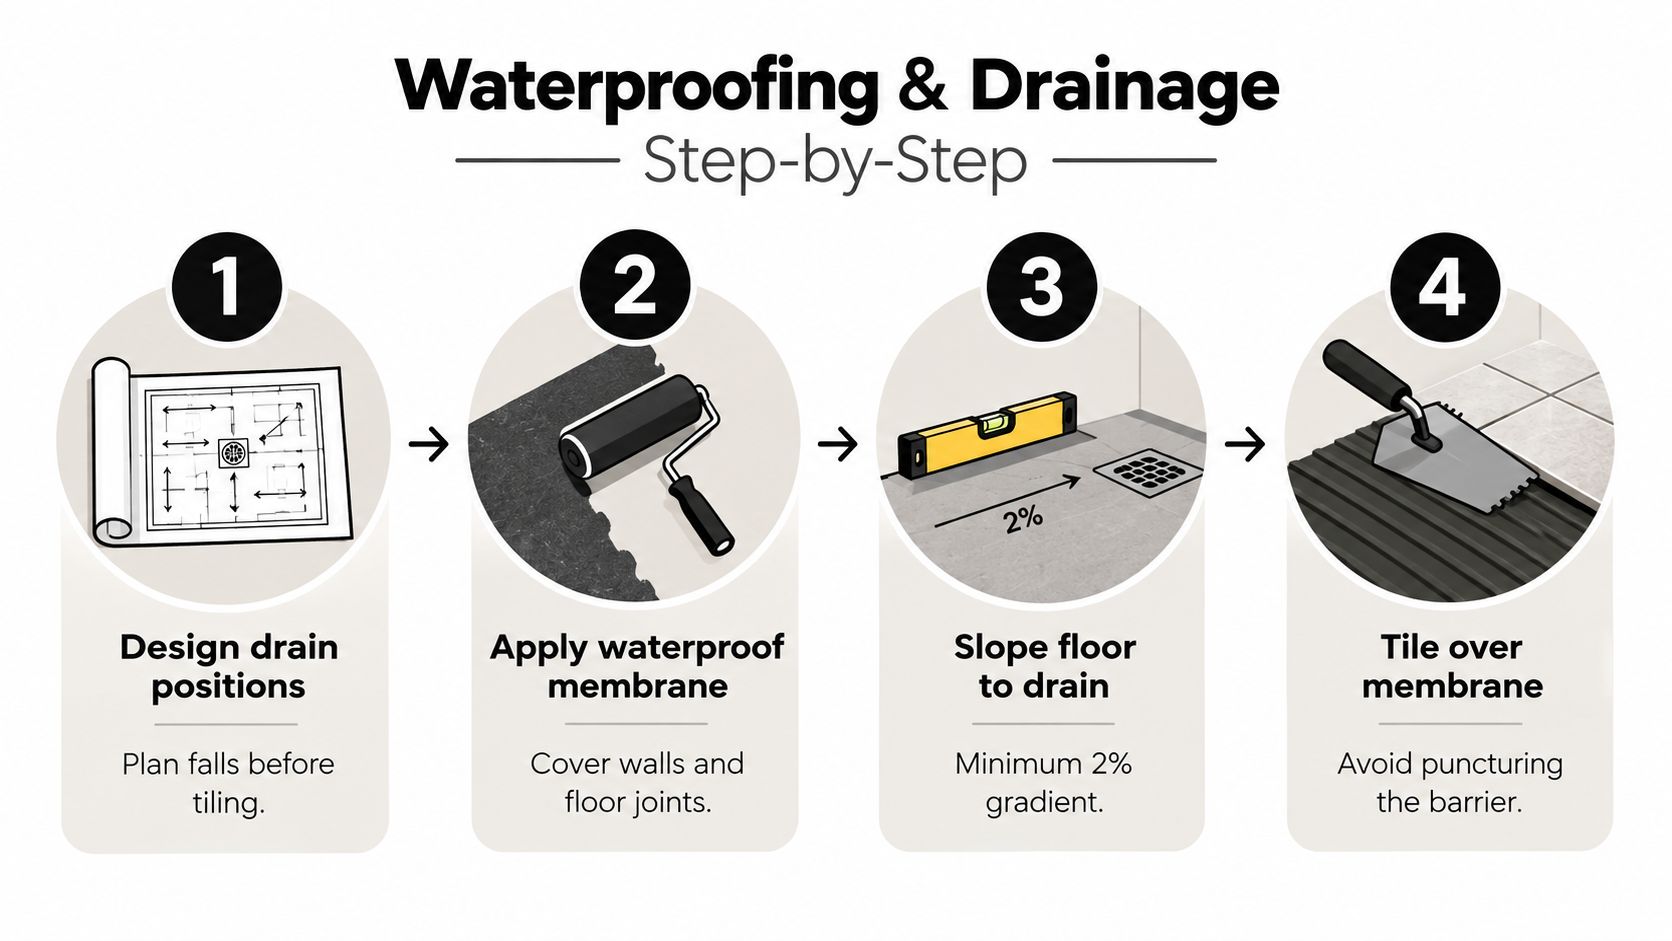
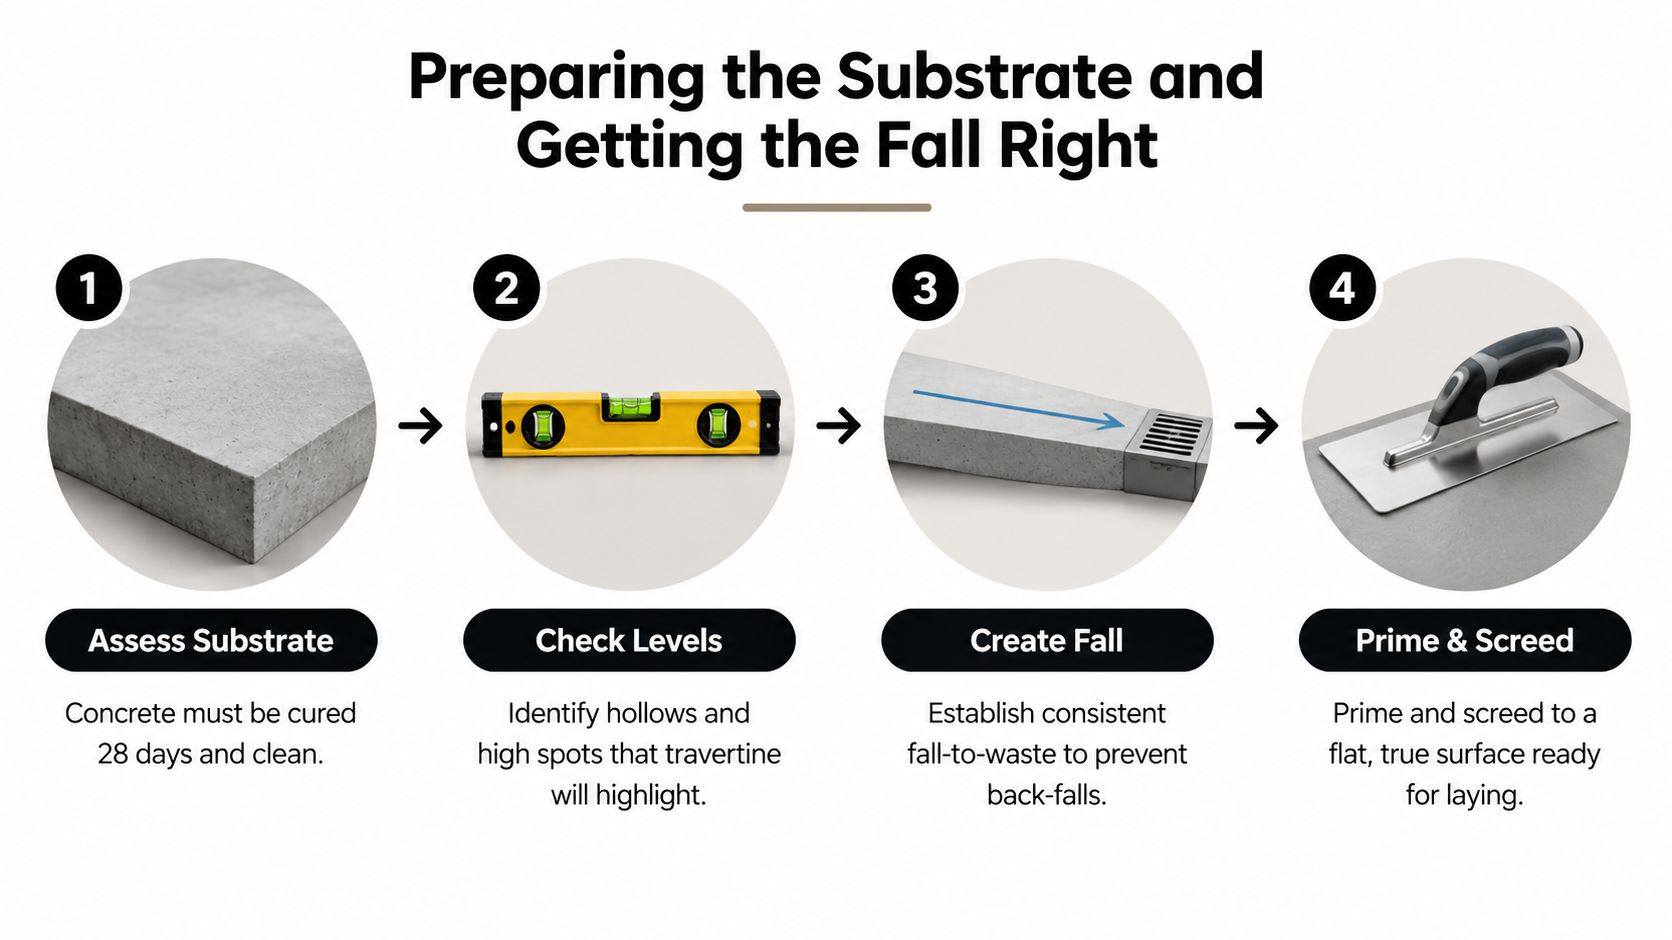
A sound sequence usually starts with demolition and substrate assessment, then repairs, floor preparation, screeding or levelling, waterproofing, set-out, tiling, grouting, sealing where required, and final fit-off. On a properly managed job, each stage is checked before the next one starts. That matters in older Melbourne homes, where out-of-level floors, previous moisture damage, and patched framing are common.

Where bathroom renovations usually go wrong

The problems that cause slip risk and early failure are often hidden behind a neat tile finish:

  • Substrate preparation is rushed. If the floor moves or the base is not flat enough for the selected tile, the finish will not stay sound.
  • Falls are poorly formed. Water should move to the waste without ponding near the shower entry, wall lines, or corners.
  • Waterproofing is treated as a stand-alone trade. It is part of a wet area system and has to suit the floor waste, junctions, penetrations, and final floor build-up.
  • The floor waste and tile format are mismatched. Large tiles on a small shower base often make correct falls harder to achieve.
  • Set-out ignores safety and maintenance. Awkward cuts, uneven joints, and badly planned transitions can create trip points and cleaning issues.

For homeowners trying to understand what should be happening beneath the tile finish, this overview of bathroom waterproofing systems is a useful reference.

If the floor holds water, people start adjusting how they walk through the room. That is a design and construction failure, not just a cleaning issue.

The registered builder's role

A registered builder brings the wet area together as one compliant build, not a collection of separate trades. That means checking whether the tile selected under AS 4586 also suits the floor layout, confirming the waterproofing design aligns with AS 3740, coordinating the waterproofer, tiler, plumber and electrician, and making sure the finished room is fit for use.

That role matters most when the job gets complicated. A recessed shower, a linear waste, underfloor heating, a timber subfloor, or an apartment renovation with limited floor depth all introduce trade-offs. Better slip resistance can mean a rougher surface that needs more cleaning. A larger tile may suit the look of the room but make falls harder to form. A builder should identify those issues before materials are ordered, not after they arrive on site.

Good builders also stop bad decisions early. Sometimes that means changing the shower floor to mosaic or small-format tile so the falls can be formed properly. Sometimes it means rejecting a substrate that another contractor wanted to tile over. Those calls protect the renovation long after handover.

How to Choose a Qualified Melbourne Tiler and Builder

Not every tiler is set up to deliver a compliant wet area renovation, and not every builder understands the detail that a good bathroom floor demands. Homeowners often assume a neat tile finish equals a sound bathroom. It doesn't. The visible face is only part of the work.

The easiest way to sort serious operators from risky ones is to ask specific questions and listen for specific answers. Good tradespeople won't be offended by that. They'll usually welcome it.

A professional tile consultant assists a female customer with a project checklist in a showroom.

Questions worth asking before you sign

Start with process, not price.

  • Who is responsible for the full bathroom renovation. If multiple trades are involved, ask who coordinates them and who carries responsibility for the outcome.
  • Do you regularly install slip-rated bathroom floors and shower mosaics. Experience with standard wall tiling isn't the same as building safe wet zones.
  • How do you handle floor preparation and falls. You want a clear explanation, not a vague assurance that they “sort it on site”.
  • Who completes the waterproofing work. The answer should show that the contractor understands compliant wet area practice and trade coordination.
  • Can you explain why this tile is suitable for the bathroom floor and shower floor. A qualified operator should be able to justify the selection in practical terms.

If you're comparing local contractors, reviewing established Melbourne tiling contractors near you can help you understand what full-scope service should look like.

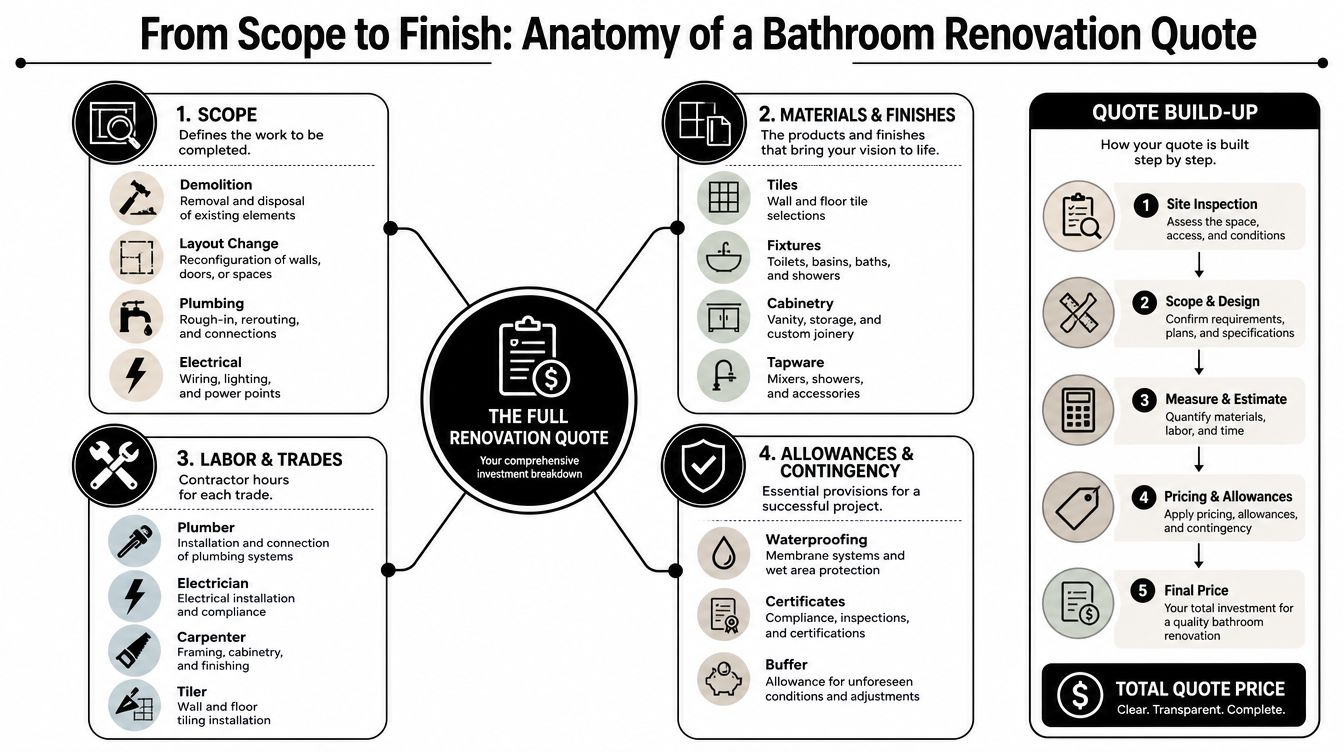
What a proper quote should include

A thin quote often means thin scope. If the document focuses only on tile supply and laying, there's a good chance important work has been assumed away or left ambiguous.

Look for these inclusions:

  • Demolition and disposal details. Old bathrooms rarely come apart cleanly without follow-on repair work.
  • Substrate preparation. This might include levelling, screeding, repair, or sheet preparation depending on the site.
  • Waterproofing allowance. It should be explicit, not buried.
  • Tile installation method. Especially relevant if you're using mosaics, large-format porcelain, or mixed finishes.
  • Grout and sealant scope. Corners, junctions, and movement areas matter.
  • Trade coordination. Plumbing, electrical, carpentry, glazing, and fit-off all affect the result.

A good quote tells you what's being built. A poor quote only tells you what's being sold.

The other thing worth checking is whether the contractor talks about the bathroom as a system. If all the conversation sits around tile style, feature walls, and finishes, that's a warning sign. Skilled bathroom renovators usually spend just as much time discussing falls, membrane work, drainage, and layout constraints.

For homeowners, confidence shouldn't come from the nicest brochure or the lowest number on a page. It should come from hearing a builder or tiler explain the work in a way that shows they've done it properly many times before.

Maintaining Your Non Slip Floor for Lasting Safety

A non slip bathroom floor doesn't stay safe by default. The same texture that improves grip can also hold onto soap film, body oils, and cleaning residue if the floor isn't maintained properly. Once that build-up sits on the surface, the floor can feel smoother and more slippery than it should.

The best routine is simple and consistent. Use cleaning products that remove residue without leaving a glossy film behind. Rinse well. Pay attention to shower exits, corners, and the area in front of the vanity, because that's where build-up often becomes noticeable first.

What helps and what hurts

A few habits make a real difference:

  • Use pH-appropriate cleaners. Harsh products can damage grout, sealers, or some stone finishes.
  • Avoid waxy or polishing products. They can defeat the purpose of a textured tile.
  • Scrub textured floors properly. A flat mop alone often won't lift residue from a structured surface.
  • Keep grout and joints in good order. Failed joints don't just look poor. They affect hygiene and performance.

The larger point is that lasting safety comes from the whole chain. Good non slip bathroom flooring starts with the right material, depends on correct installation, and stays effective through sensible maintenance. That's how bathroom renovations deliver long-term value, and it's why registered builders treat the floor as part of an entire wet area system rather than a simple tile choice.


If you're planning bathroom renovations and want guidance from Melbourne Tiling Services P/L, speak with a team of Registered Unlimited Builders who handle tiling, waterproofing, screeding, and full bathroom construction across Melbourne. They can help you choose non slip bathroom flooring that suits your home, meets the right standards, and performs properly for years.

Bathroom Ensuite Renovations Melbourne: Your 2026 Guide

A full strip-out and rebuild for a Melbourne ensuite typically sits between $20,000 and $35,000, with $25,000 to $35,000 being the most common mid-range spend bracket for Australian ensuites. If you're staring at tired tiles, a leaking shower base, or a layout that never really worked, that range is the realistic starting point for planning bathroom ensuite renovations properly.

The decision to renovate often emerges from similar experiences. The grout keeps darkening no matter how often it's cleaned. The old hob shower feels tight. The vanity has no storage, the exhaust fan never clears the steam, and somewhere in the back of your mind is the bigger worry that water may already be getting where it shouldn't.

That's where good planning matters. In Melbourne, ensuite work isn't just about choosing a vanity and tile colour. It's about whether the layout can be improved without blowing the budget, whether the waterproofing is being done to Victorian requirements, and whether the people running the job understand both bathroom renovations and registered builders obligations.

A lot of poor renovations look fine for six months. Then the silicone opens up, the falls are wrong, balcony junctions start tracking water, and the owner ends up paying twice. The right approach is simpler. Start with layout, lock in the scope, price the work transparently, and build it so it lasts.

Table of Contents

Your Melbourne Ensuite Renovation Starts Here

A dated ensuite usually doesn't fail all at once. It starts with little signs. Cracked silicone at the shower base. Hollow-sounding tiles. A vanity that swells near the kickboard because moisture keeps getting into the board. Then the owner starts putting off the job because they assume the process will be messy, expensive, and hard to control.

That hesitation is understandable. An ensuite is a small room, but it's one of the most technical rooms in the house. Every trade touches it. The plumber needs clean set-outs. The waterproofer needs the right substrate. The tiler needs correct falls and straight walls. If one stage is rushed, the next stage has to compensate, and that's where bad workmanship gets buried behind new finishes.

In Melbourne homes, there's another layer. Older houses often bring movement, uneven floors, odd wall lines, and previous patch repairs that make demolition more revealing than expected. Apartments bring tighter access, stricter site rules, and balcony or external wall interfaces that can become leak points if they're not handled carefully.

Practical rule: If an ensuite has an active leak, stained skirtings outside the bathroom, or movement underfoot, don't plan it as a cosmetic update. Treat it as a rebuild until proven otherwise.

The jobs that run best usually start with a plain conversation about what isn't working. Some owners need better storage. Some want easier cleaning and a walk-in shower. Others need a more durable result for a rental or family home. Those goals shape the right renovation more than trends do.

A good ensuite should solve daily problems first. It should give enough circulation space, enough ventilation, enough storage, and a shower area that drains correctly without relying on heavy silicone maintenance to stay watertight. Good bathroom ensuite renovations do that effectively. They don't just look sharp on handover day. They still perform after years of steam, water, and movement.

The Melbourne Ensuite Renovation Roadmap

Most ensuite jobs feel overwhelming when they're looked at as one big renovation. They're easier to manage when you see them as a sequence. Each stage sets up the next one, and if the early decisions are right, the build becomes much smoother.

A step-by-step roadmap infographic for Melbourne ensuite renovations, covering consultation, planning, permits, construction, and final handover.

Start with the room you actually have

Ensuites are often smaller than people realise once clearance, door swings, shower screens, and wall thickness are taken seriously. The practical minimum footprint for a functional ensuite with a shower, toilet, and vanity in Australia is 1.5 m × 2.0–2.2 m, or about 3.0–3.3 m², while a more comfortable layout is 1.8 m × 2.4 m (4.32 m²) according to Australian small bathroom dimension guidance.

That matters because layouts fail on paper all the time. A toilet might fit, but the clearance in front of it is poor. A vanity may look fine in a showroom, but once a shower screen is in, the room feels pinched. Good planning starts with accurate measure-ups and honest discussion about what can fit without making the room awkward.

Three early decisions shape nearly everything:

  • Keep or change the layout: Keeping plumbing in roughly the same positions usually keeps the build cleaner and simpler.
  • Choose the shower type early: A hob shower, walk-in shower, or framed screen each drives different waterproofing and tiling details.
  • Decide how much storage matters: Slim vanities save space, but many owners regret going too small once they start using the room.

The build sequence that works

An ensuite renovation runs best when trades don't trip over one another and no one is guessing what comes next.

  1. Initial consultation and measure-up
    The room is assessed properly. Existing problems matter here. Loose tiles, failed grout lines, poor ventilation, and water damage behind walls all affect the final scope.

  2. Design and selections
    During this stage, layouts are tested, tapware locations are set, and finishes are chosen. It's also where practical choices beat impulse decisions. Large-format tiles can look excellent, but only when the substrate is prepared for them.

  3. Quoting and contract stage
    A proper quote needs a defined scope. Ambiguity is what causes disputes. If an item is assumed but not written down, it usually turns into a variation later.

Good renovations are built twice. First on paper, then on site.

  1. Demolition and site preparation
    The old room is stripped out so the structure and substrate can be checked. This stage often exposes the difference between an old bathroom that was ugly and an old bathroom that was failing.

  2. Rough-in work
    Plumbing and electrical rough-ins go in before the room is closed up. If fixtures are being relocated, the complexity increases.

  3. Waterproofing, screeding, and tiling
    This is the technical heart of the job. Get this wrong and no tapware brand in the world will save the renovation.

  4. Fit-off and finishing
    Vanity, screen, toilet, basin, mirrors, lighting, accessories, and sealants go in after the wet work has cured and the tiling is complete.

  5. Final inspection and handover
    The room should be checked for finish quality, drainage, alignment, and clean presentation.

The smartest owners stay focused on sequence, not speed. A rushed ensuite often costs more because mistakes in wet areas aren't cheap to undo.

Budgeting Your Ensuite Renovation Costs in Melbourne

The budget question needs a straight answer. For a full strip-out and rebuild, ensuite renovation costs in Australia in 2026 are typically $20,000 to $35,000, with $25,000 to $35,000 sitting in the most common mid-range bracket, based on 2026 ensuite renovation cost guidance. That's the range many Melbourne owners should expect when planning bathroom ensuite renovations with proper waterproofing, tiling, and new fixtures.

That number doesn't mean every ensuite costs the same. Small rooms can be deceptive. They often cost more per square metre because the fixed labour and waterproofing components don't shrink as much as people think. The room might be compact, but it still needs demolition, plumbing, electrical work, waterproofing, tiling, and fit-off.

What different budget levels usually mean

The easiest way to budget is by scope, not wishful thinking.

Tier Estimated Cost (AUD) Typical Scope
Budget $8,000 to $15,000 Cosmetic refresh, often keeping layout and major finishes where possible
Standard $15,000 to $35,000 Full renovation range where most homeowners spend
Premium $35,000+ Higher-end finishes, more complex layouts, and luxury inclusions

The broader bathroom renovation market in Australia commonly falls into those three brackets according to Australian bathroom renovation pricing on hipages.

A cosmetic refresh usually suits owners who want a visible lift without tearing the room back to the frame. Retaining the layout, some surfaces, or cabinetry can hold the cost down. A standard renovation is where most complete ensuite upgrades sit. This is the practical middle ground where the room is rebuilt properly and looks current without drifting into luxury spend. A premium renovation often includes relocated plumbing, imported finishes, feature tapware, or high-end design details that push labour time and coordination higher.

For a closer local pricing reference, compare your scope against this Melbourne bathroom renovation cost guide.

Where the budget moves fast

Cost usually climbs for a few predictable reasons, and owners are better off knowing them early.

  • Layout changes: Moving waste points, water lines, or power points adds labour and coordination.
  • Tile selection: Material choice matters, but so does tile size. Large-format porcelain and slab products often need flatter substrates and slower handling.
  • Access issues: Tight stair access, apartment rules, and limited parking can all affect labour efficiency.
  • Hidden repairs: Water-damaged framing, failing substrate, or out-of-level floors can turn a simple price into a wider rebuild.

A few trade rates help explain why labour is such a strong driver. General building and renovation labour commonly ranges from $90 to $150 per hour, while plumbing sits around $100 to $150 per hour in the pricing guidance cited above through hipages. The rates aren't the whole story, but they explain why repeated visits, design changes, and difficult sequencing add up quickly.

Some line items are easy to underestimate. Waterproofing alone accounts for $500 to $750 in an average-sized bathroom, and tiling costs vary sharply by material. Tilers charge $35 to $120 per m², averaging $60 per m² in the cited ensuite cost guide, while floor tiling can range from $35 to $50 per m² for ceramic or porcelain and $80 to $130 per m² for natural stone in that same source.

The cheapest quote often becomes the most expensive room if it skips prep, waterproofing detail, or realistic allowances.

The best budgeting move isn't choosing the cheapest tapware package. It's deciding where quality matters. Spend where failure is expensive to fix. Waterproofing, substrate preparation, drainage, and tiling accuracy are the parts that protect the whole room.

Hiring a Registered Builder and Navigating Victorian Regulations

In Victoria, the legal side of an ensuite renovation isn't optional admin. It's part of protecting the owner, the property, and the quality of the work. For a full bathroom renovation valued at $10,000 or more, a building permit and the engagement of a registered builder are required in Victoria, and domestic building insurance becomes mandatory for work over $16,000, as set out in this Victorian renovation threshold reference.

Those thresholds matter because many ensuites easily move past them once demolition, trades, waterproofing, tiling, fixtures, and finishes are included. If the contract amount crosses the trigger, the job has to be handled properly from the start.

A flowchart detailing steps for hiring a registered builder for Victorian home renovations and regulatory compliance requirements.

Why the registered builder requirement matters

A lot of owners hear “registered builder” and think it's just a licensing detail. It isn't. In bathroom renovations, the registered builder is the party responsible for coordinating the work, carrying the right obligations, and making sure the job is delivered in a compliant sequence.

That matters for a few reasons.

  • Wet areas are high-risk areas: Water damage can travel well beyond the ensuite.
  • Trades need coordination: Plumbing, carpentry, waterproofing, electrical, and tiling all depend on correct timing.
  • Insurance and paperwork matter: If things go wrong, informal arrangements leave owners exposed.

Victoria also sets its own thresholds, and they're not the same everywhere. The verified guidance notes that Victoria's $10,000 trigger differs from NSW's $5,000 and Queensland's $3,300 threshold for comparable renovation licensing requirements, according to NSW licensing information referenced in the verified guidance. That's why Melbourne owners shouldn't rely on advice from interstate forums or generic renovation videos.

Compliance isn't there to slow a job down. It's there because failed wet-area work is expensive, disruptive, and often hidden until the damage spreads.

What compliance should look like on a real job

A compliant ensuite job should feel organised before demolition starts. The scope should be clear. The contract should reflect the actual work. The builder should understand whether the value triggers permit and insurance requirements. If the room involves structural or wet-area work, that should be treated seriously from day one.

A simple checklist helps:

  • Check the registration status: Don't assume a tiler or bathroom company can legally run the whole project.
  • Confirm who is coordinating the trades: If no one clearly owns the sequence, problems get passed around.
  • Ask how permit obligations are being handled: This matters more when scope grows during quoting.
  • Make sure insurance obligations are understood: If the contract value pushes past the threshold, this is not optional.

The reason experienced builders are firm on this is simple. Once walls are closed and tiles are on, a lot of defects become difficult to prove and expensive to rectify. The right paperwork, supervision, and compliance structure reduce that risk before the first tile is laid.

Waterproofing and Tiling A Foundation for Quality

The best-looking ensuite in the house is still a failed renovation if water gets behind it. In wet areas, appearance matters, but performance matters first. That's why waterproofing and tiling should be treated as the structural heart of the room, not just the finish.

A professional construction worker applying grey waterproofing membrane to a shower wall in a bathroom.

What proper waterproofing looks like

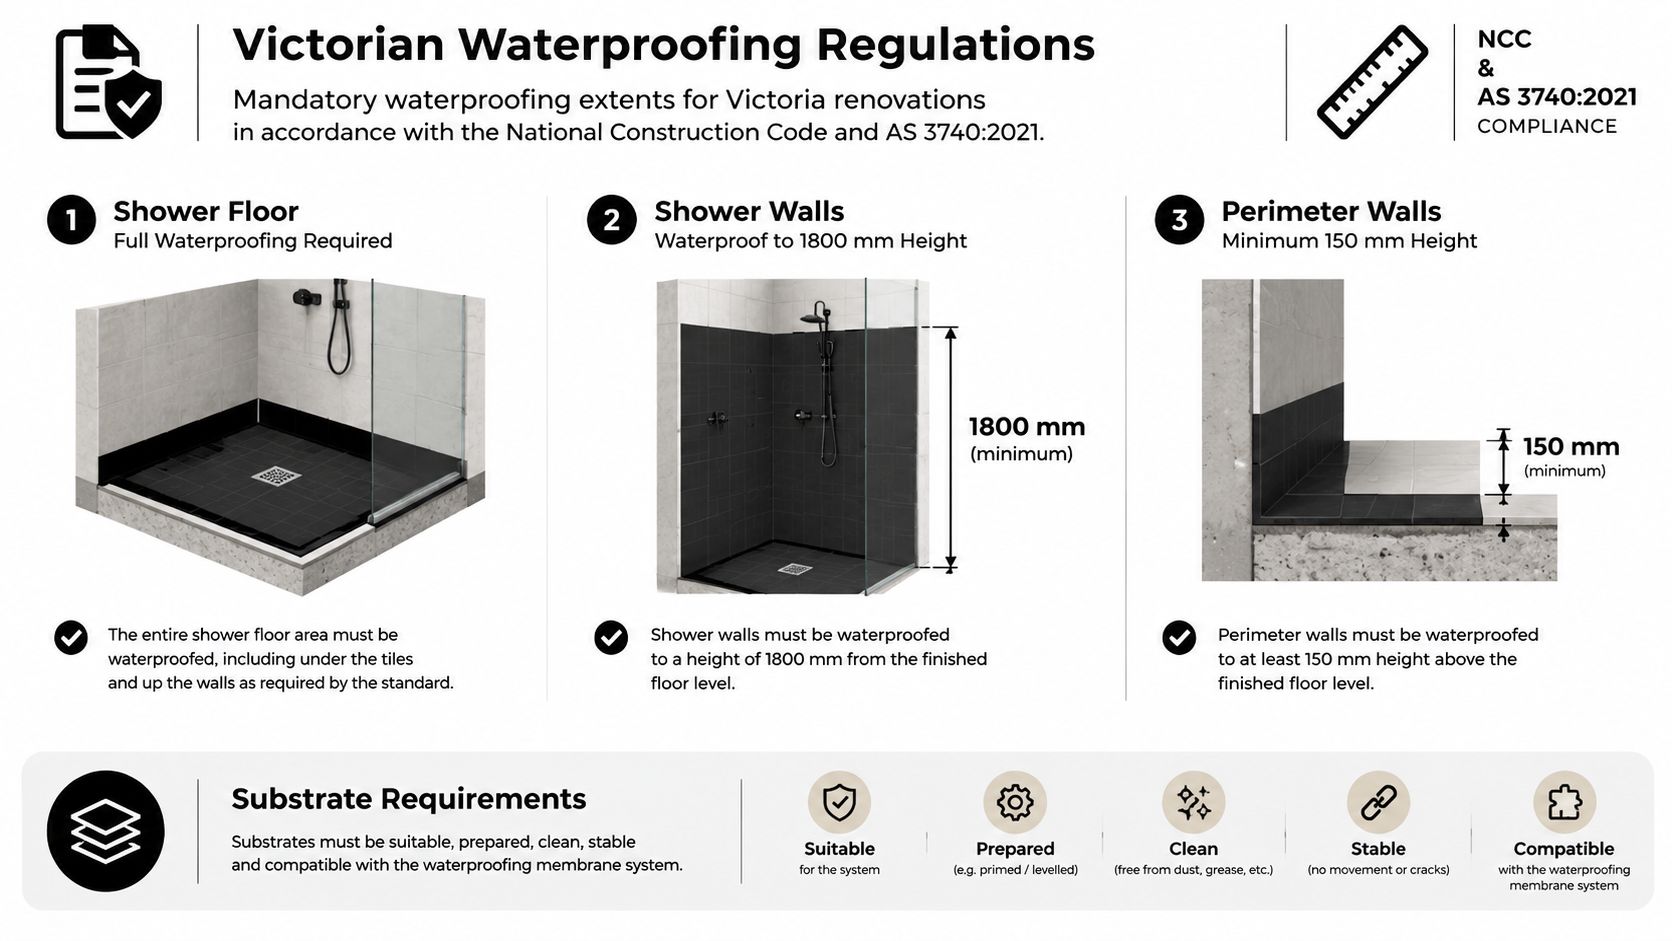
In Victoria, compliance with AS 3740:2021 is mandatory for bathroom waterproofing. That means the entire shower floor and walls up to 1,800 mm above the finished floor must be waterproofed, plus at least 150 mm on the remaining walls, with a mandatory waterstop angle at the shower entry, as outlined in this Victorian waterproofing requirement summary.

That requirement exists for good reason. Most shower leaks aren't dramatic pipe bursts. They're slow failures. Water gets through a weak junction, an underdone corner, a poor screen transition, or a floor that doesn't shed water cleanly to the waste. Once that starts, damage can spread into skirtings, robes, ceilings below, or adjoining balconies.

A proper wet-area build relies on sequence:

  1. Sound substrate first
    Waterproofing over unstable sheeting, movement, or loose patching is asking for trouble.

  2. Correct falls to waste
    If the screed is wrong, the room will fight the user every day. Water sits. Grout stays wet. Cleaning gets harder.

  3. Membrane continuity
    Corners, penetrations, wall-floor junctions, and entry transitions need care. These are the places that usually fail first.

For a deeper look at wet-area failures and repair methods, this Melbourne waterproofing guide is useful.

Tiling choices that perform in ensuites

Tiles do more than set the look of the room. They affect maintenance, slip behaviour, cleaning, visual scale, and installation complexity.

Porcelain remains a strong choice in ensuites because it's durable and suits modern formats. Natural stone can look excellent but demands more care in both selection and long-term maintenance. Large-format tiles and slab-style products create a cleaner, more uniform result, but they also expose poor prep instantly. If the wall is out, the tile shows it. If the floor isn't flat enough, lippage becomes harder to control.

A tiler can't fix a bad substrate with a premium tile. Expensive finishes usually make prep errors more obvious, not less.

The tile layout should be worked out before adhesive hits the wall. Niche positions, tapware centring, vanity alignment, and screen lines all need to relate to each other. The jobs that look calm and balanced usually had those set-outs planned early.

This short video gives a useful visual reference for wet-area work and bathroom build sequencing.

Good tiling isn't just straight joints. It's straight decisions. The right tile for the room is the one that suits the substrate, the drainage, the maintenance expectations, and the level of workmanship being applied.

Visualising Your Vision The 3D Design and Quote Process

Most disputes in ensuite projects start before demolition. They start when the owner and the contractor think they're talking about the same room, but they aren't. One is imagining a recessed niche, a wall-hung vanity, and brushed tapware centred to the tile grid. The other is pricing a more basic build with standard set-outs and provisional assumptions.

That's why 3D design has become such a useful step in bathroom ensuite renovations. It turns vague ideas into an actual room. Owners can see whether the walk-in shower feels open enough, whether a niche lines up, and whether the vanity depth makes the circulation too tight.

Screenshot from https://melbournetilingservices.com.au

Why drawings save money

A proper drawing process cuts out a lot of expensive uncertainty. Owners usually change their mind less when they can see the room clearly. Builders and trades also make fewer assumptions when fixture positions, tile extents, and joinery sizes are documented.

The key benefit isn't style. It's coordination.

  • Layout confidence: You can test whether the room feels cramped before any demolition starts.
  • Selection clarity: Tiles, vanity style, mirror size, and screen type become easier to compare when they're shown in context.
  • Trade accuracy: Plumbers, sparkies, waterproofer, and tiler work better from defined set-outs than verbal descriptions.

What a usable quote should include

A quote is only useful if the scope is stable. If the design is half-formed, the quote usually carries assumptions, and assumptions are where projects drift.

A strong ensuite quote should make clear:

  • What is being removed and rebuilt
  • Which fixtures and finishes are included
  • Whether the layout is staying or changing
  • Who is responsible for supply and installation
  • What site conditions may affect final scope

The more detail resolved before demolition, the less money gets spent on fixing preventable changes during the build.

Owners don't need a flashy rendering for the sake of it. They need enough visual and written detail to know that the room they're approving is the room being priced. When that link is missing, budgets become slippery and expectations split.

Solving Common Renovation Problems Leaks and Balconies

Not every ensuite renovation starts as an upgrade. A lot start because something has already failed. The owner may notice swollen architraves, bubbling paint outside the bathroom, or a musty smell that never really goes away. In homes with an adjoining balcony, the symptoms can spread further and become harder to diagnose.

Why shower leaks keep coming back

Shower leaks are often misdiagnosed. People blame grout first because that's what they can see. In reality, recurring leaks usually come from deeper issues. Failed membrane junctions, poor floor falls, movement in the substrate, and badly handled penetrations are more common causes than a simple surface problem.

That's why patch jobs often disappoint. Replacing silicone or regrouting can freshen the appearance, but if the waterproofing system underneath has failed, the water path is still there. The right response starts with diagnosis, not cosmetic repair.

A practical leak investigation usually checks:

  • Moisture pattern: Is the damage isolated to the shower, or is it travelling into nearby walls or flooring?
  • Drainage behaviour: Does water clear properly to the waste, or does it sit near corners and screen lines?
  • Movement points: Are there cracked joints, loose tiles, or flex in the floor or wall lining?
  • Previous repair history: Multiple patch repairs usually suggest the original system was never resolved.

Balcony junctions need more attention than most builders give them

Where an ensuite meets an external balcony or sits near one, leak risk increases because the waterproofing transitions become more demanding. Water doesn't respect room names. If a balcony threshold, door track, or adjacent wall detail is weak, moisture can track laterally and show up where the owner least expects it.

Balcony problems usually aren't fixed by treating the bathroom and balcony as separate jobs. The junctions need to be looked at together. That often means reviewing falls, membrane continuity, threshold detailing, and whether previous work trapped water instead of directing it away.

For owners dealing with that type of issue, this Melbourne balcony waterproofing page gives a useful overview of the problem area.

The main lesson is simple. Leaks rarely care about where one trade stopped and the next one started. Rectification needs someone who understands the whole water path, not just the visible symptom.

Frequently Asked Questions for Melbourne Renovators

How do I know if my ensuite needs a full renovation or just a refresh

If the room has active leaks, movement, mould returning around joints, or damage outside the shower area, a cosmetic refresh usually won't solve the underlying issue. A refresh suits rooms that are dated but still structurally sound.

Is a small ensuite cheaper just because it uses fewer tiles

Not always. Smaller ensuites often have tighter working conditions and similar fixed trade stages to larger bathrooms. That's why small wet areas can still carry a substantial renovation cost.

What should landlords and property managers focus on

Prioritise durability and easy maintenance. Choose finishes that clean well, avoid awkward grout-heavy detailing, and make sure the drainage and waterproofing are done properly. Tenants notice function long before they notice designer tapware.

Do large-format tiles work in compact ensuites

They can work very well, especially if you want a cleaner visual finish with fewer joints. The catch is preparation. Walls and floors need to be true enough to support the format properly.

How do I reduce surprises during the build

Lock in your selections early, approve drawings before demolition, and make sure the quote reflects the actual room being built. Mid-project decision changes are one of the fastest ways to create cost drift.

What matters most at handover

Check the room like a user, not just like a buyer. Run the shower, look at where water sits, open the vanity, inspect silicone lines, and make sure fittings, lighting, and screen operation feel right in daily use.


If you're planning an ensuite upgrade, leak rectification, or a full bathroom renovation in Melbourne, Melbourne Tiling Services P/L handles start-to-finish bathroom renovations, waterproofing, screeding, tiling, shower screens, 3D drawings, and compliance-led project delivery across Melbourne and greater Victoria. Reach out for a clear scope, practical advice, and a quote that reflects how the room should be built.

Certificate III in Construction Waterproofing: A 2026 Guide

You're probably in one of two spots right now. Either you're planning a bathroom renovation and trying to work out who can waterproof it properly, or you're looking at the trade itself and wondering whether the Certificate III in Construction Waterproofing is enough to get you on site and working legally.

That confusion matters because waterproofing isn't decorative work. When it fails, the damage sits behind tiles, under screeds, around shower bases, inside timber frames, and beneath finishes that looked perfect on handover day. Registered builders see the same pattern over and over in failed bathroom renovations. The tiling might look straight, the tapware might be expensive, and the shower screen might be premium, but if the waterproofing was handled by someone without the right training or licensing, the whole job is vulnerable.

The important point is simple. The Certificate III in Construction Waterproofing is the trade foundation, not the whole legal pathway in Victoria. That distinction catches out new tradespeople and homeowners alike.

Table of Contents

Why Your Bathroom Renovation Depends on One Qualification

The bathroom looks finished on Friday. By winter, paint is bubbling on the hallway side of the wall, the skirting has swollen, and the owner is arguing with the tiler, plumber, and builder about who is responsible.

I see this pattern regularly. The failure usually starts long before the first cracked grout line or water stain appears. It starts behind the tiles, where poor preparation, bad detailing, or the wrong membrane application gets buried and signed off as if the job were sound.

That is why the Certificate III in Construction Waterproofing matters on bathroom renovations. It is the trade qualification that shows the installer has been trained to carry out waterproofing work as a building system, with sequence, substrate preparation, junction treatment, compatibility, curing, and compliance all handled properly. Homeowners often focus on the finish they can see. Builders focus on the work that can fail after handover.

The gap between a qualified waterproofer and a person who has only applied waterproofing products previously is wide. In a bathroom, small errors cause expensive failures. A poorly treated wall to floor junction, an untreated penetration, or a rushed flood-test sequence can leave water tracking into framing, sheeting, insulation, and adjoining rooms. By the time that damage is visible, the repair usually means demolition.

That same distinction is often misunderstood in Victoria. Holding the Certificate III is not the same as holding a contractor licence or registration to take on waterproofing work in your own right. The qualification shows trade competence. The legal right to contract, advertise, and carry responsibility for the work depends on the licensing and registration framework that applies to the job and the person performing it. For tradespeople, that affects the path into the industry. For homeowners, it affects who should be hired and who carries accountability if the work fails.

Wet areas do not forgive shortcuts.

For people entering the trade, this qualification marks the point where waterproofing stops being treated as a side task and starts being treated as specialist construction work. For clients, it is one of the clearest signs that the person doing the job understands what is at stake before the bathroom is closed up and the evidence disappears.

What the Certificate III in Construction Waterproofing Covers

A proper waterproofing qualification teaches a trade process, not a product demonstration. That distinction matters on site. The person applying the system has to understand the build-up under the tiles, the sequence of other trades, and the standards that govern how wet areas are prepared and treated.

A diagram outlining the key components of the Certificate III in Construction Waterproofing, including core units, electives, and safety.

What the qualification structure tells you

The Certificate III is built as a trade qualification with core units and electives. In practice, that means the training is meant to produce someone who can work across common waterproofing situations, not someone who has only seen one membrane brand or one bathroom detail in a classroom.

For tradespeople, that broad scope matters because waterproofing failures rarely come from one dramatic mistake. They usually come from several smaller ones. The falls were never checked. The substrate was still too wet. The bond breaker was skipped at a movement point. The membrane was applied before penetrations were properly detailed. Training needs to cover the full chain, because failures happen across the full chain.

For homeowners and builders, the takeaway is straightforward. A person who has completed the qualification should be able to explain the whole waterproofing sequence from inspection to final application, including why each step affects compliance and durability.

What competent training should develop

Good training builds judgment as much as technique. It should develop capability in areas such as:

Area Why it matters in practice
Plan reading The installer needs to identify set-downs, wet-area extents, junction details, penetrations, and drainage intent before work starts.
Surface preparation Membranes fail early on dusty, unstable, contaminated, or damp substrates. Prep work decides whether the system bonds properly.
Material handling Primers, sheet systems, liquid membranes, bond breakers, and sealants all have different limits, curing times, and application methods.
Assessment skills The waterproofer has to judge whether the area is ready, whether previous trade work is acceptable, and whether the specified system suits the conditions.

The strongest operators are the ones who can stop a job before it goes wrong.

That might mean rejecting a substrate, sending a plumber back to fix penetrations, or delaying application because moisture levels and curing times are not right. Anyone can open a bucket. A trained waterproofer is expected to know when not to.

This is also where people often get confused in Victoria. The Certificate III shows that a worker has been trained in the trade. It does not automatically mean that person can contract directly with clients as a licensed waterproofing contractor. That licensing and registration question sits beyond the qualification itself, and it matters just as much as the training when work is being priced, signed off, and warranted.

For anyone comparing course content with real site work, a step-by-step guide to waterproofing a shower properly helps show how many separate decisions sit behind what looks like one simple trade task. That is the gap the Certificate III is supposed to address. It trains the work, not just the coating.

The Practical Skills of a Certified Waterproofer

A trained waterproofer protects the parts of the bathroom renovation that nobody wants to reopen later. That means the work has to be accurate before tiles, stone, screed, grout, and fixtures cover everything up.

A construction worker in a safety helmet applying waterproof membrane to a concrete surface on site.

The difference between a certified waterproofer and a general handyman usually comes down to detail. A tradesperson with proper training understands that a membrane system only works when the substrate, junction treatment, penetrations, curing sequence, and drainage intent are all handled properly. Miss one of those and the rest of the job can still fail.

Membrane thickness is not guesswork

One of the clearest examples is membrane coverage. The Certificate III in Construction Waterproofing mandates competence in applying liquid-applied membranes to achieve a minimum wet-out thickness of 1.5mm for shower bases and 1.0mm for vertical walls, as specified in AS 3740:2021, according to this training overview on Certificate III waterproofing requirements.

That matters because membrane thickness isn't cosmetic. Too thin, and the system can't perform as intended. Too inconsistent, and weak points appear where movement, ponding, or ongoing moisture exposure will test the installation.

On site, the better operators don't rush this stage. They inspect the substrate, check corners and junctions, allow for bond breakers where needed, and apply the system evenly instead of chasing speed.

If you want a practical look at the process in a shower area, this guide to how to waterproof a shower properly is useful because it shows the sequence matters as much as the product.

Falls, trays, and substrate preparation decide whether the job lasts

A compliant waterproofed bathroom also relies on drainage. Water must move to the waste, not sit in corners, puddle under tile finishes, or linger at doorway transitions. The same verified training source notes that trained practitioners must be competent in installing pre-formed shower trays with a minimum 1:100 slope to the waste.

That requirement goes straight to one of the most common practical failures in bathroom renovations. People focus on the membrane and ignore the fall. But waterproofing over a bad surface profile doesn't fix drainage. It just seals in a defect.

A certified waterproofer should be able to judge whether the area is ready to waterproof. That includes:

  • Substrate soundness: Cracked, unstable, contaminated, or damp surfaces need attention before any membrane goes down.
  • Correct falls: Water must move to the waste consistently, especially in shower bases and wet floors.
  • Trade coordination: Plumbing penetrations, carpentry details, and screed levels have to align before the membrane system is installed.

If the substrate is wrong, the membrane is being asked to rescue a problem it wasn't designed to solve.

That's the practical value of the qualification. It doesn't just certify that someone has seen waterproofing done. It certifies that they've been trained to recognise the conditions that make waterproofing succeed or fail.

From Certificate to Licensed Contractor in Victoria

This is the part that causes the most confusion in the trade. Many people finish the course and assume they're now a licensed waterproofer. In Victoria, that's not how it works.

A four-step infographic illustrating the pathway to becoming a licensed construction contractor in Victoria, Australia.

The qualification and the licence are not the same thing

The key distinction is legal, not academic. Completing the Certificate III does not grant a licence in Victoria. As explained in this Victorian guide to hiring a licensed waterproofer, an aspiring waterproofer must separately apply to the VBA and provide evidence of competency and insurance.

That same source also states that any bathroom waterproofing job valued over $5,000 in labour and materials, including GST, requires the waterproofer to hold a specific contractor licence in Victoria, and owner-builders are prohibited from performing their own wet area waterproofing work even if they hold an owner-builder permit.

This catches out two groups all the time:

  1. New tradespeople who think the certificate is the final box to tick.
  2. Homeowners who assume that a person saying they're “qualified” must also be legally licensed to contract for the work.

They're not the same thing. Qualification shows formal trade training. Licensing is the separate legal approval to contract for regulated work.

What this means on real projects

For homeowners, the risk is obvious. You can hire someone who has done some training, speaks confidently, and prices the job attractively, but still isn't properly licensed for the work they're taking on. If the job value crosses the legal threshold, that matters immediately.

For registered builders, the distinction matters for procurement and liability. A bathroom renovation doesn't run in isolation. Waterproofers work in sequence with plumbers, carpenters, screeders, tilers, and shower screen installers. If the waterproofer's status isn't verified properly, the risk doesn't stay with that trade alone. It spreads through the whole project.

A compliance document also becomes part of the discussion. Homeowners regularly ask what proof they should expect after completion, and that's where understanding the waterproofing compliance certificate requirements in Victoria helps frame the conversation.

A certificate from a training provider proves education. A contractor licence proves legal authority to take on regulated work.

A practical pathway for new tradespeople

If you're entering the trade in Victoria, the sensible way to think about the process is:

  • First, get the qualification. The Certificate III is the trade base and the prerequisite discussed in the verified material for contractor licensing pathways.
  • Then build evidence of real competence. You need to be able to demonstrate that you can perform the work properly, not just pass coursework.
  • Arrange the required insurance and complete the VBA application. This is the step many overlook, even though it's where legal contracting capacity is determined.
  • Only contract within the rules once licensed. Taking on work beyond what you're authorised to do is where minor confusion turns into major exposure.

There's also a broader interstate lesson here. The verified training details note that in NSW, applicants for a waterproofing licence must have at least two years of practical on-the-job experience under supervision, alongside the Certificate III qualification, as outlined in the training details for CPC31411. The details differ by state, but the pattern is the same. Training alone isn't always the whole legal pathway.

That's why smart operators don't stop at “I've done the course.” They ask the harder questions. Can I legally contract for the work? Can I prove competence? Do I have the insurance and paperwork to back up what I'm offering clients? Those are the questions that separate someone preparing for a long-term trade career from someone drifting into avoidable trouble.

Your Career Path and Earning Potential as a Waterproofer

For people considering the trade, waterproofing offers something many construction roles don't. It's specialised, regulated, and directly tied to project risk. That combination usually gives qualified operators a stronger position than general labour roles.

A professional construction worker wearing a white hard hat stands confidently on a flat residential roof.

Why the trade pays well

In Victoria, that value shows up clearly in pay. Licensed waterproofers holding the qualification command average annual salaries between $75,000 and $85,000, with experienced professionals earning up to $110,000 and licensed contractors potentially reaching $90,000–$120,000 per annum, according to this Australian waterproofer salary overview.

The same source ties that pay level to the mandatory licensing environment and notes a median bathroom renovation cost in Melbourne of approximately $10,000, which reflects the importance clients place on compliant and durable wet-area work. It also states that construction industry employment is projected to grow by 137,900 workers, or 13.0%, over a five-year period.

Those numbers make sense from a builder's point of view. Waterproofing defects are expensive, disruptive, and often discovered after multiple downstream trades have finished. When one trade can prevent that kind of exposure, builders and clients pay attention.

Where the career can lead

The career path usually develops in layers rather than leaps.

  • Newly qualified worker: You start by applying what you learned under supervision and building consistency on site.
  • Trusted specialist: With experience, you become the person builders want on wet areas that need reliable execution, not rework.
  • Licensed contractor: Once you've completed the legal pathway, you can contract for the work in your own right within the Victorian framework.
  • Broader site role: Some waterproofers move into supervision, coordination, or specialist subcontracting roles with registered builders on larger projects.

That progression rewards precision. Builders remember the waterproofers who arrive prepared, reject poor substrates, sequence work correctly, and leave clear records. They also remember the ones who say “she'll be right” and create defects that others have to uncover and repair.

The trade pays better when people trust your judgement, not just your labour.

For someone choosing between a general construction path and a specialist one, that's the primary appeal of Certificate III in Construction Waterproofing. It creates a route into a trade where proper training has visible market value.

How to Choose a Reputable Training Provider in Melbourne

Not all training experiences prepare people equally well for site work. The qualification code may be the same, but the standard of delivery can vary sharply. If you're choosing a provider in Melbourne, cost alone is a poor filter.

What to check before you enrol

A strong provider should give you more than classroom exposure. It should train you to recognise site conditions, work through wet-area details, and handle practical application with discipline.

Use this checklist when comparing options:

  • Hands-on training: Ask how much of the course involves practical application work, not just theory, slides, or product talk.
  • Wet-area realism: Find out whether students work through bathroom-style details such as junctions, penetrations, corners, shower bases, and wall-floor transitions.
  • Trainer background: You want instructors who understand site sequencing, defects, and remedial issues, not just course administration.
  • Assessment quality: Ask how practical competence is assessed. A trade like this needs observation of technique, not just written answers.
  • Industry relevance: Providers with stronger links to local construction work usually have a better feel for what builders and contractors expect in practice.

A decent provider should also answer direct questions plainly. If they can't explain the gap between qualification and licensing in Victoria, that's a warning sign.

What homeowners and builders should look for in a contractor

Even if you're not enrolling in the course yourself, this still matters. Homeowners and registered builders can use the same logic when checking a contractor's background.

Look for someone who can clearly explain:

  • How they prepare substrates before waterproofing
  • How they manage falls, drainage, and penetrations
  • What evidence supports their qualification and licence status
  • How their waterproofing work fits into the wider bathroom renovation sequence

The best contractors don't get defensive when you ask technical questions. They answer them clearly, because they understand the trade and they know those details protect the project.

The Foundation of Every Successful Building Project

The Certificate III in Construction Waterproofing matters because waterproofing is one of the few trades that can make an otherwise beautiful project fail from underneath. In bathroom renovations especially, the risk sits behind the finishes, which means errors stay hidden until the damage is already spreading.

For tradespeople, the qualification is the proper entry point into a specialised trade. For homeowners and registered builders, it's the first sign that the person doing the work has been trained to handle more than a bucket of membrane and a roller. In Victoria, the bigger lesson is even more important. A qualification is not the same as a contractor licence. Anyone hiring for regulated wet-area work needs to understand that difference before the job starts.

If you're checking standards, comparing contractors, or planning leak prevention in a renovation, it helps to understand how professional waterproofing in Melbourne should be approached from both a compliance and workmanship point of view.

Done properly, waterproofing protects the whole build. Done poorly, it drags the whole build backwards.


If you're planning a bathroom renovation, leak rectification, or compliant wet-area waterproofing in Victoria, Melbourne Tiling Services P/L can help with high-end bathroom and ensuite renovations, tiling, waterproofing, and coordinated trade delivery by experienced registered builders.

Expert Tilers Sunshine Coast: Your 2026 Renovation Guide

You're probably doing what most Sunshine Coast homeowners do at the start of a bathroom project. You search for tilers, save a few photos, request a couple of quotes, and try to work out why one price looks sharp, another feels vague, and a third contractor starts asking questions about waterproofing, screeds, and who's managing plumbing.

That confusion matters because a bathroom renovation isn't just a tiling job with better fixtures. In a coastal setting, the finish you see is only as good as the preparation underneath it. If the floor isn't flat, if the membrane isn't handled properly, or if trades arrive out of sequence, the room can look excellent at handover and still fail early.

The labour market doesn't make that choice any easier. The broader Australian construction industry faces a critical shortfall of approximately 12,000 qualified wall and floor tilers nationally in 2026, which often translates to higher labour premiums and potential scheduling delays for homeowners, according to the 2026 tiler shortage report. Good trades are busy. The best ones usually aren't available next week.
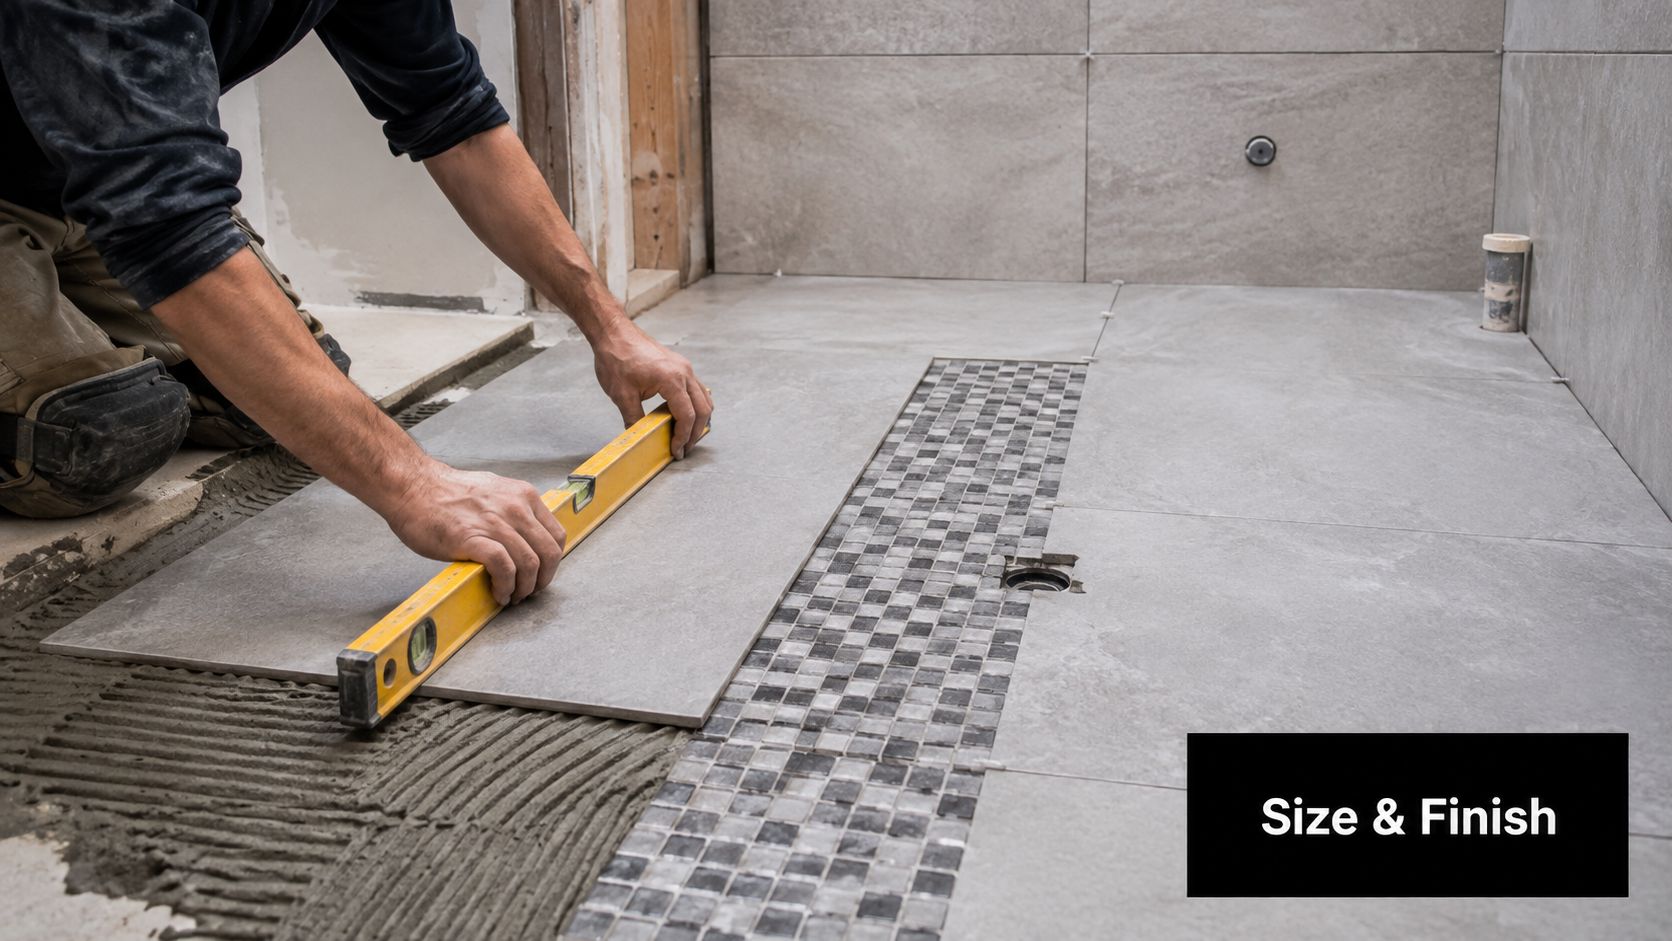
That's why the smartest way to approach tilers on the Sunshine Coast is to think bigger than tile selection and per-square-metre rates. Start by deciding whether you need a standalone tiler or someone who can run the whole renovation properly, the way full-scope bathroom renovation and tiling services are typically coordinated on more complex jobs.

Table of Contents

Your Sunshine Coast Renovation Starts Here

A lot of bathroom projects begin with a simple assumption. The tiles are old, the shower leaks a bit, the vanity feels tired, so hiring a tiler should sort it out. Sometimes that's true. If the room is otherwise sound and you're only replacing finishes, a capable tiler may be exactly the right trade.

But many bathrooms on the Sunshine Coast aren't that simple. The old substrate may be out of level, the shower area may need rectification, and the existing layout might no longer suit how the household uses the space. Once plumbing, waterproofing, demolition, and fixture coordination enter the picture, the job stops being “just tiling”.

What homeowners usually run into first

The first quote often focuses on visible surfaces. You'll see line items for floor tiling, wall tiling, perhaps feature work, and maybe removal. What's often less clear is who checks the substrate, who signs off on sequencing, and who takes responsibility if another trade's work compromises the tile finish later.

That's the point where many homeowners get stuck. A solo tiler may do excellent laying work, but if no one owns the whole renovation, gaps appear fast.

Practical rule: If multiple trades are involved, someone needs clear responsibility for programming, compliance, and final finish quality.

Why booking the right professional matters more now

With skilled labour under pressure nationally, rushed decisions usually cost more than patient ones. Good tradespeople can be selective. They'll often prioritise projects with a clear scope, realistic access, and a client who understands that quality bathrooms are built in layers, not rushed in one pass.

On the Sunshine Coast, that matters even more because bathrooms live in a humid, coastal environment. Materials move, moisture lingers, and weak preparation gets exposed. Choosing between tilers on the Sunshine Coast isn't only about finding someone available. It's about finding someone who recognises where a standard tile install ends and where renovation risk begins.

The better starting question

Instead of asking, “Who can tile my bathroom?”, ask this first:

  • Is this a tiling job or a renovation job
  • Who is managing waterproofing and trade sequence
  • Who carries responsibility if defects show up after completion
  • Is the quote based on existing conditions, or assumptions that may change after demolition

Those questions will tell you far more than a polished gallery ever will.

Why a Licensed Builder is Key for Bathroom Renovations

A bathroom renovation has moving parts that need control, not just attendance. Tiles go in near the end. Long before that, someone has to manage demolition, rough-ins, substrate preparation, waterproofing, set-out, and fit-off. If those stages aren't coordinated properly, the final tiling can't rescue the result.

A diagram illustrating the essential roles of a licensed builder in managing professional bathroom renovation projects.

A solo tiler and a renovation lead are not the same role

A solo tiler is usually engaged to tile. A licensed builder managing bathroom renovations is engaged to deliver the whole room. That difference sounds obvious, but it changes accountability completely.

If the walls are out, if the falls are wrong, or if the plumbing penetrations aren't ready, a standalone tiler can only work with what's there or stop and wait. A builder-led renovation model reduces that drift because one party controls sequencing and trade interfaces from the start.

Why the builder model protects the job

In regulated states like Victoria, any domestic building work contract exceeding $10,000 legally requires a registered builder, and using a fully licensed contractor for major renovations is presented as the safest way to protect your investment in the Victorian bathroom renovation guide. Queensland doesn't mirror Victoria exactly, but the principle still holds. When a bathroom is being rebuilt rather than merely retiled, builder-level oversight is the safer model.

Here's where that matters in practice:

Project issue Solo tiler approach Licensed builder approach
Plumbing delays Waits for plumber Reprograms job and coordinates access
Waterproofing scope confusion May rely on others Clarifies scope before tiling starts
Defect responsibility Can become fragmented One lead contractor manages resolution
Layout changes mid-project Limited authority Can assess broader renovation impact

What tends to go wrong without one lead contractor

Separate trades can all be competent and still produce a poor result if no one is running the job. The plumber may finish late. The waterproofer may arrive before prep is complete. The tiler may inherit a floor that should have been corrected earlier. Then every trade starts protecting its own scope instead of the room as a whole.

The cleanest bathrooms are usually built by teams with one person making final calls on sequence, standards, and handover quality.

For homeowners comparing tilers on the Sunshine Coast, this is the key distinction. If you're replacing a splashback or laying a small floor, a tiler may be enough. If you're doing a full bathroom renovation, a licensed builder is often the difference between a coordinated project and a chain of subcontractor assumptions.

How to Choose the Best Tilers on the Sunshine Coast

Once you know whether you need a tiler or a renovation lead, the shortlist gets easier. The next step is filtering out quotes that look acceptable on paper but won't hold up once demolition starts.

A checklist for choosing top-rated tilers on the Sunshine Coast with steps like verifying insurance and warranties.

Start with credentials, then move to evidence

Before you discuss tile patterns or grout colour, verify the contractor's licence status and make sure the scope they're proposing matches the work you want done. If they're quoting a renovation, they should be able to explain exactly who manages demolition, waterproofing, plumbing, and electrical coordination.

Insurance matters too. Public liability should be current, and the contractor should be comfortable discussing who is responsible for each stage of the work.

Review the portfolio with the right questions

A portfolio should show more than pretty finished rooms. Look for evidence that the contractor understands full wet-area work, not just the decorative layer. If you're assessing examples of local tiling contractors near you, ask what happened before the photos were taken.

Use this checklist:

  • Ask what was corrected before tiling: Was the floor self-levelled, screeded, or rebuilt in parts?
  • Check for large-format experience: Bigger porcelain tile demands tighter prep and cleaner set-out than smaller ceramics.
  • Look at junctions and edges: Niches, returns, trims, and transitions reveal care faster than hero shots do.
  • Request local references: A contractor should be able to point to nearby work and explain the project type.
  • Read the quote line by line: Vague wording around prep and waterproofing usually creates disputes later.

Pay attention to how they communicate

Good contractors ask specific questions. They'll want to know whether you're changing the layout, keeping fixtures in place, supplying tiles yourself, or working around access issues. That isn't overcomplication. That's job control.

Poor communication early usually becomes poor communication on site. If someone can't explain their scope clearly before the deposit, don't expect better once the room is stripped out.

“A clear quote is usually a sign of a clear process.”

Red flags worth taking seriously

Some warning signs show up fast:

  • Extremely fast availability: Sometimes that's luck. Sometimes it means the schedule is empty for a reason.
  • One-price-only quoting: If there's no discussion of possible substrate issues, the number may not survive demolition.
  • No mention of waterproofing responsibility: Wet-area work needs explicit ownership.
  • Dismissive answers about prep: Tile doesn't hide movement, poor falls, or unstable backgrounds for long.

The best tilers on the Sunshine Coast don't just sell neat lines. They show how they'll control the conditions that make neat lines last.

Understanding Tiling and Renovation Costs

Pricing gets messy when homeowners compare unlike scopes. One quote may cover tile laying only. Another may include removal, prep, screeding, and full bathroom coordination. If you don't separate labour, materials, and renovation management, the cheapest number can be the most expensive decision.

A professional contractor in a hard hat reviewing a digital tiling budget estimate on a tablet.

On the Sunshine Coast, standard floor tiling labour ranges from $34 to $87 per square metre, wall tiling ranges from $39 to $97 per square metre, and a complete bathroom tiling job typically requires a labour investment of $580 to $1,550, excluding tile supply costs, according to this Sunshine Coast tiling cost guide. The same guide notes that tile supply can add $20 to $250 per square metre, depending on the material selected.

What changes the number

The rate isn't driven by tile size alone. Cost usually moves because of condition and complexity.

A plain square room with stable walls and straightforward set-out is one thing. A bathroom with niches, hob details, feature strips, uneven backgrounds, or extensive cutting is another. Mosaic and feature work also sit in a higher labour bracket than standard floor or wall tile work.

Labour and materials are different conversations

Here's a clean way to clarify:

Cost area What it usually covers
Labour Laying, cutting, alignment, grouting, finish detail
Tile supply Porcelain, ceramic, natural stone, feature products
Preparation Levelling, screeding, substrate correction, removal
Renovation management Trade coordination, scheduling, compliance oversight

A cheap tile can still be costly to install if the room needs major prep. A premium porcelain can be economical long term if it lays cleanly and suits the space.

For a practical look at how trade pricing discussions often unfold, this walkthrough is useful before comparing quotes:

What a good quote should spell out

You want itemised scope, not just a grand total.

  • Preparation allowances: If demolition exposes defective substrate, how is that handled?
  • Tile format assumptions: Large-format porcelain, mosaics, and natural stone don't install the same way.
  • Supply responsibilities: Clarify who is supplying tiles, trims, grout, adhesives, and sealants.
  • Exclusions: If waterproofing, fixture removal, or disposal isn't included, it should be stated plainly.

That's how you compare tilers on the Sunshine Coast properly. Not by headline price, but by what the contractor has allowed for.

The Renovation and Tiling Process Step-by-Step

A good bathroom build follows a sequence. If that sequence gets compressed or rearranged to save time, the defects usually appear in the layers you can't see once the room is finished.

A step-by-step infographic illustrating the eight stages of a professional bathroom renovation and tiling process.

Consultation and planning

The job starts with scope, not demolition. Layout decisions, fixture selection, tile format, drainage details, and access all affect the build path. On better-run renovations, this stage also identifies likely substrate issues before anyone starts pricing as if the room is perfect.

If the client wants recessed niches, large-format wall tiles, or a curbless shower look, those choices need to be resolved early because they affect framing, falls, and set-out.

Strip-out and rough-in work

Demolition exposes the truth of the room. Old water damage, movement, poor sheeting, and non-compliant previous work often become visible only once finishes are removed.

After demolition, the rough-in phase begins. Plumbers and electricians do their work before the room is closed back up. This stage needs discipline because rushed penetrations and late changes can compromise later waterproofing.

Site rule: Don't let the tiler inherit unresolved plumbing, loose sheeting, or uncertain floor falls.

Surface preparation and waterproofing

Successful bathroom renovations hinge on meticulous preparation. Floors may need screeding or self-levelling. Walls may need correction for plumb and alignment. Shower zones need a proper moisture management strategy before a single tile is laid.

Waterproofing must be complete and protected before the tile phase begins. If other trades damage the membrane after application, the problem doesn't disappear because tile goes over it.

Tiling, grouting, and finish detail

Once the room is ready, set-out matters. A skilled tiler doesn't just start at the easiest wall. They work backward from visual lines, cuts, drainage points, and fixture positions so the room looks balanced when complete.

Then comes grouting, sealing where appropriate, and final detail work. This is the stage most homeowners notice, but by then the room's success has already been determined by everything underneath.

Fit-off and handover

The final stage is fixture installation, trim-out, clean-up, and defect inspection. Vanity alignment, screen fitting, silicone work, and drainage performance all need checking before handover.

A sound handover should leave the homeowner with clear care guidance, a realistic understanding of what to monitor in the first weeks of use, and no uncertainty about who to call if an issue appears.

Waterproofing and Materials for Coastal Durability

The Sunshine Coast is hard on wet areas for reasons that aren't always obvious at quoting stage. Bathrooms hold moisture already. Add humid air, coastal conditions, and daily temperature movement, and weak material choices show up faster.

The essential layer is waterproofing. In real bathrooms, the membrane system, the junction treatment, and the protection of that work during later trades matter more than any tile brand or feature wall. If that stage is compromised, the visible finish becomes cosmetic cover over a future defect. Homeowners comparing systems should understand how professional wet-area waterproofing systems fit into the broader renovation, especially where showers and floor wastes are involved.

Large-format tile needs flatter substrate

Large-format porcelain is popular for good reason. It looks cleaner, reduces grout lines, and suits contemporary bathrooms. But it is less forgiving.

According to this guidance on large-format tiling requirements in coastal conditions, large-format porcelain tiles require a substrate variance of no more than 3mm over 3m, and failure to achieve that flatness in the Sunshine Coast's tropical climate can lead to a 40% increase in crack propagation at tile edges due to thermal expansion. That is a technical issue, not a styling issue.

What works and what doesn't

Here's the practical split:

Material or method Where it works Where it fails
Large-format porcelain On properly levelled, stable substrate Over uneven floors or rushed wall prep
Mosaic or feature tile In controlled feature areas and curved details As a shortcut to hide poor backgrounds
Natural stone Where sealing and maintenance are understood Where homeowners expect zero upkeep
Tile-over-tile In limited situations with sound substrate and proper prep As a shortcut over doubtful wet-area conditions

The mistake isn't choosing ambitious materials. The mistake is choosing them without upgrading the preparation standard to match.

Coastal durability is a maintenance issue too

Bathrooms on the Sunshine Coast need sensible ongoing care. Grout, silicone, and movement joints don't stay at day-one condition forever. That doesn't mean a bathroom is failing. It means wet areas are service environments, not static displays.

Coastal bathrooms last longer when owners treat maintenance as part of the build outcome, not as a separate problem for later.

For homeowners searching for tilers on the Sunshine Coast, the right question isn't only “Can you lay this tile?” It's “Can this room support this tile format, in this climate, for the long term?”

Frequently Asked Questions

Do you need to move out during bathroom renovations

Not always. If it's your only bathroom, daily life gets awkward fast, especially during demolition, waterproofing, and fixture downtime. If the house has a second bathroom, most families stay put and isolate the work area. The decision usually comes down to access, dust tolerance, and whether children or older occupants are in the home.

How long should waterproofing cure before tiling starts

Follow the product system and the installer's process. This isn't the stage to compress because another trade is waiting. In bathrooms, patience at membrane stage is cheaper than leak rectification later.

What's the difference between rectified and non-rectified tiles

Rectified tiles are mechanically finished to a more precise edge. They suit tighter joints and a sharper contemporary look, but they also expose poor set-out more quickly. Non-rectified tiles are a bit more forgiving visually and can suit softer layouts.

Is tile-over-tile a good option

Sometimes, but only when the existing substrate is sound, the levels work, and the wet-area conditions have been properly assessed. It shouldn't be used as a shortcut around deeper renovation issues. If there's any doubt about movement, moisture damage, or previous waterproofing quality, removal is usually the safer path.

What should you do to maintain new grout and silicone

Keep the bathroom ventilated, clean gently, and pay attention to changes rather than waiting for obvious failure. Such vigilance is key, as waterproofing failures are the leading cause of bathroom renovation repairs in Australia, as noted in this industry overview of tiling and waterproofing issues. The visible signs often start small, such as discoloured joints, cracked silicone, or persistent damp smells.

What's the biggest mistake homeowners make when hiring tilers

They compare only the finish and the price. The actual difference between contractors usually sits in prep standards, scope clarity, and who takes responsibility when the project involves more than tile laying.


If you want a builder-led approach to bathroom renovations, waterproofing, and high-end tiling, Melbourne Tiling Services P/L offers start-to-finish project coordination with registered builder oversight, detailed quoting, and a strong focus on durable wet-area work.

Marble Floor Tiles Matt Guide for Melbourne Bathrooms

You might be standing in a half-finished Melbourne bathroom right now, trying to decide whether the floor should gleam like a showroom or feel calmer, safer, and easier to live with. That choice gets more complicated when the tiles are marble, because the finish changes how the room looks, how it feels under wet feet, and how the work needs to be handled by your builder.

Marble floor tiles matt sit in that sweet spot between luxury and practicality. In Australia, the domestic consumption of marble and travertine reached 810,000 tons in 2024, valued at $195 million AUD, with matte finishes increasingly favoured for their slip resistance in wet areas like bathrooms and ensuites (IndexBox market overview). For Melbourne homeowners, that means the finish isn't just a style choice, it's part of the safety and renovation conversation.

Table of Contents

Introduction to Matte Marble Floor Tiles

Sarah and Tom had just finished their ensuite, and the first thing they noticed wasn't the vanity or the tapware. It was the floor. Their builder had suggested a softer marble finish instead of a glossy one, and once the bathroom filled with daylight, the difference was obvious, less glare, calmer tone, and a more grounded feel underfoot.

That reaction is common. People often fall in love with marble for its natural movement, then realise the finish changes the whole room. Matt marble tiles don't shout for attention, they allow the stone's natural character to emerge, which is why they suit bathrooms where comfort, safety, and restraint matter just as much as appearance.

The market data backs up the wider shift in demand for marble materials, including floor tiles across residential and commercial spaces in Victoria and nationwide. When you're planning a bathroom renovation, that matters because your tile choice affects not only the visual outcome but also the materials your registered builder needs to specify, install, seal, and sign off correctly.

If you're weighing up finishes, start with the basics, then let the bathroom do the talking. A wet-zone floor needs to look good on day one and still make sense after daily use, cleaning, and winter mornings.

Understanding What Matt Marble Floor Tiles Are

Matt and honed are often used for the same kind of finish, and in practical conversation they usually point to a surface that has lost the mirror-like shine of polished stone. Much like sanding raw timber, the wood doesn't become fake; it just becomes softer to the eye and easier to live with.

An infographic explaining the definition, manufacturing process, and key characteristics of matt marble floor tiles.

The finish comes from micro-abrasion, where the stone's surface is gently worked so it scatters light rather than reflecting it sharply. That creates the velvety look many Melbourne homeowners want in bathrooms, because it reads as natural rather than glossy, and it tends to hide the busy visual noise that polished stone can throw back at you under bright downlights.

How the surface changes the room

The main effect is visual comfort. A matt surface reduces glare from windows, mirrors, and ceiling lights, so the floor feels more settled. That's especially useful in en suites and compact bathrooms where every shiny surface can add to the sense of crowding.
The term also covers how the room feels emotionally. A polished floor can feel formal and dramatic, while a matt floor usually feels softer and more grounded. That's one reason people compare it to honed timber, it still has character, but it doesn't try to dominate the room.

What to ask before you buy

If you're shopping in Melbourne, ask whether the tile is a matt marble finish or a marble-look porcelain product. Both can work well, but they behave differently in installation and maintenance.

Practical rule: ask for the tile's finish description, its cleaning requirements, and whether it's meant for floor use in a wet area before you commit.

For local examples and product categories, this Melbourne marble tile resource can help you see how the finish sits within a broader bathroom design context. The key is to judge the tile by how it will function in your room, not just by how it looks under showroom lighting.

Comparing Matt and Polished Finishes

A glossy marble floor makes a strong first impression. It reflects light, highlights veining, and can make a bathroom feel formal or high-end. A matt floor does something different, it calms the room, softens contrast, and keeps attention on the texture of the stone rather than the shine.

A comparison chart outlining the differences between matt and polished marble finishes regarding appearance, light, and maintenance.

The biggest technical divide is reflectance. True matt-finish marble floor tiles in Australia typically exhibit an LRV between 5% and 15%, while polished marble can exceed 30% LRV, which means the polished surface bounces much more light back into the room (WD Tiles). That difference sounds abstract, but in a bathroom it changes how every towel, tap, and shadow reads against the floor.

Appearance and mood

Matt marble gives you a quieter palette. It suits bathrooms where you want the floor to frame the vanity, bath, or shower screen without competing for attention. Polished marble is more theatrical, and that can work beautifully in the right space, but it tends to announce itself first.

Wear, cleaning, and daily life

Matt surfaces usually hide small scuffs and incidental marks more easily because they don't catch every reflection. Polished stone can look spectacular when freshly cleaned, but once water spots, streaks, or surface wear appear, you notice them faster.

A recent Melbourne ensuite project I reviewed in design terms, not as a published case study, used matt marble on the floor and a brighter wall finish above. The result felt balanced, because the floor anchored the room while the walls kept it lively. That's the kind of split many architects prefer when the client wants softness underfoot without losing visual energy.

Choosing by user needs

If the bathroom is used by children, older adults, or anyone who values a more forgiving floor surface, matt usually makes more sense. If the space is a display bathroom with minimal wet traffic and a strong preference for gloss, polished may still fit.

A good tile choice should suit the person using the room every day, not just the photo you'll take after installation.

For a closer look at bathroom tile categories and layout ideas, the porcelain bathroom tile guide is a useful comparison point when you're deciding whether a marble-look or natural marble route is better for your budget and maintenance tolerance.

Safety and Slip Resistance in Wet Zones

Bathroom floors expose weak tile choices quickly. A tile that looks calm and elegant in a showroom can feel very different once water, soap, and steam are part of everyday use. That is why matt marble floor tiles are discussed as much for safety as for appearance.

A graphic explaining the safety features of matt marble, highlighting slip resistance, light reflectance, and wet area suitability.

A matt surface reduces glare, so the floor reads as calmer and less shiny under bathroom lighting. That lower reflectance can help a wet room feel less visually slippery, which is one reason matt finishes are often preferred in practical wet zones. The point is not that the tile alone makes a bathroom safe. It is that the finish supports the overall safety of the room.

Why texture matters

A matt finish uses a fine surface texture that scatters light and gives the foot a little more purchase than a highly reflective surface. That matters when the floor is damp, your hands are full, or steam has softened visibility in the room. In Melbourne bathrooms, where family members often want a floor that feels forgiving without looking rough, that added surface control can make daily use easier.

The finish also needs to be considered alongside Australian slip-resistance expectations under AS 4586 and the wet-area requirements in the NCC waterproofing provisions. In a shower zone, or anywhere the floor is regularly exposed to water, the tile choice cannot be judged on appearance alone. It has to be checked as part of the full system, including substrate preparation, waterproofing, and drainage fall.

For a broader look at tile categories and bathroom layout ideas, the porcelain bathroom tile guide is useful when you are comparing a marble-look option with natural marble for maintenance and budgeting.

What to verify before you order

  • Ask for the slip data: The tile should come with technical information showing it suits wet-area use.
  • Read the surface description carefully: Matt, honed, textured, and anti-slip do not always mean the same thing, so check the specification sheet rather than relying on the brochure.
  • Confirm the installation plan: Even a better-performing tile still depends on proper substrate preparation, waterproofing, and drainage fall.

A secure-feeling surface is only one part of the decision. The installer still has to match the tile to the room conditions, and that is where careful planning matters just as much as the material itself.

Sealing Maintenance and Longevity

Marble asks for a bit more discipline than some other floor coverings, and matt marble asks for it in a slightly different way. The texture that gives it character also means dirt, soap residue, and cleaning products can sit differently on the surface, so maintenance needs to be intentional, not casual.

A bottle of Aqua Mix Sealer's Choice Gold sealer standing on light beige marble floor tiles.

For Melbourne homeowners, the main goal is to preserve the look without flattening the stone. A penetrating sealer is usually preferred over a topical coating because it works inside the surface rather than sitting as a film on top. That matters on a matt finish, where you want to protect the stone without creating a plastic sheen.

A simple maintenance rhythm

Start with the first clean after installation, then wait for the sealer and grout advice from your tiler or stone supplier. From there, use a gentle, pH-neutral cleaner and avoid anything acidic, because acids can attack marble and make the surface dull or patchy.

Practical rule: if a cleaner is strong enough to strip soap scum in seconds, it's probably too aggressive for marble.

The day-to-day routine should be boring, and that's a good thing. Wipe down standing water, use soft mops, and keep harsh scrub pads away from the stone. A matt surface can look beautifully understated for years, but only if the cleaning process respects the finish.

What Melbourne homeowners often get wrong

People sometimes assume matt means maintenance-free. It doesn't. It can be forgiving in appearance, but it still needs sealing and sensible cleaning. That said, many homeowners prefer the way matt marble ages because small marks don't jump out the way they do on polished stone.

There's also a comfort question that comes up often in Melbourne's cooler months. Insufficient coverage exists on the specific acoustic and thermal comfort advantages of matt-finish marble versus polished marble in Melbourne's cooler climate, despite anecdotal reports of a softer underfoot feel in winter months (Stonemasons installation guide). So if comfort is part of your buying decision, treat it as a lived experience point rather than a fully quantified claim.

If your renovation includes both tiling and waterproofing, the tiling and waterproofing overview is a useful reminder that the floor finish, membrane, falls, and cleaning plan all belong in the same conversation.

Choosing Tile Sizes Grout and Cost Framework

Tile size changes the room more than many homeowners expect. A large-format tile can make a bathroom feel calmer because there are fewer grout lines. A smaller tile can add texture and flexibility, but it also introduces more joints, which means more visual interruption and potentially more maintenance.

Matte marble tiles in Australia are often manufactured as rectified porcelain in 600×1200 mm format with ±0.5 mm edge precision, allowing 2 mm grout joints that reduce water ingress (TileMob). That precision matters in bathrooms because narrow, even joints support cleaner lines and a more disciplined finish.

Tile sizes and grout recommendations

Tile Size Grout Width Use Case
Large-format rectified 600×1200 mm 2 mm High-end en suites, minimal grout look, contemporary bathrooms
Traditional marble format Wider joints Older homes, more irregular rooms, classic layouts
Smaller modular sizes Wider joints Feature floors, tighter rooms, detailed patterns

The narrower joint on rectified tile also helps reduce the chance of water finding its way into vulnerable edges, provided the waterproofing and substrate are done properly. That's why many Melbourne builders favour rectified products in premium bathrooms, especially when the visual goal is a visually continuous floor.

Budget thinking without guesswork

Price can vary widely depending on the stone type, fabrication, rectification, sealing, and labour, so it's better to price the whole bathroom rather than the tile alone. If you're comparing quotes, make sure each one includes the same assumptions about substrate preparation, waterproofing, trim details, grout, and sealing.

Ask for a quote that separates supply, install, waterproofing, and finishing work. If those items are bundled vaguely, it becomes hard to compare one builder against another.

A practical buying mindset helps here. If you want a restrained, upscale look and easy-to-read grout lines, large-format rectified tile is often the cleanest option. If your room has awkward angles or heritage details, a different format may be easier to fit neatly without forcing cuts into visible areas.

Design Inspiration and Local Sourcing Tips

A good marble bathroom does not need much decoration. In Melbourne homes, the strongest examples usually rely on proportion, restraint, and one clear material choice. A matt floor can carry much of that visual weight on its own, like a calm backdrop that lets the rest of the room speak clearly.

A Fitzroy renovation might use matt marble floor tiles with simple wall tile and compact brass fittings, so the old-house character stays intact. In Southbank, the same finish might sit under slimline fixtures and a frameless screen, which makes the room feel cleaner and more architectural. In a suburban family bathroom, the floor may become the quietest part of the room, while storage and easy cleaning take priority.

What local sourcing should look like

Good sourcing starts with touch and light. Ask to see the tile in natural light and under artificial light, then check how the veining and surface finish read from standing height. A matt finish can look richer in one showroom and flatter in another, depending on the lighting and the size of the room.

Trade compliance matters at the same time. In Victoria, any domestic building work valued over $10,000 in labour and materials requires the contractor to hold appropriate VBA registration, so homeowners need a registered builder for many bathroom renovations (CertifyMe VBA guide). If the total contract value exceeds $16,000, domestic building insurance becomes legally required for the registered builder, which gives the homeowner protection for structural defects and non-completion (builders warranty discussion).

A builder checklist worth keeping

  • Confirm registration early: Do not wait until the quote is accepted.
  • Ask about project scope: Cosmetic retiling is one thing, but structural changes, plumbing moves, electrical updates, or major waterproofing can change permit requirements.
  • Check experience level: Domestic Builder (Unlimited) Registration in Victoria requires at least three years of practical experience within the seven years before application, while Domestic Builder (Limited) Registration requires two years (HIA Victoria licence guide).

A building permit in Melbourne is required when the renovation includes structural modifications, plumbing system changes, electrical updates, or major waterproofing work needed to meet Australian standards. Purely cosmetic updates like retiling or replacing taps in the same location generally do not require a permit (Melbourne permit guide). That distinction matters because the finish you choose can affect the scope of the job, which in turn affects who can legally do the work.

Conclusion and Next Steps

Matt marble works best when you want a bathroom that feels calm, safe, and timeless rather than bright and glossy. It suits wet areas because the finish lowers glare, supports better slip resistance, and gives the room a more grounded look, but the installation still has to be handled by the right registered builder.

If you're planning bathroom renovations in Melbourne, compare finish, grout, sealing, and builder credentials together, not separately. Then ask for a clear quote, confirm the registration details, and choose the tile that fits the way your household lives.


A CTA for Melbourne Tiling Services P/L.

Expert Guide to Sealing Stone Tiles 2026

You're usually standing in the same spot when the problem shows up, looking at a new bathroom or balcony and wondering why the stone has already picked up a dark patch, a grout haze line, or a water mark that won't wipe away. That's the point where sealing stone tiles stops being a vague maintenance chore and becomes a practical decision about moisture, staining, and how long the finish will hold up in real use. In Melbourne homes, that decision also affects renovation timing, because sealing, waterproofing, and builder coordination often overlap in the same job.

Table of Contents

Understanding When and Why to Seal Stone Tiles

A homeowner rings up after a bathroom renovation because the new stone around the shower is already showing a faint tea-coloured stain near the base. The tile looked flawless on day one, but the first few weeks of real moisture exposure exposed what the eye missed. That's the common pattern with porous stone, because the finish can look clean while still absorbing water and contaminants below the surface.

The bigger issue is that not every stone tile needs the same treatment. A major underserved question is whether all stone tiles need sealing, because many guides focus on how to seal but do not clearly distinguish between stone types, finishes, or whether the tile is already low-porosity, as noted in this Australian stone-sealing discussion. In practice, marble, travertine, limestone, and slate often behave very differently from porcelain-look surfaces or denser ceramics.

Use a simple water test before you assume anything

A water-drop test is the quickest reality check. If water beads and stays on the surface, the tile may already have protection or low absorption. If it darkens quickly, the surface is taking in moisture and needs attention.

Practical rule: if the stone darkens, it's telling you the surface is open enough to absorb spills, grout residue, and cleaning chemicals.

Wet areas raise the stakes. Bathrooms, showers, balconies, and other exposed zones don't just face spills, they face repeated moisture cycling, which is exactly what shortens sealer life and increases the need for periodic resealing. If you're planning a renovation, it's also worth checking the tile and waterproofing sequence against the Melbourne tiling and waterproofing service approach, because sealing shouldn't be treated as a random afterthought.

Think in terms of exposure, not just material

Indoor walls and decorative areas often need less frequent attention than floors, especially in wet zones. By contrast, balconies, shower floors, and busy family spaces take constant wear from foot traffic, soap residue, and cleaning products. That's why the same stone can be suitable for one space and demanding in another.

Some tiles only need periodic touch-ups, but once moisture gets into the pores, the maintenance cycle usually gets shorter.

A good habit is to inspect grout lines and edges as carefully as the tile face. Grout often reveals failure first, and that can tell you whether the problem is the sealer, the surface prep, or the wrong product for the tile.

Preparing Different Stone Surfaces for Sealing

Surface prep is where most long-term failures start. Stone that looks clean can still carry grout haze, soap residue, dust, or cleaning product film, and any of those can block penetration. The safest approach is to match the prep to the material, not use one blanket method for everything.
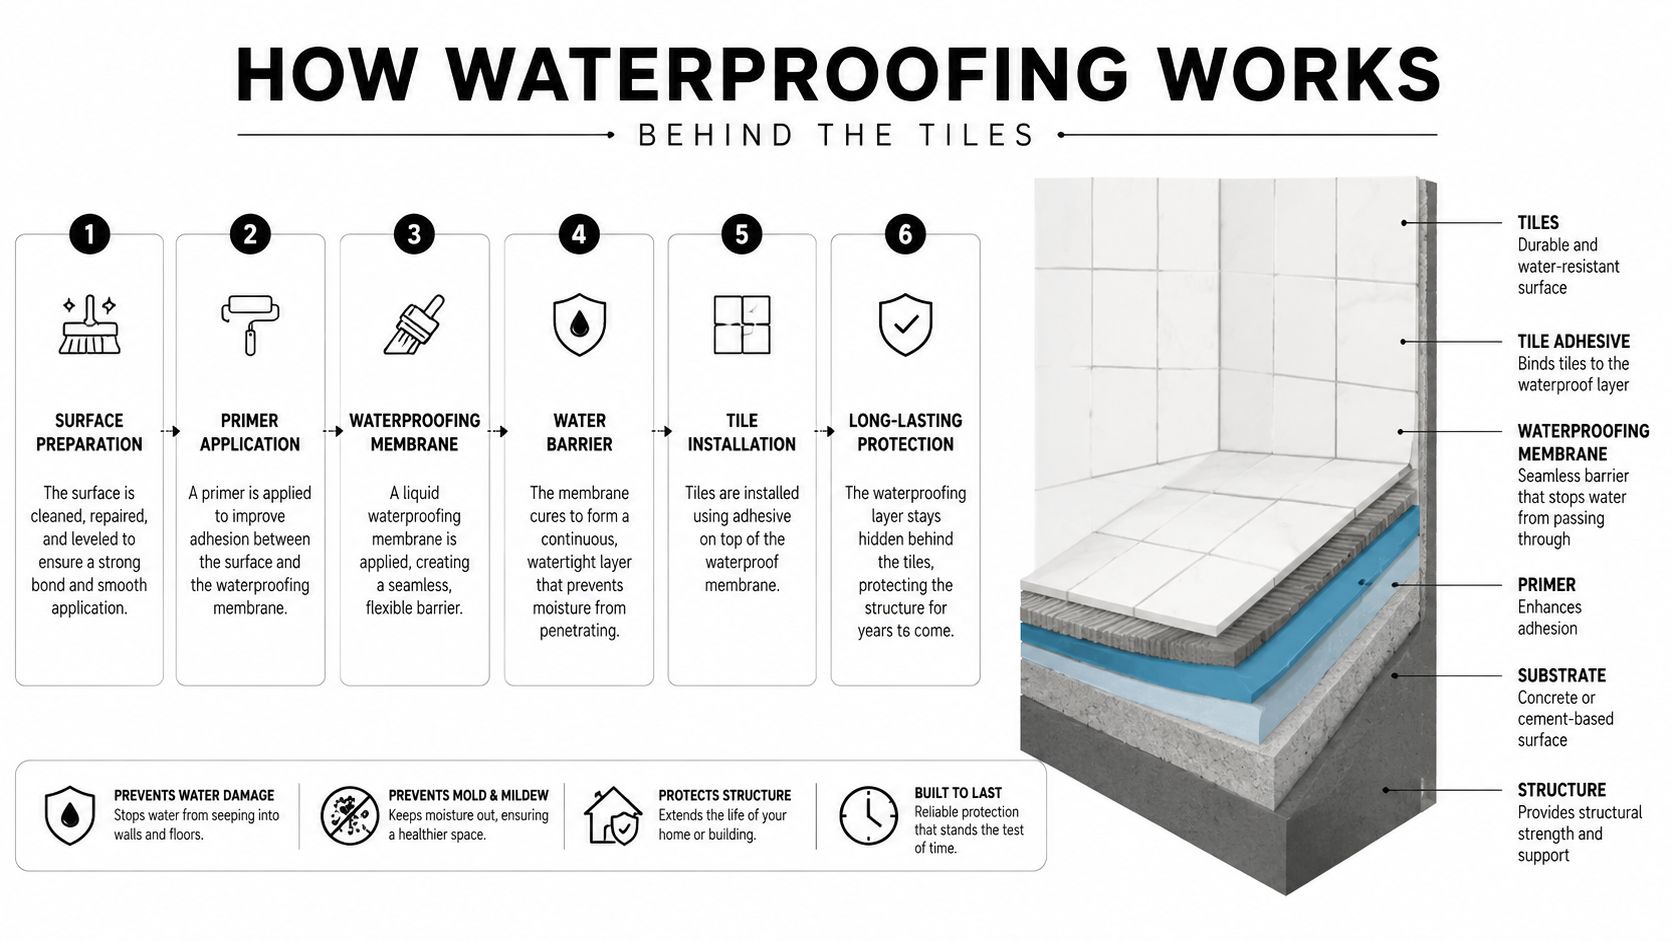
An infographic detailing step-by-step cleaning and preparation methods for various stone surfaces prior to applying sealant.

Clean each stone type the right way

Marble needs the gentlest handling. Use a pH-neutral cleaner, rinse well, and let it air dry fully so you don't leave streaks or residue behind. Travertine usually needs deeper cleaning because its texture can trap grime in the pits, so a careful scrub with the right cleaner works better than a quick wipe.
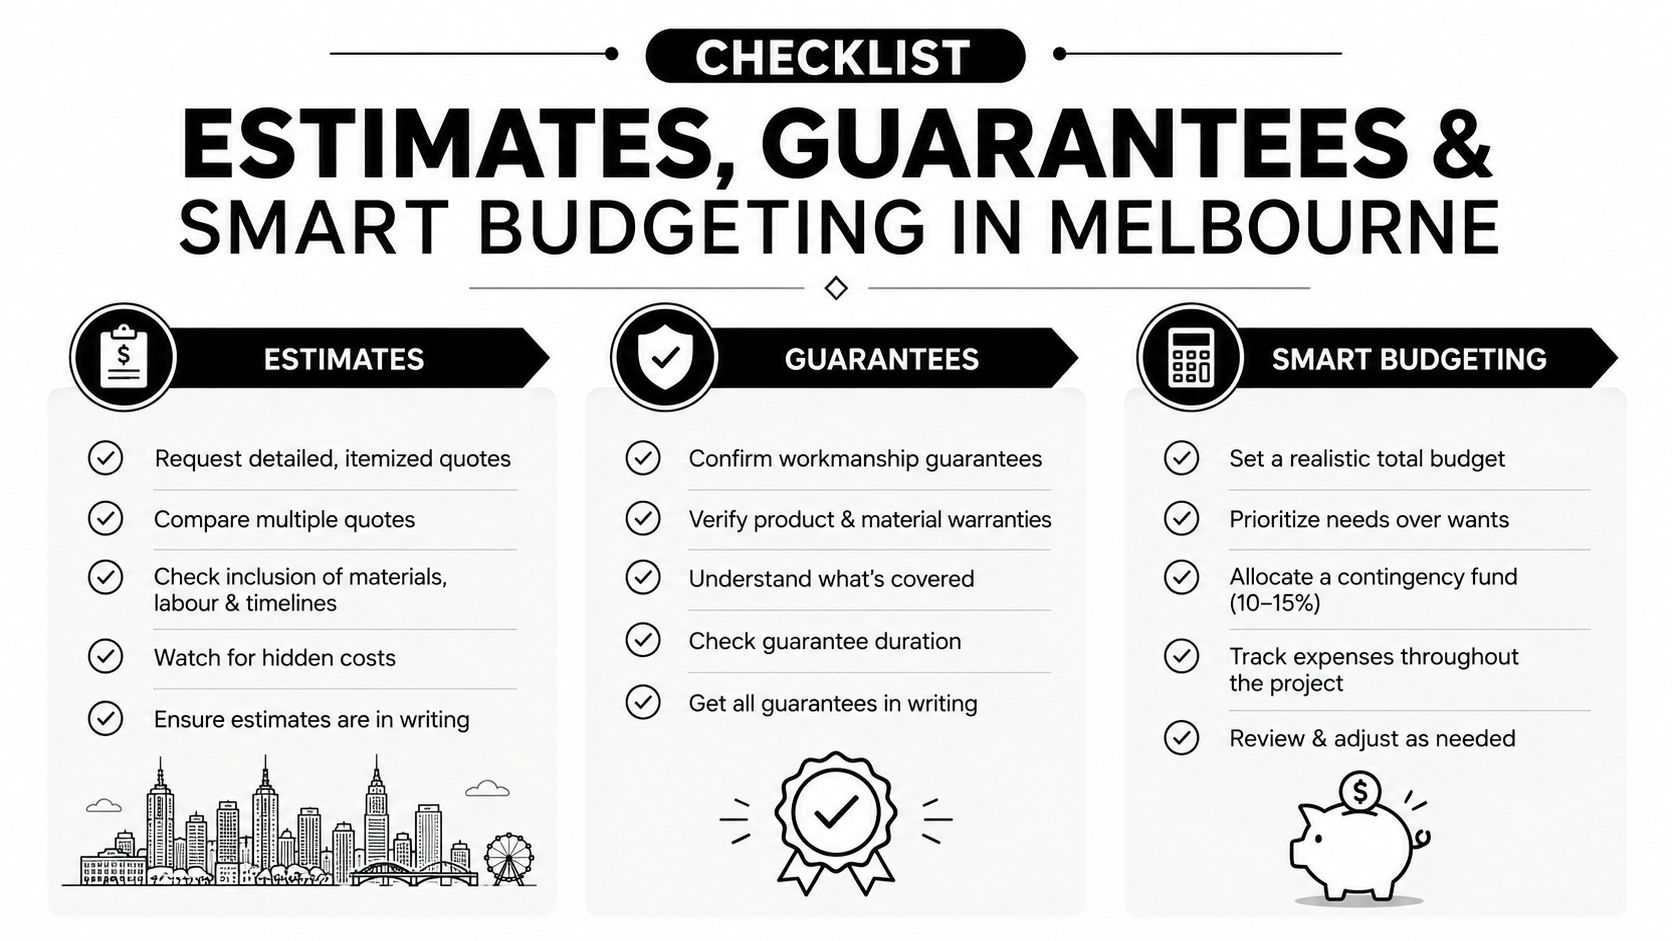
Limestone is more sensitive than many homeowners realise. Avoid acidic cleaners, because they can etch or discolour the surface. For porcelain-look stone, a standard tile cleaner usually does the job, and a degreaser can help with stubborn spots, especially in kitchens or shared bathrooms where body oils and cosmetics build up.

Outdoor pavers need a different mindset again. Remove debris, efflorescence, and embedded dirt before you even think about sealing, because any contamination left behind becomes part of the finish. A thorough rinse and full dry period matter more outdoors than many DIY guides admit.

Drying isn't optional

For sealing natural stone tiles in wet areas, Australian trade guidance recommends a dry-surface, test-first, penetrating-sealer workflow, with a water-drop test held for 5 to 20 minutes and a 24 to 48 hour dry or cure window before light use, according to Dunlop Trade's technical bulletin. That matters because trapped moisture is the fastest route to haze, weak bonding, and patchy absorption.

Ventilation helps, but it doesn't replace time. If the room feels humid, the stone often needs longer than the label suggests. Keep showers, bath edges, and balcony zones dry while the surface is curing, and don't rush back onto the floor just because it looks dry on top.

If the stone is still cool and damp to the touch, it's not ready, even if the surface appears fine.

Gloves, eye protection, and knee pads make sense on real jobs, especially when you're deep-cleaning grout and working close to corners. Those edges are where missed residue tends to hide.

Choosing the Right Sealer for Each Tile Type

Not every sealer belongs on every tile. The main choice is between a penetrating sealer, which absorbs into the stone, and a topical sealer, which sits on the surface. A hybrid product can make sense in specific mixed conditions, but it's not a universal answer.

A guide illustrating the differences between penetrating, topical, and hybrid sealers for various natural stone tiles.

Penetrating sealers suit porous stone best

Penetrating sealers are the usual fit for marble, travertine, and limestone because they protect from within while keeping the natural finish visible. They're especially useful where you want breathability and don't want a glossy film changing the appearance.

The trade-off is clear. They don't create a hard surface layer, so they won't stop scratches or etching, and they usually need more frequent reapplication than topical products. That's why they're a maintenance solution, not a cosmetic shortcut.

Topical sealers behave differently

Topical sealers form a layer on the face of the tile, which can help with surface protection and may add sheen or deepen colour. That can be useful on some porcelain-look stones or certain high-traffic outdoor pavers where surface cleaning is a priority.

They also bring compromises. Surface films can scratch, peel, or alter the stone's natural look, and reduced breathability can be a problem in wet or moisture-prone settings. If you're working on a bathroom floor, that trade-off needs real thought before you commit.

Hybrid products belong in niche cases

Hybrid sealers sit between those two approaches. They can be useful on mixed surfaces, or where a project needs some surface resistance without giving up all of the stone's natural character. They're not the first product I'd reach for on a straightforward job, but they're worth considering when the installation has unusual wear patterns or design constraints.

If you're choosing for a renovation with marble finishes, the product you pair with the tile matters as much as the tile itself. For that kind of planning, the marble tile guidance used in Melbourne projects is a sensible reference point because marble is less forgiving than glazed ceramic and usually benefits from a carefully matched penetrating system.

Here's the simplest selection logic.

Tile type Better fit Why it usually works
Marble Penetrating sealer Preserves the natural look and allows breathability
Travertine Penetrating sealer Handles porous structure without building a surface film
Limestone Penetrating sealer Better for delicate stone that needs internal protection
Porcelain-look stone Topical or no sealer, depending on surface Denser surfaces often need less treatment
Outdoor pavers Topical or hybrid in specific cases Surface wear and exposure can make film protection useful

Application Techniques and Drying Guidelines

The cleanest application starts with restraint. Stone sealer works best in small sections, because once it begins to dry unevenly, you're fighting streaks and haze instead of protecting the tile. Thin coats, even pressure, and prompt wipe-back are the difference between a professional result and a cloudy mess.

A checklist infographic detailing the five essential steps for properly applying stone floor sealer for a flawless finish.

The practical sequence is simple. Work in a manageable area, apply with a foam pad, lint-free cloth, or small roller, and don't flood the surface. Let the product sit long enough to penetrate, then wipe away anything that hasn't absorbed before it dries on top.

Timing makes or breaks the finish

Australian guidance treats dryness and cure time as foundational, noting that new installations should bond for 24 hours before sealing, penetration can take up to 5 minutes, surface traffic may resume after 2 hours, and a 24-hour full cure is the basic benchmark, with 30-minute gaps between coats, according to Aquamix's natural-look penetrating sealer guide. Those timings matter because sealing too soon traps moisture and weakens the bond.

Melbourne weather can stretch those windows. Cool mornings, damp air, and low airflow all slow down evaporation, so the same product that behaves neatly in a warm, dry room can turn sticky in a bathroom that hasn't been ventilated properly.

Keep the room open to airflow, but keep dust and splashes away while the cure is active.

Work methodically, not quickly

A good applicator keeps the edge wet enough to blend but small enough to control. If you're back-rolling grout lines, keep the pressure light so you don't overfill the pores or leave puddles in corners. The goal is even absorption, not a shiny coat sitting on top.

Heavy water exposure needs more patience. Even if the floor feels touch-dry, showers, balconies, and similar areas are better left alone for longer when the product label and site conditions suggest it. The label matters, but the room conditions matter just as much.

A quality finish is easy to recognise. The tile looks consistent, the grout isn't streaked, and there's no residue bloom around edges or cut lines.

Cost Estimates and Maintenance Schedule

Budgeting for sealing is easier when you treat it as part of the maintenance cycle, not a one-off expense. In Australian practice, local sealing work is commonly priced at about $25 to $35 per square metre indoors and $35 to $45 outdoors, according to this stone sealing guide. That difference makes sense, because outdoor work usually needs more prep, more exposure control, and more labour around access and weather.

The bigger cost question is frequency. Natural stone floors are commonly resealed every 1 to 2 years, while walls and less exposed areas can stretch to 3 to 5 years. The wear pattern is the deciding factor, not just the material name on the box.

Maintenance intervals and costs by tile type

Tile Type Reseal Interval Indoors Reseal Interval Outdoors Cost Indoor m² Cost Outdoor m²
Natural stone floors 1 to 2 years 1 to 2 years $25 to $35 $35 to $45
Natural stone walls 3 to 5 years 3 to 5 years $25 to $35 $35 to $45
Wet-area stone Check regularly, reseal as needed Not usually the main use case $25 to $35 $35 to $45
Porcelain or unglazed ceramic, if required 3 to 5 years 3 to 5 years $25 to $35 $35 to $45

Those figures are useful because they remind owners that sealing sits inside the long-term maintenance budget. A bathroom floor that sees constant water and foot traffic is not on the same timetable as a decorative wall panel.

Match the schedule to the space

Balconies and outdoor paving need closer inspection because weather, UV, and drainage issues pile on faster than indoor wear. Bathroom floors need checks around grout and shower edges, since those are the spots most likely to start absorbing water first.

If you're planning a broader renovation, sealing should also be weighed against the overall bathroom budget. Current Australian bathroom-renovation guides place a full project around A$26,000, with many projects falling between A$8,000 and A$35,000+, while Melbourne guides place standard local renos in a wider band of roughly A$15,000 to A$22,000 for many full jobs, depending on scope and finishes. For cost context around those ranges, see the current bathroom renovation benchmark and the Melbourne renovation market guide.

Common Mistakes and When to Hire Professionals

The worst sealing jobs usually fail for boring reasons. Someone seals damp stone, skips the grout cure, uses an acidic cleaner, or leaves excess product on the surface long enough to haze. None of those mistakes look dramatic at the time, but each one can leave a bathroom harder to clean and more vulnerable to staining.

Know the mistakes that cause real damage

Acidic cleaners like vinegar are a frequent problem, especially on marble and limestone. So is sealing too early after installation, because trapped moisture gets in the way of proper bonding. If the tile is still damp or the grout hasn't cured, the sealer often performs badly no matter how expensive it is.

The other common problem is over-application. More product doesn't mean more protection, it usually means residue. If you can feel a film on the surface after curing, the tile probably wasn't wiped back properly.

If the finish looks cloudy, the first thing to check is residue, not the brand name.

Bring in a registered builder when the job crosses into renovation work

Some sealing jobs are straightforward enough for a skilled tiler or owner-occupier. Others sit inside a bigger building task and need a registered builder to coordinate compliance, waterproofing, and the trade sequence. In Victoria, when bathroom works involve structural changes, plumbing alterations, or waterproofing, permits and compliance paperwork come into play, with typical costs of A$400 to A$800 for building permits, A$300 to A$500 for plumbing compliance certificates, A$200 to A$400 for electrical certificates, and A$300 to A$500 for waterproofing inspection certification, according to Melbourne bathroom compliance guidance.

That matters on bigger jobs, especially if the project includes shower niches, balcony remediation, or large-format installations that need careful substrate prep. In those cases, coordination matters as much as the sealant itself.

For repair-heavy jobs, the practical route is to start with a proper inspection rather than guessing at the cause of the stain or leak. If the issue is beyond a simple reseal, the tile repair process used in Melbourne is the kind of structured approach that avoids repeated patchwork.

A DIY reseal is fine when the stone is sound, dry, and clearly compatible with the product. Once there's movement, failed waterproofing, or recurring moisture at corners and junctions, a registered builder is the safer call.


If you're planning stone tile sealing as part of a bathroom renovation, balcony refresh, or leak repair in Melbourne, contact Melbourne Tiling Services P/L for a clear scope, proper sequencing, and a finish that holds up beyond the first clean.

Large Format Tile Installation Cost: A Melbourne Guide

In Melbourne, a realistic large format tile installation cost often lands around $200 to $450+ per square metre all in, and the biggest variable isn't usually the tile price, it's the substrate preparation needed to make the surface flat enough for large tiles. If the floor or wall needs screeding, self-levelling, waterproofing, or rectification before the first tile goes down, the quote moves fast.

Table of Contents

The True Cost of a Continuous Tile Finish

A modern, luxurious bathroom with large format gray tiles, a floating vanity, and a freestanding bathtub.

A homeowner walks into a tile showroom, likes oversized porcelain, and assumes the bathroom quote will mostly be driven by the tile choice. Then the quotes arrive, and one installer is hundreds more than the next. That gap is usually the cost of getting a real Melbourne bathroom ready for large-format tiles.

Practical rule: compare the quote for the finished surface, not just the tile. If the substrate is out of tolerance, the final price will rise whether you planned for it or not.

The part most pricing guides leave out is the work under the tile. Substrate correction, waterproofing, and screeding often decide whether the job is straightforward or labor-heavy. AS 3958.1 calls for no more than 3mm deviation under a 3m straightedge, and large tiles make that standard matter even more. If the floor is not close to flat, the installer spends time bringing it into line before the first tile goes down.

That is where the budget moves. A floor with a hump, a shower base that needs rectification, or walls that are out of plumb all add labour before tiling starts. In a bathroom renovation, those hidden hours can cost more than the tile itself.

A clean, unbroken look is what people want from large tiles, but the job starts with the parts you never see. If the floor falls the wrong way, the membrane needs repair, or the drain set-out is off, the installer has to correct it first. One missed substrate problem can turn a tidy quote into a much larger one once the room is measured properly.

A cost guide chart for large format tile installation in Melbourne, Australia for the year 2026.

Why the quote varies so much

Some bathrooms are ready for tile. Others need old finishes removed, levelling work, waterproofing, and extra care around drains, niches, and thresholds.

That is why two quotes for the same room can sit far apart. One may include only laying tile, while the other includes the substrate work needed to make the bathroom usable and compliant.

Ask one question first, what work is included before tiling starts?

A fair large-format quote is not the cheapest line on the page. It is the one that accounts for the condition of the room, the prep needed to meet the standard, and the waterproofing work that protects the renovation long term. That is what separates a bathroom that holds up well from one that shows lippage, movement, or bond failure early.

Melbourne Large Format Tile Installation Cost Guide 2026

A Melbourne bathroom renovation gets expensive fast when the quote only covers tile laying and ignores the work underneath. A complete budget covers tile supply, labour, subfloor or wall prep, waterproofing, and finishing around drains, edges, and trims. Large-format work stays in a premium band because the room often needs more correction before the first tile goes down, and that is where many homeowners get caught out. The broad pricing pattern is consistent with industry guides that place large-format installation above standard tiling costs. The Spruce cost guide

Tier Tile type Estimated cost per m², inc. GST
Entry level Standard porcelain, straightforward layout $180 to $220/m²
Mid-range Large-format porcelain, typical bathroom work $280 to $350/m²
Premium Premium porcelain or natural stone, complex layout $380 to $450+/m²

Those figures are a practical Melbourne guide, not a fixed quote. A flat room with sound walls and a simple layout can sit near the lower end, while a bathroom that needs levelling, screeding, waterproofing repairs, or careful set-out around niches and drains quickly moves into the higher bands. Large-format tiles magnify any fault in the base, so the prep line matters as much as the tile choice itself.

A useful way to sanity-check a quote is to compare it with independent 2026 tiling data. One set of estimates shows a typical tile job can land around $4,000 to $8,000 total, while a similar bathroom using large-format tile often sits around $4,000 to $9,000 or more once tile size, surface preparation, and layout complexity are counted in. EstimationPro's 2026 tiling price data

What that means for a Melbourne bathroom

For an 8m² bathroom floor and walls, the final number can still vary a lot. A clean, ready-to-tile room may stay close to the base install rate. A renovation with uneven walls, tired substrate, shower recess corrections, or new waterproofing will cost more because the job has moved beyond simple tile installation.

If you are comparing quotes, separate the numbers into supply, prep, waterproofing, and install. That shows where the money is going and makes it easier to compare apples with apples. It also helps explain why one quote can look cheap at first and end up higher once all the required work is added back in.

Budgeting tip: ask for substrate preparation, waterproofing, and tile laying as separate line items. It is the fastest way to see whether a quote is genuinely cheaper or just missing work.

The video below shows a large-format floor installation, including the set-out and levelling process that often drives the final price in a bathroom renovation.

Estimated Large Format Tile Installation Costs in Melbourne, Per Square Metre

Tier Tile Type Estimated Cost per m², inc. GST
Entry level Standard porcelain with light prep $180 to $220/m²
Mid-range Large-format porcelain bathroom installation $280 to $350/m²
Upper range Premium porcelain or stone with detailed prep $380 to $450+/m²

For Melbourne homeowners, the main cost driver is not just the tile. It is the amount of correction needed before and during installation. A bathroom with a flat substrate and simple layout behaves very differently from one that needs rectification before the waterproofing membrane even goes on. That is why large-format tiling is best priced as a total project, not as a simple square-metre rate.

Why Large Format Tiles Cost More The Key Drivers

A professional tile setter uses a long spirit level to check the alignment of a large porcelain tile.

Large tiles act like a mirror for everything underneath them. A slight dip, a raised edge, or a wall that's out of square becomes visible fast, which is why substrate tolerance matters more with large-format work than with smaller tiles. In plain terms, the surface has to be flatter, cleaner, and more controlled before installation begins.

The floor has to be right first

The situation is akin to building a house. If the slab is off, everything above it asks for extra work.

Bathroom floors often need screeding to form correct falls, especially around showers and drainage points. Some jobs also need self-levelling before tiling starts, and that adds labour, material, and drying time. The same principle appears in large-format pricing guides, where labour rises because the setter has to avoid lippage and maintain even coverage across a much bigger tile face. Ideal Tile installation guide

U.S. benchmark data place large-format or custom tile work at $20 to $25+ per sq ft compared with $10 to $15 per sq ft for basic ceramic, which lines up with the premium many Melbourne homeowners see once the substrate needs proper preparation. The same source notes that large-format projects often need more precise screeding and self-levelling to control the finish. Ideal Tile installation guide

Materials and handling are part of the price

Large tiles are heavier, less forgiving, and slower to set out. That changes the tools and the labour rhythm.

Large-format work usually needs more precise adhesive coverage, more careful handling, and more checking during placement. Those aren't extras, they're part of getting the job right.

The specialised side of the job also includes levelling systems, suction cups, and extra care around cuts and edge finishing. Large-format pricing benchmarks from another guide point to a 20 to 40% installation premium over standard tile work, driven by slower set-out, heavier tiles, and extra accessories. Orientbell large-format tile guide

That premium isn't random. It reflects the labour needed to make a big tile sit flat, stay bonded, and look clean at the joints. In a bathroom, where every detail is close to eye level, the finish has to be better than “good enough.”

Decoding a Sample Quote for a Melbourne Bathroom Renovation

A bathroom quote that is worth comparing should read like a scope of work, not a single number on a page. For a Melbourne ensuite using large-format porcelain, I'd expect demolition, rubbish removal, plumbing isolation, waterproofing, screeding, tile laying, grout, silicone, and finishing either listed separately or grouped in a way that makes the work clear.

Here is the kind of breakdown I would want a homeowner to see:

  • Demolition and disposal: $800 to $1,200
  • Waterproofing: $600 to $900
  • Screeding or floor correction: $400 to $700
  • Tile laying for an 8 m² bathroom: $1,200 to $1,800
  • Grout, silicone, trims, and finishing: $300 to $700
  • Plumbing isolation and reconnection, if required: priced separately

That is the sort of structure that makes a quote easy to test. If one number looks much lower, the missing item is usually the reason.

A realistic bathroom budget should also reflect what happens before the first tile is laid. If the base is uneven, the room needs rectification, not just tile fixing. In Melbourne bathrooms, that often means extra time on prep, especially in older homes where floors have moved or previous trades have left the substrate out of shape. A screeding guide for tiles is useful if you want to understand why that work gets listed as its own line item.

What a quote usually hides in plain sight

A cheap-looking quote often assumes the room is ready to tile. That assumption is where projects go off track.

The total bill can include demolition, disposal, waterproofing, screeding, trim, adhesive systems, grout, and silicone. If the room also needs plumbing disconnection or reconnection, the total rises again. None of that is unusual in a bathroom renovation, it is just the cost of doing the job properly.

A homeowner comparing two quotes should look for clear pricing on:

  • Substrate preparation, including levelling or rectification
  • Waterproofing, especially in shower and wet areas
  • Tile cuts and waste, which increase with larger formats
  • Finishing items, such as trim, grout, and silicone
  • Access and staging, especially in apartments or tight sites

A quote that leaves those items out can look cheaper until variations start appearing.

What a good comparison looks like

The better question is, “What condition does the room need to be in before you can tile it?” That single question shifts the conversation from a headline rate to the actual scope.

For homeowners planning bathroom renovations, the useful comparison is like-for-like scope, not just a square-metre figure. If one contractor includes waterproofing, screeding, and finishing, while another only prices tile laying, the lower quote is not really lower. A fair comparison is the one where the demolition, prep, waterproofing, and tile installation are all priced on the same basis, so you can see the actual total before work starts.

Budgeting for Hidden Costs and Add Ons

Hidden costs are where large-format projects surprise people. Old tile removal, poor access, extra grinding, and waste allowances can all push a bathroom over the number you first had in mind.

What to watch for before you sign

  • Old tile removal and disposal: If the room already has tiles, the labour to remove them can be significant, especially when the substrate underneath needs repair afterwards.
  • Asbestos checks in older homes: Any suspected asbestos has to be handled properly before demolition continues.
  • Poor substrate condition: If the floor is far from flat, extra grinding, levelling, or screeding may be needed before tile can start.
  • Apartment access: Tight stairs, lift bookings, loading rules, and site hours can all add time and coordination.
  • Special trims and finishing profiles: Large tiles often need neat edge solutions, not just a basic siliconed edge.
  • Waste and breakage allowance: Bigger tiles mean more careful cutting and handling, but damaged pieces still happen.

The surface-prep question holds greater significance than commonly perceived. A lot of pricing articles only quote the tile-laying rate, but the hidden cost drivers in Australia are usually the prep stages, not the visible tiles. This screeding resource is useful if you're trying to understand why a floor might need correction before tiling can even start.

Budget rule: if the substrate hasn't been inspected in person, the quote is only a starting point.

That's why contingency matters. In Melbourne bathroom renovations, the renovation often costs more than the tile supply because the work around the tile is where the complexity sits. If the room needs rectification, the labour bill starts to reflect that before any premium tile is installed.

Hiring a Qualified Tiler and Registered Builder in Victoria

A finished large-format bathroom can look simple, but the work behind it is not. The installer has to read the room, correct levels, manage waterproofing junctions, and place heavy tile with care. If any part of that sequence is off, the finish shows it.

Victoria also has compliance requirements that affect the final cost and who is allowed to do the work. For domestic building work valued over AUD 10,000, a registered builder is required to contract for the job, and bathroom renovations with large-format tiles, waterproofing, and related trades often sit in that range once all labour and prep are included. Check the Victorian Building Authority guidance before work starts, and confirm the builder's registration on the VBA register rather than relying on a quote alone. Waterproofing in wet areas must comply with AS 3740-2021, and the waterproofer should hold a current licence.

An infographic checklist for Melbourne homeowners on hiring qualified professionals for large format tile installation services.

Questions worth asking every contractor

Ask the questions that show whether the contractor understands the full job, not just the visible tile layer.

  • Verify registration: Ask whether the builder is registered for the scope they are quoting, and whether the trades involved are licensed for waterproofing and other specialist work.
  • Check waterproofing capability: Ask who applies the membrane, what system they use, and how they handle the junctions around shower bases, niches, and wall transitions.
  • Review large-format experience: Ask for examples of bathrooms with similar tile sizes, especially jobs where the substrate needed correction before tiling started.
  • Ask about insurance: Public liability and relevant worker cover should be current, and the contractor should be able to explain what each policy covers.
  • Request detailed quotes: Scope, inclusions, exclusions, substrate preparation, waterproofing, and any allowance for levelling or screeding should be written down clearly.
  • Discuss warranty terms: Know what is covered if the floor moves, tiles crack, or waterproofing fails, and who is responsible if a defect comes from another trade.

Ask how they will deal with flatness before tiling begins. The answer tells you a lot about whether they understand large-format work or are only pricing by habit.

For Melbourne apartment renovations, ask about lift bookings, loading access, site hours, and owners corporation bylaws before you approve the job. If the bathroom involves structural changes, plumbing relocation, or a permit-triggering alteration, confirm whether council approval or extra documentation is needed. That can affect the program as much as the tile choice itself.

If you want a practical place to start, use a local shortlist such as tiling contractors near me and compare how each contractor explains compliance, prep, and waterproofing. Melbourne Tiling Services P/L is one option for homeowners who want a team that handles bathroom renovation, waterproofing, screeding, self-levelling, and tiling as a coordinated scope. That structure matters when the tile finish depends on work that starts before the first tile is laid.

Are Large Format Tiles Worth the Extra Cost

If you are renovating a Melbourne bathroom and every dollar matters, large-format tiles are worth the extra cost only when the whole room is ready for them. The tile choice can look straightforward on paper, but the final bill usually comes down to what sits underneath, not just the tile itself. Flatness, waterproofing, screeding, access, and waste all push the total project cost up before a single tile is laid.

The premium is real. A practical benchmark puts large-format installs at a 20 to 40% installation premium over standard tile work because the setting-out takes longer, the tiles are harder to handle, and the installer needs tighter control over lippage and finish. On a bathroom renovation, that extra spend is easier to justify when the slab or subfloor is already in good shape. If the base needs correction first, the tile size matters less than the prep bill.

When the extra spend makes sense

Large-format tile is a strong choice when the room already suits the format and you are paying for a full renovation rather than a quick refresh.

  • You want a calmer visual finish, and the room has enough size and layout simplicity to carry larger tiles well.
  • The bathroom is being stripped back, so substrate preparation, waterproofing, and set-out are already part of the scope.
  • You are paying for durability and easier cleaning, and you are prepared to spend more upfront for a finish that holds up better over time.
  • The space is modern or open-plan, where larger tiles suit the proportions of the room and the rest of the renovation.

When standard tiles can be the smarter call

Standard tiles can be the better spend when the substrate is out of plane and the budget is tight. A smaller tile format can tolerate more of the room's existing movement and unevenness, which reduces the amount of correction work needed before tiling starts.

That decision is mostly about total cost, not style alone. If the substrate correction adds more than you can comfortably absorb, a standard 300 x 600 layout can often deliver most of the visual result for less money overall. In a tight Melbourne bathroom renovation, that trade-off is worth modelling before you approve the larger format.

The cleanest way to compare the options is to price the full job, not the tile line alone. Ask for the substrate work, waterproofing, screeding, tile laying, and finishing to be separated in the quote, then compare what each version costs once the base is corrected. The large-format tiles page at Melbourne Tiling Services is a useful reference if you want to see how the finish changes once the room is properly prepared.

If you want the project cost broken down before you commit, contact Melbourne Tiling Services P/L to discuss your bathroom, your tile size, and the work needed underneath the tiles.

Bathroom Ventilation Requirements: A Practical Guide

You can have a beautiful bathroom on paper, frameless shower, big tiles, clean lines, soft lighting, and still end up with a room that fogs up, smells damp, and starts lifting paint around the ceiling joint. I see that problem most often in Melbourne renovations where the bathroom is internal, the window is tiny or useless, and the fan was chosen late, usually after the waterproofing and tiling decisions were already locked in.

That's the trap. Bathroom ventilation requirements aren't a finishing touch, they're part of the build's performance layer. In a cool, damp winter city like Melbourne, the room that's hardest to ventilate is often the first one that fails.

Table of Contents

Why Bathroom Ventilation Decides Whether Your Renovation Lasts

A sleek ensuite can look finished the day the silicone goes on and still be wrong in the one area that matters. I've seen internal bathrooms with perfect tile work, good falls, and expensive fittings end up with flaky paint and mildew because the fan was treated like a token accessory instead of part of the moisture strategy.

The room that tells the truth first

Bathroom surfaces reveal weak planning faster than any other room. If the air can't get out, moisture settles on the ceiling, around the mirror, and inside corners where plaster and paint are most vulnerable. That's when a “finished” bathroom starts looking tired long before the rest of the home does.

A lot of homeowners think waterproofing alone will protect the room. It won't. Waterproofing protects the wet zones and the substrate, but it doesn't remove humid air from the room after a shower. That's where extraction comes in, and it's why registered builders need to think about ventilation before the walls are closed.

Practical rule: if the bathroom can make steam, it needs a real plan for where that steam goes.

In Australian guidance, 25 L/s, about 90 m³/h, is commonly treated as the minimum exhaust floor for bathrooms, while wet bathrooms with showers are often recommended at 50–100 L/s to control condensation and mould risk (bathroom ventilation guidance). That distinction matters because an odour fan and a moisture-control fan are not always the same thing.

For Melbourne homeowners, that becomes a renovation decision, not a maintenance tweak. If you're rebuilding an ensuite or internal bathroom, ventilation should be coordinated with tiling, waterproofing, and ceiling penetrations from day one, not guessed at after the shower screen is installed. A good reference point is this tiling and waterproofing overview, because ventilation and substrate protection are much more connected than you might realise.

What happens when the fan is wrong

Undersized or badly placed extraction doesn't fail dramatically. It fails in a more subtle way. The bathroom just stays damp longer, the mirrors clear too slowly, and the room begins to carry that stale, humid smell that many notice only after the damage is already visible.

That's why I treat ventilation as part of the structure, not the accessories list. It affects paint, plaster, grout lines, sealants, and the lifespan of the renovation.

The Codes and Standards That Shape Australian Bathroom Ventilation

A bathroom in Melbourne can look finished and still miss the mark on ventilation. The room might have a shiny exhaust fan, a louvred window, and fresh paint, yet still leave moisture hanging around after a winter shower. That is why bathroom ventilation is tied to the National Construction Code, with state and territory rules applying it on the ground. The test is performance, not a guess based on the product in the ceiling, as set out in the NCC framework overview.

How the national framework works in practice

That matters in renovation work because ventilation now has to be documented, not assumed. Older habits relied on lines like, “there's a window, so it should be fine,” or “this fan looks strong enough.” The current approach is stricter. Builders, plumbers, and building surveyors need a clear path from design to inspection, with measurable outcomes they can point to.

For a bathroom renovation, that usually means one of two routes. If the room has a compliant openable window, natural ventilation may meet the baseline. If it doesn't, mechanical exhaust becomes the practical specification. For Victorian projects, that compliance sits alongside plumbing, waterproofing, and energy-efficiency checks, so ventilation is part of the whole building sequence, not a separate decision. You can read more about the local compliance process in our waterproofing compliance certificate guide.

The code is not asking whether you preferred a certain fan brand or grille style. It is asking whether the room can move moisture out in a way that can be checked on site.

A diagram illustrating the Australian standards and National Construction Code requirements for bathroom ventilation and exhaust systems.

What registered builders look for

A registered builder coordinating a bathroom renovation is usually checking several things together. Is there a compliant natural pathway, is mechanical exhaust required, where does the duct go, and does the chosen system suit the moisture-control work around it? Those questions matter because the ventilation layout affects ceiling framing, electrical rough-in, and where waterproofing transitions finish.

The code sets the floor. The renovation design has to make that floor work in the real room.

That is especially true on Victorian jobs where compliance paperwork, plumbing inspections, and waterproofing sign-off can all interact. A bathroom can look complete and still fail the functional test if the airflow path was never properly planned.

Air Change Rates and Fan Sizing Explained in Plain Language

A fan rating on a brochure only helps if it performs well in a bathroom. A quiet unit that looks strong on paper can still fall short once it is connected to a long duct run, a tight bend, or a sloppy roof or wall termination. The number that matters is delivered airflow at the room, not the label on the box.

Turning airflow numbers into a renovation decision

For a standard 2.0 m by 2.5 m bathroom, natural ventilation needs an openable window of at least 0.25 m² if that is the path you are relying on. Mechanical exhaust is commonly specified around 90 m³/h under Australian guidance, which is a practical baseline for quoting and selection. If the room cannot realistically meet the window requirement, a mechanical fan is usually the better call.

Melbourne renovations expose the trade-off quickly. Internal bathrooms, apartment wet areas, and weatherboard additions often leave little room for a short, straight duct run. In those jobs, a fan can satisfy the paperwork and still struggle in daily use if the ducting, grille, or outlet is compromised. That is why airflow and the room layout have to be assessed together.

The other number that matters is the difference between odour removal and moisture removal. In Australian industry guidance, 25 L/s is often treated as the minimum floor, but for a bathroom with a shower, 50–100 L/s is the more realistic moisture-control range. A fan can be technically acceptable and still leave condensation on mirrors, paint, and ceilings after a long shower.

Bathroom Exhaust Fan Sizing at a Glance

Bathroom Type Minimum (L/s) Recommended (L/s) Equivalent (m³/h)
Small bathroom with light use 25 25–50 90–180
Standard bathroom with shower 25 50–75 180–270
Wet bathroom or steam-heavy use 25 75–100 270–360

The table stays simple because a homeowner needs a size that matches the room, not a sales pitch. A small powder room with light use can sit at the lower end. A standard family bathroom with regular showers needs more headroom. A wet room, a bathroom with a lot of steam, or a space that stays closed up in winter needs the strongest end of the range. If the bathroom has long showers, a shower-over-bath layout, or awkward ducting, I would not treat the minimum figure as enough.

Why brochure ratings can mislead

Fan brochures usually advertise a nominal output under ideal conditions. Real bathrooms do not run on ideal conditions. Once you add duct friction, bends, and poor termination, the actual airflow drops, sometimes enough to change how the room performs on a cold July morning.

That is why a builder should never approve a fan by catalogue alone. In Melbourne, I have seen compact systems work well in a straightforward villa conversion and then underperform in a top-floor apartment where the duct has to snake through tight ceiling space. The spec has to suit the room, the run, and the way the bathroom will be used.

Natural Ventilation Versus Mechanical Exhaust

A window sounds simple until you try to use the bathroom in winter, or in an apartment, or in a room where opening the window means giving up privacy. That's when natural ventilation stops being a neat idea and starts becoming a compromise.

A comparison chart showing the differences between natural ventilation through windows and mechanical exhaust systems in apartments.

When a window is enough, and when it isn't

Under the NCC, the minimum natural-ventilation pathway for a bathroom is an openable window with a clear openable area of at least 5% of the floor area, and mechanical exhaust is commonly used where a window isn't practical (NCC ventilation guide). That's a useful rule, but it isn't a guarantee that the room will behave well in real use.

In Melbourne's apartment stock, many bathrooms are internal, tucked away from exterior walls, or part of a layout where the window is too small, blocked, or awkward to leave open. In those cases, mechanical extraction is usually the path that works. It doesn't depend on the weather, the occupants remembering to open the window, or the neighbours seeing into the room.

The privacy and orientation problem

A bathroom window can exist and still be a poor ventilation solution. If the room faces a walkway, another courtyard, or a tight side boundary, people won't leave it open for long. If it's a north-facing room that gets used in cold weather, the instinct is to shut it. That's human behaviour, not bad design, and the ventilation system has to work with it.

Mechanical exhaust also avoids the apartment problem where opening a window changes the room's comfort level without reliably clearing steam. In those projects, the fan becomes the dependable option because it works regardless of orientation or privacy concerns.

Hybrid setups are often the smartest

A window plus a fan can be a strong combination when the room allows it. The window helps with background air movement, and the fan handles the post-shower moisture load. That said, the fan still needs to be specified as if it's doing the work, because in many Melbourne renovations the window is there for compliance, not for practical extraction.

Placement and Ducting Best Practices for Real Bathrooms

The fan body is only part of the system. The route from the bathroom ceiling to the outside wall or roof is where many renovations go wrong, and it's usually the part nobody wants to revisit after the plasterboard is up.

Keep the air path simple

Energy-efficiency guidance from the Building America Solution Center notes that the exhaust duct should vent directly outdoors, the first three feet should be straight, and unnecessary elbows can significantly reduce airflow (bathroom exhaust fan guidance). That's not a theoretical point. Every bend adds resistance, and every bit of resistance makes the fan work harder for less result.

I've seen plenty of bathroom refurbishments where the duct was snaked around framing because it was convenient at the time. The room still “had a fan,” but the airflow at the termination point was weak. Once the ceiling is closed, fixing that mistake is slow and expensive.

Follow the ducting hierarchy

  1. Start inside the bathroom. Place the extraction point where steam gathers, usually near the shower zone or central ceiling area.
  2. Keep the first run straight. A straight start reduces turbulence and helps preserve the fan's output.
  3. Limit elbows and long flexible sections. Long, crushed, or sagging ducting makes the fan underperform.
  4. Terminate outside the building. Roof voids, attics, and enclosed cavities are not acceptable discharge points.

A short, direct path with a proper exterior cowl is usually better than a clever but messy route through the ceiling space. If the bathroom is internal, the duct may need more planning, not a more powerful brochure figure.

Practical rule: if the duct is hard to explain on a sketch, it'll probably be hard to live with in winter.

Why the finish matters

The exterior termination needs to be clear, functional, and protected against backflow. A neat grille doesn't help if the air can't exit cleanly or if outside air keeps pushing back into the line. That's why installation quality matters just as much as fan selection.

How Ventilation Interacts With Waterproofing and Condensation

A waterproofed bathroom can still fail if humid air lingers after every shower. The membrane protects the substrate from direct water, but it doesn't stop condensation on cold surfaces, and it doesn't clear the moisture that hangs in the room air.

Moisture moves differently from water

That distinction is the part many homeowners never get told. Waterproofing handles liquid water at the floor and wet zones. Ventilation handles vapour in the air. If one is missing, the room still suffers.

In Melbourne, that problem shows up fast in internal bathrooms and apartments where there's no natural cross-flow. The mirror fogs, the ceiling stays damp longer, and then the surfaces start looking tired. Silicone joints age faster, paint loses its clean edge, and mould finds the places where humidity lingers.

Australian industry guidance notes that 25 L/s is mainly an odour-control floor, not a moisture-control target, and that a shower bathroom is better served by 50–100 L/s for actual condensation control (bathroom ventilation guidance). That's the number range that helps reduce the mould and surface deterioration that follow persistent dampness.

Why builders need to coordinate the trades

Ventilation and waterproofing work best when they're planned together. The fan position affects ceiling penetrations. The shower screen position affects where steam sits. The membrane details matter where services pass through the room. None of those decisions should be left to chance.

A registered builder should be thinking about the whole moisture system, not just the visible finishes. The tiler wants clean lines, the plumber wants service access, the electrician wants a practical switch location, and the builder has to make sure the air path supports the room.

If you're planning the wet zone, this shower waterproofing reference is useful because it shows why extraction and waterproofing are part of the same conversation, not separate packages.

Standout point: a bathroom doesn't fail because one trade missed one detail. It fails when the details weren't coordinated.

A Renovation Compliance Checklist for Homeowners and Builders

The easiest way to manage ventilation on a renovation is to treat it as a stage-by-stage sign-off item. That stops the usual problem where everyone assumes someone else has already allowed for the fan, the duct, or the external outlet.

A renovation compliance checklist for bathroom ventilation featuring design, installation, and inspection phases for builders.

Design phase

  • Confirm the ventilation path. Decide whether the room relies on a window, a mechanical fan, or both.
  • Check the fan target. A standard bathroom should at least be planned around 25 L/s, with stronger extraction considered for shower-heavy rooms.
  • Map the duct route early. The route should be short, direct, and realistic before ceilings are closed.

Installation phase

  • Set the fan in the right spot. Don't hide it where it can't capture steam effectively.
  • Keep the first duct section straight. That helps preserve airflow and reduce resistance.
  • Use the fewest bends you can. Every extra bend makes the system harder to work.

Final inspection

  • Test the airflow. Don't assume the brochure rating made it to the grille.
  • Check the termination. It needs to discharge outside, not into a roof space or enclosed cavity.
  • Look for lingering condensation. If the room stays damp too long, the system needs review.

The homeowner's best question at each stage is simple. “How does this room clear moisture?” If the answer is vague, the specification is probably vague too.

This is also where a good registered builder earns their keep. They should produce a clear plan, coordinate the trades, and make sure the fan, duct, switch, and termination all line up with the finished bathroom.

Common Pitfalls and How to Avoid Them

The most common ventilation mistakes aren't dramatic. They're quiet, cheap-looking decisions that become expensive after the bathroom is finished and the symptoms start showing up.

The usual failure modes

A fan with a decent label can still disappoint if the duct run is long, crushed, or full of unnecessary bends. Flexible ducting is especially easy to damage in ceiling spaces, and once it sags or kinks, the system loses effectiveness. That's how a bathroom ends up technically ventilated but still damp.

Another common mistake is discharging into the roof void because it was the easiest path during rough-in. That isn't a shortcut. It just moves the moisture from the bathroom into the building fabric, where it can create a different problem later.

Oversized fans can also be a bad fit if they're noisy enough that people never use them. A fan that stays off because it's irritating is worse than a smaller one that gets switched on. Timer controls and humidity-triggered operation help here because they keep the fan running long enough to do its job.

  • Brochure ratings: match the quoted airflow to the actual duct path, not just the box.
  • Flexible ducting: keep it short and protected, or it'll underperform.
  • Roof void discharge: avoid it completely.
  • Noise: don't spec a fan people will hate hearing.
  • Switching: include timer or humidity logic where the room is prone to lingering moisture.

A window-only approach is another trap in apartments and ensuites where privacy or weather means the window stays shut most of the time. If the room can't be left open in real life, the natural option isn't a real moisture strategy.

The fix is usually straightforward when it's handled early. Choose the right fan, route the duct properly, terminate outside, and make sure the control method matches how the bathroom is used.


If you're planning a bathroom renovation in Melbourne or Victoria and want the ventilation, waterproofing, and tiling coordinated properly from the start, contact Melbourne Tiling Services P/L for a practical renovation plan, clear advice, and a quote that accounts for the actual conditions in your bathroom.

Universal Design Bathroom Ideas for Safer Melbourne Homes

You don't usually start a bathroom renovation because you want a disability-friendly room. More often, you've had a close call on a wet floor, you're helping an ageing parent feel comfortable when they visit, or you've realised the family bathroom is going to be harder to use in ten years than it is today. That's where a universal design bathroom makes sense in Melbourne, because it's about building a space that still works when life changes, not waiting for a crisis and then tearing out new work later.

A good result isn't clinical, and it isn't a compromise. Done well, bathroom renovations can deliver a room that feels safer, looks refined, and is built around the way real households move through a morning routine, a recovery period, or an older age.

Table of Contents

Why Melbourne Homeowners Are Rethinking the Family Bathroom

A lot of renovation conversations in Melbourne start the same way. A family is planning an ensuite before an older parent moves in, a couple is thinking about retirement, or someone has already slipped on a wet floor and doesn't want a second warning. In those moments, the bathroom stops being a cosmetic project and becomes part of how the home supports daily life.

That shift matters because a universal design bathroom is built around changing needs, not one fixed user. It needs to work for a toddler, a guest on crutches, a parent with arthritis, and a homeowner who wants to stay in the same house longer without constant compromise. Australian guidance around AS 1428 accessibility standards and liveable housing concepts has pushed that thinking into mainstream renovation planning, especially where people want step-free entries, better circulation, and space for future aids.

Future-proofing beats a reactive rebuild

A bathroom that only works for one phase of life often becomes a liability later. Once walls are tiled and waterproofing is closed in, the cost of widening circulation or adding reinforcement for grab bars climbs fast. The layout choices that feel small during the build can become expensive limits once the room is finished.

Planning for adaptability from the start avoids that trap. Even if nobody in the house needs a mobility aid today, the room can still be framed, spaced, and detailed so future changes are possible without tearing the whole wet area apart.

Practical rule: if you're already opening the bathroom, think about the person who'll use it in five or ten years, not just the one using it this week.

The other reason homeowners are paying attention is resale. Buyers recognise quality wet areas when they see them, and a bathroom that feels safe, generous, and easy to use reads as a more resilient asset than one that is styled well but awkward to live with. In Melbourne and greater Victoria, that has turned universal design from a niche accessibility brief into a sensible future-proofing investment.

What Universal Design Means in a Bathroom

Universal design is not the same thing as “accessible” in the narrow, clinical sense. It's a design approach that aims for a bathroom usable by as many people as possible, with as little special adaptation as possible. In practice, that means a room can feel natural to a child, a guest, a recovering athlete, an older adult, or someone using a mobility aid, without looking like it was built for a facility rather than a family home.

A diagram illustrating the principles of universal design in bathrooms for safety, comfort, and accessibility.

The seven principles translate neatly into bathroom planning. Equitable use means the shower, vanity, and toilet work for different users without awkward add-ons. Flexibility in use is the reason a handheld shower on a rail helps both seated and standing users. Simple and intuitive use shows up in controls that don't need explaining. Perceptible information is about clear visual cues, better lighting, and obvious transitions between wet and dry areas.

The hidden value is usability without fuss

Tolerance for error matters more than many homeowners realise. Rounded edges, safe floor finishes, and sensible water control reduce the chance that a small slip becomes a serious injury. Low physical effort is why lever handles, sensible heights, and easy-reach storage feel better every day, not just in a medical scenario. Size and space for use is the principle that keeps the room from feeling cramped when somebody needs more room to turn, reach, or assist a family member.

The point isn't to turn a bathroom into a checklist of devices. It's to make choices that remove friction from ordinary routines. That's why a universal design bathroom is often more comfortable for everyone in the house, even when nobody has asked for “accessible” features.

A well planned room doesn't announce itself as accessible. It just feels easy the moment you walk in.

That's also why resale is stronger when universal design is done subtly. The best outcome looks like a premium renovation first, and a supportive one second.

Spatial Rules That Shape a Universal Design Bathroom

The first mistake I see is a homeowner choosing finishes before the room can actually work. If the layout cannot support the right turning space, door swing, or fixture clearance, no amount of good tapware will make the room easier to use. Spatial planning comes first because wall positions, rough-in points, and door openings decide what the bathroom can do.

In practice, a universal design bathroom needs enough room for a person to move through it without fighting the layout. A 5 x 5 ft turning space is commonly used in universal design bathroom specifications, along with clear floor space in front of fixtures and enough room under a basin for seated access universal design bathroom specifications bathroom planning guidelines. Those guides line up with the kind of room planning I use on Melbourne jobs, where a bathroom has to work for the family now and still make sense later.

What those measurements mean on site

Those numbers change the build, not just the drawing. They affect whether a hinged door can stay in place or whether a sliding option makes the room usable, where the vanity can sit, and whether the shower can be placed opposite the entry without crowding circulation. They also affect demolition decisions, because once waterproofing, tiles, and cabinetry are installed, moving a wall becomes a much bigger job.

On site, I also look at what the room needs to do around waterproofing, because the layout and the wet-area details have to work together. If the floor plan is tight, the waterproofing and fall to waste have less room for error, which is why a proper waterproofing in Melbourne approach needs to be part of the spatial plan from day one. That is the point where a room stops being a sketch and starts becoming a buildable bathroom.

Here's the practical breakdown for Melbourne renovations:

Fixture Clearance Target Renovation Implication
Turn space 1,200 mm clear manoeuvring space Shapes wall placement, door type, and circulation
Fixture approach space 750 x 1,200 mm clear manoeuvring space Affects vanity depth and toilet position
Toilet area 32 in clear floor space in front Limits how close opposite fixtures can sit
Basin access 29 in vertical clearance, 32 in horizontal clearance Encourages wall-hung or open-under-sink designs

Reinforced blocking is the detail most homeowners miss. If there is any chance you will want grab bars later, the walls need proper backing before the tile goes on. That hidden work is simple compared with opening finished walls after the fact.

Good layout design feels invisible. When it is done properly, the bathroom does more than satisfy a measurement. It moves properly, looks balanced, and still feels like part of a normal family home.

Wet-Area Features That Make the Bathroom Safer

A bathroom can look polished and still be unsafe if the wet area is handled poorly. In a universal design bathroom, the shower is usually the first place I check, because that is where falls, water control, and finish selection all meet. A walk-in, no-step shower removes the obvious trip point, but it only works if the floor falls cleanly to waste, the waterproofing is correct, and the edge detail stays low enough for daily use bathroom planning guidelines NKBA bath planning guidelines.

A modern, accessible walk-in shower featuring safety grab bars, a built-in seat, and a slip-resistant floor.

Australian bathroom guidance also calls for a non-slip surface in bathrooms, and that matters because the floor finish is part of the safety system, not just a visual choice non-slip surface guidance. In Melbourne, that affects tile selection, grout joints, shower gradients, and the way a tiled wet area is detailed so it drains properly without looking bulky or awkward. The visual result still matters. Homeowners want a room that feels like part of the house, not a later add-on.

The features that do the real work

A few elements should come before the decorative decisions. Start with the parts that affect safety, cleaning, and long-term usability.

  • Low-threshold showering: NKBA guidance used in Australian bathroom planning says shower thresholds should be minimized to no more than ½ inch (13 mm). That affects waterproofing detail, floor build-up, and drain position.
  • Tap controls that are easy to grasp: Lever or loop handles are easier for arthritic hands and generally clearer to use than small round knobs.
  • Open basin access: At least one sink should allow seated approach, which means planning for knee space and avoiding bulky cabinetry in the wrong place.
  • Grab-bar readiness: Blocking in the wall needs to be there before tiling, even if the bars themselves are fitted later.
  • Safe flooring choices: Slip resistance matters most in the shower and immediate wet zone, where the risk is highest.

That is where build sequence matters. Waterproofing has to be coordinated with falls, tile setting, and drainage from the start, which is why a clear bathroom waterproofing in Melbourne plan should be part of the wet-area design rather than something left to the end of the job.

A good universal-design wet area does not feel loaded with gear. It feels calm, drains well, cleans easily, and gives you confidence every time you step in.

Designing a Bathroom That Looks Like a Bathroom

A lot of people still worry that an accessible bathroom will look institutional. That only happens when function is bolted on after the design is finished. If accessibility is built into the materials, lighting, and joinery from the start, the room reads as deliberate and premium, not clinical.

Large-format porcelain is a strong choice because it gives you a cleaner visual field with fewer grout lines. Timber-look tile can soften the room without sacrificing wet-area performance, and a full-height feature wall can anchor the space so it feels designed rather than assembled. The point is not to hide the universal design features. The point is to make them feel like part of the style language.

Finish choices do more than decorate

Lighting does a lot of heavy lifting here. Layered lighting makes the bathroom easier to use at different times of day, while a well-placed mirror helps the room feel larger and more usable. Tapware finish matters too, because it should sit comfortably with the rest of the palette rather than drawing attention to itself as a “special” product.

Integrated niches, frameless shower screens, and linear drains are especially useful because they keep the room visually quiet. A shower can still be easy to enter, easy to clean, and easy to use, while looking like a contemporary Melbourne renovation rather than a retrofit. That's the detail most homeowners want.

Design rule: if a safety feature makes the room look worse, it usually hasn't been integrated properly.

Australian inclusivity guidance also recognises that aesthetics and ease of maintenance are part of inclusive design, not extras designing for inclusivity. That matters because a bathroom that feels harsh or temporary tends to get used less comfortably, even when it's technically compliant.

A premium universal design bathroom is one where the grab bar, the niche, the shower screen, and the basin all look like they belong in the same sentence. When that happens, accessibility stops reading as a compromise and starts reading as good architecture.

Compliance, Standards, and the Registered Builder Question

Bathroom renovation in Victoria sits inside a real compliance framework, not just design preference. AS 1428 and liveable housing ideas shape accessible planning, while the National Construction Code and Victorian domestic building rules determine what has to be documented, supervised, or signed off. Not every home bathroom has to be built as a fully accessible space, but the work still needs to be done properly if you want it to last and stand up later at resale.

In Victoria, domestic building work costing more than AU$10,000 falls within the domestic building framework, and higher-value residential work must be handled by a registered builder in the relevant category registered builder and domestic building framework reference. That matters for bathroom renovations because the contract structure, insurance, supervision, and accountability all sit inside that system.

A checklist infographic titled Compliance, Standards, and the Registered Builder Question for home construction projects.

What registration means in practice

A registered builder isn't just a label. It means someone is responsible for coordinating the work, managing the trades, and making sure the bathroom is built as a whole rather than as a pile of disconnected jobs. It also gives homeowners a clearer complaints pathway through the Victorian regulator if the project goes off course.

The distinction between design intent and legal accessibility matters too. A family bathroom can borrow universal-design ideas without being a formally classified accessible facility. That said, if you're planning a renovation in a multi-use home, or you want the bathroom to work for a future mobility need, the safest route is to document the layout, waterproofing, and structural decisions properly from the beginning.

For homeowners comparing options, the practical difference is simple. An owner-renovator path can suit smaller scope work in some cases, but once the project becomes a full wet-area rebuild, the value of registered oversight climbs fast. If you want a renovation team that handles coordinated bathroom renovation work, Melbourne Tiling Services P/L bathroom renovation specialists are one example of the kind of registered, trade-coordinated setup homeowners can look for.

Good paperwork isn't just bureaucracy. It protects the build, the warranty position, and the story you'll tell the next buyer.

Cost Ranges and Phased Implementation

The cleanest universal design renovation is usually the one planned all at once. In practice, plenty of Melbourne homeowners stage the work because they're balancing cash flow, family timing, and the rest of the house. Melbourne Tiling Services notes a transparent renovation calculator and a budget approach typically around a median $10,000 scope, which is a useful anchor for homeowners trying to decide whether to do a full rebuild or phase the room in bathroom renovation cost guide.

That baseline doesn't mean every bathroom should stop there. It means the scope can be customized, then expanded later if needed. The key is to avoid staging the wrong parts.

What to do now and what can wait

Some elements are worth locking in early because they're hard to change later. Waterproofing, screeding, floor falls, and wall blocking are the ones I'd prioritise if the renovation is being phased. They shape the room's safety and future flexibility, even if the final tapware or grab bars go in during a later stage.

Other finishes can sometimes wait without compromising the structure of the room. Tapware selection, decorative hardware, and some visual detailing can be staged if the underlying build is ready for them. That's the difference between a smart phased plan and a false economy.

A simple way to understand this is:

  • Phase one: waterproofing, substrate prep, falls, structural backing, and safe layout.
  • Phase two: shower screen, tapware, vanities, mirrors, and final fittings.
  • Phase three: optional refinements such as extra supports, upgraded accessories, or visual changes.

The mistake is trying to save money by skipping the invisible work. If the waterproofing or blocking is compromised, you don't really have a phased plan. You've just delayed the expensive part.

A targeted upgrade can still deliver value when the room's bones are sound. A full renovation makes more sense when the layout is wrong, the surfaces are failing, or the bathroom needs a complete universal-design reset.

Your Renovation Checklist and Working With Melbourne Tiling Services

Before you ask for quotes, walk through the bathroom with a tape measure and a clear brief. Check whether the room can accommodate the circulation you need, where the shower, vanity, and toilet can sit without crowding each other, and whether you want the space to support ageing in place from day one. Then decide which features are essential, which are desirable, and which can wait for a later phase.

A summary infographic for a renovation project featuring a checklist and benefits of Melbourne Tiling Services.

Use this checklist before you book a consult

  • Measure the clearances: Confirm the turning space, shower approach, and fixture spacing before you fall in love with finishes.
  • Decide on the wet area: Choose between a low-threshold or step-free shower early, because it affects the floor build and waterproofing.
  • Plan backing now: Ask for wall reinforcement where grab bars may be needed later.
  • Choose safer finishes: Look for non-slip surfaces and practical tapware that's easy to grasp.
  • Treat aesthetics as part of function: Pick materials, lighting, and screens that make the room feel intentional, not medical.
  • Confirm the builder pathway: Make sure the job is being managed by people who understand Victorian compliance and the trade sequence.

Melbourne Tiling Services P/L fits into this kind of work as a coordinated renovation team, with start-to-finish handling across carpenters, plumbers, electricians, tilers, and waterproofers, plus Registered Unlimited Builders, free quotes, 3D drawings, and a transparent renovation calculator. That matters because a universal design bathroom is only as good as the way the trades line up behind the plan.

If you want the room to look refined, function safely, and age well with the household, use the checklist above to define your scope before the first quote lands. A clear brief saves money, reduces rework, and makes the finished bathroom feel like it was always meant to be there.


If you're planning a universal design bathroom in Melbourne, speak with Melbourne Tiling Services P/L about a renovation that balances safety, waterproofing, and a premium finish. Bring your measurements, your wish list, and your questions, and they can help turn the layout into a bathroom that works now and still makes sense years from now.

Universal Design Bathroom Ideas for Safer Melbourne Homes

You don't usually start a bathroom renovation because you want a disability-friendly room. More often, you've had a close call on a wet floor, you're helping an ageing parent feel comfortable when they visit, or you've realised the family bathroom is going to be harder to use in ten years than it is today. That's where a universal design bathroom makes sense in Melbourne, because it's about building a space that still works when life changes, not waiting for a crisis and then tearing out new work later.

A good result isn't clinical, and it isn't a compromise. Done well, bathroom renovations can deliver a room that feels safer, looks refined, and is built around the way real households move through a morning routine, a recovery period, or an older age.

Table of Contents

Why Melbourne Homeowners Are Rethinking the Family Bathroom

A lot of renovation conversations in Melbourne start the same way. A family is planning an ensuite before an older parent moves in, a couple is thinking about retirement, or someone has already slipped on a wet floor and doesn't want a second warning. In those moments, the bathroom stops being a cosmetic project and becomes part of how the home supports daily life.

That shift matters because a universal design bathroom is built around changing needs, not one fixed user. It needs to work for a toddler, a guest on crutches, a parent with arthritis, and a homeowner who wants to stay in the same house longer without constant compromise. Australian guidance around AS 1428 accessibility standards and liveable housing concepts has pushed that thinking into mainstream renovation planning, especially where people want step-free entries, better circulation, and space for future aids.

Future-proofing beats a reactive rebuild

A bathroom that only works for one phase of life often becomes a liability later. Once walls are tiled and waterproofing is closed in, the cost of widening circulation or adding reinforcement for grab bars climbs fast. The layout choices that feel small during the build can become expensive limits once the room is finished.

Planning for adaptability from the start avoids that trap. Even if nobody in the house needs a mobility aid today, the room can still be framed, spaced, and detailed so future changes are possible without tearing the whole wet area apart.

Practical rule: if you're already opening the bathroom, think about the person who'll use it in five or ten years, not just the one using it this week.

The other reason homeowners are paying attention is resale. Buyers recognise quality wet areas when they see them, and a bathroom that feels safe, generous, and easy to use reads as a more resilient asset than one that is styled well but awkward to live with. In Melbourne and greater Victoria, that has turned universal design from a niche accessibility brief into a sensible future-proofing investment.

What Universal Design Means in a Bathroom

Universal design is not the same thing as “accessible” in the narrow, clinical sense. It's a design approach that aims for a bathroom usable by as many people as possible, with as little special adaptation as possible. In practice, that means a room can feel natural to a child, a guest, a recovering athlete, an older adult, or someone using a mobility aid, without looking like it was built for a facility rather than a family home.

A diagram illustrating the principles of universal design in bathrooms for safety, comfort, and accessibility.

The seven principles translate neatly into bathroom planning. Equitable use means the shower, vanity, and toilet work for different users without awkward add-ons. Flexibility in use is the reason a handheld shower on a rail helps both seated and standing users. Simple and intuitive use shows up in controls that don't need explaining. Perceptible information is about clear visual cues, better lighting, and obvious transitions between wet and dry areas.

The hidden value is usability without fuss

Tolerance for error matters more than many homeowners realise. Rounded edges, safe floor finishes, and sensible water control reduce the chance that a small slip becomes a serious injury. Low physical effort is why lever handles, sensible heights, and easy-reach storage feel better every day, not just in a medical scenario. Size and space for use is the principle that keeps the room from feeling cramped when somebody needs more room to turn, reach, or assist a family member.

The point isn't to turn a bathroom into a checklist of devices. It's to make choices that remove friction from ordinary routines. That's why a universal design bathroom is often more comfortable for everyone in the house, even when nobody has asked for “accessible” features.

A well planned room doesn't announce itself as accessible. It just feels easy the moment you walk in.

That's also why resale is stronger when universal design is done subtly. The best outcome looks like a premium renovation first, and a supportive one second.

Spatial Rules That Shape a Universal Design Bathroom

The first mistake I see is a homeowner choosing finishes before the room can actually work. If the layout cannot support the right turning space, door swing, or fixture clearance, no amount of good tapware will make the room easier to use. Spatial planning comes first because wall positions, rough-in points, and door openings decide what the bathroom can do.

In practice, a universal design bathroom needs enough room for a person to move through it without fighting the layout. A 5 x 5 ft turning space is commonly used in universal design bathroom specifications, along with clear floor space in front of fixtures and enough room under a basin for seated access universal design bathroom specifications bathroom planning guidelines. Those guides line up with the kind of room planning I use on Melbourne jobs, where a bathroom has to work for the family now and still make sense later.

What those measurements mean on site

Those numbers change the build, not just the drawing. They affect whether a hinged door can stay in place or whether a sliding option makes the room usable, where the vanity can sit, and whether the shower can be placed opposite the entry without crowding circulation. They also affect demolition decisions, because once waterproofing, tiles, and cabinetry are installed, moving a wall becomes a much bigger job.

On site, I also look at what the room needs to do around waterproofing, because the layout and the wet-area details have to work together. If the floor plan is tight, the waterproofing and fall to waste have less room for error, which is why a proper waterproofing in Melbourne approach needs to be part of the spatial plan from day one. That is the point where a room stops being a sketch and starts becoming a buildable bathroom.

Here's the practical breakdown for Melbourne renovations:

Fixture Clearance Target Renovation Implication
Turn space 1,200 mm clear manoeuvring space Shapes wall placement, door type, and circulation
Fixture approach space 750 x 1,200 mm clear manoeuvring space Affects vanity depth and toilet position
Toilet area 32 in clear floor space in front Limits how close opposite fixtures can sit
Basin access 29 in vertical clearance, 32 in horizontal clearance Encourages wall-hung or open-under-sink designs

Reinforced blocking is the detail most homeowners miss. If there is any chance you will want grab bars later, the walls need proper backing before the tile goes on. That hidden work is simple compared with opening finished walls after the fact.

Good layout design feels invisible. When it is done properly, the bathroom does more than satisfy a measurement. It moves properly, looks balanced, and still feels like part of a normal family home.

Wet-Area Features That Make the Bathroom Safer

A bathroom can look polished and still be unsafe if the wet area is handled poorly. In a universal design bathroom, the shower is usually the first place I check, because that is where falls, water control, and finish selection all meet. A walk-in, no-step shower removes the obvious trip point, but it only works if the floor falls cleanly to waste, the waterproofing is correct, and the edge detail stays low enough for daily use bathroom planning guidelines NKBA bath planning guidelines.

A modern, accessible walk-in shower featuring safety grab bars, a built-in seat, and a slip-resistant floor.

Australian bathroom guidance also calls for a non-slip surface in bathrooms, and that matters because the floor finish is part of the safety system, not just a visual choice non-slip surface guidance. In Melbourne, that affects tile selection, grout joints, shower gradients, and the way a tiled wet area is detailed so it drains properly without looking bulky or awkward. The visual result still matters. Homeowners want a room that feels like part of the house, not a later add-on.

The features that do the real work

A few elements should come before the decorative decisions. Start with the parts that affect safety, cleaning, and long-term usability.

  • Low-threshold showering: NKBA guidance used in Australian bathroom planning says shower thresholds should be minimized to no more than ½ inch (13 mm). That affects waterproofing detail, floor build-up, and drain position.
  • Tap controls that are easy to grasp: Lever or loop handles are easier for arthritic hands and generally clearer to use than small round knobs.
  • Open basin access: At least one sink should allow seated approach, which means planning for knee space and avoiding bulky cabinetry in the wrong place.
  • Grab-bar readiness: Blocking in the wall needs to be there before tiling, even if the bars themselves are fitted later.
  • Safe flooring choices: Slip resistance matters most in the shower and immediate wet zone, where the risk is highest.

That is where build sequence matters. Waterproofing has to be coordinated with falls, tile setting, and drainage from the start, which is why a clear bathroom waterproofing in Melbourne plan should be part of the wet-area design rather than something left to the end of the job.

A good universal-design wet area does not feel loaded with gear. It feels calm, drains well, cleans easily, and gives you confidence every time you step in.

Designing a Bathroom That Looks Like a Bathroom

A lot of people still worry that an accessible bathroom will look institutional. That only happens when function is bolted on after the design is finished. If accessibility is built into the materials, lighting, and joinery from the start, the room reads as deliberate and premium, not clinical.

Large-format porcelain is a strong choice because it gives you a cleaner visual field with fewer grout lines. Timber-look tile can soften the room without sacrificing wet-area performance, and a full-height feature wall can anchor the space so it feels designed rather than assembled. The point is not to hide the universal design features. The point is to make them feel like part of the style language.

Finish choices do more than decorate

Lighting does a lot of heavy lifting here. Layered lighting makes the bathroom easier to use at different times of day, while a well-placed mirror helps the room feel larger and more usable. Tapware finish matters too, because it should sit comfortably with the rest of the palette rather than drawing attention to itself as a “special” product.

Integrated niches, frameless shower screens, and linear drains are especially useful because they keep the room visually quiet. A shower can still be easy to enter, easy to clean, and easy to use, while looking like a contemporary Melbourne renovation rather than a retrofit. That's the detail most homeowners want.

Design rule: if a safety feature makes the room look worse, it usually hasn't been integrated properly.

Australian inclusivity guidance also recognises that aesthetics and ease of maintenance are part of inclusive design, not extras designing for inclusivity. That matters because a bathroom that feels harsh or temporary tends to get used less comfortably, even when it's technically compliant.

A premium universal design bathroom is one where the grab bar, the niche, the shower screen, and the basin all look like they belong in the same sentence. When that happens, accessibility stops reading as a compromise and starts reading as good architecture.

Compliance, Standards, and the Registered Builder Question

Bathroom renovation in Victoria sits inside a real compliance framework, not just design preference. AS 1428 and liveable housing ideas shape accessible planning, while the National Construction Code and Victorian domestic building rules determine what has to be documented, supervised, or signed off. Not every home bathroom has to be built as a fully accessible space, but the work still needs to be done properly if you want it to last and stand up later at resale.

In Victoria, domestic building work costing more than AU$10,000 falls within the domestic building framework, and higher-value residential work must be handled by a registered builder in the relevant category registered builder and domestic building framework reference. That matters for bathroom renovations because the contract structure, insurance, supervision, and accountability all sit inside that system.

A checklist infographic titled Compliance, Standards, and the Registered Builder Question for home construction projects.

What registration means in practice

A registered builder isn't just a label. It means someone is responsible for coordinating the work, managing the trades, and making sure the bathroom is built as a whole rather than as a pile of disconnected jobs. It also gives homeowners a clearer complaints pathway through the Victorian regulator if the project goes off course.

The distinction between design intent and legal accessibility matters too. A family bathroom can borrow universal-design ideas without being a formally classified accessible facility. That said, if you're planning a renovation in a multi-use home, or you want the bathroom to work for a future mobility need, the safest route is to document the layout, waterproofing, and structural decisions properly from the beginning.

For homeowners comparing options, the practical difference is simple. An owner-renovator path can suit smaller scope work in some cases, but once the project becomes a full wet-area rebuild, the value of registered oversight climbs fast. If you want a renovation team that handles coordinated bathroom renovation work, Melbourne Tiling Services P/L bathroom renovation specialists are one example of the kind of registered, trade-coordinated setup homeowners can look for.

Good paperwork isn't just bureaucracy. It protects the build, the warranty position, and the story you'll tell the next buyer.

Cost Ranges and Phased Implementation

The cleanest universal design renovation is usually the one planned all at once. In practice, plenty of Melbourne homeowners stage the work because they're balancing cash flow, family timing, and the rest of the house. Melbourne Tiling Services notes a transparent renovation calculator and a budget approach typically around a median $10,000 scope, which is a useful anchor for homeowners trying to decide whether to do a full rebuild or phase the room in bathroom renovation cost guide.

That baseline doesn't mean every bathroom should stop there. It means the scope can be customized, then expanded later if needed. The key is to avoid staging the wrong parts.

What to do now and what can wait

Some elements are worth locking in early because they're hard to change later. Waterproofing, screeding, floor falls, and wall blocking are the ones I'd prioritise if the renovation is being phased. They shape the room's safety and future flexibility, even if the final tapware or grab bars go in during a later stage.

Other finishes can sometimes wait without compromising the structure of the room. Tapware selection, decorative hardware, and some visual detailing can be staged if the underlying build is ready for them. That's the difference between a smart phased plan and a false economy.

A simple way to understand this is:

  • Phase one: waterproofing, substrate prep, falls, structural backing, and safe layout.
  • Phase two: shower screen, tapware, vanities, mirrors, and final fittings.
  • Phase three: optional refinements such as extra supports, upgraded accessories, or visual changes.

The mistake is trying to save money by skipping the invisible work. If the waterproofing or blocking is compromised, you don't really have a phased plan. You've just delayed the expensive part.

A targeted upgrade can still deliver value when the room's bones are sound. A full renovation makes more sense when the layout is wrong, the surfaces are failing, or the bathroom needs a complete universal-design reset.

Your Renovation Checklist and Working With Melbourne Tiling Services

Before you ask for quotes, walk through the bathroom with a tape measure and a clear brief. Check whether the room can accommodate the circulation you need, where the shower, vanity, and toilet can sit without crowding each other, and whether you want the space to support ageing in place from day one. Then decide which features are essential, which are desirable, and which can wait for a later phase.

A summary infographic for a renovation project featuring a checklist and benefits of Melbourne Tiling Services.

Use this checklist before you book a consult

  • Measure the clearances: Confirm the turning space, shower approach, and fixture spacing before you fall in love with finishes.
  • Decide on the wet area: Choose between a low-threshold or step-free shower early, because it affects the floor build and waterproofing.
  • Plan backing now: Ask for wall reinforcement where grab bars may be needed later.
  • Choose safer finishes: Look for non-slip surfaces and practical tapware that's easy to grasp.
  • Treat aesthetics as part of function: Pick materials, lighting, and screens that make the room feel intentional, not medical.
  • Confirm the builder pathway: Make sure the job is being managed by people who understand Victorian compliance and the trade sequence.

Melbourne Tiling Services P/L fits into this kind of work as a coordinated renovation team, with start-to-finish handling across carpenters, plumbers, electricians, tilers, and waterproofers, plus Registered Unlimited Builders, free quotes, 3D drawings, and a transparent renovation calculator. That matters because a universal design bathroom is only as good as the way the trades line up behind the plan.

If you want the room to look refined, function safely, and age well with the household, use the checklist above to define your scope before the first quote lands. A clear brief saves money, reduces rework, and makes the finished bathroom feel like it was always meant to be there.


If you're planning a universal design bathroom in Melbourne, speak with Melbourne Tiling Services P/L about a renovation that balances safety, waterproofing, and a premium finish. Bring your measurements, your wish list, and your questions, and they can help turn the layout into a bathroom that works now and still makes sense years from now.