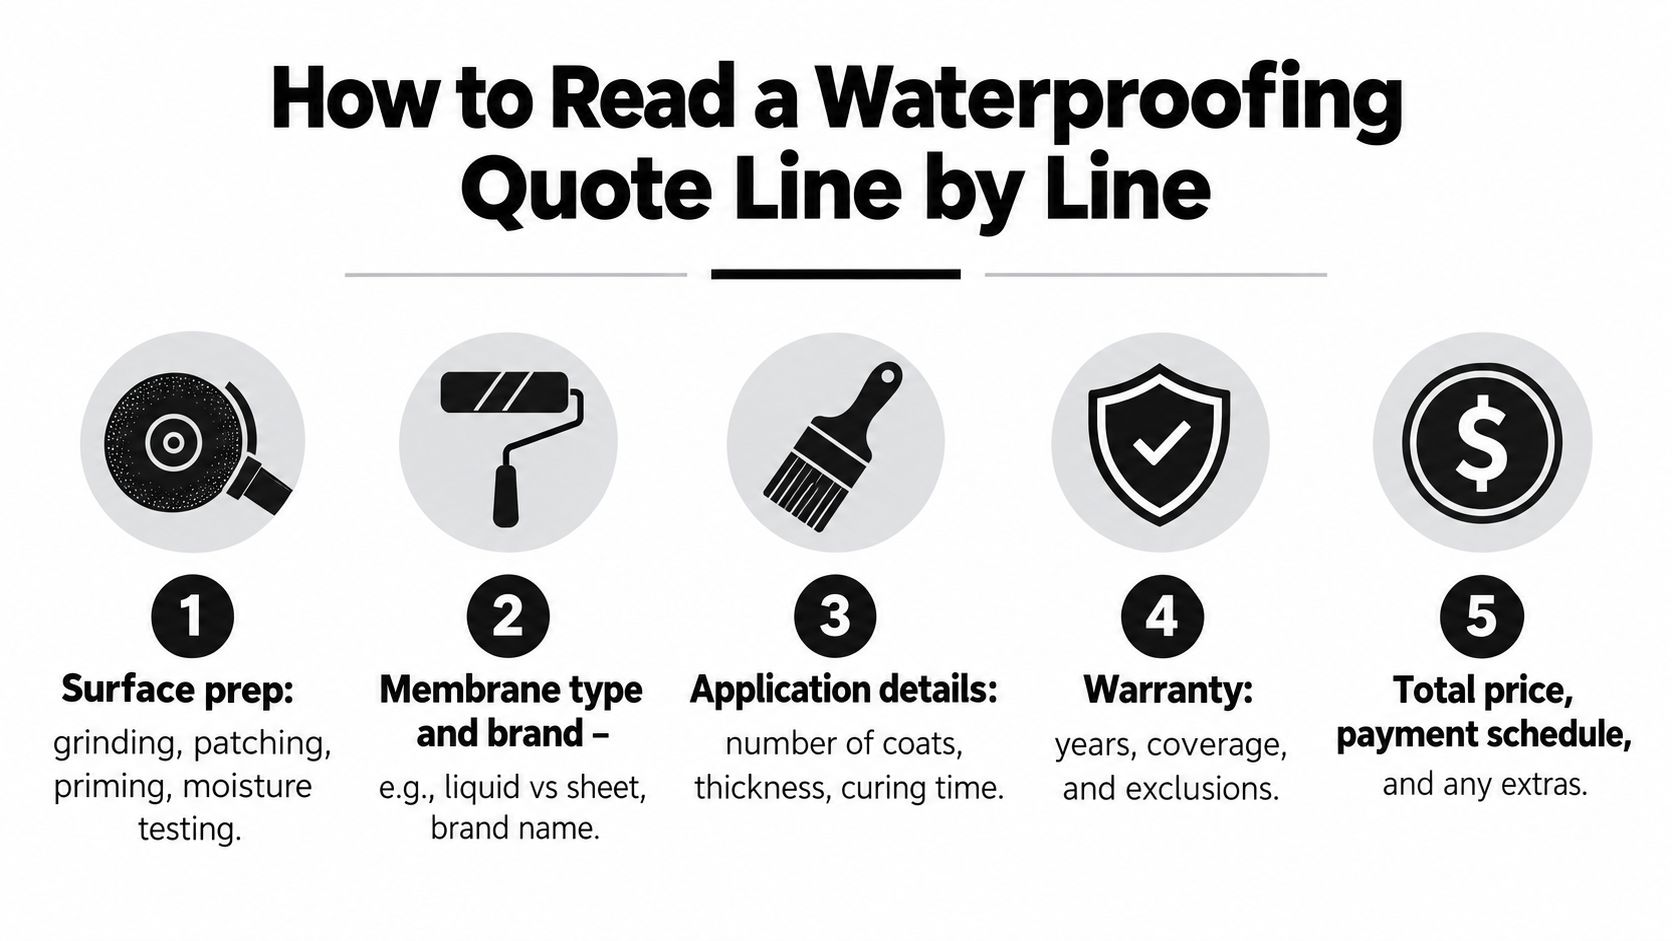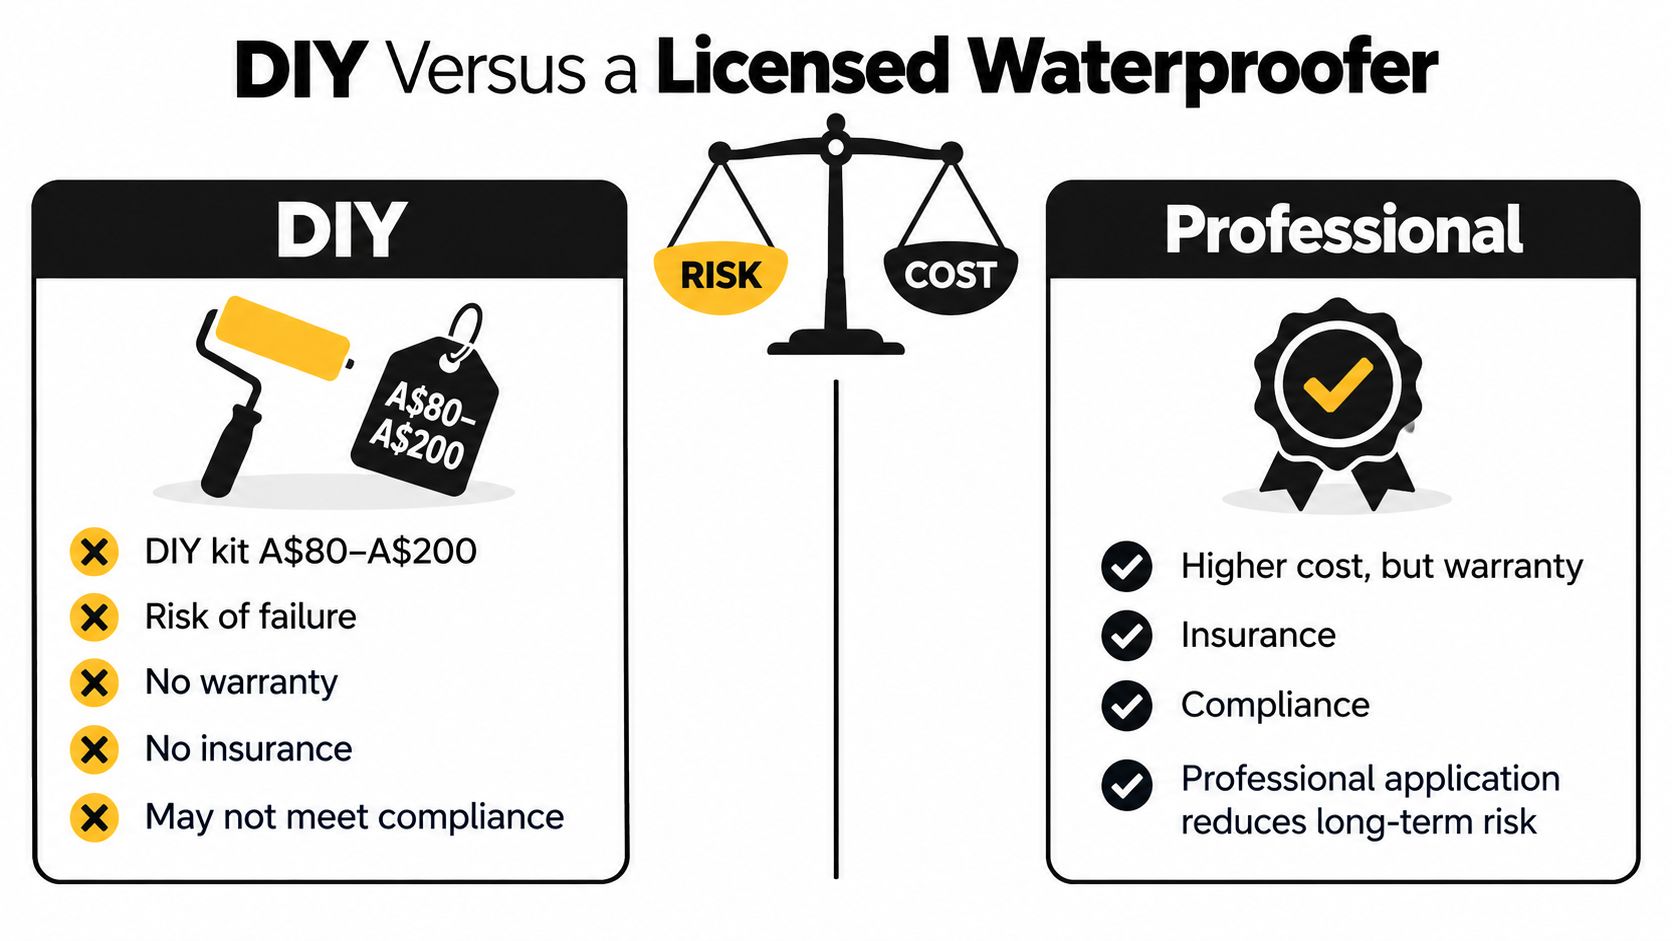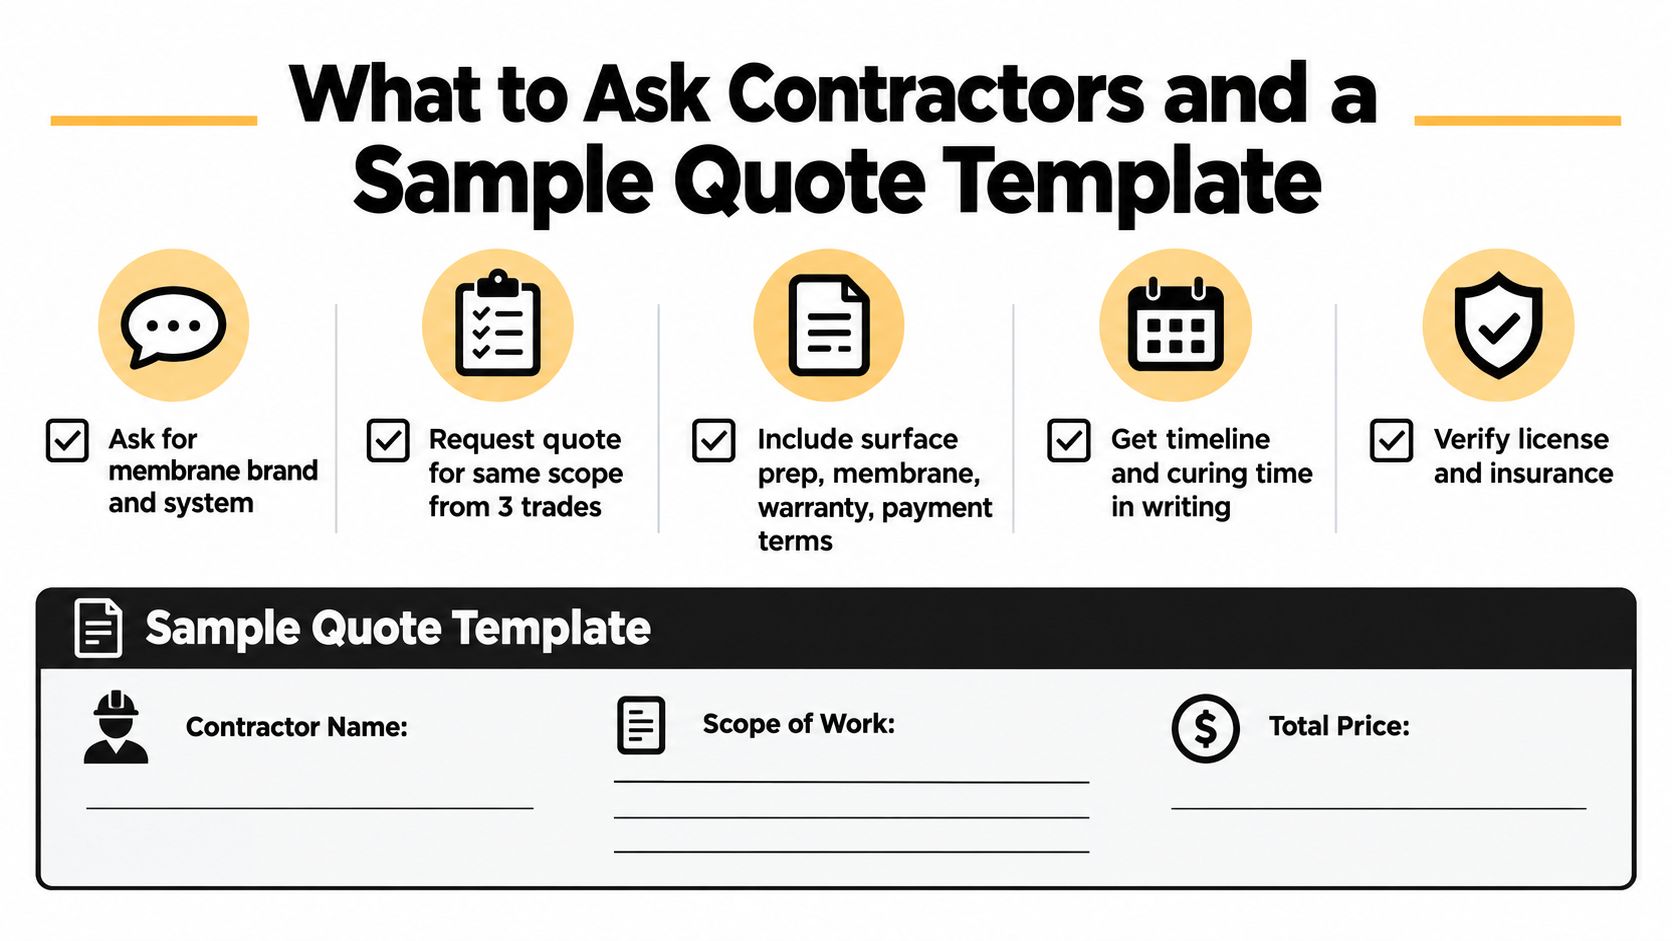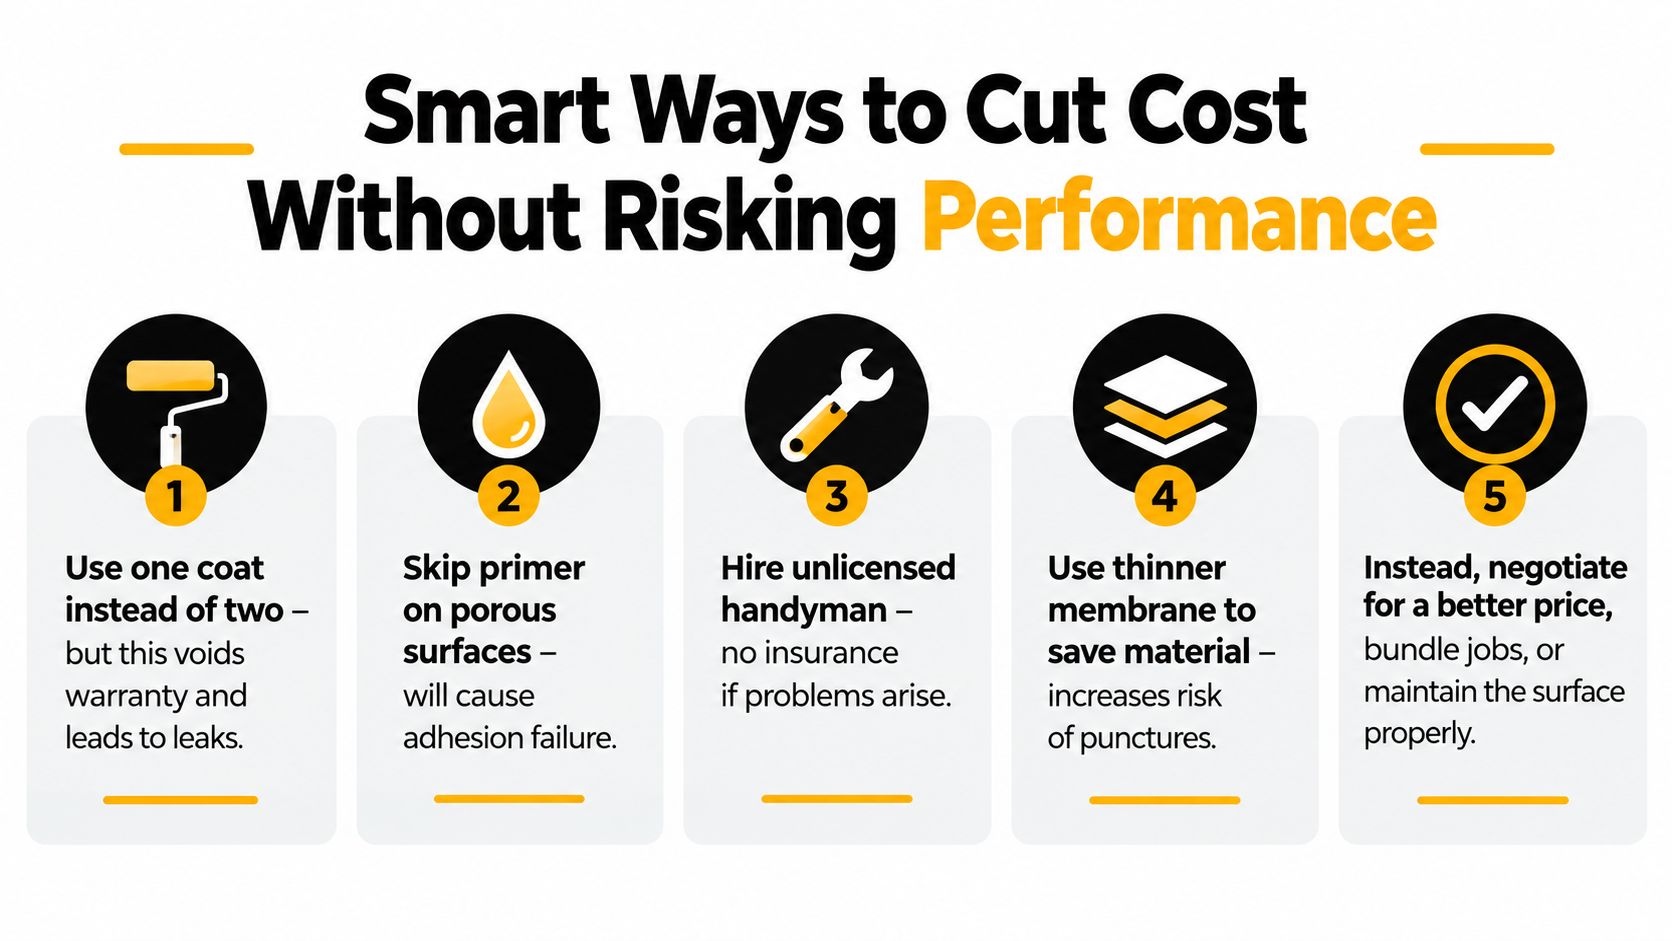
Bathroom Floor Waterproofing: A 2026 Melbourne Guide

You're probably looking at tile samples, tapware finishes, vanity sizes and shower screen options. That's how most bathroom renovations start. The part that decides whether the room lasts, though, sits under the tiles and behind the walls.

Bathroom floor waterproofing is where good-looking bathrooms either become durable wet areas or expensive repair jobs. A bathroom can look flawless on handover day and still be set up to fail if the substrate is wrong, the falls are poor, the corners aren't reinforced, or the membrane never reaches compliant coverage. In Melbourne homes, especially older properties and second-storey bathrooms, those misses show up later as loose tiles, swollen skirting, mould, and insurance headaches.

Table of Contents

The Hidden Weakness in Your Bathroom Renovation

A bathroom can look nearly finished and still be set up to fail.

I see it in Melbourne renovations all the time. Demolition is complete, the plumbing rough-in is done, tile selections are locked in, and everyone is focused on the visible progress. Then the floor waterproofing goes in, gets covered, and no one wants to slow the job down to question what sits underneath it.

That hidden layer carries the risk that causes the expensive call-back.

In bathroom failures, the problem is often not the tile or the grout line the homeowner can see. It is the substrate, the falls, the bond, the junction detailing, or the way the membrane was treated at the drain and floor-to-wall connection before tiling started. Once tiles are down, those defects are hard to inspect and expensive to rectify.

A failed waterproofing job can lead to water tracking into adjoining rooms, damp screed, movement at junctions, swelling in nearby timber, persistent odours, and a strip-out that arrives years earlier than expected. On an upper floor, the consequences are worse because the leak path can damage ceilings, framing and finishes below.

Practical rule: If the waterproofing details are not clear before tiling starts, the renovation is not ready for tiles.

For Melbourne homeowners, two compliance points get missed more often than they should. First, the substrate under the membrane has to be legal for a wet area under AS 3740:2021. Older bathrooms often uncover particleboard or timber-based flooring that should not remain under the waterproofed area. Second, second-storey bathrooms need more careful treatment than many DIY guides suggest, because the cost of failure below is far higher than the cost of doing the floor properly the first time.

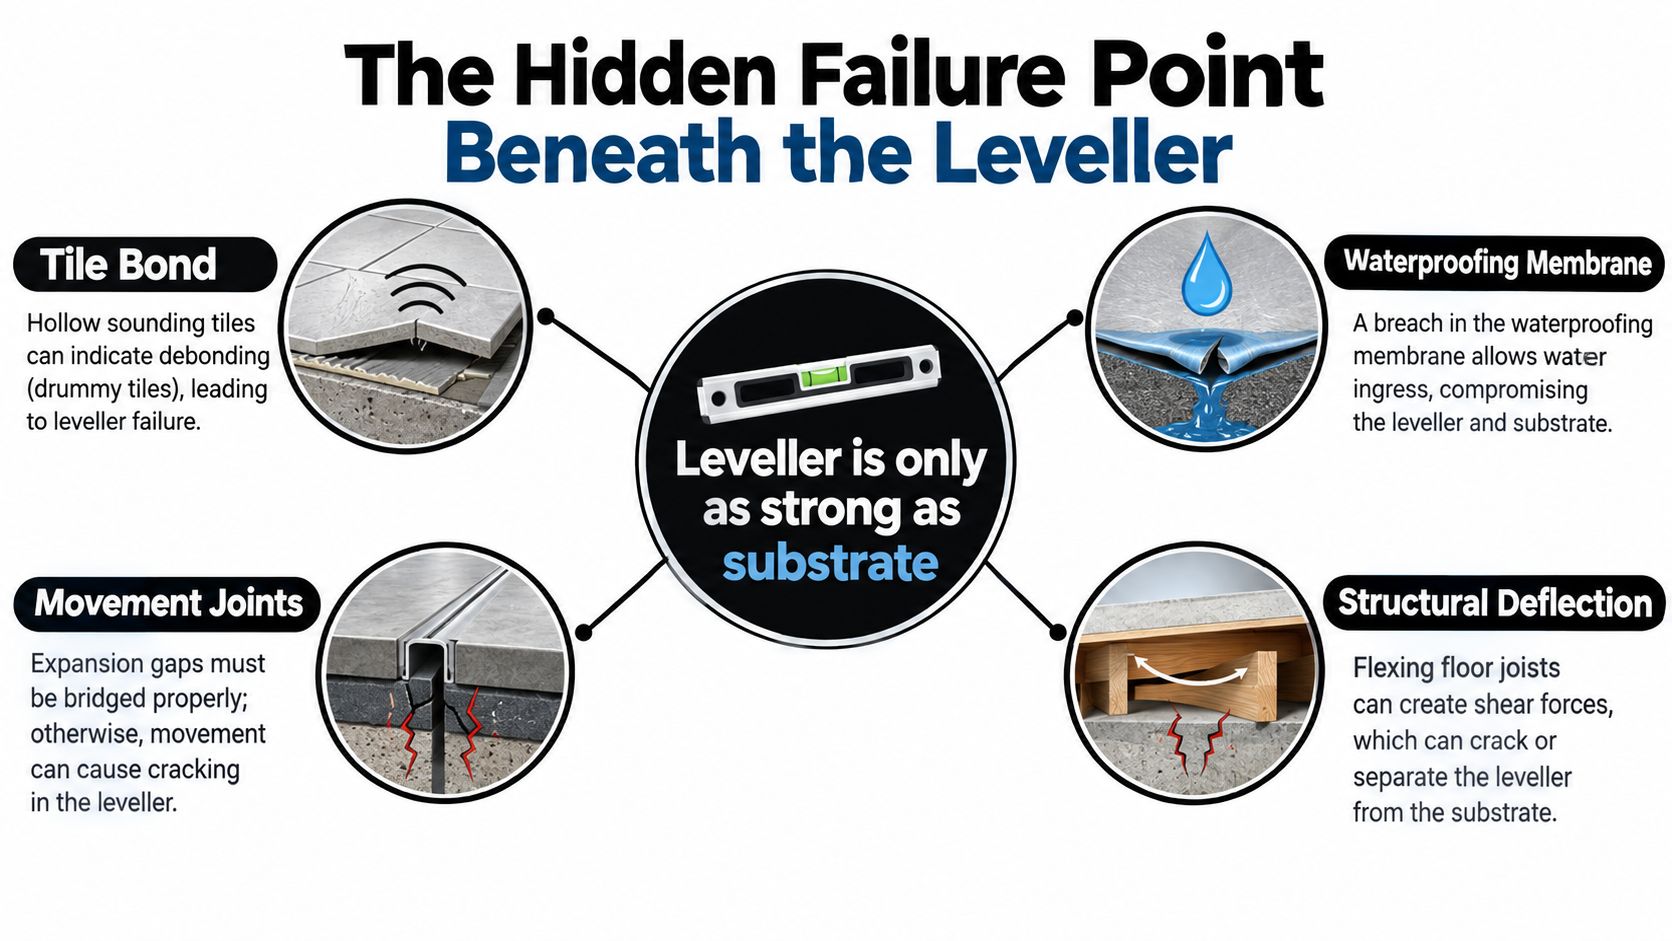
That is also why I pay close attention to the base before any membrane discussion starts. If the floor needs correction, a properly prepared bed or screeding for bathroom floor tiles is often part of getting the waterproofing system to work as intended.

A bathroom that appears finished is easy to build. A bathroom that stays watertight for years depends on the parts no one sees after handover.

Laying the Groundwork for a Watertight Floor

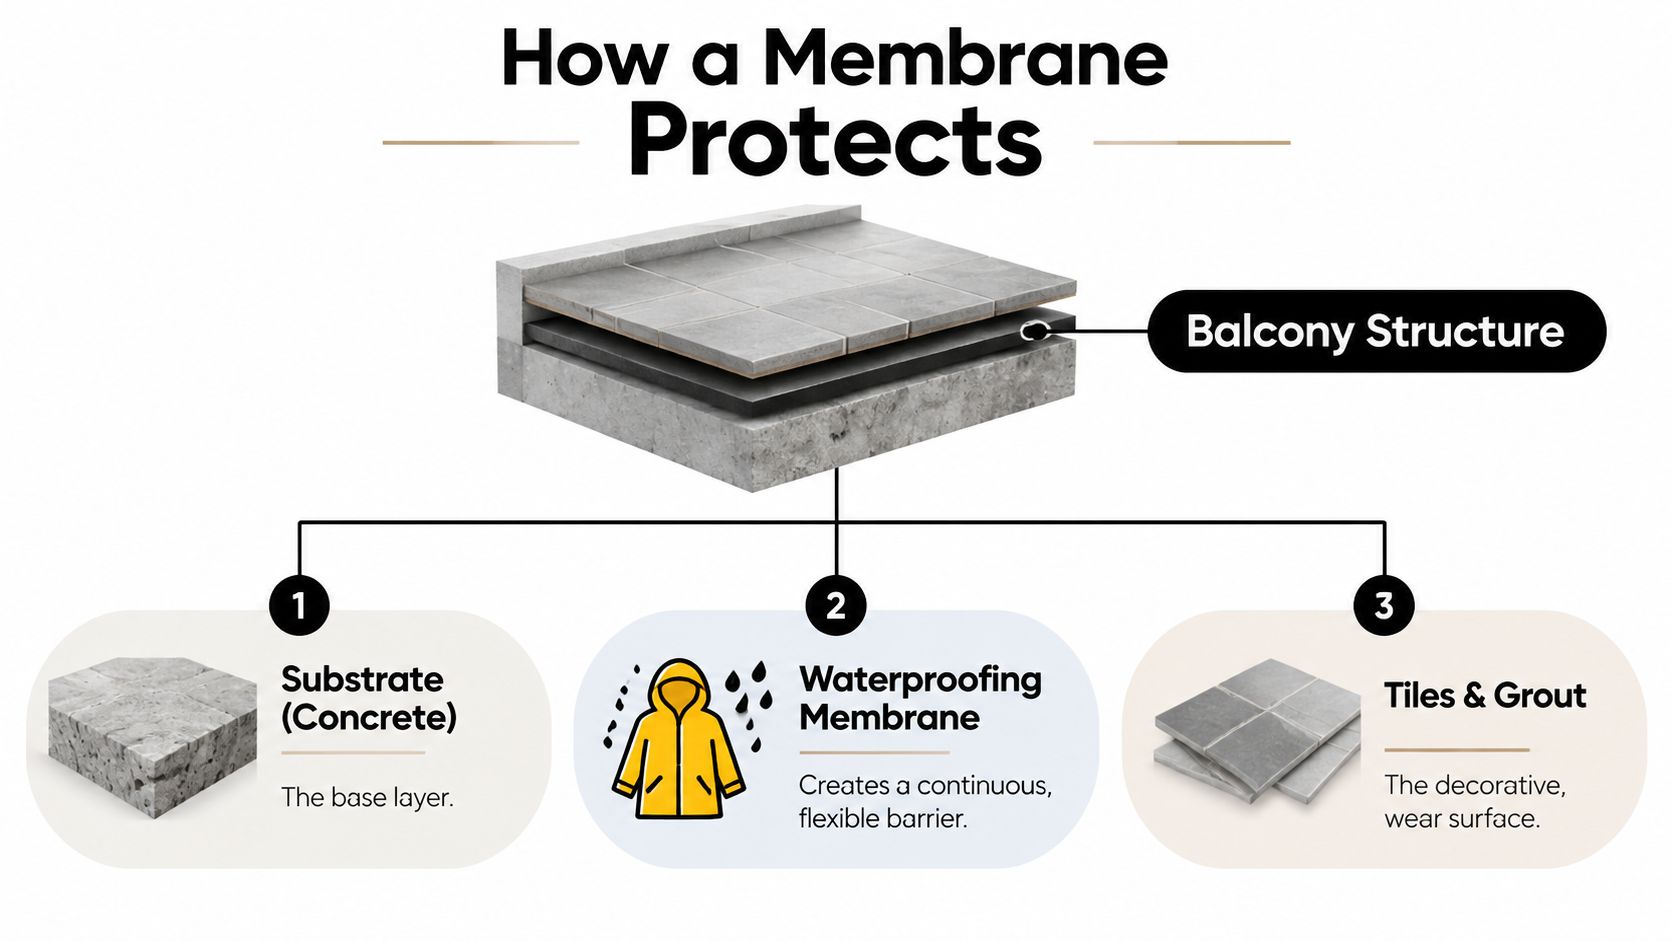
A membrane can only perform as well as the surface under it. If the base moves, sheds dust, holds contaminants, or uses a non-compliant sheet material, the membrane is already being asked to fail.

What has to be removed before waterproofing starts

In older Melbourne bathrooms, the first job is often discovering what the last renovation left behind. Vinyl adhesive residue, old paint, flaky levelling compounds, and water-damaged sheet flooring all interfere with bond. Surface contamination isn't a cosmetic issue. It stops primer and membrane from grabbing properly.

The bigger compliance issue is the substrate itself. The 2021 version of AS 3740 explicitly bans particle board and timber flooring substrates in wet areas, which is a major shift many DIY videos still miss, as outlined in this discussion of current Australian waterproofing requirements. If you're renovating an older home and uncover particleboard or timber sheeting in the wet area, the answer isn't to seal over it and hope for the best. It needs to be replaced with a compliant substrate.

That's the part many budgets don't allow for early enough. Homeowners price the visible renovation items, then get caught when the floor has to come up.

Preparation that actually matters

The preparation sequence is usually straightforward, but every part has to be done properly:

  • Remove weak material: Any loose topping, brittle patching, or swollen board has to go. Membrane over failure is still failure.
  • Mechanically prepare the surface: Grinding is often the right call because it removes contaminants and opens the surface for primer adhesion.
  • Vacuum thoroughly: Dust left behind acts like a release layer.
  • Prime to suit the substrate: Primer isn't optional. It controls suction and helps the membrane bond evenly.
  • Correct levels and falls before waterproofing: Membrane follows the shape beneath it. It won't fix bad drainage.

Where falls are wrong, the floor usually needs proper screeding before waterproofing starts. That's why screeding for tiles matters so much in wet areas. If water sits instead of moving to the waste, the room is already underperforming before the membrane goes down.

A quick site check can tell you whether the room is ready:

Check What you want to see What goes wrong if ignored
Substrate Compliant, stable, dry, solid Membrane loses bond or cracks
Surface condition Clean, ground, dust-free Primer and membrane don't adhere consistently
Junctions Sharp defects removed, transitions clean Weak points appear at corners and edges
Falls Water directed to the waste Ponding, staining, and ongoing wetting

A clean floor isn't the same as a prepared floor. Sweeping alone won't fix contaminants, movement, or a non-compliant base.

For a confident DIYer, this is the stage where honesty matters. If you don't know what the substrate is, don't proceed until you do.

Choosing Your Waterproofing System

Homeowners often ask which membrane is “best”. The better question is which system suits the room, the detailing, and the installer's skill.

A comparison chart outlining the pros and cons of liquid versus sheet membranes for bathroom waterproofing projects.

Where liquid membranes make sense

Liquid-applied systems are common in residential bathroom floor waterproofing because they handle awkward shapes well. Around puddle flanges, nib walls, pipe penetrations, recesses, and mixed junctions, a brush-and-roller system gives the installer flexibility.

They're also easier for homeowners to understand. You can see the coverage building. You can cut in edges with a brush and roll broad areas with a medium nap roller. For standard bathrooms and ensuites, that makes liquid membrane the system many people reach for first.

The catch is consistency. Liquid products only work when the installer respects drying times, reinforcement details, and final film build. A membrane that looks continuous can still be too thin.

Where sheet membranes earn their place

Sheet systems appeal to trades for a different reason. Thickness is more controlled from the outset. On flatter areas, especially where layouts are simple, sheet membranes can provide a very reliable barrier when they're installed correctly.
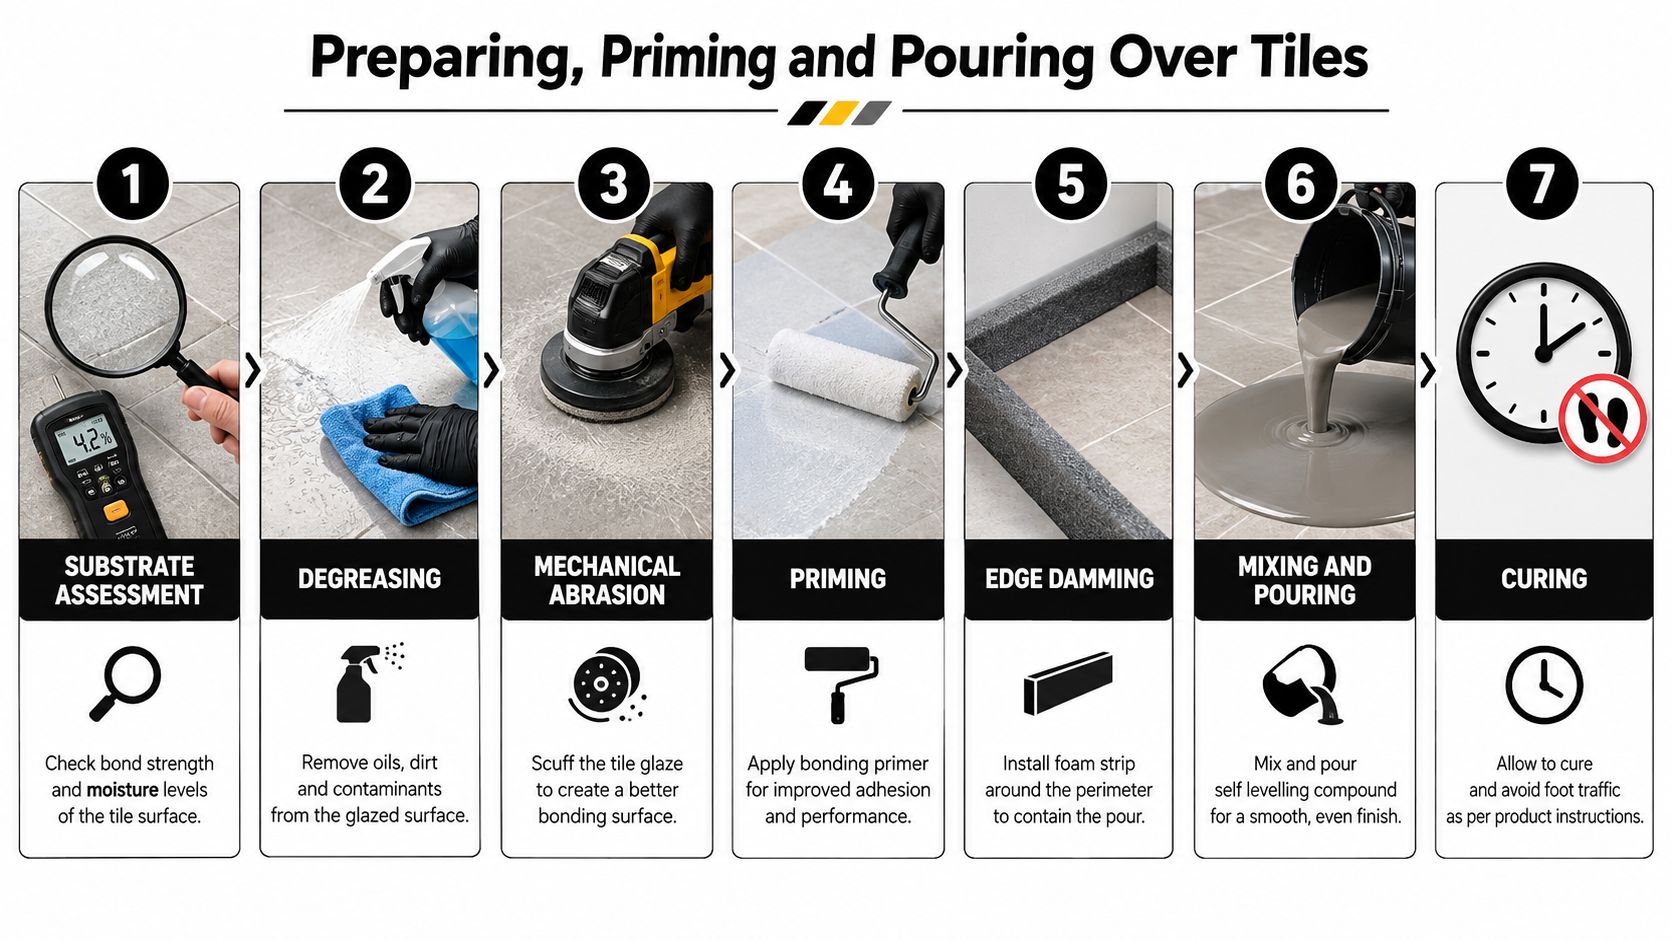
Their weakness is detailing. Seams, corners, upturns, drains, and penetrations demand accuracy. A poor overlap or sloppy bond at a corner can undo the advantage of factory thickness. That's why sheet products usually reward experience more than enthusiasm.

A simple comparison helps:

System Strength Weak point Best fit
Liquid membrane Seamless application over complex shapes Easy to apply too thin or inconsistently Typical residential bathrooms with detailed junctions
Sheet membrane Consistent material thickness Seams and detailing require high precision Simple layouts and experienced installers

A simple way to decide

If the bathroom has multiple corners, a recessed shower, several penetrations and a lot of fussy geometry, liquid systems are usually more forgiving in shape but less forgiving in workmanship. If the room is simpler and the installer is experienced with seaming and detailing, sheet systems can be excellent.

This is also where product system compatibility matters. Primer, bond breaker, reinforcing fabric, drain detail and top membrane should belong to one compliant approach, not a grab-bag of whatever was on the shelf. A clear explanation of different waterproofing systems helps homeowners ask better questions before work starts.

Pick the system your installer can execute cleanly, not the system that sounds best in a brochure.

A Practical Guide to Membrane Application

Good membrane application looks calm and methodical. The bad jobs usually look rushed. You see patchy coverage, missed edges, excess buildup in one area and barely any in another.

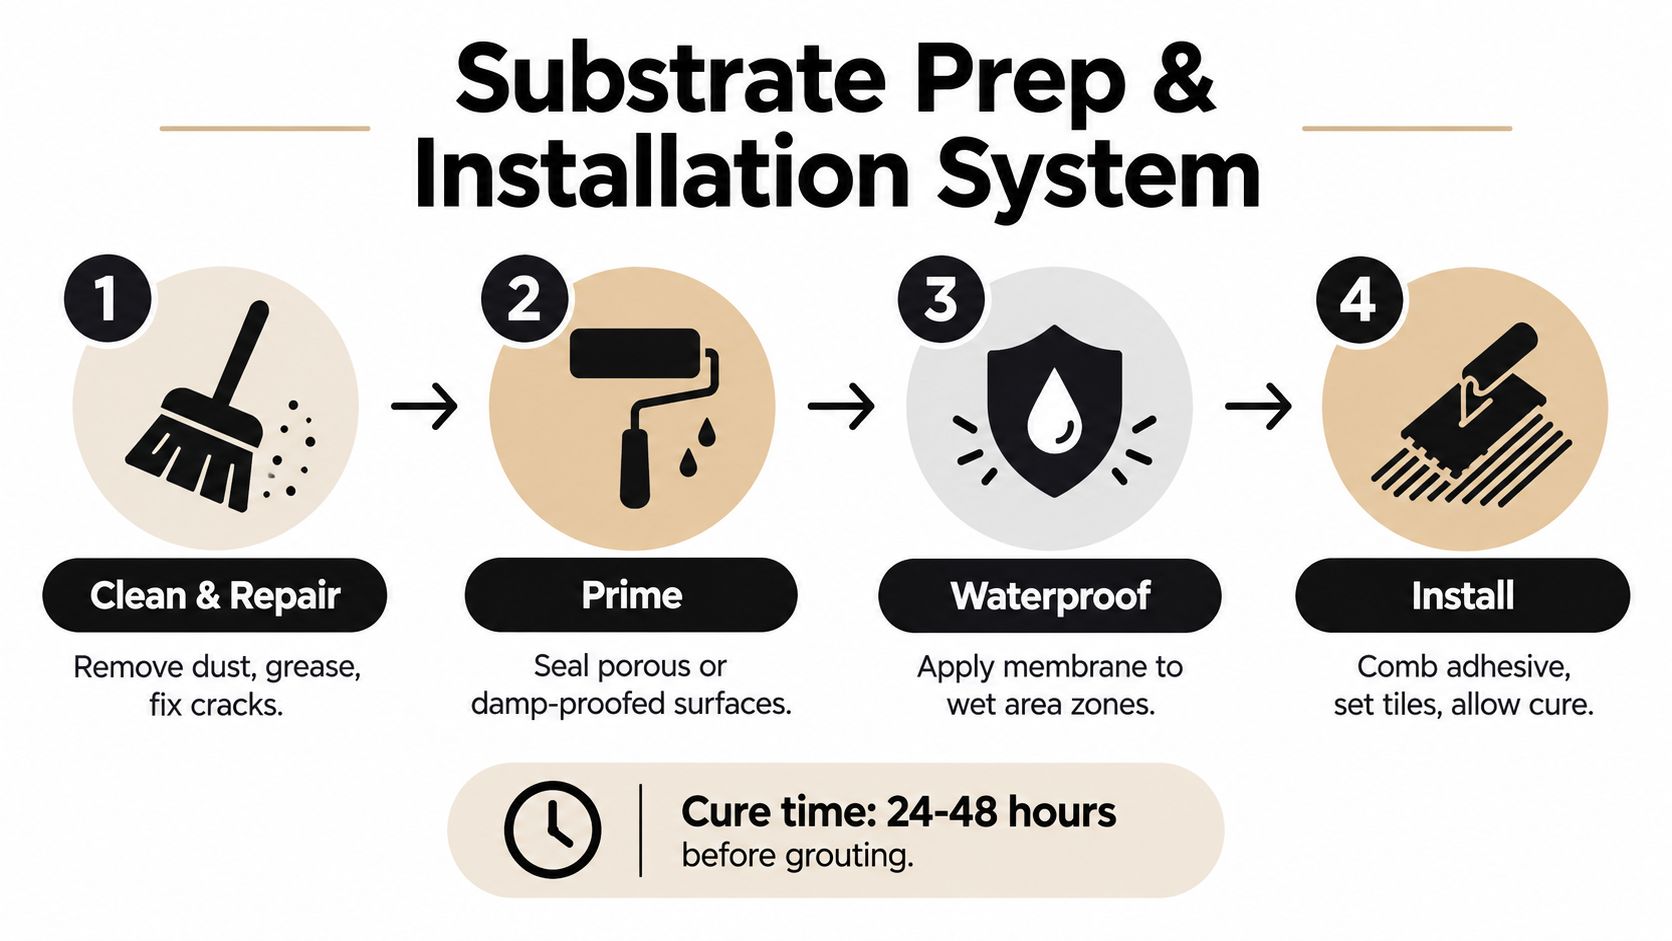
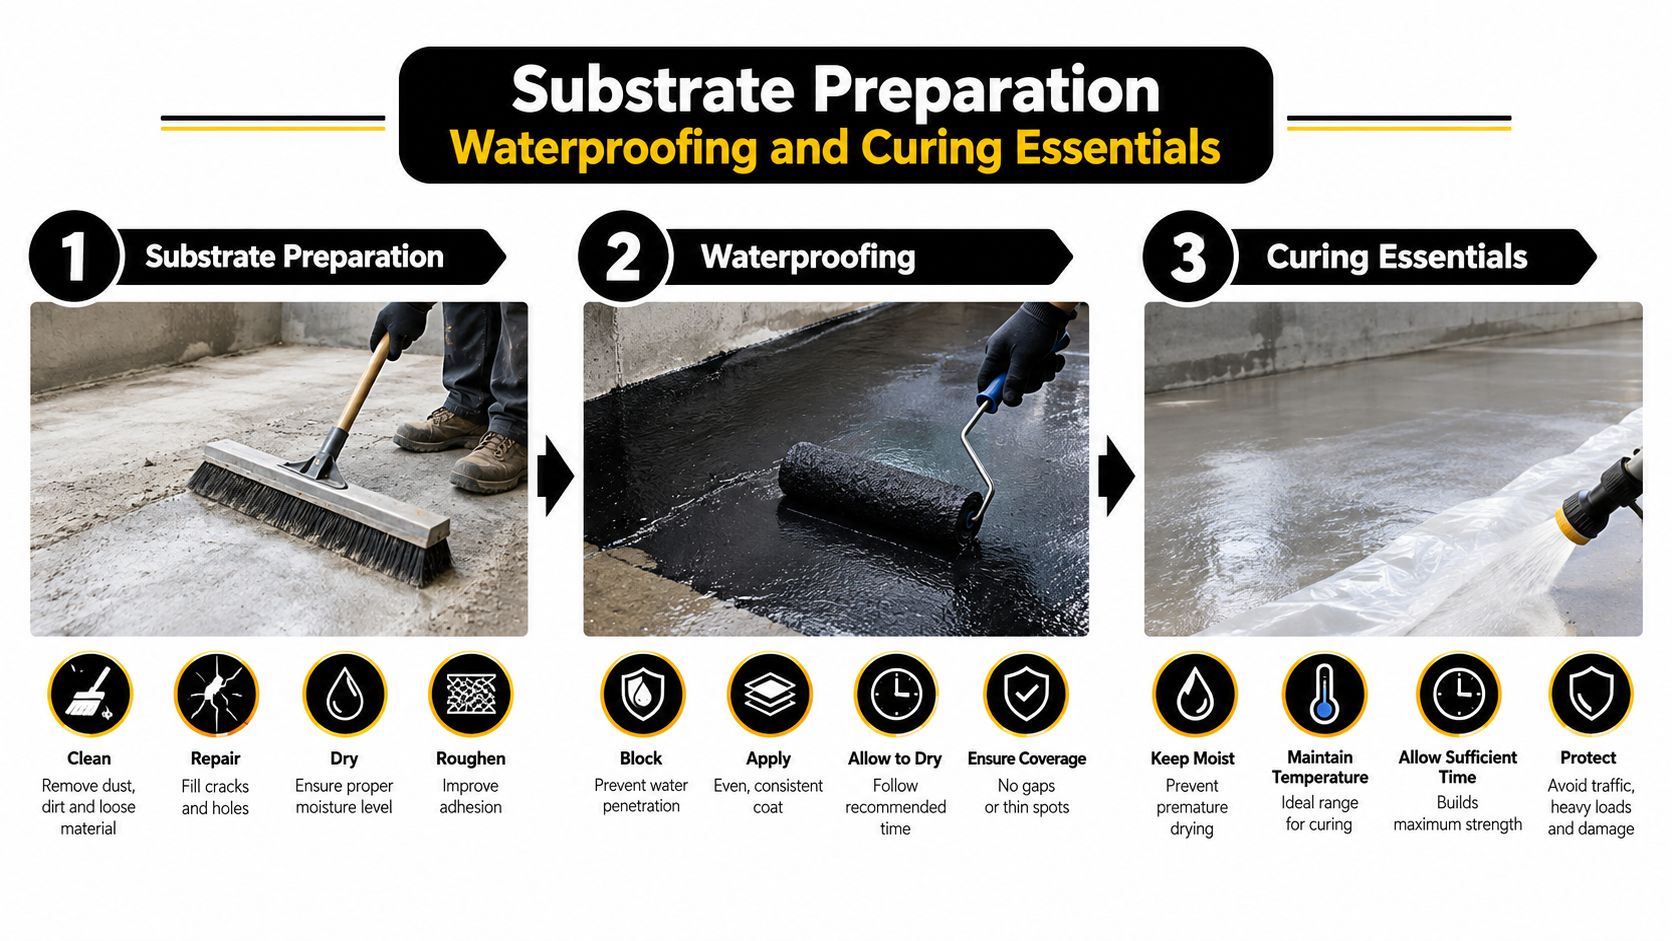
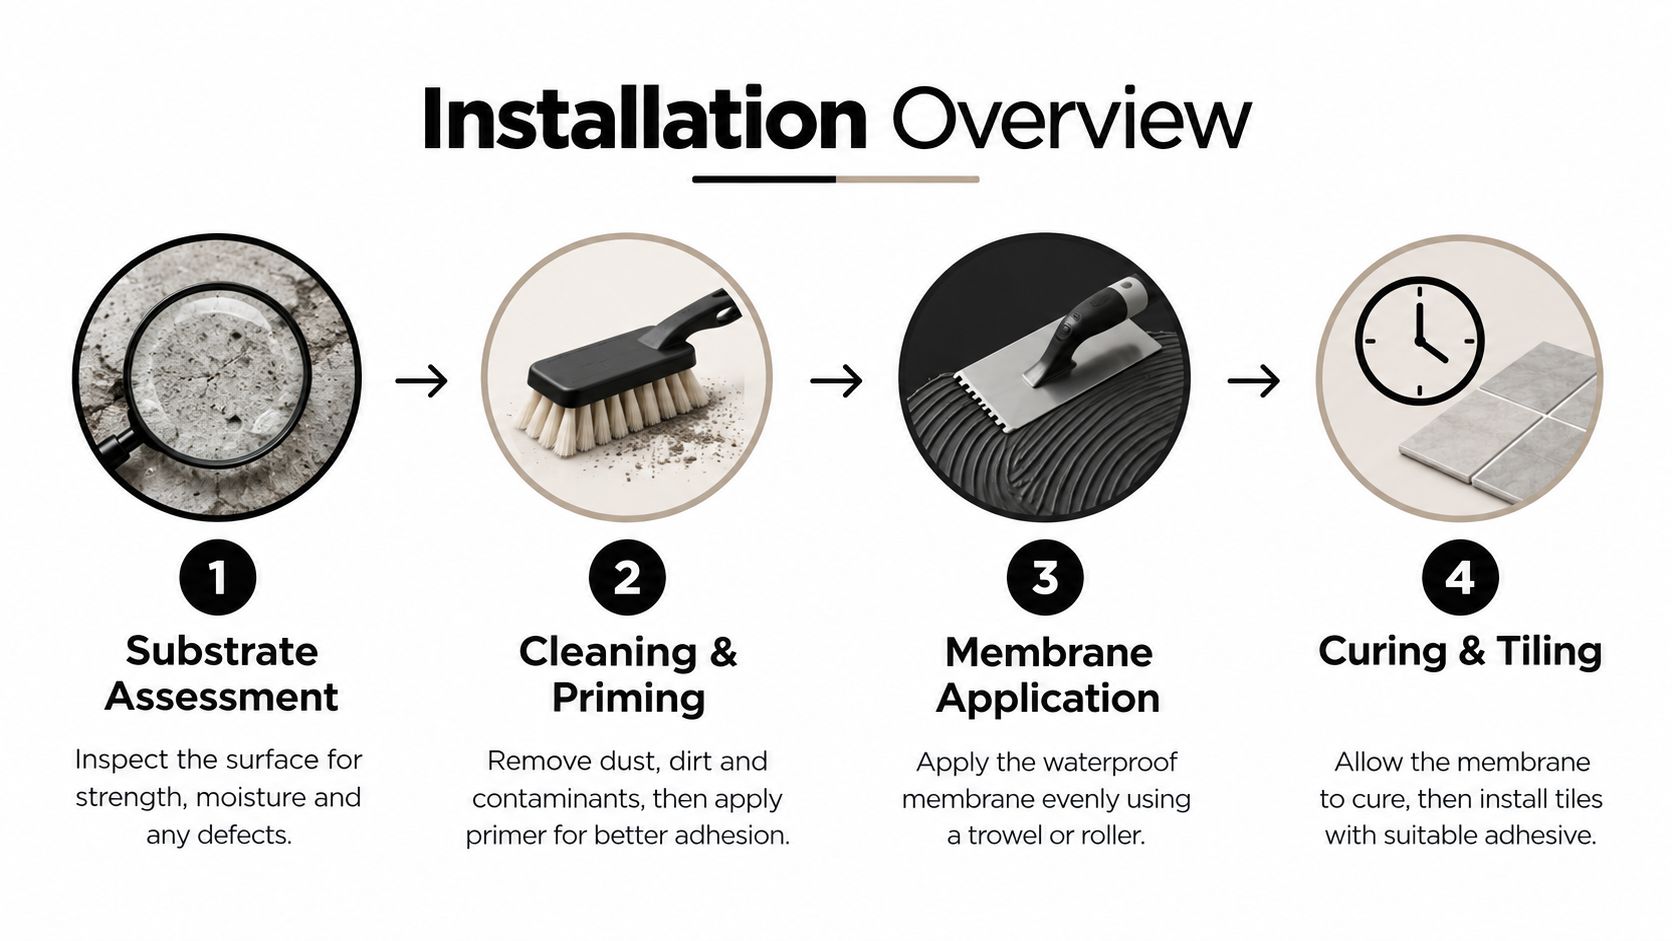
A visual workflow helps homeowners understand what should happen on site.

A step-by-step infographic showing the workflow for applying bathroom floor waterproofing membranes, from surface preparation to inspection.

Corners drains and penetrations first

Before broad membrane coats begin, the vulnerable points need detailing. Internal corners, wall-floor junctions, hob edges, around wastes, and pipe penetrations move more than open floor areas. That movement is exactly where failures start.

The correct method demands embedding reinforcing tape in high-risk junctions and applying a liquid membrane to achieve a minimum total dry thickness of 1mm after two coats, as detailed in this guide to Australian-standard bathroom waterproofing. If the tape is skipped, the membrane has to bridge movement on its own. That's where stress cracks tend to appear.

The drain detail deserves special attention. The puddle flange must be secure, correctly set, and integrated cleanly so the membrane terminates and bonds as part of a complete system. If water can track around the drain detail, the rest of the floor waterproofing won't save the job.

Pipe penetrations need the same care. A rough cut around plumbing with a dab of sealant isn't proper detailing. The membrane has to seal those penetrations as part of the system.

For homeowners who want to see the workflow in action, this video is a useful reference point.

Getting the coats right

Once the detailing is done and cured as required by the product system, the first full coat goes on. On floors, that usually means working from the perimeter back toward the exit so the installer doesn't trap themselves in a corner. Coverage needs to be even, with no pinholes, dry patches, or heavy ridges.

After the first coat cures properly, the second coat goes on to build the system to the required total thickness. Cross-rolling or changing direction between coats often helps produce more uniform coverage.

The common mistakes are predictable:

  • Rushing cure times: A second coat applied too early can drag or compromise the first.
  • Leaving thin edges: Perimeters and upturns are often where installers get stingy.
  • Treating corners like open floor: Junctions need reinforcement and deliberate buildup.
  • Guessing thickness: If the membrane doesn't reach the required dry film build, appearance won't save it.

The membrane has to be continuous, reinforced where movement occurs, and thick enough when dry. Looking glossy isn't a compliance test.

What a careful homeowner should inspect

You don't need to be a waterproofer to spot warning signs before tiling starts. Ask the installer to walk you through the finished membrane. Look for neat corner reinforcement, clean drain detailing, consistent upturns, and full coverage without missed areas.

A useful homeowner checklist looks like this:

  • Corners and junctions: Reinforcing tape should be visible beneath or within the membrane build where required.
  • Around drains: The membrane should terminate neatly into the drain detail, not stop short.
  • Pipe penetrations: Openings should be sealed and dressed properly, not left as rough cut-outs.
  • Coat consistency: The floor shouldn't show obvious roller holidays or translucent weak spots.

If the installer gets defensive about reasonable inspection before tiles go down, that's not a good sign.

Meeting Australian Standards and Avoiding Costly Mistakes

Compliance in wet areas isn't a style preference. It's a set of hard rules that control where water can go and how quickly it must drain away.

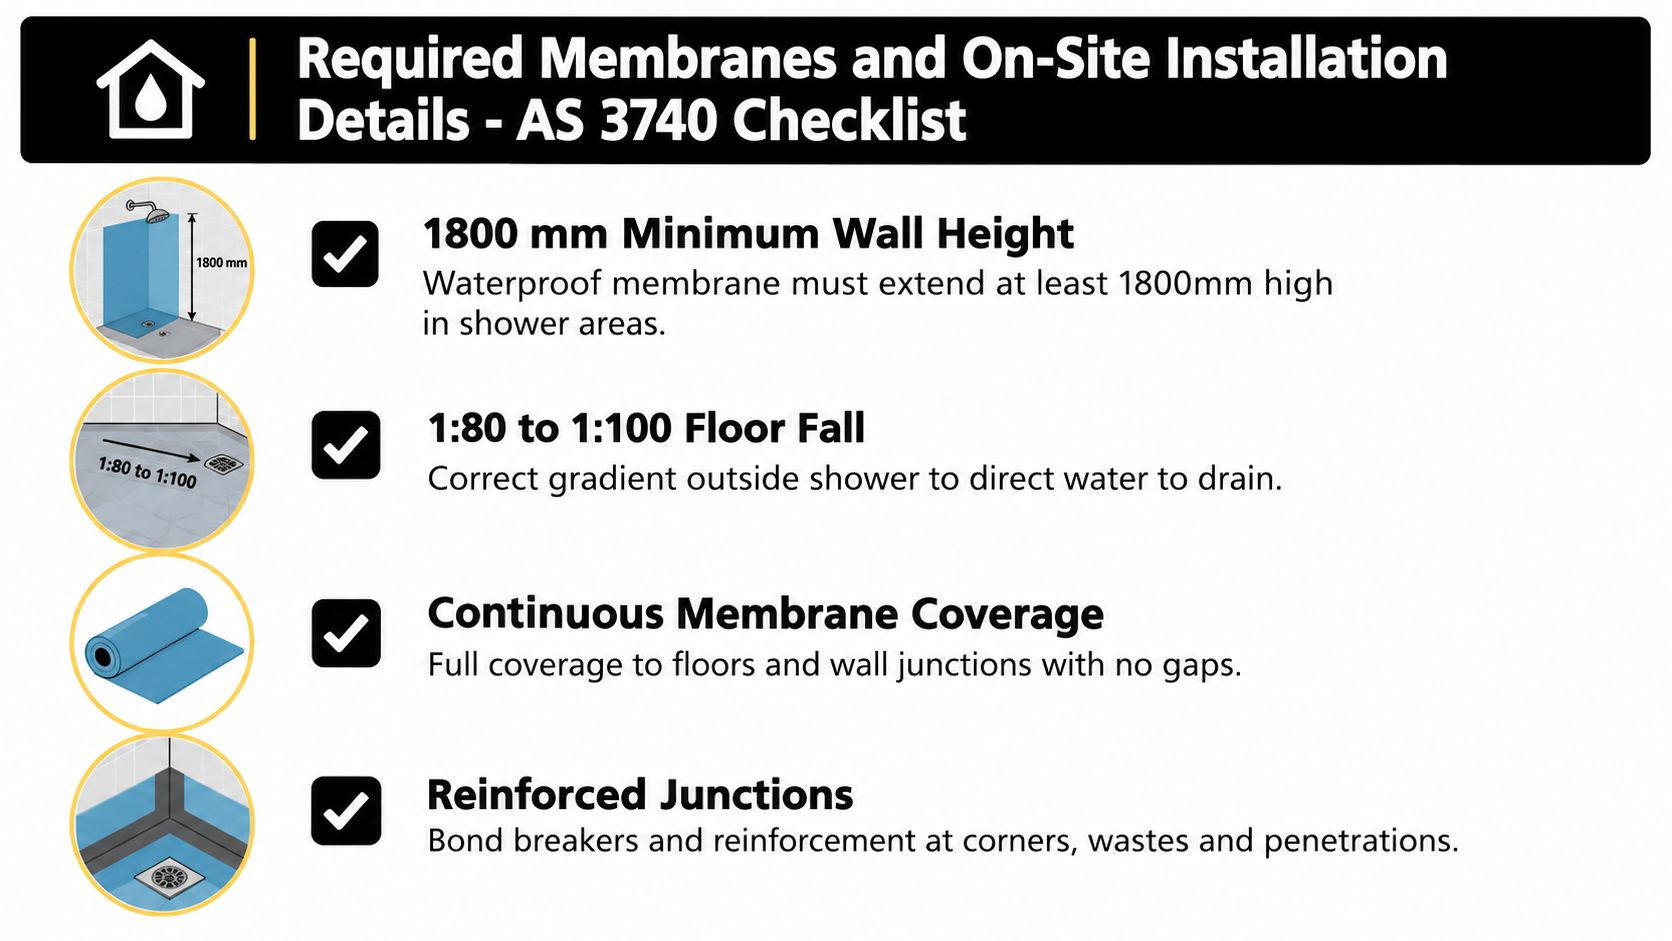
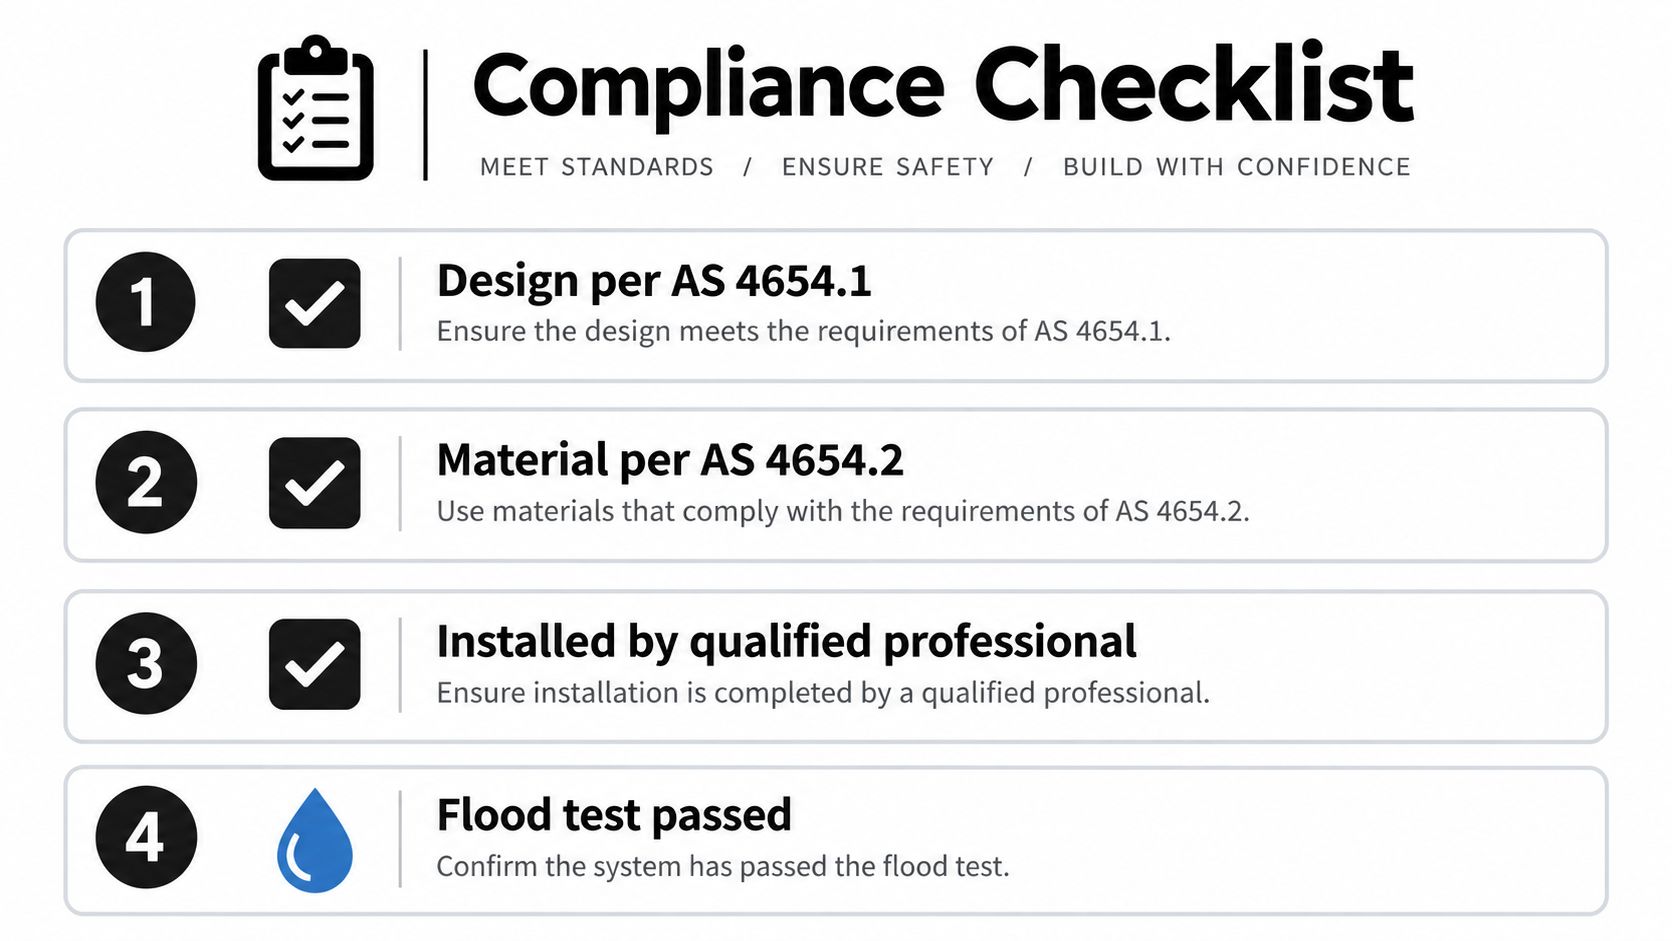
A checklist for bathroom waterproofing standards based on AS 3740-2010 regulations, including installation and product compliance requirements.

The compliance points that catch people out

Under AS 3740-2010, shower walls must be waterproofed to a minimum of 1800 mm, the entire shower floor must be treated, and bathrooms on a second storey require the entire floor to be waterproofed, as explained in this Australian bathroom waterproofing guide. That same guidance also sets the required floor falls. Wet area floors need a minimum fall of 1:60 to the waste, and shower recess floors need 1:40 in the immediate drain vicinity.

Those aren't rough targets. They're compliance points.

The mistakes I see homeowners misunderstand most often are these:

  • Wall height confusion: People assume a short upturn is enough because the tile runs higher anyway. It isn't.
  • Falls left to the tiler: Falls are a substrate and set-out issue, not something to hope adhesive can fix.
  • Frameless shower underestimation: Open and frameless layouts allow more splash migration, so the treated area becomes more critical.
  • Hob and transition details missed: Water finds weak transitions fast.

Second-storey bathrooms need different thinking

Many DIY guides oversimplify the rules. People hear that only the shower recess floor needs waterproofing in some situations and assume that applies universally. It doesn't.

On a second storey, the risk sits below the room as much as inside it. Water that escapes the shower zone doesn't just mark a skirting board. It can affect ceilings, insulation, framing, and rooms underneath. For apartments, townhouses and upper-floor ensuites, that risk is multiplied by neighbours, strata issues and harder access for rectification.

Best practice often goes beyond the bare minimum, especially where damage can travel into adjacent rooms or levels below.

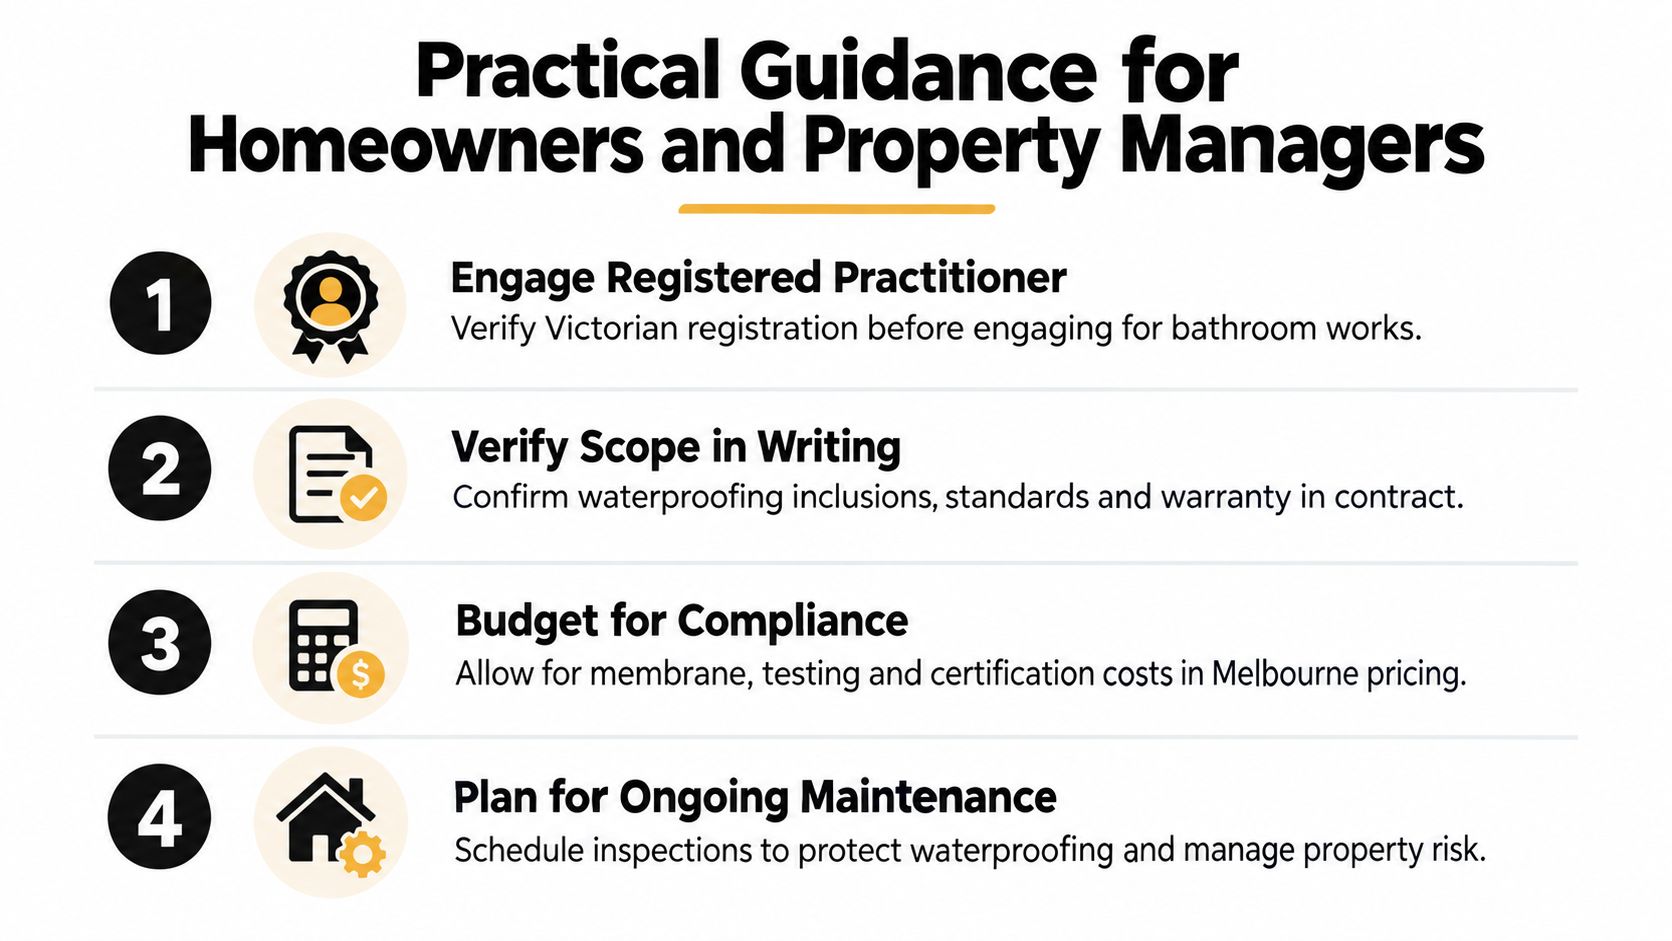
If your renovation sits above another habitable space, treat floor waterproofing decisions with that reality in mind. A legal minimum approach and a low-risk approach aren't always the same thing. For certificate and handover questions in Victoria, it's worth understanding the role of a waterproofing compliance certificate in Victoria before the job begins, not after a leak appears.

Check before tiles go down

The best time to find a problem is before adhesive covers the membrane. Once tiling starts, inspection becomes far more limited.

A practical pre-tiling review should include:

Item What to confirm
Coverage Required areas are fully waterproofed
Height Wall waterproofing reaches compliant heights where required
Falls Water is directed toward the waste, not into corners or doorways
Junctions Corners, penetrations and transitions are properly detailed
Drain detail Waste connection is integrated and watertight

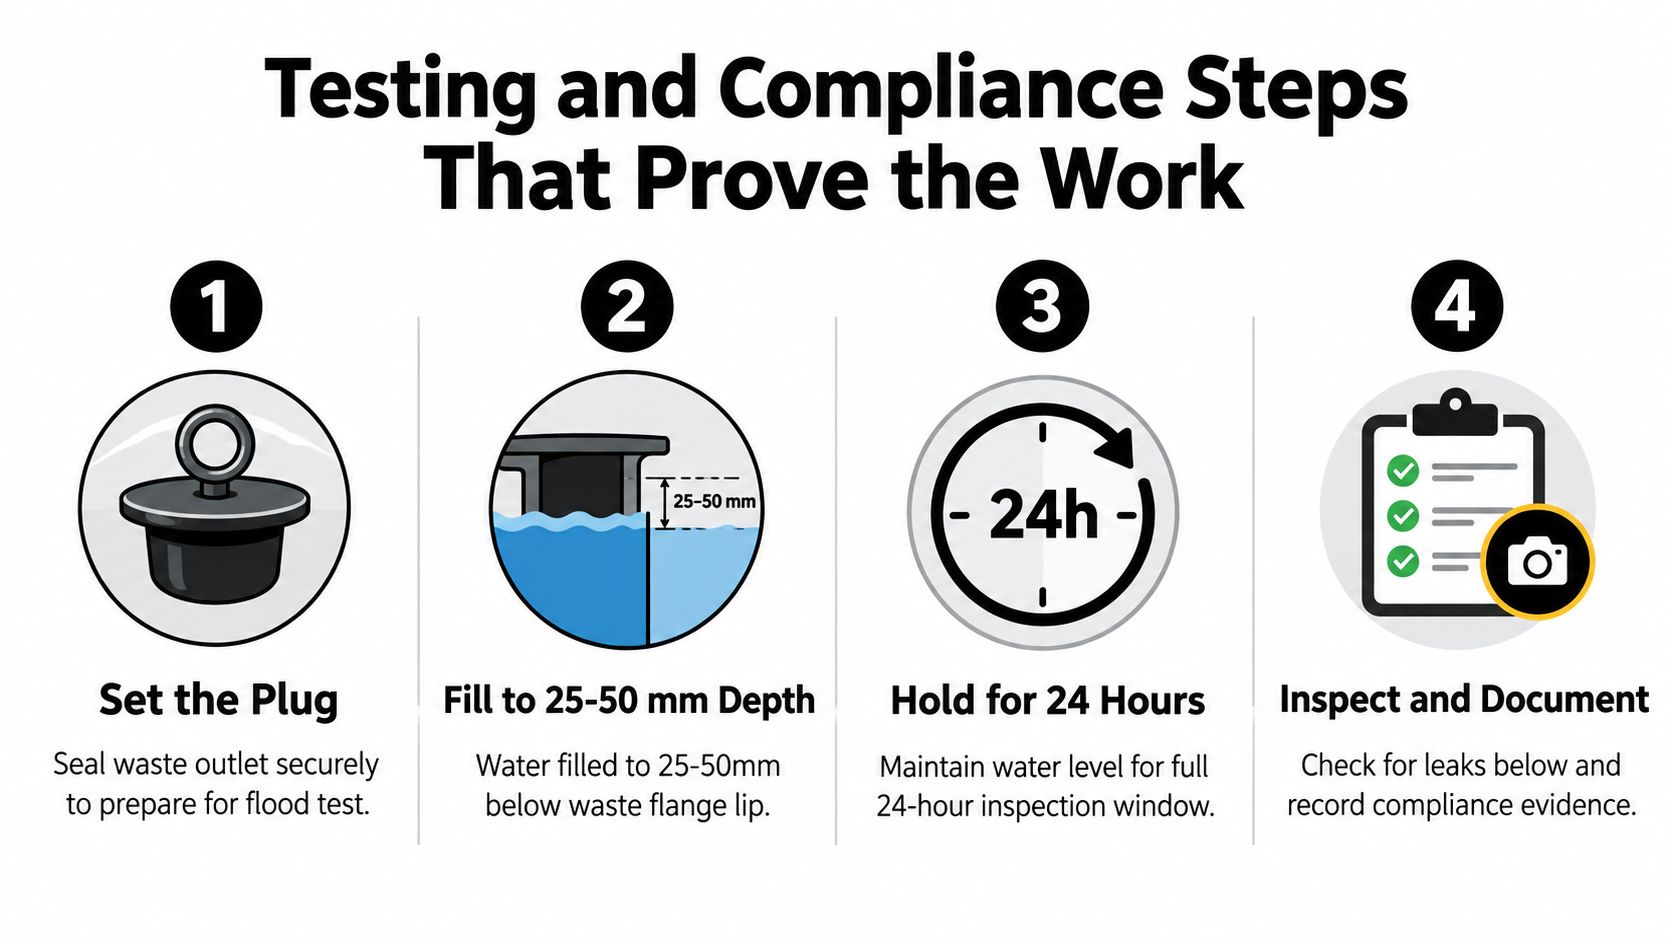
Where appropriate, a flood test before tiling can reveal issues while the system is still exposed and fixable. That test only has value if the room has been detailed properly and the waste is set up correctly for testing.

When to Call a Registered Builder for Your Renovation

A common Melbourne renovation story goes like this. The bathroom looks fine after handover, then six or twelve months later paint starts lifting on the ceiling below, or water shows up at a doorway, skirting, or adjoining room. By then the tiles, screen, vanity and finishes are in, and finding the fault means pulling a finished bathroom apart.

That is usually the point where homeowner oversight has ended and licensed responsibility should have started.

Where confident DIY ends

A capable homeowner can do a lot well. Demolition, product selection, checking the scope, and asking the right questions all help. Some can also manage minor preparation. The handover point comes earlier than many expect once the job involves a wet area floor, structural repair, substrate replacement, drain set-out, or any bathroom above another storey.

The two points I see missed most often in Melbourne are not about brushing on membrane. They are about whether the substrate is suitable and lawful under AS 3740:2021, and whether an upstairs bathroom has been detailed for the higher consequence of failure. Many DIY guides skip both. They jump straight to products and application, which is the easy part to film and the hard part to verify once covered.

A second-storey bathroom is where I stop treating waterproofing as a simple trade task and start treating it as renovation risk management. If water gets through on the ground floor, you may be replacing skirtings and a section of wall. If it gets through upstairs, you can be dealing with ceilings, insulation, framing moisture, electrical fittings, and damage to rooms below. In apartments, add neighbours and strata.

Screenshot from https://melbournetilingservices.com.au

What registered builders bring to bathroom renovations

A registered builder coordinates the parts of the job that tend to fail at the joins between trades. That is its core value.

The carpenter or installer sets the substrate. The plumber fixes the waste location and penetrations. The waterproofer relies on both being right. The tiler then covers the evidence. If no one is checking those interfaces, defects can pass through the whole job unnoticed until the room is in use.

In practice, a good builder improves the job in a few specific ways:

  • Substrate control: checks that the sheeting, movement, framing condition and floor build-up are suitable before waterproofing starts
  • Set-out and falls: makes sure waste positions and heights allow proper falls without creating birdbaths, sharp lips or ponding at the doorway
  • Trade sequencing: stops waterproofing being rushed to suit another booking and stops tiling over work that has not been inspected
  • Scope clarity: makes one party responsible for the junctions between plumbing, carpentry, screeding, waterproofing and tiling
  • Records: keeps the paperwork and product information needed if there is a dispute, sale, defect claim or insurance question later

One clear supervisor saves a lot of arguments.

Why the certificate matters

For homeowners, the paperwork often feels secondary until there is a leak. It is not secondary. It is part of proving who did the work, what system was used, and whether the wet area was completed by the right party.

An official installation certificate or compliance record is not something a homeowner can issue to themselves after watching a few videos and buying membrane from a trade counter. If the job needs documented compliance, insurance support, or a clear chain of responsibility, use a qualified waterproofer and have the renovation managed properly from the start.

That matters most in four situations. Upstairs bathrooms. Apartments and multi-residential buildings. Older Melbourne homes where floors and walls are rarely as straight or sound as they first appear. Full renovations where several trades affect the wet area before it is closed up.

If your project sits in one of those categories, bring in a registered builder early and get the substrate, set-out and sequencing resolved before waterproofing day. That is the point where expensive failures are prevented.


If you're planning bathroom renovations and want the job handled by registered builders who understand waterproofing, screeding, tiling and compliance from start to finish, speak with Melbourne Tiling Services P/L. They work across Melbourne and greater Victoria, coordinating the right trades for durable, fully finished wet areas that don't just look good on completion, but hold up properly over time.

Tiles Installation Services: Your 2026 Melbourne Guide

You're probably looking at a bathroom that no longer matches the rest of the house. The tiles look tired, the shower may be holding water where it shouldn't, and every quote seems to say something slightly different. One tiler talks about tile supply only. Another mentions waterproofing but not who's responsible for the carpentry, plumbing or final compliance. That's where many bathroom renovations start to go off track.

A tiled bathroom isn't just a tile job. It's a building job with tile as the visible finish. If the substrate is out, the falls are wrong, or the waterproofing sequence is poorly coordinated, the surface can look excellent on handover day and still fail years too early. Homeowners usually notice the symptoms first. Hollow tiles, cracked grout, water sitting near the waste, swollen skirtings outside the shower, or movement around large-format panels.

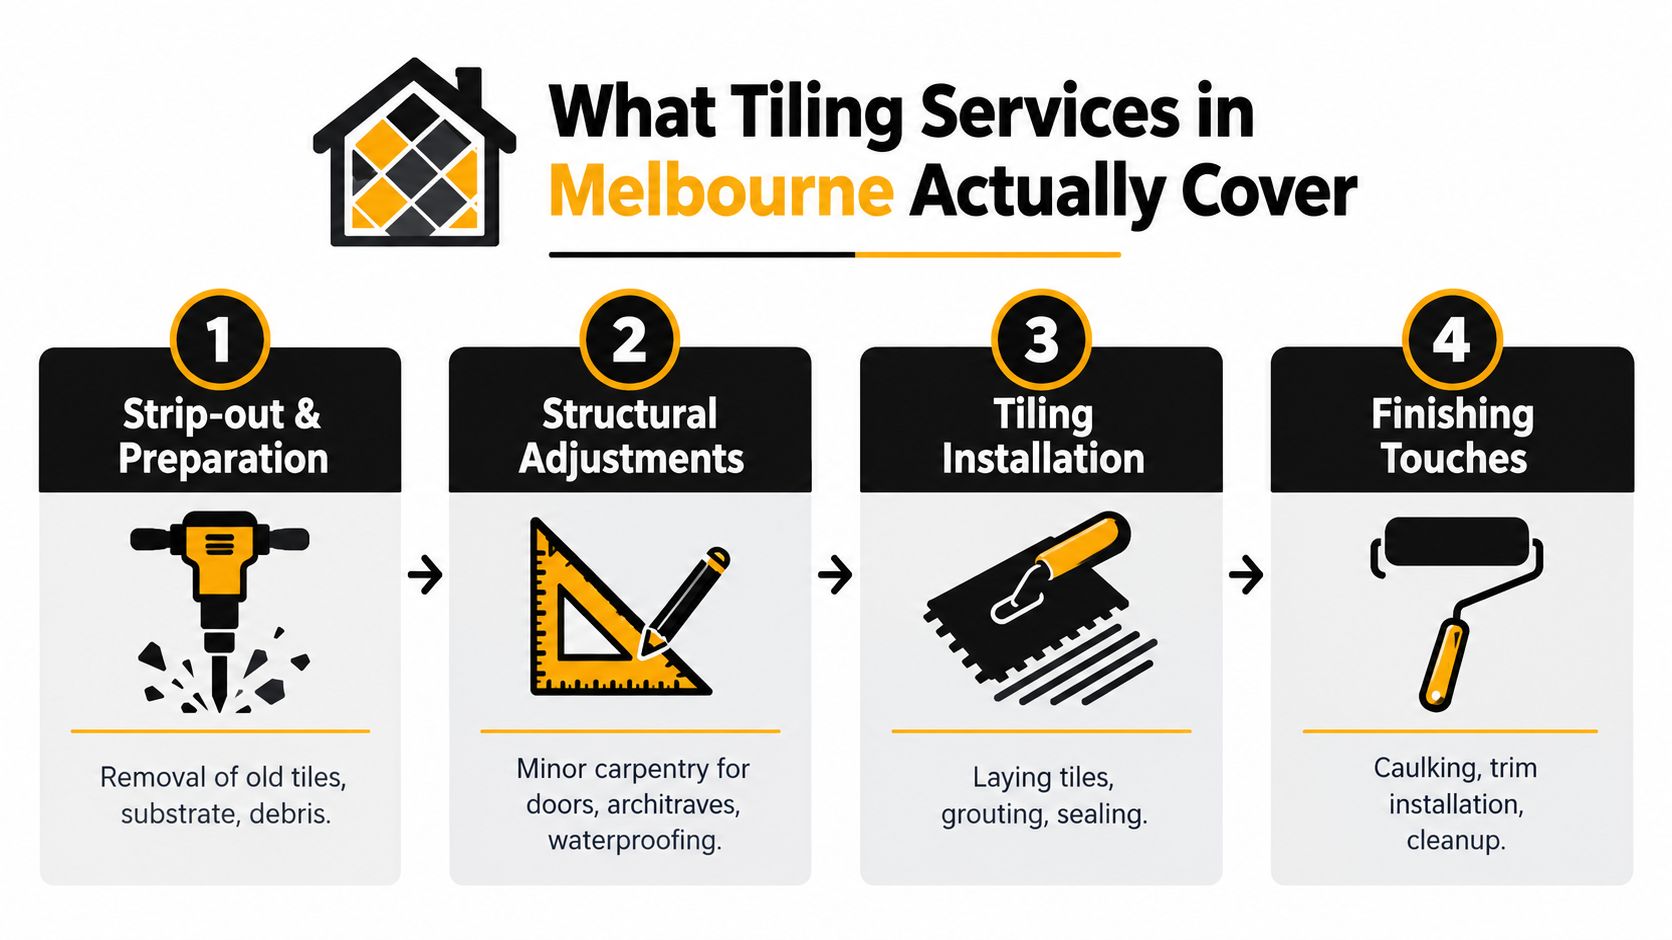
That's why a registered builder matters in bathroom renovations. A builder-led process looks at demolition, framing, sheet preparation, waterproofing, screeding, tile selection, slip resistance, drainage, shower screen set-out and trade sequencing as one system. In Melbourne homes, especially where older substrates meet modern large-format finishes, that joined-up approach is what separates a cosmetic refresh from a bathroom that stays sound.

Table of Contents

Your Melbourne Bathroom Renovation Starts Here

A smart bathroom renovation usually begins with one simple question. Are you buying tiles, or are you buying a complete result?

In Melbourne, plenty of bathrooms sit on concrete slabs, older screeds, patched walls and substrates that have seen multiple repairs over time. On the surface, the room might look straightforward. Strip it, waterproof it, tile it, finish it. In practice, the job turns on what's hidden. A registered builder sees the risk points before demolition starts, not after the expensive tiles arrive on site.

That matters because bathroom renovations involve more than a neat tile line. The builder needs to coordinate licensed trades, check the condition of the existing structure, make sure the falls can be formed correctly, confirm the screen and niche set-out, and prevent one trade from compromising the work of another. If the plumbing rough-in sits proud, the screed thickness changes. If the wall sheeting is wrong for the selected tile, the final plane shifts. If no one checks door clearances and waste positions together, the room starts absorbing compromises.

Practical rule: The visible finish only performs as well as the preparation underneath it.

A builder-led process keeps those details connected. It also gives you one accountable party for sequencing and compliance instead of a string of separate subcontractors pointing at each other when something goes wrong. That's especially important with large-format porcelain, marble, mitred edges, recessed shelves and frameless shower screens, where tolerances tighten and minor errors become obvious.

For homeowners comparing tiles installation services, this is the difference between a quote that prices laying only and a renovation that's built to last. The first can look cheaper. The second is usually what prevents leaks, lippage, cracked grout and rework.

From Porcelain to Marble The Best Tile Materials

Choosing tile by colour alone is how people end up with a bathroom that photographs well and performs poorly. The right material depends on the room, the substrate, the maintenance you'll tolerate and the finish you expect years from now.

A collection of various tile samples including marble, ceramic, and textured stone squares displayed on a table.

Porcelain for hard-wearing wet areas

Porcelain is often the safest all-rounder for bathroom renovations. It's dense, durable, stable and available in finishes that mimic stone, concrete, terrazzo and timber without the same maintenance burden. For floors and shower areas, that mix of durability and design flexibility is hard to beat.

Slip performance matters as much as appearance. In Australia, AS 4586 slip resistance compliance is critical in wet areas. Residential shower tiles need a minimum P3 slip rating, while commercial wet areas require P4 to P5 according to this guide to Australian tile performance ratings. That same source notes that unsealed ceramic tiles with low water absorption of less than 0.5% maintained adhesion strength of more than 1.5 N/mm² after 720 hours of immersion, while more porous tiles with less than 3% absorption dropped below 0.8 N/mm², which increases the risk of delamination.

Ceramic when budget and wall use align

Ceramic still has a place, especially on bathroom walls where impact and foot traffic are lower. It's often easier to cut and can open up more cost-effective design options. But ceramic isn't a default answer for every zone. In wet areas, absorption, finish and intended use all need checking.

For many homeowners, ceramic works best when the wall tile does one job well. It delivers the look you want without pretending to be a heavy-duty floor tile. That's a sensible use of budget.
A useful starting point is to compare finishes, body types and maintenance requirements before buying. This overview of tiling materials gives a practical sense of where different products fit.
Marble and natural stone for premium spaces

Marble changes the feel of a room in a way printed tile doesn't. It has depth, variation and a natural surface character that gives a bathroom weight and permanence. In the right room, it can be exceptional.
It also demands more from the installation and the owner. Stone selection needs tighter batching control. Veining direction matters. Sealing matters. So does the suitability of the substrate and adhesive system. If you want a low-maintenance family bathroom, porcelain that reproduces marble may be the better long-term call. If you want natural stone, build the project around its needs instead of treating it like a standard ceramic wall tile.

Marble rewards discipline. If the set-out, sealing and edge work are average, the material won't hide it.

Kerlite and other large-format panels

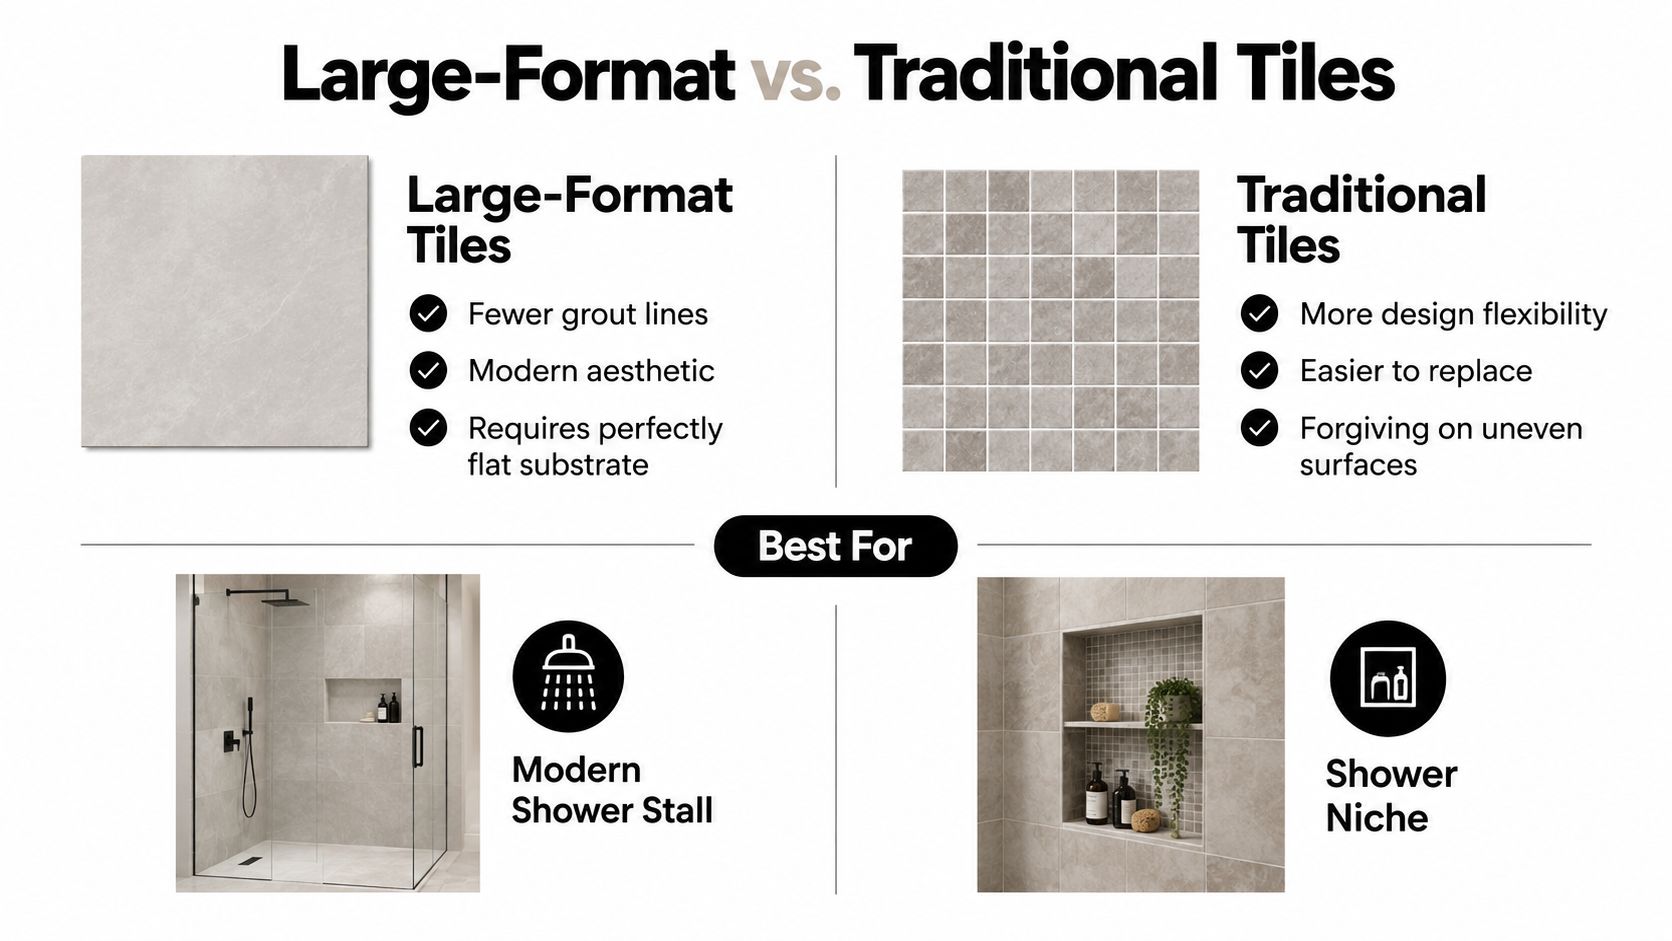
Large-format products such as Kerlite create a cleaner visual field with fewer grout joints. They suit contemporary bathrooms, open-plan floors and feature walls where you want scale and continuity. Used properly, they can make a compact room feel broader and calmer.

They also expose poor preparation immediately. Big panels don't bend to forgive an uneven substrate. They bridge over high spots, rock on low spots and show lippage under natural light. That's why tiles installation services for large-format work should be judged less by the tile catalogue and more by the installer's preparation standard.

A good tile choice doesn't just suit the room on day one. It suits the way the room will be used, cleaned and maintained for years.

The Anatomy of a Flawless Tiling Installation

A bathroom gets stripped, new tiles go in, and six months later water sits in a corner of the shower, grout starts shading dark, and one large-format floor tile sounds hollow underfoot. The tile did not fail on its own. The build sequence failed underneath it.

A first-rate tiling job is a controlled system of demolition, substrate correction, waterproofing, set-out, fixing, movement treatment and curing. Registered builders approach tiles installation services differently from lay-only installers because they manage the whole assembly, not just the visible surface.

A six-step infographic illustrating the professional process of a flawless ceramic floor tile installation.

The work that happens before the first tile

Demolition tells the truth. Once the old finishes are out, the actual work appears. Slab levels, wall plumb, waste position, framing movement, sheeting quality, previous patch repairs and water damage all become visible. That is the point where a builder decides whether the planned tile size, joint width and waste detail still suit the room.

Large-format tiles are unforgiving. If the floor is out, the tile will show it. If the wall bows, rectified edges will telegraph it. Sunlight across a bathroom floor exposes lippage that a quick quote never allowed for.

That is why substrate preparation carries so much weight.

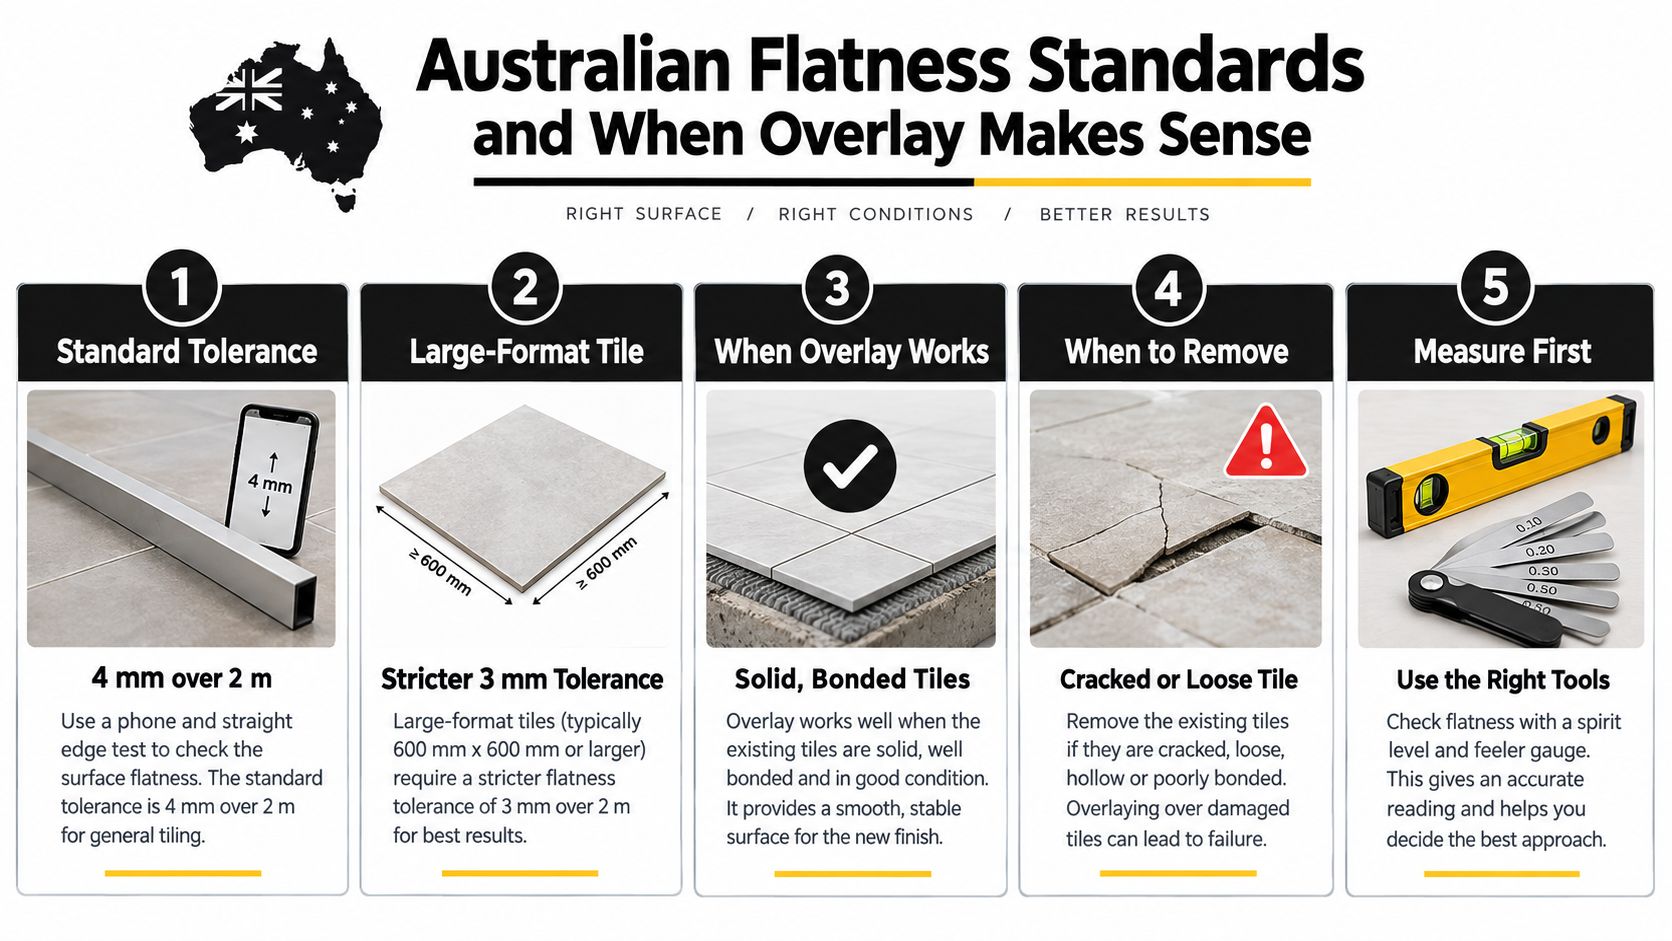
In practical terms, flatness usually means screeding, local patching, or self-levelling before a single tile is fixed. Proper screeding for tiles often makes the difference between a floor that looks crisp for decades and one that starts showing ponding, chipped edges and uneven joints as soon as the room is in regular use.

Setting out falls flatness and adhesion

Set-out is not just about centring a pattern. It decides where cuts finish, whether niches line through with grout joints, how the waste sits within the layout, and whether the room looks resolved instead of improvised. Good tilers mark this before mixing adhesive, because once fixing starts, small layout mistakes become permanent.

In wet areas, geometry matters as much as appearance. The shower base has to fall to the waste without low spots, reverse falls or awkward cut triangles that trap water. Wall junctions, hob heights, recesses and doorway transitions all need to be worked out with the finished tile thickness in mind. If those dimensions are guessed during installation, the room usually pays for it in poor drainage, misaligned trims or a shower screen that never sits quite right.

A useful visual reference sits below.

For large-format work, the background has to be flat enough to support the tile properly and the adhesive bed has to achieve strong, consistent coverage, especially in wet areas. Those are installation controls, not finishing touches. Get them wrong and the common failures are predictable. Cracked corners, drummy tiles, edge lipping, water sitting where it should drain, and movement that breaks grout long before the bathroom should need repair.

The finishing stage that decides longevity

After fixing comes the part many homeowners see as cleanup. In trade terms, it is still construction. Grout selection, movement joints, silicone at changes of plane, edge finishing, final wash and cure protection all affect service life.

A sound finish usually includes:

  • Joint widths that suit the tile calibre, rectification and expected movement of the room
  • Silicone joints at internal corners and other changes of plane, instead of hard grout where movement will cause cracking
  • Edge details such as trims, mitres or stone profiles planned before installation so corners finish cleanly
  • Protection during curing so fresh grout, silicone and tile edges are not damaged by early trade traffic

If a contractor talks only about tile choice and not about substrate, falls, waterproofing and movement joints, they are pricing the easiest part of the job.

Bathrooms last longer when one party coordinates the plumber, waterproofer, tiler, shower screen installer and electrician. That builder-led process is what prevents the small technical misses that turn into leaks, cracked large-format tiles and expensive rectification later.

Budgeting Your Tiling Project Costs and Timelines

A bathroom quote can look reasonable on paper and still miss the work that keeps water inside the shower and large-format tiles from cracking six months later. I see that gap often. One price allows for substrate correction, proper set-out, movement joints, drying time and compliant wet-area sequencing. Another price allows for tiles on a surface that was never ready.

What drives the quote up or down

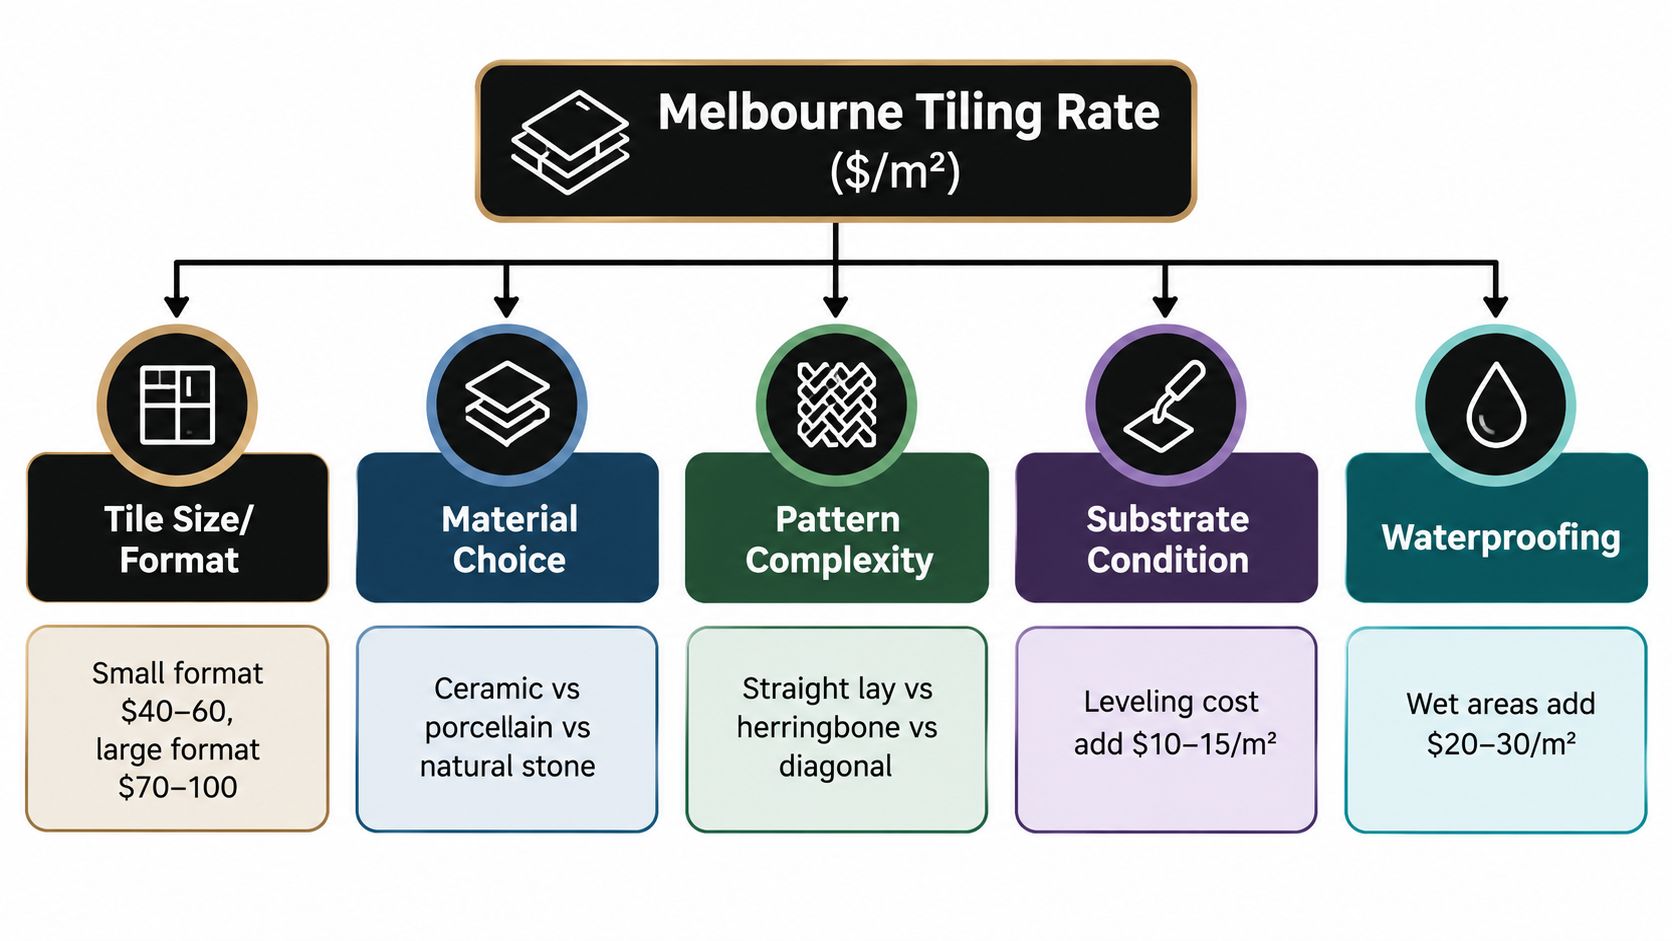
In Australia, the average market cost to install floor tiles ranges from $30 to $150 per m², with labour typically adding another $30 to $120 per m² depending on location and tile type. Complex installations, including custom layouts or large-format tiles, can push labour to $100 to $150 per m², according to Hipages floor tile installation pricing.

The cost range is broad because the scope of tile installation varies significantly. A straight lay on a sound, level floor is one type of job. A bathroom with demolition, membrane repairs, floor levelling, recessed niches, mitred corners, stone sealing, difficult access or corrected shower falls is a different scope entirely.

For bathroom tiling labour specifically, the average hiring rate in Australia is about $60 per m², with a standard market range of $35 to $120 per m², excluding the tile cost itself, based on Hipages bathroom renovation cost guidance.

Bathroom renovation budgets also need the full project context. According to 2023 Housing Industry Association data, the average cost of a full bathroom renovation in Australia is $26,000, with a typical range of $8,000 to $35,000, as summarised by Canstar's bathroom renovation cost article.

Cheap quotes usually leave out the hard parts.

A proper builder-led allowance should make room for surface preparation, moisture management, inspection points between trades, and the slower handling required for rectified and large-format tiles. Those items do not make a quote look exciting, but they are usually the difference between a bathroom that performs for decades and one that needs rectification after the warranty period.

Sample Tiling Costs in Melbourne per square metre

Tile Type Material Cost (per m²) Labour Cost (per m²) Best For
Basic ceramic $30 to $50 $30 to $120 Budget-conscious wall and floor applications where the specification suits the room
Porcelain $40 to $100 $30 to $120 Bathrooms, ensuites and general wet areas needing durability and design flexibility
Natural stone $50 to $150 $30 to $120 Premium bathrooms and feature areas where natural variation is part of the design
Large-format or custom layout installation Depends on tile selected $100 to $150 Projects requiring precision set-out, levelling and advanced installation methods

That same Hipages pricing data also notes that a medium-sized bathroom of about 17 m² can range from $1,020 to $4,590 for installation depending on materials and complexity.

How to think about timing

Timeframes are driven by sequence, not just labour hours. Demolition can expose rotten sheet flooring, out-of-plumb walls or previous waterproofing failures. Once that shows up, the programme changes because the room has to be rebuilt properly before tile goes down.

Wet-area work also has curing windows that should not be compressed. Screeds, waterproofing systems, adhesives, grout and silicone all need the right conditions and enough time. Push those stages too hard and the bathroom may finish faster, but the risk shifts straight into bond failure, trapped moisture, cracked joints and leaks.

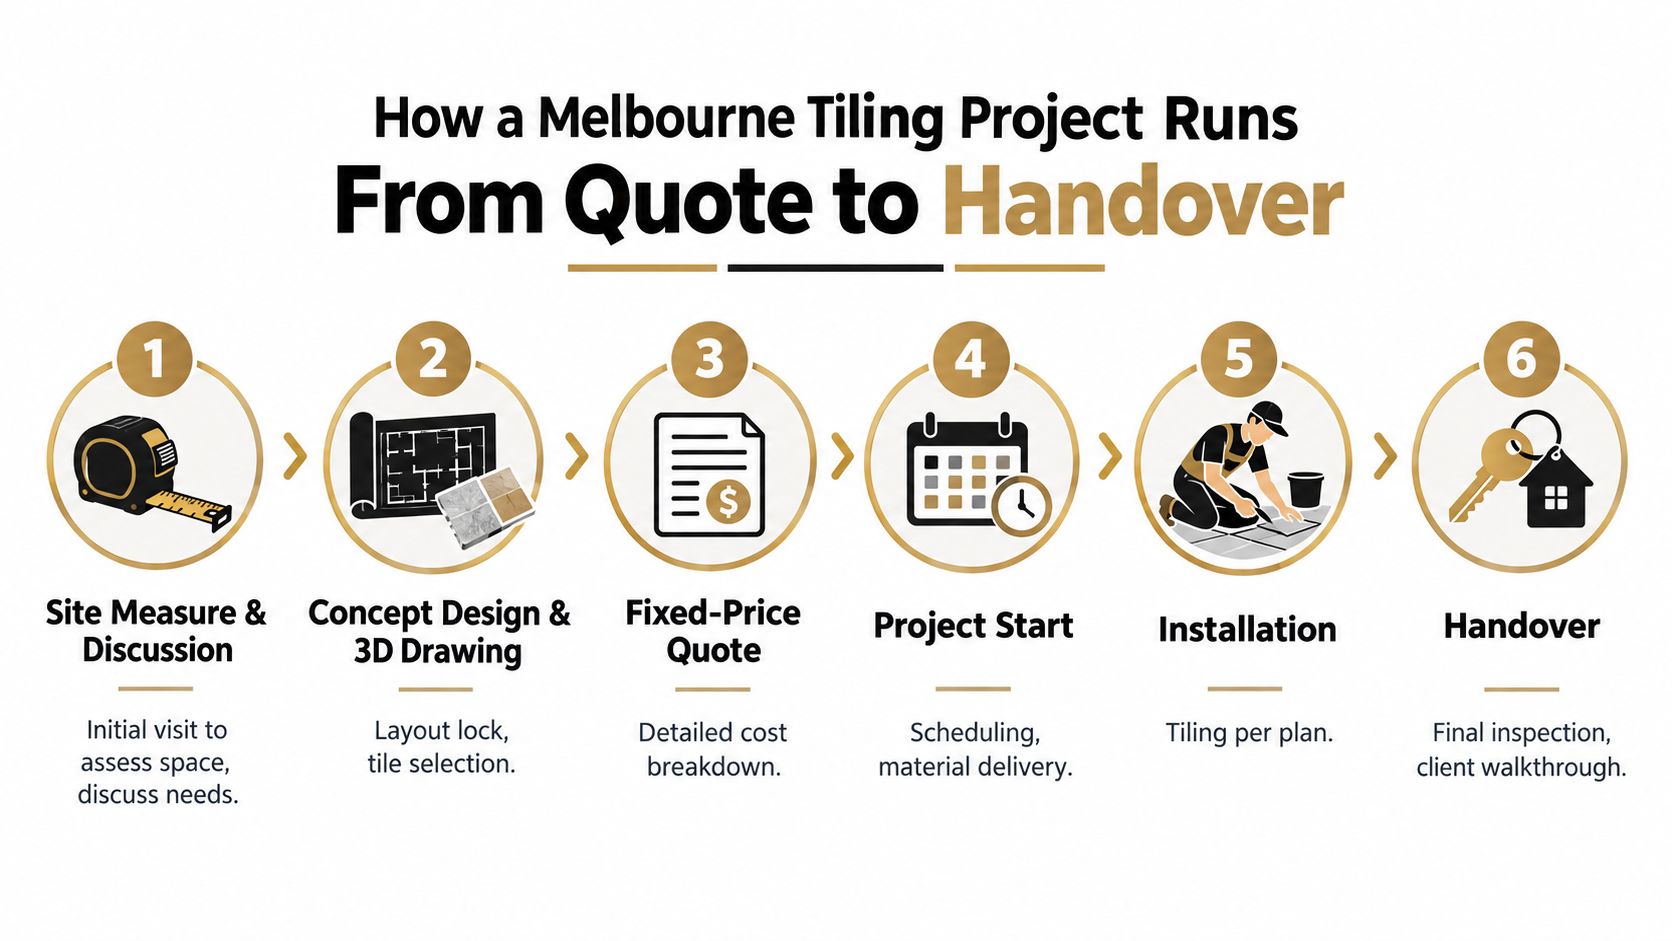
A realistic programme also allows for tile delivery, batch checking, set-out approval, and protection from follow-on trades. That is why registered builders tend to run bathroom projects more predictably. One party controls the sequence, signs off each stage, and makes sure the tiling work is built on compliant preparation instead of assumptions.

Why Tiles Fail Common Problems and Expert Solutions

Most tile failures aren't caused by the tile itself. They start below it or behind it.

Leaks usually start with geometry not appearance

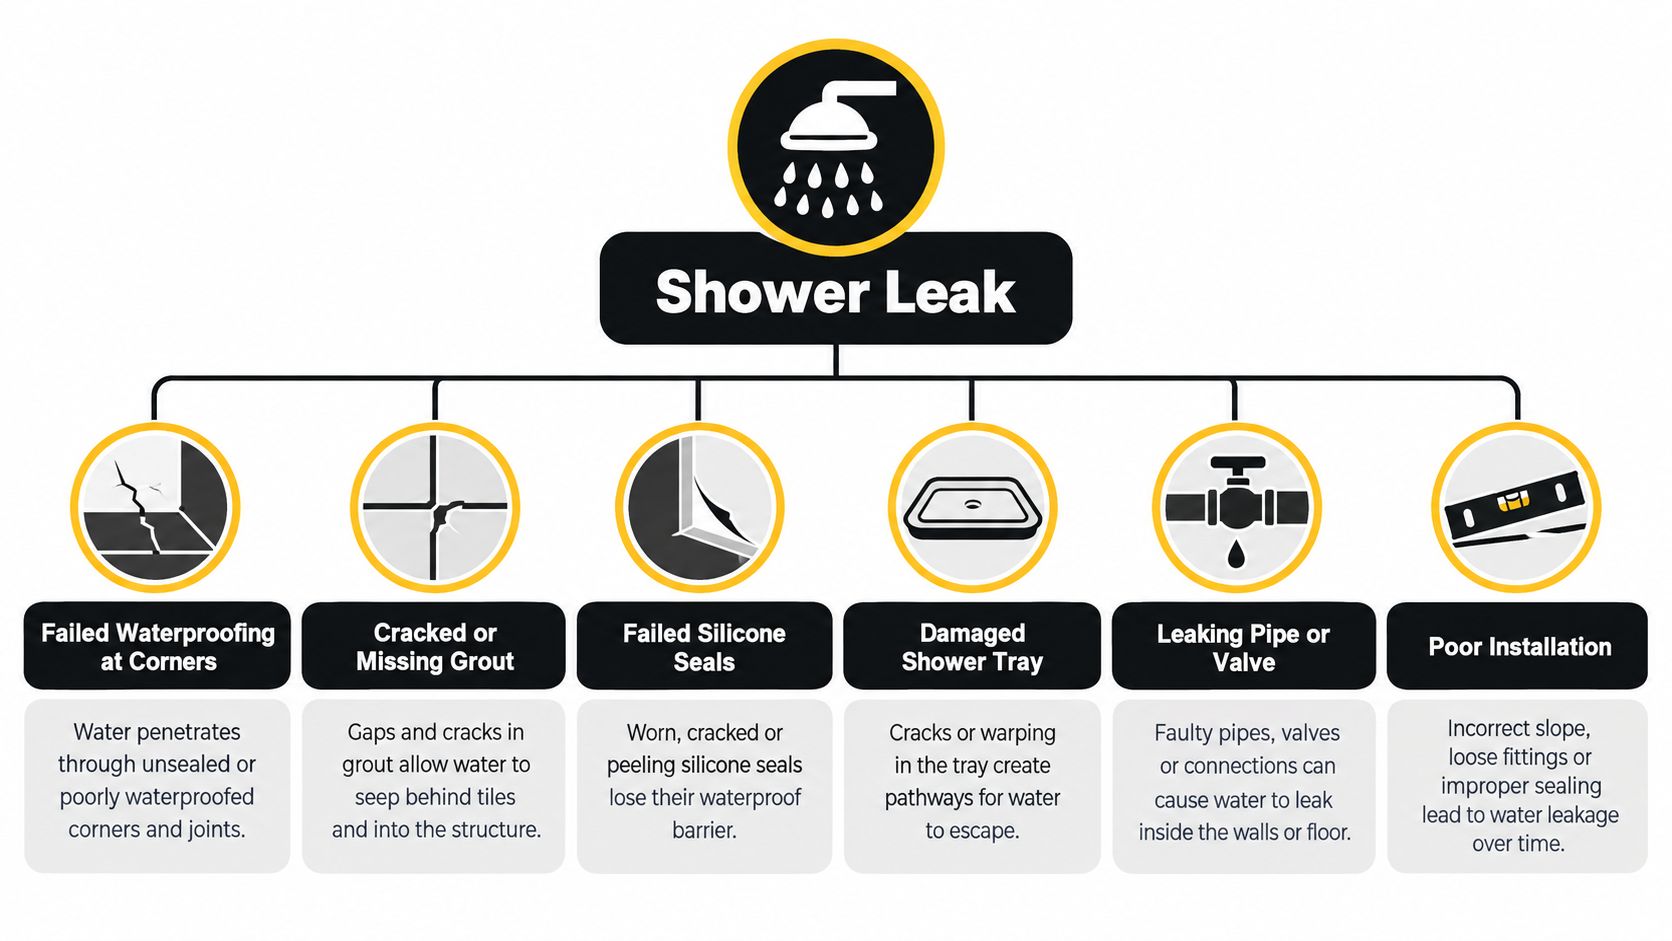
Homeowners often assume a leaking shower means the membrane failed. Sometimes it did. But many shower failures begin with incorrect falls and badly formed wet-area junctions.

A key issue in Australia is the slope and angle at the shower base. Data referenced in this wet-area tiling discussion states that 40% of shower leak failures stem from improper corner angles and insufficient slope at the wet-area base rather than membrane failure alone. The same source points to a minimum 1:60 slope at the shower base and 45° mitre angles at wall junctions as critical details for drainage and water control.

That explains why some showers leak despite looking neatly tiled. Water doesn't care how square the grout joints are. It follows gravity. If the base geometry is wrong, water pools, tracks, sits against junctions and eventually finds a path.

A shower can look immaculate and still be built to fail if the falls were guessed instead of formed.

The professional answer is to correct the substrate and falls before tiling. Not after. Rectification usually involves removing enough of the assembly to rebuild the drainage geometry properly, then reinstating the waterproofing and finish in the correct sequence.

Cracks and hollow spots are often installation failures

Cracked tiles, drummy sounds and edge lippage usually point to support and bonding issues. Large-format tile makes these problems more obvious because the pieces are heavier, flatter and less forgiving of uneven backgrounds.

If the floor or wall wasn't brought within tolerance before tiling, the adhesive bed has to compensate. That's where stress builds. High spots force the tile proud. Low spots reduce support. Voids remain under corners or centres. Over time, movement and load expose the weakness.

Typical root causes include:

  • Out-of-tolerance substrates that should have been screeded or levelled first.
  • Poor adhesive coverage behind large-format tiles, especially in wet areas.
  • Incorrect movement treatment where internal corners or transitions were hard grouted.
  • Bad sequencing where another trade damages the waterproofing or substrate before tiling starts.

The solution isn't cosmetic patching. It's diagnosis. A proper tiler or registered builder traces the defect back to its cause, then decides whether the area can be locally repaired or needs full replacement. That's the difference between a short-term fix and a durable repair.

Your Checklist for Hiring a Tiling Contractor

The contractor you choose decides more than the finish. They decide the process, the risk level and who's accountable when details collide on site.

An infographic checklist for hiring a professional tiling contractor featuring six essential steps for homeowners.

Questions worth asking before you sign

Start with scope. Are you hiring someone to lay tile only, or someone who can manage the bathroom renovation as a registered builder? If your project includes demolition, waterproofing, plumbing changes, sheeting, screeding and shower screen set-out, that difference matters.

Then move to technical competence. For large-format tile installations of 400 mm x 400 mm or greater, AS 3958.1 requires background flatness of no more than 3 mm over 2 m, and failure to meet that standard can lead to cracked tiles or hollow spots, according to ARDEX's large-format tile bulletin. If the contractor can't discuss substrate tolerances clearly, they may not be the right fit for premium work.

Use this checklist when you compare tiles installation services:

  • Builder status and trade coordination: Ask whether they're a registered builder if your job is a full bathroom renovation, not just a tile replacement.
  • Insurance and compliance: Confirm public liability, workers compensation arrangements and who issues compliance documentation where applicable.
  • Waterproofing responsibility: Ask who performs it, who signs off on it and how it's protected before tiling begins.
  • Large-format experience: If you're using porcelain panels, Kerlite or stone, ask for examples of similar work and how they handle flatness correction.
  • Problem-solving method: Ask what they do if demolition exposes rotten framing, uneven slabs or failed previous waterproofing.
  • Local availability: If you're comparing options, this guide to tiling contractors near me is a useful reference point for what a full-scope service can include.

What a proper quote should show

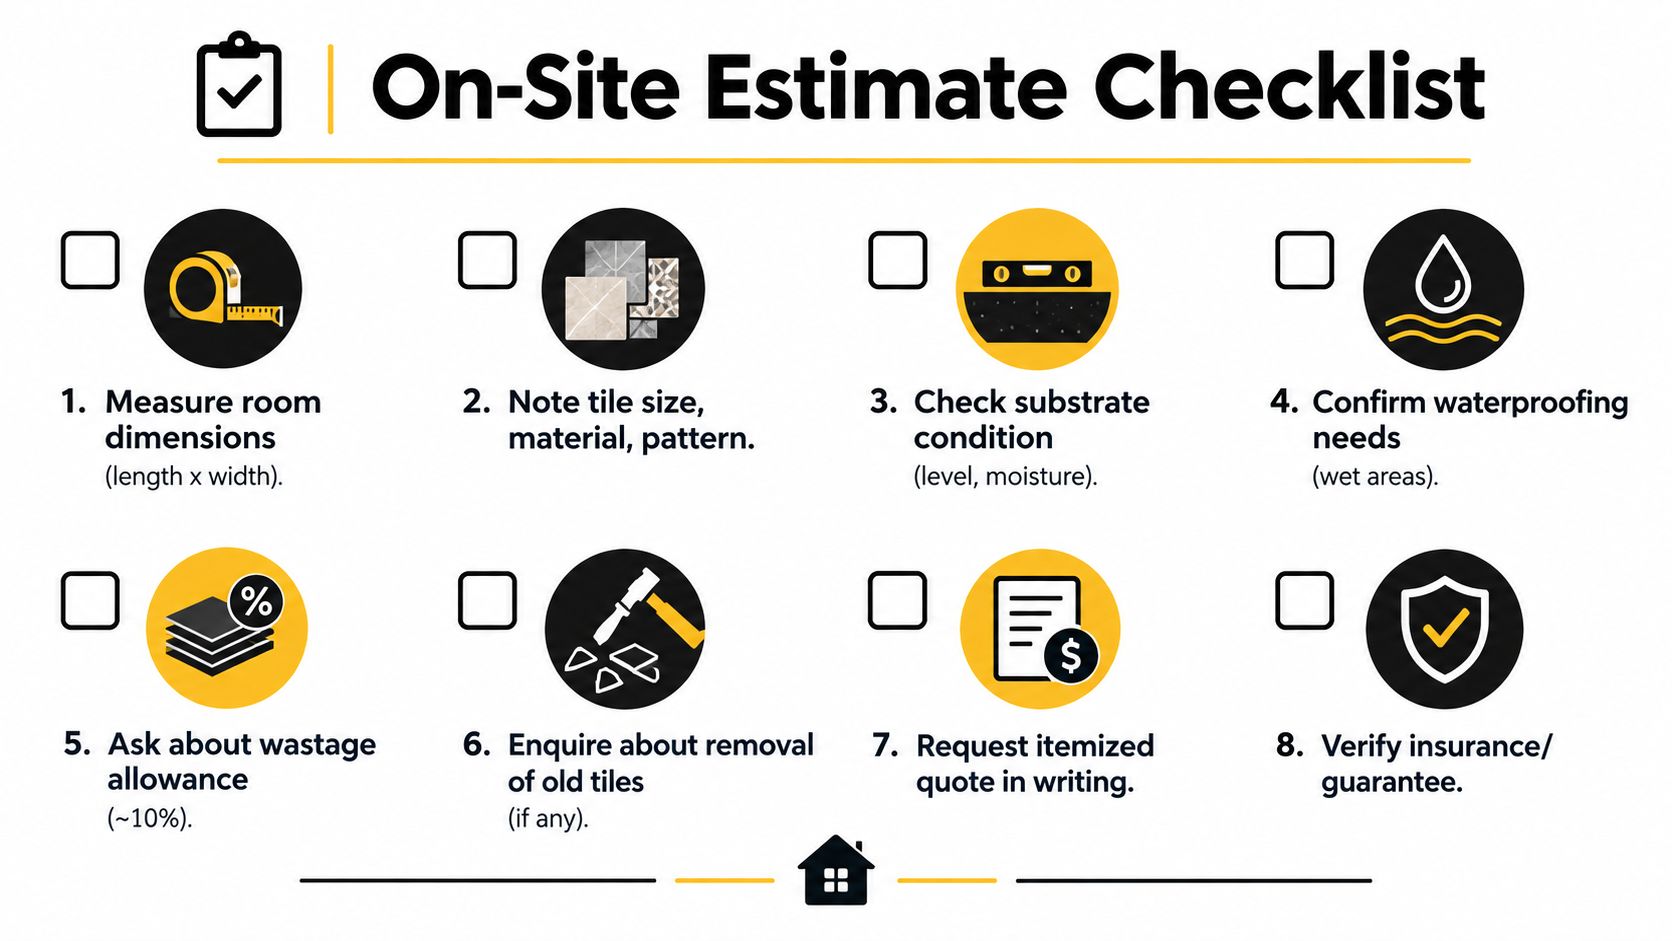
A proper quote should separate supply, preparation and installation. It should tell you whether demolition is included, whether substrate correction is allowed for, whether waterproofing is in scope, and what happens if the room is out of tolerance once opened up.

It should also make the finish standard clear. Are mitres included? Are trims specified? Does the quote include sealing where relevant, silicone to changes of plane, tile waste allowance and clean-up?

Melbourne Tiling Services P/L is one example of a contractor model that combines tiling with registered builder oversight, which is relevant when the project needs demolition, wet-area rectification, screeding and trade coordination rather than tile laying alone.

Cheap quotes often stay cheap by excluding the exact work that stops the bathroom from failing.

That's why the best quote isn't always the lowest. It's the one that shows the contractor understands the room as a building system.

Bringing Your Vision to Life with Confidence

A bathroom renovation succeeds when every hidden layer supports the finish you can see. Tile selection matters. So do layout, slip resistance, edge details and grout choice. But the work that decides whether the room lasts is the work often unseen. Substrate correction, waterproofing, falls, adhesion and trade coordination.

That's why hiring a registered builder for bathroom renovations changes the result. You get one party looking at the whole assembly instead of one trade looking only at the final surface. For homeowners in Melbourne and greater Victoria, that's often the cleanest path to a bathroom that looks sharp, drains properly and avoids the common failure points that lead to leaks and rectification.

If you're comparing tiles installation services, judge them on more than the tile line. Ask how they prepare the floor. Ask how they control falls. Ask who carries responsibility for the wet area from demolition through to handover. The answers will tell you a lot.

A good bathroom should feel effortless to use. That only happens when the build behind it is disciplined.


If you're planning a bathroom renovation, ensuite upgrade, leak rectification or premium wall and floor tiling project, Melbourne Tiling Services P/L offers free quotes, 3D drawings and a renovation calculator to help you define scope, budget and the right builder-led process before work begins.

Epoxy Grout vs Cement Grout: The Right Choice for 2026

You're probably at the point where the bathroom looks half-finished, the tiles are chosen, the tapware is locked in, and then someone asks a question that sounds minor but isn't: Do you want epoxy grout or cement grout?

That decision sits in a tiny joint between tiles, but it affects almost everything that matters in bathroom renovations. Cleaning. Staining. Waterproofing performance at the tile surface. How the room ages. Whether the shower still looks sharp a few years after handover or starts showing dark joints, patchy colour, and hard-to-shift grime.

In Melbourne, that choice deserves more thought than is typically given. A good Registered Builder will treat grout as part of the whole wet-area system, not a cosmetic afterthought. The tile, adhesive, substrate preparation, waterproofing membrane, movement joints, falls, drainage, and grout all need to work together. If one part is wrong, the finished room can still fail in service, even if it looked great on day one.

Table of Contents

Choosing Your Grout The Critical Decision in Your Renovation

A common renovation moment goes like this. The wall tiles are already selected. The vanity is on order. The layout has been marked out. Then the grout discussion starts, and many homeowners assume it's just a colour card decision.

It isn't.

In a high-end bathroom, grout is one of the materials you'll notice every day without realising it. You see it when the shower dries unevenly, when soap residue hangs around in corners, when light-coloured joints start to darken, or when a floor still looks fresh because the grout hasn't absorbed half the room. That's why this choice belongs in the same conversation as waterproofing, tile specification, and the build method your Registered Builder signs off on.

A woman carefully considering different tile and grout samples while shopping for home renovation materials.

In practical terms, most homeowners are choosing between cement grout and epoxy grout. Cement grout is familiar, easier to work with, and often suits dry or lower-demand areas. Epoxy grout is denser, less forgiving to install, and usually chosen where long-term performance matters more than keeping the initial material cost down.

The small decision isn't small at all. In a shower, grout choice affects how the room behaves under daily water, cleaning products, steam, and use.

For Melbourne homeowners, the answer shouldn't come from trend talk. It should come from the room itself. Is it a family bathroom used hard every day? A premium ensuite with large-format porcelain? A balcony detail where leak risk is already a concern? A heritage-style floor where the look of a traditional grout line matters?

A seasoned tiler and a Registered Builder will look at the same issue from slightly different angles. The tiler focuses on finish, joint performance, cleanability, and installation method. The Registered Builder focuses on system compatibility, wet-area compliance, coordination of trades, and whether the final assembly aligns with AS 3740 and the broader bathroom renovation scope. That's the right way to judge epoxy grout vs cement grout.

Understanding the Contenders Cement and Epoxy Grout

Grout is not a generic filler. In a bathroom renovation, it is part of the finished system, and the type you choose affects appearance, cleaning, maintenance, and how well the tiled surface holds up in service.

Cement grout in simple terms

Cement grout is the traditional product used between tiles after the adhesive has cured. It is cement-based, usually blended with fine sand, pigments, and additives to improve workability. On many Melbourne projects, it remains the standard choice because it is familiar to installers, easier to shape in the joint, and available in a wide range of colours and price points.

There are two main types:

  • Sanded cement grout suits wider joints because the added aggregate gives it more body and helps reduce shrinkage.
  • Unsanded cement grout is smoother and better suited to narrow joints or tile surfaces that can scratch easily.

That distinction matters on site. A grout that does not suit the joint width can finish poorly, wear unevenly, or become harder to maintain. I see this regularly on bathroom renovations where the tile has been chosen first and the grout specification left until late. A Registered Builder will usually push that decision earlier, because the tile, joint width, substrate movement, and wet-area detailing all need to work together, especially where the bathroom must comply with AS 3740.

If you're weighing up tile finishes, joint widths, and product compatibility, it helps to review the full range of tiling materials used in premium bathroom builds.

Epoxy grout in simple terms

Epoxy grout is a resin-based product made from epoxy resins and a filler component, mixed as a system before application. It does not behave like standard cement grout on the wall or floor. It is denser, less absorbent, and much more technique-sensitive during installation.

From a builder's perspective, that difference is not just technical. It affects who should install it, how quickly it must be cleaned off the tile face, and whether the selected tile is suitable for an epoxy system in the first place. On high-end bathrooms, epoxy grout is often specified because the owner wants stronger stain resistance and easier long-term cleaning, but it only delivers that result if the installation is done properly.

A simple comparison helps:

Material type Composition General behaviour
Cement grout Cement, fine aggregate, pigments, additives More porous, easier to install, more traditional in appearance
Epoxy grout Epoxy resin and filler components Dense, low-absorption, harder to install, more resistant in use

Why the composition matters

The material makeup drives the actual result. Cement-based grout can take up moisture, soap residue, and surface staining more readily. Epoxy grout resists that far better because the joint surface is much less absorbent.

That matters in Melbourne bathrooms, where steam, regular shower use, and inconsistent ventilation can expose weak points over time. It also matters in the broader renovation scope. A Registered Builder is not only looking at the grout line itself. The builder is checking whether the whole wet-area assembly, including waterproofing, tile selection, joint treatment, and finishes, is suitable for the room and aligned with AS 3740.

Tile type also changes the decision. Large-format porcelain, mosaics, textured tiles, natural stone, and handmade finishes all respond differently during grouting and clean-up. A product that performs well on a dense porcelain wall tile may be the wrong choice on a stone surface that can mark, stain, or react during installation.

In short, cement grout and epoxy grout are built differently, installed differently, and expected to perform differently. That is why the right selection should be made as part of the bathroom specification, not as an afterthought once the tiles are already on site.

Performance and Durability Head to Head Comparison

A premium bathroom can look sharp at handover and still disappoint two winters later. In Melbourne, that usually shows up in the shower first. Darkened grout lines, staining around niches, and joints that never seem to stay clean. For a Registered Builder or tiler specifying a wet area properly, performance has to be judged over years of use, not on installation day.

Feature Epoxy Grout Cement Grout (Sanded/Unsanded)
Water resistance Dense, very low absorption Porous and more likely to hold moisture
Sealing Doesn't require sealing Requires sealing and periodic upkeep
Stain resistance Strong resistance to common bathroom staining More likely to absorb residue and discolour
Chemical resistance Handles stronger cleaning regimes better Needs more care with product selection
Installation Technique-sensitive and less forgiving Easier to place and wash off
Typical use Showers, floors, niches, high-use bathrooms Lower-demand areas or cost-conscious selections
Material cost Higher upfront Lower upfront

A visual comparison makes the trade-offs easier to scan.

A comparison chart showing the performance differences between epoxy grout and cement grout for tiling projects.

Moisture Performance and Porosity

In bathroom work, porosity is the dividing line.

As noted in Zephyr and Stone's epoxy grout overview, epoxy grout is non-porous, waterproof, stain-resistant, and does not require sealing, while cement grout remains porous. On site, that difference shows up in how the room handles daily shower use, steam, and slower drying conditions through Melbourne's colder months.

That surface performance still sits behind the primary compliance issue. Grout is not the waterproofing system. Under AS 3740, the waterproof membrane and wet-area detailing are what protect the structure. The grout choice affects how much moisture and residue the tiled surface holds, how easily it cleans up, and how well the finish presents over time. If you want the full wet-area assembly specified properly, this guide on how to waterproof a shower correctly is the right starting point.

In practical terms, epoxy gives water less chance to sit in the joint itself. Cement grout can still perform acceptably in a compliant bathroom, but it asks for more maintenance discipline from the owner.

In a shower, the membrane protects the building. The grout affects how the surface wears, stains, and cleans.

Later in this section, the video below shows the practical differences in handling and finish.

Stain and Chemical Resistance

Bathrooms cop more abuse than many owners expect. Shampoo, soap scum, fake tan, hair colour, makeup, cleaning sprays, and hard-water residue all end up on the joints.

Epoxy handles that environment better because contaminants stay closer to the surface instead of soaking in. That is why it is regularly specified in places with stricter hygiene demands, including some commercial and healthcare settings. For a high-end residential bathroom, the benefit is simpler. The grout line tends to keep its original colour and needs less coaxing to look clean.

Cement grout is more forgiving to install, but it is less forgiving in service. Pale joints around mixers, niches, and shower floors often show the age of the room well before the tiles do. Sealing helps, but it does not turn a porous product into a non-porous one.

Durability and Movement

Durability is not only about compressive strength or hardness. It is about how the joint holds its appearance under cleaning, foot traffic, heat, moisture cycling, and normal building movement.

Epoxy generally holds colour better and is less prone to the shrinkage and surface wear that can make cement joints look tired early. For clients spending serious money on porcelain, stone, custom joinery, and fixtures, that matters. A bathroom should still look considered after years of use, not just in the project photos.

There is a limit, though. No grout should be expected to act as a movement joint. Changes of plane, junctions between materials, and larger tiled areas still need correct movement accommodation and flexible sealant where required. A Registered Builder will look at those details because long-term performance depends on the full assembly, not one bag or bucket of grout.

Appearance and Colour Consistency

Many decisions get made, even if owners do not say it outright. They want the bathroom to keep the same look in year five that it had in week one.

Cement grout can suit a classic finish and can look excellent in the right hands. But the final colour is more vulnerable to variation from mixing water, wash timing, curing conditions, and general site control. On larger bathrooms, that can leave subtle patchiness between walls or between separate days of installation.

Epoxy usually delivers a more consistent finished colour, especially in wet zones built around rectified porcelain or mosaics where every joint is on display. The trade-off is workmanship tolerance. If the installer is slow on cleanup or leaves residue on the tile face, epoxy will expose that mistake quickly. In other words, epoxy often gives the better long-term finish, but only when the tiler and builder have allowed for the product properly in the specification and installation sequence.

Suitability by Location Where to Use Each Grout Type

A Melbourne bathroom can have a beautiful tile selection, a good membrane, and still become harder to live with than it should be if the grout choice is wrong for the room. I look at this the same way a Registered Builder should. By location, cleaning load, moisture exposure, and how the full assembly has been designed to perform over time.

A split image showing a clean modern bathroom shower and a tidy kitchen backsplash with text overlay.

Showers and Other Wet Areas

For premium showers, epoxy grout usually makes the stronger case.

That applies in many Melbourne homes because bathrooms often dry slowly through winter, exhaust fans are not always used well, and family bathrooms see repeated daily use. Shower floors, lower wall sections, niches, and bench seats stay under the most pressure. Soap residue builds up there. Water sits longer there. Those are the locations where epoxy's lower absorbency and better stain resistance pay off in day-to-day use.

Under AS 3740, the waterproofing membrane remains the layer that protects the structure in internal wet areas. Grout sits above that system and affects serviceability, maintenance, and appearance. It does not replace compliant waterproofing. If you are planning a renovation, this guide on how to waterproof a shower correctly is a useful reference before tile and grout are specified.

Cement grout can still be used in some bathroom areas, but I would be more selective with it in high-end work. It suits lower-risk wall areas outside direct and repeated soaking, especially where the owner accepts sealing and more ongoing care. In a main shower used every day, epoxy is usually the better long-term decision.

Kitchen Splashbacks and Feature Walls

These areas are more about use pattern than water exposure alone.

Epoxy works well on splashbacks behind cooktops, coffee stations, and prep areas where oil, food splatter, and frequent wiping are expected. It also suits light-coloured grout joints where clients want the original look to hold up without gradual darkening around the busiest parts of the kitchen.

Cement grout remains a reasonable option on decorative walls with lighter service conditions. A powder room feature wall, a laundry wall above the trough, or a bathroom wall outside the wet zone does not face the same cleaning demand as a shower recess. In those locations, a quality cement grout can be the more balanced specification if budget, tile type, and finish all support it.

Floor Areas and Balconies

Floor decisions should follow traffic, moisture, and cleaning method.

On an internal floor in a guest bathroom or lower-use room, cement grout can perform well if the tile system has been built properly and the owner understands the maintenance involved. On a bathroom floor used by a family every morning, with wet feet, regular mopping, and hair or product residue around the vanity, epoxy generally holds up better and keeps the joints looking cleaner.

Balconies need a stricter assessment. A builder should be looking first at falls, drainage, membrane detailing, substrate movement, and perimeter junctions. Grout matters, but it is one part of a larger external waterproofing and drainage strategy. Epoxy can be a sensible choice on exposed tiled surfaces because it copes better with moisture and contamination than standard cement grout, yet it will not compensate for poor falls or bad detailing.

On balconies, grout supports the system. If the substrate, membrane, drainage, or movement detailing is wrong, the tiled finish remains at risk regardless of grout type.

That is the practical distinction Melbourne homeowners should keep in mind. Use epoxy where moisture, staining, and cleaning pressure are highest. Use cement grout where the area is lower risk, the aesthetic suits it, and the maintenance trade-off is acceptable.

Installation The Professional Tiler and Registered Builder's Role

A grout choice often looks simple on a quote. On site, it affects programming, workmanship, risk, and who carries responsibility if the bathroom does not perform as intended.

That matters more in Melbourne than many owners realise. Winter curing conditions, variable humidity, and the way wet areas are signed off under AS 3740 all put pressure on installation quality. From a Registered Builder's point of view, grout is not a cosmetic afterthought. It sits inside a wet-area system that has to be built, sequenced, and handed over properly.

An instructional infographic detailing the five essential steps for professional tile grout installation, from surface preparation to curing.

Why Epoxy Installation Demands More Control

Epoxy gives very little margin for delay. Once mixed, the installer has a short working window, and cleanup has to be controlled from the first section. If the tiler spreads too much, washes too late, or works over a tile with heavy texture without testing first, residue can become a serious defect rather than a minor snagging item.

I see the same pattern on higher-end renovations. The epoxy product itself is usually not the problem. Trouble starts when the crew treats it like standard cement grout, works too fast in the wrong places, or fails to coordinate with the builder on timing, access, and room conditions.

Common causes of a poor result include:

  • Oversized mixes that begin to tighten before the area is finished
  • Sections that are too large for proper wash-off control
  • Residue left on matte, textured, or stone-look tiles
  • Untidy finishing at drains, niches, junctions, and trim edges
  • Poor site coordination around temperature, moisture, lighting, and trade access

Cement grout is more forgiving. It still needs a competent hand, but it allows more correction time and generally suits straightforward installations better.

What the Builder Should Be Checking

On a compliant bathroom build, the tiler and Registered Builder have different roles, but they should be working to the same plan.

The builder should already have the wet-area assembly under control before grout is discussed. That includes substrate condition, set-downs where required, falls, drainage layout, waterproofing, movement joints, and protection of finished work. Under AS 3740, the bathroom has to perform as a system. Grout selection needs to suit that system, not fight against it.

A proper installation usually includes the following:

  1. Joint preparation
    Adhesive squeeze-up, dust, and loose debris are cleared so the grout can fill the joint properly.

  2. Correct curing time after tile fixing
    The tile bed must be stable before grouting starts. Rushing this step invites avoidable movement and bond issues.

  3. Accurate mixing and handling
    Epoxy in particular needs disciplined proportioning and batch control.

  4. Tight work zones
    Good tilers break the room into manageable sections and finish each one fully before moving on.

  5. Controlled cleanup and protection
    The tiled surface is cleaned methodically, then protected from early traffic, water, and follow-on trades.

For owners comparing quotes, it helps to choose local tiling contractors with experience in high-spec wet areas rather than a general handyman who offers grouting as a side service.

What a Homeowner Should Expect on Installation Day

A professional crew should be able to explain the method in plain terms. They should know whether the selected grout suits the tile surface, the joint width, and the room's level of water exposure. They should also be clear about curing times, cleaning limitations, and when other trades can come back into the room.

That last part is often missed on renovation sites. A grout job can be technically sound and still be damaged by early use, wet testing at the wrong time, or another trade dragging gear across fresh joints.

Use this checklist when you review the job:

  • Surface readiness: Joints are clean, tile faces are checked, and the room is ready for the specified grout.
  • Product suitability: The grout matches the tile, joint width, and intended use of the bathroom.
  • Application method: The installer works in controlled sections, especially with epoxy.
  • Cleanup standard: Residue is managed immediately, not left until the end of the day.
  • Post-install protection: The area is protected while the grout cures.
  • Builder oversight: Responsibility is clear between tiler, waterproofer, builder, and other trades.

In a premium bathroom renovation, that coordination is what separates a finish that looks good at handover from one that still looks right years later.

Lifecycle Cost Maintenance and Repair Considerations

A Melbourne bathroom often looks perfect at handover. The true test starts six months later, after winter condensation, daily showers, cleaning products, and regular use have worked on every joint.

That is why grout selection should be judged on ownership, not just purchase price. For homeowners planning a high-end renovation, and for a Registered Builder carrying responsibility for the finished wet area, the better question is simple. Which grout will still perform, present well, and stay serviceable without avoidable callbacks?

Upfront Spend Versus Long-Term Ownership

Cement grout usually wins the first invoice. It can be a sensible choice in the right location, especially where the area is low risk and easy to maintain. But in a main bathroom, ensuite, or shower used every day, the cheaper starting point can lead to more cleaning, more maintenance, and earlier cosmetic decline.

That matters in Melbourne homes. Bathrooms here deal with cool mornings, steam build-up, and periods where moisture hangs around longer than clients expect. If joints stay damp or collect residue, cement grout tends to show it sooner. Sealing helps, but sealing is still a maintenance task that has to be done properly and repeated over time.

Epoxy changes that ownership pattern. It asks for more care in specification and installation, then usually asks less from the homeowner afterward.

Maintenance Reality in a Family Bathroom

In practical terms, maintenance is where the difference becomes obvious.

A sealed cement joint can perform well, but it still needs attention. The surface is more likely to hold soap residue, body oils, and general bathroom grime, particularly in shower floors, niches, and corners where airflow is poor. Once discolouration sets in, the room can look tired even if the tiles themselves are still in good condition.

Epoxy is easier to keep looking consistent. It resists staining better, does not require sealing, and generally stands up better to the cleaning routine that busy households realistically follow, not the ideal one written on a product sheet.

Ownership factor Epoxy grout Cement grout
Routine cleaning Wipes down more easily in wet areas More prone to holding residue and dulling over time
Ongoing upkeep No sealing required Sealing and periodic refresh work may be needed
Visual consistency Better colour stability in heavy-use bathrooms More likely to show patchiness or staining with age
Best fit Showers, ensuites, family bathrooms, premium wet areas Dry walls, lower-use spaces, tighter renovation budgets

A bathroom that is hard to keep clean often becomes the bathroom clients want redone first.

Repairability and Future Access

Cement grout still has one practical advantage. It is usually easier to rake out, patch, and refresh in a localised area. If a small section is damaged, the repair process is generally simpler and less specialised.

Epoxy is harder once cured. Spot repairs can be more noticeable, and removal takes more time and more care, especially around large-format porcelain, mitred edges, underfloor heating zones, and finished waterproof details. In other words, epoxy rewards accuracy at the start.

From a Registered Builder's point of view, that is a risk allocation issue as much as a product issue. Under AS 3740, the wet area system has to work as a system. Grout is not the waterproofing layer, but failures, staining, cracked joints, or careless repair work can still trigger invasive investigation, trade coordination, and disputes about responsibility. In a premium renovation, the cost of opening up a shower is rarely limited to the grout line itself.

The practical conclusion is straightforward. Cement grout is easier to repair, but more likely to need attention. Epoxy is harder to repair, but in the right location it is often less likely to become a maintenance problem in the first place.

That is usually the deciding trade-off for Melbourne homeowners who want the bathroom to keep its finish, meet the expectations of a high-end build, and stay out of the callback cycle.

Your Final Verdict A Recommendation for Your Project

If you want the shortest practical answer on epoxy grout vs cement grout, here it is.

If your project is a main shower, family bathroom, ensuite, niche, bench seat, or other wet area that will be used every day, epoxy grout is usually the stronger long-term choice. It suits homeowners who want less maintenance, stronger stain resistance, and a cleaner finish over time.

If your project is a dry wall area, a decorative feature, a lower-use room, or a renovation where budget is tight and the risk is low, cement grout can still make sense. It's familiar, more forgiving to install, and often appropriate where the room isn't under constant moisture pressure.

If you're planning high-end bathroom renovations with large-format porcelain, tight joint lines, and an expectation that the room should still look premium after years of use, epoxy is hard to ignore.

If you're renovating under the guidance of registered builders, the right question isn't “Which grout is better in general?” It's “Which grout fits this tile, this room, this waterproofing system, and this maintenance expectation?” That's how professionals make the call.

Choose epoxy when performance leads the brief. Choose cement when the location allows it and the trade-offs are acceptable. Don't choose either in isolation from the rest of the wet-area system, especially where AS 3740 compliance, waterproofing detail, and long-term durability are on the line.


If you're planning a bathroom renovation, ensuite upgrade, leak rectification project, or need advice on the right grout system for a wet area, Melbourne Tiling Services P/L can help you assess the full assembly, not just the tile surface. As Melbourne-based specialists in bathroom renovations and tiling, they coordinate the details that matter, from waterproofing and substrate preparation to premium tile installation and finish quality, so your grout choice supports a bathroom that looks right and performs properly.

Natural Stone Bathroom Tiles: A 2026 Melbourne Guide

Thinking about a bathroom upgrade? If you're aiming for something beyond the ordinary, natural stone bathroom tiles are in a class of their own. They can elevate a simple, functional room into a space that feels like a genuine retreat. Unlike a mass-produced tile, every single piece of stone has a unique character, formed over millions of years. For anyone planning bathroom renovations, understanding the unique appeal of stone is the first step towards creating a truly luxurious space.

Table of Contents

Why Choose Natural Stone for Your Melbourne Bathroom?

Here in Melbourne, we see a lot of bathroom renovations. While porcelain and ceramic tiles are always popular, there's a definite pull towards the unique elegance that only natural stone delivers. It's about creating a space that feels truly personal and calming—a proper escape from the hustle and bustle. Engaging a registered builder for these types of high-end bathroom renovations ensures that the vision is executed flawlessly.

The real magic is in its authenticity. A manufactured tile is designed for uniformity, but a slab of marble or a travertine tile is a complete one-off, with its own veining, textures, and subtle colour shifts. This connection to the natural world brings a level of sophistication that simply can't be duplicated.

A luxurious bathroom featuring elegant natural stone tiles, a white freestanding bathtub, and a wooden stool.

A Considered Choice for a Premium Finish

While porcelain is a fantastic, durable choice for most Aussie bathrooms, stone is what people turn to when they want that undeniable 'air of luxury'. As noted in a recent look at Australian bathroom trends on Elite Makeovers, many homeowners accept that stone is pricier and needs more care simply because it "looks just that much better". It's a deliberate choice for a premium outcome in any bathroom renovation.

But getting that high-end finish is about more than just the tiles themselves. A natural stone bathroom is a serious project. The weight of the stone, its porosity, and its sheer value demand a professional approach from day one.

This is exactly why we always stress the importance of using registered builders for this kind of high-end renovation. A builder is essential for coordinating all the licensed trades—from waterproofing and plumbing to structural checks—making sure every single detail is handled correctly and to code.

At the end of the day, choosing natural stone is an investment. It’s a statement about your commitment to quality and timeless design, and the result is a stunning space that genuinely adds character and value to your home.

Matching the Right Stone to Your Bathroom’s Style

Choosing the right natural stone for your bathroom tiles is much more than a technical decision—it’s about setting the entire mood. Every piece of stone has its own story and a character forged over millions of years. This choice will define the personality of your bathroom renovation, so it's worth having a clear vision before you even start looking at samples.

Think of it like casting the lead role in your bathroom's design. Are you aiming for the timeless drama of a five-star hotel, or the warm, earthy feel of a rustic retreat? The stone you choose is the foundation of that story.

Defining Your Bathroom’s Personality

Let's walk through the most popular stone choices we see in Melbourne homes. Understanding their inherent style and character is the first step in creating a space you’ll truly love.

  • Marble for Timeless Drama: Marble is the undisputed classic for a reason. Its distinctive, sweeping veins create a sense of movement and luxury that is simply unmatched. It makes a powerful statement of sophisticated elegance, perfect for a feature wall behind a freestanding tub or a stunning vanity top.

  • Travertine for an Earthy, Warm Feel: If you want your bathroom to feel like a warm, welcoming sanctuary, travertine is a fantastic choice. Its creamy, honey-toned palette and naturally pitted surface bring to mind a rustic Mediterranean villa. It’s brilliant for creating a refined yet relaxed atmosphere, especially on floors.

  • Slate for Bold, Modern Texture: For anyone leaning towards a contemporary or even industrial look, slate delivers a bold, textural impact. Its deep, moody colours—from dark charcoal to rich greens and blues—provide a dramatic backdrop. A honed slate floor not only looks sleek and modern but also offers excellent natural slip resistance.

  • Limestone for Soft, Understated Elegance: Limestone is the master of subtlety. Its soft, muted tones of beige, ivory, and gentle grey are perfect for creating a serene and calming environment. With a more consistent, quiet pattern, limestone is ideal for minimalist designs where tranquillity is the ultimate goal.

Your choice of stone directly influences the entire feel of your bathroom renovation. A registered builder can provide samples and guide you on how each option will interact with your home's lighting and space, ensuring the final result matches your vision perfectly.

From Feature Walls to Family Floors

Beyond just looks, it's crucial to match the stone's practical properties to its intended use. That breathtaking polished marble might be perfect for a feature wall in a master ensuite, but its softer nature makes it a poor choice for the high-traffic floor of a busy family bathroom. In that scenario, a more hard-wearing option like honed travertine or slate would be a far more practical and durable choice.

This is where a detailed conversation with your tiler or builder becomes invaluable. By discussing how you use the space every day, they can recommend a stone that is not only beautiful but also tough enough for your lifestyle. For example, the slip resistance of a tumbled finish makes it ideal for shower floors, while a glossy polished finish should be reserved for vertical surfaces where it can be admired without risk.

If you find yourself captivated by the allure of marble tiles in Melbourne, it's worth exploring the nuances of its application to ensure it's the right fit for your project.

Ultimately, the best natural stone bathroom tiles are those that reflect your personal style while meeting the real-world demands of your home. A well-informed choice ensures your new bathroom isn't just beautiful on day one, but a space you will love and enjoy for decades to come.

Why Professional Installation Is Non-Negotiable

Choosing beautiful natural stone tiles is one of the most exciting parts of planning a bathroom renovation. But the real measure of success—the difference between a showpiece and a disaster—comes down to the installation. This isn't your average tiling job.

Laying natural stone is a true craft, a specialised skill that's worlds away from a weekend DIY project with ceramic tiles. Get it wrong, and you're not just looking at a wonky finish. You could be facing ruined, expensive stone, cracked tiles, persistent leaks, and even serious water damage to the structure of your home.

The Hidden Complexities of Stone Tiling

So, what makes it so different? For starters, the sheer weight. Natural stone is incredibly heavy, and your average bathroom subfloor, built for lightweight timber or ceramic, might not be up to the task. Without a professional assessment, the floor could sag or flex over time, leading to cracked tiles and failed grout.

Then there’s the precision. When you're dealing with premium materials, every single cut has to be perfect. An experienced tiler has the specialised equipment and skill to make intricate cuts for drains and corners with minimal waste. It’s a level of detail that a general handyman simply can’t match.

The infographic below highlights the unique beauty of different stones, giving you a sense of what you're trying to protect.

A comparison chart of four natural stone bathroom tiles including marble, travertine, slate, and limestone with descriptions.

Whether it's the dramatic veining of marble or the earthy texture of travertine, flawless installation is the key to letting the stone's character shine.

The Role of Registered Builders in Bathroom Renovations

The single most important step you can take to protect your investment is to entrust your project to a registered builder. A registered builder isn't just a project manager; they are legally responsible for the quality and compliance of the entire renovation.

A registered builder coordinates all the licensed trades needed for the job—from the plumber and electrician to the waterproofer and screeder. This ensures every single part of the project meets strict Australian Standards and building codes, giving you a renovation that is fully warrantied and compliant.

This level of professional oversight is absolutely essential for a natural stone bathroom. For example, because all stone is porous to some degree, perfect waterproofing is non-negotiable. You can learn more about this crucial step in our guide to professional waterproofing in Melbourne.

Ultimately, hiring a registered builder gives you peace of mind. It’s the assurance that your luxurious new bathroom is built on a foundation of structural integrity, expert craftsmanship, and flawless waterproofing. It's the only way to guarantee your beautiful space will last a lifetime.

Budgeting for Your Natural Stone Bathroom Renovation

So, you’re dreaming of a natural stone bathroom, but what's it really going to cost? Let's get one thing straight: when you're working with materials like marble or travertine, you have to look well beyond the price per square metre on the tile itself. The real cost lies in the total project, and stone brings its own unique set of considerations to the table.

Unlike lightweight porcelain or ceramic tiles, natural stone demands a different level of planning and expertise. Understanding what drives the final price is the key to budgeting accurately and avoiding any nasty surprises down the track.

Factors That Shape Your Final Quote

The final quote you receive is a careful calculation of materials, specialised labour, and the unique complexities of your space. A huge factor is the sheer weight of the stone. This isn't something you can just slap on the wall; it often means reinforcing the subfloor to handle the load, which is a job strictly for qualified professionals. The added weight also makes installation a much more intensive and costly process.

The specific stone you fall in love with will also have a major impact on the budget:

  • Stone Rarity: A beautiful, common limestone or travertine will always be more wallet-friendly than a slab of rare Calacatta marble sourced from a specific quarry in Italy.
  • Tile Size and Layout: Large-format slabs create a stunning, seamless look but require expert handling and specialised equipment to install. Similarly, intricate patterns like herringbone or basketweave take more time and skill, which is reflected in the labour costs.
  • Finishing Details: It’s the little things that add up. Custom-cut shower niches, perfectly mitred edges on corners, and complex trim work all require a master tiler's touch and will influence the final cost.

While the median cost for standard bathroom renovations in Melbourne can sit around $10,000, projects featuring premium natural stone will almost certainly push past this figure. It's not just the higher price of the stone itself; it's the investment in the specialised skills needed to install it flawlessly.

A Long-Term Investment in Your Home

It’s true that the initial outlay for natural stone is higher, but it’s one of the best long-term investments you can make in your home. This isn't a material you'll need to replace in a decade. Its incredible durability means you get a timeless, hard-wearing finish that adds significant and lasting value to your property.

Working with registered builders is non-negotiable. They can provide a comprehensive quote that covers every single detail, from the initial structural checks right through to the final sealing and polishing. If you're starting to plan your project, our detailed guide on the cost of a bathroom renovation in Melbourne is a great place to get a clearer picture of the expenses involved.

Caring for Natural Stone: Simplicity is Key

One of the biggest misconceptions we hear from clients is that natural stone is a nightmare to look after. Let's be honest, you've invested in a beautiful, unique material, and the last thing you want is a high-maintenance headache. The good news is that caring for natural stone bathroom tiles is far less about hard work and much more about a simple, consistent routine.

A little bit of know-how is all it takes to keep that stone looking as stunning as the day it was installed.

A woman cleaning a marble countertop in a modern bathroom to maintain natural stone bathroom tiles.

The secret weapon in protecting your stone is the sealant. Think of it like a high-quality, invisible shield that stops moisture and stains from penetrating the naturally porous surface. When we complete a bathroom renovation, applying a professional-grade sealer is one of the final, crucial steps. It’s your first and best line of defence.

A Simple Cleaning Rhythm

Keeping your stone pristine doesn't mean endless scrubbing. It’s all about getting into a few easy habits and using the right products.

Here’s a straightforward rhythm that will ensure your stone remains the stunning centrepiece of your bathroom for years to come.

  • Daily Habits: The most effective thing you can do is simply to be mindful. Wipe up any spills—water, soap, makeup—as they happen with a soft, dry cloth. This prevents any potential marks from setting in. A fantastic trick is to keep a squeegee in the shower; a quick wipe-down of the walls after you shower goes a long way.

  • Weekly Care: Once a week, give your tiles a clean with a pH-neutral stone cleaner. These formulas are made specifically to wash away grime without stripping the protective sealant or harming the stone itself. This is probably the most important part of any long-term care plan.

A word of caution: never use common household cleaners that are acidic or abrasive. Anything with vinegar, lemon, or harsh chemicals will etch the surface of your stone, creating dull spots that are difficult and expensive to fix.

Over time, that protective sealant will need a top-up. Depending on the stone and how much traffic the bathroom sees, this is usually a simple DIY job every few years. This small amount of maintenance is all that stands between you and a lifetime of enjoying your beautiful investment.

The Eco-Friendly Advantage of Natural Stone

When you're planning a bathroom renovation, your mind probably jumps straight to aesthetics—the colours, the textures, the overall feel. But for many Melbourne homeowners, the story behind the materials is just as important. If sustainability is on your mind, you'll be glad to know that choosing natural stone bathroom tiles is one of the greenest decisions you can make.

The beauty of stone's eco-credentials lies in its simplicity. It's a raw material, quarried directly from the earth. Think about what that means: it completely skips the energy-guzzling manufacturing needed for tiles like porcelain or ceramic, which have to be fired in intensely hot kilns. Stone is already made by nature.

A Lower Ecological Footprint

That difference isn't just a small detail; it has a massive flow-on effect. When researchers look at the entire lifecycle of building materials, natural stone consistently comes out on top. In fact, studies show that natural stone tiles have an ecological footprint that's a staggering 84% lower than large ceramic tiles.

This is a direct result of it being a 'found' material rather than a heavily manufactured one. You can read more about the research and sustainable benefits over at Stone3.

But the green story doesn't end there. The incredible durability of stone is where its eco-friendly nature truly shines.

A natural stone finish is built to last for an immensely long time, which means you aren't constantly replacing it. That simple fact translates to less manufacturing, less quarrying, less transport, and less waste heading to landfill over the decades.

When you invest in a stone bathroom, you're not just thinking about the next five or ten years. You're choosing a surface for the life of your home. By opting for a material that endures, you're actively reducing the wasteful cycle of renovating and replacing.

Working with registered builders who are well-versed in sustainable practices can amplify this benefit. They can guide you on sourcing and ensure your entire renovation aligns with your environmental values, making your beautiful new bathroom a truly responsible choice.

Your Top Questions About Natural Stone Bathrooms

Even with all the stunning photos and design ideas, it’s completely normal to have a few practical questions before you commit to a material like natural stone. These are exactly the kinds of details you should be thinking about. Answering them upfront usually highlights why getting professional advice and craftsmanship is so important for a bathroom renovation that lasts.

Let's get into the most common questions we hear from homeowners.

Are Natural Stone Tiles Too Slippery for a Bathroom Floor?

That's a great question, and the answer comes down to one thing: the finish. A highly polished, glossy stone looks incredible on a feature wall, but you're right—it's far too slippery for a wet floor.

The solution is to choose a different finish. A honed, tumbled, or brushed finish gives the stone a more matte, textured surface with plenty of grip. These finishes are perfect for bathroom and shower floors, giving you that beautiful natural look while being safe and compliant with Australian standards. We can guide you to a finish that’s both safe and stunning.

Can My Floor Actually Support Heavy Stone Tiles?

This is a critical point, and it’s precisely why you need a registered builder involved in a natural stone project. Stone is significantly heavier than standard ceramic or porcelain, and your floor structure needs to be up to the task. A professional builder will always assess your subfloor to make sure it can handle the load before any work begins.

If your floor joists do need strengthening, your builder will manage those structural reinforcements. This is a complex job that can only be legally and safely handled by a qualified, registered builder, giving you total peace of mind that your home's integrity is protected.

Can I Really Use Natural Stone in a Shower?

Absolutely! A shower wrapped in natural stone is the definition of luxury. The key to getting it right involves two non-negotiables: choosing a suitable, less porous stone and, most importantly, flawless waterproofing and sealing.

Expert waterproofers essentially build a fully sealed "tank" in the shower recess before a single tile goes on the wall. After the tiles are installed, the stone itself is then sealed with a high-quality impregnating sealer to stop water from soaking in. It's this careful, two-step process that guarantees your shower will be a beautiful, water-tight space for decades.

What Is the Difference Between a Tiler and a Registered Builder?

A tiler is a skilled tradesperson who specialises in laying tiles. A registered builder, however, is the captain of the ship for the entire renovation.

For a complex bathroom renovation involving natural stone, the builder is your single point of accountability. They coordinate everything—from the initial structural checks and demolition to the plumbing, waterproofing, electrical work, tiling, and final project sign-off. Using a registered builder ensures your project is managed properly, meets all building codes, and is covered by the necessary warranties from start to finish.


Ready to transform your bathroom with the timeless beauty of natural stone? The team at Melbourne Tiling Services P/L are registered builders and renovation experts. Contact us today for a free quote and 3D design consultation.

Shower Leak Repair Cost: A 2026 Melbourne Guide

In Melbourne, a minor shower reseal usually sits around $350 to $900, while major repairs involving waterproofing membrane replacement generally land between $2,000 and $4,000 or more. The final shower leak repair cost depends less on the drip you can see and more on the hidden damage you can't.

A leak is rarely reported the moment it starts. Calls typically occur when the ceiling below shows a stain, when the grout turns sandy, or when the bathroom starts smelling damp even after a clean. By then, the question isn't just “how much to stop the leak?” It's whether the leak is a surface maintenance issue, a failed waterproofing system, or the first sign that bathroom renovations are now part of the discussion.

That's reality with shower leaks in Melbourne homes. Some are straightforward. Some sit behind tiles for months or years and only show themselves when water has already worked into the substrate, skirting, ceiling, or framing. As registered builders, we look at these jobs through a wider lens. The repair has to stop the leak, meet compliance requirements, protect the structure, and make sense for the age and condition of the bathroom.

Table of Contents

That Small Drip Could Be a Big Problem

A typical call starts with something that seems minor. A homeowner notices blackening silicone in one corner, cracked grout on the shower floor, or a discoloured patch on the ceiling below an upstairs bathroom. They assume it's a plumbing issue, maybe a bead of silicone and a quick visit from a tradie.

Sometimes that assumption is right. Sometimes it isn't.

I've seen showers where the visible issue was a small split in sealant, but the underlying problem was a wet substrate and a failed membrane behind the tiles. I've also seen older bathrooms where years of small movement, poor falls, or tired grout had let water migrate slowly into places it should never reach. The leak looked local. The repair wasn't.

Why the visible symptom rarely tells the full story

A shower can leak in several ways. Water might escape through failed grout joints, cracked silicone, loose tap penetrations, a damaged shower base, or a waterproofing system that has reached the end of its life. The symptom is often the same. Dampness, staining, mould, or movement underfoot.

What matters is whether the leak is cosmetic, plumbing-related, or structural.

Practical rule: If the floor feels spongey, tiles sound hollow, or moisture is showing outside the shower itself, don't assume a reseal will solve it.

That's where a builder's view matters. A proper diagnosis looks at the whole wet area, not just the most obvious crack. If the bathroom is dated, poorly built, or already showing signs of widespread deterioration, a repair may only delay a larger problem. In those cases, full bathroom renovations can be the smarter financial decision because they deal with waterproofing, tiling, drainage, and compliance in one coordinated scope.

Why homeowners get caught out on cost

Leaks become expensive when people pay twice. First for a patch. Then for the actual repair.

Cheap surface fixes often look attractive because they're fast and relatively inexpensive upfront. But if water is already behind the tile bed or in the wall, fresh silicone only hides the issue. The leak continues. The damage spreads. The eventual job gets larger, messier, and harder to contain.

That's why shower leak repair cost varies so much. The labour, materials, and disruption all change once demolition, drying, rebuilding, and compliance come into play.

What Really Drives the Shower Leak Repair Cost

The biggest factor in pricing is scope, not optimism. You're not paying for a tradie to “have a look”. You're paying for diagnosis, access, repair method, materials, and the level of rebuilding needed to deliver a lasting result.

A flowchart infographic detailing the key factors that influence the total cost of repairing a shower leak.

Membrane failure changes everything

In practical terms, the cheapest jobs are usually localised maintenance. The expensive jobs are waterproofing failures. In the Australian market, minor resealing with grout and silicone typically ranges from $350 to $650, while full membrane replacement requiring tile removal sits around $2,000 to $4,000 because labour and material demands increase sharply, as outlined in this Australian shower leak cost breakdown.

That gap exists for a reason. Once tiles need to come off, the job can involve demolition, substrate assessment, preparation, membrane installation, curing time, retiling, sealing, and finishing. It stops being a maintenance visit and starts becoming a construction job.

Access, trades, and repair method

A clean quote usually reflects several moving parts:

  • Diagnosis first: A leak in the shower recess can come from the wall, floor, screen junction, waste, tap penetration, or a failed membrane. A proper inspection avoids pricing the wrong fix.
  • Trade coordination: Some jobs need only a tiler or leak repair specialist. Others need a plumber, waterproofer, carpenter, and tiler in sequence.
  • Site protection: In occupied homes, protecting adjacent floors, vanities, hallways, and fixtures matters. Good repair work includes containment and clean-up, not just tile removal.
  • Matching existing finishes: If replacement tiles are unavailable, a partial repair can become more complex because the visual finish has to be considered alongside the technical fix.

A “quick look” rarely tells you whether the water is staying inside the shower footprint or moving into the structure.

Materials matter, but labour usually drives the jump

Homeowners often focus on the price of silicone, grout, or tiles. That's understandable, but it's usually not where the cost blows out. Labour and process do that. Waterproofing needs correct preparation and curing. Tile removal takes care if the goal is to limit surrounding damage. Reinstatement has to restore falls, junctions, penetrations, and finish quality.

There's also the question of compliance. Wet area work isn't something to wing. If the bathroom is older, if previous repairs were done over the top of defects, or if the shower design has weak points, the new work needs to address those conditions properly.

Why registered builder oversight changes the outcome

When a registered builder assesses a leaking shower, the brief isn't just “stop the water today”. It's to identify the failure point, decide whether repair or replacement makes sense, and manage any larger implications for the room. That broader view often prevents false economies.

If the shower is one part of a tired wet area, the most cost-effective solution may not be another patch. It may be a targeted rebuild of the shower zone or a more extensive bathroom renovation that eliminates repeat failure points altogether.

Common Shower Leak Scenarios and Melbourne Price Ranges

Not every leak follows the same script. The easiest way to understand shower leak repair cost is to look at the kind of job you may be dealing with.

Localised grout and silicone failure

This is the scenario homeowners hope for. The shower still feels solid underfoot. Water staining is minor or only just beginning. Grout has cracked, silicone has pulled away at corners, and the shower is letting water escape at junctions rather than through a failed membrane.

In the Australian market, minor resealing tasks range from $350 to $900, while extensive repairs involving full waterproofing membrane replacement and retiling range from $2,000 to $4,000 or more, according to this national leaking shower cost guide.

A proper reseal can be a valid repair when the waterproofing beneath is still sound. A cosmetic reseal over an already failed substrate usually isn't.

Leaking tap hardware or shower fittings

Sometimes the leak isn't the shower recess itself. It's a worn washer, O-ring, tap set, or plumbing penetration. These jobs are often cheaper and less invasive, but they still need a proper diagnosis because plumbing leaks and waterproofing leaks can show similar symptoms from the outside.

If the issue is confined to hardware, the repair is often straightforward. If water has been escaping around penetrations for a long period, the surrounding wall lining or substrate may also need attention.

Failed waterproofing membrane

This is the job that catches people by surprise. The grout may look tired, but the bigger warning signs are a spongey floor, loose tiles, persistent damp smells, or moisture appearing outside the shower zone. At that point, the membrane has likely stopped doing its job.

Once that happens, there's no meaningful shortcut. Tiles usually need to come up, the substrate has to be inspected, waterproofing needs to be redone correctly, and the shower must be rebuilt to a compliant standard.

If water is already under the tiles, surface products won't reverse the damage. They only make the defect harder to diagnose later.

Cracked or leaking shower base

A shower base problem sits in the awkward middle ground. It may not require a full bathroom rebuild, but it can still involve substantial work depending on how the base ties into the wall finish, screen, and floor. If the surrounding structure has been wet for a while, the scope expands quickly.

In homes with open-plan or modern layouts, even a single failed element can create a broader rectification issue because the wet area design leaves little room for isolated repair.

Example shower leak repair costs in Melbourne 2026

Repair Scenario Common Cause Typical Cost Range (VIC)
Localised grout and silicone repair Cracked grout, failed silicone, minor junction leaks $350 to $900
Leaking tap hardware Worn washer or O-ring in compression faucet $50 to $200
General professional servicing to stop leaks Minor diagnostic and repair work $120 to $300
Shower base repair Shattered or leaking base $800 to $2,500+
Full membrane replacement and retiling Failed waterproofing behind tiles $2,000 to $4,000 or more

A cost guide only helps if it matches the actual failure. That's why inspections matter. Two showers can show the same cracked grout line and need completely different solutions.

DIY Fixes vs Hiring a Registered Builder

DIY shower leak repairs are tempting because the visible materials look simple. A tube of silicone, a grout touch-up product, a weekend of effort, and the problem appears solved. The risk is that many shower leaks aren't surface-level failures. They're building failures showing up on the surface.

A comparison chart showing the pros and cons of DIY versus professional shower leak repair services.

What DIY can do, and where it stops

DIY work can help with maintenance. Cleaning old sealant. Monitoring cracks. Replacing obviously deteriorated silicone in a low-risk area. Those jobs have a place if you already know the waterproofing system underneath is sound.

What DIY can't do is confirm whether the membrane has failed, whether the falls are wrong, whether movement is cracking the tile bed, or whether water has already reached framing or subfloor elements.

That's why quick-fix products often disappoint. High-quality shower waterproofing systems typically last 10 to 25+ years, while remedial or liquid-applied membranes used in quick-fix repairs generally last only 5 to 10+ years, as noted in this Australian waterproofing lifespan guide. A cheap patch can buy time, but it can also set up another failure cycle.

Why registered builder oversight matters

A registered builder doesn't just arrange a repair. They manage the whole wet-area problem. That includes diagnosis, scope, sequencing, trade coordination, compliance, and final responsibility for the result.

For homeowners, that matters in a few practical ways:

  • Compliance: Wet area work has to meet current standards and correct installation practice.
  • Trade management: Plumbing, waterproofing, screeding, tiling, and finishing often overlap.
  • Broader judgement: A builder can tell you when the shower is still repairable and when the bathroom has crossed into renovation territory.
  • Documentation and accountability: A proper scope of works is clearer than a verbal promise and a tube of sealant.

If you're comparing options, it helps to review a professional approach to fixing leaking showers before deciding whether a patch is worth doing.

DIY works best for maintenance. It works poorly as a substitute for diagnosis.

The long-term property value angle

Leaking showers aren't only inconvenient. They can affect saleability, tenant complaints, insurance discussions, and future renovation costs. Buyers and property managers notice bathrooms that feel soft underfoot, smell musty, or show evidence of repeated patching.

A compliant repair protects more than the shower recess. It protects the asset.

Our Leak Detection and Repair Process Explained

A proper leak job should feel organised from the first conversation. Homeowners don't need mystery, vague allowances, or a quote that changes shape every time another tile comes off. They need a clear process.

A six-step infographic detailing the professional shower leak repair process from initial contact to final warranty.

Step one to step three

The first part is about understanding what's happening, where it's happening, and how far it has spread.

  1. Initial contact
    The homeowner describes the symptoms. Ceiling stain, loose tiles, failed silicone, damp odour, shower screen leak, or water outside the recess.

  2. On-site assessment
    We inspect the shower, surrounding finishes, floor feel, tile condition, movement points, penetrations, and any signs of water migration beyond the wet area.

  3. Leak detection and scope
    When needed, we use more targeted assessment methods and then define the scope. If you're researching what this stage involves, this page on leak detection in Melbourne gives a good overview of how non-invasive diagnosis fits into a repair plan.

This short video gives a useful visual sense of how leak issues are identified and discussed on site.

Quote, repair, and quality control

Once the defect is identified, the next job is making the scope understandable. Good quotes don't hide the logic. They show whether the solution is a reseal, a base repair, a partial rebuild, or something larger.

At this stage, registered builder oversight becomes especially important in complex bathrooms. Melbourne-specific reporting notes that leak rectification for modern hobless showers can reach $6,800, and if the problem is diagnosed too late or incorrectly, some layouts can push owners into a $20,000 to $40,000 bathroom renovation, as discussed in this Melbourne-focused shower rectification article.

What the repair phase should include

A professional repair process usually includes:

  • Protection of the home: Dust control, floor protection, and careful demolition.
  • Licensed trade coordination: Plumbing, waterproofing, carpentry, and tiling where required.
  • Reinstatement with intent: Not just making it look finished, but restoring falls, junctions, and waterproof integrity.
  • Final inspection: Testing, finish review, and handover.

Melbourne Tiling Services P/L handles this type of builder-managed wet area work as part of its broader bathroom renovation and leak rectification service. That matters when a leaking shower turns out to be one piece of a larger bathroom failure rather than a stand-alone defect.

The repair should leave you with clarity. What failed, what was replaced, and why the chosen method fits the bathroom.

How to Reduce Costs and Prevent Future Leaks

The cheapest shower leak repair cost is usually the one tackled early. Once water gets into framing, ceilings, skirtings, or adjacent finishes, the leak stops being local.

In Victoria, ignoring a leaking shower can lead to secondary structural repairs costing $2,000 to $15,000+ and mould removal bills of $500 to $3,000+, according to this Victorian leak damage discussion. That's why speed matters.

How to keep the current job under control

A few practical steps can stop a repair from expanding unnecessarily:

  • Act early: Don't wait for visible ceiling damage downstairs or soft flooring around the shower entry.
  • Ask what's being diagnosed: A quote without a clear cause can be the first sign of a patch, not a solution.
  • Clarify the repair boundary: Make sure you understand what's included if hidden damage is found after tile removal.
  • Think beyond the recess: If the bathroom is old or poorly laid out, discuss whether a staged renovation makes more sense than repeated repairs.

A simple prevention checklist

Preventative maintenance isn't complicated, but it has to be consistent.

  • Inspect sealant lines: Check corners, wall-to-floor joints, and around screens for shrinkage, splitting, or mould.
  • Watch for movement: Loose tiles, drummy tiles, and cracking grout often point to something deeper than surface wear.
  • Pay attention to smell: A musty odour that returns quickly can indicate trapped moisture.
  • Keep the waterproofing system in mind: If the bathroom is ageing, preventive planning matters. This guide to how to waterproof a shower is useful if you want to understand what a proper system should include.

A homeowner doesn't need to become a builder. They do need to recognise that recurrent leaks are rarely solved by cosmetic maintenance alone.

Secure Your Home with a Professional Repair

A leaking shower can cost a few hundred dollars, a few thousand, or far more if the problem has spread into the structure. The wide range isn't random. It reflects the difference between a tired sealant joint and a failed wet-area system.

That's why the right first step is diagnosis, not guesswork. If the issue is minor, a targeted repair may be enough. If the membrane, base, or room layout has failed, the responsible answer may be a more substantial rebuild or one of the bathroom renovations that properly resets the space for the long term.

Registered builders approach these jobs differently because they have to. The work isn't just about stopping visible water. It's about compliance, coordinated trades, and protecting the home's value.

Screenshot from https://melbournetilingservices.com.au

Don't let a small leak become a renovation nightmare. Get the shower assessed properly, understand the full scope, and choose a repair path that fits the condition of the bathroom.


If you want clear advice on shower leak repair cost, compliant rectification, or whether the smarter move is a targeted repair or a full bathroom upgrade, contact Melbourne Tiling Services P/L for a free, no-obligation quote and a 3D estimate.

Frameless Shower Screen Regulations AU: A Builder’s Guide

You're probably looking at bathroom inspiration photos right now. Clean tiles, open sightlines, no bulky aluminium frame, just a neat sheet of glass that makes the room feel bigger and sharper. Frameless shower screens do that well. They suit modern bathroom renovations, they work beautifully in smaller ensuites, and they can lift the whole finish of a room.

The problem is that frameless looks simple only after it's done properly. Behind that clean look sits a chain of compliance issues that many homeowners never see until something goes wrong. A panel is fixed with silicone instead of brackets. The glass is too thin for the application. The screen height looks right on paper but falls short once the screed and finished floor build-up are taken into account. Then the job that was meant to improve the home turns into leak rectification, glazing replacement, or a compliance dispute.

In Victoria, that matters. Frameless shower screen regulations aren't just a glazing issue. They sit at the intersection of waterproofing, substrate preparation, fixing methods, and builder responsibility. If one trade treats the screen as a stand-alone item, the rest of the bathroom can pay for it later. That's why registered builders approach these installations as part of the whole wet-area system, not as an afterthought at the end of the job.

Table of Contents

Your Dream Bathroom vs The Building Code

A common renovation sequence goes like this. The tiles are selected first. Then the vanity, tapware, niche position, mirror cabinet, and lighting. The frameless shower screen gets discussed late because it seems straightforward. It's “just glass”.

That assumption causes plenty of trouble in bathroom renovations.

A frameless panel has no forgiving outer frame to hide bad set-out, compensate for poor wall preparation, or stiffen glass that's underspecified. If the walls are out, if the hob isn't finished correctly, or if the waterproofing line and final floor height weren't considered early enough, the installer inherits a problem that shouldn't have reached site.

A frameless screen doesn't fail because the design is modern. It fails because someone treated it like a finishing item instead of a regulated building element.

Homeowners usually notice the style first. Registered builders notice the load path, the wall substrate, the tile build-up, the waterproofing extent, and whether the fixing points are suitable. That's the difference between a screen that stays quiet and serviceable for years and one that starts shifting, leaking, or drawing attention from an inspector.

The building code isn't there to ruin the look of the bathroom. It's there because glass in a wet area has to do two jobs at once. It has to be safe when people slip, lean, or bump into it, and it has to help contain water so the room behind the tiles doesn't get damaged.

If you're planning a sleek frameless enclosure, the right question isn't “Can this design be done?” Usually it can. The better question is “Can it be done without creating a compliance issue in glazing or waterproofing?” That's where many nice-looking jobs come undone.

Understanding the Hierarchy of Rules

The easiest way to understand frameless shower screen regulations is to think of the documents in layers.

The National Construction Code, or NCC, is the main rulebook for building work in Australia. It sets the performance expectations. Then the Australian Standards sit underneath it and deal with the technical detail for specific materials and installation methods.

Why these rules exist

There are two practical reasons these rules matter in a shower.

The first is human safety. Bathroom floors get slippery. People lose balance. A frameless screen has to resist normal use and foreseeable impact without becoming the hazard itself.

The second is water management. A shower doesn't just wet the visible tile surface. Water finds joints, edges, penetrations, and transitions between materials. If the screen location, height, and fixing method aren't considered together with the waterproofing system, the failure may show up well after the renovation is finished.

A homeowner might see one product. A builder sees several connected systems:

  • Glass and hardware determine whether the panel is safe and stable.
  • Wall construction determines whether fixings are anchored into something adequate.
  • Waterproofing determines whether the area behind and below the screen can tolerate water exposure.
  • Finished floor levels determine whether the final geometry still complies once everything is built.

How the documents work together

In simple terms, the NCC tells you the outcome that has to be achieved. The Standards tell trades how to select and install materials so that outcome is met.

For frameless shower screens, the important relationship is this:

Document What it governs in practice
NCC Wet-area requirements, including the minimum shower screen height and waterproofing extent
AS 1288 Glass selection and installation requirements
AS/NZS 2208 Safety glazing materials and the required safety glass classification

Compliance can't be judged from one angle only. A glazier might focus on glass. A waterproofer might focus on membrane coverage. A tiler might focus on falls and levels. A registered builder has to make sure those decisions line up so the final installation works as a whole.

Practical rule: If the quote or discussion only talks about “supplying and fitting glass”, it's too narrow. A compliant frameless screen depends on what sits behind it, under it, and beside it.

That's why experienced bathroom contractors don't leave screen decisions to the final week. The regulations reach back into earlier stages of the build, especially screeding, self-levelling, waterproofing, and wall preparation.

Key Standards Your Shower Screen Must Meet

A frameless shower screen can pass the eye test and still fail on site. In Melbourne renovations, that usually happens when the glass supplier measures the opening late, after screeding, self-levelling, tiles, and waterproofing have already changed the finished heights.

A diagram outlining the three main compliance standards for shower screens: glass specifications, installation methods, and waterproofing.

Three checks decide whether the screen is compliant. The glass must be safety glazing suitable for the location. The panel thickness must suit a frameless installation. The screen height must still work with the waterproofed wall height after the full floor build-up is complete.

Glass type and safety marking

Frameless shower screens in Australia must use safety glass selected and installed under AS 1288, with the glazing material complying with AS/NZS 2208. In practice, that means Grade A toughened safety glass for this application.

Check the stamp on the panel. It should identify the safety glazing classification clearly enough for the installer or supplier to verify what has been provided. If the glass is unmarked, or the contractor cannot show what standard the panel complies with, stop the job until that is resolved. Homeowners rarely get a second chance once the hardware is drilled, silicone is in, and the bathroom is handed over.

Thickness and what frameless glass has to do

For a frameless screen, 6mm toughened safety glass is generally the minimum under AS 1288. Framed systems can sometimes use thinner glass because the frame shares the load. Frameless panels do not get that support.

That difference matters on real renovation sites. Hinges, brackets, panel width, door swing, out-of-square walls, and the stiffness of the panel all affect how the installation performs day to day. A minimum-compliant panel is not always the best choice for a wider door or a layout with little tolerance in the reveals.

I see this issue more often in older Melbourne homes where walls are not perfectly plumb and floors have been corrected with a raised screed. The more the bathroom shell has been adjusted, the more important it is to make sure the screen design suits the finished opening rather than the original plan. Good bathroom waterproofing in Melbourne also matters here because the fixing locations, screen line, and membrane coverage need to work together.

Height and the waterproofing line

The NCC requires a shower screen height of at least 1800mm. The wet-area wall waterproofing must also extend high enough to suit the shower area. That pairing is where costly mistakes happen.

On paper, 1800mm sounds straightforward. On site, the reference point is what catches people out. In a bathroom with a raised screed, thick tile bed, under-tile heating build-up, or a step-down that has been corrected during renovation, the finished floor level can shift from what was first measured. If the membrane height was set off one level and the glass height was set off another, the screen can end up sitting above the waterproofed zone or falling short of the required height in practical terms.

That is a builder coordination issue, not just a glazing issue.

A useful Victorian industry summary brings these points together in one place, covering Grade A toughened glass, typical minimum thickness for frameless screens, the 1800mm screen and waterproofing relationship, and VBA enforcement of defective wet-area work: technical compliance reference on Australian shower screen standards.

For homeowners, the safe approach is simple. Do not approve the final shower screen measure until the floor build-up, tile thickness, falls, and waterproofing heights are already locked in and checked against each other. That is how you avoid a bathroom that looks sharp on handover and then turns into a rectification job.

Who Is Responsible for Compliance

A frameless shower screen usually arrives near the end of the renovation, but responsibility for compliance starts much earlier. By the time the glass is measured, decisions about wall straightness, noggings, substrate build-up, screeding, tile set-out, waterproofing, and penetrations should already support the final installation.

That coordination responsibility sits most clearly with the party managing the whole bathroom renovation.

A professional builder holding blueprints and pointing towards a newly installed glass shower screen in a bathroom.

The registered builder's role

Registered builders don't just hire trades and hope the details line up. They sequence the work so the shower screen can be installed onto a bathroom that is already suitable for it. That means checking wall construction before tiling, confirming where hardware will fix, coordinating wet-area preparation, and making sure the finished result matches the compliance requirements discussed earlier.

A good builder also knows where responsibilities overlap. The waterproofer doesn't choose the glass. The glazier doesn't control the screed height. The tiler doesn't certify every part of the glazing installation. Someone has to own the full chain.

For homeowners in Victoria, documentation matters as much as workmanship. A proper waterproofing compliance certificate in Victoria is part of proving the wet-area system was handled correctly.

Why direct trade hiring creates gaps

Plenty of homeowners try to save money by organising each trade separately. Sometimes it works. Often it creates a grey zone where nobody accepts responsibility for the junctions between trades.

A direct-hired glazier may say the wall wasn't ready. The tiler may say the screen was measured after the waterproofing and floor build-up changed. The waterproofer may say the fixing locations weren't disclosed early enough. Each person may be partly right, but the homeowner is left with the problem.

The riskiest jobs are the ones where the screen is treated like a stand-alone product purchase. It isn't. It's a regulated installation tied into the rest of the wet area.

Before you engage anyone, ask for these basics:

  • Builder registration if one party is managing the renovation end to end
  • Insurance details so you know the work sits inside a proper business structure
  • Clear scope of responsibility for waterproofing, glazing, set-out, and final sign-off
  • A plan for wall and floor preparation before the glass is ever measured

If the answers are vague, the risk usually isn't small. It's hidden until later.

Common and Costly Installation Pitfalls

A shower screen can pass the eye test and still be set up to fail. The expensive problems usually start earlier, at set-out, fixing, and floor build-up, long before any crack or leak appears.

One recurring issue is the assumption that glass installation sits outside the rest of the wet-area build. It does not. In a Melbourne renovation, the screen, the waterproofing, the tile set-out, and the substrate levels all affect each other. If those parts are handled separately, the screen often ends up fighting the room instead of fitting it properly.

An infographic detailing three common installation pitfalls for frameless shower screens, including silicone, anchoring, and panel gaps.

Silicone is not a structural fixing

Silicone is a sealant. It helps keep water in the shower area. It does not hold a frameless panel in a compliant way.

Guidance discussed in this AGWA-based article on why frameless shower screens need brackets makes three points homeowners should understand before approving an install. Failed safety inspections commonly involve inadequate fixing. Silicone alone is not treated as a structural support. Standard 10mm toughened glass is widely used, but the glass specification still has to match the actual design and fixing method.

On site, this mistake usually shows up as overconfidence in a neat-looking finish. A bead of cured silicone can feel hard. That has nothing to do with whether the panel is properly restrained under use, impact, or long-term movement.

If a panel is relying on sealant to stay upright, the job has been set up badly.

The fix is practical. The panel needs mechanical support suited to the design, such as brackets, a channel, hinges, or another approved fixing method. Just as important, the wall or floor receiving that hardware needs suitable backing and substrate condition. Tile is the finish. It is not the structure.

Homeowners comparing quotes should ask a blunt question. What is physically supporting the glass apart from silicone? If the answer is vague, stop there.

It also helps to compare the proposed hardware, wall preparation, and fixing method against a proper frameless shower screen installation method instead of judging the job by the render or showroom photo.

Minimum glass can still be the wrong choice

A code-compliant minimum is only the starting point. It is not a shortcut to a good result.

In frameless work, glass thickness, panel width, hinge location, bracing, and fixing method all work together. A panel can technically meet a minimum on paper and still feel poor in use if the design pushes the glass too far. Excess flex at the door edge, movement at the wall, and a rattly feel on opening and closing are common signs that the specification was chosen to hit a price, not to suit the layout.

This matters more in renovations than in new builds. Existing walls are rarely perfect. Floors may be out of level. Openings can be tighter than expected after straightening and tiling. In that context, the cheapest acceptable glass selection often leaves less tolerance for the actual conditions on site.

I tell clients the same thing every time. Do not buy a frameless screen as if it were only a glass panel. Buy the full fixing system and the site preparation behind it.

Here's the video explanation many clients find useful before signing off on hardware and layout:

The raised floor trap in Melbourne bathrooms

This catches a lot of Victorian renovations, especially older bathrooms being corrected with screed or self-levelling before tiling.

Once the floor is built up, the finished tile level sits higher than the original substrate. If the screen is ordered from an early site measure, or from a nominal height without checking the final floor build-up, the numbers can drift quickly. The glass may still arrive looking correct on paper. After installation, the relationship between the panel, the waterproofed area, and the final shower geometry can be wrong.

Raised screeded floors change more than height. They can affect the bottom gap under the glass, the position of channels or support hardware, the fall back to the waste, and whether the door clears nearby fixtures cleanly. A few millimetres in the wrong place is enough to create water escape, awkward operation, or a screen that looks visibly mean for the opening.

Good builders and glaziers measure from the actual build-up, not from assumptions made earlier in the job. They confirm the screed depth, tile thickness, adhesive bed, finished floor level, and fixing locations before the glass is signed off for manufacture. That is where glazing, waterproofing, and builder responsibility meet. If one part is guessed, the whole installation can end up in dispute.

A Homeowners Frameless Screen Compliance Checklist

A lot of shower screen problems are locked in before the glass is even made. By the time the panel arrives, the core issue is usually earlier in the job. The set-out was taken too soon, the wall backing was never confirmed, or the screen design was treated as separate from waterproofing and floor levels.

A checklist for homeowner frameless shower screen compliance with Australian building and safety standards for bathroom installation.

What to confirm before installation

Ask these questions before anyone places the glass order. That is the point where mistakes are still cheap to fix.

  • Is the glass specified in writing as Grade A toughened safety glass? Verbal assurances are not enough.
  • What glass thickness has been nominated for this exact frameless layout? Different panel sizes and door arrangements need different allowances.
  • What fixing method is being used? Brackets, channels, hinges and support arms each place different demands on the wall, floor and glass.
  • Has the wall structure behind the tiles been checked for fixing support? Hardware must be fixed to suitable backing or framing, not left relying on tile and adhesive.
  • Has the final site measure been done after screeding, waterproofing and tiling heights were confirmed? In Melbourne renovations, that question matters more than homeowners expect.

One missed check here can turn into remaking glass, patching membranes, or opening walls after the bathroom looks finished.

Site check: If the installer or builder cannot clearly explain the fixing points, wall backing and final measured height, stop the job and get that clarified before installation starts.

What to check on the day

The installation day is not just for watching the screen go in. It is the last chance to catch a mismatch between what was ordered and what the bathroom can support.

  • Look for the safety marking on the glass. It should be visible and identifiable.
  • Check that the hardware on site matches the agreed design. If the plan showed mechanical support and the installer is trying to rely on silicone alone, raise it straight away.
  • Check the panel position against the finished bathroom, not an old plan. The clearances at the floor, wall and adjacent fixtures should make sense in the built room.
  • Look at the bottom gap and water path. A frameless screen can be technically installed and still let water escape if the set-out is wrong for the floor fall and shower layout.

Height needs a practical check, not just a nominal one. In Victorian renovations, raised screeded floors and added tile build-up can change the relationship between the finished floor level, the screen, and the waterproofed wall area. If the screen was measured too early, the numbers can still look close while the built result is wrong.

What to collect before final payment

Do not treat the last invoice as the finish line. Treat it as the point where the paperwork and the installation need to match.

A practical close-out list looks like this:

Item Why it matters
Final scope confirmation Shows what was actually supplied and installed
Relevant compliance paperwork Helps confirm the wet area and glazing work were documented properly
Warranty information Gives you a clear path if hardware, seals or workmanship issues appear later
Care instructions Helps avoid damage to glass finishes, seals and metal hardware

Homeowners do not need to know every clause. They do need enough confidence to stop the job when the builder, waterproofer, tiler and screen installer are not working from the same finished set-out. In a frameless shower, that is where expensive defects usually start.

Ensuring a Safe and Stylish Finish

A frameless shower screen can be one of the best features in a bathroom. It opens the room up, suits contemporary finishes, and gives a clean result that framed systems often can't match. But the neat look hides a lot of technical responsibility.

The three essential requirements are simple. Use the right safety glass, install it with proper mechanical fixings, and make sure the screen height and set-out still work with the bathroom's waterproofing and finished floor build-up. Miss any one of those and the installation can become expensive very quickly.

For homeowners in Victoria, the safest path is to treat the shower screen as part of the whole wet-area build. That means involving qualified trades early, asking direct questions, and putting a registered builder in charge when the renovation includes multiple moving parts. Bathroom renovations rarely fail because one product looked wrong in a showroom. They fail because the connections between trades weren't managed on site.

If your project involves screeding, waterproofing, tiling, and a frameless enclosure, get the compliance side sorted before the glass is ordered. It's much easier to prevent a defect than to remove a finished screen and rebuild the area around it.


For homeowners planning bathroom renovations in Melbourne and greater Victoria, Melbourne Tiling Services P/L offers end-to-end renovation delivery under registered builders who understand how glazing, waterproofing, screeding, tiling, and final fit-off need to work together. If you want a frameless shower screen that looks sharp and meets the practical demands of compliance, safety, and long-term performance, speak with their team for a detailed quote and project advice.

Small Bathroom Renovation Cost: Your Melbourne Guide For

A small bathroom renovation in Melbourne typically starts around $8,000 for a basic job, usually sits at $15,000 to $25,000 for a mid-range finish, and can reach $25,000 to $40,000 for a premium project. If you're pricing a proper renovation rather than a cosmetic touch-up, that's the range you should plan around.

If you're reading this, you're probably standing in a tired ensuite or family bathroom wondering how a room this small can cost so much to renovate. That's a fair question. Small bathrooms look cheaper on paper because there's less floor area, fewer tiles, and less cabinetry. In practice, bathroom renovations still need waterproofing, plumbing, electrical, tiling, and coordination across multiple trades, and those costs don't shrink just because the room does.

Melbourne adds another layer. Compliance matters here, moisture issues in older homes are common, and once your project crosses the legal threshold, registered builders aren't optional. That's why a cheap-looking quote can become an expensive problem later.

Table of Contents

The Real Cost of a Small Bathroom Reno in Melbourne

A lot of homeowners start with the same assumption. It's a compact room, so the small bathroom renovation cost should be modest. That only holds true if you're repainting, swapping a vanity, and leaving the waterproofed shell untouched.

Once you strip the room out and rebuild it properly, the numbers move quickly. For 2026, a small bathroom renovation in Australia for a 3 to 5 m² space sits at $8,000 to $15,000 for a basic finish, $15,000 to $25,000 for mid-range, and $25,000 to $40,000 for premium quality, while the average spend on any bathroom renovation in Australia is about $26,000, according to What's The Damage's small bathroom cost guide.

That gives you the broad market view. In Melbourne, the practical reality is this. A genuine full renovation with compliant waterproofing, licensed trades, and decent fixtures usually doesn't behave like a bargain project.

What changes the number

The first major split is cosmetic refresh versus full renovation.

  • Cosmetic work: Keeping the room largely intact, repainting, changing fittings, and improving appearance without rebuilding the wet area.
  • Full renovation: Demolition, substrate preparation, waterproofing, tiling, plumbing, electrical, fixtures, and finishing.
  • Layout changes: Moving a shower, vanity, or toilet adds complexity fast because more trades need to rework the service locations.

Practical rule: If the room is being stripped back and rebuilt, price it as a construction project, not as a decorating job.

Why Melbourne owners need a realistic baseline

The biggest mistake is budgeting from a national headline number without checking local conditions. Inner and middle-ring Melbourne homes often come with old substrates, out-of-level floors, moisture damage, or previous bathroom work that wasn't done well.

If you want a rough planning tool before requesting quotes, a bathroom renovation cost calculator for Melbourne projects can help you map your likely spend against finish level and scope. It won't replace a site inspection, but it will stop you anchoring to an unrealistic figure.

A Complete Small Bathroom Renovation Cost Breakdown

The total price only makes sense when you look at the moving parts. A bathroom quote isn't one cost. It's a stack of trade costs, product selections, and labour hours compressed into a small footprint.

A useful way to think about it is this. The room may be small, but the trade sequence isn't.

A comprehensive infographic illustrating the various cost categories involved in a small bathroom renovation project.

Why small rooms still cost real money

Labour is the main driver. Labour expenses account for 40% to 60% of the total cost to renovate a bathroom in Australia. For a $10,000 small bathroom project, roughly $4,000 to $6,000 goes to trades. Tiling labour costs $45 to $120 per square metre, excluding tiles, and plumbing hourly rates range from $100 to $150, based on Domain's bathroom renovation cost guide.

That matters because the fixed work still has to happen:

  • Demolition and disposal: Old tiles, screed, sheeting, fittings, and waste removal.
  • Plumbing: Disconnect, rough-in, fit-off, and any service adjustments.
  • Electrical: Lighting, exhaust, power points, switches, and compliance.
  • Waterproofing: The wet area has to be prepared and sealed correctly before tile goes down.
  • Tiling and fit-off: The visible finish that everyone notices, but only after the hidden work is done properly.

A small room can feel less forgiving than a larger one. Every cut tile is visible. Falls to waste matter more. Tight tolerances show mistakes immediately.

Here's a visual walkthrough of how those stages come together in a real-world bathroom job.

Typical line-item costs

Below is a practical planning table. It's not a substitute for a formal quote, but it does show where the money usually goes in bathroom renovations.

Item / Trade Budget Range (AUD) Mid-Range Range (AUD)
Waterproofing $500 to $750 $500 to $750
Plumbing $3,000 to $5,500 $3,000 to $5,500
Tiling $3,500 to $6,000 $3,500 to $6,000
Shower screen installation around $400 up to $600
Vanity, cabinetry and fixtures $2,000 to $5,000 $2,000 to $5,000

A few points matter more than the table itself.

The cheapest quote often looks cheaper because something has been left vague, excluded, or pushed into a provisional allowance.

What these allowances usually mean

Waterproofing is rarely where you want to chase the lowest number. If substrate prep is poor or detailing is rushed, the room may look fine at handover and fail later.

Plumbing costs jump when fixtures move. Keeping the shower, vanity, and toilet in their existing positions usually protects the budget better than any styling compromise.

Tiling isn't just tile laying. It includes set-out, cuts, edge details, surface prep, and working with walls and floors that are often not perfectly square.

Fixtures and fittings can considerably sway the project. One off-the-shelf vanity and a standard shower screen keep things controlled. Custom cabinetry, frameless glass, and premium tapware change the result and the spend.

Why a Registered Builder is Essential for Your Melbourne Renovation

In Victoria, one threshold changes the conversation completely. Once your bathroom renovation contract value goes over $10,000, the job must be handled by a Registered Builder. That's not a preference. It's a legal requirement for work scopes that regularly exceed that number.

A professional registered builder wearing a white hard hat and yellow high-visibility vest examining construction blueprints.

The legal line homeowners miss

According to Baron Constructions' Victorian bathroom renovation cost guide, in Victoria, bathroom renovation projects must be undertaken by a Registered Builder if the total contract value exceeds $10,000. That same source notes that small bathroom work scopes often land between $15,000 and $22,000, which means many full bathroom renovations automatically sit above the threshold.

People often get caught when they compare quotes, see one that comes from an unregistered operator, and think they're saving money. What they're often doing is stepping outside the legal framework that protects the homeowner.

If the work isn't set up correctly, insurance can become a problem and liability gets murky very quickly.

What registered builders actually do

A proper renovation isn't one trade turning up with a ute and a tile cutter. It's coordination.

  • Scope control: Registered builders pull the full scope together so demolition, rough-in, waterproofing, tiling, and fit-off happen in the correct sequence.
  • Trade coordination: Plumbers, electricians, waterproofers, carpenters, and tilers need to work to the same plan.
  • Compliance management: Wet areas need to be built to standard, and the paperwork matters as much as the visible finish.
  • Contract clarity: Homeowners need a proper contract, not a vague text message list of inclusions.

For waterproofing in particular, this isn't a casual detail. If you want to understand why wet area compliance carries so much weight in Melbourne, this guide to bathroom waterproofing in Melbourne gives useful context around what proper work should include.

Hiring one person for a whole bathroom sounds simpler. In most full renos, it usually creates gaps between trades, responsibility, and compliance.

The practical difference is peace of mind. Registered builders don't just arrange the work. They own the process in a way that protects the project from becoming a patchwork of assumptions.

Uncovering Hidden Costs and Planning Your Contingency

The quote you receive before demolition is rarely the final financial story. Bathrooms hide problems well. Once tiles come off and the floor is opened up, defects that were invisible from the outside can become impossible to ignore.

That doesn't mean every project blows out. It means smart planning assumes some risk from the start.

What blows out a quote

One of the most overlooked parts of small bathroom renovation cost is the contingency. A hidden 10% to 20% buffer is recommended for Melbourne's moisture and compliance risks, and a $10,000 quote can realistically become $12,000 to $14,000 once issues such as subfloor rot are factored in, based on Site Pro Bathrooms' budget remodel guide.

The common triggers are usually found after demolition:

  • Subfloor damage: Water may have travelled beyond the shower area.
  • Wall straightening: Tiling over badly bowed walls creates visible problems later.
  • Levelling and screeding: Small rooms still need proper falls and levels.
  • Previous poor work: The old bathroom may have failed long before you saw obvious signs.

On-site reality: Hidden damage isn't a variation because someone got the quote wrong. It's work no one can price properly until the room is opened up.

How to budget without getting caught short

The safest approach is to separate your budget into two buckets. One is the planned renovation spend. The other is the contingency you don't touch unless the room demands it.

That buffer matters more in older Melbourne properties, where bathrooms have often been renovated more than once and not always to the same standard. A room can look serviceable and still have compromised substrate, poor falls, or failed membrane work underneath.

If compliance paperwork is part of your planning, this overview of a Victorian waterproofing compliance certificate is worth reading before you sign a contract. It helps you ask sharper questions about what is, and isn't, included in a quote.

A tight budget isn't the problem. A tight budget with no contingency is.

Three Tiers of Small Bathroom Budgets Explained

Most homeowners don't need more numbers. They need a clearer picture of what each price band buys.

For 2026, a small bathroom renovation in Australia for a 3 to 5 m² room typically costs $8,000 to $15,000 for basic, $15,000 to $25,000 for mid-range, and $25,000 to $40,000 for premium, with the tier mainly driven by finish and fixture quality rather than huge changes to the fixed trade cost base, according to What's The Damage's bathroom reno budget breakdown.

A comparison chart outlining three tiers of small bathroom renovation budgets: Budget-Conscious, Mid-Range, and Premium.

Budget-conscious

This tier is about restraint, not cutting corners. The best version keeps the existing layout, avoids custom joinery, and uses standard fittings that are easy to source and replace later.

Typical choices often include:

  • Standard ceramic tiles
  • Off-the-shelf vanity
  • Basic shower screen
  • Simple tapware and accessories

What works here is discipline. Pick clean, durable finishes and don't chase too many feature details in one small room.

What doesn't work is trying to make a budget renovation look premium by mixing in one or two expensive pieces while keeping everything else at the lowest spec. The room ends up visually uneven.

Mid-range

Most Melbourne homeowners opt for this level of renovation when they want a bathroom that feels properly renovated rather than merely updated. The finishes are more refined, the tile selection is stronger, and the overall fit-out feels intentional.

A mid-range job usually suits owners who want:

  1. Better tile choice and cleaner detailing
  2. A vanity that improves storage and proportion
  3. Nicer fittings in the areas you touch every day
  4. A result that still feels current years from now

You don't need extravagance to get a strong result. You need a cohesive palette, good set-out, and trades who know how to finish a wet area neatly.

Premium

Premium projects aren't defined by size. They're defined by finish level, detail, and often by how much custom work is involved.

Premium spend usually goes into the things homeowners notice every day. Better tile, cleaner glass, stronger vanity design, more precise detailing, and less compromise.

That can mean frameless glass, custom joinery, premium porcelain, feature niches, upgraded tapware, and a tighter architectural feel. It can also mean more labour because premium products often need more careful installation.

The mistake here is assuming premium only means expensive products. In reality, premium bathrooms are built on planning, proportion, and workmanship. If the detailing is poor, high-end fixtures won't rescue the room.

Smart Strategies to Save on Your Renovation Budget

Saving money on a bathroom isn't about finding the cheapest line on a quote. It's about protecting the parts that matter and simplifying the parts that don't.

The smartest budget reductions happen before work begins, when decisions are still cheap to change.

Savings that work

  • Keep the plumbing layout where it is: If the shower, toilet, and vanity stay put, the project is usually much easier to control.
  • Choose standard-sized fixtures: Standard vanities, shower screens, and mirrors are easier to source and easier to replace later.
  • Use one hero finish, not five: A well-chosen tile or vanity can carry the room without layering every surface in a premium product.
  • Simplify tile patterns: Straight lay or larger-format planning can reduce complexity compared with layouts that involve heavy cutting and intricate borders.
  • Decide early: Late product changes create friction across multiple trades and often push labour time out.

A good budget bathroom doesn't feel cheap. It feels edited.

Savings that usually backfire

Some cost-cutting choices look sensible and then create avoidable problems.

  • DIY in waterproofed areas: Wet areas are not the place for experimentation.
  • Buying fittings without checking compatibility: Cheap online fixtures can create delays if rough-in requirements don't match the plan.
  • Changing products mid-job: A discontinued tile, delayed vanity, or revised shower screen size can force rework.
  • Choosing solely on quote total: If inclusions are thin, you'll pay later through variations or compromised finish quality.

Spend where failure is expensive. Save where appearance can be simplified without affecting performance.

The best conversations with builders are specific. Ask what happens if you keep the layout. Ask whether a standard shower screen works better than a custom one. Ask which tile sizes install cleanly in your room. Those questions usually save more money than haggling over a headline number.

From Timeline to Trowel How to Plan Your Project

The cleanest bathroom renovations are usually the best-planned ones. Not the most expensive ones. Not the most ambitious ones.

Once the scope is settled, the process becomes much easier to manage.

Get the scope right before work starts

Start with the essentials. Do you need a full strip-out or a lighter refresh? Are you keeping the layout? Are there any products you already know you want, such as frameless glass, a wall-hung vanity, or large-format porcelain?

Then get the project documented properly. That means a clear quote, a written scope, and product selections that match the budget you're willing to carry.

This kind of visual planning helps homeowners make better decisions before demolition starts.

Screenshot from https://melbournetilingservices.com.au

Build decisions in the right order

The order matters more than people expect.

  1. Lock the layout first
    Every later choice depends on fixture positions.

  2. Confirm finishes second
    Tiles, shower screen type, vanity style, and tapware affect both labour and lead times.

  3. Check compliance early
    Builder registration, waterproofing scope, and documentation shouldn't be afterthoughts.

  4. Allow for site reality
    Once demolition starts, the room may reveal work that wasn't visible beforehand.

A small bathroom can move quickly when the decisions are made upfront and the trades are coordinated properly. It drags when the design is still changing after the room has been stripped out.

If you want a smoother job, get the selections, scope, and legal setup right before the first tile comes off the wall.


If you're planning bathroom renovations in Melbourne and want straight advice from registered builders who handle the full scope from design through waterproofing, tiling, and fit-off, Melbourne Tiling Services P/L is worth contacting for a detailed quote. They offer practical planning support, transparent scopes, and the kind of on-the-ground experience that helps homeowners avoid expensive mistakes before the work begins.

Tile Installation Cost Melbourne: 2026 Price Guide

Tile installation in Melbourne typically costs $45 to $150 per square metre, and a full bathroom retile usually lands between $2,500 and $7,000. If you're pricing a bathroom, ensuite, kitchen splashback, or full renovation right now, the number that matters isn't just the tiler's rate. It's the total cost once preparation, waterproofing, materials, and builder compliance are included.

That's where many budgets go wrong. A homeowner gets a low square metre rate, compares it to another low square metre rate, and assumes the cheaper quote is better value. Then the job starts, the floor isn't level, the walls need repair, the shower area needs compliant waterproofing, and the original budget no longer reflects the actual scope. In Melbourne, that gap between a simple tiling figure and the actual project cost is often the difference between a smooth renovation and an expensive cleanup.

For bathroom renovations especially, you need to separate a straightforward tiling job from a legally compliant project managed by registered builders. They are not the same thing, and they should never be budgeted the same way.

Table of Contents

Planning Your Melbourne Tiling Project Budget

A lot of Melbourne clients start the same way. They measure the room, find a square metre rate online, and assume the budget is just area multiplied by labour. That method is fine for a rough starting point. It falls apart once the existing floor is out of level, the walls are not plumb, or the bathroom needs waterproofing work before a single tile goes down.

That is why a per-metre figure on its own rarely reflects the full project cost. The tile is only the visible finish. The actual budget often shifts on what sits behind it, what has to be removed, and who is responsible for bringing the area up to a tile-ready standard.

The biggest mistake I see is treating all "bathroom tiling" quotes as if they cover the same scope. They do not. One price may allow for installation onto a prepared surface only. Another may include demolition, disposal, substrate repairs, set-out, trims, fall correction, and coordination with waterproofing or other trades. Cheap quotes often look sharp because the prep has been left out, then added later as variations.

Practical rule: Build your budget in layers. Allow for tile installation, tile supply, preparation of the substrate, waterproofing where required, and any demolition or builder-managed work.

Start with four decisions before you ask anyone to price the job:

  1. What are you renovating? A splashback, floor, shower area, laundry, or full bathroom renovation all price differently.
  2. What condition is the substrate in? A clean, flat surface is quicker and cheaper to tile than one that is cracked, drummy, out of level, or moisture damaged.
  3. What tile are you using? Standard ceramic is usually faster to lay than rectified porcelain, mosaics, large-format panels, or natural stone.
  4. Who is running the project? A straightforward tiling job is priced differently from a builder-managed renovation where multiple trades, sequencing, compliance, and defects liability have to be handled together.

If you are still comparing options, it helps to look at the different types of tiling jobs in Melbourne before you request quotes.

Get those four points clear first. The prices you receive will be easier to compare, and you are much less likely to get caught by costs that were always part of the job but never written into the first number.

Melbourne Tile Installation Cost Ranges in 2026

A client gets quoted $55 per m² for a bathroom floor, then wonders why the final invoice lands much higher. In practice, that first number often covers tile laying only. It may exclude floor levelling, sheet replacement, waterproofing, waste removal, trims, silicones, and the smaller items that still have to be supplied and installed for the job to pass and last.

That is why Melbourne tiling prices are best read as price bands, not a single market rate. Quotes are usually built as per-square-metre labour, hourly charging for small or irregular work, or a supplied-and-laid rate that rolls materials into the figure. Those methods are all legitimate. The mistake is comparing them as if they include the same scope.

A price breakdown infographic for professional tile installation costs in Melbourne for the year 2026.

Labour only versus supplied and laid

For straightforward labour-only work, Melbourne tilers commonly price standard tile installation from about $45 to $70 per m², with more complex layouts and harder materials pushing labour into the $85 to $150 per m² range, as noted earlier. Those figures are useful for budgeting, but they do not represent the full project cost on their own.

A labour-only quote usually excludes tile supply and often excludes consumables as well. Adhesive, grout, trims, movement joints, sealers, silicone, and delivery can all sit outside the headline rate. On renovation work, preparation is the bigger omission. If the substrate is out of level, damaged, damp, or not suitable for bonding, someone has to rectify it before a tile goes down.

Supplied-and-laid pricing is broader because it combines installation with material selection. The installed rates in Melbourne commonly step up along these lines in the bathroom renovation cost guide by tile material:

  • Basic ceramic tiles range from $80 to $120 per m² installed
  • Porcelain tiles (600x600mm) range from $120 to $180 per m² installed
  • Large-format porcelain (900x900mm+) ranges from $160 to $220 per m² installed
  • Natural stone ranges from $180 to $280 per m² installed

The spread is wide for a reason. A 300×300 ceramic floor in a square room is quick to set out and lay. A large-format rectified porcelain tile on walls with tight joints takes longer, needs flatter surfaces, and usually creates more cutting and handling time. Stone adds sealing, edge treatment, and stricter substrate requirements.

Small jobs, repairs, and minimum callouts

Small jobs are priced differently because the setup time is almost the same whether the tiler lays 2 m² or 20 m². A cracked tile replacement, shower repair, laundry patch, or a half-day return visit is often charged hourly or as a minimum callout, rather than by square metre. As noted earlier, smaller-job rates in Melbourne often sit around $60 to $120 per hour.

This is also where cheap comparisons go wrong. A repair may look expensive on an hourly basis, but it can involve tile matching, careful demolition, drying time, waterproofing repair, and a second visit to grout and silicone. The area is small. The labour is not.

For a clearer sense of how pricing changes between repairs, floors, feature walls, and wet areas, review these common tiling job types in Melbourne.

A usable quote states the pricing basis, the included scope, and the exclusions. If it only gives a square metre rate without mentioning preparation, waterproofing, trims, or waste, it is not showing the total cost of the project.

Key Factors That Influence Your Final Quote

A tiling quote works like a recipe. The base rate is only the flour. The final price depends on everything else you add to the mix. The same square metre area can be cheap, reasonable, or expensive depending on the surface, tile, pattern, and wet-area requirements.

For medium-complexity bathroom renovations in Melbourne, experienced tilers charge $80 to $110 per square metre, and mandatory waterproofing adds $30 to $60 per square metre, according to the Melbourne bathroom tiler cost guide. That's why bathroom work sits above a simple open floor.

An infographic showing five key factors that influence the total cost of professional tile installation services.

Surface condition changes everything

A flat concrete slab that's clean and ready is the easiest starting point. Old bathrooms are rarely that cooperative. You might be dealing with damaged sheeting, an uneven floor, old adhesive, movement in the substrate, or walls that are out enough to throw every tile line off.

Tilers can only finish as well as the surface allows. If the substrate is poor, someone has to correct it before installation starts. If that work is skipped, the finished job will show it in lippage, poor falls, hollow spots, and weak adhesion.

Tile type and tile size affect labour

Material cost is only part of the story. Large-format porcelain often looks cleaner and more modern, but it usually needs better substrate accuracy and more careful handling. Natural stone brings another level of detail, especially where sealing, edge finishing, and pattern variation matter.

Layout matters too. A straight lay is simpler than a diagonal pattern. A clean grid is quicker than a herringbone or a feature wall with tight visual alignment. Once you add niches, mitred corners, insets, strip drains, and small returns, the labour climbs because the cutting and setting become slower and less forgiving.

Wet areas cost more for good reason

Bathrooms and shower areas require tighter workmanship than a plain floor in a living zone. Waterproofing has to integrate properly. Falls need to work. Junctions around wastes, corners, and penetrations have to be handled carefully.

Here's the practical difference:

  • Open floor tiling is usually more repetitive and faster to lay
  • Bathroom floor tiling often involves more cuts, falls, and drainage detail
  • Shower recess work demands precision because even small errors can create long-term problems
  • Wall tiling in bathrooms slows down further when feature walls, niches, trims, and fixture alignment are involved

Cheap rates usually rely on one assumption. The room is perfectly prepared and nothing awkward will be discovered once work begins.

Decoding Your Tiling Quote And Avoiding Hidden Costs

A cheap quote often looks attractive because it keeps the visible number low. The problem is that low numbers can hide missing scope, and missing scope always comes back later as a variation, delay, or defect.

A detailed tile installation quote document and a handwritten summary page placed on a flat white surface.

Most online cost guides don't separate substrate preparation and waterproofing from the tile figure. According to the Melbourne floor tiling cost analysis, that omission leads homeowners to underestimate total expenses by 20–30%. The same source notes that waterproofing runs $30–$60/m², and 60% of Melbourne bathroom leaks come from improper prep.

That's the number many people never see when they compare quotes line by line. They look at the tile rate and miss the work that makes the tile system last.

What a vague quote usually leaves out

If a quote is one sentence long, treat it carefully. “Bathroom tiling, supplied and laid” doesn't tell you enough. It may not include removing old finishes, repairing the base, levelling the floor, adjusting walls, waterproofing, trim selection, grout colour, silicone work, or rubbish removal.

A proper quote should make it obvious whether these items are included:

  • Demolition and removal of old tiles or sheeting
  • Substrate preparation such as levelling, patching, or correcting falls
  • Waterproofing scope and who is responsible for it
  • Tile supply details including material type and size
  • Finishing items like trims, grout, silicone, and movement joints

If they aren't listed, ask before the job starts, not after the first invoice arrives.

The cheapest quote often wins on paper because it excludes the work that prevents failures.

What to ask before you accept any quote

When a client asks how to compare two prices properly, the answer is simple. Don't ask only “how much”. Ask “what exactly is included”.

That means asking who is handling prep, whether waterproofing is included, what happens if the substrate is out of tolerance, and whether the quote is labour only or supplied and laid. If the answer stays vague, the quote is still incomplete.

This walkthrough helps show the difference between visual appeal and technical accuracy in bathroom tile work:

A good quote may not be the lowest one. It's the one that makes the full scope visible before the project begins.

Full Bathroom Renovation Costs With a Registered Builder

Bathroom tiling and bathroom renovations are related, but they are not the same service. A tiling job can be one trade working on a prepared space. A full renovation means demolition, waste removal, carpentry, plumbing, electrical, sheeting, waterproofing, tiling, fit-off, and coordination across the whole job. That's where registered builders come in.

In Melbourne, a legally compliant full bathroom renovation performed by a registered builder has a bare minimum cost of about $15,000, while standard mid-range projects average $18,000 to $28,000, according to the Melbourne bathroom renovation cost guide for registered builder projects.

A tiling job and a renovation are priced differently

Homeowners often mix numbers from different categories. They read a bathroom retile price and assume it applies to a full renovation. It doesn't.

A retile usually focuses on surfaces. A renovation covers the whole room. That includes all the work required before any tile goes down and after the tiles are finished. For a practical benchmark, this guide to bathroom renovation cost in Melbourne is useful when you're planning beyond tiles alone.

For a standard $25,000 mid-range bathroom renovation in Melbourne, labour by trades accounts for $8,000 to $12,000, or 35% to 45% of the total, according to the registered builders Melbourne bathroom scope article. That's a good reminder that tiling is a major part of the room, but never the whole project.

Here's the difference in plain terms:

Project type What you're paying for
Retiling only Tile removal if required, substrate checks, waterproofing coordination where relevant, tile installation, grout, silicone, finishing
Full bathroom renovation Builder management, demolition, carpentry, plumbing, electrical, waterproofing, certification, tiling, fixture installation, defect rectification, compliance

Installed tile costs by material

If you're pricing the finishes inside a broader renovation, material selection has a direct effect on the supplied-and-installed figure.

Tile Material Average Installed Cost per m²
Ceramic $80 to $120 per m²
Porcelain 600x600mm $120 to $180 per m²
Large-format porcelain 900x900mm+ $160 to $220 per m²
Natural stone $180 to $280 per m²

Those installed material rates are drawn from the earlier 2026 Melbourne material guide already cited in this article. The practical lesson is simple. A client can keep the room layout almost identical and still shift the budget noticeably just by changing from ceramic to large-format porcelain or stone.

If your project includes moving fixtures, changing waterproofed areas, or rebuilding the bathroom structure, you're budgeting for a renovation, not just a tiling job.

The Tiling Process Timelines and Legal Essentials

Most clients don't just want a price. They want to know what happens on site, in what order, and what paperwork matters at the end. That's especially important in wet areas, where appearance and compliance have to work together.

How a project usually runs on site

A straightforward tiling job moves in stages. First comes inspection and measuring. Then the existing surface is checked for level, strength, and moisture issues. If demolition is part of the scope, that has to be completed and cleared before prep starts.

After that, the work usually follows this order:

  1. Preparation. Levelling, patching, or correcting the substrate.
  2. Waterproofing in wet areas. This has to be done correctly and allowed to cure.
  3. Tile set-out. Good set-out prevents awkward cuts in the wrong places.
  4. Tile installation. Floors and walls are laid according to the agreed pattern.
  5. Grouting and silicone. Final junctions and movement points are finished.
  6. Clean-up and handover. The site is cleaned and any compliance documents are issued where required.

A full bathroom renovation takes more coordination because trades overlap. Demolition has to happen before plumbing rough-in. Sheeting and waterproofing need to be in place before tiling. Fittings and screens come later. When registered builders manage the sequence well, the room flows properly from one trade to the next instead of stalling between handovers.

Legal checks that matter in Victoria

In Victoria, legal compliance isn't optional on bathroom renovations. Victorian law requires any builder undertaking a bathroom renovation to hold a valid Victorian Domestic Builder licence, and homeowners should verify that licence before signing contracts, according to this Victorian bathroom renovation licensing explanation.

That check matters because bathroom work isn't just cosmetic. Waterproofing, structural alterations, and trade coordination carry legal and practical consequences. If the job falls under builder-managed renovation work, make sure the person running it is authorised to do so.

For wet-area work, homeowners should also make sure the project includes the right compliance records. This guide to a waterproofing compliance certificate in Victoria is a useful reference point when you want to understand what should be documented.

A professional team should be able to answer these questions clearly:

  • Who holds the builder licence
  • Who is responsible for waterproofing
  • What compliance documents will be provided
  • How defects or rectification are handled if discovered during the build

If those answers are fuzzy, the risk sits with the homeowner.

Start Your Melbourne Renovation With Confidence

If you've made it this far, you already know more than many do before requesting quotes. The main takeaway is simple. Don't budget from a tile rate alone.

For tile installation cost Melbourne, the useful starting range is $45 to $150 per square metre for labour, with bathroom retiles commonly sitting between $2,500 and $7,000. But that's only part of the picture. Project cost depends on what's under the tiles, whether waterproofing is required, what tile you choose, and whether the work is a tiling package or a full bathroom renovation under registered builders.

That's where homeowners save themselves trouble. They ask for line-item clarity. They compare scope, not just headline price. They treat waterproofing, substrate preparation, and compliance as mandatory parts of the budget rather than optional extras.

Screenshot from https://melbournetilingservices.com.au

If you're planning a bathroom, ensuite, laundry, or wet-area upgrade, the smartest next step is to turn rough ideas into an itemised scope. That's how you get from “What does tiling cost?” to “What will my project cost, and why?”


If you want a clear path forward, Melbourne Tiling Services P/L can help you plan the job properly from the start. Use their renovation calculator, request a free quote, or ask for 3D drawings so you can see the layout, understand the scope, and budget for the full project instead of guessing from a square metre rate alone.

Universal Design Bathroom Ideas for Safer Melbourne Homes

You don't usually start a bathroom renovation because you want a disability-friendly room. More often, you've had a close call on a wet floor, you're helping an ageing parent feel comfortable when they visit, or you've realised the family bathroom is going to be harder to use in ten years than it is today. That's where a universal design bathroom makes sense in Melbourne, because it's about building a space that still works when life changes, not waiting for a crisis and then tearing out new work later.

A good result isn't clinical, and it isn't a compromise. Done well, bathroom renovations can deliver a room that feels safer, looks refined, and is built around the way real households move through a morning routine, a recovery period, or an older age.

Table of Contents

Why Melbourne Homeowners Are Rethinking the Family Bathroom

A lot of renovation conversations in Melbourne start the same way. A family is planning an ensuite before an older parent moves in, a couple is thinking about retirement, or someone has already slipped on a wet floor and doesn't want a second warning. In those moments, the bathroom stops being a cosmetic project and becomes part of how the home supports daily life.

That shift matters because a universal design bathroom is built around changing needs, not one fixed user. It needs to work for a toddler, a guest on crutches, a parent with arthritis, and a homeowner who wants to stay in the same house longer without constant compromise. Australian guidance around AS 1428 accessibility standards and liveable housing concepts has pushed that thinking into mainstream renovation planning, especially where people want step-free entries, better circulation, and space for future aids.

Future-proofing beats a reactive rebuild

A bathroom that only works for one phase of life often becomes a liability later. Once walls are tiled and waterproofing is closed in, the cost of widening circulation or adding reinforcement for grab bars climbs fast. The layout choices that feel small during the build can become expensive limits once the room is finished.

Planning for adaptability from the start avoids that trap. Even if nobody in the house needs a mobility aid today, the room can still be framed, spaced, and detailed so future changes are possible without tearing the whole wet area apart.

Practical rule: if you're already opening the bathroom, think about the person who'll use it in five or ten years, not just the one using it this week.

The other reason homeowners are paying attention is resale. Buyers recognise quality wet areas when they see them, and a bathroom that feels safe, generous, and easy to use reads as a more resilient asset than one that is styled well but awkward to live with. In Melbourne and greater Victoria, that has turned universal design from a niche accessibility brief into a sensible future-proofing investment.

What Universal Design Means in a Bathroom

Universal design is not the same thing as “accessible” in the narrow, clinical sense. It's a design approach that aims for a bathroom usable by as many people as possible, with as little special adaptation as possible. In practice, that means a room can feel natural to a child, a guest, a recovering athlete, an older adult, or someone using a mobility aid, without looking like it was built for a facility rather than a family home.

A diagram illustrating the principles of universal design in bathrooms for safety, comfort, and accessibility.

The seven principles translate neatly into bathroom planning. Equitable use means the shower, vanity, and toilet work for different users without awkward add-ons. Flexibility in use is the reason a handheld shower on a rail helps both seated and standing users. Simple and intuitive use shows up in controls that don't need explaining. Perceptible information is about clear visual cues, better lighting, and obvious transitions between wet and dry areas.

The hidden value is usability without fuss

Tolerance for error matters more than many homeowners realise. Rounded edges, safe floor finishes, and sensible water control reduce the chance that a small slip becomes a serious injury. Low physical effort is why lever handles, sensible heights, and easy-reach storage feel better every day, not just in a medical scenario. Size and space for use is the principle that keeps the room from feeling cramped when somebody needs more room to turn, reach, or assist a family member.

The point isn't to turn a bathroom into a checklist of devices. It's to make choices that remove friction from ordinary routines. That's why a universal design bathroom is often more comfortable for everyone in the house, even when nobody has asked for “accessible” features.

A well planned room doesn't announce itself as accessible. It just feels easy the moment you walk in.

That's also why resale is stronger when universal design is done subtly. The best outcome looks like a premium renovation first, and a supportive one second.

Spatial Rules That Shape a Universal Design Bathroom

The first mistake I see is a homeowner choosing finishes before the room can actually work. If the layout cannot support the right turning space, door swing, or fixture clearance, no amount of good tapware will make the room easier to use. Spatial planning comes first because wall positions, rough-in points, and door openings decide what the bathroom can do.

In practice, a universal design bathroom needs enough room for a person to move through it without fighting the layout. A 5 x 5 ft turning space is commonly used in universal design bathroom specifications, along with clear floor space in front of fixtures and enough room under a basin for seated access universal design bathroom specifications bathroom planning guidelines. Those guides line up with the kind of room planning I use on Melbourne jobs, where a bathroom has to work for the family now and still make sense later.

What those measurements mean on site

Those numbers change the build, not just the drawing. They affect whether a hinged door can stay in place or whether a sliding option makes the room usable, where the vanity can sit, and whether the shower can be placed opposite the entry without crowding circulation. They also affect demolition decisions, because once waterproofing, tiles, and cabinetry are installed, moving a wall becomes a much bigger job.

On site, I also look at what the room needs to do around waterproofing, because the layout and the wet-area details have to work together. If the floor plan is tight, the waterproofing and fall to waste have less room for error, which is why a proper waterproofing in Melbourne approach needs to be part of the spatial plan from day one. That is the point where a room stops being a sketch and starts becoming a buildable bathroom.

Here's the practical breakdown for Melbourne renovations:

Fixture Clearance Target Renovation Implication
Turn space 1,200 mm clear manoeuvring space Shapes wall placement, door type, and circulation
Fixture approach space 750 x 1,200 mm clear manoeuvring space Affects vanity depth and toilet position
Toilet area 32 in clear floor space in front Limits how close opposite fixtures can sit
Basin access 29 in vertical clearance, 32 in horizontal clearance Encourages wall-hung or open-under-sink designs

Reinforced blocking is the detail most homeowners miss. If there is any chance you will want grab bars later, the walls need proper backing before the tile goes on. That hidden work is simple compared with opening finished walls after the fact.

Good layout design feels invisible. When it is done properly, the bathroom does more than satisfy a measurement. It moves properly, looks balanced, and still feels like part of a normal family home.

Wet-Area Features That Make the Bathroom Safer

A bathroom can look polished and still be unsafe if the wet area is handled poorly. In a universal design bathroom, the shower is usually the first place I check, because that is where falls, water control, and finish selection all meet. A walk-in, no-step shower removes the obvious trip point, but it only works if the floor falls cleanly to waste, the waterproofing is correct, and the edge detail stays low enough for daily use bathroom planning guidelines NKBA bath planning guidelines.

A modern, accessible walk-in shower featuring safety grab bars, a built-in seat, and a slip-resistant floor.

Australian bathroom guidance also calls for a non-slip surface in bathrooms, and that matters because the floor finish is part of the safety system, not just a visual choice non-slip surface guidance. In Melbourne, that affects tile selection, grout joints, shower gradients, and the way a tiled wet area is detailed so it drains properly without looking bulky or awkward. The visual result still matters. Homeowners want a room that feels like part of the house, not a later add-on.

The features that do the real work

A few elements should come before the decorative decisions. Start with the parts that affect safety, cleaning, and long-term usability.

  • Low-threshold showering: NKBA guidance used in Australian bathroom planning says shower thresholds should be minimized to no more than ½ inch (13 mm). That affects waterproofing detail, floor build-up, and drain position.
  • Tap controls that are easy to grasp: Lever or loop handles are easier for arthritic hands and generally clearer to use than small round knobs.
  • Open basin access: At least one sink should allow seated approach, which means planning for knee space and avoiding bulky cabinetry in the wrong place.
  • Grab-bar readiness: Blocking in the wall needs to be there before tiling, even if the bars themselves are fitted later.
  • Safe flooring choices: Slip resistance matters most in the shower and immediate wet zone, where the risk is highest.

That is where build sequence matters. Waterproofing has to be coordinated with falls, tile setting, and drainage from the start, which is why a clear bathroom waterproofing in Melbourne plan should be part of the wet-area design rather than something left to the end of the job.

A good universal-design wet area does not feel loaded with gear. It feels calm, drains well, cleans easily, and gives you confidence every time you step in.

Designing a Bathroom That Looks Like a Bathroom

A lot of people still worry that an accessible bathroom will look institutional. That only happens when function is bolted on after the design is finished. If accessibility is built into the materials, lighting, and joinery from the start, the room reads as deliberate and premium, not clinical.

Large-format porcelain is a strong choice because it gives you a cleaner visual field with fewer grout lines. Timber-look tile can soften the room without sacrificing wet-area performance, and a full-height feature wall can anchor the space so it feels designed rather than assembled. The point is not to hide the universal design features. The point is to make them feel like part of the style language.

Finish choices do more than decorate

Lighting does a lot of heavy lifting here. Layered lighting makes the bathroom easier to use at different times of day, while a well-placed mirror helps the room feel larger and more usable. Tapware finish matters too, because it should sit comfortably with the rest of the palette rather than drawing attention to itself as a “special” product.

Integrated niches, frameless shower screens, and linear drains are especially useful because they keep the room visually quiet. A shower can still be easy to enter, easy to clean, and easy to use, while looking like a contemporary Melbourne renovation rather than a retrofit. That's the detail most homeowners want.

Design rule: if a safety feature makes the room look worse, it usually hasn't been integrated properly.

Australian inclusivity guidance also recognises that aesthetics and ease of maintenance are part of inclusive design, not extras designing for inclusivity. That matters because a bathroom that feels harsh or temporary tends to get used less comfortably, even when it's technically compliant.

A premium universal design bathroom is one where the grab bar, the niche, the shower screen, and the basin all look like they belong in the same sentence. When that happens, accessibility stops reading as a compromise and starts reading as good architecture.

Compliance, Standards, and the Registered Builder Question

Bathroom renovation in Victoria sits inside a real compliance framework, not just design preference. AS 1428 and liveable housing ideas shape accessible planning, while the National Construction Code and Victorian domestic building rules determine what has to be documented, supervised, or signed off. Not every home bathroom has to be built as a fully accessible space, but the work still needs to be done properly if you want it to last and stand up later at resale.

In Victoria, domestic building work costing more than AU$10,000 falls within the domestic building framework, and higher-value residential work must be handled by a registered builder in the relevant category registered builder and domestic building framework reference. That matters for bathroom renovations because the contract structure, insurance, supervision, and accountability all sit inside that system.

A checklist infographic titled Compliance, Standards, and the Registered Builder Question for home construction projects.

What registration means in practice

A registered builder isn't just a label. It means someone is responsible for coordinating the work, managing the trades, and making sure the bathroom is built as a whole rather than as a pile of disconnected jobs. It also gives homeowners a clearer complaints pathway through the Victorian regulator if the project goes off course.

The distinction between design intent and legal accessibility matters too. A family bathroom can borrow universal-design ideas without being a formally classified accessible facility. That said, if you're planning a renovation in a multi-use home, or you want the bathroom to work for a future mobility need, the safest route is to document the layout, waterproofing, and structural decisions properly from the beginning.

For homeowners comparing options, the practical difference is simple. An owner-renovator path can suit smaller scope work in some cases, but once the project becomes a full wet-area rebuild, the value of registered oversight climbs fast. If you want a renovation team that handles coordinated bathroom renovation work, Melbourne Tiling Services P/L bathroom renovation specialists are one example of the kind of registered, trade-coordinated setup homeowners can look for.

Good paperwork isn't just bureaucracy. It protects the build, the warranty position, and the story you'll tell the next buyer.

Cost Ranges and Phased Implementation

The cleanest universal design renovation is usually the one planned all at once. In practice, plenty of Melbourne homeowners stage the work because they're balancing cash flow, family timing, and the rest of the house. Melbourne Tiling Services notes a transparent renovation calculator and a budget approach typically around a median $10,000 scope, which is a useful anchor for homeowners trying to decide whether to do a full rebuild or phase the room in bathroom renovation cost guide.

That baseline doesn't mean every bathroom should stop there. It means the scope can be customized, then expanded later if needed. The key is to avoid staging the wrong parts.

What to do now and what can wait

Some elements are worth locking in early because they're hard to change later. Waterproofing, screeding, floor falls, and wall blocking are the ones I'd prioritise if the renovation is being phased. They shape the room's safety and future flexibility, even if the final tapware or grab bars go in during a later stage.

Other finishes can sometimes wait without compromising the structure of the room. Tapware selection, decorative hardware, and some visual detailing can be staged if the underlying build is ready for them. That's the difference between a smart phased plan and a false economy.

A simple way to understand this is:

  • Phase one: waterproofing, substrate prep, falls, structural backing, and safe layout.
  • Phase two: shower screen, tapware, vanities, mirrors, and final fittings.
  • Phase three: optional refinements such as extra supports, upgraded accessories, or visual changes.

The mistake is trying to save money by skipping the invisible work. If the waterproofing or blocking is compromised, you don't really have a phased plan. You've just delayed the expensive part.

A targeted upgrade can still deliver value when the room's bones are sound. A full renovation makes more sense when the layout is wrong, the surfaces are failing, or the bathroom needs a complete universal-design reset.

Your Renovation Checklist and Working With Melbourne Tiling Services

Before you ask for quotes, walk through the bathroom with a tape measure and a clear brief. Check whether the room can accommodate the circulation you need, where the shower, vanity, and toilet can sit without crowding each other, and whether you want the space to support ageing in place from day one. Then decide which features are essential, which are desirable, and which can wait for a later phase.

A summary infographic for a renovation project featuring a checklist and benefits of Melbourne Tiling Services.

Use this checklist before you book a consult

  • Measure the clearances: Confirm the turning space, shower approach, and fixture spacing before you fall in love with finishes.
  • Decide on the wet area: Choose between a low-threshold or step-free shower early, because it affects the floor build and waterproofing.
  • Plan backing now: Ask for wall reinforcement where grab bars may be needed later.
  • Choose safer finishes: Look for non-slip surfaces and practical tapware that's easy to grasp.
  • Treat aesthetics as part of function: Pick materials, lighting, and screens that make the room feel intentional, not medical.
  • Confirm the builder pathway: Make sure the job is being managed by people who understand Victorian compliance and the trade sequence.

Melbourne Tiling Services P/L fits into this kind of work as a coordinated renovation team, with start-to-finish handling across carpenters, plumbers, electricians, tilers, and waterproofers, plus Registered Unlimited Builders, free quotes, 3D drawings, and a transparent renovation calculator. That matters because a universal design bathroom is only as good as the way the trades line up behind the plan.

If you want the room to look refined, function safely, and age well with the household, use the checklist above to define your scope before the first quote lands. A clear brief saves money, reduces rework, and makes the finished bathroom feel like it was always meant to be there.


If you're planning a universal design bathroom in Melbourne, speak with Melbourne Tiling Services P/L about a renovation that balances safety, waterproofing, and a premium finish. Bring your measurements, your wish list, and your questions, and they can help turn the layout into a bathroom that works now and still makes sense years from now.

Marble Look Porcelain Tiles: A Melbourne Renovation Guide

You're probably in the same spot as a lot of Melbourne homeowners when they start bathroom renovations. You want the clean, high-end look of marble on the walls or floor, but you've also heard the stories about staining, etching, sealing, and the stress of keeping it looking good once the room is in use.

That's exactly where marble look porcelain tiles make sense. They give you the visual language of marble without forcing you into the maintenance routine that comes with natural stone. In Melbourne projects, that matters even more because bathrooms aren't showroom spaces. They're wet areas, used every day, and they need to perform properly under real conditions.

Table of Contents

The Marble Dream Without the Marble Drawbacks

A typical conversation starts the same way. The client has saved images of bright bathrooms with soft grey veining, full-height shower walls, and floors that feel more like stone slabs than tiles. Then the practical questions come in. Will it stain. Will it need sealing. Will it be hard to clean. What happens in a family bathroom that gets used hard every day.

That's where porcelain changed the market. Marble-look porcelain tiles have gained prominence in the Australian building sector since the early 2000s, aligning with the rise of high-end bathroom renovation specialists such as Melbourne Tiling Services P/L, which has operated since 2003 across residential and commercial projects, as noted in this Australian glazed porcelain tile market outlook.

The important point is that porcelain isn't a second-choice material anymore. In a good renovation, it's often the smarter specification from the start. You still get the marble aesthetic, but you're pairing it with a surface built for wet areas, heavy use, and straightforward cleaning.

A better fit for Melbourne homes

In older Melbourne homes, bathrooms often sit over timber floors, uneven substrates, or dated wet area construction. In newer homes and apartments, the challenge is different. Tighter tolerances, cleaner detailing, and larger tile formats mean there's less room for sloppy work.

Marble look porcelain tiles suit both situations because they can be specified to match the design intent without introducing unnecessary maintenance headaches.

Practical rule: If you love the look of marble but don't want to treat your bathroom like a museum piece, porcelain is usually the right call.

Why clients keep choosing it

A few reasons come up again and again:

  • Daily usability: You can clean it without the anxiety that comes with natural stone.
  • Design flexibility: You can use the same look across floors, walls, niches, and feature panels.
  • Consistent finish: Veining, tone, and sizing are more controlled than natural marble.
  • Better project balance: Budget can go into waterproofing, layout changes, joinery, or fittings instead of stone upkeep.

Porcelain vs Real Marble A Head to Head Comparison

Natural marble has presence. Nobody disputes that. But once you compare materials as a builder or tiler, the decision usually comes down to how the room will be used, how much maintenance the owner is willing to accept, and how much risk sits behind the finish.

A comparison chart outlining the key differences between marble look porcelain and natural marble tiles for home flooring.

What the material is actually doing

Porcelain wins on performance because of how it's made. Marble-look porcelain tiles are fired at 1200–1250°C, creating a density of more than 2.4 g/cm³ and a water absorption rate of less than 0.5%, according to this marble versus marble-look tile technical review. In practice, that means a denser, less porous surface that handles moisture and routine use far better in a bathroom.

Natural marble is different. It's stone, and stone varies. That variation is part of the appeal, but it also means the material can be softer, more reactive, and less forgiving when exposed to cleaners, cosmetics, water, and daily traffic.

Attribute Marble Look Porcelain Natural Marble
Durability Dense, hard-wearing manufactured tile for wet and high-traffic areas Softer stone that can scratch and etch more easily
Maintenance Low-maintenance surface with simple routine cleaning Needs more careful cleaning and ongoing sealing attention
Cost-effectiveness More predictable for bathroom renovations and day-to-day ownership Higher upkeep burden over time
Aesthetic versatility Consistent veining, wide format range, slab-look layouts Unique natural variation and stone character
Water behaviour Very low water absorption More porous and more dependent on sealing

A practical comparison usually comes down to these trade-offs:

  • Durability: Porcelain is built to take wear. That matters on floors, ensuite entries, and family bathrooms.
  • Maintenance: Marble needs more disciplined care. Porcelain is far less fussy in real households.
  • Appearance control: Porcelain lets you plan vein flow, tile size, and layout more precisely.
  • Wet-area suitability: Porcelain is the easier specification when the room has regular steam and splash exposure.

If you're still weighing materials, it helps to compare marble products and alternatives side by side with a supplier or installer who works across both. This marble tile range in Melbourne is one example of the type of reference point worth reviewing during selection.

Marble is beautiful. Porcelain is usually easier to live with.

Where marble still has a place

There are projects where real marble still makes sense. Powder rooms with lighter use. Feature walls away from direct water exposure. Homes where the client understands the maintenance and wants the stone for its natural variation above everything else.

But in bathrooms, especially the main bathroom or ensuite, I'd usually steer clients toward porcelain unless there's a very specific reason not to.

That's not because marble is inferior. It's because bathrooms punish materials. Steam, soaps, shampoo, body products, cleaning routines, and water left on surfaces all test the finish. Porcelain handles that environment with fewer compromises.

Choosing Your Perfect Tile Finishes Sizes and Formats

Specification matters more than commonly understood. Two marble look porcelain tiles can look similar in a showroom sample and perform very differently once they're installed on a floor, wrapped through a shower, or carried onto a feature wall.

A display of various marble look porcelain tile samples, including square tiles and a hexagonal mosaic pattern.

Start with finish before you look at colour

Most clients start with veining and colour. I'd start with finish.

A polished tile gives you a sharper, more reflective marble effect. It works well on walls and in bathrooms where you want light bounce and a dressier look. On floors, though, you need to think carefully about slip, maintenance of the surface appearance, and how the room is used.

A matt finish is usually the safer all-rounder. It feels more grounded, it hides water spotting better, and it suits floors very well. Lappato sits in the middle. It gives some movement and sheen without the full reflectivity of polished porcelain.

Here's the practical way to sort it:

  • For floors: Matt is usually the strongest choice.
  • For shower walls: Polished or lappato can work well if you want more visual lift.
  • For family bathrooms: Choose finishes that forgive water marks and daily wear.
  • For small ensuites: A lighter tile with a restrained vein pattern often keeps the space calmer.

Size changes the whole room

Tile size isn't only a design decision. It changes the feel of the room, the number of grout joints, the amount of pattern interruption, and the level of installation skill required.

Large-format tiles usually produce the cleanest marble effect because the veining reads across a bigger surface. The room feels less chopped up. On walls, that can make a bathroom feel more architectural and less busy. On floors, it can help a modest footprint feel broader.

For clients considering oversized panels or slab-style porcelain, this large-format tile installation guide is worth reviewing because the handling, preparation, and fixing methods are different from standard tiling.

Rectified edges make a visible difference

Rectified porcelain is one of the details that separates an average job from a refined one. Rectified marble-look porcelain tiles in Australia are manufactured to an edge precision of ±0.3mm under AS/NZS 4402, allowing minimal 2mm grout joints, which is what gives that cleaner slab-like look in Melbourne conditions, as described in this rectified porcelain tile specification.

That matters because wide, uneven grout joints can kill the marble effect. If you're paying for a premium-looking tile, you want the installation to support that look, not interrupt it.

A good selection process usually comes down to three questions:

  1. Where is the tile going
    Floors, walls, niches, vanity splashbacks, and shower interiors all have different demands.

  2. How quiet or bold should the room feel
    Some marble patterns are soft and cloudy. Others are high-contrast and dramatic.

  3. Do you want tile or slab visual language
    If the goal is a more monolithic finish, larger formats and rectified edges matter.

The sample board doesn't tell the whole story. Ask to see how the tile looks over a larger area and how the grout joint will actually present.

Designing Your Melbourne Bathroom with Marble Look Porcelain

The biggest strength of marble look porcelain tiles is that they can carry the whole room. You don't need layers of competing finishes if the tile itself has enough movement and scale.

A modern luxury bathroom featuring marble look porcelain tiles, a sleek double vanity, and a freestanding soaking tub.

Using the tile as the main design element

One approach I like in Melbourne bathroom renovations is to let the tile set the tone, then keep everything else disciplined. A soft white marble-look porcelain with controlled grey veining can run from floor to shower wall to niche, while the joinery, tapware, and screen stay understated.

That's especially effective in ensuites where space is limited. Fewer material changes usually mean a calmer room. If the tile has enough scale, you don't need extra tricks.

A few layouts consistently work well:

  • Full-height shower wall: This creates an obvious focal point without adding clutter.
  • Floor-to-wall continuation: Using the same series ties the room together and reduces visual breaks.
  • Feature vanity wall: A stronger vein pattern can sit behind the mirror and basin area.
  • Indoor-outdoor continuity: On some projects, porcelain can help connect an adjoining balcony or similar exterior threshold if the specification is right for both zones.

Layouts that work in real bathrooms

The best designs are usually the ones that offer subtle solutions to problems. In a narrow bathroom, running larger marble look porcelain tiles with a clean joint pattern can reduce visual chopping. In a darker room, a lighter base colour helps bounce light without relying on glossy everything.

Bookmatching is another option people ask about. It can look excellent when done properly, especially on larger wall installations where opposing vein patterns create a symmetrical statement. But it only works if the tile series supports it and the installer plans the set-out carefully before fixing starts.

This video gives a useful visual reference for the kind of finish many clients are aiming for in modern bathrooms.

What doesn't work is forcing a dramatic tile into every surface and then adding busy tapware, patterned joinery, and strong feature lighting on top. The room starts fighting itself.

In a good bathroom, the tile should lead. The other finishes should support it.

For period homes in Melbourne, marble look porcelain can also bridge old and new nicely. You keep a classic material language, but the finish and installation feel sharper and more current. That balance is often what makes a renovation feel expensive without becoming overdone.

Installation Essentials Waterproofing and Best Practices

A premium tile won't rescue a poor build-up. If the substrate is out, the falls are wrong, or the waterproofing is incomplete, the room will fail long before the tile wears out.

That's why the installation side matters as much as the tile selection. In bathroom renovations, the visible finish gets the attention, but the hidden work determines whether the bathroom stays sound.

The substrate decides the result

Every tiled bathroom starts with the base. Floors need to be level where they should be level, and graded where they need falls. Walls need to be straight enough to take the format you've chosen. If they aren't, large-format porcelain will expose every defect.

The critical layers usually include:

  • Demolition and inspection: Existing movement, moisture damage, and framing issues need to be identified early.
  • Preparation: That might mean screeding, patching, or self-levelling depending on the substrate.
  • Waterproofing: Wet areas must be treated as wet areas, not as a paint-on afterthought.
  • Tile setting: Adhesive choice, coverage, and lippage control all matter more with larger formats.

For anyone assessing the wet-area side of a project, this Melbourne waterproofing page is a useful reference point because compliant waterproofing is essential in bathrooms.

Large format tiles raise the standard

Large marble look porcelain tiles demand cleaner work than smaller formats. There's less forgiveness in the set-out, less room to hide an uneven wall, and more risk if the substrate prep is rushed.

That doesn't mean they're difficult for the sake of it. It means the installer has to control more variables:

  1. Set-out planning
    Vein direction, joint alignment, fixture locations, and cuts around niches or tapware need to be planned before the first tile is fixed.

  2. Handling and support
    Bigger porcelain pieces need proper handling to avoid edge damage and improper bedding.

  3. Adhesive coverage
    Voids behind large tiles are asking for trouble, especially in wet areas.

  4. Movement accommodation
    Bathrooms still move. Different materials expand and contract, and that has to be accounted for.

A lot of avoidable problems start when clients spend carefully on the tile and then treat installation like a commodity. That's the wrong order of priority.

Site advice: The more refined the finish you want, the less tolerance there is for average preparation.

The same applies to shower bases, niches, hobs, and junctions with frameless screens. These are not decorative details. They are failure points if they're badly built. In a proper bathroom renovation, waterproofing, falls, tile layout, and trim decisions all need to work together.

Budgeting Your Project Costs and Maintenance in Melbourne

Clients usually ask the wrong first question. They ask what the tile costs per square metre. That matters, but it's only one part of the budget.

In bathroom renovations, the bigger financial picture includes demolition, preparation, waterproofing, tiling labour, trims, fixtures, screens, plumbing, electrical, and whatever rectification work is needed once the old room is opened up.

What to allow for at the start

As a baseline, tile flooring installation in Australia averages $72 per square metre, and that benchmark applies directly to marble-look porcelain tiles used in residential renovations, according to this Australian tile flooring cost guide. That gives you a starting point for labour, but it doesn't represent the whole bathroom renovation cost on its own.

A bathroom budget usually shifts based on practical factors such as:

  • Tile format: Larger tiles often require more exact preparation and handling.
  • Existing condition: Rotten substrates, movement, and old water damage increase the scope.
  • Layout complexity: Niches, herringbone inserts, mitred edges, and feature walls all affect labour.
  • Access: Tight stair access, apartment rules, and parking can change site logistics.
  • Coordination of trades: Plumbing and electrical changes often drive cost more than tile supply.

For homeowners, the useful mindset is this. Don't compare a bathroom renovation to a simple floor tiling rate. They're different scopes.

Where porcelain saves money later

The strongest value case for marble look porcelain usually shows up after handover, not before. Natural marble often asks for ongoing care, cautious cleaning, and intervention if the finish starts reacting to moisture or products.

Porcelain is easier to own because routine maintenance is simpler and the material is less temperamental in wet areas. That gives you more confidence using the room normally, especially in a main bathroom or busy ensuite.

A smart budget doesn't only chase the lowest install number. It protects the build-up, allows for proper waterproofing, and chooses materials that won't become expensive to babysit.

If you're trying to make the budget work, I'd usually suggest preserving money for the things that are hard to change later. Waterproofing, substrate preparation, drainage, tile layout, and clean installation all matter more than squeezing every last dollar out of the tile selection.

Why Your Tiler Should Be a Registered Builder in Melbourne

You choose marble look porcelain because you want a premium finish without the upkeep. Fair enough. But in Melbourne bathrooms, the finish is only half the job. If the substrate moves, the falls are wrong, the waterproofing is patchy, or the trades are out of sequence, even excellent tiles end up on a failed build.

That is why I recommend a registered builder for full bathroom renovations, especially where wet-area construction, multiple trades, and high-end materials are involved. A registered builder is responsible for the entire project: demolition, repairs, waterproofing, trade sequencing, compliance, and final fit-off. That changes the outcome.

A bathroom renovation is a build, not a tile supply and install package

Premium porcelain performs well in wet areas and is easier to live with than real marble. As noted earlier, porcelain has very low water absorption, generally less than 0.5%, and it does not need the polishing and resealing that often come with natural stone. In Victoria's climate, that usually means lower maintenance spend over the life of the bathroom and fewer material-related headaches in busy family homes.

But material savings only hold if the room is built properly.

Screenshot from https://melbournetilingservices.com.au

The failures I see are rarely about the tile itself. They come from movement in the substrate, poor set-out, rushed waterproofing, bad drainage, and weak coordination between plumbing, electrical, carpentry, and tiling. Large-format marble look porcelain makes that even less forgiving because the layout has to be right, the surfaces have to be flat, and the edges and junctions need careful planning before the first tile goes down.

A registered builder handles those moving parts as one job instead of leaving the owner to manage separate trades and hope the details line up. That matters in Melbourne renovations, where older homes often hide out-of-level floors, damaged framing, legacy moisture issues, and wall surfaces that need correction before waterproofing starts.

One Melbourne option for that type of builder-led delivery is Melbourne Tiling Services P/L, which handles bathroom renovations, tiling, waterproofing, and trade coordination as a registered builder.

If your project includes wet-area construction, premium finishes, and more than one trade, treat it like a building job from day one.